

Fennec
Fennec’s have the appearance of a fox, with very long ears and a light brown body. Fennecs prefer mountainous regions, and can often be found in Orlais and Ferelden. Their diet appears to consist of rodents such as voles.
| Info | Description |
|---|---|
| Location: | Crestwood, Forbidden Oasis, Hissing Wastes, The Hinterlands, Western Approach |
| Level Range: | 1-15 |
| Health Modifer: | 0.15 |
| Armor: | Very Low |
| Resistances: | None |
| Vulnerabilities: | None |
| Immunities: | None |
| Crafting Material: | Fennec Fur |
Giants
They tower over most living creatures in Thedas at tall heights, and are described as being very much like a “Troll”.
Giants are said to be the most common in northern Thedas, more specifically in the Tevinter Imperium, but can be often seen in southern areas such as Orlais and Ferelden. Waterways are a preferred location for these creatures. They are described as being “destructive beasts”, with the hunt for food as being their primary motivation. Giants are omnivorous creatures, as they can be found eating foods ranging from meat, grain, and leaves, but do not seem to be picky when it comes to what they eat as it is noted they will eat nearly anything digestible, no matter the texture or taste.
| Info | Description |
|---|---|
| Location: | Emerald Graves, Emprise du Lion, Forbidden Oasis, Storm Coast, Western Approach |
| Level Range: | 8-19 |
| Health Modifer: | 3 |
| Armor: | Very High |
| Resistances: | None |
| Vulnerabilities: | Electricity |
| Immunities: | Physical Effects/Fear/Paralyze/Freeze/Sleep/Weakness/Snare |
Giant Spider
Giant spiders typically appear in small numbers, but have been known to gather into larger groups for ambushes. Their primary ability allows them to throw their webbing, causing the victim to become encased and immobilized unless they pass a resistance check. Spiders can also use the Overwhelm ability, wherewith the spider tackles its victim, repeatedly inflicting physical damage and stunning the target for the remainder of the attack.
The party members should support each other whenever spiders arrive. If you end up apart, a spider’s web or Overwhelm attack can incapacitate a lone companion. When webbed, the companions who aren’t trapped should defend their comrade. Against an Overwhelm attack, everyone else should immediately focus on the charging spider to kill it before it kills your companion. Both their Web and Overwhelm abilities are quite hard to resist, particularly the latter which keeps the target knocked down and taking serious damage for a few seconds (while additionally vulnerable to damage from other sources). Although Spiders use their abilities relatively rarely and chaotically, they sometimes happen to spontaneously chain them in a nasty way. Two inconspicuous Spiders chaining two Overwhelms in a row with a Web in between can even kill a lower-level warrior in the lower levels, whilst not giving him a split second to do anything at all. Quicksave your game before going against these creepy-crawlies.
| Info | Description |
|---|---|
| Location: | Crestwood, Emerald Graves, Forbidden Oasis, Hissing Wastes,The Hinterlands, Revenant Church, Storm Coast, Western Approach |
| Level Range: | 8-19 |
| Health Modifer: | 1 |
| Armor: | Very Low |
| Resistances: | Electricity |
| Vulnerabilities: | None |
| Immunities: | None |
| Crafting Material: | Giant Spider Glands |
Giant Bear
The Orlesian great bear is so named because it is very large. Very large, indeed. Other names for it include the colorful “Old Man of the Forest” and the less-charming, but more clearly descriptive “Woodsman’s Death.” I am told that they are only found in remote parts of the Dales and that not even the nobility is willing to hunt for them, which makes them unique among the rare, giant, deadly, exotic fauna of Thedas: the only thing the Orlesians are truly afraid of.
| Info | Description |
|---|---|
| Location: | Emerald Graves, Emprise du Lion |
| Level Range: | 11-19 |
| Health Modifer: | 3 |
| Armor: | High |
| Resistances: | Cold |
| Vulnerabilities: | Fire |
| Immunities: | Physical Effects/Paralyze/Freeze |
| Crafting Material: | Great bear Hide |
Gurgut
“I have seen the gurgut basking in a slanted shaft of sunlight in the penumbral canyon, its putrescent tongue scenting the rancid air of the nameless and unnameable swamp, swishing the uncaring grass of the plains with its passage. It is some cousin of the wyvern, but bereft of the savage ferocity for which the latter is praised and hunted by Orlesian nobles. Its thick-lidded eyes stare witlessly, and its jaw hangs agape; it is not befuddled or frustrated by its want of reason, but perfectly content, a drooling idiot. Its pallid belly stretches and distends, disdaining all reason, when it gorges itself upon its prey. I have seen such a lowly beast swallow a chevalier whole, the great and shining warrior taken by surprise in the tall grass, his silverite armor gleaming as the gurgut unhinged its jaw to draw the chevalier in. Across its belly, I saw the kicks and struggles grow frenzied and then still, and the idiot beast settled into a happy torpor. The ruined armor of the noble chevalier lay among the gurgut’s spoor several days later.”
— An excerpt from An Anatomie of Various Terrible Beasts, by Baron Havard-Pierre d’Amortisan
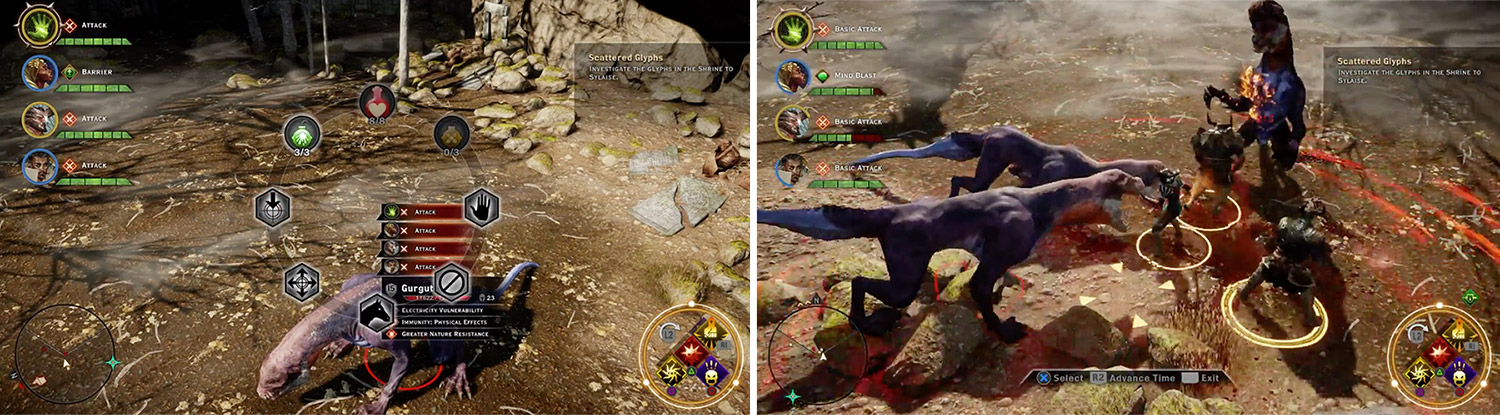
Gurguts can appear in numbers.
| Info | Description |
|---|---|
| Location: | Exalted Plains |
| Level Range: | 12-15 |
| Health Modifer: | 3 |
| Armor: | Low |
| Resistances: | Fire |
| Vulnerabilities: | Electricity |
| Immunities: | Physical Effects |
| Crafting Material: | Craggy Skin |
Gurn
We woke to a herd from nowhere, just standing around the camp. And it wasn’t the first time. Getting water at an oasis, humming to myself, poof, there’s one behind me. Talk to another rider for a few minutes, and there’s two, just staring. I think they think talking is weird. Harmless, so long as you don’t treat them like cattle. Maybe farm-raised, but not wild. One time, we figured we’d saddle one. Maybe break it like a horse? Because that hump would bounce arrows real nice. Bad idea. Did not end well for Five-Toe. We used to call him Six-Toe, but not because of his feet. He got the horn something fierce.
— Excerpts on the Gurn, Voices of Working Caravans, collected by Philliam, a bard
| Info | Description |
|---|---|
| Location: | The Exalted Plains |
| Level Range: | 8-19 |
| Health Modifer: | 0.20.25 |
| Armor: | Very Low |
| Resistances: | None |
| Vulnerabilities: | None |
| Immunities: | None |
| Crafting Material: | Halla Leather |
Halla
“The first thing you must understand about the halla is that they are not our servants. They are not our pets. They are our brothers and sisters. Remember that Ghilan’nain, the first halla and mother of them all, was once a huntress of the people. Without the halla, there would be no Dalish. The second thing you must understand about the halla is that you cannot force a halla to do something against her will. I have heard tales of shemlen who come across herds and attempt to capture the halla, using ropes and bridles. Many shemlen have died impaled on horns as a result of this foolishness. Never forget that the halla once bore our knights into battle. The fierce blood of a warrior still runs through her veins and she would sooner fight to the death than demean herself. Like the Dalish, the halla are proud. A halla knows who she is, and will tolerate no being that tells her that she is less.”
— Adara, halla-tender of the Ralaferin clan, to her apprentice
| Info | Description |
|---|---|
| Location: | The Exalted Plains |
| Level Range: | 8-19 |
| Health Modifer: | 0.25 |
| Armor: | Very Low |
| Resistances: | None |
| Vulnerabilities: | None |
| Immunities: | None |
| Crafting Material: | Halla Leather |
High Dragon
There are a total of 10 High Dragons to be hunted down and defeated for masterwork crafting materials as well as rare weapons and armor. There is a quest for defeating 10 High Dragons, and you will find information on them in the locations where they have taken residence. The Main Quest Dragons do not drop any crafting materials or rare equipment.


| Info | Description |
|---|---|
| Location: | Crestwood, Emerald Graves, Emprise du Lion, Hissing Wastes, The Hinterlands, Storm Coast, Western Approach |
| Level Range: | 13-25 |
| Health Modifer: | 36 |
| Armor: | Average |
| Resistances: | Varies |
| Vulnerabilities: | Varies |
| Immunities: | Physical Effects/Fear/Paralyze/Freeze/Sleep/Snare/Confuse |
| Crafting Material: | Intense Dragon Blood, Dragon’s Tooth, Dragon Webbing, Dragon Scales, Dragon Bone |
| Dragon | Location | Abilities |
|---|---|---|
| Ancient Dragon | Arbor Wilds | Fire |
| Ferelden Frostback | The Hinterlands | Matriarch, Fire |
| Gamoran Stormrider | The Exalted Plains | Electricity |
| Greater Mistral | Emerald Graves | Armored, Cold |
| Highland Ravager | Emprise du Lion | Armored, Berserk, Matriarch Fire |
| Hivernal | Emprise du Lion | Berserk, Cold |
| Kaltenzahn | Emprise du Lion | Armored, Cold, Matriarch |
| Northern Hunter | Crestwood | Berserk, Electricity |
| Red Lyrium Dragon | Finale | Armored, Red Lyrium |
| Sandy Howler | Hissing Wastes | Armored, Matriarch, Fire |
| The Abyssal High Dragon | Western Approach | Armored, Fire |
| Vinsomer | Storm Coast | Armored, Berserk, Electricity |
Hyena
“The common hyena is a remarkable predator, flourishing in the harshest of conditions. Packs working in concert have sometimes taken down prey as formidable as a great bear. It’s an incredible sight, but you should keep your distance because one of those beauties took down my bronto in under a minute.”
— From The Wilds of Thedas: Volume Two, by Stephan d’Eroin
| Info | Description |
|---|---|
| Location: | Forbidden Oasis, Western Approach |
| Level Range: | 8-11 |
| Health Modifer: | 2 |
| Armor: | Low |
| Resistances: | Cold |
| Vulnerabilities: | Fire |
| Immunities: | None |
| Crafting Material: | Canine Leather |
No Comments