

Breaking Through the Blockade
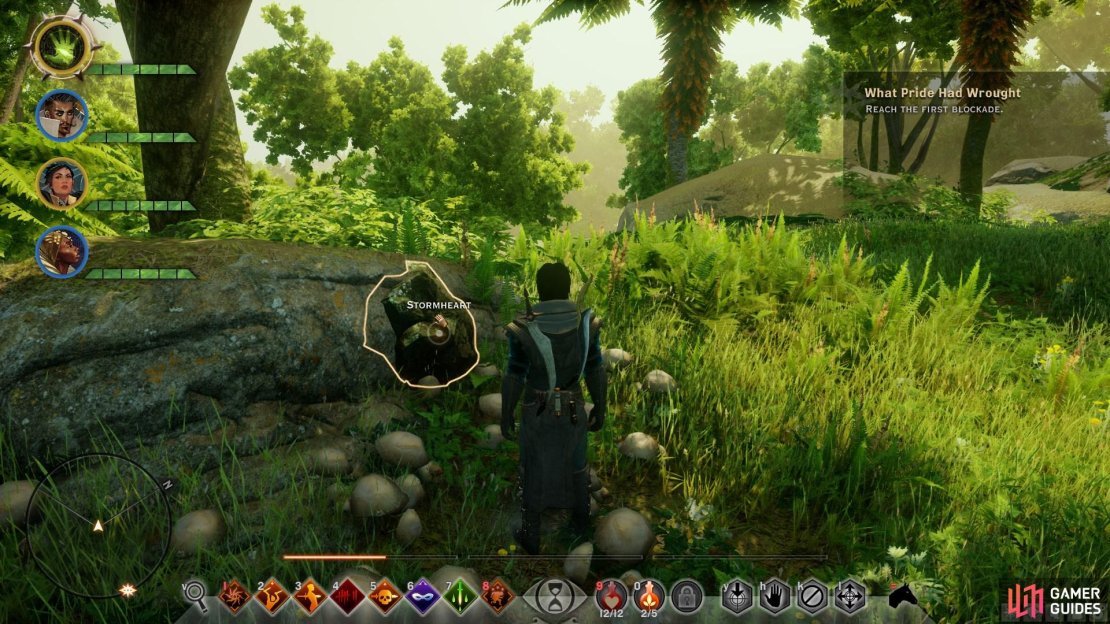
This is the first and last time you’ll enter the Arbor Wilds so keep your eyes peeled for ![]() Stormheart and
Stormheart and ![]() Silverite as you travel. The trip to the first blockade is relatively smooth, just a few Red Templars and Horrors along the road and they will be split up at that. At the blockade is a Knight with some Marksman; you want to take out the ranged attackers first. Continue to the bottom of the waterfall and aid the Inquisition members against the Horrors.
Silverite as you travel. The trip to the first blockade is relatively smooth, just a few Red Templars and Horrors along the road and they will be split up at that. At the blockade is a Knight with some Marksman; you want to take out the ranged attackers first. Continue to the bottom of the waterfall and aid the Inquisition members against the Horrors.
Turn south to find a Red Templar Forward Camp. Clear out the camp and loot the Chest for a ![]() Master Dragon-Slaying Rune and
Master Dragon-Slaying Rune and ![]() Bianca Arms VI and next to it is a note and Supply Cache. Continue through the jungle to the water where you’ll find a Sentinel Shadow and Red Templar. This foe is much tougher than others, so focus on it first. Cross the river to find two Behemoths and make sure to focus on one at a time. If you go south from here you’ll find a small camp with a note and a chest containing
Bianca Arms VI and next to it is a note and Supply Cache. Continue through the jungle to the water where you’ll find a Sentinel Shadow and Red Templar. This foe is much tougher than others, so focus on it first. Cross the river to find two Behemoths and make sure to focus on one at a time. If you go south from here you’ll find a small camp with a note and a chest containing ![]() Mhemet’s War Hammer. Past the camp you’ll find a clearing with an elven chest holding a
Mhemet’s War Hammer. Past the camp you’ll find a clearing with an elven chest holding a ![]() Dragon Staff Blade Schematic and nearby some
Dragon Staff Blade Schematic and nearby some ![]() Felandaris.
Felandaris.
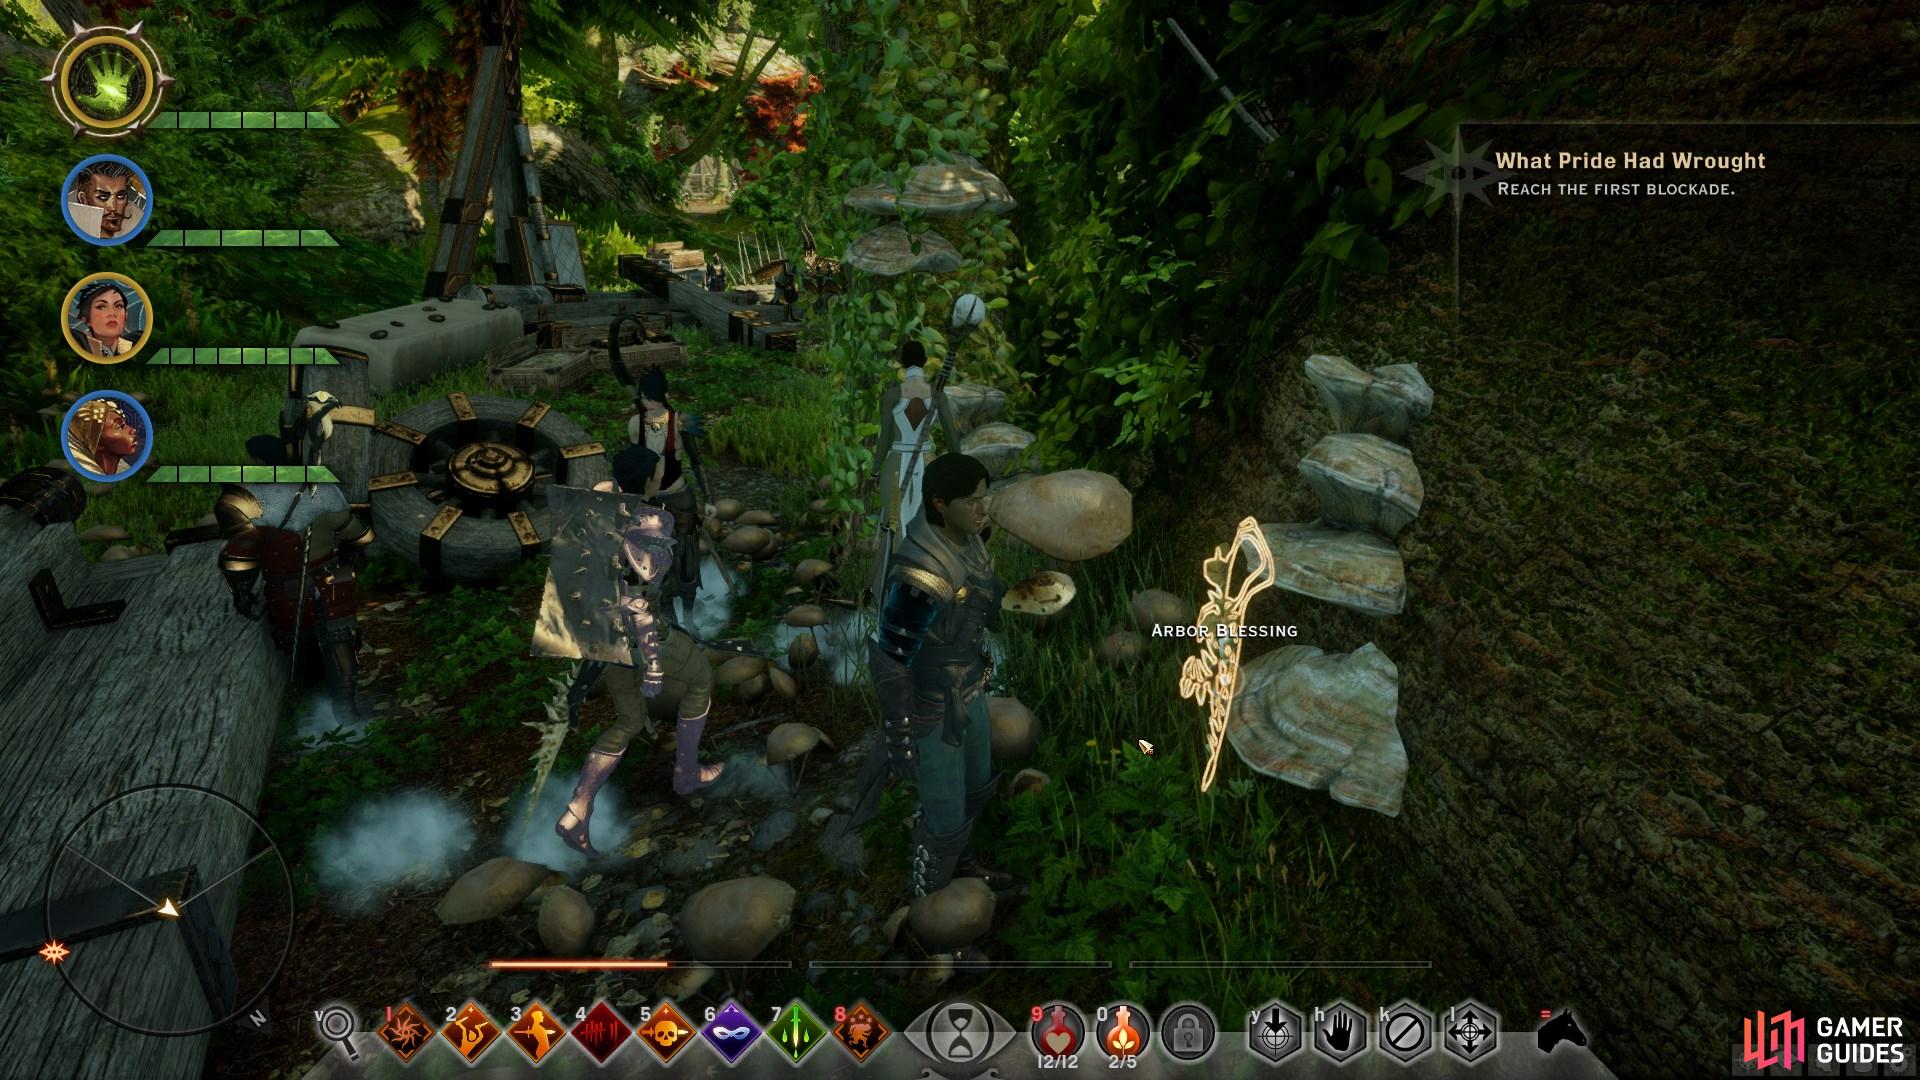


(1 of 3) Looting Arbor Blessing will allow you to acquire their seeds, which can later be planted at Skyhold.
Light the Veilfire here and examine the walls to find some Old Elven Writing. Return to the second blockade and go north up the river. Defeat some Horrors and turn east to find Leliana near a Footlocker and Supply Cache. Trek north into the clearing where the Temple Gates and the final blockade are located. There are a number of Red Templar Horrors and Senior Wardens here; focus on the Horrors first.
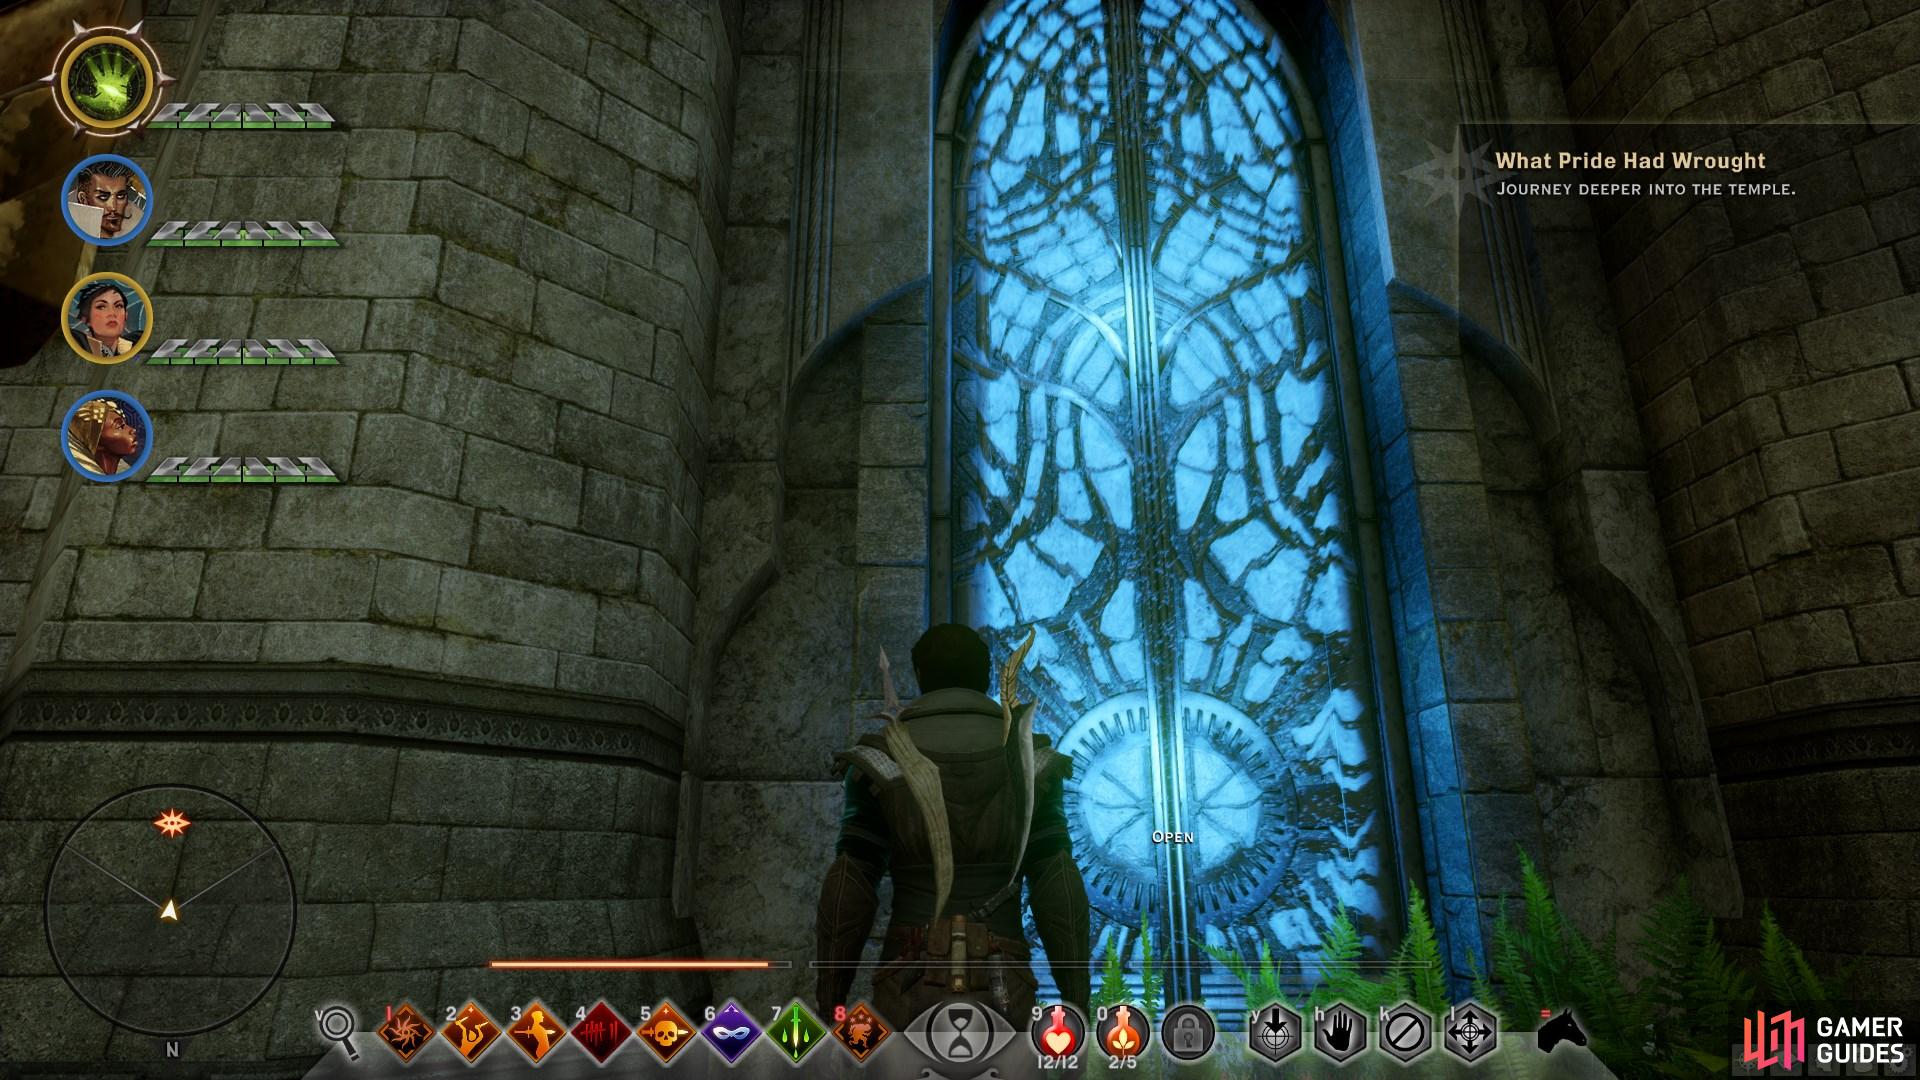
The Temple of Mythal
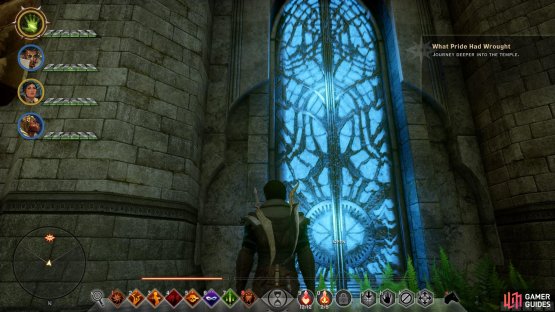
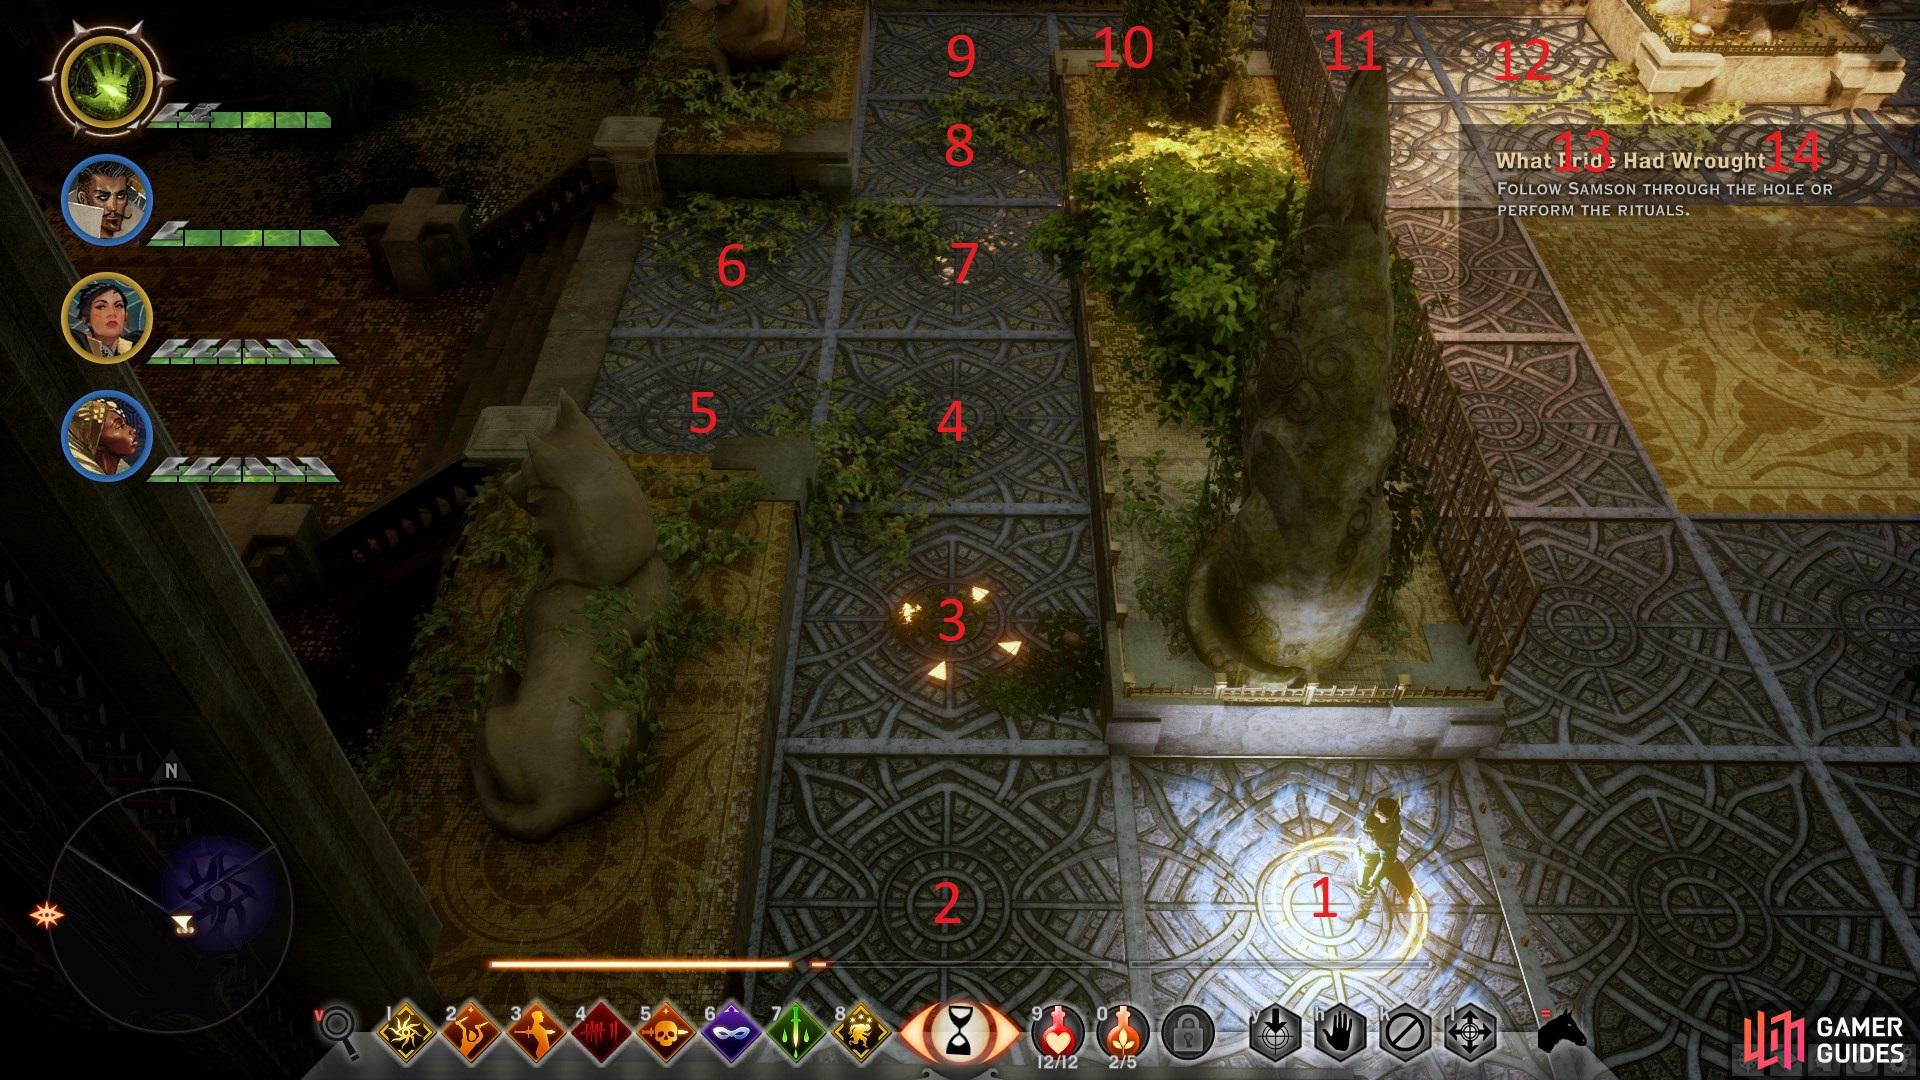
With the blockades broken through, enter the Temple. Here you’ll have a scene with Corypheus and his general (Calpernia or Samson). Head up to the first platform for a scene then you’ll need to perform a ritual to open the door. You need to walk on the tiles to light them up without walking on the same one more than once. If you overlap where you’ve walked you will need to start over. This first ritual is not difficult.


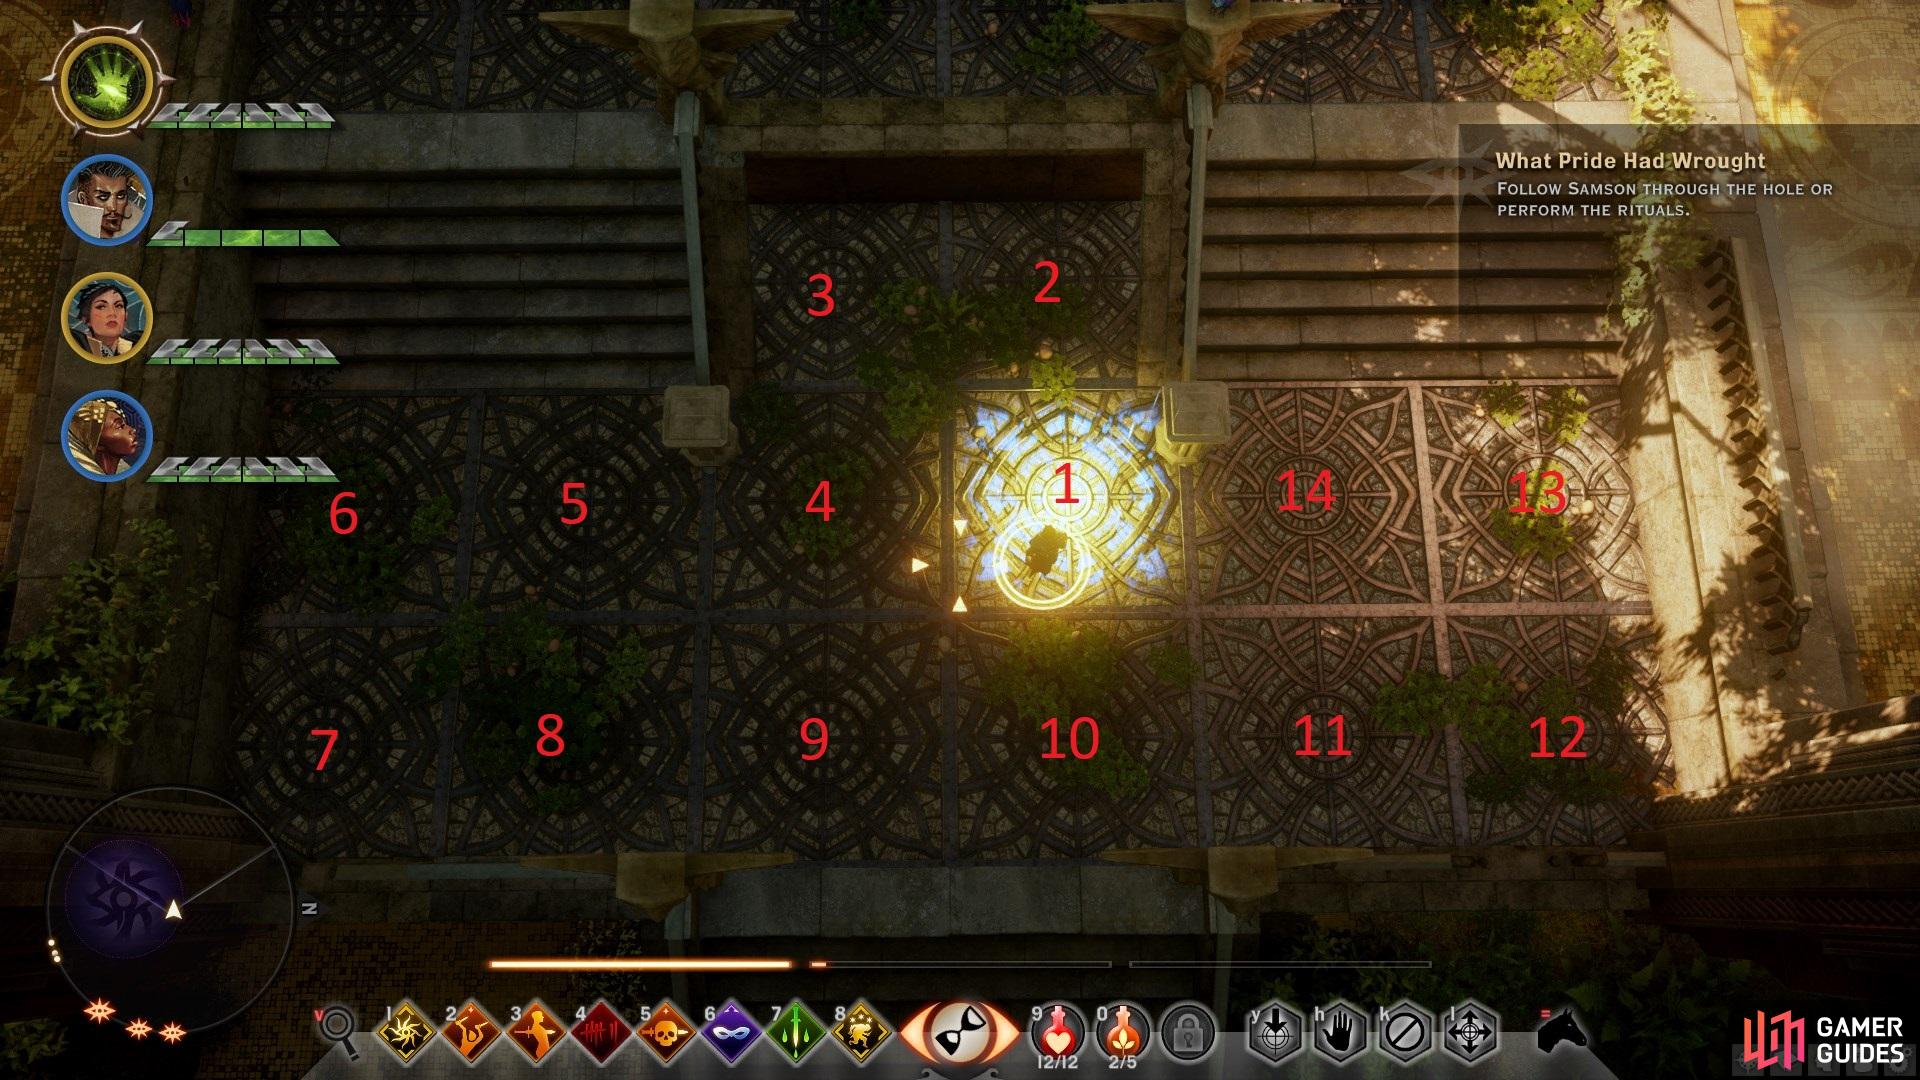
(1 of 2) To perform the first ritual, simply run over each square without leaving one that you’d need to backtrack to.
To perform the first ritual, simply run over each square without leaving one that you’d need to backtrack to. (left), Once all squares are lit in blue, the door will follow and you’ll be able to enter. (right)
Head up the stairs after solving the puzzle but go all the way around the left past the door instead of through it. Here is another elven chest with a Tier 3 Schematic inside. Further in you can obtain the codex The Rebel God. Enter the chamber where you are ambushed; just defeat the Horrors and Templars for another scene. You have a choice now: You can follow the General and jump down the hole or go through the rituals which is much more rewarding. If you jump down the hole, skip ahead a bit to see what you have in store.
Approval Upon Completing Rituals
Solas - Approves
Dorian - Approves
Cassandra - Disapproves![]() Iron Bull - Disapproves
Iron Bull - Disapproves
Blackwall - Slightly Disapproves
Vivienne - Slightly Disapproves
Sera - Disapproves
Approval Upon Skipping Rituals
Solas - Greatly Disapproves
Dorian - Disapproves
Sera - Approves
Cassandra - Approves
Iron Bull - Slightly Approves
Blackwall - Slightly Approves
Vivienne - Slightly Approves
The Elven Rituals
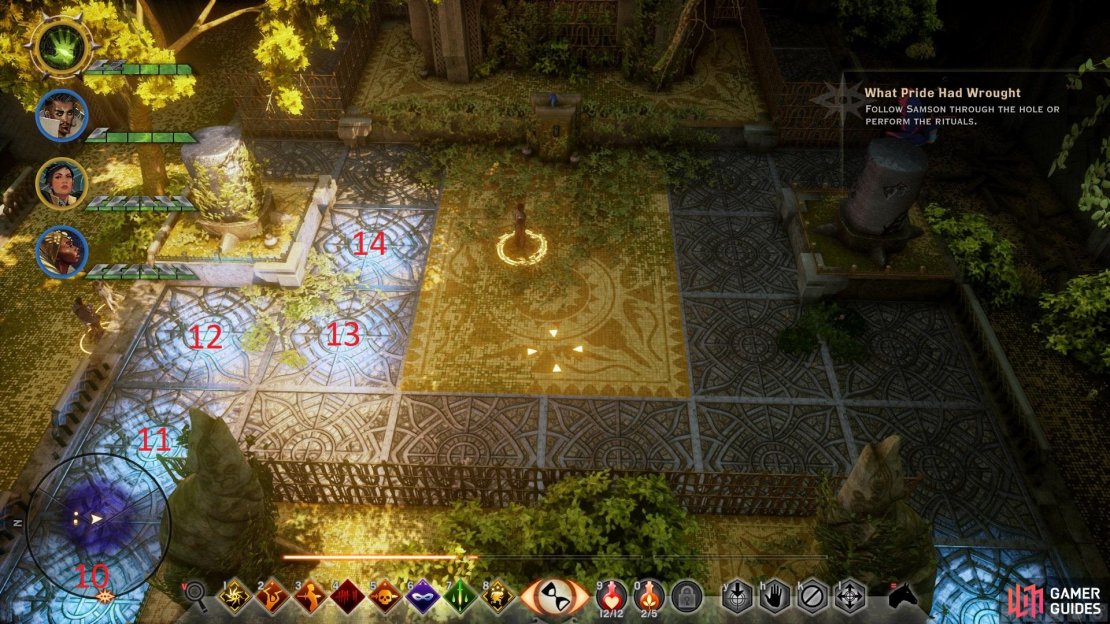
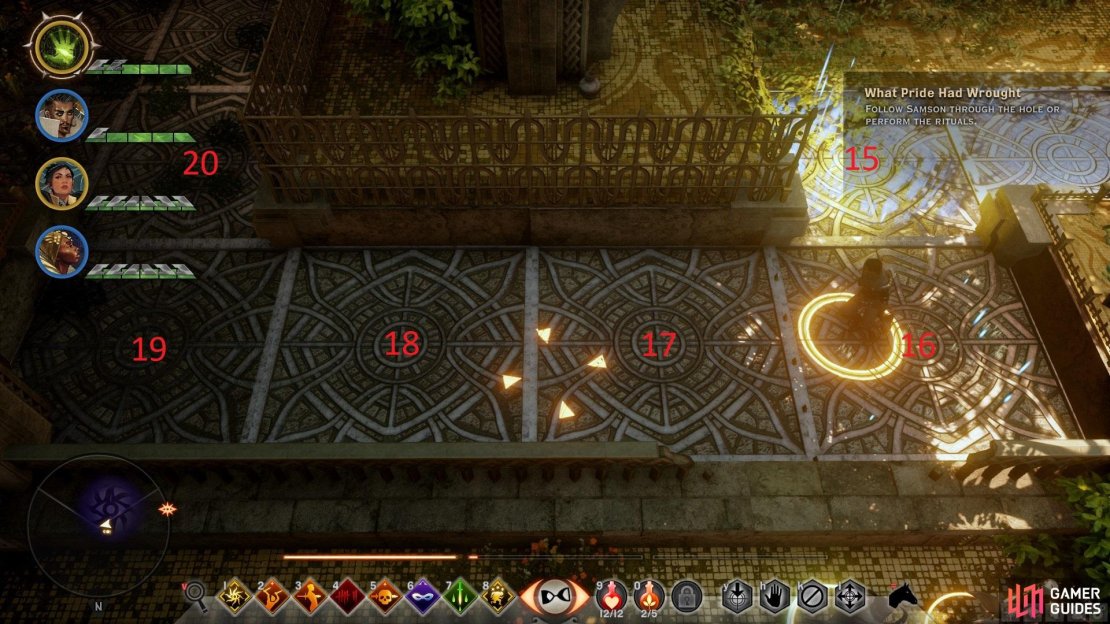
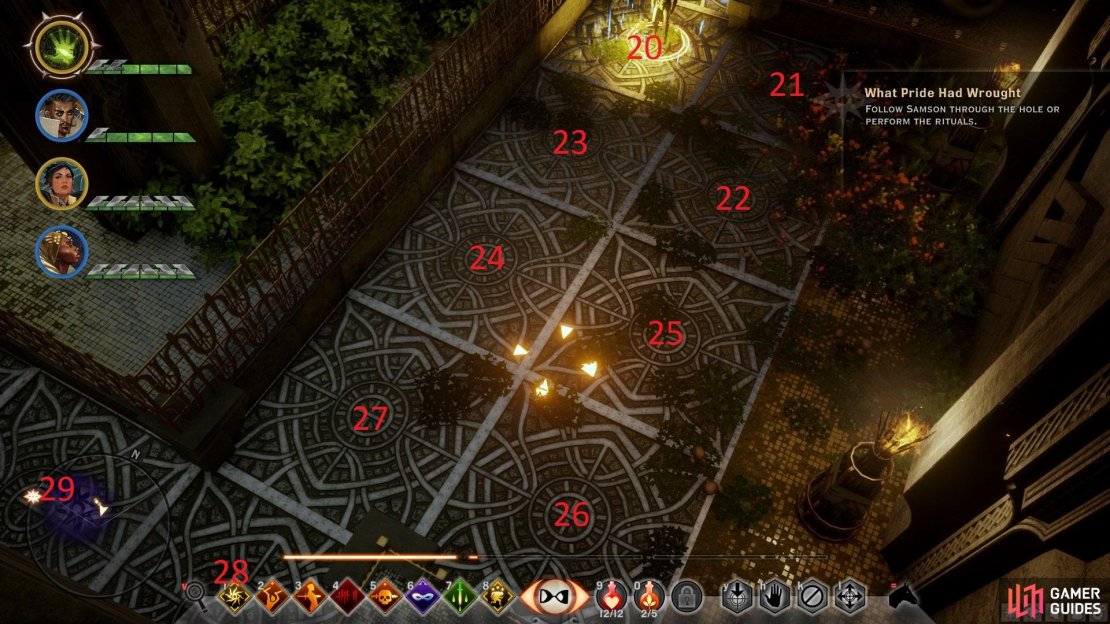
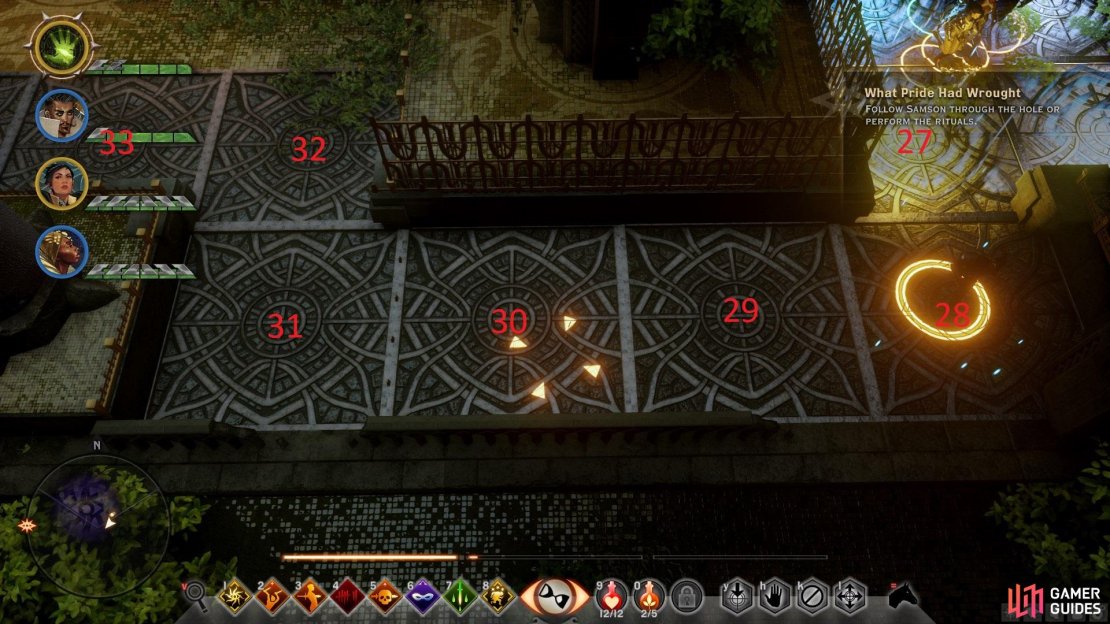
As with the first ritual, you will need to step on each platform to activate it and light it up in order to complete the ritual. The first was as straightforward as can be, while these require a specific order. You will find the order for each in the screenshots below.
Western Ritual
Head over to the western ritual first. On the way inspect the codex entries Song of Falon’Din and down the steps The Mystery of June.

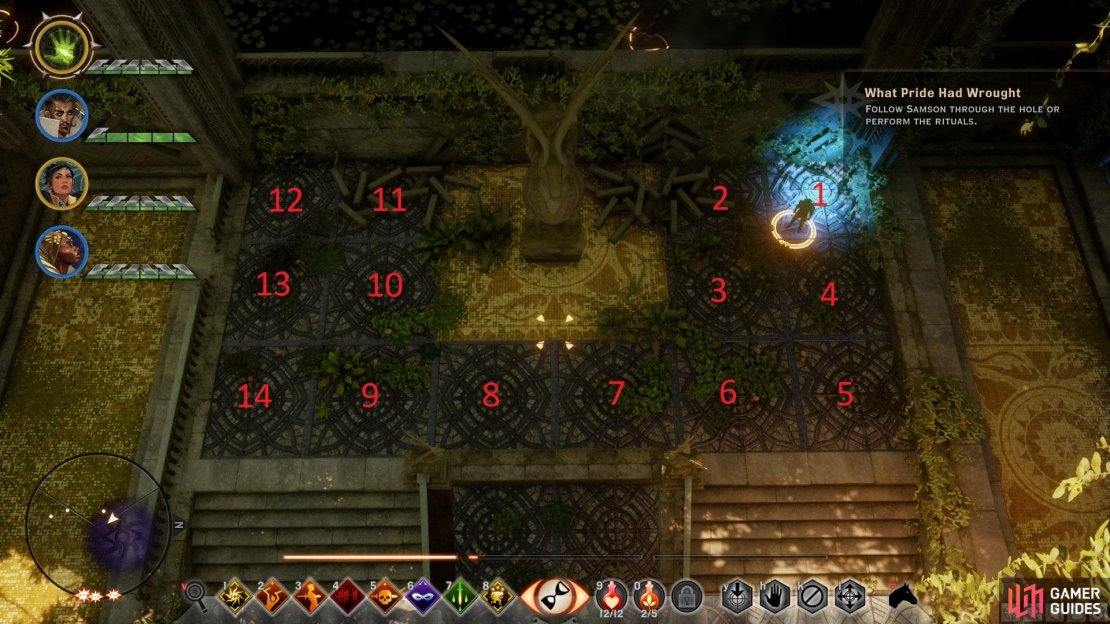
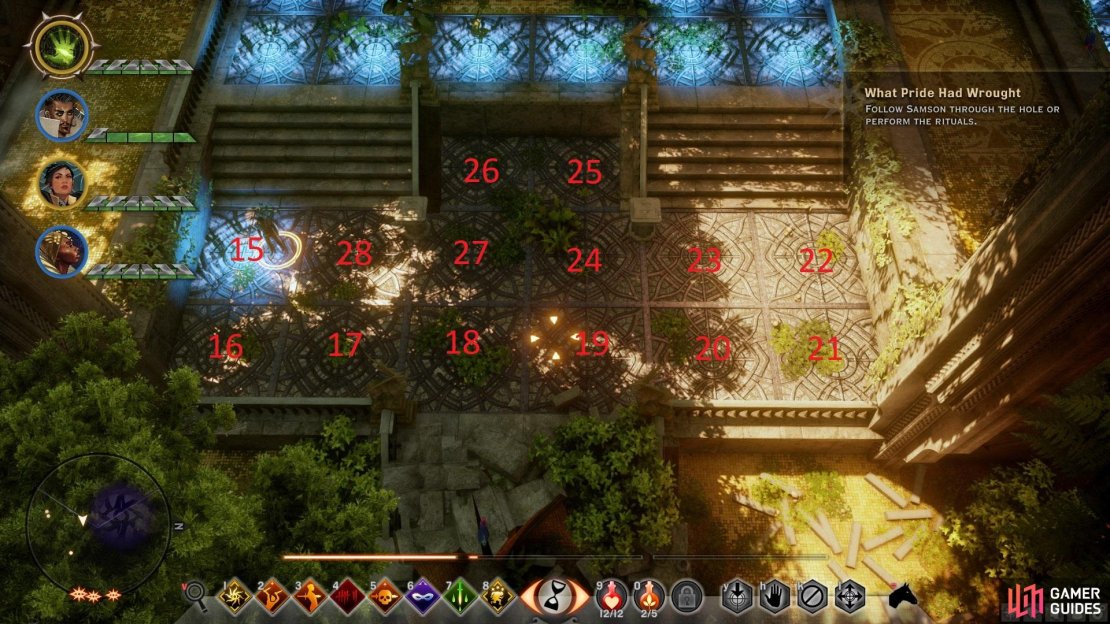
(1 of 4) The order for the first phase of the western ritual.
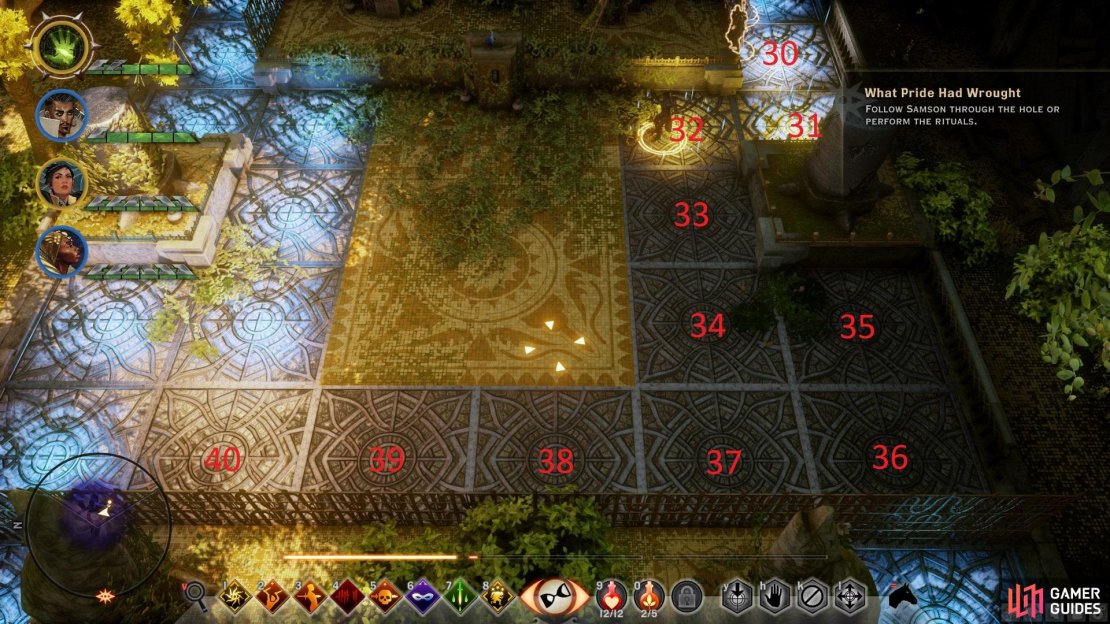
North East Ritual
Next, head to the north east ritual across the courtyard. This one is much easier, and there is only one set of platforms.

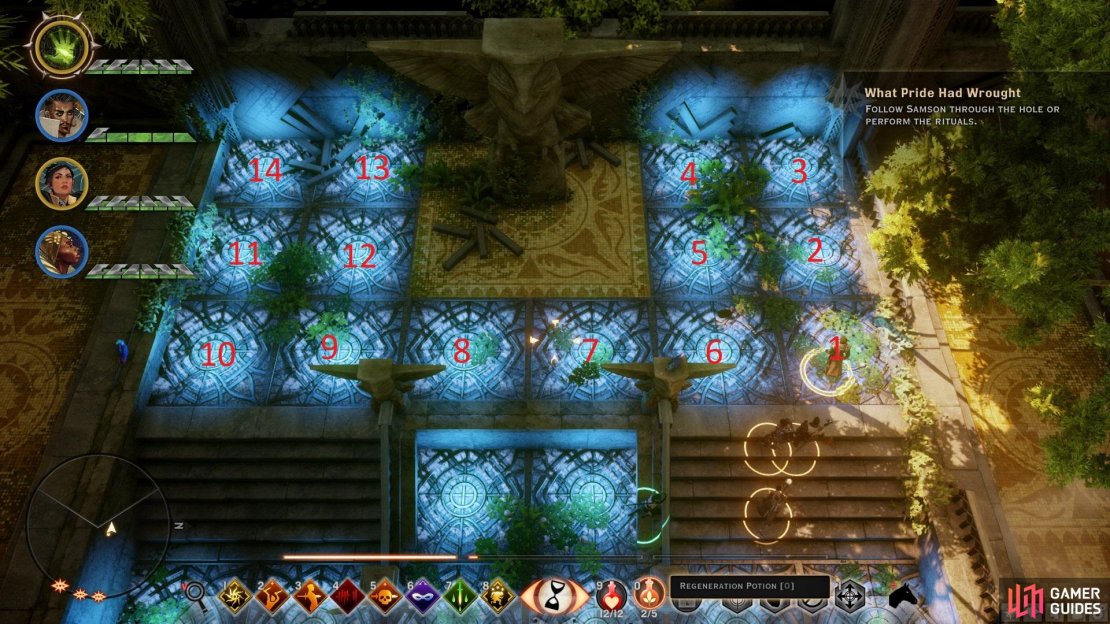
(1 of 2) Be sure to take the stairs down to the north eastern platform to avoid fall damage.

Be sure to take the stairs down to the north eastern platform to avoid fall damage. (left), The order for the north eastern ritual. (right)
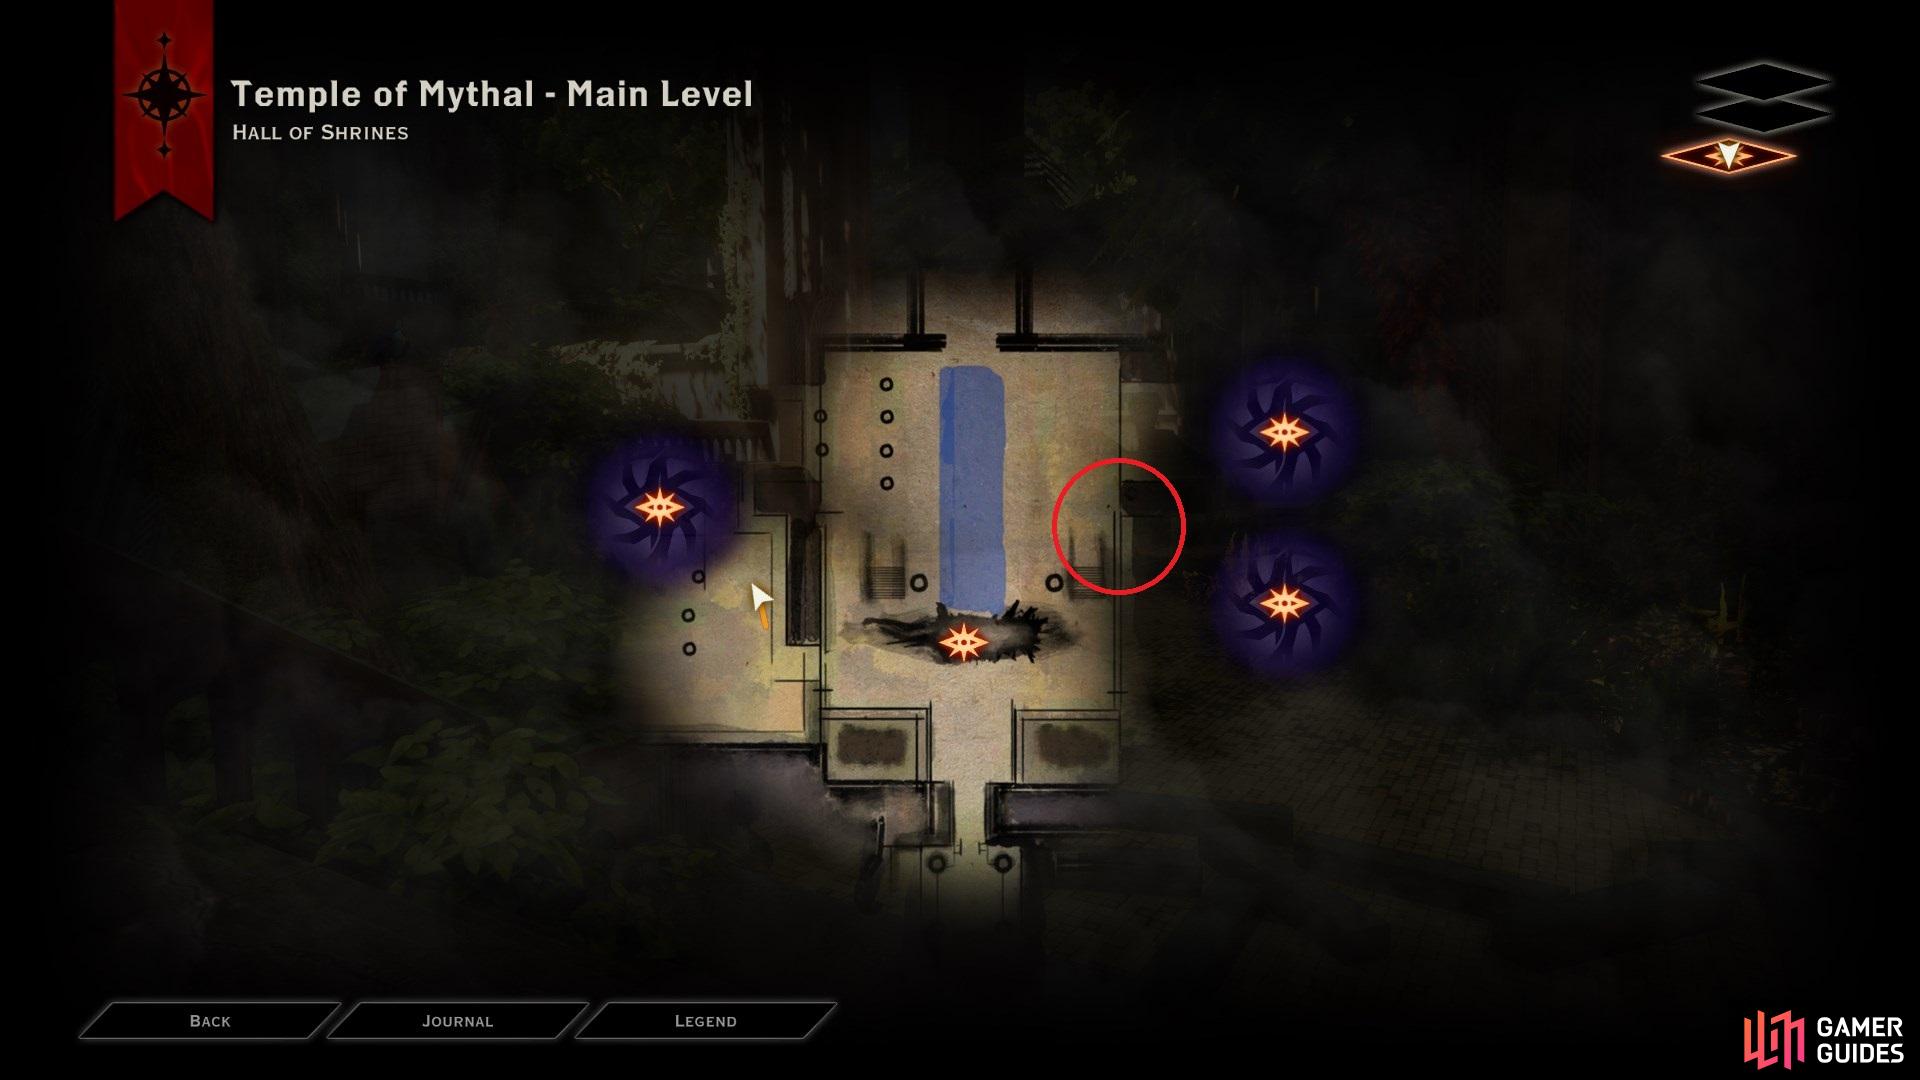
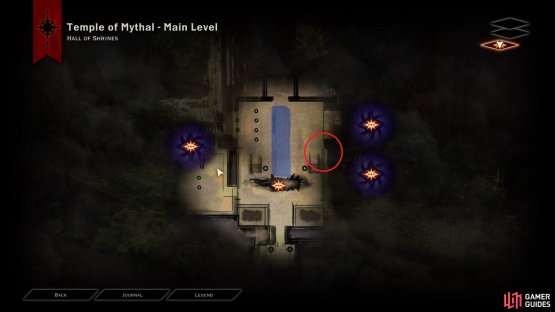
Eastern Ritual
This one can be a bit tricky because there are a couple of grates blocking your path that can be lowered with a switch. The switch will lower the grates but raise two more so it may be necessary to use it twice to complete. If you’re quick enough, you will only need to pull the switch once.


Rituals Complete
Head to the Inner Sanctum and you will meet Abelas. He will offer an alliance. If you accept then you don’t have to fight him or the Sentinels any longer. Refuse or jump down the hole from earlier and you will contend with them. Follow the guide to a pot with an ![]() Amulet of Power (Solas), the
Amulet of Power (Solas), the ![]() Longbow of the Griffon, and the Judgement of Mythal codex. In the next room interact with the Song to Elgarn’nan, Twins in the Shadow, and The Ascension of Ghilan’nain. Light the Veilfire and check the southwestern wall for Unreadable Elven Writing.
Longbow of the Griffon, and the Judgement of Mythal codex. In the next room interact with the Song to Elgarn’nan, Twins in the Shadow, and The Ascension of Ghilan’nain. Light the Veilfire and check the southwestern wall for Unreadable Elven Writing.
Head up the steps and search another wall with veilfire for Untranslatable Elven Writing then open the door nearby after finding the Song to Sylaise. Plenty of fighting goes on here and it can wrap around where you are going anyway, so follow the guide if you agreed to Abelas’ alliance. There is an Elvhen Chest down the tunnel where the Sentinel Guide goes. Loot the Elvhen Chest here at the top of the stairs then go into the next room and into the Well of Sorrows. Here you’ll meet the General of Corypheus’ army depending on who you sided with earlier in the game. If you did previous quests to find out their weaknesses (Samson and his armor), you will have a chance to weaken them.
Down the Hole
Solas isn’t too happy about this, but who has time to fiddle with silly Ancient Elven Rituals? There’s a group of Red Templars waiting for you in the Ancient Crypts ahead: Two Red Templar Marksman, two Horrors, a Templar, and a Knight. Dispatch them and notice more enemies waiting on the left. The lootable body here is your new Replenish Supplies apparatus. Morbid. Kill the templars and you will face a Spirit Barrier with a Chest nearby. There is also a lockpick door. You can go through either one or use them both to flank the Templars beyond.
Once down, turn around and you’ll find another door. Go through it and you will notice some gates on your right. Continue forward to the veilfire. Use the search to locate a lever in a small room off to the side of the veilfire. This lever lowers the gates that you passed. You want to light the veilfire and head into the first small alcove that is now open. Inside you can find a Chest and Vase thing but more importantly, examine the rune on the wall for Ancient Elven Writings codex.
Moving forward again, you will come to another Spirit Barrier with more veilfire next to it. Take out the barrier and light some more veilfire if you’ve misplaced your other torch. Use the veilfire to examine another rune for Untranslatable Elven Writing. There’s some loot, elfroot, and a chest in here you can grab.
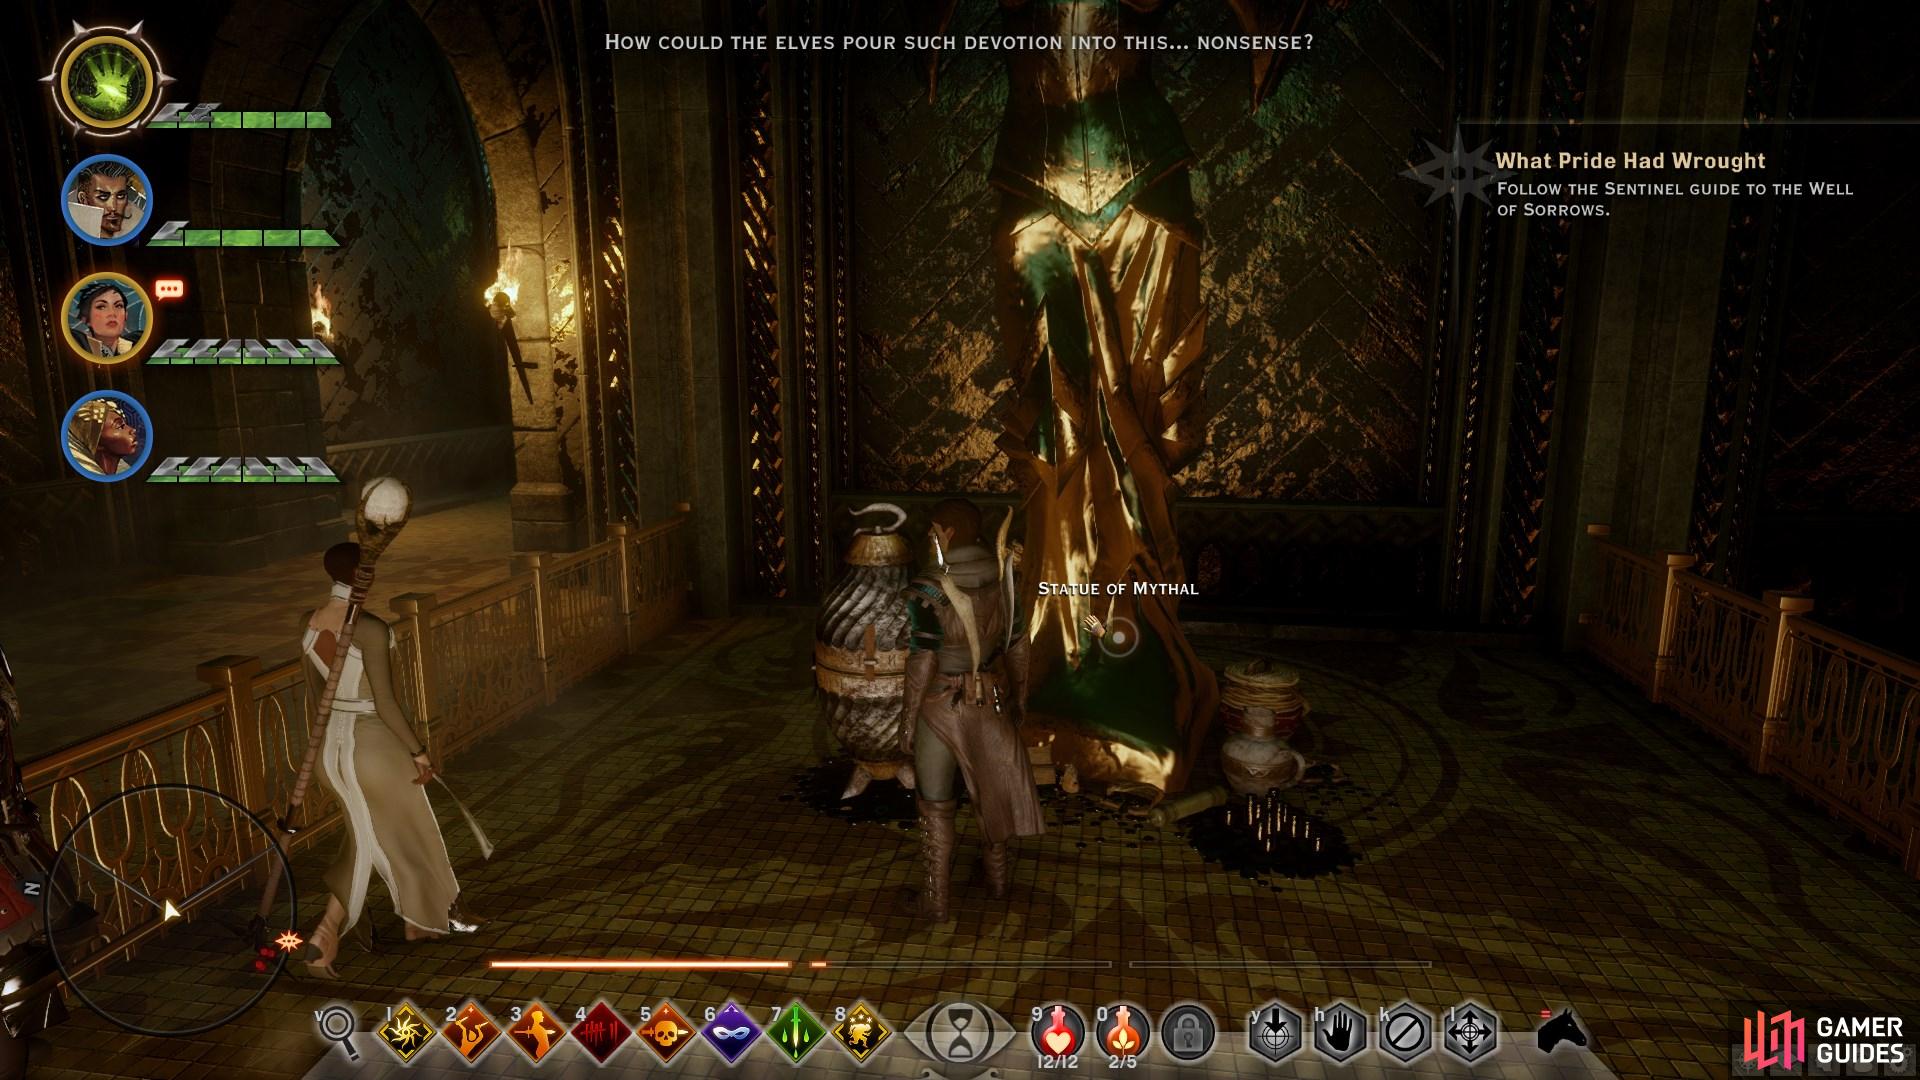


(1 of 2) Be sure to interact with statues as you go, and take the loot beneath them.
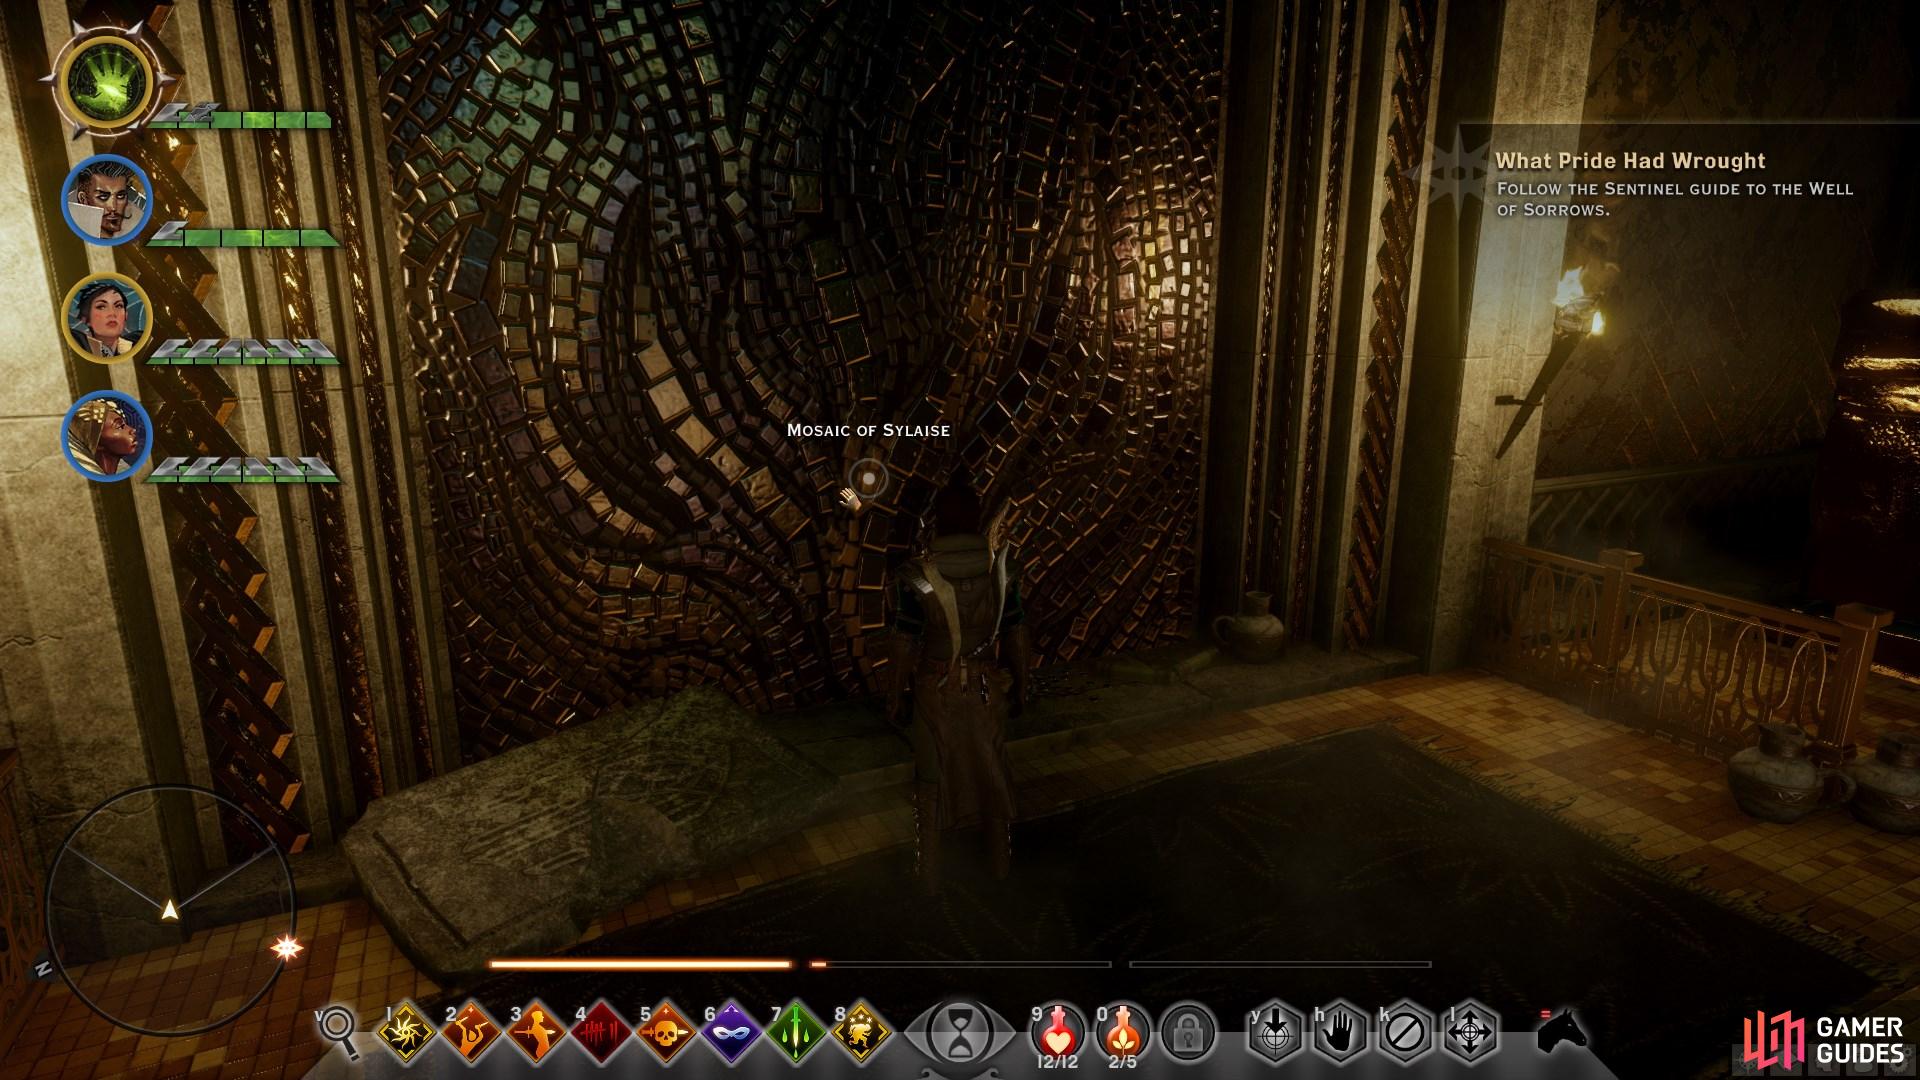
Be sure to interact with statues as you go, and take the loot beneath them. (left), Be sure to interact with the mosaics as you go. (right)
Make your way across the water where you will find a lockpick door straight ahead. You won’t find much of anything in this room and can exit the way you came or via another lockpick door. You will spy another Spirit Barrier with a couple of enemies behind it. Don’t destroy it yet. There is a door to the right of the barrier; you want to make your way through that door. You will find more gates and a search begins.
The seach will lead you out to your right then straight ahead where you will find more veilfire and another hidden lever. Just like the other hidden lever, this one lowers the gates allowing us to come at our opponents from the side. Hold off on that for a moment. Light some veilfire and go through the doorway just to the left of it. On the left wall you can examine the rune for Unreadable Elven Writing.
Head back to the barrier where the two horrors await. You will notice the gate next to them has been lowered allowing you to hit them from two sides. Split your forces and surprise! More templars a little further down may join the fight but they’ll get caught in your crossfire. When they are defeated you will find two alcoves with some loot in each. Loot in hand, head through the broken wall and turn right to find a lone Templar Knight. One guy is really going to stand in our way.
Once he’s down move forward to find some stairs. You’re getting somewhere now. There is no loot in the dark corners here so continue up the stairs to enter the Inner Sanctum and trigger a cutscene.
Fight in the Inner Sanctum
Abelas is not thrilled you ignored the Rituals. He leaves to destroy the well, Morrigan gives chase, and now six angry Sentinel Archers are waiting to kill you. Perfect. Four of them are grouped close to each other so you want to use some AoE abilities to take them out then go after the other two. With them taken care of, you want to go through the door on your left. It’s the only door you can open from this room. It leads to some stairs so move up the stairs and come to another door. You can hear fighting going on the other side. It’s four Red Templars versus a Sentinel Spellweaver and a Sentinel Champion. You can open the door and charge in (Free for all!) or wait until the fighting subsides so you have less to deal with.
Either way defeat them all and open the door. Go up some stairs and another door. Search the wall straight ahead for a secret lever that opens a doorway on the right. You can find a body to loot to Replenish Supplies. Do so if needed then go through the doorway, up the stairs and into a room with a brazier in the middle. Turn left and you will spot a mosaic on the wall. Examine it for Songs of Sylaise. Thanks, Sylaise. Across the room is another set of doors with stairs that lead to more Templars and Sentinels fighting. Charge in or wait for both sides to wear each other down a little. There is a pair of Sentinel Shadows you want to watch out for. Once everything is defeated in the mayhem it’s time to move on.
The next room you come to is rather large and has a set of stairs on the right. Up the stairs we go and to another room where you can hear fighting. Two Sentinel Archers, a Sentinel Champion, two Red Templar Knights, and a Knight Shadow are going after each other. Wait until one side is defeated (most likely the Sentinels) then open the door and mop up what’s left. Everyone okay? Good. This is the last set of doors, we swear. Proceed through the double doors to reach the Well of Sorrows. You’ll want to use the loot corpse to replenish your supplies because a boss fight is coming. At the bottom of the stairs Samson/Calpernia await.
BOSS - Samson
| Value | Stats |
|---|---|
| Health | 80709 |
| Defence | 68 |
| Immunity | All Physical Effects, Frozen, Paralyzed, Panicked, Slowed |
| Ability | Perceptive |
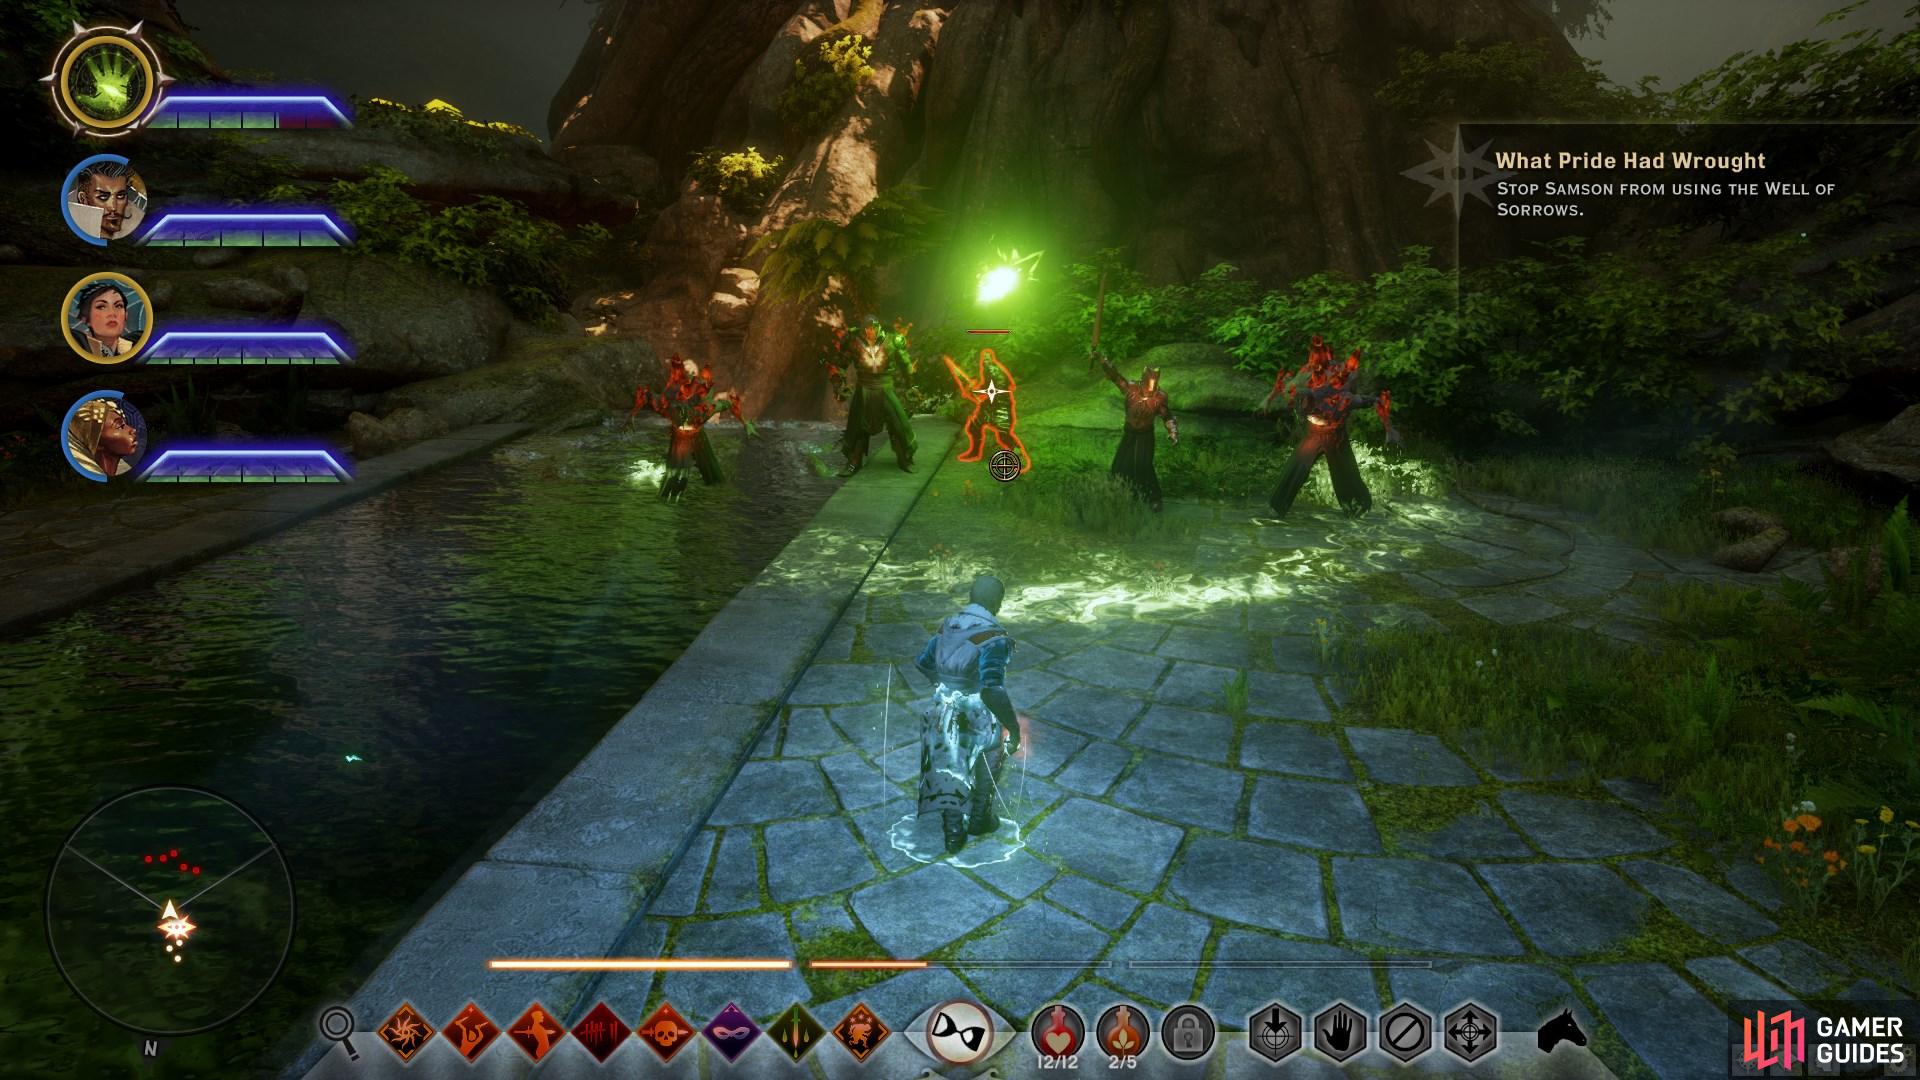
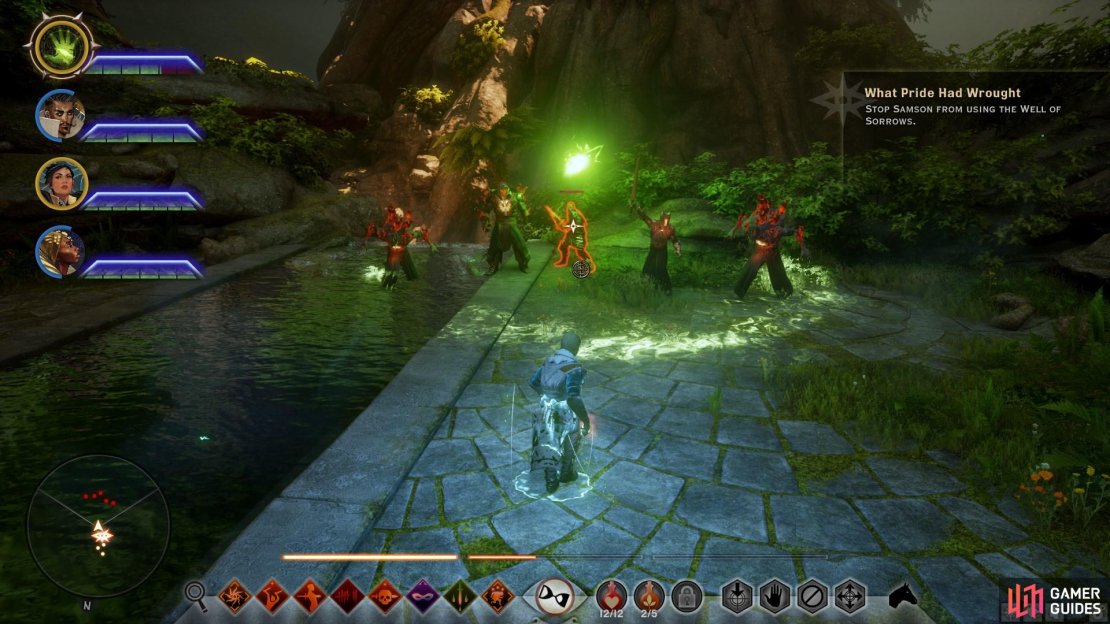
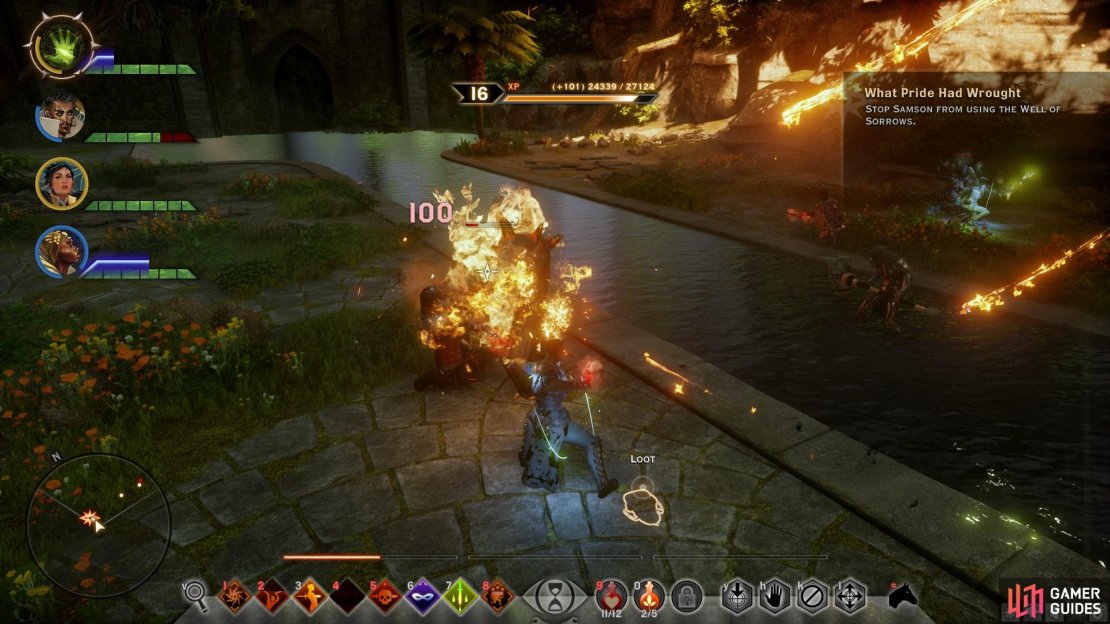
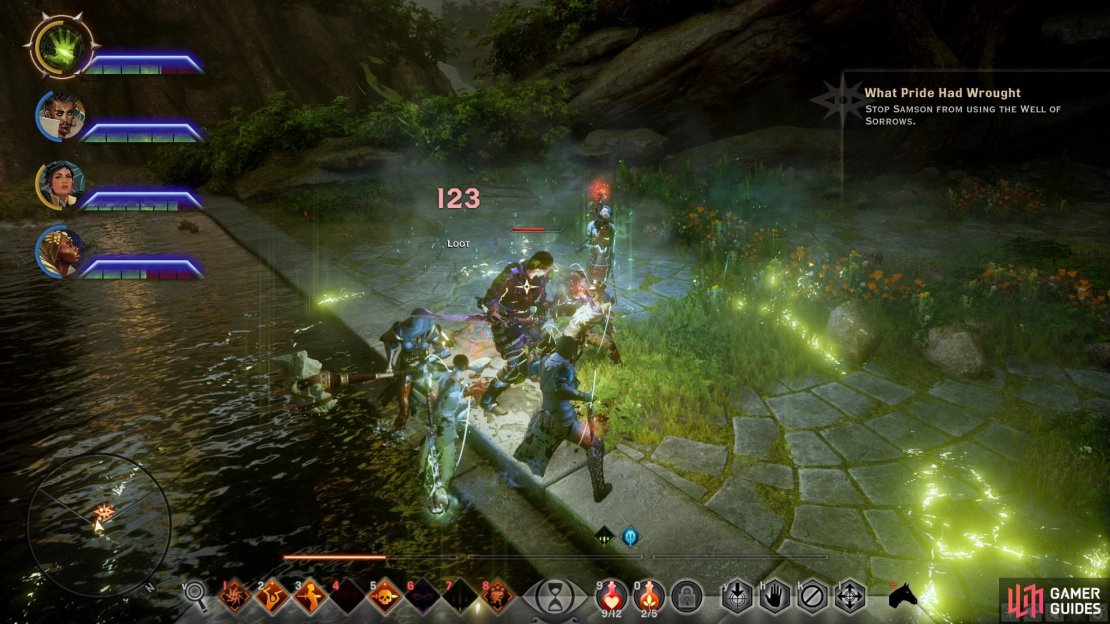
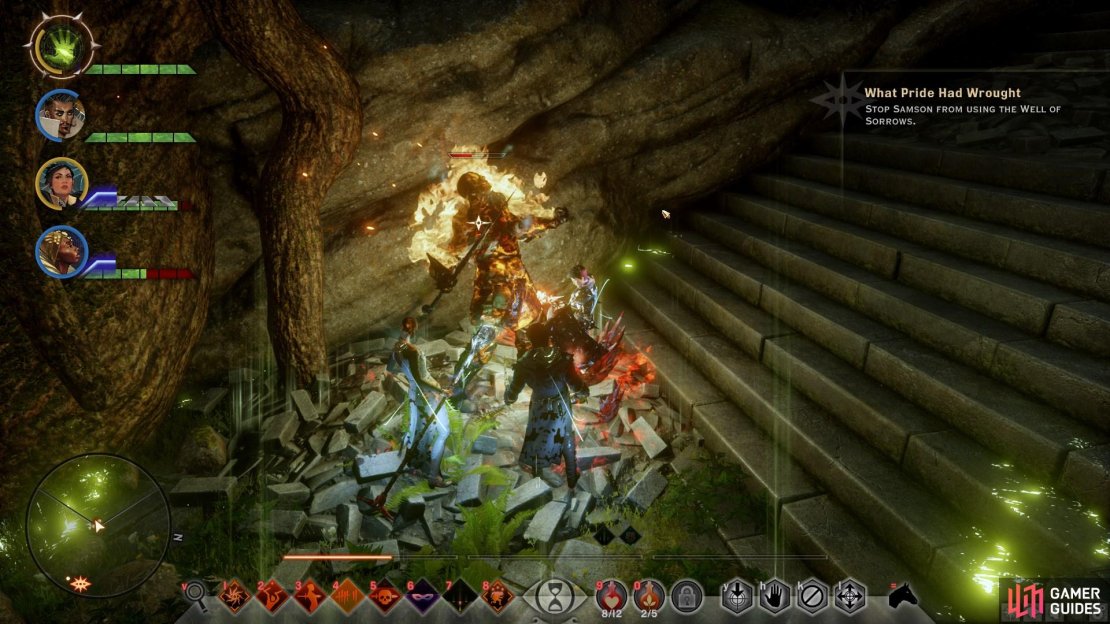
(1 of 4) Use Mark of the Rift at the beginning of the fight to weaken Samson and his allies.
Whether you weaken Samson or not, you’ll still have to contend with the Templars at his side and his flurry of attacks. Use an area of effect attack at the start to destroy the Templars; Mark of the Rift works well if you have any Focus. Samson will use fullspins to knock down your companions and build Guard so that you aren’t actually hurting him. Use War Horn and Shield Bash to break through this and keep Samson taunted away from your ranged attackers. He will sometimes use a leaping attack to go after your ranged characters. An Archer Inquisitor can use Leaping Shot to avoid it while dealing some damage or use Evade to dodge it entirely. It will take some time, but this is a battle against a single man so it isn’t that difficult.
After the battle you meet up with Abelas and Morrigan again. You now have a choice: Will Morrigan or the Inquisitor drink from the Well of Sorrows? Your companions will have an opinion on the matter if you ask. They will also give approval or disapproval depending on your choice.
Inquisitor Drinks:
Blackwall - Approves
Cassandra - Approves
Dorian - Slightly Disapproves
Iron Bull - Approves
Sera - Greatly Disapproves
Solas - Disapproves
Vivienne - Greatly Approves
Morrigan Drinks:
Blackwall - Approves
Cassandra - Disapproves
Dorian - Approves
Iron Bull - Disapproves
Sera - Approves
Solas - Approves
Vivienne - Greatly Disapproves


| Codex Entries | Codex Entries accessible after allying with Sentinels | Enemies |
|---|---|---|
| Arbor Wilds | The Judgment of Mythal | Red Templar |
| Folded Note | Twins in Shadow | Red Templar Marksman |
| Official-looking Letter | The Ascension of Ghilan’nain | Red Templar Horror |
| Old Elven Writing | Song to Elgar’nan | Red Templar Knight |
| The Temple of Mythal | Red Templar Behemoth | |
| The Rebel God | Warden | |
| Elven God Andruil | Sentinel Shadow | |
| Song to Falon’Din | Senior Warden | |
| The Mystery of June | ||
| Ancient Elven Writing | ||
| Untranslatable Elven Writing | ||
| Unreadable Elven Writing | ||
| Song to Sylaise | ||
| The Sentinel Elves |
No Comments