

This quest begins immediately after On Ameridan’s Trail. You need to return to Svarah Sun-Hair and inform her of your progress in accessing the fortress. You will find her sat on her throne in Stone-Bear Hold.
When the assault begins, run to the gates of the fortress with your allies. A Hakkonite Bruiser will appear in front of the gates. Bruisers are both tough and deal significant damage, so be sure to remain in a flanking position while you whittle down their health. Further in you’ll find some archers and mages on the walls. These shouldn’t pose much of a threat so long as you reach them swiftly and engage them in melee.
Once you’ve dealt with the initial enemies, head north-northeast down the hill toward the inner gates. Along the way you’ll encounter some Winter Shards. These will slow and freeze you if you get too close. Use powerful ranged abilities to destroy them, or if you have to enter melee, be sure to run away before they explode after depleting their health.
As you move further down a number of Hakkonite spies will attack from behind, so be sure to take them out quickly to avoid losing any Avvar allies. Once you’re through the inner walls you’ll encounter more archers and another Bruiser. Take out the Winter Shards first to avoid being frozen, then focus on the archers and finally the Bruiser. Alternatively you can use barriers to negate incoming ranged damage as you focus on the Bruiser.
When all enemies have been dealt with from the inner walls, interact with the door leading to the Old Temple to proceed. Once inside you’ll notice a new status bar on the right side of your screen named ‘Warmth’. Unsurprisingly, this tracks how warm you are within the Old Temple. The bar will swiftly deplete if you stray too far from fires for too long, so be sure to manage your path based on accessible fire pits.
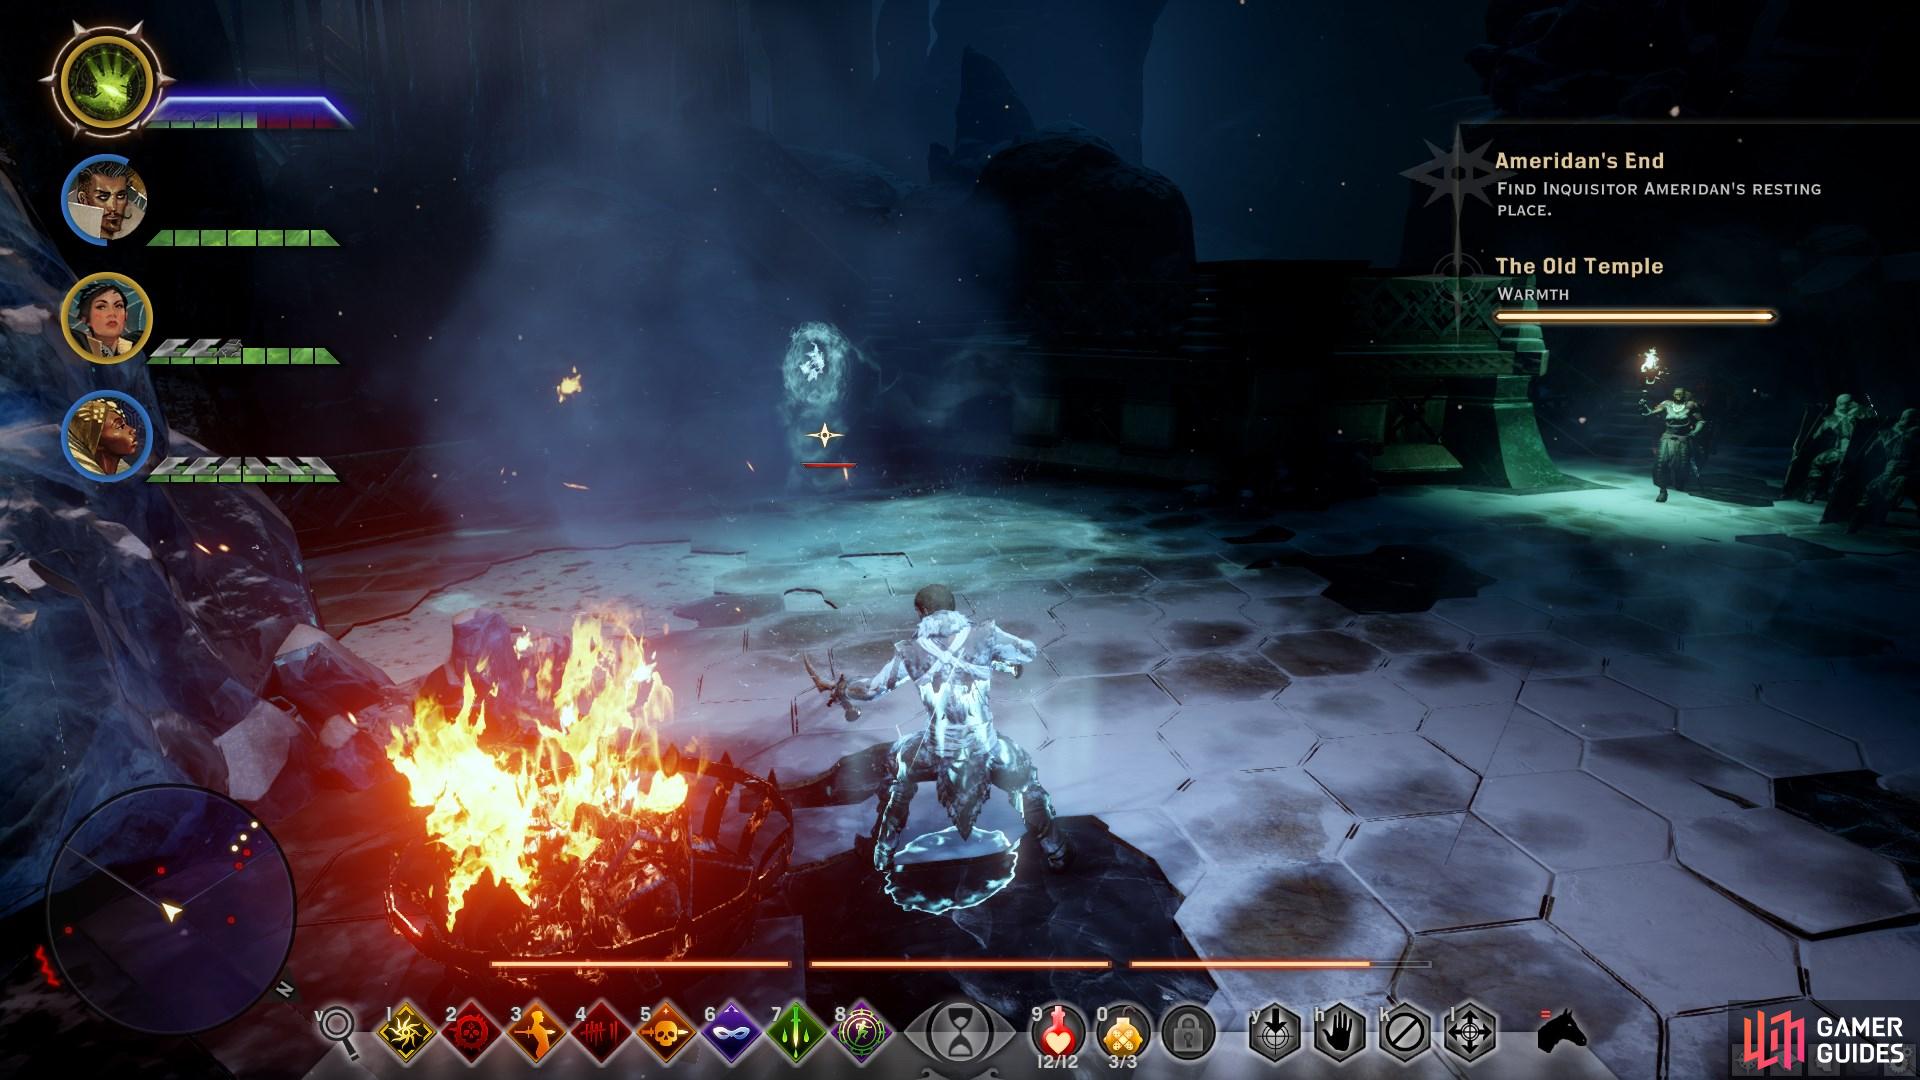
(1 of 5) Try to take out Winter Shards from afar to avoid being caught by their freeze.
Near the first fire pit you will find a Supply Cache. Be sure to use it to replenish your potions before you proceed. While looting the Old Temple at this point is tempting, you will risk death if you stray too far from the fire. It is therefore recommended that you leave looting until after you have deactivated the ice magic. There are some areas which have reliable fire pits which can be lit to allow for exploration, though.
Head down the hallway to the west from the first fire pit. At the end you will find a room with a fire pit which can be lit. You will find a note on the floor which unlocks a codex, and if you have a mage in your party you can interact with the table to create a potions bench which can be used to replenish rare potions. You can continue north to find another fire pit. Light it to warm up and then loot the chests at the end of the hallway.
When ready, return to the first fire pit and make your way north down the steps. Turn east immediately from the bottom of the steps to a room with another camp fire. Once lit, take the key from the top of the box and interact with the rune beneath the statue to unlock a special schematic. Make your way back to the main hall and warm yourself using the first fire pit.
You will see a Winter Shard in the main hall facing north. Be sure to kill this quickly, preferably using ranged skills, before you proceed. If the shard freezes you here there will be limited time to reach the fire pit behind it. When you’re warmed up, continue north through the door and light the next fire pit. Here you will find numerous loot containers and a note which unlocks a codex.
When you’re fully warmed up, continue down the steps where you’ll find another Winter Shard, two Hakkonite Archers, two Defenders, and one Bruiser. Kill the shard from a safe distance first and then focus on the others. You will also find a Spellbinder to the east, which you should damage from afar while staying near the fire pit.
Once you’ve regained some warm continue north and then take the first turn east to reach a fire pit. Warm up here and then head north to trigger another fight with a group of Hakkonites. You can goad them back to the fire pit to ensure that you don’t freeze to death while fighting. Alternatively you can enter the centre of the room and light the fire pit there, though you may risk taking significant damage by exposing yourself.
When all the Hakkonites are dead the ice wall blocking the way will be destroyed. Make your way west and then south to the main chamber where the dragon is being kept. Here you will be attacked by two Bruisers and multiple mages. Take out the mages first to avoid taking unnecessary damage, but be sure to return to fire pits if you’re losing warmth.
Once all the Hakkonite mobs are dead, you will need to fight Gurd Harofsen. You should remain close to fire pits as the ice magic is active until you have defeated Hakkon. The fire pits will be doused repeatedly, so be sure to light them again when needed. At half health a number of Hakkonite mobs will spawn, and the intensity of the ice magic will strengthen near Gurd Harofsen.
Deal with the Hakkonite mobs and then refocus your fire on Harofsen, preferably from a distance to avoid the damaging ice magic. If you get too close to Harofsen you will freeze, and some of the fire pits will not be possible to relight. At around 25% health Harofsen will summon Winter Shards and two Bruisers. Destroy these as soon as possible to avoid any unexpected freezes and then deal with the Bruisers.
Once all the mobs are dead, all you need to do is remain near the last fire pit as you maintain consistent damage to Harofsen. After 25% health there will be no more surprises. when he falls a cut scene will follow, after which the quest ends. Be sure to loot the rest of the temple before you leave via the door to the west.
No Comments