

Get to the Rift With Cassandra
Once you’ve selected the gender, race, class, and appearance of your character, you will be thrown into the game world. You will be introduced to Cassandra Pentaghast, who will lead you to the main gate leading to the nearby rift. Head through the gate and turn left. The path is fairly linear; just navigate over the bridge where it gets taken out and you are forced to battle two shades.
Dialogue Options:
To gain Cassandra’s approval, choose “If I can help, I will.”, to incite disapproval, choose “Do I have a choice?”, and to ensure a neutral response, choose “Will helping save me?”.
You’ll pick up a weapon that is suited to the class you chose at the start: an Archer will find a bow, Mages will find a Staff, Two-Hand Warriors will find a Greatsword, and Rogues will find two daggers. The Shades are simple enough to defeat. If you lure the one focusing on you over to Cassandra, she can use Taunt to allow you flanking and distance if you are ranged, or opportunistic positioning if you’re a melee rogue. After the fight, Cassandra will speak with you again.
Dialogue Options:
To gain Cassandra’s approval, choose “All right. I’ll disarm.”, to incite disapproval, choose “You need to trust me.”, and to ensure a neutral response, choose “I need this weapon!”.
Ahead you’ll find a lootable Corpse then two more Shades. Send Cassandra down into the lower levels to get their attention then follow up with your own arsenal. Turn around and look beneath the trees to the north east for some Iron, then jump down to the frozen river. Go south to find some loot and an Elfroot then climb up the cliff to the left by jumping. You’ll find more loot near the wagons as you head back to the bridge. Loot the Elfroot then head back to the frozen stream.
You will acquire a weapon relevant to your class from the chest.

Play your class to its strengths, such as keeping your distance and maintaining the high ground as an archer.
Continue down the frozen stream to find a Shade and up the stairs a Wraith – this enemy strikes from a distance so take it out first. Check the corner to the right of the ramp for some Elfroot then head over the hill and look right to find a Lesser Shade and Wraith that are easily wrangled up by Cassandra. There is some fire nearby; look from it across the ice to find two more Wraiths and a Lesser Shade. Head north of the staircase in front of you to find some Iron and Elfroot then ascend.
A number of Shades infest this area, but you have some help. Quickly dispatch these foes to trigger a scene where you’ll meet Solas and Varric Tethras. From here you’ll receive a new task.
Dialogue Options:
When speaking with Solas, choose “Thank you”, “You know about the mark?”, and “And when this is over?” for slight approval. All other options result in a neutral response.
Reach the Forward Camp
Go down the ramp and button hook right to the corner. Loot the corpse to find a Figurine of Maferath the Betrayer and some Iron . Move down the path to an open area in the ice. Numerous Shades and Wraiths appear, so focus on the Wraiths first to allow your party to focus on the Greater Shade all at once. You can actually do a little exploring at this point. Turn right and go past the house for now where you’ll find some Iron up the hill. Go back down the hill and right of the trees you’ll find more Iron and then Elfroot behind the rock.
Enter the house and loot the few things inside. Go straight down the river, bypassing the steps to your right. Search the burning house for some loot and also behind it is another Elfroot. Continue along the path to the south west. You will find more Elfroot along the way up the hill where you’ll also find a Greater Shade and two Lesser Shades in a camp. Defeat them and loot the Iron then the Lifeward Amulet.
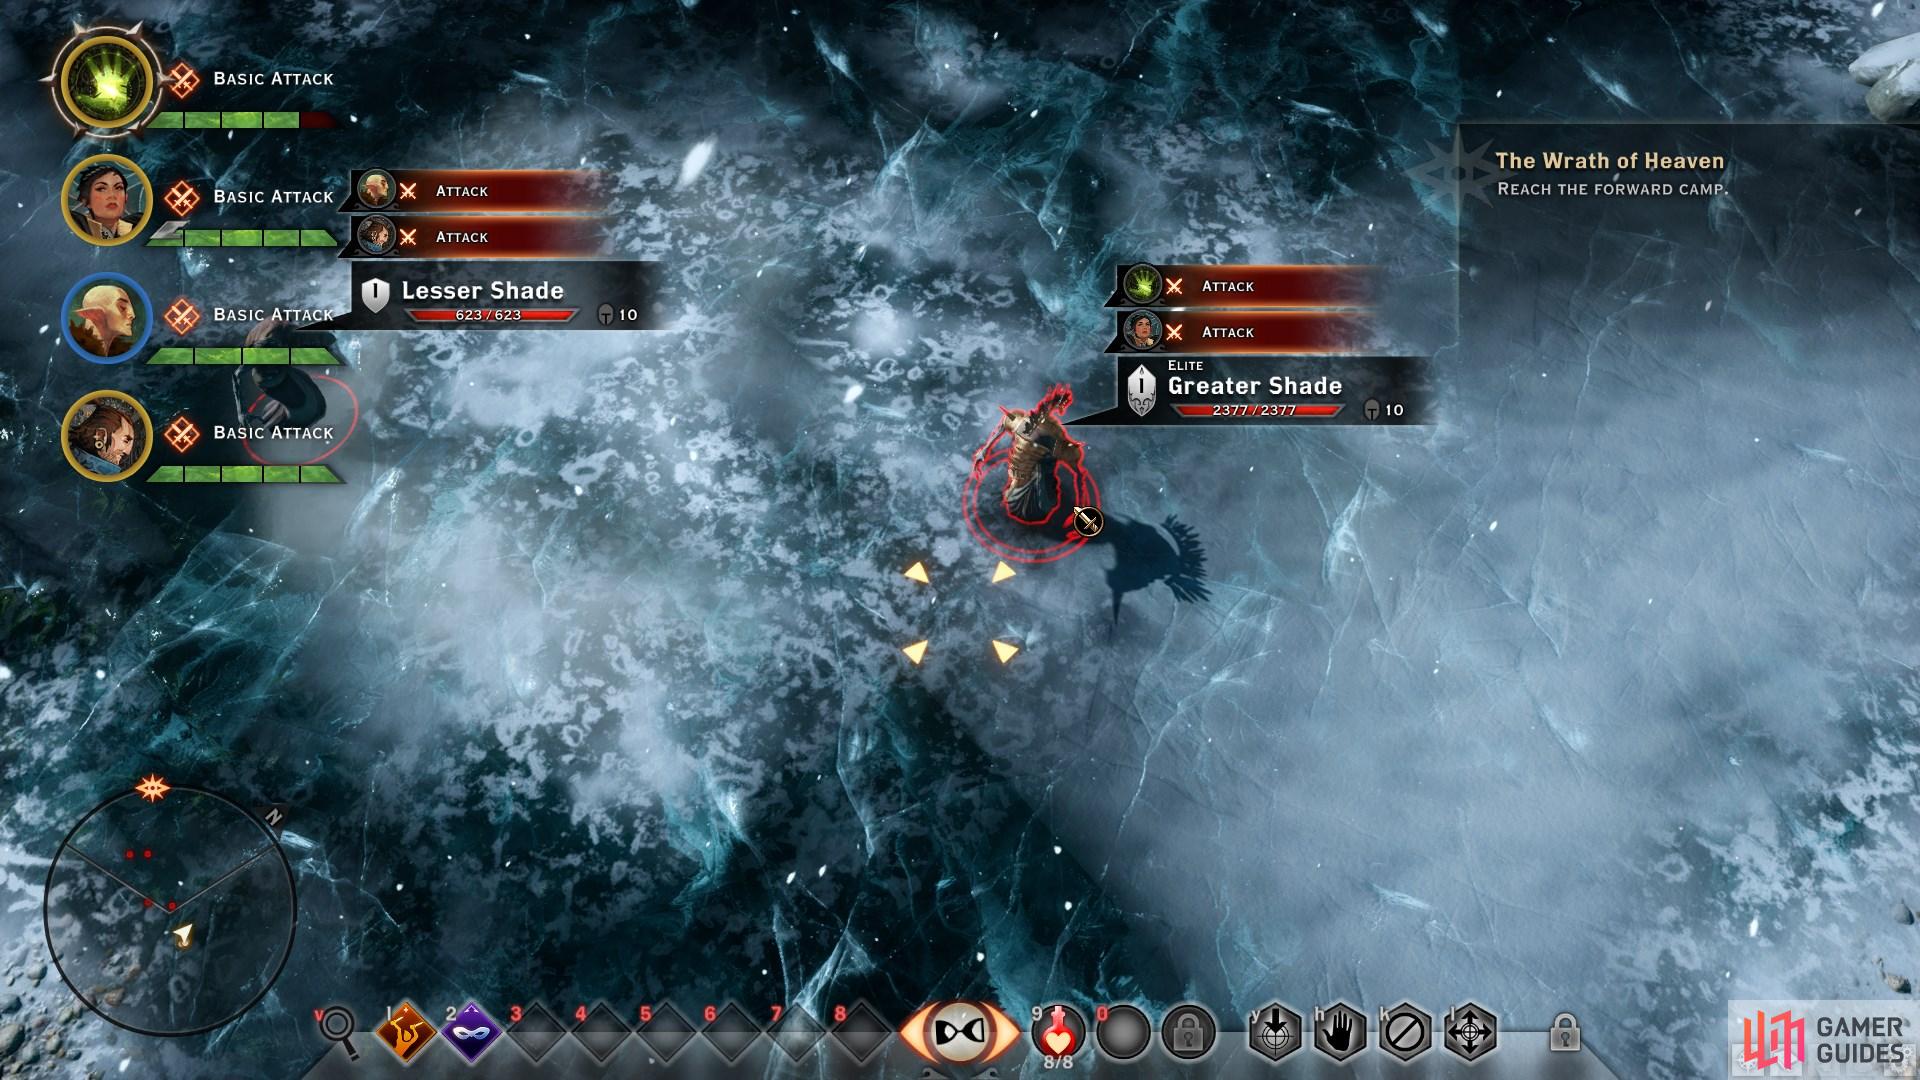
(1 of 5) Familiarise yourself with Tactical Mode whenever you encounter a large group of enemies.
Once you have the amulet, go back to the centre of the lake and turn north west up the staircase. Another Greater Shade is accompanied by Lesser Shades and Wraiths; remember to take out the Wraiths first! You will find more Iron up the hill to the north, and more Elfroot amid the trees as you approach the Rift. Your objective here is to clear out the area and seal the Rift. Use your Action command to seal it. You will gain enough experience to level up at this point so assign your points carefully. Don’t proceed just yet, turn east and explore the hilltop to find more Elfroot and Iron.
At the Forward Camp you can replenish your potions and loot a Strongbox. You will find Leliana and be forced to make a decision on how to reach the Temple of Sacred Ashes.
Dialogue Options:
After Roderick speaks during the cutscene, choose “What about the Breach?” to earn slight approval from Solas. When asked how to proceed, choose “Take the mountain path.” for slight approval from Cassandra and complete approval from Varric, or “Charge with the soldiers”. for complete approval from Cassandra.
Reach the Temple Through the Mountain Path
Climb up a way and when you reach the tunnel you’ll find a Greater Shade and two Wraiths waiting for you. Proceed up the stairs and down the path a little until you reach a small room. Light the torch and loot the Chest before continuing on. Ahead you can loot some smaller items; up the stairs is a Greater Shade, Lesser Shade, and two Wraiths waiting to ambush you. Loot the Sack on the balcony and head outside. Veer off the path to the left to loot more Iron and Elfroot. Ahead is another Rift.
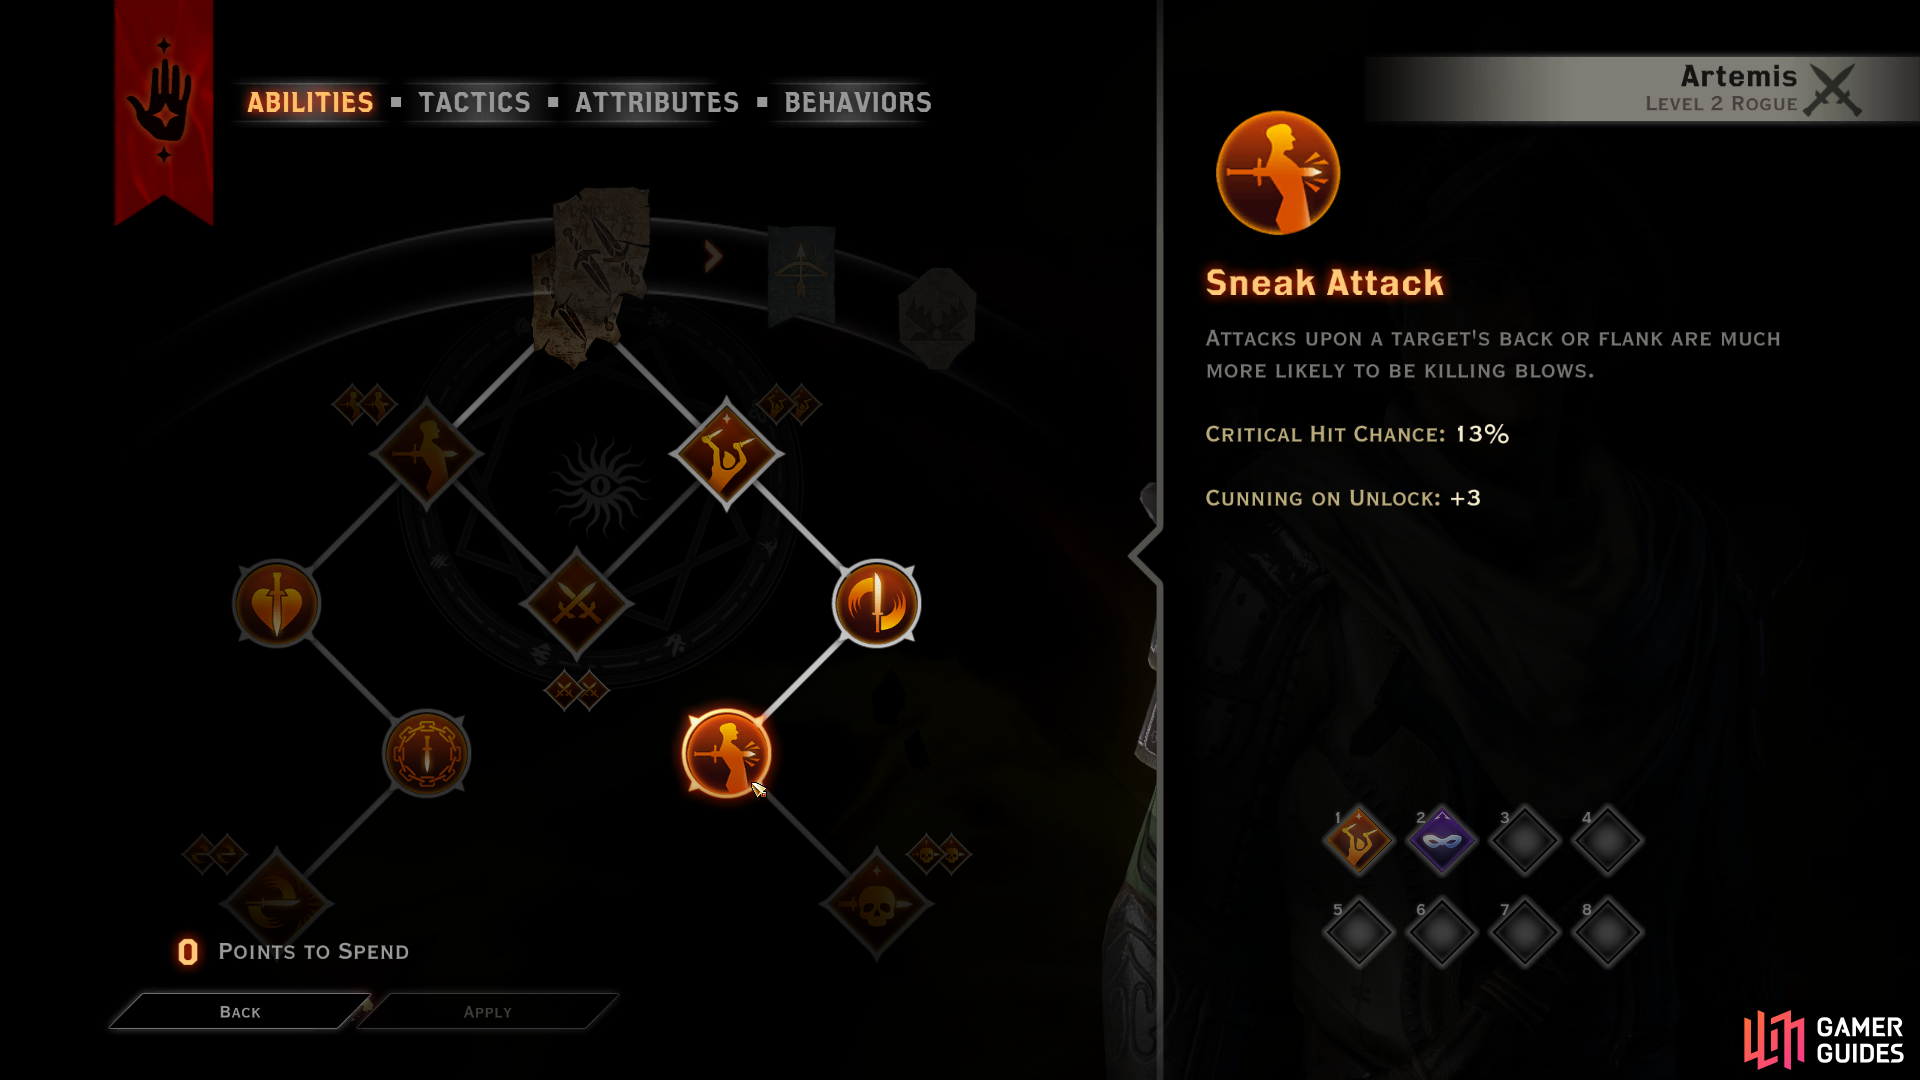
(1 of 3) After meeting with Leliana at the Forward Camp, be sure to invest points in new abilities before proceeding.
Like last time defeat the wave of demons but be prepared for a new enemy, the Lesser Terror , after you defeat the initial wave. Seal the Rift then head down the ladder.
Dialogue Options:
On the mountain path, when speaking with the Lieutenant, choose “It was worth the risk.” for slight approval from Solas. All other options are neutral.
Help the Soldiers
Head up to a small encampment. There are plenty of dead bodies to the left, but more importantly a Strongbox to the right with assorted gear and loot. Continue beyond the gate and join the soldiers already fighting the Wraiths and Shades. As you get to the rift in the distance, two new enemies, the Lesser Terrors, will show up. Take them out and then seal the Rift. You’ll get a cutscene here as you push onward to the temple.
Dialogue Options:
On the soldiers’ path, when speaking with Cullen, choose “I hope they’re right, too.” for slight approval from Solas. All other options are neutral.
Find a Way Down to the Rift
Loot the body here then descend for a quick cutscene. Afterwards, progress around the Rift and drop down to the Breach for another scene.
BOSS - Pride Demon Level 4
| Stat | Value |
|---|---|
| Health | 16565 |
| Defence | 34 |
| Resistance | Electricity |
| Immunity | Asleep; Frozen; Paralyse; Physical Effects |
| Ability | Perceptive |
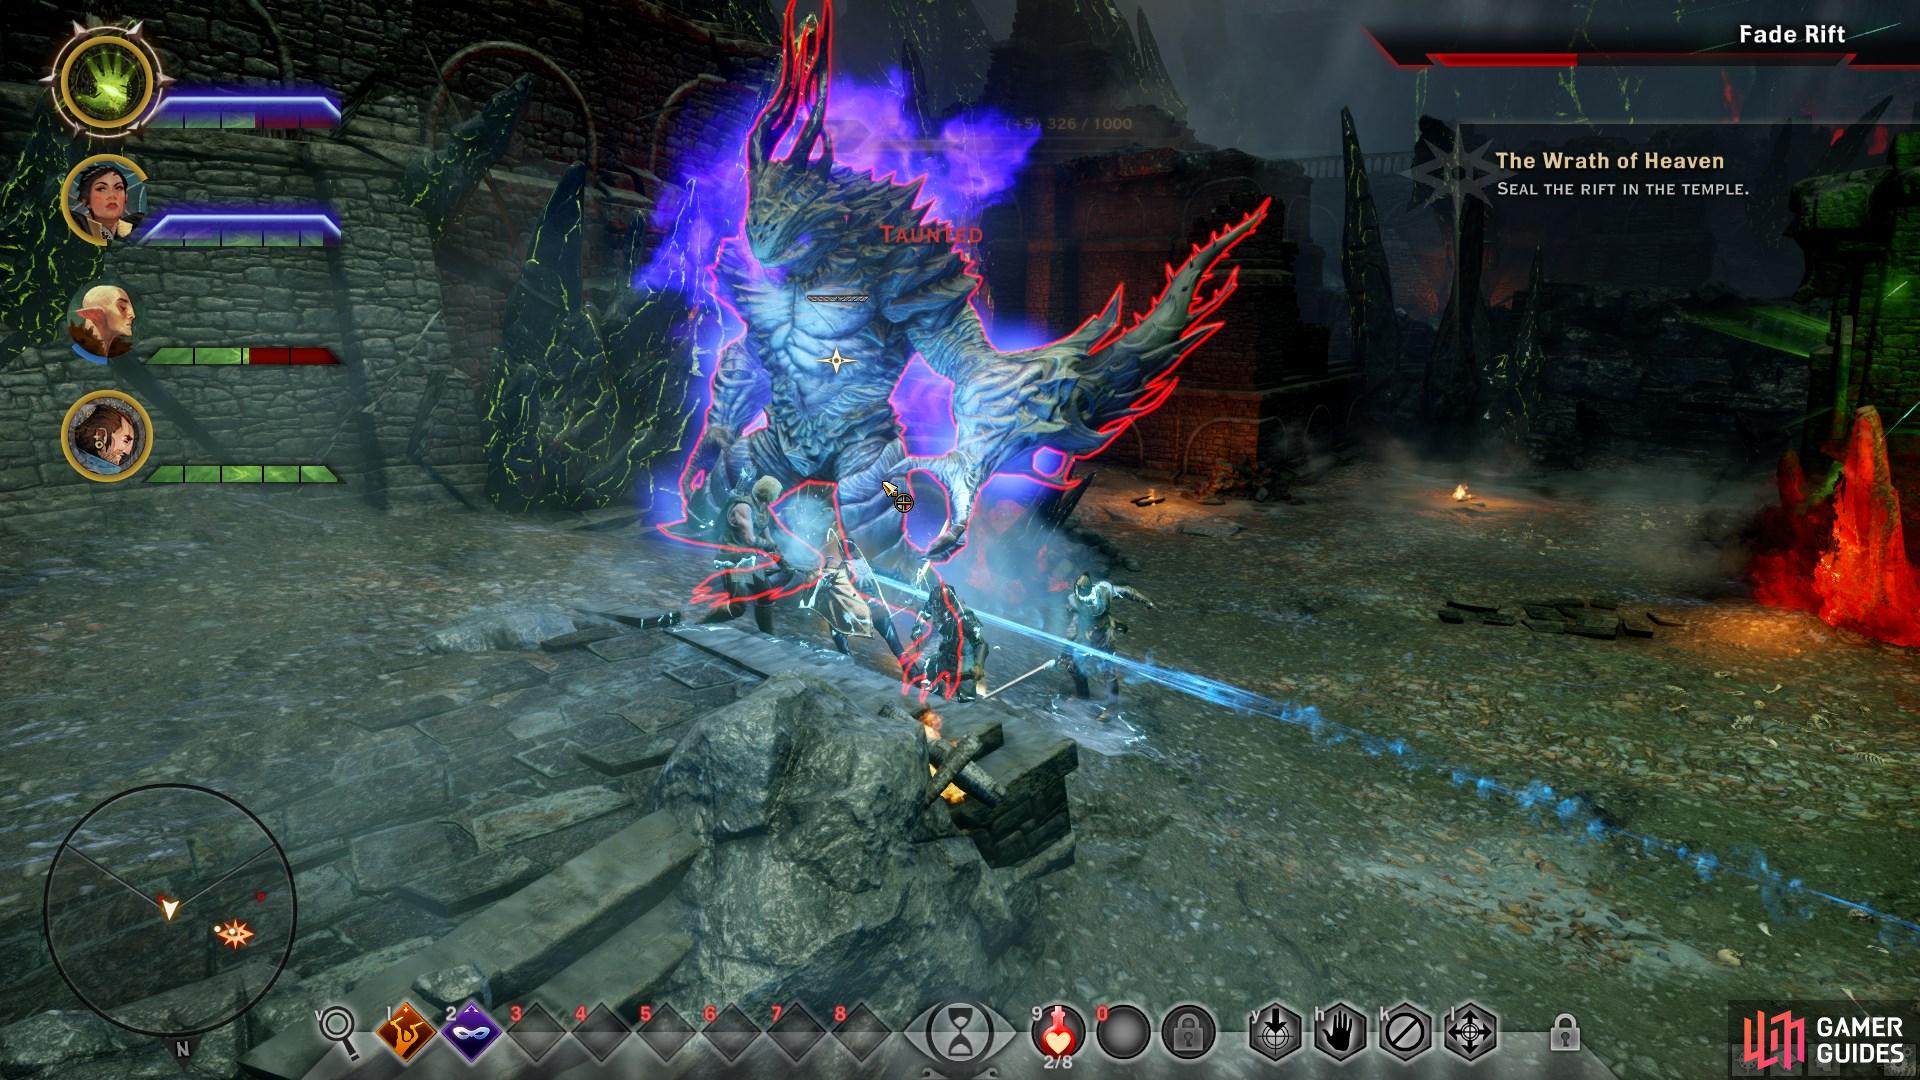
The Pride Demon has some nasty little abilities, one of which is an electric whip that reaches quite a distance. The best practice for this battle is to have Cassandra use Challenge then move her towards a wall with her back to it. This way the Pride Demon has his back to the rest of the party and you can utilize Solas and Varric’s ranged attacks. Use your Inquisitor to disrupt the Fade Rift; this will stun the Pride Demon and weaken it temporarily allowing for a chunk of damage to be dealt. Be careful at this point because Lesser Shades will join the fray when you interrupt the Fade Rift.
Do your best to keep Barrier on Cassandra and have her use Challenge and Shield Wall to mitigate as much damage as possible. When the Lesser Shades come you should change your focus to them then back to the Pride Demon. When it uses Guard you can disrupt the Fade Rift again to break it then stun and weaken the foe. Repeat this a few times and you’ll come out victorious, but avoid using the Fade Rift too often or you’ll find yourself overrun by Shades.


| Codex Entries | Enemies | Items |
|---|---|---|
| The Conclave | Shade | Figurine of Maferath the Betrayer |
| The Qunari | Wraith | Lifeward Amulet |
| Divine Justinia V | Lesser Terror | |
| Shade | ||
| Wraith | ||
| The Breach | ||
| Adaar, The Vashoth | ||
| Cassandra Pentaghast | ||
| Vitar | ||
| Varric Tethras | ||
| Solas |
No Comments