
Walkthrough for the Main Quest Death’s Door in Horizon Forbidden West, including information on how to craft the Igniter, how to make your way through Latopolis and how to defeat Erik.
This quest will begin immediately after completing [The Embassy], albeit after Aloy plunders the Shieldwing from the foe she just defeated and has a lengthy conversation with Lawan. After that, however, you’ll find yourself alone on a plain just southwest of Barren Light, free to finally explore the Forbidden West.
| Starting Location | Prerequisite | Level | Rewards |
|---|---|---|---|
| No Man’s Land | Complete [The Embassy] | 10 |
How to Reach the Coordinates Recovered from the Spire
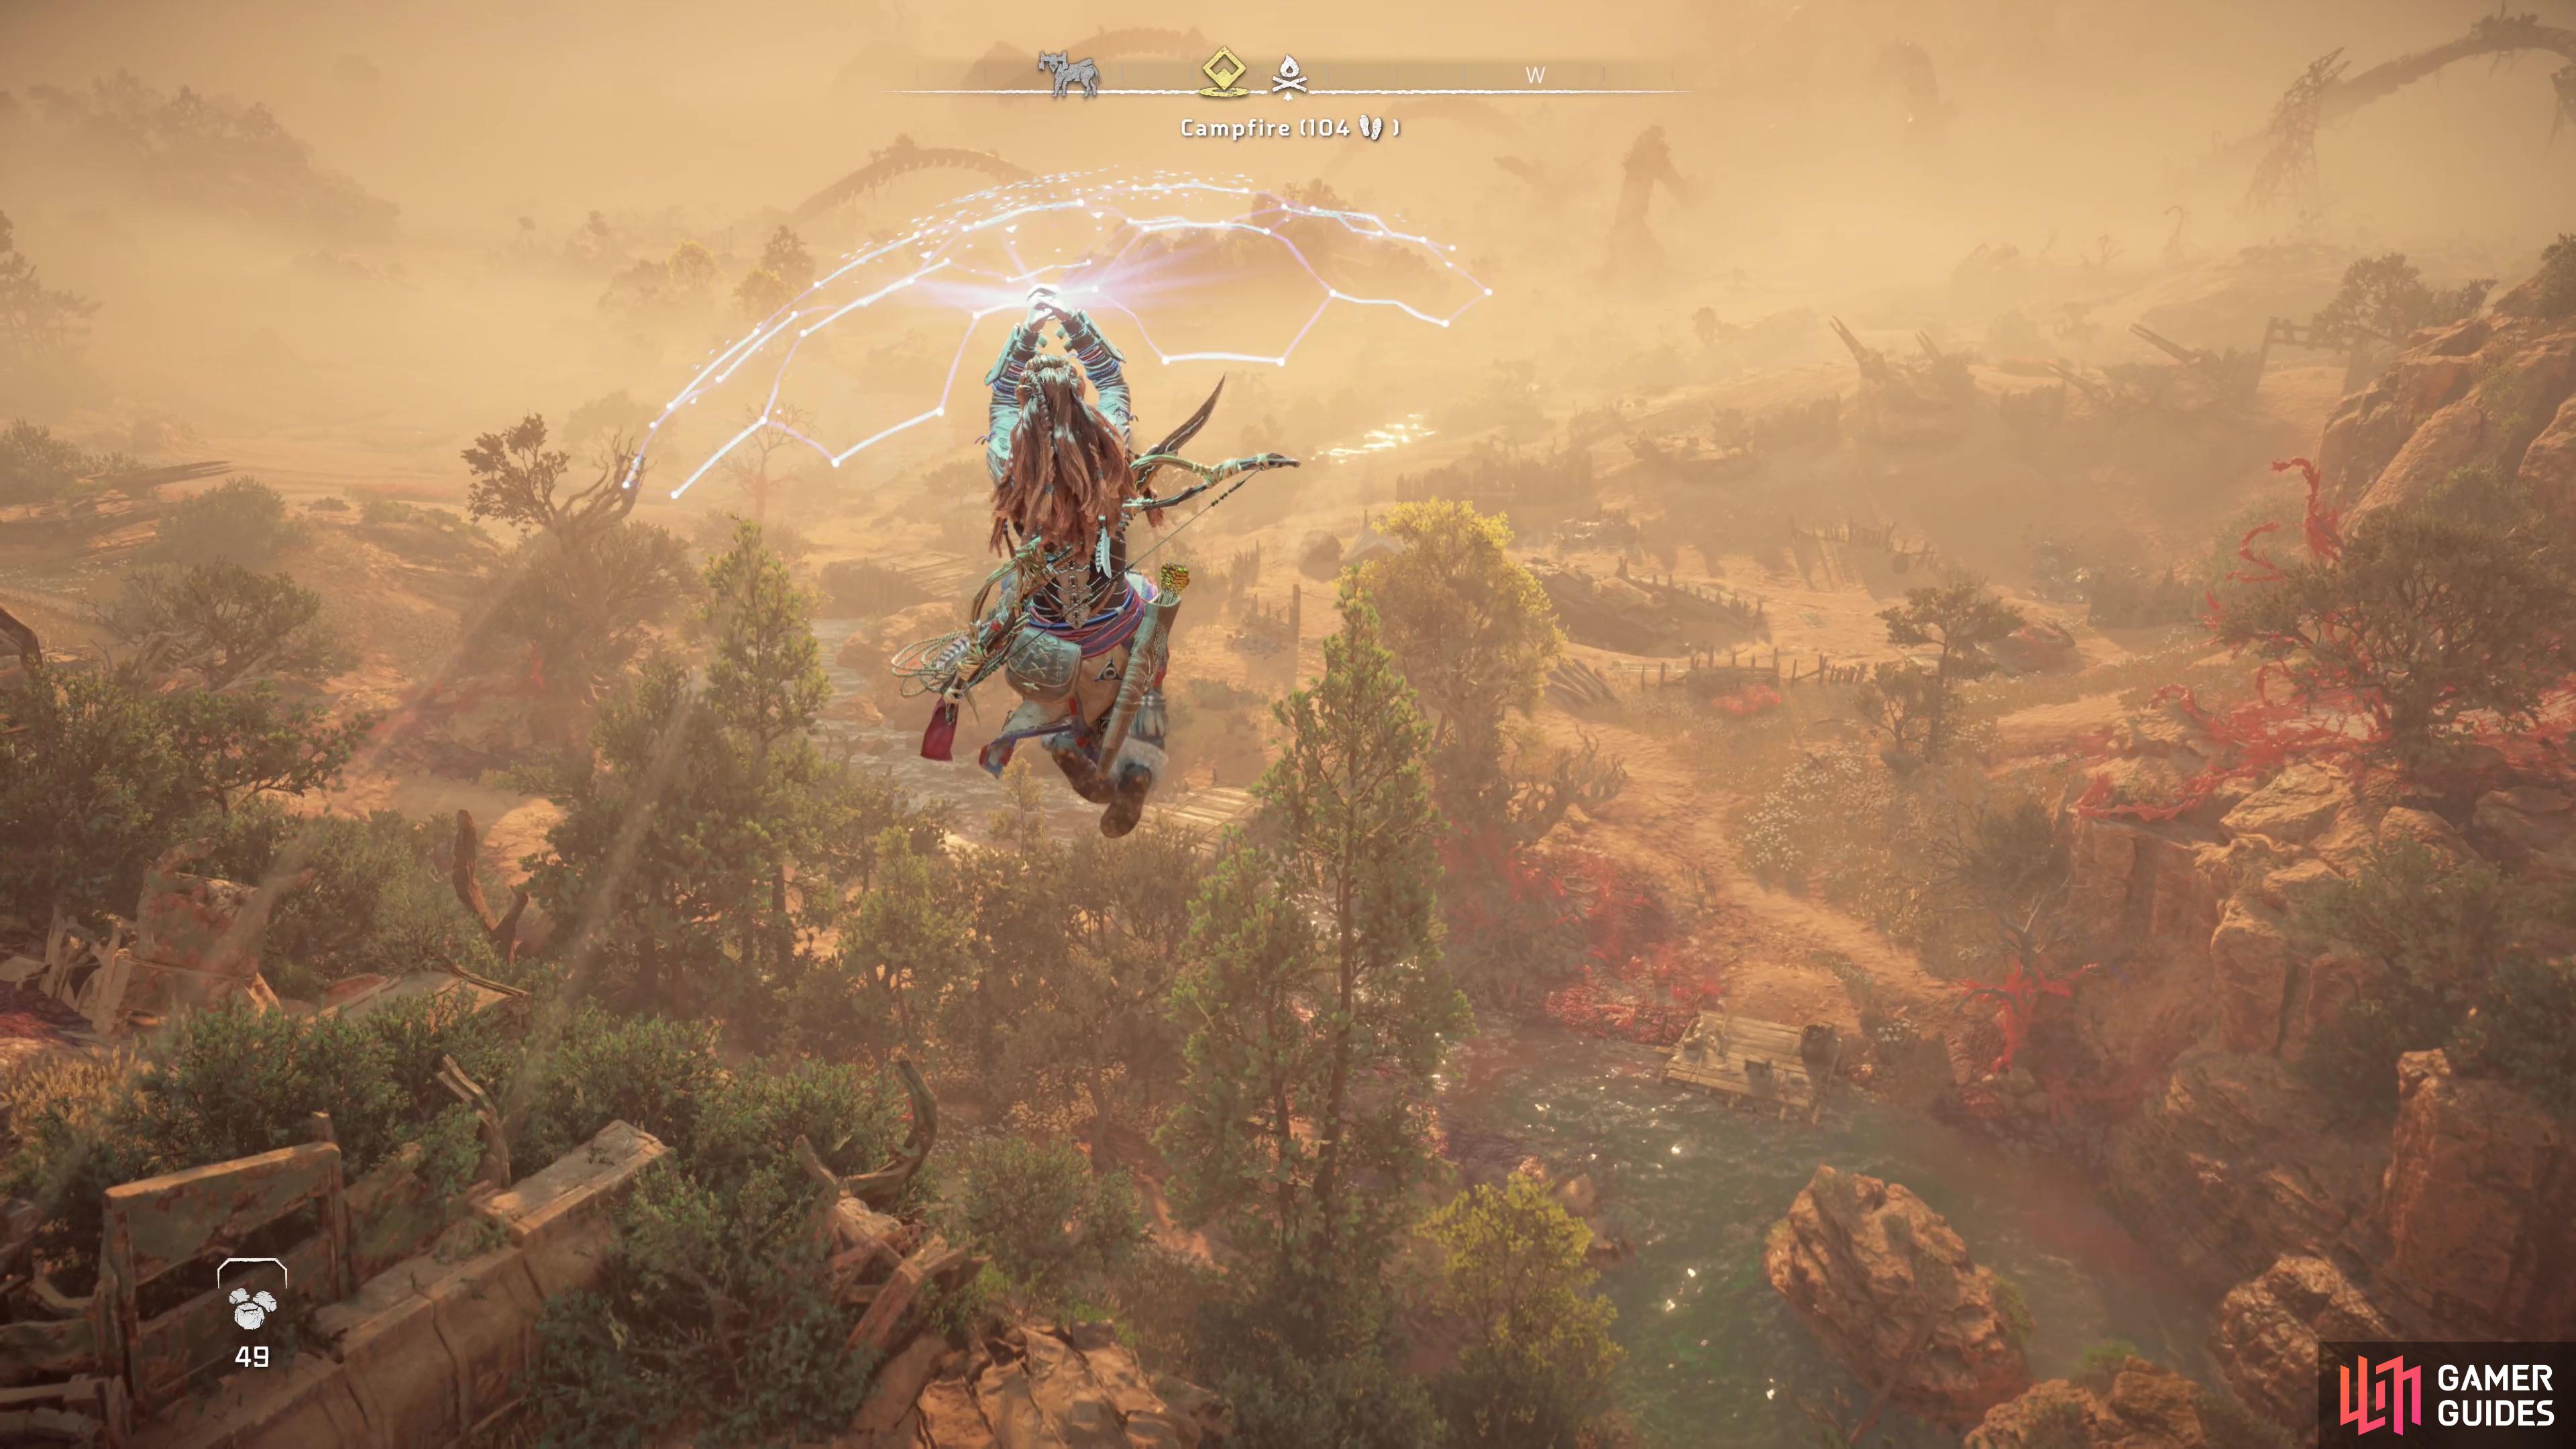
Make use of the nearby Campfire to the west, save if you wish, then check out your map. Your current objective, to follow where Sylens beckons, requires you to travel a good distance to the southwest.
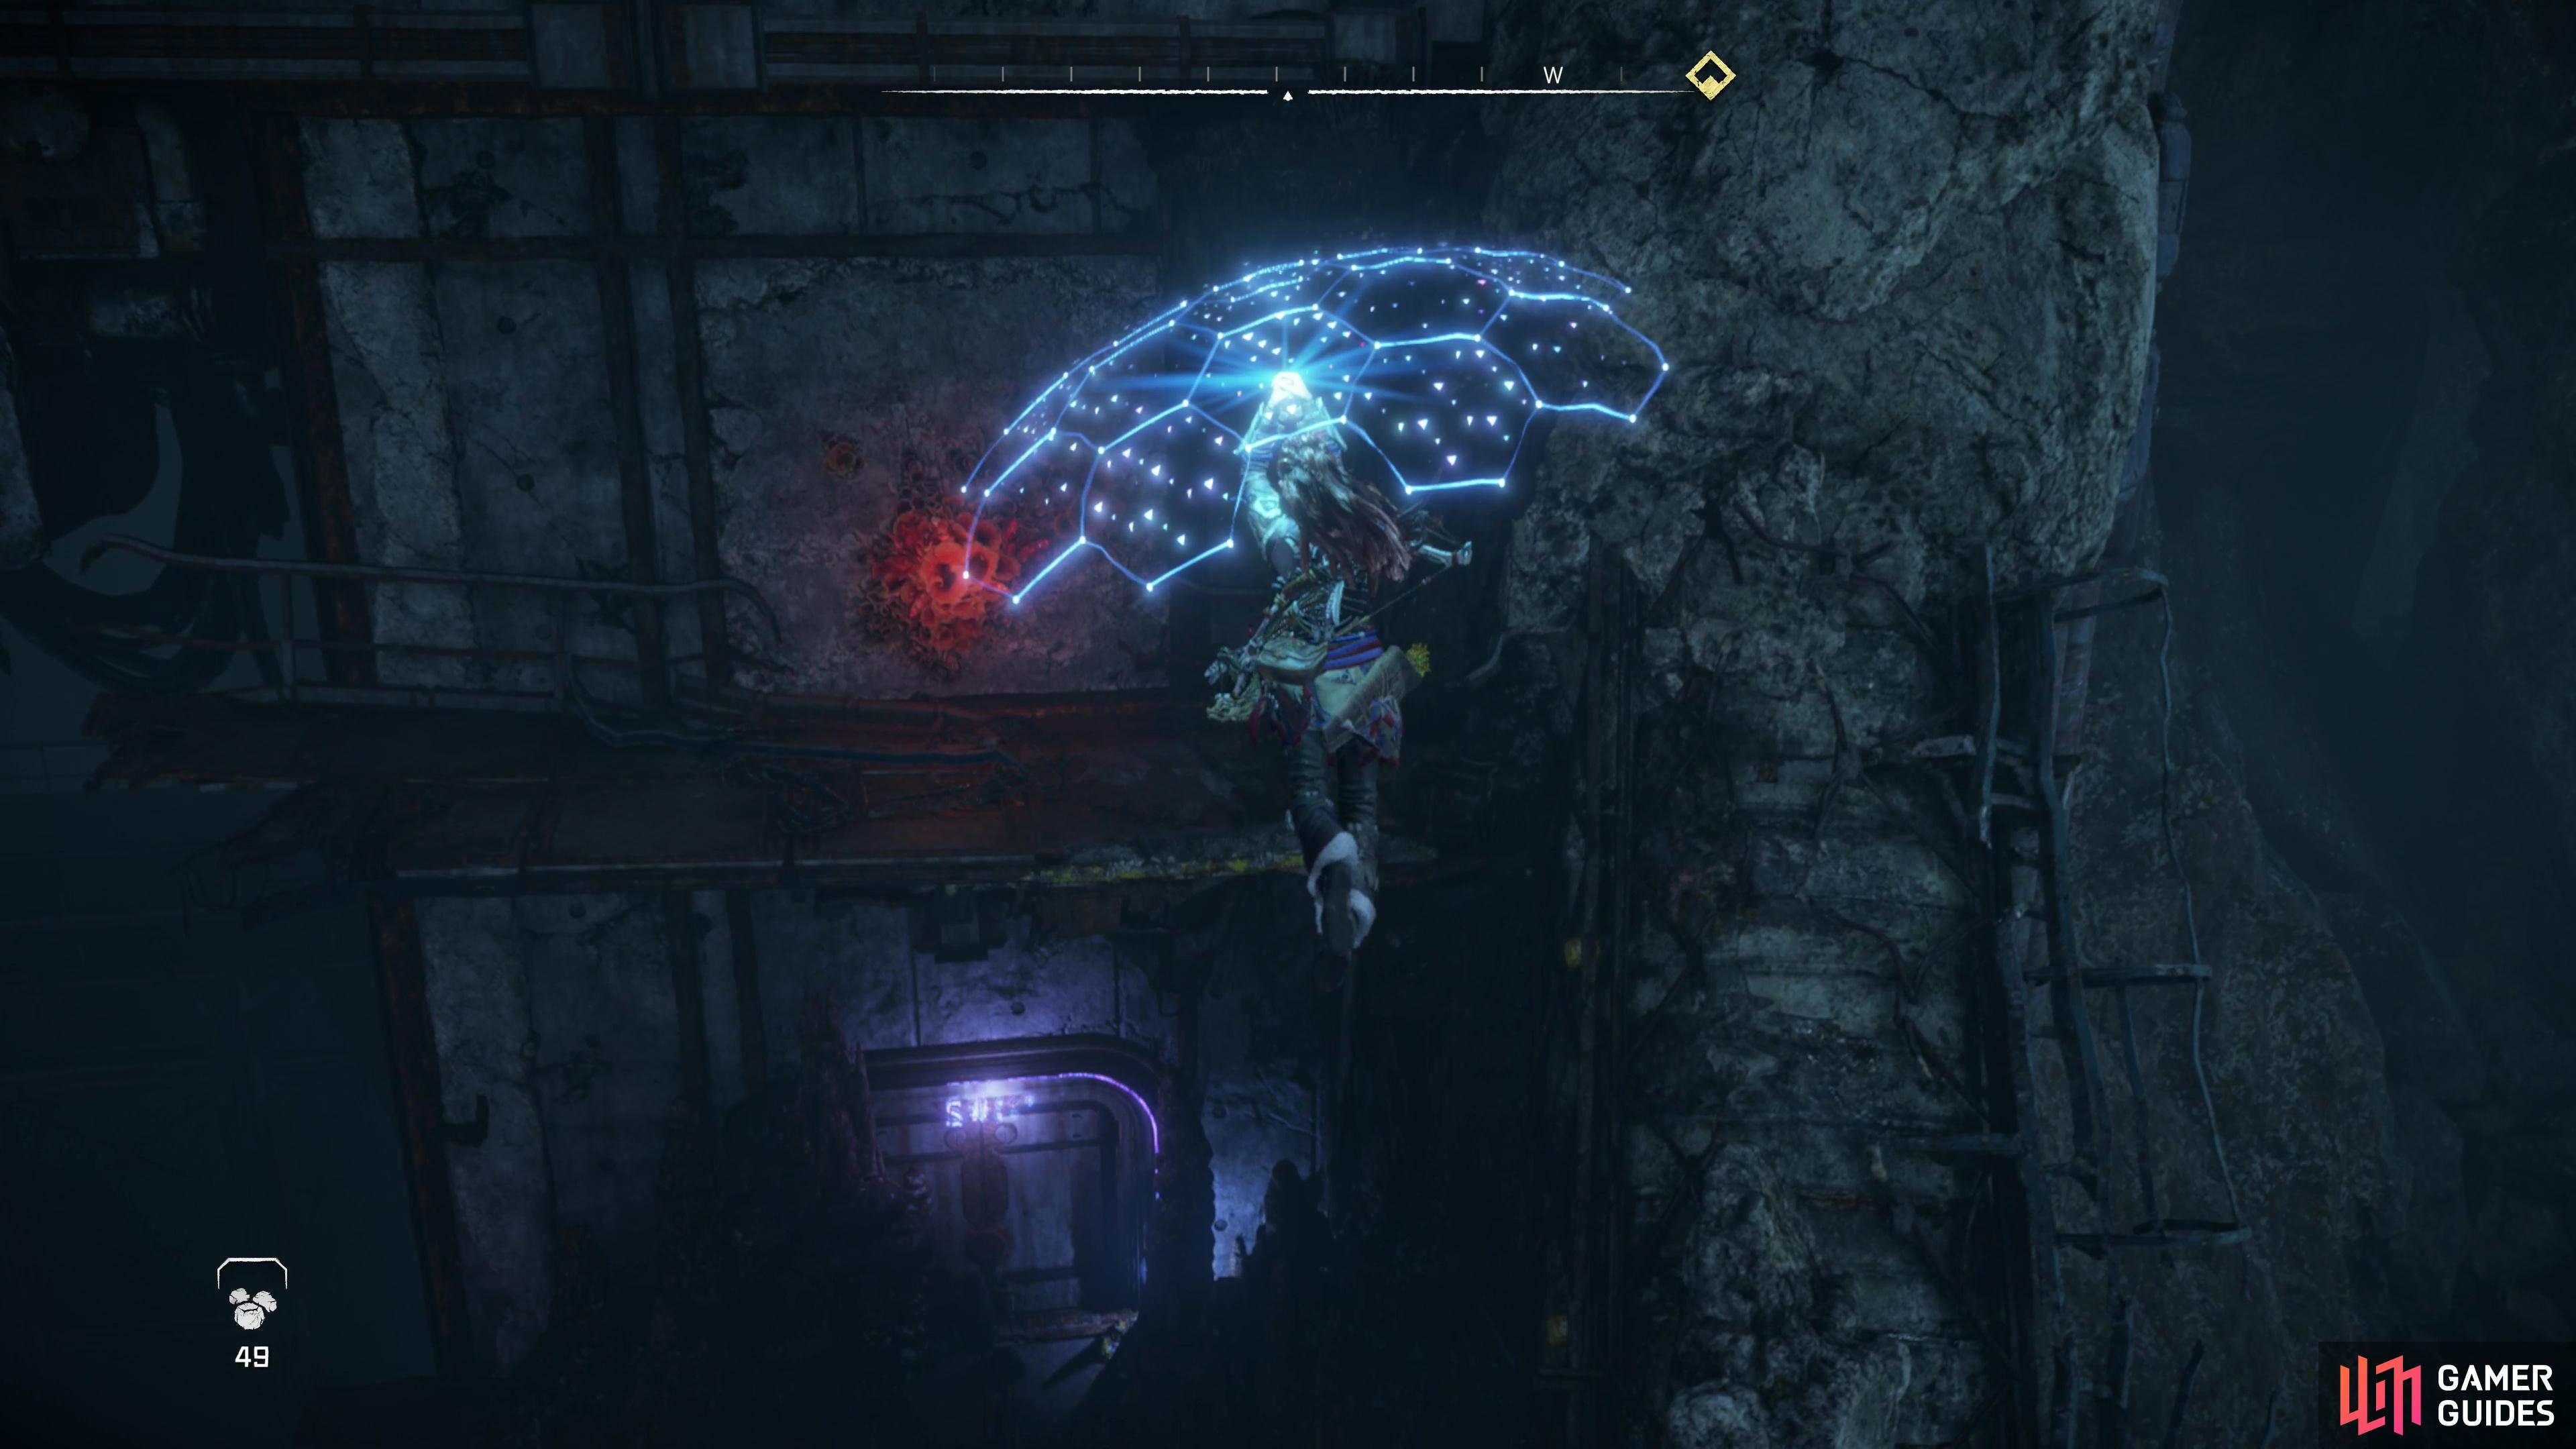
(1 of 3) Using the Shieldwing to glide down from heights makes traversal much simpler.
Assuming you’re ready to go, give that Shieldwing a try by leaping off the cliff to the west and gliding down to the southwest. You should land near an Oseram salvager camp, where you can start [Salvage Contractor: Barren Light]. There’s also another Campfire nearby, if your few moments of exploration requires saving. From here you should be able to just follow the roads most of the way to your destination; if you do, you’ll likely encounter some Oseram, led by Jelda, being attacked by some Rebel Warriors near a Campfire. If you assist the Oseram and talk to Jelda afterwards, they’ll tell you about the nearby Relic Ruins: No Man’s Land, which serves as an introduction to the activity. You can’t gain access to these Relic Ruins at this point, due to the “red crystals” Jelda mentions.
Avoid or defeat the machines you encounter as you continue southwest (you’ll find some [Scrappers] and [Leapslashers] along the way) and you’ll find yourself along the edge of a lake, with a massive Horus machine looming over it. Ominous.
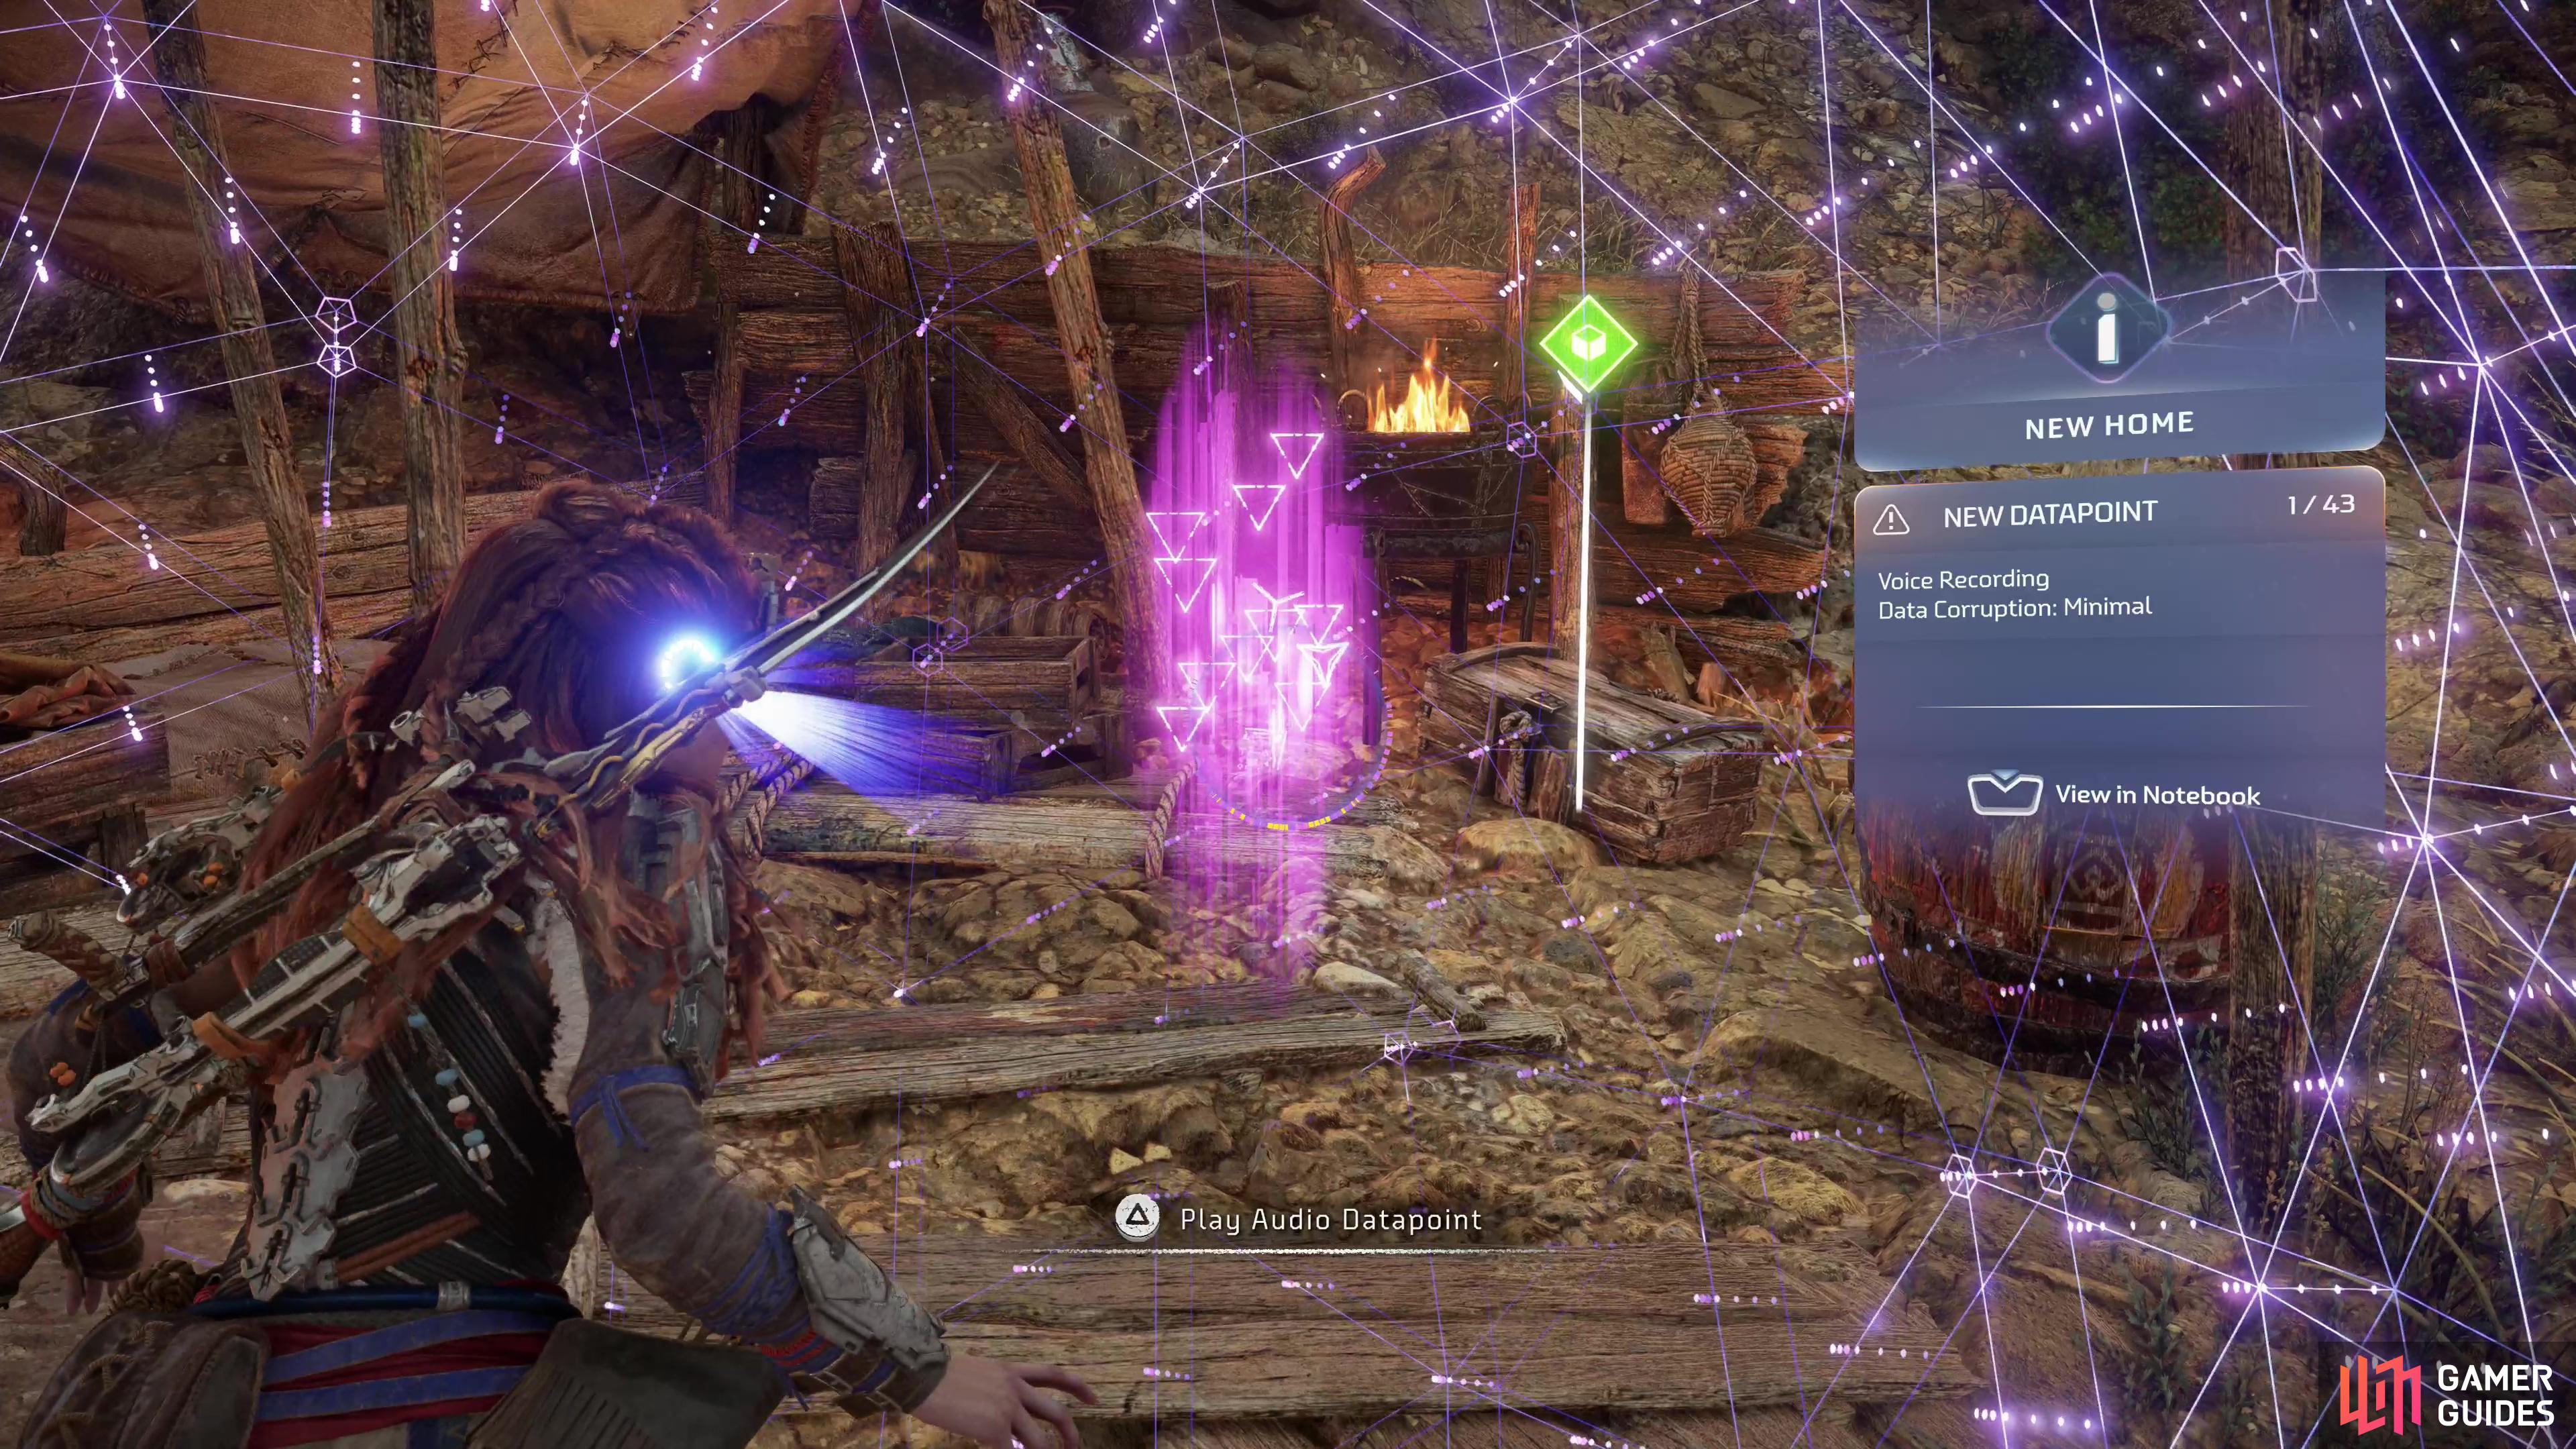
Swim across the lake to the southwest until you reach the quest marker, which, unsurprisingly, is under the dormant Horus machine. Use a Campfire located nearby, then use your Focus to search the workshop Sylens set up under the massive machine to find the New Home audio datapoint under a shelter to the north, and the Interrogation Log text datapoint on a table to the southwest. Next interact with a console along the northeastern end of Sylen’s camp and you’ll be greeted by a pre-recorded hologram from Sylens.
(1 of 3) Follow the rut left by HADES’ processor core prison, stopping, perhaps to do business with a hunter near a Campfire.
Follow the Orb’s Trail
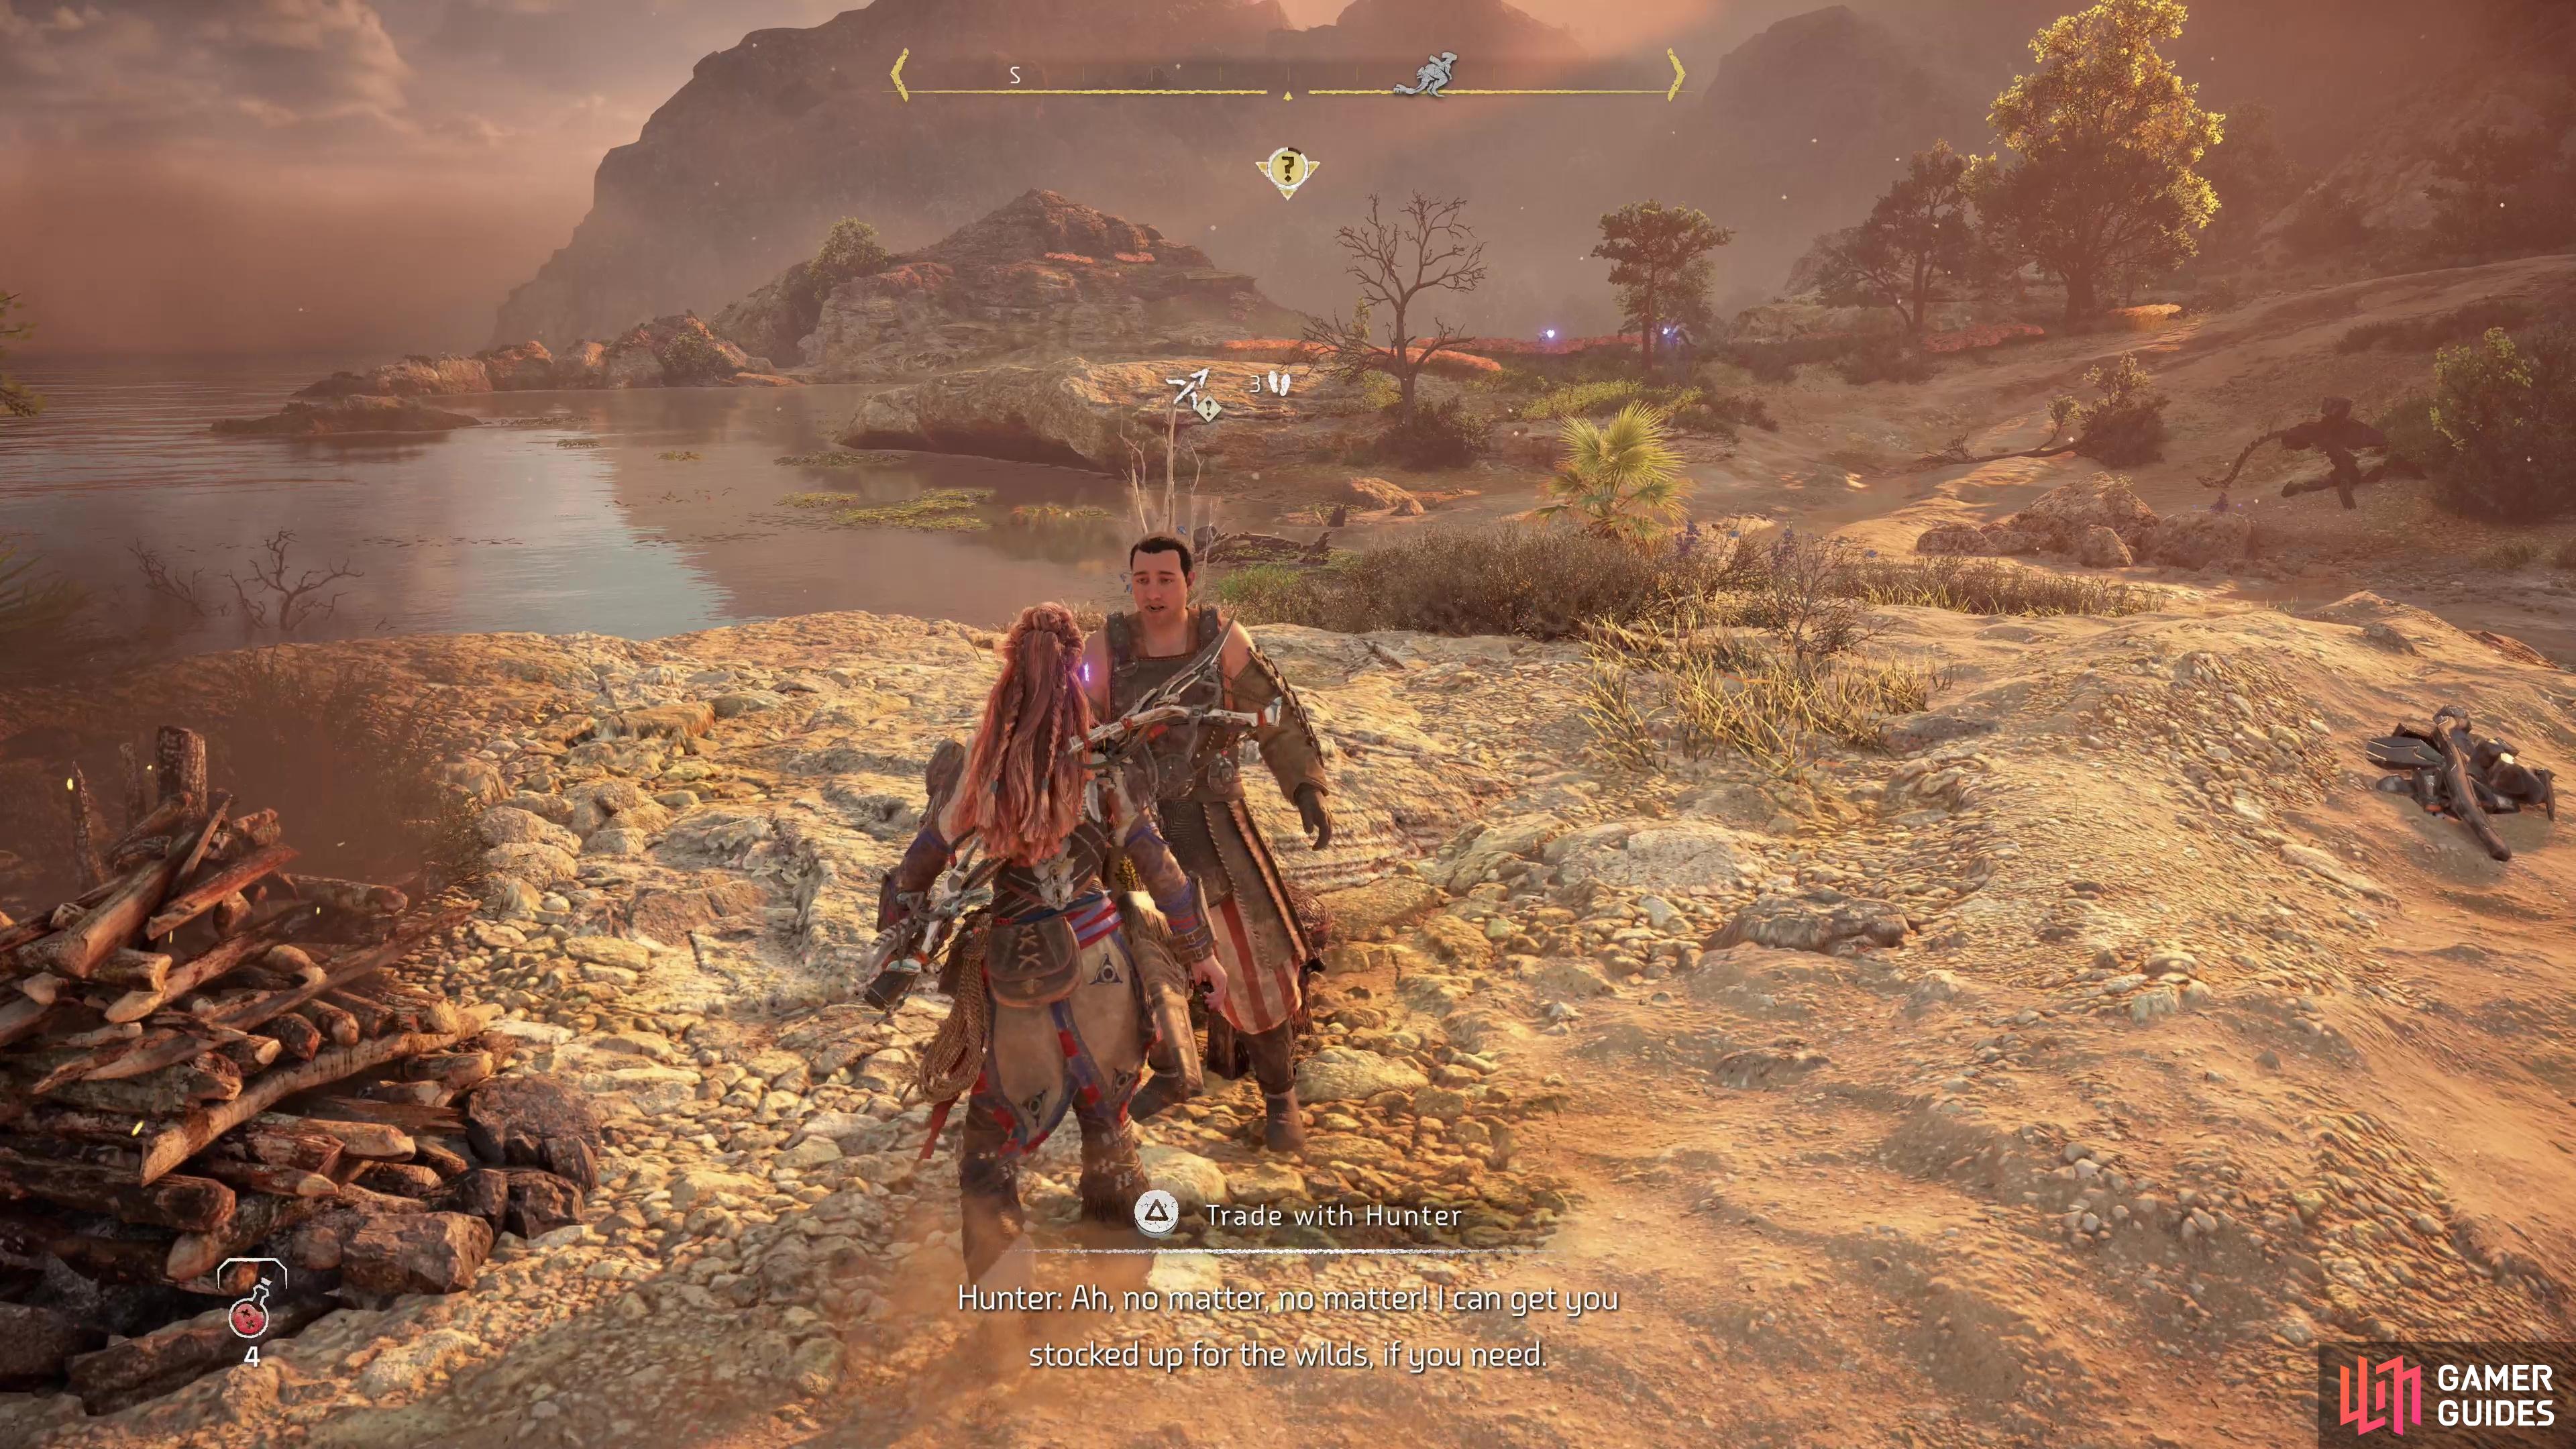
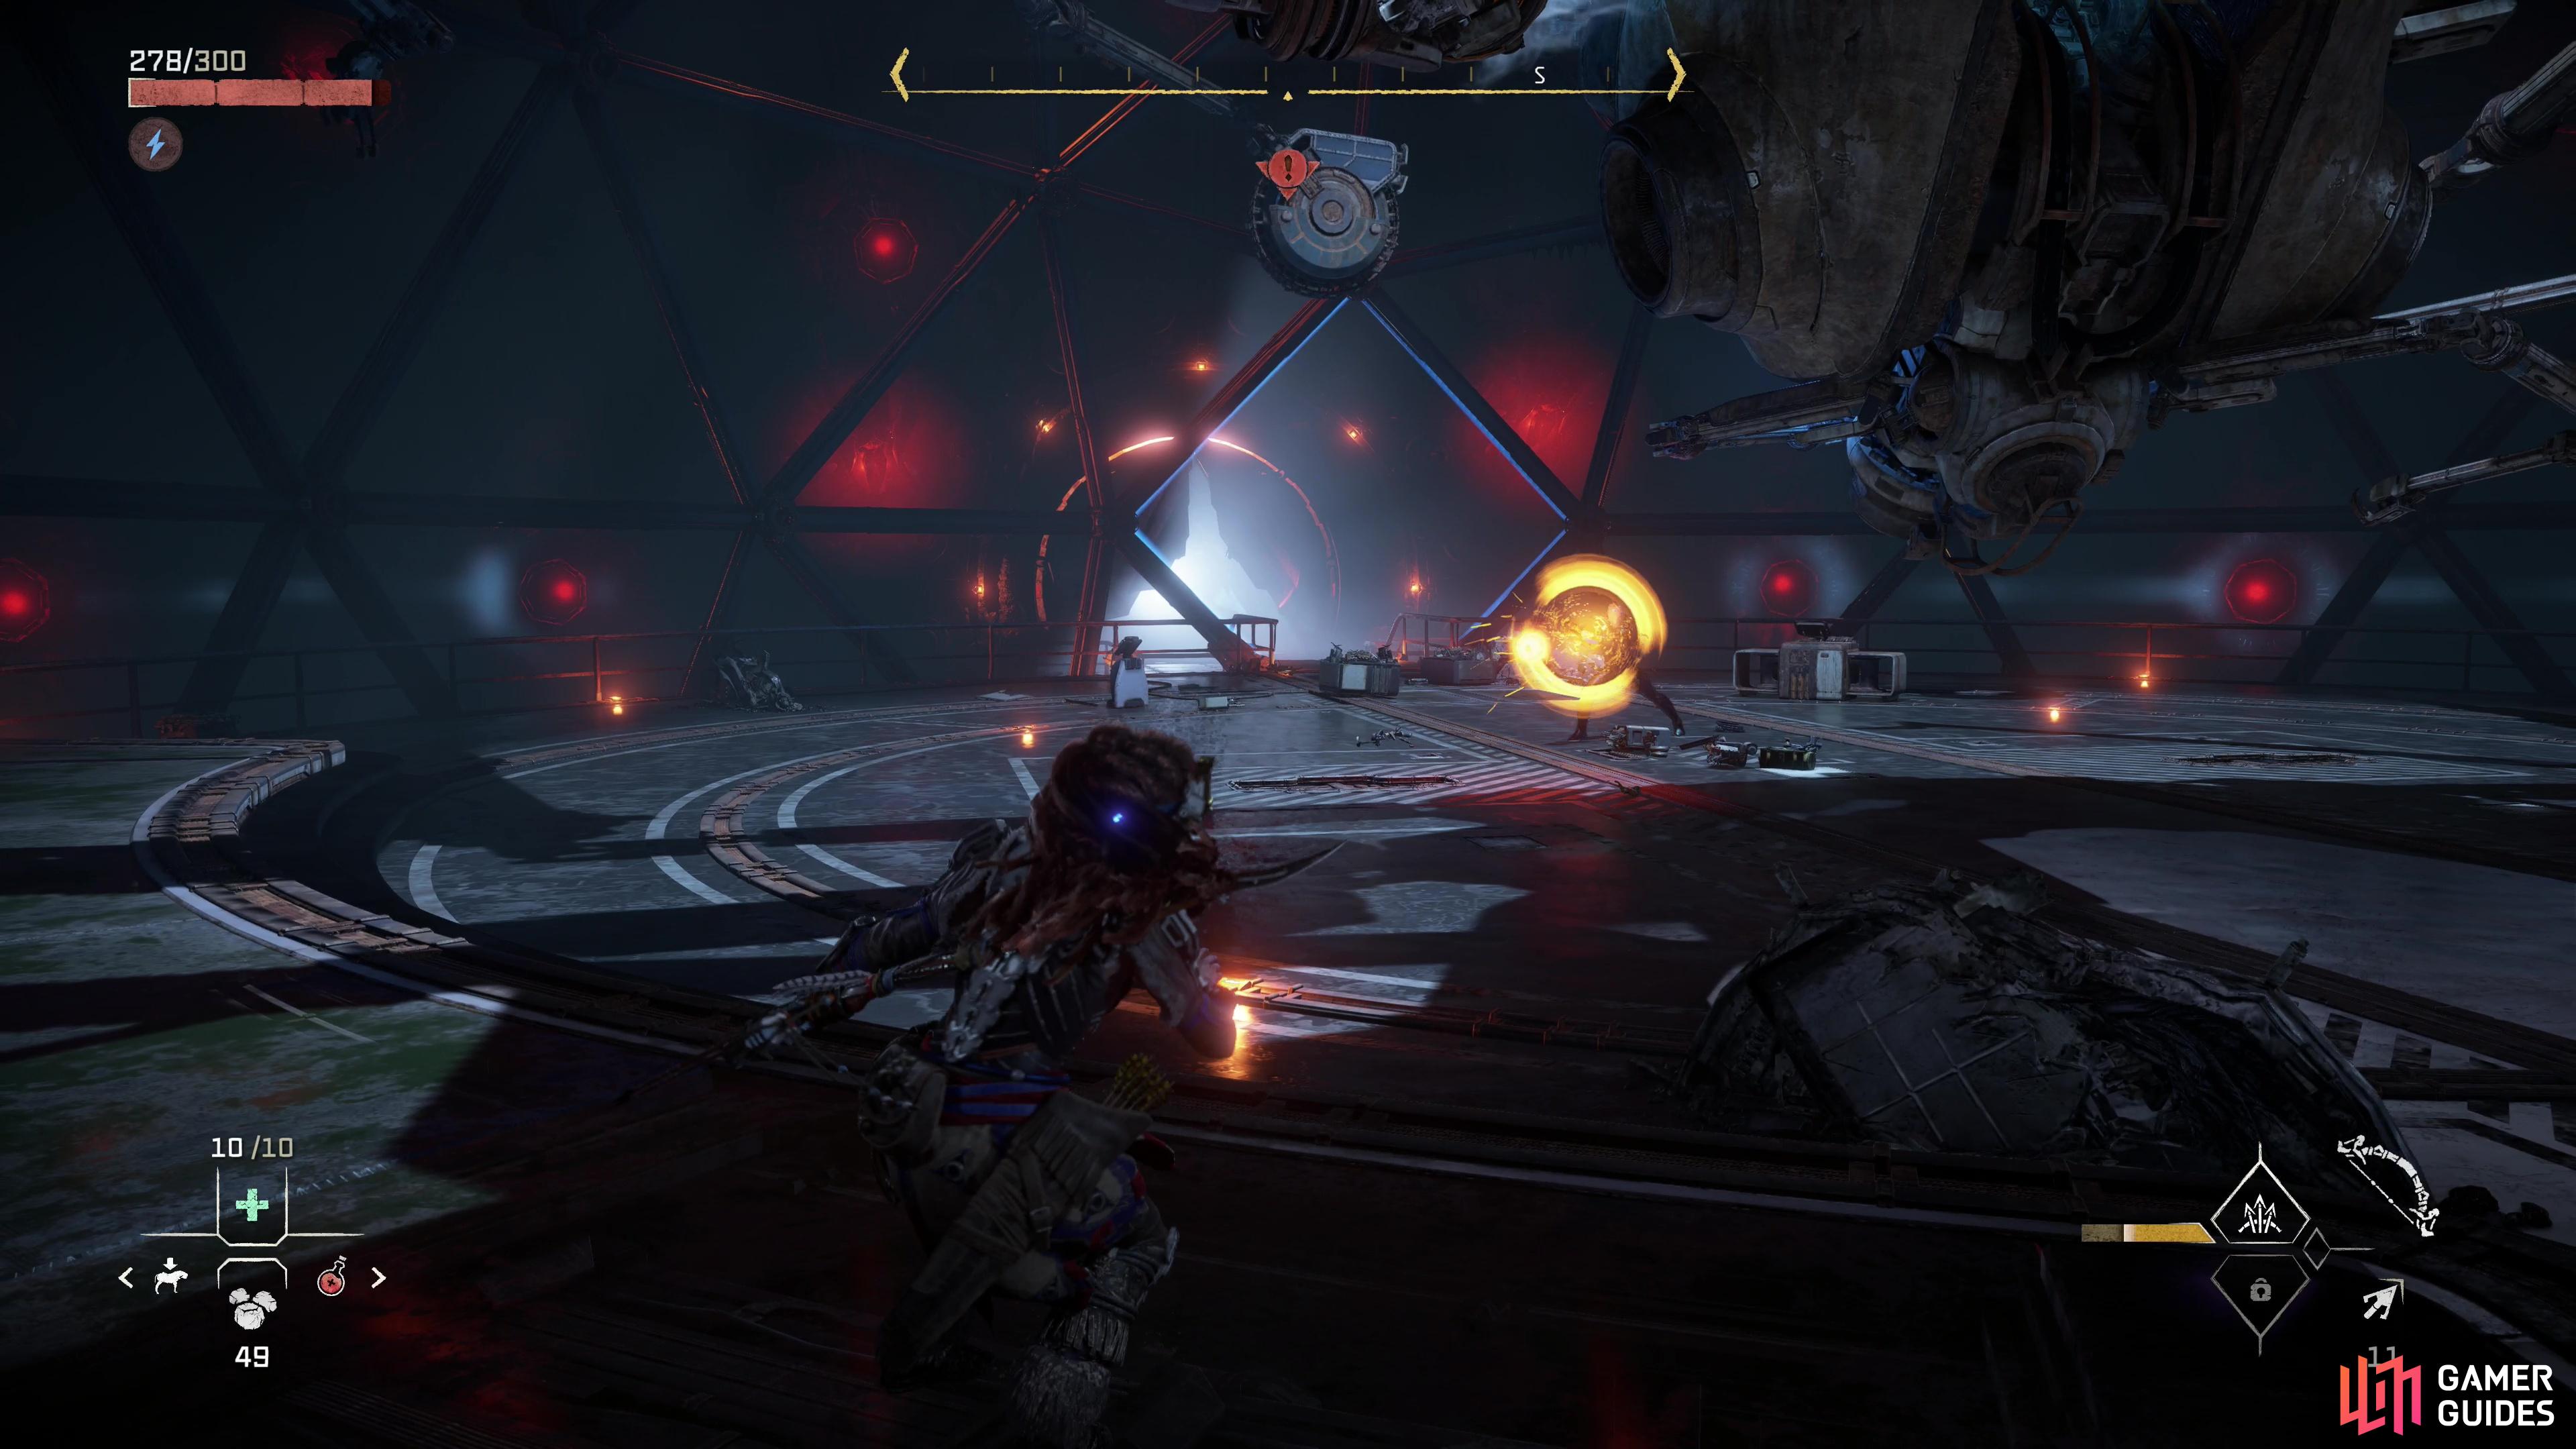
Once again you need to follow where Sylens leads, and this time the rut caused by HADES’ processing orb provides a clear trail for you to follow. The trail will generally run along the coast, taking you through an ancient battlefield, taking you past some [Frost Glinthawks] and some [Scrappers], and later on you’ll run past a group of [Chargers]. Fight or avoid these machines as you see fit and eventually you’ll reach another [Campfire] along the rut trail, near which you’ll find a Hunter who will sell you hunting goods. Peruse his wares if you wish, then continue following the rut trail.
As you follow HADES’ trail you may see some [Leapslashers] off the road to the left. Ignore them for now - you may have some use for them later. Continue into some ruins and follow the linear path ahead until you find the processing orb that serves as HADES’ prison.
Interact with HADES and you’ll find yourself conversing with the malignant AI subroutine. Exhaust its dialog options and Aloy will finish what Sylens started. Once she’s done interfacing with HADES, you’ll get a live chat with Sylens, albeit via hologram. After Sylens is done dropping exposition, head forward to a biometrically-sealed door and Aloy will make use of her genetics to get the door open.

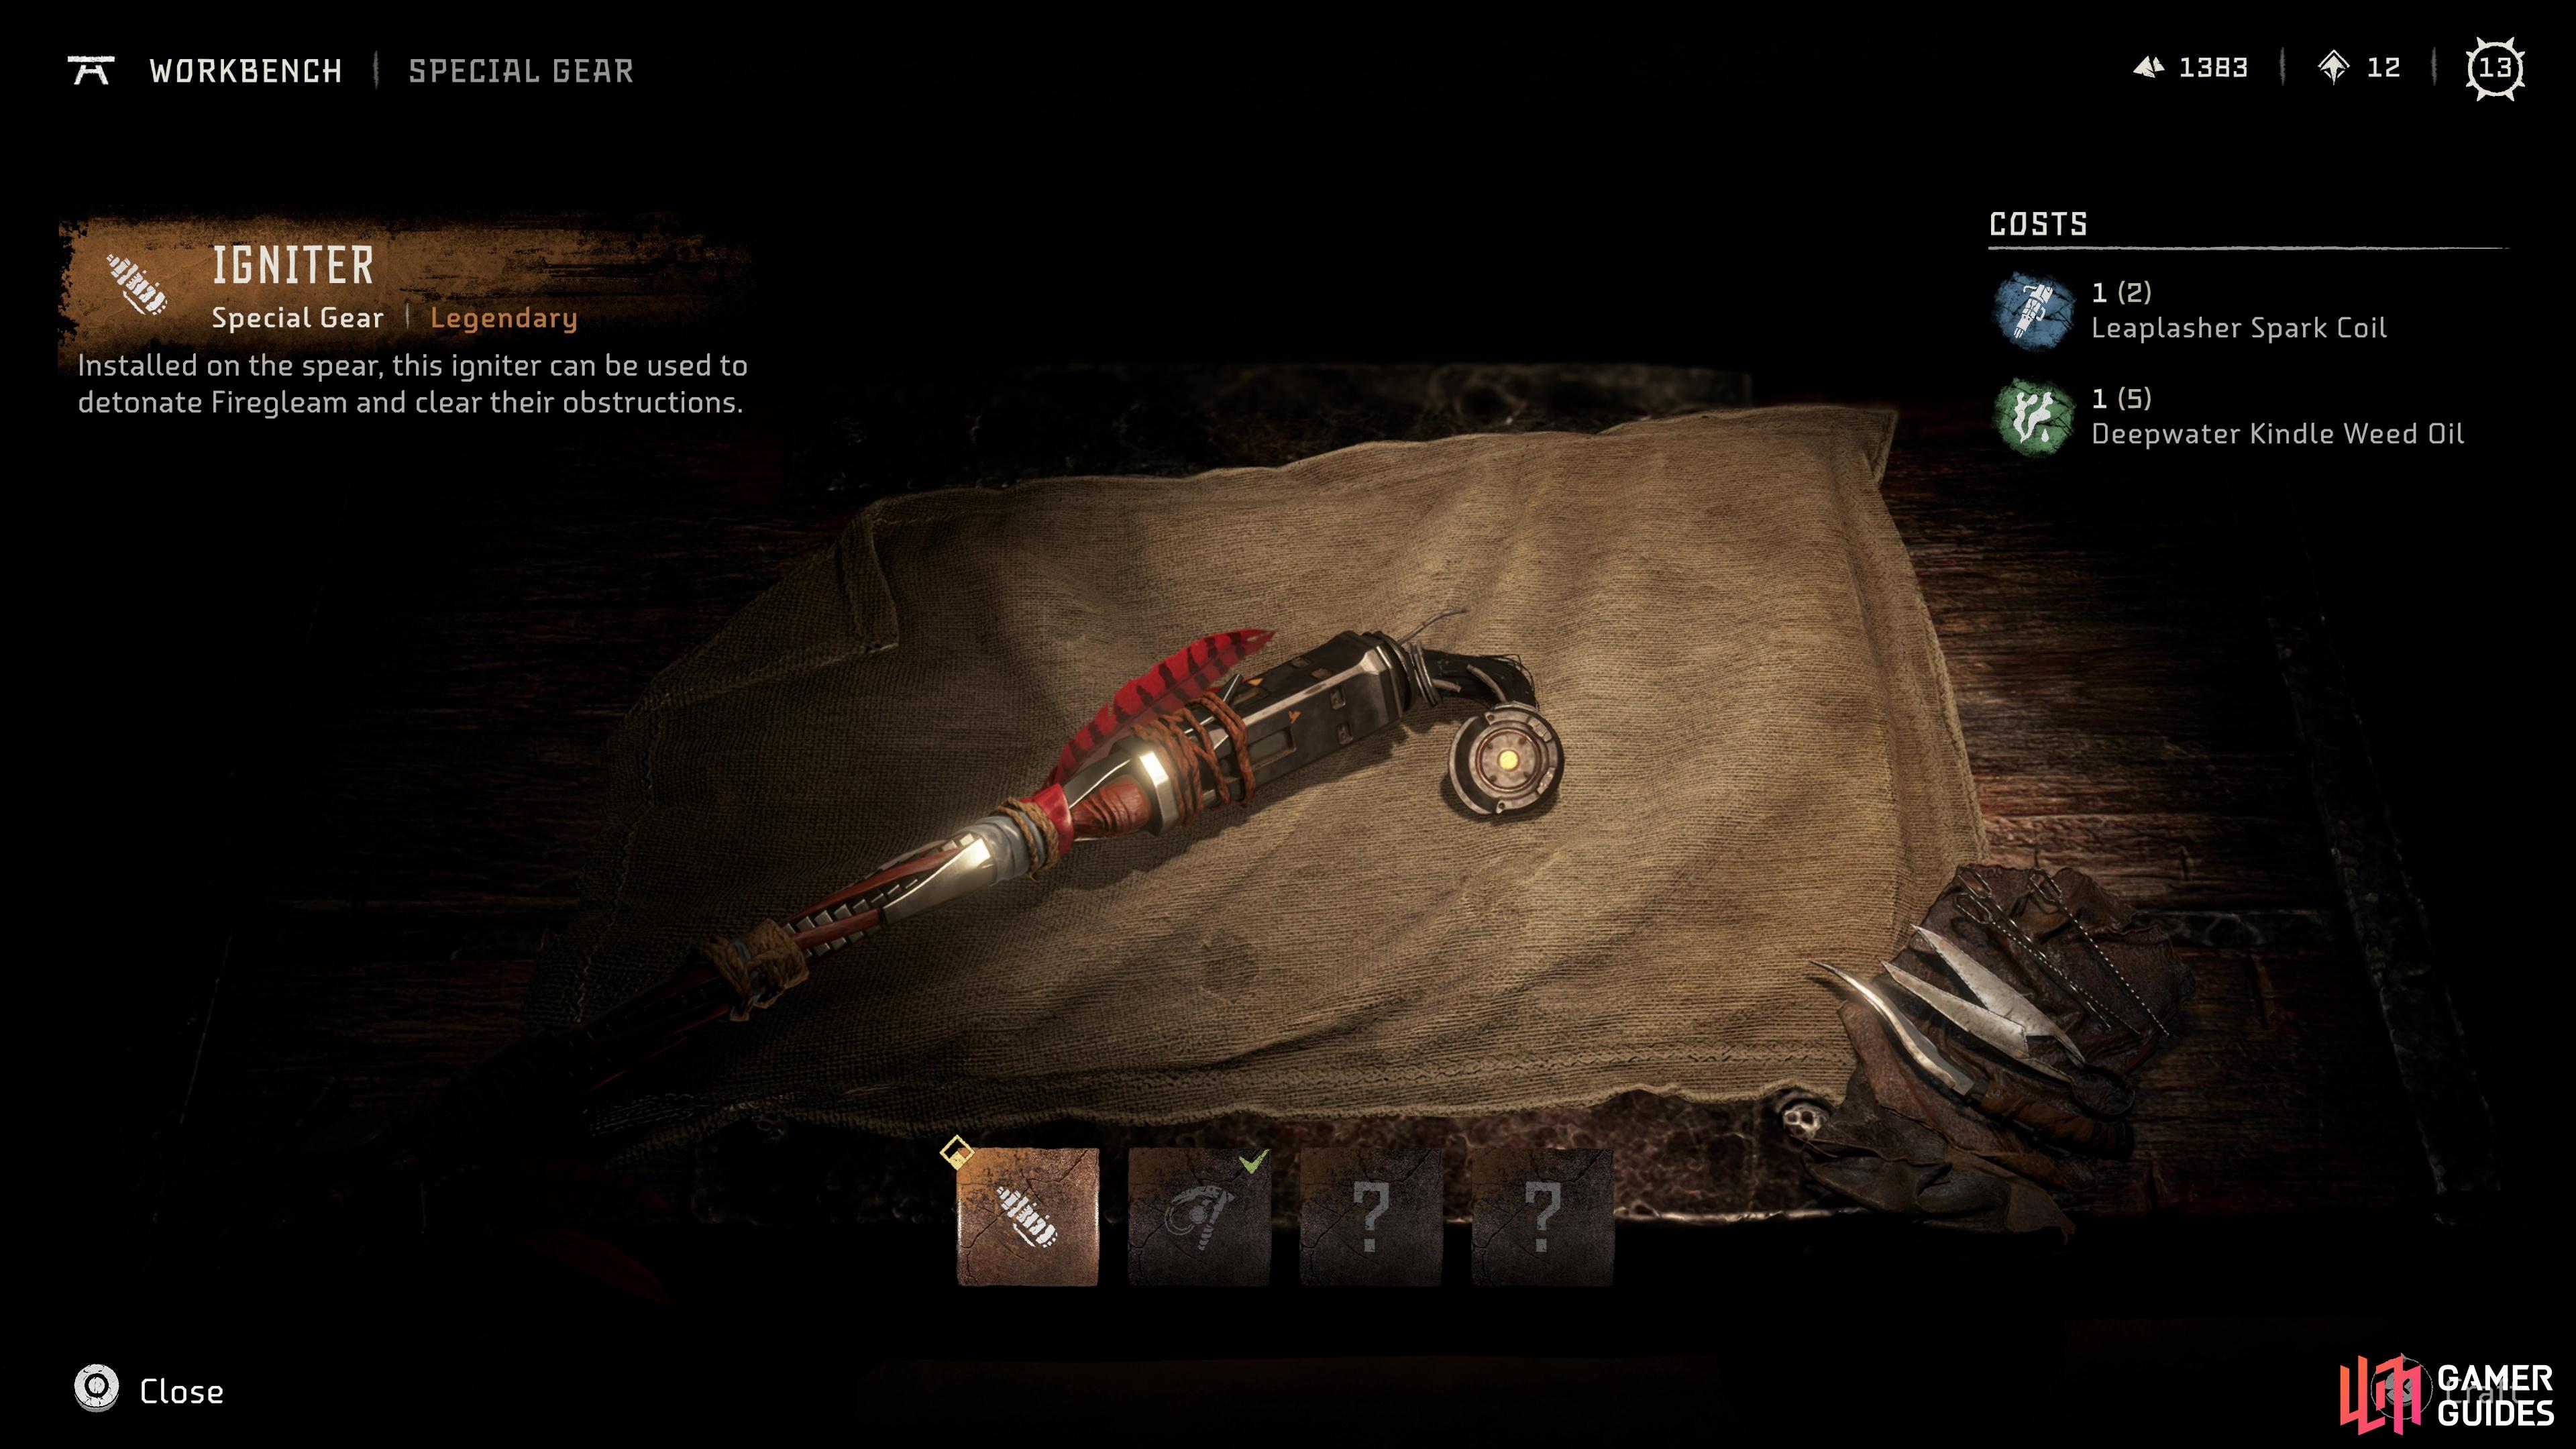
To bypass a Firegleam-encrusted door you’ll need to craft an Igniter.
How to Craft the Igniter
Alas, time makes fools of us all, and where ancient technology has failed, modern ingenuity will have to triumph; you’ll need to craft an Igniter to bypass the “Firegleam” on the door, and to do this you’ll need to gather some Deepwater Kindle Weed Oil and a Leapslasher’s Spark Coil.
Where to find a Leapslasher’s Spark Coil
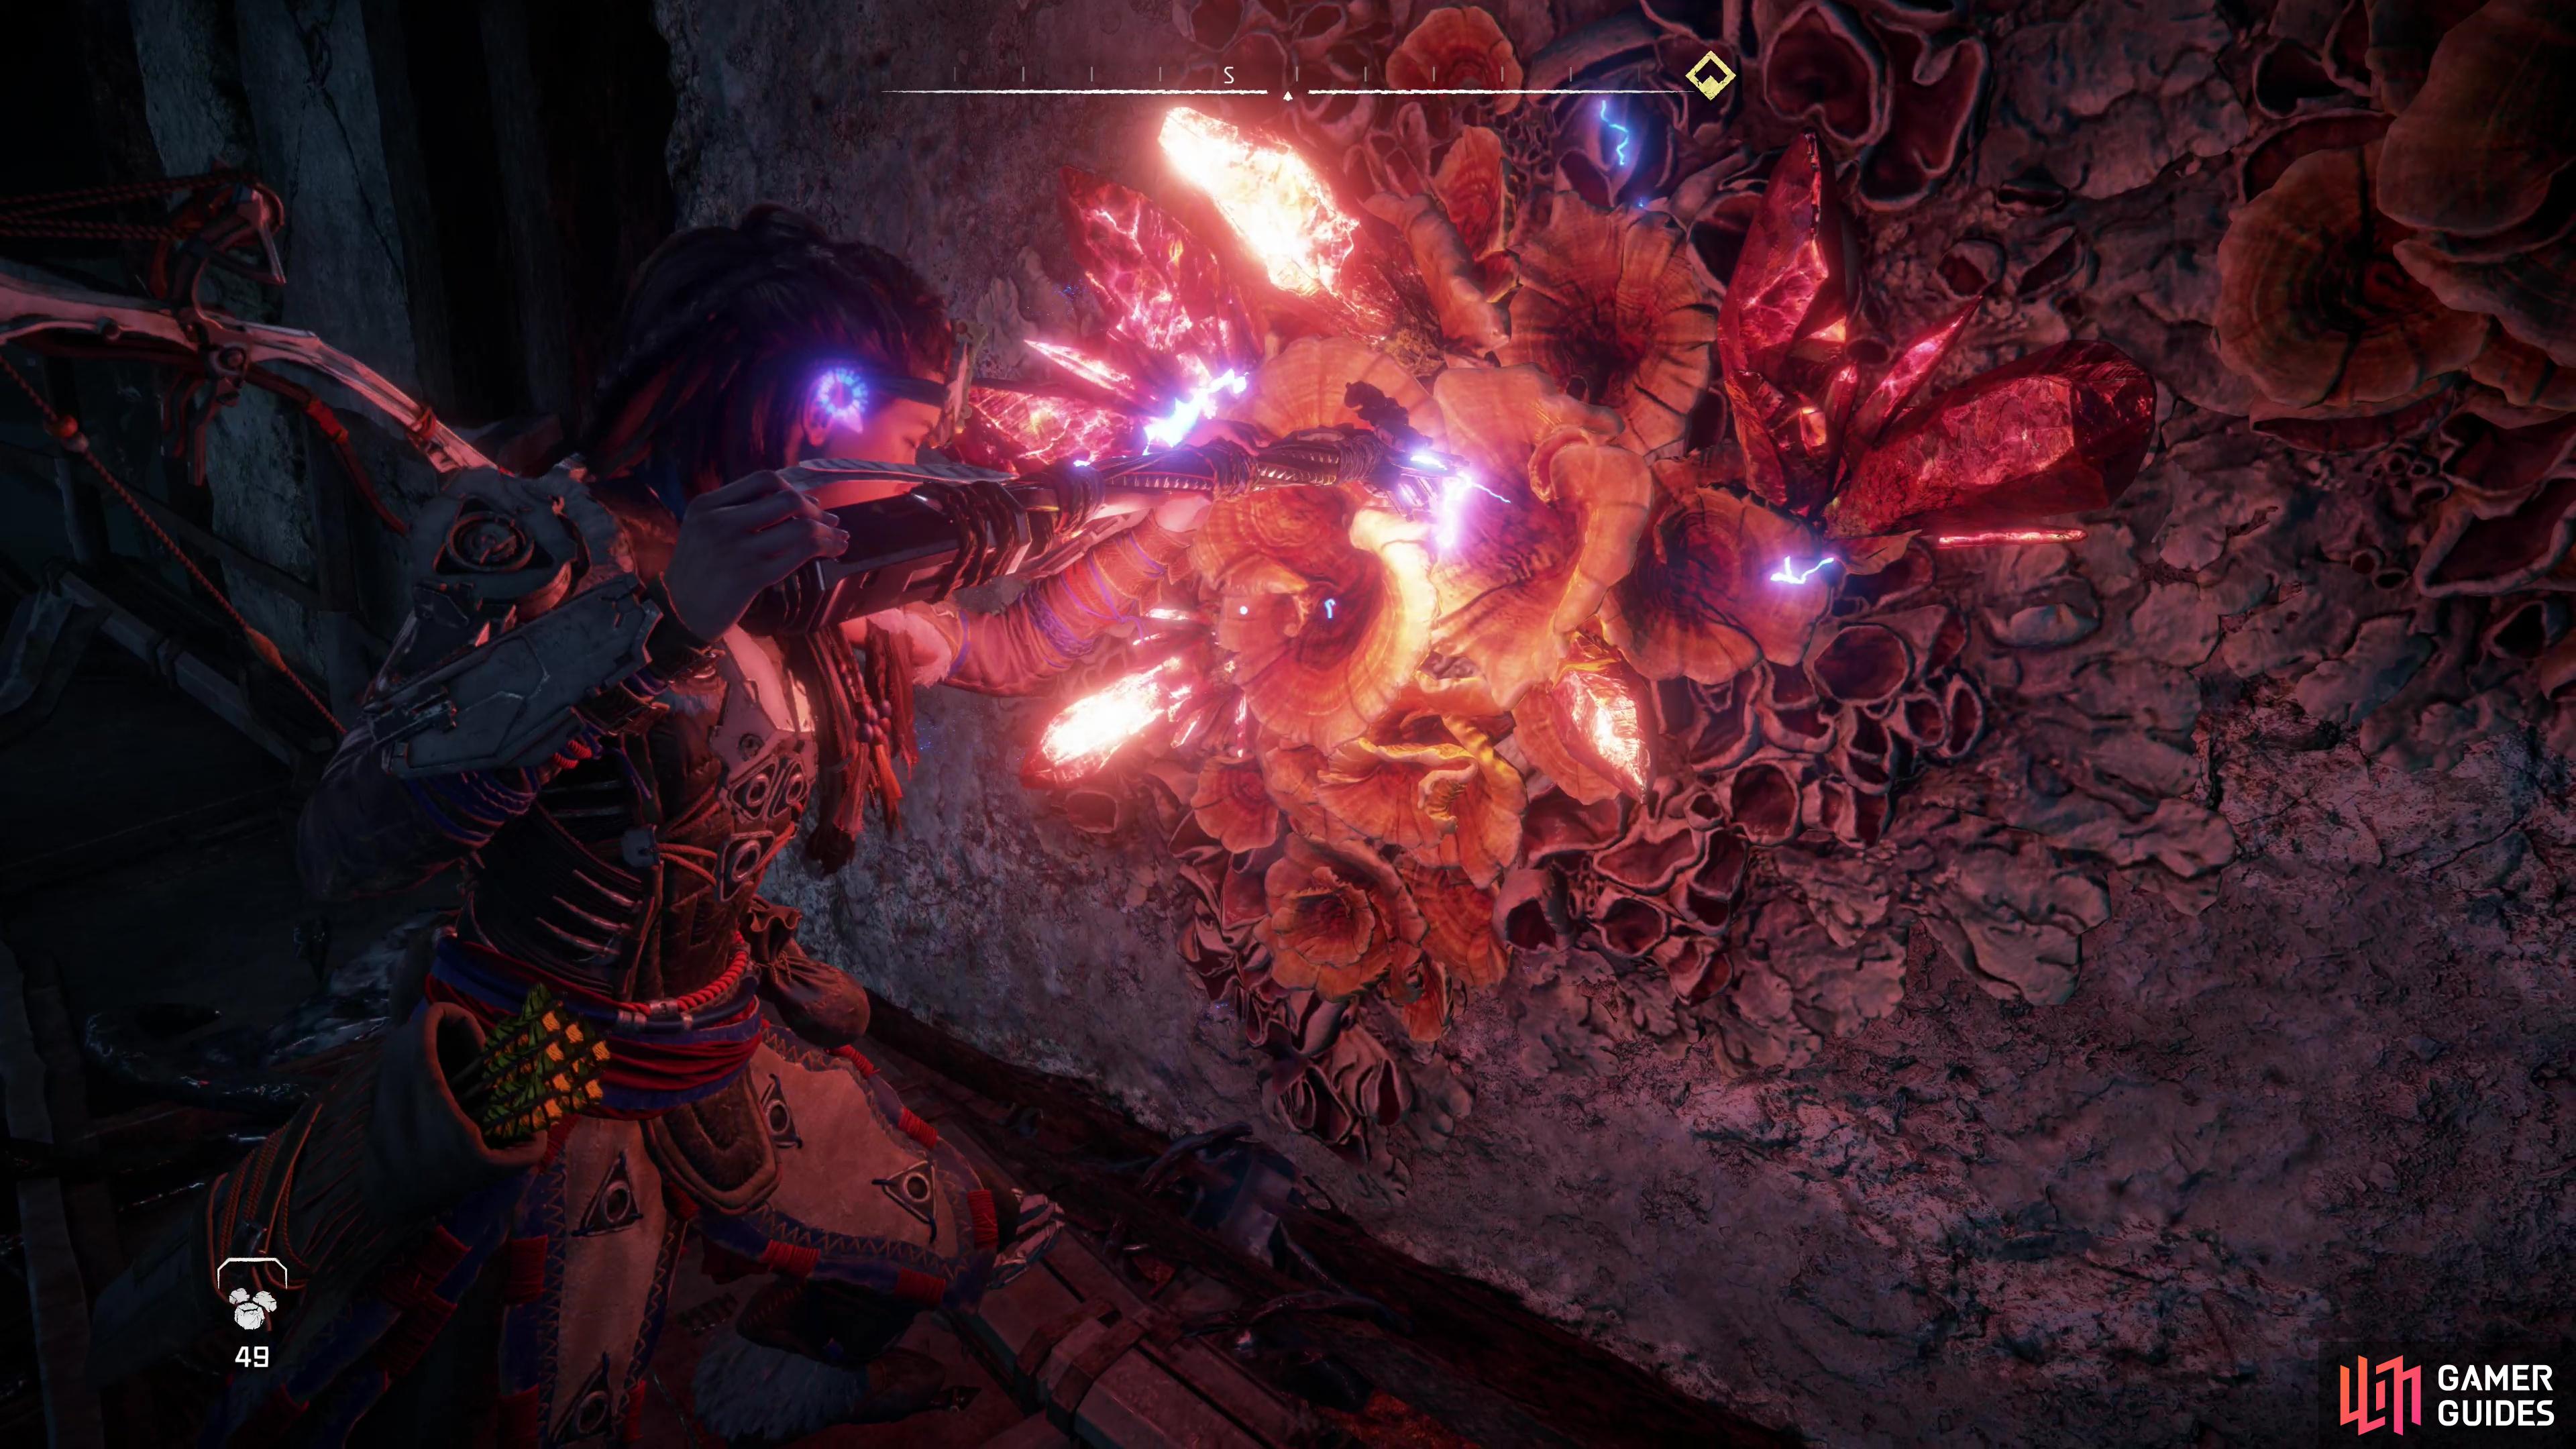
Of the two components you need, the Leapslasher’s Spark Coil is the most difficult to obtain. Southeast of the entrance to the old world ruins you’ll find a Leapslasher Site, where three of the kangaroo machines hop about, oblivious to your intentions. To get a shot at a Leapslasher Spark Coil you’ll need to shoot off a Leapslasher’s Power Cell, which is located on their back, just above their tail. There’s plenty of grass to hide in, so wait for an opening and take your shot - if you fail to detach the Power Cell or otherwise botch things, there’s no shame in retreating, hiding until the machines calm down, then trying again. Try not to destroy any of the Leapslashers without removing their Power Cells, otherwise you’ll have to travel away from this site long enough for the Leapslashers to respawn, or find another Leapslasher site.
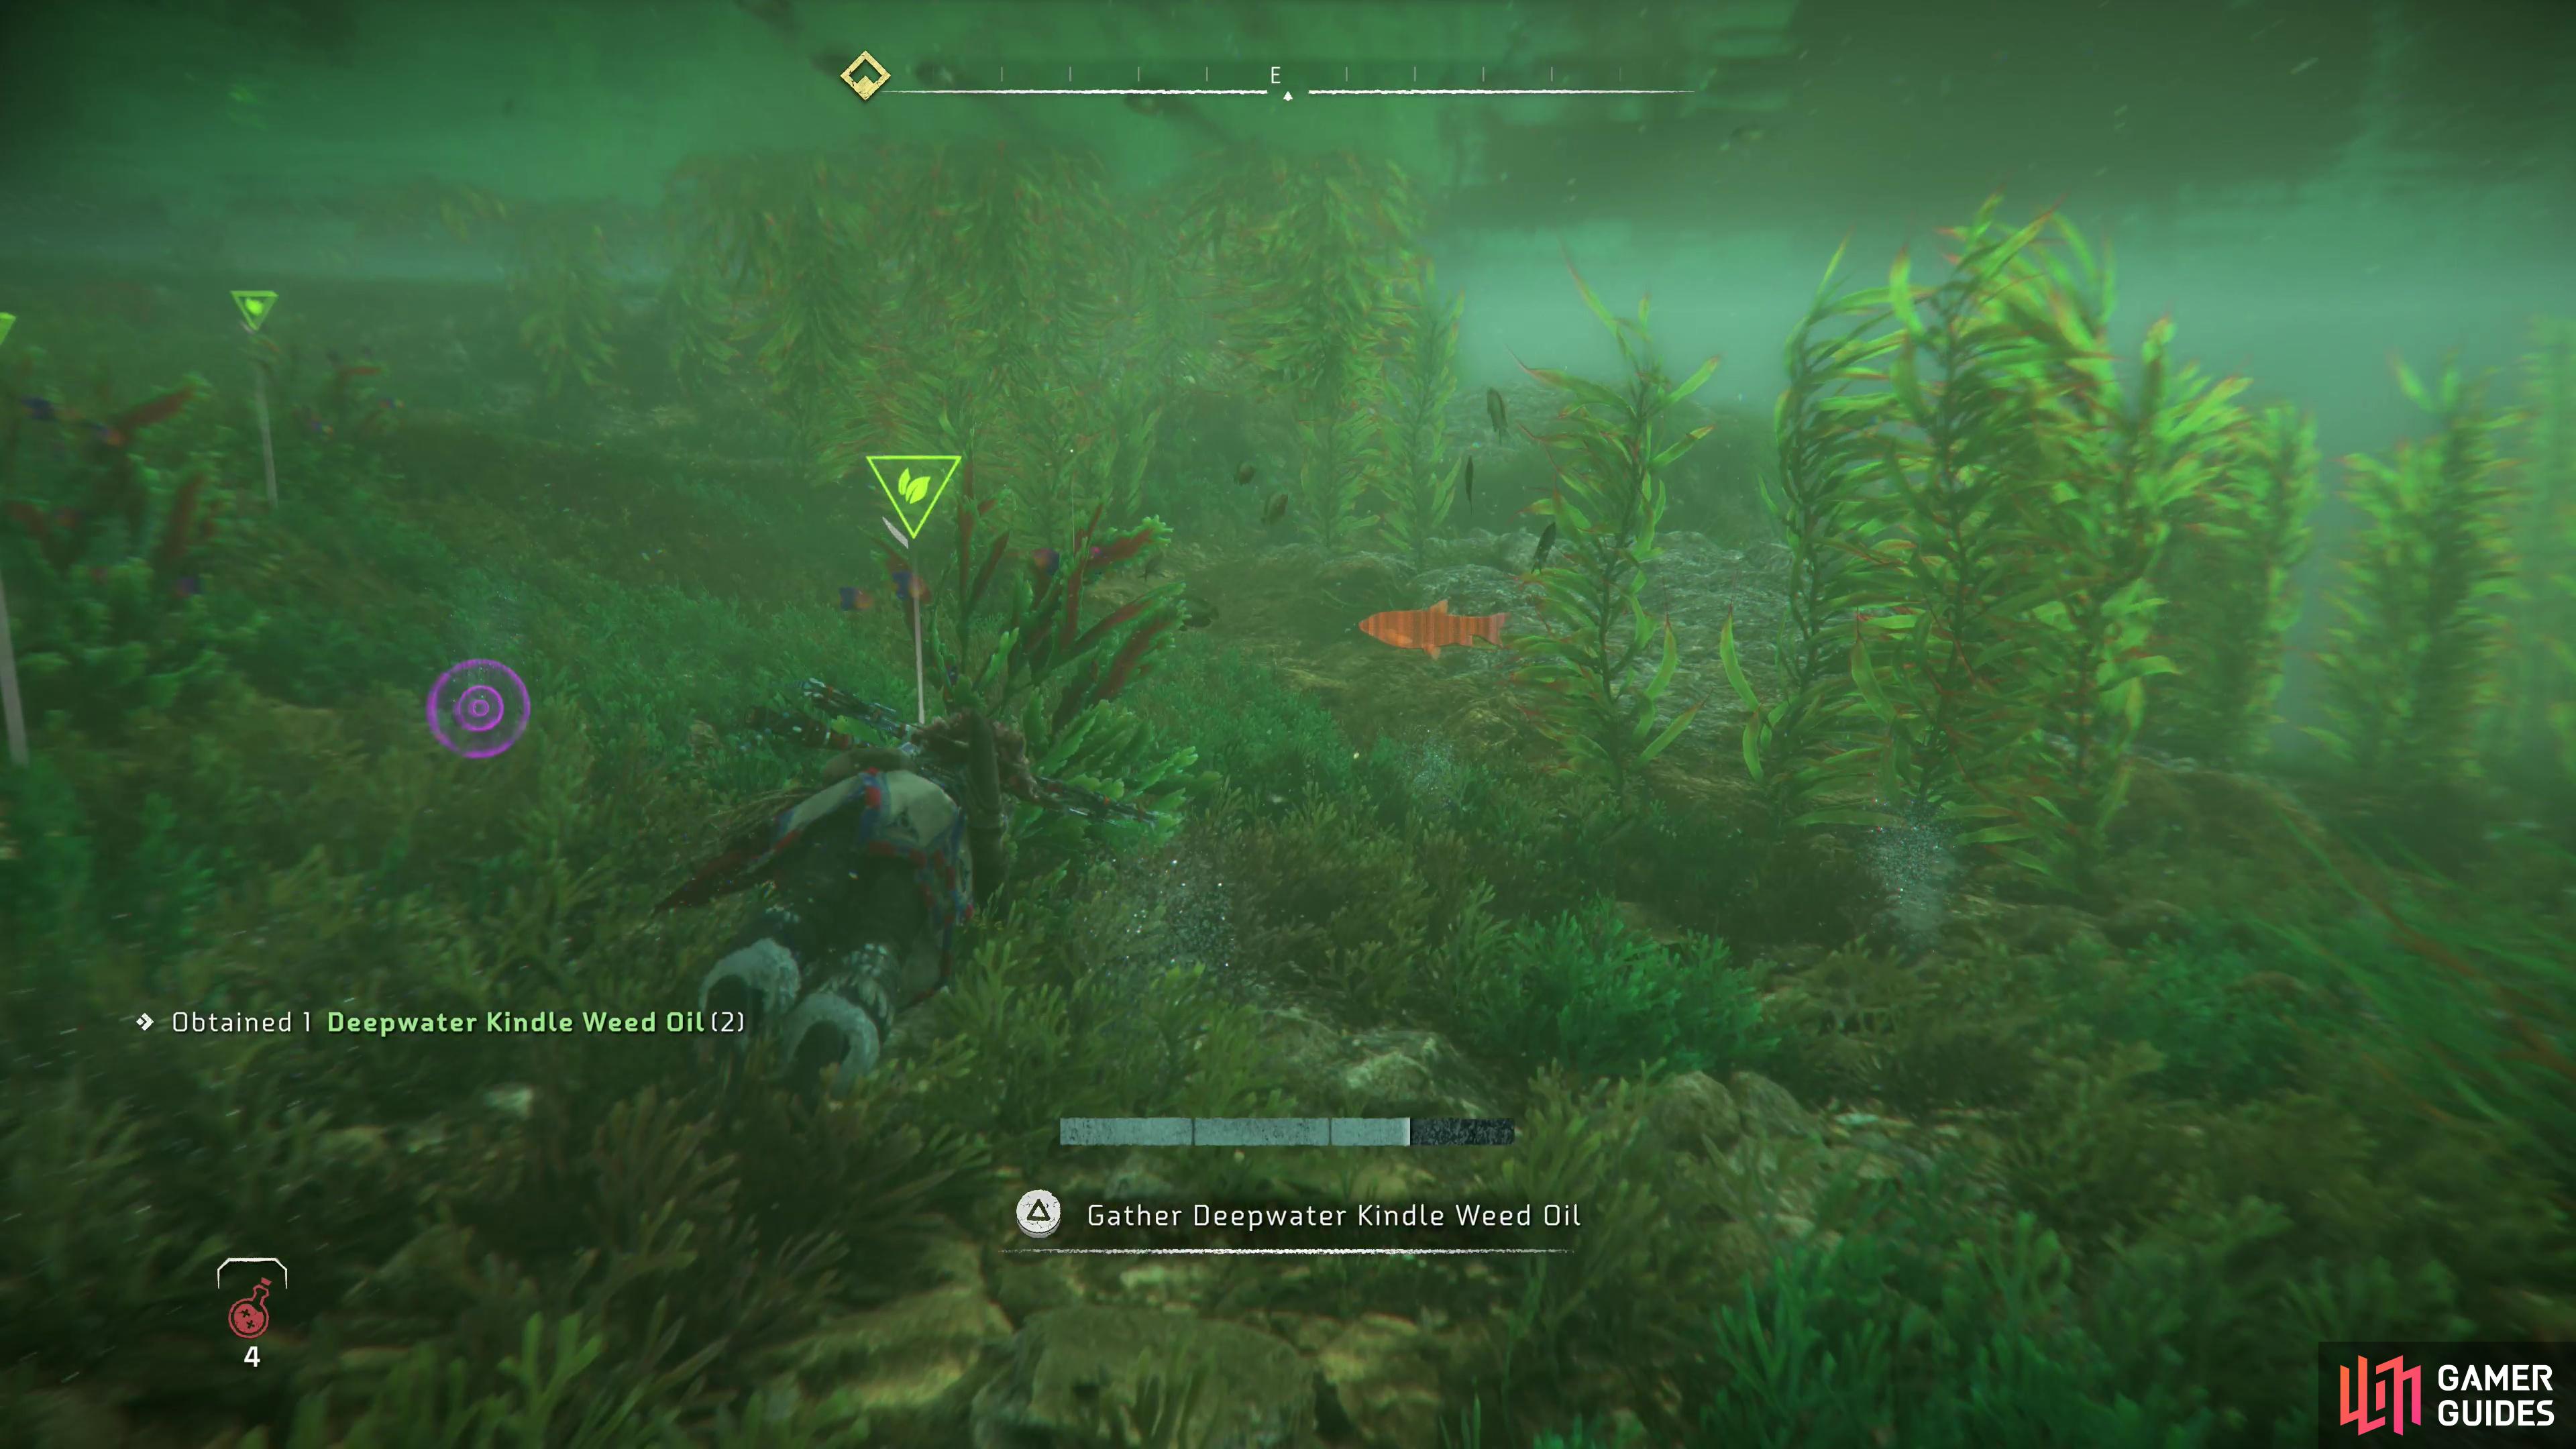
You can find plenty of Deepwater Kindle Weed Oil in the water near the ancient ruins.
Where to find Deepwater Kindle Weed Oil
The Deepwater Kindle Weed Oil you need is fairly simple to gather by comparison. Once you have the Leapslasher Spark Coil, simply dive into the water southeast of the Leapslasher Site and search the sea floor for a green and red plant. There’s plenty of them about, so you should have no trouble getting the Deepwater Kindle Weed Oil you need.
Craft the Igniter,
then use the Igniter to detonate the Firegleam on the door.
Crafting the Igniter
Once you have the two components you need, head back up to the ancient tunnel and seek out a Workbench just to the left of the entrance. Use the Workbench and craft yourself a brand new Igniter, with which you can clear off deposits of Firegleam you find during your adventures… and most importantly, on the door ahead.
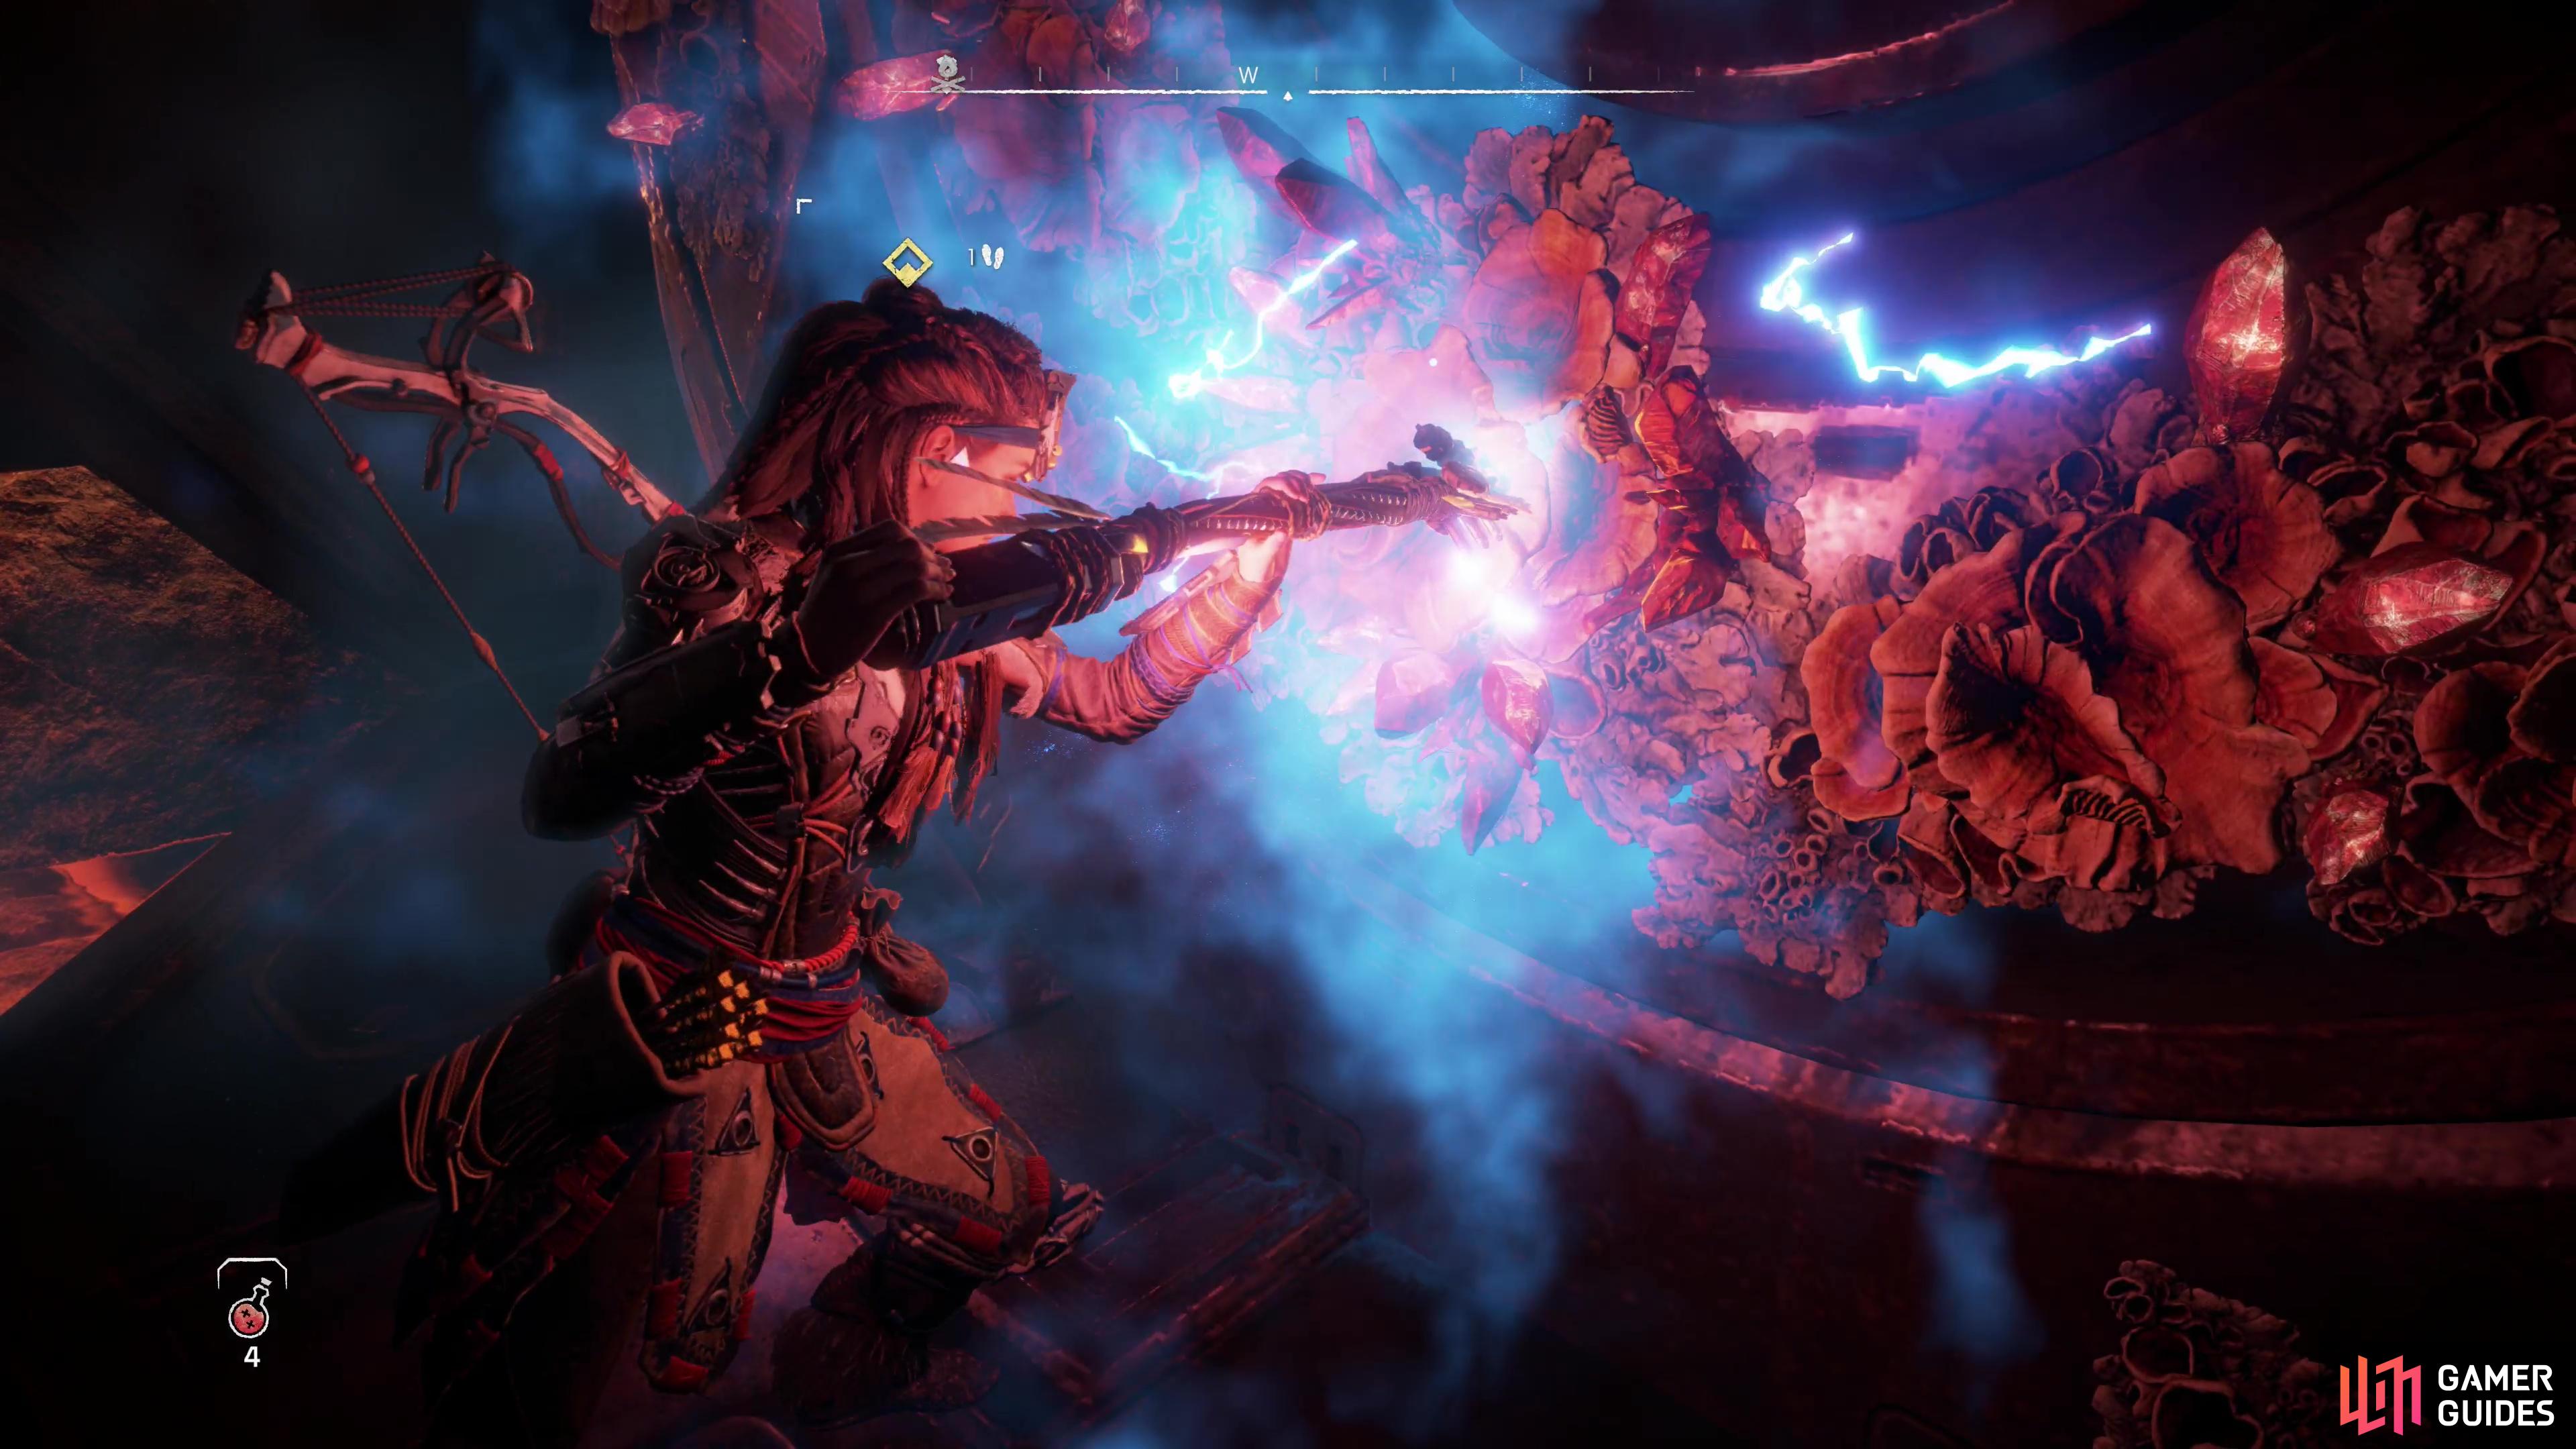
Speaking of which, return to the Firegleam-encrusted door and press R2 to give your Igniter a trial run. Once ignited, get some distance and when the Firegleam explodes the door will open enough for you to crawl through to the ancient ruins of Latopolis.
How to Get Through Latopolis
Getting through the door might have been a chore, but you’ve still got all of Latopolis ahead of you. These ancient ruins are basically a series of puzzles (mostly platforming) you’ll have to zigzag through in order to reach the depths of the ruins as well as to claim optional loot along the way. Expect to employ various tools like the Shieldwing and Pullcaster at times to get through, and if you slip up, you’re going for a swim to start the segment over again. Fortunately there you’ll get the opportunity to kick down ladders at regular intervals, preventing you from having to restart due to a single mistake.
Scramble over the door and into the hallway beyond, take a right, loot a chest, then pry open a door to find yourself in a massive, flooded chamber. Much of your time in Latopolis will be devoted to getting to the far (northwestern) end of this chamber, and since there’s no direct route across you’ll have to settle for working your way across in an indirect manner, a process complicated further if you want to seek out any extraneous loot caches.
For the first platforming segment:
-
First, jump across to a platform to the northwest (if Aloy derps into the water, you can find a ladder along the northeastern edge of this platform)
-
Turn left (southwest) and jump across the tops of some metal supports.
-
Aim at a box on a concrete pillar and use your Pullcaster to expose a grapple point.
-
Grapple onto the grapple point and climb up and around the pillar to the right.
-
You should spot a grapple point on another concrete pillar. Grapple over to it.
-
On the second concrete pillar, climb right and up.
-
When you’re on the far side of the second pillar you should see a metal walkway below you. Press the Right Analog towards this platform, then press Circle to jump over to it.
-
Optional: Climb up the far side of the second pillar as far as you can, aim south, then jump back onto another, higher platform. You’ll find a chest hidden up here you can loot. After you’re done, just drop down onto the lower platform.
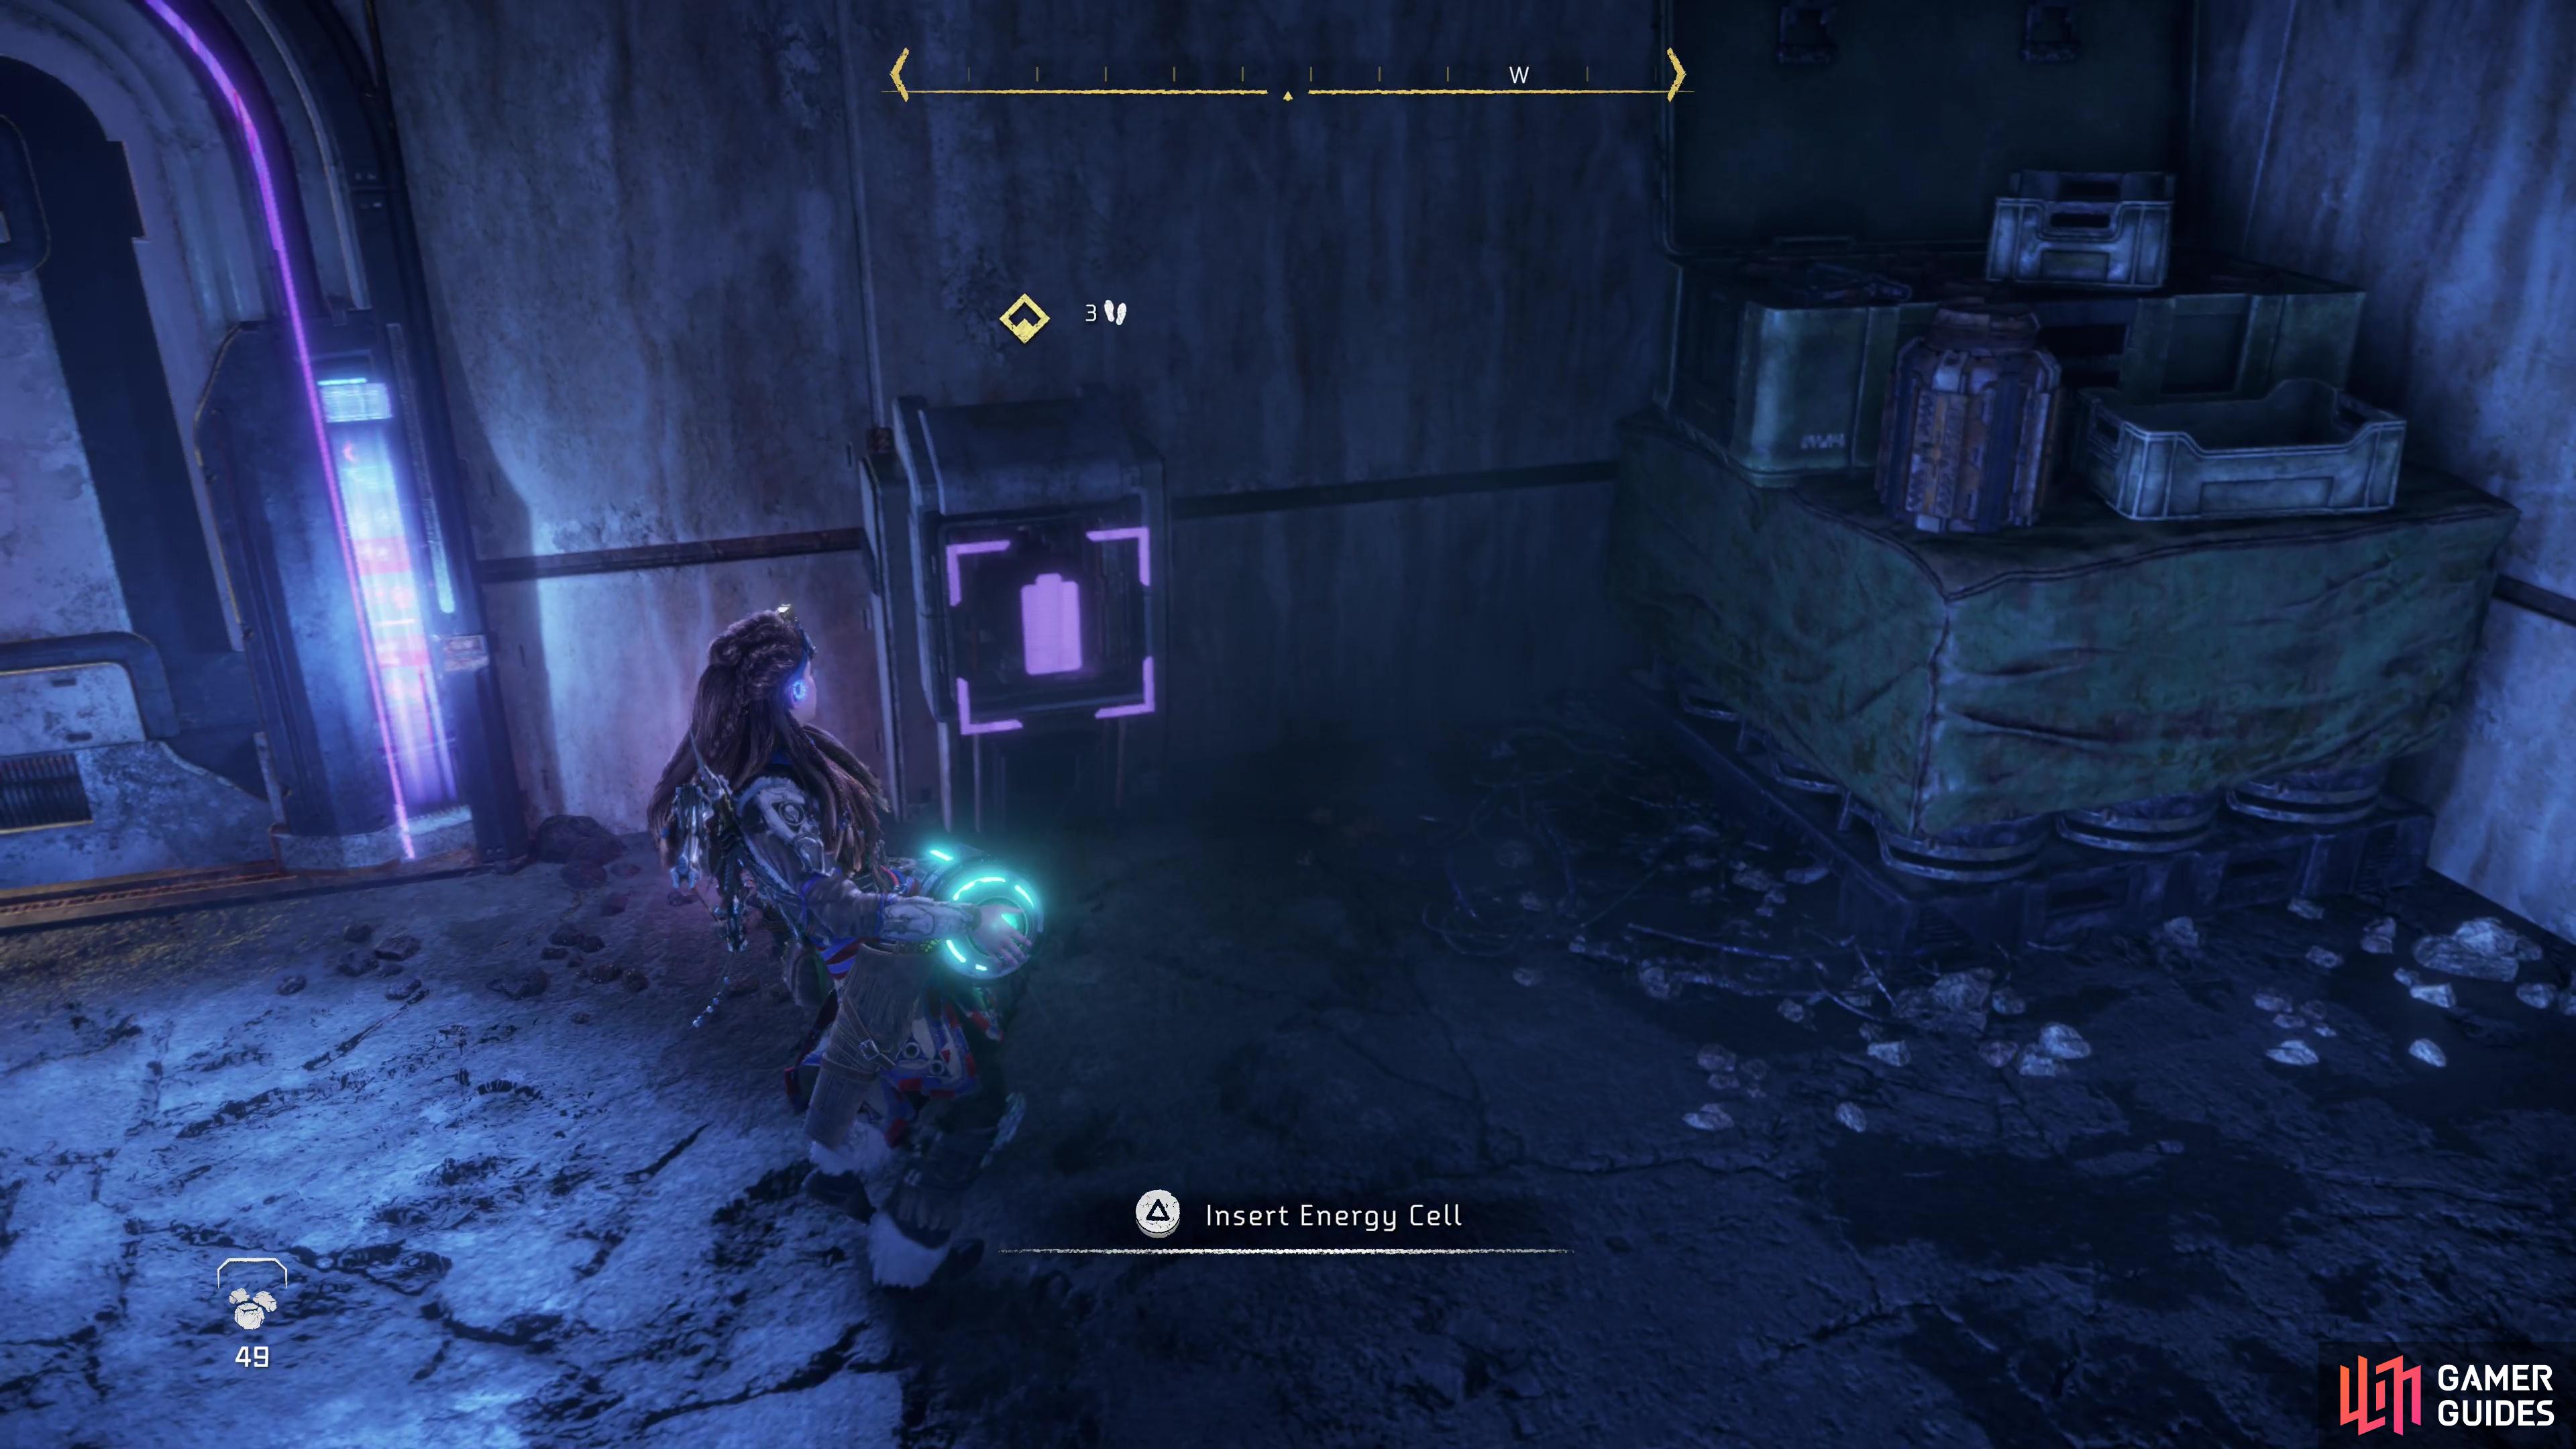
Use an Energy Cell to open a door,

then push a crate down a hole in the floor.
Kick down a ladder to the northwest when you reach the platform to ensure you’ll merely need to swim a bit if you want to get back here, then turn your attention to a door to the southwest. It’s inoperable, so climb through a hole above the door and you’ll reach a room with another sealed door.
Scan a Power Terminal to the right of the door, then search the eastern corner of the room to find an Energy Cell. Take it off the shelf and slot it into the Power Terminal, which will allow you to open the door. Once the door is open, you don’t need to keep the Energy Cell in place, but you’ve also got no immediate need to lug it around, either, so leave it in place.
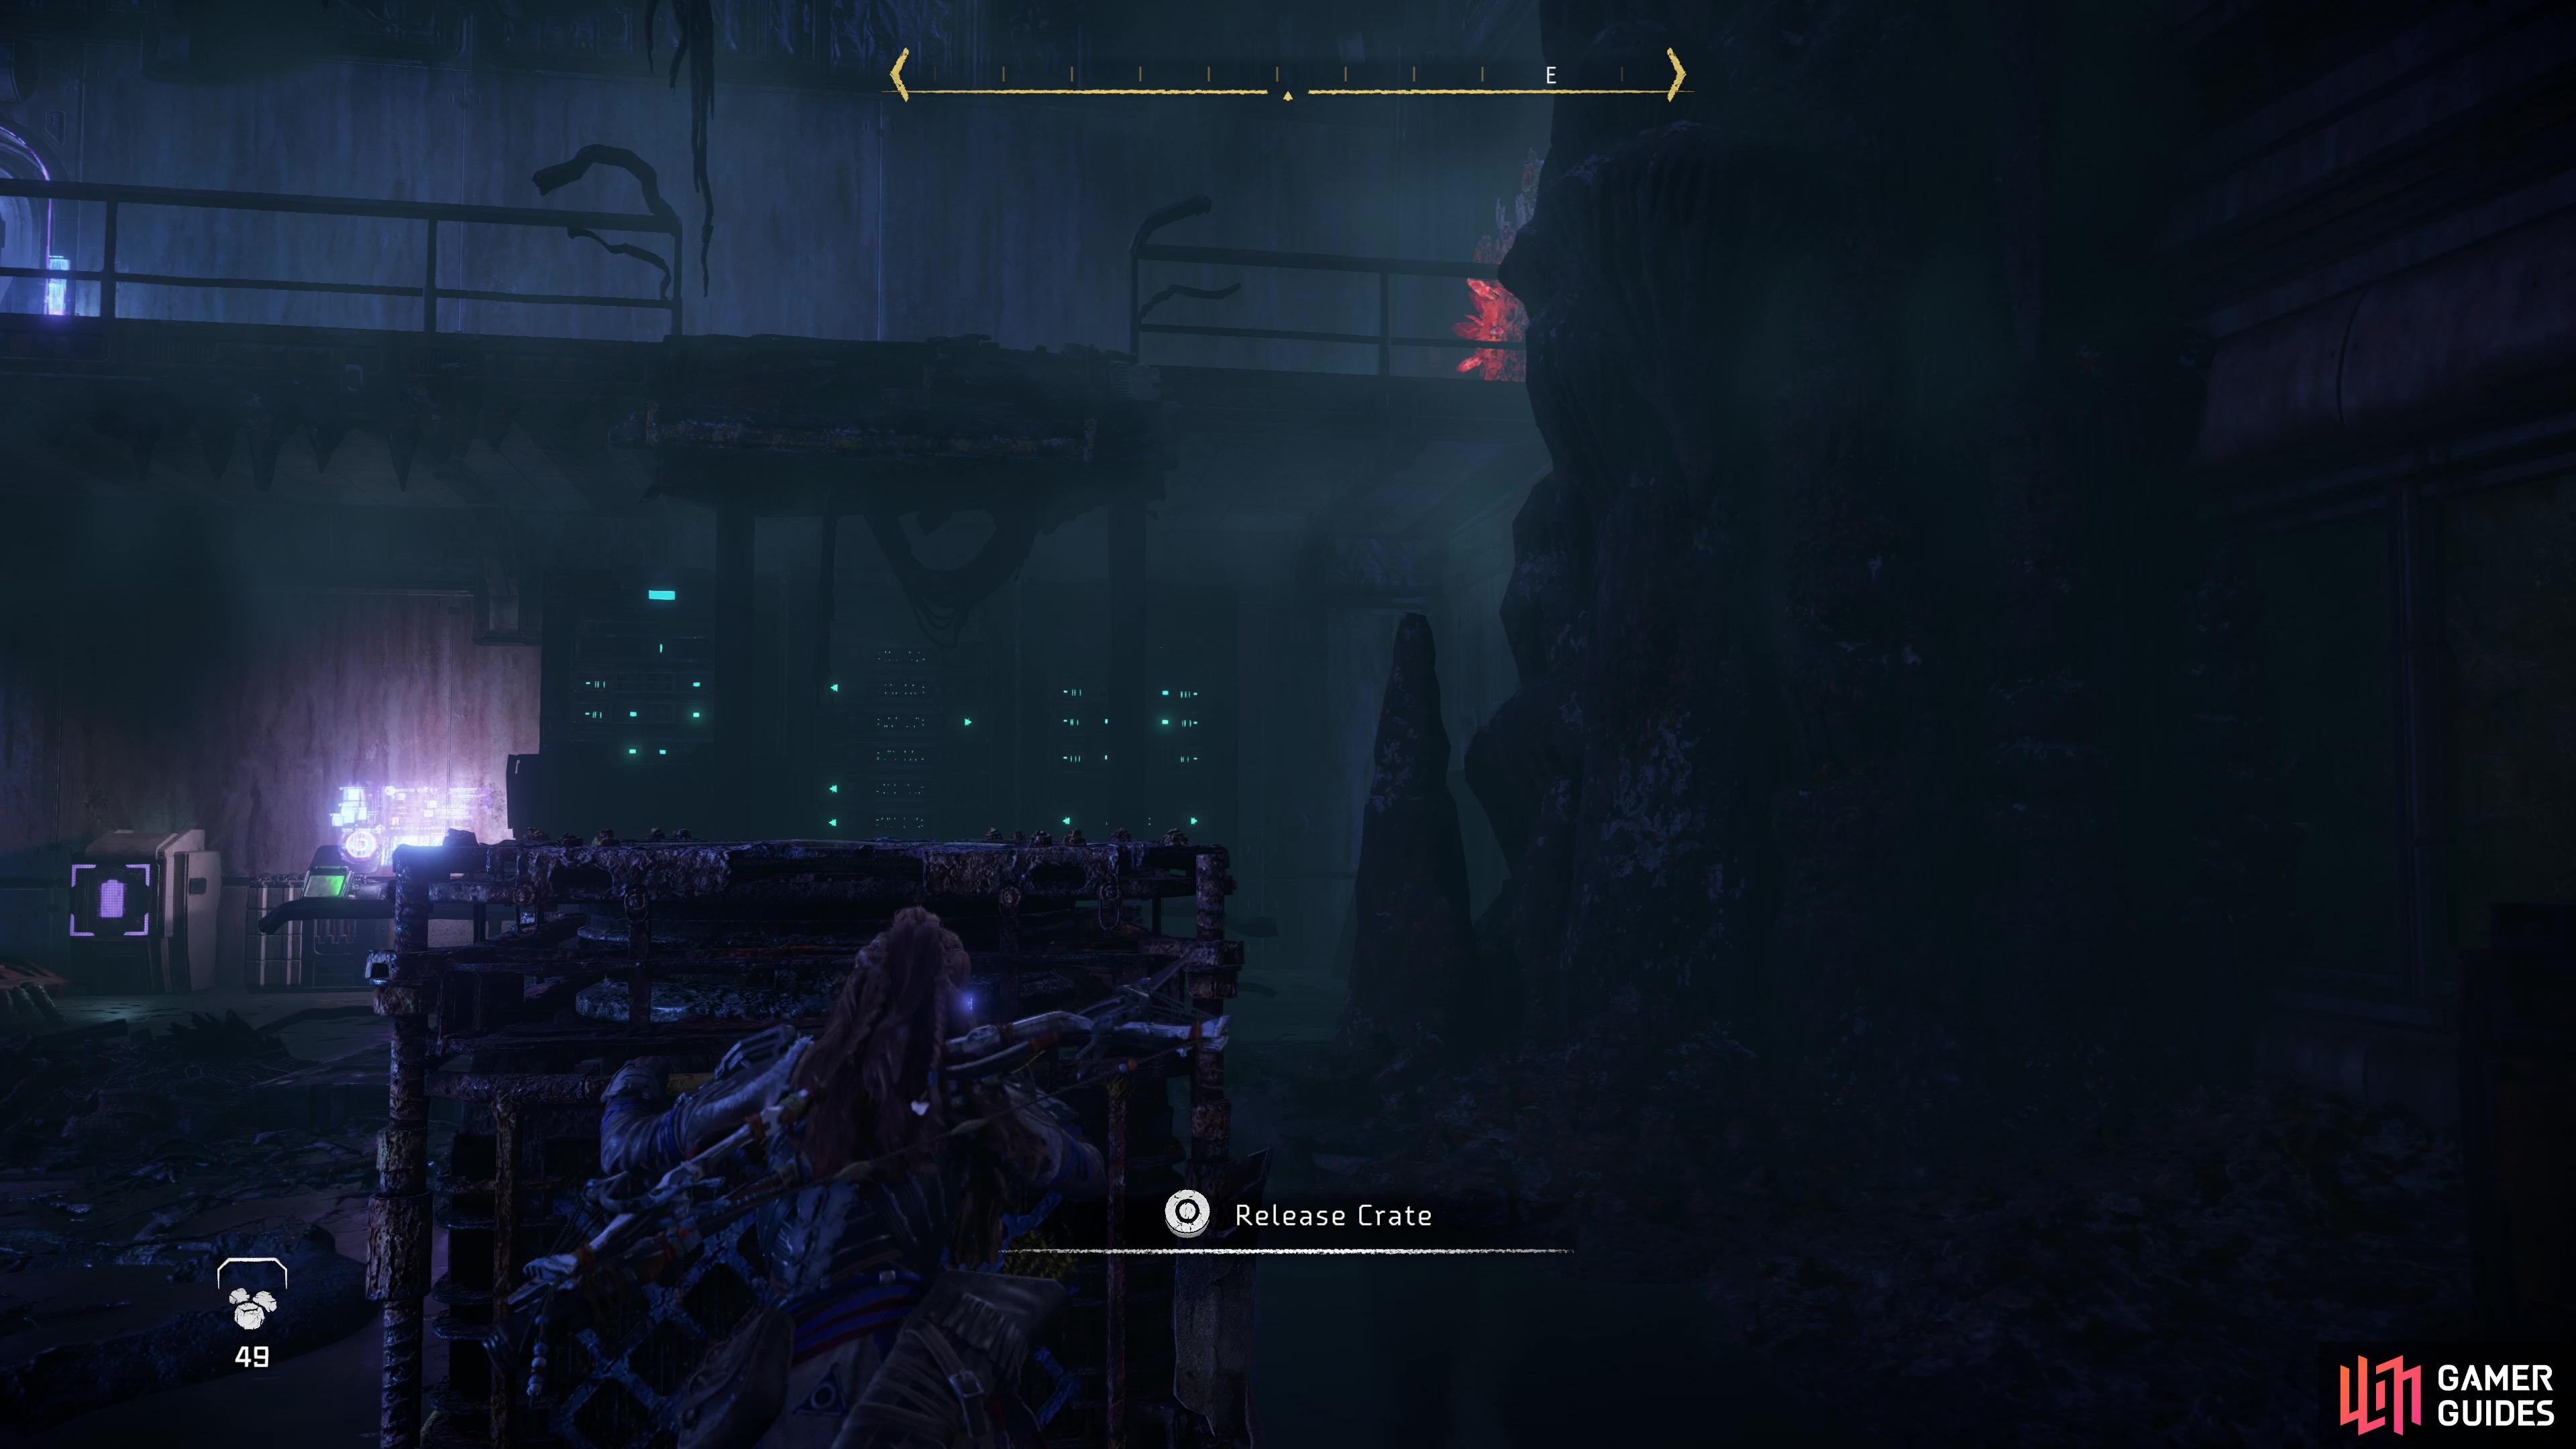
Go through the now-open doorway and round a corner to loot a chest, then head back to the doorway and look up and to the southwest to spot a grapple point. Grapple up to an elevated walkway, turn right, then grab onto a crate beyond an open doorway. Push it forward (northwest) and it’ll fall down a hole, making it useful for future platforming. For now, however, jump over the hole in the floor to the northwest (get a running start) to loot another chest, then drop down the hole you pushed the crate down a moment ago.
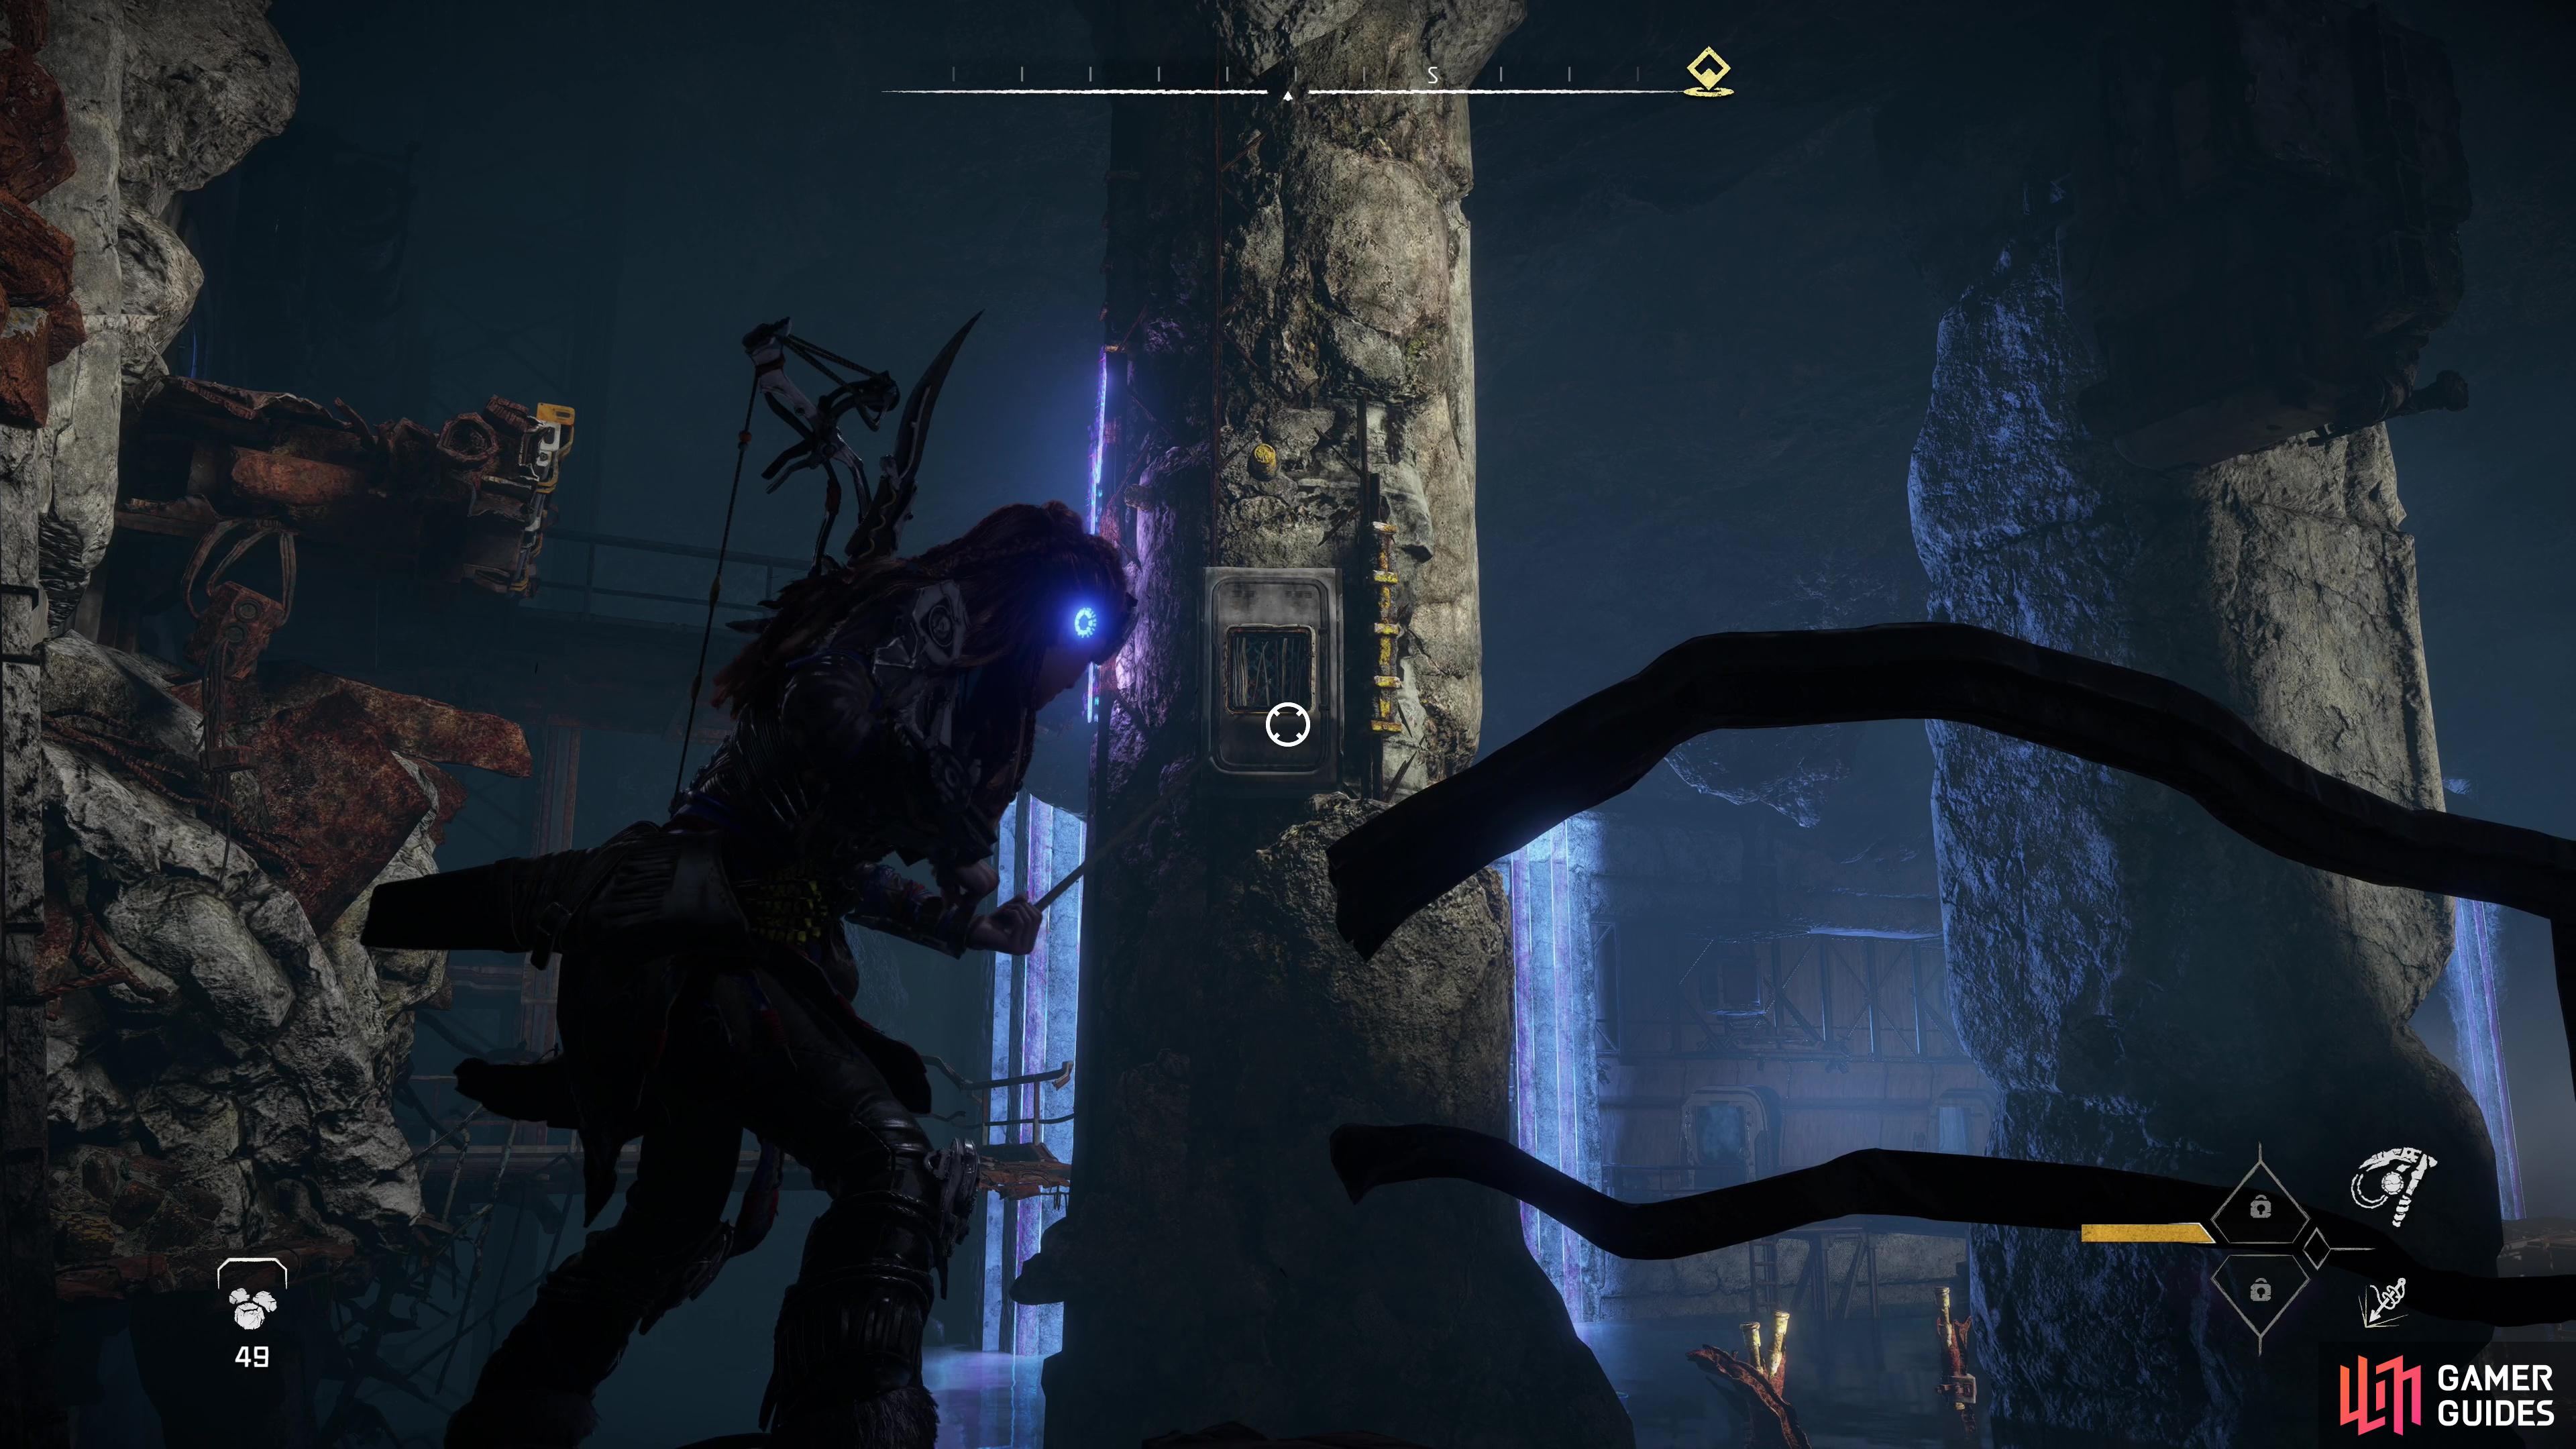
In the room below you’ll find two Power Terminals - one along the northwestern wall and one to the northeast. You can’t do much with either right now. Instead, grab your friendly crate and push it northeast until it’s under a ledge in the eastern corner of the room. Climb up, turn right and you’ll find some Firegleam on the wall. Use your Igniter to detonate it, which will blow a hole in the wall and give you access back to the beginning of this area. Pull the Energy Cell out of the first Power Terminal, then huff the massive battery back to the previous room.
Slot it into the Power Terminal along the northeastern wall to access a trunk, and once that’s looted, install the Energy Cell into the Power Terminal along the northwestern wall. This will both open the door at the left end of the walkway and power up a lengthy hologram, where Aloy will get to indulge her fixation of Elisabet, oblivious to her apparent character flaws. Once that’s done, use your pal the crate to climb back up to the elevated walkway, turn left and go through the now-opened door to return to the massive, flooded central chamber.
Kick down a ladder, then get ready for the second platforming segment:
-
From the ladder you kicked down, turn northwest to find another ladder leading up. Climb it to reach a higher platform.
-
Turn northeast and you’ll find a box atop a metal support, which you can target with your Pullcaster. Do so to reveal a grapple point, then grapple over there.
-
Jump onto two metal supports nearby (northwest, then northeast) then look northeast at a distant platform below you.
-
Jump and glide (via the Shieldwing) over to this platform and kick a ladder down.
From this platform you can turn northwest to find another platform you can jump onto. Do so if you want to score a loot cache, then make your way back to the previous platform and get ready for the third platforming segment:
-
Jump onto a metal support along the eastern corner of the platform.
-
Grapple over to a grapple point to the northeast.
-
Glide via the Shieldwing onto a walkway to the northeast.
Not too bad, that. Kick another ladder down, then note you can make your way left (northwest) or right (southeast). Going northwest will lead to another wall coated with Firegleam, while if you go southeast you can find some extraneous loot.
Use the Pullcaster to reveal a grapple point,
then leap backwards onto a platform to get some loot.
If you head southeast, keep an eye out for a concrete pillar with a box you can target with your Pullcaster. You have to be very near the edge of the platform to do this, so watch your step and creep forward until you’re within range. Once the box is removed and grapple point revealed, jump and grapple onto it and climb up as high as you can go. Do so, then turn the camera to face a platform opposite Aloy (northeast) and jump back onto it.
Reach the platform and pry open a door to find a chest, then head back outside. Make your way to the southeastern edge of this platform to spot another platform below you, which you can jump down onto. Do so to find a second chest. From here you just need to swim back northwest to the ladder you dropped earlier to get back to the end of the last platforming segment.
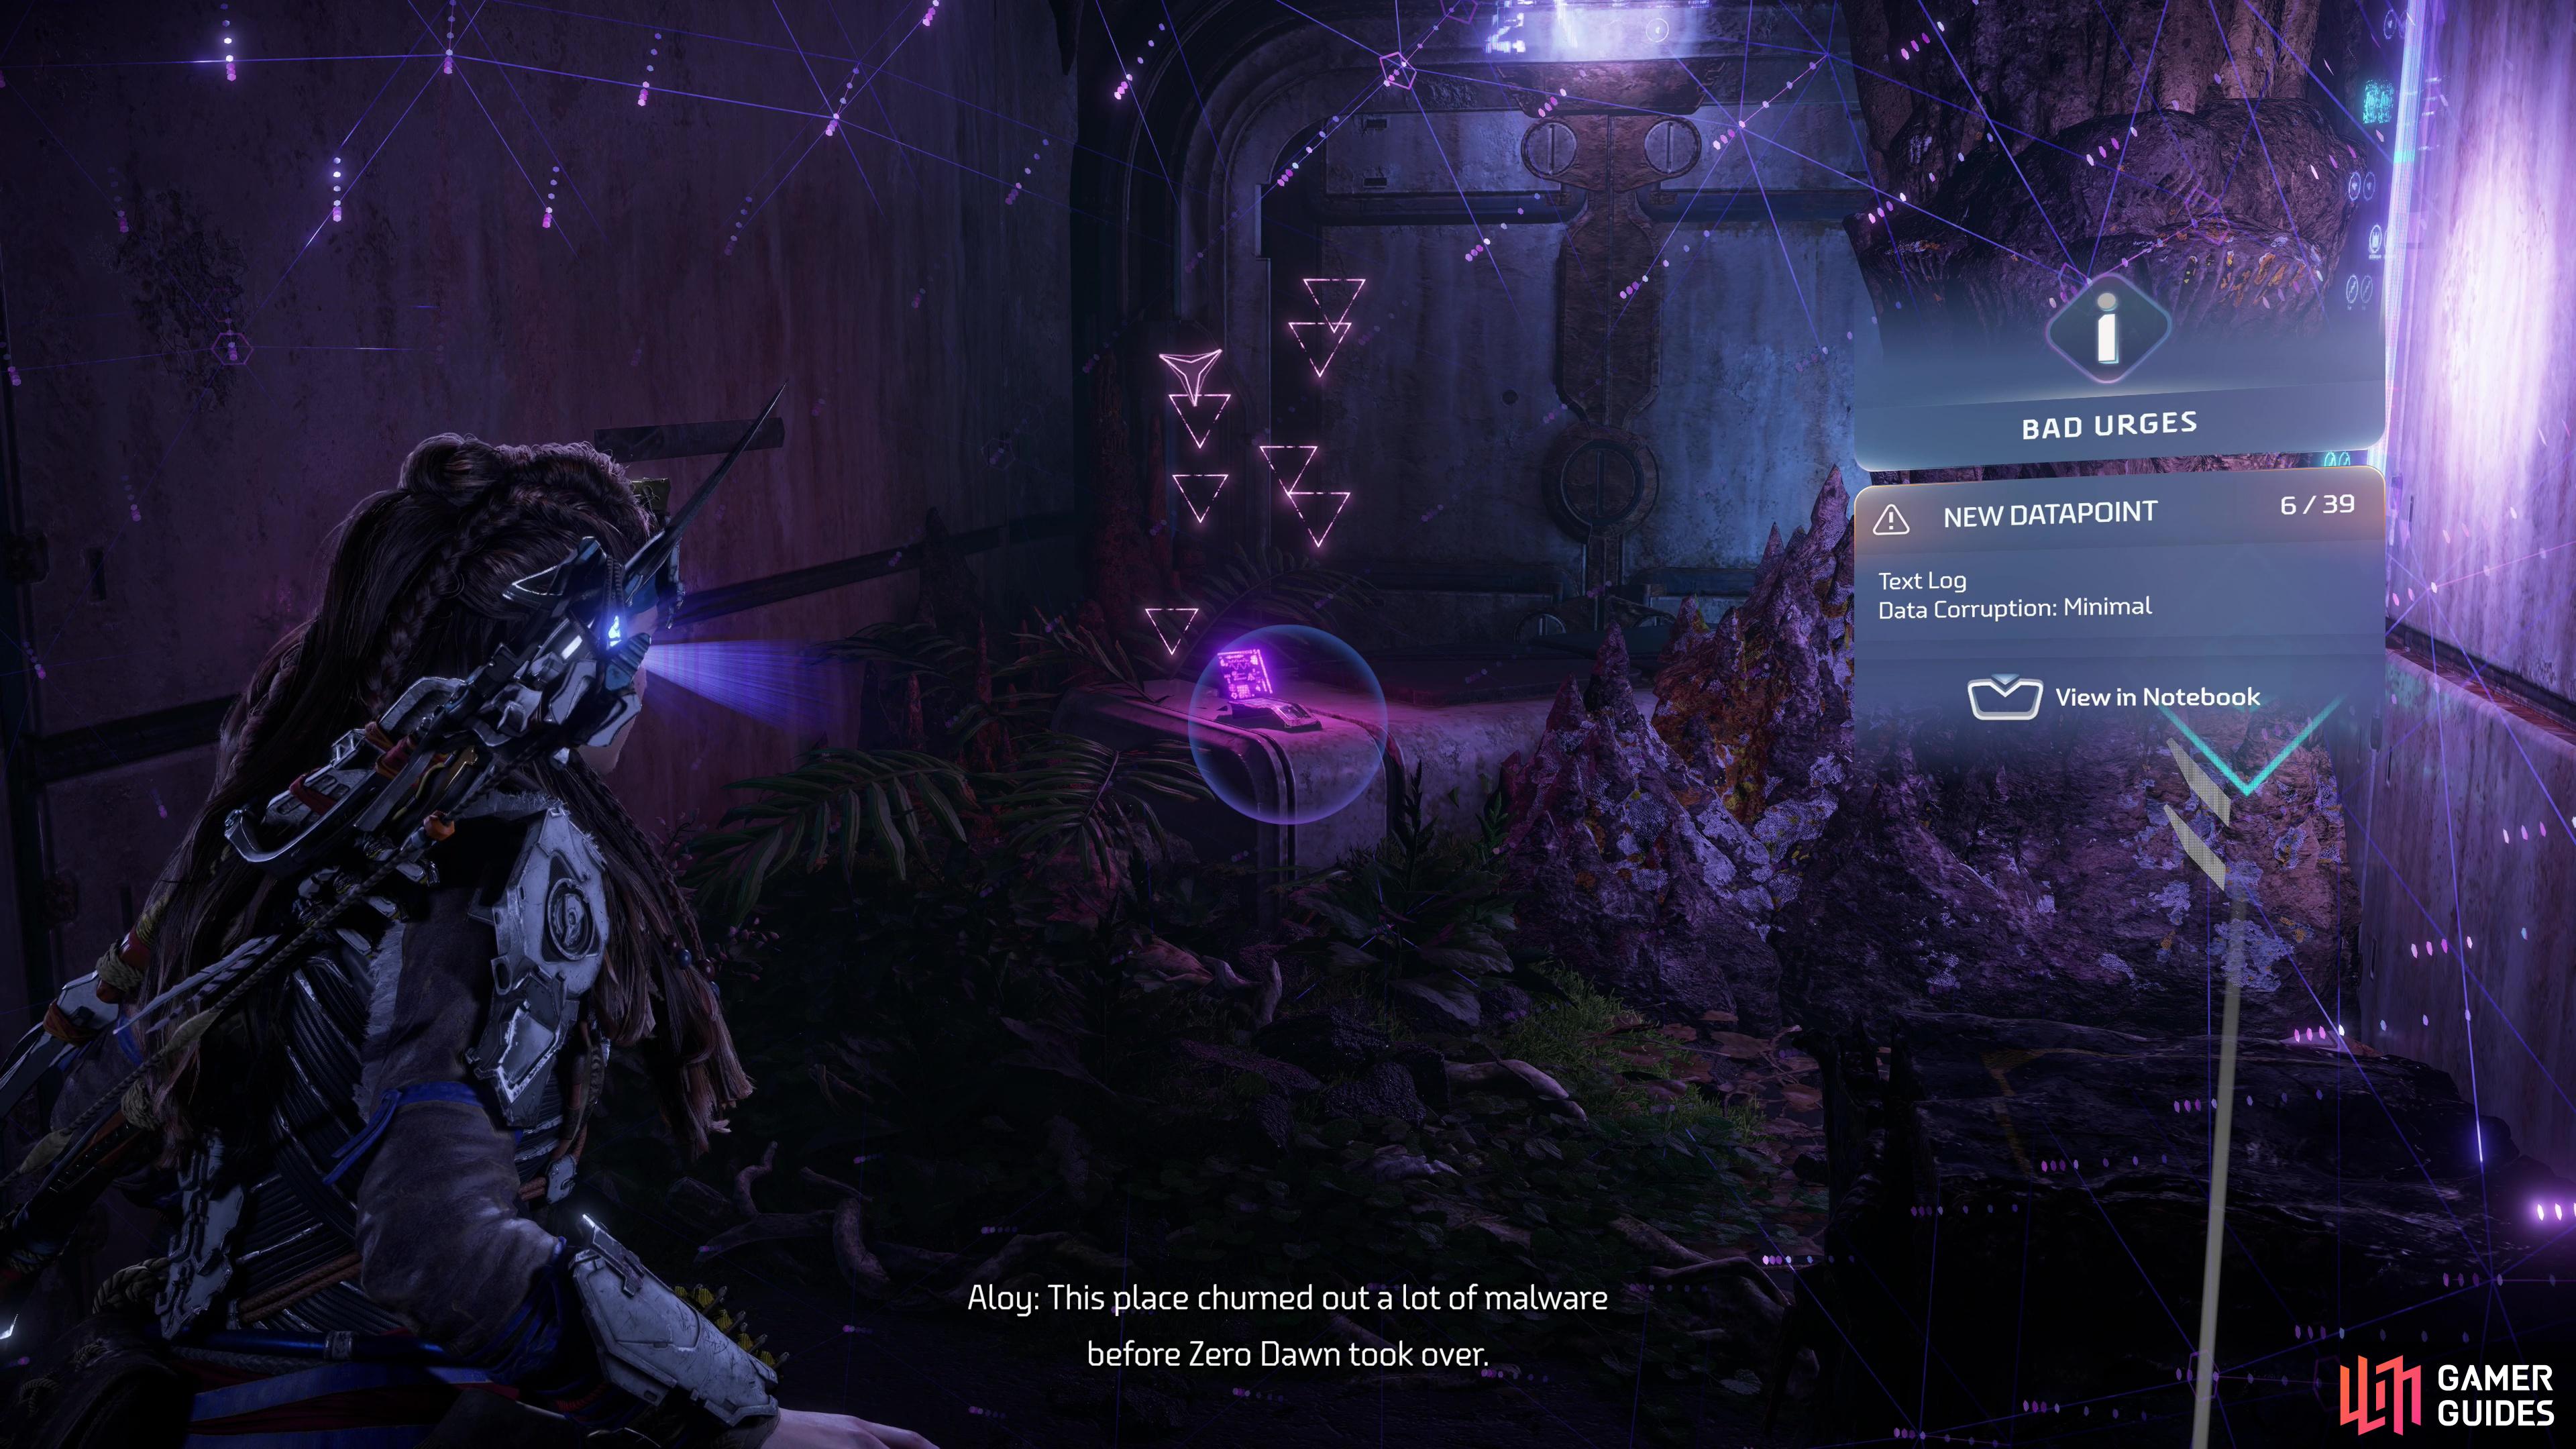
Scan the Bad Urges datapoint,
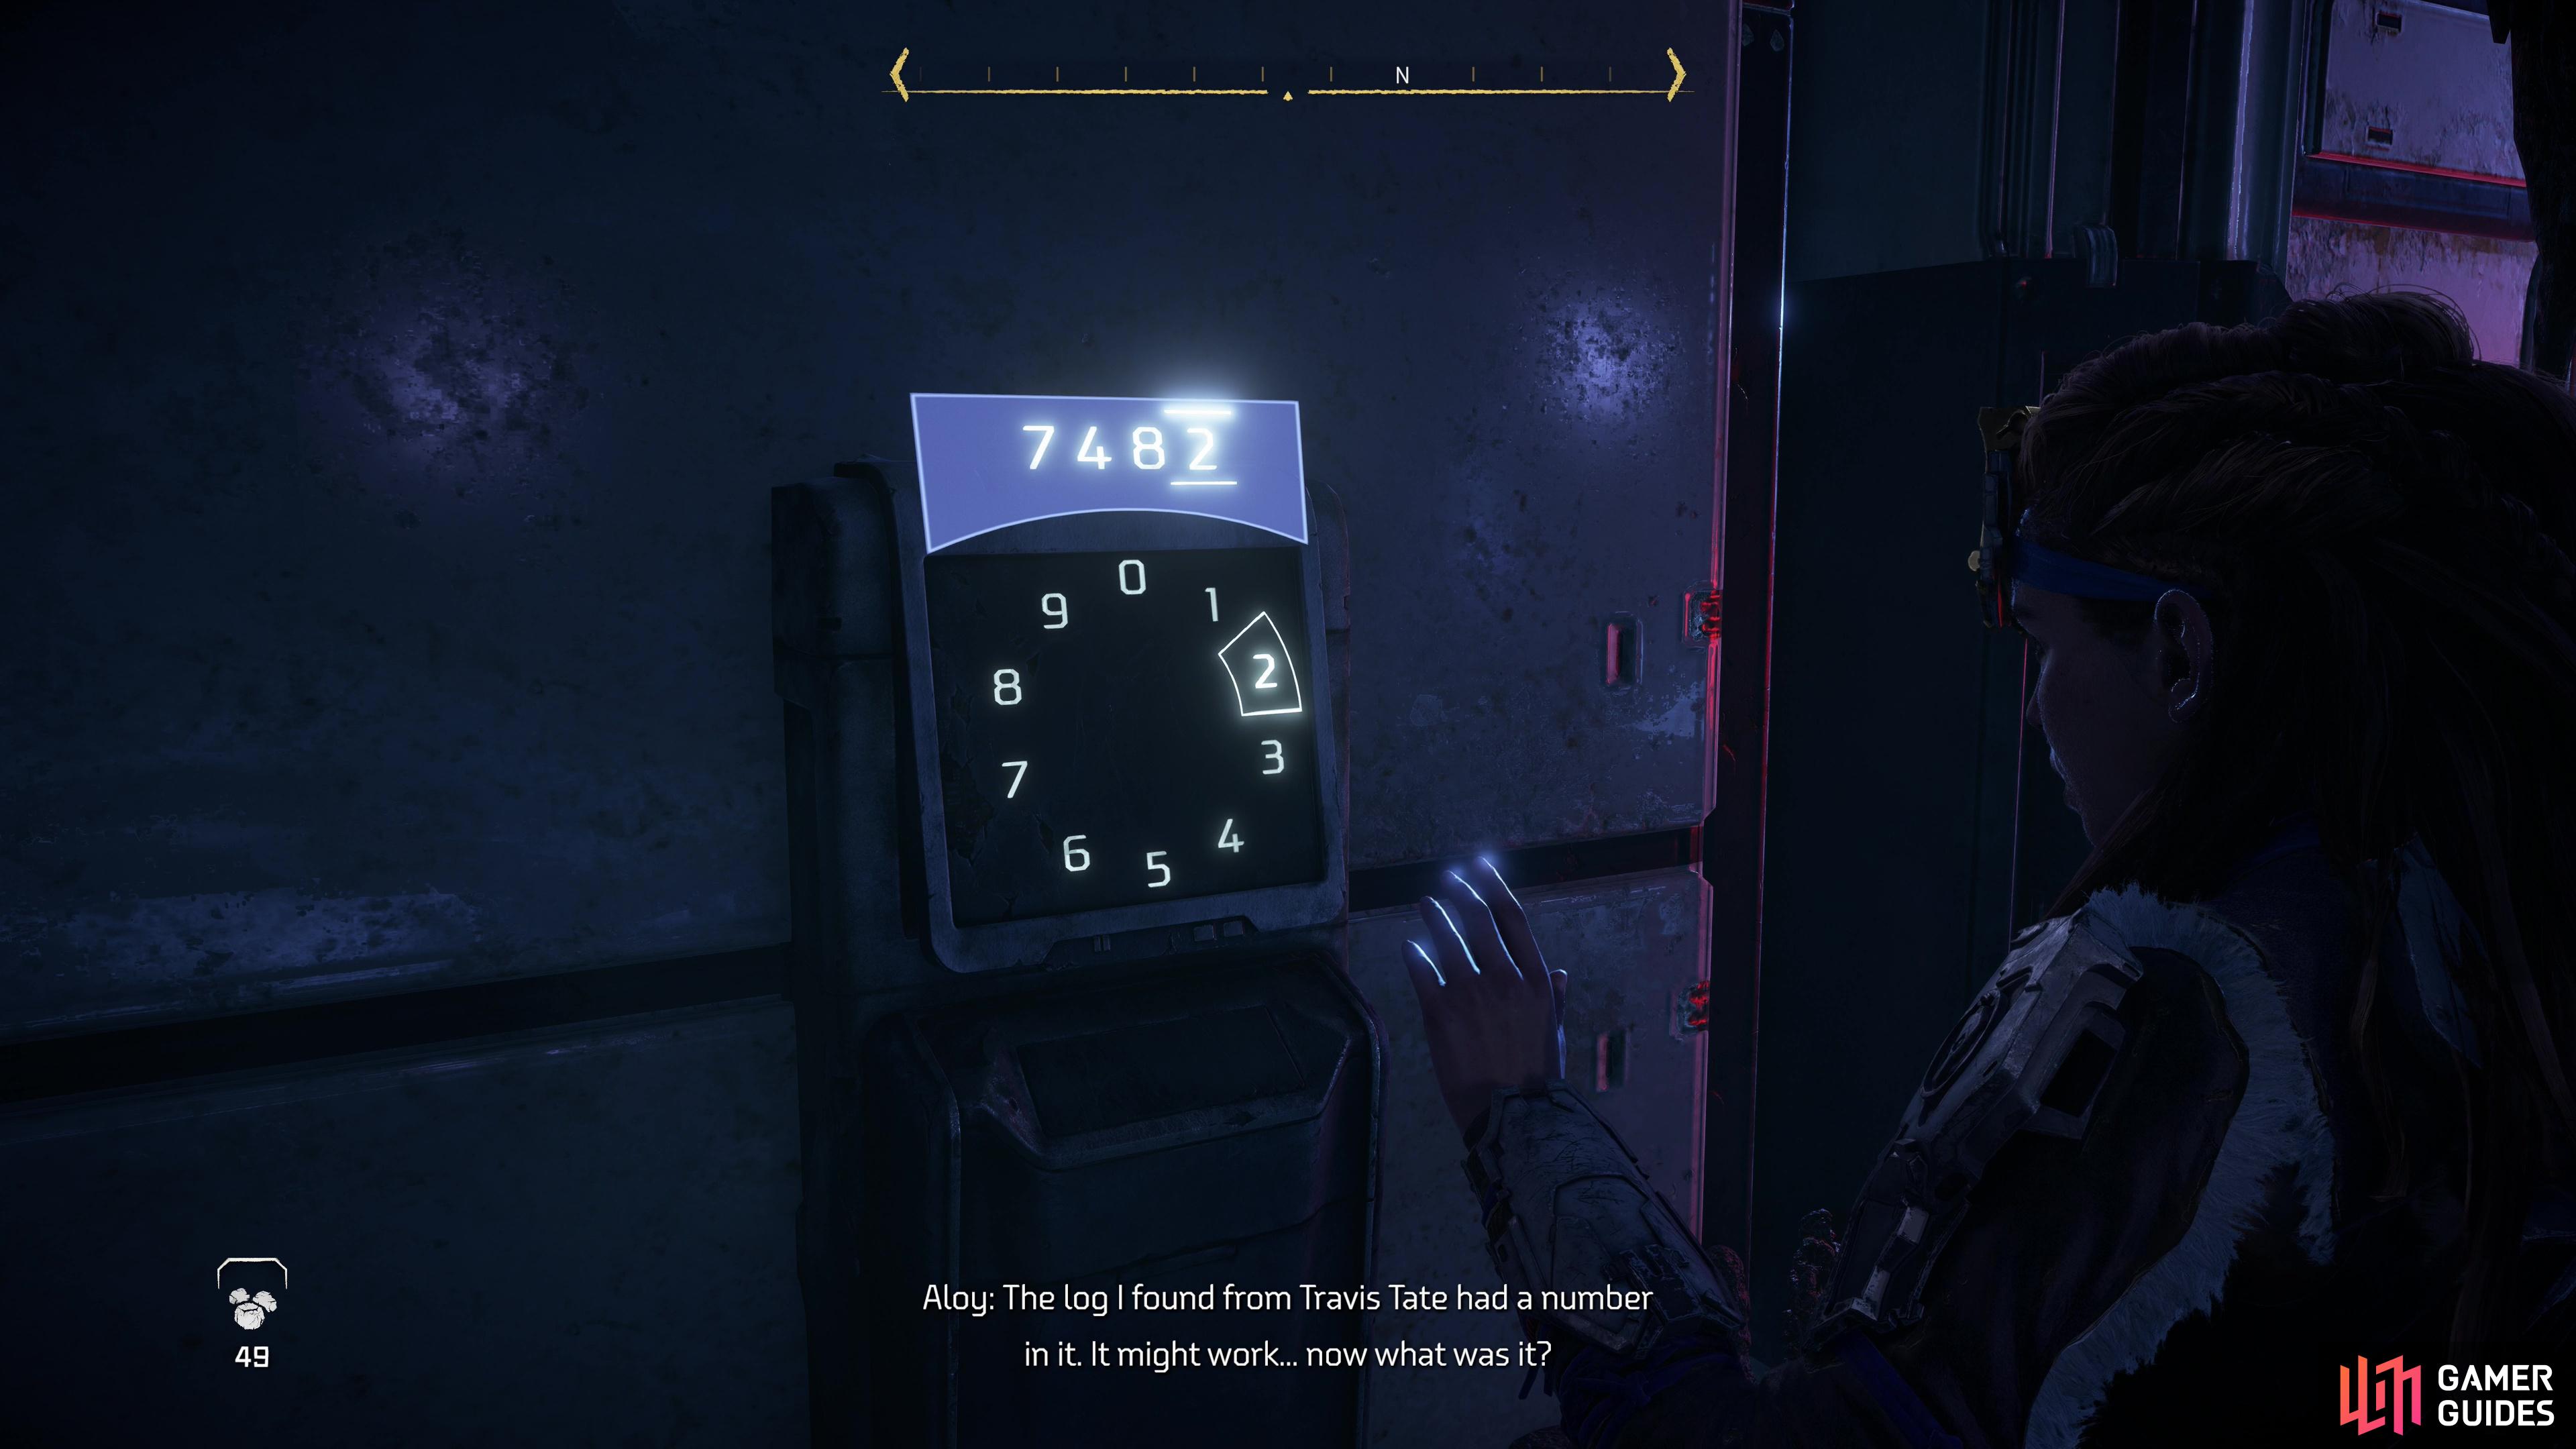
then enter the code 7482 into the access console.
When you’re ready to advance, pop the Firegleam to create a hole in the wall, then enter through this improvised door. Scan an Access Console near a door to the northwest, then search a table to the northeast to find a table with a chest and chest the Travis Got No Truck With Traitors audio datapoint. Go through a doorway to the southeast and you’ll find a safe, then turn left and scan the Bad Urges text datapoint. Read it and you’ll find mention of “Sovereign 7482”.
Make your way to the Access Console in the previous room and enter the code 7482 and Bob’s your uncle - door’s open. Go through and pry open another door around the corner, climb an elevator shaft, then enter a room where you can scan the An Apology audio datapoint on a table, along with a box you can loot. Go through the door to the right to return to the large, flooded central chamber.
Kick down another ladder and get ready for the fourth and final platforming segment:
-
To the west, northwest you’ll find a concrete pillar. Jump onto it and climb until you get a grapple prompt from a grapple point on another concrete pillar to the right.
-
Once you’ve grappled onto the second pillar, press Square to drop down until you’re standing on a beam.
-
Look east, southeast at the first pillar to spot a blue “X” attachment you can target with your Pullcaster. Do so and pull a beam off the concrete pillar.
-
Jump onto the beam you pulled down, then leap onto a support to the south. Turn southwest and leap onto another support.
-
Look south, southwest and you’ll spot a box you can target with your Pullcaster. Pull it apart to reveal a grapple point.
-
Jump toward the grapple point and grapple up to it.
-
Turn northwest and jump onto a nearby support pillar.
-
If you want to reach the end of the dungeon, look down and to the northwest to find a box you can target with your Pullcaster. Do so to create a grapple point, then grapple up onto the ledge in the northwestern corner of the room. Alternatively you can just jump and glide over to said platform.
To get a final bit of bonus loot you’ll need to grapple and glide your way across the flooded chamber to reach its southwestern corner,
then ignite another patch of Firegleam.
-
Optional: From the support near the ledge bearing the exit door, turn southwest and jump onto a support pillar.
-
Jump southwest and grapple onto a grapple point.
-
Jump southwest again and glide with your Shieldwing to reach a ledge.
Use your Igniter to clear some Firegleam, then go through the hole in the wall you created to find a safe you can loot. Backtrack to the ledge on the northwestern edge of the flooded chamber with the Gene-Locked Hatch on it - you can do this without going for a swim by jumping towards distant grapple points, gliding, then grappling when you get close enough for the prompt to appear.
Bonus loot or not, once you’re on the ledge with the Gene-Locked Hatch, open the door you worked so hard to reach and head inside.
After some chatter, interact with an Operations Console to your left to activate RECLUSE SPIDER, and after some more talking and another mechanical malfunction, head up to and activate an Access Console under RECLUSE SPIDER. After another malfunction, aim at the fidgeting arm to your right and shoot the red highlighted section - keep this in mind, you’ll need to make use of this knowledge under more hectic conditions shortly. Once your shot the arm into submission, examine the GAIA Repository
A lengthy sequence of cutscenes will follow, after which you’ll be facing off against a new threat…
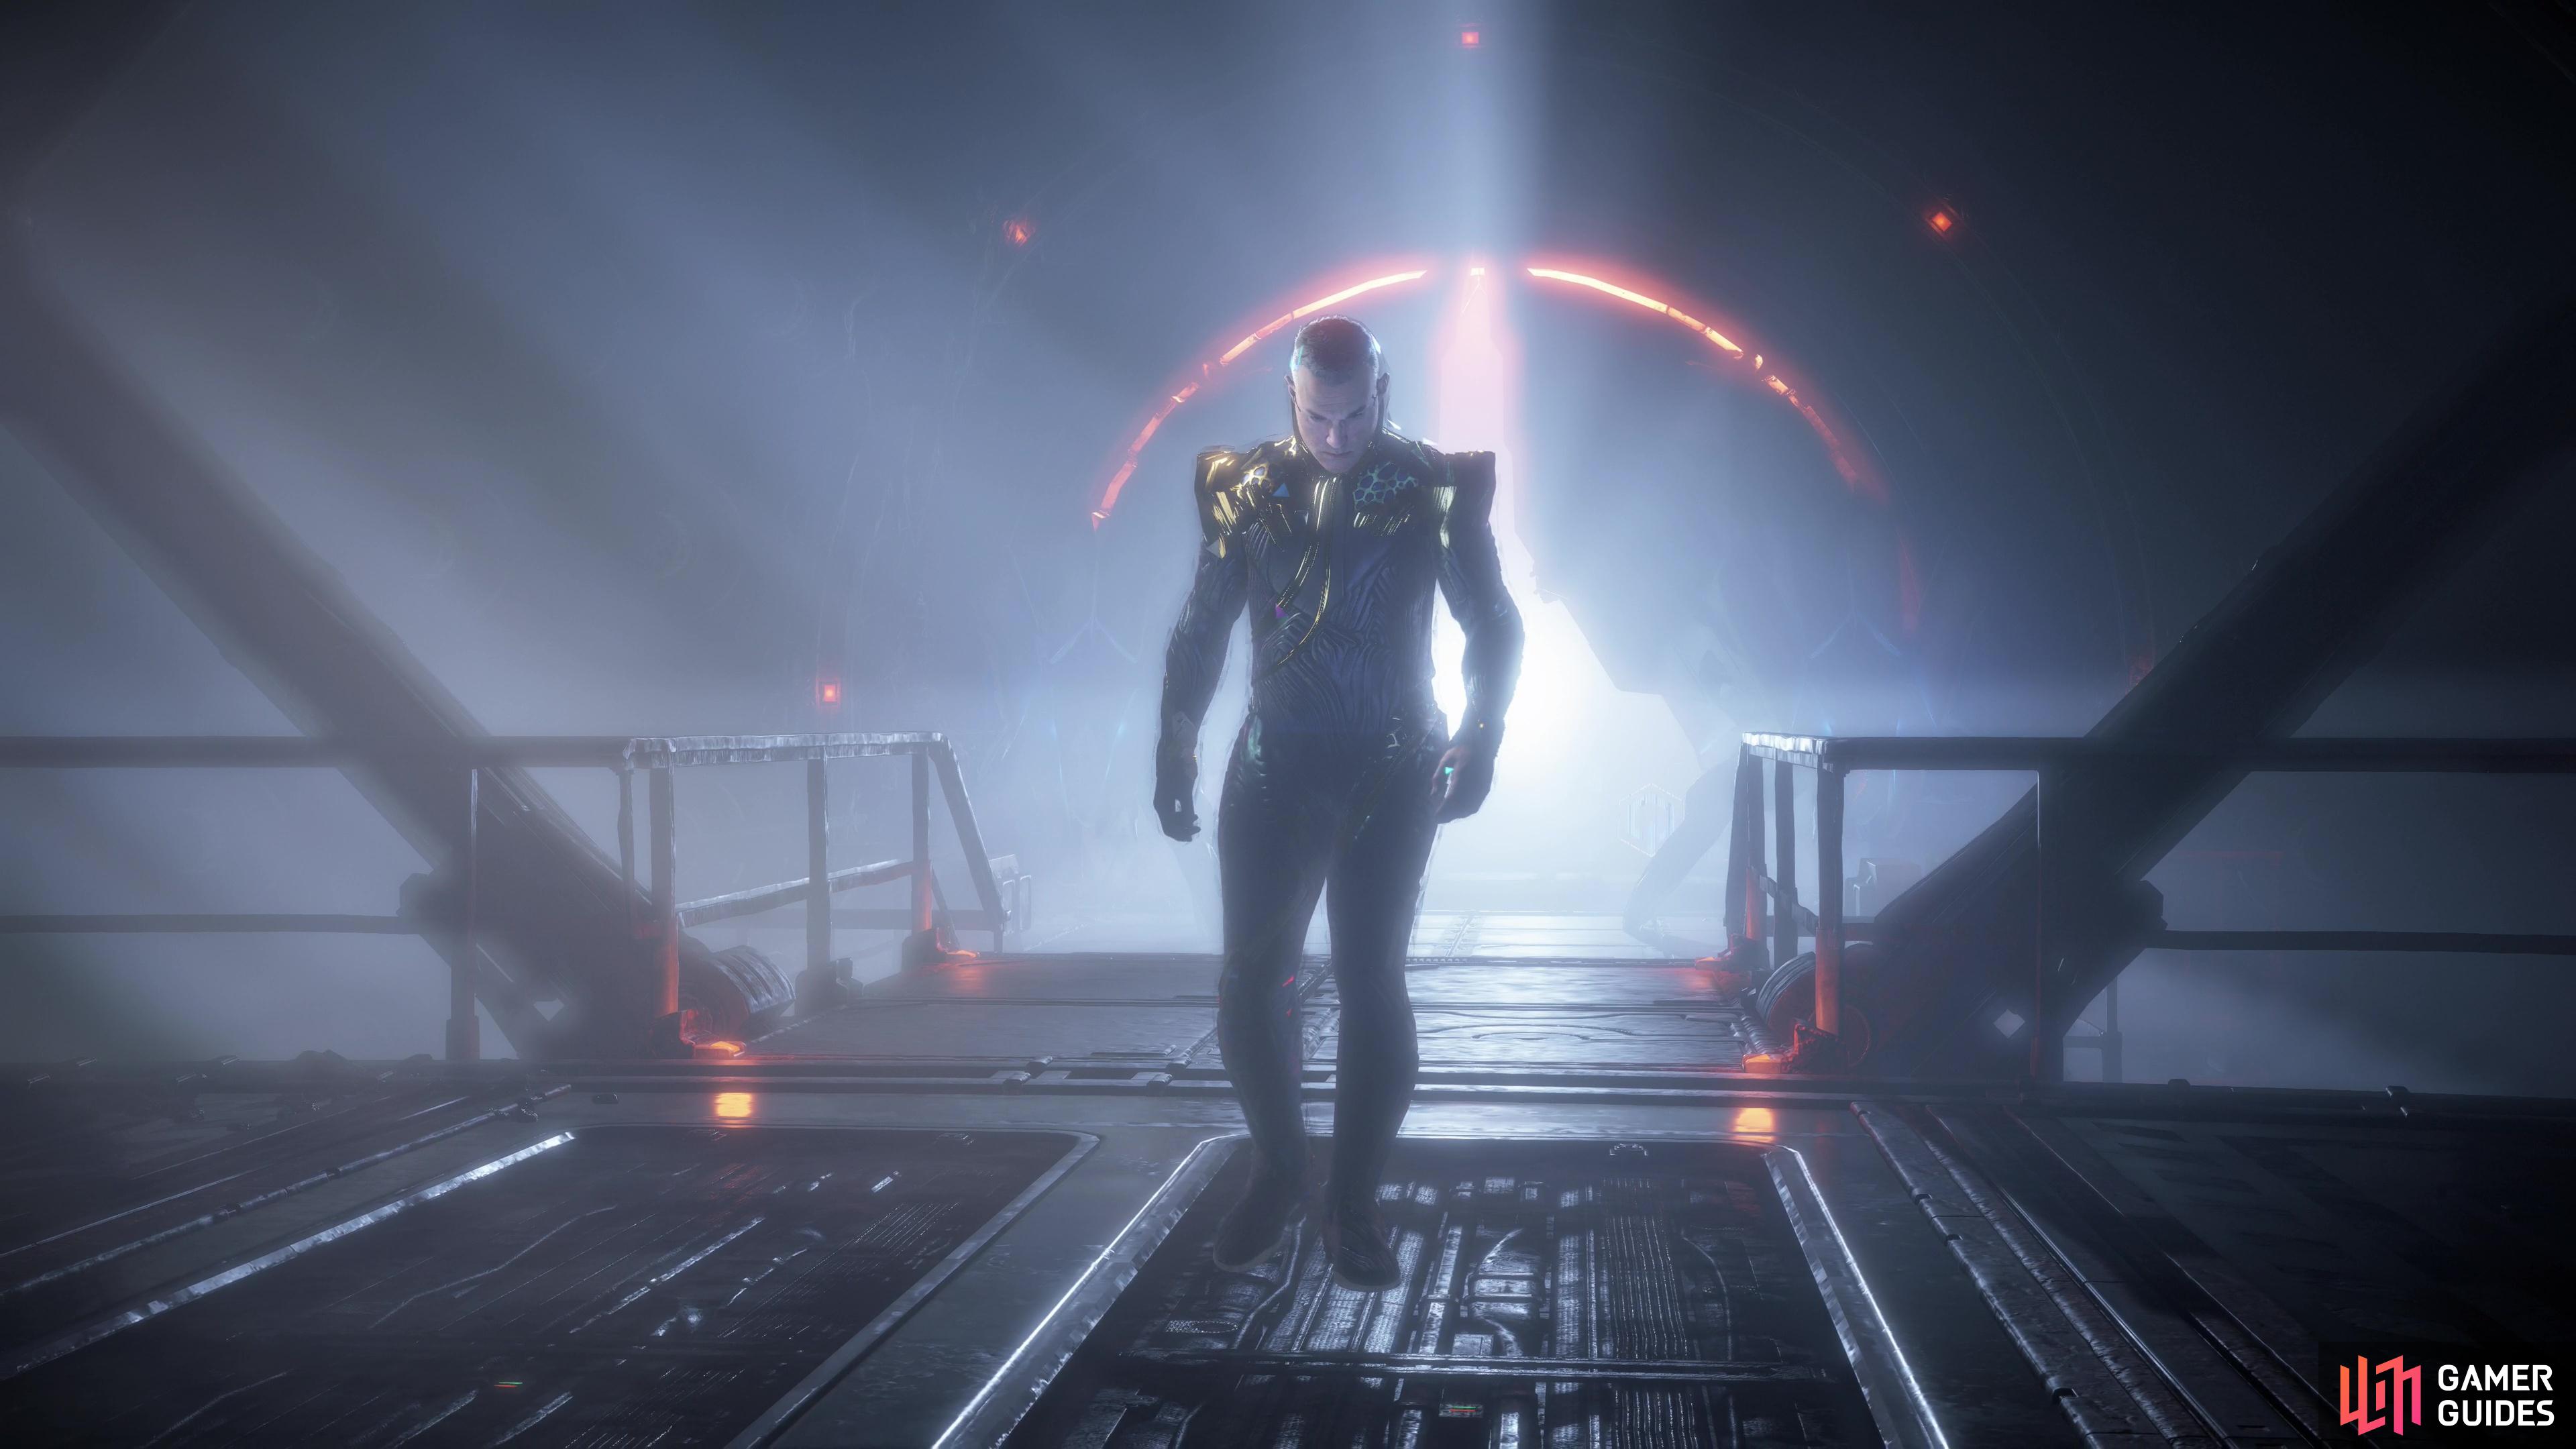
Erik readily follows his orders to exterminate Aloy.
How to Defeat Erik
This isn’t so much a fight against Erik as it’s an attempt to wreck the RECLUSE SPIDER while surviving Erik’s attacks. Whatever technology he has, it renders him functionally invulnerable to whatever offense you may throw at him, so don’t even waste your resources. There are three phases to this fight:
Use the Holo Projector
For the first phase, Erik will remain somewhat passive, content to stalk you while employing only a handful of attacks:
Lance Thrust: Erik will form an energy lance around his arm and dash forward, stabbing with it. You’ll have to wait until he’s charging and rearing back before dodging it, else he’ll adapt and hit you.
Sweep Slash: Used only when you’re close to Erik, he’ll form an energy blade around his arm and perform a sweeping slash with it.
Shock Spike Slam: Erik will leap a great distance and slam the ground, dealing impact damage and causing a series of shock spikes to erupt from the ground at the point of impact.
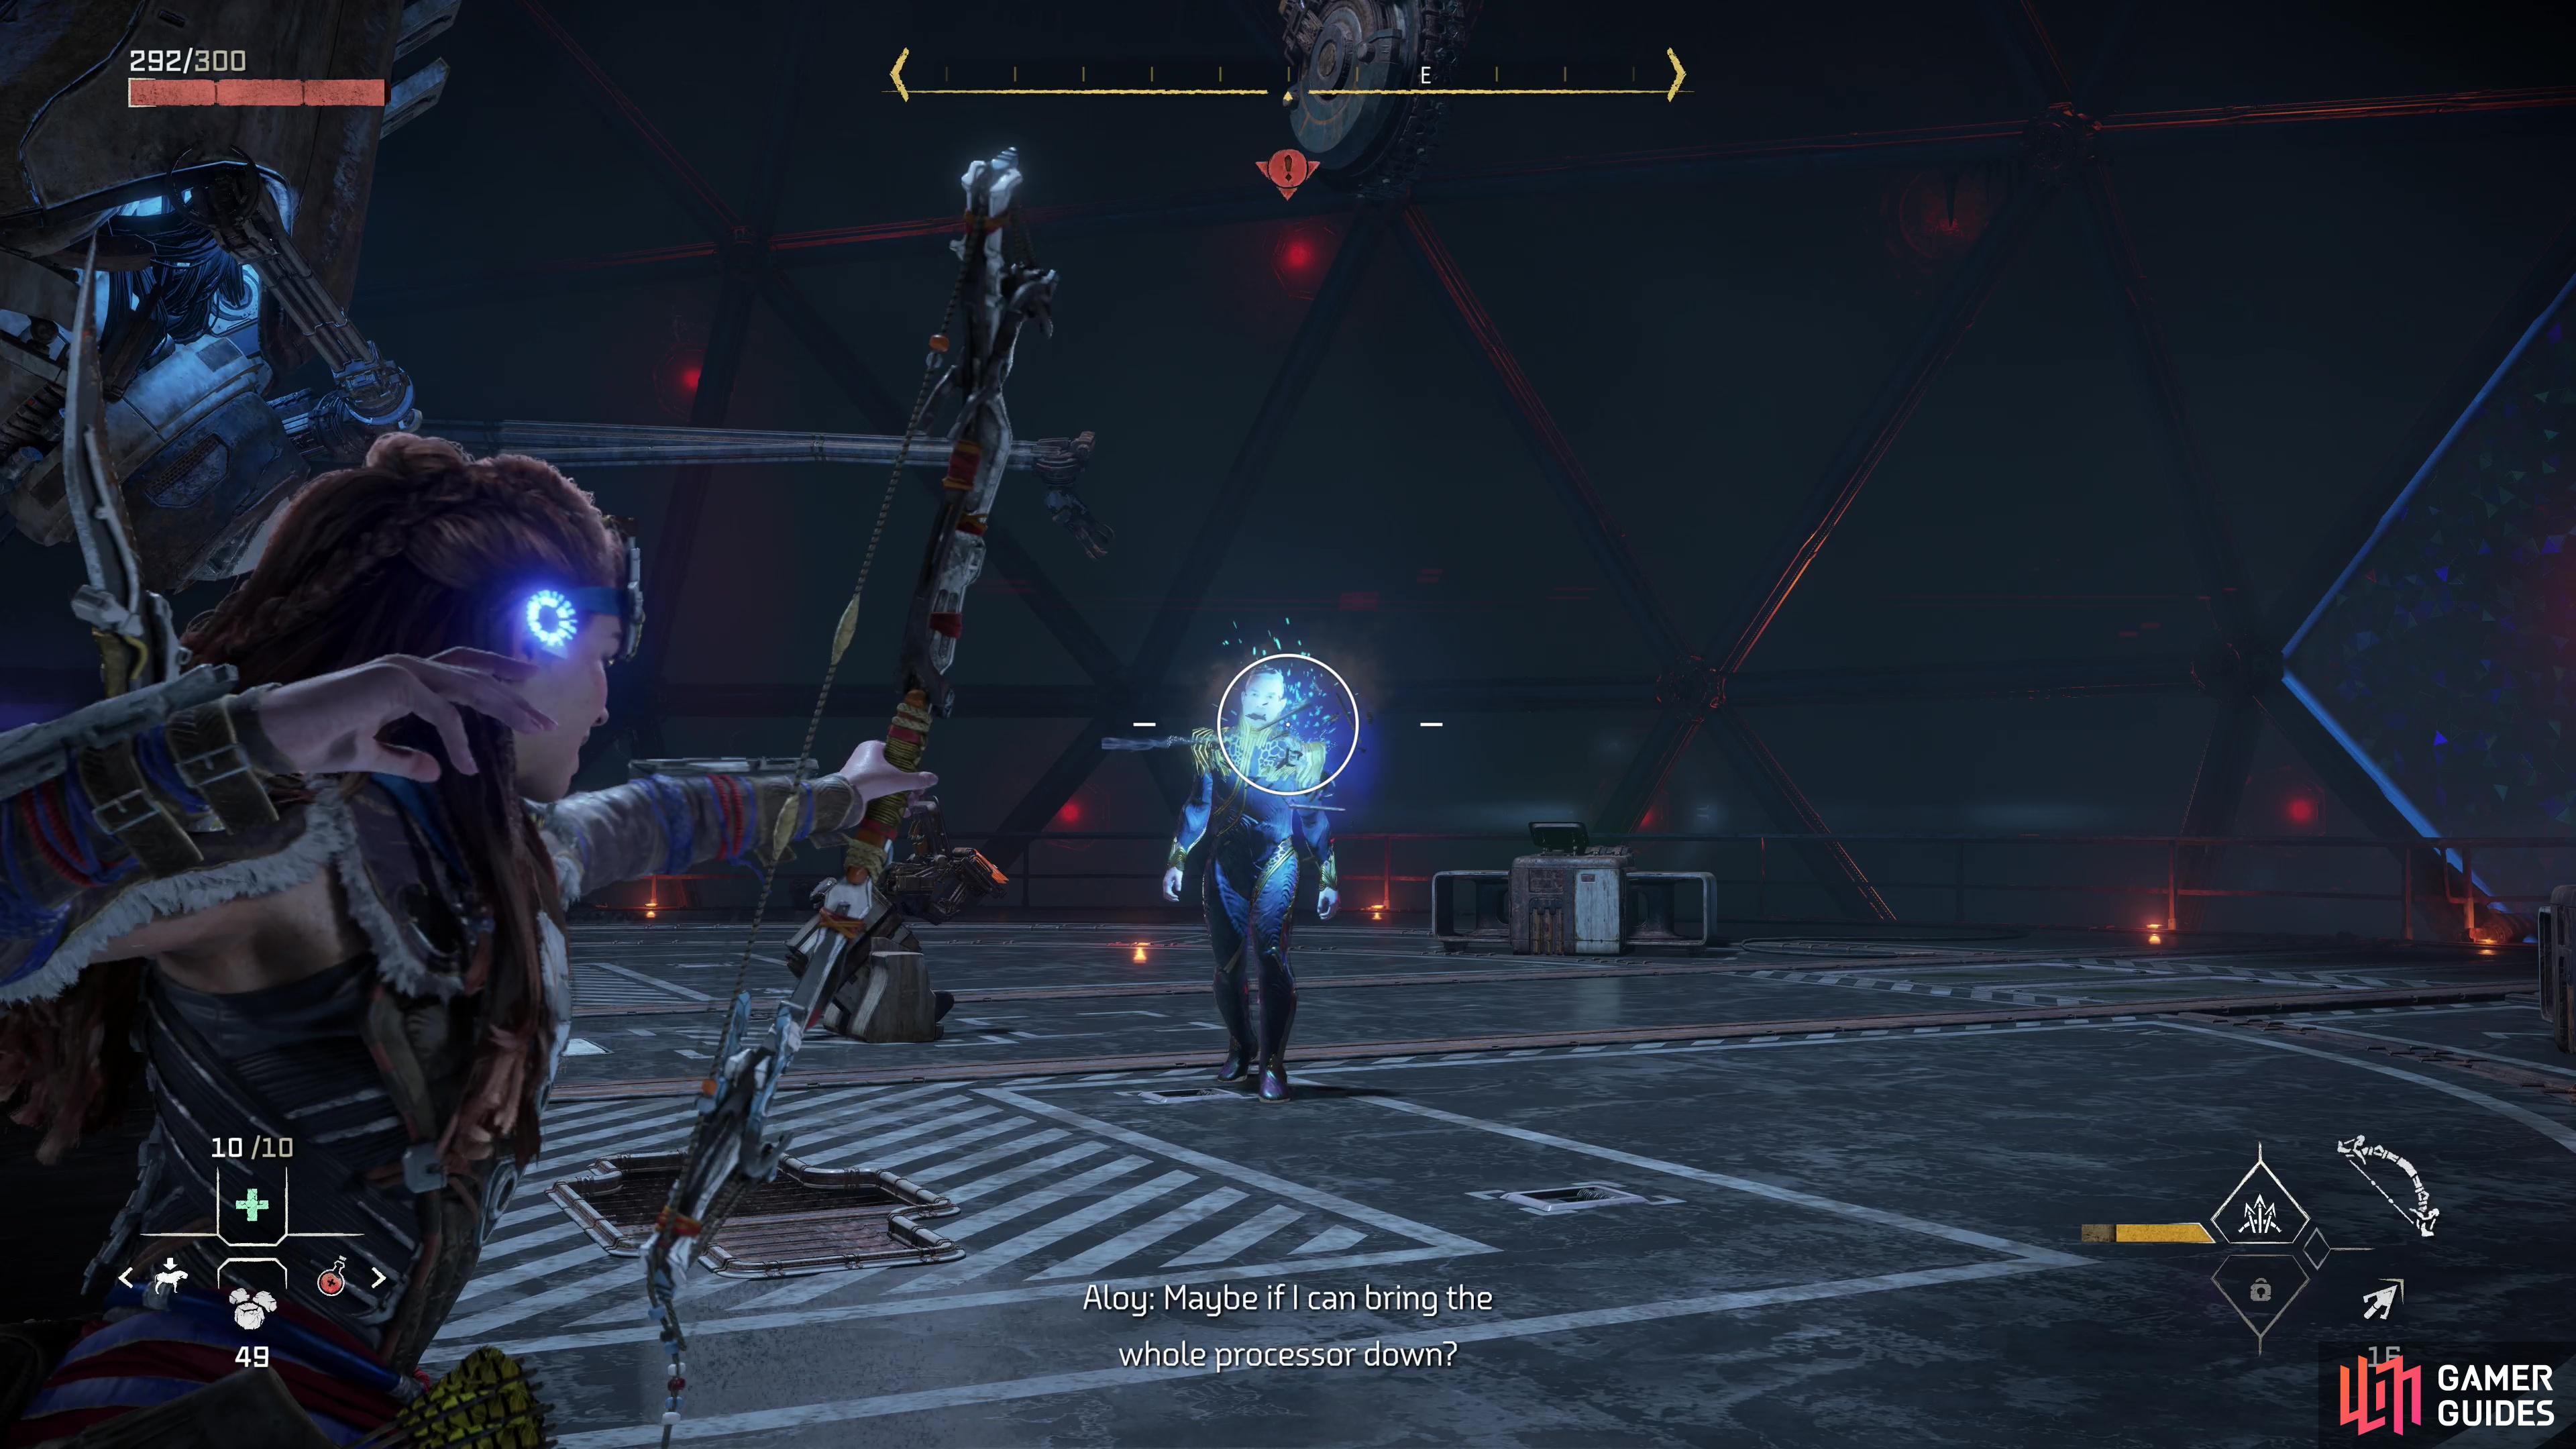
Your goal here is to reach the Holo Projector console along the northeastern corner of the room. Erik cannot be nearby, or Aloy won’t have time to use the console. This isn’t a matter of luck - if Erik’s too close, you simply won’t be able to interact with the console. Lure Erik away, wait for him to commit to an attack, then run to the console and activate it. After this phase two will begin:
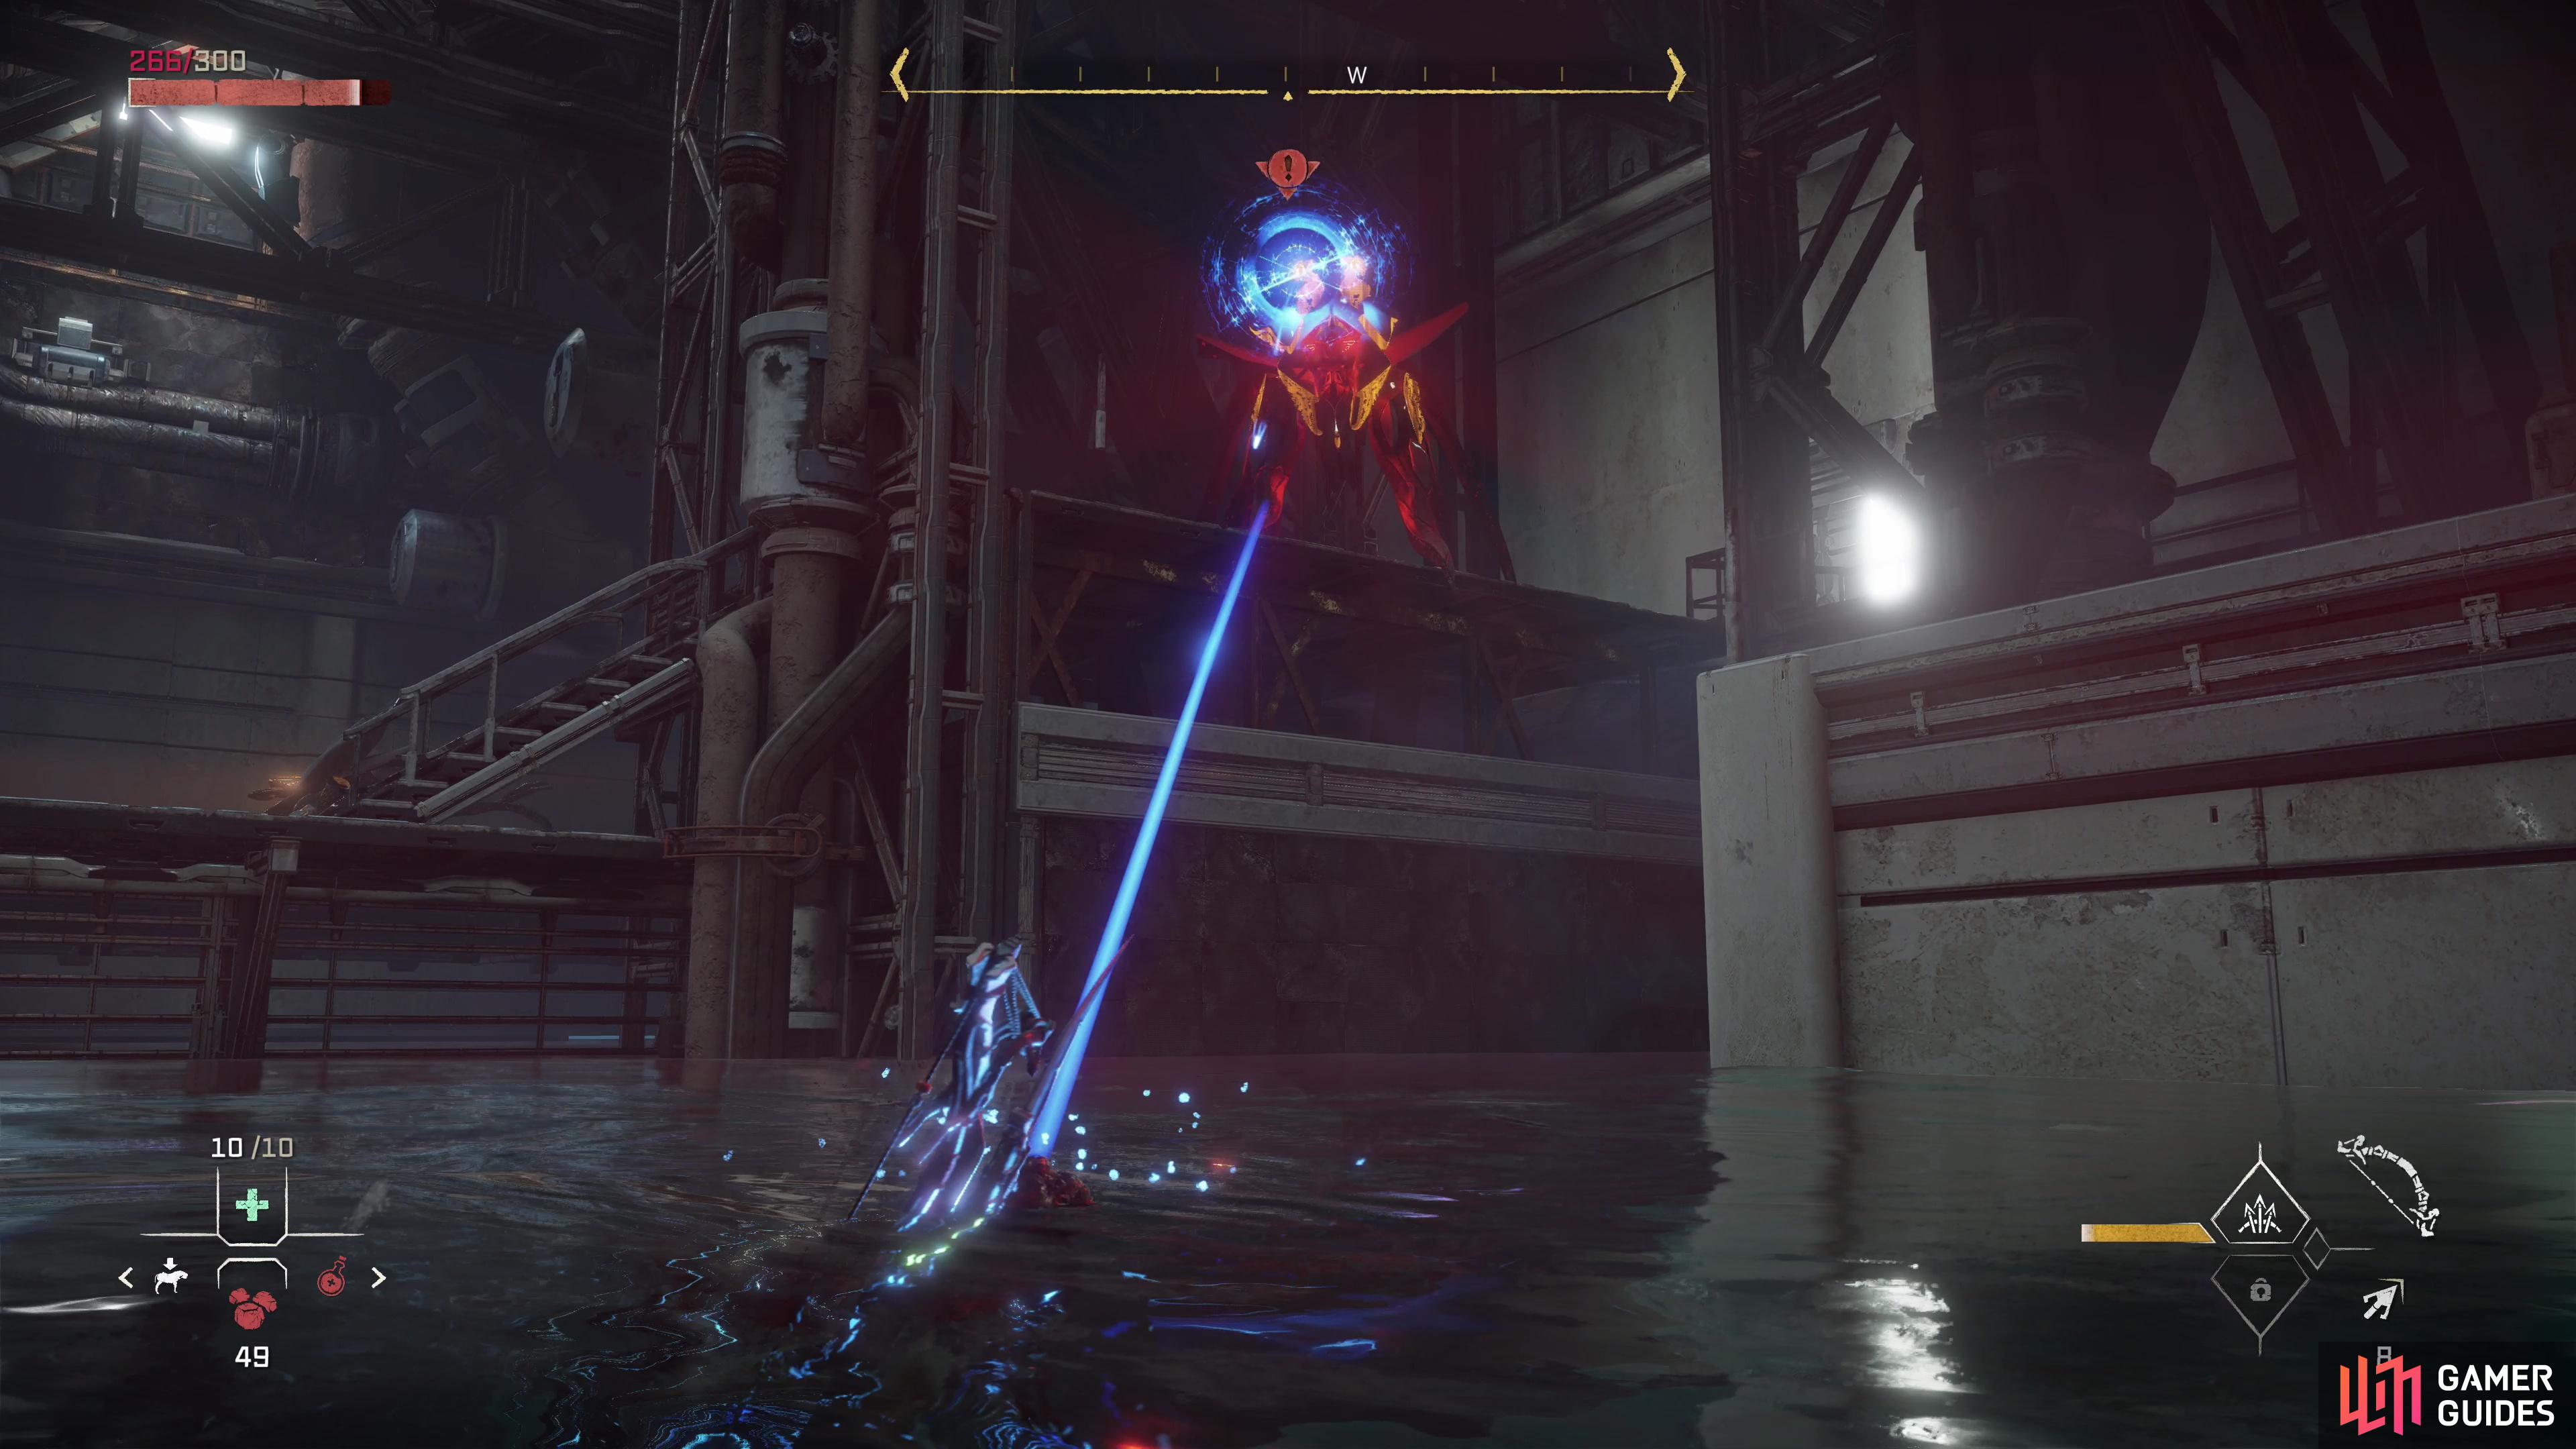
(1 of 3) During the second phase of the battle, Erik will shoot out a variable number of energy pulses,
Shoot the RECLUSE SPIDER Arm Couplings
Erik will be much more active for this phase of the battle, starting out immediately with his Energy Pulses attack. Not only will he attack far more frequently, but he’ll use new attacks as well:
Energy Pulses: Erik will debut this attack immediately after you use the console, destroying it in the process. He’ll shoot out numerous pulses of energy in sequence, at least three pulses per attack, but as many as seven. He’ll usually pause momentarily between the second and third pulse.
Shock Javelin: Your foe will throw between one and half a dozen javelins at you, or at least, in your general direction. While they’ll deal some damage if they score a direct hit, they’ll also lodge into the flood and deal shock damage if you get too close. Erik will employ it as an area-denial attack.
Shock Nova: In the later half of the fight, this becomes Erik’s go-to close-range attack. He’ll run up to Aloy, float in the air, and will be surrounded by ribbons of electrical energy. After charging up momentarily, he’ll discharge this energy in an explosive burst. Wastes a lot of time and isn’t very likely to hit - use it to heal or sabotage the RECLUSE SPIDER.
While Erik attacks, you’ll need to shoot at the arms of the RECLUSE SPIDER. When they glow red and you’ve got some breathing room, put some arrows into them. If you’re low-level and/or using weak weapons, it may take two arrows to bring down an arm. If you have Triple Notch, load up two arrows while you’re dodging Erik’s attacks so you can disable an arm every time you fire. This will speed up the second phase of the fight considerably.
Destroy all the arms of the RECLUSE SPIDER and the third phase of the fight will begin.
Shoot the RECLUSE SPIDER Stem Couplings
You’re in the home stretch, now, and Erik will grow even more aggressive. He doesn’t have any new tricks, however. Your target is the support stem that connects the RECLUSE SPIDER to the ceiling, and there are several specific sections of the stem you have to shoot (like the arms, they’ll glow to let you know where they are and when they can take damage). Destroy a half dozen or so stem segments to finish the fight.
How to Escape Latopolis
After some more scenes Aloy will find herself in some water, being hounded by some high-tech machines - [Specters]. Swim southwest and when you near a wall, dive and swim through a hole in the wall, following the winding path ahead (left, right, right, left) until you can surface - you should have just enough oxygen to make it.
In the next room you’ll encounter your first pair of Specters, who won’t come into the water after you, but they’re not above taking potshots with their Pulse Cannons. Staying submerged as much as possible will limit your exposure to this attack.
While they won’t join you for a swim, Specters are still dangerous at range due to their Pulse Cannons.
Try to scan a Specter if you get the time - when you’re crawling through a duct provides a safe opportunity.
Get your air back, then dive and swim through a doorway to the northwest to reach a room where you can surface in safety, then dive again and swim southwest, then southeast to reach a submerged door. Surface near the door for air, then dive again, open the door, and swim through.
Turn left (northeast) and use some objects (press Triangle) on the floor to boost-swim through the current and into another room. Surface, get on a platform, then loot to the southeast to spot a vent on the wall you can target with your Pullcaster. Pull it open, swim over to it, then climb into the duct the vent was blocking and follow the duct (you can stop and scan a Specter on the ceiling to the southwest risk-free here) until you reach another vent cover.
Open the vent and quickly dive into the water and swim southwest through a doorway. You’ll come under fire from some Specters as you swim, but once you’re through the doorway you can surface safely. In fact, past this point you’re pretty much in the clear.
Swim northwest, go through a door to the southwest, then enter an elevator shaft and surface. Climb a ladder along the southwestern wall, use some rungs to ascend higher, then turn southeast and jump backwards into another duct. Drop down and go through a door, then follow the linear path ahead until you spot some Firegleam on a wall to the left (southwest). Ignite it and this quest will end.
Many length scenes will follow, after which Aloy will find herself in the settlement of Stone’s Echo, where the next main quest, [The Dying Lands] will begin.
No Comments