
Walkthrough for the Main Quest The Kulrut in Horizon Forbidden West, including information about how to defeat the [Slitherfang] and recover AETHER.
This quest will begin immediately after completing The Broken Sky.
| Starting Location | Prerequisite | Level | Rewards |
|---|---|---|---|
| The Bulwark | Complete The Broken Sky | 18 |
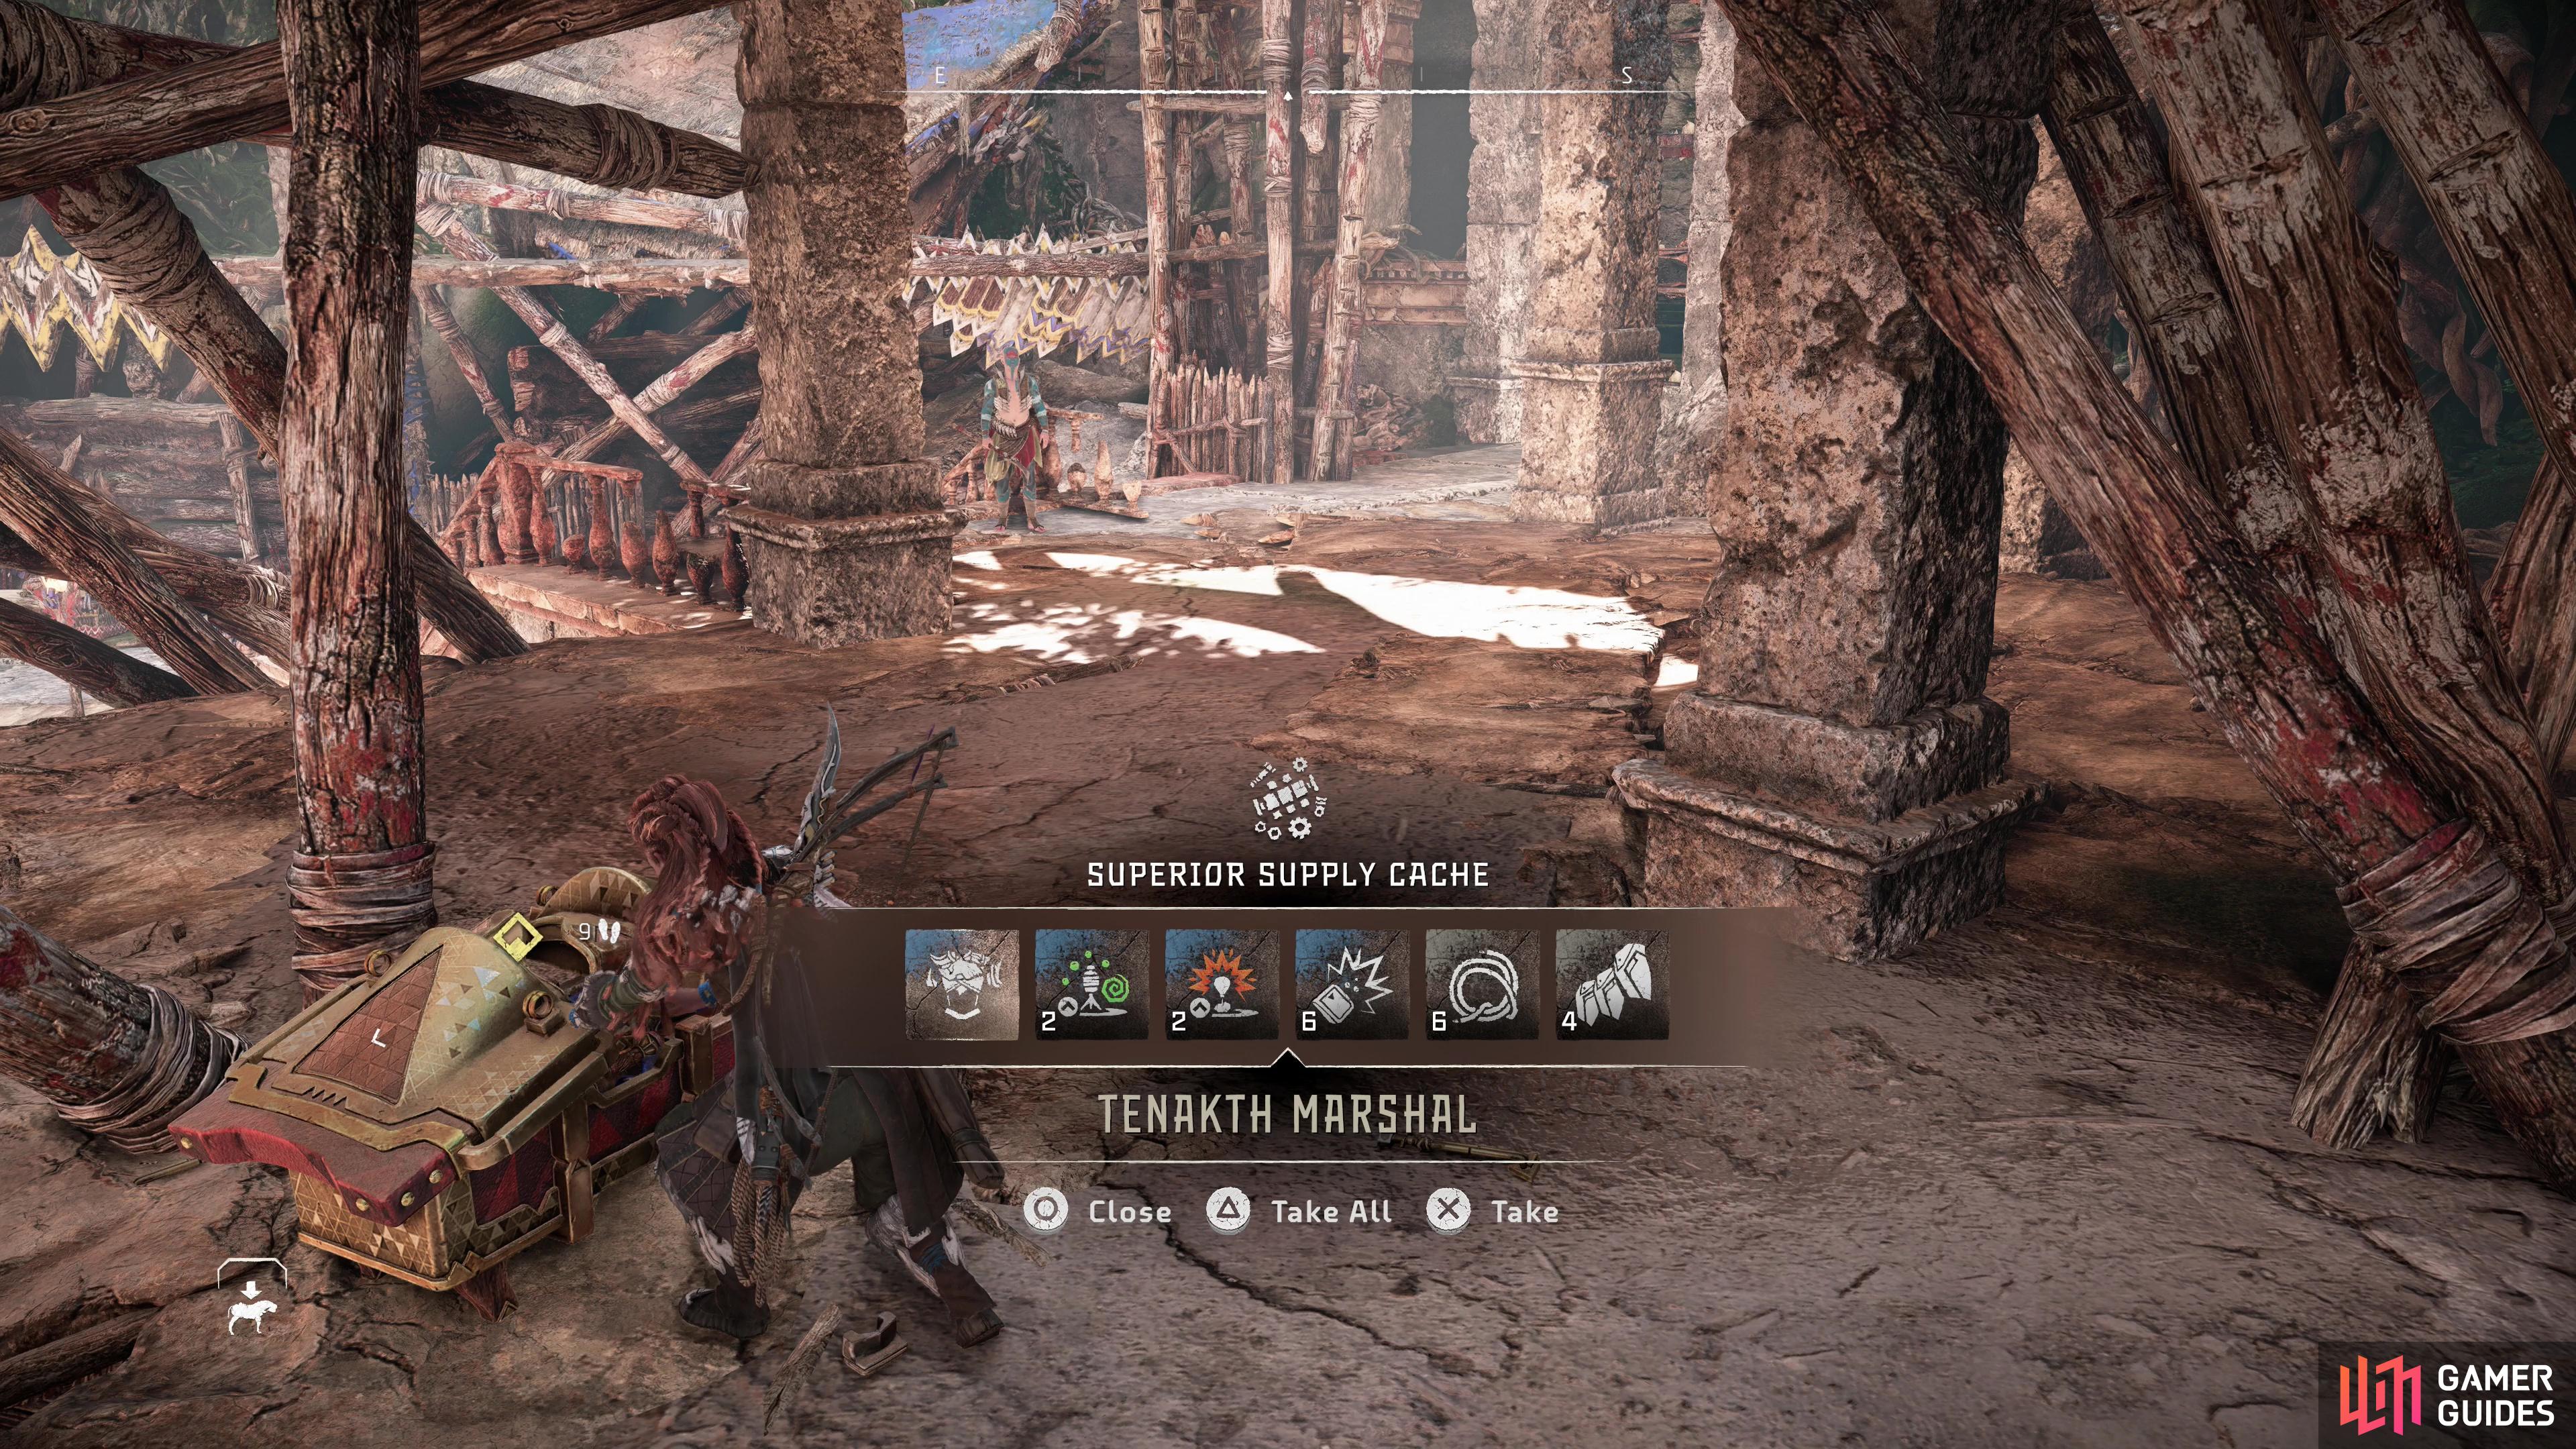
Loot the Tenakth Marshal armor,

and inform Hekarro when you’re ready to start the Kulrut.
How to Start the Kulrut
Return to the Memorial Grove and make your way to the arena, behind Hekarro’s throne room. On the way you can scan the Outdoor Exhibits datapoint, and when you arrive in the arena, you can scan the Not Bad I Guess, A Vet Remembers and Crater Memorial datapoints. Be sure to pry open a cache and loot it for the Tenakth Marshal armor, too. What? Nobody said you couldn’t take it!
Report to Hekarro when you’re done looting and scanning and you’ll be given the opportunity to make final preparations, if needed. When you’re ready for the Kulrut begin, inform Hekarro. Once done, make your way around the arena’s balcony, jump off the end, then head north up a trench and climb a ladder to your left to rendezvous with Dekka.
The Kulrut will begin after some chatter.
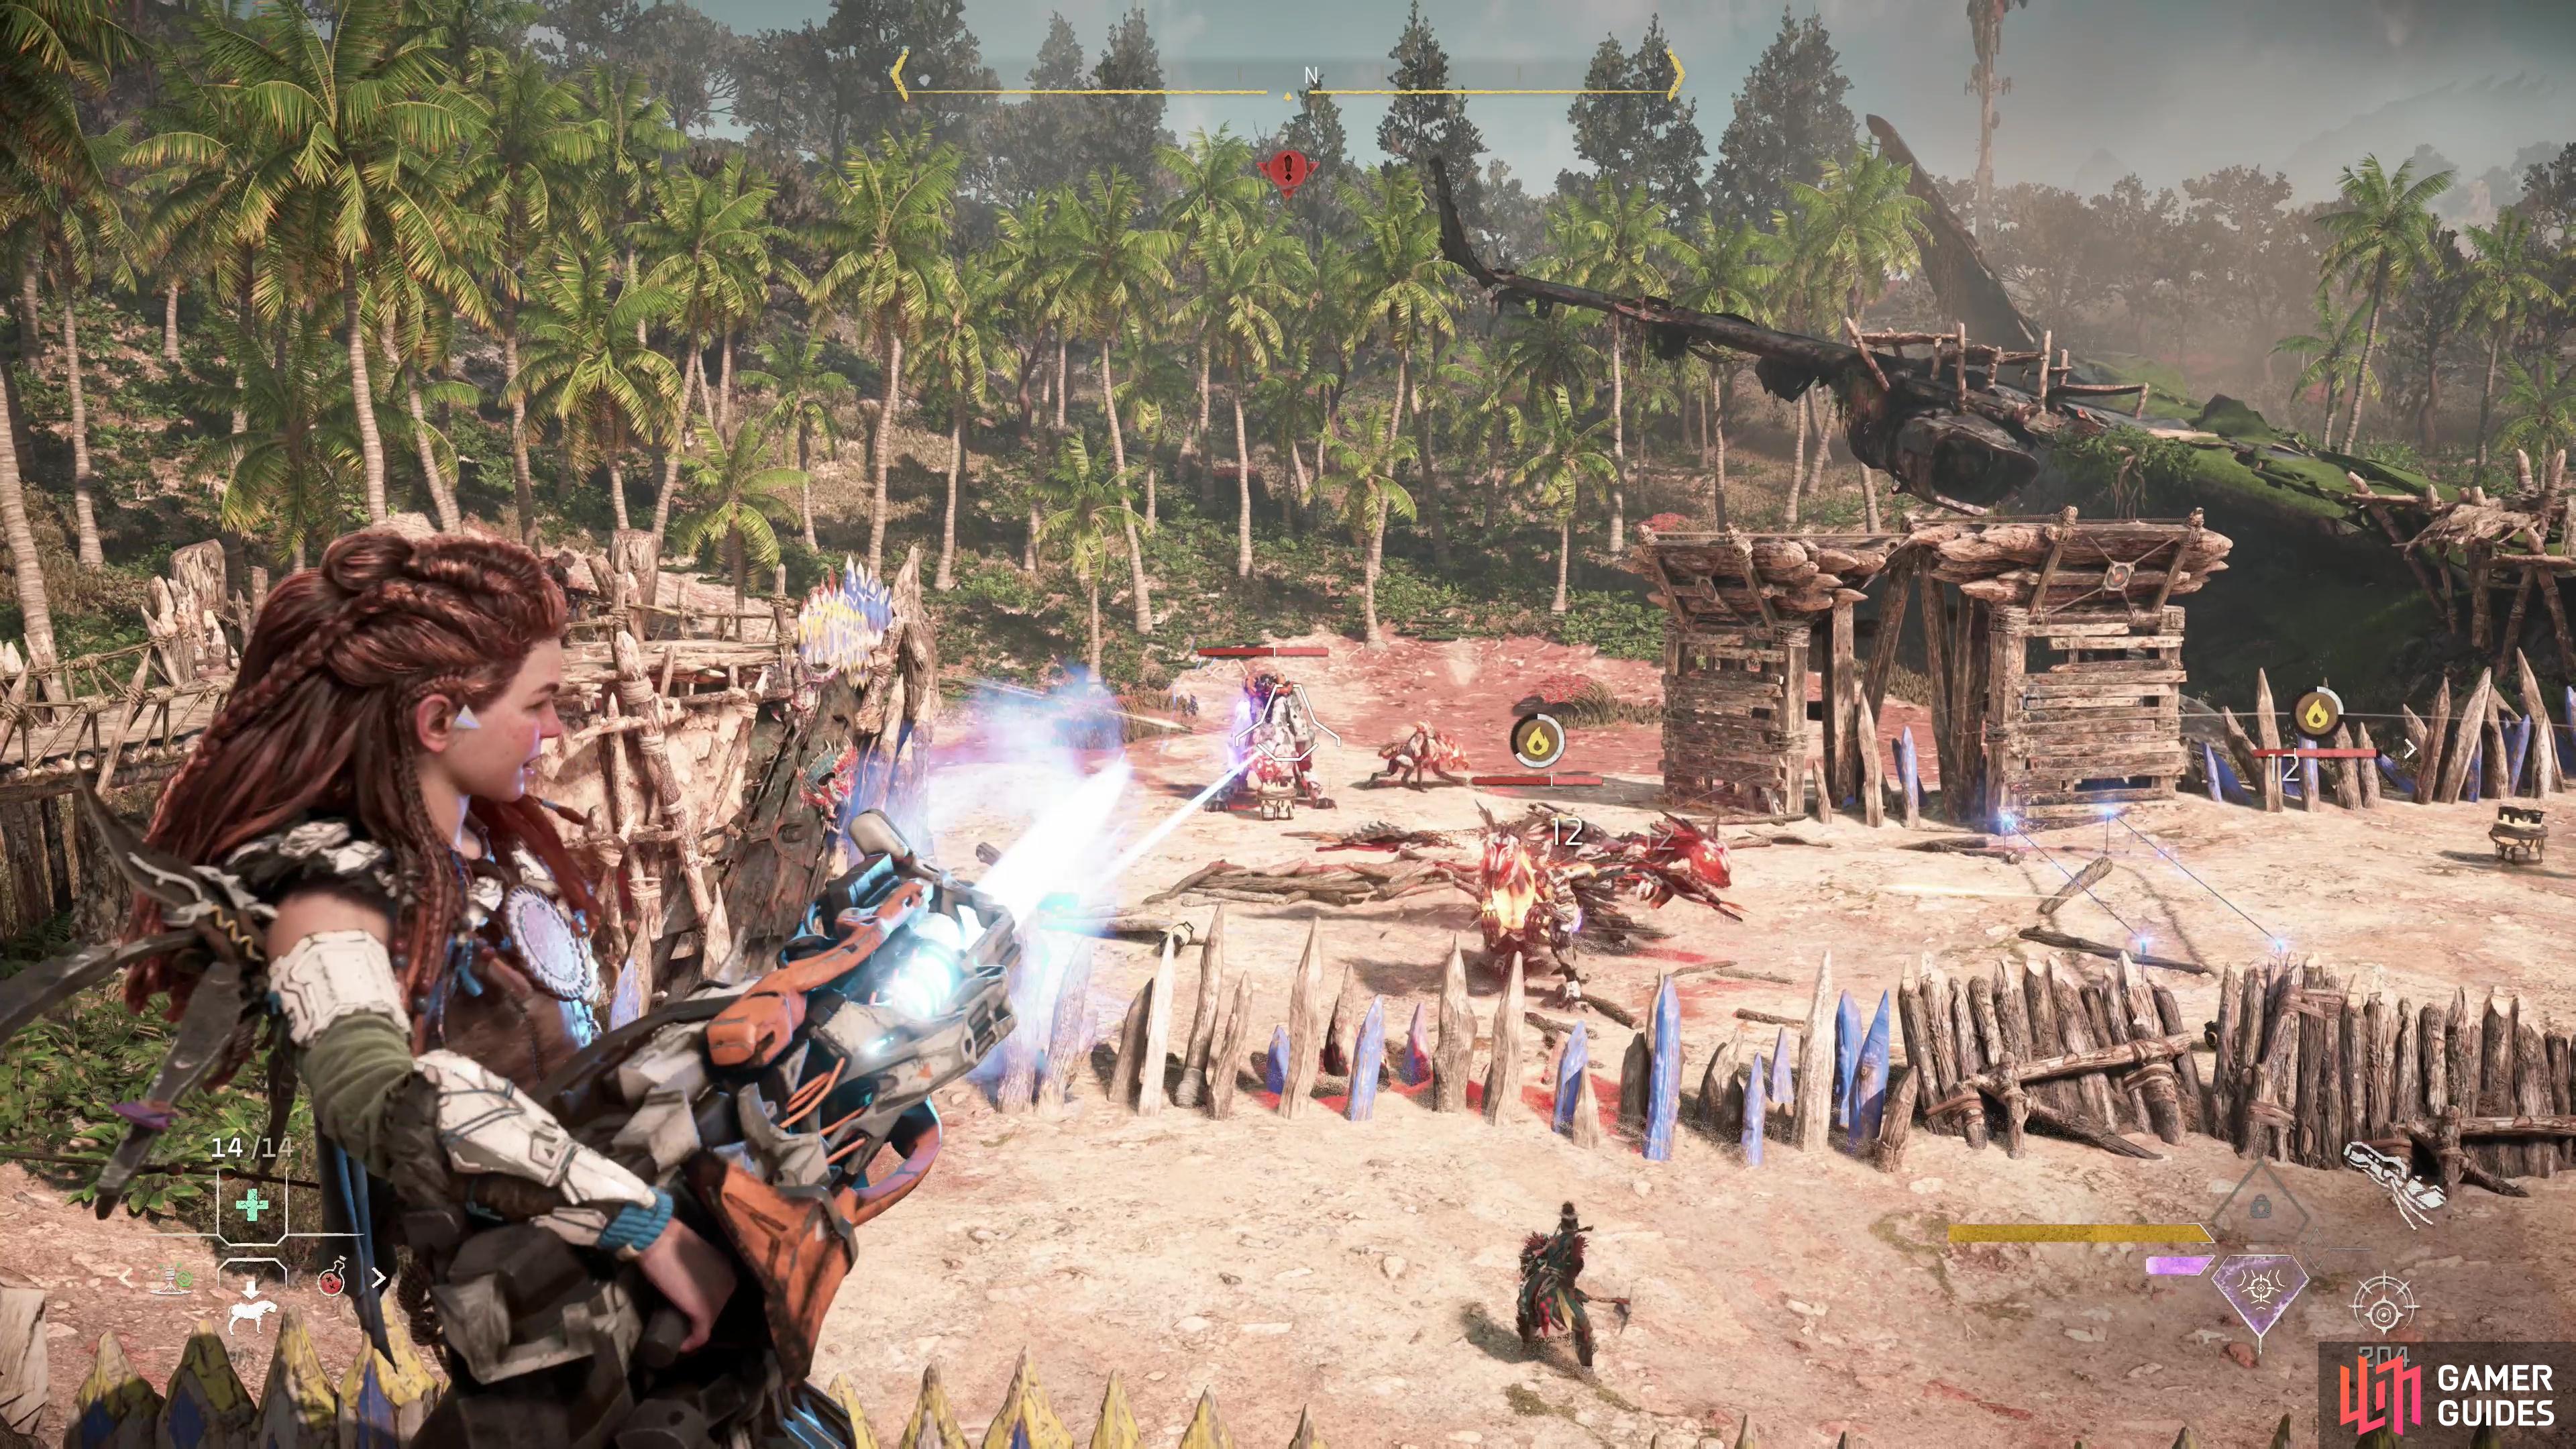
Use the heavy weapons at your disposal to defeat Regalla’s machines.
How to Defeat the Rebel Ambush
Once the Kulrut is underway, Regalla will prove predictable by launching an attack from the north. This will consist of several waves of machines - mostly [Clawstriders], with the odd Scrapper, [Ravager], [Rollerback] and [Grimhorn] thrown in for good measure.
Fortunately you’ll be on high ground armed with a Fire Repeater, which is virtually identical to a Ravager Cannon, save it sets enemies on fire. Most of the machines can’t do much to hurt you due to your elevated position, but the Ravagers are an exception. Make sure to give them preferential treatment to limit the damage you sustain, and don’t show restraint with your ammo - there are more heavy weapons you can pick up if your initial equipment runs dry.
Wipe out the machines and after some more scenes you’ll find yourself facing a trial of your own in the arena.
How to Defeat the Slitherfang
The more things change, the more they stay the same.
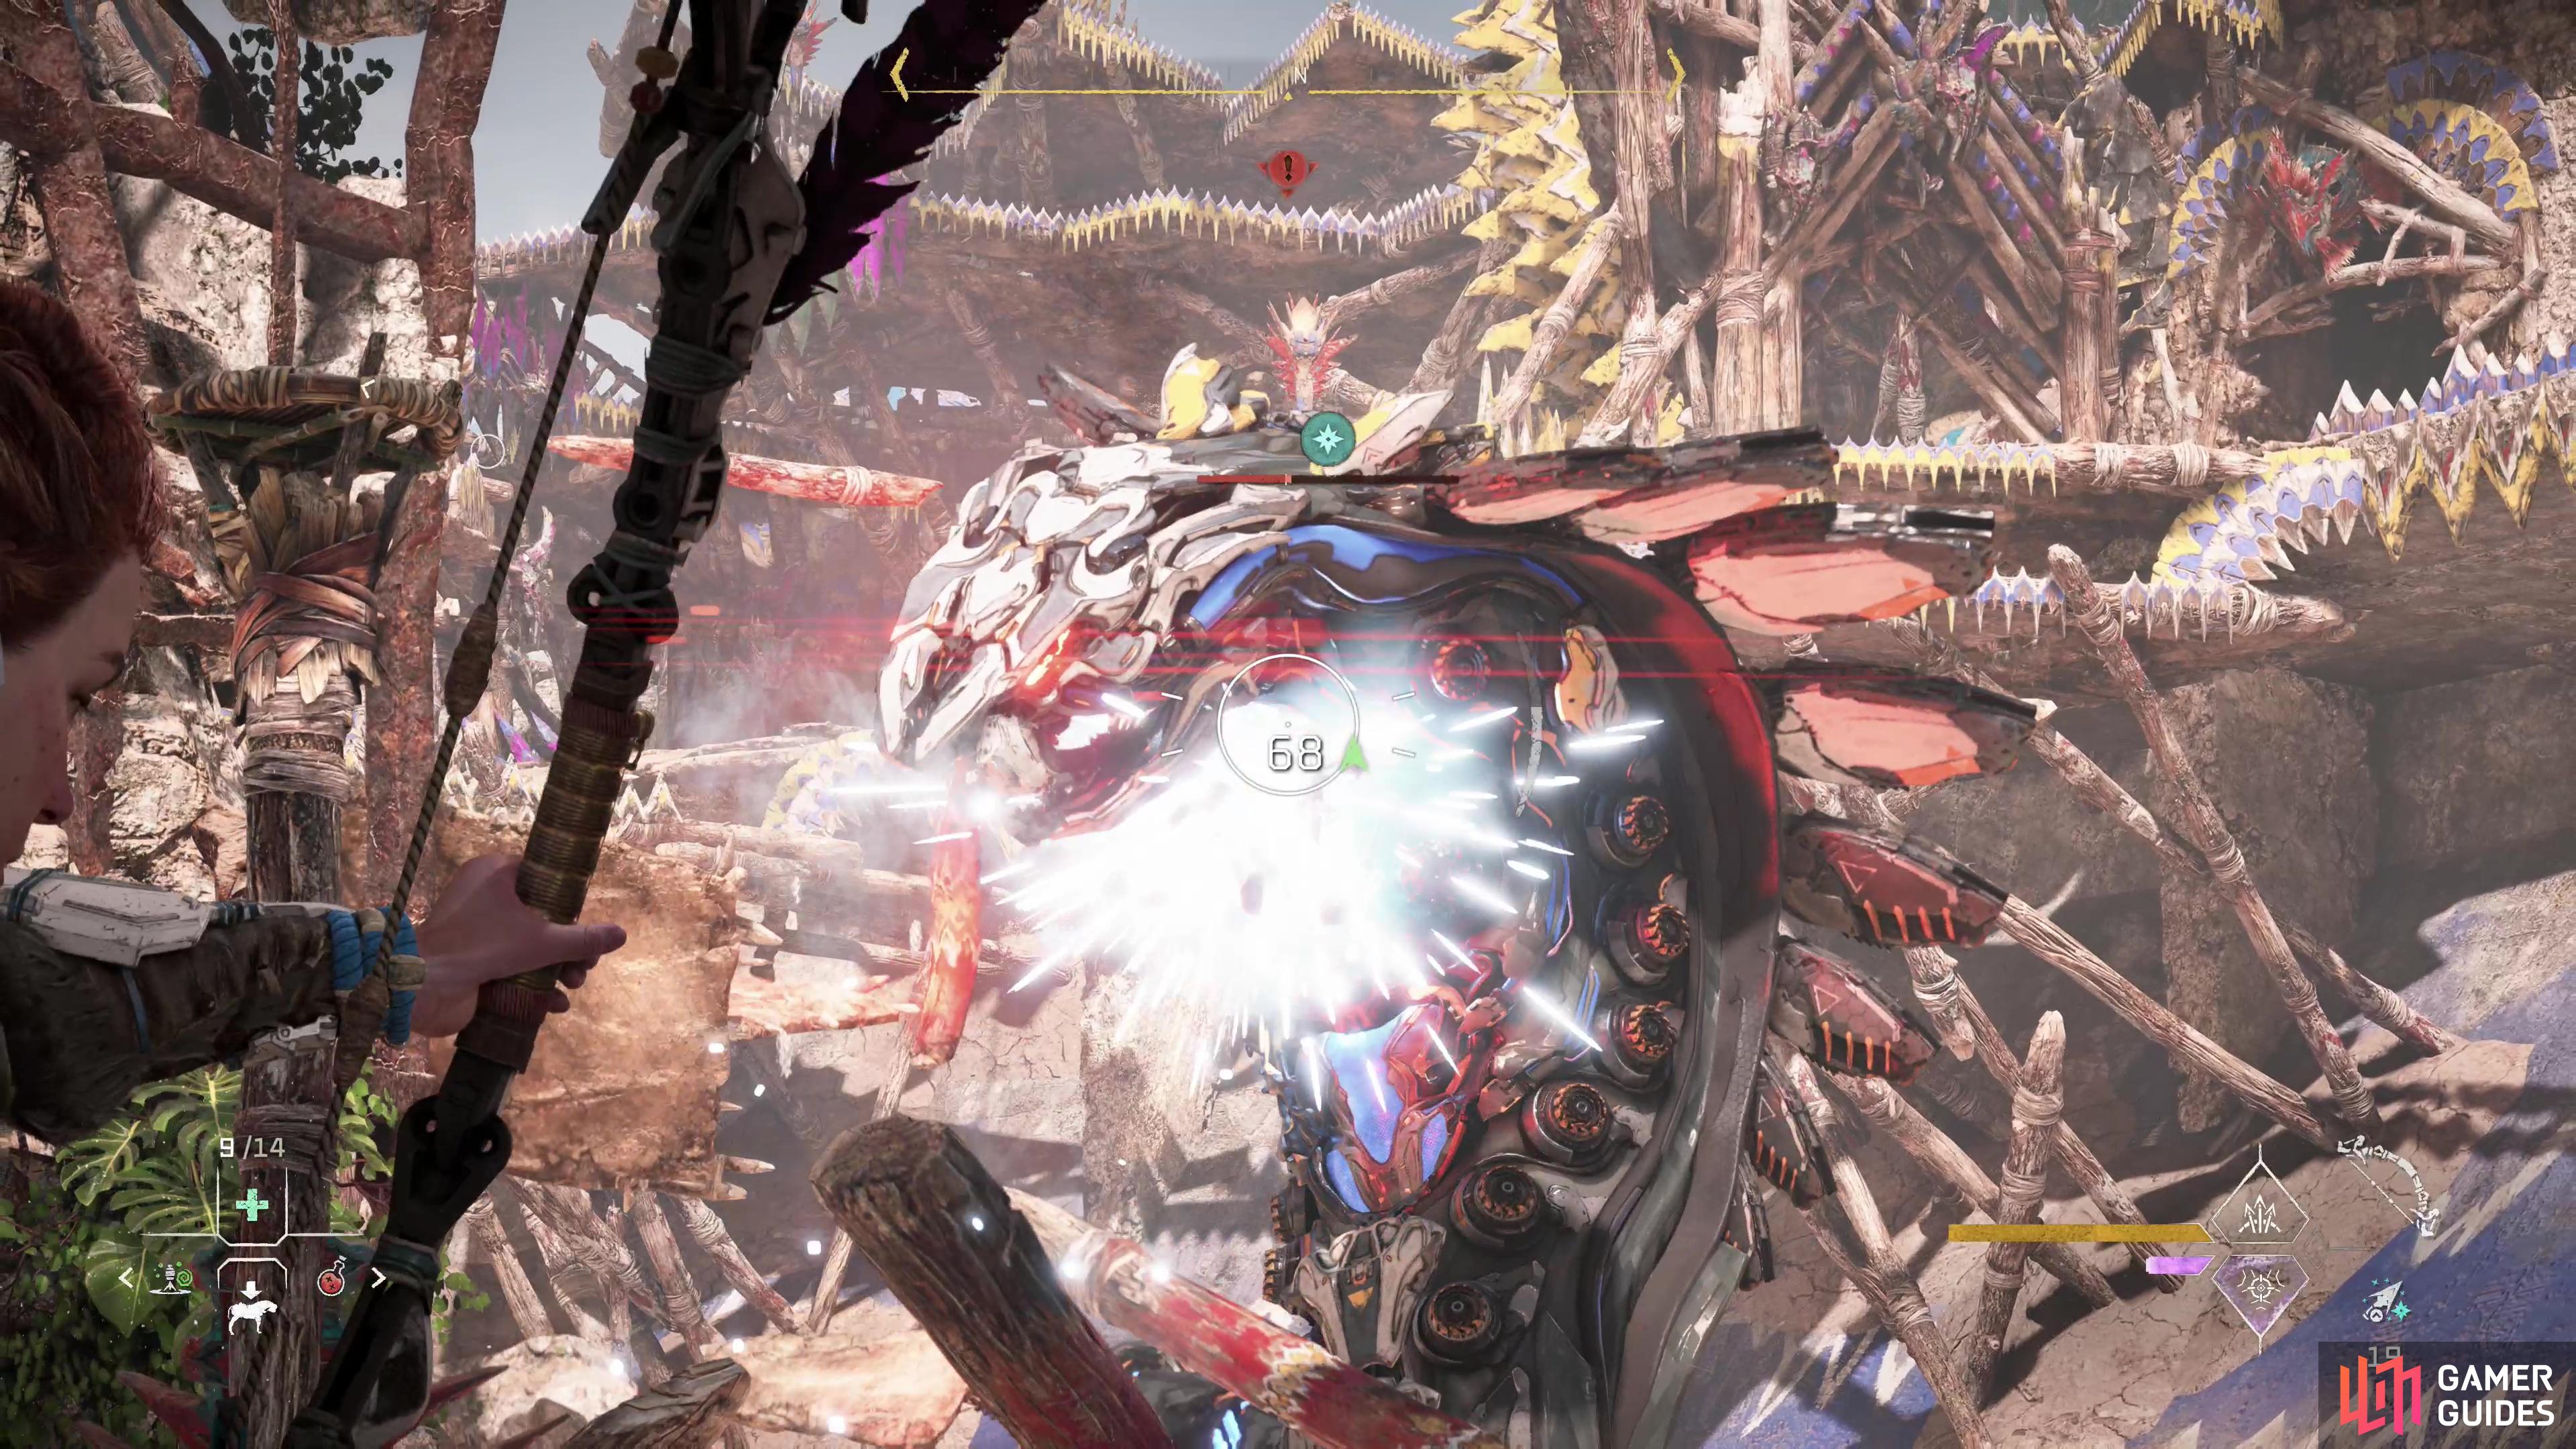
This [Slitherfang] won’t start out the fight compromised, but you’re much stronger now than you were the last time you fought one of these snakes. They’re weak to a host of elements, including Fire, Frost and Plasma, so you should be spoiled for choice when it comes to elements to use. We prefer Frost, as it’ll inflict the Brittle debuff, which will allow us to deal extra damage, but it’s really just a matter of preference.
Inflict whatever debuff you wish, then go hunting weakpoints. The flanges which make up its Sonic Hood are decent enough targets, since they’re usually within sight, and the Earthgrinder and Metalbite Sac on the Slitherfang’s upper torso (just under the mouth) are often exposed as well, with the former yielding the valuable Slitherfang Earthgrinder component if detached. The Slitherfang is littered with other weakpoints that are generally more difficult to hit, mostly due to their size, but also due to the snake’s undulating movements.
As for offense, the Slitherfang can perform a variety of lunges and sweeps, as should be expected, but it can also spit acid and charge up its tail with lightning, slamming it into the ground to deal Shock damage in an area.
If you’re having trouble, there’s plenty of medicinal herbs around you can harvest, and your allies will eventually man a ballista and shoot the Slitherfang if you can lure it out into the open, but you shouldn’t count on them to contribute a whole lot.
Once the Slitherfang has been reduced to scrap, loot it, grab any healing left in the arena, loot some caches, then head up a rubble ramp along the southern end of the arena. Fight or avoid some rebels fighting some allied Tenakth, then scale a wall to trigger a scene.
After the Kulrut is over, you’ll be able to acquire AETHER.
How to Recover AETHER
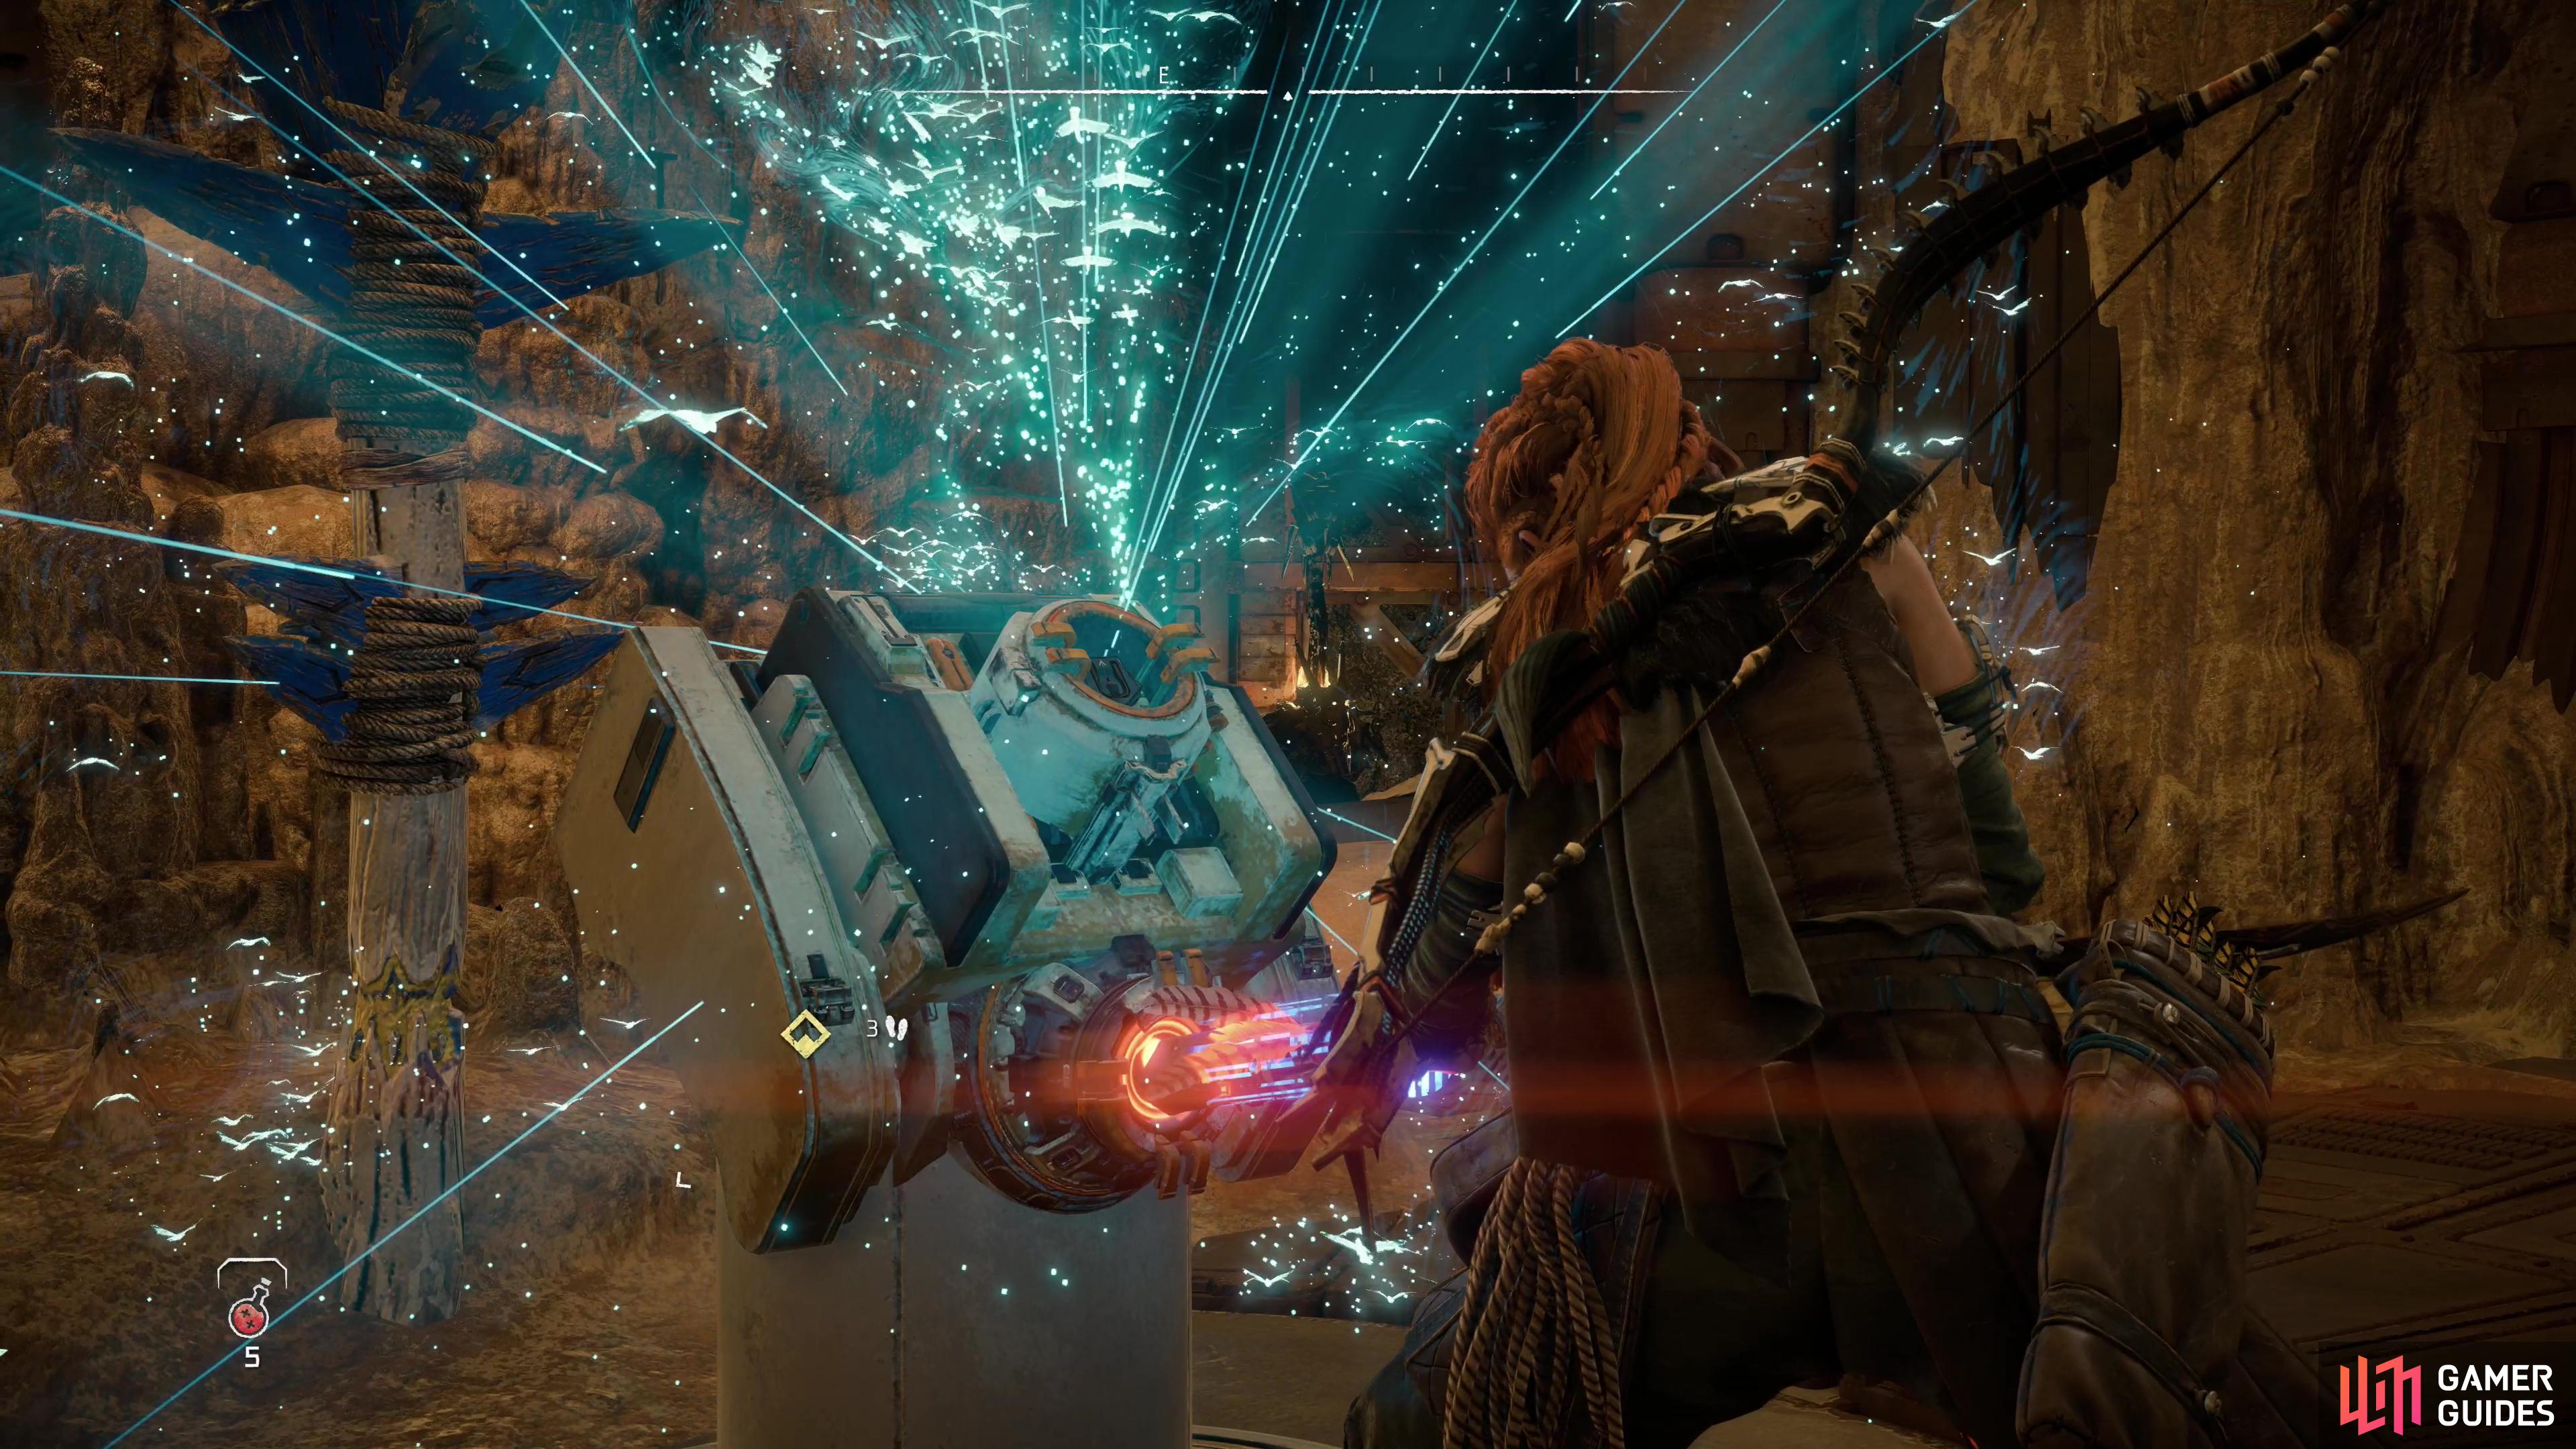
After the scene, climb down the ladder behind the throne and when you reach the ruins below, scan for the WTH Perkins??? datapoint, then interact with the console to recover AETHER. Once done, return to the suface and talk to Dekka. You’ll gain a new ally, as well as the Unity datapoint. You can then go through the museum and interact with the “Visions” again to gain the following new datapoints:
- Columbia Drop [R]
- Gold Mountain [R]
- Military Life [R]
- Nevada Ambush [R]
To complete this quest, you need merely return to The Base and restore AETHERto GAIA.
If this is the first subordinate function you’ve restored to GAIA, the main quest [Cradle of Echoes] will begin. If not, continue with either The Sea of Sands or [Seeds of the Past]. If this was the last of the three completed, you’ll continue with the main quest [Faro’s Tomb], instead.


No Comments