Description
To acquire the Ultima Esper, you’ll need to continue the story until you reach the end of The Great Crystal and defeat Shemhazai. You’ll obtain the Treaty Blade as part of this, allowing you to venture into the optional parts of the Great Crystal. Visit the Great Crystal section to discover all of it’s secrets and Treasures where you’ll encounter the Ultima battle at the very top.
Stats
| Lv | HP | Weakness | Steal |
|---|---|---|---|
| 63 | 258,001 | Dark | Virgo Gem, Elixir, Megalixir |
Resistances
| Resistances |
|---|
| Holy (Absorb), Fire, Lightning, Earth, Ice, Water, Wind (Immune) |
Strategy
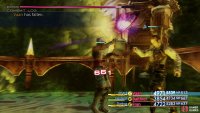
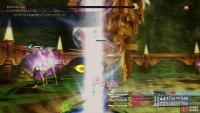
A lot of the strategy into the Ultima battle is all down to your preparation before going in. As you may expect, Ultima will use Holyja often so White Masks and Sage Rings are your friend here, just note that for each member that has these, it will increase how often she casts the Magick. Although you’ll absorb the damage from it, there’s a high probability that you’ll be struck with the troublesome Reverse status at which point she’ll attempt to cast Renew or Curaja on the inflicted party members, it’s imperative you have Esunaga Gambits at the ready. This is just the start of her attacks, the rest are as follows:
-
Attack - Her regular attacks are fast and have a 4% chance to inflict Sap.
-
Redemption - Ultima will target a single party member and deal heavy Holy Damage, she won’t use this on any characters that Absorb Holy.
-
Holyja - Arguably Ultima’s deadliest attack, even if you absorb Holy. Major Holy damage on all party members with a high chance to inflict Reverse. Be sure to follow up with Esunaga and keep Shell up to lessen the chance.
-
Curaja, Renew - Ultima will use both of these as attack spells after a party member is hit with Reverse. Renew, especially, will take the party member down to 1HP which could be dangerous if you’re in a HP Sap field.
-
Reflectga - Ultima will attempt to stick this to your party members, you’ll want Opal Rings to negate it on your healer(s).
-
Blindna - Surprisingly, Ultima is susceptible to Blind however if you do cast it, she’ll simply remove it.
-
Greater Barrier - Ultima will only use this once her HP drops below 50%. This will grant her Protect, Shell and Reduce Damage (reduces all damage by 30%).
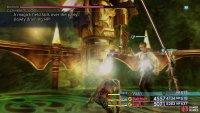
This is only just the start of the battle however, once you lower her HP to 70%, the true gimmick of the battle comes into play. At this point, she’ll use a Magick Field which will cause a rotating debilitation in a set order:
-
HP Sap - Your party will be inflicted with an unremovable Sap effect, this is especially deadly following casts of Holyja.
-
MP Sap - The same as above, except true for MP. You’ll want your healers especially to be ready with Hi-Ethers or Elixirs should their MP drop too low.
-
No Attack - As it says, the Attack command will be unavailable, be sure to manually cast Technicks or Magicks during this phase if you have an Attack Gambit set up.
-
No Magicks - Magicks are disabled here so you’ll want to make sure you have access to X-Potions to heal or equip Ring of Renewals for it’s Regen effect.
-
No Technicks - The least troubling attack based seal but can still cause problems none the less. Resort to attacks or Magicks during this phase.
-
No Items - This one can cause a lot of issues, you’ll be unable to use Phoenix Downs with characters who can’t raise along with not being able to restore MP to mages low from the MP Sap field.
-
Magnetic Field - This will affect the attack speed of your characters using any metal based weapons, it’s a good idea to switch over to Magick for characters using this.
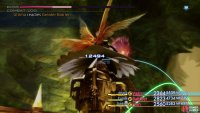
Following Magnetic Field, Ultima will return to HP Sap and repeat the cycle. As you can see, the longer you let this battle go on, the tougher it becomes so your primary focus should be to deal as much damage to Ultima as quickly as possible. Yagyu Darkblades (with a Black Robe equipped if possible) is fantastic for Ultima, she’s weak to Dark and if you then both Haste and Bravery the user along with equipping Germinas Boots, the user will pump out some serious damage. Likewise, Darkga is very useful against Ultima for the same reasons and you can even bounce it against your reflected party members for even more damage.
Once you get Ultima down to her final 30%, she’ll start attacking quicker and her deal a lot more damage, this is your queue to try and rush to finish the battle. Quickenings should come in play to hopefully finish the job or perhaps make use of Exodus and Zeromus’ ultimate attacks (Summon them and cast the ultimate immediately).





No Comments