


Information
| Type | Petitioner | Location | Reward |
|---|---|---|---|
| Notice Board | Sherral (Rabanastre: Amal’s Weaponry) | Nam-Yensa Sandsea, Simoon Bluff | 1000 Gil, Elfin Bow, Shell Shield |
Stats
| Lv | HP | Weakness | Steal |
|---|---|---|---|
| 18 | 18669 | Earth | Yensa Scale, Crooked Fang, Wyvern Wing |
Resistances
| Resistances | Status Immunities |
|---|---|
| Wind (Absorb) | Confuse, Disable, Disease, Doom, Lure, Petrify, Oil, Poison, Sap, Silence, Slow, Stop |
Strategy
Upon picking up the bill from the Notice Board, make your way to Amal’s Weaponry in Rabnastre to find the petitioner, Sherral. The Wyvern Lord flies along the northern end of the Simoon Bluff, and despite its airs, the beast isn’t quite as powerful as it may lead you to believe. First note that the beast is flying, which means you’ll need ranged weapons or magicks to hit it. Machinists, Archers, Red Battlemages and Black Mages all qualify, and as many as possible should be brought to the fight, although a bit of healing from a White Mage won’t hurt. Vossler (if you attempt this during your first visit), for his part, has Telekinesis, a technick which will allow him to contribute.
While the Wyvern Lord boasts a hefty supply of HP (over 18,000), its attack power is only marginally higher than other foes you’ve faced, and it has nothing in the way of special attacks that can inflict damage spikes. It can hit quite a few times in succession if it combos, however, but that’s the worst you’ll have to fear, at least as far as direct damage goes. Its most dangerous aspect, however, is its ability to Petrify characters on hit. Setting up the Gambit “Ally: any –> Golden Needle” on a character should be sufficient enough protection.
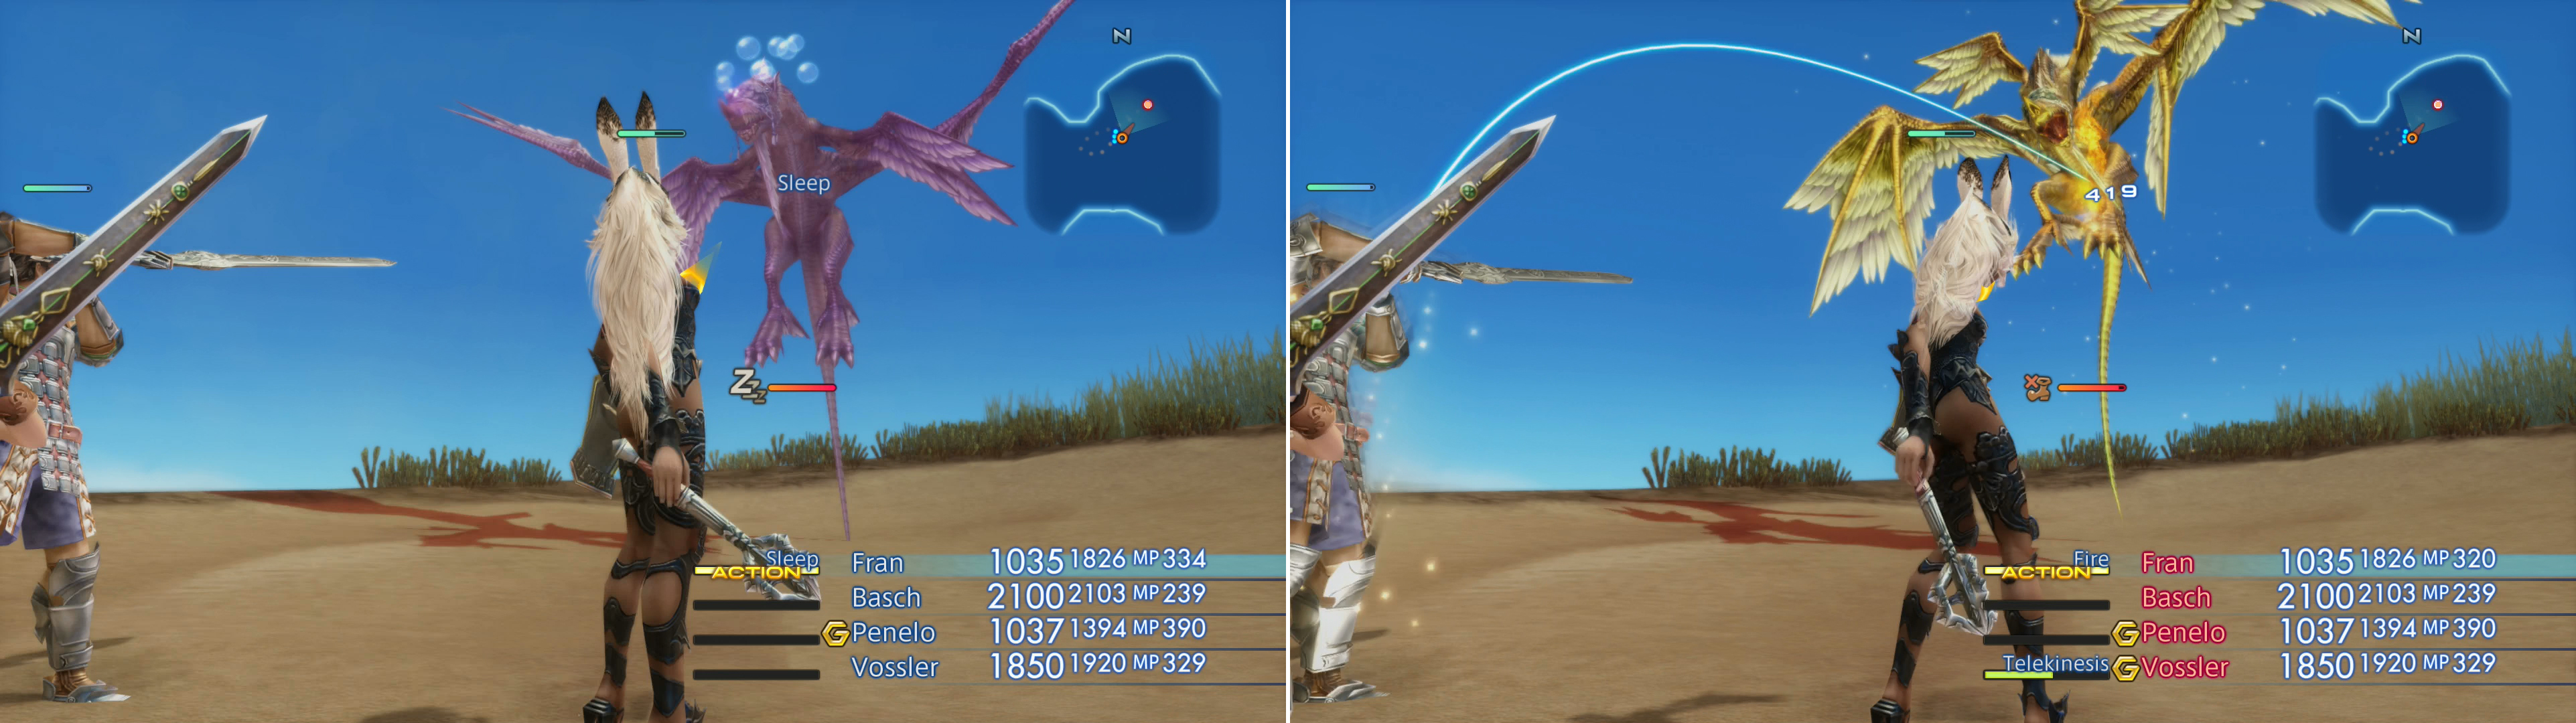
Wyvern Lord can be put to Sleep (left), and when defenseless can be pelted with magicks (right).
You can also use magick to your advantage to make this fight far easier than it has to be. The Wyvern Lord is vulnerable to both Sleep and Immobilize, and since it has no ranged attacks, an Immobilized Wyvern Lord is as good as dead. Sleep will also stop it, but you’ll have to forego physical attacks if you wish to avoid waking it up. Casting Immobilize and pelting it from afar with ranged attacks should be sufficient to defeat it without the slightest difficulty. You can steal a Yensa Scale, a Crooked Fang and a Wyvern Wing from it, and the last bit of loot is part of a high-end weapon Bazaar bundle, but there will be other, easier ways to obtain them later in the game. The Wyvern Lord is weak to Earth, and absorbs Wind.
When you return to Rabanastre at a later point, be sure to return to Sherral at Amal’s Weaponry to claim your reward.
No Comments