


| Bestiary |
|---|
| Axebeak • Emeralditan • Megabomb (Rare Game) • Wyvern Lord (Mark). |
| Items In This Area |
|---|
| Ancient Sword (Steal from Urutan Eater) • Balaclava • Balance • Chanter’s Djellaba • Chopper • Elfin Bow • Embroidered Tippet • Eskir Berries • Heavy Coat • Heavy Lance • Lambent Hat • Lohengrin • Shell Shield • Soldier’s Cap • Vega (Drop from Axebeak) Wizard’s Hat. |
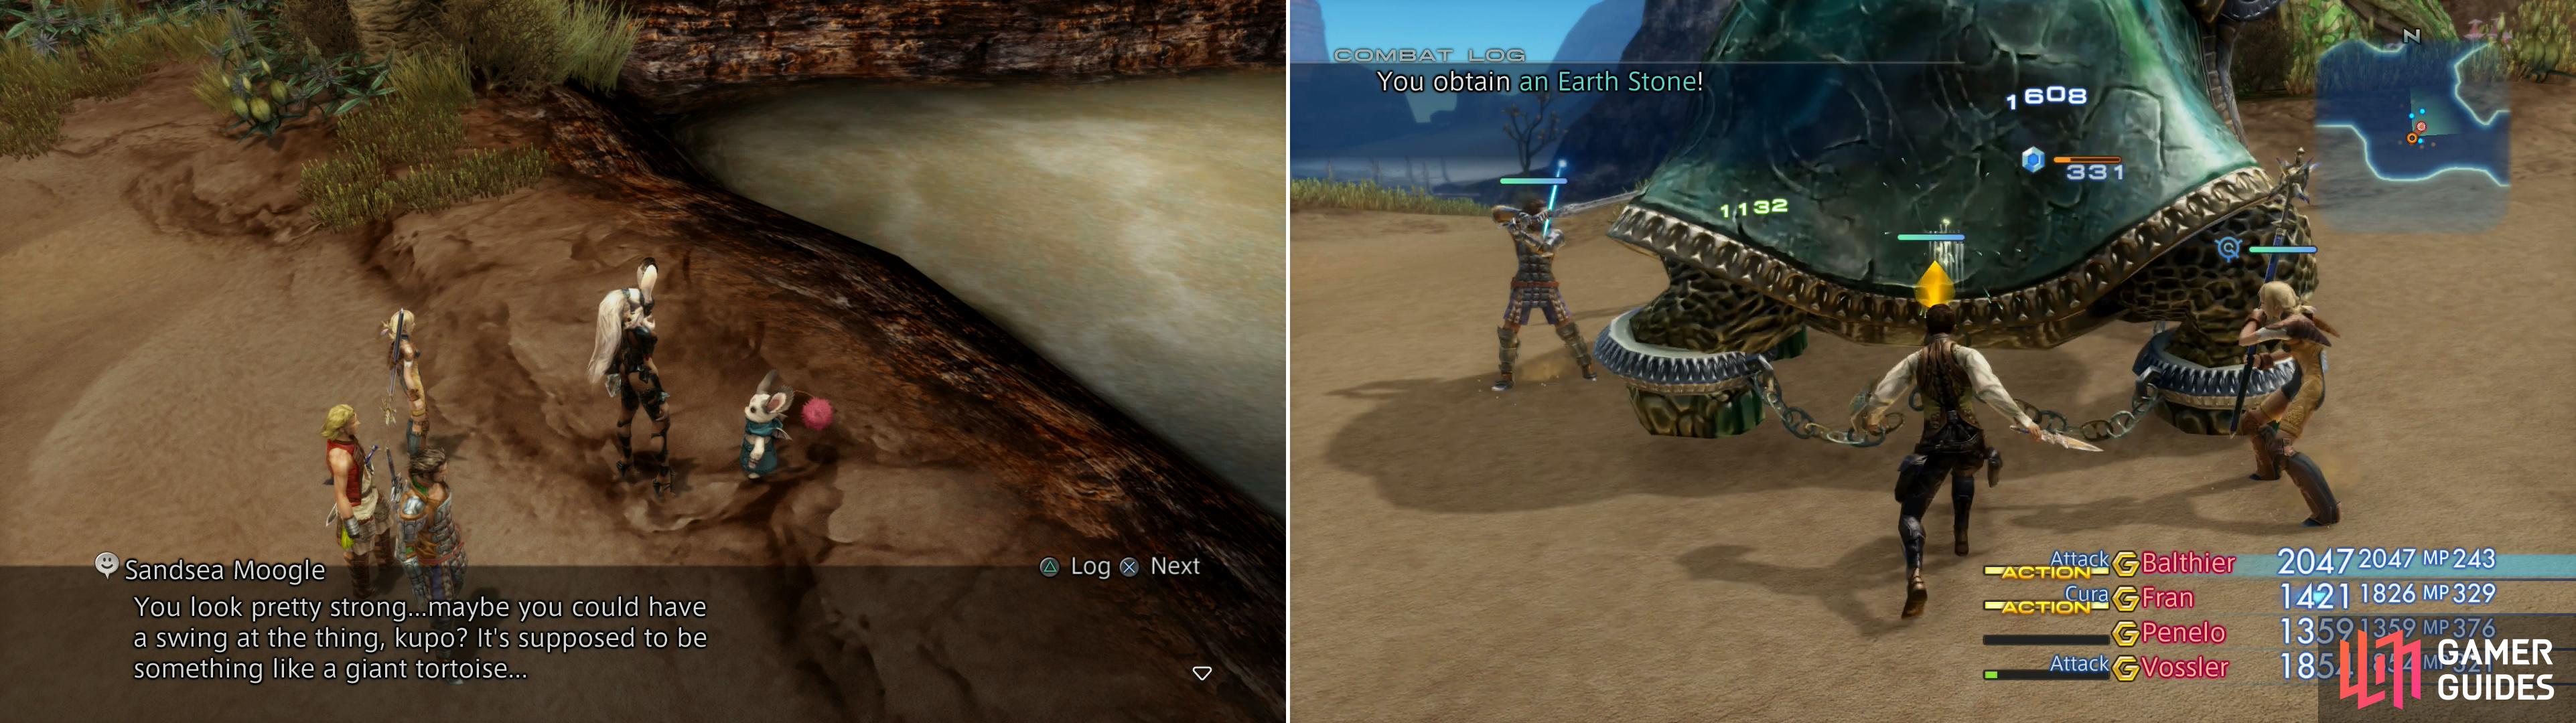
The Sandsea Moogle will tell you of a beast harassing the Urutan Yensa (left). Help the xenophobic crab-critters out by killing the Urutan Eater (right).
The Sandscale Bank
This area is small and rather uneventful, but it does possess a Save Crystal, which you should take advantage of. When you’re done saving and replenishing yourself, turn north from the Save Crystals to spot an Urutan-Yensa meeting with a Moogle. When you approach, the Urutan-Yensa will run off, so talk to the Moogle to see what’s up and the cute little critter will inform you that there are things that even the Urutan-Yensa fear. A hungry, giant tortoise would probably be a mortal enemy for a bunch of sand goblin crab people. Not only does the Moogle hint a reward for defeating such a beast, but for the sake of completionism (and a full bestiary), it should prove interesting enough to hunt.
The Urutan-Yensa Sea
When you’re done talking to the Moogle head southwest to the next area, The Urutan-Yensa Sea. This area isn’t terribly interesting, and despite its name, you’ll start out by finding Alraunes along the northern end of the area. As you fight your way west and south you’ll encounter Urutan-Yensa. Kill these familiar foes and after you turn south, search a patch of grassy area along the eastern end of the area. Here you’ll find two chests, one of which (the easternmost one) can include a Heavy Lance . This chest is finicky, as it only has about a 20% chance to spawn, and when it does it has a 60% chance to contain Gil. Granted, a whopping quantity of Gil (over 1,000G at a time), but the odds of getting a Heavy Lance is about 6% per zone-in. It might take some doing to get it, but it’s still far easier than grinding the Fideliant.
The Urutan Eater
| Urutan Eater | . |
|---|---|
| Level | 16 |
| Weaknesses | Wind |
| Resistances | Earth (Absorbs) |
| Immunities | Confuse, Disable, Doom, Petrify, Oil, Poison, Sap, Silence, Sleep, Stop |
| Safety | Yes |
| Drop | N/A |
| Steal | Turtle Shell (55%), Ancient Sword (10%), Aries Gem (3%) |
Continue to the southern end of the area and cross a bridge to reach the next area, the northern end of the Withering Shores area, to be precise. When you arrive, watch some Urutan-Yensa waddle away. Follow them southwest and you’ll find them fighting the Urutan Eater - a fight the Urutan-Yensa are destined to lose.
This tremendous Testudinidae might make Urutan-Yensa tremble, but you’re not nearly as tasty as those crablings are. It boasts just over 8,000 HP and higher attack power than most of the weaklings that commonly populate the Sandseas, but that’s a long shot from making this shelled monster a significant threat. It can cast Blizzard, Fire, Thunder and Protect, giving it a fair selection of offensive and defensive magicks to choose from, and it can perform the Sonic Turn technick, an area-of-effect attack that’ll hit all nearby foes. If particularly pressed it may use Renew to fully heal itself.
Despite this, it’s weak to Wind, meaning the Gladius should make quick work of it. You can inflict Immobilize and/or Blind upon the beast, but this will likely just provoke it to respond with magicks, although Blind on its own will further reduce the danger of its already mediocre melee attacks. It doesn’t drop anything, nor can it be Poached, but you can steal a Turtle Shell, an Ancient Sword or an Aries Gem from it. It will be listed as an “Emeralditan” in your Clan Primer, in case you were wondering.

Chase down the Urutan who has your reward (left) and after his trial pick loot some Eksir Berries (right).
After toppling the turtle terror, return to the first area of the Nam-Yensa Sandsea, The Sandscale Bank, and talk to the Moogle, who tells you that the Urutan-Yensa he was talking to ran back to the Ogir-Yensa Sandsea, perhaps to gather the treasure you were promised? Return to the Platform 2 - Refinery area and make your way east up the ramp to where the Urutan Exile was. On your way there you’ll see a scene, drawing your attention back west to the Nam-Yensa Sandsea.
Return to The Sandscale Bank area and you’ll witness a gathering of Urutan-Yensa, which the Moogle at first narrates, then interferes with. Watch the scene and the Urutan-Yensa will prove themselves as cruel as they are ugly, after which you’ll be able to pick up a “ Rogue Urutan Flower “ from the beach near the Moogle. Investigate this plant and pick the berries off it to obtain some Eksir Berries , which will prove quite useful shortly.
Withering Shores (North)
When you’re done dealing with the Urutan Eater, it’s time to explore the Withering Shores area fully. Return there and honestly, it’s not all that interesting. Aside from Urutan-Yensa, you’ll probably only encounter Danbania near the water. In fact, don’t be surprised if Danbania or Yensa emerge from the sandsea when you near it. As for loot, there’s nothing here of any particular interest, just chests full of curatives. At the eastern end of the area you’ll find some ramps leading to a platform, which itself leads to the Demesne of the Sandqueen, while along its western end you’ll find an area transition leading to the Augur Hill area.
Augur Hill
Go west first to reach the Augur Hill area, which is another uninteresting zone. Here you’ll encounter Bagoly, Yensa, and Urutan-Yensa and find chests filled with curatives, or perhaps a Cura Mote. Not very compelling stuff. At the western end of the area, however, you’ll find an area transition returning to the Ogir-Yensa Sandsea, more specifically the Yensa Border Tunnel zone, where you’ll find a Gate Crystal and a merchant, should you need their services. When the key features of an area is that it leads to a more interesting area, you know it’s time to move on. Fight your way to the southwestern corner of the zone to find an area transition leading to the Yellow Sands area.
Yellow Sands
As with the last area, this one isn’t too interesting. You can encounter Bagoly, Yensa and Urutan-Yensa and find plenty of chests with curatives in them. Unlike the previous zone, however, there’s a new critter to acquaint yourself with - the Axebeak.
Axebeak :
A palette-swap of the Cockatrice, the Axebeak is hardly more impressive than the Urutan-Yensa you’ve been killing in droves in terms of HP or offensive output. They can drop a Small Feather, a Fire Stone, a Vega (Guns 2) or a Warp Mote, you can steal a Fire Stone, Alarm Clock or Dark Mote from them, and they can be poached for a Small Feather or a Rainbow Egg. They are weak to Water.
Well, that was fun while it lasted. Other than a new foe (which is really only worth mentioning as a bestiary entry) there’s little to recommend this place. Along the southwestern end of the area you’ll find another entrance to the Zertinan Caverns (the Darkened Wharf zone, to be specific), but your progress is limited and there’s no treasure to quickly grab, so you might as well ignore it. Instead, about midway through the Yellow Sands zone turn north, cross some docks, then go up some ramps to reach a platform, along which is a bridge that leads southwest to the next area, the Demesne of the Sandqueen.
Demesne of the Sandqueen
You’ll face the usual suspects in this area, Axebeaks, Bagoly, Danbania, Urutan-Yensa and Yensa, so there’s nothing exciting from an enemy standpoint. On the other hand, however, there’s actual loot in the area! From the platform on which you start, make your way southwest down some ramps and once you hit the sand turn east, then north, working your way around the foundation of the platform, killing Urutan-Yensa as you go. Here you’ll find two chests: the one near the platform possesses little of interest, but the one in the grass to the north may yield a Balaclava .
Make your way south across some bridges and exterminate more Urutan-Yensa as you work your way west across the level. There’s not much to see to the east besides a platform that leads back to the Yellow Sands area. Keep pushing west until you spot two traps in front of a long, wooden, L-shaped dock. Bypass the traps and head to the end of the dock, killing Urutan-Yensa and Yensa as you go until you reach the shorter section of dock perpendicular to the larger section. On this section you may find two chests, the northern-most of which will always contain the Balance magick (Time Magick 3). This spell, when cast, deals area-of-effect damage to the target(s) equal to the difference between the caster’s current HP and max HP. If you have, say, 2,000 max HP and are at 1,200 HP when the spell is cast, you’ll deal 800 damage. Pretty simple.
Return south to solid ground, or sand, in any event, and continue working your way west. Kill a small group of Axebeaks rolling about and search south of where they were rolling to find a chest, inside of which you may find a Wizard’s Hat. After that, you need merely continue west to reach the next area - the Trail of Fading Warmth. Before you go on, however, note that there’s a Rare Game you can encounter in this area with a bit of effort - Megabomb.

Search a chest on a bridge to find the Balance magick (left). You can find the Rare Game Megabomb in the same area (right).
Megabomb
Don’t let the name fool you, this bomb isn’t much more of a threat than Pineapple was. Kind of redundant, really. Anyway, to spawn this beastie you need merely rack up a battle chain of twenty-one in any part of the Nam-Yensa Sandsea. A good place to do this is in the Withering Shores area, as Urutan-Yensa are really the only hostile foes that’ll regularly spawn. You won’t get all the kills you need here, but you can supplement what you’re missing by picking on the Urutan-Yensa in the southern end of The Urutan-Yensa Sea area to the north and the northern part of the Demesne of the Sandqueen area - just make sure your twenty-first kill isn’t in the Demesne of the Sandqueen area, just to be safe.
As for its stats, they’re virtually identical to Pineapple’s. It boasts over 4,000 HP and does around the same damage as Pineapple. It can inflict Oil when it hits, as well as cast Fire and Protect, so at least it can take advantage of the Oil status. Otherwise, though, pretty typical Bomb stuff. It absorbs Fire damage and is weak to Water. It can drop Bomb Ashes or a Bomb Shell, you can steal a Bomb Fragment from it, and it can be Poached for a Pebble or a Scorpio Gem.
Trail of Fading Warmth
Exit the Demesne of the Sandqueen via the area’s western end to reach the Trail of Fading Warmth. There’s little in the way of treasure or challenge here, as you’ll just need to swat aside a handful of Urutan-Yensa and Axebeaks. Continue through the area to the southwest, west, then north and you’ll find an area transition leading to another area - the Simoon Bluff. A much more interesting area, indeed, but first, there’s one bit of business to see to in the Trail of Fading Warmth.
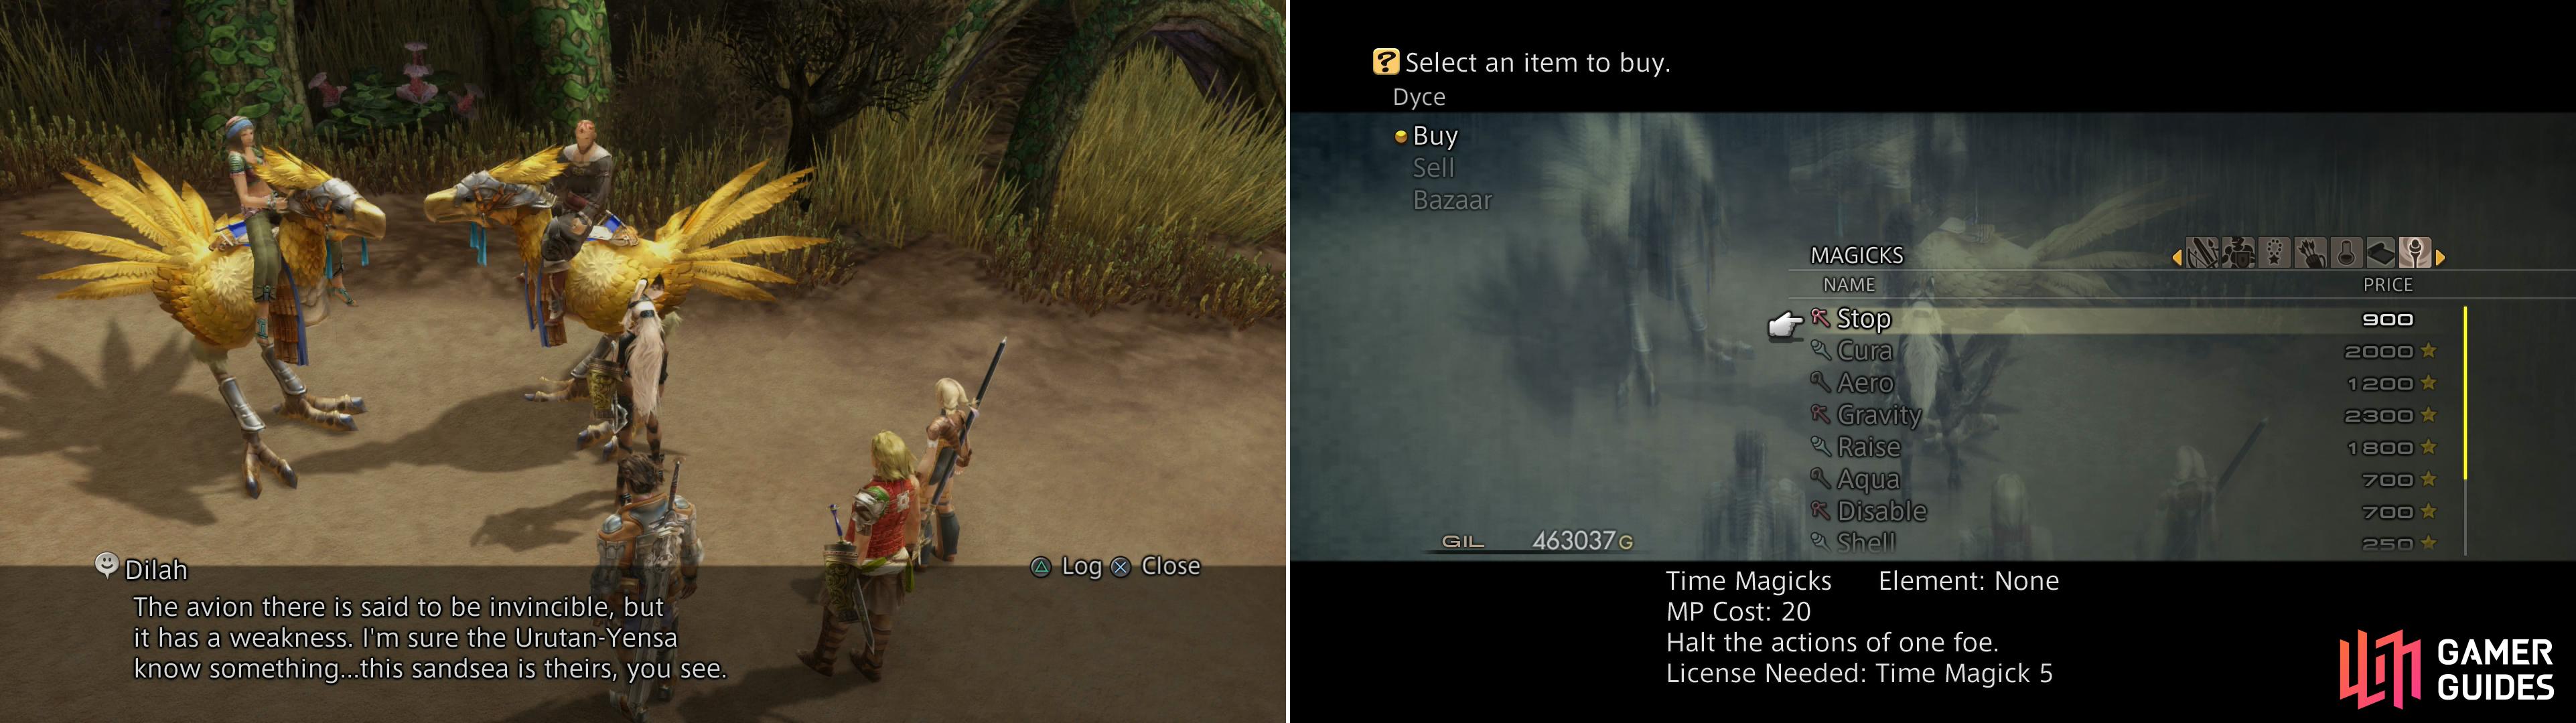
Talk to the mounted merchant to gain some advice about a foe looming ahead (left). You can also buy new magicks from him (right).
Turn west from the area transition to the Simoon Bluff and turn north up a bridge to find another area transition, near which you’ll find the merchant and his friend from the Yensa Border Tunnel area. Talk to him and, after hinting at a dangerous bird looming ahead, he will mention a way to make it weaker, which the Urutan-Yensa might know. Wonder what that could be, eh? After he’s done giving you hints he’ll suggest that his inventory may surprise you, and he’s not wrong, as his stock has improved greatly since last you spoke.
In particular he’ll sell the sword Lohengrin (Swords 4), the Longbow (Bows 3) and a Chopper (Daggers 3), all of which should be new, as well as pretty much every weapon you could have picked out of the Sandsea areas. As for armor, he’ll now sell a Heavy Coat (Light Armor 4) and a Chanter’s Djellaba (Mystic Armor 4). New accessories include Nishijin Belts and Black Belts, and most importantly he sells the spell Stop (Time Magick 5).
Despite all these nice new items, you need only consider buying a few, as you’ll be able to grab most of them in the upcoming areas. In particular, you don’t need to worry yourself with the Lohengrin, Chopper, Heavy Coat or Chanter’s Djellaba.
Navigate a group of traps (left) and you’ll be able to plunder the area beyond for some relatively potent gear (right).
Simoon Bluff
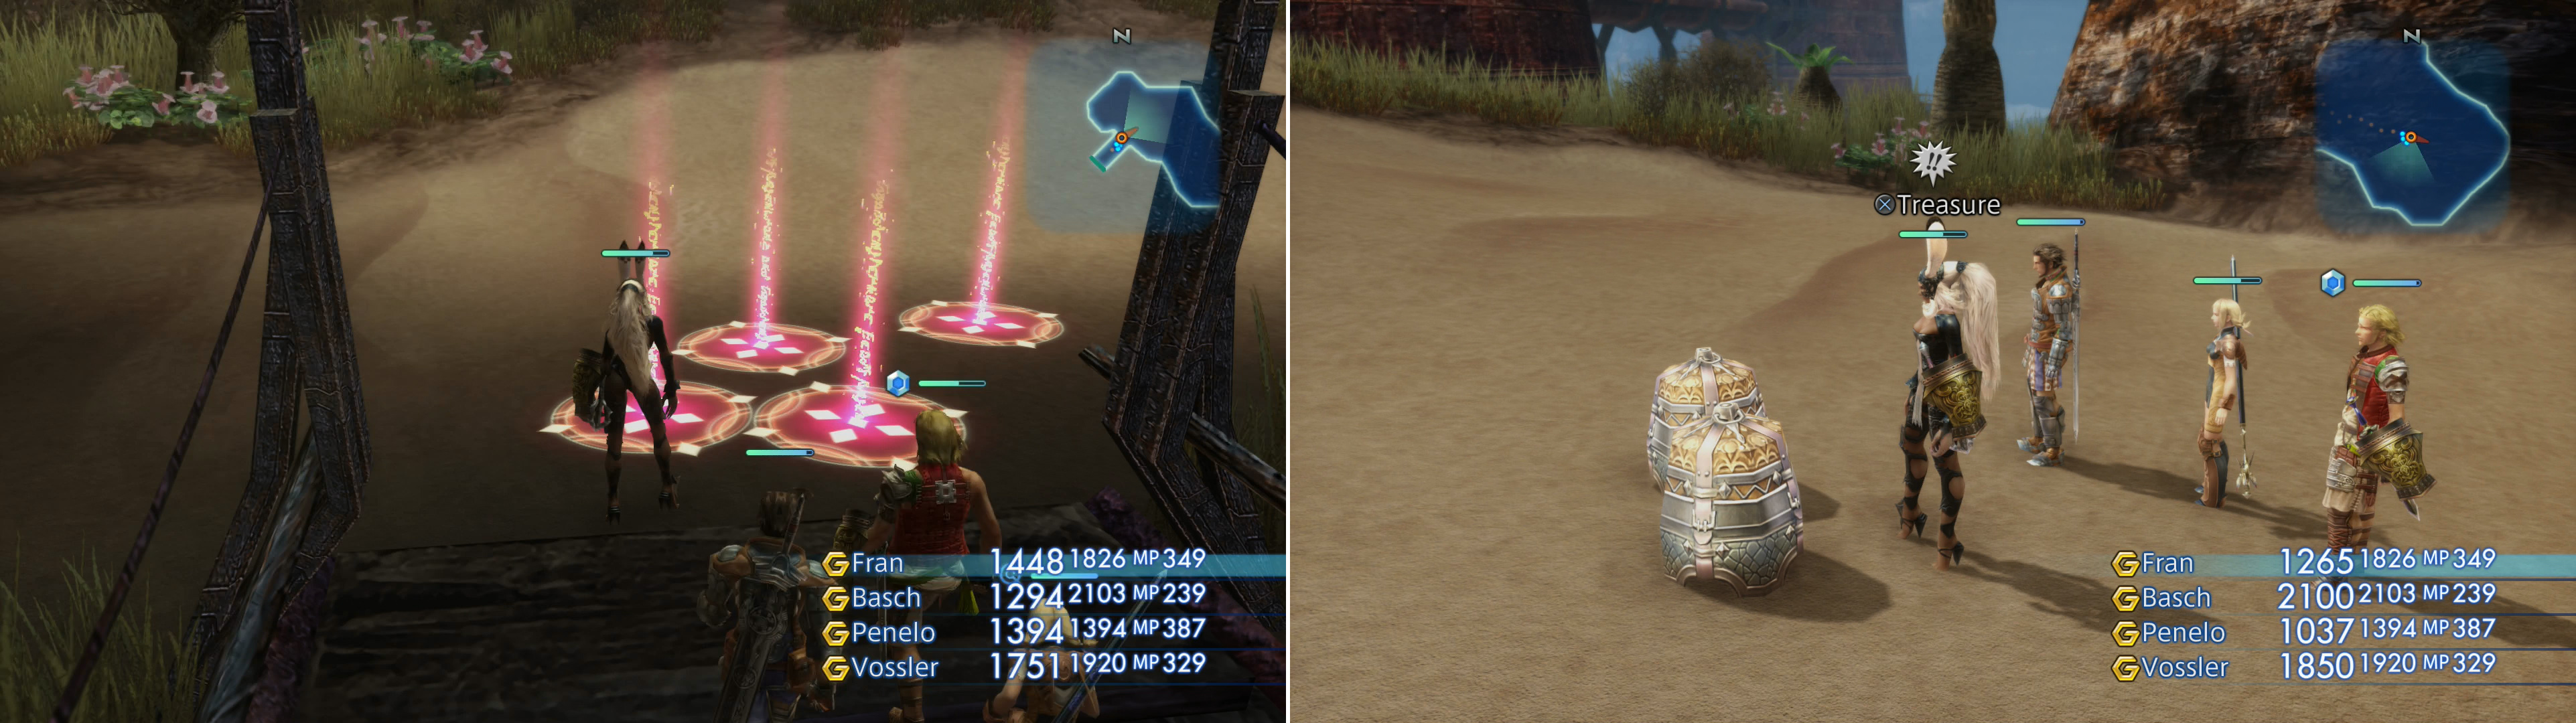
Return back south across the bridge, turn east and go through the area transition to reach the Simoon Bluff area. As soon as you enter you’ll be greeted by a cluster of four traps, which takes careful manuevering - or cavalier indifference - to get through. After you clear that obstacle make your way east, southeast to find some ramps, near which some Bagoly prowl. Kill them, then ascend the ramp to reach a barren platform. While there’s nothing on this platfrom, cross a bridge to the northeast and circle around to the northeastern end of the platform to find three chests, each of which contain loot worth mentioning.
The middle chest always contains an Embroidered Tippet , a lovely accessory which doubles the XP of the wearer. This chest always spawns, but will not respawn after it’s been looted. The chest on the right (northwest) may hold a Chopper , while the chest on the left (southeast) sometimes contains a Lohengrin . Seems the Nam-Yensa Sandsea isn’t so barren, after all; all the treasure worth talking about just happens to be in this area! Speaking of which, there’s still quite a bit more to be had in this area.
Return back southwest and descend the ramps to return to the sandy lowlands again, then make your way northeast through the level, killing Bagolys and Axebeaks as you go until the contours of the level force you to turn northwest and proceed uphill. Continue northwest until you find a fork, at which continue west a bit further to find a dead-end where two chests may spawn. The one to the south near the grass may yield a Soldier’s Cap while the one in the center of the sand can be plundered for a Chanter’s Djellaba .
After searching for those two chests turn back east to return to the fork, at which turn northeast to reach the northern-most part of the level. Here you’ll find the Wyvern Lord flying about the northwestern end of the level, at least if you accepted the hunt “ A Scream from the Sky “. Hopefully so, because that beastie is next on the agenda, but first, let’s finish off the loot in this area.
Be patient and avoid the Wyvern Lord and you may find a chest along the grassy ledge at the northwestern end of the level, inside of which there might be a Sirius . From here continue east and you may spot two chests standing together in the middle of the sand. One of them can be searched for a shot at a Lambent Hat while the other has a chance to contain a Heavy Coat . With the looting out the way, let’s see to this so-called Wyvern Lord.
Hunt - Wyvern Lord
| Wyvern Lord | . |
|---|---|
| Level | 18 |
| Weaknesses | Earth |
| Resistances | Wind (Absorbs) |
| Immunities | Confuse, Disable, Disease, Doom, Lure, Petrify, Oil, Poison, Sap, Silence, Slow, Stop |
| Safety | No |
| Drop | N/A |
| Steal | Yensa Scale (55%), Crooked Fang (10%), Wyvern Wing (3%) |
The Wyvern Lord flies along the northern end of the Simoon Bluff, and despite its airs, the beast isn’t quite as powerful as it may lead you to believe. First note that the beast is flying, which means you’ll need ranged weapons or magicks to hit it. Machinists, Archers, Red Battlemages and Black Mages all qualify, and as many as possible should be brought to the fight, although a bit of healing from a White Mage won’t hurt. Vossler, for his part, has Telekinesis, a technick which will allow him to contribute.
While the Wyvern Lord boasts a hefty supply of HP (over 18,000), its attack power is only marginally higher than other foes you’ve faced, and it has nothing in the way of special attacks that can inflict damage spikes. It can hit quite a few times in succession if it combos, however, but that’s the worst you’ll have to fear, at least as far as direct damage goes. Its most dangerous aspect, however, is its ability to Petrify characters on hit. Setting up the Gambit “Ally: any –> Golden Needle” on a character should be sufficient enough protection.
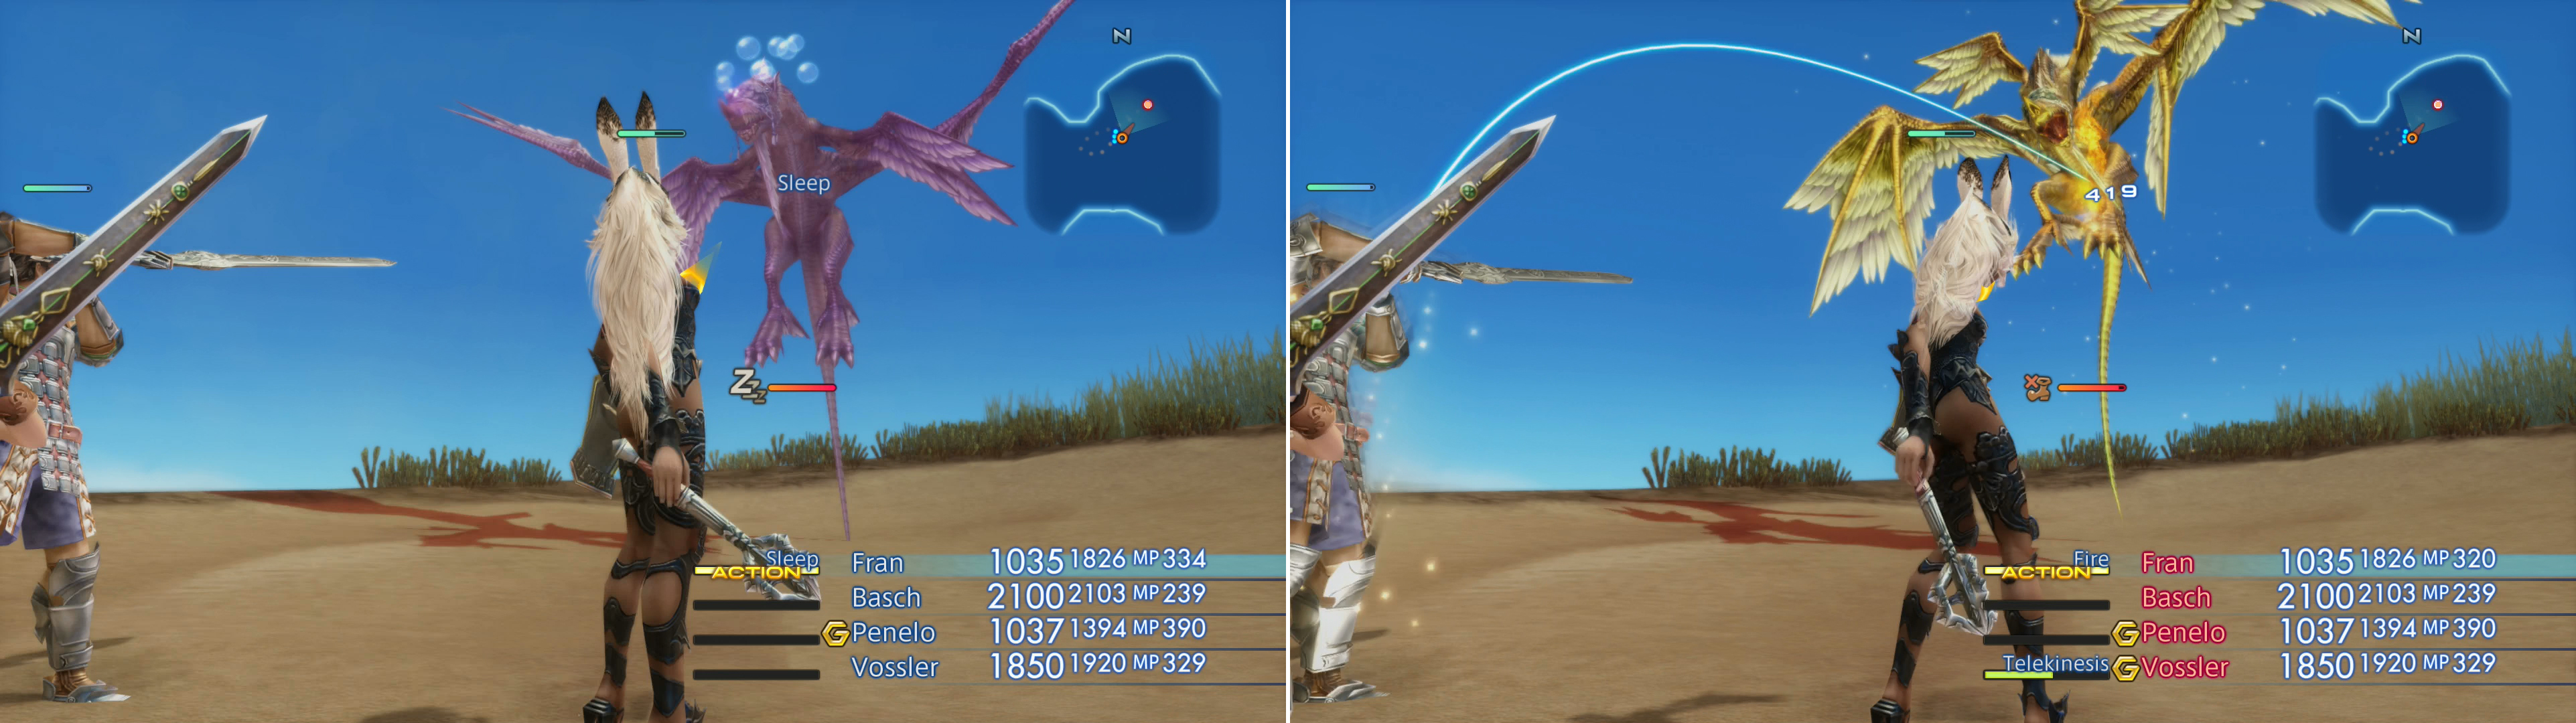
Wyvern Lord can be put to Sleep (left), and when defenseless can be pelted with magicks (right).
You can also use magick to your advantage to make this fight far easier than it has to be. The Wyvern Lord is vulnerable to both Sleep and Immobilize, and since it has no ranged attacks, an Immobilized Wyvern Lord is as good as dead. Sleep will also stop it, but you’ll have to forego physical attacks if you wish to avoid waking it up. Casting Immobilize and pelting it from afar with ranged attacks should be sufficient to defeat it without the slightest difficulty. You can steal a Yensa Scale, a Crooked Fang and a Wyvern Wing from it, and the last bit of loot is part of a high-end weapon Bazaar bundle, but there will be other, easier ways to obtain them later in the game. The Wyvern Lord is weak to Earth, and absorbs Wind.
When you return to Rabanastre at a later point, be sure to return to Sherral at Amal’s Weaponry to claim your reward. This will be left up to your own volition.
| Reward (For ending the Wyvern Lord’s threat to Rabanastre) |
|---|
| 1000 Gil |
| Elfin Bow |
| Shell Shield |
Now that you’re done with the Simoon Bluff area, return south to the Trail of Fading Warmth, then make your way to the northwestern edge of the area, past the merchant and his friend (and their Chocobos!) to find an area transition. Buy and sell whatever you think you’ll need, then press on to the next area.
No Comments