


Information
| Type | Petitioner | Location | Reward |
|---|---|---|---|
| Notice Board | Nera (Eruyt Village: Spiritwood) | Golmore Jungle, The Rustling Chapel | 2000 Gil, Lightning Arrows, Gillie Boots, Rabbit’s Tail |
Stats
| Lv | HP | Weakness | Steal |
|---|---|---|---|
| 31 | 20010 | Holy | Drab Wool, Hi-Potion, Blood Wool |
Resistances
| Resistances | Status Immunities |
|---|---|
| Dark (Absorb), Fire, Lightning, Ice, Earth, Water, Wind (Halves) | Petrify, Stop, Doom, Confuse, Sleep, Reverse, Disable, Immobilize, Poison, Berserk |
Strategy
Upon picking up the bill, make your way to Eruyt Village to speak with Nera, the petitioner then proceed to the southeastern edge of The Needlebrake to find an area transition leading to The Rustling Chapel area, the southern-most zone of the Golmore Jungle.
You’ll start out on the northern-most of this area’s three platforms. Kill whatever foes lurk nearby, then make your way to the southwestern end of this platform to find two paths, one running west, then south, and the other running south, then west. Both lead to the same place, another platform near the center of the zone. On this central platform Vorpal Bunny will spawn, popping out of the ground when you approach its hidden burrow. Despite its name, it’s nothing like the Killer Bunny of Monty Pyton fame. Instead, its first instinct is to flee, and should it gain enough distance it’ll burrow again and fully heal. There are two ways to prevent this; either fill your party with characters possessing ranged weapons so they have more chances to strike the elusive rabbit. Failing that, you can always just cast Berserk, which will make the Vorpal Bunny more inclined towards confrontation, even at the expense of increasing its potency.
That said, Vorpal Bunny isn’t an impressive specimen as far as Marks go. It has just over 20,000 HP, no magicks or technicks, and even when buffed by Berserk its physical attacks will struggle to do more than 400~ damage. Against a well-armed party with Protect active, a Berserk Vorpal Bunny is an easy kill. Just be wary, as its physical attacks can inflict Sap. It’ll start out the fight with some buffs active, so be sure to Dispel those before you apply Berserk. A Black Mage isn’t terribly effective in this fight, as the Vorpal Bunny absorbs Dark, is weak to Holy (an element which you likely don’t have access to right now) and takes half damage from all other elements. Too bad you don’t have a holy hand grenade handy, eh? You can further impede its laughable offense by inflicting it with Blind and Slow.
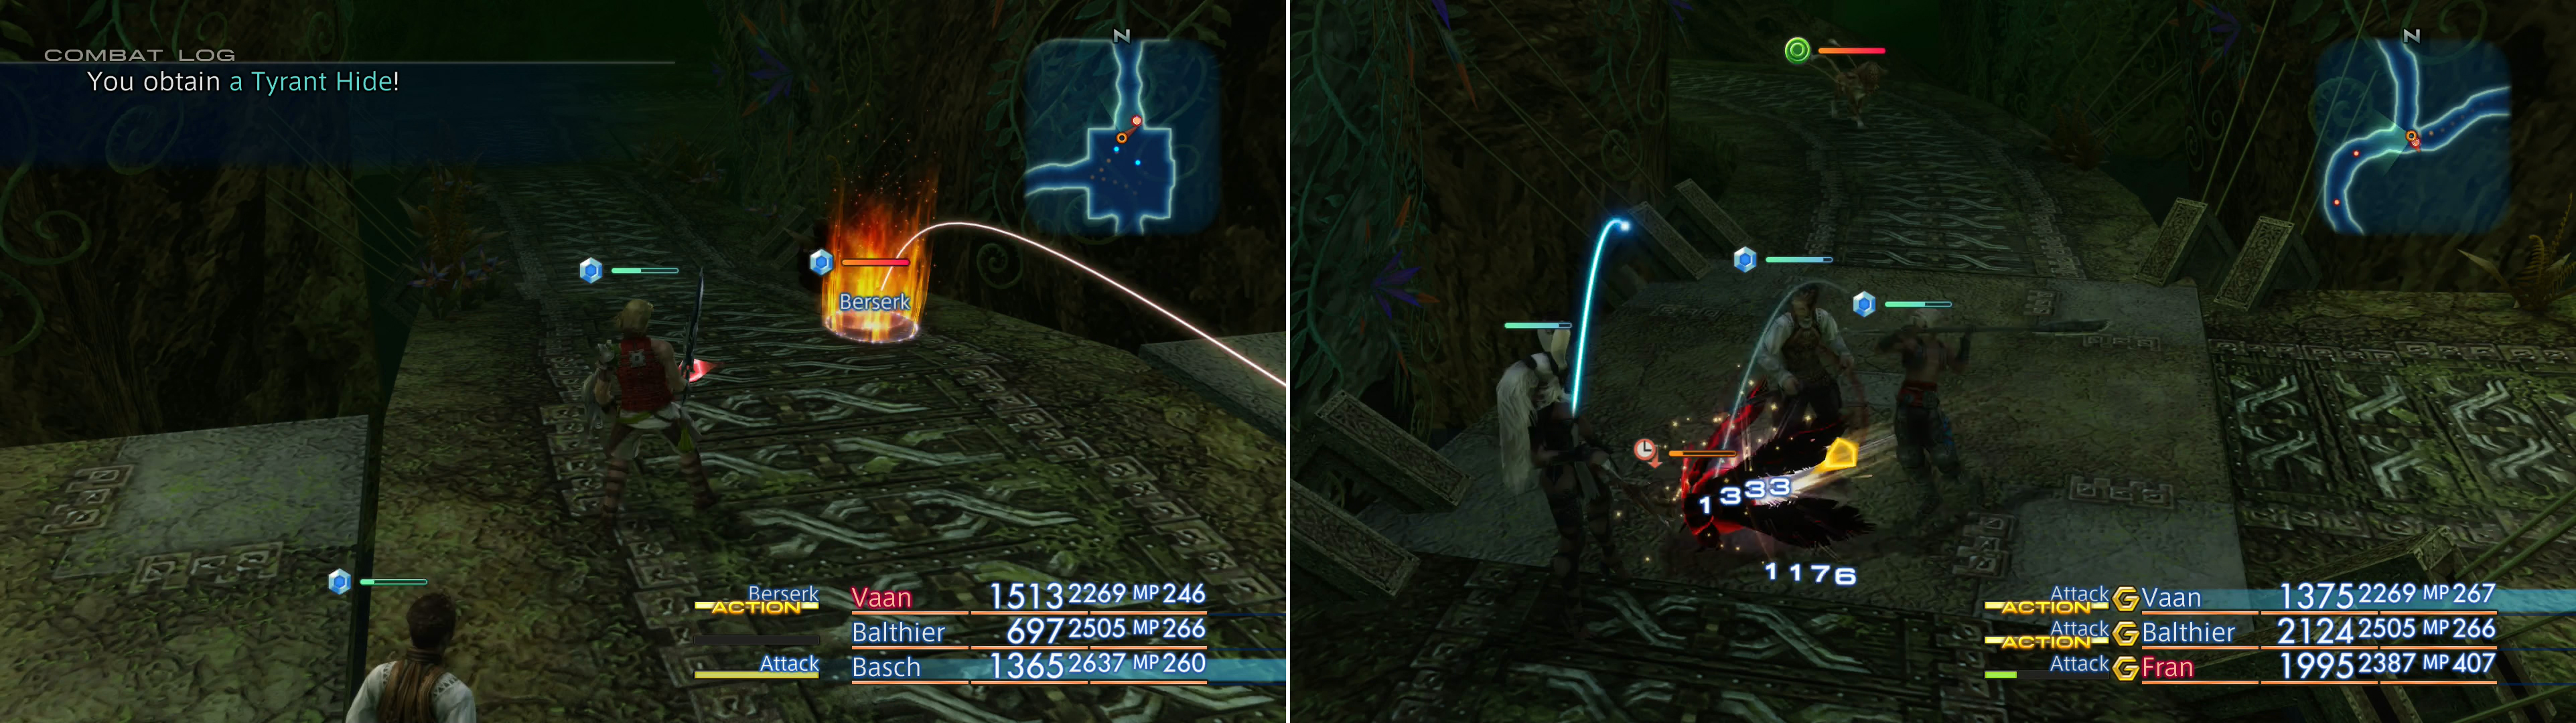
Inflict Berserk on the Vorpal Bunny to prevent it from running away (left) after which it shouldn’t be much trouble to put down (right).
After vanquishing the Vorpal Bunny you’ll be able to pluck off the object of your hunt - its “Rabbit’s Tail”. With it in hand return to Eruyt Village, where Nera will meet you near the entrance to the town and conduct you in secrecy to her abode. All her scheming is for naught, however, as Alja will drop in during your conversation and discover your collaboration. The two will air their laundry and reveal some of the inner workings of Viera society before you finally get your reward.
No Comments