


| Bestiary |
|---|
| Feral Retriever (Mark), Ixtab (Mark), Ring Wyrm (Mark) |
| Items In This Area |
|---|
| Hunting Crossbow, Icebrand |
You’ve finally made it through Paramina Rift, and now that you’ve reached Mt. Bur-Omisace, you can finally get on with the story, right? Well… sure, but there are a few things you should take care of before you do. Mt. Bur-Omisace is almost entirely story, and once you advance you may find yourself lacking access to certain… resources. You’ve covered a bit of ground and hopefully gained a few levels and new licenses, and more importantly, unlocked new hunts. Now is a fine time to knock some of those hunts out, while you have a guest to assist you.
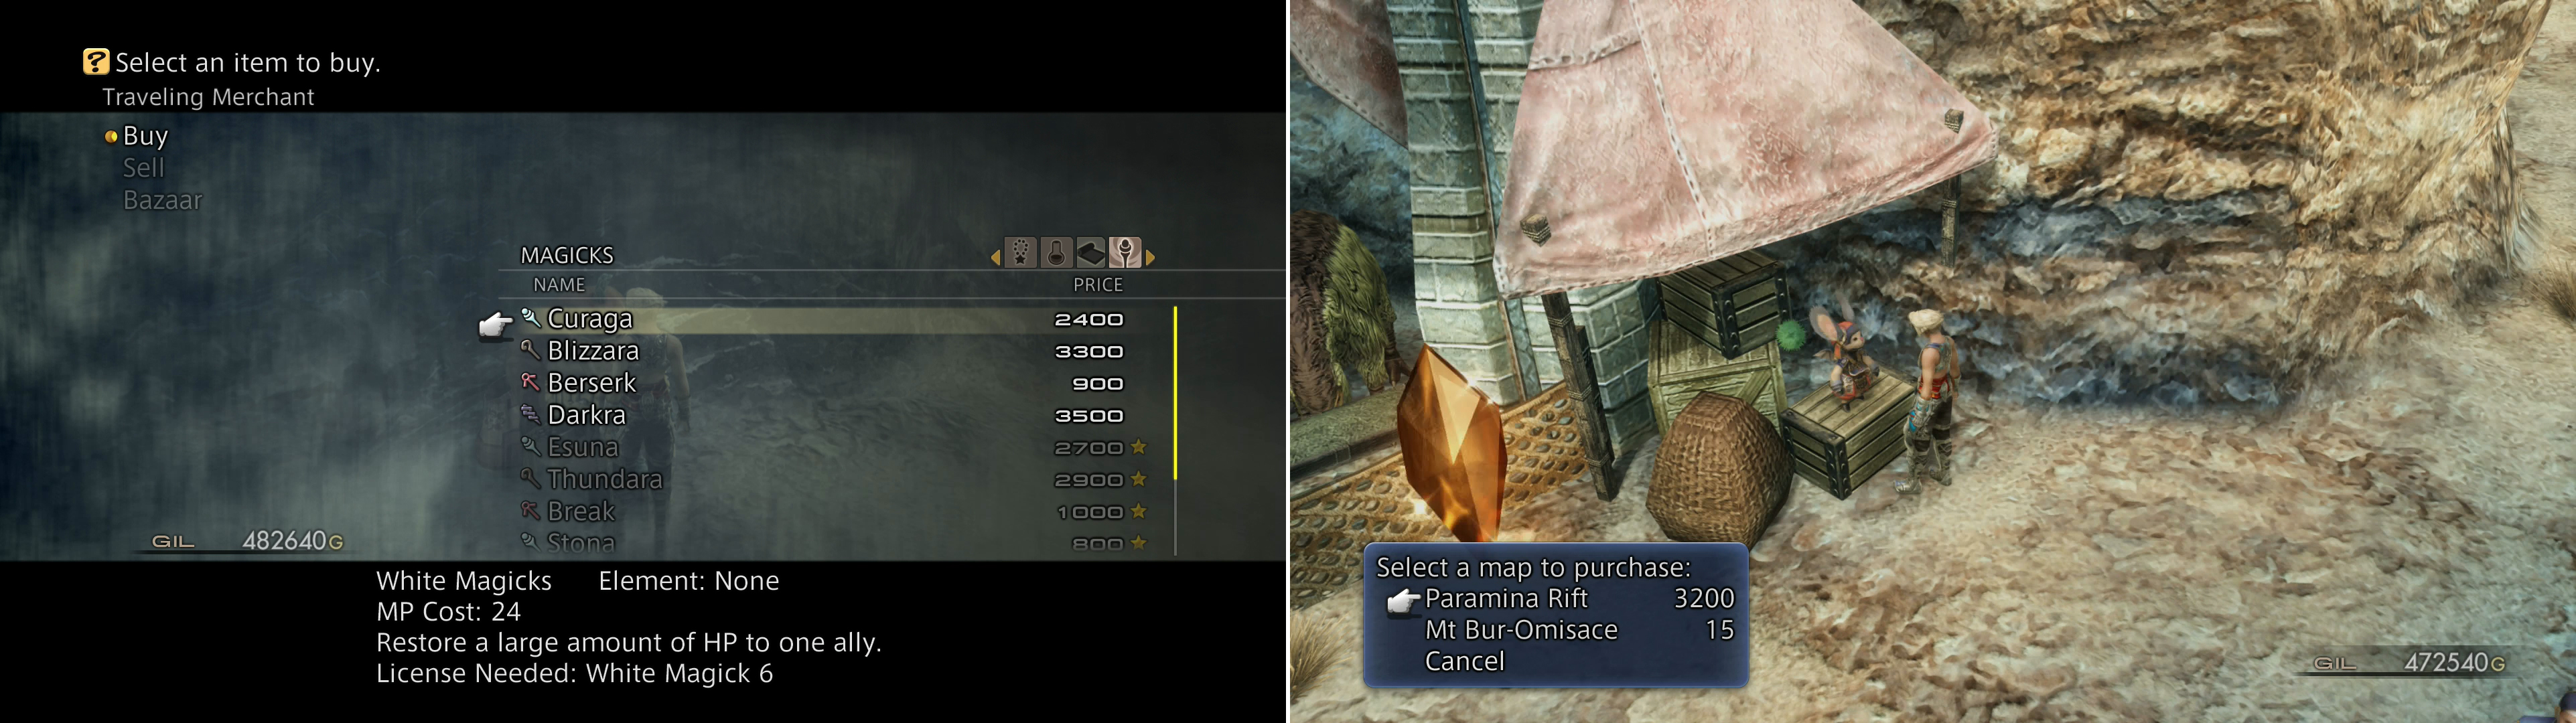
Be sure to do business with the merchants on Mt. Bur-Omisace, as they have lovely new magicks for sale (left). As is the norm, you can also buy new maps here (right).
Merchants on the Mount
Before that, however, you might as well check out what the merchants at Mt. Bur-Omisace are offering. South of the Gate Crystal are two merchants, the Seeq to the east sells accessories, items, technicks and magicks, while the Hume to the west sells weapons and armor. You should have found much of the latter merchant’s wares in Paramina Rift, but the Seeq does have some interesting things to buy.
You temporariliy had access to the Souleater technick courtesy of Vossler, but now you can buy it yourself for a mere 6,000G. Of more interest, however, are the magicks. Curaga (White Magick 6) heals a massive amount of HP to one character - you probably don’t have enough HP to really need this yet, but it’ll come in handy sooner or later. Blizzara (Black Magicks 6) gives you a more potent, area-of-effect Ice elemental attack. Berserk (Time Magick 7) will inflict the Berserk status on a character, increasing their attack, but also making them rampage indiscriminately. It’s not bad for a character whom has no higher strategic value, but it does mean they won’t be able to respond to changing battle conditions. Finally you have Darkra (Arcane Magick 1), a Dark element area-of-effect magick.
Buy what you will from these two merchants, then turn your attention to the Cartographer Moogle near the Gate Crystal, who will sell maps for Paramina Rift (3,200G) and Mt. Bur-Omisace (15G). Ouch. After you’ve acquired whatever maps you care to buy, it’s time to use the Gate Crystal to teleport back to Rabanastre. If you want to tackle hunts, anyways. If not, skip down to the section “Meeting the Gran Kiltias” to continue with the story.
| Cartographer’s Guild - Maps | . |
|---|---|
| Paramina Rift | 3,200 Gil |
| Mt. Bur-Omisace | 15 Gil |
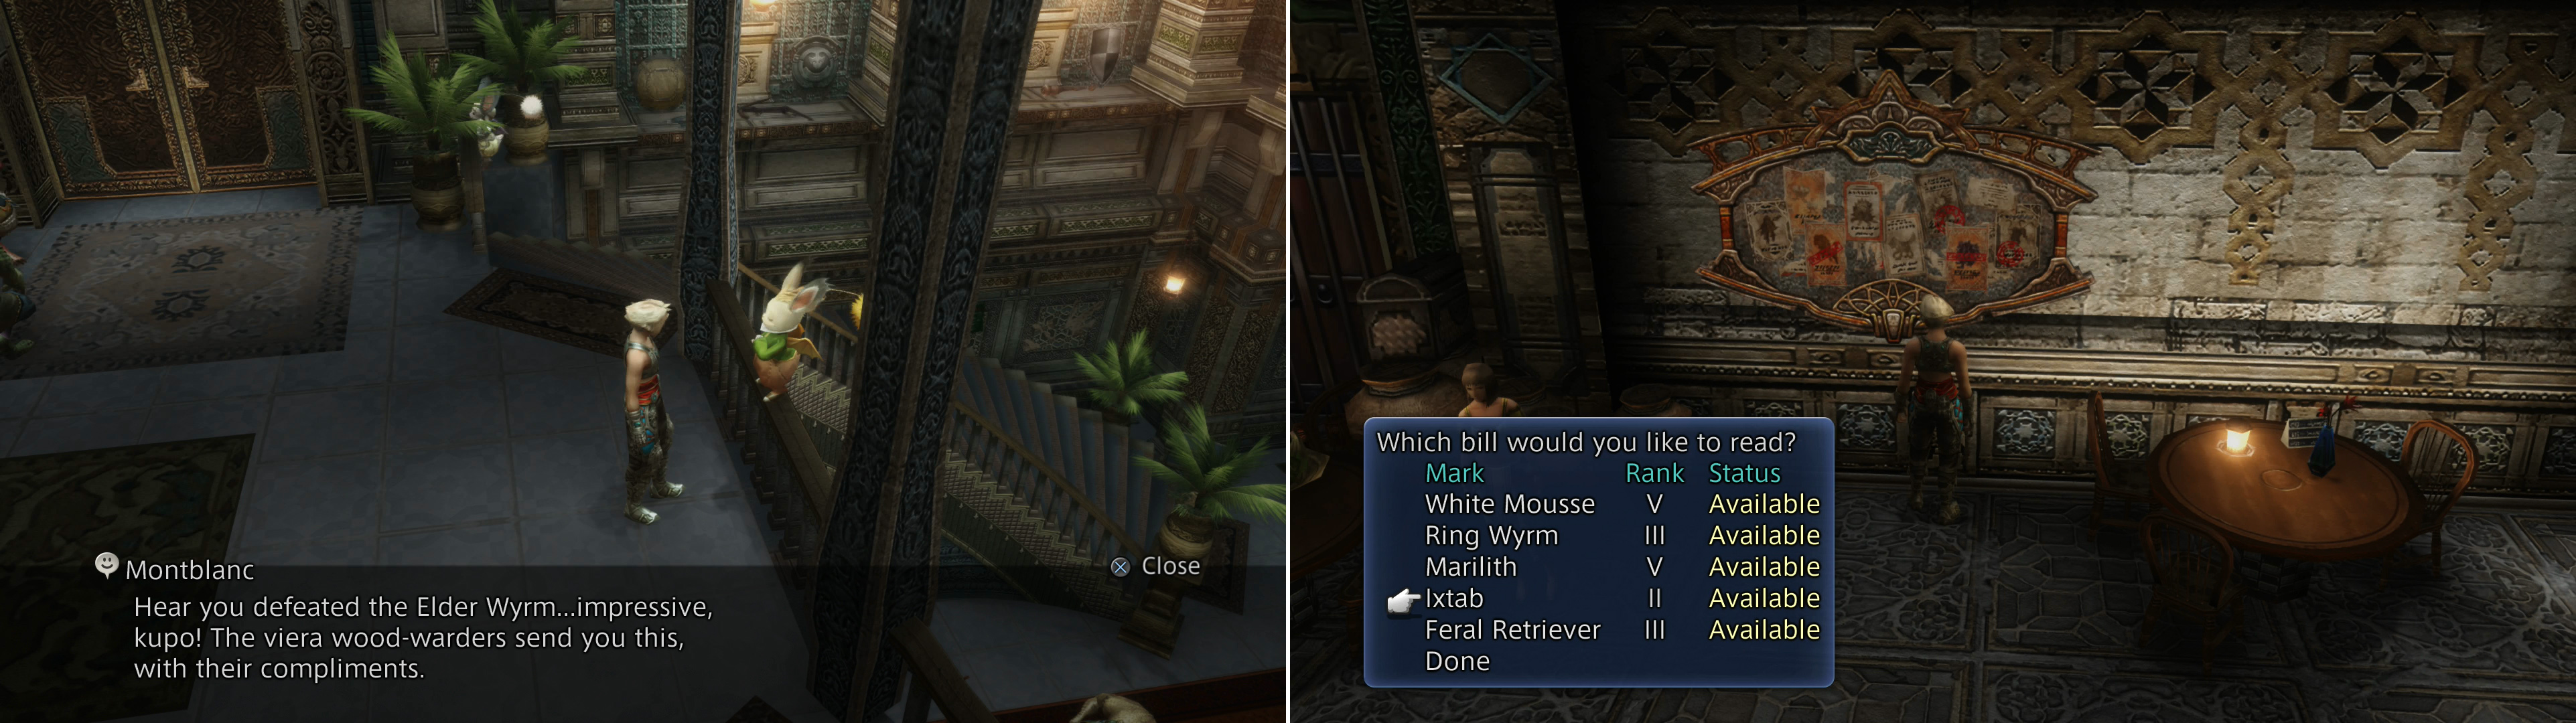
Use the convenient Gate Crystal to teleport back to Rabanastre, where you can visit Montblanc for some rewards (left), then pick up a few new hunts (right).
Headhunter Rewards
Teleport to Rabanaster and, while you’re in Rabanastre again, be sure to visit The Clan Hall and talk to Montblanc. Not only will he reward you for reaching the rank of Headhunter (kill ten Marks - if you’ve finished everything up to this point should have accomplished this feat) to the tune of two Ethers and two Teleport Stones, but he’ll reward you for killing the Elder Wyrm (800G) and Tiamat (900G).
| Reward (For exterminating the Elder Wyrm) |
|---|
| 800G |
| Reward (For thrashing Tiamat) |
|---|
| 900G |
Montblanc is also offering up more Elite Marks, but they’re all probably out of your league right now, so pay them no mind. Instead, head off to the Sandsea and check out the notice board there, where you’ll find three hunts that should be pretty easy to handle right now - Ixtab, Feral Retriever and Ring Wyrm. Pick the ones you intend to pursue, then peruse the following sections for the relevant hunt(s).
Hunt - Ixtab
| Ixtab | . |
|---|---|
| Level | 24 |
| Weaknesses | Holy |
| Resistances | Dark (Absorbs) |
| Immunities | Disable, Disease, Doom, Lure, Oil, Petrify, Poison, Sleep |
| Safety | Yes |
| Drop | N/A |
| Steal | Dark Crystal (55%), Book of Orgain-Mille (10%), Flame Shield (3%) |
To properly start this quest you’ll need to travel to Jahara, then cross the bridge to The Elderknoll area, where you’ll find High-chief Zayalu waiting for you in the tent to the west. Talk to him and when he’s done wasting him time fear-mongering at you he’ll tell you that you can find the beast in the Henne Mines, in the Phase 1 Shaft area.
Head to the Banks of the Sogoht area and talk to Gurdy, the Chocobo-Moogle and rent one it its birds, then ride to the southern end of The Shred zone in the Ozmone Plains, from which you can reach the Henne Mines. For this hunt you may want to take along a Red Battlemage, as they can cast all the necessary magicks you’ll want at your disposal - Cura, Dispel, and Silence. A Black Mage and White Mage’s combined powers will suffice, however. Otherwise, you need not be picky.
Head on into the Henne Mines and make your way to the third area, pressing the switches in the North Entrance and Pithead Junction A areas to open up the doors leading to the looping tunnels to the east and south, as this is where Ixtab dwells. Make your way to where the two tunnels intersect in the southeast and Ixtab will manifest and attack.
Ixtab can be a pretty rough customer, at least given its offensive capabilities. It can harass you with Aquara, Aerora and Dark, and like Wraith it’s happy enough to cast Doom on your characters and wait for them to die. In addition, its physical attacks inflict the Doom status and it can use the Annul technick to fully deplete a character’s MP. If this happens to your mage, be sure to use an Ether. Ixtab does have two weaknesses, however - its HP are a mere 22,000, far from being impressive. Even more damning, however, Ixtab isn’t immune to Silence, and hitting it with this Black Magick will cut off the worst of its offense. Counter Doom with a Remedy (if you have the Rememdy Lore 3 license) while Stop can be removed with Dispel. You can also easily defeat Ixtab by simply summoning Belias, as Espers are immune to status-effect.
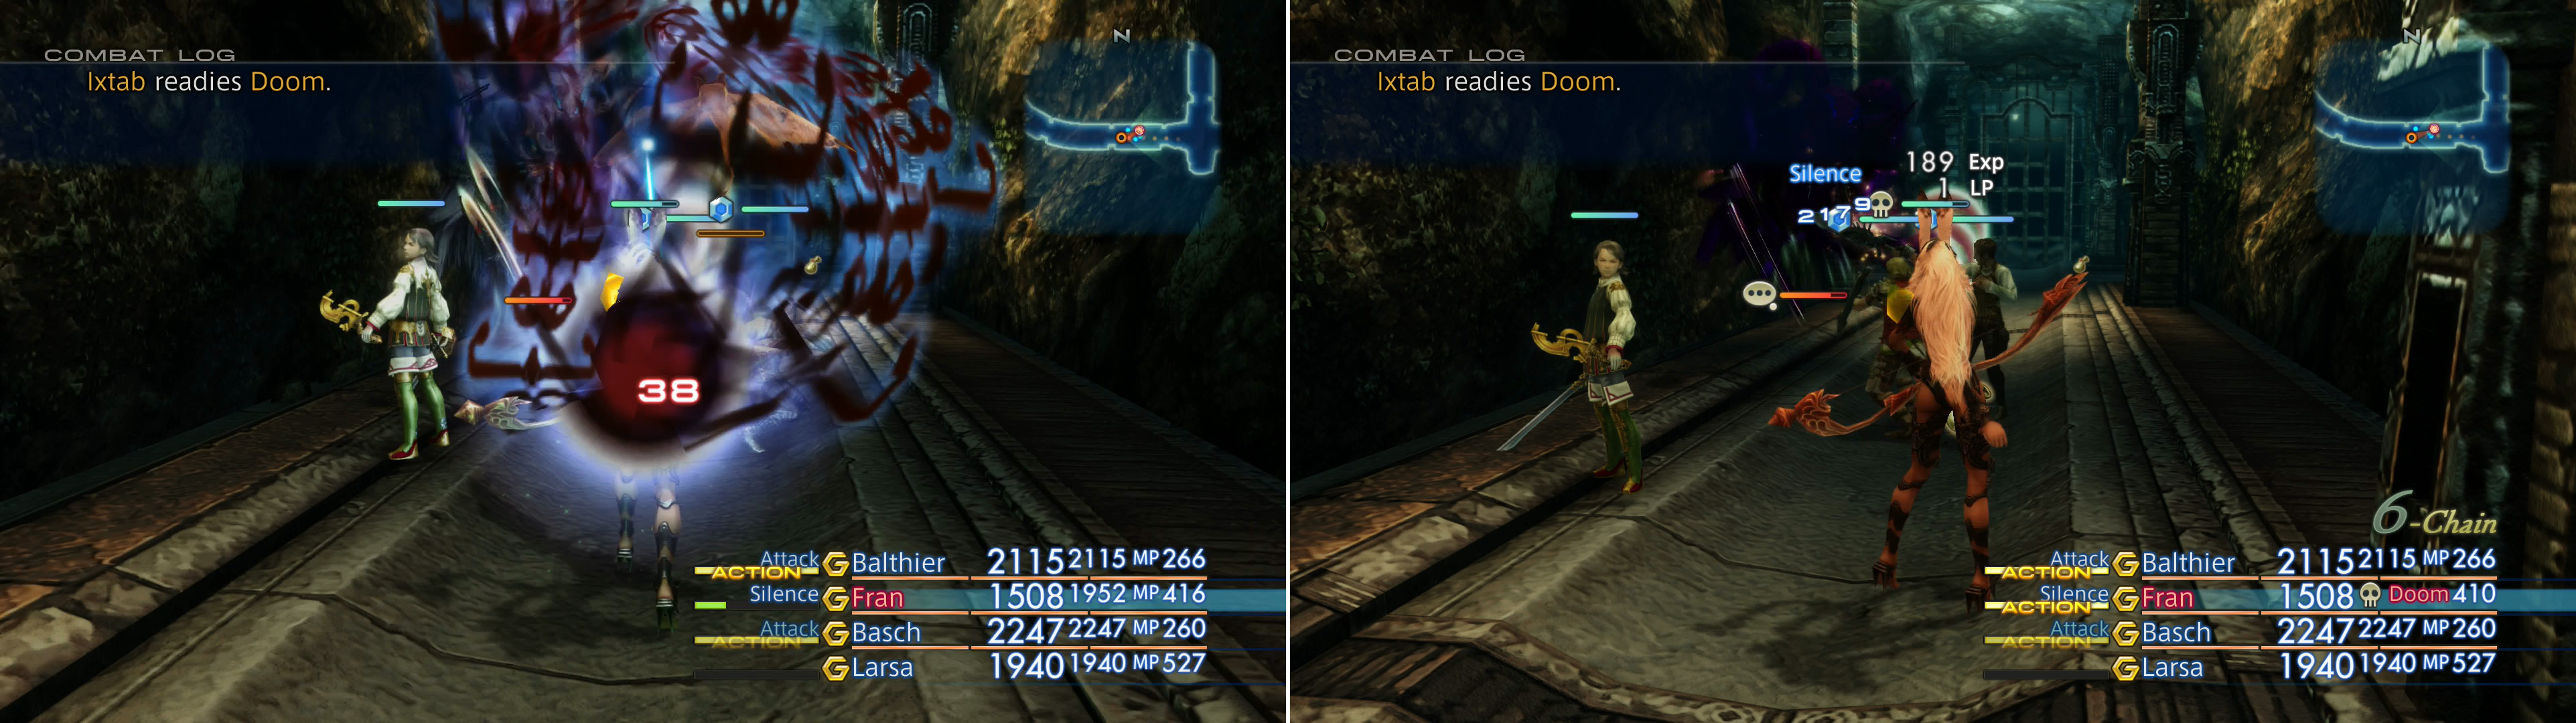
Ixtab will use a variety of nasty magicks and technicks on you (left), but much of his offense can be neutralized by inflicting Silence (right).
When Ixtab has been banished, return to Jahara and tell High-chief Zayalu the news, who will hand of your well-deserved reward in return.
| Reward (For eradicating Ixtab) |
|---|
| 1.300 Gil |
| Ether x1 |
| Soul Powder x1 |
Hunt - Ring Wyrm
The petitioner for this hunt happens to be none other than Balzac, who can, of course, be found sitting in front of the entrance to the Resistance base in Lowtown. More specifically, look for him along the southwestern edge of the North Sprawl. Talk to him to get the details of the bill, where he suggests you can find the Mark troubling him in the Windtrace Dunes section of the Westersand… provided the weather is right.
Make your way to the Westersand via Rabanastre’s Westgate and zone in until there’s a sandstorm. Failing that, make your way north through the Galtea Downs area, then east through the Corridor of Sand to reach the Wyrm’s Nest area, which will spawn a sandstorm. After a sandstorm spawns, simply make your way west to the Windtrace Dunes zone and search the southeastern end of the area. Don’t worry if the sandstorm appears to subside in The Midfault zone - if there was a sandstorm in the Corridor of Sand or the Galtea Downs, there should be one in the Windtrace Dunes.
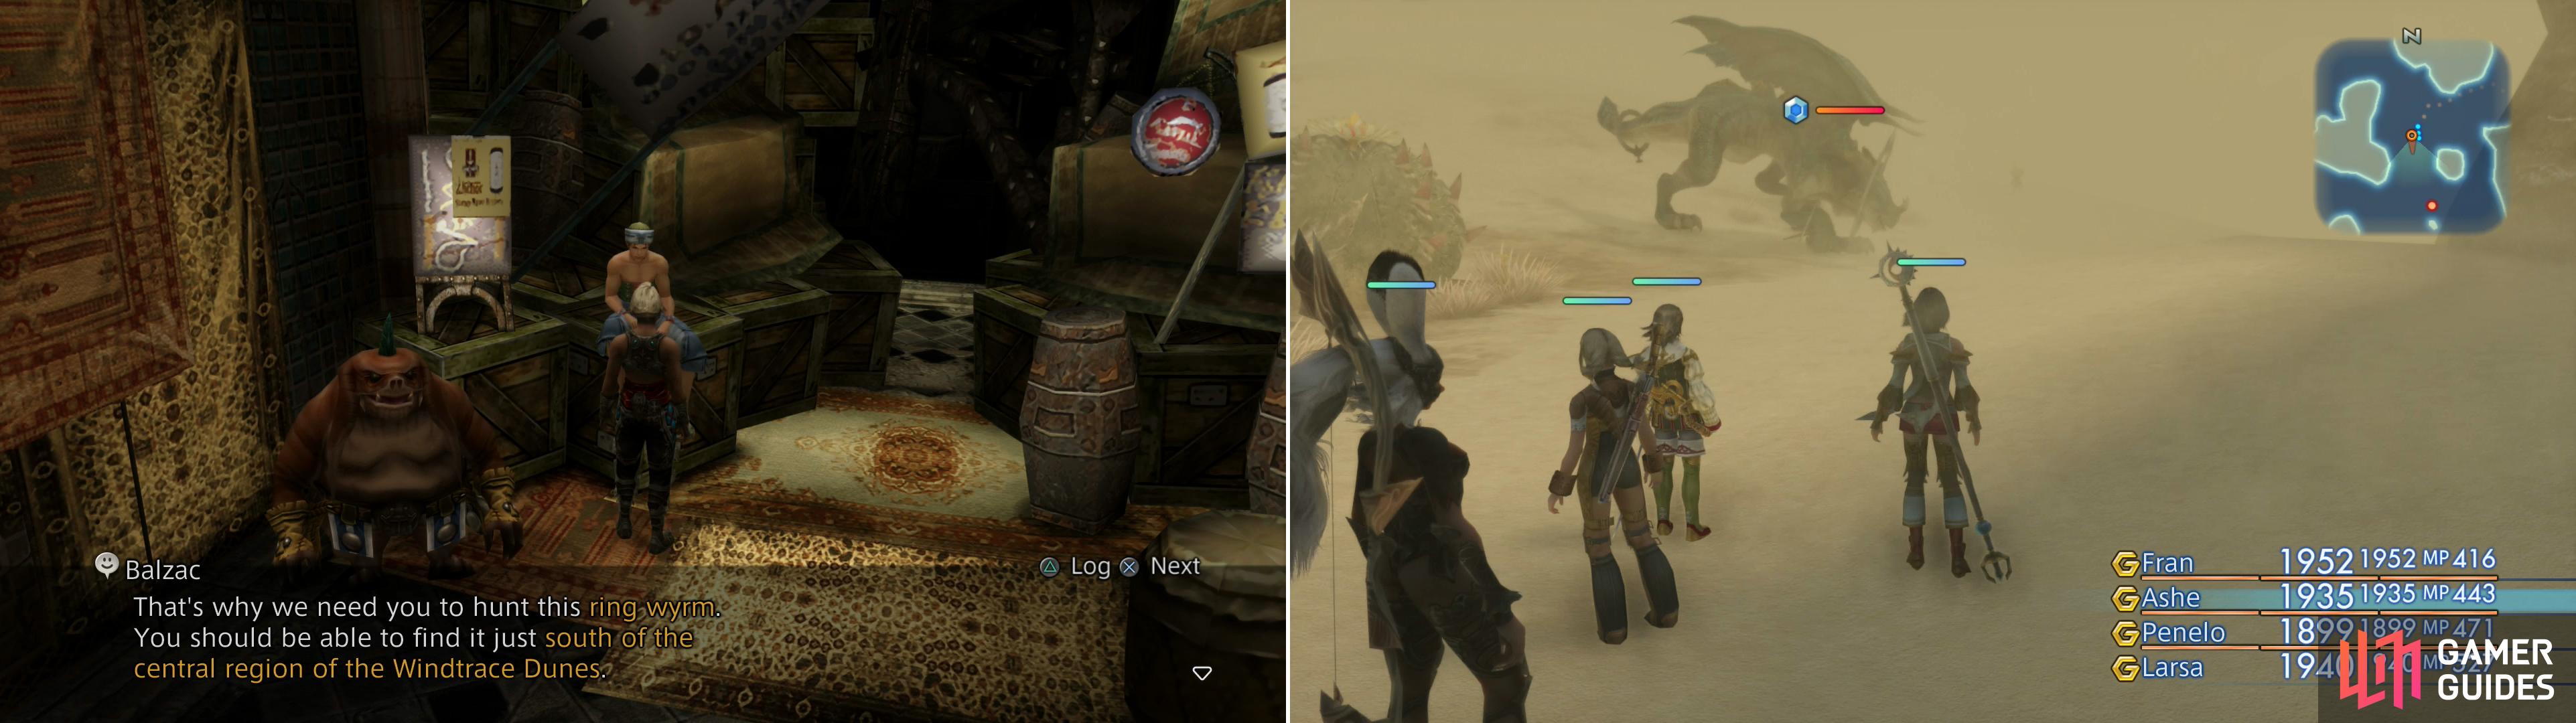
Speak to Balzac in Lowtown to learn about his Mark, the Ring Wyrm (left). You’ll find Ring Wyrm in the Windtrace Dunes zone, as long as there’s a sandstorm active (right).
| Ring Wyrm | . |
|---|---|
| Level | 32 |
| Weaknesses | Fire |
| Resistances | Water (Absorbs), Dark, Earth, Holy, Ice, Lightning, Wind (Halves) |
| Immunities | Disable, Disease, Doom, Lure, Oil, Petrify, Poison, Reverse, Sap, Silence, Sleep, Stop |
| Safety | Yes |
| Drop N/A | N/A |
| Steal | Phoenix Down (55%), Hi-Potion (10%), Water Magicite (3%) |
For the Ring Wyrm battle, magick will go a long way. The monster has access to three elemental magicks - Blizzara, Fira and Thundara, so there’s no good way to neutralize all of its attacks. That being the case, a White Mage with a Cura Gambit will be useful for restoring injured characters - if you have 2,000 HP or so per character, the common Gambit “Ally: HP Cura” should suffice to keep you alive. In addition to that, Ring Wyrm also has Immobilizega, which can inflict your entire party with Immobilize. Again, if they’re mages this is hardly much of a handicap.
Start the battle out by having your White Mage cast Dispel to remove Ring Wyrm’s buffs (especially Shell), as your Red Battlemage and Black Mage pelt it with Fira. This Mark has over 120,000 HP, so even if you’re dealing 3,000+ damage per Fira, it’ll take a few castings to bring him down. On top of that, Ring Wyrm will cast Restore once during the battle, healing it a substantial amount. While the Ring Wyrm has plenty of magicks at its disposal, it seems to prefer attacking in melee, so casting Blind is a fine way to limit its offense - especially since its physical attacks can inflict Confuse. In addition, its Breath attack deals a hefty bit of Fire damage and can inflict Sap. Set your White Mage up with the Gambit “Ally: any –> Esuna” and they should keep you out of danger from any of these attacks. Ironically, Ring Wyrm isn’t immune to any of the status effects (Confuse, Immobilize, Sap) that it can inflict, although they’re arguably more inconvenient for you than for it.
Belias is also a viable tactic here, as he absorbs Fire damage and takes half damage from both Ice and Lightning, making him rather well protected from Ring Wyrm’s magicks. You can also use Quickenings to shave some of Ring Wyrm’s HP down quickly, if the need or desire arises.
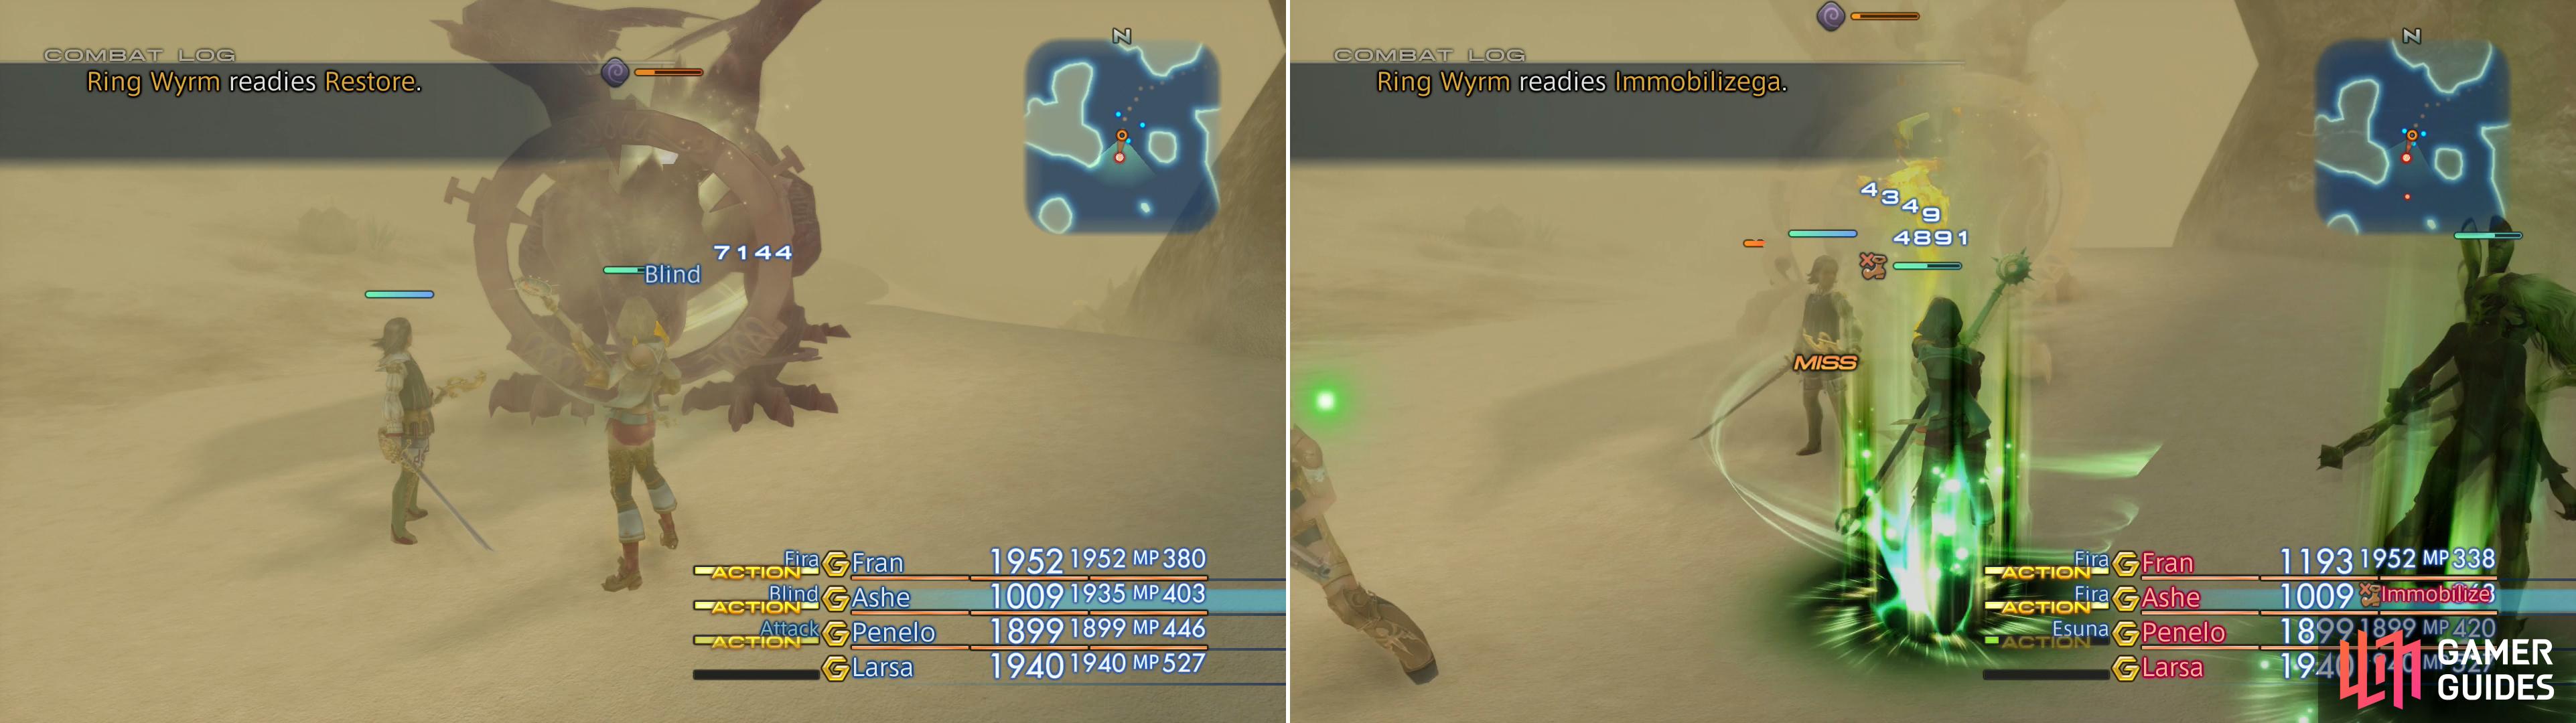
Ring Wyrm can be inflicted with Blind, and Fira will do obscene damage to him (left). Just be wary of Immobilizega, which can inflict Immobilize on the entire party (right).
When Ring Wyrm falls, return to Balzac in Rabanastre to claim your reward. If you’ve bested all twelve hunts up to this point (recently including Ixtab and Ring Wyrm) you should attain the rank of Ward of Justice. For this feat Montblanc will reward you with two X-Potions and two Teleport Stones… and don’t forget to claim your reward from Balzac, either!
| Reward (For restraining the Ring Wyrm) |
|---|
| 200G |
| Moon Ring |
| Icebrand |
Hunt - Feral Retriever
The final hunt of this section will, fittingly, take you back to Mt. Bur-Omisace, and that’s really the entire reason why this hunt was saved for last. There’s certainly no reason from a strength standpoint to hunt the Feral Retriever after Ring Wyrm, anyways. When you arrive at Mt. Bur-Omisace, talk to the monk named Hymms just southwest of the Gate Crystal to start this hunt, after which you’ll be instructed to seek the Feral Retriever out in the Spine of the Icewyrm zone of Paramina Rift.
To get there, leave Mt. Bur-Omisace and continue south through the Freezing Gorge zone, then take the southwestern exit in the Frozen Brook area to reach the Path of the Firstfall. Take advantage of the Save Crystal here, then continue west to the Spine of the Icewyrm zone, where you’ll find the Feral Retriever lurking along the northern reaches.
| Feral Retriever | . |
|---|---|
| Level | 28 |
| Weaknesses | Earth |
| Resistances | Wind (Absorbs), Dark, Fire, Holy, Ice, Lightning, Water (Halves) |
| Immunities | Disable, Lure, Petrify, Oil, Poison, Sap, Sleep, Stop |
| Safety | Yes |
| Drop | N/A |
| Steal | Pebble (55%), Quality Pelt (10%), Prime Pelt (3%) |
Feral Retriever’s offense is entirely based on inflicting status effects, and bringing along a White Mage will go far to frustrate the Mark. Start out the first with Dispel (a common tactic from here on out) then have your White Mage sit back and counter Feral Retriever’s many attacks with Esuna. The Feral Retriever can inflict Sap with its attacks, Petrify with its Stone Gaze technick, and worst of all, Blind, Silence, Sleep and Slow with its Blaster technick.
It can also remove status effects inflicted upon it with Purify, making the attempt to inflict Blind and Slow upon it dubious propositions. Its most dangerous attack, however, is Balance, which it may use when its HP are low. Feral Retriever isn’t well protected by HP, having just over 20,000 or so, but when it uses Balance it’s almost certain to have sustained more than 10,000 damage, meaning this attack will one-hit-kill its target. Just another job for the White Mage!
Feral Retriever is weak to Earth, absorbs Wind and takes half damage from every other element. This being the case, your best bet is to engage with two melee characters (Shiraki/Foebreaker, Knight/Bushi) to draw its attention and whittle its HP down while your White Mage sits comfortably in the back. Larsa can, of course, help out with Bubble and Cura, as needed.
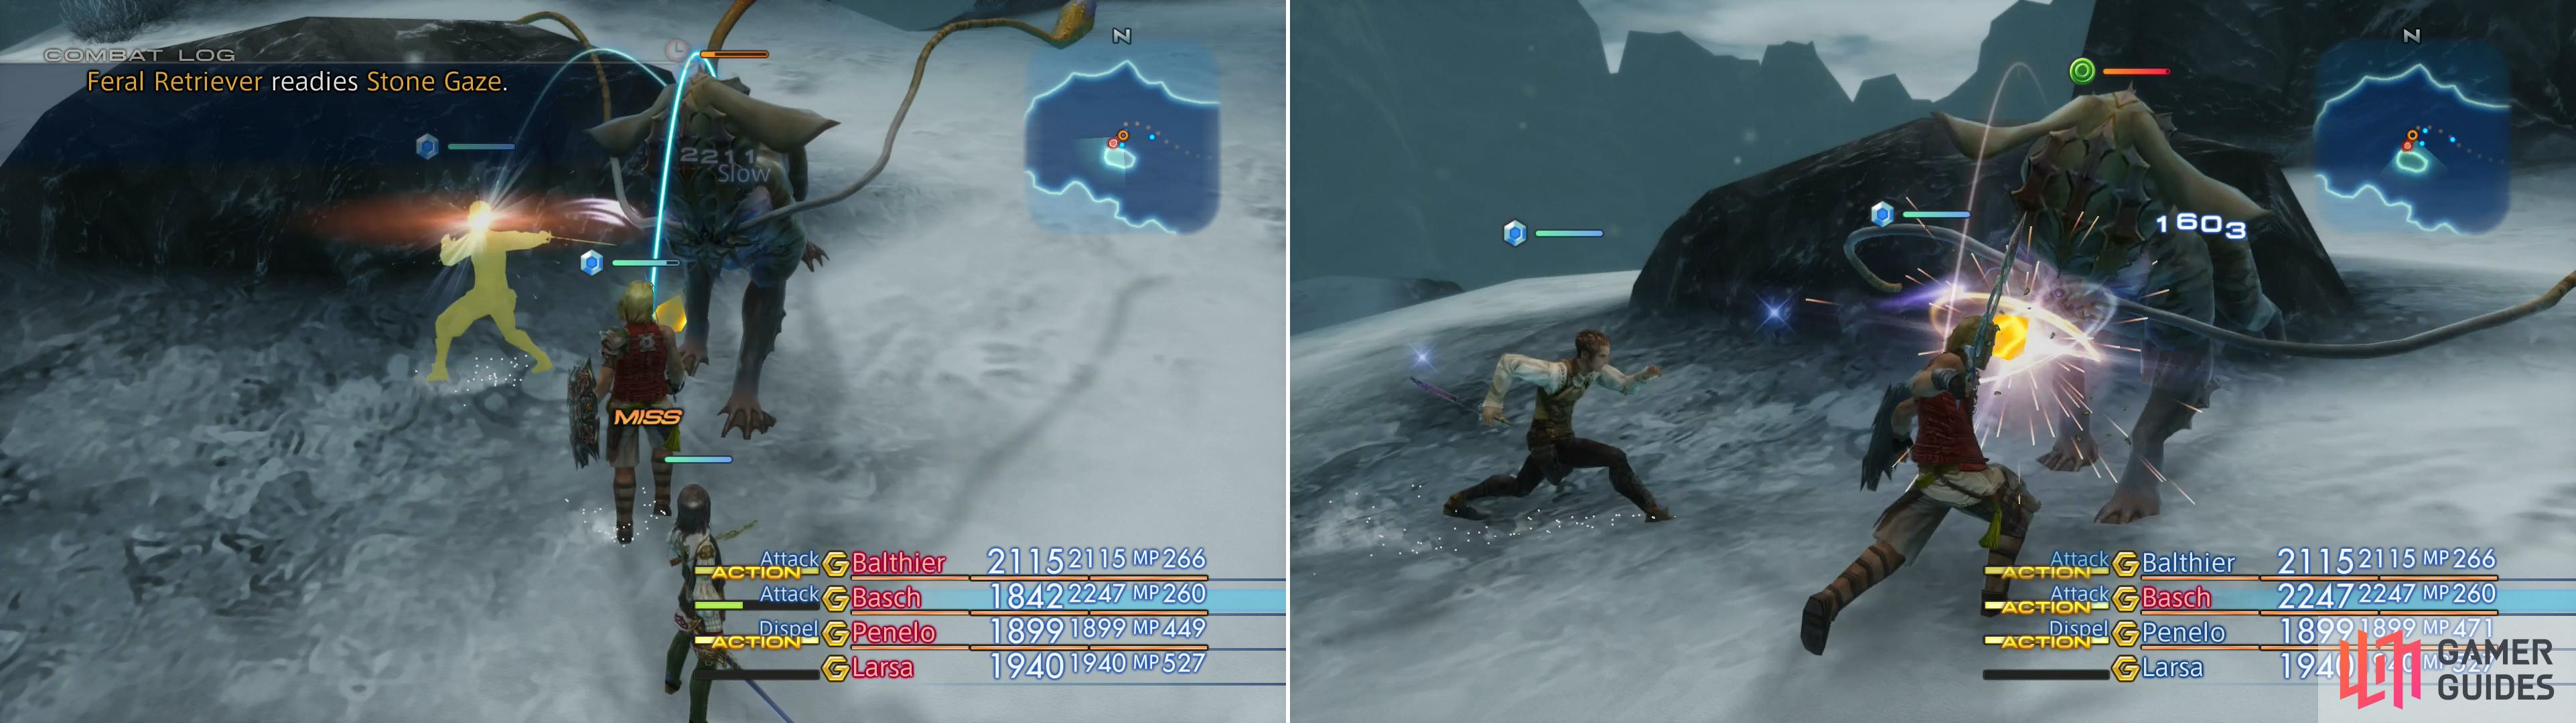
Like all Coeurl-type enemies, Feral Retriever will attempt to inflict a variety of status effects on the party (left). Despite that, he can easily be over-powered if you’ve been doing even a little work to keep your gear current (right).
Once Feral Retrieve is smote, return to Hymm in Mt. Bur-Omisace for your reward. This is the last of the hunts worth attempting now, as the others are either quite a spike in difficulty, or take you to areas that need not be explored just yet. You can, of course, attempt more Trial Mode stages, and by now everything through stage sixteen should be fairly easy for you. Since you only keep progress in increments of ten, however, and the loot in stages 11 - 16 aren’t anything terribly special, getting past stage ten is a fine goal for now. If this interests you, continue on with “Meeting the Gran Kiltias”.
| Reward (For fending off the Feral Retriever) |
|---|
| 1.500 Gil |
| Hunting Crossbow |
| Teleport Stone x2 |
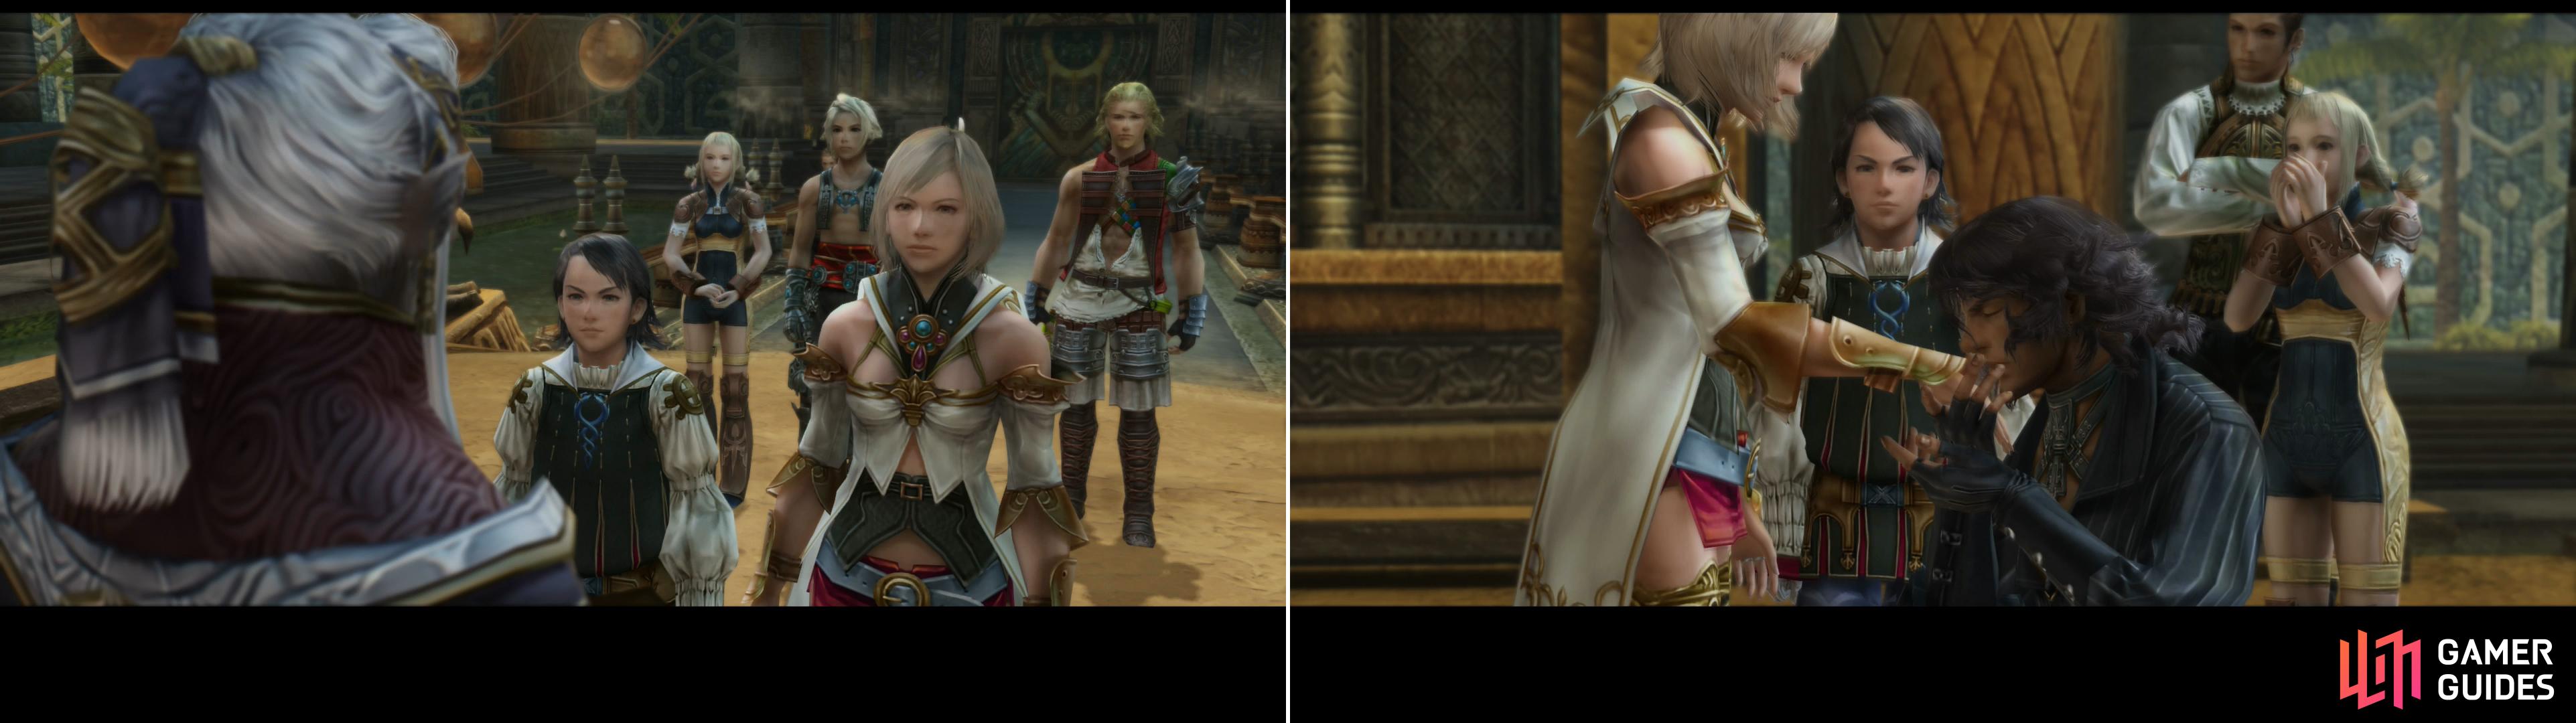
The party will meet the Gran Kiltias on Mt. Bur-Omisace (left) along with other, creepier, unexpected individuals (right).
Meeting the Gran Kiltias
You’ve done as much as is reasonably feasible with Larsa at this time, so there’s nothing to do now but continue with the main story and finish your long-delayed climb of Mt. Bur-Omisace. Make your way north through the Sand-strewn Pass area, then Temple Approach area, talking to NPCs as you go, should you have a care to indulge in a bit of inconsequential lore. Next make your way east through the Temple Grounds zone and open the “Gate of the Holy Circle”, beyond which lies the Hall of Light. From here, simply continue north to meet with Gran Kiltias Anastasis.
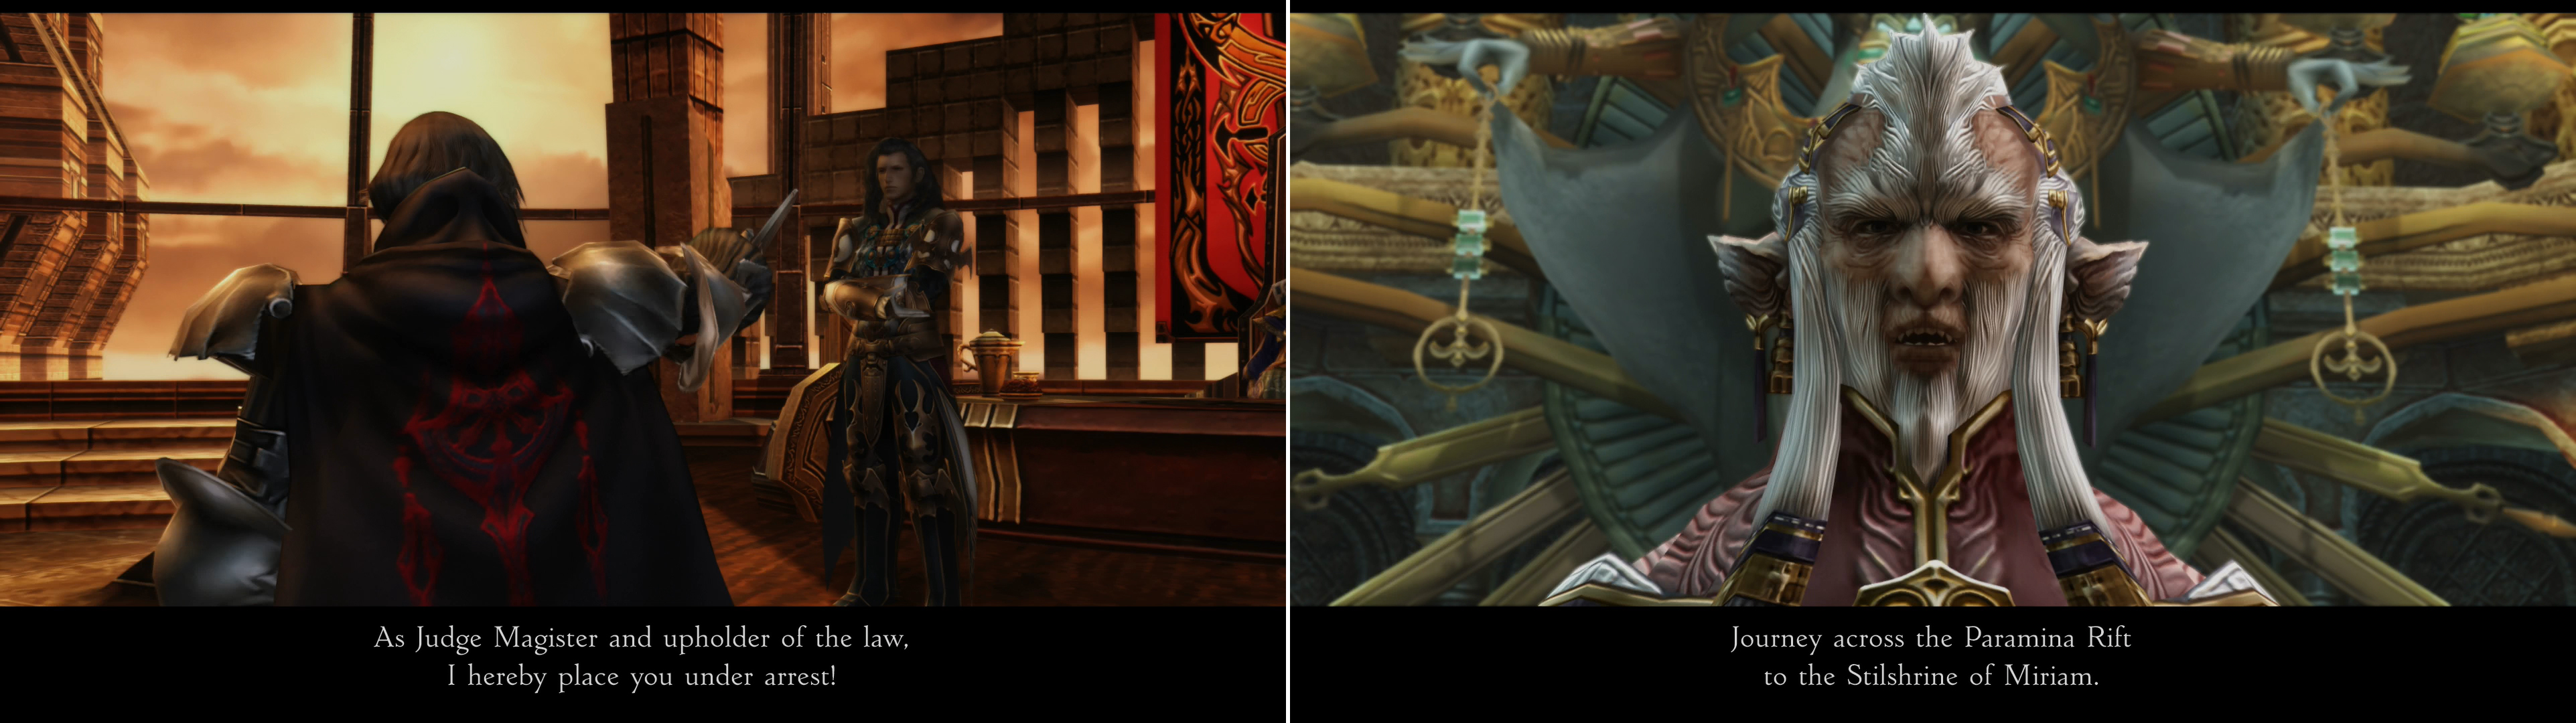
Vayne makes a power-play in Archades (left), and in response to this revelation the Gran Kiltias will advise you to seek out the Sword of Kings in the Stilshrine of Miriam (right).
Some scenes will occur where the Gran Kiltias will say appropriately vague, cryptic and seer-ish stuff, after which your presence will be graced by the arrival of another obnoxious noble, Al-Cid Margrace, a member of the royal family of the Rozarrian Empire. Compared to this cringe-worthy primadonna, the Imperials don’t seem so bad. More obvious politics will be discussed (if only Ivalice’s two mega-powers would be friends, everything would be peaches!) before Al-Cid tells Larsa a rather momentous bit of news concerning the Archadian Empire. With that cue, the scene will change and you’ll bear witness to some political developments in Archadia, which certainly do not suggest that peace is likely in Ivalice’s near future. Back in Mt. Bur-Omisace, Ashe will react to the news as she always does - by lusting for more power, by which she may impose her will on the future of Ivalice. This wish is indulged by the Gran Kiltias, who tells Ashe of some Sword of Kings - a weapon with the power to cut Nethicite - which can be claimed in the Stilshrine of Miriam.
No Comments