


| Bestiary |
|---|
| Basilisk • Behemoth • Giruveganus • Juggernaut (Rare Game) • Preying Mantis. |
| Items In This Area |
|---|
| Agate Ring (Steal from Onion Queen) Bowline Sash (Steal from Preying Mantis) • Bubble Belt • Carabineer Mail • Carabineer Mail (Steal from Giruveganus) • Chakra Band • Cross Scale (Steal from Alraune King) • Deathbringer • Defender • Dispelga • Giant’s Helmet • Giant’s Helmet (Steal from Behemoth) • Golden Amulet • Hypnocrown • Ivory Pole • Jade Gown • Kaiser Shield • Morning Star • Platinum Dagger • Power Armlet • Power Vest • Reflectga • Spica • Traitor’s Bow • Traitor’s Bow (Drop from Pumpkin Star) • Trident • White Mask (Drop from Juggernaut). |
White Magicks Embrace
After a few steps into the area you’ll be greeted by a new foe - the Preying Mantis. Surprisingly, it’s not a palette-swap, either! You’ll find another new enemy in the form of the elusive Basilisk, which slithers out of the scenery like the other serpent enemies you’ve fought thus far. In addition to these new, common monsters you can also encounter the Rare Game Juggernaut, who will spawn in this area when the minutes on the game clock are between :00 and :10. The area is otherwise filled out by Mirrorknights.
Preying Mantis:
The deeper into the Feywood you trek, the more dangerous beasties become… right? Well, not if the Preying Mantis has anything to say about it! As far as its stats go, the Preying Mantis is a slight step up from the monsters you fought up north. They have around 7,500 HP and higher Attack Power, but can inflict none of the status effects that made some of the monsters in the north truly dangerous. In fact, their most dangerous attack is Shock Wave, an area-of-effect attack. They can drop an Insect Husk, a Dark Crystal, a Reflectga Mote or a Cancer Gem, you can steal a Dark Crystal, a Cancer Gem or a Bowline Sash and they can be Poached for an Insect Husk or a Sickle-blade. They are weak to Holy.
You’ll need three Cancer Gems to unlock some ammunition via the Bazaar and two Sickle-Blades for another weapon. Sickle-Blades might be a chore if they weren’t Monograph drops (5% chance, Knight’s Monograph), but since they are, you should get more than enough just by killing them as you explore. The Cancer Gems are best obtained via theft, however.
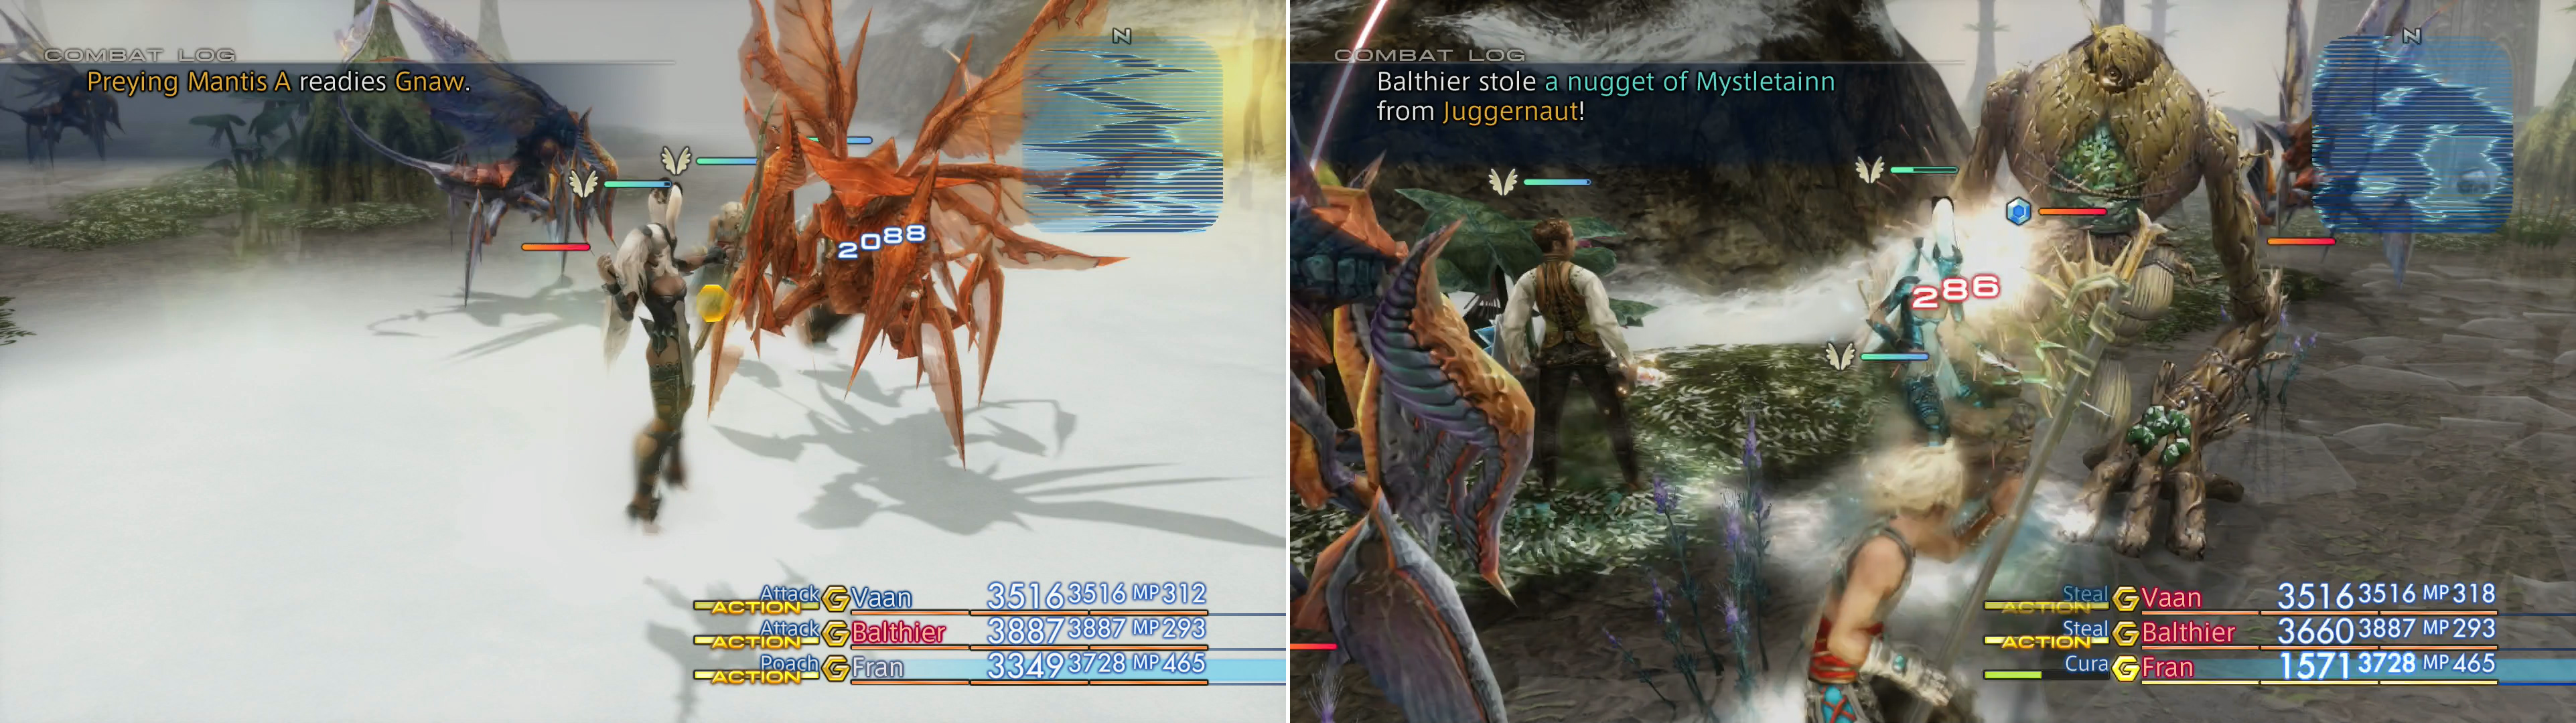
You’ll find the snowy, southern reaches of the Feywood populated with new enemies (left), including the Rare Game Juggernaut, who can be deprived of some Mystleainn (right).
Basilisk :
This serpentine pest is, honestly, rather weak for this point in the game. Like the Preying Mantis their abilities fail to impress, their entire arsenal consisting of Gnaw and Tail Spear, as well as being able to inflict Poison with their attacks. It’s hard to imagine a party that’s not massively under-leveled having any problem with this monster. They can drop an Ice Crystal, a Chronos Tear, Prime Tanned Hide or a Serpent Eye, you can steal an Antidote, 80 Gil or an Aries Gem and they can be Poached for a Prime Tanned Hide or a Serpent Eye.
Ice Crystals (7) are required for a Bazaar bundle sure to make your Archer happy, while you’ll need seven Prime Tanned Hides for two different armor sets. Neither should trouble you much, although it could take a number of kills (or a few Poaches) to get the Prime Tanned Hide. The Serpent Eye is required as a component for another item which can then be sold to unlock a top-tier weapon, and after all is said and done you’ll need six of them. Fortunately, they’re the beast’s Monograph drop (8% chance, Hunter Monograph).
Juggernaut :
There’s a one in six chance this Rare Game will spawn in the White Magick’s Embrace area, but it’s not sheer luck that’s involved, as the monster will only appear when the minutes recorded on the game clock is anywhere between :00 and :10. While this brute has a good amount of HP - over 76,000 - and they hit harder than most foes in the area, they just don’t have the attacks to be much of a threat. They can inflict Confuse when they hit, however, which is by far their most dangerous attack. Otherwise, their attacks include Lunge, Tri-Attack and Wild Charge. They can drop a piece of Lumber or a White Mask while you can steal Mystlelainn from them. It’s their only item to steal and it’s their common steal, so it’s not much work to get. It can be a pain to zone-in and out and your time with this monster is limited, but it’s another way to get your hands on Mystlelainn. They are weak to Wind and absorb Earth.
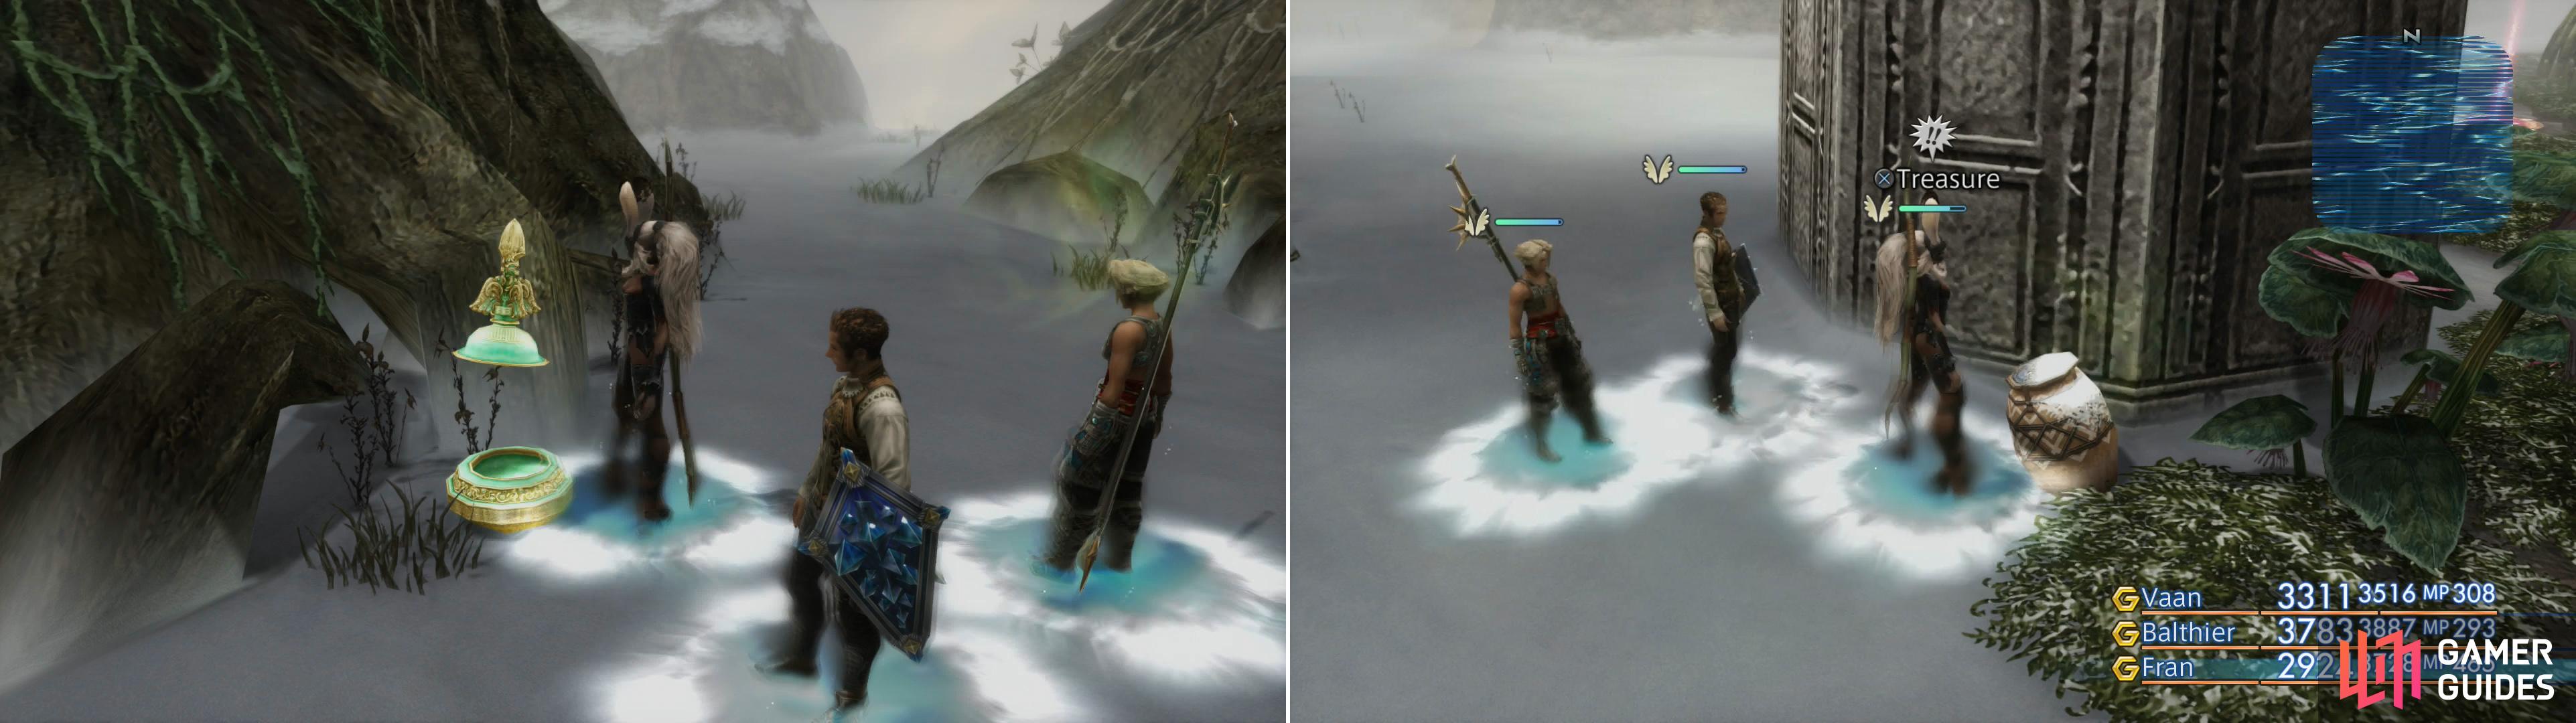
Search the southern part of the Feywood for another map (left), and various urns, including one containing the Dispelga magick (right).
So much for the monsters, now for the loot. From where you enter turn east and follow the area’s boundary cliffs southeast, then south. Note a rock formation to the west as you, and continue south to spot some vegetation, also to the west. Near this vegetation is a stone pillar, and near this stone pillar is an urn which contains the Dispelga magick (White Magick 10). That’s right, not all the treasure in this area is curatives. Dispelga is an area-of-effect version of Dispel, handy considering that even common monsters now employ buffs, and it’s getting harder to simply cut through them all.
Return east to the boundary cliffs and continue following them south until you reach a massive tree, at the base of which is a decorative urn. This urn contains a Feywood Candle , an item that fills in “secret” areas of the Feywood, something your useless map didn’t do. After plundering this urn turn west and when you reach a fork, turn southwest to reach another fork. Here you should turn southeast, then east to reach a dead-end, in the middle of which will be a treasure urn containing a Golden Amulet … useful if you still need LP at this point in the game.
Kill the monsters, grab the loot, then make your way to the southern end of the area (west, then south of the urn with the Golden Amulet in it) to find an area transition that leads to the next zone.
Ice Field of Clearsight
Leave the White Magick’s Embrace and enter the area to the south, the Ice Field of Clearsight. The key features of this area are four shrines, one to the northwest, one to the northeast, one to the southwest, and one to the southeast. If you smell a puzzle, your gamer instincts are working right. Ignore them for now, however, as there’s loot to be had, and getting it will take you throughout the level, most of which is populated by Basilisks and Preying Mantises.
From the area transition to the White Magick’s Embrace area along the northeastern end of this zone follow the boundary cliffs south until you find an urn about midway between the two eastern shrine. This urn may yield a Giant’s Helmet . Continue south and you’ll pass by the eastern edge of the southeastern-most shrine. Continue south past this shrine and, just southeast of the shrine you may find an urn, wherein you may find a suit of Carabineer Mail . If that’s not enough loot, search south of the southeastern-most shrine, where you might find an urn with a Chakra Band inside.
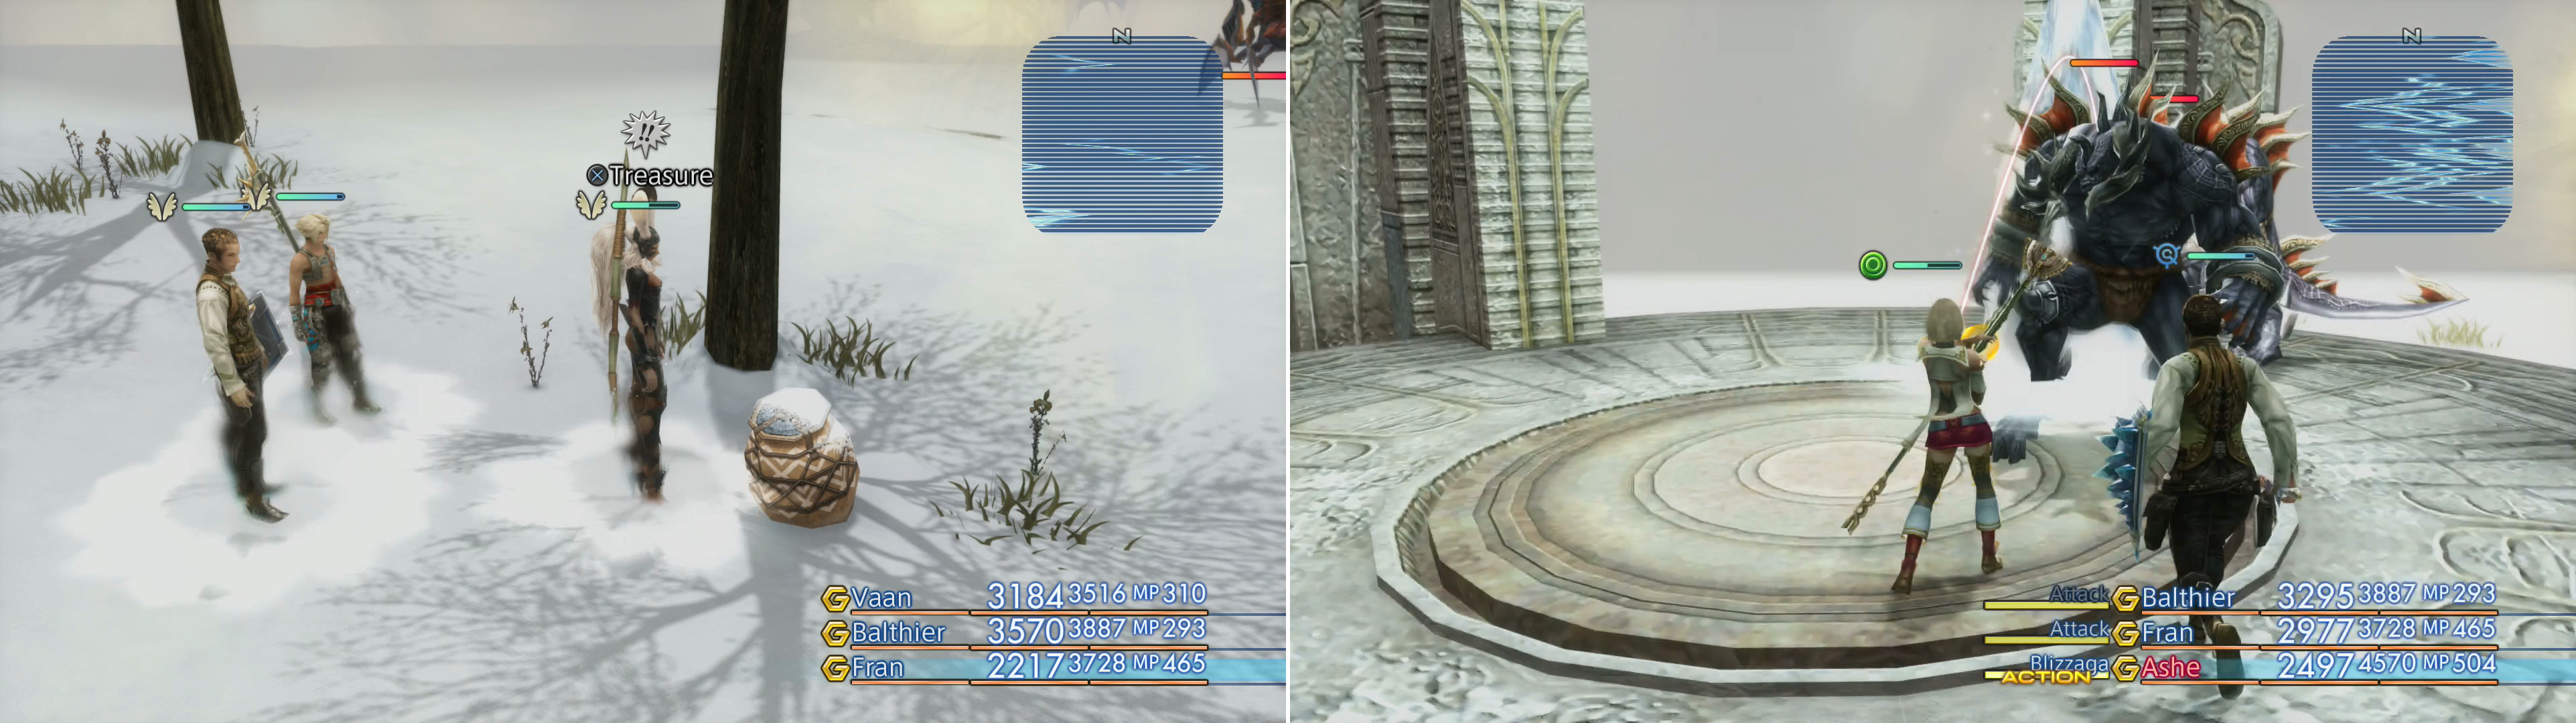
In the Ice Field of Clearsight and the Edge of Reason area you’ll find an abundance of treasure (left). Some of the shrines in these areas house dangerous creatures (right).
From this urn continue following the cliffs forming the area’s southern boundary to the west to find a series of six stone pillars, ruins of some larger structure whose purpose is now lost to time. East of the southern-most pillar, near the cliffs, you’ll find an urn. While it doesn’t contain anything interesting, this is a fine landmark, as you can simply head north from the western-most pillars to reach the center of the area, where you may find three urns near some trees. The southeastern-most urn will always contain a Bubble Belt . This urn will not respawn. The middle one may forfeit a Jade Gown , while the northwestern-most one may contain a Hypnocrown .
Continue north and you should pass by the eastern end of the northwestern-most shrine. Keep going until you hit the cliffs that form this area’s northern boundary, then turn east until you find an urn just north of the northwestern-most shrine. This urn may not yield anything exciting, but continue west along the cliffs until you reach the northwestern corner of the area, where another urn can be found. Loot it to get a shot at a Power Vest , then continue south along the cliffs and search a cubby to the west, which contains nothing interesting. Continue south a short distance and you’ll find a stone pillar, along the northern end of which may lie an urn that can grant you a Kaiser Shield . Along the southern end of this generous pillar you may find another urn, which may yield a Power Armlet .
From this last urn make your way southeast to reach the southwestern-most shrine, which is guarded by two Behemoths. Not only can you encounter these new foes here, but if you clear all the monsters in the area, zone out and return, you’ll spawn the Mandragora family. You remember them, the first boss encounter you fought in the Sochen Cave Palace, against which you contended with an Alraune King, a Mandragora Prince, an Onion Queen, a Pumpkin Star and a Topstalk? Same enemies, the ones in Sochen Cave Palace even counted towards the Feywood Bestiary entries for the same.
There are some differences between these ones and the plants you thrashed in the Sochen Cave Palace and while these differences will be discussed in more detail below, there are some general tips you should be aware of. First, the plants tend to spawn in the area’s shrines, and they’re no less averse to fleeing now than they were in the Sochen Cave Palace. You must not let them flee, however, as they’ll buff themselves with Warsong, Vespersong, and worst of all, Mystery Waltz, the latter of which will boost their level by 20%. While similar technicks have proven trivial before, in this case they can - if given enough time - boost themselves all the way up to Level 99. If they achieve this, they’ll probably be too much to handle. You can respawn them (but not the other foes that normally populate this zone) by retreating two zones away (to the Redolent Glade) then returning. They share battle chain progress, so as long as you don’t disturb the monsters in the White Magick’s Embrace area, you can chain them as much as you please.
This is useful because they do have a bit of interesting loot. Most drop some variety of crystal (Earth, Fire, Storm, Water or Wind) and they all drop Virgo Gems and Screamroots, sometimes at a pretty dependable rate. You’ll need seven Screamroots to unlock a Bazaar Bundle. Each of them also has a rare Poachable item, which is always also a Monograph drop (Dragoon Monograph), although the value of the Bazaar bundles they unlock is questionable, at best. Get the Screamroots, the rest is optional.
Alraune King:
The Alraune King is capable of using the Pollen (inflicts Poison, Sleep and Slow) technick, as well as Mystery Waltz (raises level by 20%) and Ram. Its attacks can inflict Sap. It drops an Earth Crystal, a Screamroot, a Gold Needle or a Virgo Gem. You can steal a Screamroot, Virgo Gem or Cross Scale from it, while it can be Poached for a Screamroot or a Gimble Stalk. It is weak to Wind.
Mandragora Prince:
Capable of casting Cura and Esuna magicks and using Pollen, Ram and Warsong technicks, the Mandragora Prince serves the Mandragora family as a low-end healer, who can still prove to be a nuisance with his status effects. In addition to Pollen, he can inflict Sleep with his normal attacks. He can drop a Water Crystal, Screamroot, Teleport Stone or a Virgo Gem, you can steal a Water Crystal, Hi-Potion or Screamroot, and he can be Poached for a Screamroot or a Four-leaf Clover. He is weak to Fire.
Onion Queen:
The only member of the Mandragora royal family that has a female title, the Onion Queen is the quality healer of the bunch, having access to Curaga, Haste, Protect and Shell magicks. In addition she can defend herself with Pollen, Ram and Vespersong. She can drop a Screamroot, a Wind Crystal, a Remedy or a Virgo Gem, you can steal a Wind Crystal, a Screamroot or an Agate Ring , and she can be Poached for a Screamroot and an Onion. She is weak to Earth.
Pumpkin Star:
The star of the family - it’s even in his name! This obnoxious plant has access to more than his fair share of status effect inducing attacks, including the Blind, Silence and Sleep magicks. As for technicks he has Bleed (inflicts Sap), Mystery Waltz, Ram, Scream and Toxify. Furthermore, he can inflict Confuse with his attacks. The Pumpkin Start can drop a Storm Crystal, a Screamroot, a Traitor’s Bow or a Virgo Gem, you can steal a Screamroot, a Hi-Potion or a Virgo Gem, while it can be Poached for a Screamroot or a Jack-o’-Lantern. They are weak to Ice.
Topstalk :
Topstalk is no star, and that’s made patently clear by taking a gander at its abilities. It has none of the magicks Pumpkin Star has, and all of the same technicks. Instead of Confuse, its melee attack inflicts Disable. It can drop a Fire Crystal, a Screamroot, some Echo Herbs or a Virgo Gem, you can steal a Screamroot, a Virgo Gem, or a Jade Gown, and it can be Poached for a Screamroot or a Tomato Talk. It is weak to Water.
Behemoth :
Foregoing the typical appearance of a Final Fantasy Behemoth, the Behemoths in Final Fantasy XII are bipedal, sword-wielding brutes, and while they’re large enough in this game, they’re nowhere near the size they tend to be in other games. Don’t let this relative lack of stature give you any false impressions, though, Behemoths have over 10,000 HP and respectable Attack Power, which they can increase by downing an amphora of Bacchus’s Wine to inflict Berserk on themselves. Otherwise they’ll content themselves with Ice Break, Ram, Smite of Rage, Tail Swipe and Thundara. They can drop a Prime Tanned Hide, a Storm Crystal, a Red Fang or a Gemini Gem, you can steal a Storm Crystal, a Gemini Gem or a Giant’s Helmet and they can be poached for a Prime Tanned Hide or a Behemoth Steak. They are weak to Ice.
The Gemini Gems (3) they drop can be sold to unlock a Bazaar bundle, which will provide you with arrows worthy of some of the top-tier bows you may be getting your hands on shortly. With Thief’s Cuffs you have a 30% to steal them, but don’t feel compelled to force the issue in this area - there will be more Behemoths lurking in the next few areas.
When you’re done looting and killing, turn your attention to the neglected shrines. This puzzle could hardly be simpler, just look inside each shrine and note the circle in the center. If you see inert concentric stone rings, look for another shrine. If you see a glowing white glyph in the center, stand on the glyph to activate it. Once you activate one shrine, another, previously inert shrine will gain a glyph, and to note which one (aside from relying on trial and error, which works just fine) look around at the various openings of the shrine while standing in the center until you see an illusion appear in one of the openings of a verdant forest, and head in that direction. Repeat the process until you stand on all the shrines, at which point you’ll be able to pass to the next zone.
There’s no fanfare when you get it right, and there’s no way mess this up. Worst case scenario you run around to every shrine until you activate enough of them to pass on. If you attempt to use the area transition in the southwestern corner of the zone before all the shrines are active, you’ll appear back at the northeastern end of the zone. To save you some time, hit the shrines in this order: northeast, southeast, southwest. Once those three are lit up (note the exclamation points that appear on your map - this signifies they’ve been activated) you can exit the map via the area transition to the southwest and reach The Edge of Reason area.
The Edge of Reason
Like the last area, this place is noteworthy for its shrines - five of them instead of four. Despite the increased number of shrines, they work exactly the same as the ones in the previous area, so at worst this will just require more time and running about. To spare yourself the trouble, activate the central shrine first, then the northeastern shrine, and finally the southwestern shrine. After that, continue to the southwestern edge of the area (west of the southwestern-most shrine) to find a large door blocking your way. There’s another step involved to get through this area and finally reach Giruvegan, but before you bother with that, you might as well properly search this area and plunder its treasures.
Let’s start searching the area at the massive gate in the southwestern edge of the area, near which, just south of the door you’ll find an urn. It contains nothing of interest, but follow the southern boundary cliffs to the west and move through the nearby shrine when you must to continue west along the southern edge of the zone. In fact, immediately after you make it to the southwestern edge of the shrine, search the light-source along the exterior edge of the pillar that blocked your path and you’ll find an urn, wherein you may find a Traitor’s Bow . Continue following the cliffs west until you (hopefully) spot another urn just to the north, which may yield a Morning Star .
Follow the cliffs west until they turn north, then continue north to until you reach the outskirts of a shrine - the area’s southeastern-most shrine. South of this shrine you should find an urn which always contains a Defender . This urn will not respawn. Return east to the cliffs and follow them north until you find four stone monoliths standing in the snow. Search the southern end of the northeastern-most of these structures to find an urn, which might forfeit a Platinum Dagger .
If you keep going north you’ll reach the area transition leading back to the Ice Field of Clearsight zone. Bypass it and follow the northern boundary cliffs to the west until you reach an urn just north of the northeastern-most shrine. Rummage about inside of it to get a shot at pulling out a Trident , then continue west until you hit the northwestern corner of the area, where another urn rests. Inside this earn you may be fortunate enough to find another Deathbringer . To finish up your perimeter sweep, turn south and continue past the northwestern-most shrine until you find another set of four stone monoliths, west of which are two, larger stone pillars. Search the southern end of the northern-most of these two massive pillars to find an urn, wherein you may find an Ivory Pole .
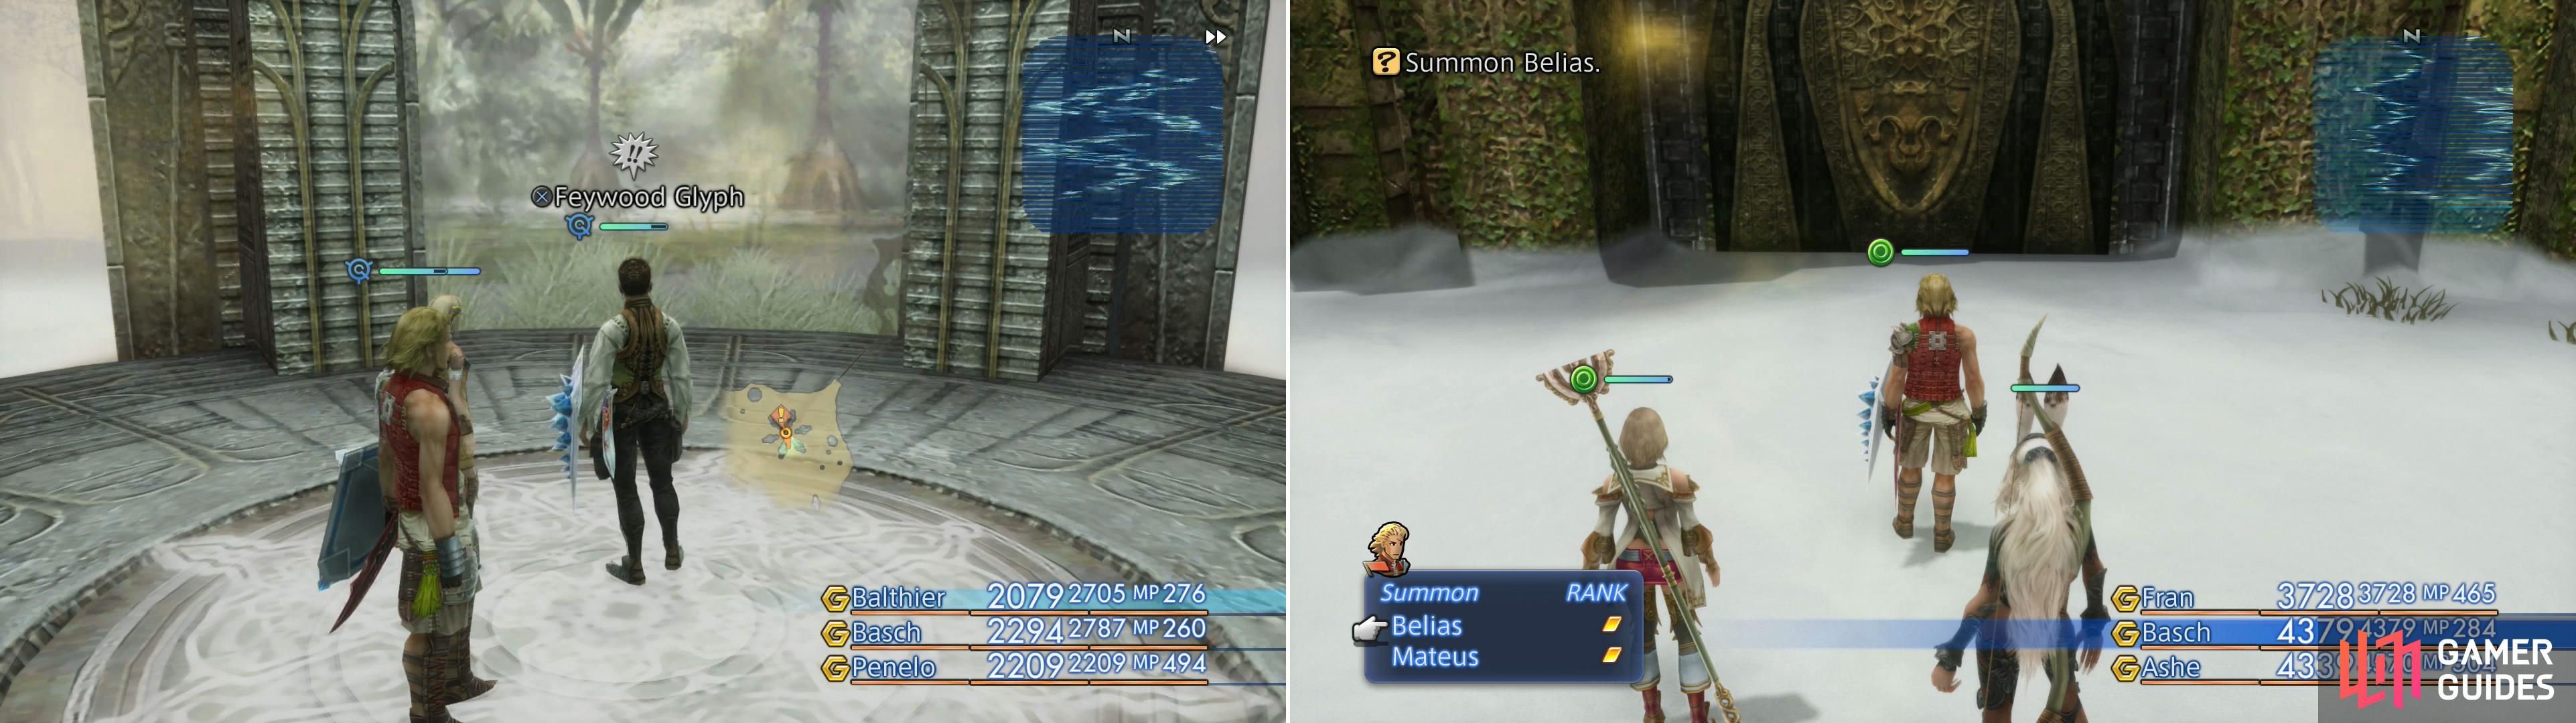
Stand in the center of each shrine and look for the illusion of a verdant forest - this will lead you to the next correct shrine (left). After activating all the shrine, you’ll need to summon Belias to get through the gate leading to Giruvegan (right).
For the last three treasures in this area, make your way to the central shrine, which will be the point of reference you’ll use to gather the rest of the treasure. To the northwest you’ll find an urn just south of two tree. Or at least, you may find an urn - this one rarely spawns, and when it does, half the time it’ll contain Gil. With the Diamond Armlet you may, very rarely, obtain a Baltoro’s Seed, a high-end curative that’ll bestow Bravery, Bubble, Faith, Float, Haste, Libra, Protect, Regen, Shell and Vanish on the user. Whether it’s worth your time to try to get such a treasure is debatable. Return to the shrine and head south to find two trees. South of the eastern-most tree you’ll find an urn, inside of which rests a Spica . Finally, head west from this urn (southwest of the central shrine) to find a trap, in the center of which sits another urn. This urn always spawns, and will grant you the Reflectga magick (Time Magick 9) when plundered. This magick will make it much easier to bestow Reflect on your entire party.
As for enemies, expect to find the typical Basilisk, Preying Mantis duo wandering about, along with a few Behemoths guarding choice shrines. In the center of the zone you’ll encounter a Giruveganus, which will also be encountered later.
Giruveganus :
While they vary widely in power, the one stomping around in the Feywood is the weakest of their kind, possessing a mere 13,000 HP. They have no magicks to back them up, but they can inflict Confuse with their melee attacks. In addition, they can use a variety of technicks including Crushing Fangs (has a high chance to inflict instant KO), Rage, Ram, Screwtail and Sonic Fangs. It can drop a Prime Tanned Hide, a Dark Crystal, and X-Potion, or a Lego Gem, while you can steal Prime Tanned Hide, a Broken Greataxe or a suit of Carabineer Mail from it. It is weak to Holy and absorbs Dark.
Its uncommon steal and Monograph drop (15% chance, Dragoon Monograph) is the Broken Greataxe, two of which are required to unlock a potent Bazaar bundle. It might take a few tries, but stealing them are your best bet.
Kill the monsters in the area, grab what loot you want, and when you’re ready to move on, head over to the massive door in the southwestern end of the zone. Examine the door - Gate Gigas - and read the inscription to find out that Gigas holds sway over the gate, and presumably the summoner of Gigas will gain entry to Giruvegan. Well, only one critter is referred to as Gigas, and that’s Belias the Gigas. Summon him with whatever character you assigned Belias to, then open the door to finally reach Giruvegan.
No Comments