


| Bestiary |
|---|
| Barmuu (Rare Game), Chickatrice (Mark), Cluckatrice (Mark), Demon Wall, Garuda-Egi, Lesser Chimera, Ragoh,Tallow, Zombie Mage. |
| Items In This Area |
|---|
| Amber Armlet, Betelgeuse (Drop from Barmuu), Blood Sword (Steal from Seeker), Broadaxe (Drop from Tallow), Chanter’s Djellaba, Dawn Shard, Dispel, Flame Staff, Lamia’s Tiara (Steal from Barmuu), Soldier’s Hat, Vanish, Winged Helm (Drop from Ragoh) |
Upon entering the Tomb of Raithwall area you’ll be given the opportunity to save your game, which you should take advantage of. After which you’ll be greeted with a nice cinematic showcasing how isolated the place is. When you finally regain control, run forward to see the entrance to the tomb. However, as you approach a radiating bird will fly down, and it doesn’t want to be friends…
Boss - Garuda
| Garuda | . |
|---|---|
| Level | 16 |
| Weaknesses | Dark |
| Resistances | Holy (Absorbs) |
| Immunities | Confuse, Disable, Doom, Immobilize, Oil, Petrify, Poison, Slow, Stop |
| Safety | Yes |
| Drop | N/A |
| Steal | Gold Needle (55%), Giant Feather (10%), White Fang (3%) |
The Garuda, as evidenced by its slightly bright introduction, is a flying creature and as a result, you will not be able to damage it without ranged weapons, spears/poles, magicks or certain technicks (like Telekinesis). Luckily for you, Vossler comes equipped with Telekinesis as one of his gambits, so he will be able to at least damage him. If you happen to have a Monk or Uhlan, then they will be able to damage them with their weapons. Likewise, Fran and Balthier have access to ranged weapons with their default licenses, so if you don’t have anything else, switch them to those weapons. The biggest damage will come from a Red Battlemage, if you have one, since Garuda is weak to Dark, but a Black Mage will also work (Fran has Fire and Thunder as default spells).
As for the battle itself, Garuda will typically start off with Enrage, making it so all of its attacks come out immediately without any Charge Time. Outside of that, Garuda only has Lunge in addition to its basic attack, which has a chance of inflicting Sleep on a character hit by it. To gain an advantage against Garuda, you can use the Eksir Berries on it, which, if you remember, were obtained by finishing the Urutan Eater sidequest at the beginning of the Nam-Yensa Sandsea. This seems to dispel its Enrage, making it so its attacks have Charge Time again, forcing it to take much longer to complete attacks. It makes the battle much more manageable, since you don’t have to worry about its attacks being instant. You can steal a Gold Needle, Giant Feather or White Fang from it.
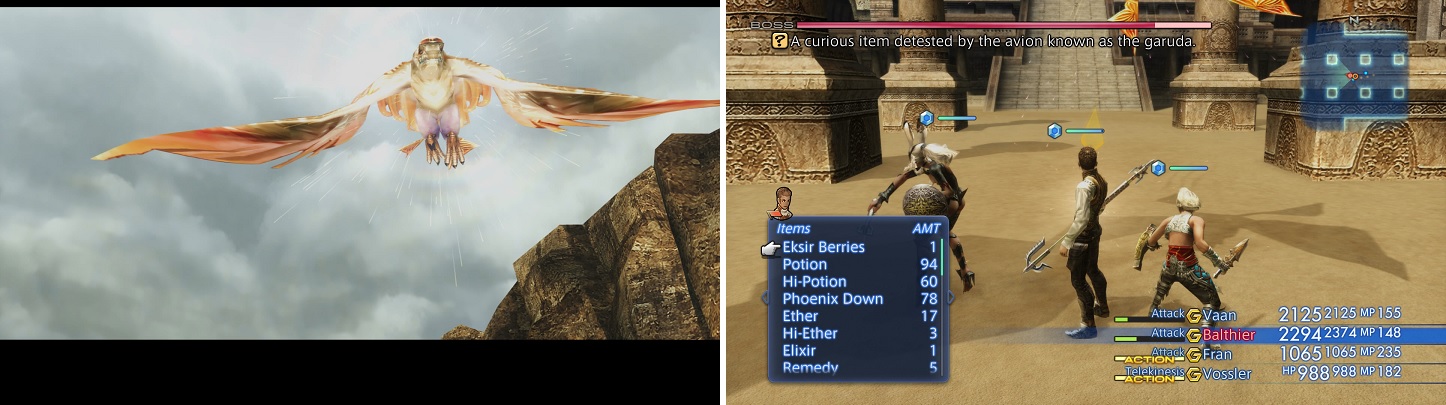
The Garuda will fly in to guard the entrance to the tomb (left). The Eksir Berries will debuff Garuda, getting rid of its Enrage (right).
After the battle is over you’ll get a brief glimpse of an ancient device activating, which will allow you to gain entry into the Tomb of Raithwall. As you do you’ll bear witness to a scene where Ashe babbles about ancient history, particularly concerning Raithwall himself. When you are back in control, descend the stairs to see that Dyce has taken the opportunistic approach of setting up shop right outside Raithwall, now that the Garuda has been slain. Of course, he sells the same wares as before and there won’t be anyone else coming, so you don’t really need to worry about updating anything if you did it before.
Before you head into the Tomb of Raithwall, there’s a bit of unfinished business you can clear up back around Rabanastre; a hunt to be precise. It might seem terribly inconvenient, but really, it’s the best time to do this, as if you wait any later the Giza Plains will be switching over to the rainy season, and your Mark only comes out in the dry season. Also, given the levels you piled on and gear you gained since leaving Rabanastre for the Sandseas, this hunt will be far easier now than it would have been then.
Hunt - Cluckatrice
Don’t worry about running all the way back, simply head upstairs to the Tomb of Raithwall and use the Gate Crystal to teleport back to Rabanastre. You should have obtained plenty of Teleport Stones from the Urutan-Yensa you’ve been slaying to make this a trival expense. Once you arrive back in Rabanastre (the Southgate area, to be precise), make your way to The Clan Hall in North End, talk to Montblanc and accept the Cluckatrice hunt.
Once done make your way back to Southgate and head south to enter Giza Plains, then make your way straight for Nomad Village where you will want to speak with Dania in the Cockatrice pen to officially start this hunt. The Cluckatrice will spawn in Giza’s North Bank, which is one zone to the east of the Nomad Village, but there’s a catch. When you enter the zone and explore it, you see no sign of the feathery fiend. In order to make it appear, you will have to kill everything in the zone, then exit and re-enter. This includes every single thing that is moving, yes, even the cute little bunnies.
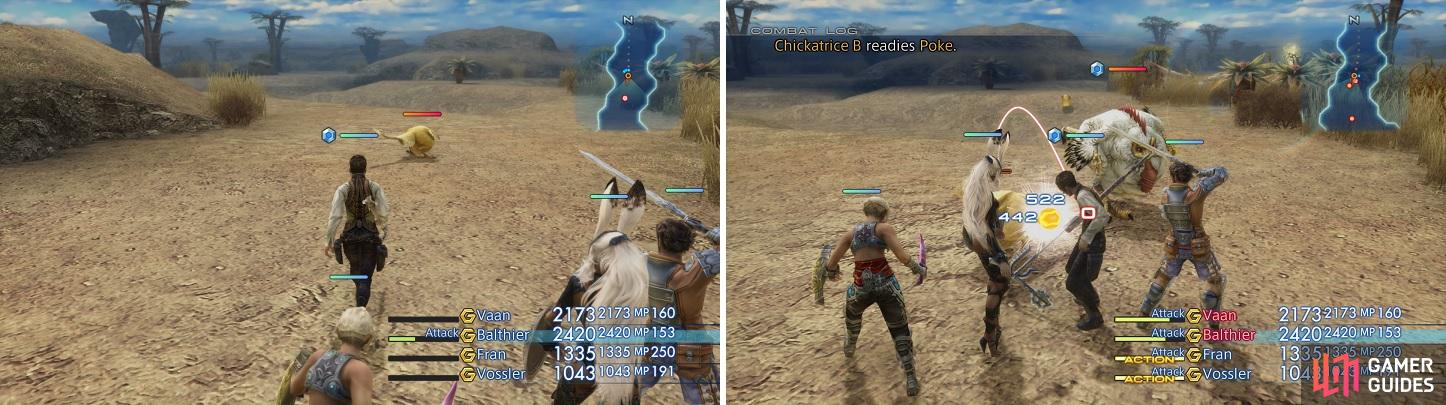
Approach any of the Chickatrices (left) and Cluckatrice will come stampeding towards you (right).
| Cluckatrice | . |
|---|---|
| Level | 15 |
| Weaknesses | Earth |
| Resistances | Wind (Absorbs) |
| Immunities | Confuse, Doom, Oil, Petrify, Poison, Sleep, Slow |
| Safety | Yes |
| Drop | N/A |
| Steal | Small Feather (55%), Wind Stone (10%), Taurus Gem (3%) |
Once you do this, you should see some lovely little Chickatrices running around, but when you decide to approach one, their mother will come stampeding out and start attacking you. Depending on your levels and equipment, Cluckatrice might be a bit of a letdown for you, but it can still be annoying. The first thing you should do is get rid of the Chickatrices, although they can do nothing but just attack you. All of them absorb Wind, so that shiny new Gladius you might have obtained is useless in this fight. Cluckatrice is a bit more problematic, as it can inflict Slow and Petrify with its physical attacks, plus it has Stone Gaze and Mucus to double up on those same ailments. It also has access to Purify, should you try to inflict ailments on it.
Of course, inflicting ailments is one of the easier ways to tackle the Cluckatrice. It is vulnerable to Blind, Immobilize and Disable, with the last one being the most devastating. Put Disable (Red/Time Battlemage) on it, then concentrate on the Chickatrices until they go down, reapplying Disable if needed. Having a Gambit that uses a Gold Needle in case someone gets Petrified is useful here. None of the enemies drop anything and you can steal a Small Feather, Wind Stone or Taurus Gem from the Cluckatrice; the Chickatrices will yield a Potion, Small Feather or Large Feather when using Steal. All of the enemies need to be defeated in order to complete the hunt; if you leave the zone having just beaten Cluckatrice, it will respawn.
When all of the enemies are defeated, return to the petitioner in Nomad Village to receive your reward.
| Reward (For clipping the Cluckatrice’s wings) |
|---|
| 1000 Gil |
| Amber Armlet |
| Rainbow Egg |
Once you’re finished, return to Raithwall and climb the stairs again (make sure to save your game at the Gate Crystal) and interact with the device, opting to use it to be teleported inside the tomb. When you arrive, Balthier will justify his ignorance with practicality, then head down some stairs to the west, after which the wall behind you will start moving…
Boss - Demon Wall (Optional)
As it says right there, this fight is optional and if you don’t want to do it right now, you can simply run to the end of the hallway and go through the door. If you decide to stay and fail to defeat the Demon Wall before it reaches that same door, then you will be crushed and that will result in a Game Over. That being said, it is possible to defeat this Demon Wall, but it might require certain jobs in order to do so. The strategy outlined below requires the use of Reflect, and you should have at least two Reflectga Motes from the Dreadnought Leviathan; the Time Battlemage and Red Battlemage also gain access to Reflect through the Time Magick 2 license, and you should have found the Reflect magick in Ogir-Yensa Sandsea (Primary Tank Complex).
In addition to the above, you will want a spell that hits multiple targets (you should be getting a faint idea what to do here). At this moment, you have access to two such magicks, Dark and Aero. The former is accessible to the Red Battlemage, while the latter can be used by both Black Mages and Red Battlemages. The idea behind this strategy involves having Reflect on everyone and then using Aero on your party (Aero Motes won’t work because they ignore Reflect), which will get reflected back at the Demon Wall four times, dealing some nice damage. To add even more to this, if you have a Black Mage, then equipping the Cherry Staff will cause Aero to do even more damage. To make this process a little more automatic, set a gambit for “Ally: Reflect -> Aero” on the mages.
As for what the Demon Wall can do to you, it can be a royal pain. You will find that your party members will have a lot of ailments on them, as Demon Wall has access to quite a few, such as Blind (Blindga, so it’ll be cast on everyone in range), Silence, Sleep and even Doom. In addition, one of the more annoying skills will drain a character of all their MP, called Annul. Hopefully, you managed to pick up some Ethers from random treasures while hiking through some areas. Lastly, you will likely see an attack called Telega, which removes the character it is cast on from the battle, sending them into another dimension. This is designated as the character having “X-Zone” over their name in the status window and there is no way to bring them back while you’re still battling (moving to another room will bring them back, though).
The tough thing about this fight at this point is there is a bit of luck involved, as you don’t know who the Demon Wall will use Telega on. It would prove quite troublesome if the Demon Wall were to use Telega on your essential mages, as you would then have no one to use Aero with for the Reflect strategy. One thing you can do to help you with the battle, though, is to set the Battle Speed to its highest, as the Demon Wall will still move the same speed, but your attacks will come out faster (although the same holds true for the Demon Wall’s attacks).
Whether you run away or stay and fight, you will want to journey west into the next room, the Hall of the Sentinel, where you will encounter another Demon Wall!
Boss - Demon Wall (Mandatory)
Unlike the previous Demon Wall, you will be required to break this one to dust before you’re allowed to continue. It is weaker than the previous one and you will have a lot more time to do battle with it, but it can still present a challenge. Although you can probably straight up fight this Demon Wall, you can still use the same strategies as outlined above. You should notice something else, though, in this battle - the pedestals on the side of the arena can be used. Interacting with them can cause one of two effects, either the Demon Wall will speed up or slow down. Of course, you don’t know which will happen when you use one, so it’s a bit of a gamble and should only be used as a last resort. This Demon Wall has the same moveset as the other one, so hope your best damage dealer doesn’t get taken out of the fight with Telega. You can steal a Gold Needle, Solid Stone or Quality Stone from either of the Demon Walls.
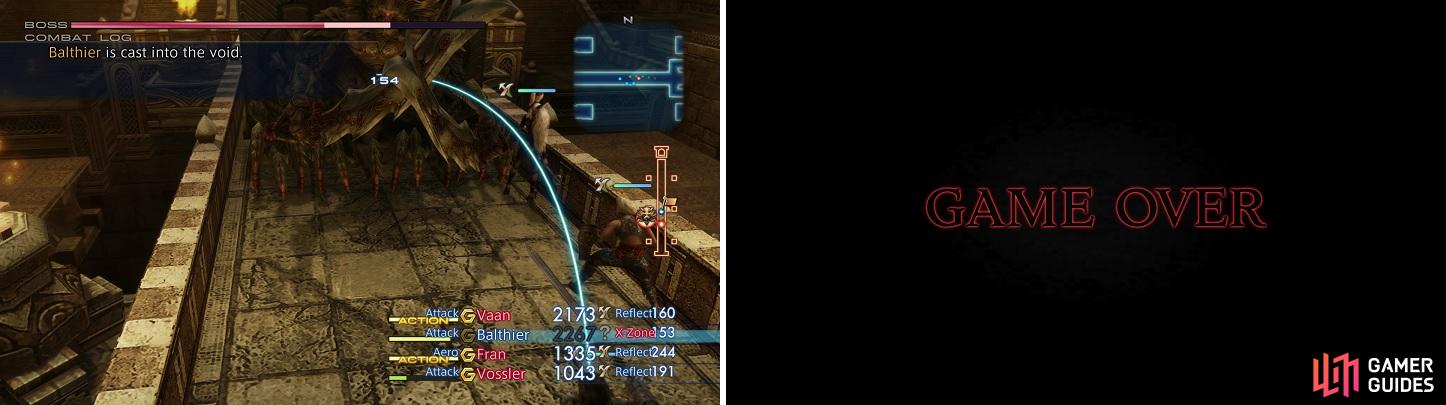
The Demon Wall can remove a party member with Telega, sending them to the X-Zone (left). If you don’t kill it quick enough, it will smash you and cause a game over (right).
Royal Passage
If you managed to kill both Demon Walls, congratulations on that feat. There’s no reward for doing so aside from bragging rights and progression deeper into the dungeon. Return east to where the first one was located to see a jewel on the wall. Interact with it to deploy some stairs on the walkways to the north and south, both of which lead to the same area. Follow either of them west to reach the Hall of the Sentinel area, then continue west to reach the Royal Passage. Here you’ll notice that there’s no map information for the ground you stand on. Don’t let it deter you, however, and head downstairs, killing Seekers and Tallows as you go. When you reach a level walkway running north-south along the eastern edge of the area, look for a chest containing a Scathe Mote. This chest will not respawn once looted.
Seeker :
It’s possible you may have encountered a Seeker in your prior visit to Barheim Passage, but if you didn’t, you will find them in full force here in Raithwall. Think of them as cousins to the Steeling, with similar moves. They have Gnaw and Joyous Soundwave, as well as Leech (siphons HP from you to heal themselves). The only new skill they have is Self-Sacrifice, which sounds just like its name - the Seeker will do damage and once it does, it will die. They are weak to earth and can drop a Wind Stone, Antidote, Crooked Fang or a Prince’s Kiss. You can also steal a Wind Stone, Taurus Gem or Blood Sword from them.
Tallow :
Tallows are similar to Flans and don’t really have much to them. Their physical attack can inflict a character with Oil, which is a pain since they can cast Fire on you. As you may remember from your encounter with Pineapple, a character inflicted with Oil takes more damage from fire-based attacks. Outside of that, they know Lunge to deal a little more damage than normal. Tallows absorb Fire and are weak to Water, with a chance to drop Green Liquid, Fire Stone, Echo Herbs or a Broadaxe . You can also pilfer a Green Liquid, Fire Stone or Hi-Potion from their gelatinous bodies.
That’s all you can do here in this area, so return back east to the location of the first Demon Wall in the Hall of the Destroyer, then make your way down the central bridge to the west path where you fought the second Demon Wall. Beyond this battlefield bridge you’ll find some stairs leading to a door, which leads to the proper part of the Royal Passage area (the part that actually appears on the map, anyway). When you enter the area, Vossler and Ashe will discuss the poor company they keep, after which Ashe claims to have conversations with minerals. Lovely. After the scene you should notice three more Waystones before you at the bottom of the stairs. Two are dormant for now, but the blue one is active, and using it will teleport you back to the Waystone towards the beginning of the dungeon. Handy if you didn’t happen to kill the optional Demon Wall, as it will allow you to bypass it if you need to leave for any reason.
From the active, blue, Waystone, make your way west to find an urn, which contains a map of the Tomb of Raithwall. Take a look at your map and you should notice walkways running north and south, both of which branch east before turning north-south again, after which they each split into two walkways running east, four in total. Each of these four walkways leads to an area transition, and for the sake of convenience, let’s number them path #1, path #2, path #3 and path #4, from north to south.
At the eastern end of each of the previously-mentioned area transition-bearing paths are treasures you can snatch, although only two are guaranteed to spawn and actually contain anything of value. These two walkways are path #1 and path #3 (the northern-most and the northern of the two-southern paths), where you will find Dispel (White Magick 5) and Vanish (Time Magick 3), respectively.
Barmuu :
After acquiring that delicious treasure, you may think you are finished with the spacious interior of the Royal Passage, but there is one more thing left to do. There is a Rare Game afoot, but as usual, you’ll need to coerce it to come out and play. To do this, you need to kill the Seekers flitting about the level until you have a battle chain of twelve or higher, after which, return to the platform upon which the waystones rest in the center of the area, where you should find Barmuu waiting for you. There are usually five or so Seekers on the northern and southern ends of the level, so you’ll likely need to run back and forth (once again, Speed Mode is great here) to keep finding more - you cannot leave the Royal Passage or you’ll need to begin chaining them anew.
Once you get Barmuu to spawn, the first thing you should do is steal from it, as you can pilfer a Lamia’s Tiara (Mystic Armor 5) from it. It’s a rare steal, but it’s also the only item you can steal from it, so while it may take a while, you’re guaranteed to get it if you put in the time. While you’re attempting to steal the Lamia’s Tiara, Barmuu will be pelting you with Water, Aerora, and Dark. It also has access to Flash, which can blind your characters, and its physical attacks (normal and Lunge) can inflict Petrify on your characters. When Barmuu goes down, it can drop a Solid Stone (common) or Betelgeuse . Unfortunately it’s immune to just about everything - save Slow and Oil - so there’s not much you can do to mitigate its offense. Casting Reflect on your entire party works, albeit a bit too well, as there’s a chance it’ll end up nuking itself to death via its own reflected magicks before you manage to kill it.
However you deal with the beast, once it’s been chastised it’ll be time to move deeper into the tomb. To start out, turn your attention to the northern two exits, paths #1 and #2. Go through the northern-most of the area transitions on this level (path #1) to reach the Northfall Passage area.
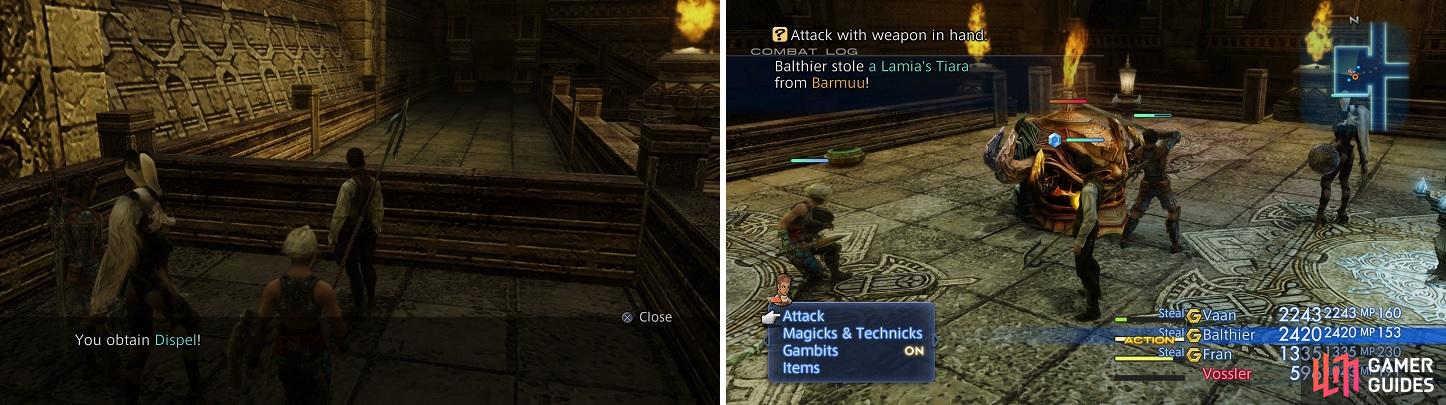
Dispel (left) is one of the more important magicks in the game. The Lamia’s Tiara you can steal from Barmuu is a decent upgrade (right).
Northfall Passage
As soon as you enter this area, head west and you might find a treasure at the dead end, which could contain a Chanter’s Djellaba . Return back east to where you entered the area and take a look at your map to note that this area is rather maze-like. Despite that, however, the area is pretty linear, so despite the stairs, bridges, twists and turns, there’s not much in the way of diversions. On that note, continue east past where you entered and you’ll start encountering enemies, some old and some new. Zombies in Raithwall are pretty much identical to their Barheim Passage variant, except you know, stronger, of course. Just past the Zombie will be one of the new enemies, the Lesser Chimera.
Lesser Chimera :
Another palette-swap of the Cockatrice! So soon after the Axebeak, too. It should be no surprise that the Lesser Chimera has similar moves to the Cockatrice, too, or more particularly the Cluckatrice you hunted not too long ago. They have a physical attack that is slightly stronger than their normal one (Poke), as well as Mucus (Slow) and Stone Gaze (Petrify). You can steal a Fire Stone, Gold Needle or Taurus Gem from them and they can drop a Fire Stone, Handkerchief, Small Feather or Hi-Potion. They are weak to Water.
Work your way through more of Northfall Passage until you find a Waystone at the center of the area. Activate the Northfall Pedestal along the wall to the south to get the Waystone working again. After you mess with this, a Zombie Mage will pop up to say hello (bestiary follows). Should you use the Waystone you’ll be returned to the three waystones in the Royal Passage area, activating the red one, to be specific. Travel there, then return to Northfall Passage. Once back, search to the west of the Waystone to find a “Mystic Altar”, which has sunk into the floor. The stairs beyond the altar suggests that it has more moving to go, so you’d best to get to it.
Zombie Mage:
Just as its name implies, the Zombie Mage is a zombie that can use magicks. Thankfully, it only knows the most basics of Black Magicks, mainly Fire, Thunder and Blizzard. However, it can use Dark Motes and has access to a move called Cloying Breath, which can inflict both Sleep and Slow. The Zombie Mage can drop a Dark Stone, Foul Flesh, Teleport Stone or Balance Mote, plus you can steal a Dark Stone, Foul Flesh or 100 Gil from it. They absorb Dark and are weak to Holy.
Once you finish off the Zombie Mages, go north down some stairs to reach a large room occuped by a familiar-looking enemy, especially if you went after the Barmuu:
Ragoh :
Ragohs look like giant statues of a face or mask and they don’t move at all, so you can actually run away from them easily. They don’t have a varied repertoire of attacks, mostly using Lunge and Flash (chance to Blind the party). One thing you need to watch out for, though, is its ability to Self-Destruct should you not kill them quick enough. They are weak to Wind, so if you have the Gladius, then whoever has that equipped will do some big damage. Ragohs can drop a Solid Stone, Earth Stone, Eye Drops or Winged Helm , plus you can steal an Earth Stone, 90 Gil or a Hi-Potion.
As soon as you’re done vandalizing the Ragoh, search the western end of the chamber it was guarding to find a chest near a brazier, which may contain a Soldier’s Hat . Return back east, turn north until you reach the entrance of the chamber, then turn east again and follow the hallway beyond until you find yourself in a small room along the northeastern corner of the map. Turn west and you’ll find three treasures lined up in a row. If your gamer senses told you these are a trap, well, they were wrong this time, but they don’t have anything aside from curatives in them, anyway. Loot them and continue west, then south through two rooms, then head west and south again through two more rooms. In this fourth room you may find a chest containing a Flame Staff , an item you could have nabbed from Dustia long ago. Now it’s a common drop that anybody can plunder from a chest.
That’s the last interesting thing to note in this area, so simply continue west, south, then east to reach the area transition that’ll take you back to the Royal Passage area, the path #2 exit, to be specific. Now it’s time to explore the area south of the Royal Passage, so make your way to the southern-most walkway (path #4) and pass through the area transition to reach the Southfall Passage area.
No Comments