


| Bestiary |
|---|
| Dustia (Rare Game) |
| Items In This Area |
|---|
| Firefly • Flame Staff (Drop from Dustia) |
Phoenix Downs and Other Preparations
This section is entirely optional, but well-suited for the gamer who wants to gain power quickly… and who frankly doesn’t care if the next few sections of story are laughably easy. There’s a monster in the Westersand that can be somewhat easily killed with the right strategy, even though it’s quite a bit stronger than you are. This isn’t without risk, however, and there’s a bit of preparation work before you can bother with it, but if that doesn’t deter you, read on. If you want to continue with the story, skip ahead to “Sunstones in the Giza Plains”.
While your target is in the Westersand, you’ll want to head to the Estersand first, as there’s a bit of farming you need to do. Enter the first area of the Estersand - The Stepping - and make your way to the northern end of the map, killing whatever Wolves bar your passage. Here, you should find an area transition which leads to another area, creatively named “Outpost”. It’s unimaginative, if not inaccurate. While this area is mostly just a zone-out spot, it does have an item worth grabbing. Make your way to the eastern-most part of the map, past a palm tree, where you’ll find an urn waiting for you near the sheer cliffs. Plunder it to score a Firefly (Accessory 2) - a useless-seeming accessory that prevents its wearer from earning XP. What’s the purpose of this? Well, if you want to grab choice items and Gil from the monster this section is dedicated to, but don’t want to get over-powered level-wise, wearing this accessory is what you’re looking for.
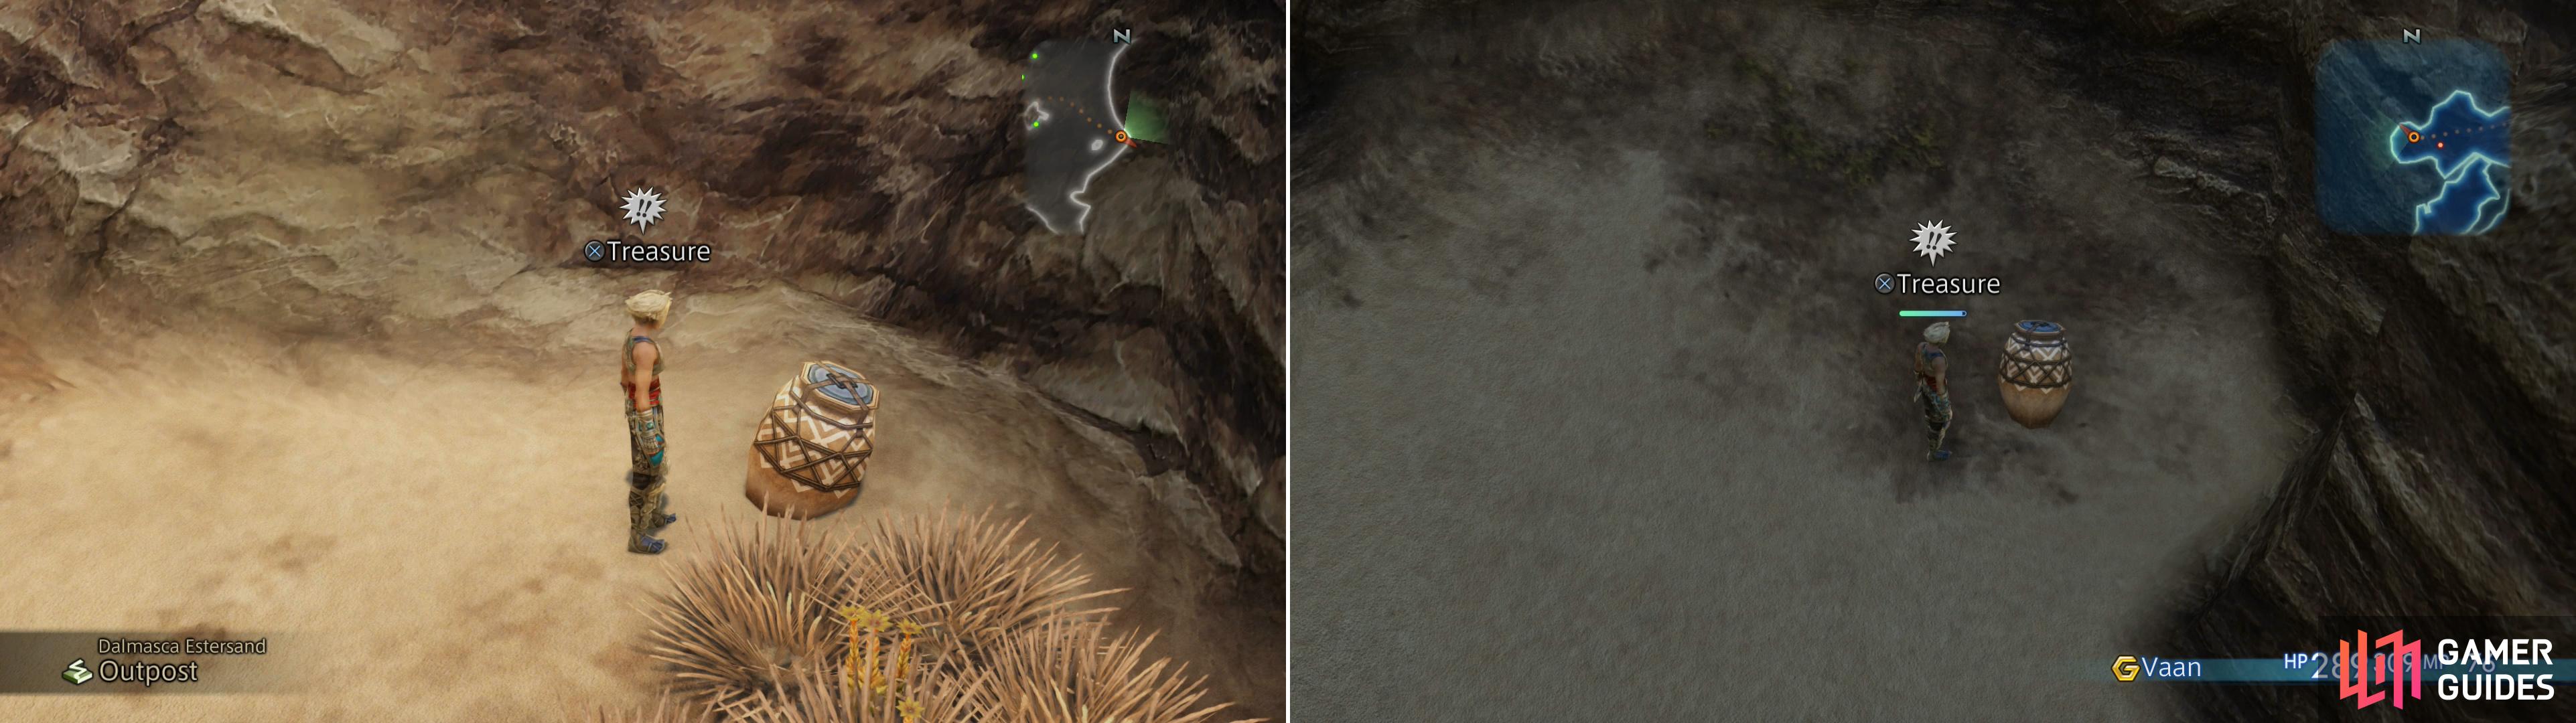
Visit the Outpost in the Estersand to obtain a Firefly (left) then stock up on Phoenix Downs from an urn in The Stepping (right).
Now that you have a tool that’ll keep your leveling on a leash (whether you make use of it or not is up to you), exit the Outpost. From the area transition, simply follow the cliffs southwest - past several docile Cactites - until you reach a dead end, where you should find an urn. It does have a spawn chance, however, so it might not be there. If not, return to the Outpost area and run back until it appears (it should appear more often than not). When you find it, loot it to obtain either Gil or a Phoenix Down; it’s the latter item you’re after. You’re going to want quite a lot of these, as they’re the tool that’ll fuel your grinding, and since it’s got a good chance of spawning every time you leave the area and return, it’s not too tedious to simply run back and forth between this urn and the Outpost.
The more you grab, the more you’ll be able to grind, but you’ll need at least thirty to have a good chance of acquiring one of the monster’s better items, and the more you grab, the more grinding you can do… without returning here, anyways. If the urn ever stops respawning regularly (give it 4-5 times in a row without respawning) return to Rabanastre, save, exit to the menu (press [Options] to pause the game, then press [Square] to return to the menu). Exiting the game and reloading should cause the urn to start respawning again more regularly.
Preparations in the Westersand
When you have as many Phoenix Downs as you care to grab, make your way back to Rabanstre, enter the West Gate area and save your game. Seriously, save it. It would be a shame to die and lose all those Phoenix Downs you gained. Once you’ve saved, go into your menu, select the Config option, then turn Battle Speed down to its lowest setting. This will help you get the jump on the enemy you’re hunting, which is essential if you want to… you know, not die. You should also make sure you have some Potions, or some other form of healing… again, so you don’t die.
With those preparations made, head out into the Westersand. There’s some info that you’ll be presented with later on in the guide (you know, when you come to these areas when you’re supposed to!), so there may be some repetition, but for the sake of not wasting too much of your time on redundant information, it’ll be kept brief here. The weather in the Westersand is volitile and it has a random chance to spawn sandstorms. If you’re in a sandstorm, you may find it cosmetically unappealing, since it decreases visibility. If so, just run back and forth between Rabanastre and the Westersand until there’s no sandstorm. It may take a few tries.
Now that you’re in the Westersand, follow the area boundary north and west, killing whatever Wolves you find along the way. They’re stronger than the Wolves in the Estersand, but they still shouldn’t be a serious threat in a one-on-one battle. Keep following the area’s northern boundary cliffs until you find an area transition, which leads to an area called the “Corridor of Sand”.
You’ve found the right area, but now you’ve got to provoke the beast you’re after to spawn. To do so your current HP needs to be at 10% of your maximum HP or less. There’s a simple way to do this that only puts you at… a modicum of danger - simply unequip your weapon and attack yourself. Open the Battle Menu and toggle between “Foes” and “Party” by pressing [L1] or [R1], then select yourself as the target. Note how much damage you deal and if it seems like you’d do enough damage to kill yourself in the next hit, simply use a Potion and try again. Just be careful, however, as there’s a chance Vaan will combo himself. Always a stupid way to die, no?
Ashes to Ashes, Dustia to Dust
When you’re under 10% of your maximum health, enter the Corridor of Sand and wait until a wraith appears. This spectre - Dustia - is the Rare Game you’re after. Face it as it materializes and as soon as you see its HP bar use a Phoenix Down… on Dustia. Dustia is an undead critter, and there’s a long-standing tradition in Final Fantasy games that what heals the living, harms the dead. A Phoenix Down, which restores one to life, is basically a death spell to the undead, and Dustia has no defense against it. On the other hand, it’ll attempt to cast Dark on you, which - given your low HP - will certainly be enough to kill you. Your Phoenix Down should be faster, however, and when it dies immediately flee back to the previous area - Galtea Downs.
What gives? Where’s the loot?! Oh, there’s a method to this madness. If you just kill Dustia, it won’t respawn unless you return to Rabanastre and return (again, with under 10% of HP). This is nothing short of a chore, and considering the 3% drop rate for the item you’re after, not an efficient way to go about things. Notice, however, that if you flee immediately after killing Dustia (before the XP and LP text pops up) you can return to the Corridor of Sand at your leisure and Dustia will spawn again as if nothing happened. More importantly, you’ll keep your battle chain.
Battle chains were mentioned previously, and it’s not time to go into full detail with them yet, just know that the more enemies of the same type you kill consequetively - the higher your battle chain number goes - the higher your chain level goes. The higher your chain level, the better loot you’ll get from picking up the visibly superior loot icons enemies drop. Also, the longer you go without picking up loot, the faster the chain level will increase (you’ll need fewer battle chain points to hit different chain levels), so you might want to wait until you start seeing the big, decorative gold loot coins drop, indicating chain level four - the highest chain level (usually occurs around 25 - 30 chain points, if you don’t pick up loot in the mean time).
This is tricky for a number of reasons, namely that it might not be easy to pick up loot and quickly leave the area before the game fully registers the kill. Also, the more lucrative loot coins (dropped at chain levels three and four) have a chance to heal you, which is a nuisance for obvious reasons. Still, high chain level drops have a much higher chance of being the rare item you’re looking for - even multiple copies of the item! The drop you want from Dustia is the Flame Staff (Staves 3), but it also has a high chance to drop Books of Orgain. These sell for 532G, making them a great way to score Gil early on. In addition, each Dustia you kill will net you 1,000 XP, 3 LP and around 600 CP, which are huge boosts at this point in the game.
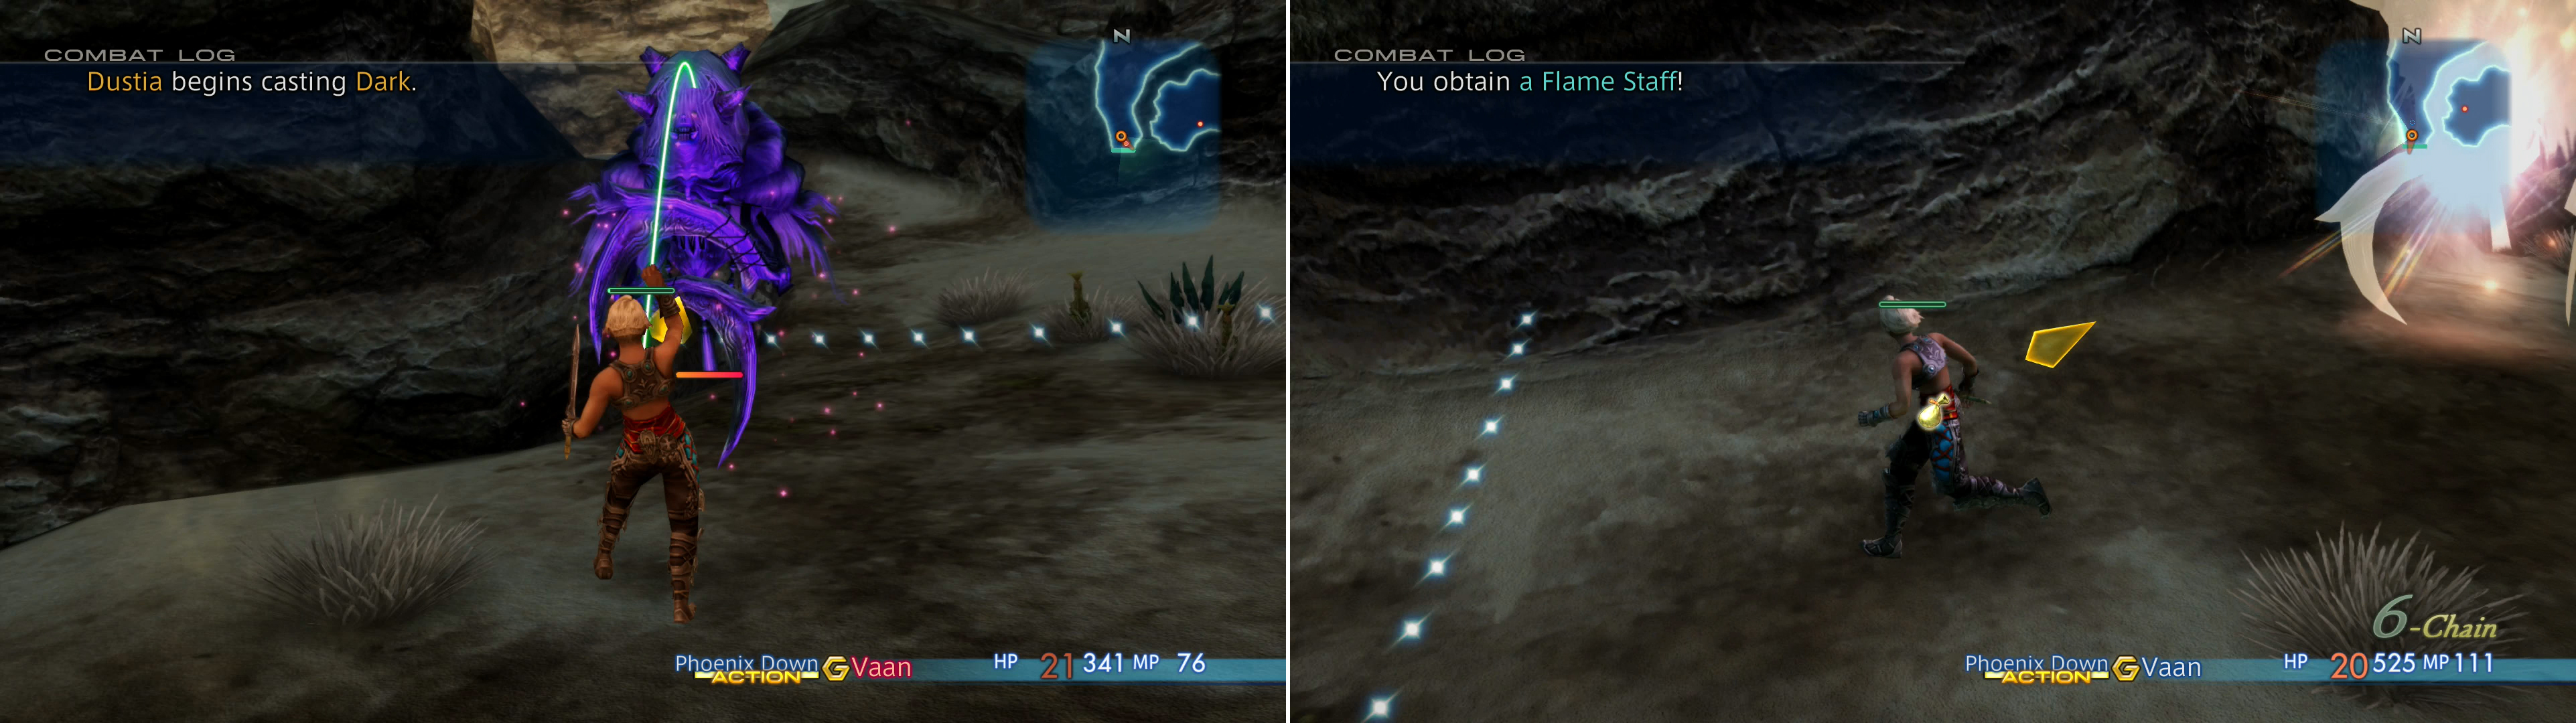
Dustia can be instantly slain by using a Phoenix Down (left) and if you’re fortunate, you may obtain a Flame Staff (right).
If that’s proving too difficult for you (it can be rather tricky to pick up the item drop and still leave the area before the XP/LP text pops up), just kill Dustia as normal with the Phoenix Downs, pick up loot when he drops it, zone out when he doesn’t, and return to Rabanastre between loot drops. If you thoroughly kill the Wolves between the Corridor of Sand and Rabanastre (zone out a few times to see if the Wolves in your way respawn, if so kill them again), the run back should be clear and you won’t need to fiddle with your HP between Dustia runs. This will, of course, kill your battle chain, but it’ll provide a slow-but-steady flow of treasure.
That’s all there is to it. Grind Dustia to your heart’s content, level up, sell Books of Orgain, and collect a Flame Staff or two. When you’ve had enough grinding, continue on with the main story.
No Comments