
A list of the best sorceries in Elden Ring, including information on how to obtain them and how to use them effectively.
There are dozens of sorceries in Elden Ring, and while many of them are situationally useful, you only have so many Memory Slots, limiting the number of sorceries and incantations you can have equipped at a time. That means there’s going to be winners and losers and the following page will cover our picks of the best sorceries in Elden Ring… which is basically a list of the ones we kept equipped most often, and why.
Boosting Magic Damage (Sorcery) in Elden Ring
Before we get to the individual spells, however, there are some universal pointers that’ll help you make the most out of every sorcery you cast. After all, even the best sorcery is no good in the hands of a character ill-equipped to use it effectively.
Intelligence
First, and perhaps most obvious, you want to invest points into Intelligence. The higher your Intelligence, the more damage your spells will deal. You’re not even really cooking until you’ve got 20+ Intelligence, with 40~ being more reasonable for what could be considered to be an aspiring sorcerer. 80 Intelligence is the effective cap as far as spell damage goes.
Not only does Intelligence boost your spell damage, but it also is a prerequisite for some spells. Comet Azur requires a commitment of 60 Intelligence before you can even cast it, but most spells on this list are much, much lower. In fact, many “early game” spells make the cut, proving that you’ll need to do more than just look at the stat requirements to determine winners and losers when it comes to effective sorceries.
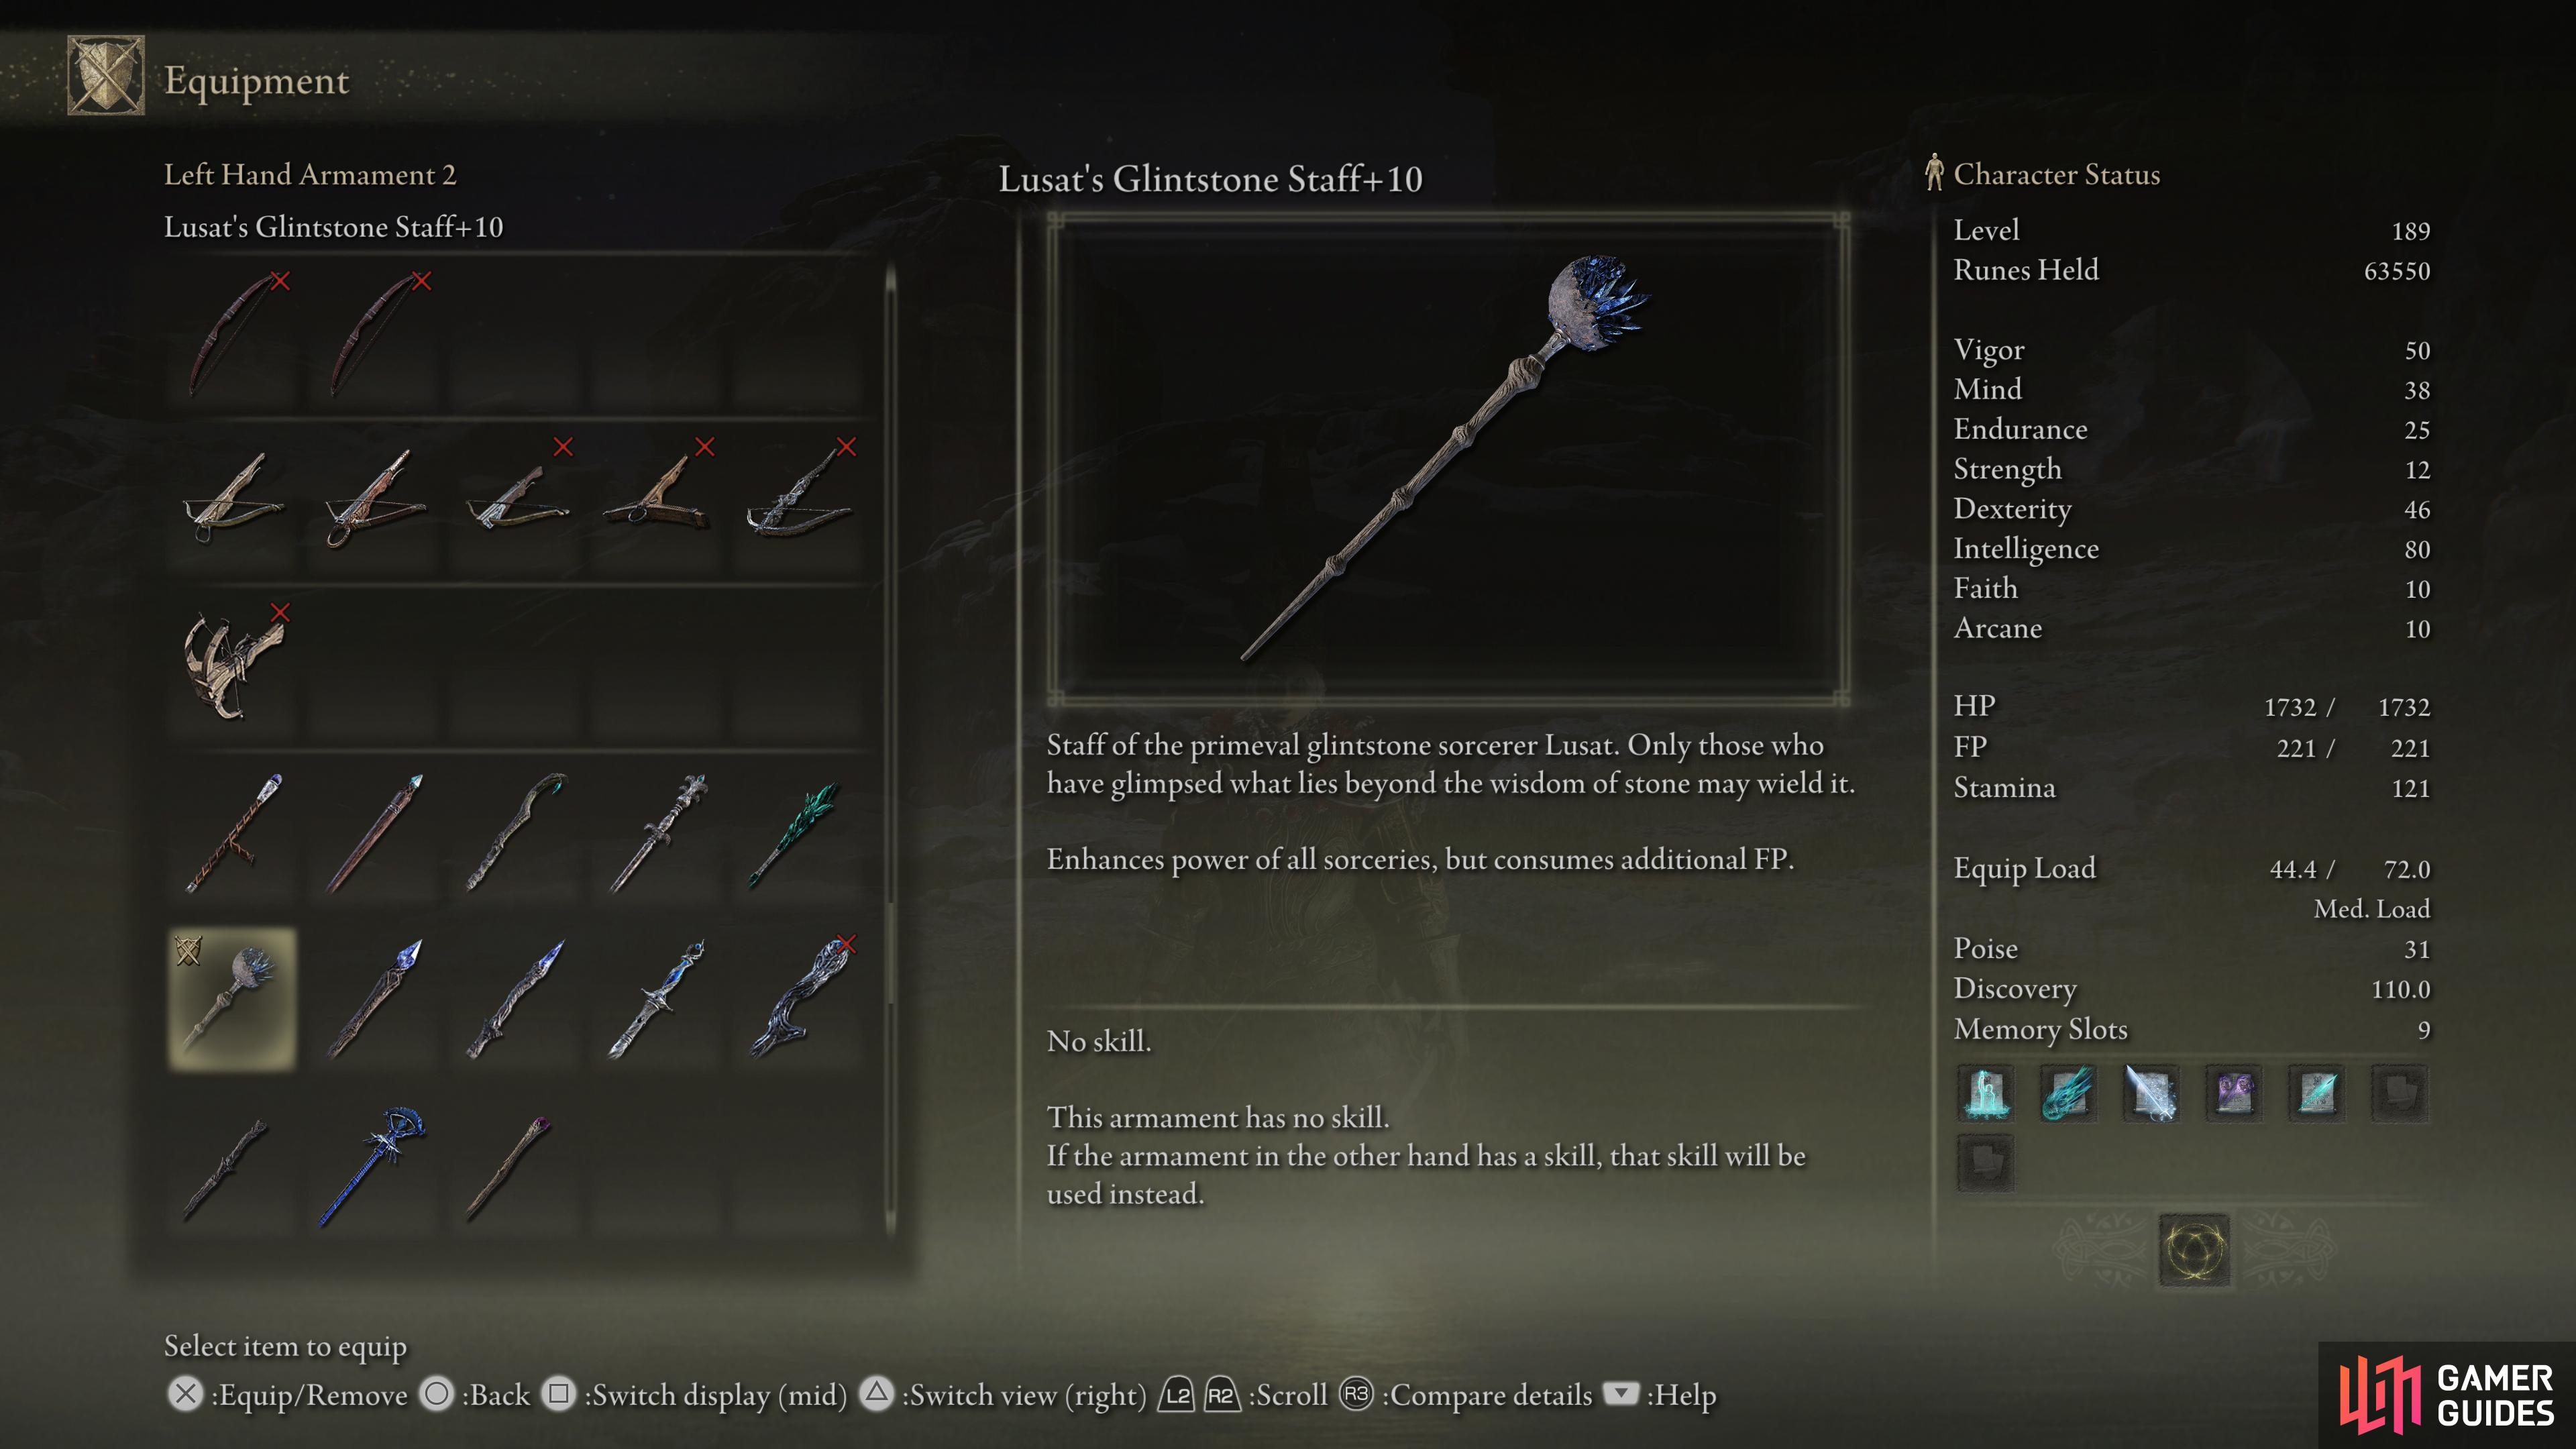
Lusat’s Staff is popular among magic builds, as it has S-rank Intelligence scaling, high Sorcery scaling, and boosts magic damage at the expense of higher FP consumption.
Staves
You can’t cast anything without a staff, so this bit of kit isn’t really optional. Why a might sorcerer needs a stick - however well imbued it may be - to weave their sorceries is a question worth asking, but it’s sadly entrenched in fantasy lore.
Assuming you don’t start out with a staff (something only the Astrologer class and Prisoner class does) you’ll need to acquire such a device. You’ve got several options, but arguably the best of the bunch is to seek out the Meteorite Staff… which to be fair is something you’ll want to do even if you do start out with a staff. This weapon can’t be upgraded, but it innately has S-rank Intelligence scaling, meaning your Intelligence will increase your spell damage significantly compared to other staves… at least until they’re upgraded. This isn’t the best staff in the game, but it will get you through the game until you can find - and upgrade - a successor. It also boosts one of our chosen spells, Rock Sling, and the two of them can easily carry you through much of the game.
For a better late-game staff you’ll want to look to either Azur’s Glintstone Staff (reduced casting time at the expense of more FP usage) or Lusat’s Glintstone Staff (sorceries deal more damage, but consume more FP). To obtain the latter you’ll need to travel to Sellia, Town of Sorcery in Caelid and defeat the Nox Swordstress and Nox Priest bosses, while the former can be found in Raya Lucaria Academy.
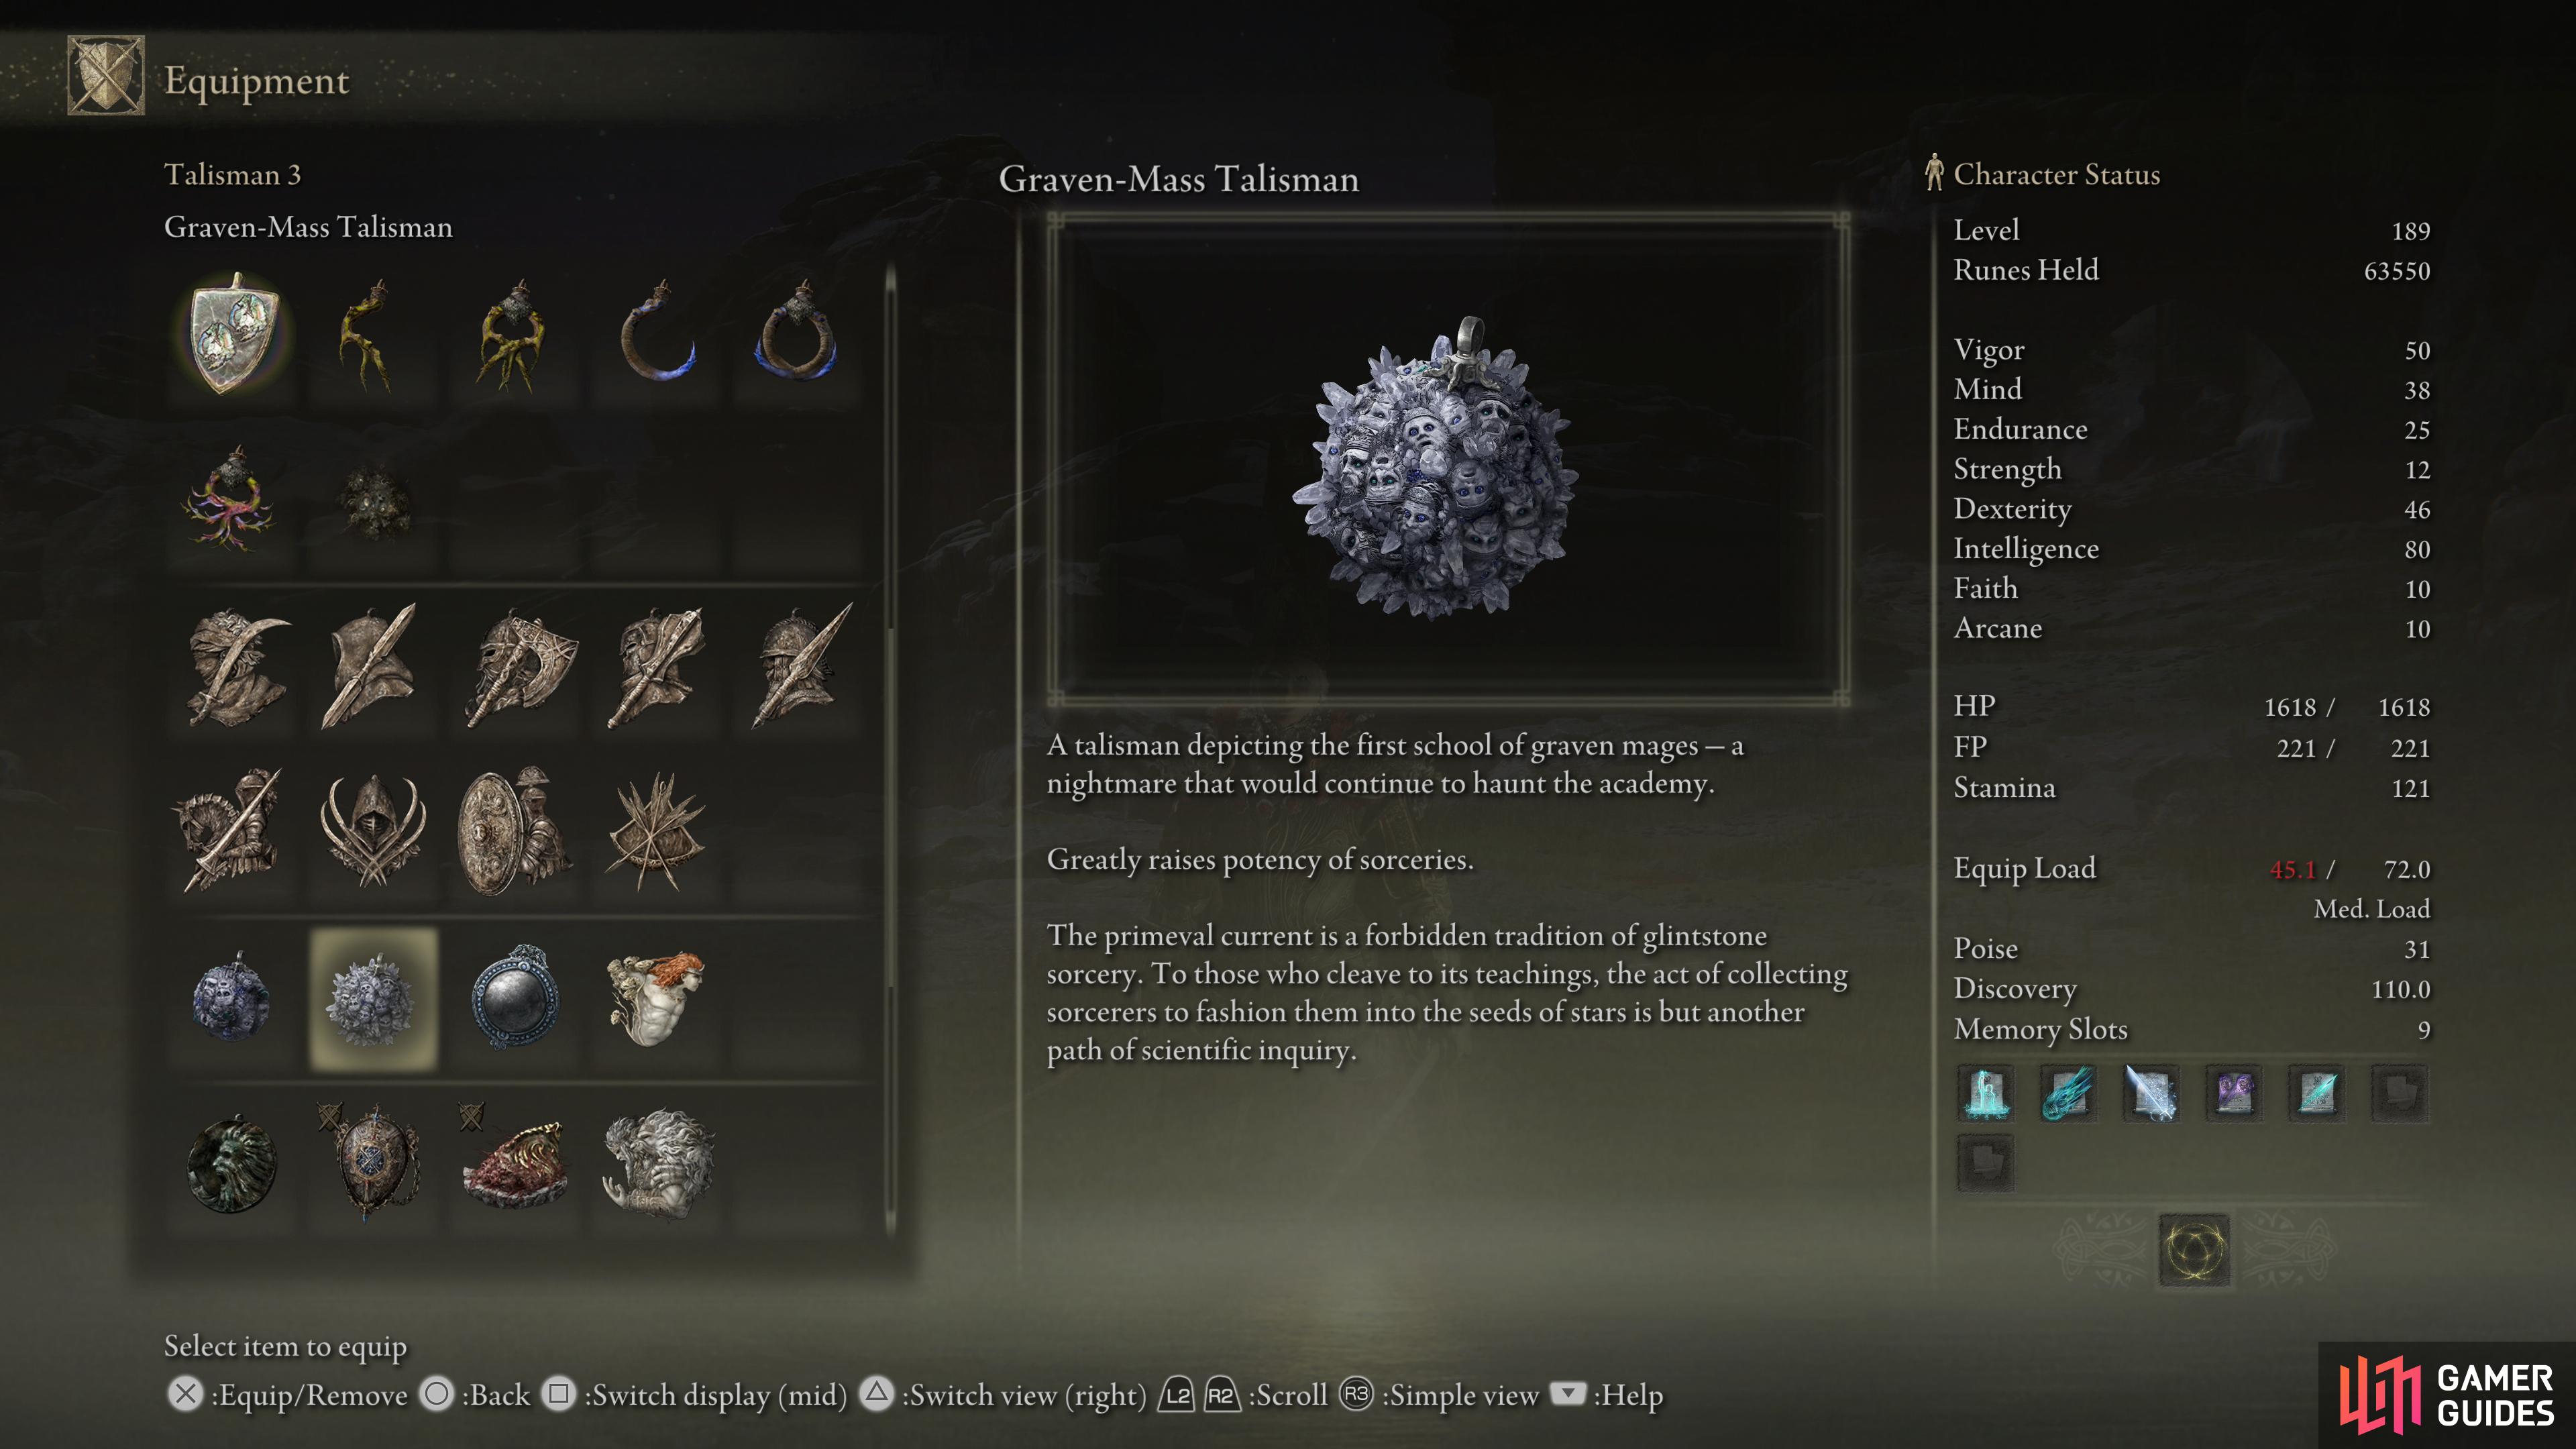
Numerous talismans - like the Graven-Mass Talisman - will boost the damage of your spells.
Talismans
Various talismans can give you a variety of boons, including increased magic damage and shortened casting times. Having a high Intelligence and a potent, upgraded staff are both well and good, but you’re missing out on a lot of damage if you neglect your talismans. Some standouts include the following:
| Talisman | Effect | Location |
|---|---|---|
| Graven-School Talisman | +4% Sorcery damage | Raya Lucaria Academy |
| Graven-Mass Talisman | +8% Sorcery damage | Albinauric Rise, Consecrated Snowfield |
| Magic Scorpion Charm | +12% magic damage, receive 10% more physical damage | Advance Preceptor Sellus’s questline. |
| Radagon Icon | Shortens spell casting time | Raya Lucaria Academy |
| Stargazer Heirloom | +5 Intelligence | Divine Tower of Liurnia |
First, note the difference in wording: anything that boosts magic damage will buff both sorceries and the magic damage dealt by weapons and skills (such as Moonveil). Anything that specifically boosts skill/charged/magic damage is much more restrictive; the Graven-Mass Talisman will boost sorcery damage by +8%, but not the damage dealt by Moonveil, likewise the Shard of Alexander will only boost skill damage, not sorcery damage.
The Graven-School Talisman and Graven-Mass Talisman boost sorcery damage by +4% and +8%, respectively. If both are worn, their effects stack.
The Magic Scorpion Charm is one of the most easily-missed talismans in the game - if you’re working on Ranni’s questline, you must take special care that you don’t give her the Fingerslayer Blade, or else you won’t be able to get this charm from Preceptor Sellius. It gives a fairly substantial boon to magic damage output at the expense of taking more physical damage - a tradeoff most casters would be willing to make.
The Stargazer Heirloom gives a flat +5 bonus to Intelligence while worn. The effects of this vary depending on your actual stat score; if you have 80 Intelligence already, this will benefit you very little, if at all, while if your Intelligence is between 20 - 55, you’ll see potentially worthwhile gains.
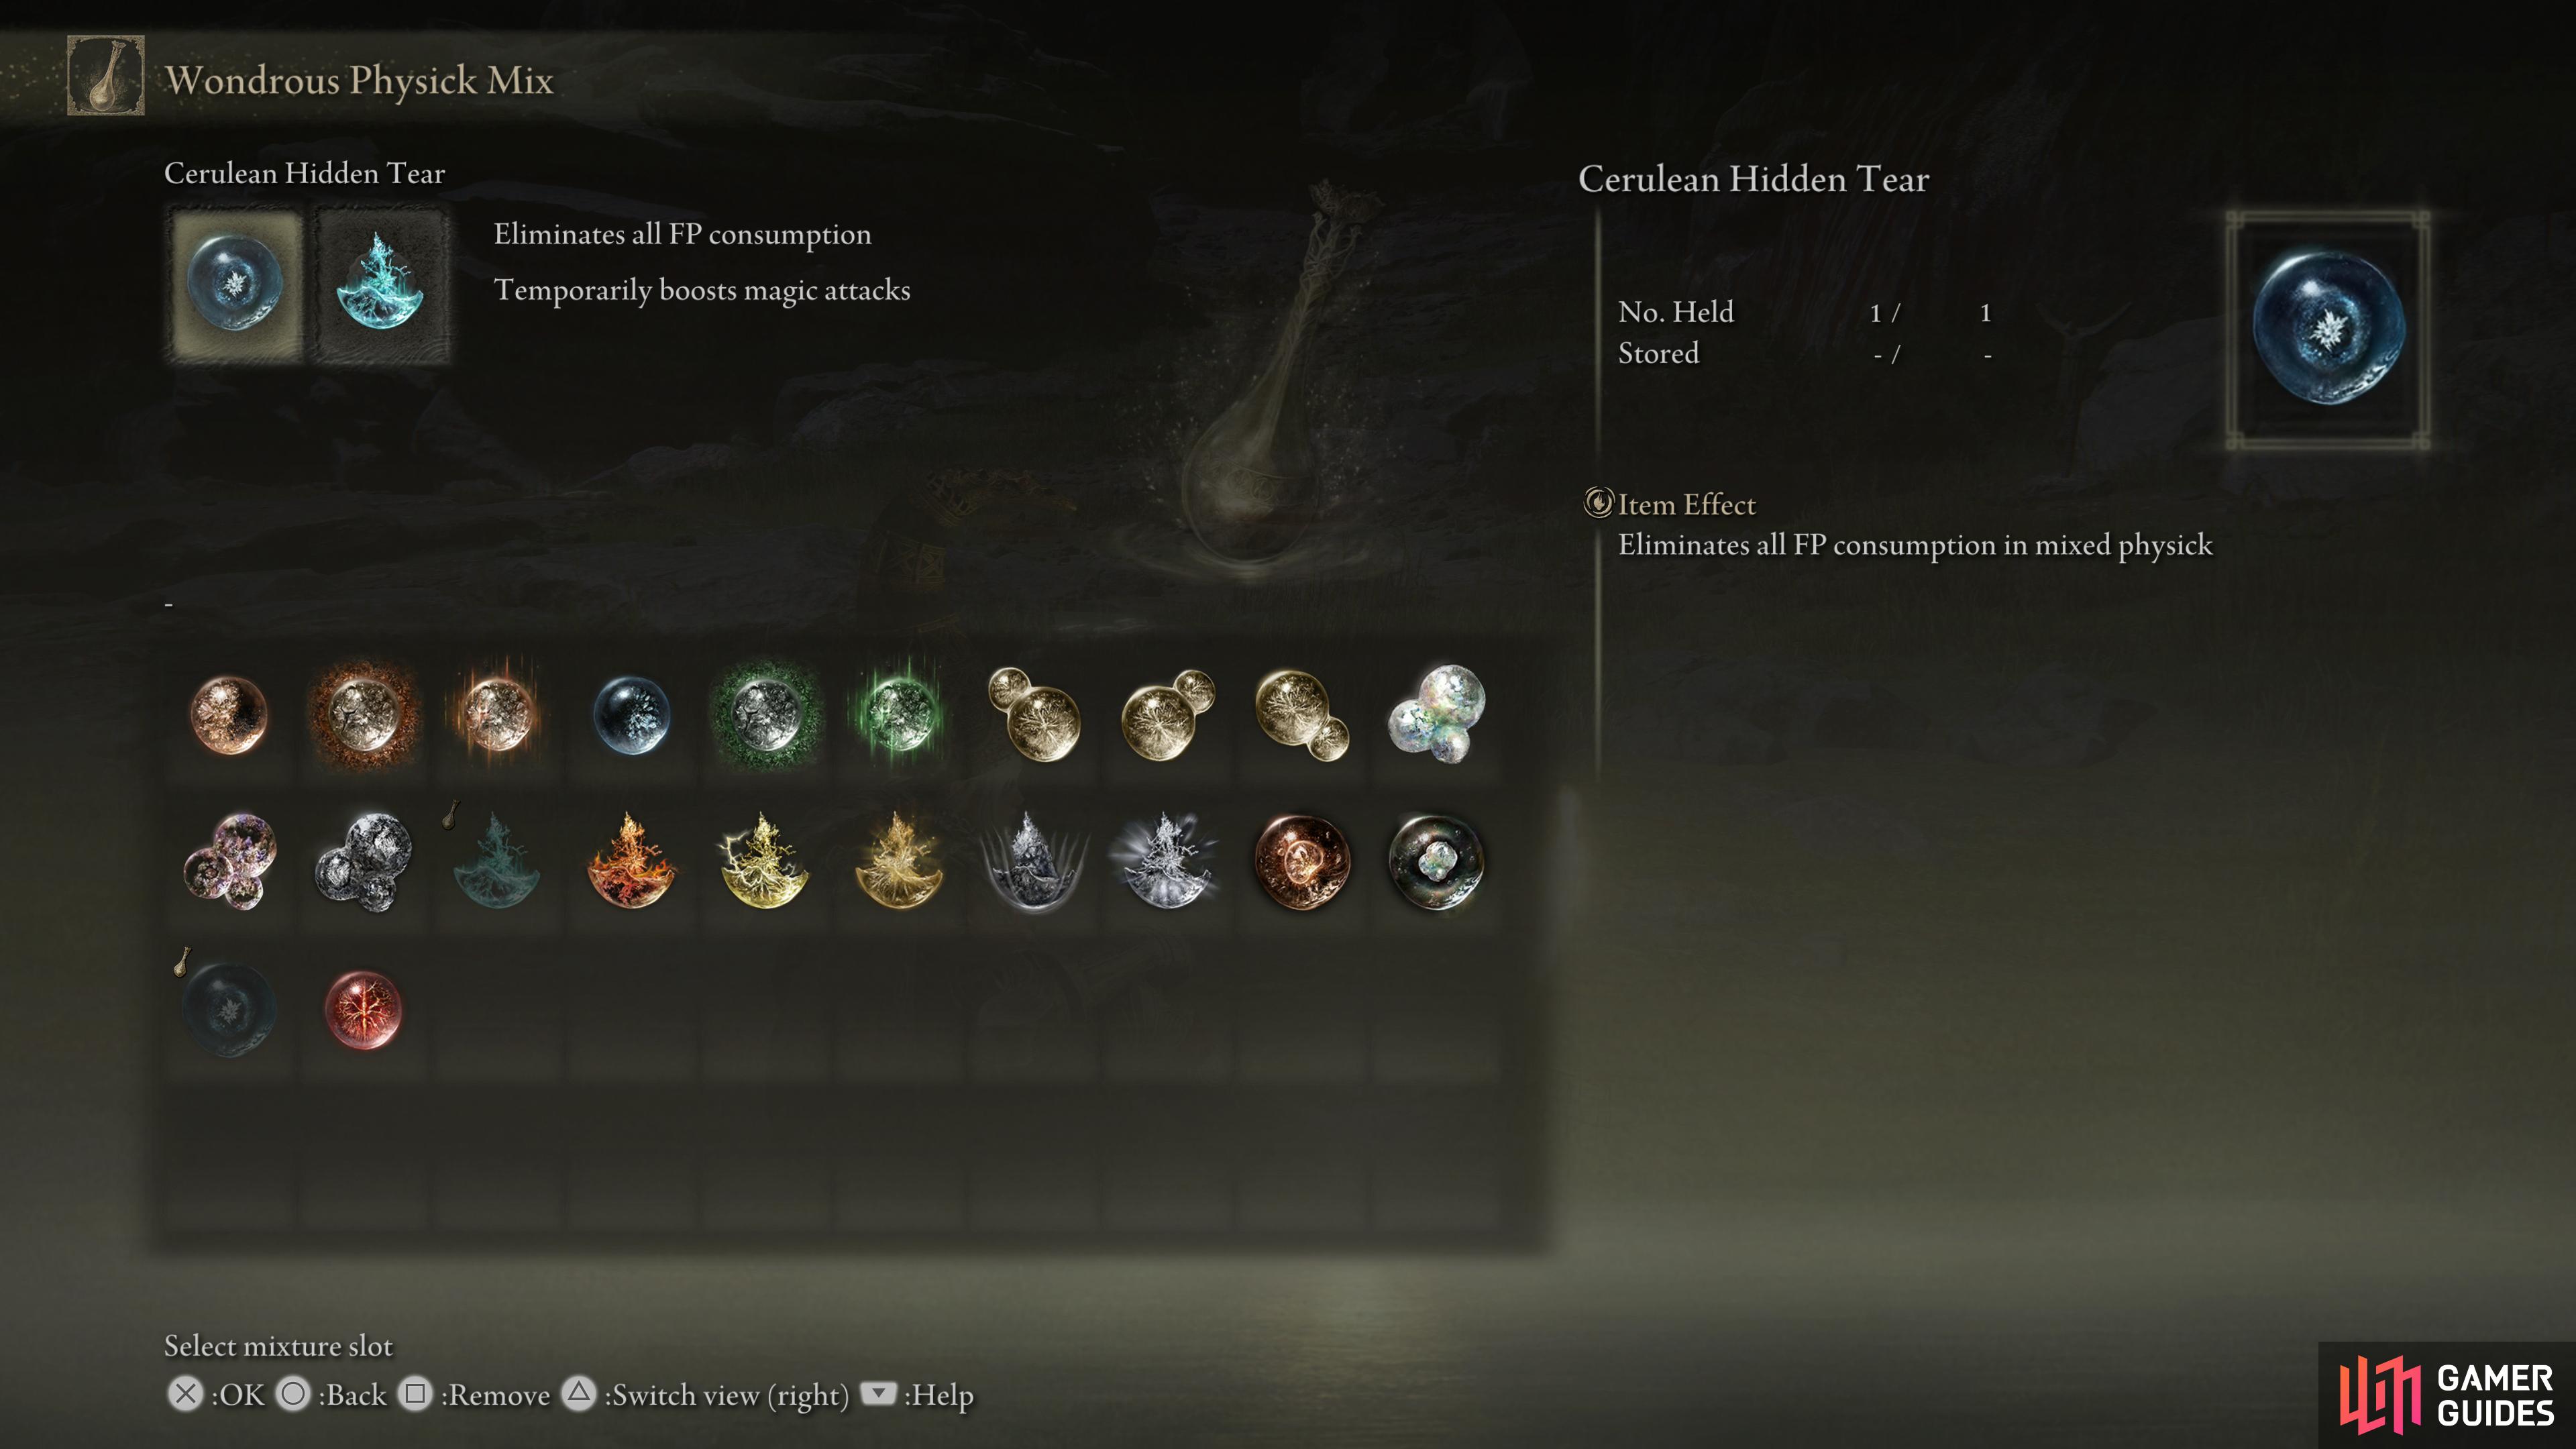
The Magic-Shrouding Cracked Tear and the Cerulean Hidden Tear mixed in your Wondrous Physick will temporarily boost your magic damage and eliminate FP costs, respectively.
Best Physick Tears for Sorcerer Build in Elden Ring
Pretty much the same idea as your Talismans, some Crystal Tears will, when used in a mixed physick, give you some invaluable boons, albeit temporarily. Standouts include the following:
| Tear | Effect | Location |
|---|---|---|
| Cerulean Hidden Tear | No FP consumption for 15 seconds | Defeat the Ulcerated Tree Spirit east of the Road of Iniquity Site of Grace on Mt. Gelmir. |
| Intelligence-knot Crystal Tear | +10 Intelligence for 3 minutes | Between the Road to the Manor Site of Grace and the Main Caria Manor Gate Site of Grace, in a low area guarded by Spider Hands. |
| Magic-Shrouding Cracked Tear | +20% magic damage for 3 minutes | Defeat the Erdtree Avatar found along the northeastern end of Liurnia. |
Yes, the Cerulean Hidden Tear is as broken as it sounds. Nothing you do will cost you any FP for 15 seconds, allowing you to cast spells you otherwise couldn’t afford. The most heralded use is to keep Comet Azur on blast for the entire duration of the effect, although it’s not a bad idea to chug this at the beginning of the fight to get a summon out for free.
The Intelligence boost from the Intelligence-knot Crystal Tear is quite substantial and lasts a good while, but again, its effectiveness depends on your build and Intelligence stat. If you’re using magic weapons like Moonveil, any Intelligence over 55 is going to see marginal gains, at best, as will sorceries once the Intelligence stat goes over 80. Good for the midgame, but once you have the other two Tears, it’s probably time to drop this one.
The Magic-Shrouding Cracked Tear shouldn’t need much explanation - it’s a long-lasting +20% buff to all magic damage output with no downsides. Any magic-user should have this mixed in their Physick.
Armor
This category is a bit more open-ended, but it’s worth a mention nonetheless. Many pieces of armor grant various passive bonuses that can boost your effectiveness, although these boosts are usually somewhat minor and heavily targeted compared to other gear. Some standouts include:
| Armor | Effect | Location |
|---|---|---|
| Azur’s Glintstone Crown | Comet Azur +15% damage, Glintstone Cometshard and Comet +10% damage. +15% FP consumption. | Complete Sorceress Sellen’s questline, then return to Azur north of Hermit Village, Mt. Gelmir. |
| Glintstone Crowns | Varies. Typically includes an Intelligence bonus at the expense of something else. | Varies. |
| Lusat’s Glintstone Crown | Stars of Ruin +15% damage, Star Shower and Glintstone Stars +10% damage. +15% FP consumption. | Complete Sorceress Sellen’s questline, then return to Lusat in the Sellia Hideaway, Caelid. |
| Queen’s Crescent Crown | +3 Intelligence | Defeat Rennala, Witch of the Full Moon, then buy this armor from Finger Reader Enia at Roundtable Hold. |
Azur’s Glintstone Crown may be worth using if you’re super keen on abusing the Cerulean Hidden Tear + Comet Azur combo, as it’s a significant damage boost with effectively no downside.
The various Glintstone Crowns will boost your Intelligence, but typically reduce some other stat. They’re almost all made redundant by the time you get the Queen’s Crescent Crown from Rennala, as it gives a +3 Intelligence boost with no downside. As always, your gains from Intelligence will vary depending on your Intelligence score.
Adula’s Moonblade
| Adula’s Moonblade | |||
|---|---|---|---|
| Type | Intelligence | FP Cost | Memory Slots |
| Cold, Carian Sword Sorcery | 32 | 26 | 1 |
A potent sorcery, top of the line when it comes to the Carian Sword Sorceries, this spell summons a massive, icy blade which the caster then swings forward in an arc, dealing significant cold damage and frostbite buildup to all foes in a wide AoE. In addition, it shoots an arc of cold energy capable of striking foes at midrage - if used in close proximity to an enemy, both the blade swing and the arc can hit. If cast consecutively, you’ll perform a counterstroke - this greatly reduces cast time between swings.
It’s moderately expensive in terms of FP cost, but the damage, range, frostbite buildup and potential of multiple hits makes it a fine midrange, crowd control option. It’s essentially a superior version of Carian Greatsword, which is a fine alternative throughout the midgame until you get Adula’s Moonblade.
Where to Find Adula’s Moonblade
To get this sorcery you must defeat Glintstone Dragon Adula, a reptile that terrorizes various highpoints of Liurnia. You can first find this beast in the Three Fingers region (northwestern edge of Liurnia), stalking the crystal and ruins-laden plains outside (northeast) of Ranni’s Rise. When you fight the dragon here, you can reduce it to 50% of its health before the winged reptile flees.
After this you’ll need to head to the Moonlight Altar region, a plateau along the southwestern edge of Liurnia. She’ll descend from the skies as you approach the Cathedral of Manus Celes. She’s significantly stronger here, but she at least has the decency to fight to the end this time. Defeat the dragon and you’ll gain this sorcery.
Comet Azur
| Comet Azur | |||
|---|---|---|---|
| Type | Intelligence | FP Cost | Memory Slots |
| Magic, Primeval Sorcery | 60 | 40 (+10/s) | 3 |
Perhaps the most hyped spell in the game, at its absolute best it’s capable of melting powerful foes - including bosses. That said, it’s perhaps also the most overhyped spell in the game - not that it’s not powerful, but it requires a lot of setup, patience, gear and perhaps a bit of luck to get the most out of it.
When cast, Comet Azur will manifest as a beam of primeval energy, dealing heavy damage to anything caught in the beam. If you hold down the button used to cast the spell, you’ll continue to channel the beam until you run out of FP, amplifying the damage dealt considerably. If used in tandem with the Cerulean Hidden Tear, you’ll gain up to 15 seconds (minus the time it takes to channel this spell) to freely keep this spell concentrated on your target. This will deal grievous damage to nearly any enemy in the game.
There are some important, and oft-ignored considerations when it comes to abusing Comet Azur. First, it requires a whopping 60 Intelligence and 3 memory slots to even use. It’s a hefty requirement, but to be fair, if you plan to abuse this spell, you’ll want at least that much Intelligence and as many memorization slots as you can get. Comet Azur is not a spell for dabblers.
Second, the charge-up time is significant to the point where if you can’t ambush a foe, it can be tricky to strike them with it. In fact, whatever Comet Azur’s potential may be, you’ll rarely see it fully realized, as it deals surprisingly little poise damage, meaning enemies will often dodge/jump/walk out of it, and the beam’s range, AoE and tracking are all incredibly limited and outright fickle. In short, between the spell’s charge up time, its inability to keep an enemy transfixed and its unintuitive effective effect, you’ll often only get a portion of its potential.
Third, while Comet Azur is powerful, it’s not quite powerful enough to live up to its reputation without a lot of help. You’ll want numerous buffs to make the most of whatever glancing blow you’re likely to land, including any gear that boosts Intelligence (up to an effective cap of 80), Azur’s Glintstone Crown (for the +15% damage buff), the Graven-School Talisman and/or the Graven-Mass Talisman (+4% sorcery damage and +8% sorcery damage, respectively - these bonuses stack), the Magic Scorpion Charm (+12% magic damage), and you’ll want to use Terra Magica (boosts magic damage +35%) and chug a Physick comprised of the Cerulean Hidden Tear (infinite FP for 15 seconds) and the Magic-Shrouding Cracked Tear (+20% magic damage for 3 minutes).
It’s an awful lot of setup, and it’ll often won’t work as well as you’d hope… but when it does, it can shorten fights considerably or even end them outright. Still, it’s best used as a pre-emptive strike, then abandoned.
Where to Find Comet Azur
Comet Azur can be found along the southeastern end of Mt. Gelmir, which is a chore to reach in itself. You’ll have to either ascend to the Atlus Plateau by going through the Ruin-Strewn Precipice and defeating Magma Wyrm Makar, or by by finding the Dectus Medallion (Left) and (Right) and using them to ascend the Grand Lift of Dectus, or by heading on foot from Volcano Manor (presumably after being transported there by being grapple-killed by an Abductor Virgin in Raya Lucaria Academy).
Once that non-trivial task is complete, make your way around Mt. Gelmir by heading counter-clockwise until you reach the Hermit Village. Primeval Sorcerer Azur is just north of this village, but you’ll have to get past the Demi-Human Queen Maggie (although not necessarily by defeating her) to reach him. Simple talk to Primeval Sorcerer Azur and, while he’s not very talkative, he will hand over Comet Azur.
Glintstone Pebble
| Glintstone Pebble | |||
|---|---|---|---|
| Type | Intelligence | FP Cost | Memory Slots |
| Magic, Glintstone Sorcery | 10 | 7 | 1 |
This has to be a mistake, the lowly Glintstone Pebble, a spell the Astrologer class starts with, is one of the top five? Ah, the magical, subjective nature of lists…
Yes, Glintstone Pebble is a spell you can have equipped from the very start of the game, through to the very end. Is it always the best go-to spell? No, but if you’re boosting your magic damage output for other sorceries, you’ll find the Glintstone Pebble actually ends up dealing a significant amount of damage, itself. Add this to its other virtues, namely fast cast time (especially when used in succession), low FP cost, moderate tracking and range, and perhaps most importantly, the fact that it’s small enough to travel to most enemies without smashing into terrain, and it’s not hard to see why it’s an evergreen spell.
It’ll be undamaged by all sorts of spells, especially presumed successor spells that shoot out a barrage of similar projectiles, albeit with higher FP costs, longer casting times, and clunkier aiming. Sometimes you just need to zorch that jerk enemy on the ledge below you, and since Rock Sling’s projectiles can be fickle, Glintstone Pebble is arguably the best option for dealing with out of the way enemies in a cost-effective manner.
It’s not your nuke, it’s not your AoE, it doesn’t debuff, it doesn’t deal non-magic damage and it doesn’t deal a ton of poise damage (although the Ash of War version is another story…), it’s a little magic missile that dominates its niche, and that’s enough to justify its place on this list.
Where to Find Glintstone Pebble
You’ll start with this sorcery if you pick the Astrologer class at the beginning of the game. Alternatively, you can purchase it from Sorceress Sellen, who can be found in the Waypoint Ruins, although you’ll have to defeat the Mad Pumpkin Head boss first.
Rock Sling
| Rock Sling | |||
|---|---|---|---|
| Type | Intelligence | FP Cost | Memory Slots |
| Physical, Gravity Sorcery | 18 | 18 | 1 |
The workhorse spell in Elden Ring, Rock Sling conjures three boulders in the air, which then streak towards an enemy. These boulders each deal light physical damage, but if they all hit it’s a pretty solid cast, and while the damage output is only moderate, at best, the poise damage this spell deals is significant. You can expect most enemies to end up staggered after a few casts, during which time you can punish them further with a critical hit - an excellent spell for a melee/caster hybrid. If that’s not good enough, the boulders have minor tracking and surprisingly good range - it’s one of the longest-range spells in the game, in fact. If you can lock into it, it’s probably within range. Mix all that with a relatively low FP cost, low Intelligence requirement and the fact that you can get the spell incredibly early and you’ve got your bread-and-butter offensive sorcery.
Oh, and the spell is boosted by the Meteorite Staff, the go-to early game staff.
It’s not all roses, however. The spell consumes a fair bit of Stamina to cast, and while mentioned before the casting time is somewhat on the slow side for the damage output. Also, the rocks are cumbersome and prone to clipping scenery, so if you’re casting this spell at enemies above or below you, or if there’s any intervening cover, you may just lose one or all of the boulders in transit.
Still, these are minor nuisances, at worst, and it’s hard to overstate just how good the poise damage is, and how useful it is to have a physical damage spell in your arsenal. Against magic-resistant foes, it’s an important alternative to your other forms of attack.
How to Find Rock Sling
You can find the Rock Sling spell in the Street of Sages Ruins in Aeonia Swamp, Caelid. Search the ruins for some stairs down and pillage a chest in the cellar. These ruins are just north of the ruined tower where you’ll find the Meteorite Staff, making this a very worthwhile trip for fledgling sorcerers, indeed.
Terra Magica
| Terra Magica | |||
|---|---|---|---|
| Type | Intelligence | FP Cost | Memory Slots |
| Glintstone Sorcery | 20 | 20 | 1 |
We have a long-range staggering spell, we have a simple, low damage, fast, versatile spell, we have a close range AoE spell that can debuff, and we have a midrange nuke. What else do we need that hasn’t already been covered?
How about a spell that makes all our other spells stronger?
Terra Magica does just that, planting a rune on the ground that boosts all magic damage by +35%, a whopping increase. It’s not too expensive, FP-wise, and while it only has a 30 second duration, that’s more than enough of an overlap with an Comet Azur beam boosted by the Cerulean Hidden Tear. The biggest downside of this spell is that the buff only applies if you remain within the rune’s area, which can be difficult (if not outright suicidal) in some fights. Still, if you can find the time to lay this down and unleash some magic while standing on the rune, it’s a hefty bonus to all your magic damage. The best uses, of course, involve enhancing Comet Azur for a pre-emptive strike, or by dropping a Terra Magica rune when you know you’ve got to punish some ranged opponent with Rock Sling.
It’s not the most-used spell in our arsenal, but it makes some of our most potent weapons stronger, and that gets it a spot.
How to Find Terra Magica
Search the northwestern end of the island that Raya Lucaria Academy is on to find the Academy Crystal Cave dungeon. You’ll need to clear this cave, kill its Crystalian bosses, then ride an elevator to reach an otherwise inaccessible tower on the Raya Lucaria Academy grounds. You’ll find this spell in a chest atop the tower.
No Comments