

| Quest Giver | Reward | Lvl |
|---|---|---|
| Lilith - The Pyre of Stars | Cash | 41 |
Enter Portal, Find Tyreen
This is it, the Destroyer is being released and Tyreen has returned to Pandora to leech it. If you have any unfinished business or preparations, now is the time to do them (you can always do them after the mission however) as once you pass through, you’ll begin the steps of the final encounter.
You’ll find yourself in The Destroyer’s Rift, a part of Pandora that is being torn apart from the Destroyer. Follow the path and you’ll come across the Fast Travel and some Vending Machines, be sure you have all of your ammo refilled before continuing. Finally, before you head south, take a detour to the east and follow the path to find the final Eridian Writing in the game, unlocking the Trophy/Achievement Tales From The Eridian Slab if you’ve collected all the others.


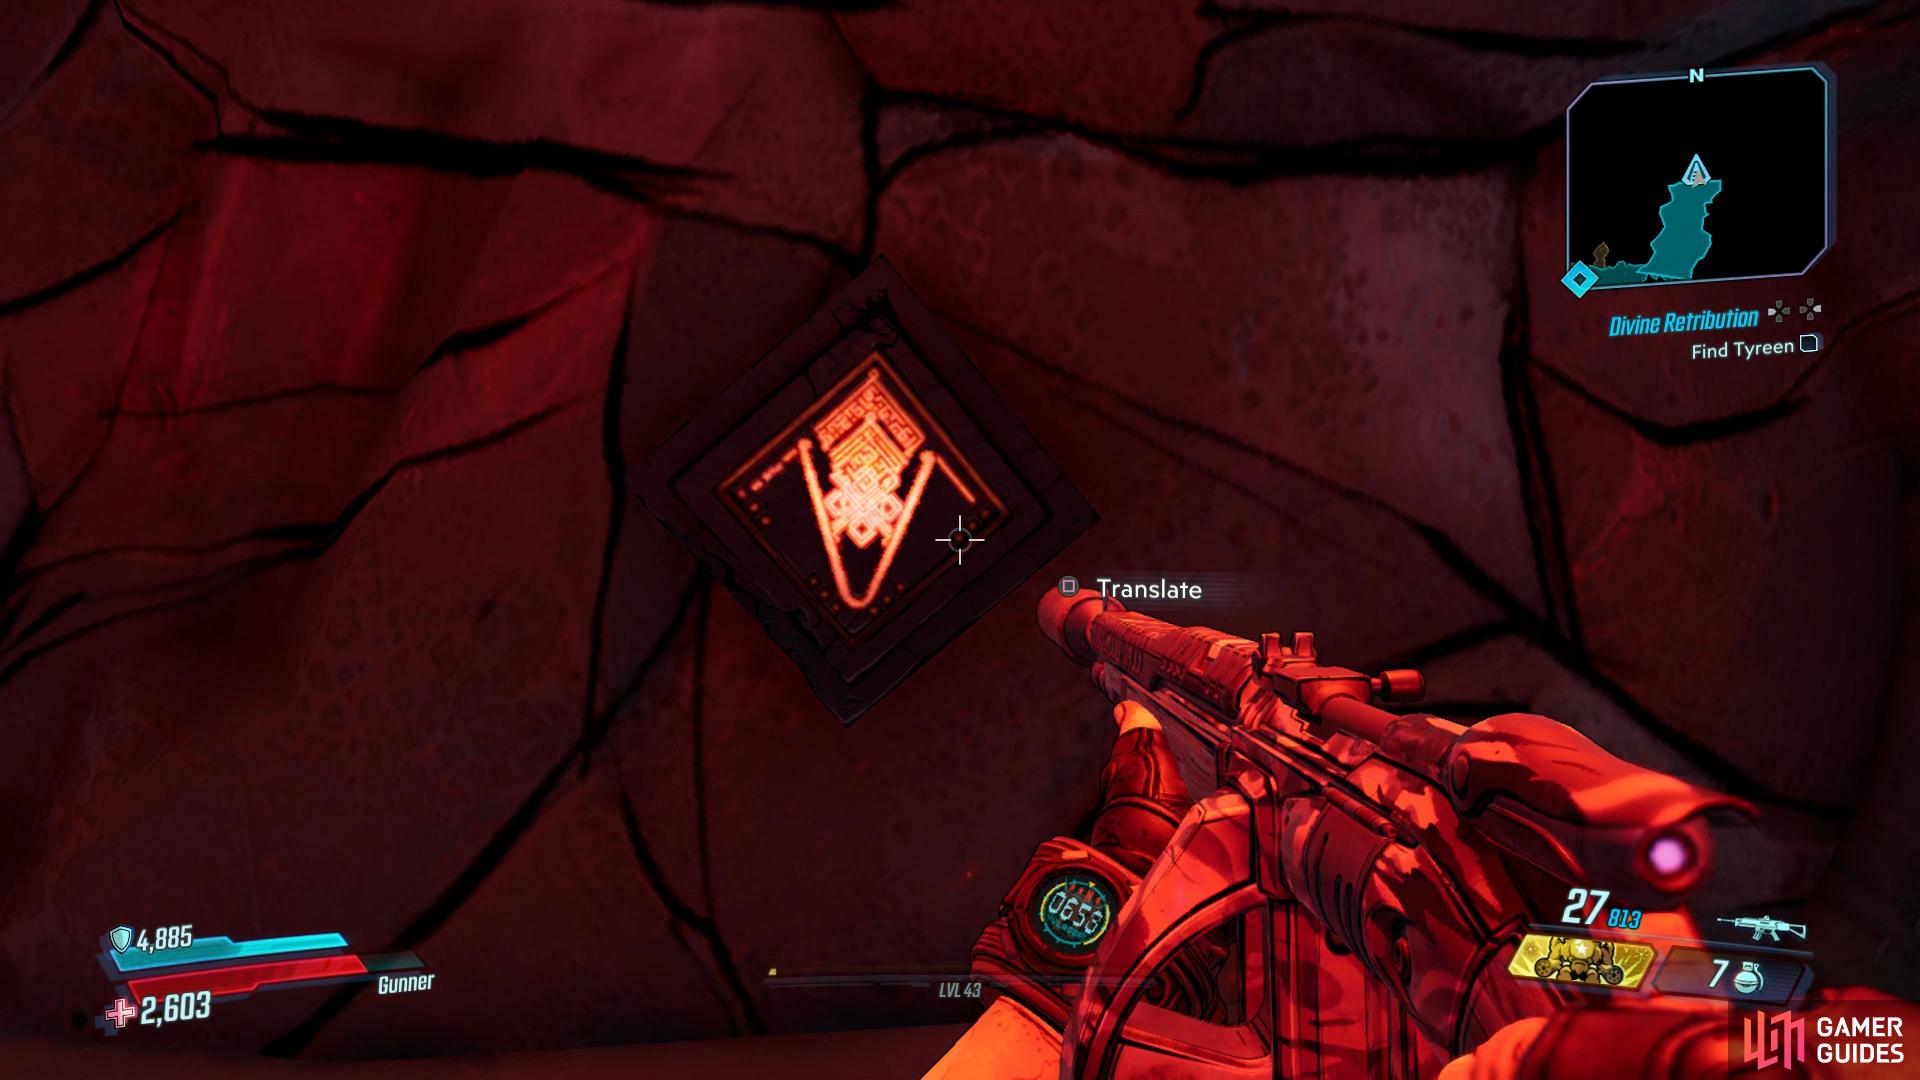
Don’t forget the final Eridian Writing Slab before you head south.
With everything else taken care of, return to where the Vending Machines were and drop down to the south to begin the final battle.
Final Boss: Tyreen the Destroyer
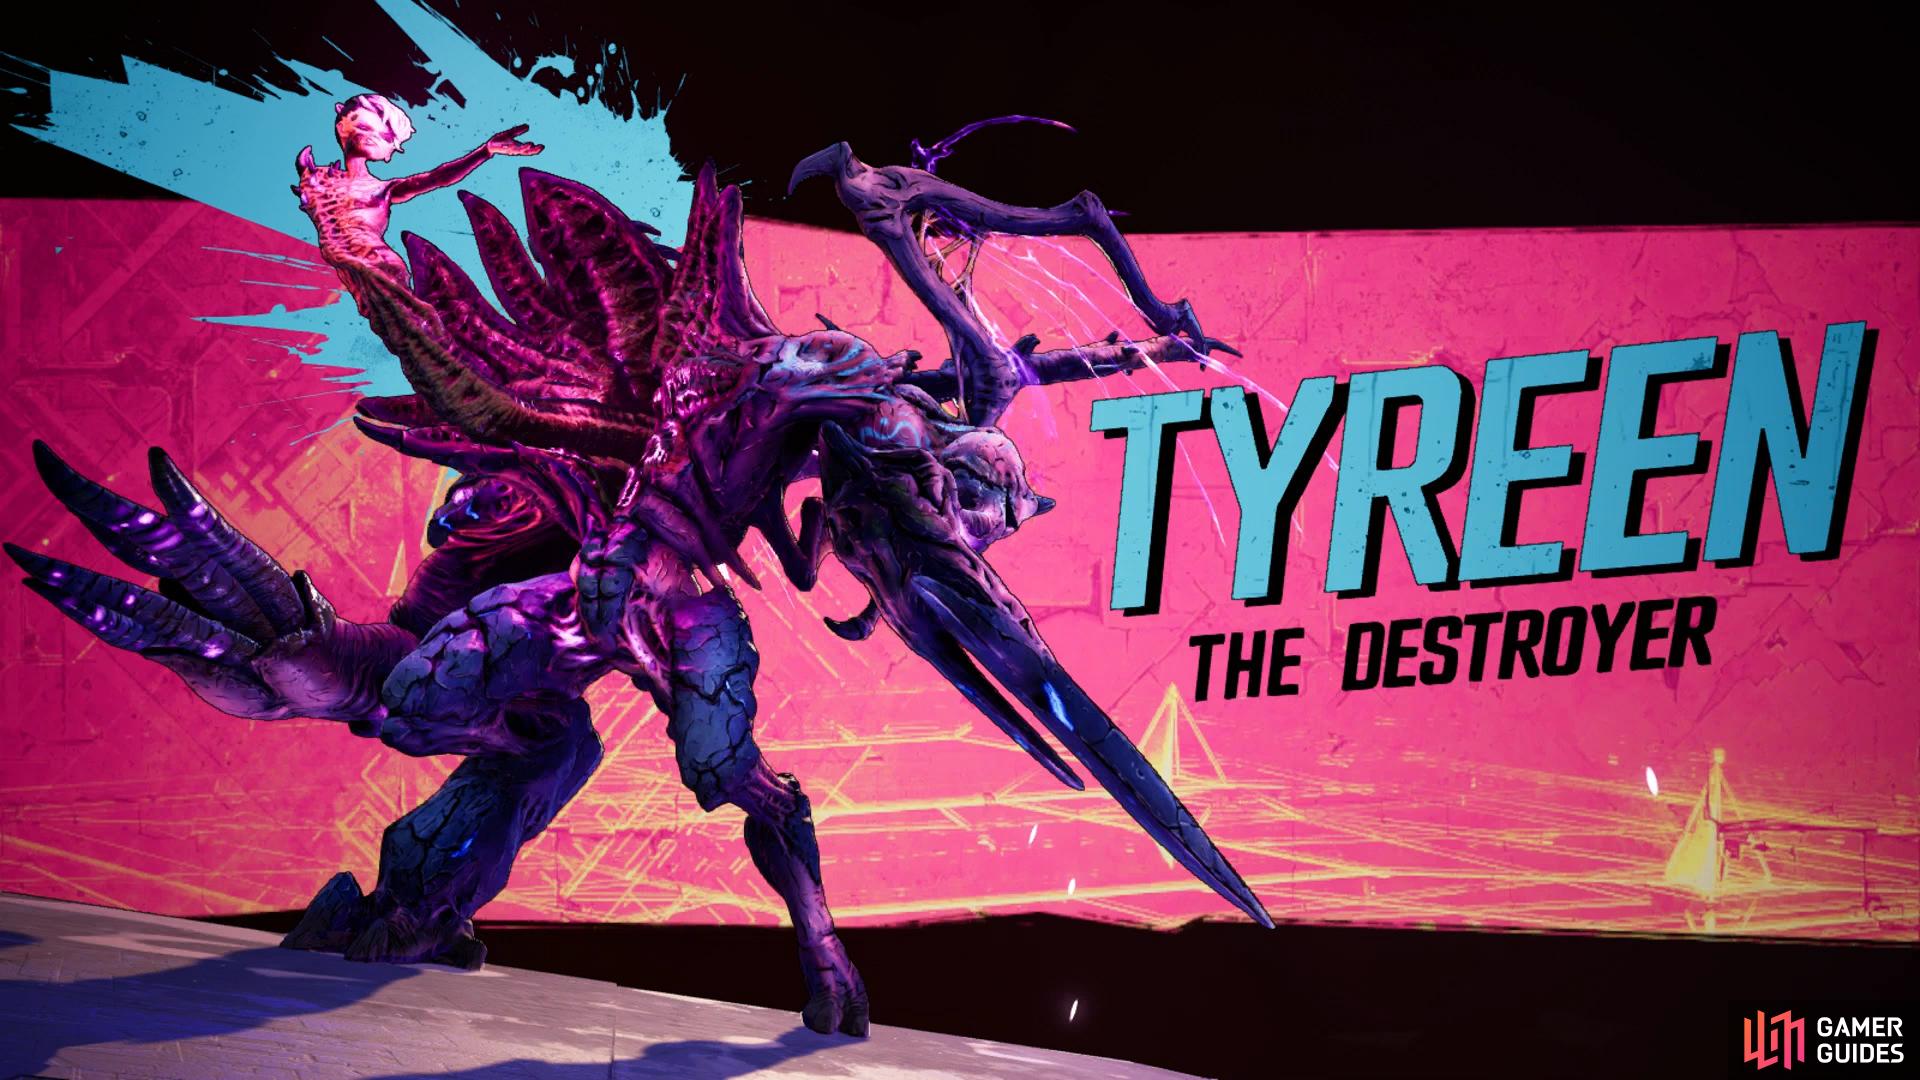
Tyreen has fused with The Destroyer and is now a gargantuan monster that you’ll need to take down. The arena is large and for good reason as you’ll need to be very active throughout the battle to avoid the majority of her attacks. To begin with, in her initial phase, Tyreen will stomp around the arena, unleashing a barrage of Crystals that travel along the ground toward you, this can be avoided by running to the side. She’ll also conjure up Fireballs that can home in on you and shoot a large Crystal that can be shot down before dealing any damage to you.
Whenever Tyreen performs any of these attacks, she’ll expose herself and thats your cue to unload your bullets into her directly due to it being her weak point. After taking away just under a quarter of her health, she’ll go immune so stop firing at her and wait for her to drop to the ground. At this point, quickly sprint around the back of her and climb up to find some yellow glowing marks. Use these to guide you up the back of her and on top, you’ll find a glowing mark in the middle, shoot at it and then drop to the ground to find Tyreen’s body exposed again, allowing you to score more Critical Damage.
At this point, you’ll have adds to contend with (that are better left alone) and she’ll retreat to the back of the arena where she’ll unleash a Circular Laser Storm that will rotate around from the back of the arena to the front so wait for them to approach and run between them to avoid taking any damage. Tyreen returns to the arena at this point and you’ll need to repeat the steps from the first phase until she goes immune again, giving to the opportunity to run up the back and expose her again by shooting the glowing mark in the middle.
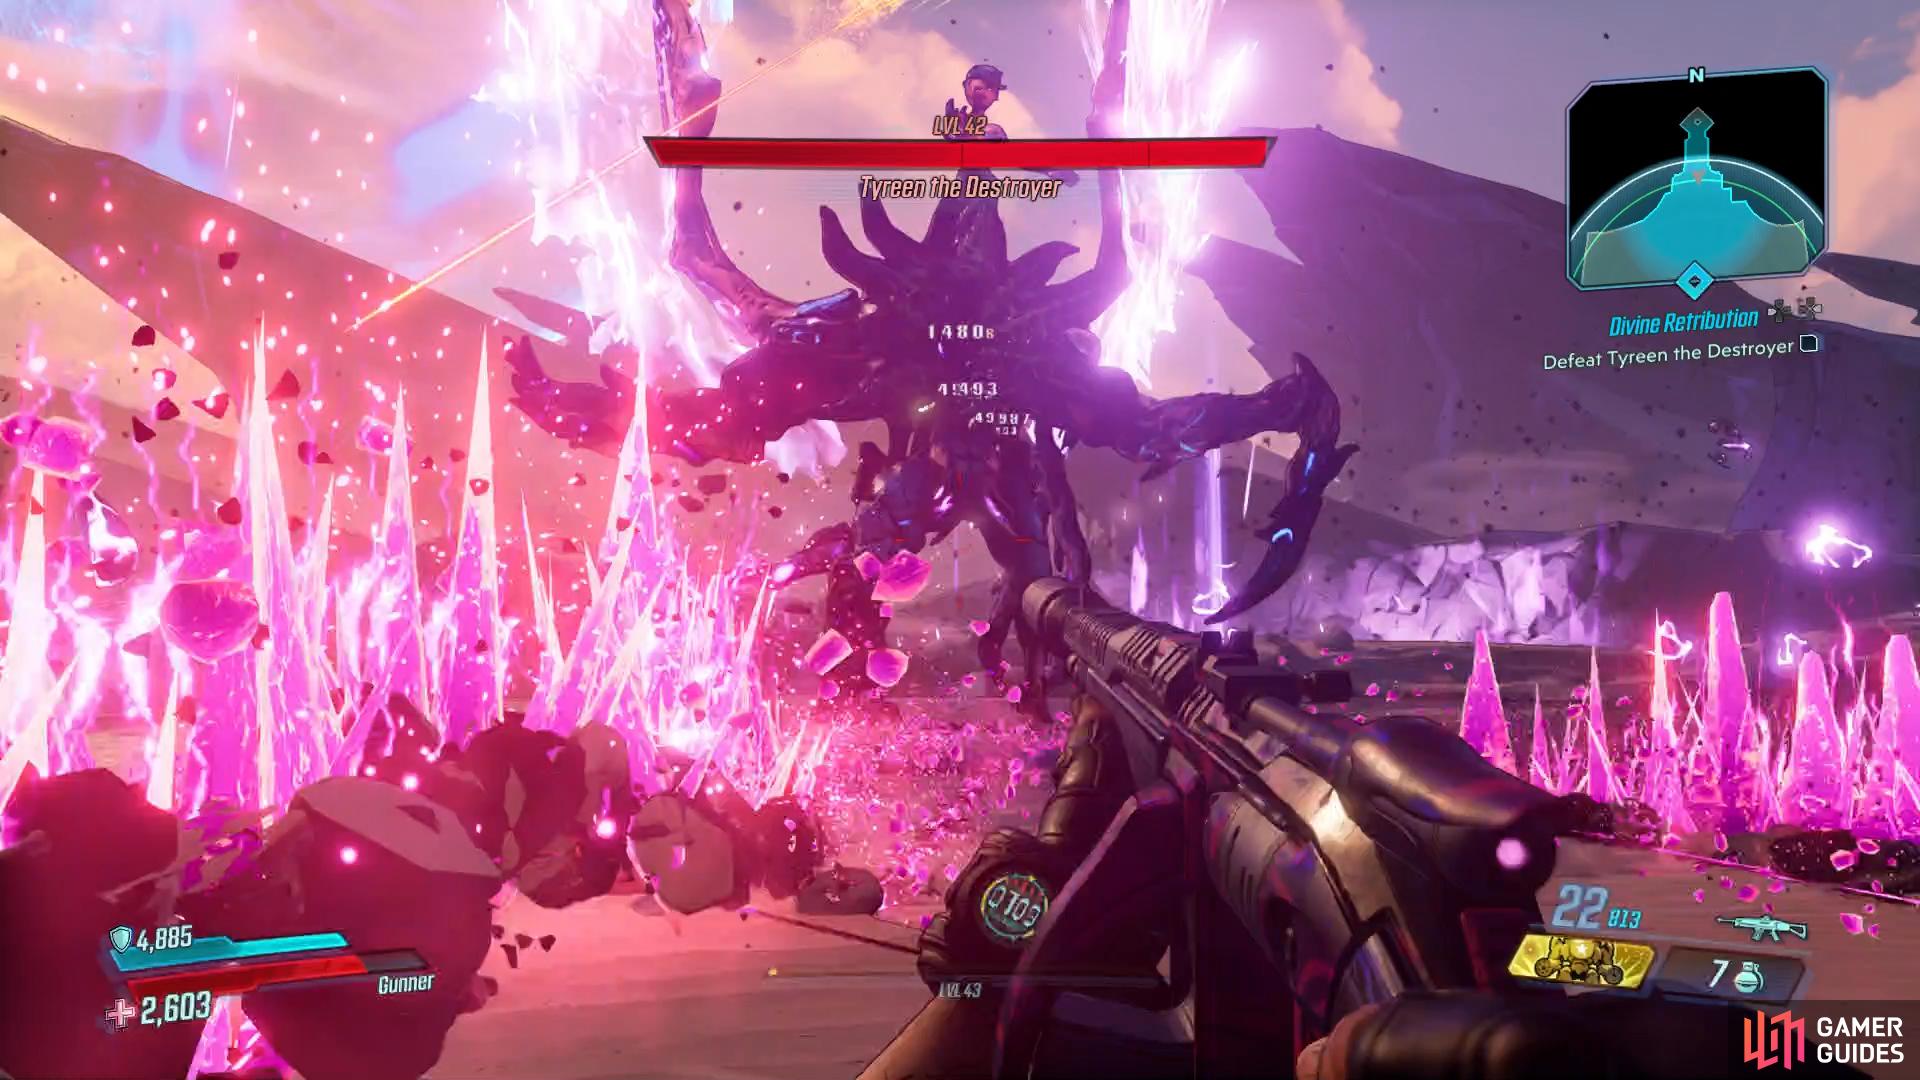
Keep repeating this until you bring her health down to under a quarter and she’ll make herself immune again as she retreats to the back of the arena once more. At this point, she’ll spawn a huge laser that spans the entire arena that will head towards you. Look carefully for the thin lasers and jump over them to avoid taking damage here, causing Tyreen to shoot a final barrage of large Fireballs that you’ll need to run in the middle of to avoid taking heavy damage.
At this point, Tyreen will cycle through these phases until you finish her off. For the most part, once you understand her to avoid her attacks, Tyreen isn’t an overly difficult final boss however make use of your Action Skills (especially if you’re using Moze for the extra protection) whenever they’re available and use the adds as opportunities for a Second Chance if you should fall. Eventually, you’ll drain Tyreen of all her health and you’ll put her down once and for all.
Legendary Pistols Queen’s Call and King’s Call
Tyreen the Destroyer can drop all of the Legendary World Drops along with two unique Legendary Pistols, Queen’s Call and King’s Call. Both guns operate the same way with the difference being their elemental properties but their bullets will ricochet around the area and return three of them to your mag, a very useful ability that will be useful in the Endgame activities.
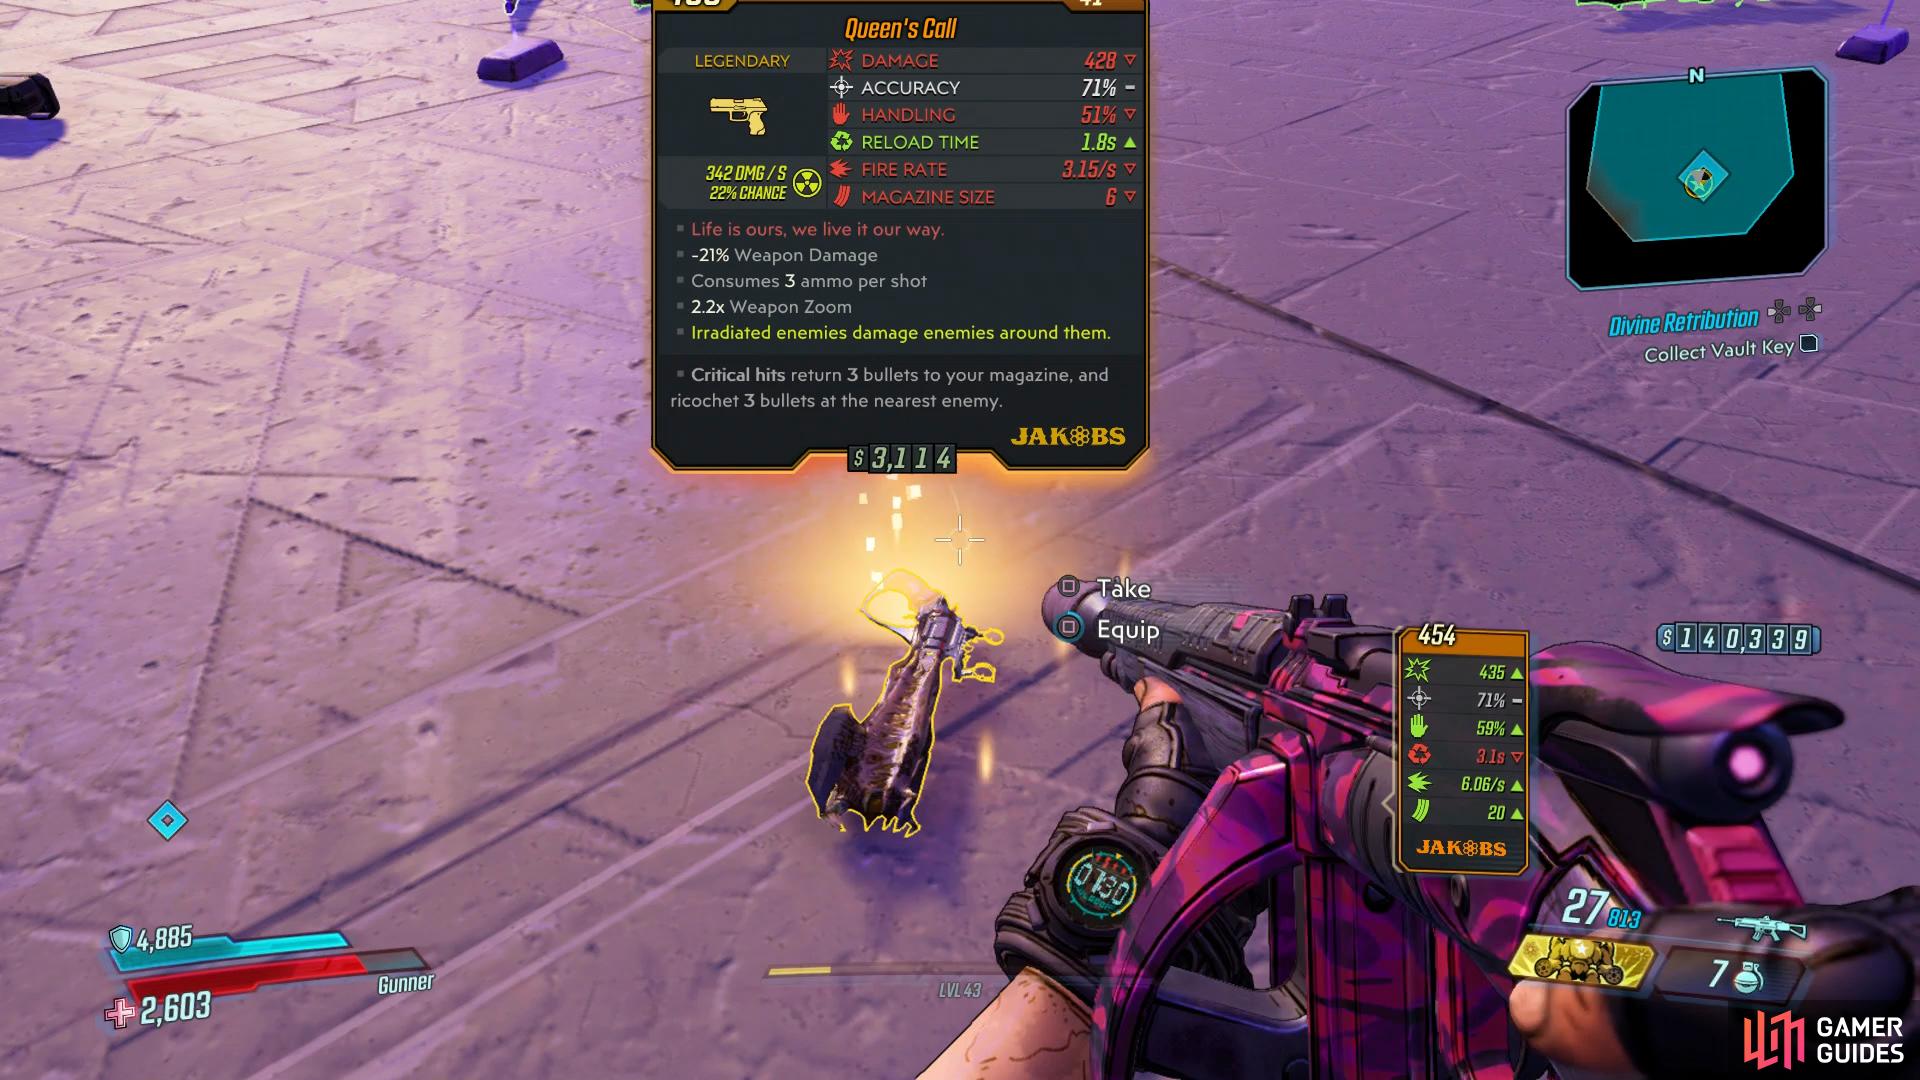
Queen’s Call and King’s Call are excellent Pistols well worth farming.
Collect Vault Key, Loot Vault
Pocket all the loot that is scattered around the arena and then collect the Vault Key to cause a Vault to erect so head inside. In the Vault of the Destroyer, you’ll find the game’s final two Red Chests along with the Eridian Ascensionator in the center. This will unlock [Mayhem Mode], which you can find out more about in the associated section of this guide. Leave the Vault and head over to Lilith to trigger the ending scenes of the Borderlands 3 campaign.
Once the credits finish rolling, make your way back to Sanctuary and head to Lilith’s room and give the Vault Key to Tannis and she’ll open a Red Chest which will contain four random Legendaries. Finally, speak to Tannis to learn a bit more about the latest Eridian Artifact you got in the Vault and then head to the north of the ship to place it in the pedestal to activate Mayhem Mode, unlock Bye, Felicia! and finally bring the campaign to a close.


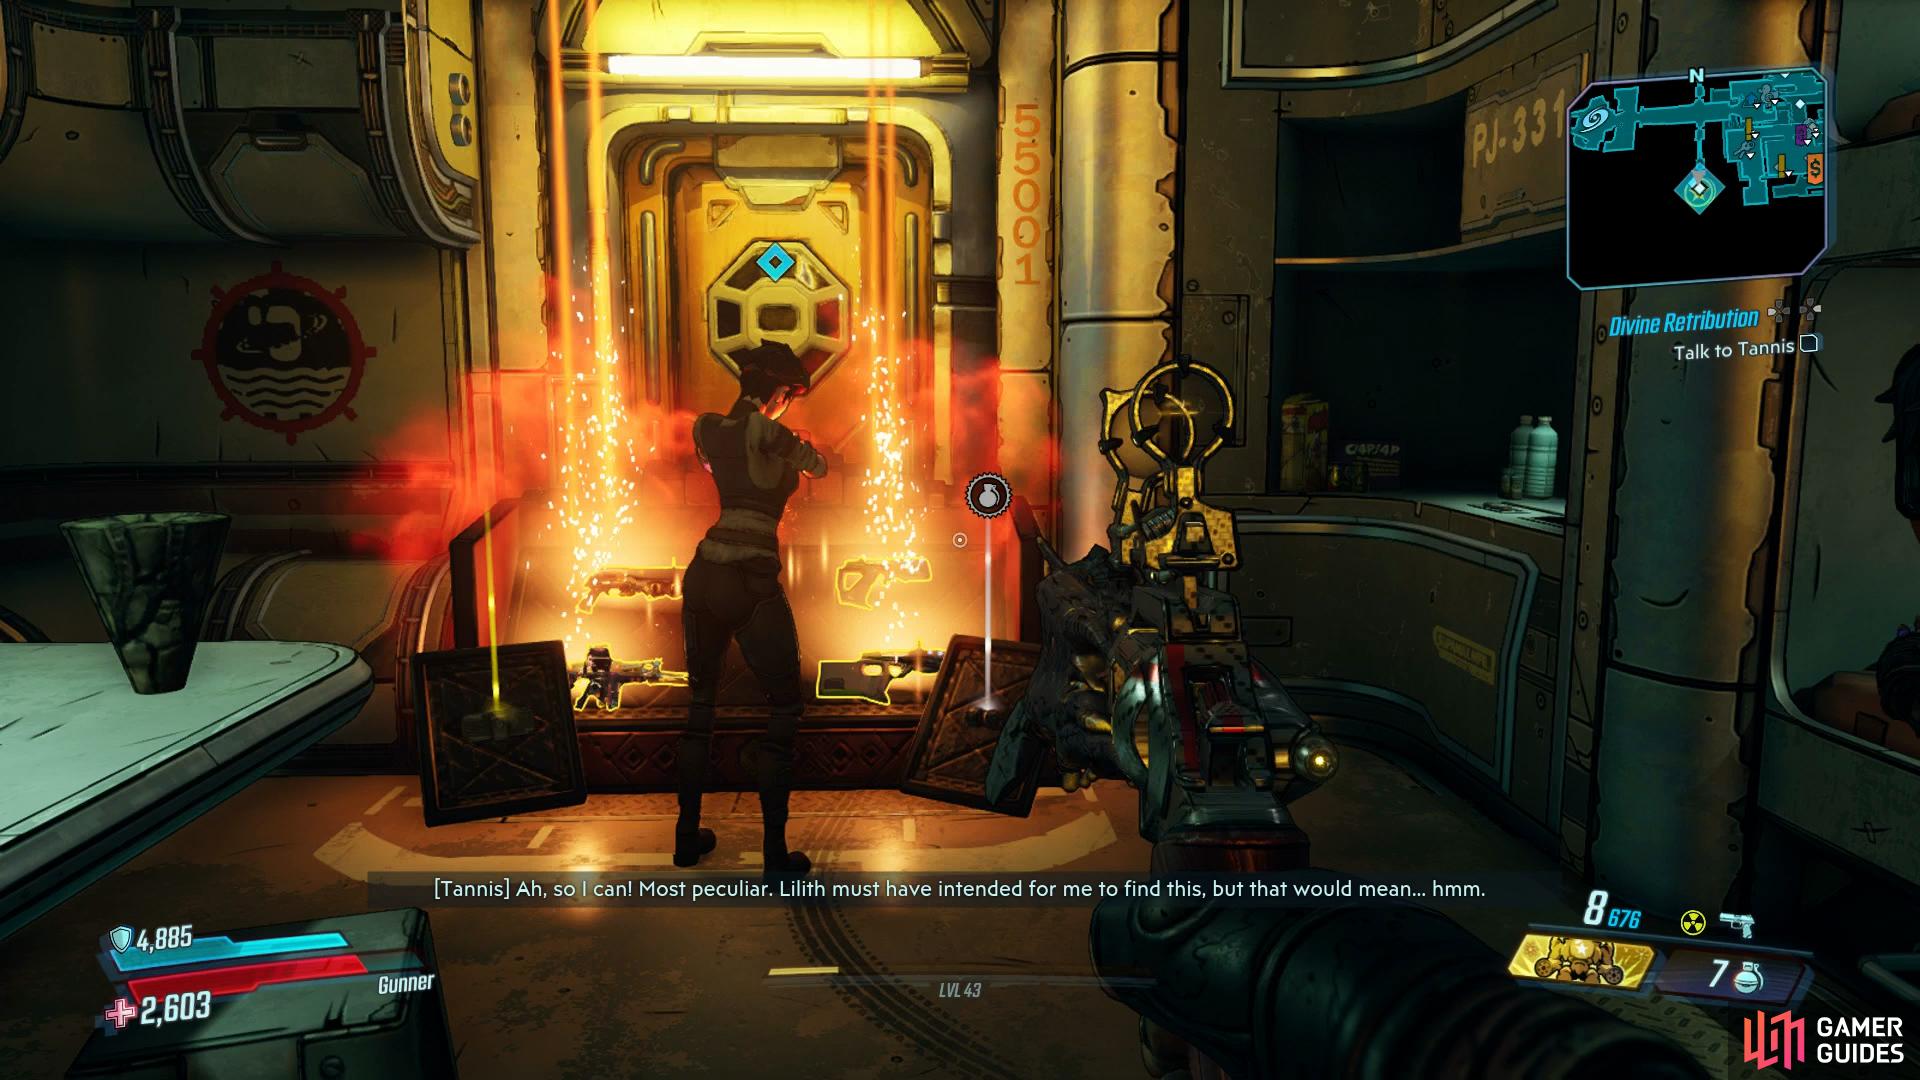
The Red Chest in Lilith’s room has guaranteed Legendaries inside.
What Now?
With the main campaign complete, you’ll unlock [Guardian Rank] which will allow you to keep advancing your character across all of them, even those you begin at Level 1 again. You’ll also unlock the previously mentioned [Mayhem Mode] which increases rewards along with the difficulty of the enemies and then there’s [True Vault Hunter Mode] which will allow you to begin the game with everything attuned to a higher level with tougher enemies and higher level rewards.
Finally, there’s the Endgame activities of the Eridian Proving Grounds and the Circle of Slaughter, both of which can be completed with the aid of Matchmaking. You’ll find some of the game’s best rewards from these activities and you’ll find all the help you need in our Endgame section. Just because there’s no more Vaults to loot, doesn’t mean your journey is over yet!
No Comments