

| Quest Giver | Reward | Lvl |
|---|---|---|
| Lilith - Sanctuary | Cash, Artifact Slot unlocked | 32 |
Talk to Wainwright, meet Clay
Upon completing the previous mission, Lilith will task you with heading back to Wainwright to track down the final Vault Key fragment so Fast Travel back to Knotty Peak. Speak to Wainwright to learn about the Jakobs Powder Cellar so Fast Travel over to Reliance to meet up with Clay once more.
Grab a vehicle and head out the northern door and take the road down to where Clay is waiting behind the waterfall and he’ll open the door for you.
Find barrel delivery pipe, secure area
The Blackbarrel Cellars is a smaller area than most on Eden-6 but there are still a few Crew Challenges and Zone Completion tasks to look out for so head over to their respective pages for more information. To begin with, follow the linear path into the first open room and dispatch the COVs that are lurking inside. Once the room is clear, search at the bottom of the stairs in the northern part of the room to discover the Dead Claptrap. Continue on to the west and you’ll enter Norton’s Study, where you’ll find the first Typhon Log along the southern wall.
You’ll find a Dead Claptrap at the bottom of the stairs in the first room
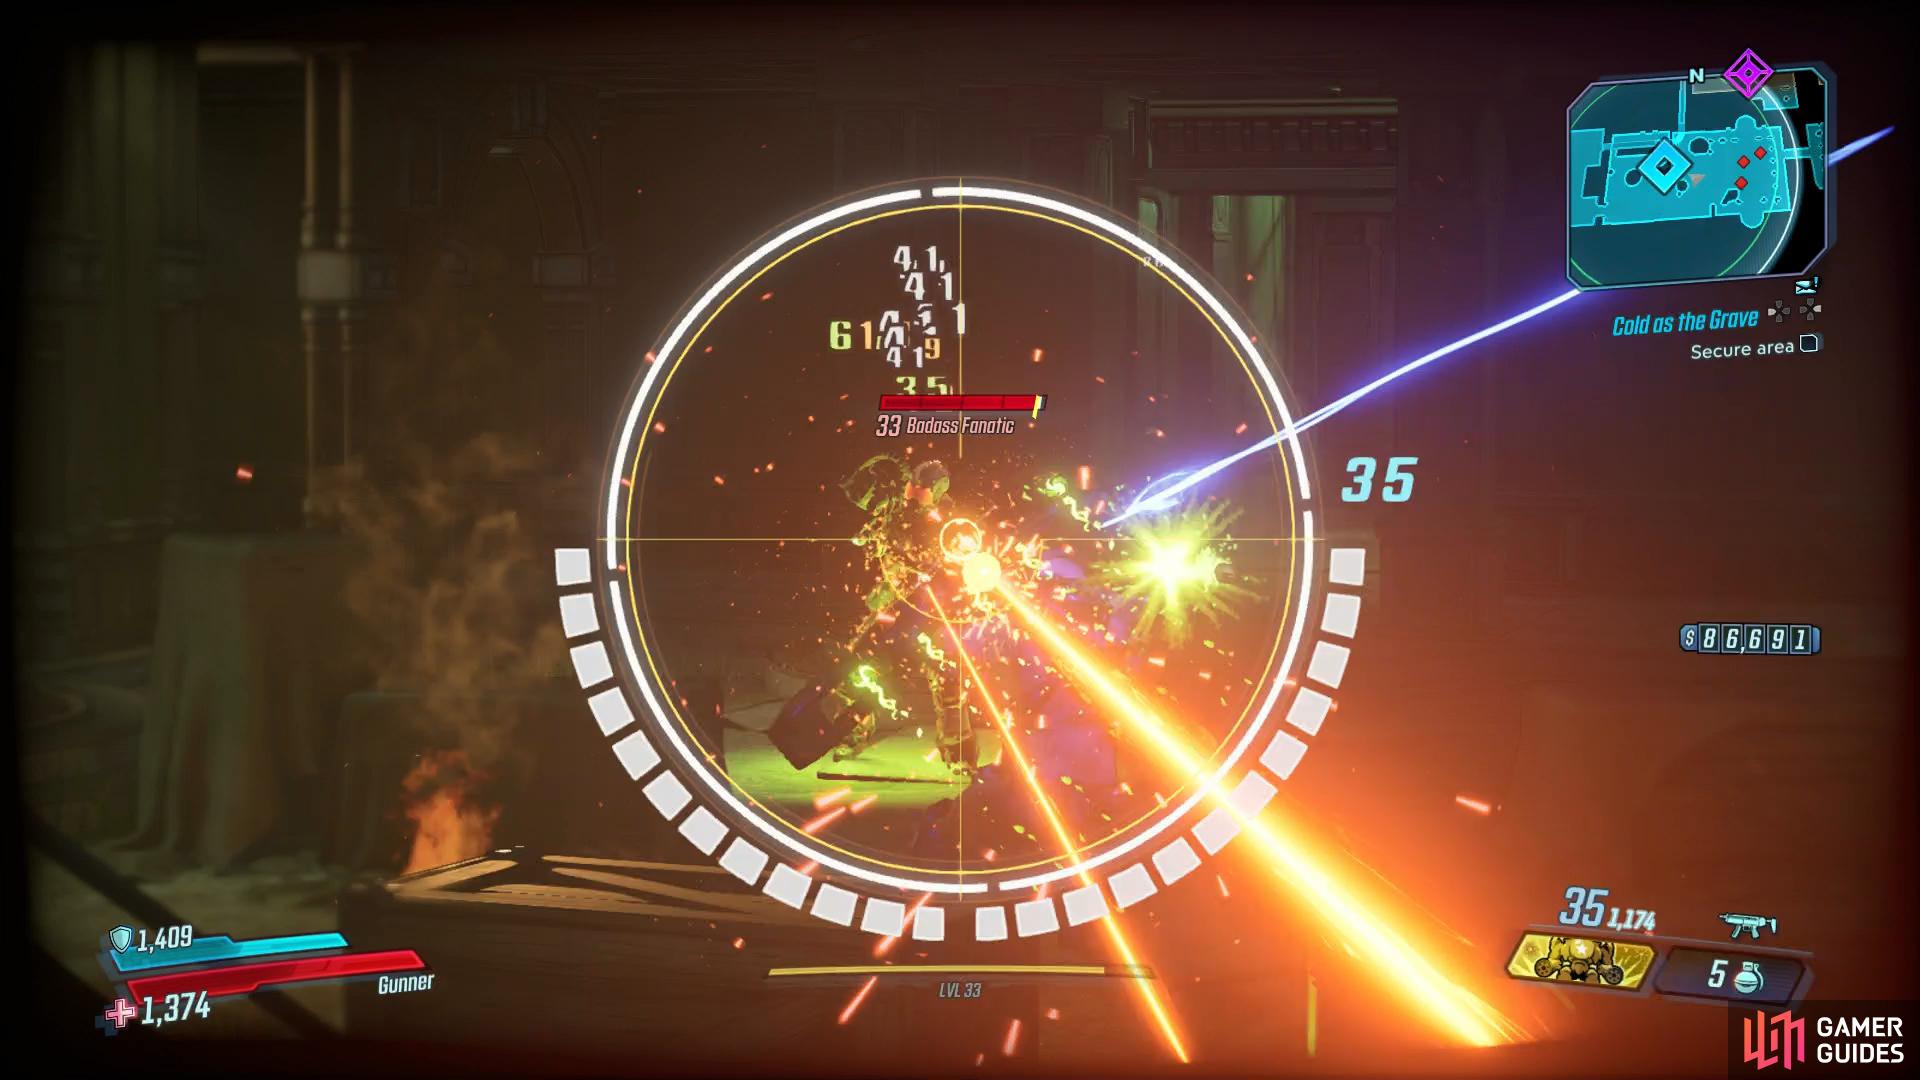
Badass enemies will attack from the second wave onwards when searching for the Vault Key fragment.
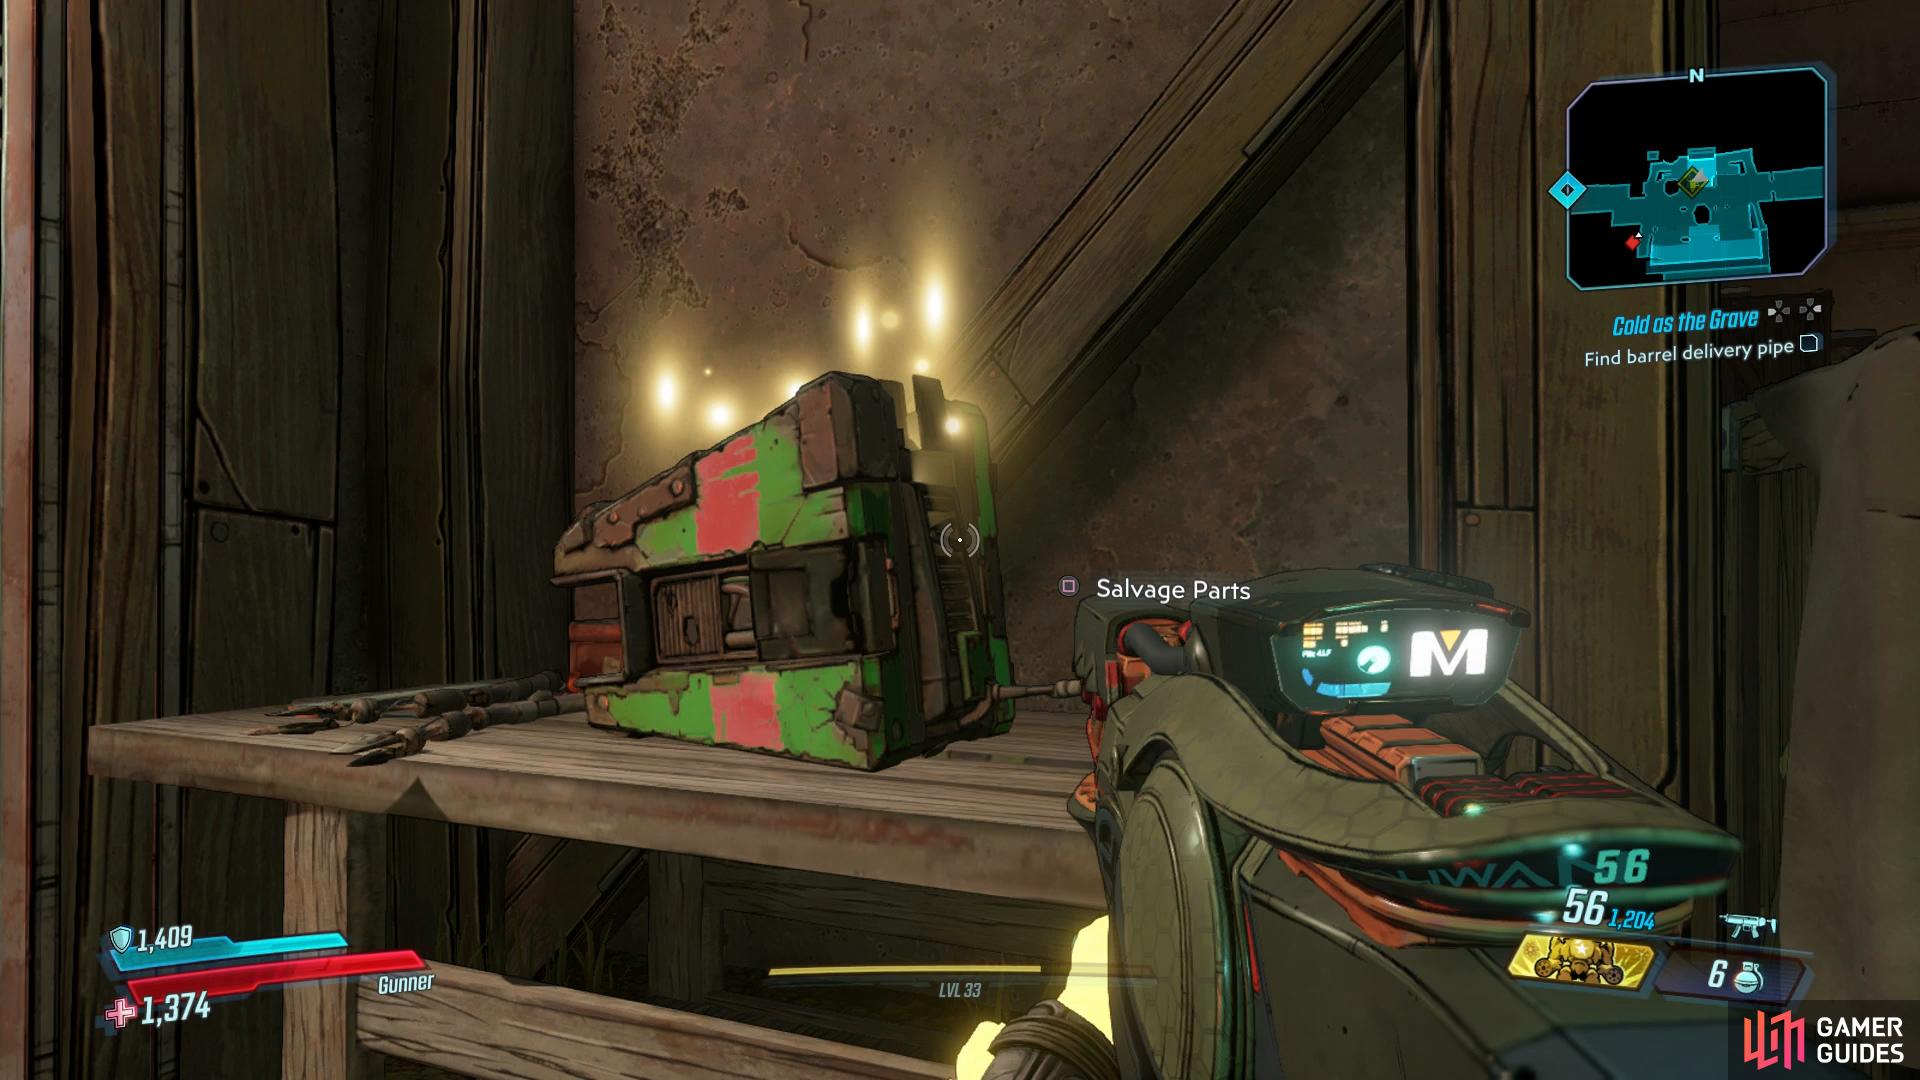
Once you enter the area ahead, you’ll need to clear the area of all the COVs. Of particular note, are the sheer number of Tinks that you’ll come up against so keep on the lookout for any Sentries that may be deployed. You’ll also find a lot of pipes that can be burst open or barrels that can be exploded. Once the area is secure, head to the center of the area to find the delivery pipe.
Assist Wainwright by activating the pipe when he requests and after the second attempt, you’ll have to deal with another, more deadly group of COVs. You’ll need to contend with a Badass Fanatic and near the end of the wave, a Badass Hag. These enemies are clad in Armor and armed with a grenade launcher that will fire spiked mines at you, equip a Corrosive weapon and take them out as quickly as possible. Once the final group of enemies fall, press the button one last time to drop the barrel, blast it open to claim the Vault Key fragment inside. Climb on to the conveyor nearby and follow it north to exit this room.
Meet Wainwright
Continue through the area and in the next open room, search in the bathroom to the north to spot the second Typhon Log. Follow the linear path through this area, dispatching another small group of COV along the way and you’ll eventually reach an area that you can drop down. Make sure you’re prepared and then when you’re ready, drop down to confront Aurelia.
Boss: Aurelia

The arena you’re fighting Aurelia in isn’t overly large but that shouldn’t matter too much as Aurelia is hardly mobile. She’ll spend the majority of the battle in the center while casting Cryo based attacks at you however do take note of the many containers around the edges of the room should you feel the need to recover health.
Aurelia can use a Cryo based wave attack at you, this heads straight at you and can be easily avoided by dodge to either side, leaving her open after. Her second, and most used attack, is the ability to conjure Whirlwinds around the room, should you get caught up in these, you’ll suffer continuous damage so do your best to steer clear of them. Finally, Aurelia will encase herself in an Frozen Pillar while she regenerates her Shields, quickly shoot at the Frozen Pillar to break it away and cause her to come jumping out of it.
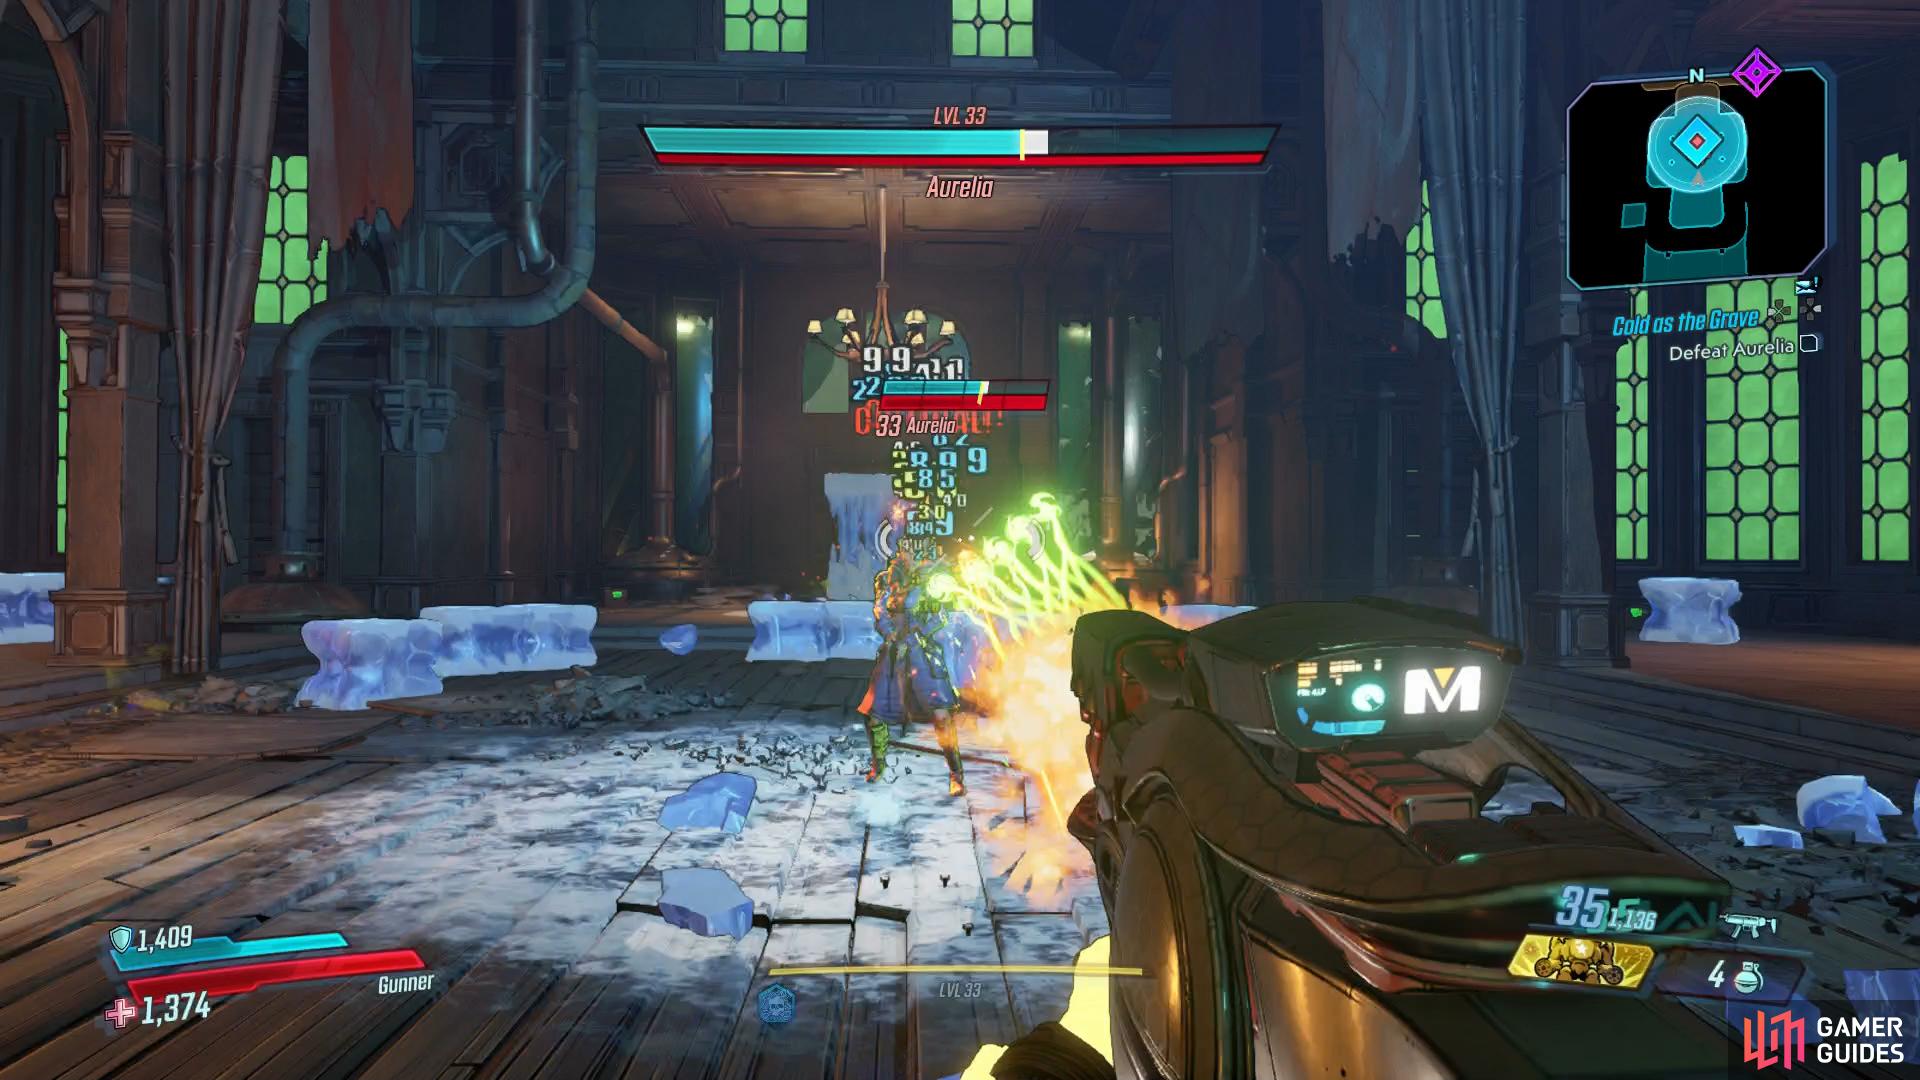
As Aurelia is not any manner of beast, her head is her weak point and any damage you direct at that position will inflict heavy damage on her. Aurelia doesn’t have too much health but her Shield can regenerate so offense is the best defense here, stand relatively close to Aurelia to avoid the Whirlwinds and unload everything you have to take her down quickly, preventing her from regenerating her Shields.
Legendary Shield, Frozen Heart
Among her drops, Aurelia drops the Legendary Shield, [Frozen Heart], a handy Shield that will release a Cryo Nova when its depleted, restoring 30% of the damage it does as health.
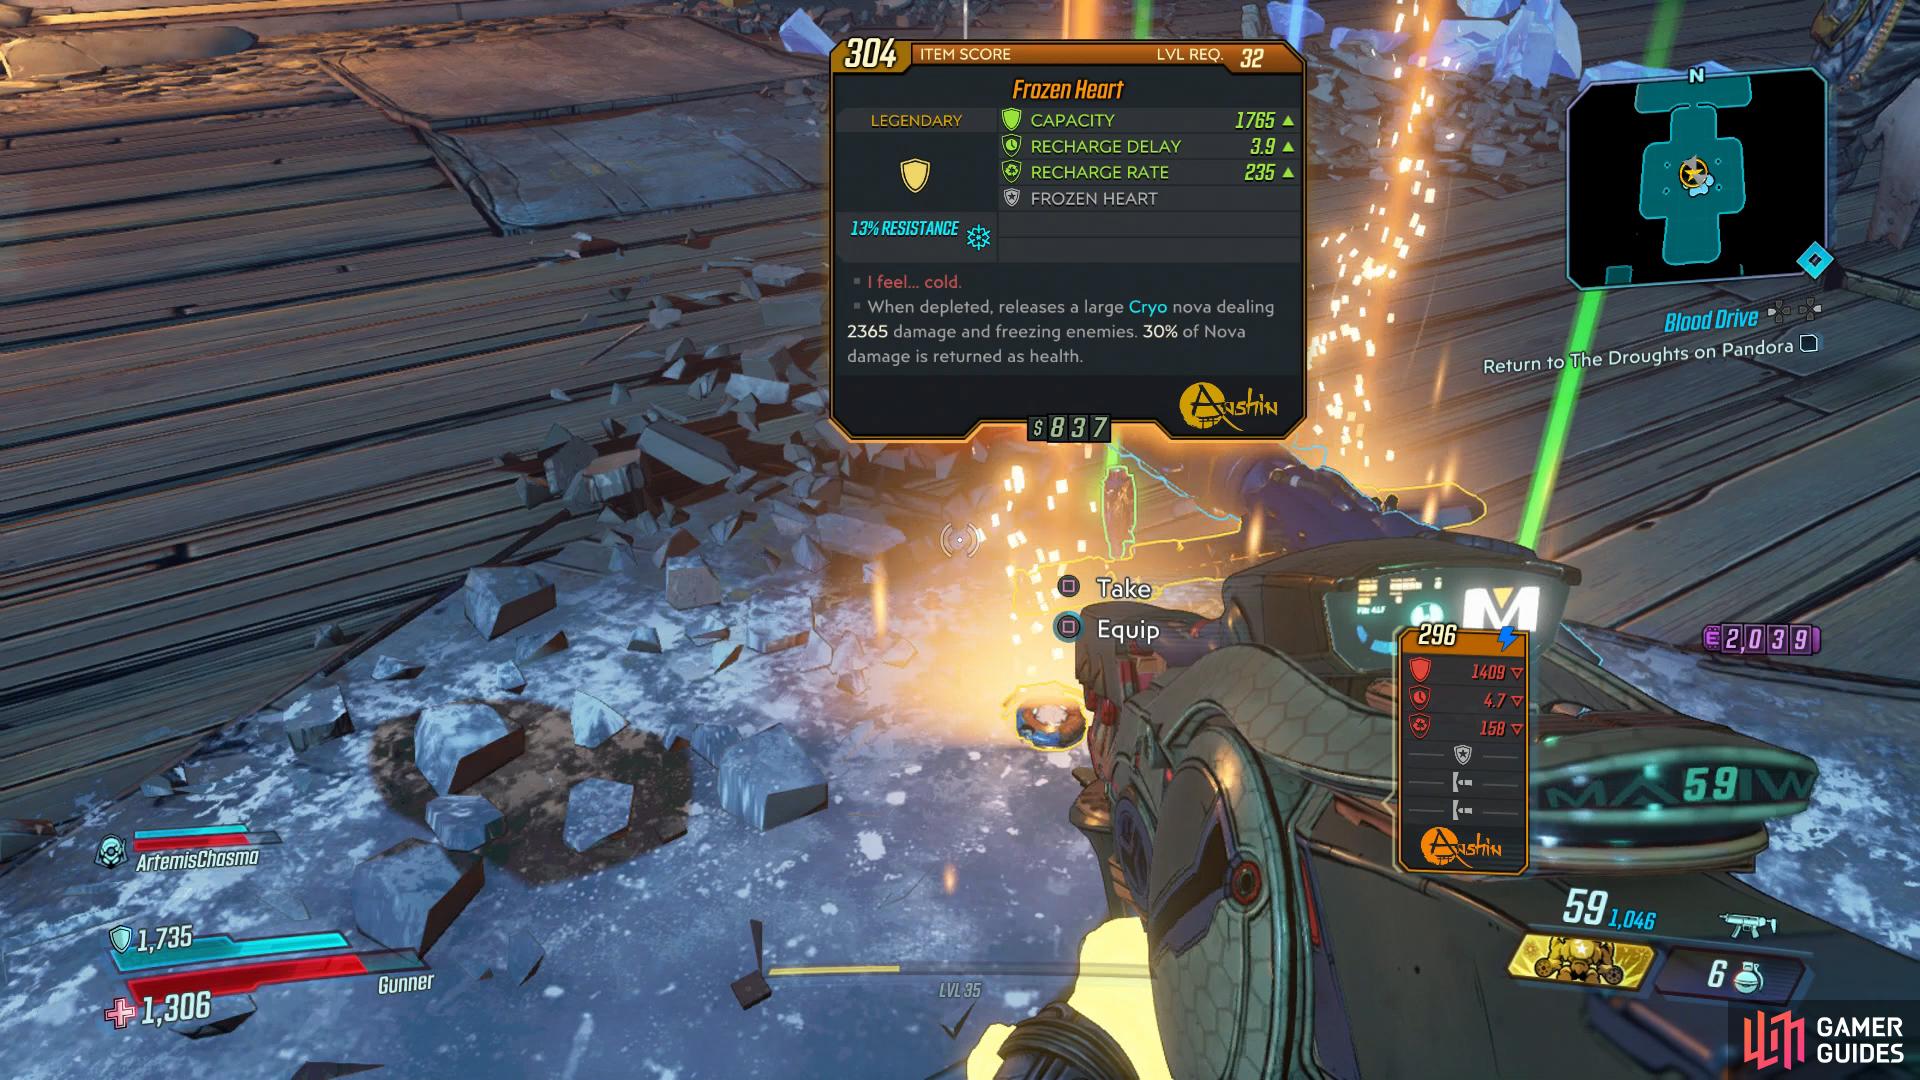
Frozen Heart is a very useful Shield unique to Aurelia.
Reveal Ruins [3]
Head over to check on Hammerlock following the battle and you’ll learn that in order to reach the Vault, you’ll need to solve some riddles in the gardens. The first statue can be found up ahead, listen to the recording to learn how this Jakobs passed and you’ll need to strike the statue in the same place, with this particular one being the face.
Head into the caves to the west next and clear out the Jabbers inside before heading to the statue and listening to the next recording. Shoot the statue in the back and then get ready to take out a Badass Jabber that spawns following it. Finally, make your way to the eastern greenhouse and dispatch the COVs inside and then climb the ladder to the south to reach the final Typhon Log. The Dead Drop can be found in the small tunnel to the southwest of the caves you just left alongside some Eridian Writing. Return to the greenhouse and approach the final statue and listen to the final recording to learn that you’ll need to strike the statue in it’s groin to solve the final riddle. Return back to the gardens and activate the bridge, leading to the Vault ahead.
Make your way forward and meet up with Tannis and she’ll assemble the Vault Key, prompting you to take it from her. Prepare at the Vending Machines nearby, as soon as you drop down and place the Vault Key, your final challenge on Eden-6 awaits.
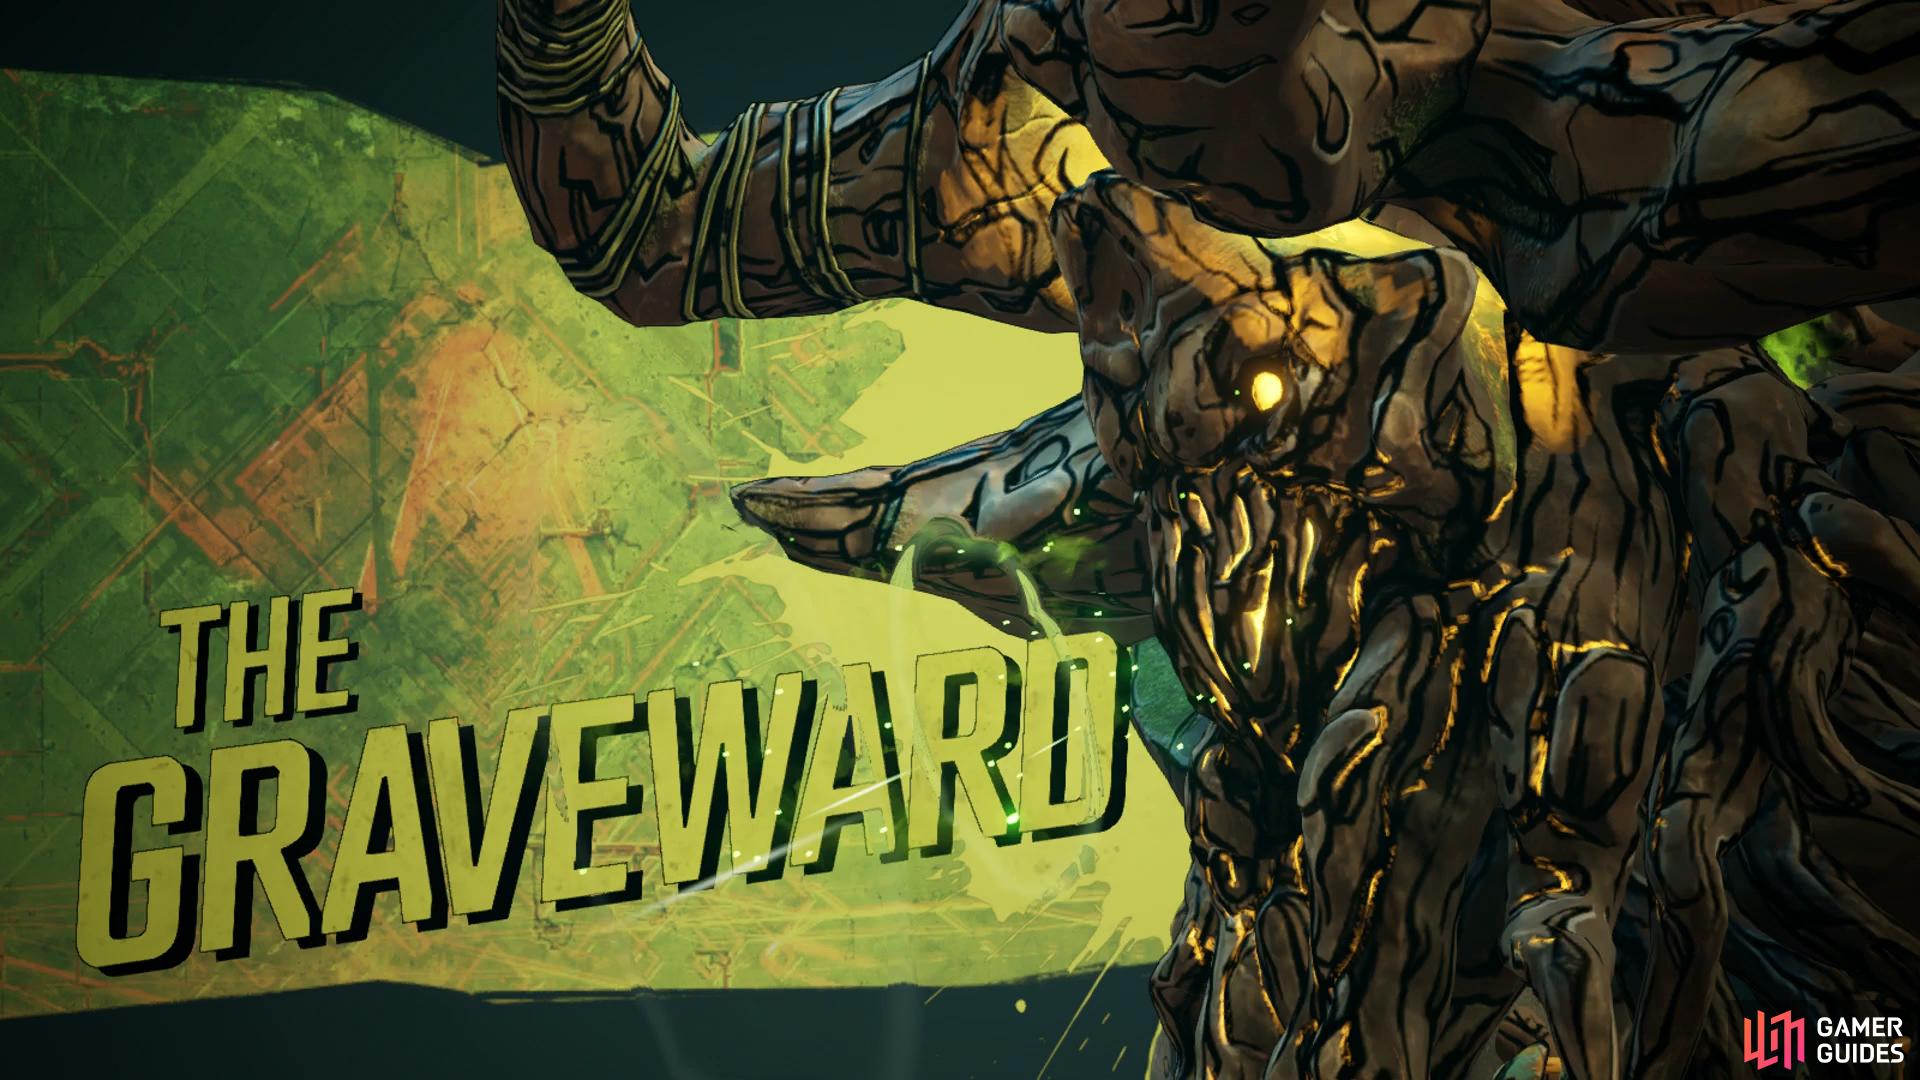
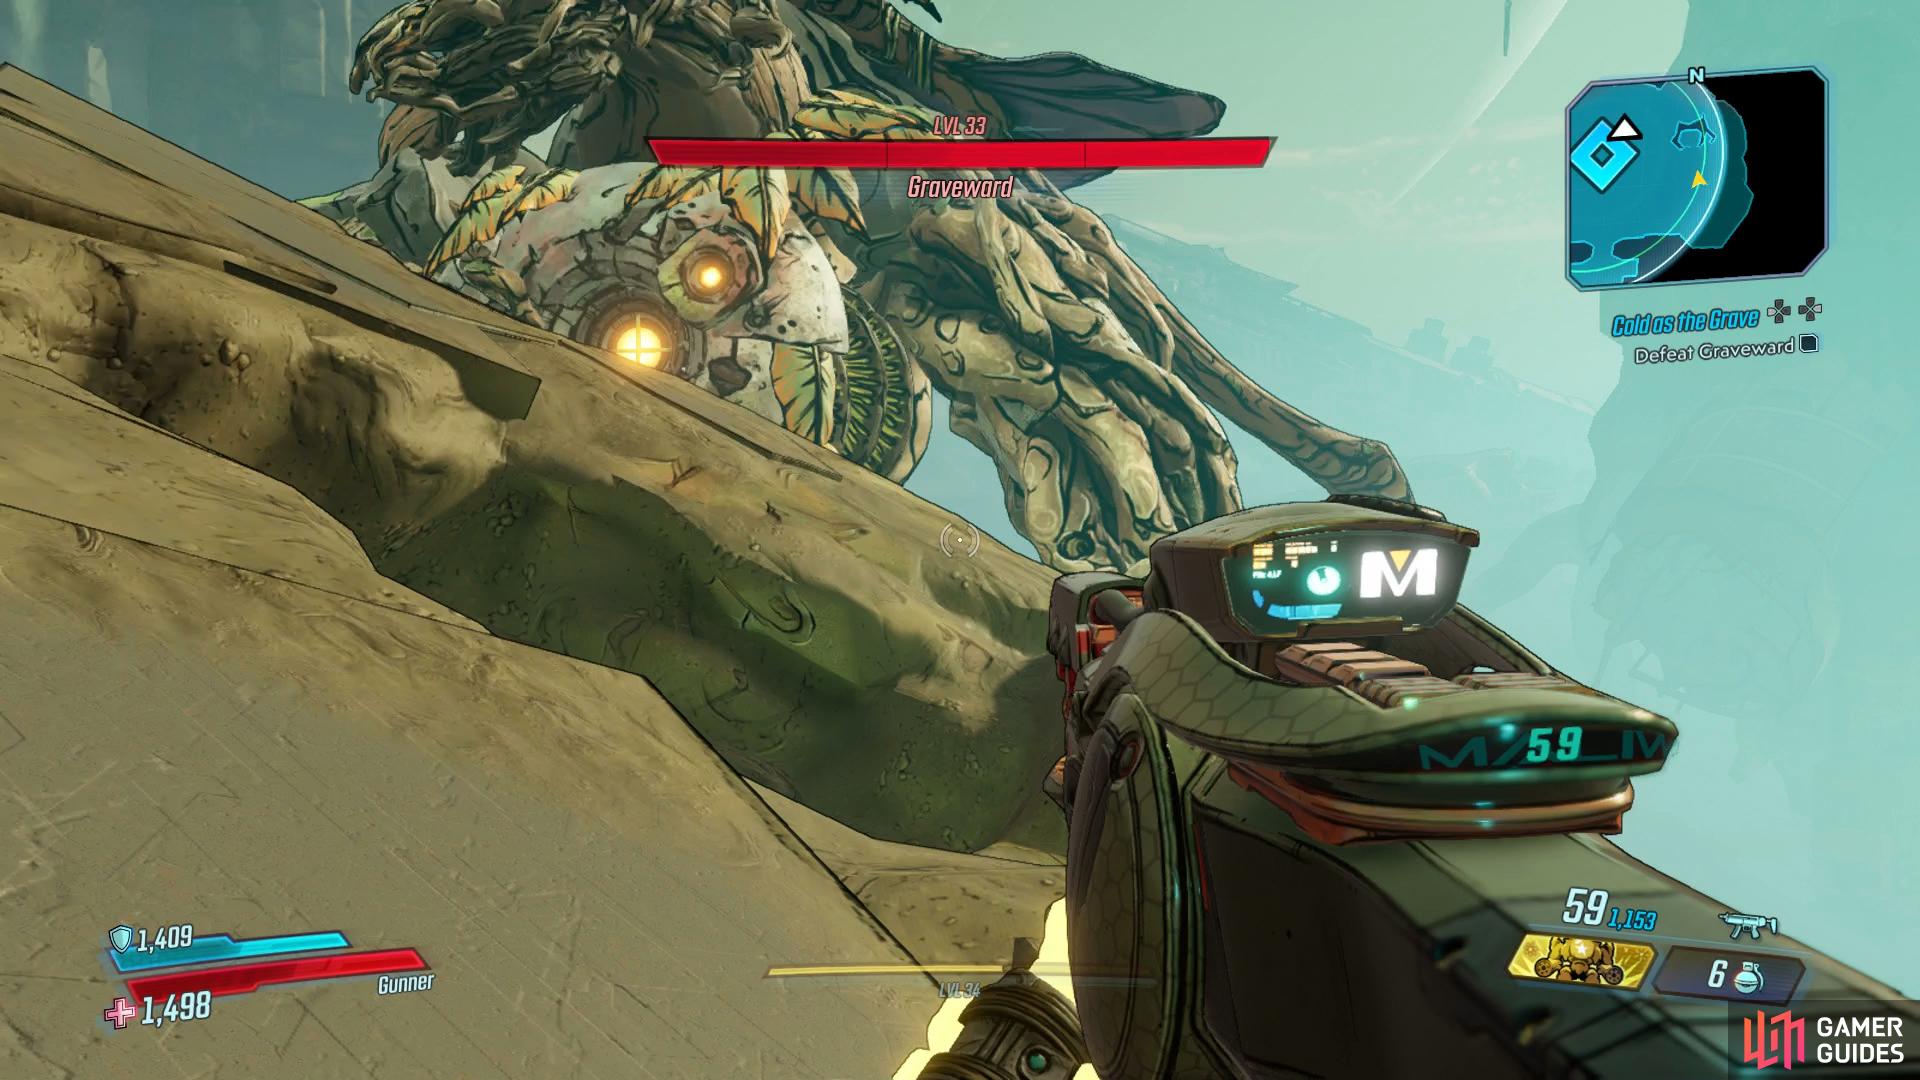
Boss: The Graveward
The Graveward is a gargantuan guardian that has a massive amount of health, even optimally, this battle is going to be a long one so make sure you prepare fully before going in. You’ll notice the arena is rather large and that there’s a hole that you drop in over to the right. This is key because you’ll need to utilize it at certain points in the battle.
The Graveward is slower than the previous Vault Guardian but all of his attacks cover a large area and you’ll need to learn how to deal with each of them to survive this battle. When the Graveward’s fist is glowing orange, it will perform a large melee slam or swipe that causes Radiated Orbs to fall from the sky, run to either side of the arena to avoid this. If he pulls the platform you’re standing on up, quickly dash over the hole and take cover to avoid the large Corosive Balls that come rolling down.
If the Graveward ducks before coming up, usually when the Jabber adds attack, he’ll spew Corosive acid all around the arena in front of him, retreat to the back wall to avoid this attack. The final attack that the Graveward uses is a large Laser Barrage, this will leave a large pool of Fire in it’s wake so run to the far side of the arena away from the lasers when he begins using them. Finally, avoid dropping off the arena, this is an instant death and will respawn you back above.
(1 of 6) When the platform tilts, run to one of the holes to avoid falling off and dying
The Graveward’s weak points are all the yellow glowing orbs all over it’s body but most notably, it’s head. Any attacks at these points will deal critical damage and considering the large amounts of health that it possesses, you’ll want to take aim at these at all times. Once you inflict enough damage, the Graveward will reel and its head will come crashing to the ground, this is your cue to pummel its weak points with continuous damage to drain its health.
The battle will follow this pattern throughout so once you learn to read it’s tells, you shouldn’t have too much problems in avoiding them. The larger concerns are the sheer amount of adds that can spawn, they’re handy for health and ammo drops and as this is a long battle, you’ll be in need of them but should there be too many out in the arena at one time, take the time to cull some.
Legendary Artifact Grave and Legendary Shield Ward
The Graveward, alongside many Legendary World Drops, has the ability to drop two unique Legendaries. The [Grave] is an Artifact that will increase your melee damage as your health drops among other benefits while the [Ward] is a Legendary Shield that has a small health regen on it along with increasing your melee by 300% when the Shield is depleted.
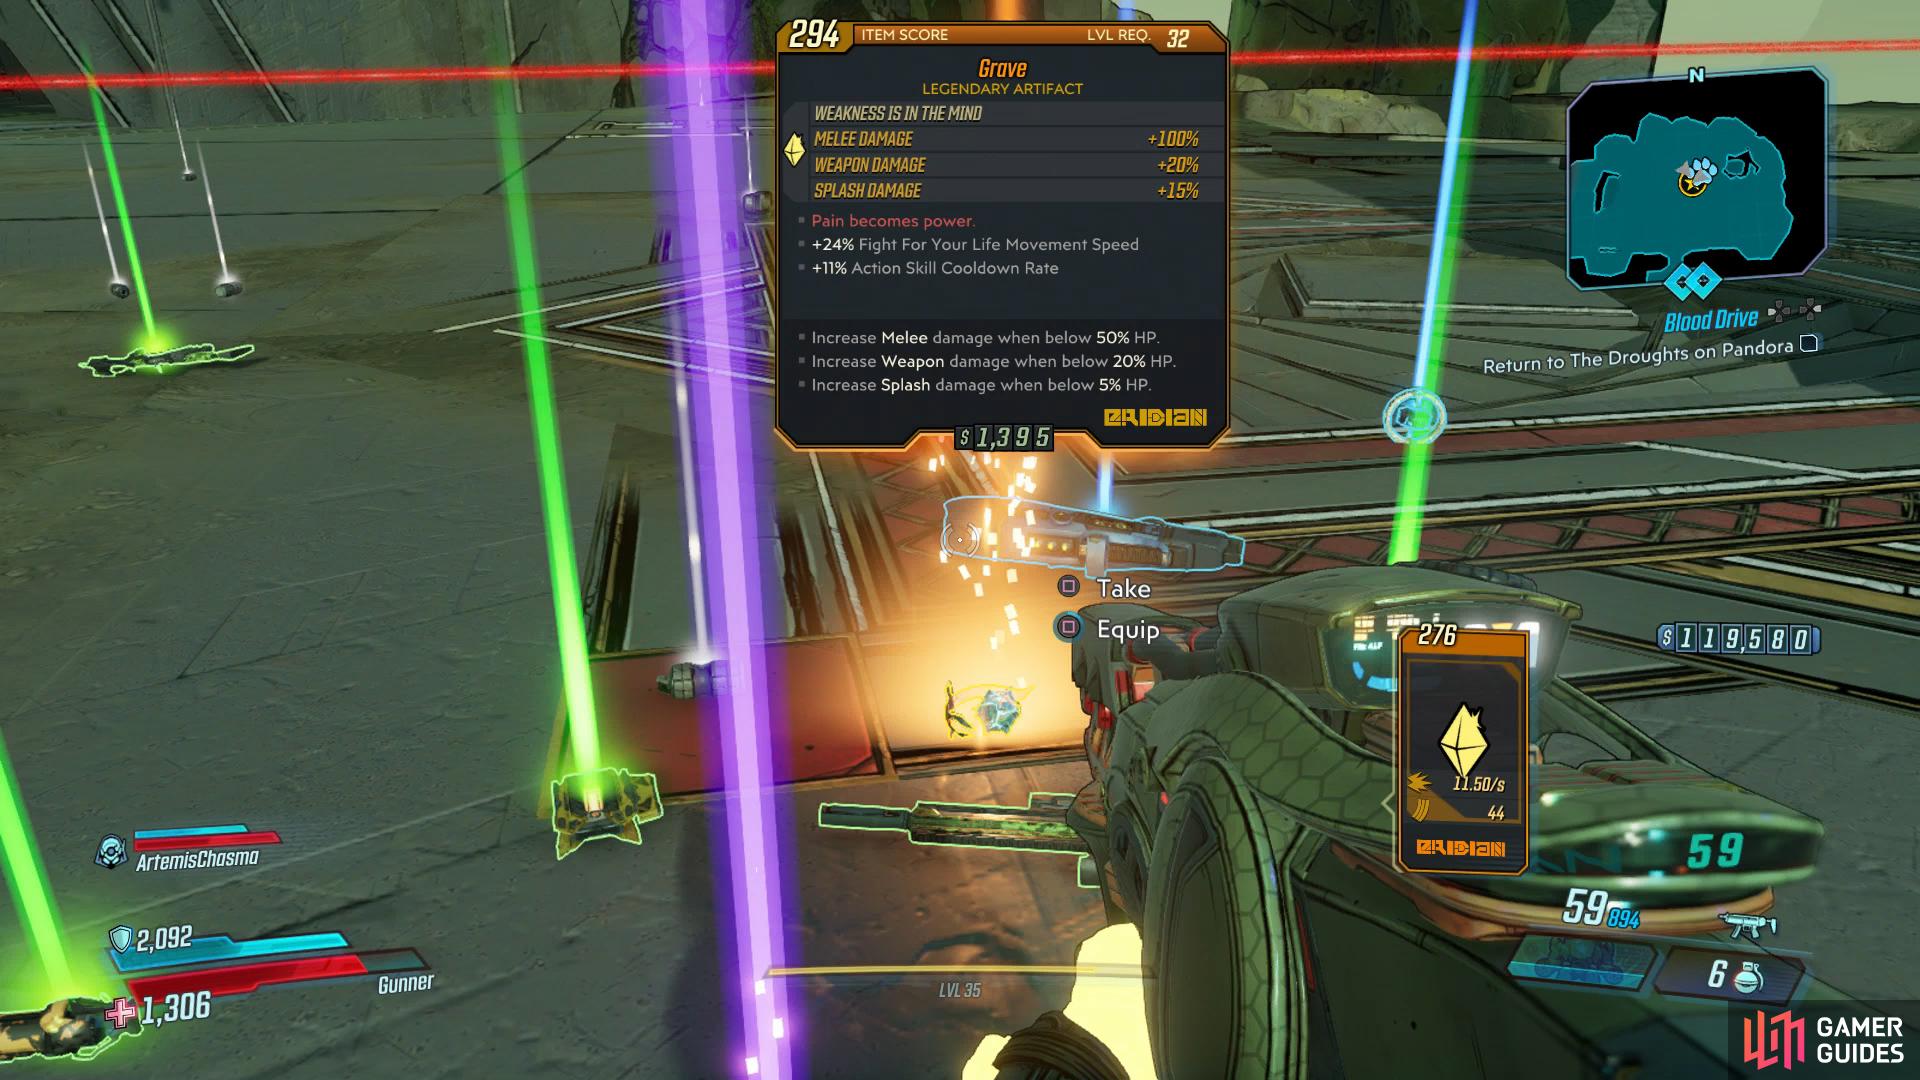
Grave is just one of two powerful unique Legendaries from Graveward.
Once the beast is defeated, observe Tannis and then head into the Vault beyond. Inside, you’ll find four Eridian Chests along with the Eridian Synchronizer in the center, this will unlock the Artifact slot. As you leave the Vault, the Calypsos will intervene again and kidnap Tannis, make your way back to Sanctuary and speak to Lilith to complete the mission and unlock Heir To An Empty Castle.


No Comments