

| Quest Giver | Reward | Lvl |
|---|---|---|
| Lilith - Covenant Pass | Cash, Character Skin | 2 |
Equip Grenade Mod and speak to Lilith
As per your reward in the previous mission, you’ll now have a Grenade Mod that you can equip. Do so and note that you can make use of them in battle by pressing the [R1]/[RB] button provided you have ample stock. Just as soon as you equip your Grenade are you set upon by more COV so take this chance to test out your new capabilities.
You’ll be up against both Fanatics and Psychos again and even though there’s a greater number of them, the help of Lilith will make this a walk in the park. Instead, take this chance to test out how grenades work and more importantly, how your new Action Skill works. This will make short work of the group of COVs leaving you free to return to Lilith as she fills you in on the current situation of the Borderlands.
Follow Lilith to gain access to the locked door and discover your next objective. Loot all of the lootables in this room before following Lilith once more to enter The Droughts, the game’s first real area.
A note about Areas
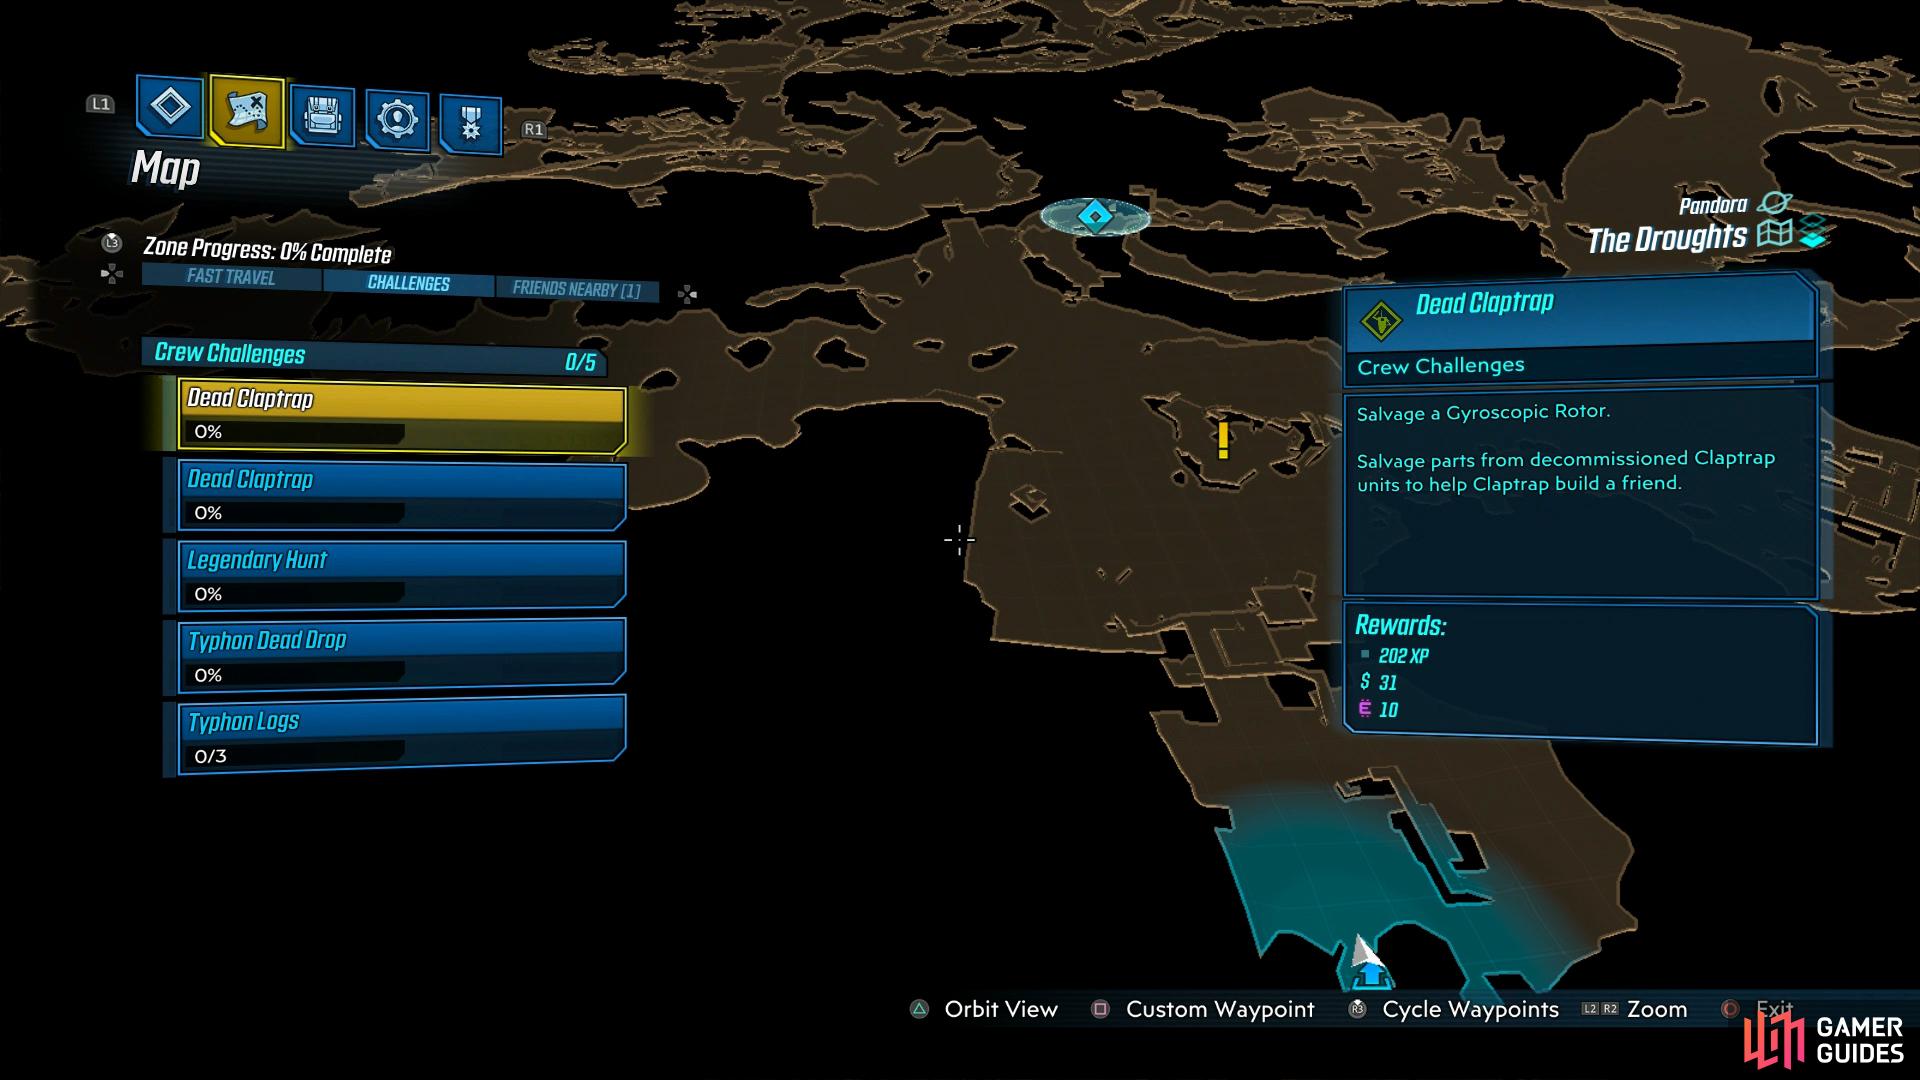
As soon as you enter the new area, take the time to take a look at your map. The first thing you’ll notice is that this area is a lot larger than the one before it and with that comes a lot more to discover and find. To begin with, you’ll start finding Side Missions, indicated by a yellow exclamation mark, make it a habbit to hunt these down and accept them.
Next up, if you press right on the D-PAD, you’ll notice that there are now Crew Challenges in this area. You’ll find this in every area from this point on and you’ll have tasks such as Dead Claptraps which are hidden on the map, along with three Typhon Logs. Upon collecting the logs, you’ll be lead to the Dead Drop which contains some great rewards when opened. Finally, most areas will usually have a Legendary Hunt or Target for you to hunt down, again rewarding you with useful weapons should you prevail.
Challenges mostly revolve around collectibles
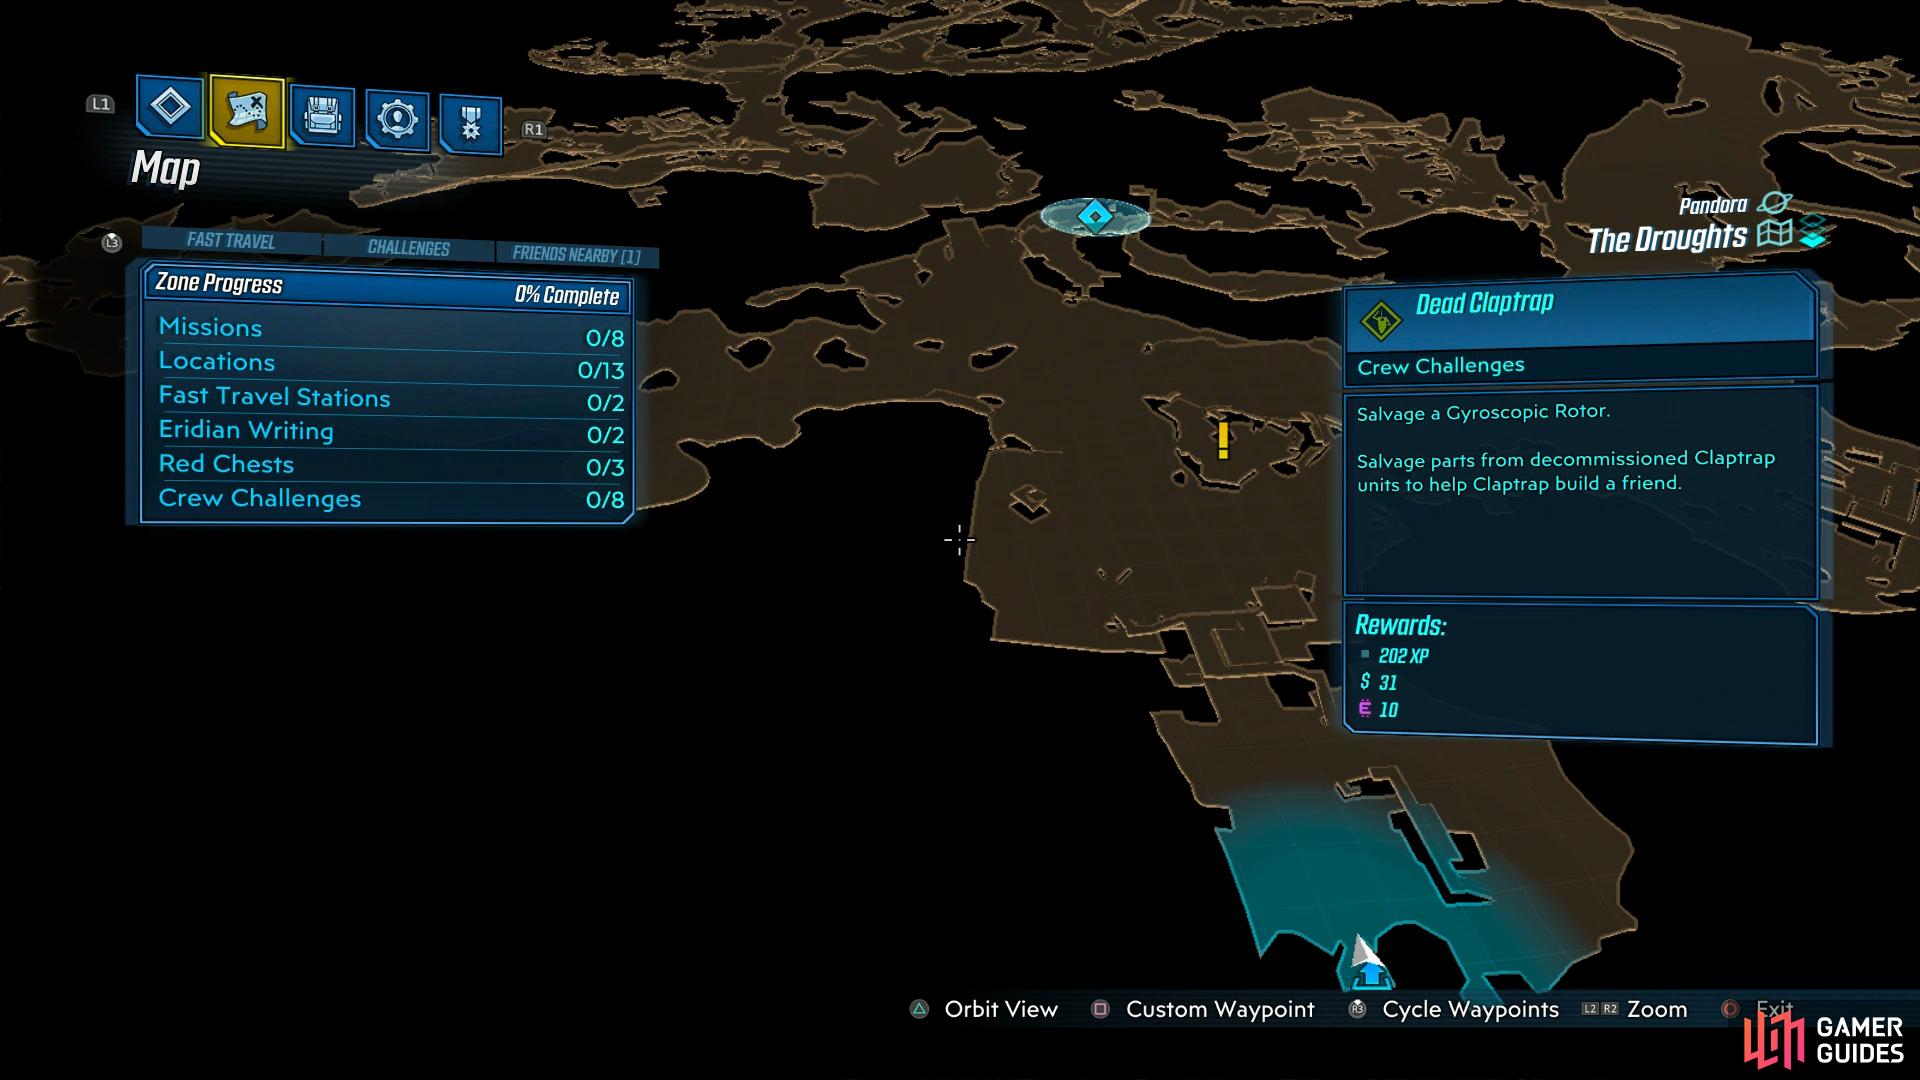
while Zone Completion is exactly as it says, all missions, red chests and more.
All of these play into the next option here, the Zone Completion which you can find by pressing the [L3]/[LS] button. For this you’ll need to complete all Missions in the zone, find every named location (of which is tied to Trophies/Achievements), any Fast Travel Stations that may be hiding there and the Crew Challenges previously mentioned. On top of that, there’s a number of Red Chests to discover per area and finally, the elusive Eridian Writing which you won’t be able to do anything with for a long time.
All of that sounds quite daunting but it’s something you should keep in mind while in a zone, noting that you may have to revisit a zone later down the line to complete more missions. If you need a helping hand with this, head to the Full Area Coverage section of this guide to find out where everything is hiding.
Find Sun Smasher chief
For now, your objective is to find the Sun Smasher chief and you’ll be left to your own devices to handle that. Your initial area has nothing of note but rather than following Claptrap, head up the stairs to the right of it to reach the Crimson Command which acts as your base of operations while on Pandora for now. You’ll find Lilith here, who you can talk to multiple times to gain some backstory for Borderlands and you’ll find many lootables.
Heading into the next room you’ll find a Quick Change station for your customization needs and just outside, two Vending Machines, an Ammo Dump and Dr. Zed’s Meds. The Ammo Dump machine is exactly that, you can refill all your ammo with a press of a button but take a look at the wares there and you’ll find Grenade Mods for sale, always be on the lookout for any good finds here. Dr. Zed’s Meds on the other hand will allow you to refill your health and purchase shields (along with Class Mods down the line), be sure to look out for any Shields that may be better than your current one. Finally, you’ll want to offload all your useless gear, inventory is scarce for the opening of the game and you’ll want all the slots you can to pick up better loot.
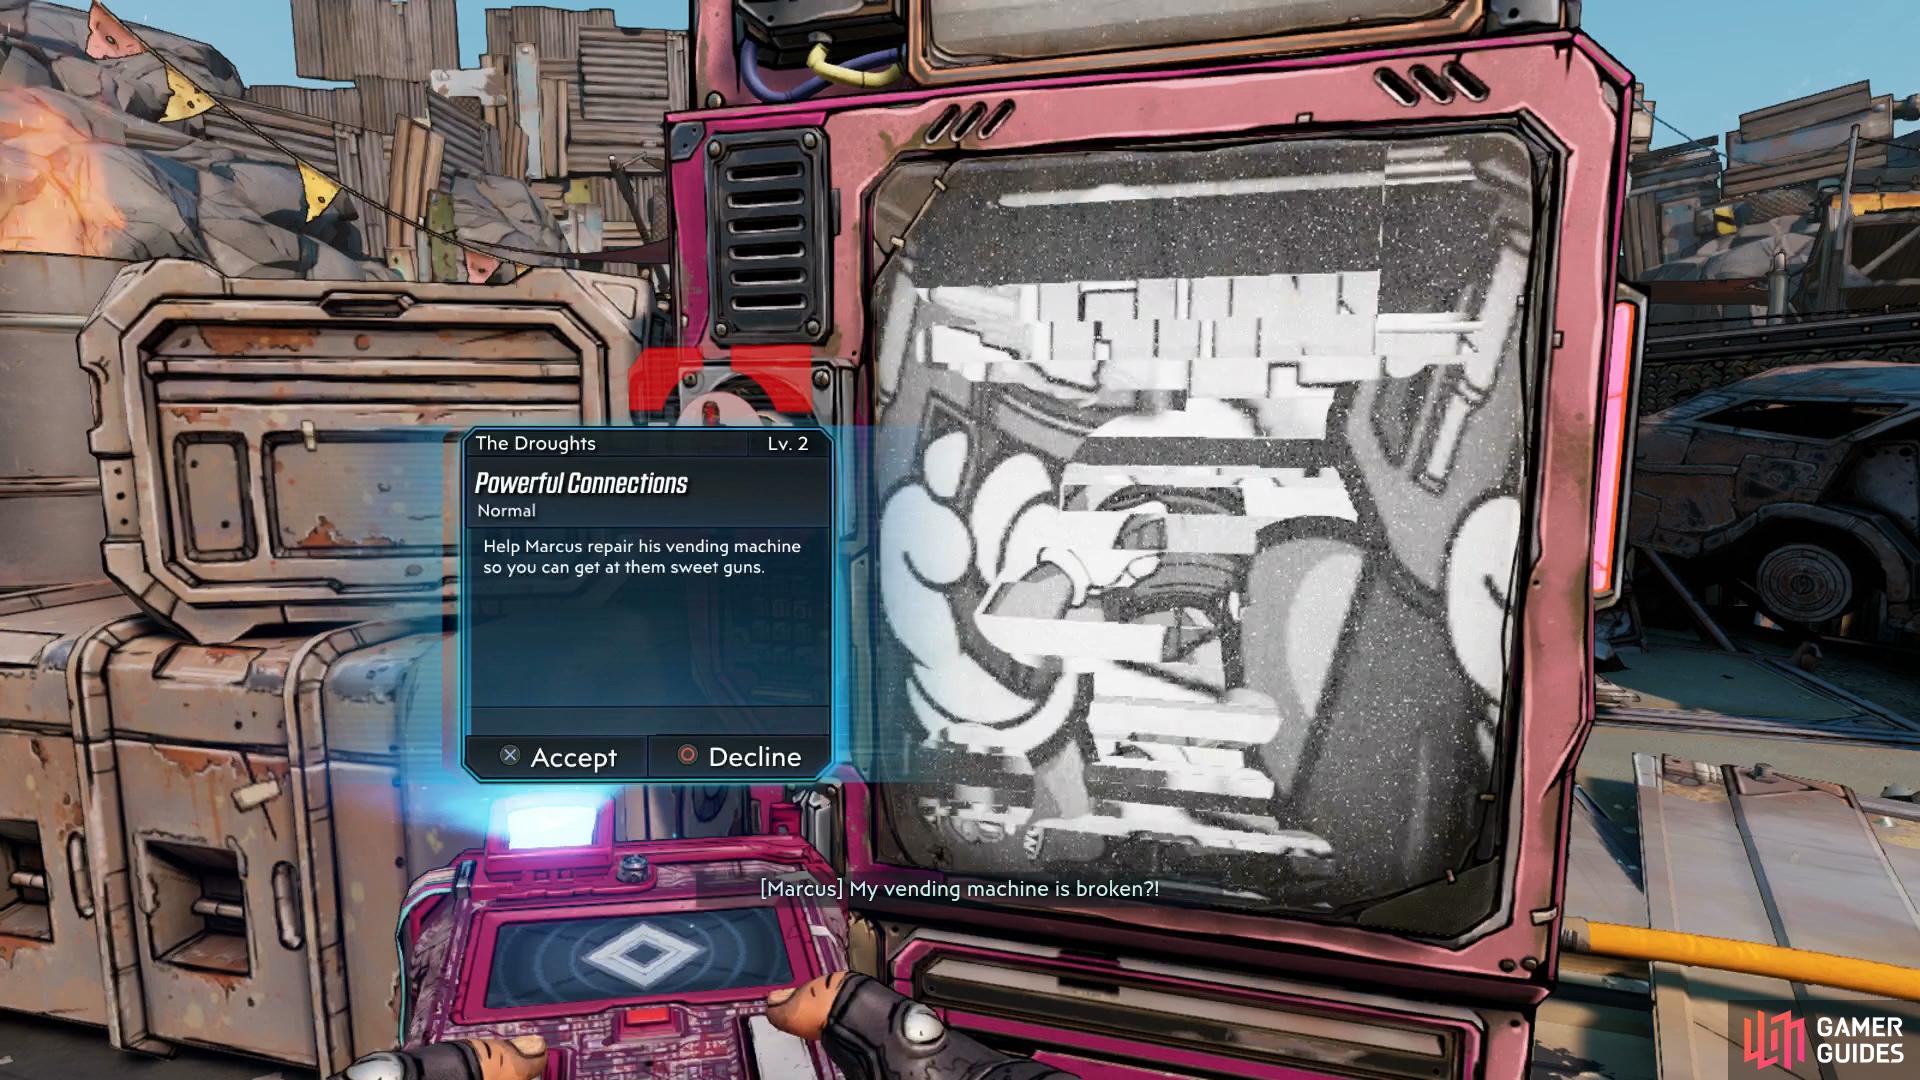
Head north from the Crimson Command center and you’ll find the Fast Travel Station to your right while there’s an inactive Catch-a-Ride to your left. Your objective is due north of your location but it’s a great idea to head to the nearby junkyard where you’ll spot your first yellow exclamation point. This indicates a Side Mission and this particular one, Powerful Connections, can be completed while you carry out your other tasks and the reward is well worth it.
Be sure to take the Optional Mission along the way
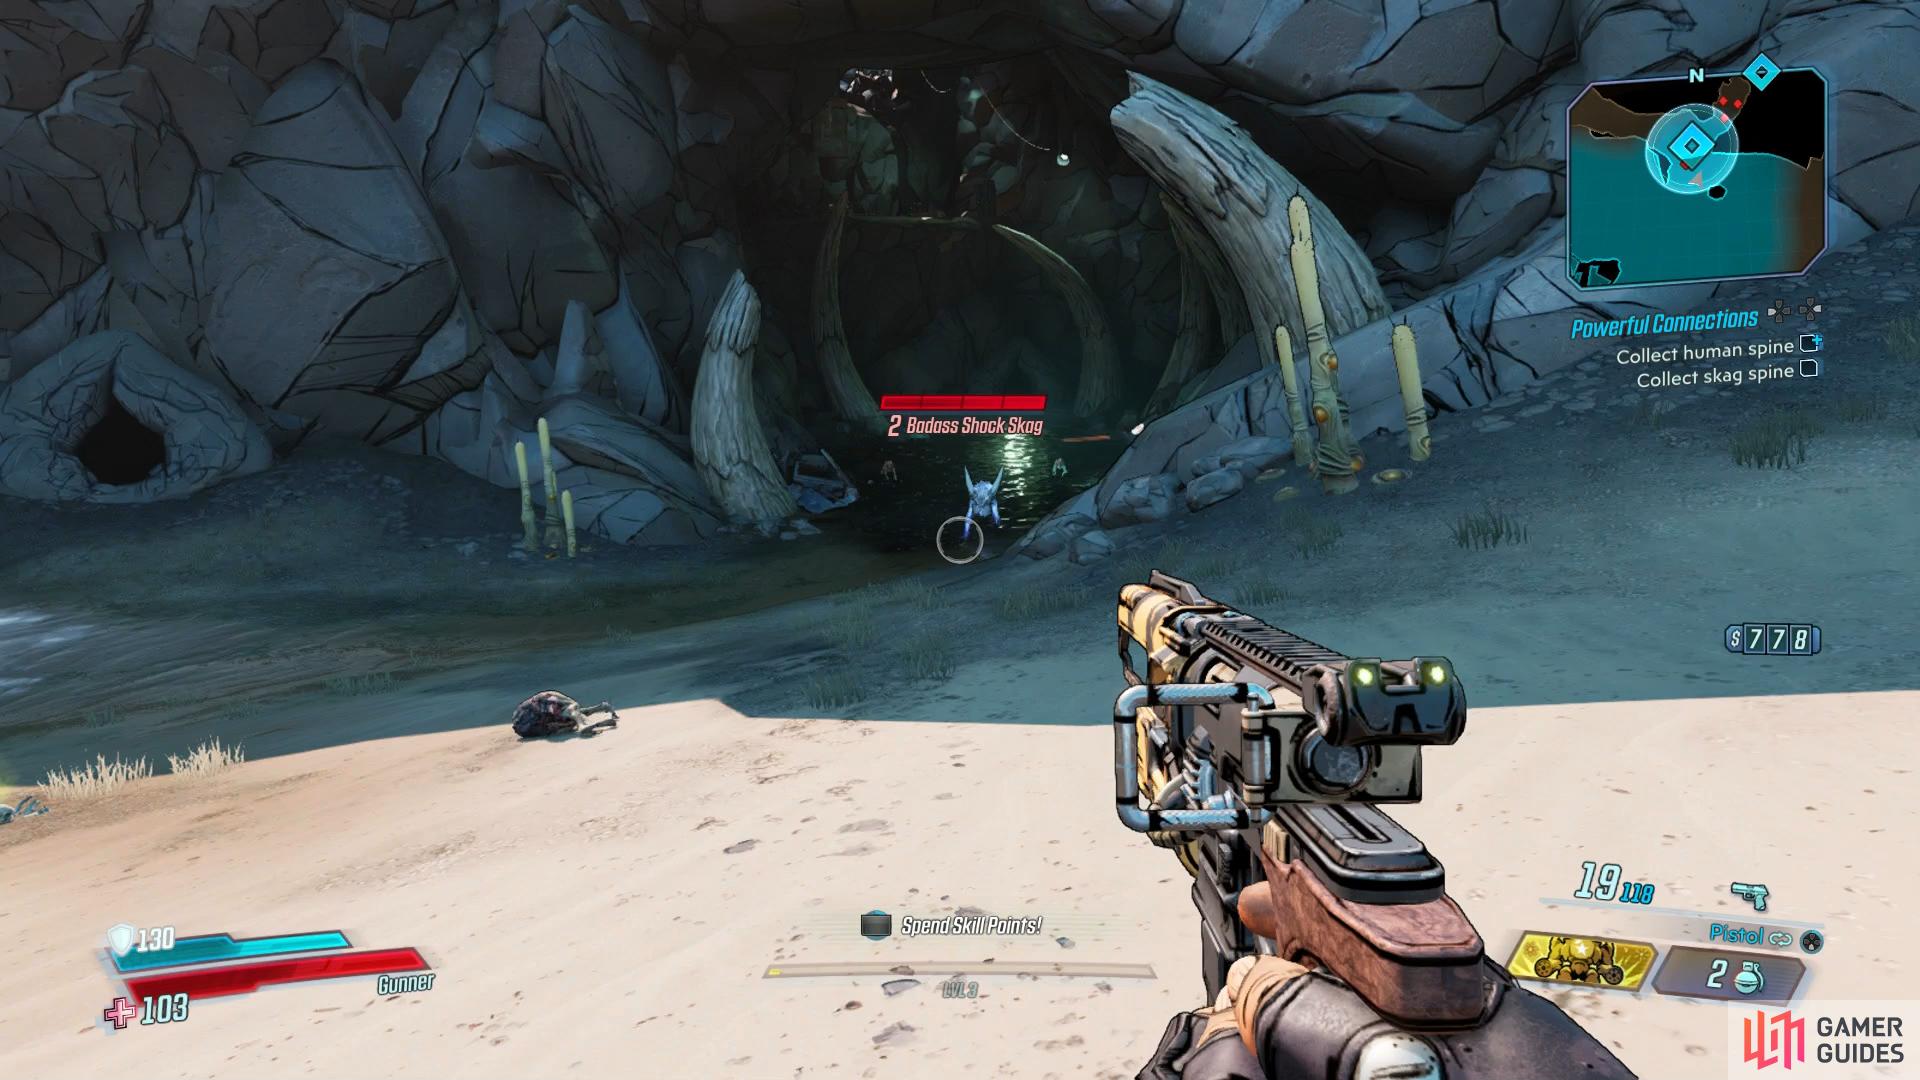
completing the Skag step on the way to the camp will aid you towards the end of the mission.
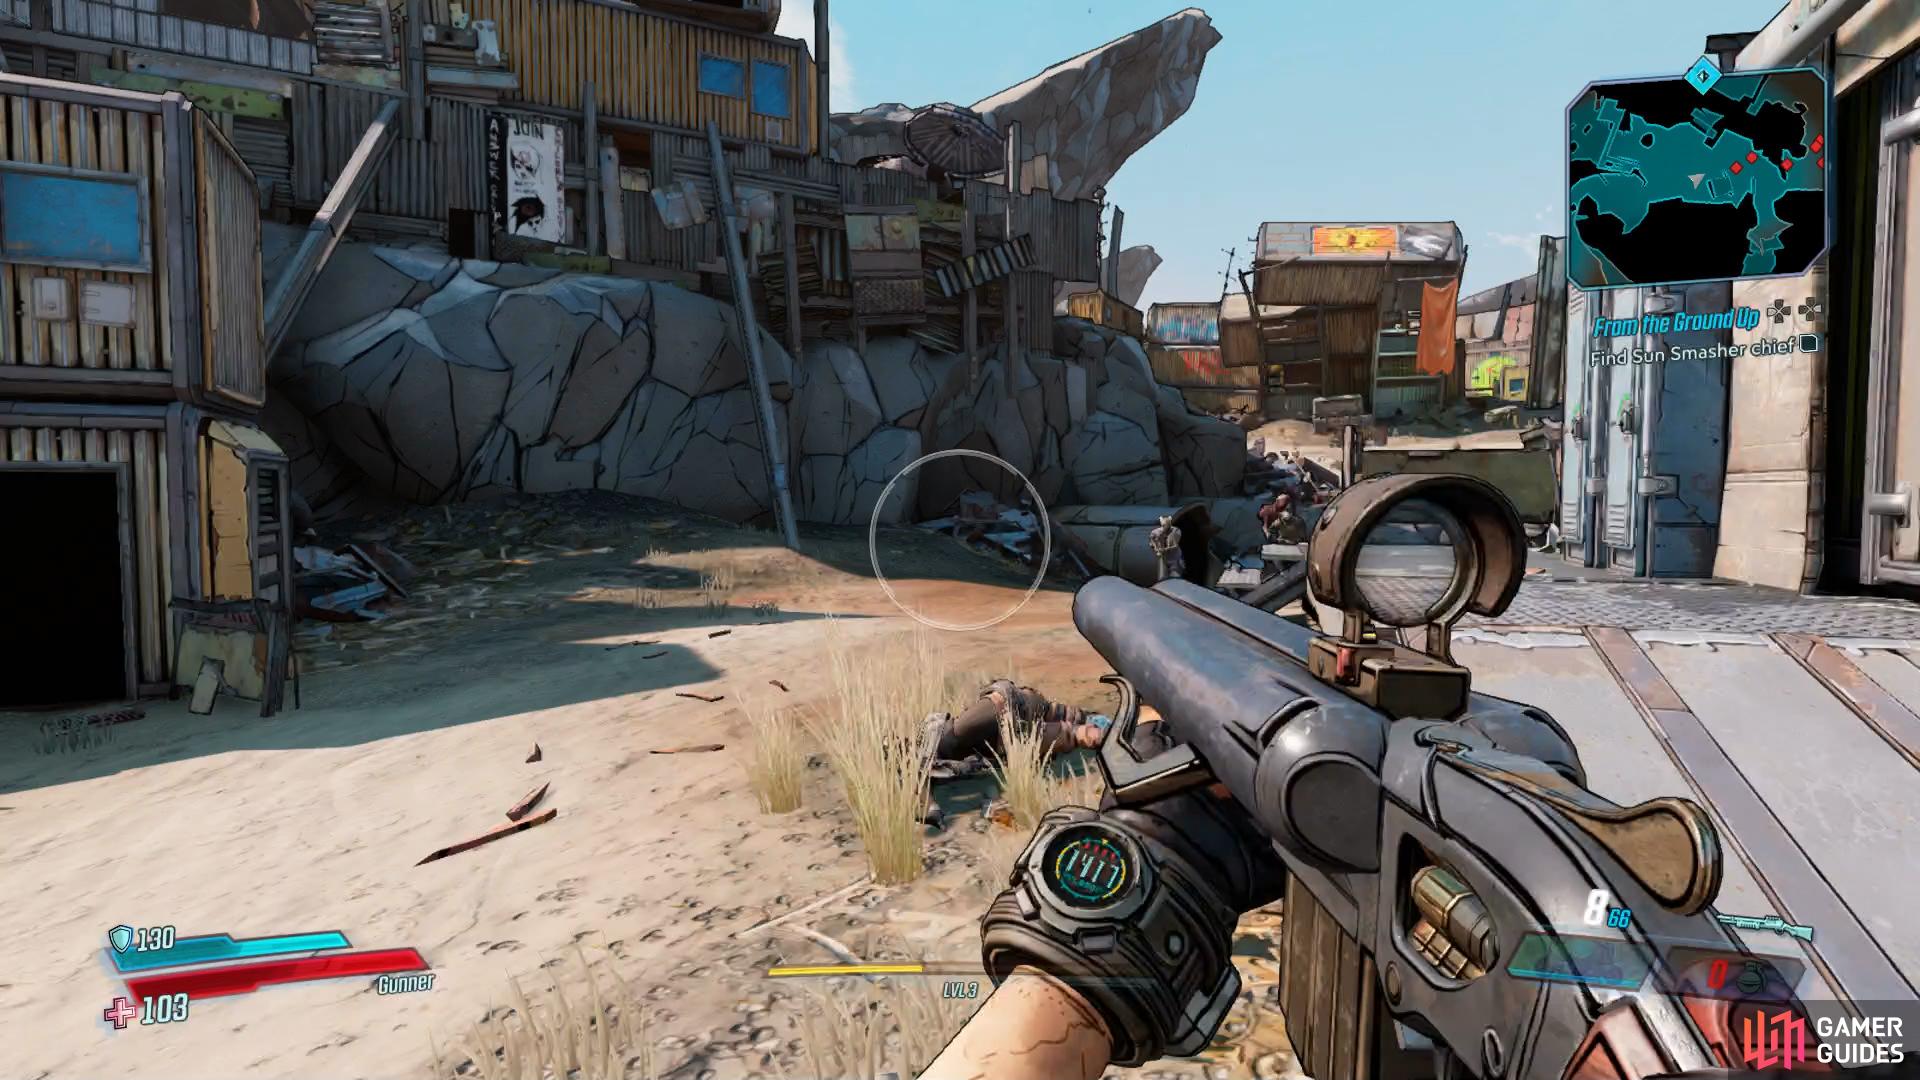
Regardless of completing this Side Mission or not, head north to find some ledges to climb (and a Respawn machine to boot) and then head around to the east to begin your assault on the Sun Smashers Camp. You’ll be introduced to Tinks here, tiny enemies that can be difficult to hit and deadly, especially when wielding a Shotgun. Take note of the walkway above in this initial encounter, there are barrels you can hit to take out the COVs in hiding and don’t be afraid to use your Action Skill, it’s designed ot be used, not saved.
As you head further east, make use of all the cover available to you and be sure to replenish your stocks with all the lootables scattered around. Beware of any potential Badass variants that may appear here, although you’ll gain increased loot from them, they’re more deadly than your regular enemies and you should prioritize them at all costs. There’s a lot of enemies here so don’t stand out in the open, make sure you hide behind the cover to give your shields a chance to recover.
With the initial battle over, take the time to scour this camp for lootables to recover your health and ammo and consider letting your Action Skill recharge before continuing to the east and continue your assault. Your foes have the high ground here so be careful about standing in the open and quickly make your way on to the structure your enemies are firing from. There’s plenty of chests here to refill your ammo or health should you need it and you’ll need to continue making your way up the stairs to finish off the last of the COVs here.
Make full use of all the cover here, especially when playing Solo
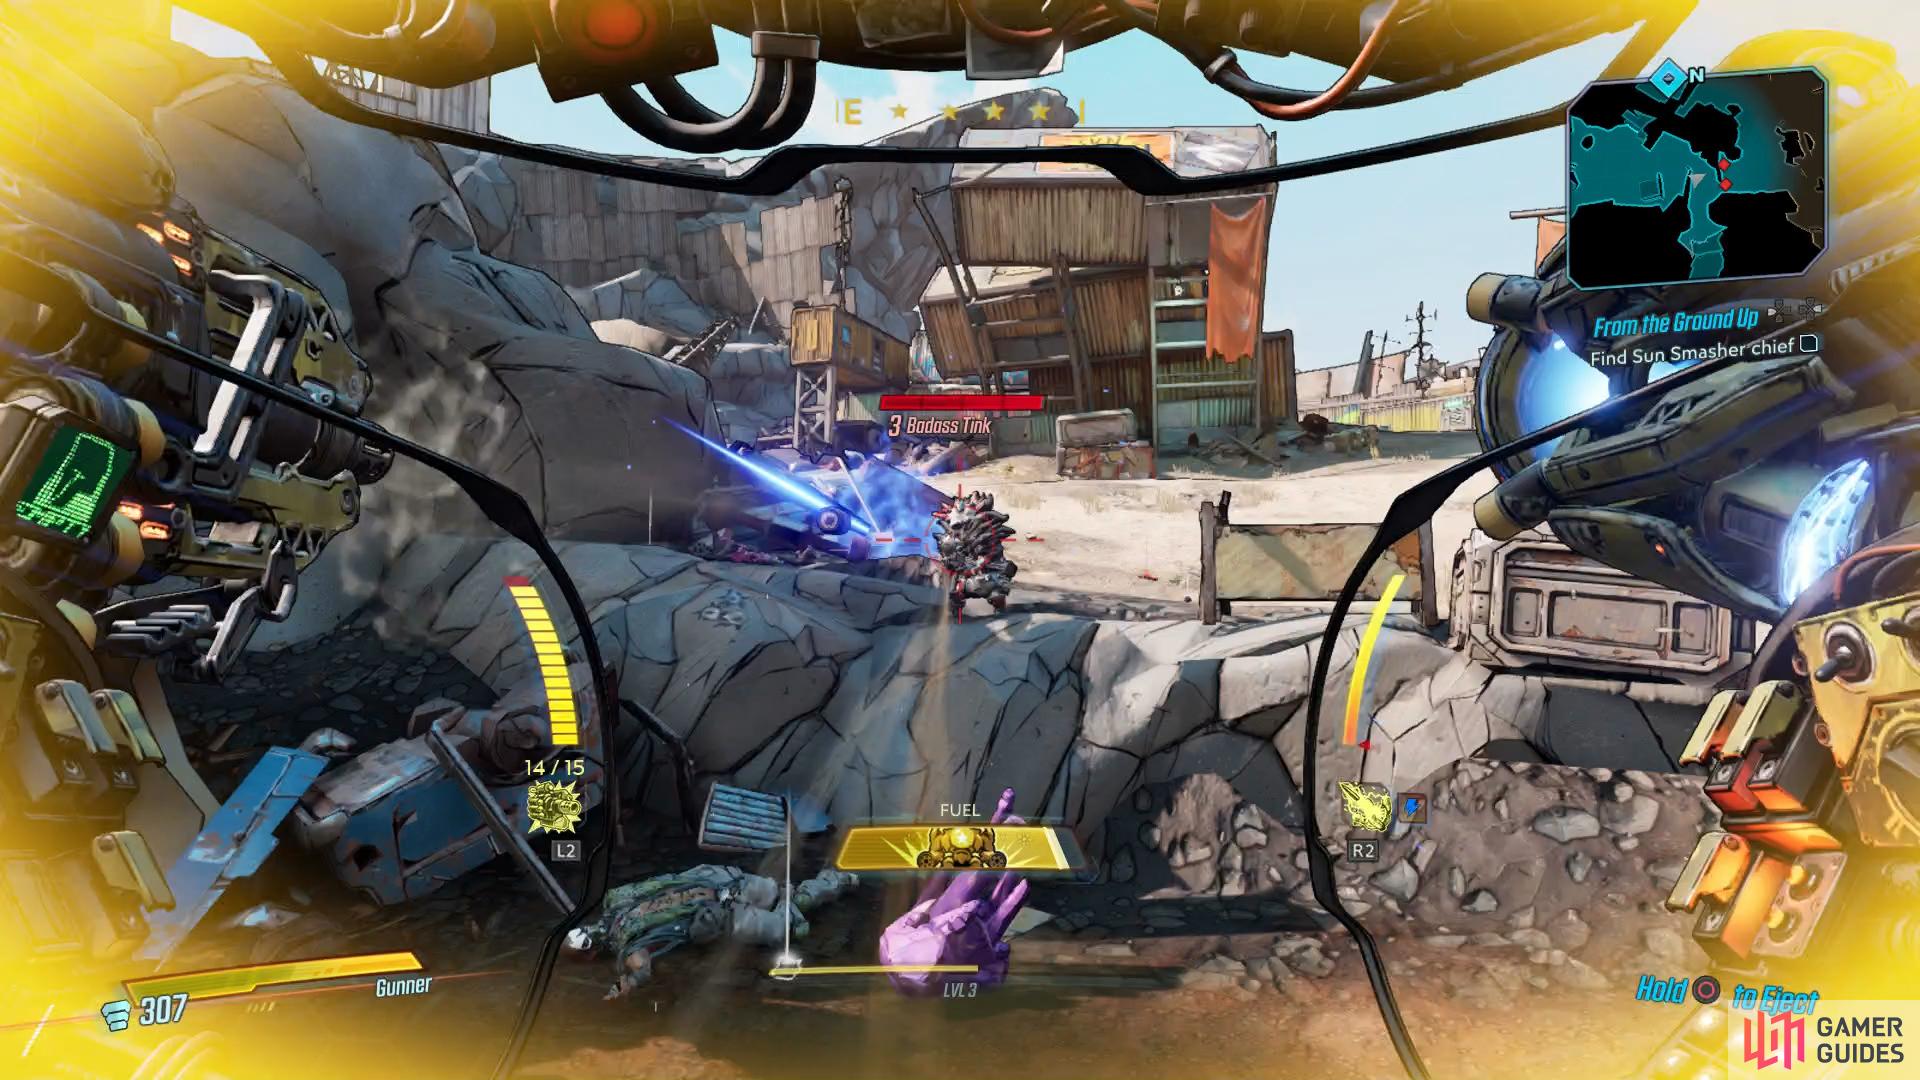
consider using your Action Skill if a Badass shows up.
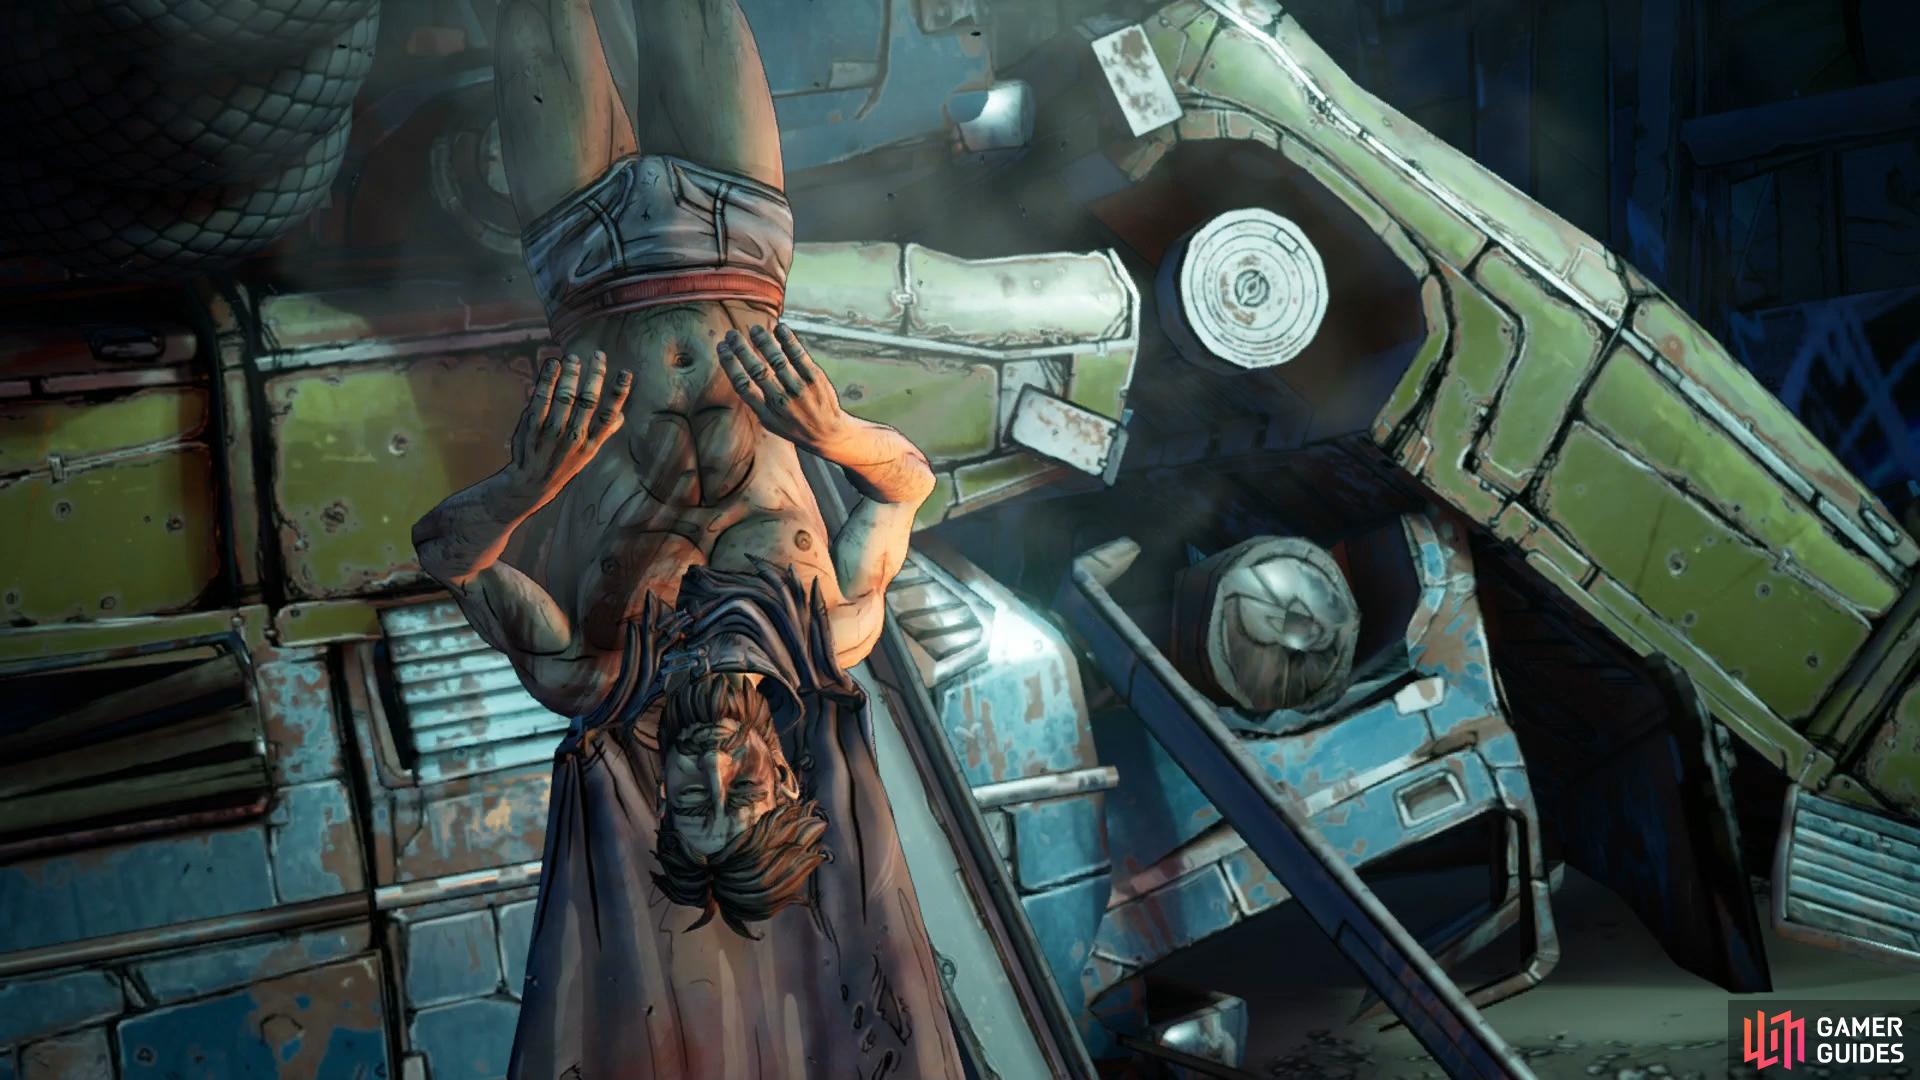
There’s not much in the way of loot here other than your basic lootables so head to the location of the constant screaming to find the chief of the Sun Smashers, Vaughn. Head into Warchief’s Domain but before you shoot Vaughn down, climb the pile of cars behind him to discover a large White Chest. With that out of the way, go ahead and drop down to shoot the chain holding Vaughn.
Follow Vaughn
Speak to Vaughn to get the ball rolling and you’ll need to follow him out of the camp and back down towards the entrance. Vaughn, however, wants to take a shortcut which just so happens to lead to a Skag den. If you neglected to complete the Powerful Connections mission earlier, you’ll need to deal with these Skags now. Drop down and take care of the Skags here, of which may contain a Badass so make good use of your grenades and Action Skill to try to take out more than one at at time.
Once taken care of, follow Vaughn back to the Crimson Command center (stopping to turn in the previously mentioned mission and score yourself a Red Chest if you completed the Optional Objective) and Speak to Lilith to complete the mission and receive your reward.
No Comments