

| Quest Giver | Reward | Lvl |
|---|---|---|
| Lilith - Sanctuary | Cash, Uncommon Class Mod, Class Mod slot unlock | 12 |
The mission will begin on board Sanctuary, head over to Ellie and speak to her to make use of the nearby Drop Pod. She’ll briefly go over how it works and then instruct you to jump in, do so and navigate your way to Promethea. Upon first arrival, you’ll spot that Promethea is gripped in a war and Lilith will task you to answer the distress call.
Answer distress call
The first Zone in Promethea, Meridian Outskirts, isn’t overly complicated but there are still a couple of Side Missions to grab along the way while there’s a Dead Claptrap, Crimson Radio, Hijack Target and the ever usual Typhon Logs to look out for, if you’d like to know their locations right now, head on over to Full Area Coverage to check it out.
From your initial location, head up and when the area opens a little, ignore the western path for now, you’ll need to come back much later to interact with the object there. Instead, as you head east while sticking to the southern wall and you’ll encounter Ratches, the resident creatures of this planet. There’s not too much to note about them, you’ll encounter them in large quantities but they behave and act similar to Varkids.
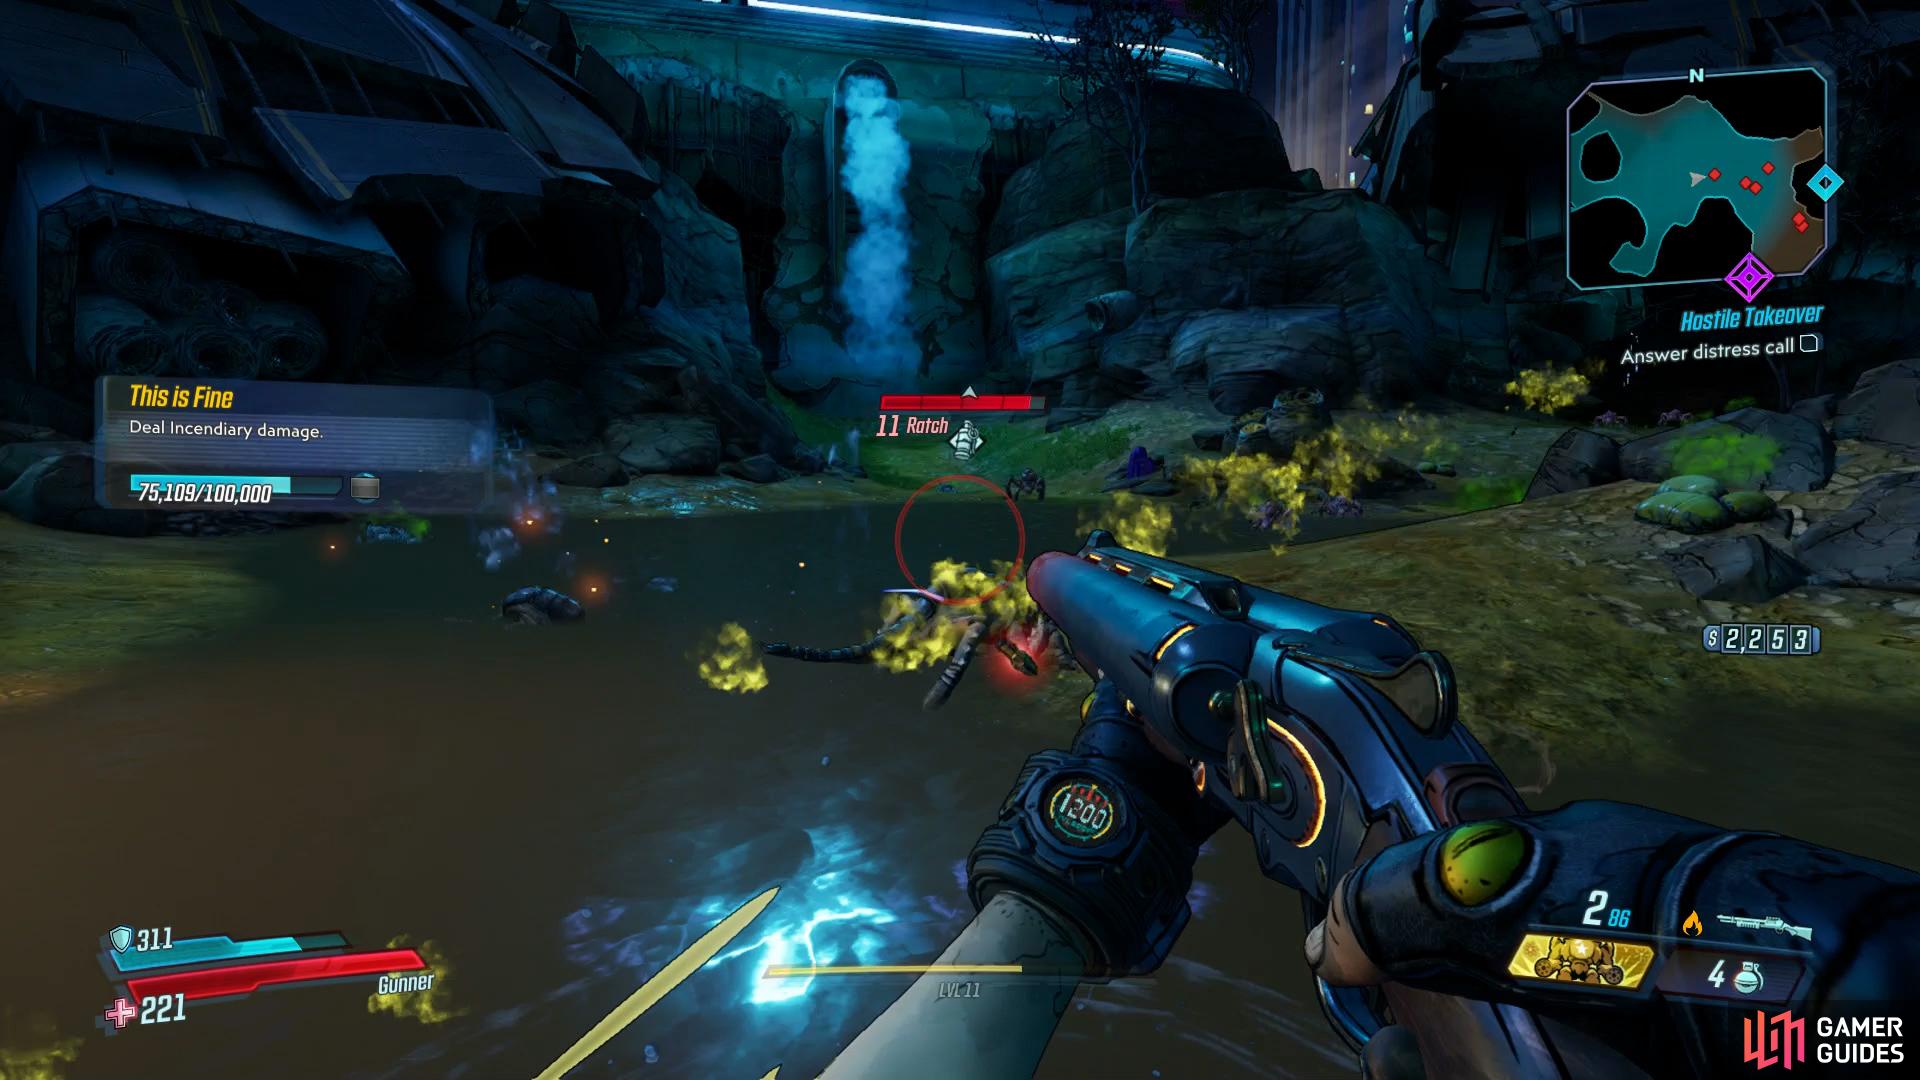
Ratch love to spew Corrosive balls at you
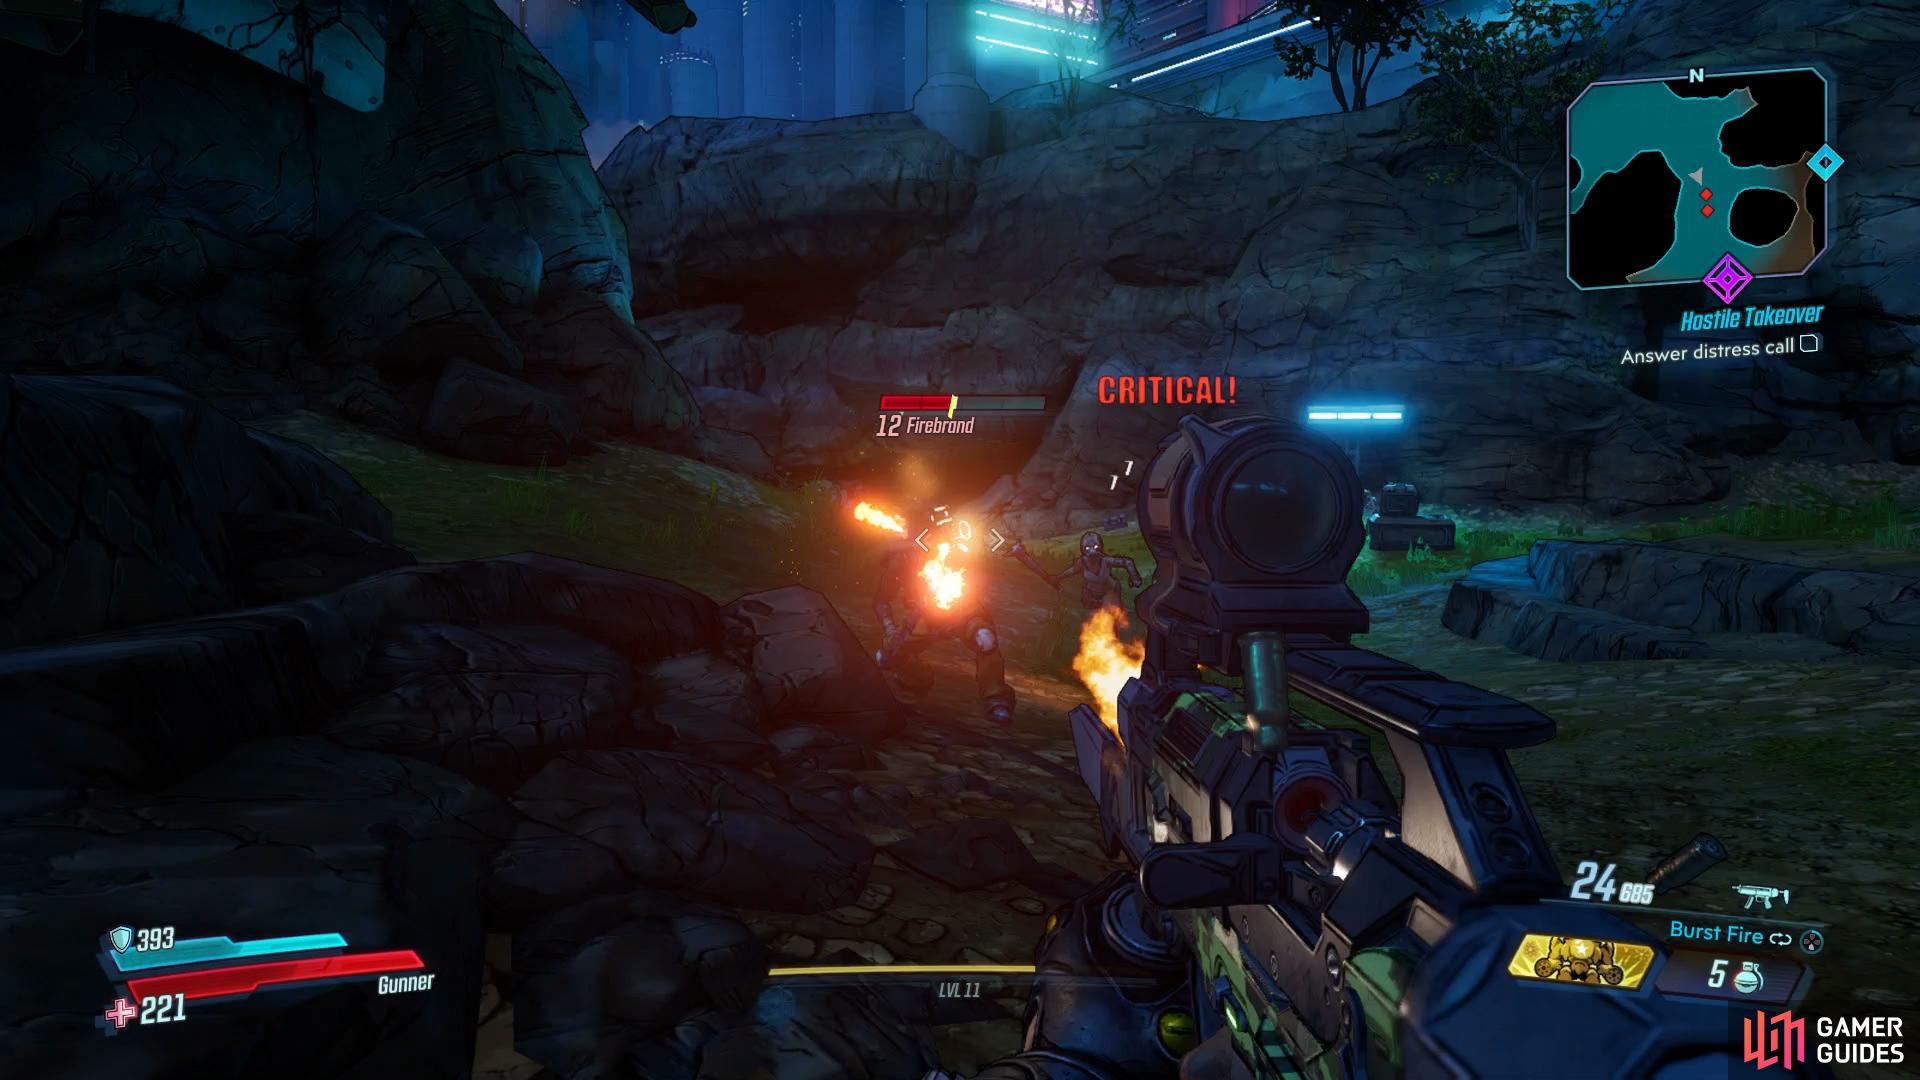
the Firebrand are immune to Incendiary.
Once the path starts heading south, you’ll encounter a new type of COV, the Firebrands. These enemies will run at you to melee you and are immune to all Fire based damage so be sure to switch elements if you’re using Fire already. Once this inital group of enemies are defeated, head into the southern cave to take out more Ratch and then locate a Dead Claptrap at the back.
Return to the main path from here and continue to the west to take out another large group of COVs. You’ll encounter your first Enforcer’s here, these brutes carry a large shield around with them that will block attacks from the front, either circle around them, toss a grenade behind them or take aim at their unprotected legs. Once you run finish them off, head forward to meet with Lorelei who gives you the lowdown on the situation on Promethea.
Contact Rhys, follow Lorelei
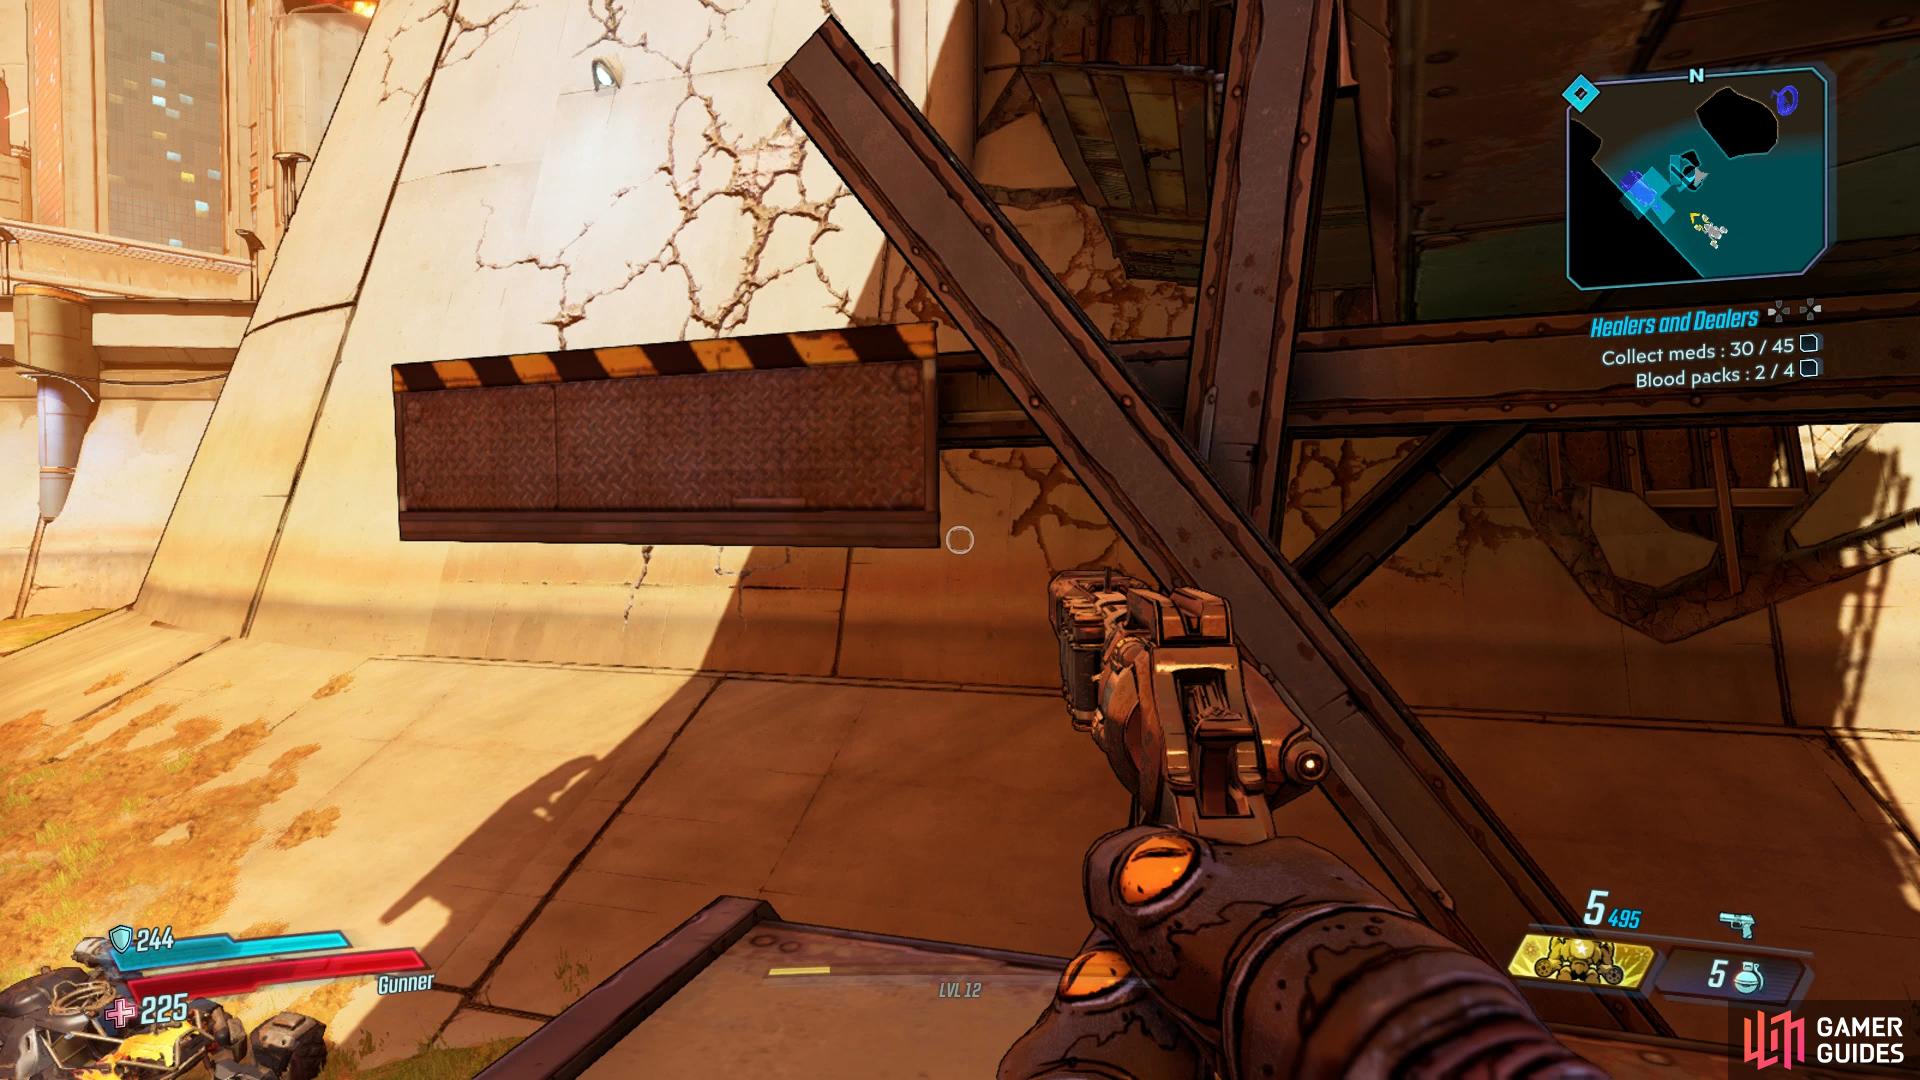
Follow Lorelai to the west and make use of the Vending Machines to either unload unwanted gear or restock on ammo and health. If you look to your left, you’ll spot a Bounty Board with a Side Mission for you to take on, Healers and Dealers that can be completed while you go about your business here. Additionally, while you’re at a newfound Fast Travel Station, consider heading back to Sanctuary to take on another Side Mission from Tannis, Just a Prick which is a short one that takes place entirely on Sanctuary. Once you’re ready to continue, talk to Lorelei to have her open the shutter and grab yourself a vehicle.
Travel through Meridian Spillways
There’s no time limit here to follow Lorelei so feel free to explore the area and to the west of this area, you’ll find your contact for the Healers and Dealers Side Mission along with some [Eridian Writing] while you’ll also find a raised area above, this is used primarily for a Side Mission a bit later so feel free to neglect it for now.
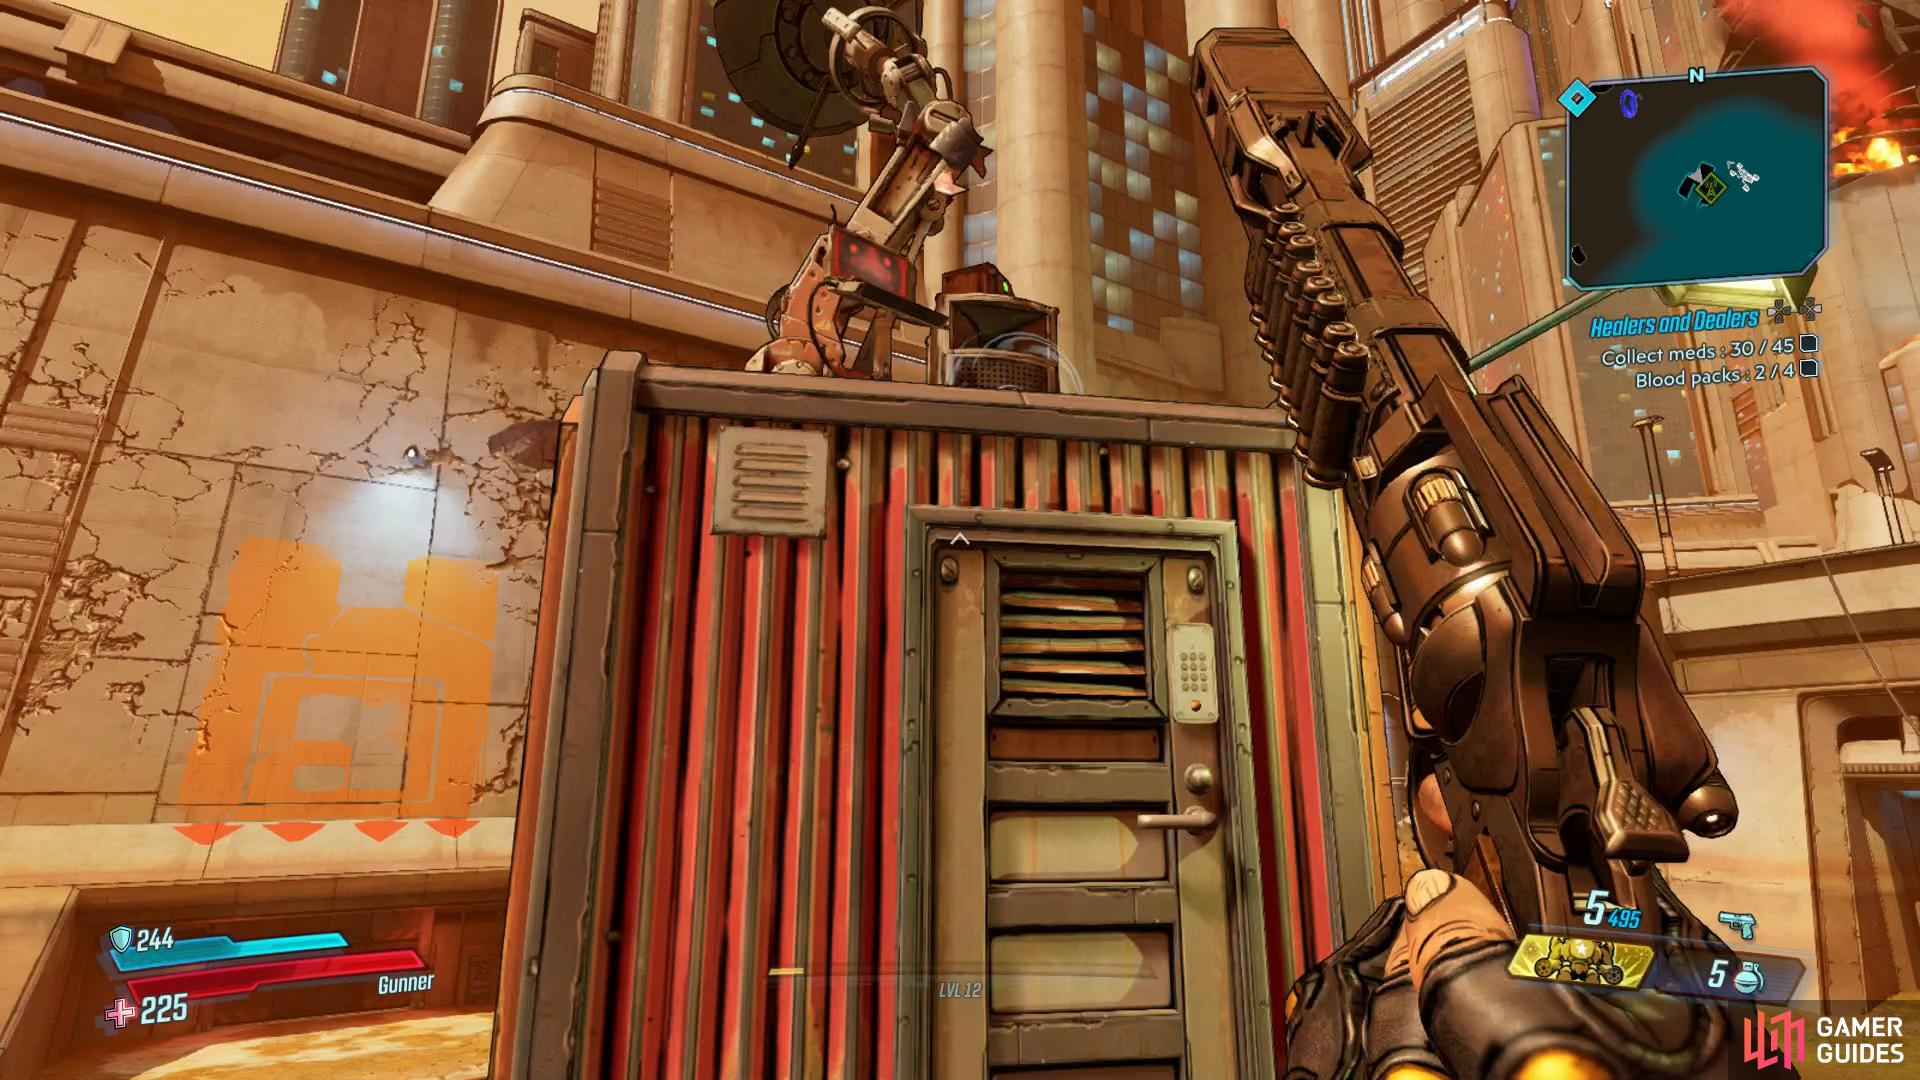
Over to the east, you’ll find your first Typhon Log under a stone tower, just north of the Fast Travel Station. Continue to follow Lorelei east and you’ll come under attack from COV Outrunners, be sure to take them out and grab the Echo that drops from it. Once you begin heading north again, note the nearby Crimson Radio to sabotage and then head over to the northwest to spot the Hijack Target up high. You can climb the container and then use the other platforms to reach it and return it to a nearby Catch-A-Ride.
Be sure to sabotage the Crimson Radio
and head up the pillar for the Hijack Target.
Return to where you nabbed the vehicle and you’ll find the next Typhon Log a little to the northeast of it, nestled inbetween some crates. Continue to follow Lorelei to the west here and eventually you’ll reach Lorelei’s stronghold. Grab the nearby Echo Log and follow her inside as she explains more about the situation.
Be sure to pick up the Maliwannabees Side Mission while you’re here, this takes place back in the earlier parts of the Outskirts, in the raised area near the beginning but persist and you’ll find the third and final Typhon Log along with a Red Chest. If that was your final Log, you’ll come across the Dead Drop while you follow Lorelei here.
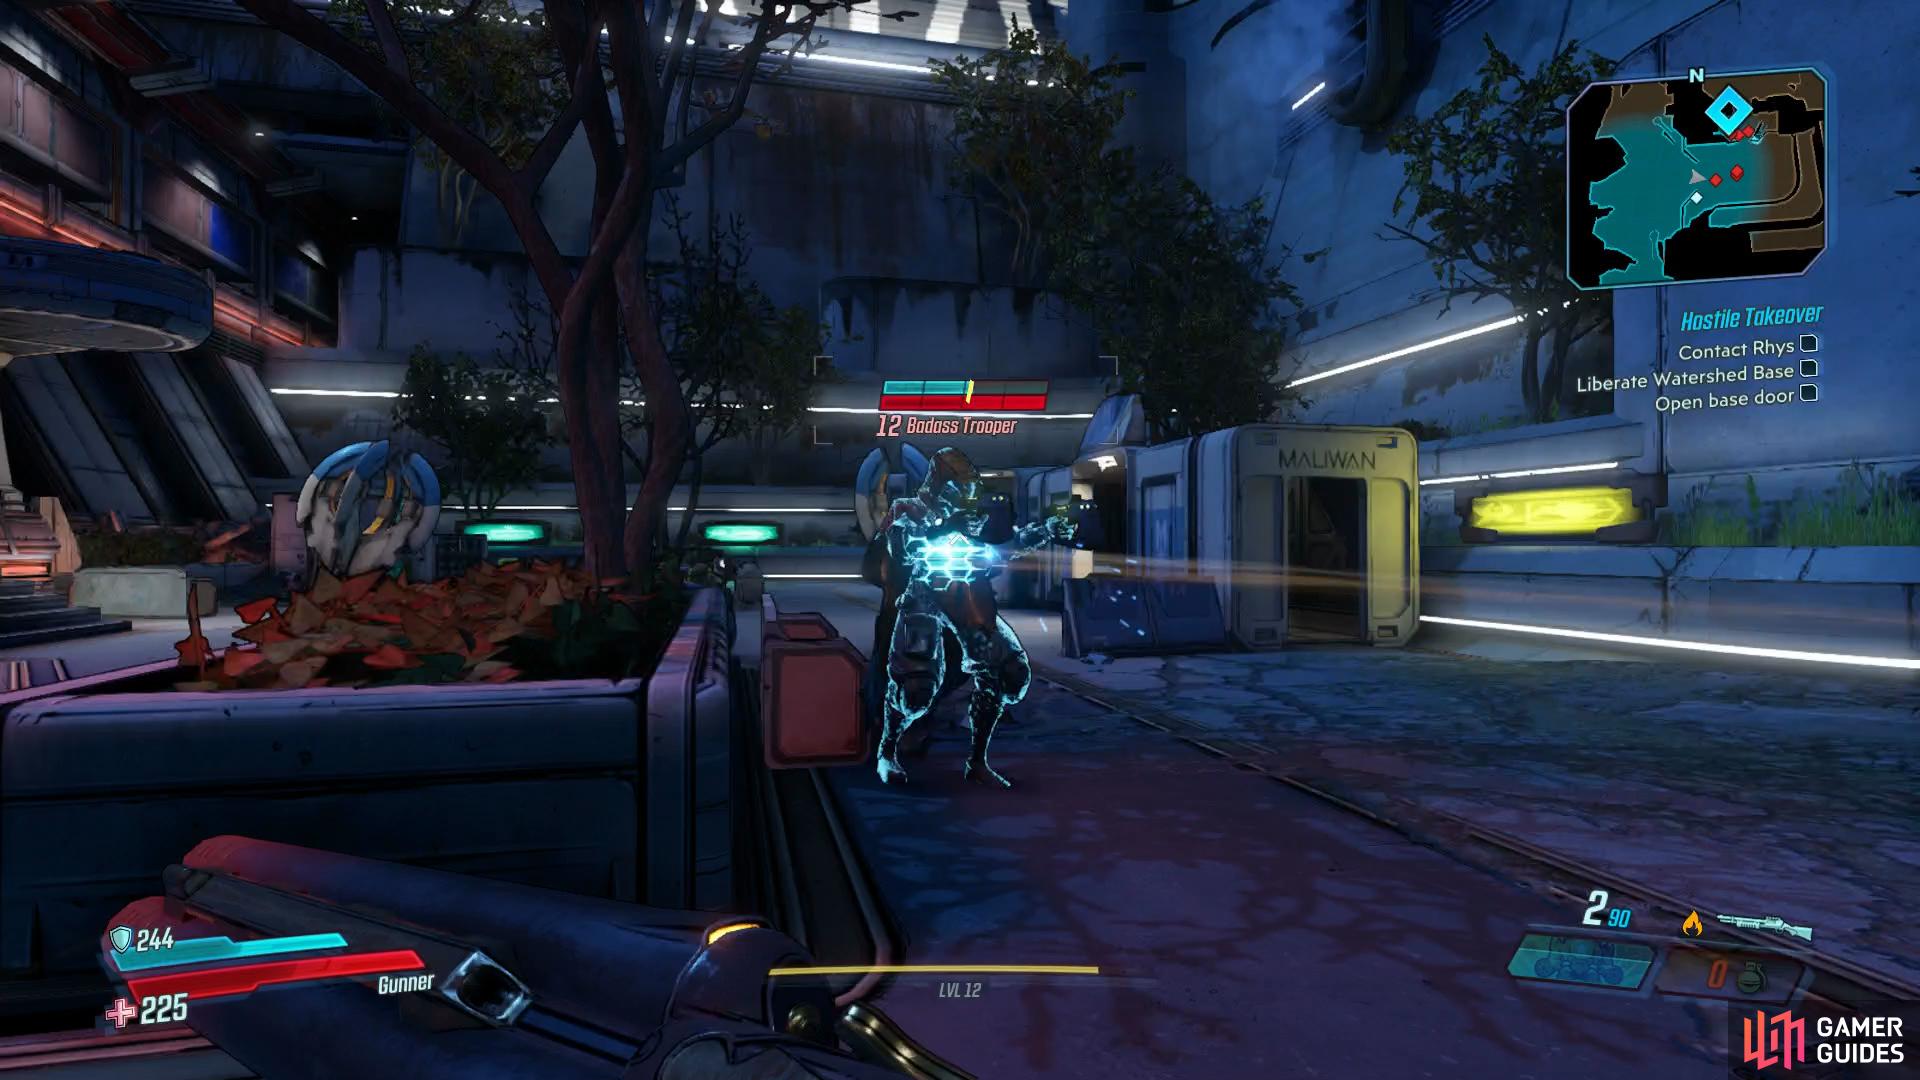
Regardless of if you complete the Side Mission or not, continue to follow Lorelei and upon speaking to her, rush forward to defend the civilians from a wave of Maliwan soldiers, of which you’ll encounter your first Assault Troopers. These are similar in nature to the Fanatics you’re used to fighting with the exception of having Shields themselves, for this purpose, if you have Shock based weapon, be sure to use them as Shields are weak to the Shock element.
As you head up the stairs and reach the hole leading outside, look to your left to locate an elevator. If you’ve revealed the Dead Drop, run in and press the button and jump back out before it can go down. Once it reaches the bottom, jump down the chute to land on the top and press the switch on the wall to send it back up, allowing you to reach the Dead Drop. Drop back down the hole and follow Lorelei once more to finish off the last of the Maliwans and enter Meridian Metroplex.
Liberate Watershed Base
The Meridian Metroplex is a lot larger than the previous area and as such you’ll have another Crimson Radio, Dead Claptrap, Hijack Target, Target of Opportunity and Typhon Logs to uncover along with three Red Chests hidden in the zone. You’ll also find Lectra City to the north, an entirely optional area with lucrative Side Missions and other such goodies. If you want to know where to find all of this right now, head on over to the Full Area Coverage section for Meridian Metroplex.
With that out of the way, follow Lorelei north, make use of the Vending Machines should you need to and then take the fight to the Assault Troopers up ahead. You’ll come across a lot of them here but there’s plenty of cover to make use of and your Action Skill should take them out fairly easily. As you head out of the tunnel, you’ll start meeting Flash Troopers, these soldiers will speed around the area however you can hit the pod on the top of their should to deal critical damage to them.
More soldiers drop down as you approach the base to the east, and you’ll have to deal with a large wave of enemies here. Make use of the cover, never stand out in the open and let Lorelei bait some of them so you’re not facing the full brunt of the attack on your own. With the area free of enemies, loot anything that’s on the ground and then head up to the door and flip the switch to gain entry to Watershed Base. Two Pyrotech Heavies will attack from here, these brutes have increase armor and will shoot pools of fire at your location, be sure to move out of these puddles and focus fire on one at a time, look for the large object on their back and shoot at it to deal critical damage. With the base now liberated, you can now use the switch to contact Rhys and learn more about precarious situation here on Promethea.
Find Atlas Operative
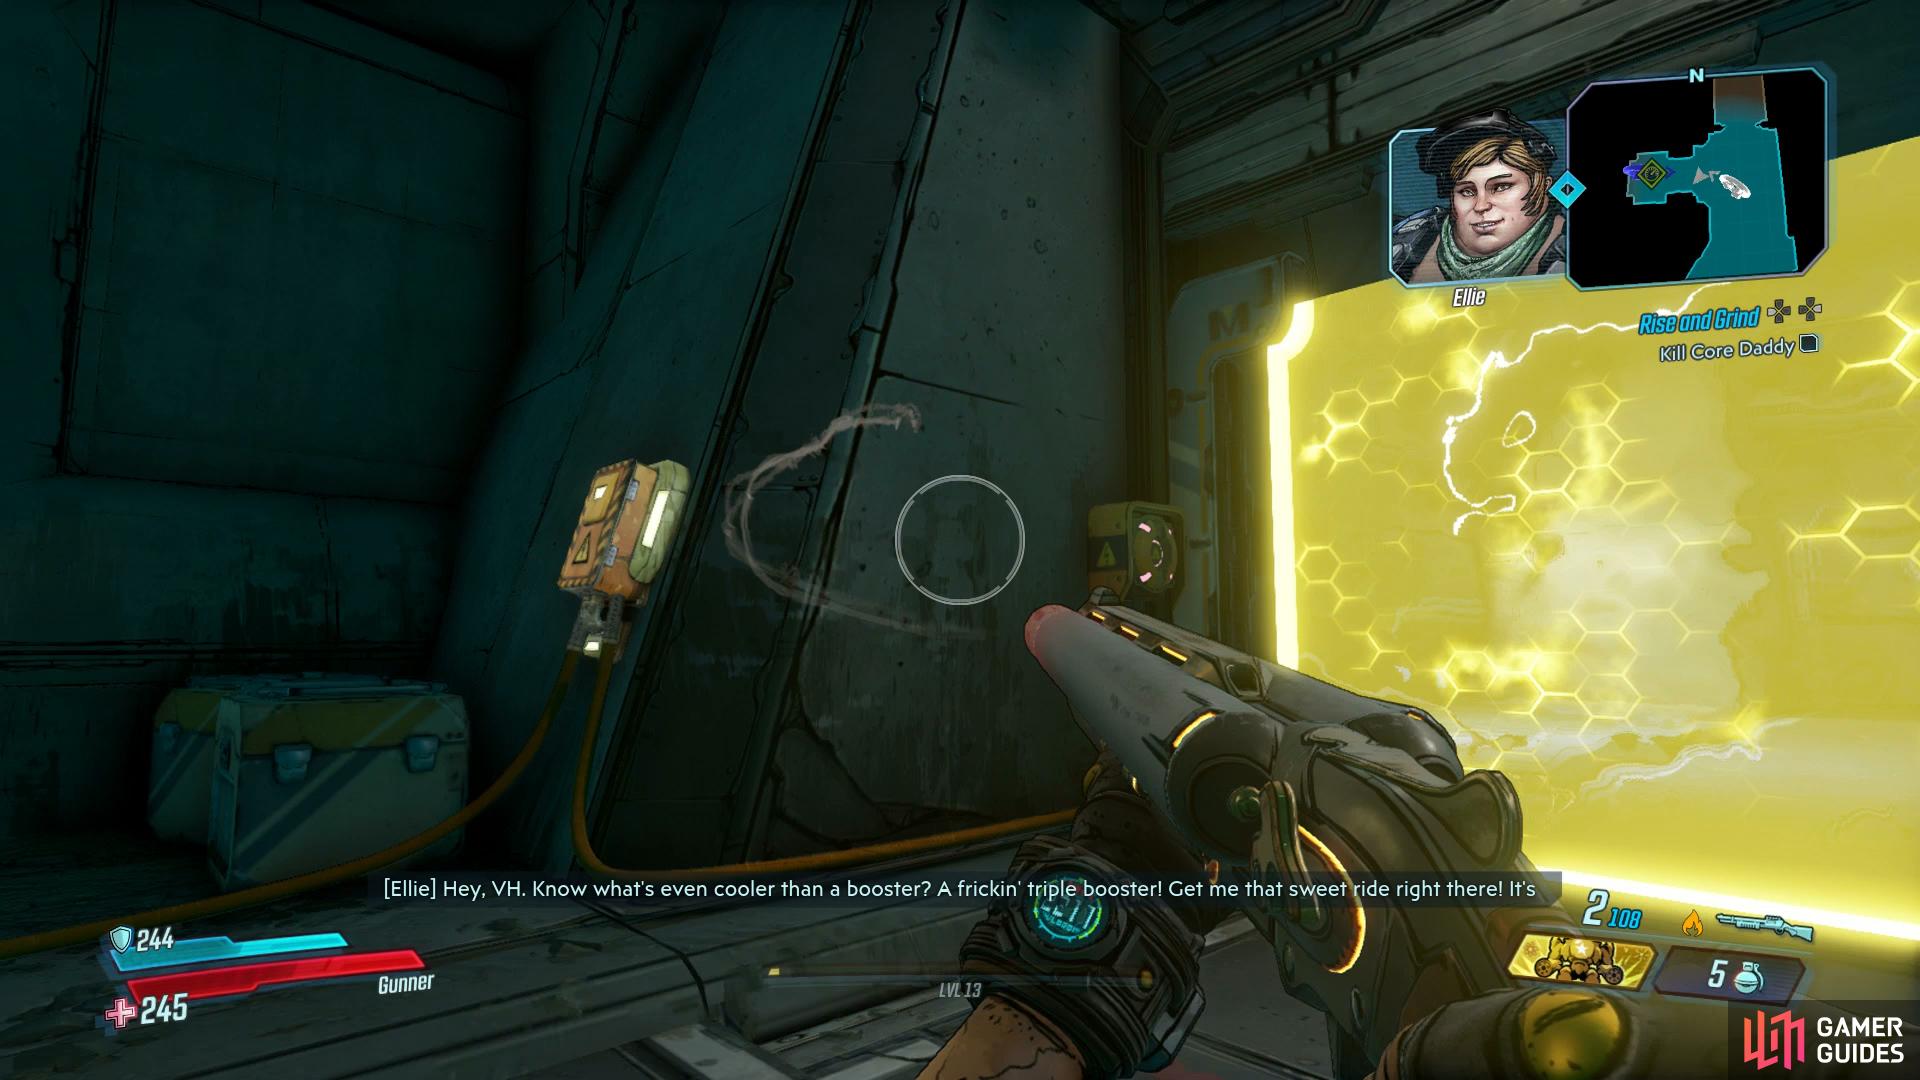
Rhys now tasks you to seek out his Atlas Operative but before you set off, make use of the Vending Machines and then talk to Lorelei to who will hook you up with a new Cyclone, these are ideal for solo drivers due to their speed. Additionally, speak to Lorelei again to begin the Rise and Grind Side Mission, which you can complete by heading to the right as you leave this tunnel. Upon completing that particular Side Mission, Lorelei will also offer a follow up, Dynasty Diner.
Your contact is to the northwest of the area but take the time to explore the city, you’ll find a Typhon Log and Hijack Target to the east while you’re doing Rise and Grind and in the center of the area you’ll find another Side Mission to accept, Kill Killavolt which you can find in Lectra City, an entirely optional area to the north with more Side Missions to pick up.
You’ll also find one of your targets for the Rise and Grind Side Mission just outside the entrance to Lectra City and if you climb the containers on the east here and jump over to the wall, you can follow it to the south to nab yourself a Red Chest and the location of the Dead Drop once you find all the Typhon Logs.
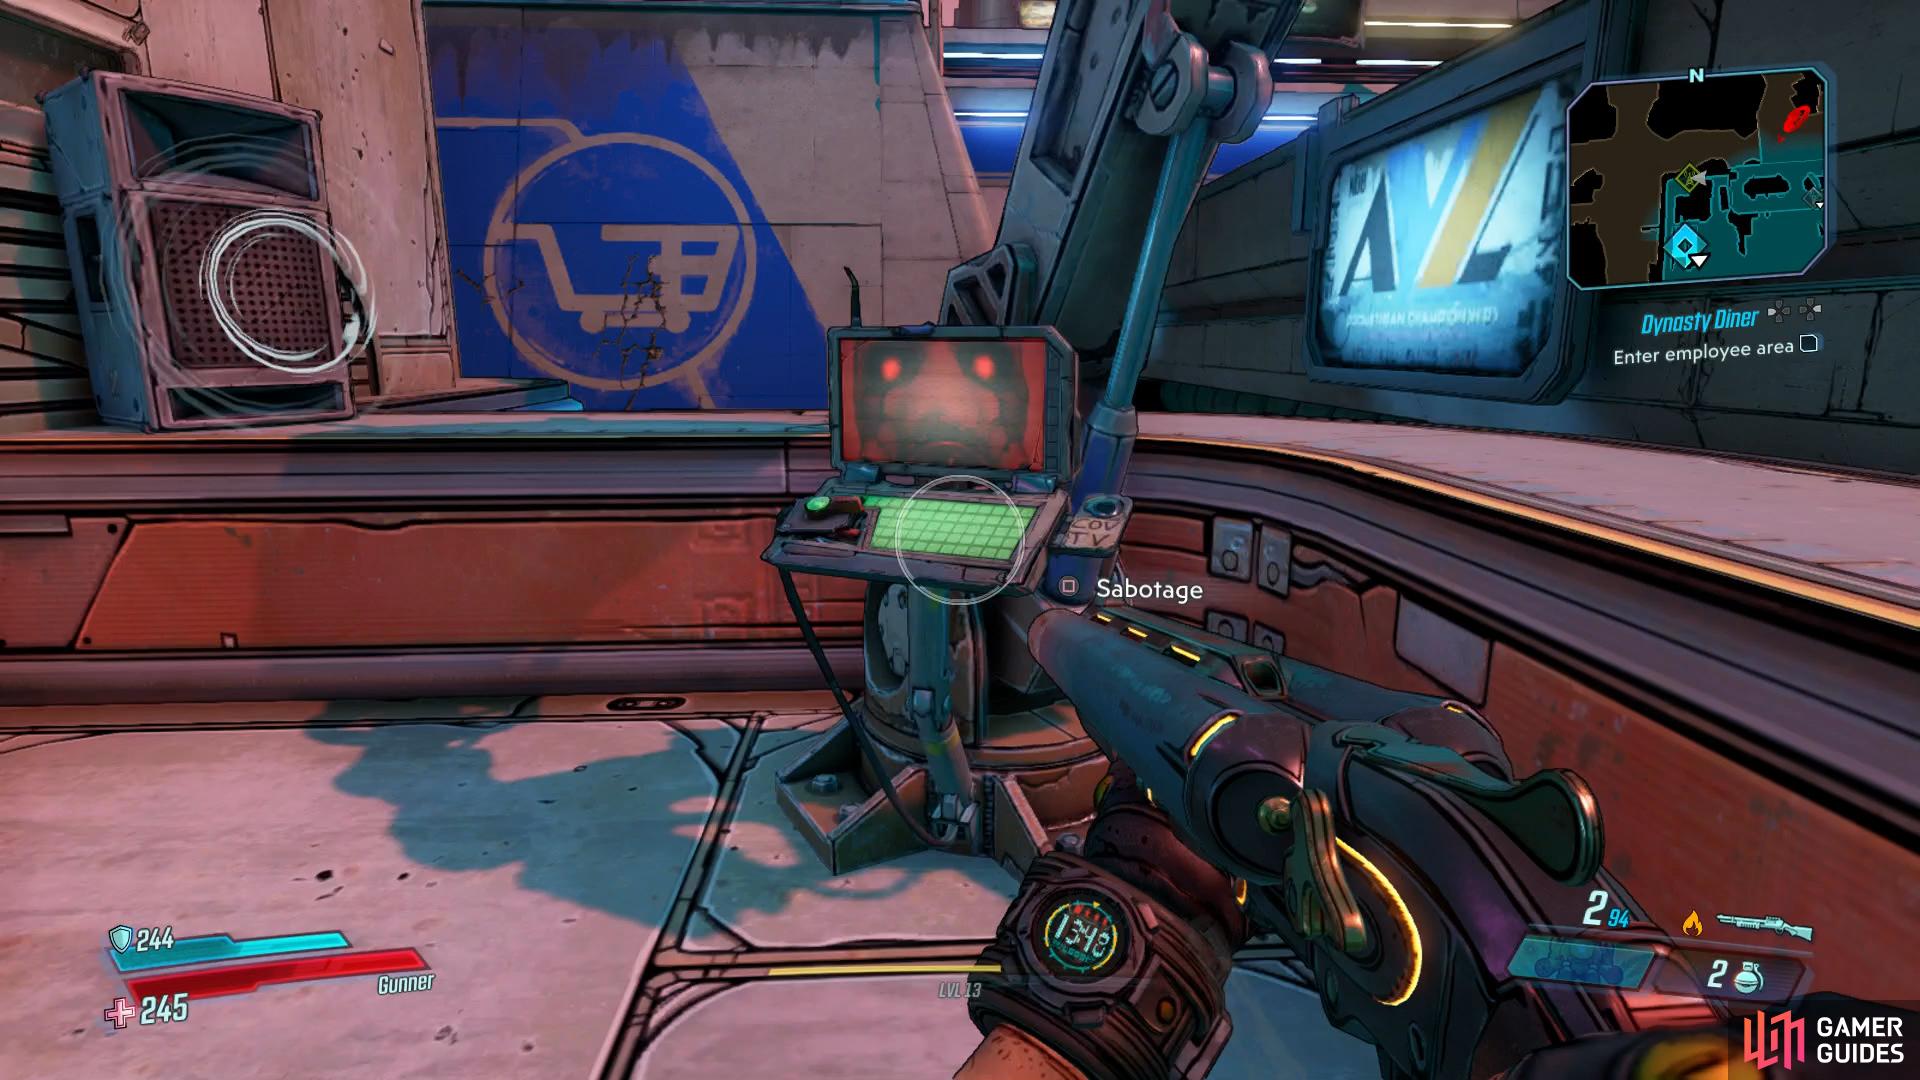
Consider sabotaging the Crimson Radio
and Hijacking the vehicle while you’re completing the Side Missions.
If you already have the Dynasty Diner Side Mission, you’ll find a Dead Claptrap down the stairs in the courtyard the Diner is at and a Crimson Radio in the northwest corner, look for the yellow paint and follow it to the Radio.
If you’re still following that Side Mission, you’ll be led to a Ratch Den but if you take the western path instead, you’ll be lead to Barron Noggin, your first Target of Opportunity which acts the same as a regular Legendary Hunt. He can be tough Solo as you’ll have to deal with many Ratch at the same time but the area is small so Grenades are effective. Additionally, if you shoot at his drone above him, you’ll make it even easier and there are pipes you can blast to spew Corrosive everywhere. Finally, the Barron has the chance to drop the Legendary Grenade Mod, EMP. With this out of the way, continue to the northwest where you’ll need to leave your vehicle to meet up with the contact.
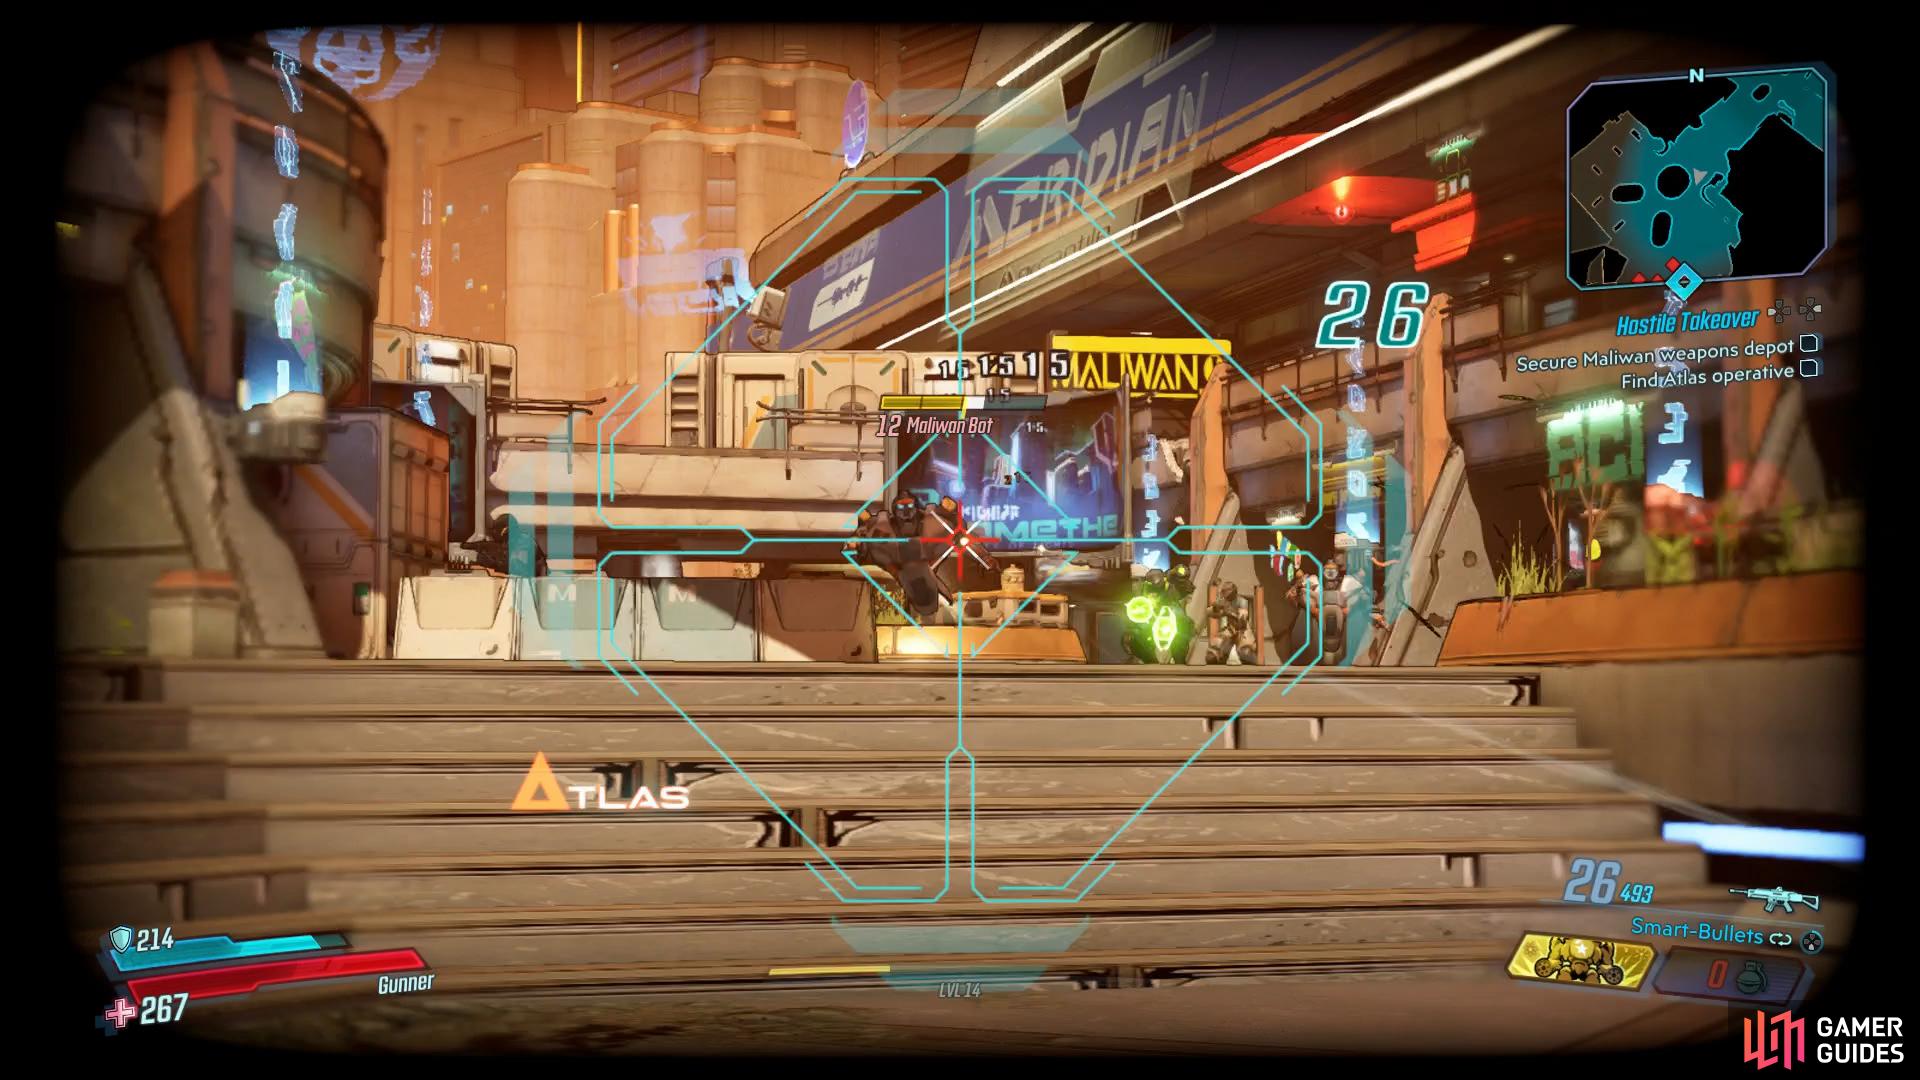
Secure Maliwan weapons depot
As you may expect from an enemy weapons depot, a lot of heavy resistance awaits you here. As you make your way down the road you’ll come across the large group occupied here. You have a lot of cover here and expect dropships to deliver more soldiers while you’re here, you’ll be going up against Flash Troopers and Assault Troopers for the first group so if you find yourself low on health, duck out of there and wait for shields to recover.
Once the initial group has been taken care of, continue to the southwest to find the next group. This time, Maliwan Bots will join in so make them your first priority and use a Corrosive weapon should you have one on you. Once they’re all defeated, you’ll spot a White Chest to the southwest just before you go out to encounter the next group of enemies.

The canister on the shoulder is the weakness for Flash Troopers
make use of cover should a Badass spawn.
Head down the stairs after this to finally meet up with your contact, Zer0, one of the playable characters from Borderlands 2. Speak to him and then be sure to grab the Typhon Log to the right of him before you follow him through the doorway he opens up and take out the large group of Maliwan Bots in the next area. You’ll have Zer0 with you so you should make quick work of them and like all Robot based enemies, Corrosive is your friend. Upon clearing out the enemies, head up the stairs and activate the console to lower the security field.
Defeat Maliwan Counterattack
It appears your actions here have caused Maliwan to react in force but the good news is that you have the high ground here. If you have a good long range weapon, you can thin out the numbers at the start. You’ll be fighting against all types of Maliwan soldiers here, including the Heavies so focus on them first when they start appearing. Zer0 is still assisting you here and you can use him as another target for the enemy. Once you reach the final stages of the battle, prepare for a Badass Heavy along with a regular Heavy, keep on the move, use your Action Skill and don’t let the Badass close the distance, his melee hurts a lot.
Use Corrosive weapons if you have them to take down Bots easier
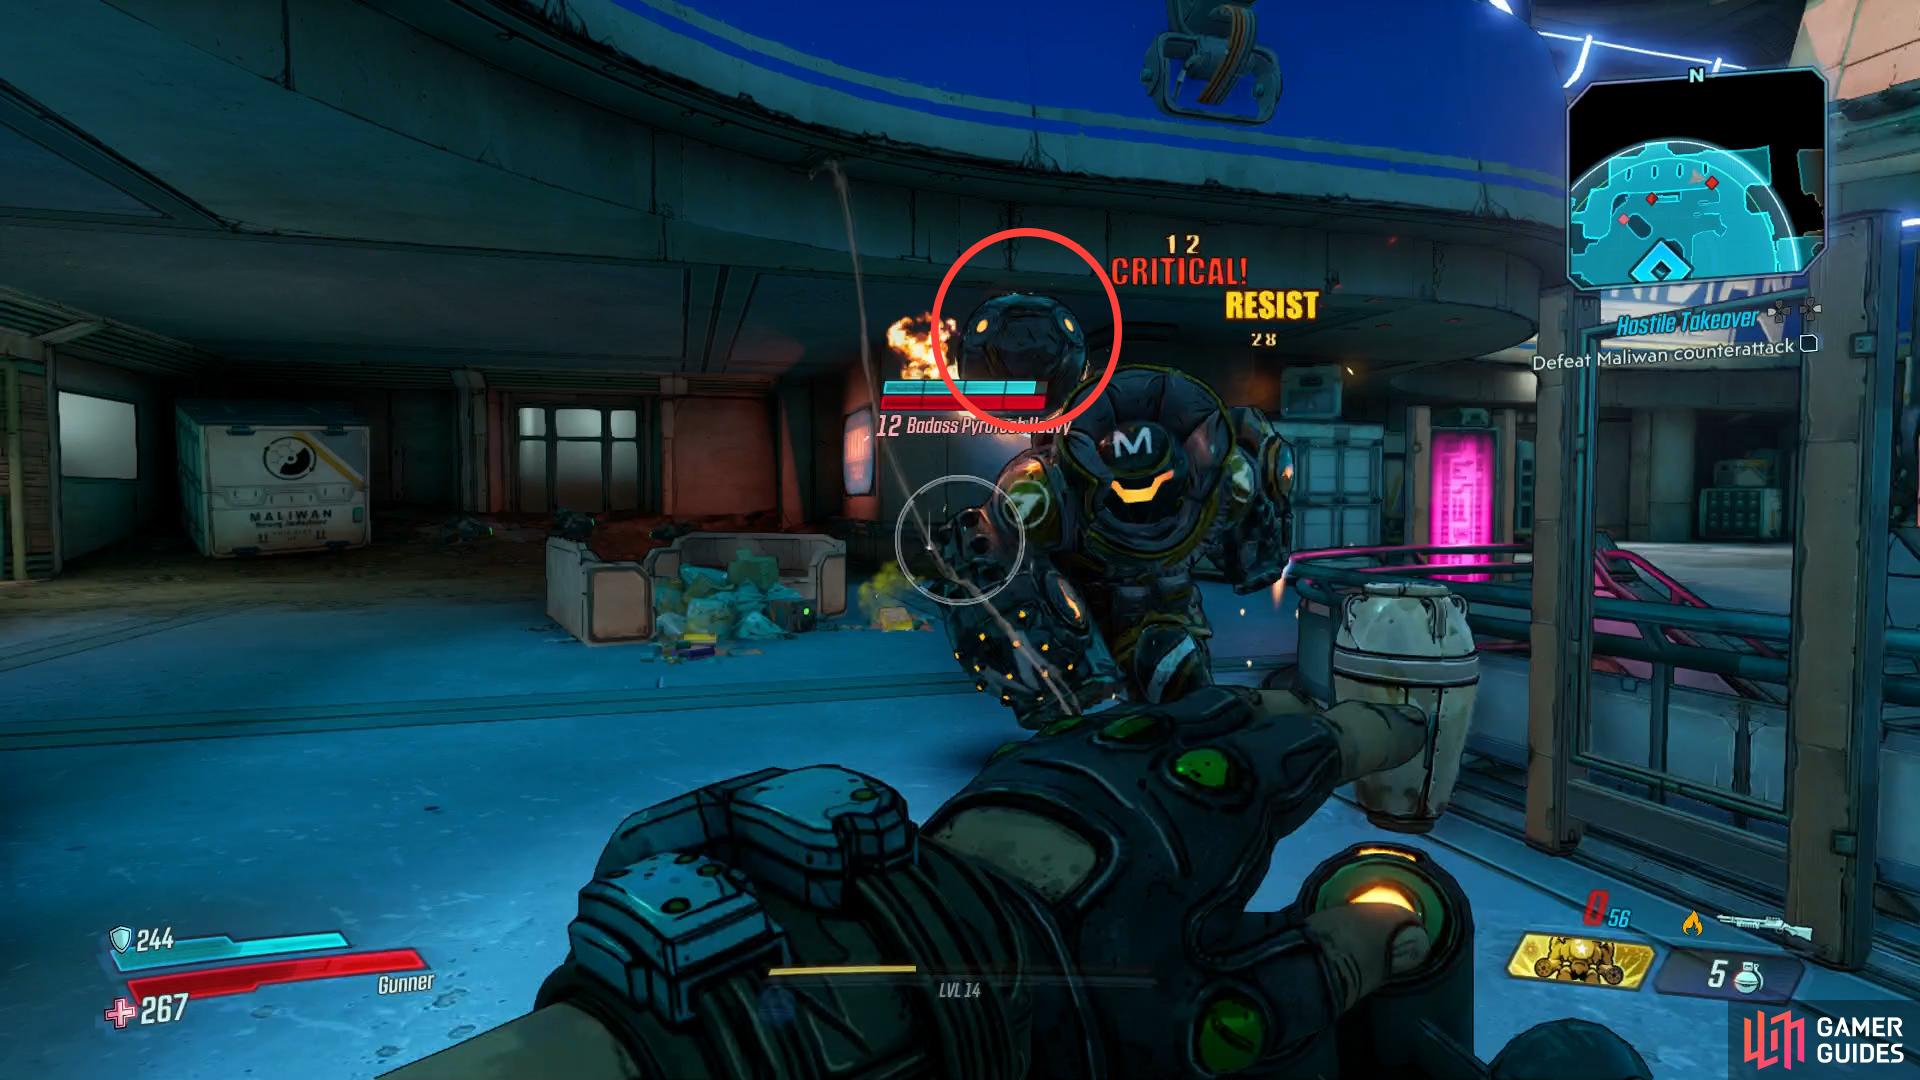
aim for this part of the Badass Heavy to inflict Critical damage.
With the battle over, head back upstairs and into the now opened door to find the depot which contains a White Chest, Red Chest and then drop down the hole to locate yet another four White Chests along with the chest holding the tech Zer0 is here for. Exchange the tech with Zer0 to obtain a Null Pointer and he’ll use it to cut down the blue barrier in front of you.
Access Gigamind
Your task now shifts to accessing and ultimately, killing the Maliwan AI, Gigamind as Zer0 advises you to meet him at the Spaceport. While you’re in your current location however, you can take a short trip to the northeast to locate what should be your third and final Typhon Log, allowing you to access the Dead Drop near the entrance to Lectra City. Additionally, while you’re looting the Dead Drop, consider accepting and completing the Technical NOGout Side Mission.
Once you’re ready to continue, return to Watershed Base if you need to restock on ammo or just sell some loot. From there, it’s just a short drive to the northeast where you can meet Zer0 outside the Halcyon Spaceport. Follow the path when you Zer0 opens the door and then prepare for a boss fight.
Boss: Gigamind

The first thing you’ll notice about Gigamind is that it’s a walking brain essentially, the second is that it has a Shield you’ll need to take down before you begin damaging his health. For this reason alone, you’ll want equipment that deals Shock damage, be it weapons, grenades or even Action Skills. You can shoot the pink spot on the back of its head to deal Critical damage however when playing Solo, your opportunities may be limited here.
The battlefield is open with many pieces of cover however you may not get a chance to use it that often due to the constant respawning Maliwan Troopers, whittle a few down but don’t waste too much time on them, they’ll keep coming throughout the battle however do use them to get yourself back up should you enter Fight for your Life.
While Gigamind has it’s Shield up, it’ll only skirt around the battlefield doing basic attacks but once the Shield drops, it becomes a lot more lethal. To begin with, you may notice a green shield that appears from time to time when it returns to the center, this indicates a barrage of bullets is about to begin so keep on the move to avoid them and wait until it’s finished before resuming your assault.
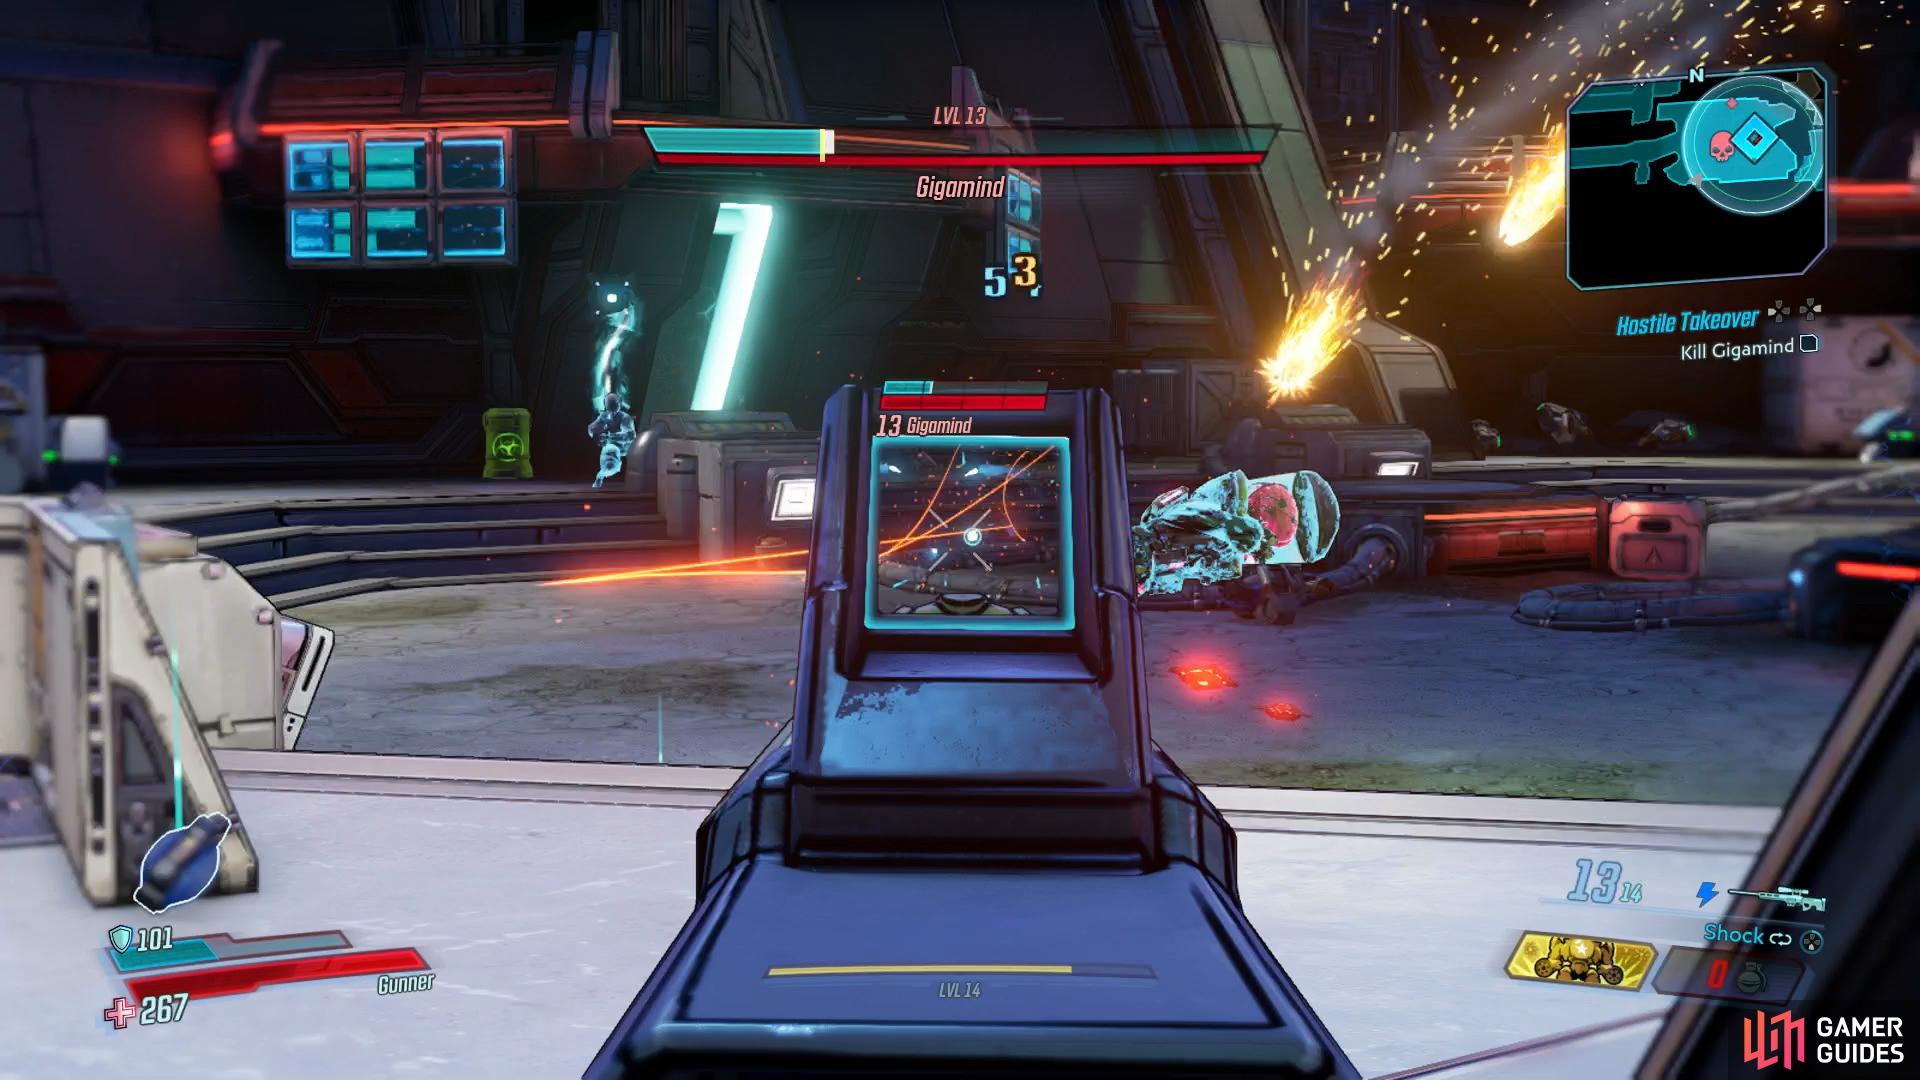
This second phase is the best time to use your Action Skill if you’re playing Moze or Amara, Cryo works especially well against Gigamind as you can slow it down and score some easy hits on it’s weak point. Provided you keep on the move, prevent the battlefield from getting to crowded and focus on the weak point, Gigamind shouldn’t pose too much of a threat.
Legendary Drop, Smart Gun XXL
You may wish to consider farming it after, it has the ability to drop the unique Legendary SMG, [Smart Gun XXL]. This SMG will deploy Spider Brain Bots when you reload your weapon that will seek out their foes and attack them, very useful indeed.
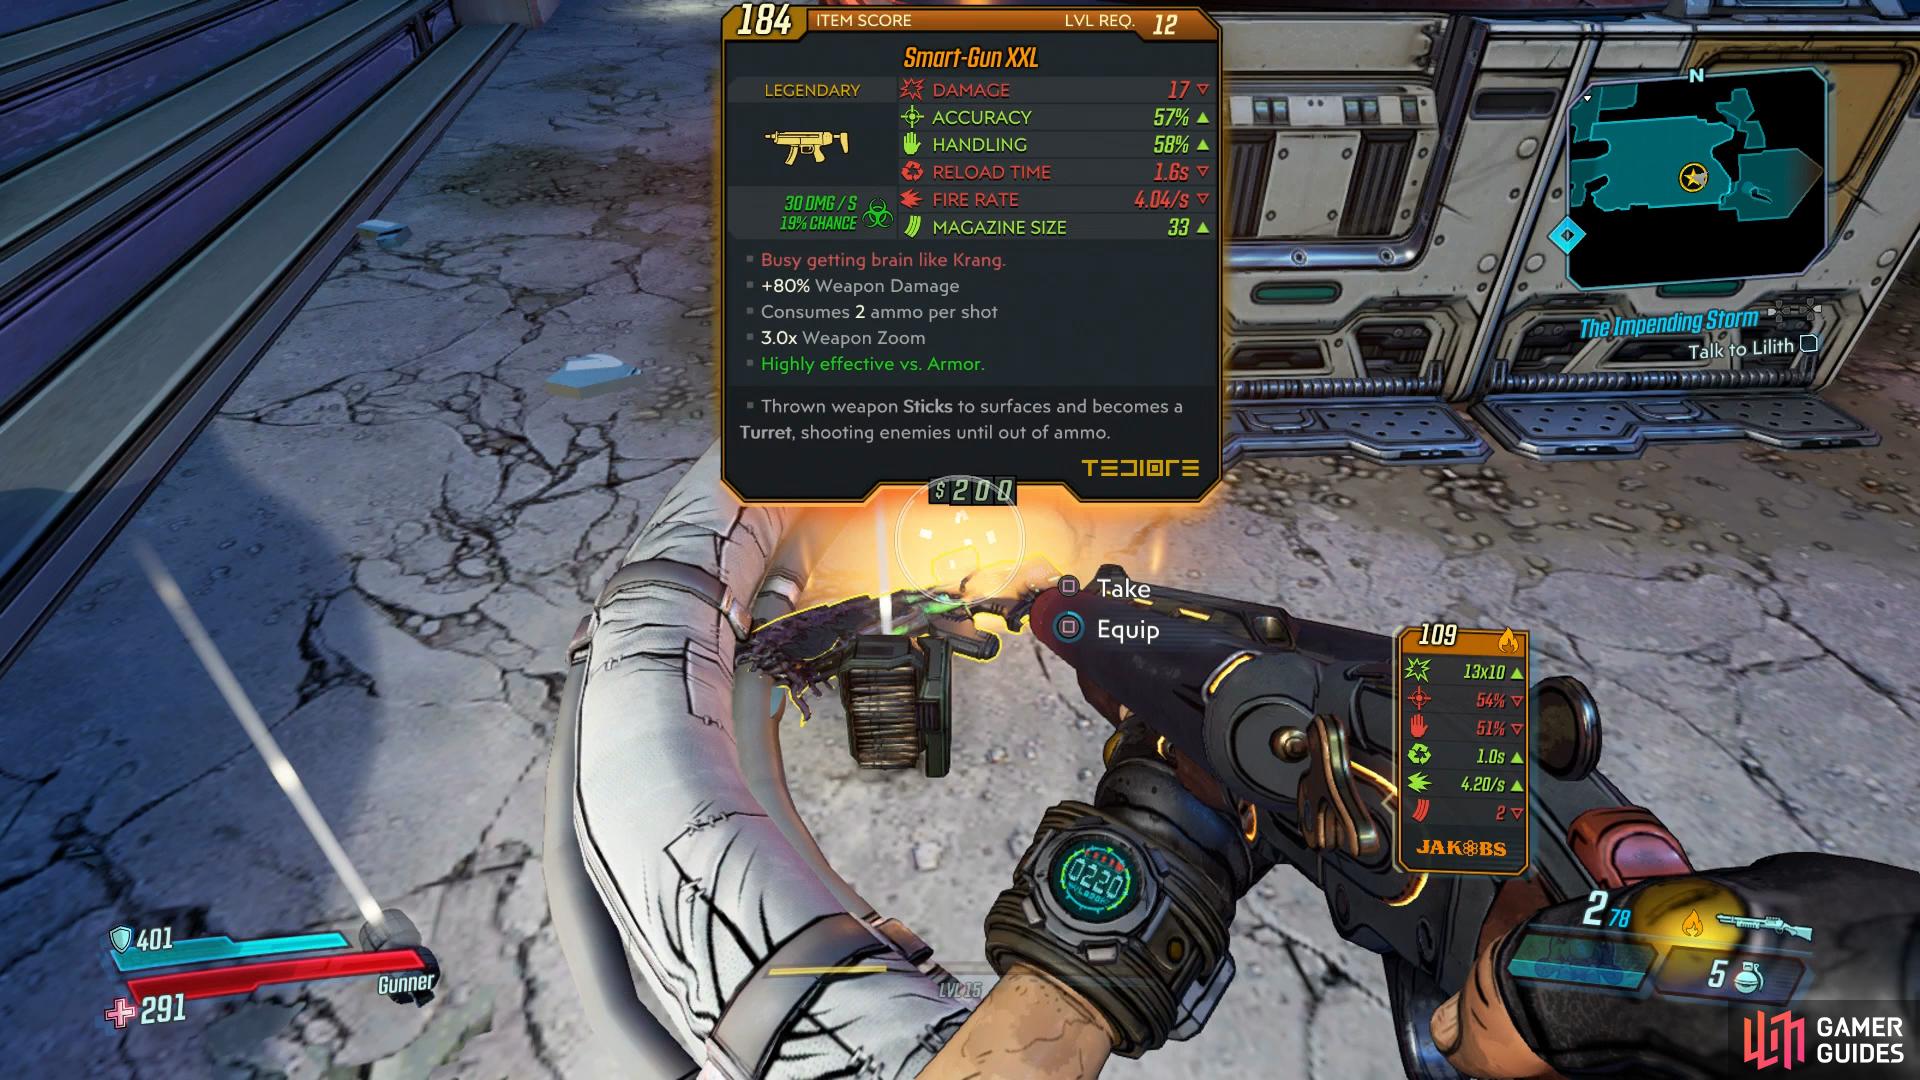
Gigamind’s Legendary Weapon will be useful for a long time.
Regardless, loot the items, open the nearby Red Chest and then grab the Gigabrain and return to Watershed Base to call Rhys and inform of him of your success. Insert the Gigabrain into the console to bring this mission to an end, unlock Class Mods and the next main mission and complete NOG It Off.


Before you leave Promethea, you may wish to head to Lectra City and complete the Zone, it’s an entirely optional one but there’s Crew Challenges, Zone Completion and the following Side Missions for you to undertake, one of which can drop another Legendary weapon:
- Kill Killavolt
- [Proof of Wife]
- [Porta Prison]
No Comments