

| Quest Giver | Reward | Lvl |
|---|---|---|
| Lilith - Sanctuary | Cash, Epic Rare Gun | 20 |
Go to Meridian Metroplex, Meet Rhys at Launchpad 7
Upon the completion of the previous mission, Rhys will seek the Vault Hunter’s help stopping Maliwan’s space laser. Return to Meridian Metroplex and Rhys will ask you to meet him at Launchpad 7. Grab yourself a Vehicle and make your way over to the northeast of the map to find the Spaceport. Kill the few grunts that are on your way and then head over to Rhys to and once you regain control, pocket the Viper Drive. Make your way back down the platform and pop it in the console and take out the enemies inside, grab the Echo Log on the desk and then make your way over to the Maliwan Shuttle to begin the journey.
Go to main gate
You’ll find yourself at Skywell-27 and as you may expect, you’ll find the gravity different here. That means you’ll jump higher and farther than planetside. As always, Skywell-27 being a new Zone brings a host of Crew Challenges and Zone Completion objectives so be on the lookout.
To begin with, head north and make use of the Vending Machines should you need to restock and then take a running jump to cross the gap at the edge you soon approach. Just past here, you’ll start running into Maliwan Troopers and a locked door, ignore this for now and take the other path down to a large open area swarming with enemies. With the area clear, head to the southwest to find a door leading back the way you came, it will lead to a control room where you can locate the first Typhon Log.
This first Log is easy to miss, go back into the control room after defeating the enemies below.
Return outside and follow the path along to the next group of Maliwan Troopers at the main gate. There’s a lot more to contend with here so you’ll need to make full use of all the cover you find here. On top of that, you’ll encounter Jet Troopers here who will fly in the air and snipe you from distance, always try to prioritize these enemies when the opportuntiy arises. The battle will culminate in two Heavies, this is the ideal time to use your Action Skill if it’s available.
Find terminal, Find elevator
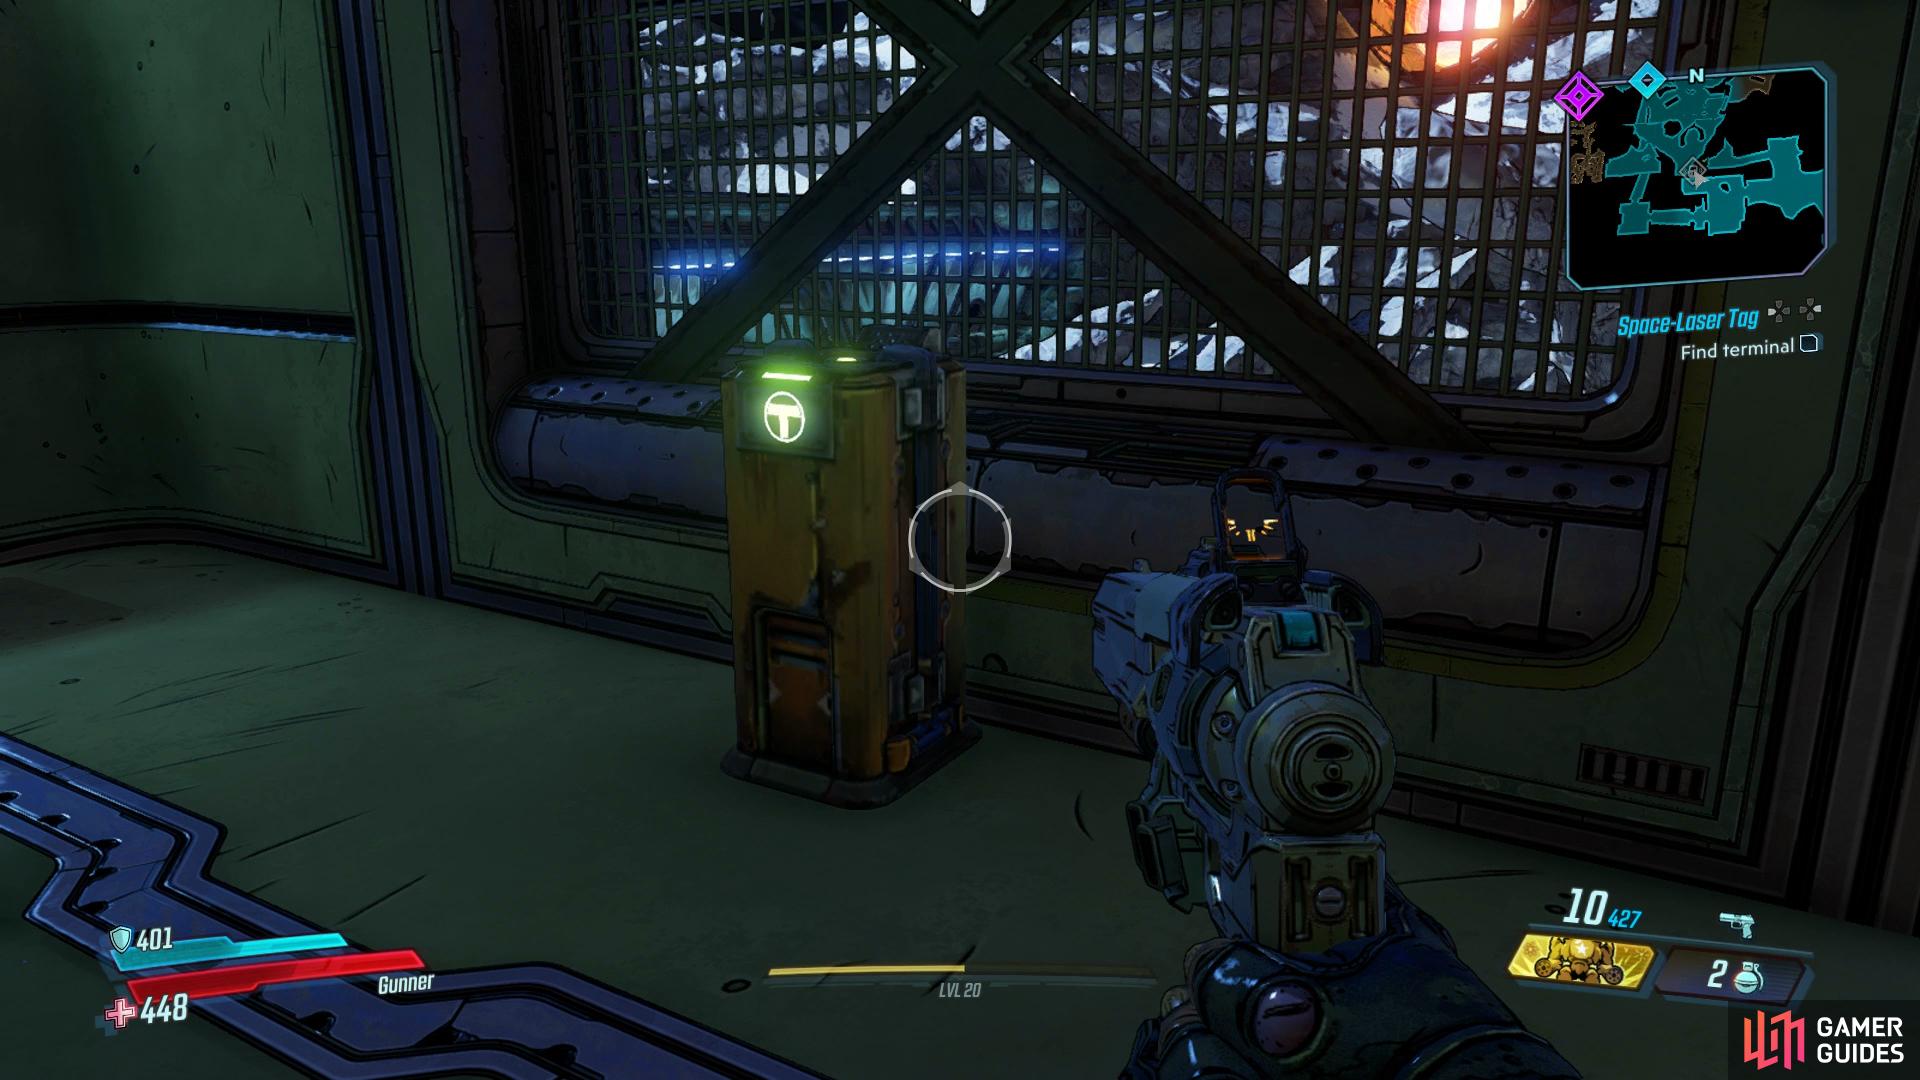
Before you take Rhys’ advice and hack the terminal, look to the northwest of this area and climb up to locate a Side Mission, [Opposition Research], a mission that can be completed as you work through the Main Mission here. Head now into the northern control room and use the Viper Drive to hack the terminal and then get ready for yet another shootout, this time with two Heavies accompanied by a Badass NOG who should be your main priority.
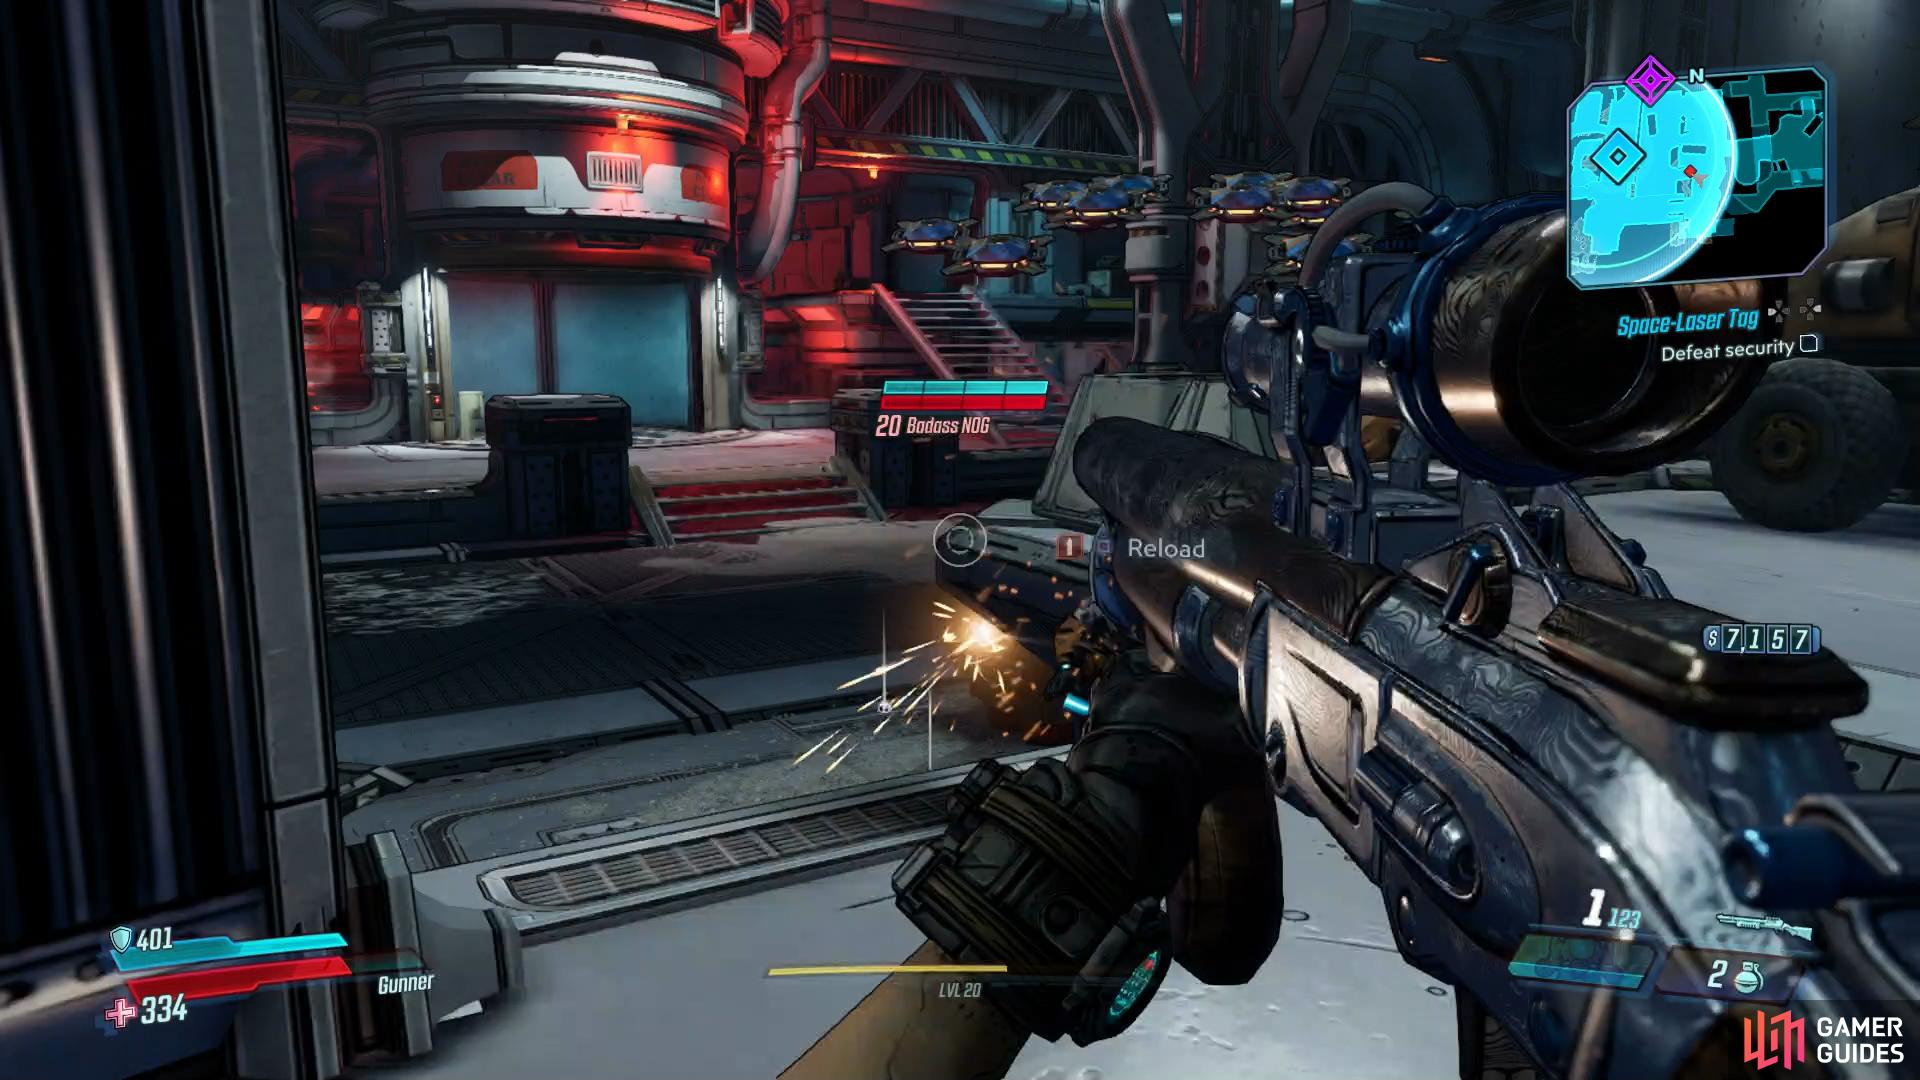
The Badass NOG can cause plenty of problems
especially if it manages to buff another Badass enemy.
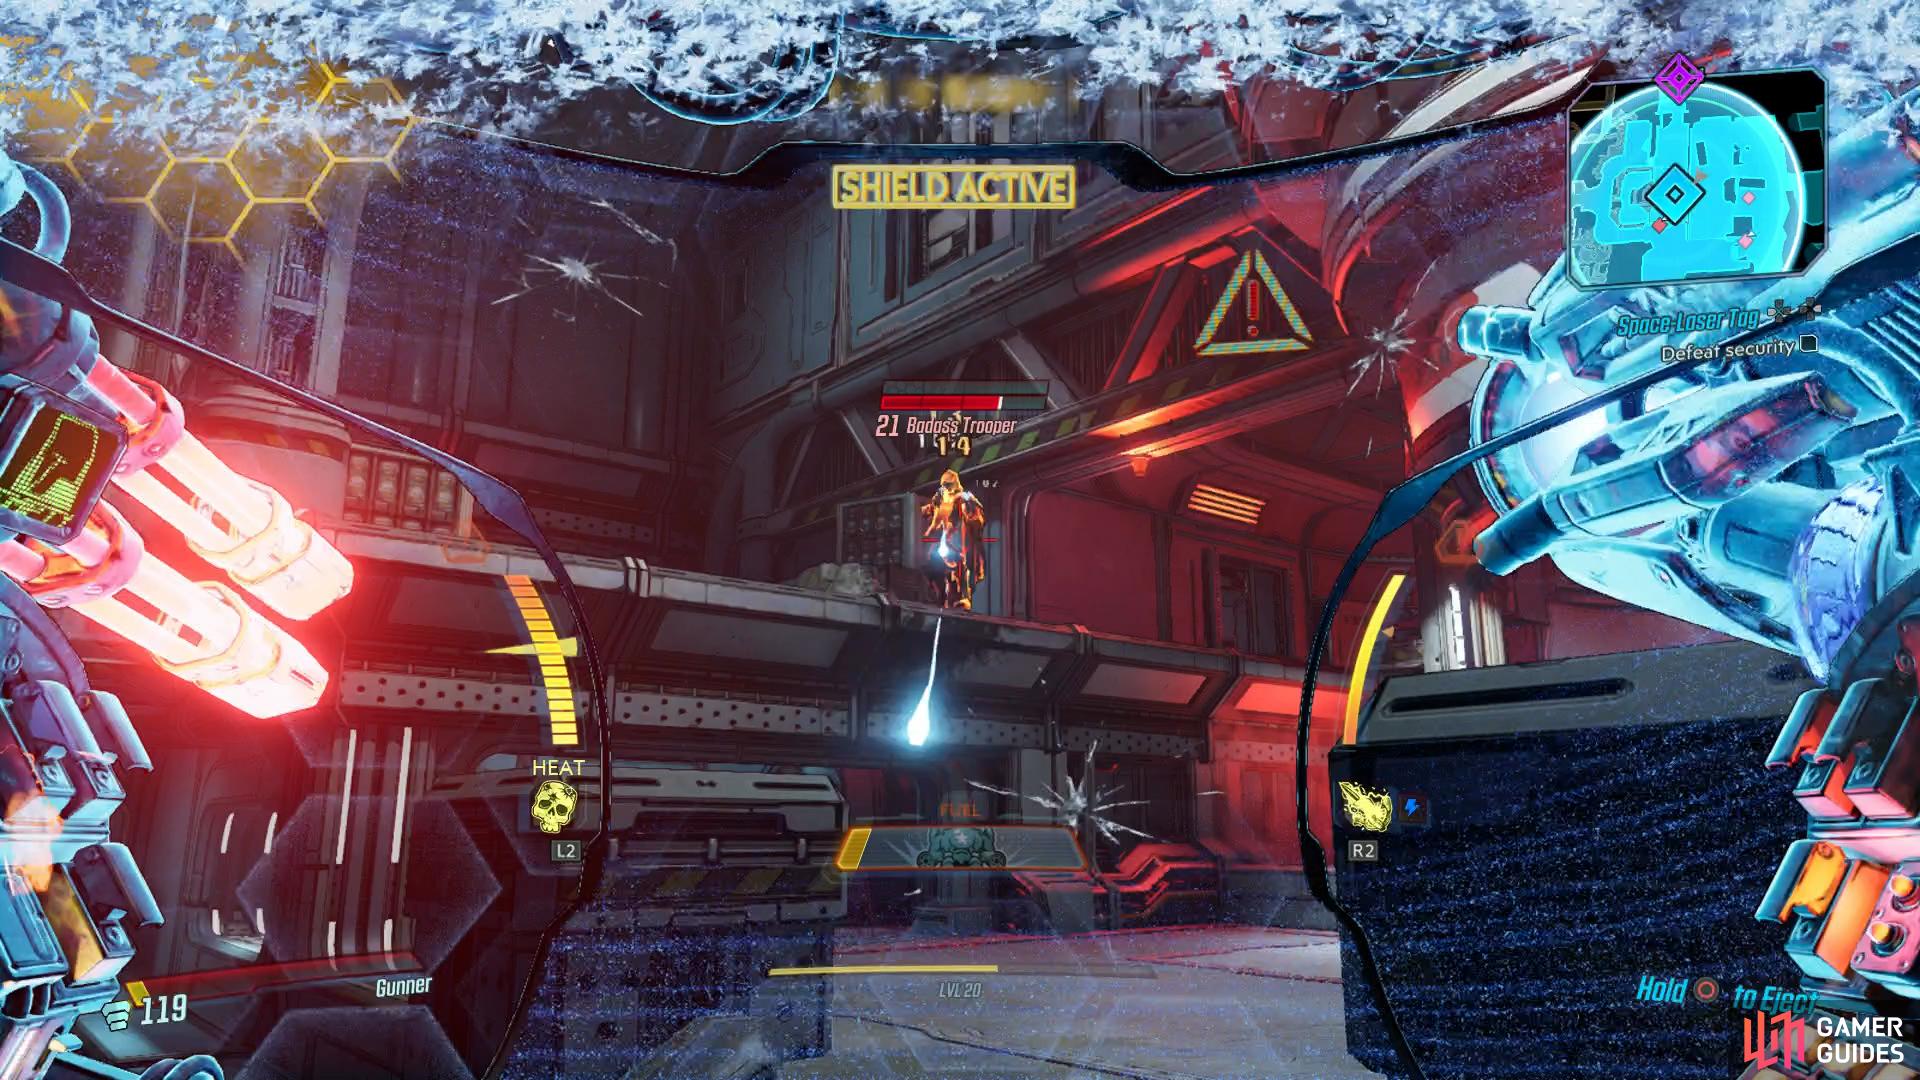
With access to the base at last, head through and you’ll spot the elevator up ahead. You’ll spot a shielded door to the north here, this leads to a Red Chest after clearing the Main Mission here. Turn your attention the elevator now and after using the Viper Drive, you’ll find it’s not quite up to scratch. You’ll be ambushed by the usual Maliwan Troopers once more but there’s a lot more cover to make use of this time and you’ll need them as you’ll have to contend with two large waves.
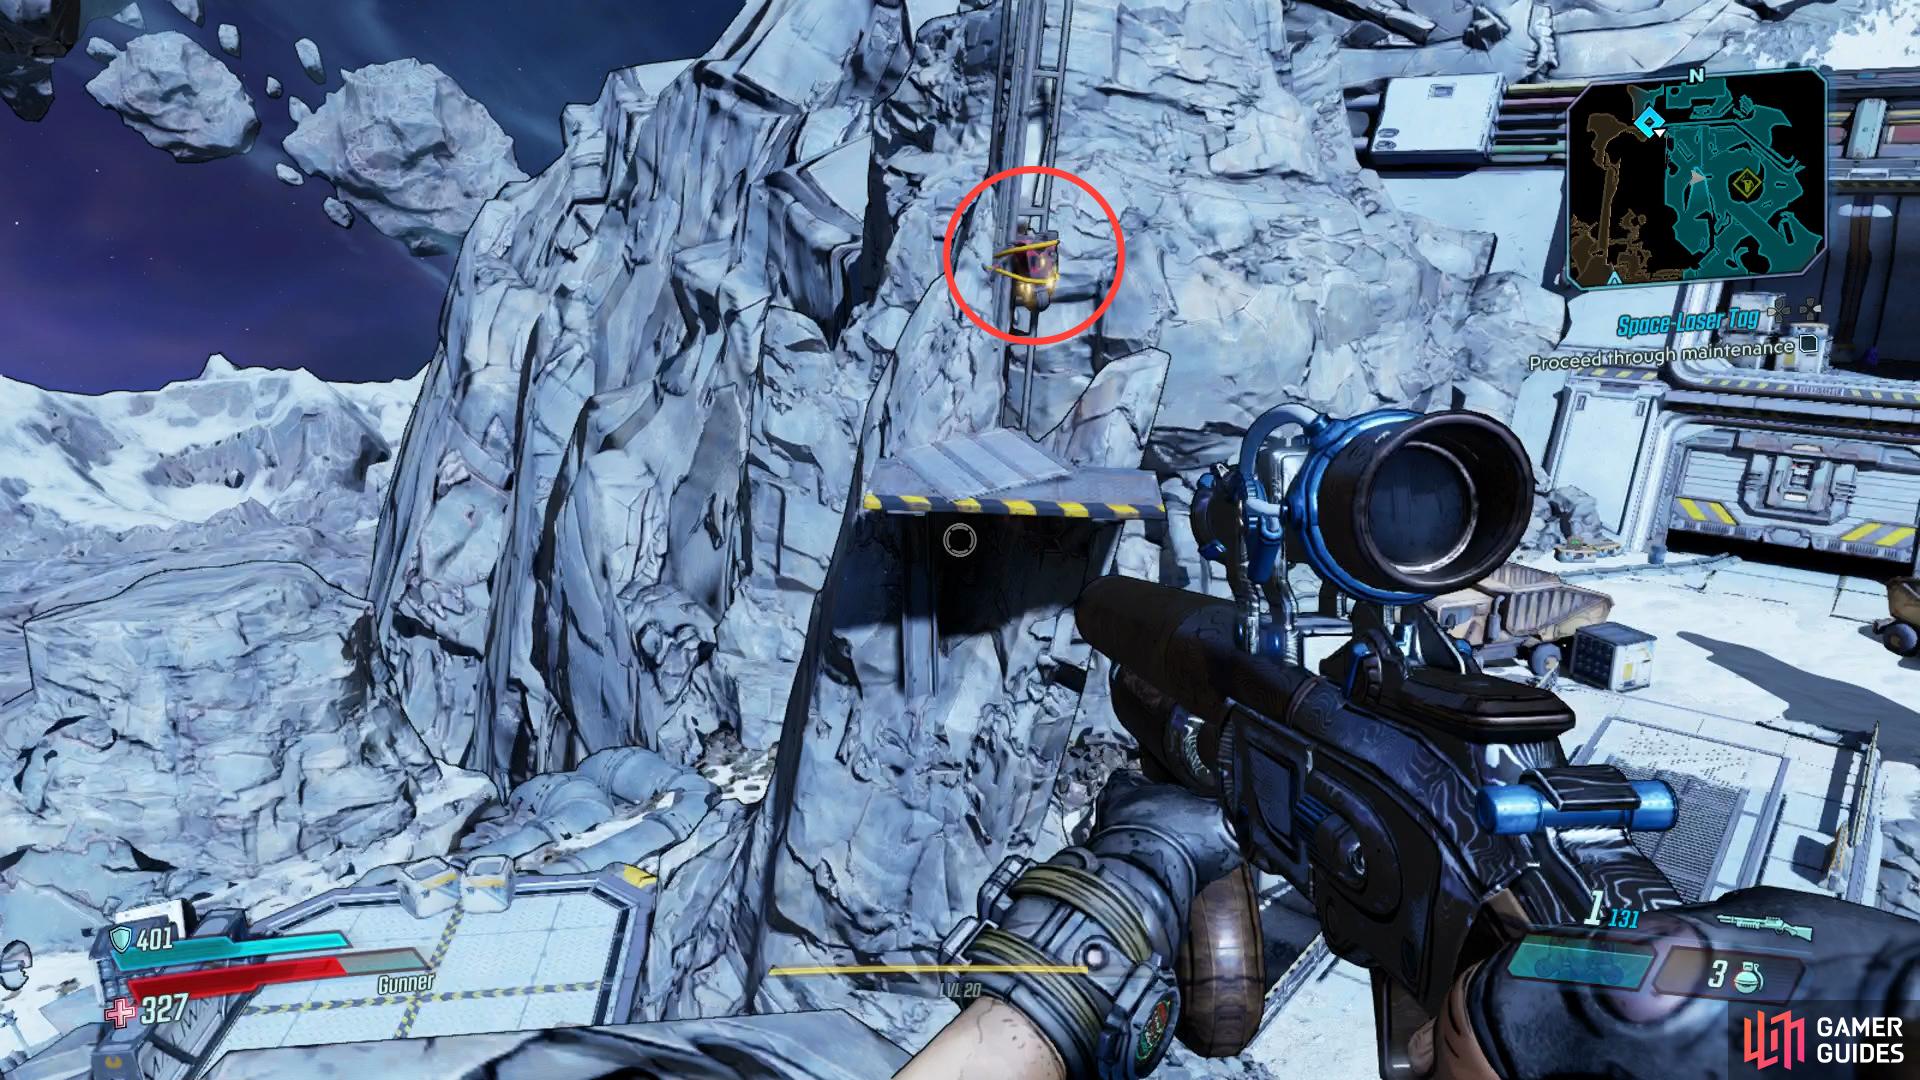
Go through ventilation ducts, proceed through maintenance
With the elevator not an option, jump to the upper walkway to to the west and before you take the ducts to continue, consider heading south for the [Opposition Research] Side Mission. Return to the duct when you’re ready and climb up to follow the ducts and reach maintenance. You’ll need to make a series of jumps here as you work your way higher. As you reach what seems like a dead end, look to the duct in the distance and make a running jump over, it’s tight so jump at the last moment to clear it and at the end you’ll find a ladder leading back to the surface.

Climb to the top of this rock here
to make the jump over to the Dead Claptrap.
Another open area awaits you full of COV and if you look to the west of this area, you’ll find a path leading to a hidden Eridian Writing to mark on your map for later. Another group awaits a little down the path and this one is much more deadly, especially if you come up against multiple Badass Tinks, keep your distance and take them out one at a time. With the enemies defeated, head over to the western wall and then follow the rocky path up to find a ledge over to the center with a Dead Claptrap.
Drop back down and continue along the path to the west and as you make your way along the walkways, take a look at the map to notice a short path leading south, drop down and follow it to snag the next Typhon Log and then return along the path and wait for the thruster to stop before jump across the chasm and quickly over to the left.
Disable thruster
As Rhys suggests, disabling the thruster you just passed may buy you some time. Head along to the north of the area and spot the yellow paint to climb up. From here, make your way over to the console and shut off the thruster and if you wish, head inside the now inactive thruster to locate a hidden White Chest.
Open chute
Return to the west and a small group of COV will attack, take them down and head into the Titanium Refinery where the rest of the COV are waiting for you. You’ll be going up against at least three waves of COVs and it’s easy to lose where you’re getting shot from, make sure to use the radar to keep your bearings. Once the area is clear, head up to the top floor from the north and to the east you’ll find your next target for the [Opposition Research] Side Mission. Just outside that area you’ll also find the controls for the chute, flip the switch and take the plunge.
Use Viper Drive
As you drop down here, you’ll be attacked by Oversphere, flying robotic spheres that can cause a real nuisance when there’s many of them. Get out of the center where you land, it’s far too open, and keep moving as you take these Overspheres out, they don’t take much to go down. Once defeated, climb out of the pit and make your way over to the east to find the door that needs hacking with the Viper Drive.
Harbinger’s will explode if they come into contact with you.
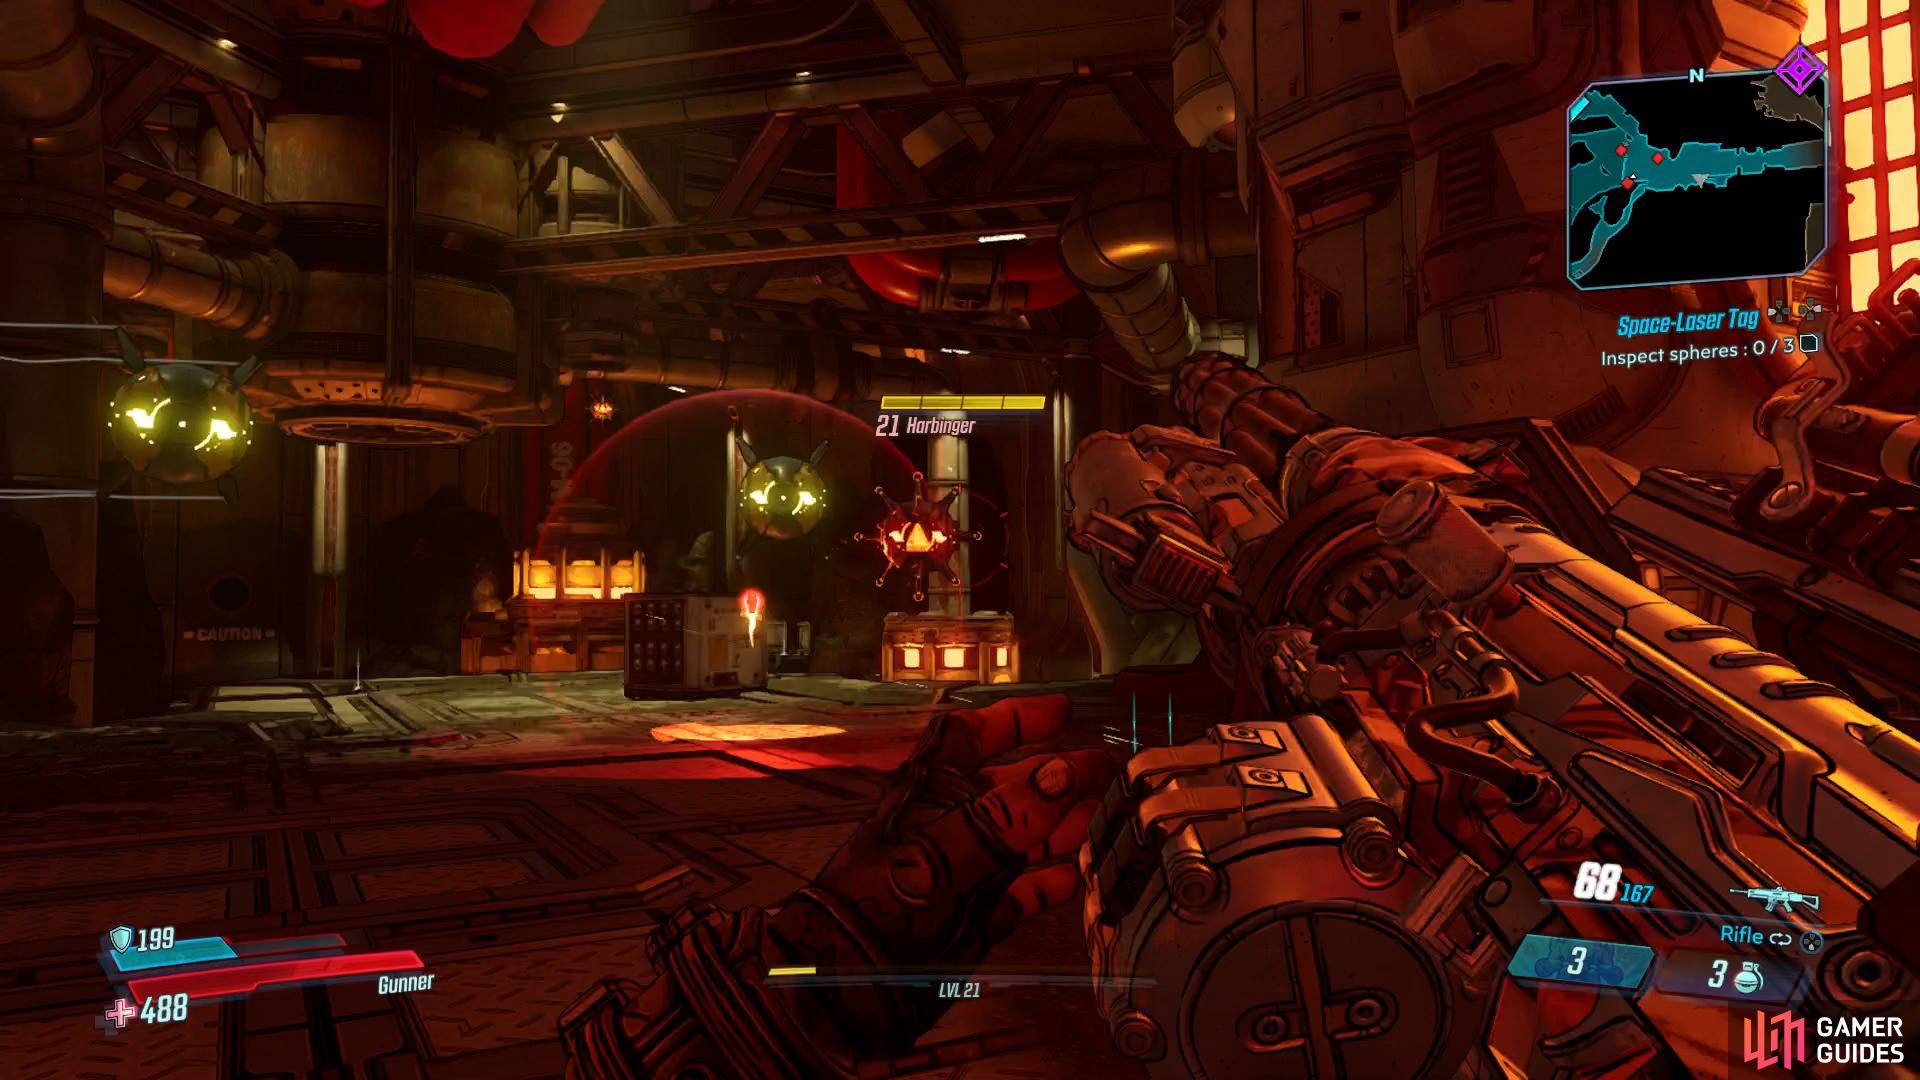
Inspect spheres [3]
Rhys has yet another genius idea to help you get through the next door however first, there’s the small matter of another large group of spheres to take out and keep an eye especially on Harbingers that are mines that approach you. Once you’re alone once more, head around the pit here examining the marked spheres until you find the final one that can only be reached by climbing the nearby crate to the south. Use the Viper Drive once more to hack Rhys into the sphere and follow him back to the door.
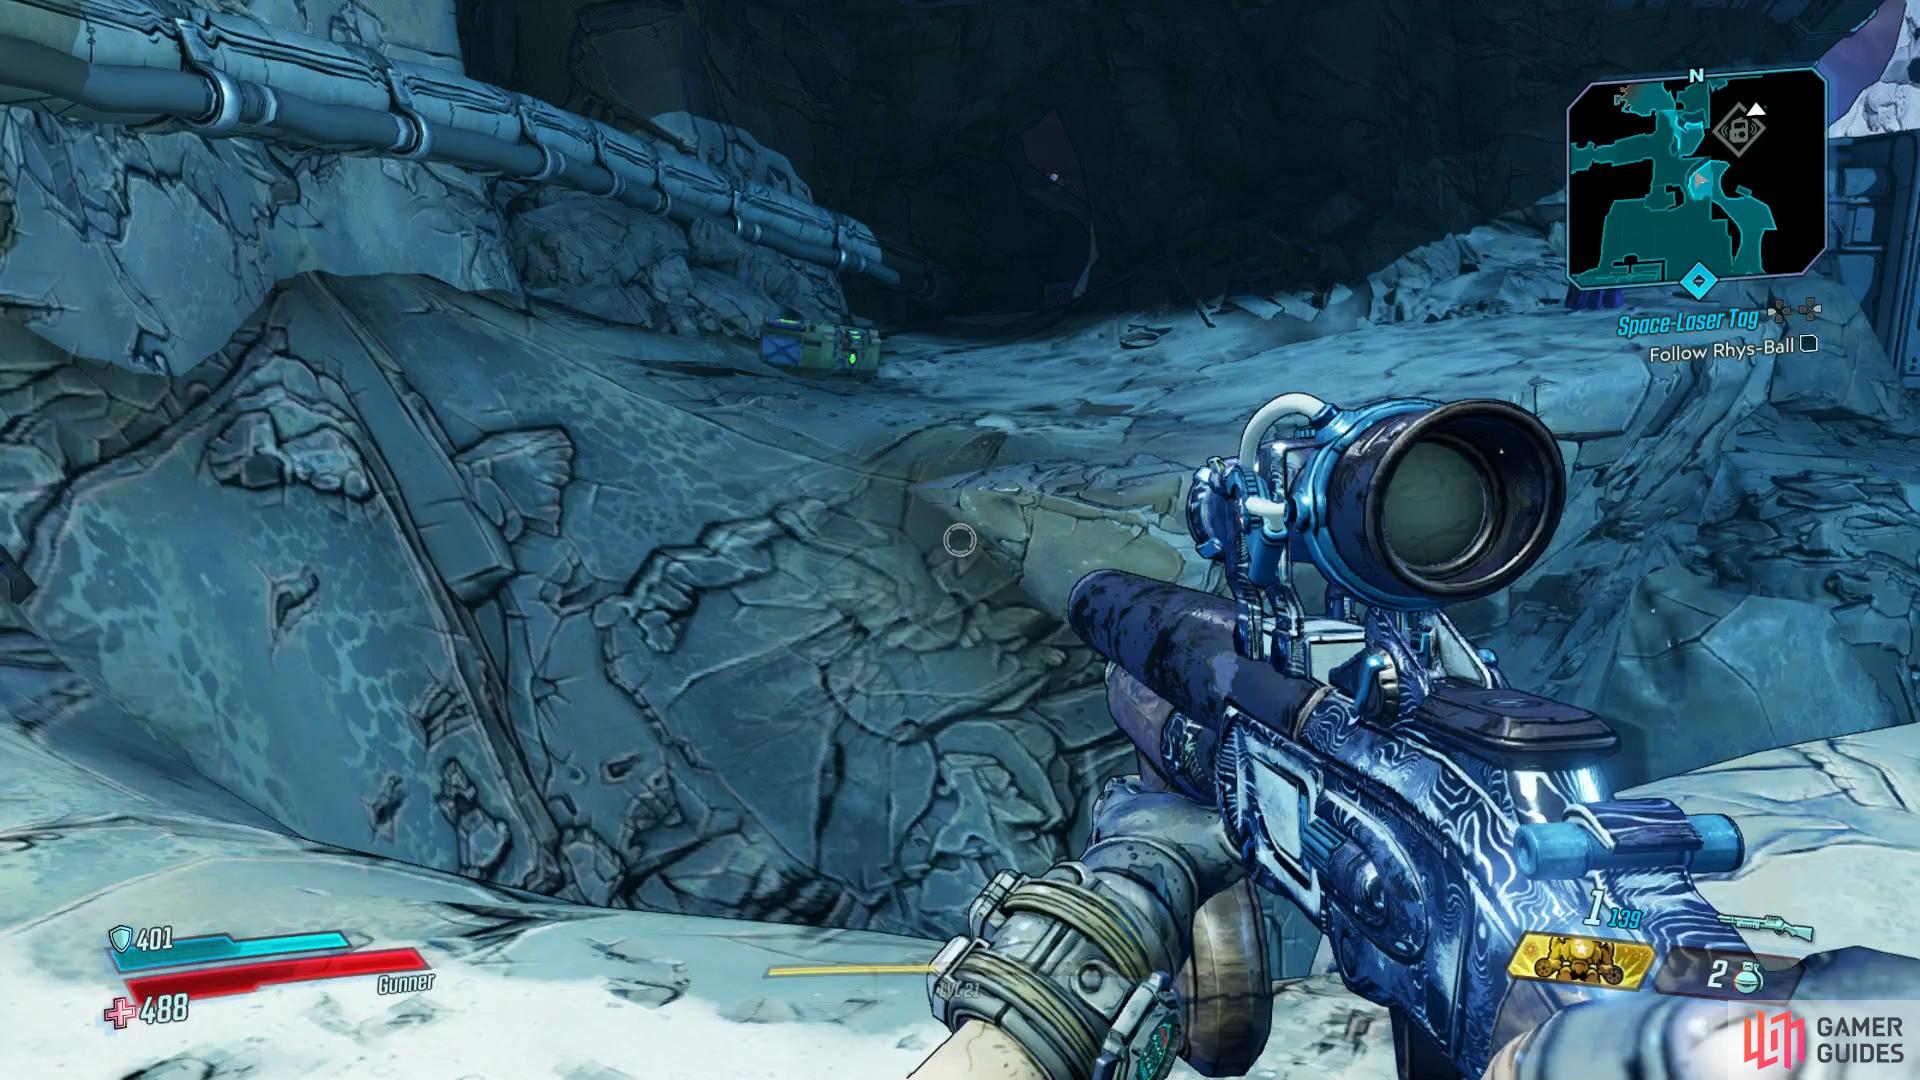
Clear the way
Once Rhys-ball opens the way, head on to reach the Obersavation Deck and wipe out the next group of Maliwan forces that attempt to intercept you. The largest obstacle here are the Badass Troopers that appear after the first wave is down, don’t try to take them out in the open and they should go down easily. Once the area is clear, climb the stairs in the center of the area and jump across to an opening where you’ll find a Dead Claptrap and then head along the northern wall to find a ladder leading up to the final Typhon Log.
Finally, before you leave this area, you can find a path leading down to the north where you’ll ecounter Handsome Jackie, the Target of Opportunity for this Zone. She’s a rather unremarkable enemy aside from her ability to move quickly but persist and there’s a chance to score a Unique Legendary, [Nimble Jack]. Return along the main path to the south and have Rhys-ball open the door.
Take this hidden path down to Handsome Jackie
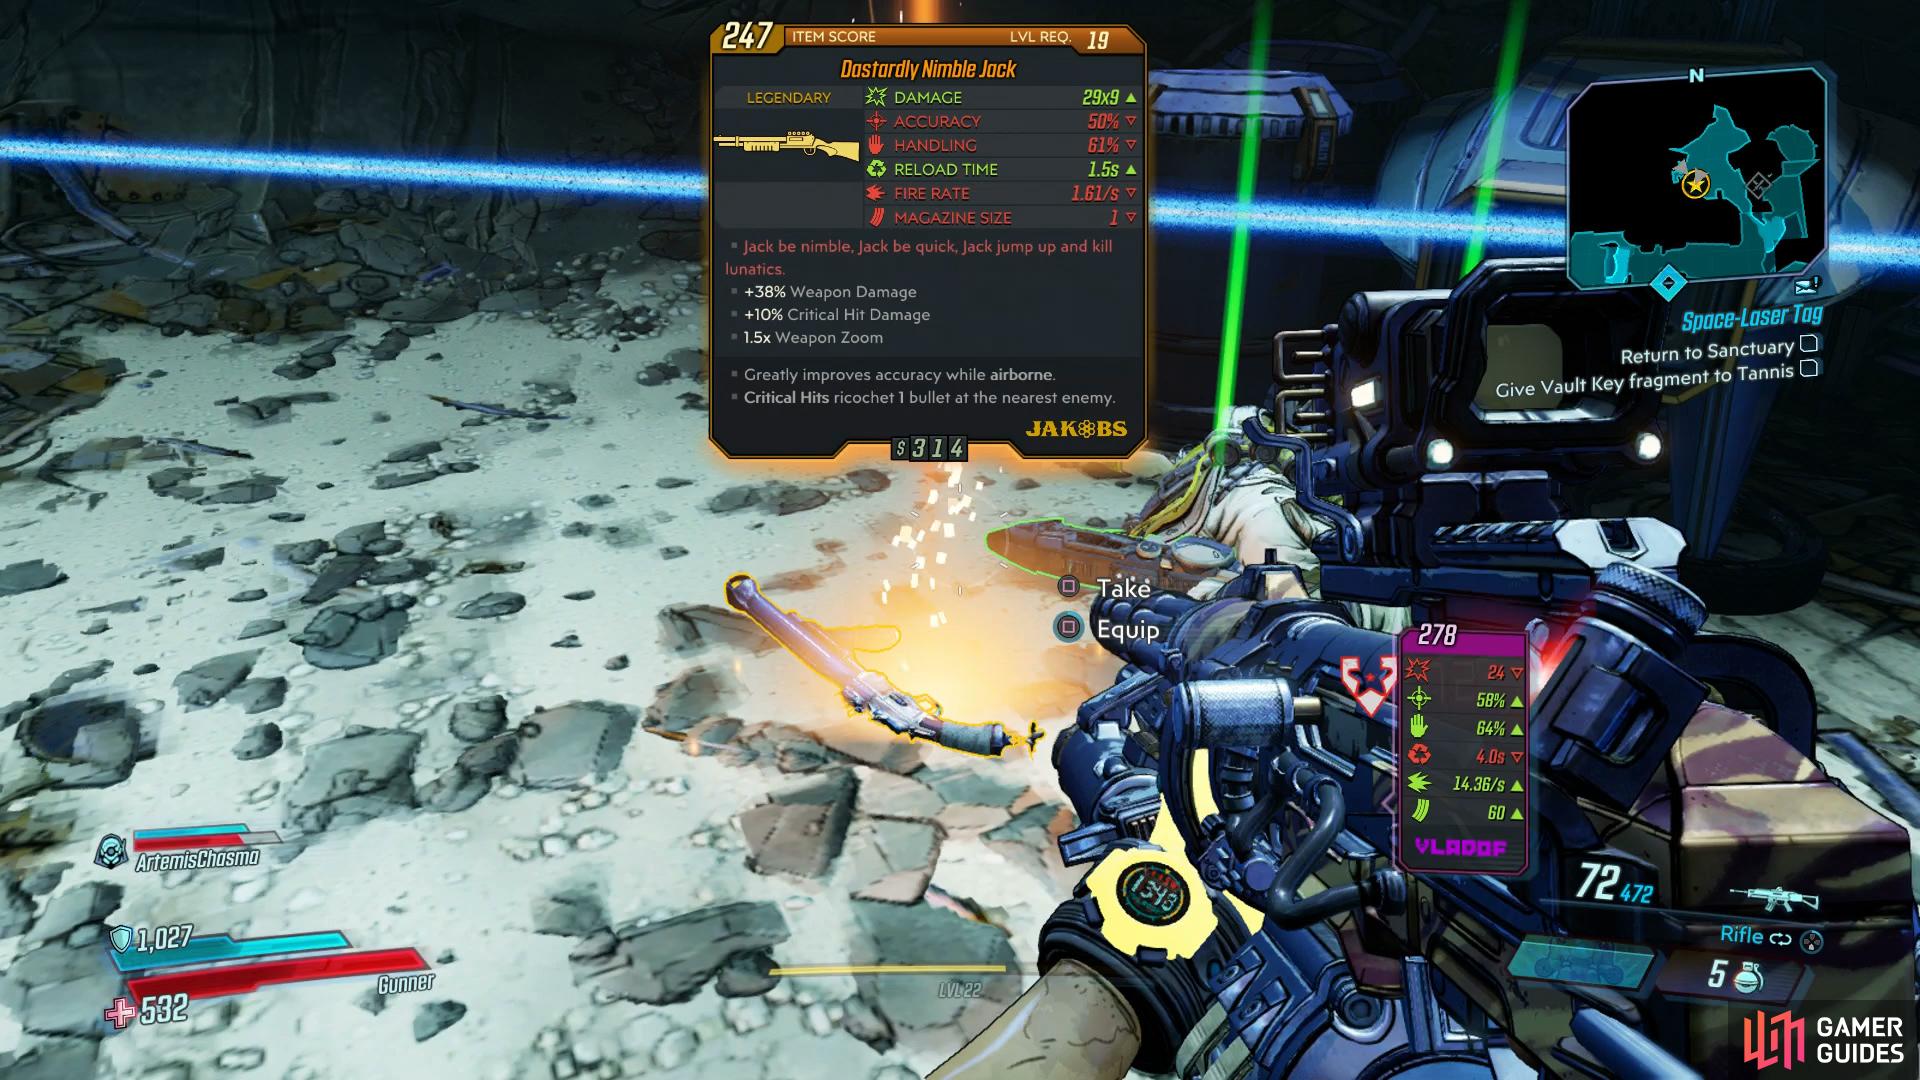
and potentially score another unique Legendary.
Destroy servers
With the way forward blocked, follow Rhys-ball to have him open the door and then head on. You’ll be greeted by another group of Maliwan here and once they’re defeated, you’ll find the final target for the [Opposition Research] Side Mission. This leads you to an optional part of the map and will result in a difficult battle, make sure you’re prepared before continuing on.
Regardless, once you’ve finished matters there, head forward to encounter an Arbalest, a walking mech that will deal massive damage to you if you decide to fight it out in the open. If you have Corrosive weapons or abilities, now is the time to put them to use as Kinetic damage will only make the battle drag on. Once defeated, head north up the stairs and then hang a left to reach this Zone’s Dead Drop provided you found the previous Logs.
Drop back down and continue to north, then east to find the servers with some convenient Corrosive Barrels gathered nearby. Don’t look a gift horse in the mouth and take aim to bring the servers down before opening the nearby White Chest and shutting down the firewall. Make your way back to Rhys-ball and he’ll open the way ahead for you and loot the ammo ahead, when you’re ready, make your way down on the elevator.
Secure control room
It’s not going to be that simple to hack the laser just yet, you’ll need to secure a control room teeming with Maliwan and another nasty Arbalest. If you’re not using a Corrosive weapon then focus on the Maliwan troops first otherwise, use a Corrosive weapon to take the Arbalest out as quickly as possible. You’ll have to then deal with another wave as you defend Rhys while he’s hacking the laser, keep on the move, replenish your ammo from the containers and don’t get caught out in the open. Once all the enemies are finally down, head over to the controls to fire the laser.
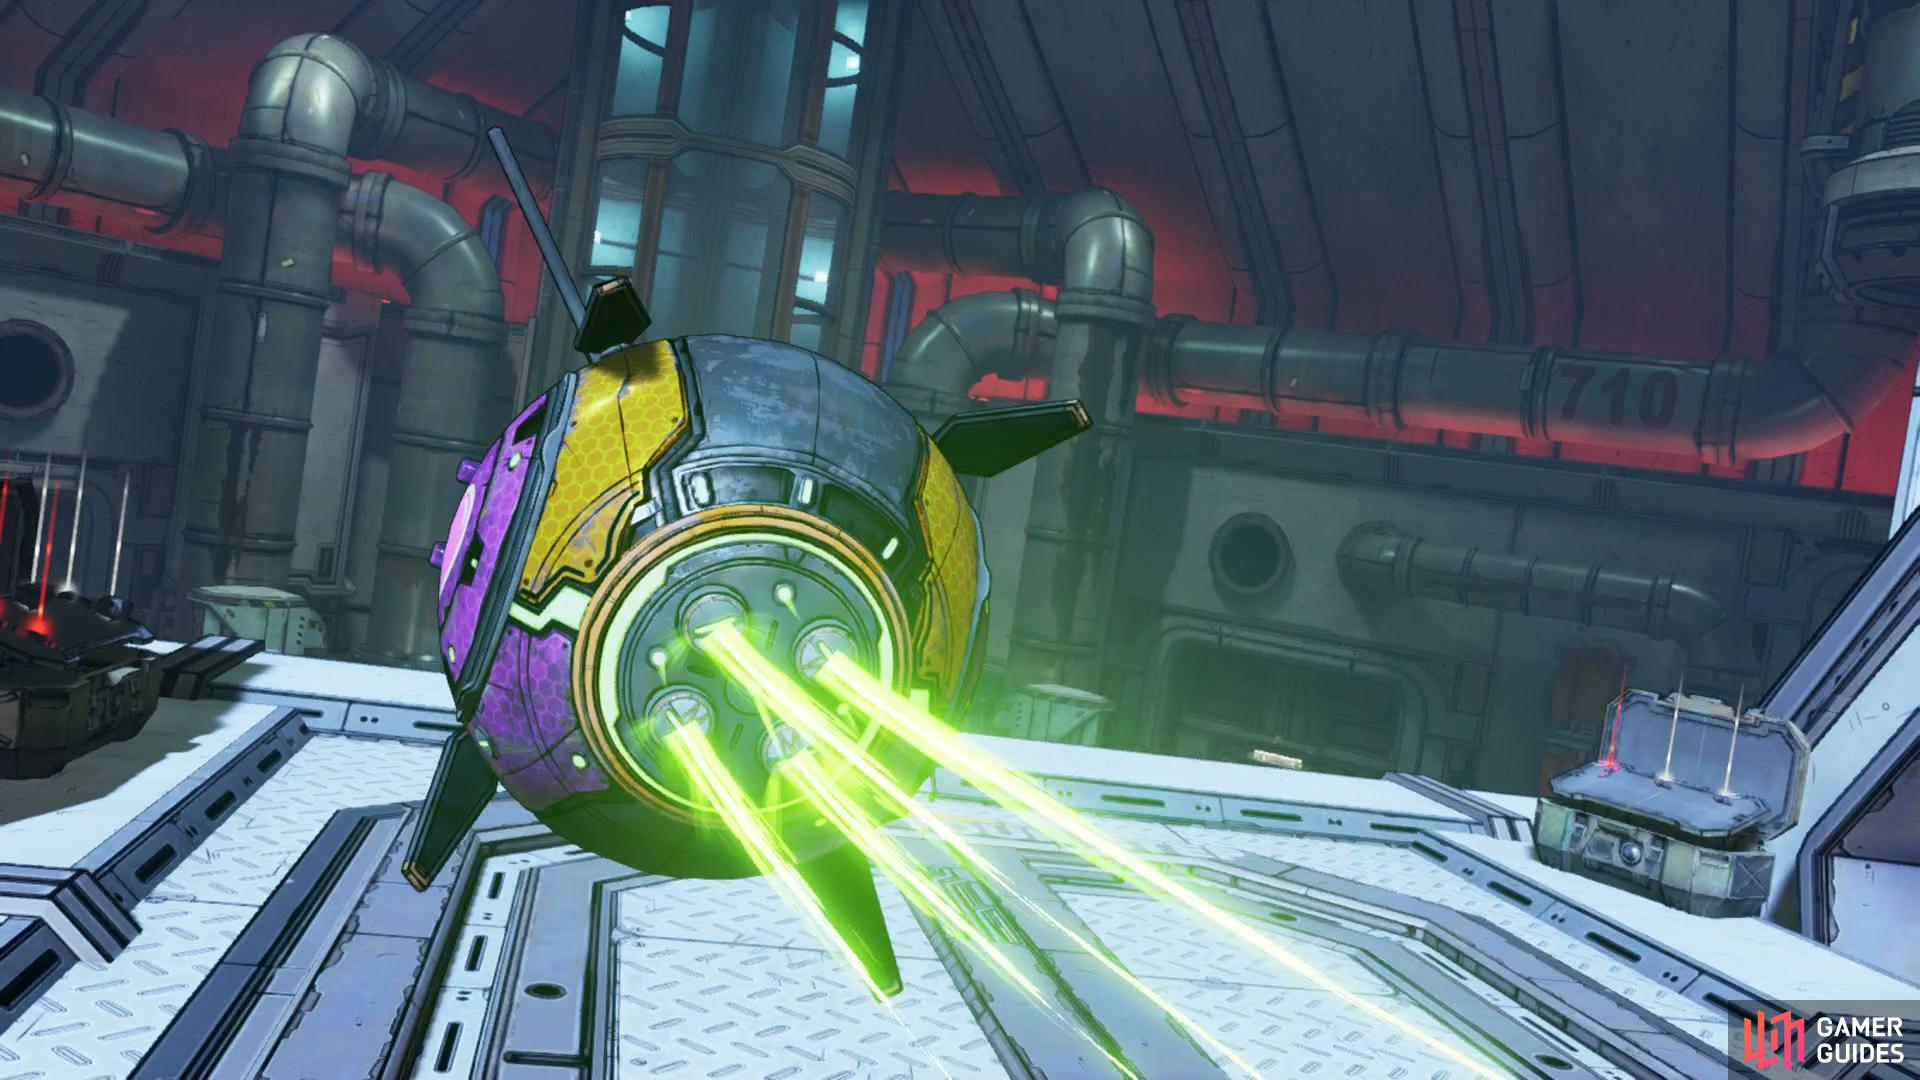
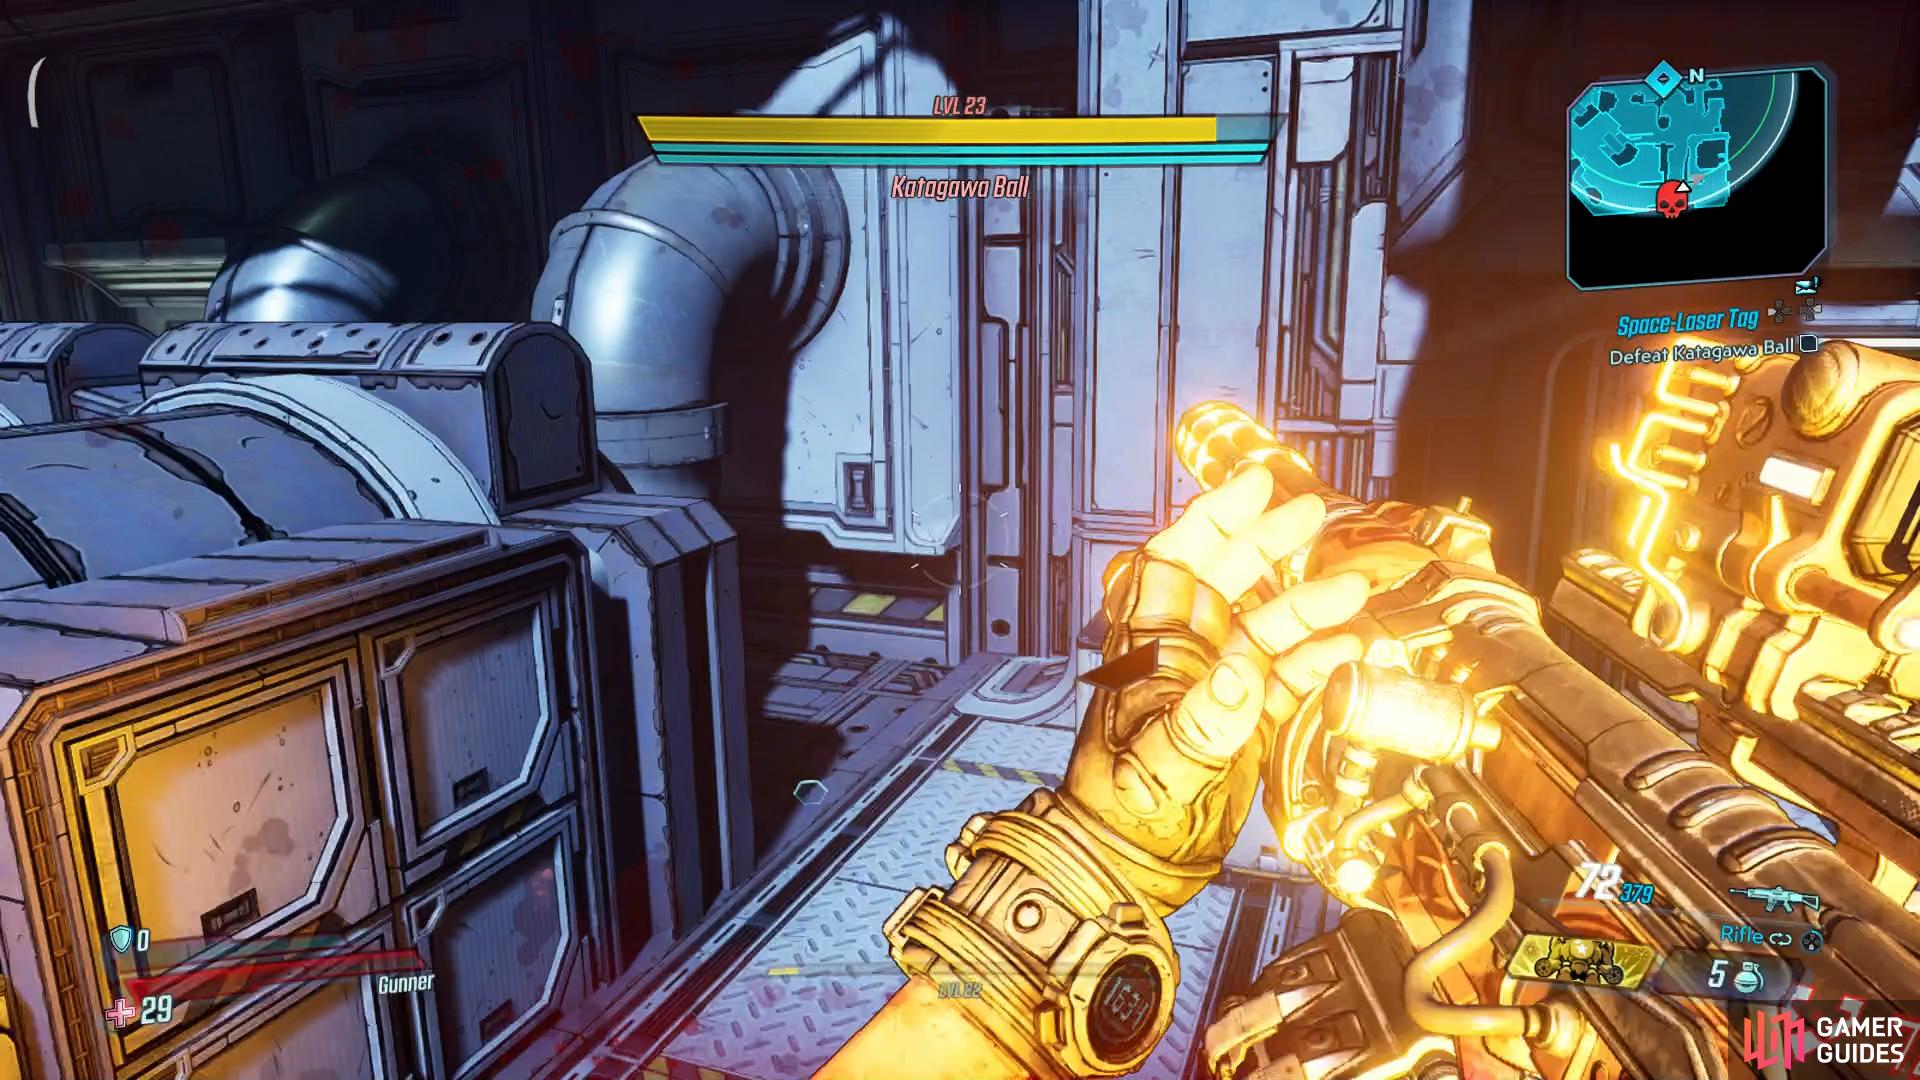
Boss: Katagawa Ball
Despite it’s large presence, Katagawa Ball is a tough boss with three health bars to deplete. If you come into the battle with guns having different elements, then you’ll have an easier time. The arena is large with lots of places to hide or take cover and you’ll need to utilize them if you want to get the best of Katagawa Ball. One of the best places to make use of cover is in the southeast corner of the arena, the cover is high and you can pop out every now and then to get some shots off.
To begin with, Katagawa Ball will have Armor up so Corrosive Weapons are what you should be firing with if you want to shed it quickly. Katagawa Ball will fire large Fireballs and Rockets at you during this phase and the Fireballs will leave a flame surface in it’s wake, be sure to move out of the cover you was in once he fires them off. The weak point for every phase is quite obviously, the center of the Ball so you shouldn’t have trouble hitting it and weapons with large splash damage will make it even easier to hit.
Once the first phase is dealt with, the Armor will disappear and you’ll have to deal with two life bars of Shield which as you may remember, is weak to Shock based weapons or skills, switch accordingly and continue your assault in the same location. At this point, Katagawa adds Corrosive blasts to his arsenal which, as you may expect, leaves a pool of Corrosive in it’s wake. Additionally, you’ll have to deal with Cryo Balls and the same Fireballs from the fist phase, the battlefield can become a real minefield at this point.
This is the reason for the cover mentioned earlier in this strategy, here you are mostly free from all attacks so long as you move in and out and you can recover your own Shield safely at most times. Finally, for the third and final phase, Katagawa Ball will errect an electrical shield around him and attempt to ram you, this will deal heavy Shock damage to you should you get caught in it so pick your times to come out of cover and finish shooting at Katagawa Ball to put it down for good.
Legendary SMG Tsunami
Katagawa Ball does have a Unique Legendary SMG that he can drop, the very useful Maliwan [Tsunami]. This particular gun will alternate between Shock and Corrosive in a wide radius, a particularly useful gun that should last you a long time. In fact, Katagawa is a useful boss to farm as he has the ability to drop many of the random world Legendaries, just remember to begin the next mission before he can start respawning.
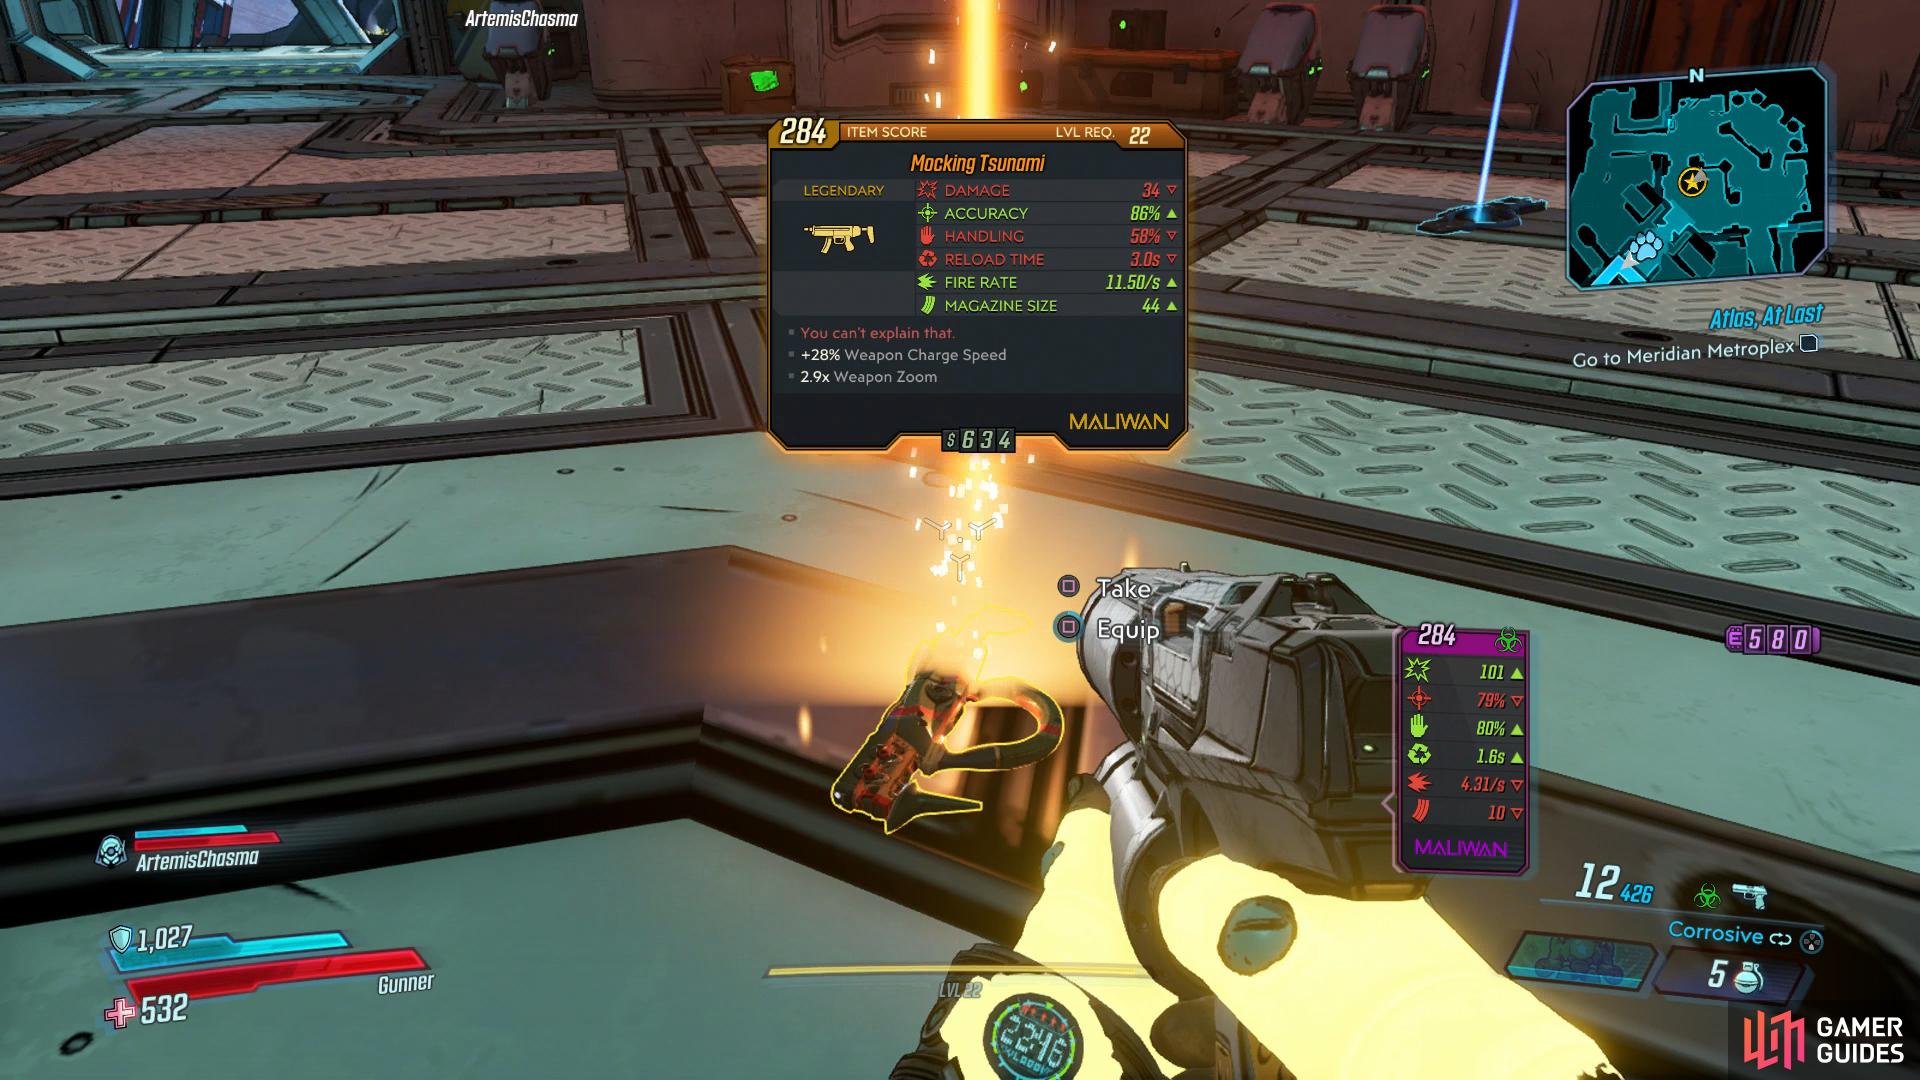
The Tsunami is a fantastic weapon, be sure to try and farm it.
Take Vault Key fragment, Give Vault Key fragment to Tannis
With the battle over, head to the center of the control room and pocket the Vault Key fragment at last and the door in front of you will open up. Before you head back to Sanctuary, loot the Red Chest in this room and then make your way from the Drop Pod of this area over to the malfunctioning elevator just before mainteance earlier. The room that had a Firewall is now open and below, you’ll find the final Red Chest of this area.
With all of that handled, return to Sanctuary and hand over the fragment to Tannis before heading over to Lilith on the bridge to complete the mission.
No Comments