
If you’ve explored Jack Frost’s Playground, then you should already have all of the trip doors up in that area, including the Coldera one. This was after obtaining the airship in Chapter 7 in this guide, so refer to that if you haven’t done it yet to secure all of the treasures. There are still a few caves/shrines to explore, though, since enemies were a bit too high in levels earlier in the game.
The Frozen Caves/Shrines
First up is Freezybones Cave, which is west of the Jack Frost’s Playground trip door and just a little east of “Permafrost Plains” on the map. There is a higgledy stone in this cave, which wants an enigma prism. Hand one over to get Benison the Bright to join you on your adventure. There is also a chest in the final room, which contains 3 Nocturnium Nuggets.
Next up is Ice House, which is a little west of Freezybones Caves, in the same area on your map. There’s another higgledy stone in this mini-dungeon, which asks for a sturdy bone; give it to have Malignity the Indignity join you. In the middle room is a Zagg, a boss you fought before in the high-leveled area of the Forest of Niall, but it’s a normal monster here. There’s a chest in the same room (3 Scentless Saps) and in the final room will have a Tainted Monster waiting for you. Level 63 Zapple is a grimchilla mage, which is absolutely easy to defeat. You’ll receive a purple Flutterby Staff for your troubles and will have one less Tainted Monster to deal with later.
Glacial Grotto is another cave found to the north of the Crash Site, on the other side of the mountains, but you explored it earlier and only found a single chest (3 Seraphic Silks). The final dungeon is Shivery Shrine and is pretty much straight east from Glacial Grotto. The single chest inside holds a Shiny Hearty Pendant and other than that, there is a Dreamer’s Door at the end. This one is quite long, being 18 floors in total, and the boss at the end is one of those bigger robots that can roll up into a ball (it’s level 59 at Danger Level 1).
Shrine of Unity

You should have the Coldera trip door from earlier
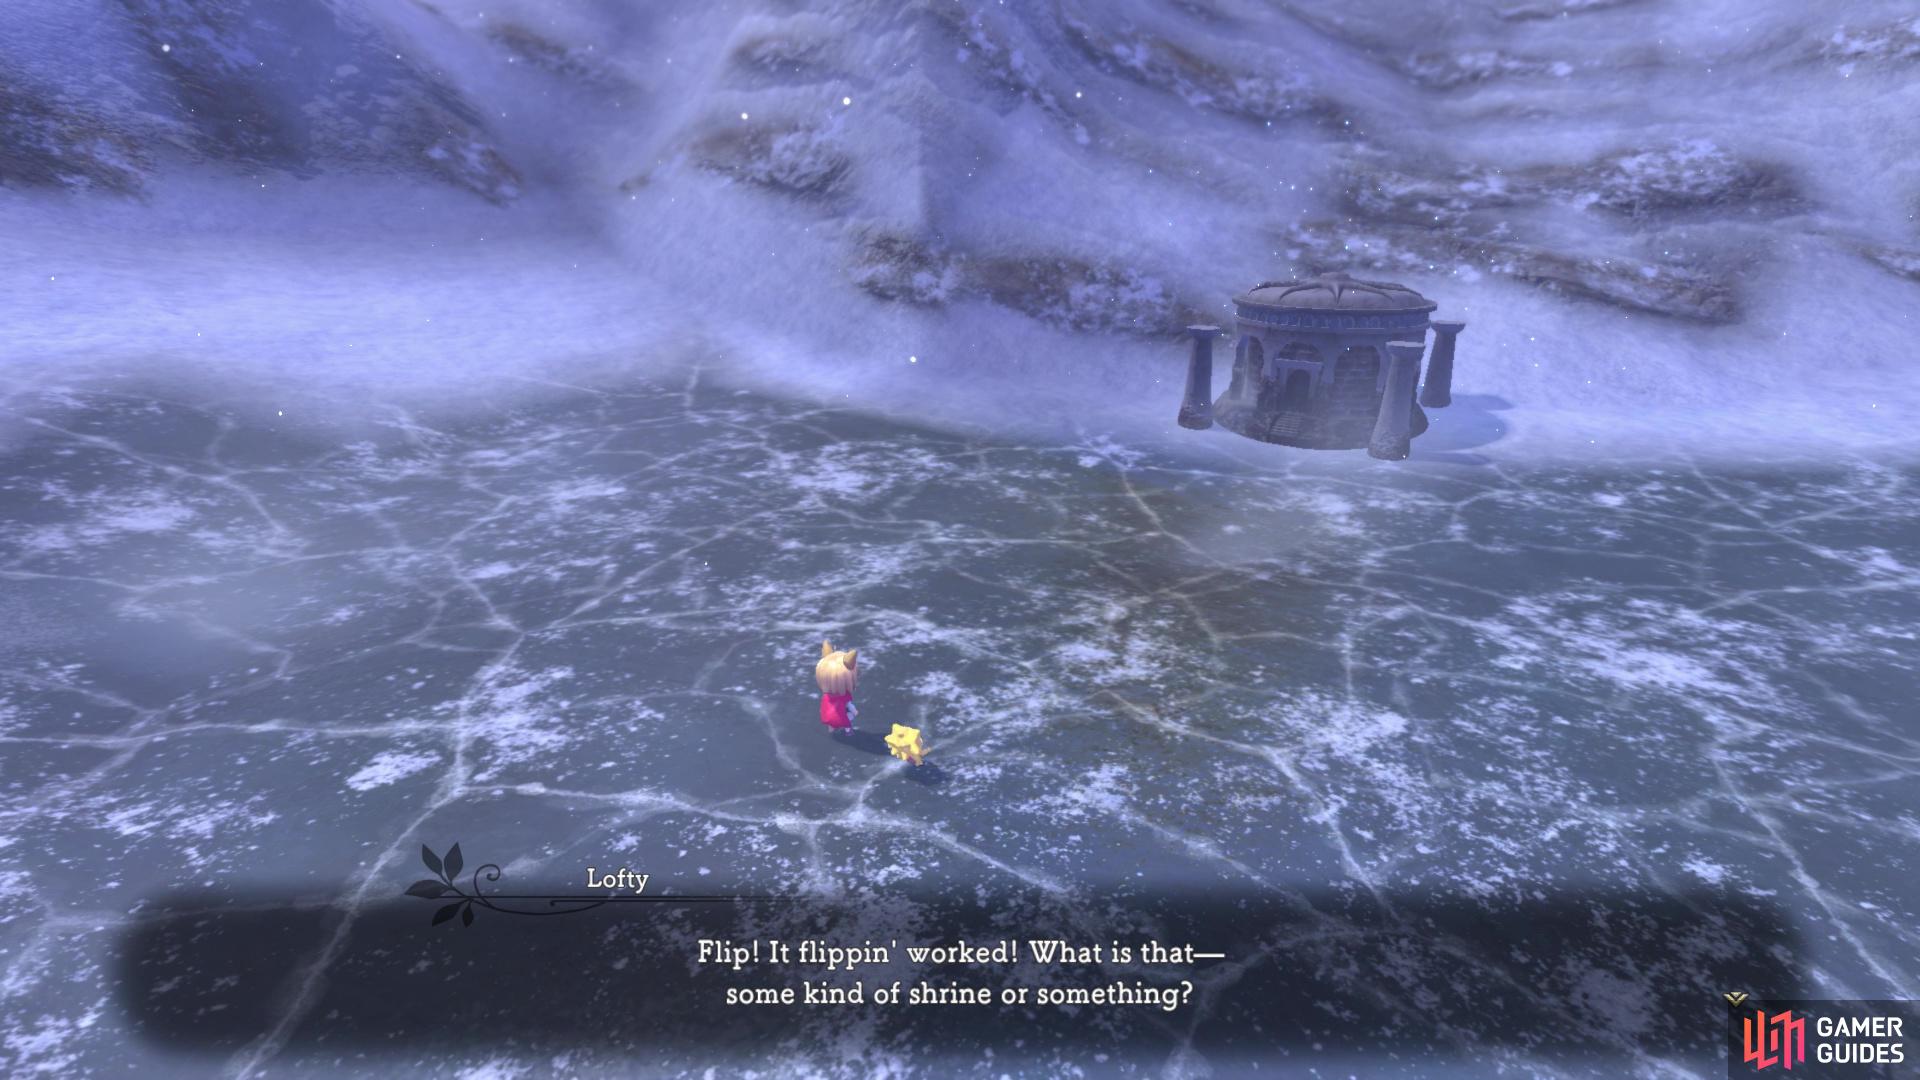
The Shrine of Unity will appear once you get close enough
Exit to the world map and board the Zippelin, then fly into Coldera and land. A scene will play out where Evan says the magic words, causing a shrine to appear out of nowhere. Enter it and when you get to the first split, head west first. Go to the dead end along the way for a chest, which contains a Savior’s Tear. Continue north and around to find yourself on the eastern path from before, where you can find a trail that leads further into the dungeon. You’ll come to another fork in the path, but both lead to the same destination, where some more enemies will be waiting for you.
Delve deeper and you will eventually come across a Brillianticore, which isn’t all too different from the normal Manticores you’ve fought thus far in the game, although it can summon some electricity, similar to the Windwyrms. At the next split, go west to find a chest at the end (Wizardly Crystal Robes), then double back and head north to reach the end. Before you can react to anything, the shrine awakens and a boss fight ensues.
BOSS - Temper Temple
One look at this boss will show that it’s not much of a difference to the Mossy Monument enemy, but this one is slightly different and more akin to the Crystal Crypt enemy around Broadleaf. It shares the one-two punch, followed by launching some fireballs that home in on your position. It also has a standalone spin attack that covers a wide range and it can also shoot its arm at you. Lastly, once it reaches a certain HP threshold, it can charge up and unleash a very large area-of-effect blast. There isn’t really much to say about this boss, since you’ve fought its kind plenty of times.
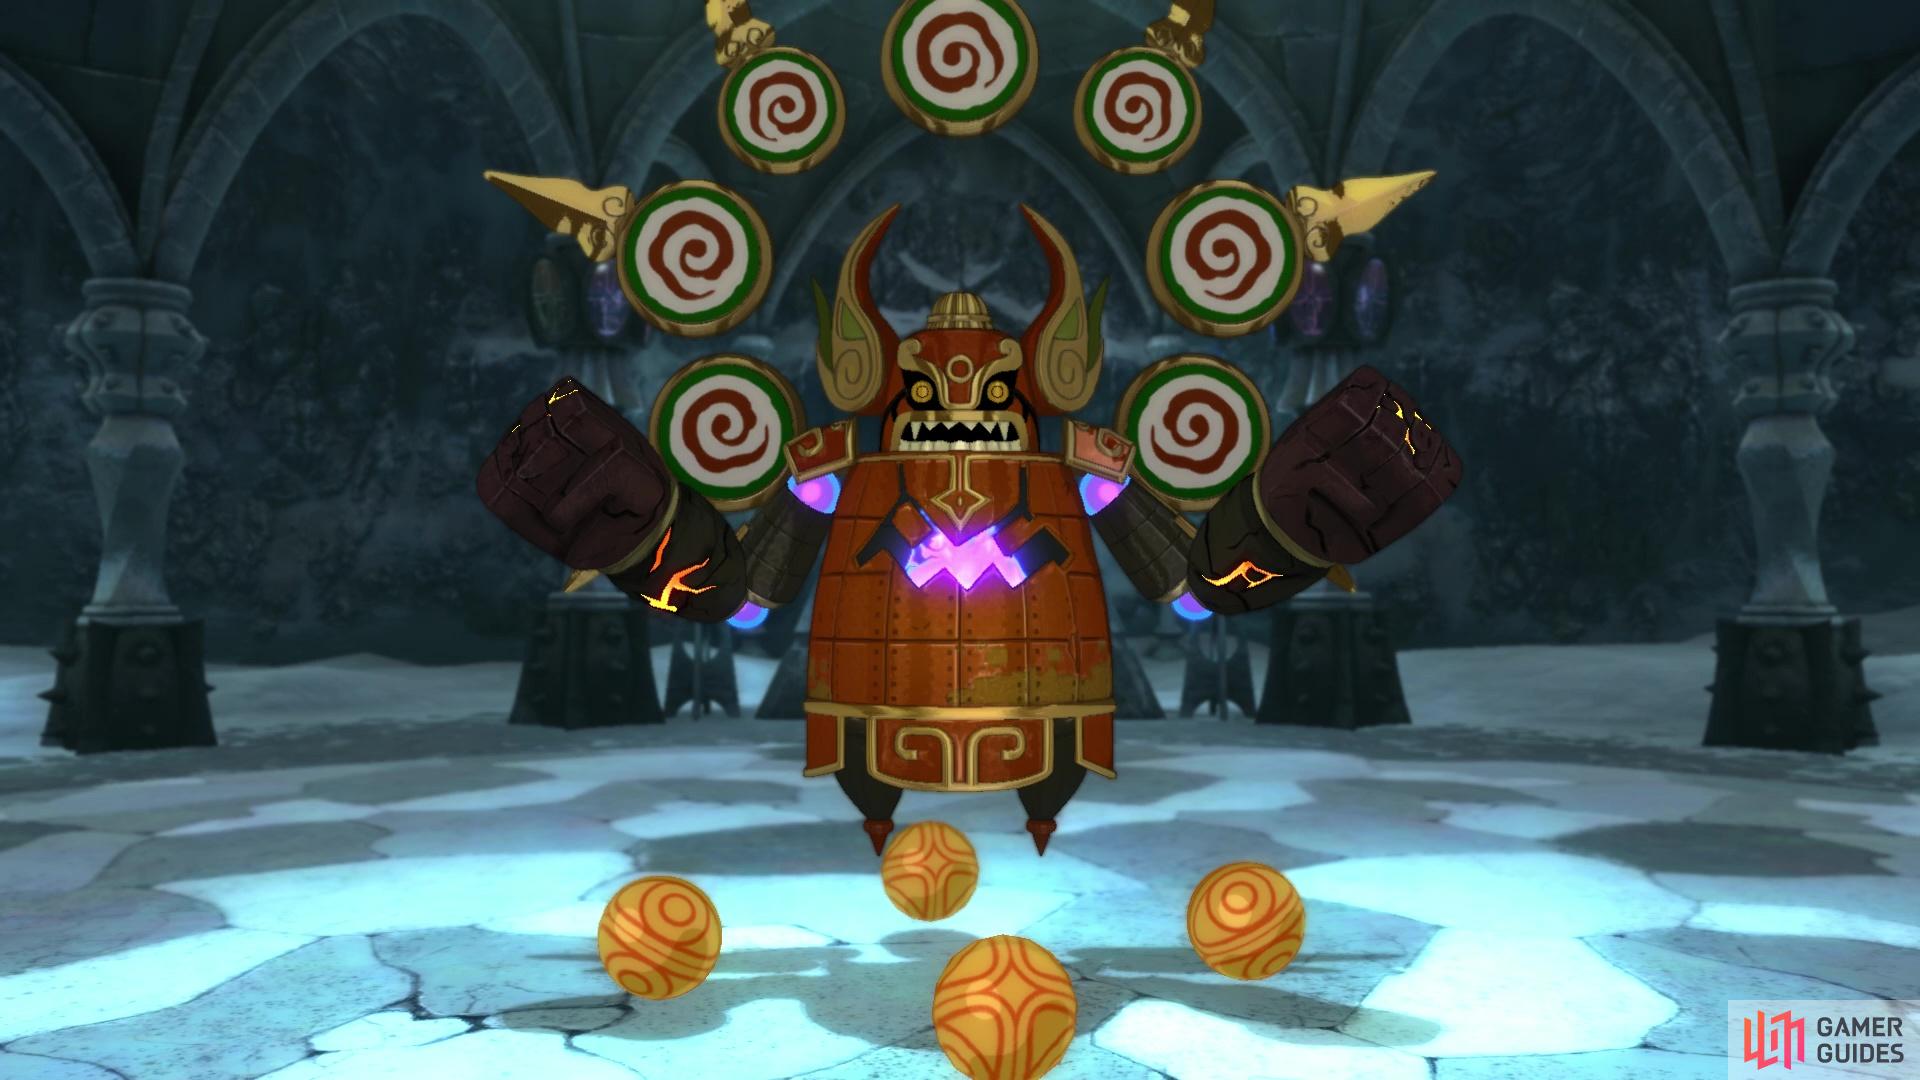
Despite its looks

Temper Temple isn’t much different than the other enemies of the same type
Upon defeating the Temper Temple, a cup will magically appear on the altar, so go ahead and retrieve it to get the Cup of Communion. Return to Evermore and enter the throne room, where you will want to ask Bracken to start development on the Sword of Unity. A few scenes later and you will finally grasp the Sword of Unity in your hands. This sword might be weaker than your others, but it has a special ability the others do not, which is boosted attack and defense against the Horned One. Anyway, the final showdown with Doloran is fast approaching…
No Comments