Published
Title
Score
Editor's Choice
Publisher
Published
Title
Publisher
Bionis' Interior
Other Collection
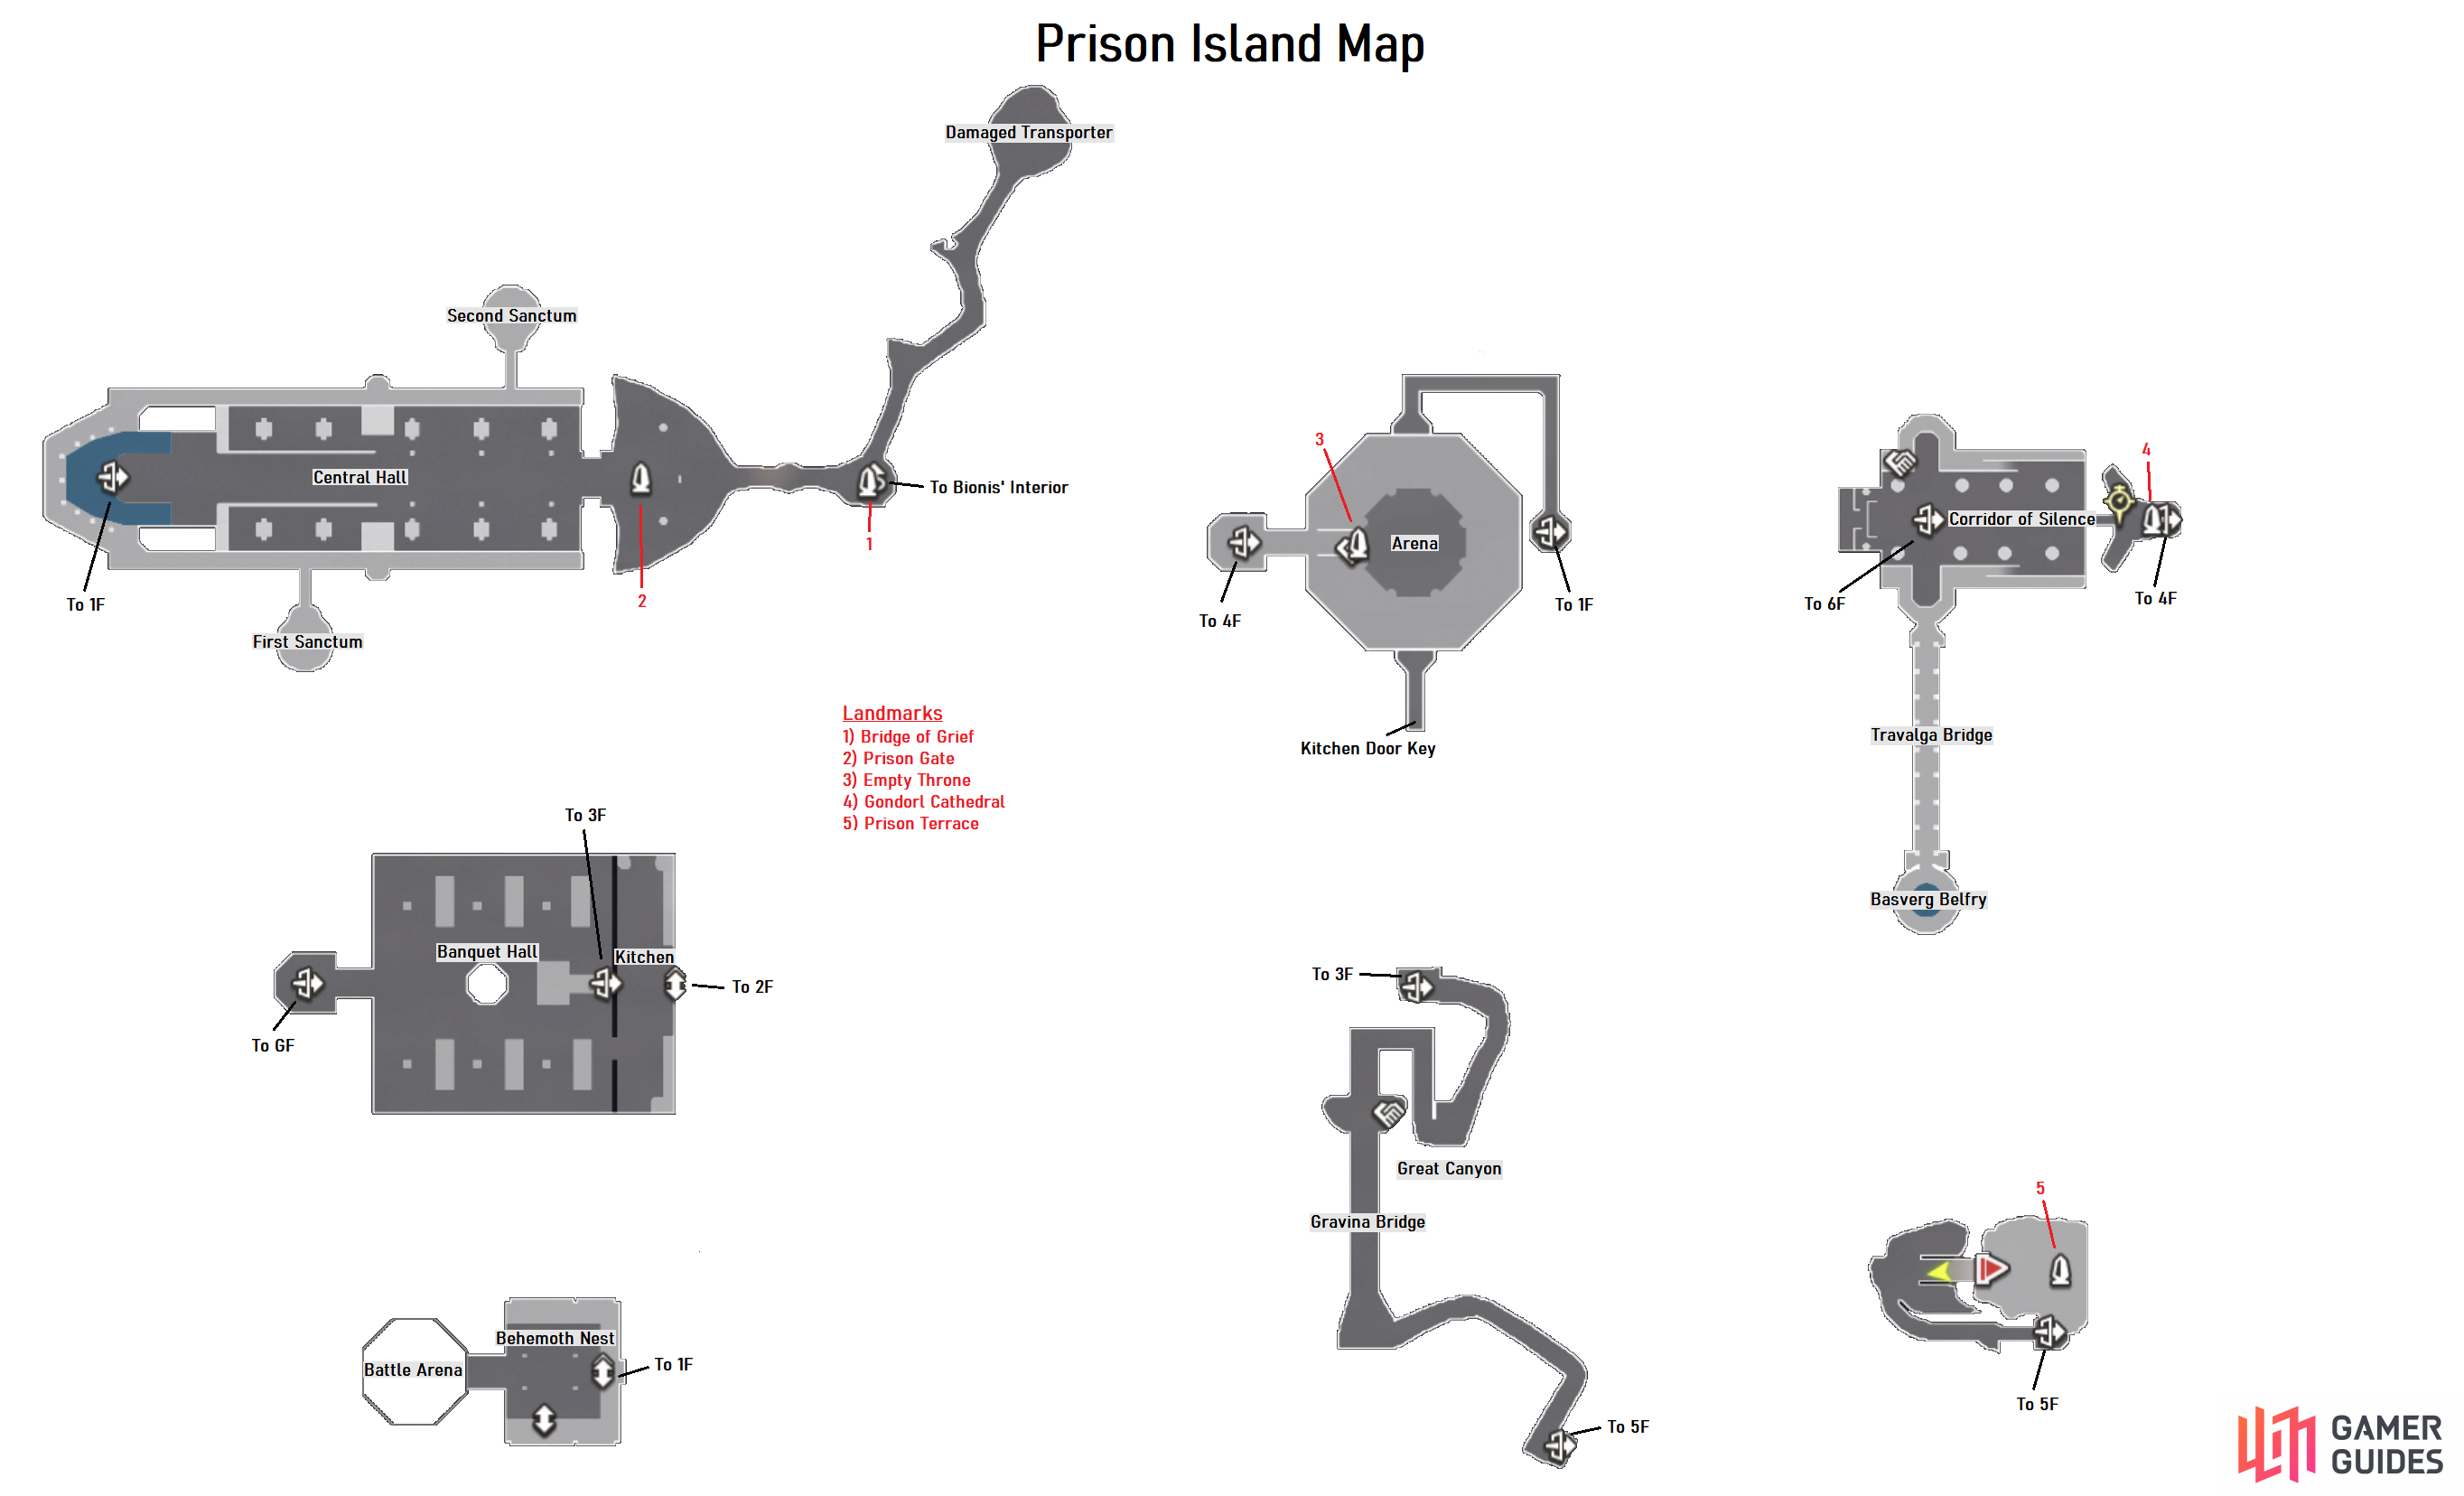
Prison Island is another area, in which you visit twice during the main story. The first visit has you exploring a limited number of floors and while there are some enemies, they are limited in number and you won’t find any collectibles. On the second visit, the entire place is opened up and enemies will be a higher level, plus you will also run into Unique Monsters this time. In order to access the First and Second Sanctums, you need to raise the Bone Pillar, then jump down from the sides to the ledges above the Central Hall, where you will be able to get to the Sanctums. There is a Kitchen Door Key on 3F, at the dead end hall to the south, which basically allows you easier access to the Kitchen area on 1F.
Collectopaedia
Category
Items
Reward
Fruit
Dry Lemon, Death Lychee, Hell Raspberry, Deadly Kiwi
Break V
Animal
Dancing Squirrel, Lightning Weasel, Angry Monkey
Good Footing V
Bug
Senorita Scarab, Emperor Beetle
Agility Up V
Nature
Absurd Branch, Insanity Moss
Strength Up V
Parts
White Cover, Modern Resistor, Green Cam, Strong Screw
Ledios Cuisses
Strange
Blue Glow, Blue Blood
Ether Up V
The reward for finishing the Collectopaedia for this area is a Ledios Plate (Heavy Chest Armour)
Landmarks
Landmark
When Available
Area
Bridge of Grief
Second Visit
GF
Prison Gate
Second Visit
GF
Empty Throne
Second Visit
3F
Gondorl Cathedral
Second Visit
5F
Prison Terrace
Second Visit
6F
Locations
Location
When Available
Area
Damaged Transporter
Second Visit
GF
Central Hall
Second Visit
GF
First Sanctum
Second Visit
GF
Second Sanctum
Second Visit
GF
Banquet Hall
Second Visit
1F
Kitchen
Second Visit
1F
Behemoth Nest
Second Visit
2F
Battle Arena
Second Visit
2F
Arena
Second Visit
3F
Gravina Bridge
Second Visit
4F
Great Canyon
Second Visit
4F
Corridor of Silence
Second Visit
5F
Travalga Bridge
Second Visit
5F
Basverg Belfry
Second Visit
5F
Normal Enemies
Enemy
Level
Location
Babel Deinos
72-75
Banquet Hall, Gravina Bridge
Babeli Barg
74-76
Central Hall, Gravina Bridge (after defeating Babel Deinos
Caura Balgas
75
Accompanies Fiendish Auburn
Cratere Nebula
77
Kitchen
Fiume Nebula
74
Central Hall
Gimran Egel
75
Travalga Bridge
Gracile Nebula
76
Arena
Newgate Laia
75-76
Flying around in outside areas
Obart Obart
76
Banquet Hall
Randa Nebula
74
Between Bridge of Grief and Damaged Transporter
Sanjibal Behemoth
78
Behemoth Nest
Solare Nebula
77
Corridor of Silence
Tored Ageshu
72-74
Banquet Hall
Uragano Nebula
76
Gravina Bridge
Unique Monsters
Unique Monster
Level
Location
Abnormal Clone Barg
77
First Sanctum
Ageless Moabit
75
Damaged Transporter
Cold Ageshu
77
Kitchen
Fiendish Auburn
78
Gravina Bridge (after defeating Babel Deinos
Inferno Heinrich
76
Kitchen
Majestic Clone Barg
77
Second Sanctum
Masterful Gigapur
77
Travalga Bridge
Serene Imlaly
76
Banquet Hall
Scroll down
Guide Information
Publisher
Platforms,
Genre
Guide Release Last Updated Version History Guide Author
Get access to this feature and a lot more by upgrading to a premium account.
Find out more
Already subscribed? Log in instead


 Deinos
No Comments