


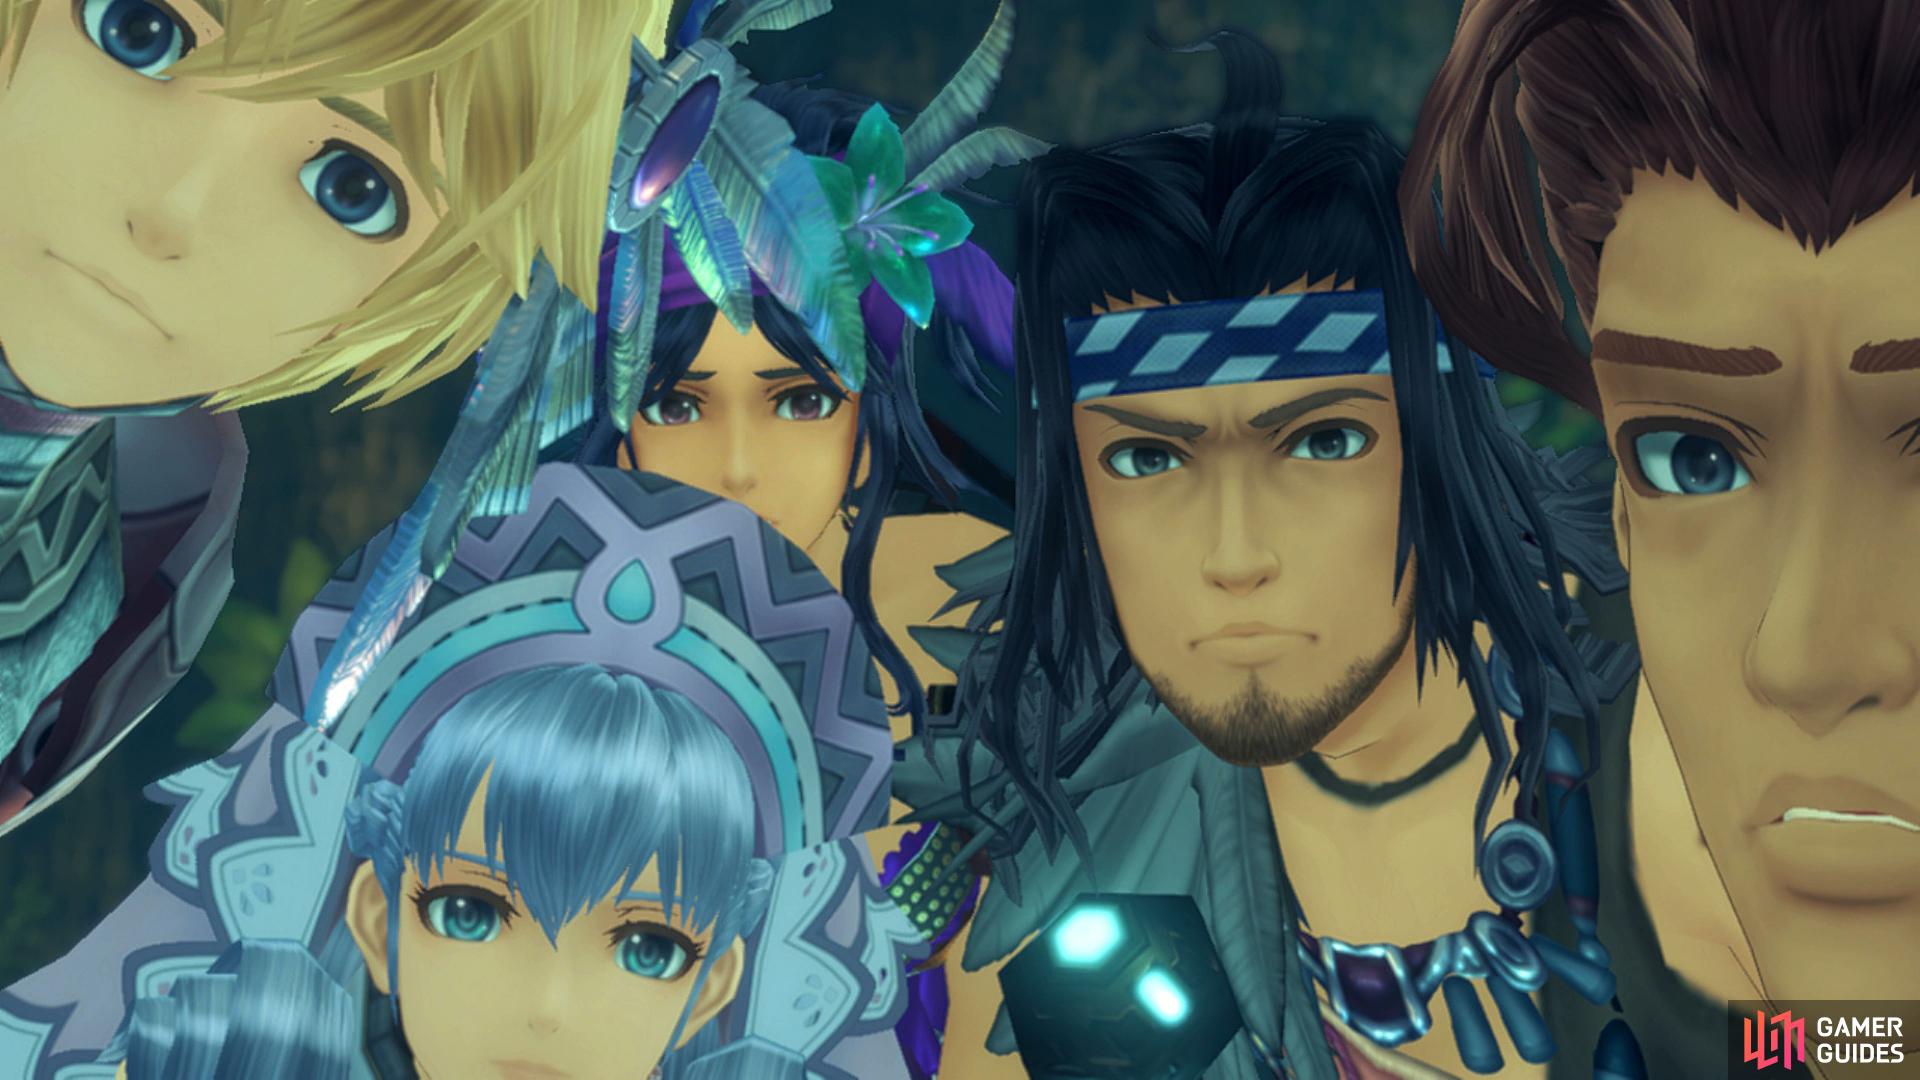
The Home of the Nopon
| Key Information | Details |
|---|---|
| New Quests | 47 |
| New NPCs | 37 |
| Heart-to-Hearts | 6 |
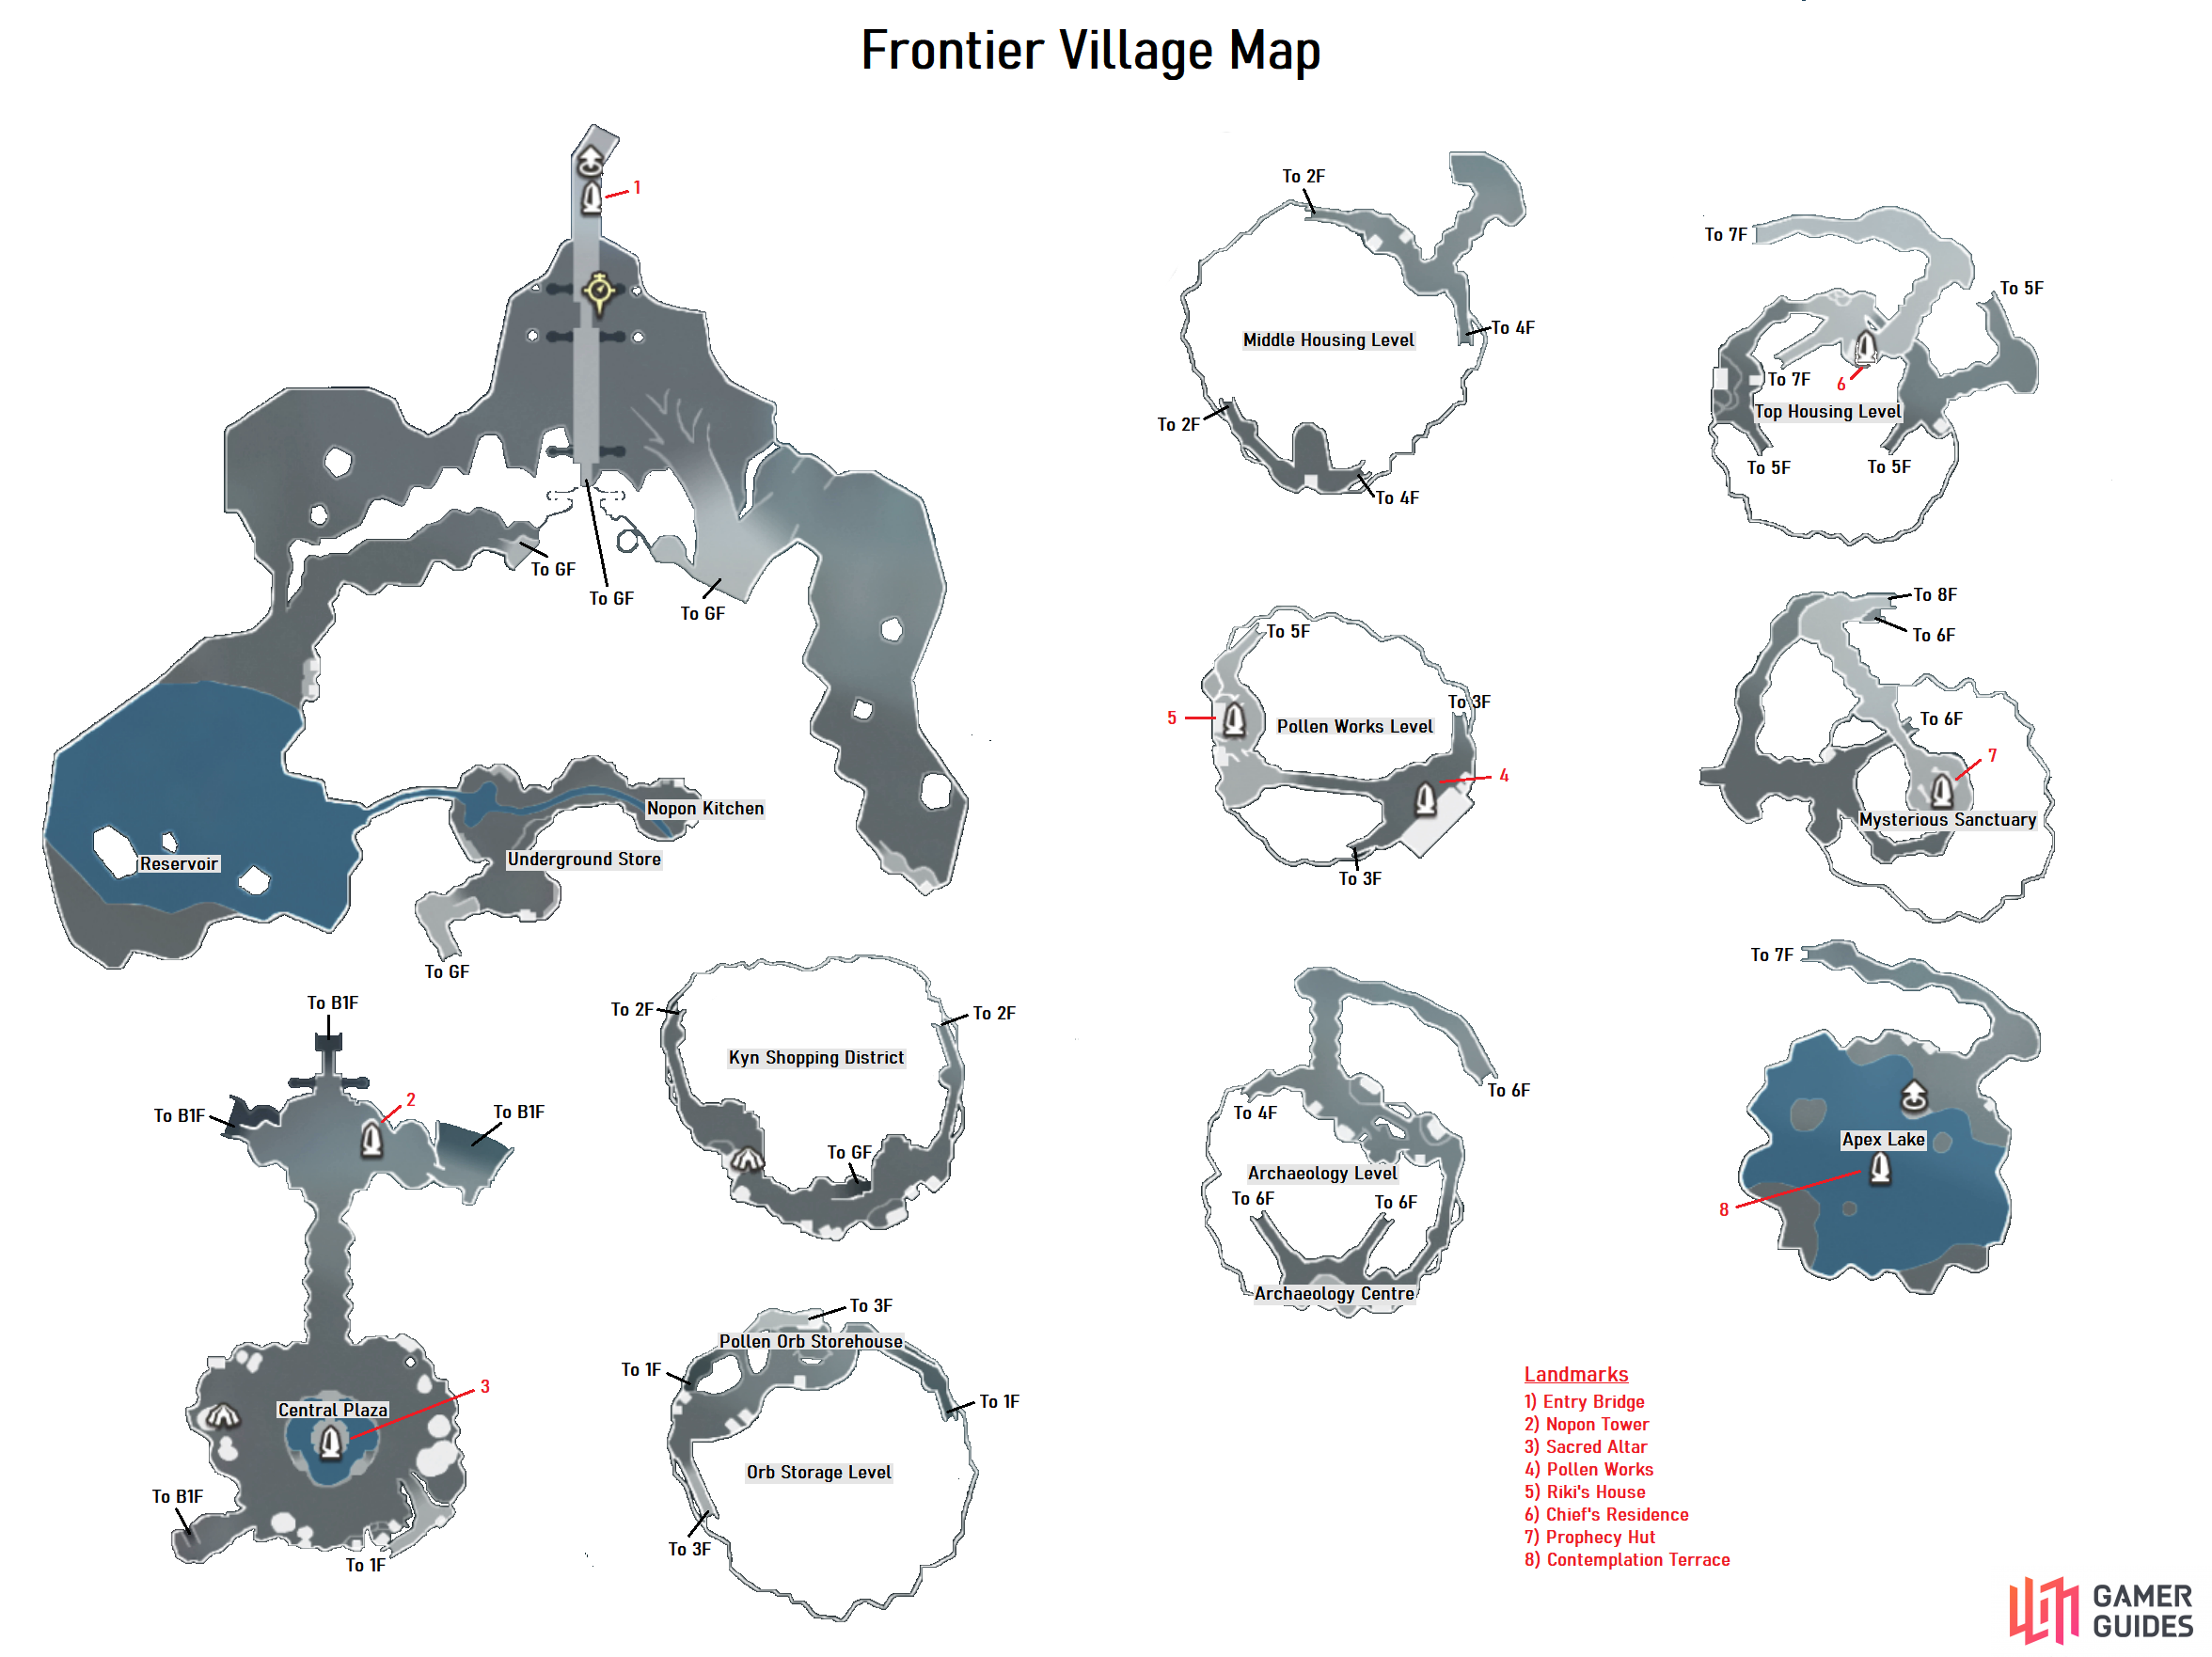
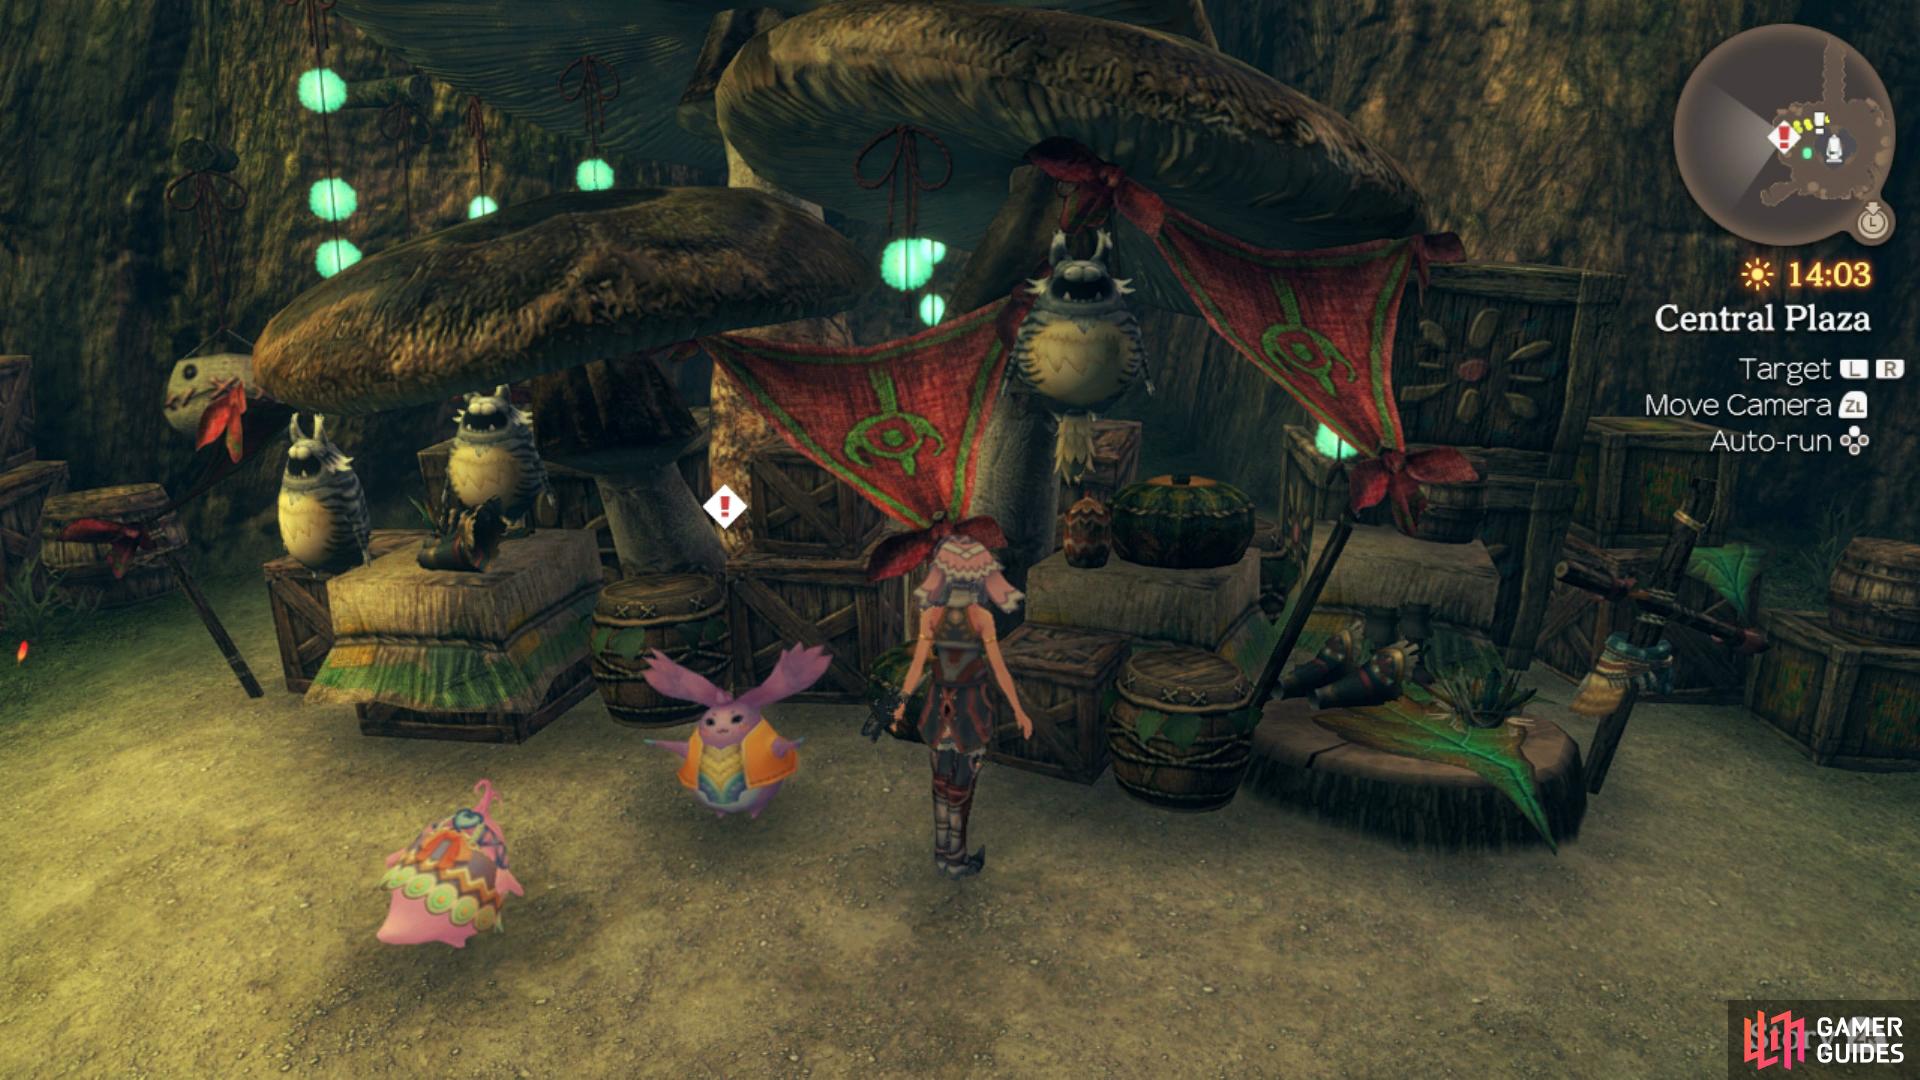
You’ve finally arrived at the large tree in the center of Makna Forest and the home of the Nopon. Once you regain control, Melia will leave the party temporarily and you’ll unlock the Sacred Altar and Central Plaza Landmark and Location respectively. Frontier Village is a sprawling maze of an area, as the map above can attest to and there’s as many Quests here as there are in Colony 9. Before you get started with any of that however, take care of the story events here and map the area so that you have your full party back for the Quests.
Begin by heading to the southwest to find some stairs leading down to B1F to unlock the Underground Store and then continue down to the bottom and head east at the intersection to unlock Nopon Kitchen. Head out to the west now to unlock the Reservoir before warping back to Sacred Altar. Make your way north here to unlock the Nopon Tower Landmark and register a Heart-to-Heart before heading across the bridge to unlock the Entry Bridge Landmark near the opening of the area.
Return back to the south and take the stairs up in the southeast to reach 1F where you’ll unlock Kyn Shopping Street and then take either stairs up to 2F where you’ll unlock Orb Storage Level, head onto this floor to search the northeast where you’ll unlock Pollen Orb Storehouse. Take the northern stairs up to the 3F to unlock Middle Housing Level and then continue up more stairs to reach 4F and unlock Pollen Works Level location and Pollen Works Landmark. Head to the nearby Heart-to-Heart to register it and then make your way across the bridge to unlock the Riki’s House Landmark and register another Heart-to-Heart.
Take the nearby stairs up another level to reach 5F and unlock Archaeology Level. Head around to the south of this level to unlock Archaeology Centre and then take the stairs up to 6F to unlock Top Housing Level. Make your way to the northern house to unlock the Chief’s Residence Landmark and then take yet more stairs up to reach 7F and unlock Mysterious Sanctuary. Ignore the Story Flag for the moment and take the stairs up to unlock the Prophecy Hut Landmark and register the nearby Heart-to-Heart. Continue north outside and take the stairs higher still to reach 8F and unlock Apex Lake along with another Heart-to-Heart to register and the final Landmark, Contemplation Terrace. Take a look at your map at this point, if you followed the directions given here you should find the entire map open.
With that out of the way, make your way back down one level and register the Heart-to-Heart next to Melia before triggering the cutscene. Melia will rejoin the party once you regain control however there’s still some more story events to take care of before you go hunting for Quests (one of which will unlock even more Quests). Make your way back to Sacred Altar on the ground floor and speak with the Chief to trigger more cutscenes.
An Errand for the Heropon
Before Riki can officially join the group, you’ll need to assist him with getting ready for the journey ahead. Head to the west and speak with the Nopon at the Armour Shop to obtain Sabre Gloves and then head to the 1F to find the Weapon Shop and obtain the Warrior Gnasher to complete this short Story Quest and trigger another cutscene as Riki officially joins the party.
Make your way to the Armor Shop
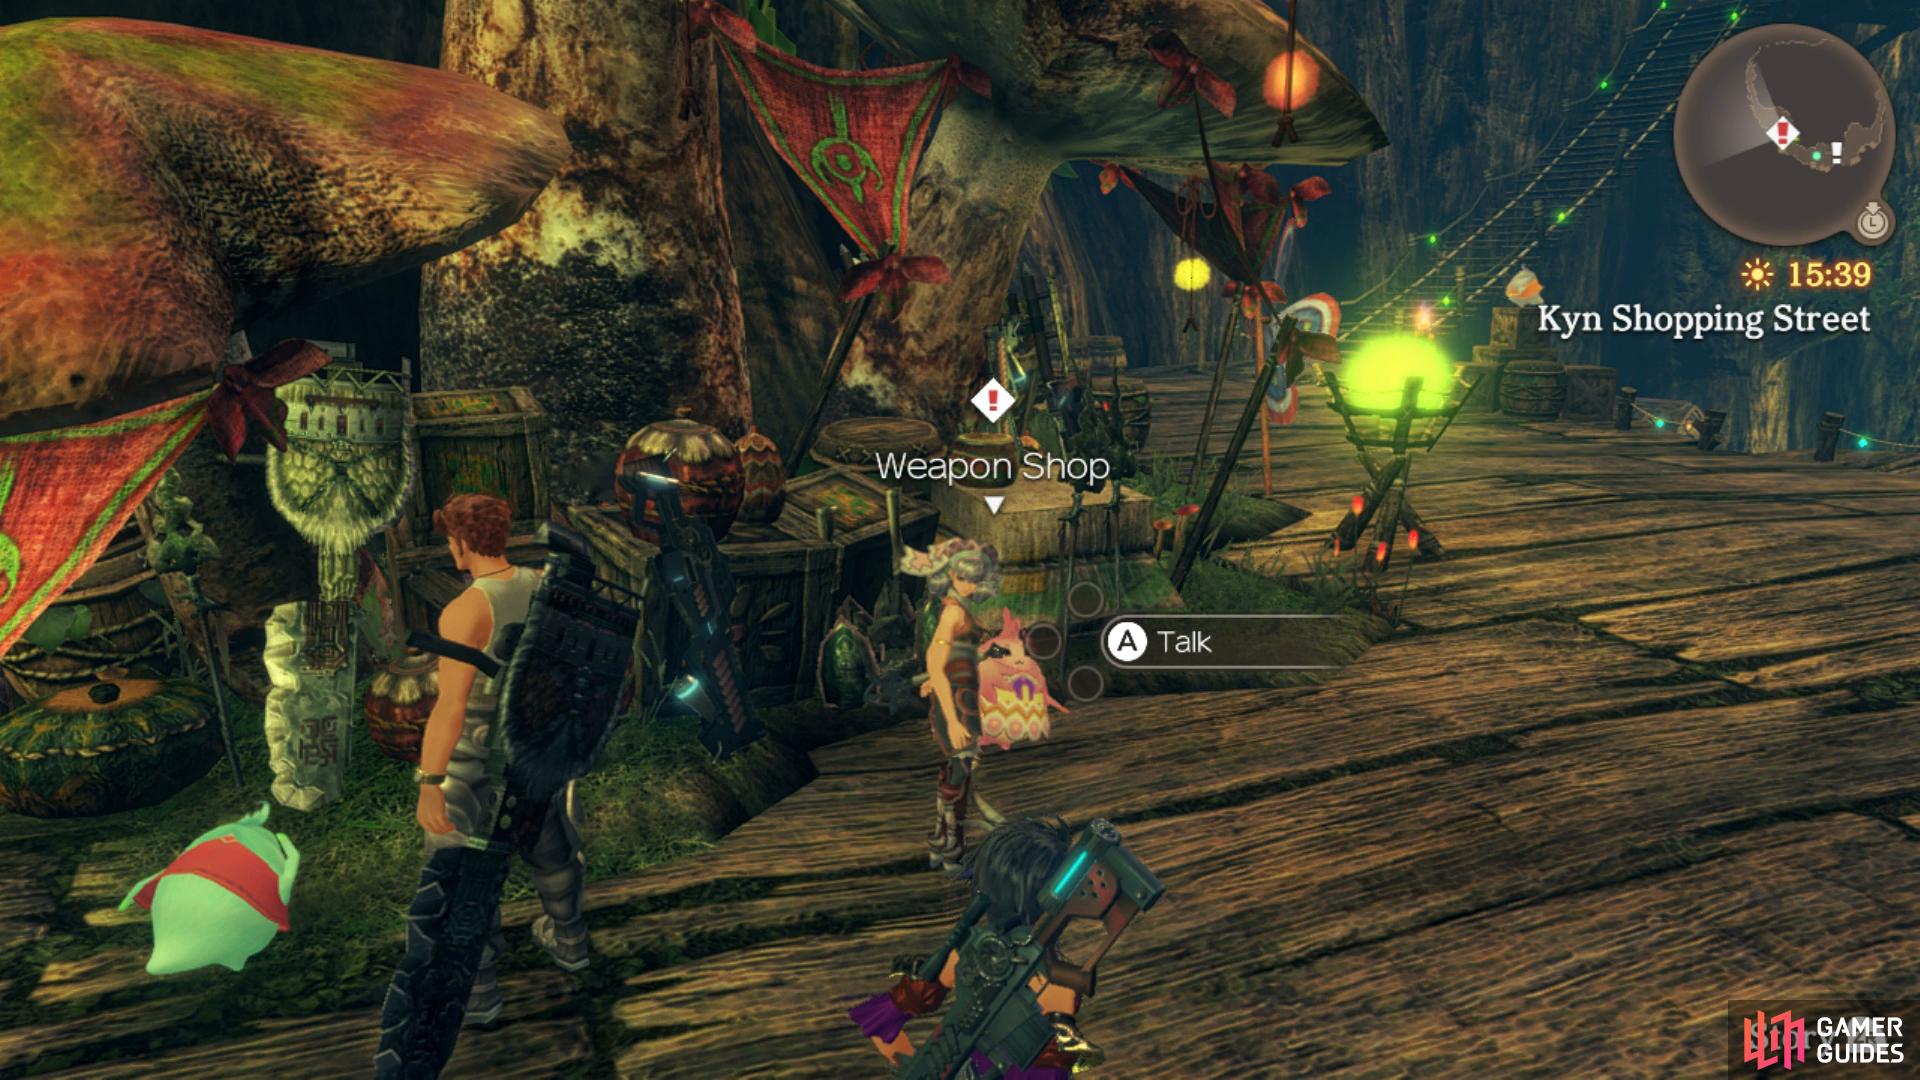
followed by the Weapon Shop to gather Riki’s equipment.
The Heropon is a rather unique party member that can fill a lot of roles but his most important one is the party support he provides along with his unique Talent Art, Yoink! which is the only way to steal items (along with stats) from enemies in the game. Riki has the highest natural HP in the game outside of using Skills and Gems so you could load him with Aggro gems for a tank, use his healing abilities as a healer or use his DoTs (although a little worse than Melia’s) to deal constant damage, there’s nothing Riki can’t do. He has rather interesting Skills to unlock such as increasing Movement Speed or more importantly, increase the drop rate of Gold Chests. As for party composition, he can fit in most parties but a full party of Riki, Melia and Sharla (also known as the Ether party) is useful for some of the game’s toughest optional battles.
Questing Around Frontier Village
As mentioned at the top of the page, Frontier Village is chock full of Quests and people that will also take you around the Makna Forest area. As always, it’s best to register everyone first, a task this is time consuming given the layout of the area. Begin by changing the time to 08:00 and warp over to the Entry Bridge Landmark on B1F and leap to the bottom to get started (you’ll work your way up the tree).
Head to the northwest here to find a Nopon Villager who will offer you Challenge 1 while you’ll also find Norara here. Head south up the stairs here and then go east to find another Nopon Villager who will offer you Material Quest 1 then head over to the east side along the bottom to find yet another Nopon Village, this one offering Collection Quest 2 while you’ll also find Deki wandering around down here. Finally, make your way east of the Reservoir to the south to find Npa and Yusa.
While still here, switch the time to 19:00 and speak to the Nopon Village to accept Search Quest 3 and then head east to find Tati. Exit back to the lake to the Reservoir to find Adidi by the edge and then head over to the eastern side to find a Nopon Village who will offer Monster Quest 1 - Parts 1 - 3 before heading to the southeast to find Ababa.
Warp to Nopon Tower next and switch the time back to 06:00 and speak to the nearby Kokora to accept Hunt for Bug-Loving Friend. Make your way south into the tree now and speak to the nearby Nopon Villager to accept Monster Quest 2 - Parts 1 - 3 while you’ll find Pipiki a little to the south of it that will offer Strange Noises from Below. Head to the west side of this area and you’ll find Kuriku then you’ll find Migaga on the structure the Chief was on earlier who will offer Fixing Time Mushrooms. You’ll find yet another Nopon, Rasha to the south of the central pool then check out the nearby Shop to purchase a bunch of Arts Manuals for Riki.
Go ahead and change the time to 18:00 now and speak to the Nopon Villager here to accept Material Quest 2. You’ll find Pokapoka here while Bana can be found to the southeast, near the stairs before switching the time back to 08:00 and heading up to 1F.
You’ll find a Villager near the stairs here who will offer Challenge 2 while you’ll find the first Time Mushroom here as part of the Fixing Time Mushrooms Quest you accepted a moment ago. Make your way over to the Shop now and purchase the next batch of Arts Manuals and then speak to Minana standing next to it. While still standing here, change the time to 11:00 to find Puko standing there and then change the time to 19:00 to find another Villager who will offer Collection Quest 1. Change the time to 22:00 now and you’ll find Kofuko who will offer Mushy Mushrooms.
Change the time back to 08:00 and head upstairs to 2F now to continue your search. Here you’ll find Dobadoba who will offer Pollen Orb Ingredients before speaking to Cherri close by. Change the time over to 19:00 now and you’ll find Dedeba to complete A Gift? that you accepted back in Satorl Marsh.
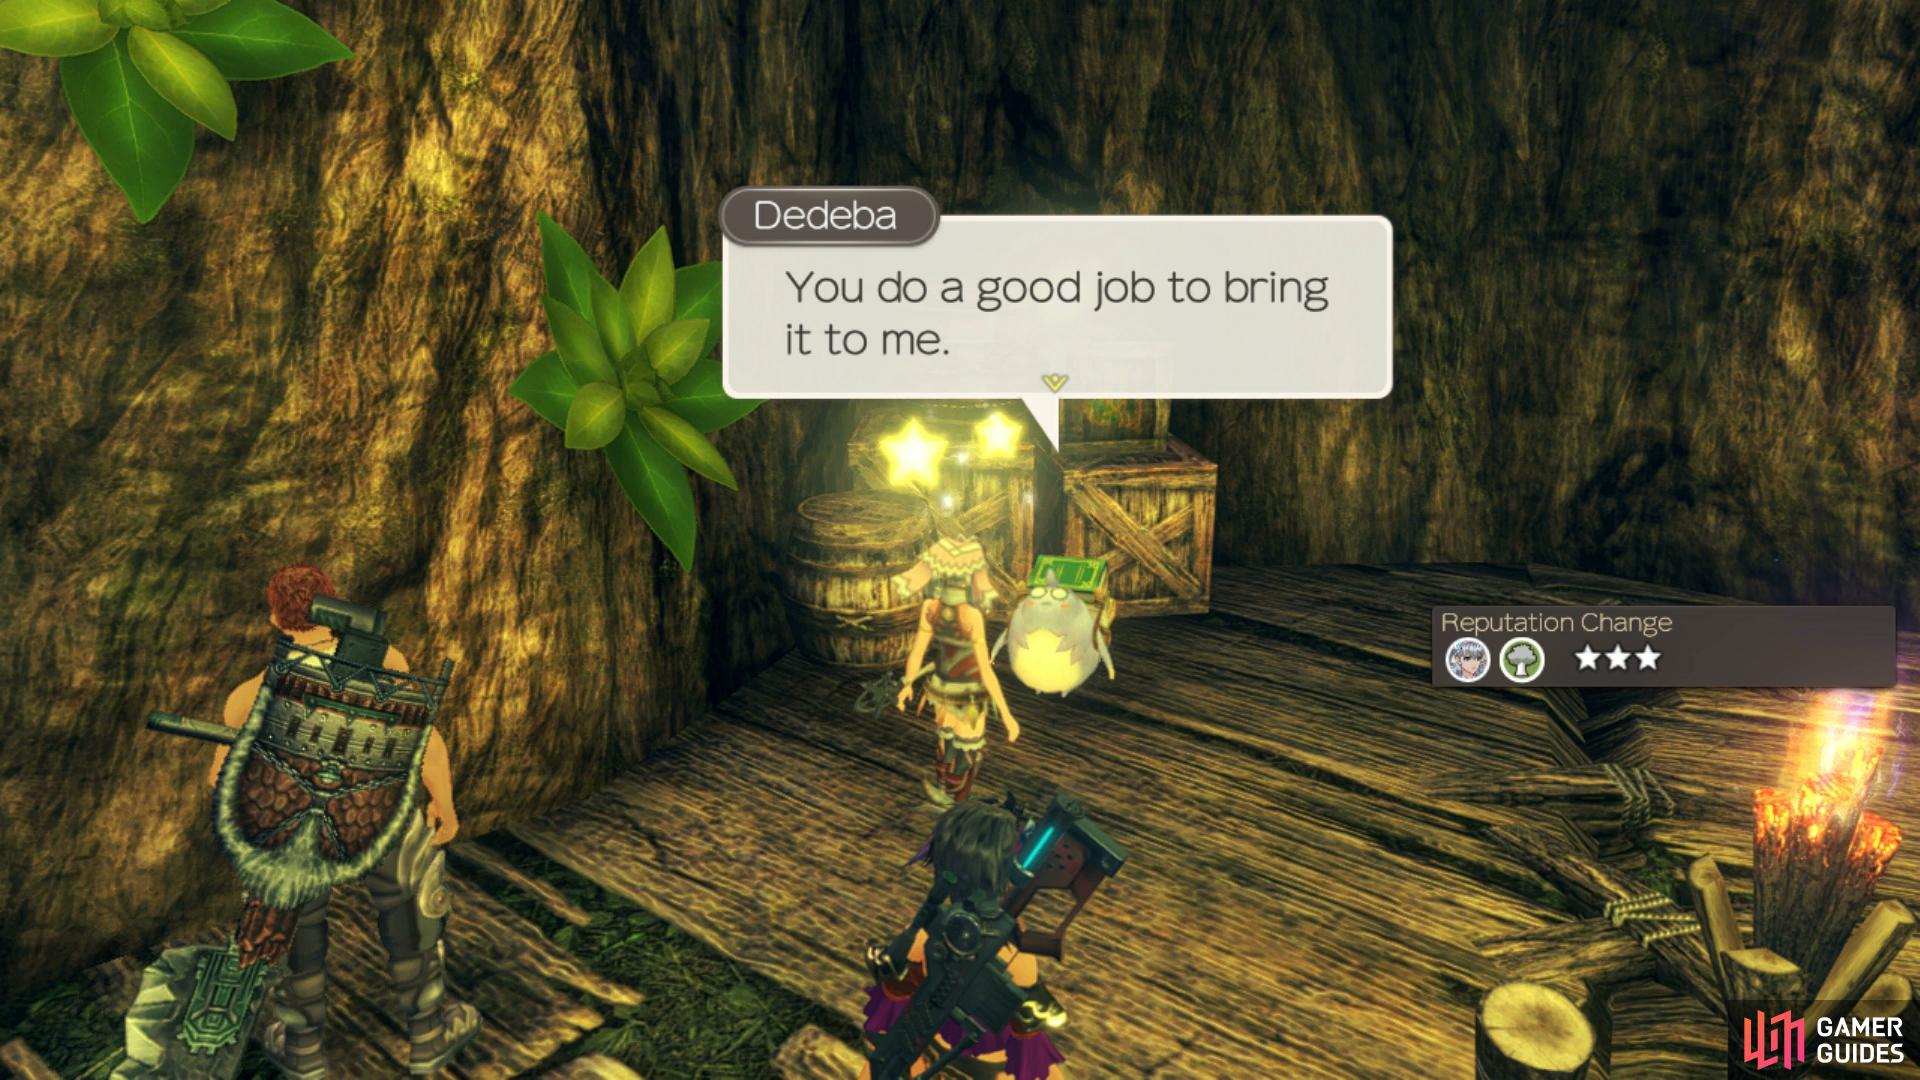
You’ll finally be able to complete the A Gift Quest you picked up in Satorl Marsh
while there’s an abundance of Quests awaiting you here.
Change the time over to 08:00 and take the stairs up to 3F and you’ll find a Nopon Villager to the northeast who will offer Search Quest 1. There’s nothing of interest at night on this level so keep the time as it is and head up to 4F. You’ll find Gadada standing near the wheel here and the next Time Mushroom across the bridge to the west. Switch the time to 19:00 now to find Rono near the wheel also and then switch to 22:00 to find Gowago near the stairs leading up.
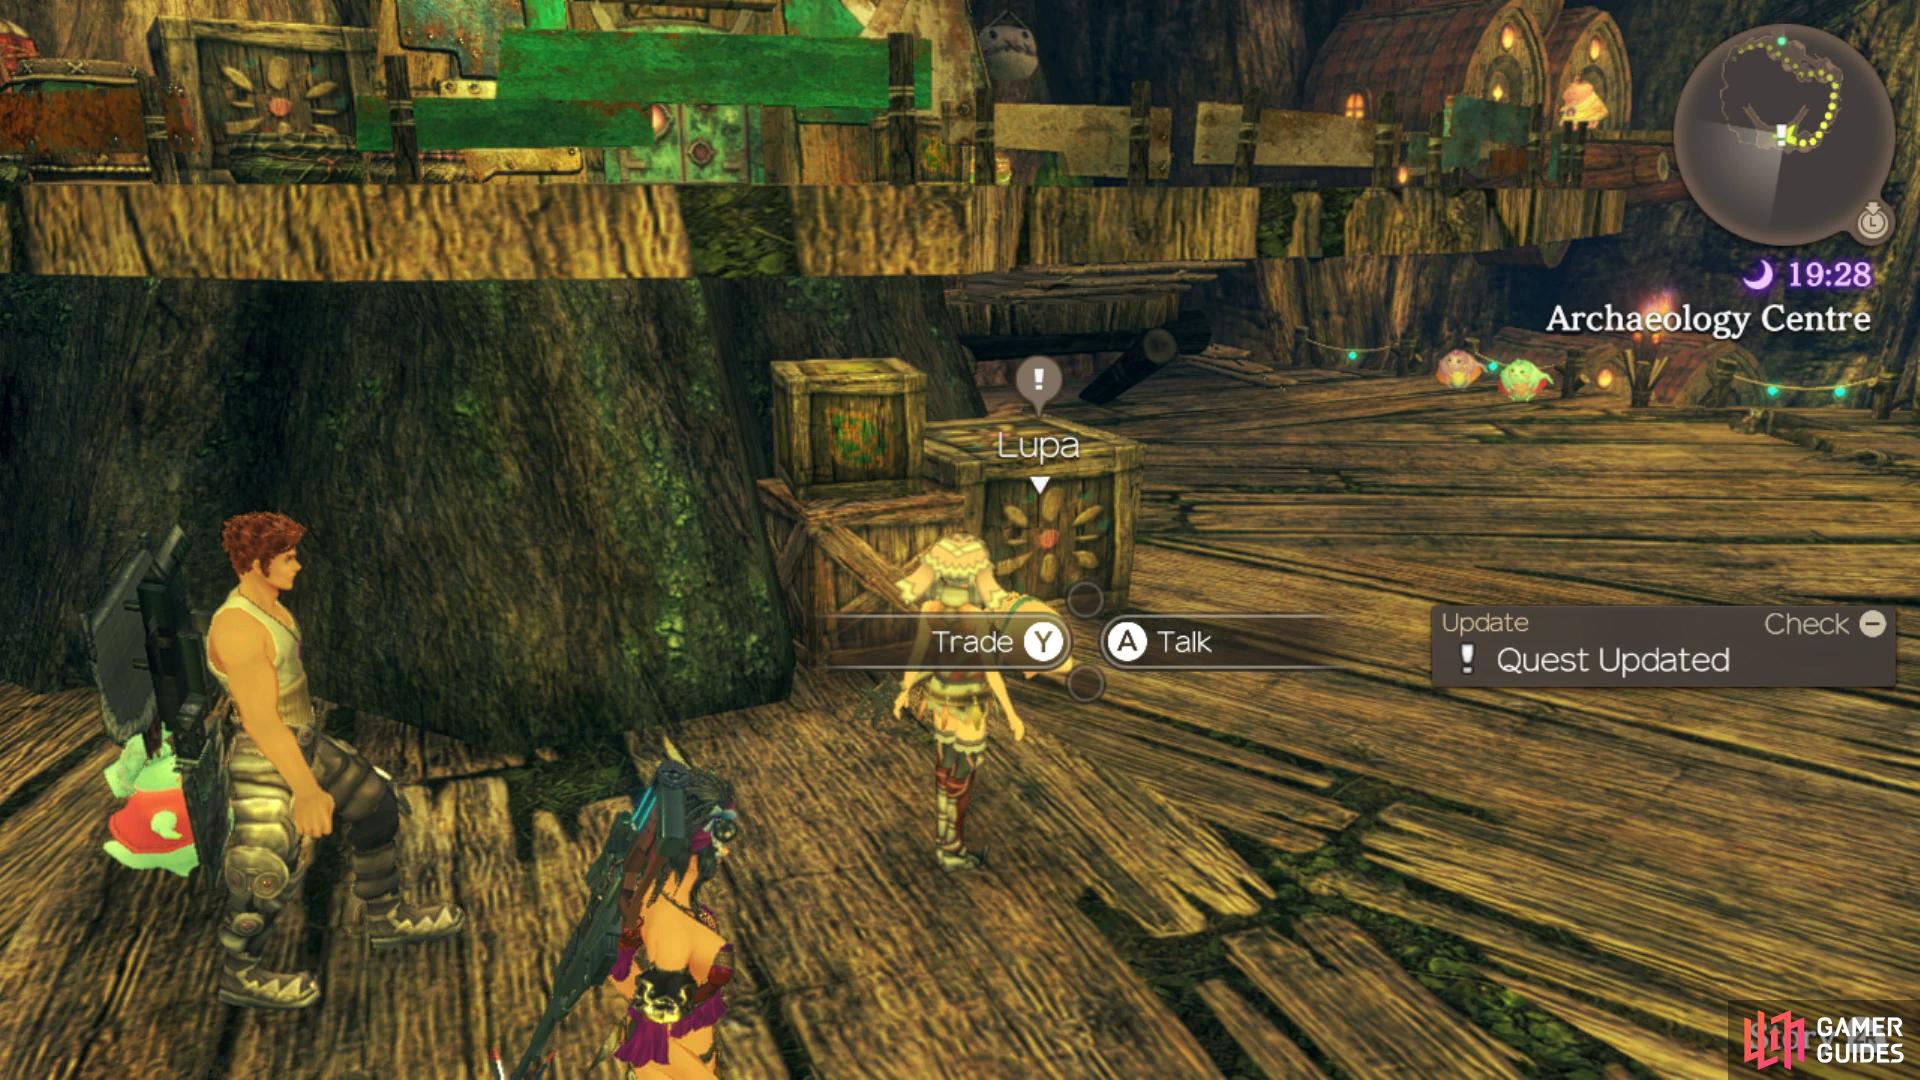
Switch back to 08:00 and head up to 5F and head east of the stairs to find both Kilaki and Leku along with accepting Leku’s Food Crisis. Continue around to the southern platform here to find Tuzu and then change the time to 11:00 and speak to Pachipa above her. Change the time back over to 19:00 now and you’ll find Modamo walking around the lower part of the level while you’ll find a Nopon Villager offering Search Quest 2 to the east. Continue up to the higher part of this level and you’ll find another who will offer Challenge 3 while Lupa can be found next to him offering Kind Lupa’s Grampypon and Secret Elixir Ingredients as part of the same series.
Switch back to 09:00 and head up to 6F and you’ll find a Shiny Ball near the stairs for Search Quest 3 and then continue higher to find Lalapa and then head outside to find Pepa who will offer Decoration Makeover. Leap over the edge to the east here to find Hoko and then while in the same position, change the time to 19:00 to find another Villager who offers Collection Quest 3.
Change to 08:00 again and make your way up to 7F where you can find the final Time Mushroom then follow the stairs up to find Miko. Switch over to 19:00 to find a Villager offering Material Quest 4 then head back down the stairs to find Dabidabi on the diving board.
Finally, switch to 08:00 once more and head up to the top level where you’ll find the item for Search Quest 2 on the bank to the south while you’ll find another Villager in the water offering Collection Quest 4. Switch the time to 22:00 now and speak to Berryjammy then head down the stairs a little to find Pelupelu. Finally, if you didn’t have Shulk as your party leader, do so now and speak to Rono at Pollen Works on 4F after 18:00 to accept Making a Mixer and Materials for a Mixer. You should also find, after registering the NPCs, that Rasha at the Sacred Altar after 08:00 will offer Disinsectization while you can talk to Pachipa after 12:00 on 3F so long as you have Gerugu already registered to change their Affinity and cause the Dadapon in Trouble Quest to appear (at 2✰ Affinity).
Take a look at your Affinity Chart following all this running around, you should have 38 NPCs registered (this includes the three from Satorl Marsh) and 32 Quests in your log (33 including the Story Quest). With all of that achieved, it’s time to start clearing some of these Quests.
Leku’s Food Crisis
Leku tells you that his little sister, Kilaki is eating too much! He asks you to collect him 10 Peachy Leg Joints to help stop him getting into debt. They are dropped by Deinos, which can be found in abundance between the Waypoint Beacon and the Twisted Tree Gate. Peachy Leg Joints aren’t a frequent drop though, so you might want to also trade for some of the items, so you don’t have to spend ages farming Deinos. You can trade for Peachy Leg Joints with both Bana and Npa at 1✰ affinity. Once you have collected 10 Peachy Leg Joints, head back to Leku to complete the quest.
Hunt for a Patron
After completing Leku’s Food Crisis, Leku asks you to ask the other villagers for help. He tells you to talk to the cleverest Nopon, the strongest Nopon and the cutest Nopon. Lupa is the cleverest Nopon and she can be found at the Archaeology Centre from 18:00 to 06:00. Modamo is the strongest Nopon, and he can be found on the Archaeology Level from 18:00 to 06:00. Pepa is the cutest Nopon and she can be found near the Chief’s Residence from 06:00 to 18:00. Once you have spoken to all of them, head back to Leku to complete the quest.
Heropon’s Spirit
Once you have helped out Leku, Kilaki will then give you a quest to fetch her 2 Tasty Ansel Wings so she can become Heropon. These can be obtained by defeating Ansels in Makna Forest. Alternatively, you could trade for some with Bana at 2✰ affinity. When you have the items, head back to Kilaki to complete the quest.
Beat Kilaki to it!
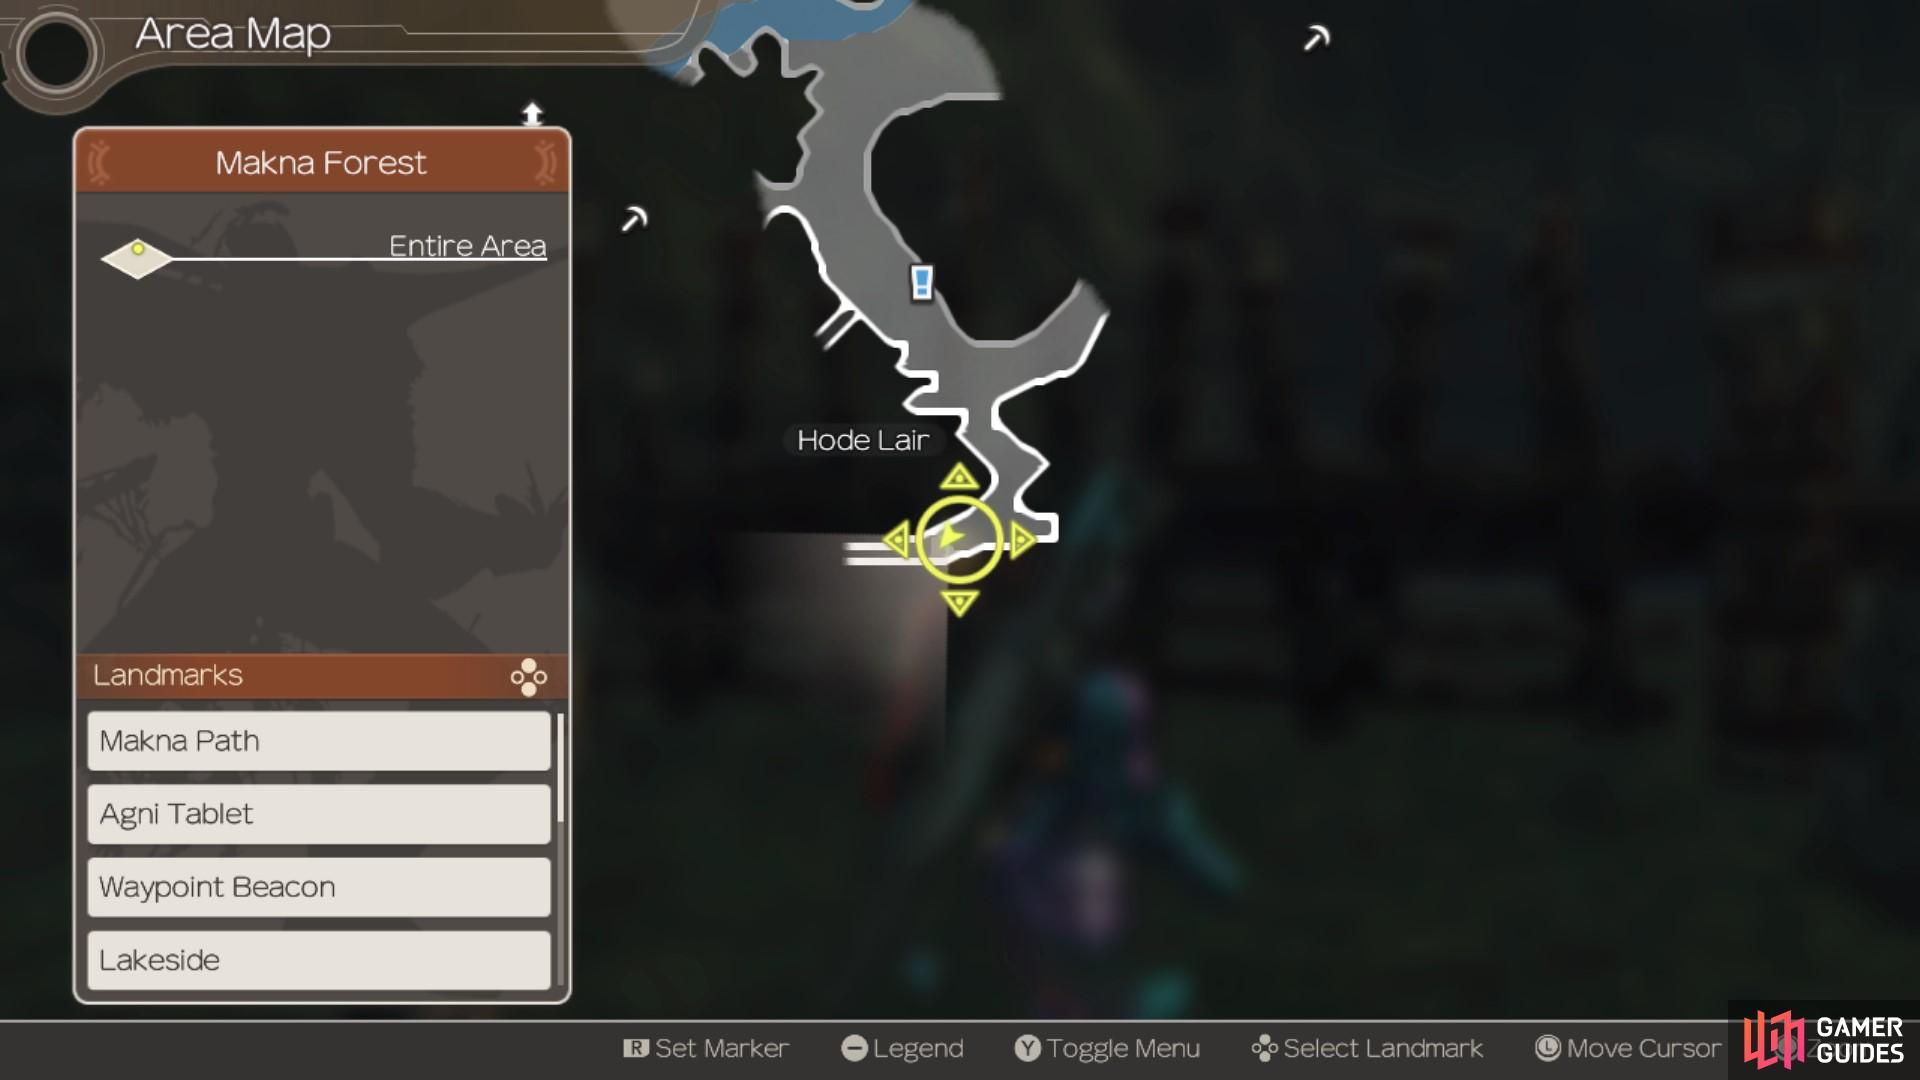
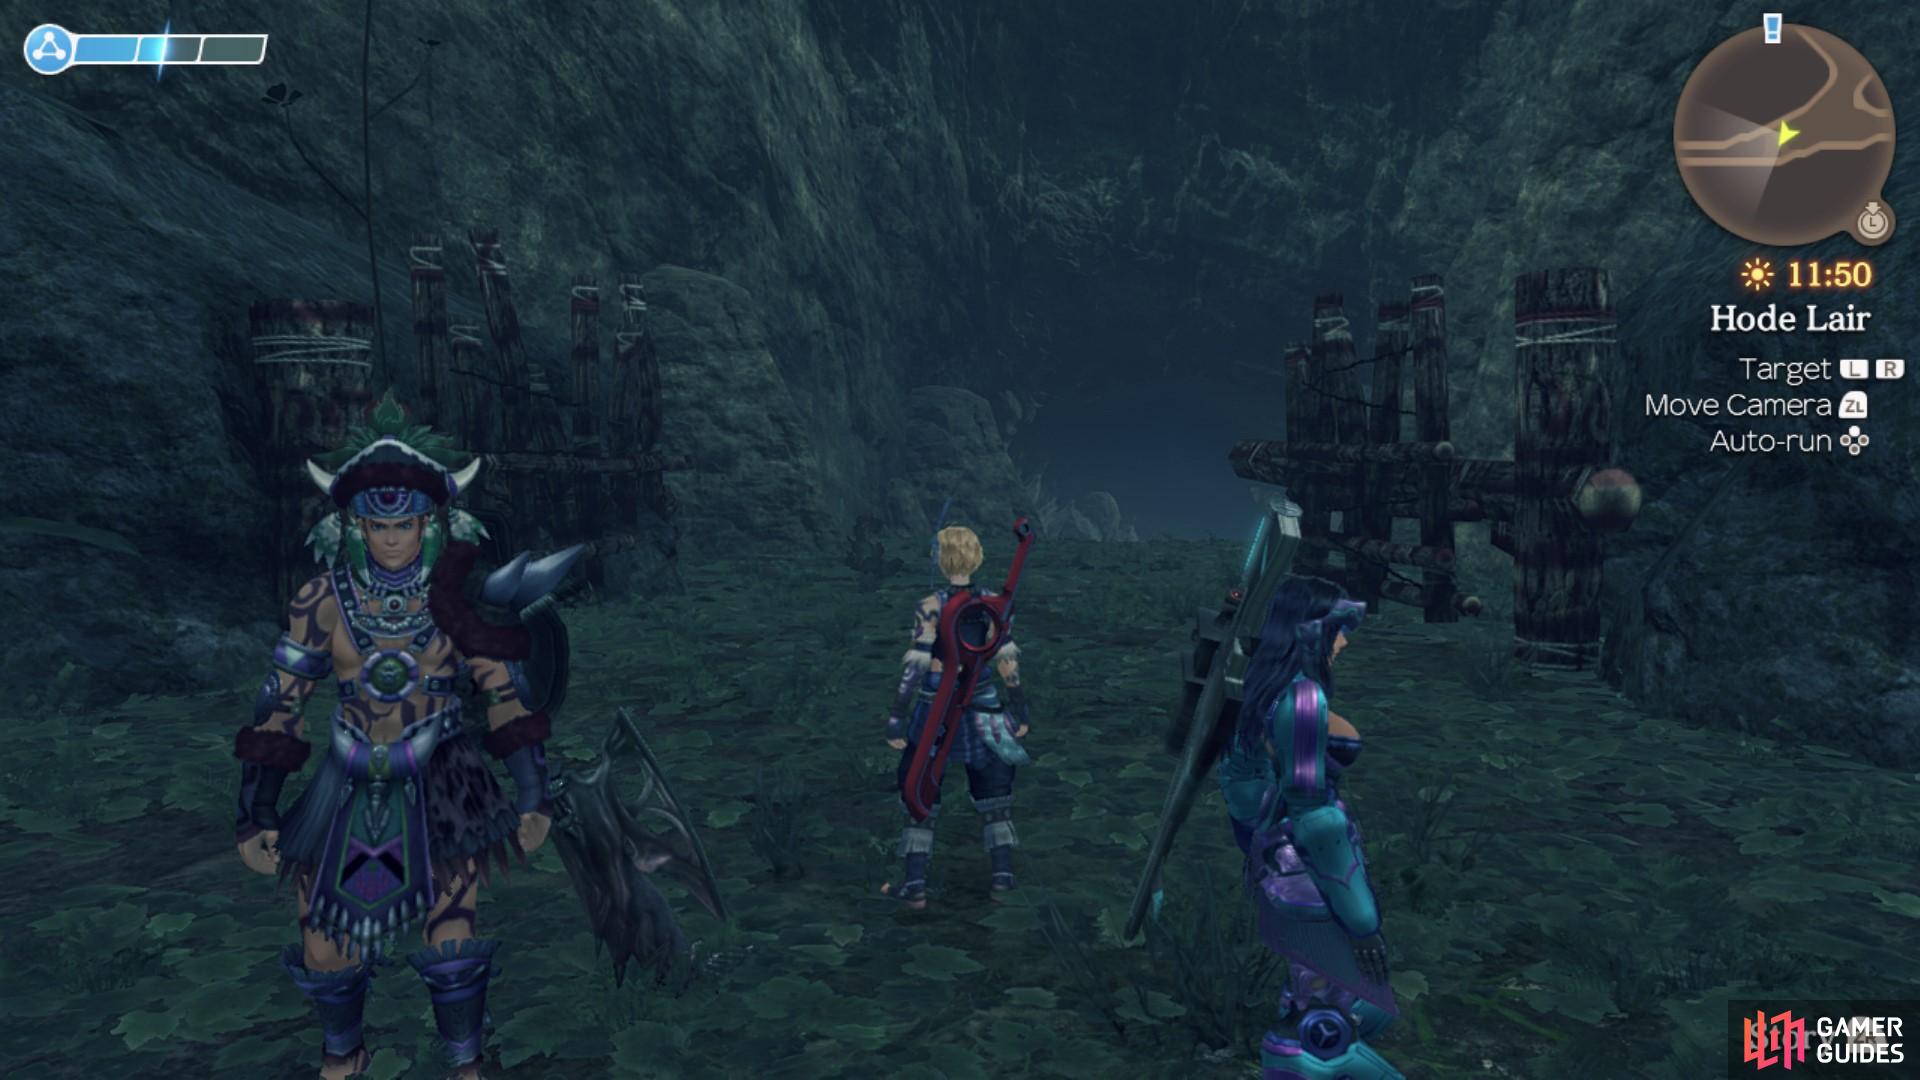
After you have completed Kilaki‘s quest, Leku tells you she’s gone to fight a big monster in Makna Forest. Leku asks you to beat her to the monster and defeat it before she gets there so she isn’t hurt. The Unique monster, Obsessive Galgaron can be found in Hode Lair, which is a hidden, underground cave just south of Precipice Bridge. You can also only enter Hode Lair when you have activated this quest, since you need Kilaki’s Note (the reward from Kilaki’s quest) to unlock the wooden gates to the path that leads to Hode Lair. The wooden gate is slightly tricky to find, but essentially it is just south of the quest marker, down a wooded pathway. You will see two Orluga-type enemies flanking the gate. You will have to defeat them if they spot you, since they aggro on sight. Once defeated, head down the tunnel to the lair. The fight ahead is quite tough, as there are a lot of enemies as well as Obsessive Galgaron.
You can tactically control who you aggro! If you stay at the entrance to the lair and attack one of the non-unique Orluga enemies that flank the entrance then, if you’re lucky, none of the other enemies there will go aggro and join the fight. You can do the same to the other non-unique Orluga enemy. And then, you can also defeat the several Hode enemies in the center of the lair. This tactic is all about positioning, make sure you’re as far away from the other enemies as possible when you initiate fights. Once all the smaller enemies are killed, you can then focus on Obsessive Galgaron. This is guaranteed to be an easier fight than running straight for Obsessive Galgaron, as that aggros everyone. Once you have defeated the Unique enemy, head back to Leku in Frontier Village to complete the quest.
The gate is just south of the given quest marker
you can only unlock the wooden gate when you have Kilaki’s Note
Popularity Premonition
After dealing with all of his sister’s issues, Leku now wants to focus on himself! When he tells you he wants a wifeypon, Shulk has a vision showing both Pepa and Lupa are interested in Leku. He asks you to choose one of the ladies for him, since he cannot decide. This quest has two endings, depending on which girl you choose.
-
Speak to Pepa (Route A) - if you choose to speak to Pepa, she will ask you to collect 3 tasty Vang Wings from Vangs in Makna Forest. She can be found near the Chief’s Residence between 06:00 and 15:00. You can find a few Teneb Vangs flying around the cave tunnels headed towards Divine Sanctuary. You might have to farm for quite a bit since the drop is quite rare, but this is easily done by just fast travelling back to the Divine Sanctuary landmark until you have the items. Once collected, head back to Pepa to complete the quest. The result of this route will be that Leku marries Pepa.
-
Speak to Lupa (Route B) - if you choose to speak to Lupa, she will ask you to collect 2 portions of Royal Apis Nectar from Apis in Makna Forest. There are a lot of Apis-type enemies across Makna Forest, but an easy place to head to would be Agni Tablet landmark since there’s several lower level Klanis Apis and Petra Apis in that area. The Royal Apis Nectar appears to be a more common drop so it shouldn’t take you too long to collect 2 portions. Head back to Lupa to complete the quest. The result of this route will be that Leku marries Lupa.
Making a Mixer and Materials for a Mixer
When you accept the quest Making a Mixer from Rono (you must be controlling Shulk to get it), you will also accept the quest Materials for a Mixer, which needs to be completed in order to finish the first quest. Rono will ask you to make a Special Mixer for him.
For Materials for a Mixer you will need to collect 2 Generic Shafts from Mechon M64 units and 2 Generic Blades from Mechon M53 units. These can be found across the Bionis’ Leg, and with any luck, you may have already picked up enough to complete this quest without having to go back. If not, then just head back out to Bionis’ Leg and find some Mechon. There’s quite a few near Maguel Road and the Raguel Bridge - South landmark. Once you have the parts, the Materials for a Mixer quest will be completed. Head over to the Weapon Dev. Lab in Colony 9 to use the materials to make the mixer for Rono. Once made, head back to Rono to give him the Special Mixer and complete the quest.
Decoration Makeover
Pepa tells you she loves cute things! She believes she will be even cuter herself if she was surrounded by cute things. She asks you to collect some things that she believes are extra cute. Each of these things are classed as collectables, so you won’t need to kill any monsters for them.
| Collectable | Collectable Location | Trade (Optional) |
|---|---|---|
| 3 Love Cranes | Glowmoss Lake, Ether Mine | – |
| 4 Happy Rabbits | Tephra Cave | Gerugu at 1✰ (Traveller’s Rest, Bionis’ Leg) |
| 6 Enigma Lotuses | Makna Forest | Kilaki at 1✰ (Riki’s House, Frontier Village) |
Once you have collected all the cute things, return to Pepa to complete the quest.
Hunt for Bug-Loving Friend
Kokora has asked you to find someone to be her grampypon’s friend. You’re tasked with finding a Nopon that likes bugs. The Nopon you’re looking for is Ababa (active 18:00 - 06:00). He can be found on the lower level near the Nopon Tower. When you have found him, he will ask you to collect 3 Shield Bugs from Makna Forest. Alternatively, you can trade for them with Miko if your affinity for Central Bionis is at 2✰. Once collected, head back to Ababa, then Kokora to complete the quest.
Mushy Mushrooms
Kofuko tells you his teeth are very bad and that he can only eat soft mushrooms now. He asks you to collect 8 Kelp Mushrooms in Makna Forest. You can either go out to the forest and find the collectables yourself, or you can head out to Nopon Tower and trade with Norara. Once you have 8 Kelp Mushrooms head back to Kofuko to complete the quest.
Strange Noises from Below
Pipiki tells you that a strange and scary noise is coming from below Central Plaza at night. He asks you to find out what is behind the noise. Head to the Nopon Kitchen at night and talk to Tati. He will admit that he has a terrible cough because he is so cold! Tati asks you to fetch him 3 Hode Camouflages from Hodes in Makna Forest so he can keep himself warm. You will find an abundance of Hode-type enemies near Windmill Pavillion and Hode Lair. Once you have obtained the materials, head back to Tati, and then speak to Pipiki to finish the quest.
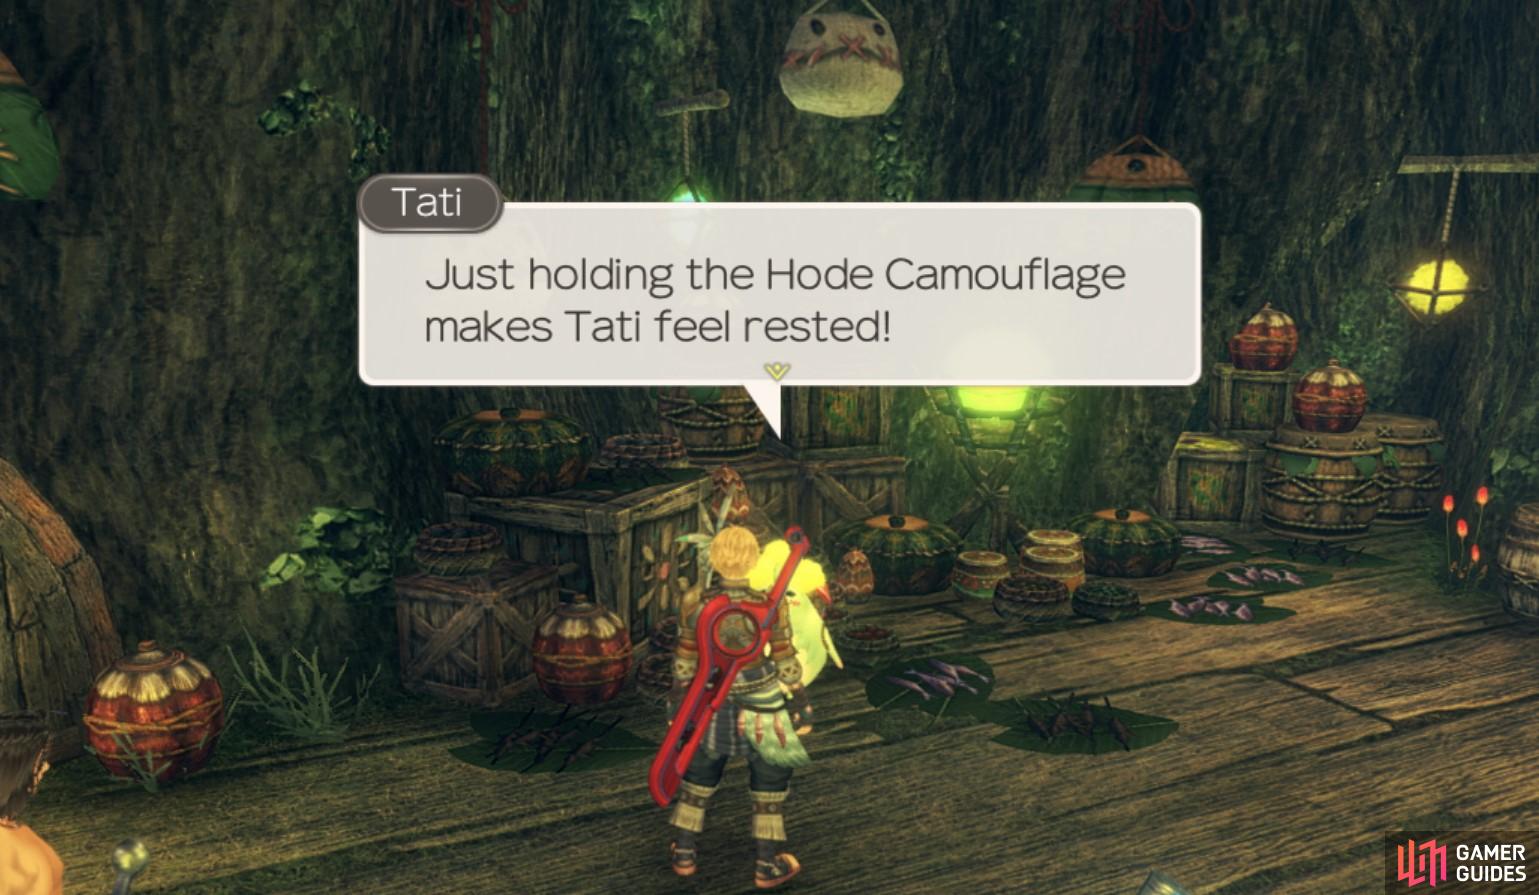
Tati had a bad cough, but the Hode Camouflage will help keep him warm.
Musical Genius
Once you have completed Strange Noises From Below and reached 1✰ affinity with Central Bionis residents, Tati will give you the quest Musical Genius. When this quest is activated, two more quests will also be added to your quest log: Things that Hum and Things that Rumble. These quests must be completed in order to finish this quest. These quests will require you to find various collectables across different regions.
Once Things that Hum and Things that Rumble have been completed, you can return to Tati to finish this quest too.
Things that Hum and Things that Rumble
Both of these quests must be completed in order to finish Musical Genius. The following items required for each quest are listed below.
- Things that Rumble -
| Collectable | Collectable Location | Trade (Optional) |
|---|---|---|
| 2 Rumble Coals | Glowmoss Lake (Ether Mine) | – |
| 2 Rumble Parts | Glowing Obelisk (Satorl Marsh) | – |
| 2 Rumble Stoneflies | Spring of Grief, Vilia Lake (Tephra Cave) | Betty at 3✰ (Tranquil Square, Colony 9) |
| 2 Rumble Boxes | Underground Store, Reservoir (Frontier Village) | – |
- Things that Hum -
| Collectable | Collectable Location | Trade (Optional) |
|---|---|---|
| 2 Humming Plums | Raguel Bridge (Bionis’ Leg) | – |
| 2 Humming Cabbages | Altar of Fate, Barren Moor (Satorl Marsh) | – |
| 2 Humming Cats | Glowing Obelisk (Satorl Marsh) | Kacha at 2✰ (Nopon Merchant Camp, Satorl Marsh) |
| 2 Humming Nettles | Makna Forest | Deki at 2✰ (Nopon Tower, Frontier Village) |
The quests will be completed when you collect the required items. Once both quests are completed, you will be able to proceed with Tati’s quest, Musical Genius.
Disinsectization
Rasha has asked you to defeat 5 Makna Elucas in Yellow Flower Grove in Makna Forest because Cherri hates bugs. Although it specifies Yellow Flower Grove, defeating any Makna Elucas in Makna Forest will be fine. They are fairly common across the region so you won’t have too much of an issue finding them. Once you’ve defeated 5 of them, head to Cherri in the Pollen Works area to tell her the bugs are gone. Then, return to Rasha to complete the quest.
At this point, you should have gained enough Affinity to unlock two more Quests, head to Entry Bridge at 10:00 and drop off to the southeast to find Deki who will offer A Worried Bug-Lover. Next, switch the time to 21:00 and head to Riki’s House to find Modamo who offers Lousy Lizards.
A Worried Bug-Lover
This quest will become available when you have completed Hunt for a Bug-Loving Friend and reached 1✰ affinity in Central Bionis. Deki has heard that Ababa likes to eat bugs! He wants to show him that eating bugs is bad by teaching him a lesson. He asks you to collect 2 lots of Green Eluca Juice from Makna Elucas. Makna Elucas are found across Makna Forest and you can find a few around Waypoint Beacon landmark in particular. Once collected, take the juice to Ababa. He will like the awful juice and once the interaction is over, head back to Deki to tell him your discovery and complete the quest.
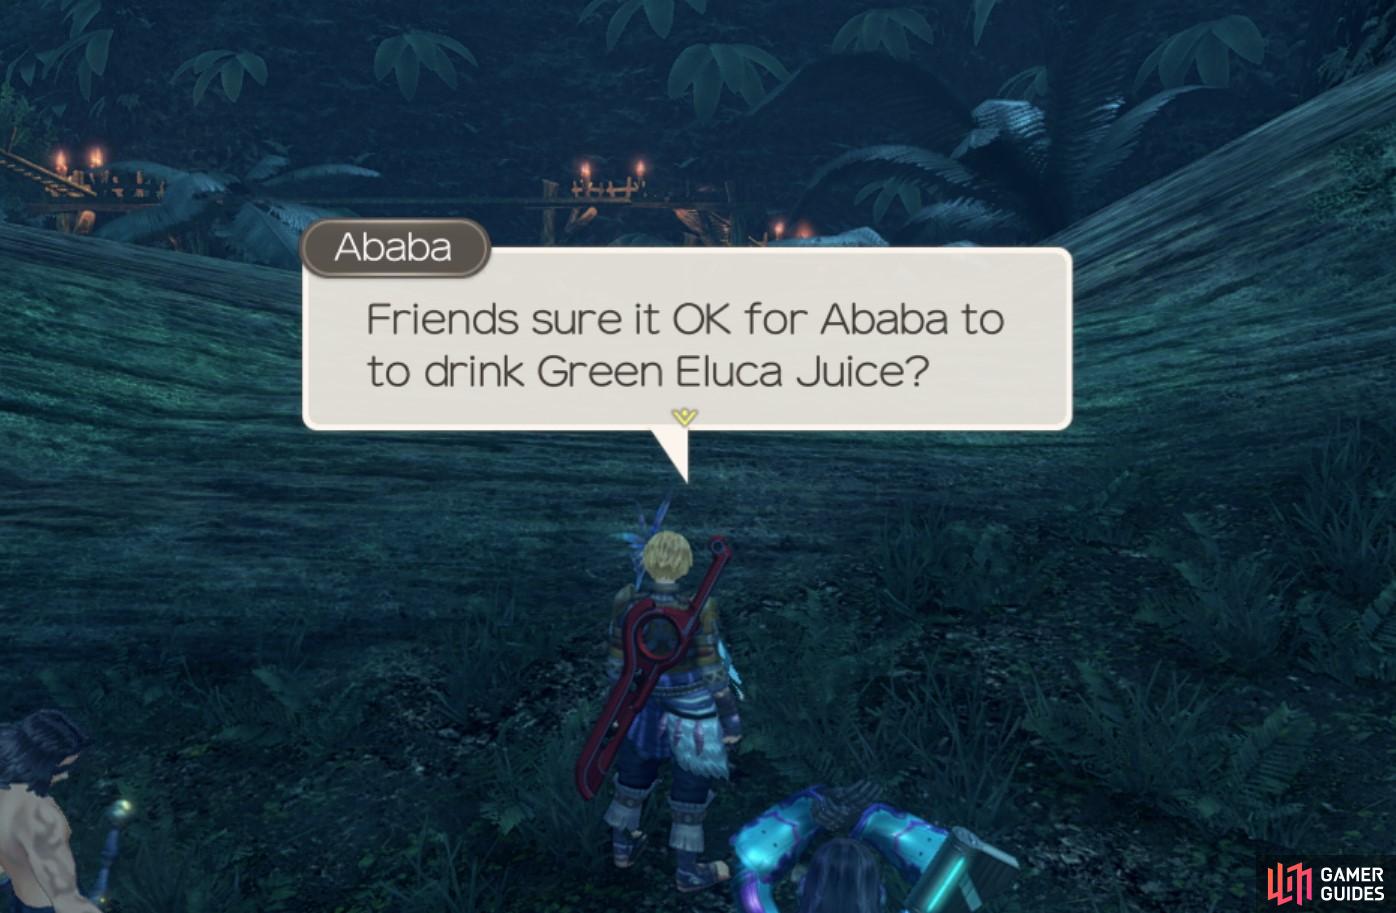
Ababa loves to eat bugs

but Deki thinks it’s a disgrace!
Dadapon in Trouble
This quest has a number of prerequisites that you must complete before you are able to activate it. Once you have arrived at Frontier Village, you need to head back to Bionis’ Leg and talk to Gerugu again at Traveller’s Rest. You may have already completed his quests The Lost Nopon and With Even More Gratitude when you were exploring Bionis’ Leg for the first time, but to activate Dadapon in Trouble you need to talk to him again after reaching Frontier Village. Once you have spoken to him, speak to Pachipa in Frontier Village, and she will tell you that her Dadapon is exploring Bionis’ Leg, this is important since it establishes an affinity link between Gerugu and Pachipa. Once you have this affinity link and your affinity in Central Bionis is at 2✰, then Pachipa will give you the quest.
Pachipa tells you that her dadapon is having trouble with some thieving Mount Tortas on Bionis’ Leg. She asks you to defeat 2 Mount Tortas so they will stop stealing Gerugu’s things. The Mount Tortas can be found under the bridges near Viliera Hill, east of the Kamos Guidepost landmark. Once defeated, head back to Pachipa to complete the quest.

The Mount Torta is found under the earth bridges near Viliera Hill.
It Definitely Exist!
To unlock this quest, you must have completed Dadapon in Trouble (and all of its prerequisites), as well as have registered an affinity link between Pipiki and Pachipa while ensuring Kuriku is on the chart. You can do this by simply talking to Pachipa after completing her first quest. For It Definitely Exist!, Pachipa has asked you to prove that the Mythical Empress exists, so that Kuriku and Pipiki stop teasing Pachipu about it. Firstly, you’ll need to head back to Traveller’s Rest on the Bionis’ Leg and speak to Gerugu about the Mythical Empress. He will tell you to find the Empress’ Ornament to be used as proof that the Empress does in fact exist. To find the evidence, head over to Zax Guidepost and then walk a little south to a hole. When you drop down you will be in an elevated cavern in the Windy Cave area. You must defeat a level 30 Empress’ Daughter arachno-type enemy to obtain the proof needed. Once collected, head back to Pachipa in Frontier Village to complete the quest.
Kind Lupa’s Grampypon and Secret Elixir Ingredients
Lupa wants to give her Grampypon some Secret Nopon Elixir. She has asked you to grab the materials to make the elixir. Activating Kind Lupa’s Grampypon also activates the quest, Secret Elixir Ingredients, which gives you a list of materials to collect.
| Material | Dropped by | Material Location |
|---|---|---|
| 5 Hades Beetles | Collectable | Across Makna Forest |
| 3 All-Seeing Eyes | Jungle Quadwings | Near Waypoint Beacon, or Agni Tablet |
| 2 lots of Potent Brog Poison | Poison Brogs | Poison Swamp (Satorl Marsh) |
Once all the items have been collected, the second quest will be completed. Head back to Lupa to give her the ingredients. She will then make the elixir and ask you to take it to Satata in Colony 6. Take the elixir to Satata, then head back to Frontier Village and talk to Lupa again to complete the quest.
Lousy Lizards
Modamo is a great warrior, but he is scared of lizards! He has asked you to go defeat 5 Inferno Deinoses and 5 Plasma Deinoses. These can be found in abundance around the Eks Watering Hole, Waypoint Beacon and Twisted Tree Gate, so you shouldn’t have too much of an issue farming 10 Deinoses. Once you have defeated 5 of both the Plasma and Inferno Deinoses, head back to Modamo to complete the quest.
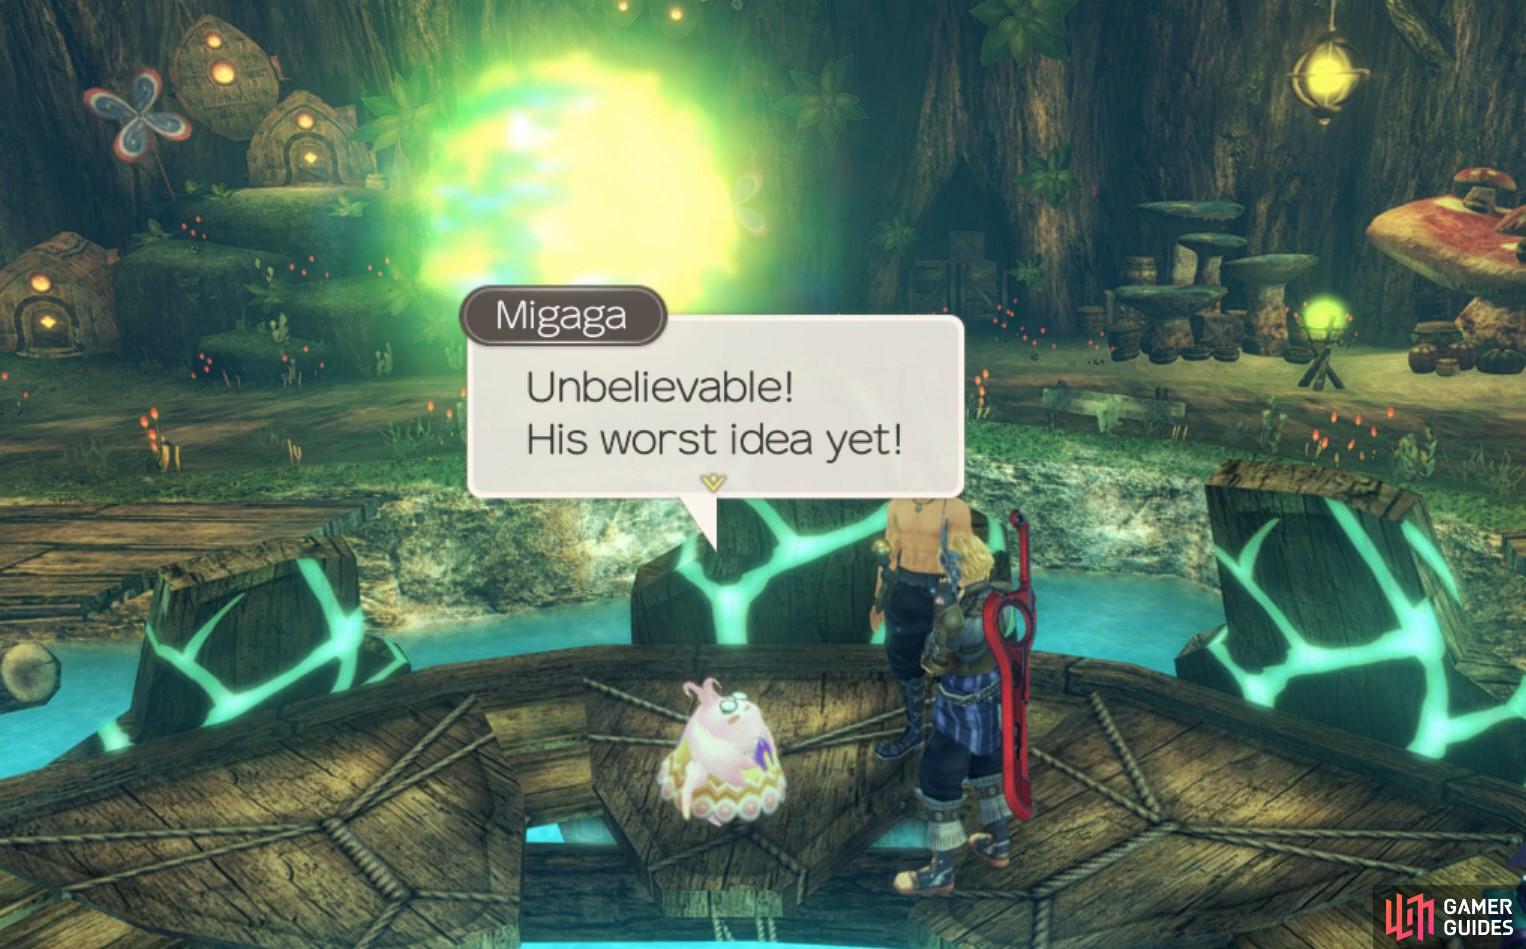
Fixing Time Mushrooms
Migaga tells you that the Time Mushrooms are all broken, and without them the Nopon don’t know what time it is. She asks you to repair them by feeding them compost. There is a Time Mushroom on the 1st, 4th and 7th floor of Frontier Village. To feed them compost, all you need to do is examine them and press ‘A’. Once completed, head back to Migaga to finish the quest.
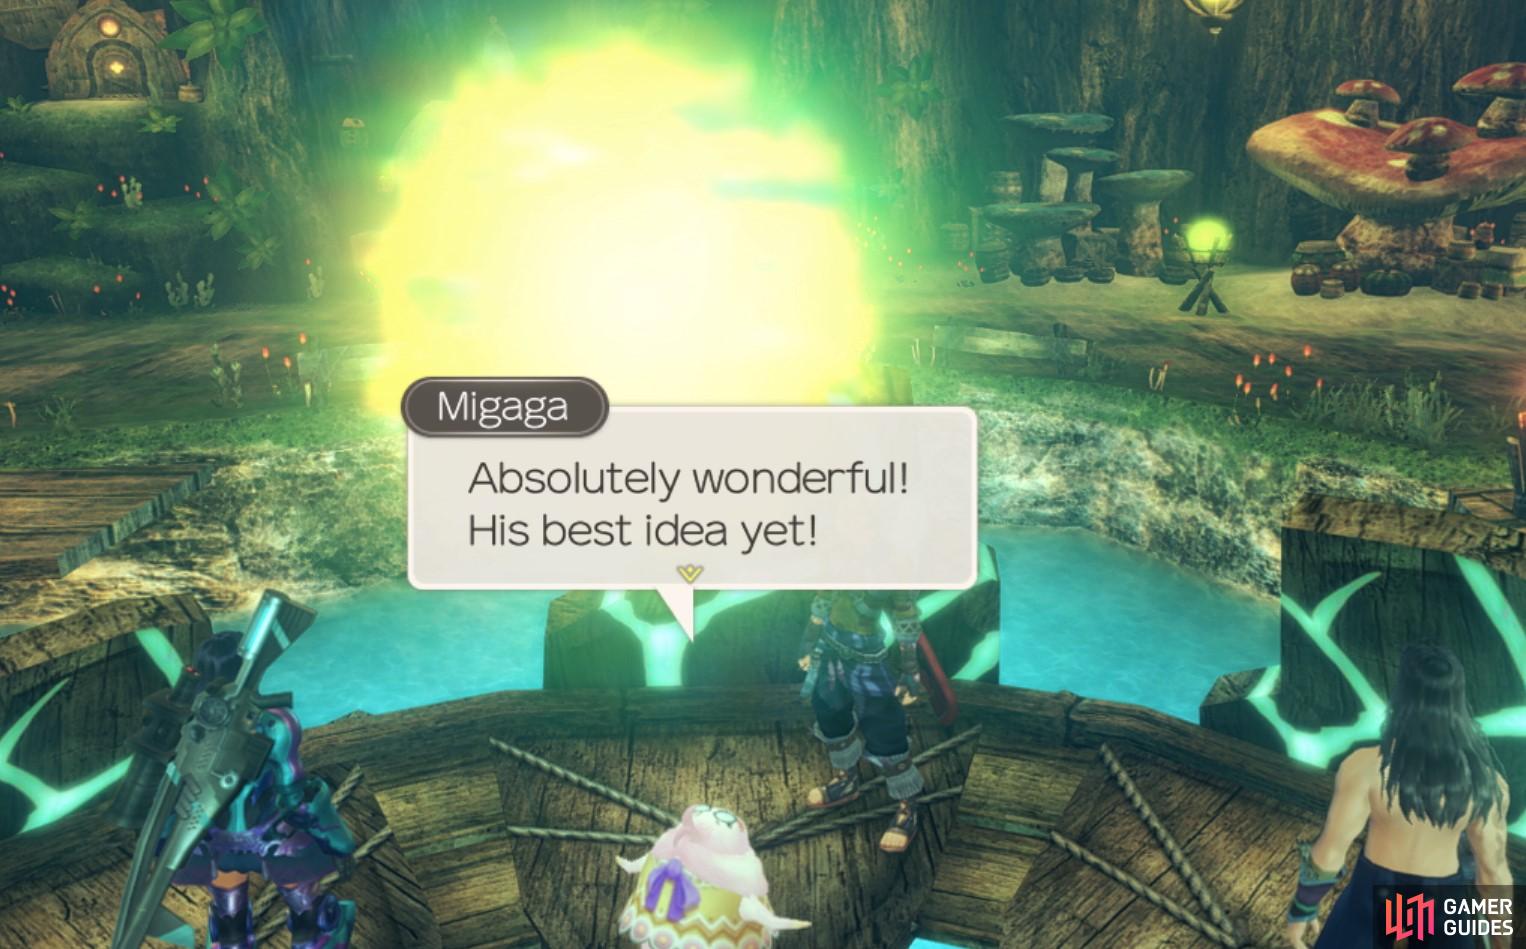
Sweet Seduction
Once you have reached 2✰ affinity and completed Fixing Time Mushrooms, Migaga will ask you to find the source of the sweet smell in Central Plaza. Firstly, talk to Kofuko who can be found near the Sacred Altar from 21:00 to 06:00. He will admit that he is trying to make a sweet alcoholic drink under the Sacred Altar. He is scared that the ingredients he is using are bad, so he asks you to fetch some more. This will activate the quest, Ingredients for a Brew, which will need to be completed in order for Sweet Seduction to also be finished.
Once you have completed Ingredients for a Brew, you can speak to Migaga again to tell her that it was Kofuko’s drink that was creating the sweet smell. Your choice of ingredient affects how she reacts to the drink. Walnut Grapes will make her angry, whilst Bitter Kiwis will make her excited to try the drink. Your choice affects their affinity link status; Route A will result in Rocky Marriage and Route B will result in Happily Married.
Migaga hates the Walnut Grapes
but she loves Bitter Kiwis!
Ingredients for a Brew
This quest is activated once you have received the quest, Secret Seduction and spoken to Kofuko. He will ask you to collect 4 Walnut Grapes (Route A) on the Bionis’ Leg OR 2 Bitter Kiwis (Route B) from Makna Forest for his brew. The different choices do have different endings: you will receive different gems for whichever you pick and your choice affects Kofuko and Migaga’s marriage. Once you have the chosen ingredients, head back to Kofuko to complete the quest. You may now proceed with Sweet Seduction by talking to Migaga again.
-
Walnut Grapes (Route A) - Choosing these ingredients will result in a sickly sweet drink that makes Migaga angry. You will receive an Auto-Heal Up III gem as a reward.
-
Bitter Kiwis (Route B) - - Choosing these ingredients will result in a great drink that makes Migaga happy. You will receive an Terrain Defence II gem as a reward.
Once you have the chosen ingredients, head back to Kofuko to complete the quest. You may now proceed with Sweet Seduction by talking to Migaga again.
Pollen Orb Ingredients
Dobadoba has asked that you head over to Yellow Flower Grove to fetch 5 bits of Yellow pollen. Yellow Flower grove is north of Glowmoss Trihenge, which is located in the eastern region of Makna Forest. When you arrive at the grove, several level 32 Makna Elucas will pop up out of the ground and guard the Yellow Pollen. You will have to defeat them (if you aren’t 5 levels higher than them) in order to retrieve the items. Once collected, head back to the Pollen works in Frontier Village and talk to Dobadoba to complete the quest. Following this Quest’s completion, head to Bana near Sacred Altar during the day to accept the next part of this Quest line.
Secret Ingredient Hunt
Once you are at 1✰ affinity with the Central Bionis region, have Gadada registered on your affinity chart and have completed Pollen Orb Ingredients, you will be able to activate this quest from Bana. Bana will ask you to collect 1 Monster Egg from Makna Forest, specifically from around the Twisted Tree Gate landmark. You may see the red shiny orb that represents the Monster Egg from a lower level before you can actually reach it. To get to the elevated cliff level that the egg can be found on, head north through the Eks Watering Hole river until you reach the northside beach area. Then follow the path east then southeast until you have to jump down onto a lower level where the Monster Egg can be found. Once retrieved, take the Monster Egg to Gadada. He can be found near the Pollen Works landmark in Frontier Village during the day. Once you have given Gadada the Monster Egg, talk to Bana to complete the quest.
Secret Innovation
Once you are at 1✰ affinity with the Central Bionis region, have Cherri registered on the affinity chart and have completed Pollen Orb Ingredients, Rasha will ask you to collect 1 Filtered Water from near the Sparkling Pool in Makna Forest. The Sparkling Pool is a Secret Area landmark, and it can be found by climbing up a large tree route from the Eks Watering Holeand heading south through the trees. The Filtered Water can only be found during the day. Once collected, take the water to Cherri as a gift from Rasha. She can be found near the Pollen Works landmark in Frontier Village during the day. Once you have given her the water, return to Rasha to complete the quest.
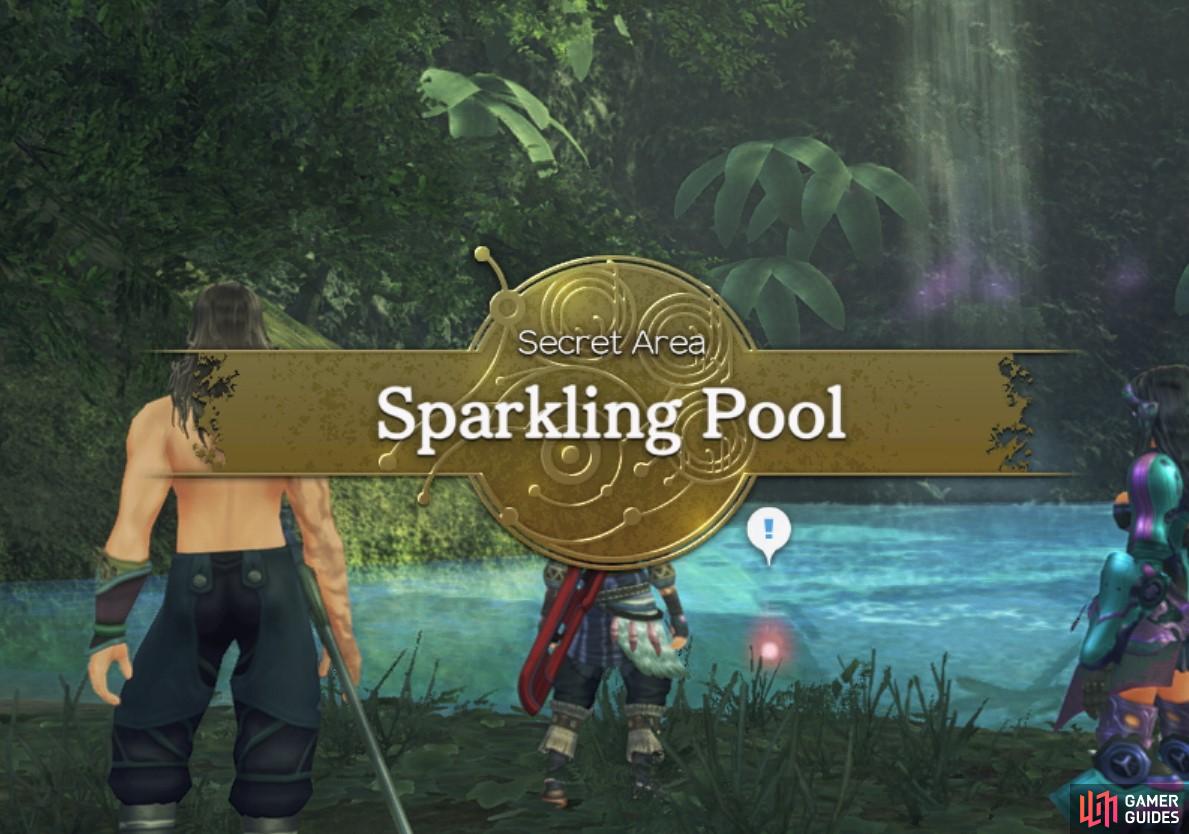
Sparkling Pool is a Secret Area
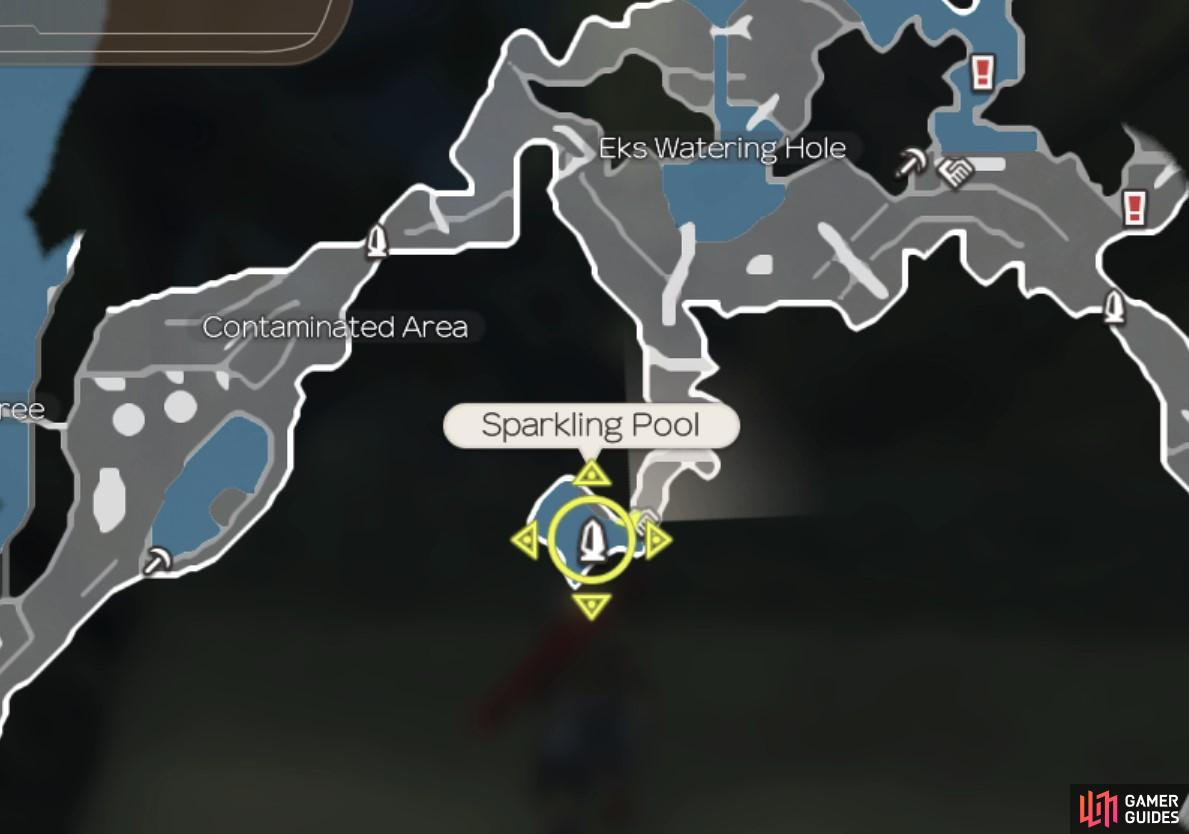
it is located south of Eks Watering Hole
The Master’s Successor
To activate this quest, you must have completed both Secret Innovation and Secret Ingredient Hunt, and also have an affinity of 2✰ in Central Bionis. Dobadoba has announced that he wants someone else to take over Pollen Works. He has asked you to choose between either Cherri or Gadada to be his successor. Firstly, you will need to talk to Gadada about his passions for the Pollen industry, then return to Dobadoba. After you’ve spoken to Dobadoba again, he will ask you to talk to Cherri about her ambitions. Head back to Dobadoba for a final time and he will ask you to make a decision about who should be his successor.
-
Choose Gadada (Route A) - If you choose Gadada as successor, then you will have the opportunity later in the game to activate the quest Safer Energy from Gadada.
-
Choose Cherri (Route B) - If you choose Cherri as successor, then you will have the opportunity later in the game to activate the quest Distilling Active Ingredients from Cherri.
There’s just one more Quest to accept for now, return to Makna Forest’s Agni Tablet and speak to the Nopon to accept Challenge. If you’ve been working on Melia and Sharla’s Affinity for the Quest you accepted back in Colony 9, you should have at least Green Affinity by now allowing you to view a Heart-to-Heart in Makna Forest.
| Heart-to-Heart | Characters | Location | Affinity | Answers |
|---|---|---|---|---|
| No Boys Allowed | Melia + Sharla | Sparkling Pool | Green | You may be correct, Are you sure?! |
The Wounded Telethia
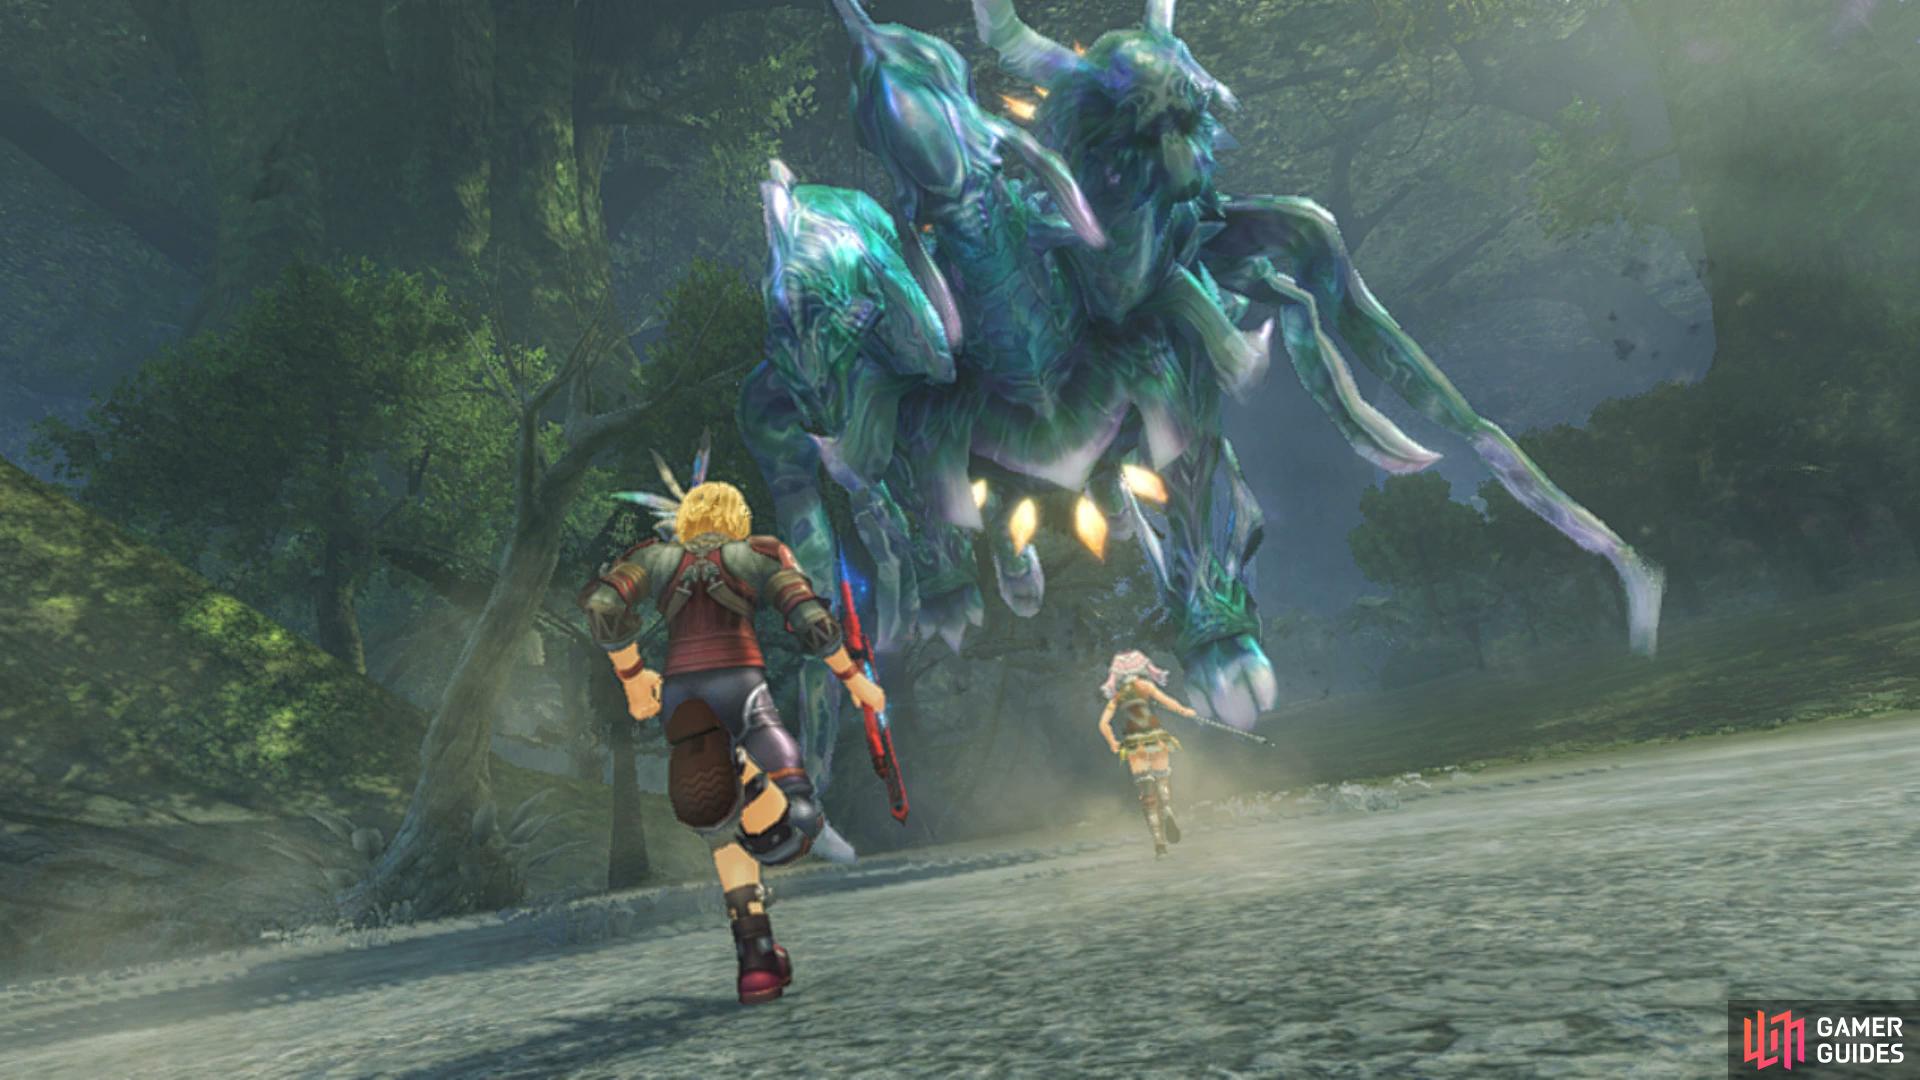
Once you’re ready to advance the story, change your party around and consider having Shulk as the party leader. Travel over to Glowmoss Trihenge and make your way east to find the Telethia you’re looking for.
Boss: Leone Telethia
| Enemy | Level | Detection |
|---|---|---|
| Leone Telethia | 36 | Sight |
Despite already fighting it’s offspring earlier in the chapter, Leone is a much tougher encounter. You have the power to stop it’s Soul Read with Monado Purge or Melia’s new Mind Blast Art however you’ll also need to pay attention to its ability to bestow Super Aura on itself which will give it a potent Regeneration ability, be sure to disable this as soon as you spot it with Monado Purge too, for that matter, save Shulk’s gauge for Monado Purge only as Leone’s Talent Absorb will drain a Talent Gauge, especially deadly on Shulk. Leone has some deadly abilities to use against you too:
-
Sleep Spin - Despite being called a Spin, this will only deal damage to targets in front of itself (which should be your tank only). Nevertheless, should you get hit you’ll take major damage with a chance of the Sleep debuff.
-
Sleep Bullet - Similar to the above with the only difference being that this is on a single target.
-
Talent Absorb - This will absorb the chosen target’s Talent Gauge, deadly if it uses it on Shulk just before using an Aura.
-
Ether Cannon II - An Ether based Talent Art that will deal major damage and knockback to a single target. Monado Shield will not work on this due to it being Ether based.
-
Channel I - Another Ether based Talent Art that deals minor damage but inflicts Bind on all targets in front of it.
-
Soul Read - Aura that prevents attacks from landing, use Monado Purge/Mind Blast as soon as possible.
-
Super Aura - Aura that bestows a potent regeneration effect on Leone, once again, use Monado Purge/Mind Blast as soon as possible.
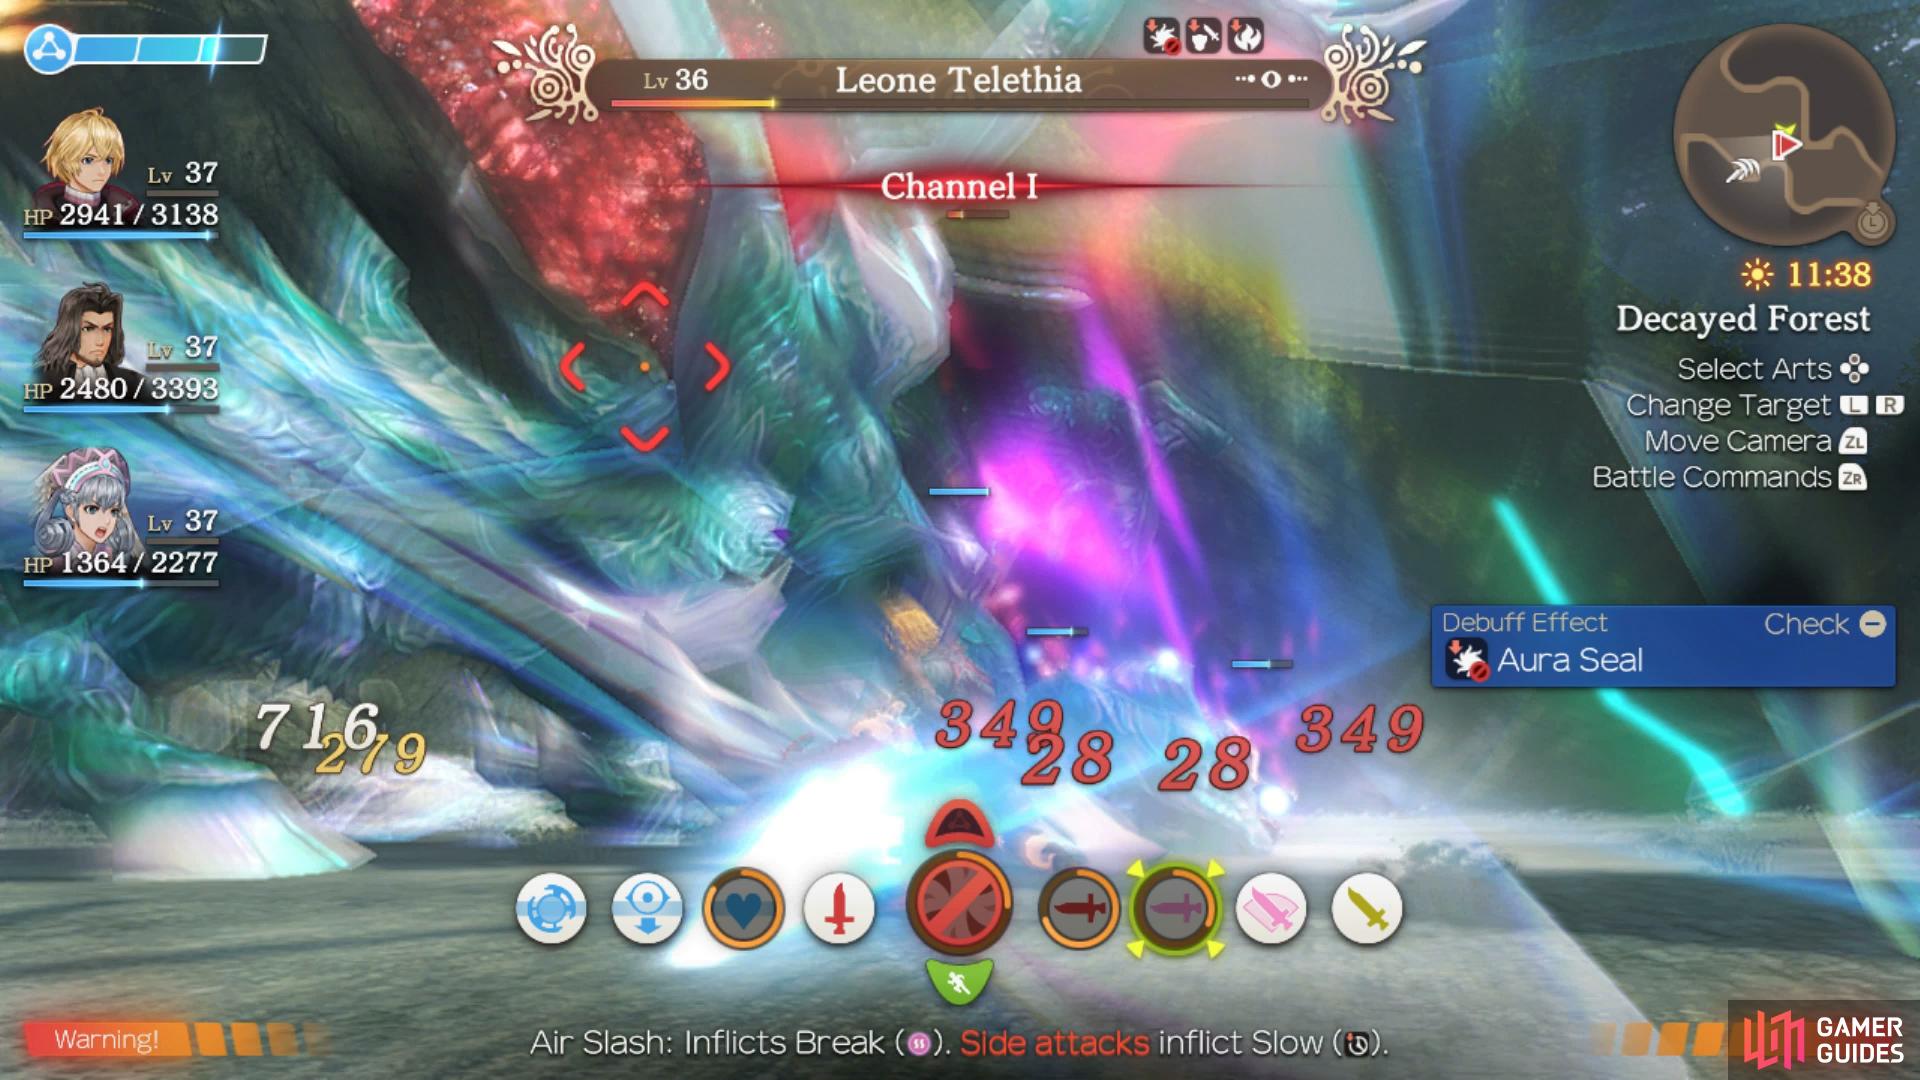
Leone Telethia is a tough encounter, especially when encountered at lower levels but pay attention to the Arts it uses and use Monado Purge or Mind Blast as necessary (pay attention to the “!” on the Art to see if an Aura is up) and you should be able to fell the beast.
Watch the scenes that follow and you’ll be automatically taken back to Frontier Village where Melia will leave temporarily. Warp to the Prophecy Hut Landmark on 7F and head down the stairs to meet with Melia and trigger more cutscenes to have her rejoin the party once more. Make your way up to the very top of Frontier Village where you’ll find the Transport Guide, speak with the Nopon to trigger a cutscene that brings Chapter 7 to an end.
No Comments