


Dadapon in Trouble
| Client | Rewards | Affinity |
|---|---|---|
| Pachipa | 3900G, 1000 EXP, Poison Plus III | 2✰ |
This quest has a number of prerequisites that you must complete before you are able to activate it. Once you have arrived at Frontier Village, you need to head back to Bionis’ Leg and talk to Gerugu again at Traveller’s Rest. You may have already completed his quests The Lost Nopon and With Even More Gratitude when you were exploring Bionis’ Leg for the first time, but to activate Dadapon in Trouble you need to talk to him again after reaching Frontier Village. Once you have spoken to him, speak to Pachipa in Frontier Village, and she will tell you that her Dadapon is exploring Bionis’ Leg, this is important since it establishes an affinity link between Gerugu and Pachipa. Once you have this affinity link and your affinity in Central Bionis is at 2✰, then Pachipa will give you the quest.
Pachipa tells you that her dadapon is having trouble with some thieving Mount Tortas on Bionis’ Leg. She asks you to defeat 2 Mount Tortas so they will stop stealing Gerugu’s things. The Mount Tortas can be found under the bridges near Viliera Hill, east of the Kamos Guidepost landmark. Once defeated, head back to Pachipa to complete the quest.

The Mount Torta is found under the earth bridges near Viliera Hill.
It Definitely Exist!
| Client | Rewards | Affinity |
|---|---|---|
| Pachipa | 6400G, 2000 EXP, Jack Guarder | 2✰ |
To unlock this quest, you must have completed Dadapon in Trouble (and all of its prerequisites), as well as have registered an affinity link between Pipiki and Pachipa. You can do this by simply talking to Pachipa after completing her first quest. For It Definitely Exist!, Pachipa has asked you to prove that the Mythical Empress exists, so that Kuriku and Pipiki stop teasing Pachipu about it. Firstly, you’ll need to head back to Traveller’s Rest on the Bionis’ Leg and speak to Gerugu about the Mythical Empress. He will tell you to find the Empress’ Ornament to be used as proof that the Empress does in fact exist. To find the evidence, head over to Zax Guidepost and then walk a little south to a hole. When you drop down you will be in an elevated cavern in the Windy Cave area. You must defeat a level 30 Empress’ Daughter arachno-type enemy to obtain the proof needed. Once collected, head back to Pachipa in Frontier Village to complete the quest.
Kind Lupa’s Grampypon and Secret Elixir Ingredients
| Client | Rewards | Affinity |
|---|---|---|
| Lupa | 3300G, 1200 EXP, Panther Shoes | 2✰ |
Lupa wants to give her Grampypon some Secret Nopon Elixir. She has asked you to grab the materials to make the elixir. Activating Kind Lupa’s Grampypon also activates the quest, Secret Elixir Ingredients, which gives you a list of materials to collect.
| Material | Dropped by | Material Location |
|---|---|---|
| 5 Hades Beetles | Collectable | Across Makna Forest |
| 3 All-Seeing Eyes | Jungle Quadwings | Near Waypoint Beacon, or Agni Tablet |
| 2 lots of Potent Brog Poison | Poison Brogs | Poison Swamp (Satorl Marsh) |
Once all the items have been collected, the second quest will be completed. Head back to Lupa to give her the ingredients. She will then make the elixir and ask you to take it to Satata in Colony 6 or Refugee Camp on the Bionis’ Leg. Take the elixir to Satata, then head back to Frontier Village and talk to Lupa again to complete the quest.
Quests Available Once Riki Has Joined Your Party
Decoration Makeover
| Client | Rewards | Affinity |
|---|---|---|
| Pepa | 5200G, 1050 EXP, Jungle Cap | None |
Pepa tells you she loves cute things! She believes she will be even cuter herself if she was surrounded by cute things. She asks you to collect some things that she believes are extra cute. Each of these things are classed as collectables, so you won’t need to kill any monsters for them.
| Collectable | Collectable Location | Trade (Optional) |
|---|---|---|
| 3 Love Cranes | Glowmoss Lake, Ether Mine | – |
| 4 Happy Rabbits | Tephra Cave | Gerugu at 1✰ (Traveller’s Rest, Bionis’ Leg) |
| 6 Enigma Lotuses | Makna Forest | Kilaki at 1✰ (Riki’s House, Frontier Village) |
Once you have collected all the cute things, return to Pepa to complete the quest.
Strange Noises from Below
| Client | Rewards | Affinity |
|---|---|---|
| Pipiki | 5800G, 2000 EXP, Panther Top | None |
Pipiki tells you that a strange and scary noise is coming from below Central Plaza at night. He asks you to find out what is behind the noise. Head to the Nopon Kitchen at night and talk to Tati. He will admit that he has a terrible cough because he is so cold! Tati asks you to fetch him 3 Hode Camouflages from Hodes in Makna Forest so he can keep himself warm. You will find an abundance of Hode-type enemies near Windmill Pavillion and Hode Lair. Once you have obtained the materials, head back to Tati, and then speak to Pipiki to finish the quest.
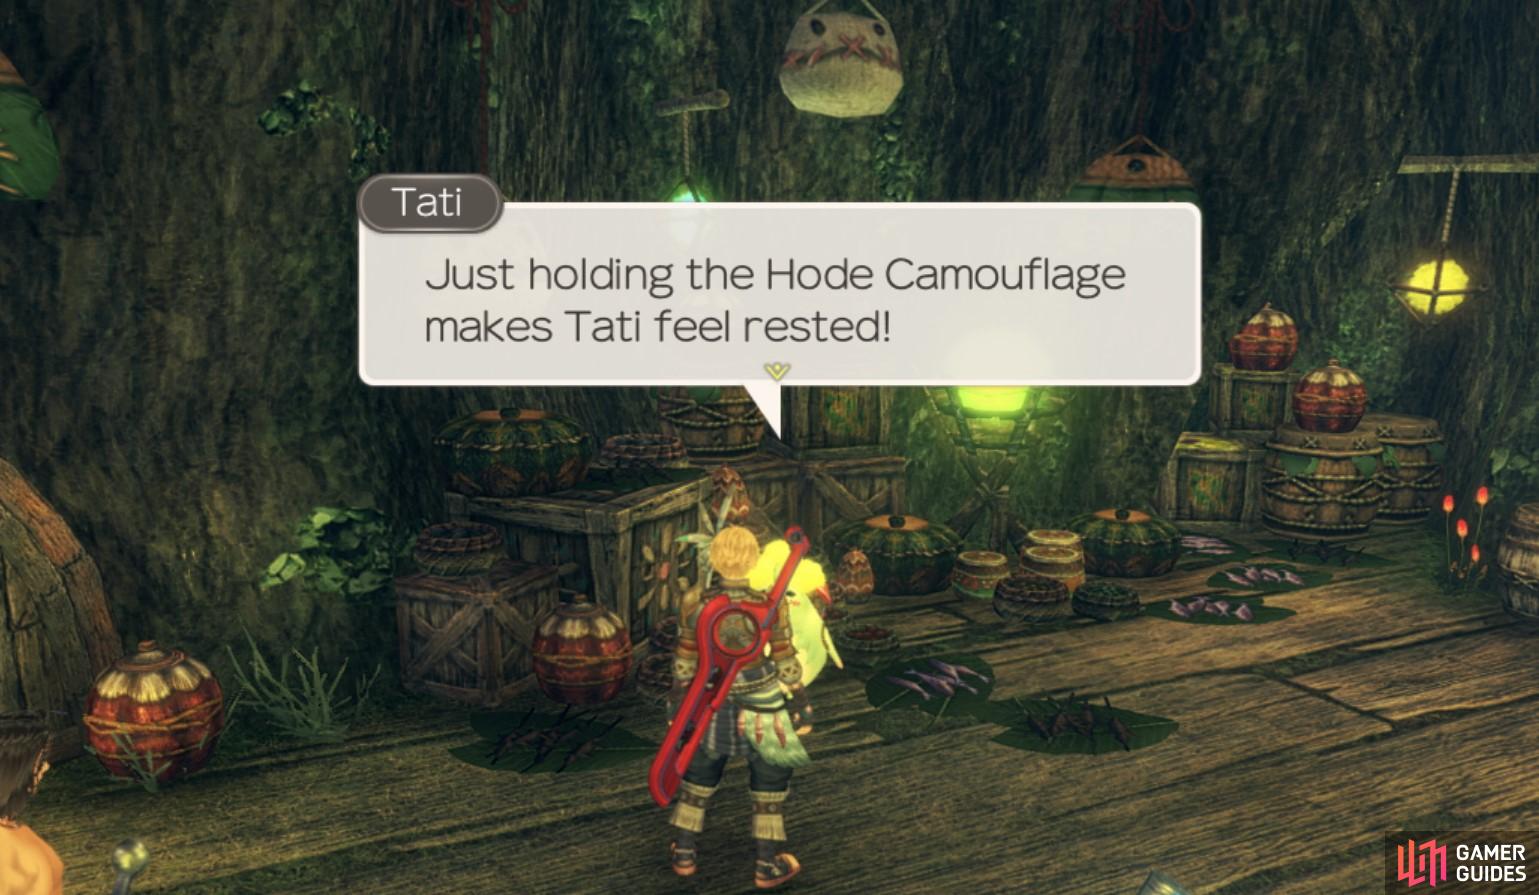
Tati had a bad cough, but the Hode Camouflage will help keep him warm.
Musical Genius
| Client | Rewards | Affinity |
|---|---|---|
| Tati | 10000G, 6500 EXP, Climb Armour, Climb Leggings, Quick Step III | 1✰ |
Once you have completed Strange Noises From Below and reached 1✰ affinity with Central Bionis residents, Tati will give you the quest Musical Genius. When this quest is activated, two more quests will also be added to your quest log: Things that Hum and Things that Rumble. These quests must be completed in order to finish this quest. These quests will require you to find various collectables across different regions.
Once Things that Hum and Things that Rumble have been completed, you can return to Tati to finish this quest too.
Things that Hum and Things that Rumble
| Client | Rewards | Affinity |
|---|---|---|
| Tati | – | 1✰ |
Both of these quests must be completed in order to finish Musical Genius. The following items required for each quest are listed below.
- Things that Rumble -
| Collectable | Collectable Location | Trade (Optional) |
|---|---|---|
| 2 Rumble Coals | Glowmoss Lake (Ether Mine) | – |
| 2 Rumble Parts | Glowing Obelisk (Satorl Marsh) | – |
| 2 Rumble Stoneflies | Spring of Grief, Vilia Lake (Tephra Cave) | Betty at 3✰ (Tranquil Square, Colony 9) |
| 2 Rumble Boxes | Underground Store, Reservoir (Frontier Village) | – |
- Things that Hum -
| Collectable | Collectable Location | Trade (Optional) |
|---|---|---|
| 2 Humming Plums | Raguel Bridge (Bionis’ Leg) | – |
| 2 Humming Cabbages | Altar of Fate, Barren Moor (Satorl Marsh) | – |
| 2 Humming Cats | Glowing Obelisk (Satorl Marsh) | Kacha at 2✰ (Nopon Merchant Camp, Satorl Marsh) |
| 2 Humming Nettles | Makna Forest | Deki at 2✰ (Nopon Tower, Frontier Village) |
The quests will be completed when you collect the required items. Once both quests are completed, you will be able to proceed with Tati’s quest, Musical Genius.
Fixing Time Mushrooms
| Client | Rewards | Affinity |
|---|---|---|
| Migaga | 4000G, 1150 EXP, Agility Down III | None |
Migaga tells you that the Time Mushrooms are all broken, and without them the Nopon don’t know what time it is. She asks you to repair them by feeding them compost. There is a Time Mushroom on the 1st, 4th and 7th floor of Frontier Village. To feed them compost, all you need to do is examine them and press ‘A’. Once completed, head back to Migaga to finish the quest.
Sweet Seduction
| Client | Rewards | Affinity |
|---|---|---|
| Migaga | 3600G, 1000 EXP, Sky Gloves, Aquatic Cloak II (A Route), Aerial Cloak II (Route B) | 2✰ |
Once you have reached 2✰ affinity and completed Fixing Time Mushrooms, Migaga will ask you to find the source of the sweet smell in Central Plaza. Firstly, talk to Kofuko who can be found near the Sacred Altar from 21:00 to 06:00. He will admit that he is trying to make a sweet alcoholic drink under the Sacred Altar. He is scared that the ingredients he is using are bad, so he asks you to fetch some more. This will activate the quest, Ingredients for a Brew, which will need to be completed in order for Sweet Seduction to also be finished.
Once you have completed Ingredients for a Brew, you can speak to Migaga again to tell her that it was Kofuko’s drink that was creating the sweet smell. Your choice of ingredient affects how she reacts to the drink. Walnut Grapes will make her angry, whilst Bitter Kiwis will make her excited to try the drink. Your choice affects their affinity link status; Route A will result in Rocky Marriage and Route B will result in Happily Married.
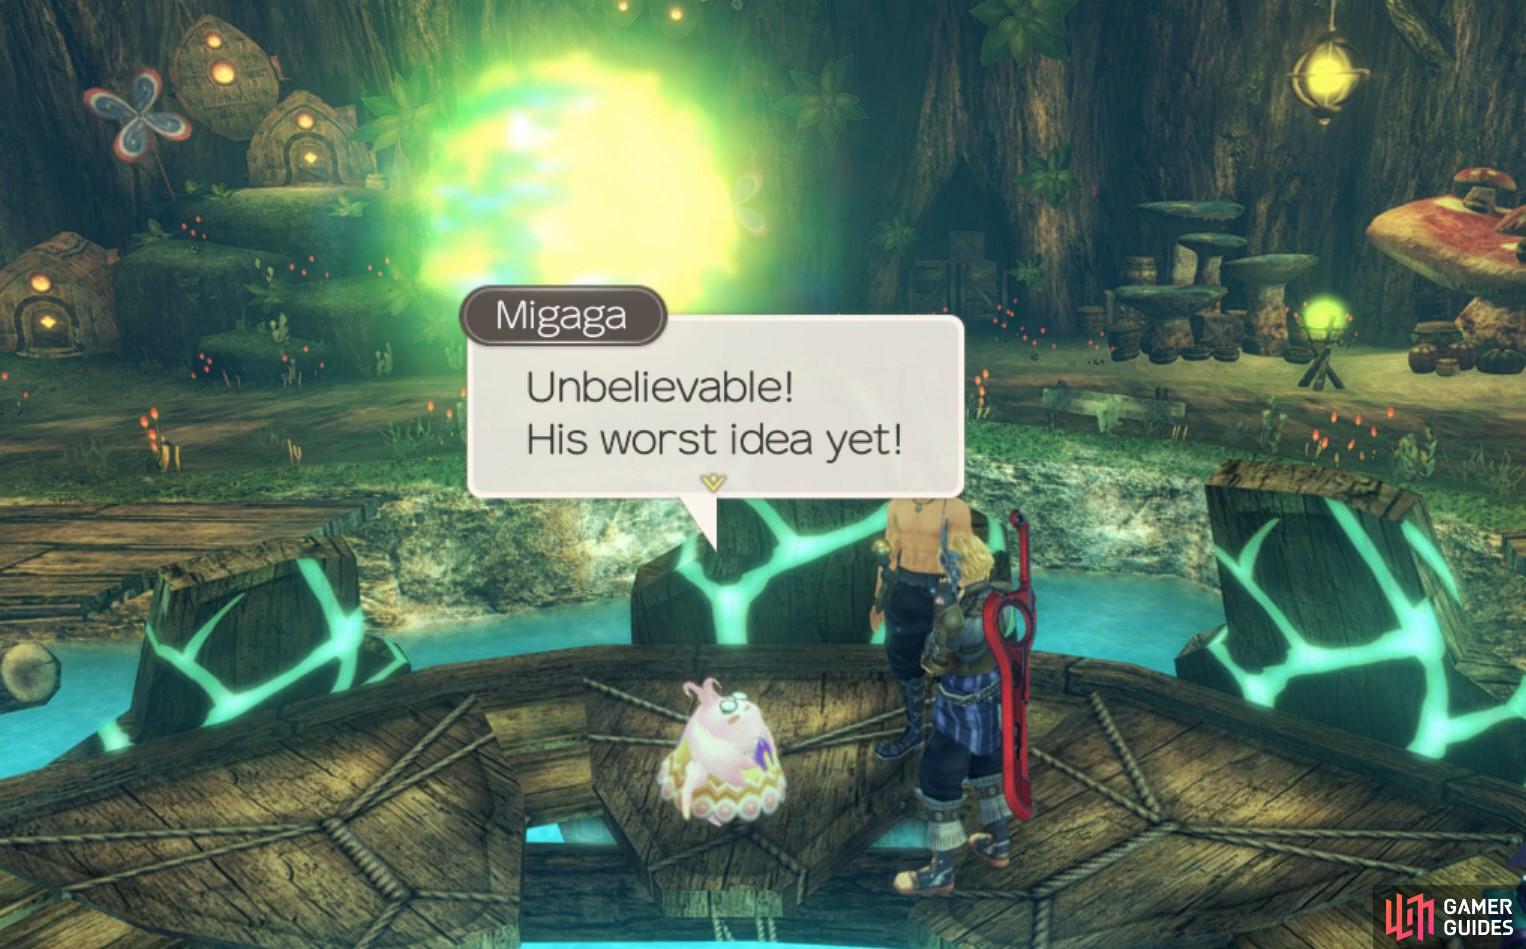
Migaga hates the Walnut Grapes
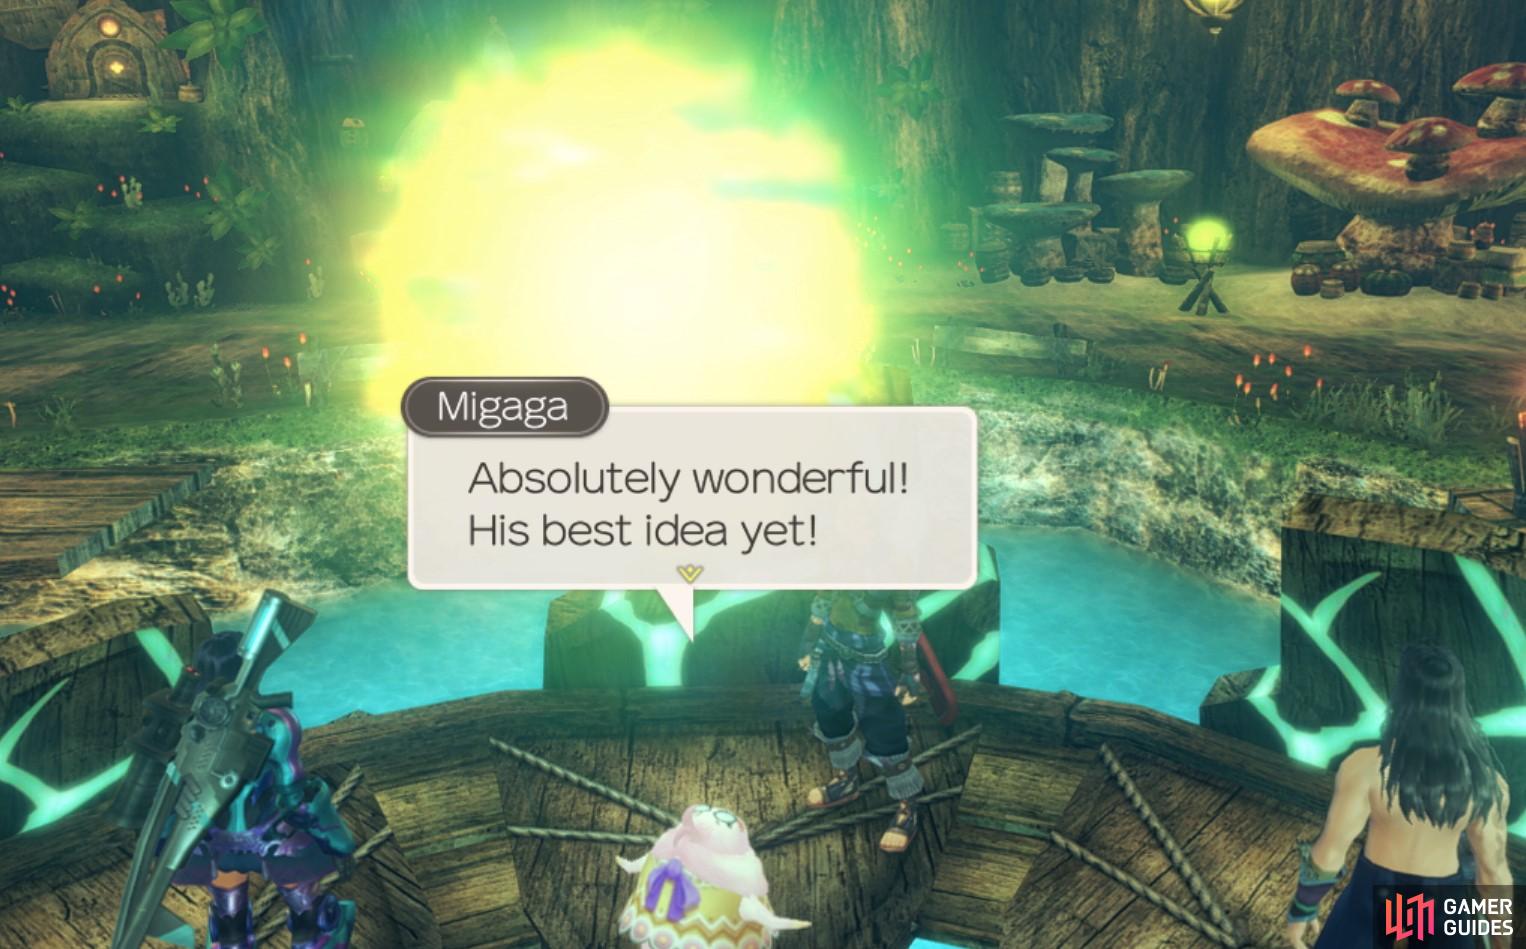
but she loves Bitter Kiwis!
Ingredients for a Brew
| Client | Rewards | Affinity |
|---|---|---|
| Kofuko | 3400G, 850 EXP, Auto-Heal Up III (A Route), Terrain Defence II (Route B) | 2✰ |
This quest is activated once you have received the quest, Secret Seduction and spoken to Kofuko. He will ask you to collect 4 Walnut Grapes (Route A) on the Bionis’ Leg OR 2 Bitter Kiwis (Route B) from Makna Forest for his brew. The different choices have different endings: you will receive different gems for whichever you pick and your choice affects Kofuko and Migaga’s marriage. Once you have the chosen ingredients, head back to Kofuko to complete the quest. You may now proceed with Sweet Seduction by talking to Migaga again.
-
Walnut Grapes (Route A) - Choosing these ingredients will result in a sickly sweet drink that makes Migaga angry. You will receive an Auto-Heal Up III gem as a reward.
-
Bitter Kiwis (Route B) - - Choosing these ingredients will result in a great drink that makes Migaga happy. You will receive an Terrain Defence II gem as a reward.
Once you have the chosen ingredients, head back to Kofuko to complete the quest. You may now proceed with Sweet Seduction by talking to Migaga again.
Lousy Lizards
| Client | Rewards | Affinity |
|---|---|---|
| Modamo | 7500G, 2000 EXP, Jungle Bottoms, Jungle Top | 2✰ |
Modamo is a great warrior, but he is scared of lizards! He has asked you to go defeat 5 Inferno Deinoses and 5 Plasma Deinoses. These can be found in abundance around the Eks Watering Hole, Waypoint Beacon and Twisted Tree Gate, so you shouldn’t have too much of an issue farming 10 Deinoses. Once you have defeated 5 of both the Plasma and Inferno Deinoses, head back to Modamo to complete the quest.
Quests Available After Reaching Eryth Sea
A Tormented Bug-Lover
| Client | Rewards | Affinity |
|---|---|---|
| Deki | 3000G, 2700 EXP, General Driver | 2✰ |
Once you have completed A Worried Bug-Lover, reached Eryth Sea in the main quest and have 2✰ affinity with Central Bionis Residents, then you may activate this quest from Deki. He still wants to teach Ababa a lesson about how awful it is to eat bugs, so he has asked you to fetch 5 lots of Bitter Wisp Fluid from Colony Wisps in Colony 6. These spawn at night and are in particular abundance around Freight Road and Watchpoint Junction. The Wisp Fluid is a bit of an uncommon drop so you may have to farm Colony Wisps for a while to get 5 lots. As soon as you’ve collected the required amount, take it to Ababa and have him drink it. Once again, Ababa likes the bug drink. Return to Deki to tell him the news, he will end up trying the wisp fluid for himself. The quest concludes with Deki loving the bug drink too! Deki and Ababa’s affinity link changes from a negative to a positive status following the completion of this quest.
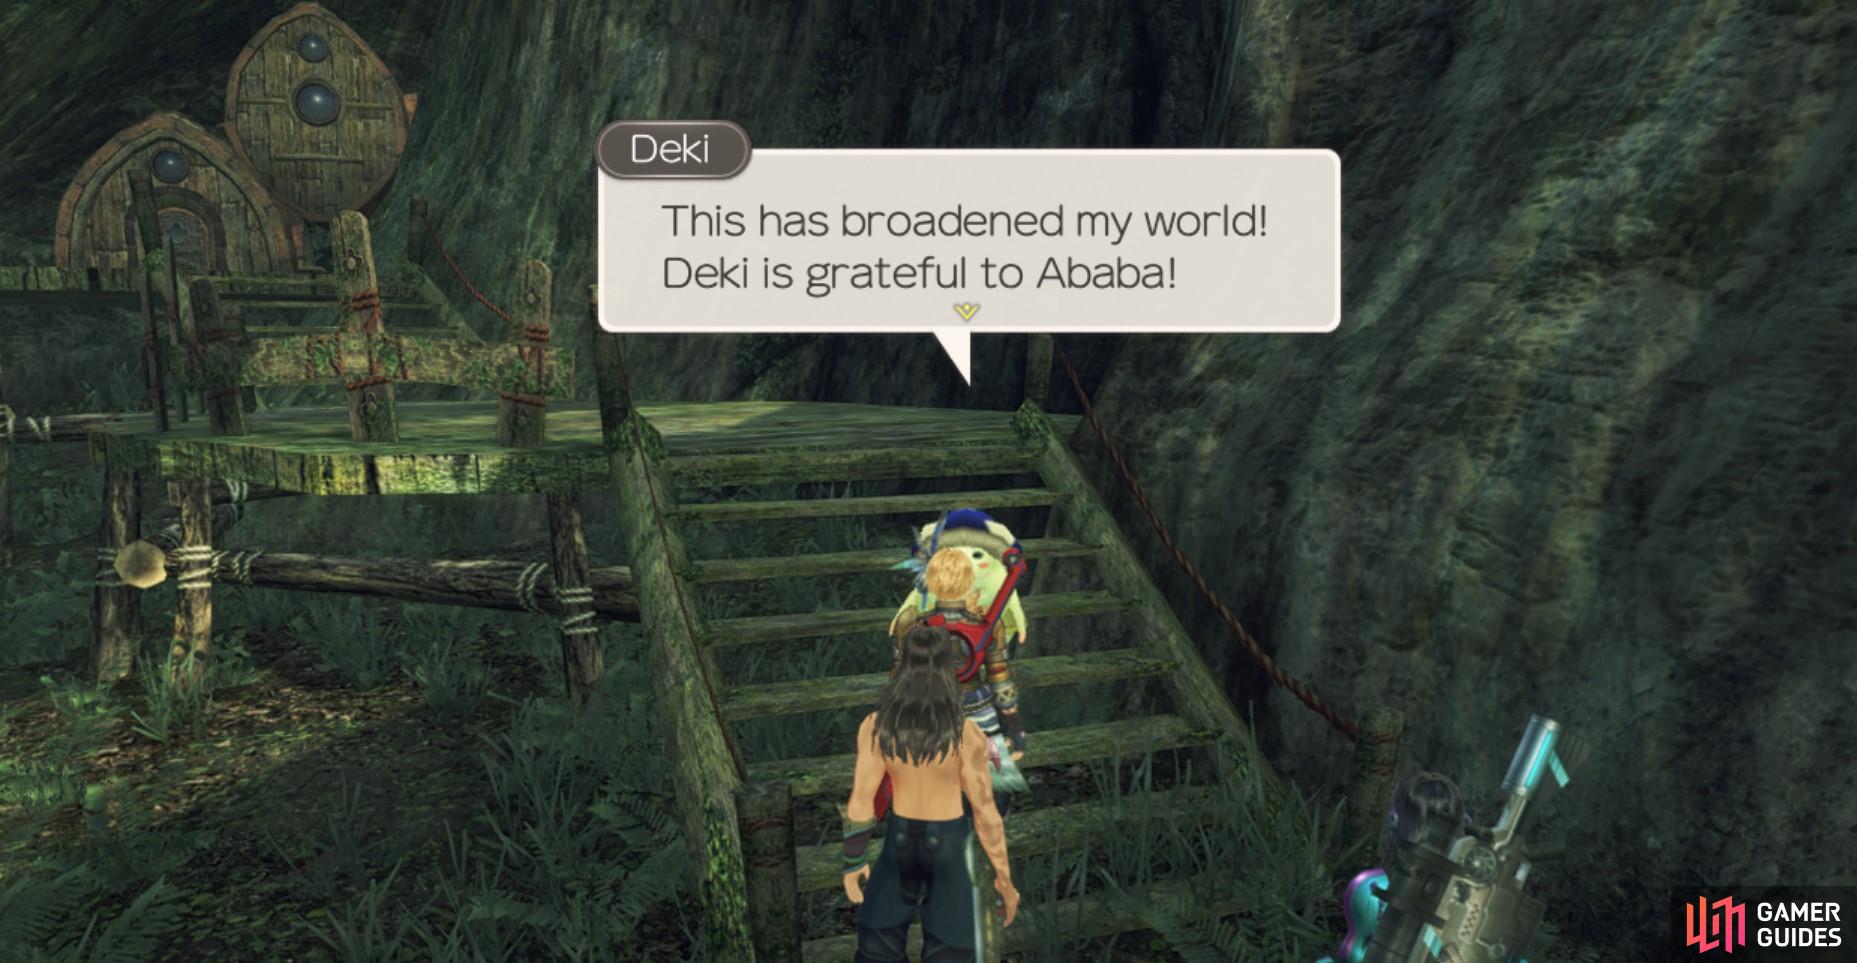
Deki loved the Bitter Wisp Fluid drink!
Honouring the Nopon Sage
| Client | Rewards | Affinity |
|---|---|---|
| Pipiki | 3000G, 2500 EXP, Aggro Up III | None |
Pipiki wants to honour the Nopon Sage who lives at Great Makna Falls. He has asked you to collect some things so that he use them as an offering to the Nopon Sage.
-
3 lots of Juicy Laia Fish - This is a material dropped by Chloro Laias in Eryth Sea. They spawn at night and most commonly around Syrath Lighthouse and Hovering Reef 5.
-
4 Benign Crickets - This is a collectable found across Makna Forest. You can also trade for them with Deki at 1✰ affinity in Frontier Village.
-
4 Soft Cucumbers - This is also a collectable found across Makna Forest. You can also trade for them with Cherri and Pepa at 2✰ affinity in Frontier Village.
Once you have collected all the items, head back to Pipiki to complete the quest.
Meeting the Nopon Sage
| Client | Rewards | Affinity |
|---|---|---|
| Pipiki | 3500G, 3500 EXP, Aggro Down III | None |
Once you have completed Honouring the Nopon Sage, Pipiki will ask you to take the offering to the Nopon Sage at Great Makna Falls. He says that the Nopon Sage will appear when there is a rainbow over the waterfall. Fast travel over to the Divine Sanctuary or Waypoint Beacon and make your way over to the small cliff ledge that faces Great Makna Falls (there should be a ! to guide you). When you’ve arrived at the point, you will notice that you have the option to make the offering but that it fails if there is no rainbow present. A rainbow should appear between the hours of 12:00 and 15:00. Once the rainbow has appeared, you will be able to make a successful offering and the Nopon Sage will appear. The Nopon Sage will grant Pipiki’s wish and then you can return to him in Frontier Village to complete the quest.
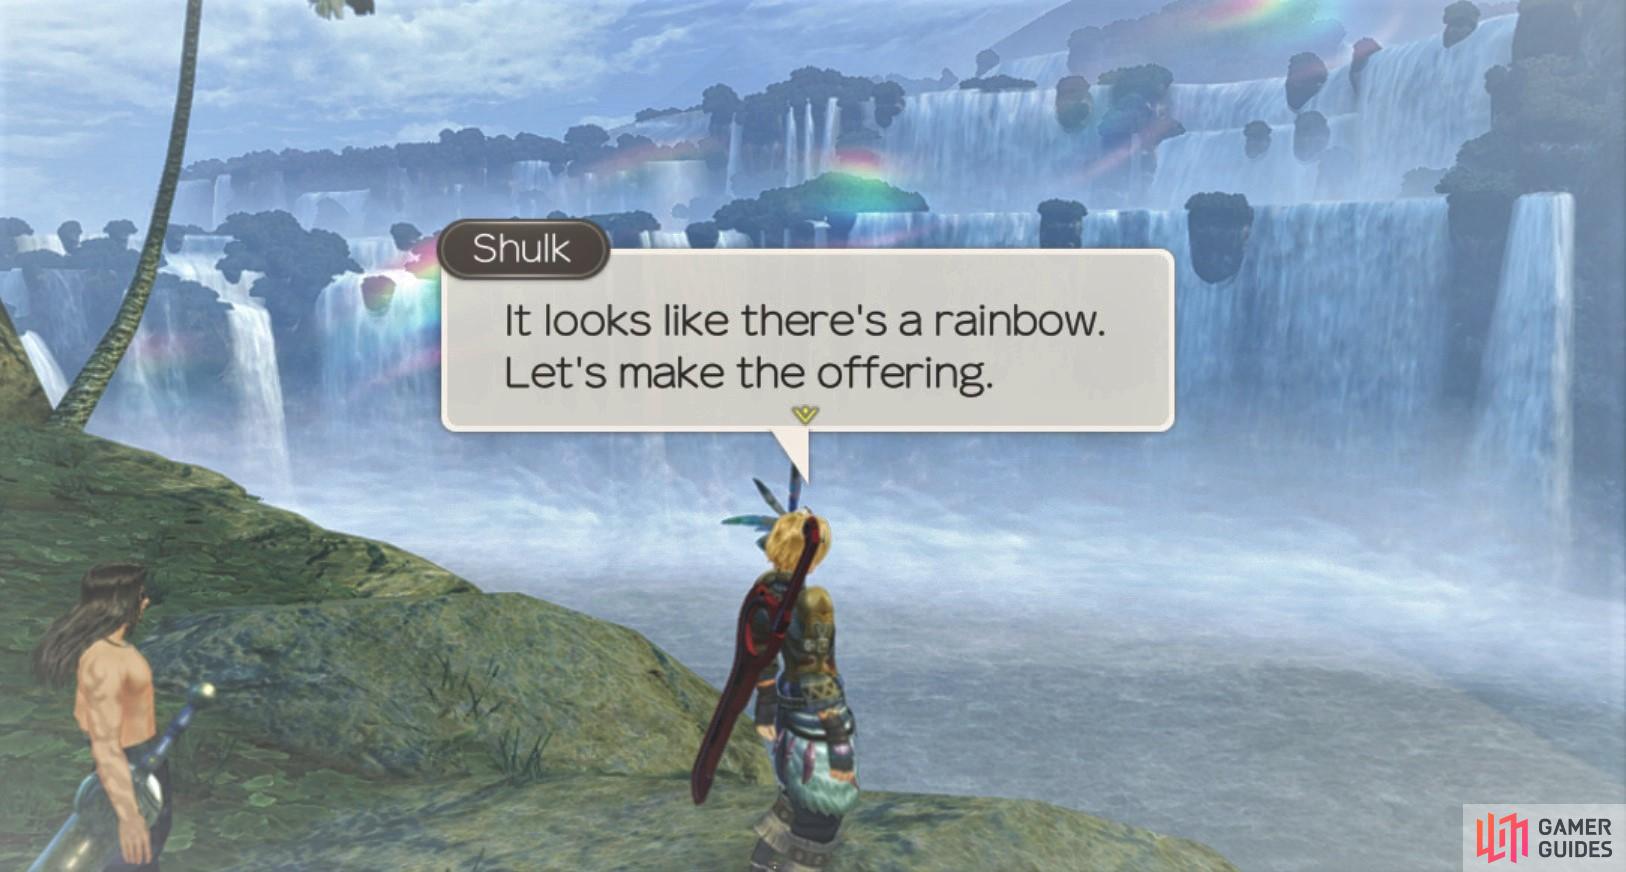
You can only make an offering when there is a rainbow above Great Makna Falls.
Avenge a Mamapon’s Death
| Client | Rewards | Affinity |
|---|---|---|
| Rasha | 5200G, 3600 EXP, Shell Leggings | 4✰ |
Once you have completed Deinsectization and Secret Innovation, reached Eryth Sea and have 4✰ affinity with Central Bionis, you may activate this quest from Rasha. Another important prerequisite is that Rasha will only give you the quest if Sharla is the party leader. She will tell you a story about her sister, Cherri’s mamapon, who was killed in Eryth Sea. She will then ask you to avenge her death by defeating Pillager Hode near the Ether Crystal Deposit in Eryth Sea. The Ether Crystal Deposit can be found southeast of Hovering Reef 6. The Pillager Hode is not a unique or quest exclusive enemy so it should not be too hard of a fight. Return to Rasha upon its defeat and she will ask that you give Cherri a piece of her Mamapon’s clothing. Cherri will only accept the Cloth Shred if there is Sharla is the party leader. Return to Rasha to complete the quest.
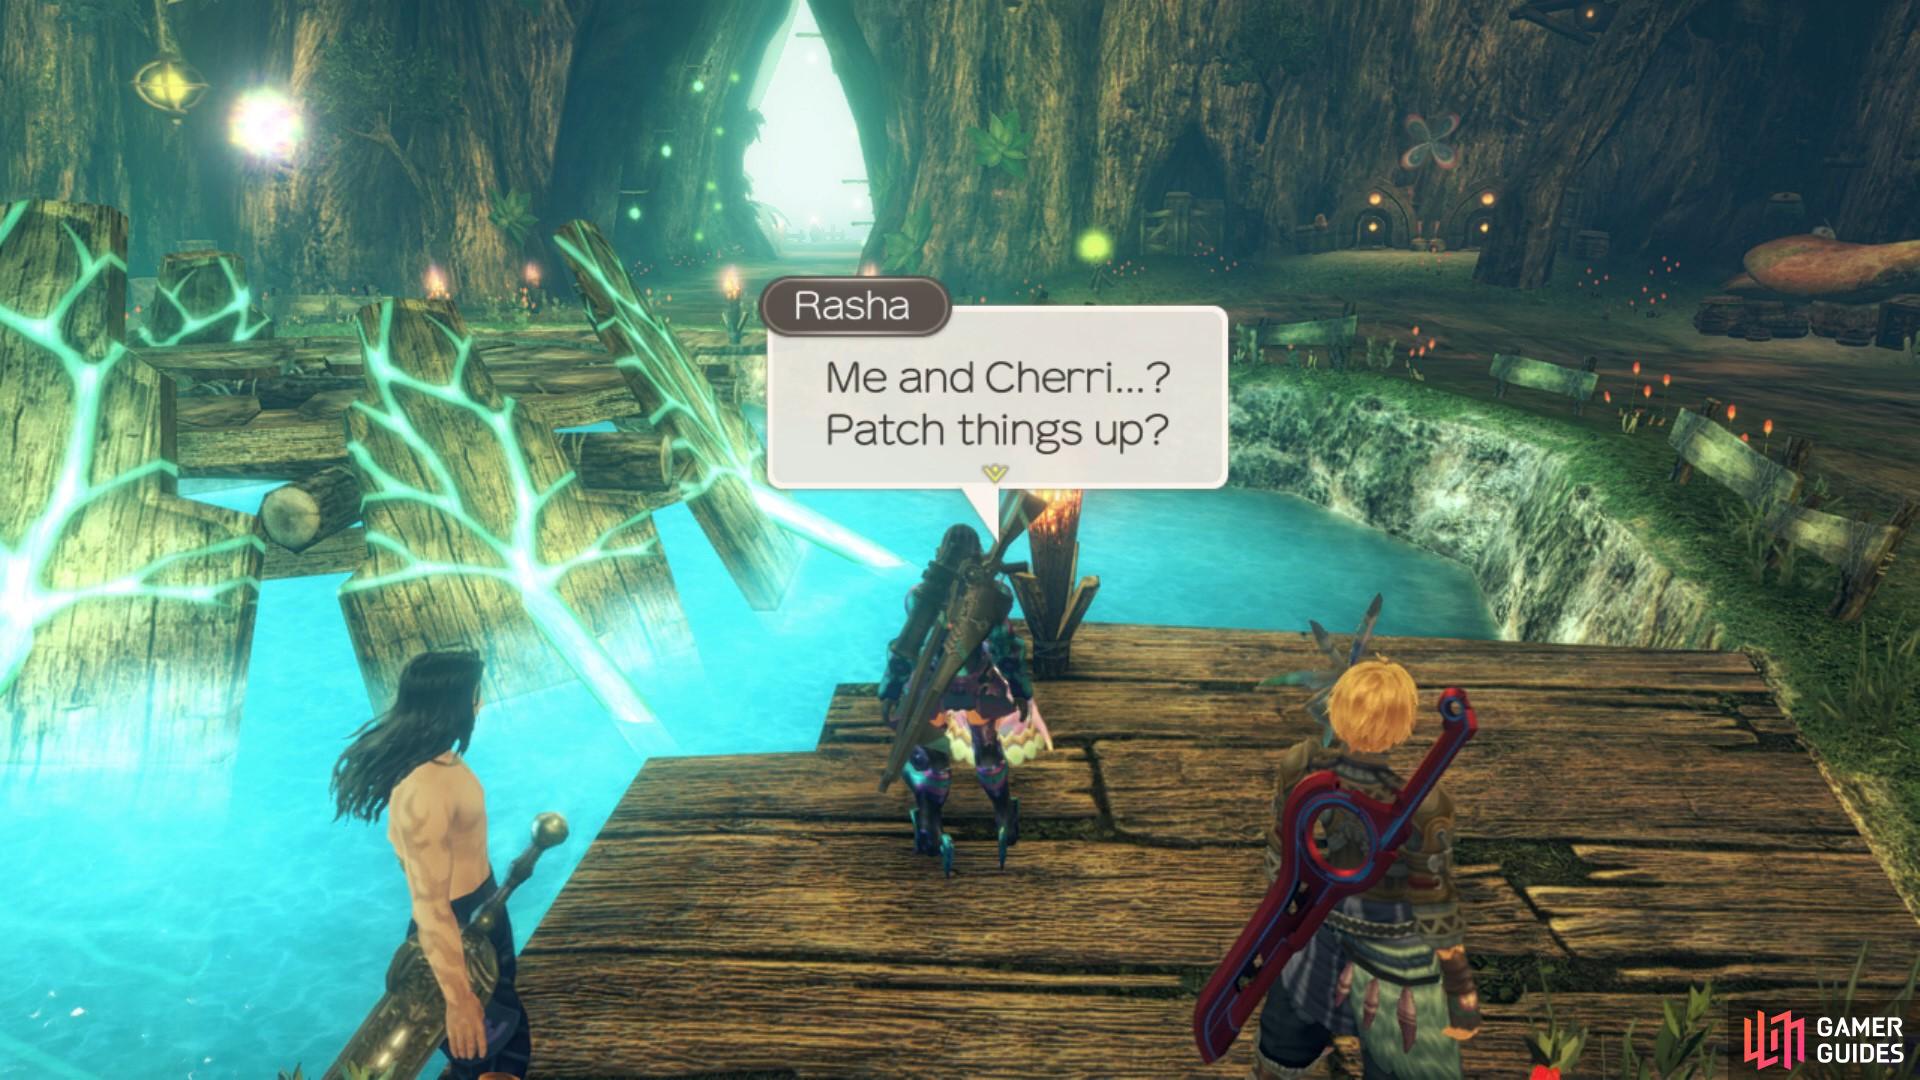
Cherri and Rasha may finally get along
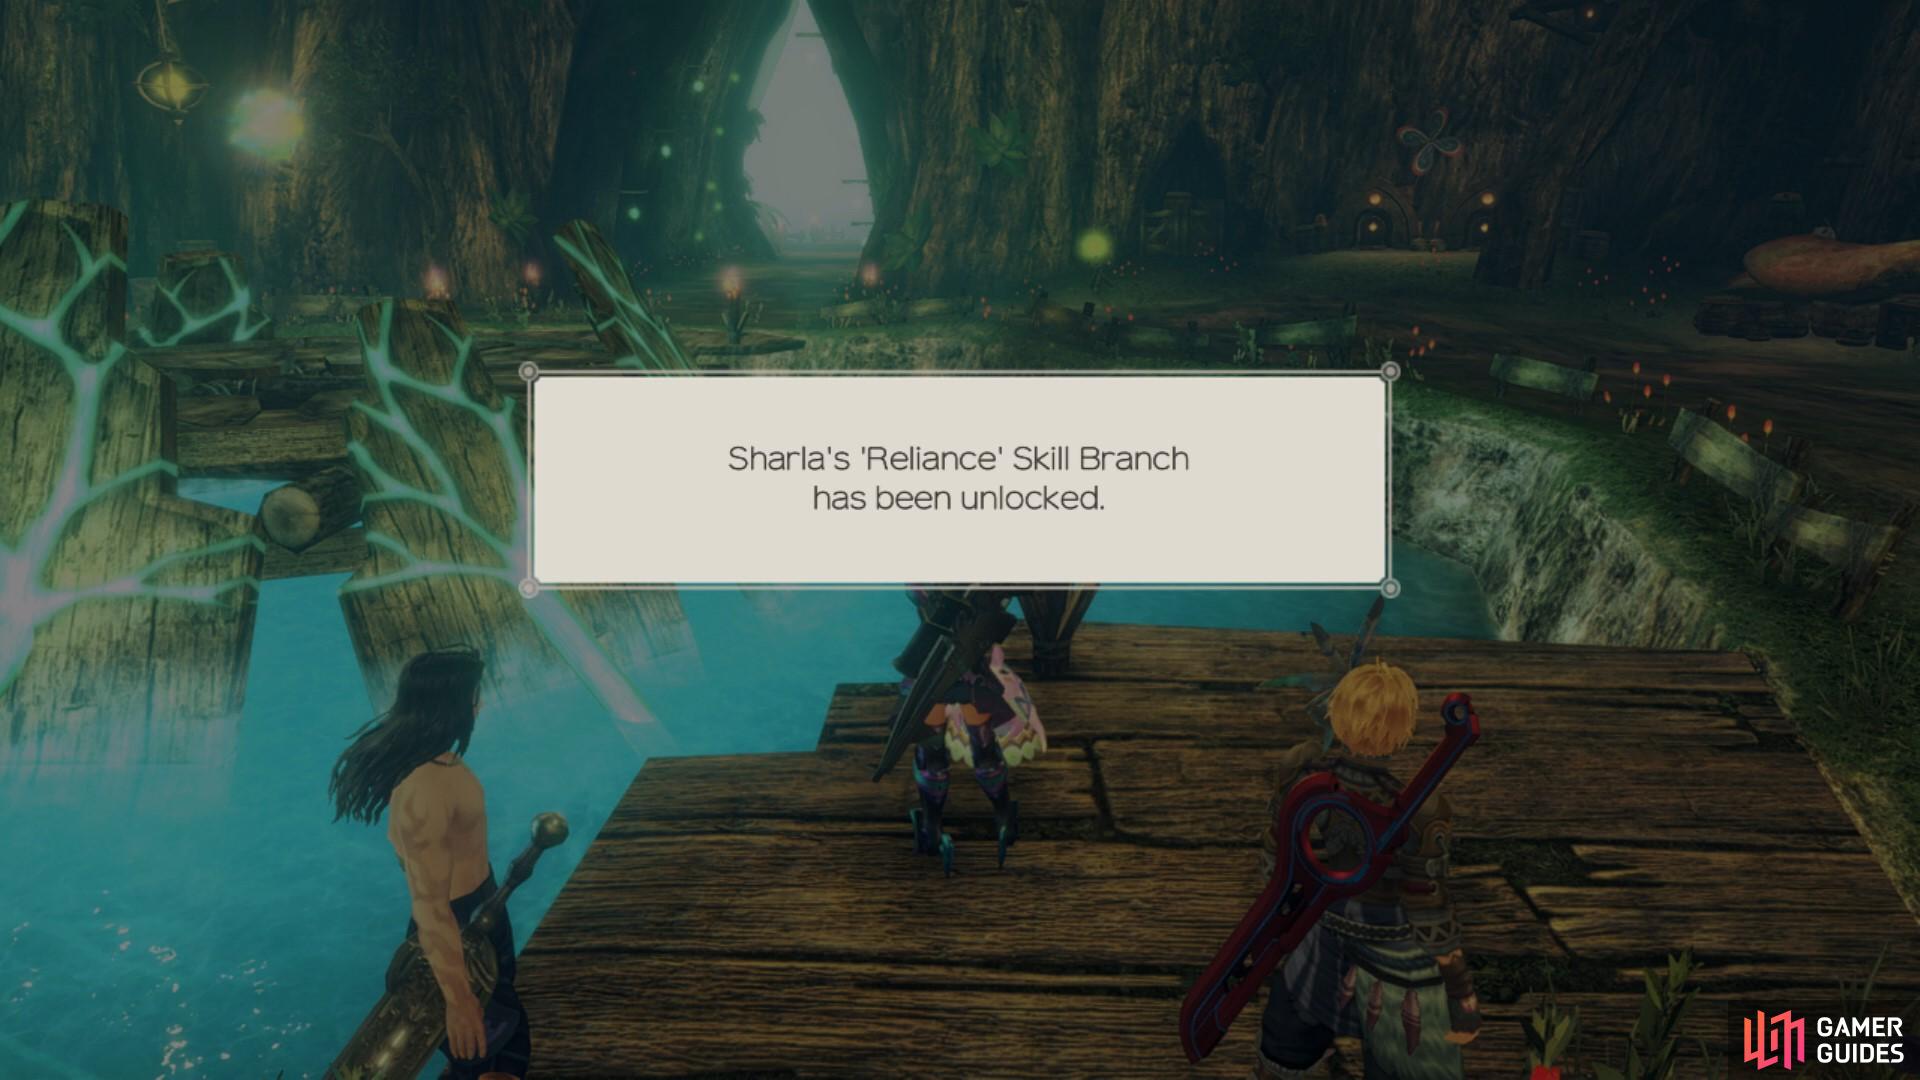
Sharla unlocks the skill branch, Reliance
Quests Available After Reaching Alcamoth
Dangerous Ambition
| Client | Rewards | Affinity |
|---|---|---|
| Cherri | 8000G, 3000 EXP, Bleed Attack II, Bleed Defence IV | 2✰ |
To activate this quest, you must have already completed The Master’s Successor, however, your choice in successor does not affect being able to pick this quest up. Cherri will tell you that Gadada has gone missing, and she asks you to help find him by asking his friends about his whereabouts. On your affinity chart, you will see that Gadada is friends with Bana. You can find Bana in Central Plaza from 18:00 to 06:00. He will give you a vague idea of where Gadada might be, for example he mentions Clear Waterfall and a deadend. You might be tempted to head straight for Clear Waterfall and navigate to the ! marker from there, however, the area that Gadada can be found in is raised and you can only get to it via the Nopon bridges. The bridges start from Village Entrance, and you just want to follow the bridges in a northeast direction until you reach an elevated area where you will find Gadada. When you reach him, it will trigger a cutscene where you discover that a High Entia has tricked him into handing over a Red Pollen Orb, which are rare and hard for the Nopon to make. Once the cut scene is over, head back to Cherri to finish the quest.
Find the Kingpin
| Client | Rewards | Affinity |
|---|---|---|
| Gadada | 10000G, 5000 EXP, Poison Attack II, Poison Defence IV | 2✰ |
Once you have reached Alcamoth in the main quest and have completed Dangerous Ambition, Gadada will offer up this quest. Following on from the story developed in Dangerous Ambition, Gadada wants to find out who it was who tricked him into giving over the Red Pollen Orbs. Firstly, you must speak to Bana, who can be found in Central Plaza between 18:00 and 06:00. He will tell you about the Nopon Merchants who gave the order. After speaking to Bana, return to Gadada to tell him the news. He will then ask you to speak to some Nopon Merchants and obtain proof from them. There are many Nopon Merchants across the Bionis, however, you will need to speak to Daza in Colony 6. First though, you must complete or have completed Daza’s quest, Secret Mission, which is the third and final instalment in Daza’s quest chain. During Secret Mission you are given Top-Secret Data as a reward. This is the proof that you need to hand over to Gadada. Once you have given him the proof, the quest will be completed.
Adviser Hunt and Gather Information
| Client | Rewards | Affinity |
|---|---|---|
| Gadada | 11000G, 5500 EXP, Double Attack II, Daze Resist III | 2✰ |
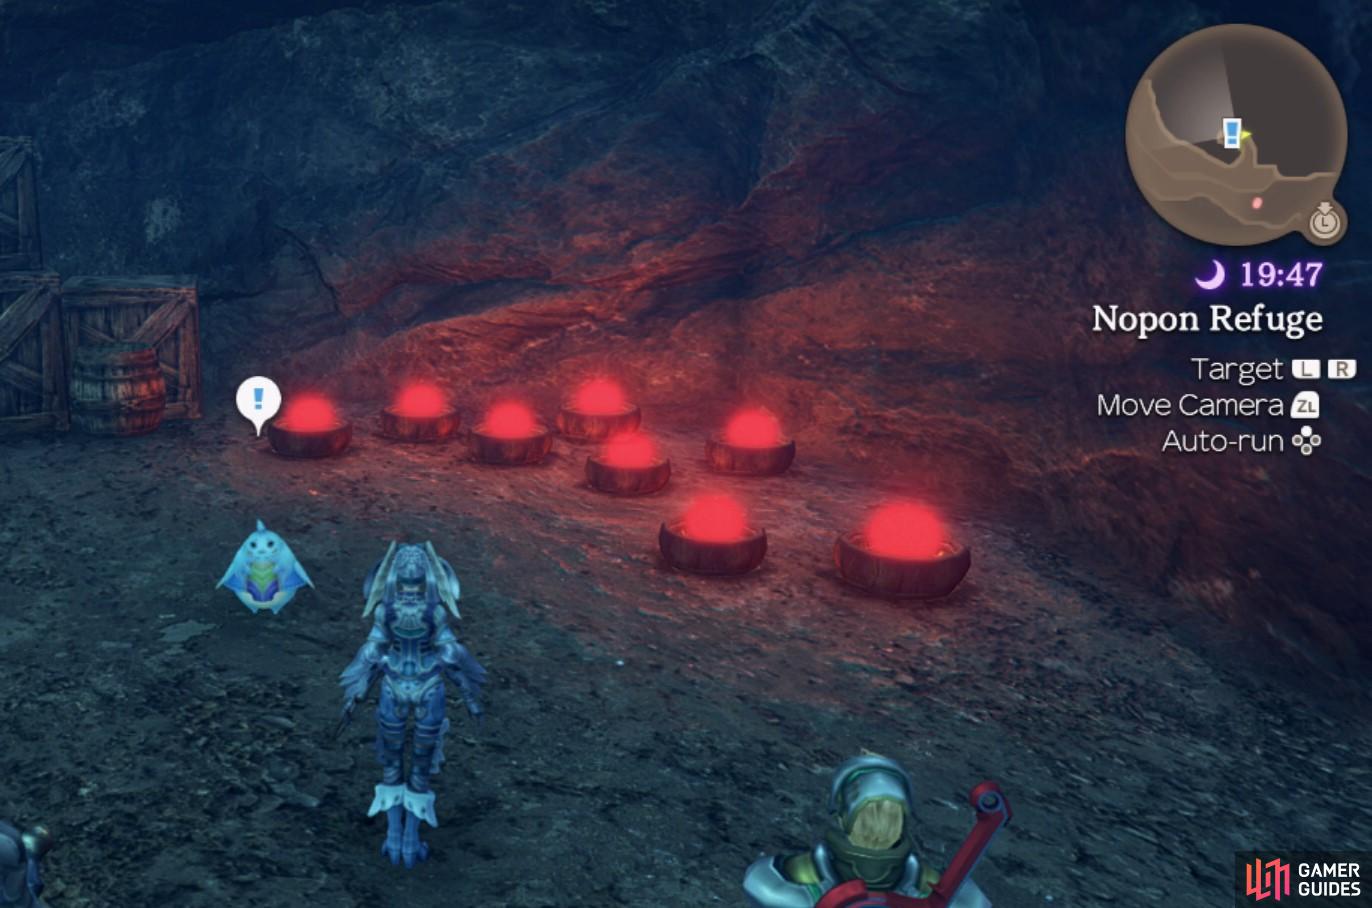
Gadada has read the Top Secret Data and has found that it was Debadeba who was misusing the Red Pollen Orbs! He has asked you to go to Debadeba’s home to investigate. When you arrive at his home though, there is nobody there. Head back to Gadada to tell him what you found. He will then explain that Debadeba has been receiving packages from a Nopon in Satorl Marsh. The quest objective says to find a “Suspicious Nopon” in Satorl Marsh. You may remember that when you completed the quest A Gift? you were instructed by Zazadan to deliver Highmore Caviar that was made from Red Pollen Orbs, to Debadeba. Head over to Glowing Obelisk in Satorl Marsh and walk north to Nopon Refuge to talk to Zazadan. Upon talking to him, you will activate the surprise quest, Gather Information.
Gather Information - this quest requires that you interrogate Zazadan to find out what he knows about the black market. You will be given a series of questions to ask him, for the best results pick the following:
-
“What happens if it’s processed?” - Zazadan will tell you that Red Pollen Orb becomes a highly addictive substance when processed. The addictive substance is Highmore Caviar, the “food” you made when you completed his quest, A Mysterious Delicacy.
-
“We don’t blame you” - Zazadan tells you that his secret Nopon society is selling the Highmore Caviar to High Entia because it is an easy way to make a lot of money.
-
“Ask where Debadeba is” - Zazadan cannot say where Debadeba is because the chairman will kill him!
Upon completion of the interrogation, you will receive an item labelled Zazadan’s Memo. After finishing Gather Information, head back to Gadada and give him the memo to complete Adviser Hunt.
Zazadan is in a lot of trouble

but under interrogation, he reveals their secret business.
Evidence Collection
| Client | Rewards | Affinity |
|---|---|---|
| Gadada | 13000G, 7500 EXP, Bind Resist III | 2✰ |
Gadada needs you to find pieces of Debadeba’s Evidence across Frontier Village so that he can finally expose him to the Chief. There are four pieces of evidence to find in total, and they are relatively easy to locate. Two of them are found in Gadada’s immediate vicinity. One is behind Debadeba’s house on the Orb Storage level, and then the last one can be found in the Underground Store. Once you have all of them, head back to Gadada to complete the quest.

Destroying the City Trade and Getting a Member’s Card
| Client | Rewards | Affinity |
|---|---|---|
| Gadada | 15000G, 8000 EXP, Agility Up III, Recovery Up IV, AP Up III | 2✰ |
Now that Gadada has the evidence, he’s ready to make Debadeba pay! He has asked you to find the location of the Secret Club in Alcamoth. Once you have found the club and speak to the Bouncer, you will trigger a Surprise Quest called Getting a Member’s Card. This quest must be completed in order to progress with Destroying the City Trade.
Getting a Member’s Card - This Surprise Quest requires you to find a Secret Club Card so that you can access the club. You can obtain a Member’s Card from Nelo who is found near the Fountain of Hope from 18:00 to 06:00. He will lend you his card on the condition that you fetch him 3 Rufus Control Units from Orluga Rufus in the High Entia Tomb. They can be found specifically on the Tower of Trials and the material required is a fairly common drop so you shouldn’t have to farm for too long. Take the items back to Nelo so that you can retrieve the Member’s card and complete the Surprise Quest.
Once you have the Member’s card, head back to the Secret Club and show the Bouncer your new card. He will let you in and you can go and talk to Debadeba. You will witness a short cutscene where Debadeba is arrested. He confesses that he has been framed and is not the Kingpin. After the cutscene you can head back to Frontier Village and talk to Gadada to complete the quest.
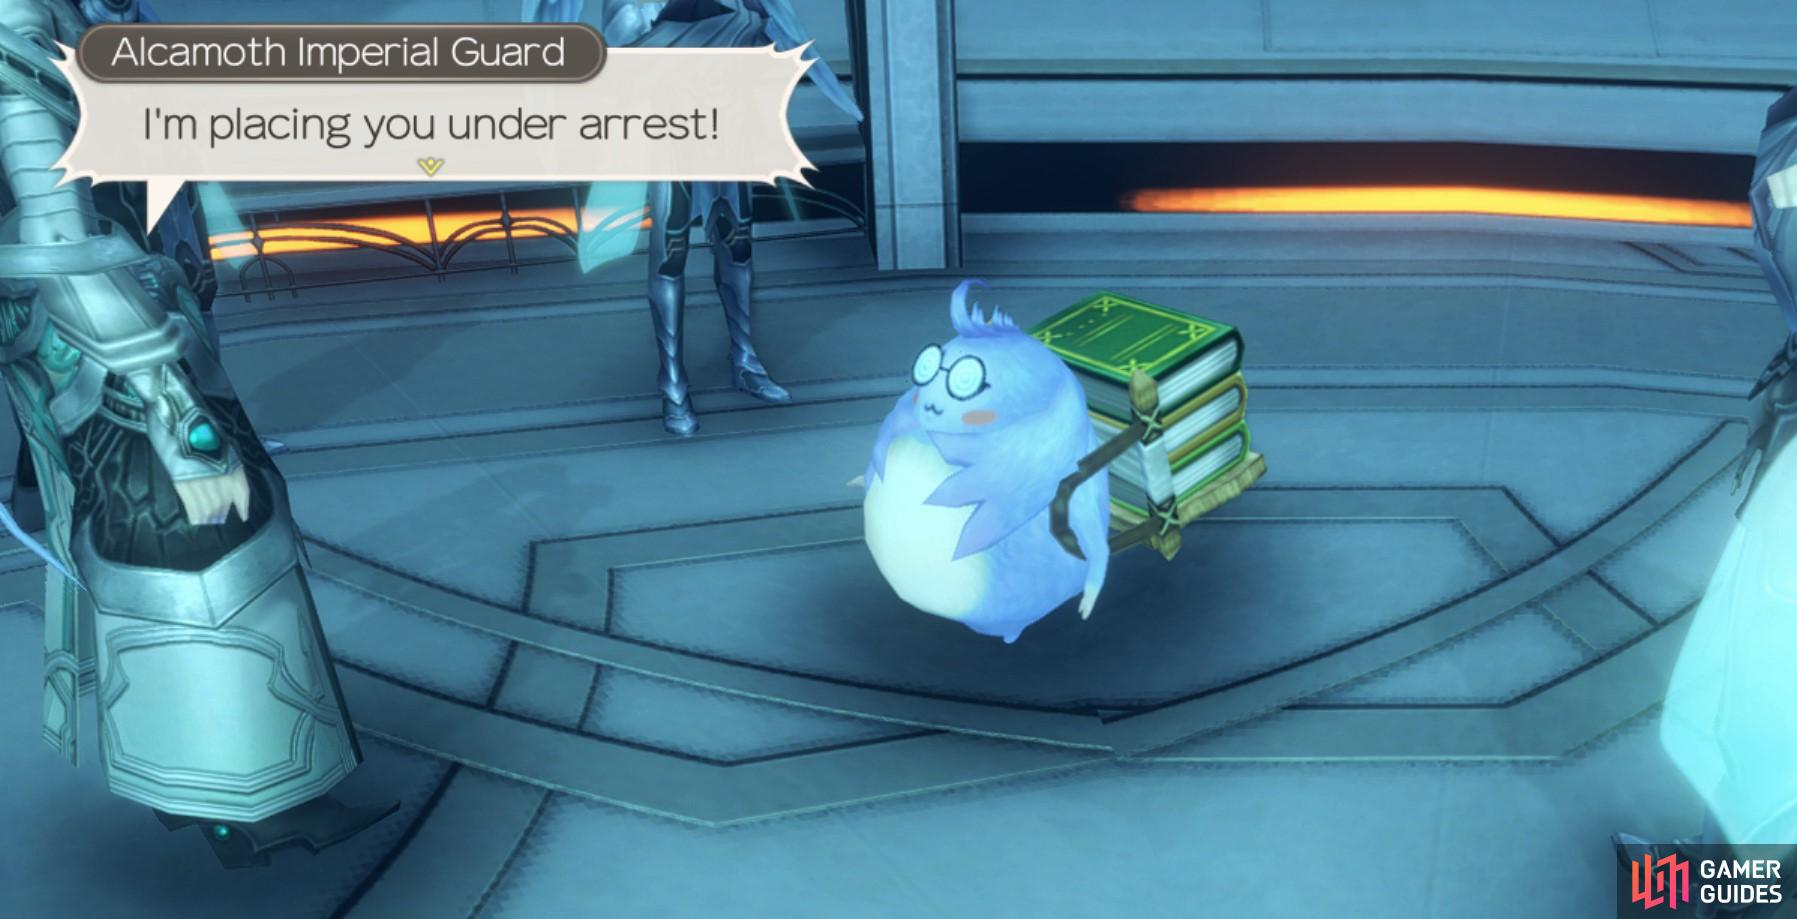
Debadeba is getting his comeuppance!
No Comments