


Loose Ends
Following the events at the end of Chapter 14, the party finds themselves back on the Fallen Arm in Junks with a clear objective, get to the Mechonis Core and put a stop to Egil. Taking a look at your Area Map, you’ll now see that Sword Valley, Galahad Fortress, Mechonis Field, Central Factory and Agniratha are now unavailable. You’ll gain entry to Central Factory one final time shortly as part of the story and then that too will become unavailable. What’s more, the events at Mechonis Core are the first point of no return, making a lot of the timed Quests fail so now is the time to tie up any loose ends. More specifically, take care of everything in Alcamoth while you can, including any Heart-to-Hearts (although you won’t be able to miss any of these).
Colony 6 Housing Lv 5
To begin with, you can now finish the last upgrade for Housing at Colony 6, this will open more Quests to boost the Affinity a little more before Mechonis Core.
- Vang Star Wings are a drop obtained from Tempest Vangs in the Windy Cave on the Bionis’ Leg. Gogol Horns are dropped by Gogols in Satorl Marsh and on the Bionis’ Leg. South of Sororal Statues in Satorl Marsh are many Baelzeb Gogol that can drop a Gogol Horn upon defeat. Black Styrene is a collectable found across Central Factory, but they will also spawn in Colony 6 when you have reached level 4 in the Special category. Rainbow Zirconia are also a collectable, and they are found in Colony 9. Alternatively, you can trade for them with Dionysis at 1✰ affinity with Colony 9. Red Frontier are a collectable found in Sword Valley. If you no longer have access to Sword Valley, and you do not have the required amount of Red Frontiers, then head to Junks on the Fallen Arm and trade with Rizaka at 5✰ affinity with Hidden Village residents.
Return to Juju and upgrade the Colony’s Housing Lv to 5 where you’ll obtain Oriental Glasses for completing the entire category. Next, you’ll want to go and invite some more residents to Colony 6 to unlock more Quests. Start by heading off to Frontier Village and inviting either Minana or Gowago, both unlock Quests but will only join if the other isn’t present so choose the character you like the most. Next, travel to Alcamoth and invite one of En Argentis or Zel Argentis. Like above, you can only invite one or the other and although they both offer the same quest (Pre-Mechonis Core for En, Post for Zel), they’ll have a different follow-up. Finally, make your way back to Colony 9 and invite Nic over to Colony 6 to complete your current recruitment spree.
Next up, check around Colony 6 to find a whole new set of Quests have opened along with you now being able to finish off a few others.
Miss Sweetness’ Gratitude
After you have reached 4✰ affinity with Colony 6 and you have completed the previous Miss Sweetness Showdown quest, you may pick this quest up from Ma’crish or Berryjammy. They will ask you to listen to their demands, and this will trigger the second quest A Final Sweet Favour, which you will need to complete in order to progress and finish Miss Sweetness’ Gratitude.
Once you have completed A Final Sweet Favour and have the required materials, return to Ma’crish or Berryjammy to finish this quest. After finishing this quest, fireflies will spawn at night around the lake in Colony 6. The Nopon in that area will comment on how wonderful they are!
A Final Sweet Flavour
After automatically accepting this quest whilst activating Miss Sweetness’ Gratitude from Berryjammy or Ma’crish, you will be asked to talk to Lalapa in Frontier Village. He is active between 06:00 and 18:00 near the Chief’s Residence. First, he will tell you to fetch Fresh Algora Sap from the Sap Cave in Makna Forest. The Sap Cave is located southwest of the Nopon Arch landmark. To get into the cave, you’ll have to defeat the Brog that blocks the path. Luckily, by now, you should be many levels higher than the Brog, so it will be a short fight. When you enter the cave, change the time to 05:00 and the Fresh Algora Sap will spawn (it only spawns at dawn). Return to Lalapa in Frontier Village and he will then direct you to Zaldania Waterfall to the east of Lacus Swamp in Satorl Marsh. There, you will need to pick up a Mysterious Droplet. This quest will automatically complete upon picking up the droplet.
After this, you will be able to continue with Berryjammy or Ma’crish’s quest, Miss Sweetness’ Gratitude.

The Mysterious Droplet is found at the base of Zaldania Waterfall in Satorl Marsh.
In Pursuit of Love
Rosemary will ask you to find her four suitors so that she can choose a new boyfriend. She wants you to find a timid Homs man, a rough-and-ready Homs man, a composed High Entia, and a Nopon food connoisseur.
- Timid Homs Man - Nic (active hours: 18:00 - 06:00)
- Nopon Food Connoisseur - Pokapoka (active hours: 06:00 - 18:00)
- Rough-and-Ready Homs Man - Peppino (active hours: 15:00 - 03:00)
- Composed High Entia - Yura (active hours: 06:00 - 18:00)
After you have spoken to all the males, return to Rosemary to complete the quest.
Dream of a Poet
Once you have completed In Pursuit of Love and reached 2✰ affinity with Colony 6 residents, you may access this quest. He will ask you to fetch the Swan Pendant from High Entia Tomb. The Pendant is found at the northest point of the map on B1F. There will be some level 35 and 36 enemies that respawn upon entry into the room, however, you are likely a far higher level than them at this point, so they won’t aggro on you.
Return to Yura, who will then ask you to take the pendant to Rosemary. To complete the quest, speak to Yura again for a final time.
The Swan Pendant is found on B1F in the High Entia Tomb
the location of the pendant on the map.
Melody of Happiness
Once you have completed In Pursuit of Love and reached 2✰ affinity with Colony 6 residents, you will be able to pick this quest up from Nic. He will ask you to fetch 2 Eks Iron Hearts from Makna Eks in Makna Forest. They can be found in common numbers around Eks Watering Hole. Return to Nic once you have the required materials. He will then make a Music Box out of the materials and ask you to take it to Rosemary. Speak to Nic for a final time to complete the quest.
A Butler’s Concerns
To access this quest, you need to have reached Central Factory in the Main Story quest. You also need to have invited Yura, from Alcamoth, to Colony 6, which requires Housing Level 3 and Reconstruction must be at 25%. You must then invite Gowago and not Minana from Frontier Village, you can only choose one of them. Choosing Minana will mean you have access to A Maid’s Concerns instead of this quest.
Once you have accepted this quest, you’ll be asked to take Poetry Anthology to Yura and he is active from 06:00 to 18:00 in Colony 6. Once you have spoken to him and given him the Poetry Anthology, return to Gowago to complete the quest.
Nic’s Training
To access this quest, you must have already completed Nopo’rikh’s other quest, Looking For Freedom. You must also have invited Nic to live in Colony 6, which requires Level 5 Housing in the reconstruction side quest. He will ask you to help train Nic by defeating the Canyon Valencia near Raguel Bridge on the Bionis’ Leg. You can only find the level 78 unique monster on a clear day. You will want to fast travel to the Observation Platform on the Upper Level of the Bionis’ Leg, since the monster flies around there, high above Raguel Lake. If he is hugely over levelled in comparison to your party, but you don’t want to wait till you’re a higher level, consider activating Casual Mode in the main menu. If you are a lower level, then you may have already used Casual Mode to collect the materials from the higher level enemies to complete Housing to Level 5. It will still be a tough fight, but you’ll actually be able to land hits and do some damage. Once you have defeated the Canyon Valencia, return to Nopo’rikh who will then tell you to go back to Bionis’ Leg and slay 10 Tempest Vangs. They are level 75 Vangs that can be found in Windy Cave beneath the Spiral Valley landmark. Once more, the advice about Casual Mode could also come in handy here, if you’re a lower level.
When you return to Nopo’rikh, he will ask you which you found hardest: the 1 strong enemy or the 10 weaker ones. Your choice does not matter to the outcome of the quest, your rewards will be the same.
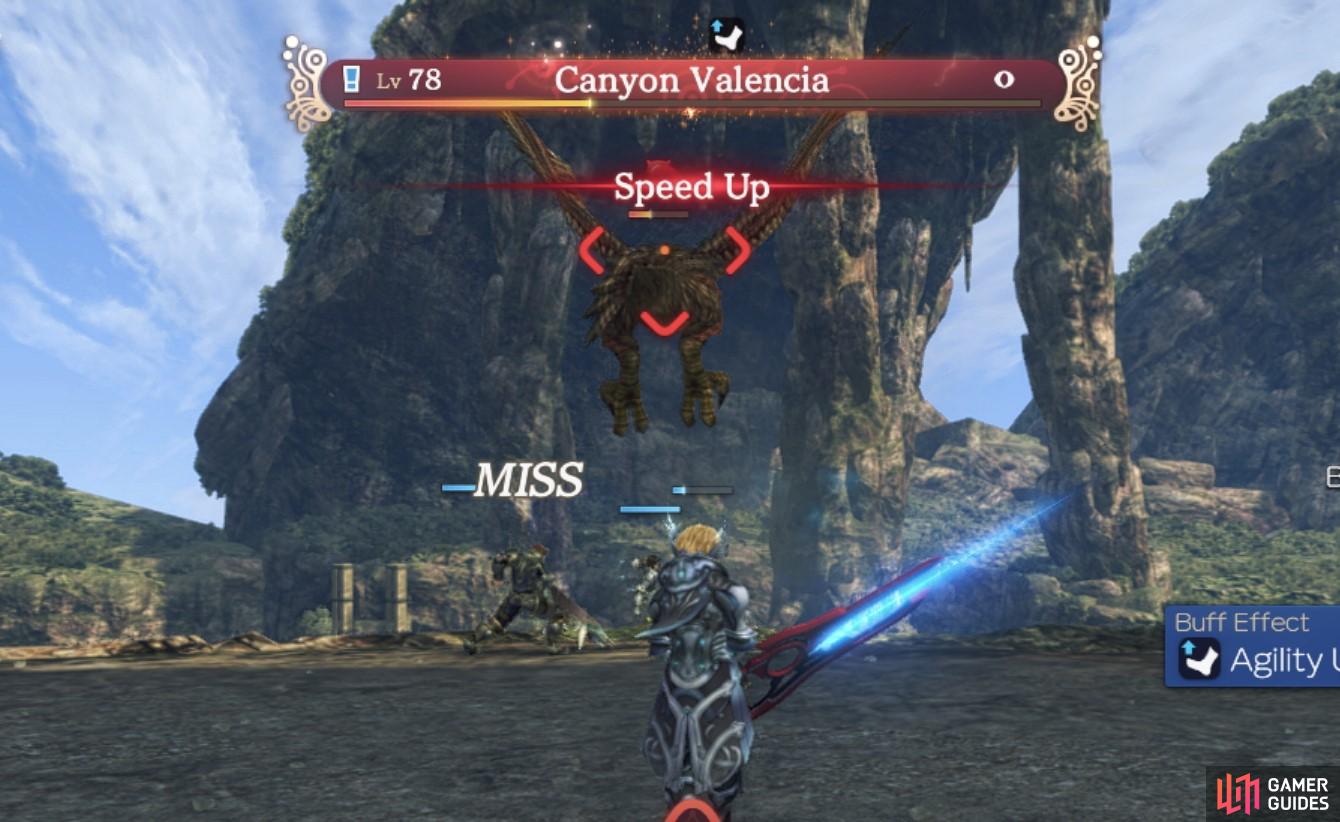
The Canyon Valencia can be found above Raguel Lake, near the Observation Platform.
Although you can accept Nic’s Final Test following this Quest, the Unique Monster you need to kill is a bit beyond your level for now (85) unless you decide to go the Casual Mode route so for now, leave it until later.
At this point, you should have everything covered, note that the Quests in both Alcamoth and Eryth Sea that have a timer are set to expire after the events at the Core so be sure you’ve finished all your business there. When you’re ready to continue with the story, head back to Junks and give the signal to head for Mechonis Core.
When you regain control following the scenes, you’ll find yourself at the Ventilation Conduit with a new objective, destroy the Apocrypha Generator. Before you set off however, head back into Junks and speak with the Junks Staff to accept a Quest that you should complete right away.
New Weapon for Fiora
A Junks Staff will tell you about a Weapon Creation Machine in the Control Tower of Central Factory. When you receive this quest, fast travelling will no longer be available in Central Factory, so you will have to walk and use the series of lifts around the area to make your way back to the Control Tower, which is on the Ground Floor. So from the Ventilation Conduit, you want to walk north until you reach the Bridge to Apocrypha. Then, use the lift to the left, which will take you to the Third Floor. Head south to the Tower Boarding Gate landmark and then take the lift to the east, which will take you to the Central Tower Lift on the Second Floor. From there, you will need to take the Central Lift, which is directly ahead of you, down to the Ground Floor.You will arrive at the Central Gate, from which you will need to travel south towards Landing Strip 1 and then west to Main Entrance 1. Finally, use the climable wall to make your way down to the Control Tower, where you will find the Weapon Creation Machine. Use it to create the War Blades for Fiora; this action will complete the quest. You’ll now have to make the long walk back up to the Bridge to Apocrypha!

Activating the Weapon Creation Machine will create some War Blades for Fiora.
Once you make your way back to the Bridge to Apocrypha, head on to it to trigger a scene and then once you regain control, head east to reach the Apocrypha Generator, finally completing the Central Factory map in the process.
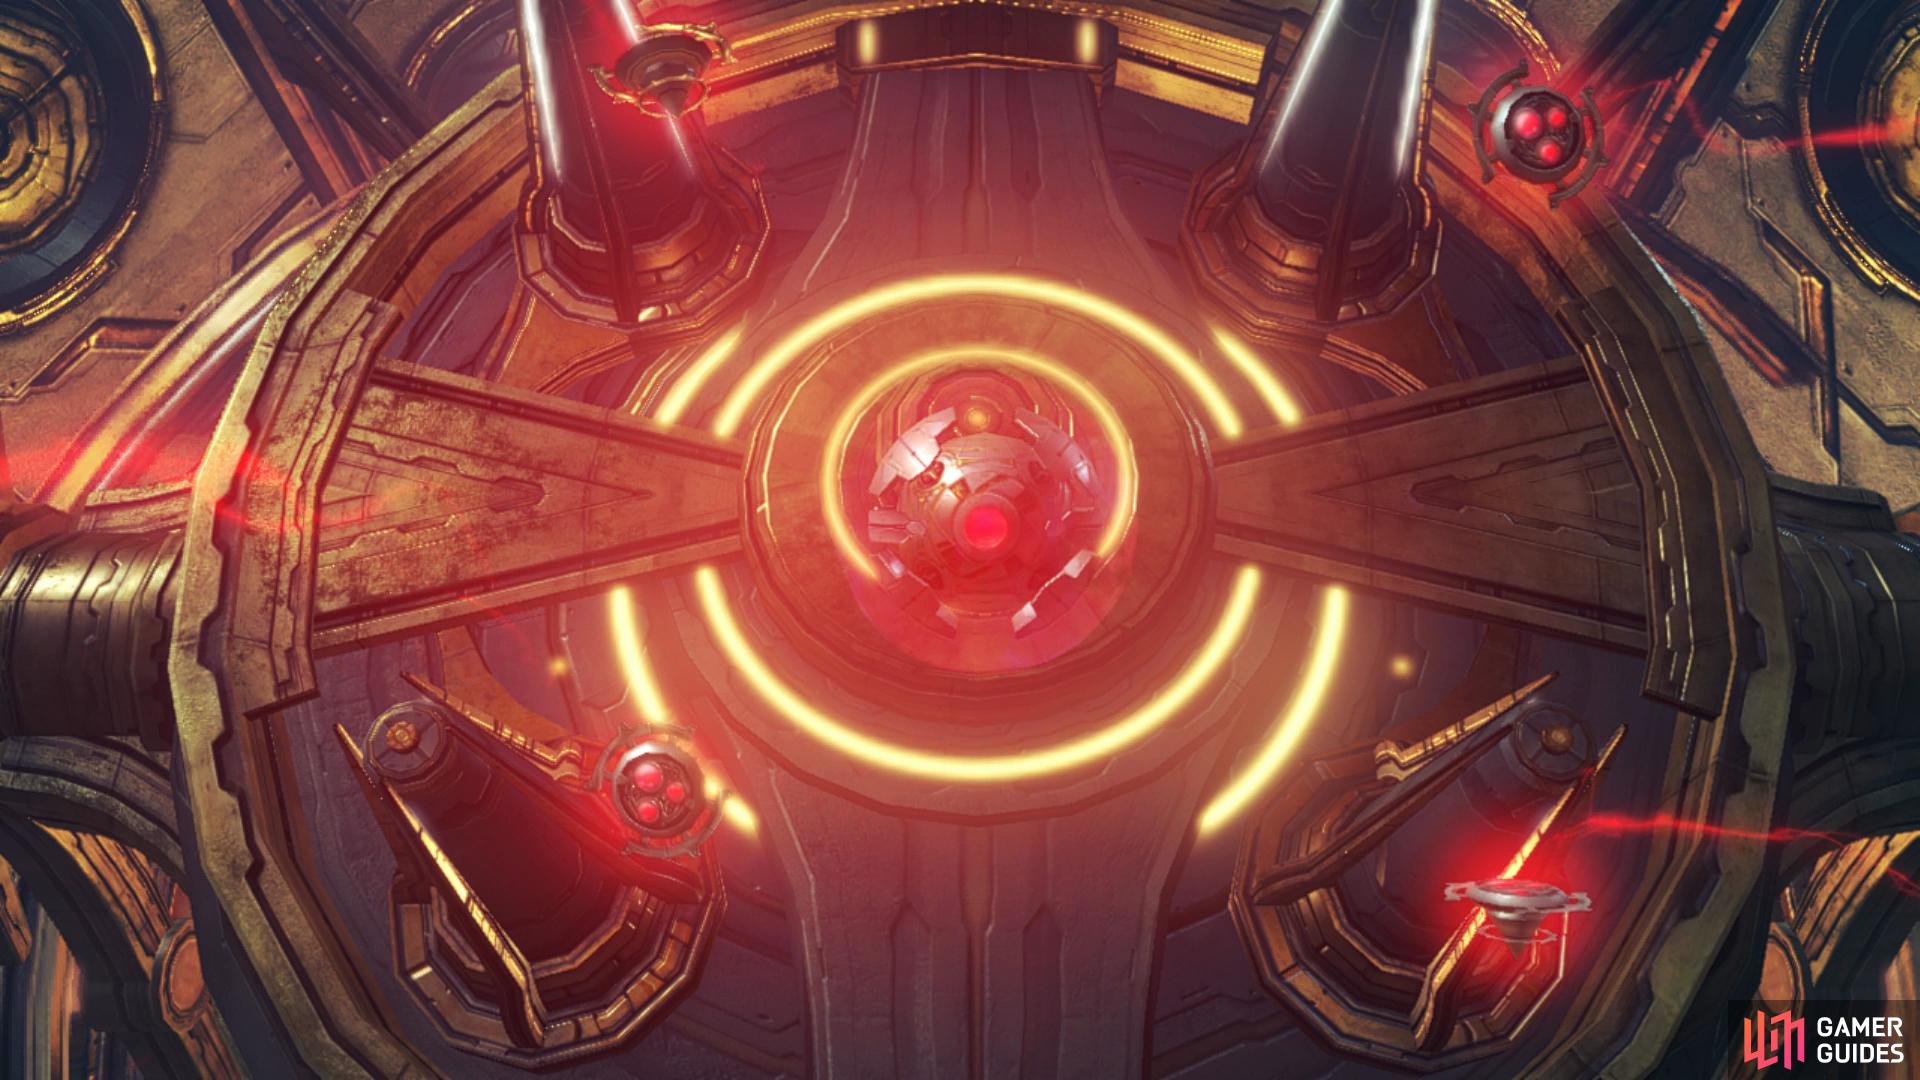
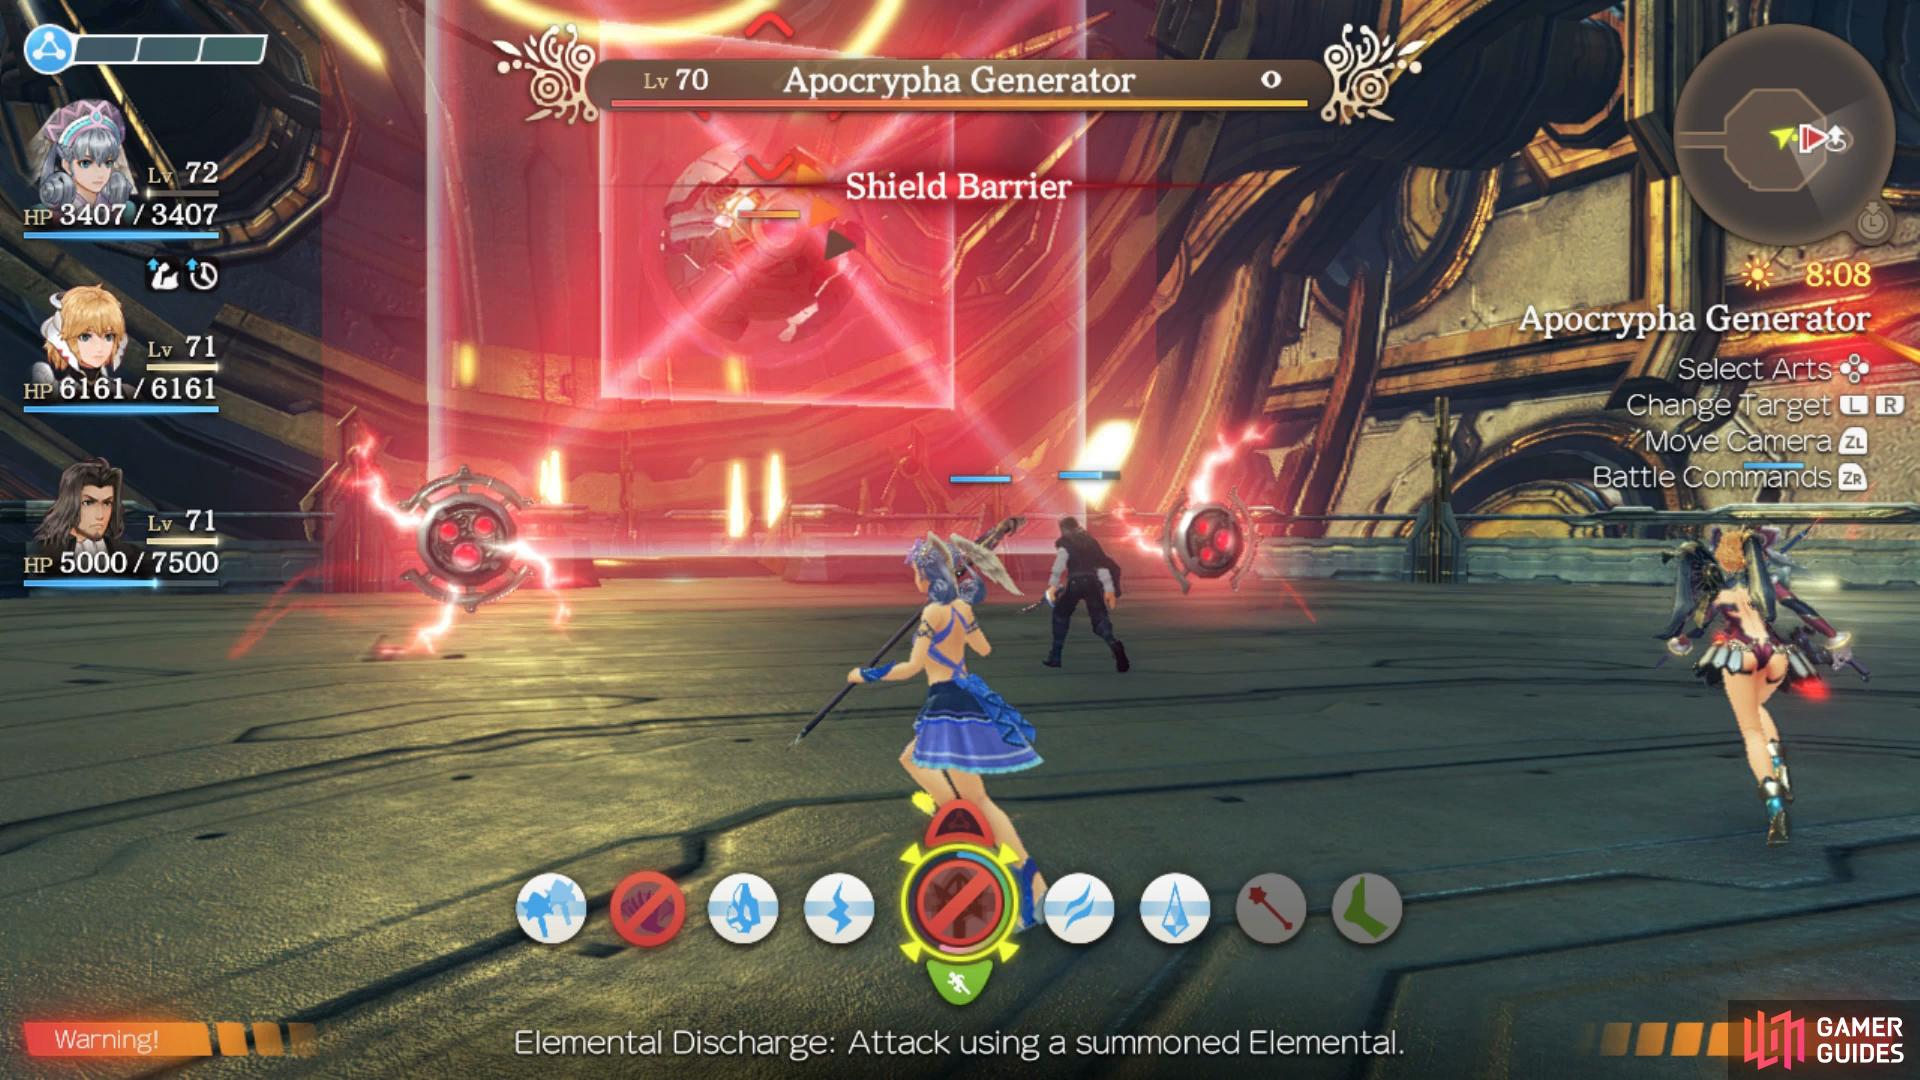
Boss: Apocrypha Generator
| Enemy | Level | Detection |
|---|---|---|
| Apocrypha Generator | 70 | Sight |
The Apocrypha Generator seems a lot tougher than it actually is and by the time you do battle with it, it should be no match for the party. Most of it’s Arts are either Buff or Debuffs with it’s only means of attack being Arts that only deal moderate damage, more than enough to deal with. It does still have the means to both Topple you and place you in Paralysis so it’s not entirely smooth sailing but this really is just the warm-up for the main event.
-
Great Laser VI - Apocrypha Generator’s Ether based Talent Art that deals moderate damage in a line while also inflicting Paralysis and Knockback.
-
Laser - An Ether based Art that deals light damage to a single target while also inflicting Topple.
-
Magnetic Field: First - Casts a Debuff on targets in a circle around itself, inflicting Strength Down and Ether Defence Down.
-
Magnetic Field: Zero - Casts a Debuff on targets in a circle around itself, inflicting Strength Down and Ether Defence Down.
-
Shield Barrier - Casts a Physical Protect and Ether Protect Buff on itself.
-
Talent Absorb - Absorbs the Talent Gauge from targets in a circle around itself.
You’ll have to deal with the Generator absorbing your Talent Gauge at regular intervals but that shouldn’t pose too many problems. As mentioned above, it’s Arts aren’t anything to write home about and all of it’s Buffs and Debuff are easily manageable, this is one of the more easier bosses you’ve fought recently.
Once you regain control following the scene, Shulk will learn a new Monado Art, Cyclone. You’ll find yourself standing just outside of the transporter leading to the Mechonis Core where Egil awaits. Take the time to customize your party and set up your Gems as the battle ahead is a tough one.
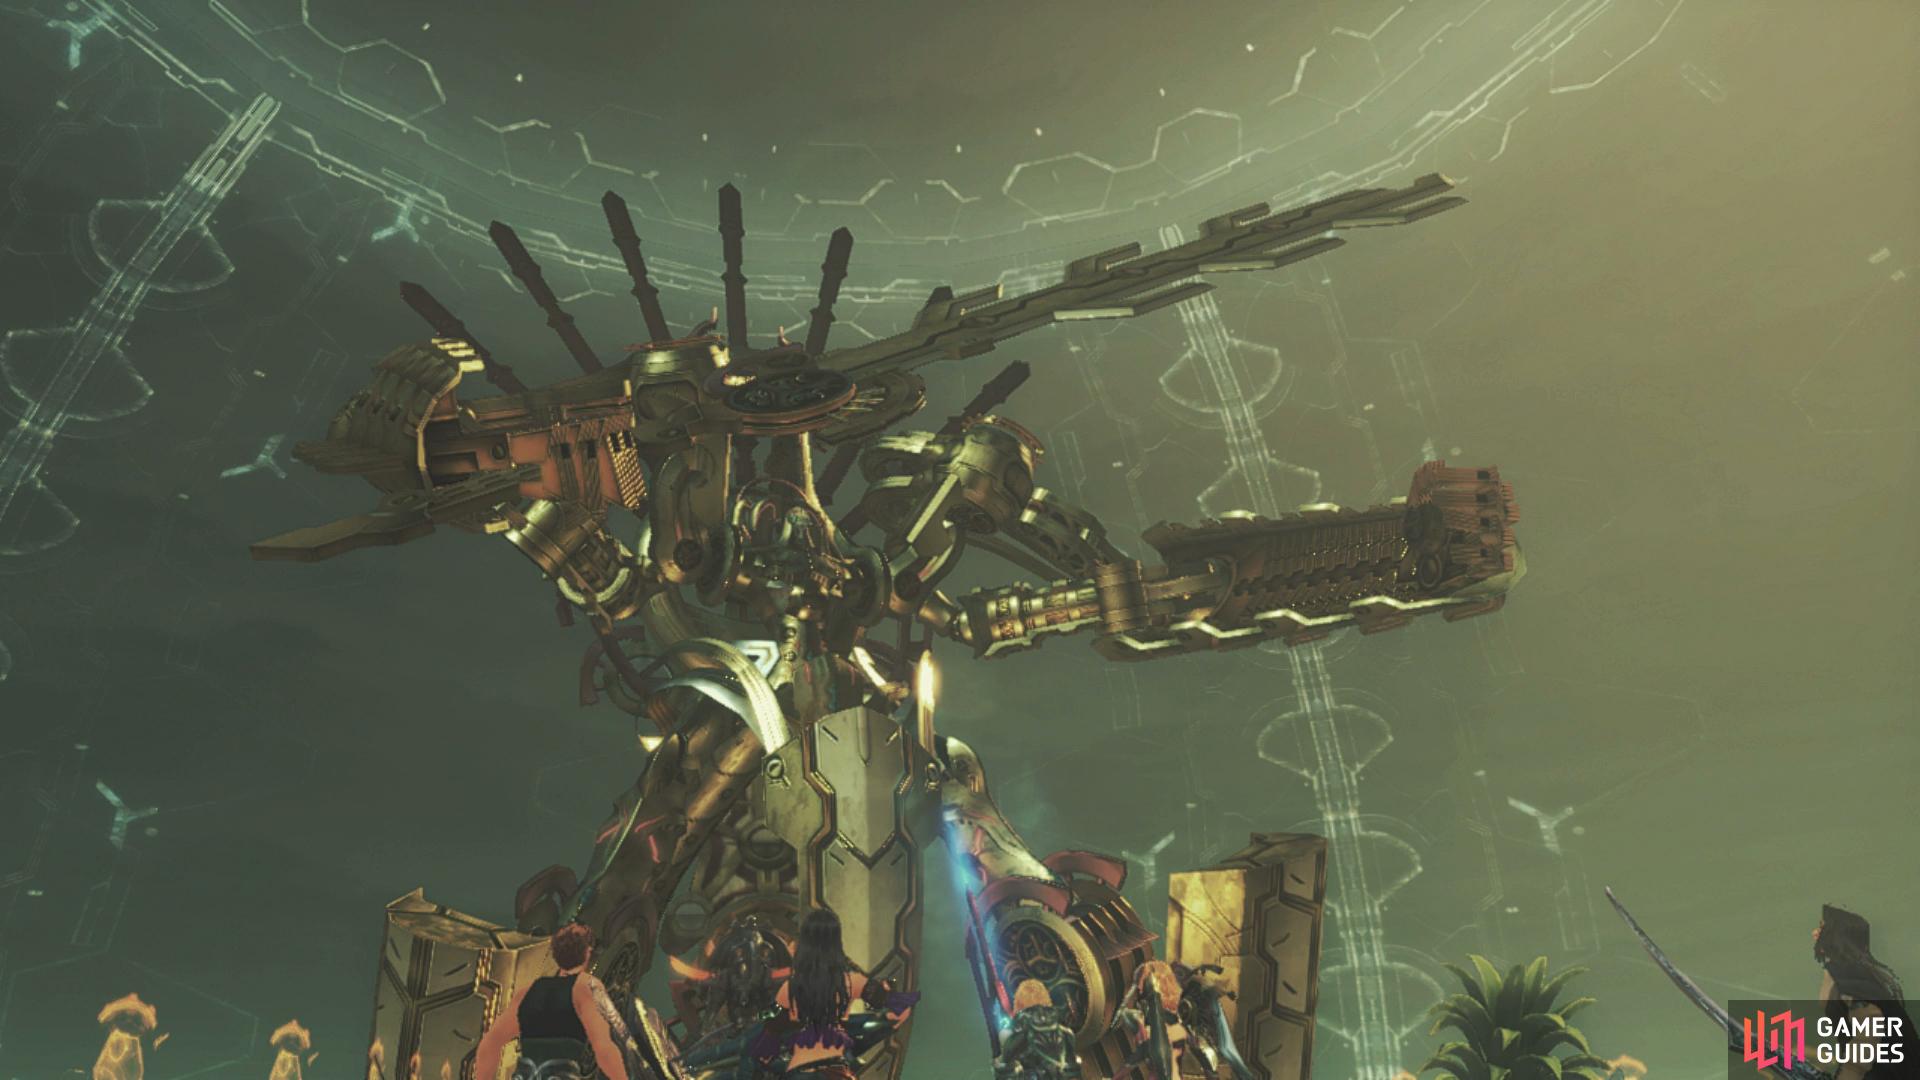
Boss: Yaldabaoth
| Enemy | Level | Detection |
|---|---|---|
| Yaldabaoth | 72 | Sight |
| Energy Device | 70 | Sight |
Yaldabaoth is stronger than ever and this time around, you’ll need to deplete Egil’s entire HP. This battle is one of the toughest you’ve fought yet and Yaldabaoth is not to be taken lightly, it has many powerful Arts at it’s disposal and has an Art that will instantly end the battle if you’re not quick.
-
Bionis Slash X - Yaldabaoth’s Physical based Talent Art that forces the Save the Bionis Story Quest. You cannot cancel this Art without killing the Energy Devices and should he use it, the battle is over.
-
Chastise - Casts a Bind Debuff on the entire party, regardless of position.
-
Continual Model - A Physical based Art that deals major damage to targets in an arc in front of him while also inflicting Arts Seal and Knockback.
-
Energy Replenish - Grants Yaldabaoth invincibility while also Summoning Mechon including the Energy Devices that must be defeated to stop the Bionis Slash X Art.
-
Manufacture Drone - Summons two Mechon to Yaldaboath’s side.
-
Strength Model - A Physical based Art that deals major damage to targets in a line while also inflicting Knockback.
-
Weakness Model - A Physical based Art that deals moderate damage to targets in a line while also inflicting Knockback and Topple.
As you can see, Yaldabaoth is deadly indeed and many of his Arts are hard to avoid due to the size of him and the battlefield in general. To begin with, you can only focus your attacks on Yaldabaoth until it uses Energy Replenish at which point he becomes invincible. This will also trigger the Save the Bionis Quest which, if failed, will see him cast Bionis Slash X and instantly wipe the party.
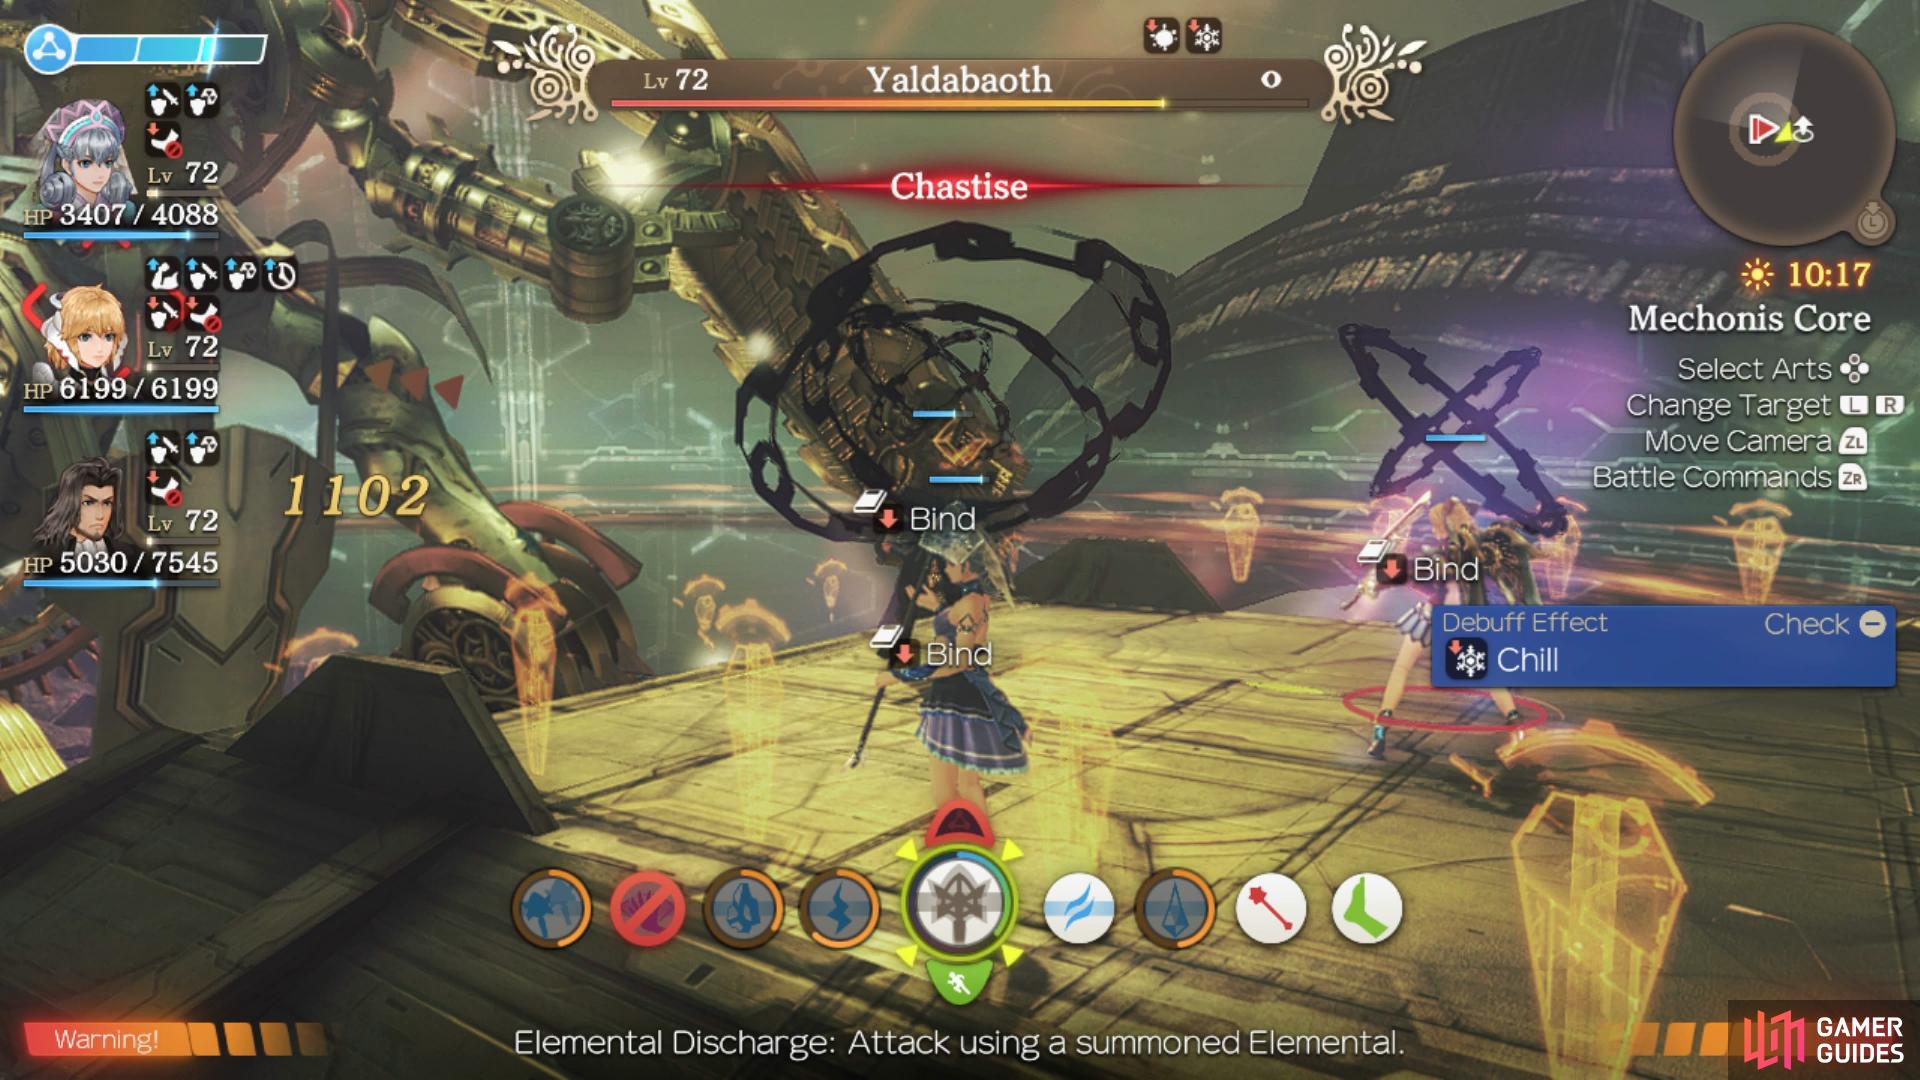
Your goal at this point is to focus all of your attention on the Energy Devices that spawn at the same time, these power Yaldaboath’s invincibility shield however beware of their ability to Self Destruct. They don’t have too much HP and you should be able to take them down without hassle so long as you focus target them just bear in mind that the floor will inflict Slow on you as you head over. Once defeated, the shield around Yaldabaoth will vanish and place him in Daze, this is your opportunity to hit him with everything you have.
The battle will follow this cycle until Yaldabaoth’s defeat, keep focused on him at all times unless you need to destroy the Energy Devices, ignore the other Mechon he summons if possible. There’s a lot going on in this battle and it’s easy to get overwhelmed, if you’re struggling with keeping your HP up, consider bringing Sharla into the party however note that this will increase the time it takes to defeat the Energy Devices, it’s a trade off you’ll have to decide if it’s worth it or not.
Victory against Yaldabaoth will trigger more scenes at which point Chapter 15 comes to an end.
No Comments