


Quests Available After Completing the Events at the Mechonis Core
Homs Determination
| Client | Rewards | Affinity |
|---|---|---|
| Perrine | 48000G, 72000 EXP, Arts Heal VI | 4✰ |
Once you’ve completed the Odd Smoke - Resolution Quest and are at least 3✰ Affinity at Colony 6, return to Perrine to pick up this Quest. Perrine wants to show Jer’ell what being Homes really means and to do that, she wants to speak of the exploits of Shulk and his friends. Your first task is to head to Bionis’ Leg and defeat 8 Sloth Gorgols, you can find these around the north of Kamos Guidepost and the northwest of Raguel Lake but beware, they’re around Lv 76. Next up, you’ll need to take down the Unique Monster, Territorial Rotbert who can be found on Gaur Plain. Beware that he is Lv 81 with the Topple Spike ability and will go into the Craze Aura around 30%. Once both objectives have been completed, return to Perrine to complete the Quest.
Melancholy Tyrea
| Client | Reward | Affinity |
|---|---|---|
| Surprise Quest | 0G, 58500 EXP, Empress Staff, Auto-Atk Stealth VI | – |
When walking between Hope Farm and Watchpoint Junction after the events at Mechonis Core, you’ll trigger this surprise quest. You’ll find Tyrea unconscious. During the cutscene, you’ll take her to Junks on the Fallen Arm. During the cutscene you’ll see a large three-headed Telethia attack Colony 6. When the cutscene ends, you’ll be tasked with the objective to chase the Telethia and defeat it. You can find the Mysterious Telethia on a beach between Agni Tablet and Great Makna Falls in Makna Forest. After you fight the Telethia, you will trigger another cutscene where Tyrea reveals that the Telethia is First Consort, Yumea. Finishing the cutscene will complete the quest.
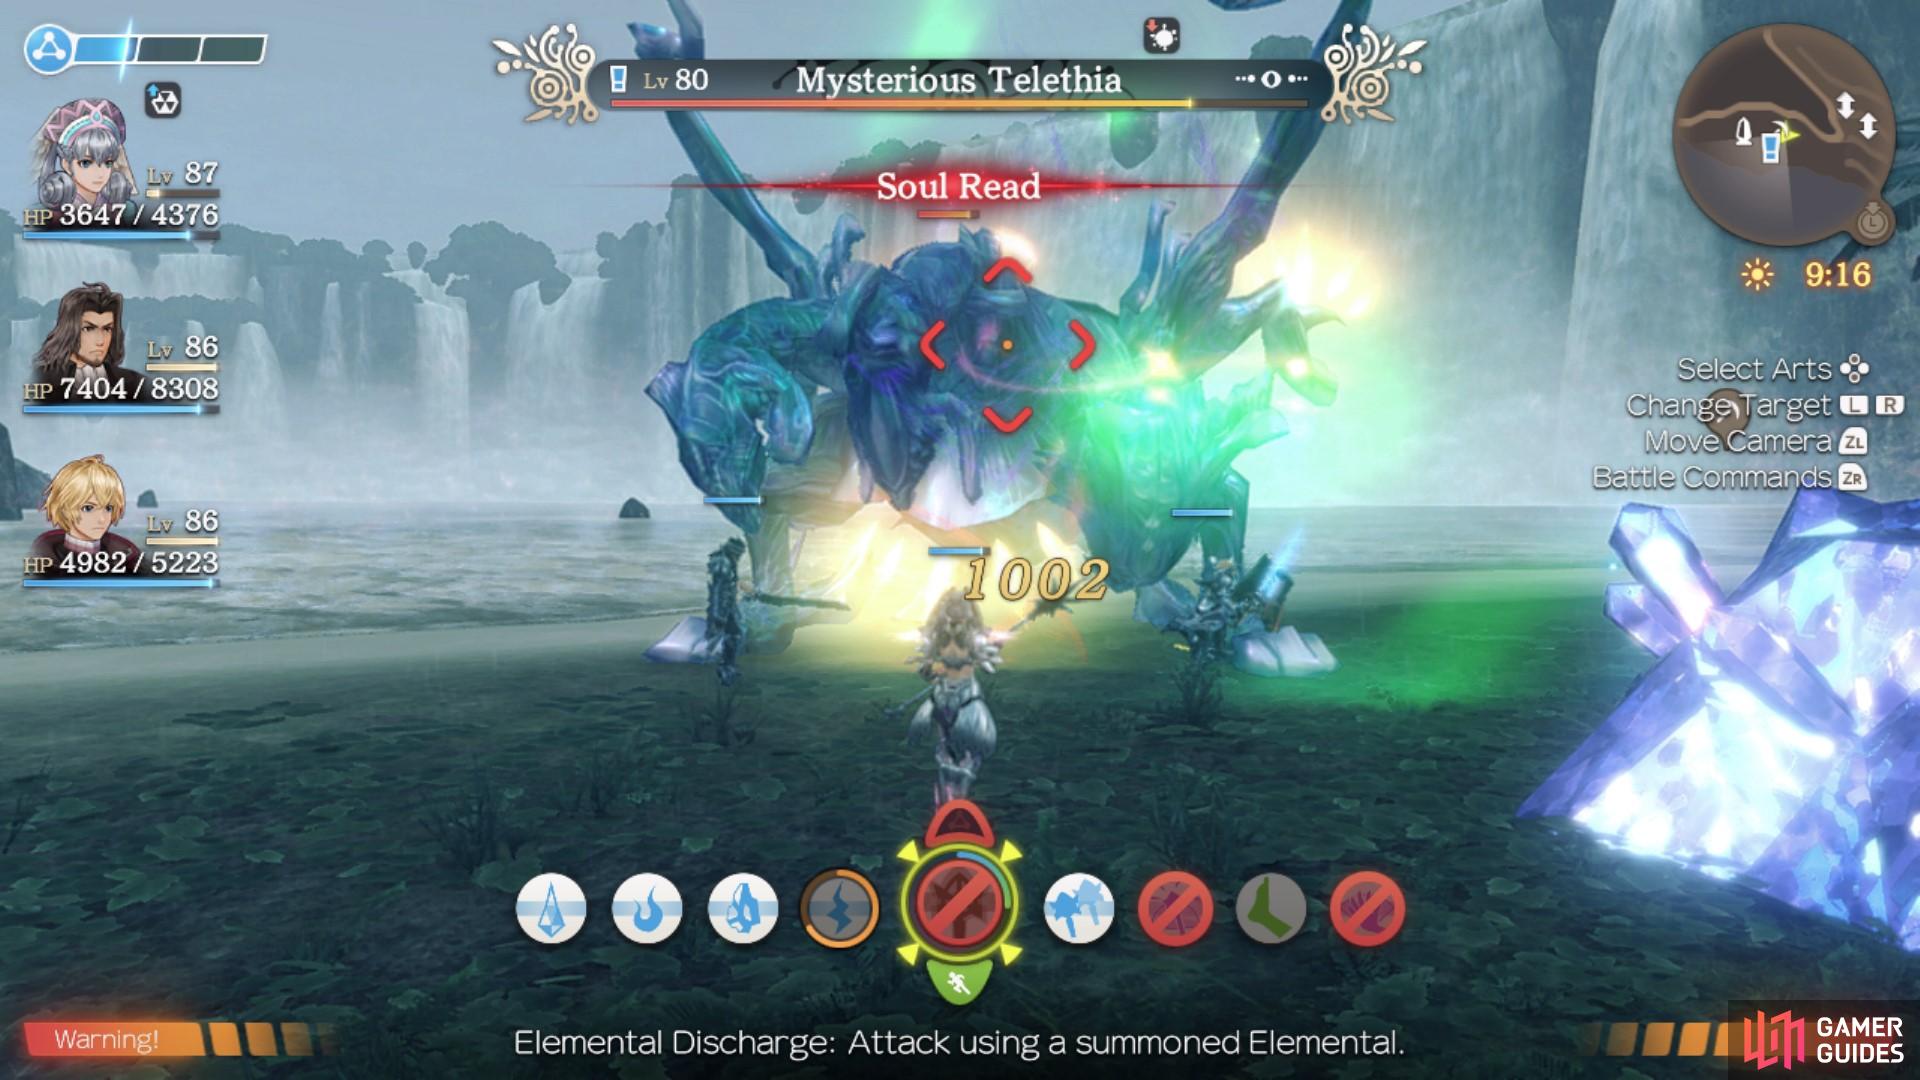
The Mysterious Telethia used to be First Consort Yumea.
A Dauntless Trader
| Client | Rewards | Affinity |
|---|---|---|
| Werner | 33000G, 37500 EXP, Auto-Heal Up V, Fall Defence IV, Terrain Defence IV | 3.5✰ |
After completing A Gutsy Trader and the event at Mechonis Core, as well as reaching over 3✰ in Colony 6, you may pick up this quest from Werner. He will ask you to consult the Nopon Residents of Colony 6 about how to bring back the butterflies. You will need to talk to Nopo’rikh or Norara. Nopo’rikh is available between 03:00 and 15:00 around the Armu Farm, and Norara is active between 06:00 and 15:00.
-
Talk to Nopo’rikh (Route A) - Nopo’rikh will tell you to fetch 10 Death Lychee from Prison Island. You may only collect this collectable if you have reached the new area of Prison Island in the Main Story quest, after the events at Mechonis Core. If you have not reached this area, it is advised that you go with Route B, as both routes yield the same outcome and rewards. If you can travel to the new Prison Island areas, then you may do so. Once you have the 10 collectables, head back to Nopo’rikh to give him the items.
-
Talk to Norara (Route B) - Norara will ask you to collect 5 Mystic Dahlias from Alcamoth. You will not be able to fast travel into Alcamoth after the events at Mechonis Core, however, you can still reach the area by teleporting to Centre Gate in Eryth Sea and using the portal to reach Alcamoth. You will notice when you arrive in Alcamoth that it is over run by Telethia that will attack on sight. You may choose to fight or avoid them, whilst you roam the area in search for the collectable. Once you have the required amount, head back to Norara to give her the items.
Once you’ve completed either route, head back to Werner to finish up this quest.
Lifespan of a Machina
| Client | Reward | Affinity |
|---|---|---|
| Neonik | 38000G, 31500 EXP, Revival HP UP V | 2✰ |
Neonik can be invited to Colony 6 when you have reached level 5 in Housing and Nature in the Reconstruction of Colony 6. When you talk to her, her speech will be all jumbled as she explains that she is malfunctioning and close to death. She asks you to find something to revitalise her. You can either collect 1 Machina Energy or 2 Pterix Energy Eggs. Machina Energy can be picked up from the Mechon Wreckage Site in Colony 9. It is important to note that if you already have 2 Pterix Energy Eggs, which are obtained from Lelepelago Pterix on the Fallen Arm, then you will automatically be locked into the choice to give Neonik the eggs over the Machina energy. The two routes do not have differing rewards, but the outcomes are slightly different. Most people would agree that the Machina Energy is the better choice because it only gives Neonik an extra 20 years of life and she can “grow old” with the other Homs residents. On the other hand, if you give her the eggs, then she will outlive everyone in Colony 6 and be alone once more. Consider removing the Pterix Energy Eggs from your inventory before accepting this quest, if you would prefer the more heartwarming ending and don’t want to be forced into the sadder ending. When you have your preferred item(s), return to Neonik to complete the quest.

Giving Neonik the Machina Energy means she can die alongside the other residents of Colony 6.
A Poet’s Concerns
| Client | Reward | Affinity |
|---|---|---|
| Yura | 31500G, 37500 EXP, Forma Spear | 3✰ |
After completing Neonik‘s quest, Lifespan of a Machina, and reached 3✰ affinity in Colony 6, you’ll be able to pick this quest up from Yura. He will ask you to talk to Neonik about writing a poem about her. When you talk to Neonik, whichever option you decide will not affect the outcome or rewards of this quest. After speaking to Neonik, the quest will update and you’ll be required to go to Eryth Sea and fetch a Tobogan Wing. This item can be found below Hovering Reef 9, which you can get to by using the west portal on Hovering Reef 8. Drop down to the island below Hovering Reef 9 by jumping into the large hole in the middle of the hovering reef. When you retrieve the item, head back to Neonik in Colony 6. Then, speak to Yura for a final time to complete the quest.
Delivering the Undeliverable
| Client | Reward | Affinity |
|---|---|---|
| Shilx | 23000G, 29500 EXP, Spike V | 2✰ |
To receive this quest, you’ll need to have invited Shilx to Colony 6, which requires Housing and Commerce at Level 5 and a population of 120. As well as this, Berryjammy needs to also live in Colony 6. Shilx will ask you to deliver a package to a person whose name ends in ‘n’. The person you’re looking for is Gorman, who can be found right outside the Reconstruction HQ at night. After delivering the package, return to Shilx, who will then ask you to take the next delivery to a 16-year-old girl. You can decipher this by looking at the Colony 6 Affinity Chart. You will find that Berryjammy is the only 16-year-old in Colony 6. She can be found near the market stalls between 18:00 and 03:00. After giving her the delivery, return to Shilx to complete the quest.
Finding the Unfindable
| Client | Reward | Affinity |
|---|---|---|
| Shilx | 31500G, 37500 EXP, Forma Spear | 2✰ |
After completing Shilx’s previous quest, Delivering the Undeliverable, you’ll be able to pick this quest up from him. He will ask you to collect 2 Energy Aubergines. These are a rare item, and can first be found in Mechonis Field. However, after the events at the Mechonis Core, you no longer have access to that area. Instead, you’ll be able to find Energy Aubergines in Colony 6, but only after you have reached Level 4 in the Special category of Colony 6 Reconstruction. Alternatively, you can head over to Bozatrox on the Rotating Bulkhead and trade for them at 4✰ affinity, but be aware that their trade value is very high.
Securing Provisions
| Client | Rewards | Affinity |
|---|---|---|
| Dulland | 36000G, 42500 EXP | None |
This quest is available once you complete the Mechonis Core section of the game. Dulland is tending to the High Entia refugees by letting them stay at the camp on Bionis’ Leg, but provisions are running low and he wants you to go get some. The problem is that the provisions are located in Tephra Cave, in the high level section. It’s best to be at around level 90 before venturing in there for this quest, as you will likely have to do battle against two level 96+ foes. Once you are prepared, fast travel to the Heavenly Window landmark and look for a small room just to the southeast.
There might be a level 97 Unique Monster, called Erratic Goliante, guarding this room, but it has no relevance to this quest and it might not always be there. A tip to possibly despawn the UM is to repeatedly fast travel to the Heavenly Window landmark. Whether you defeat Erratic Goliante or not, head inside of that small room (Trader’s Stopover) to see the red orb and a level 96 quest-exclusive Satisfied Gogol. Since it is sitting pretty much right on top of the quest item you need, you are going to have to defeat it. Once it’s out of the way, pick up the red orb to acquire the Trader’s Spare Key.
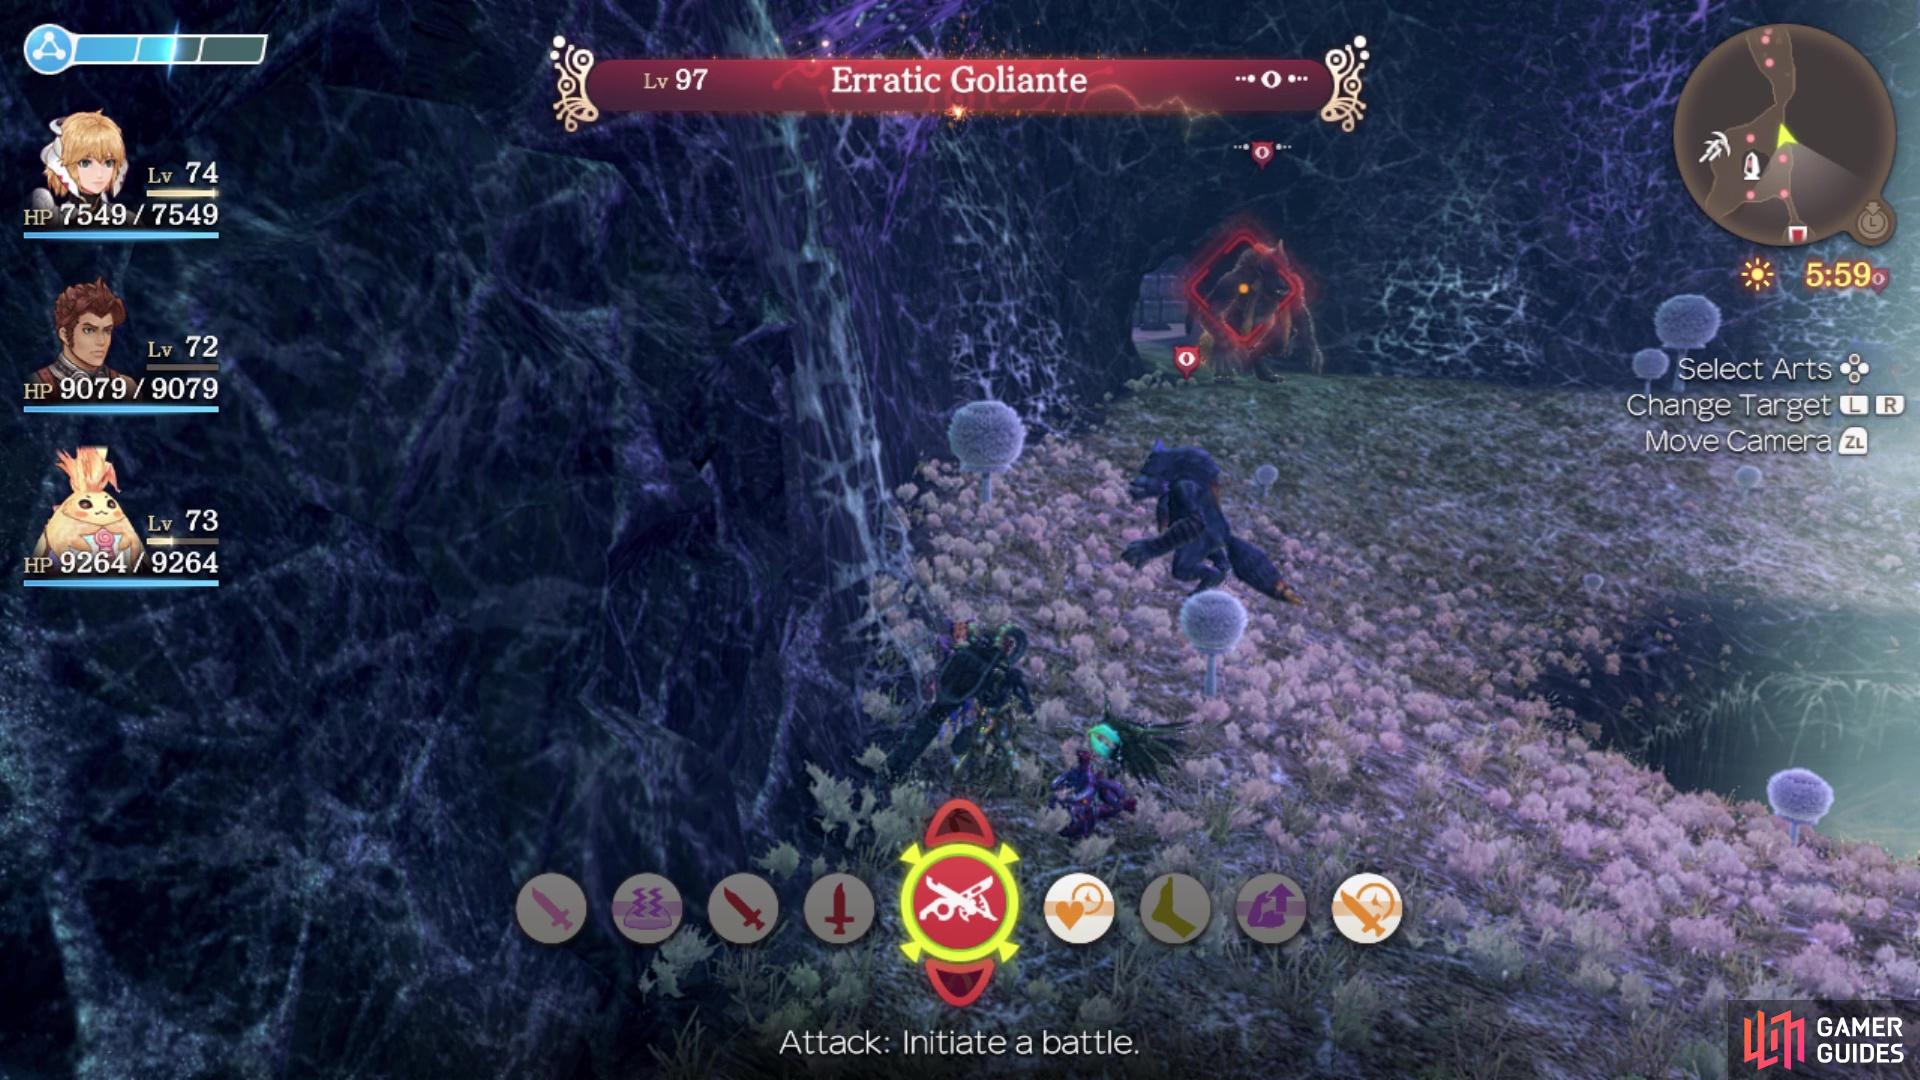
Erratic Goliante blocks passage into Trader’s Stopover
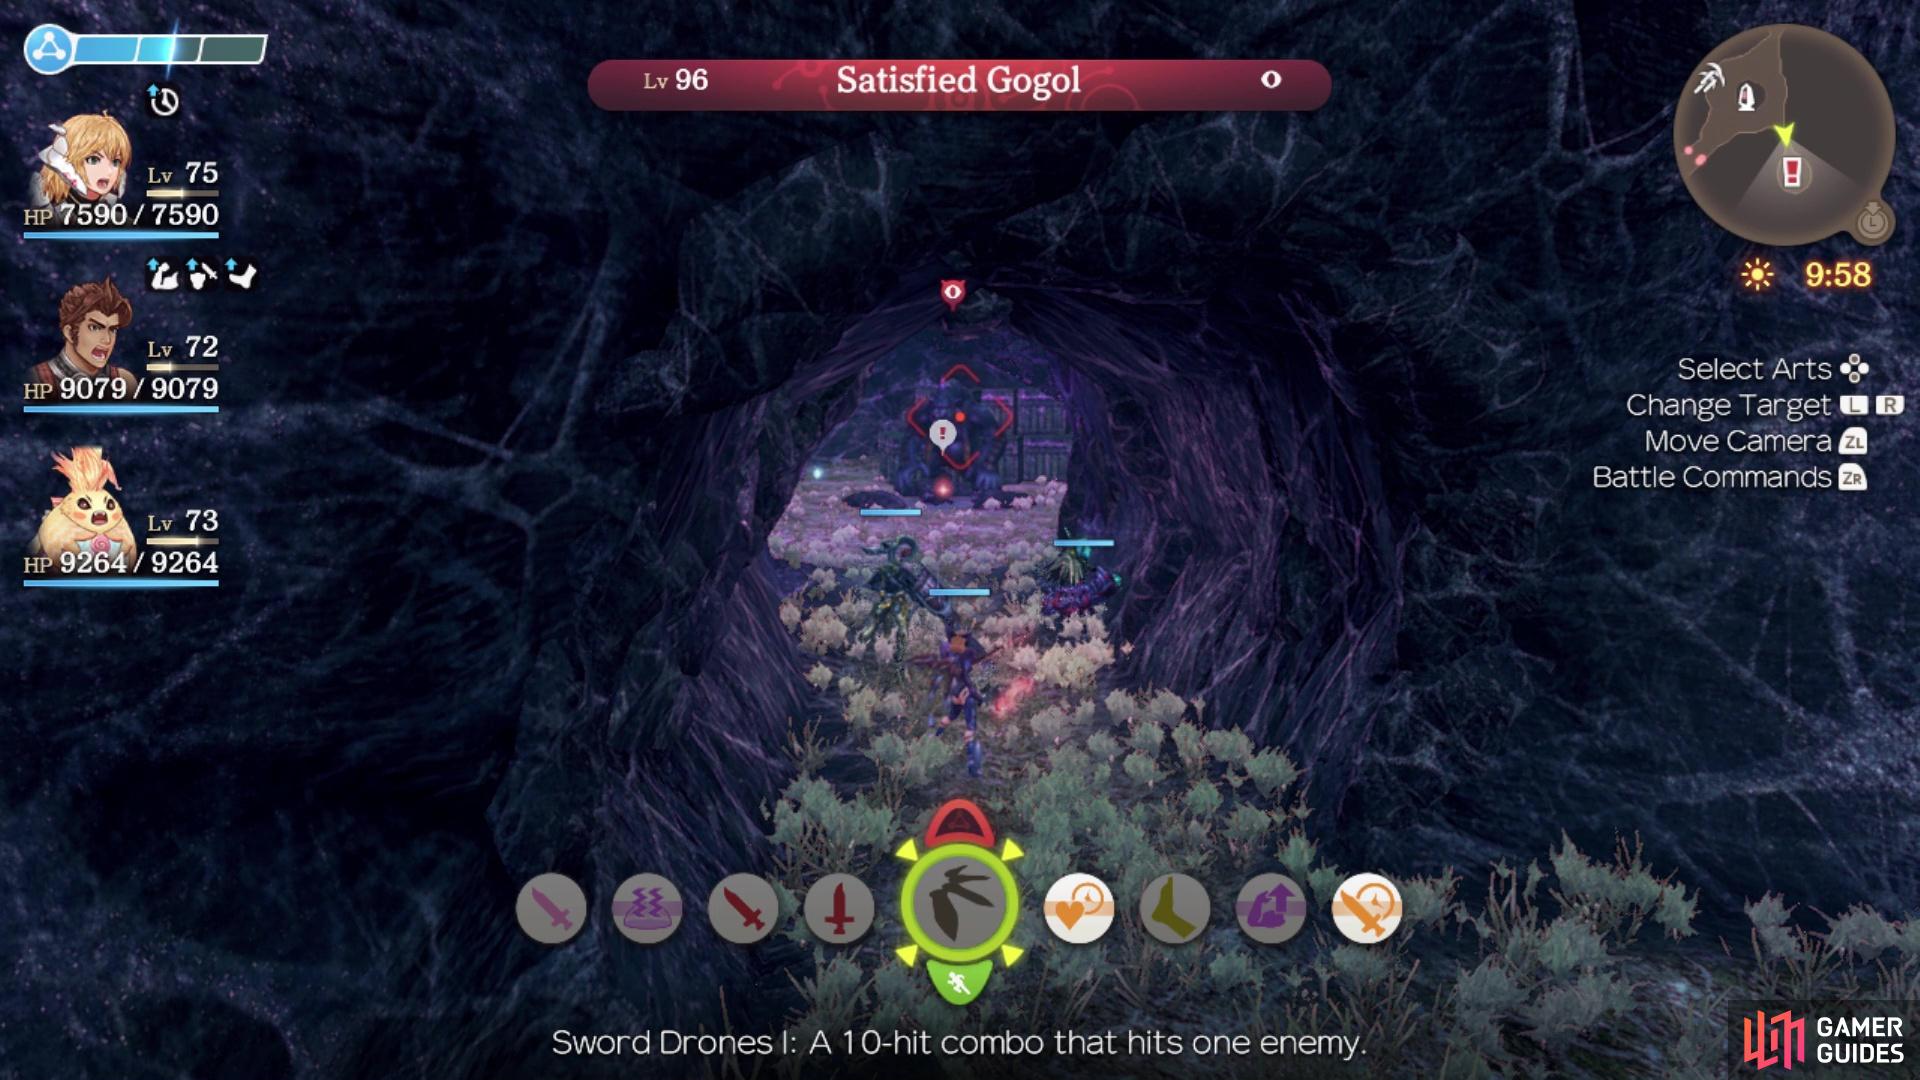
The Satisfied Gogol will be sitting right on top of the quest item
You’re not quite done with this quest yet, as that was only the key and you need to procure the provisions. Luckily, you’re done with fighting high level monsters, so fast travel to Vilia Lake and look to the southwest to find the waterfalls in the room. Behind one of the waterfalls is a door, leading to the Emergency Warehouse location. Pick up the red orb here for some Emergency Rations and return them to Dulland, who will now be at the Refugee Camp on Bionis’ Leg.
Quests Available After the Attack on Colony 6
Replica Monado 1
| Client | Rewards | Affinity |
|---|---|---|
| Vanea | 12000 EXP, Monado Rudra | None |
After the attack on Colony 6, Vanea will offer to make 5 different replicas of the Monado. This replica requires 1 Lucky Fang, 1 Caterpile Silk and 1 Ardun Elder Beard. The Lucky Fang can be obtained from the Green Feris found near Barren Moor in Satorl Marsh at night. The Caterpile Silk is dropped by Royal Caterpile found in the Windy Cave on the Bionis’ Leg. Ardun Elder Beards are dropped by Magnis Ardun found near the Kamos Guidepost landmark on the Bionis’ Leg.
Once you have all of the materials, return to Vanea and she will create the Monado Rudra. It has a lower critical rate than the Replica Monado, however its minimum attack damage is quite a lot higher and its maximum attack damage is the same, meaning that attacks are stronger on average, as well as more reliable.
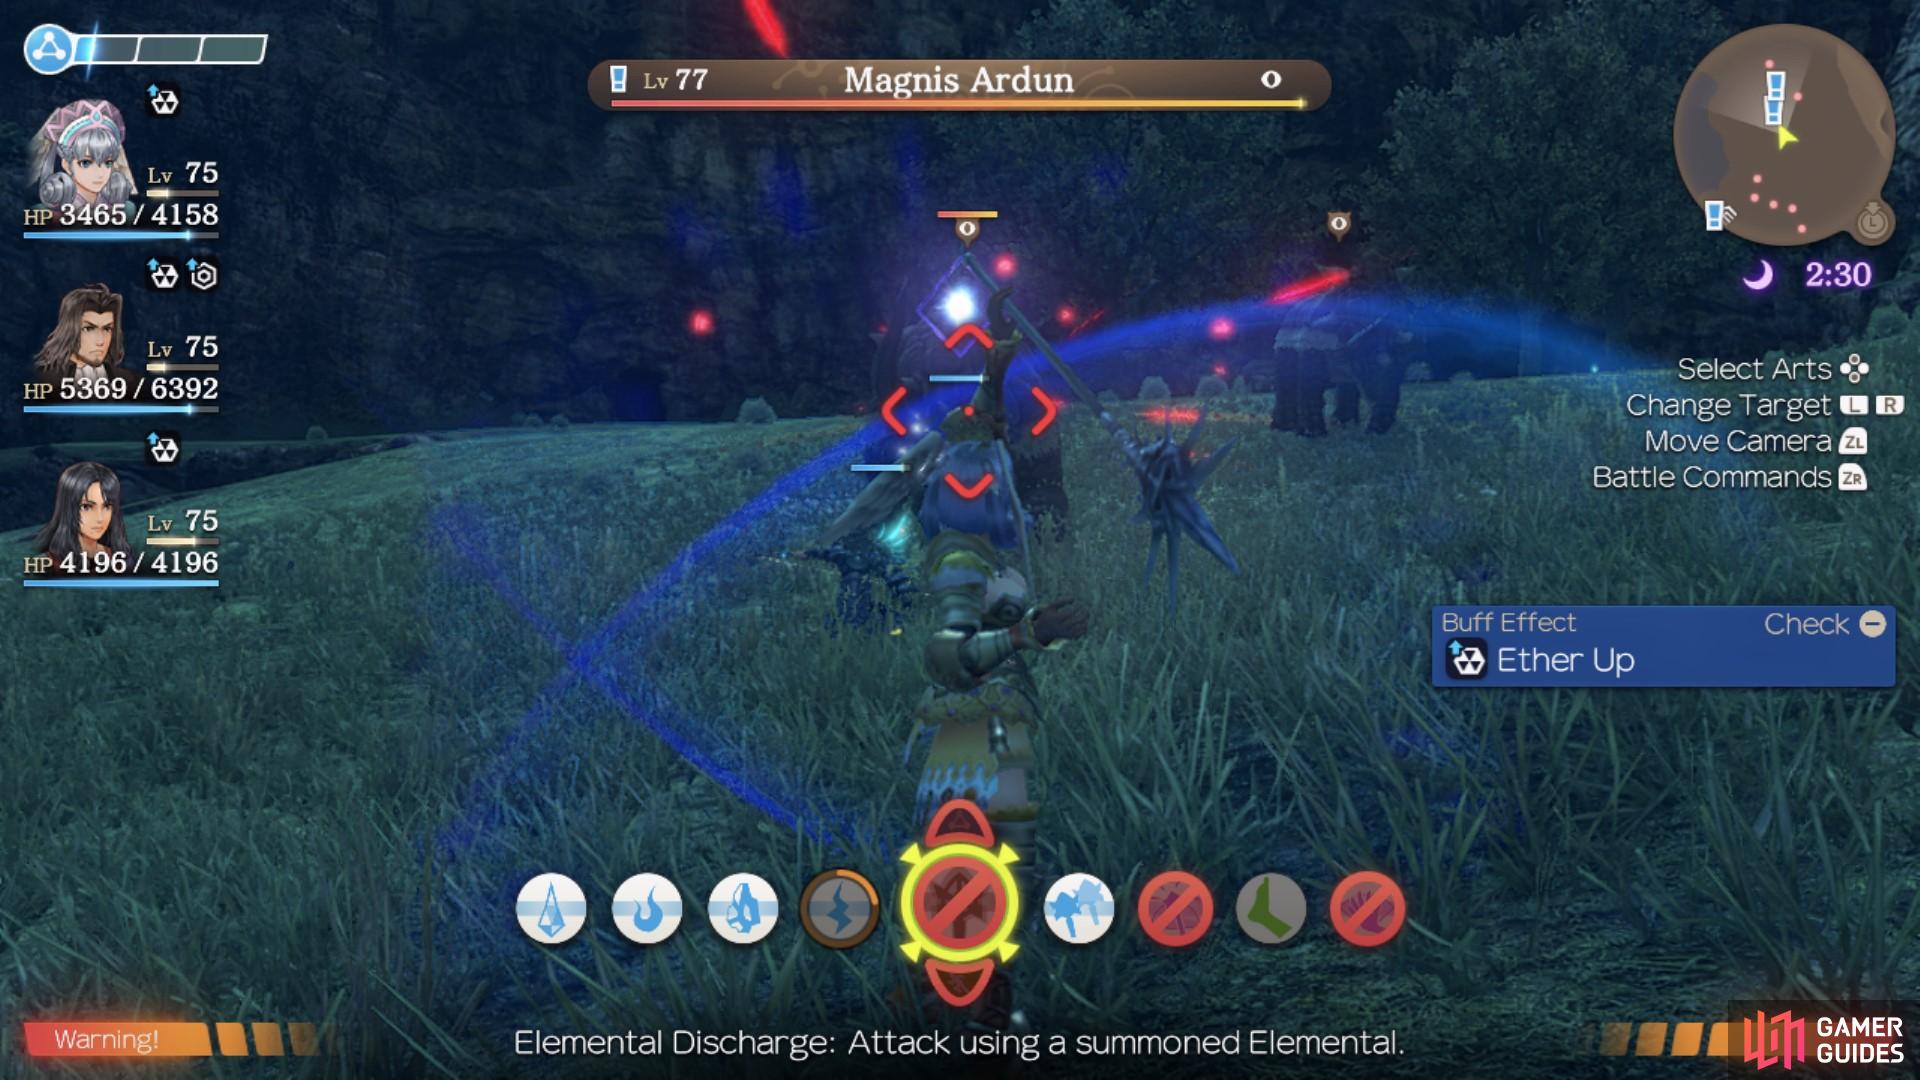
You can obtain Elder Ardun Beards from defeating Magnis Arduns on the Bionis’ Leg.
Replica Monado 2
| Client | Rewards | Affinity |
|---|---|---|
| Vanea | 12000 EXP, Monado Agni | None |
After the attack on Colony 6, Vanea will offer to make 5 different replicas of the Monado. This replica requires 1 Ocean Elixir of Life, 1 Immortal Moss and 1 Quadwing Treasure. The Ocean Elixir of Life can be obtained from the Kyel Lexos found near the Freight Road in Colony 6 when it is raining. The Immortal Moss is dropped by Satorl Torta found near the Altar of Fate in Satorl Marsh. Quadwing Treasure is also found in Satorl Marsh; it is dropped by Grove Quadwing found all across the marsh, however they are most common near Barren Moor and Dark Swamp.
Once you have all of the materials, return to Vanea and she will create the Monado Agni. It has a lower critical rate and a significantly lower auto-attack minimum than the Replica Monado. However, it makes up for this with higher Ether Defence, Physical Defence and Block Rate.
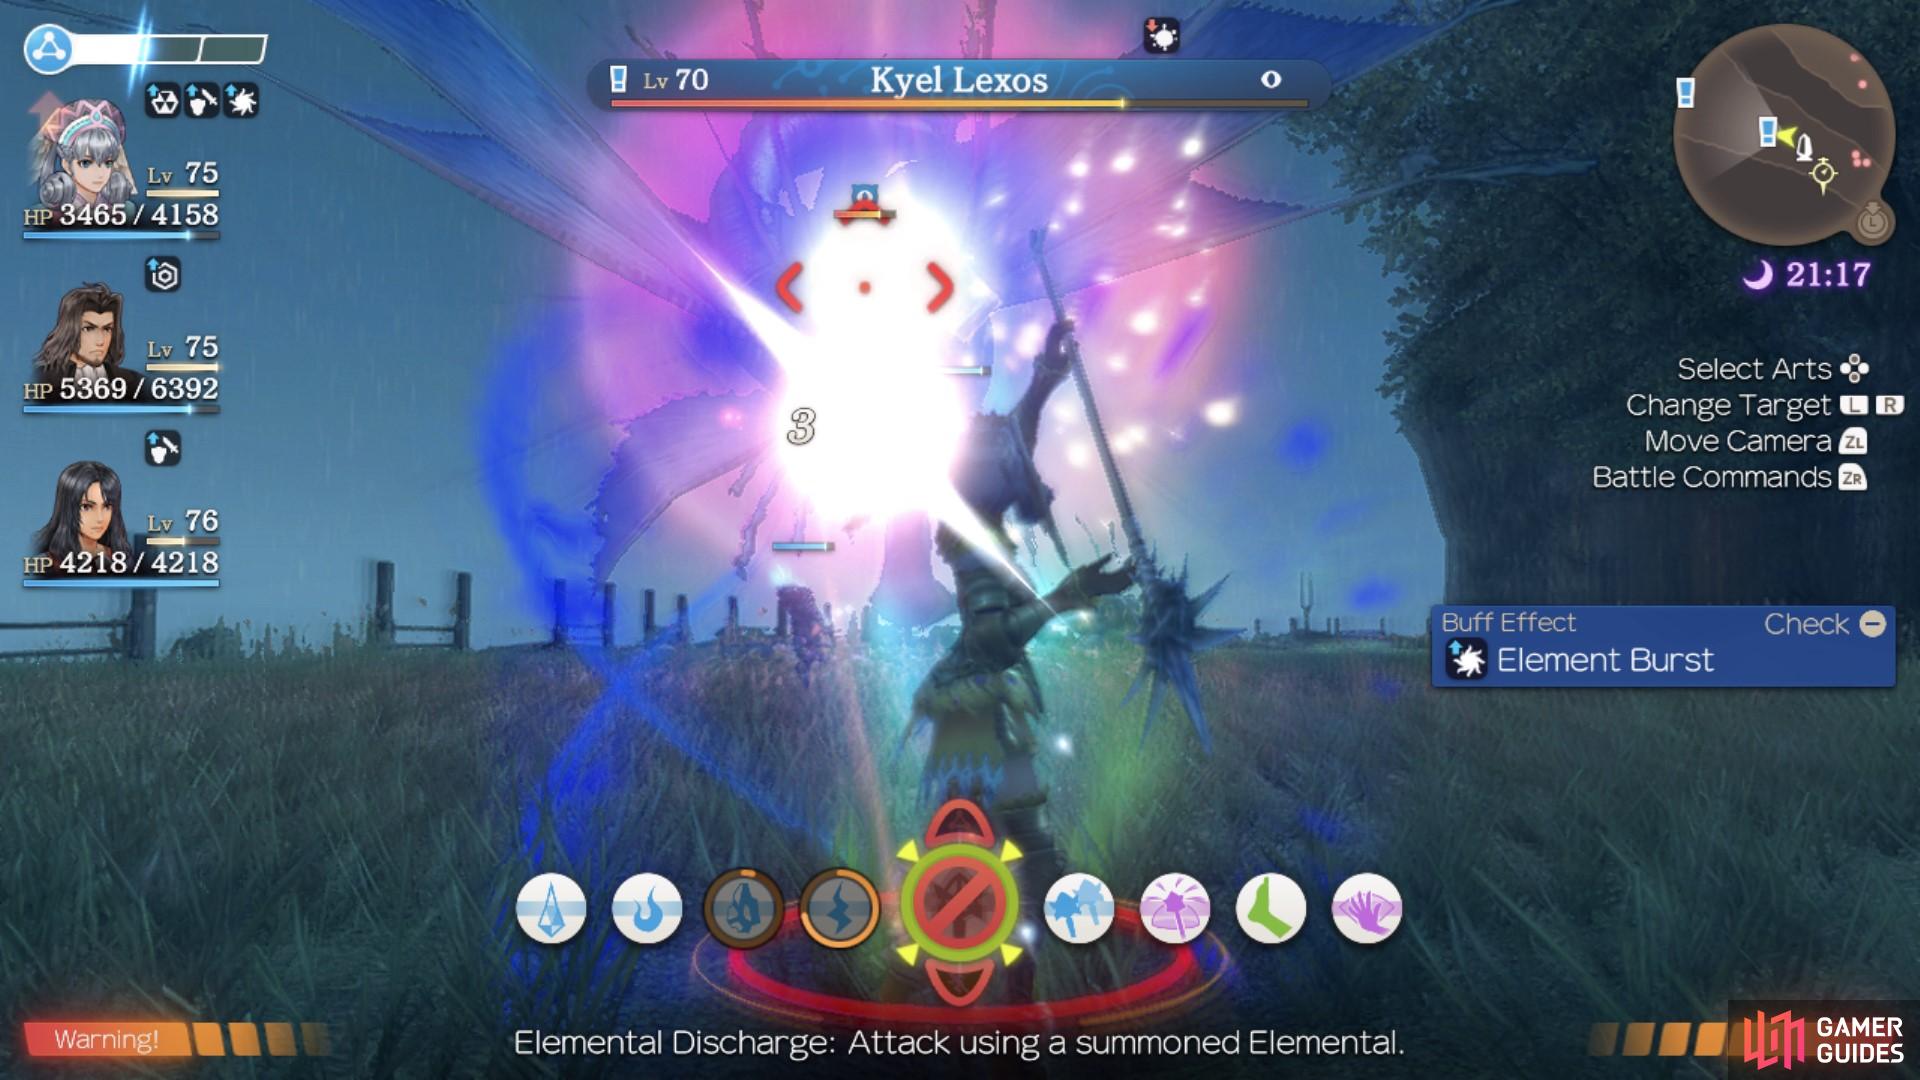
The Kyel Lexos is found on the Freight Road in Colony 6.
Replica Monado 3
| Client | Rewards | Affinity |
|---|---|---|
| Vanea | 12000 EXP, Monado Abyss | None |
After the attack on Colony 6, Vanea will offer to make 5 different replicas of the Monado. This replica requires 1 Hox Daylight Spur, 1 Glacier Element and 1 Wisp Sun Bead. The Hox Daylight Spur can be obtained from the Dark Hoxes and White Hoxes found near Raguel Bridge on the Bionis’ Leg. The Wisp Sun Bead is dropped by Femuny Wisp found in the Forgotten Cave in Tephra Cave. Glacier Element is dropped by Frost Nebulae found in Satorl Marsh. They only appear when it is foggy, and they are most common around Sororal Statues and Barren Moor.
Once you have all of the materials, return to Vanea and she will create the Monado Abyss. It has a far higher auto-attack maximum and an increased critical attack rate. It also has a similar auto-attack minumum to the Replica Monado, however, this means the Abyss’ attacks are unfocused and the auto-attack damage varies greatly.
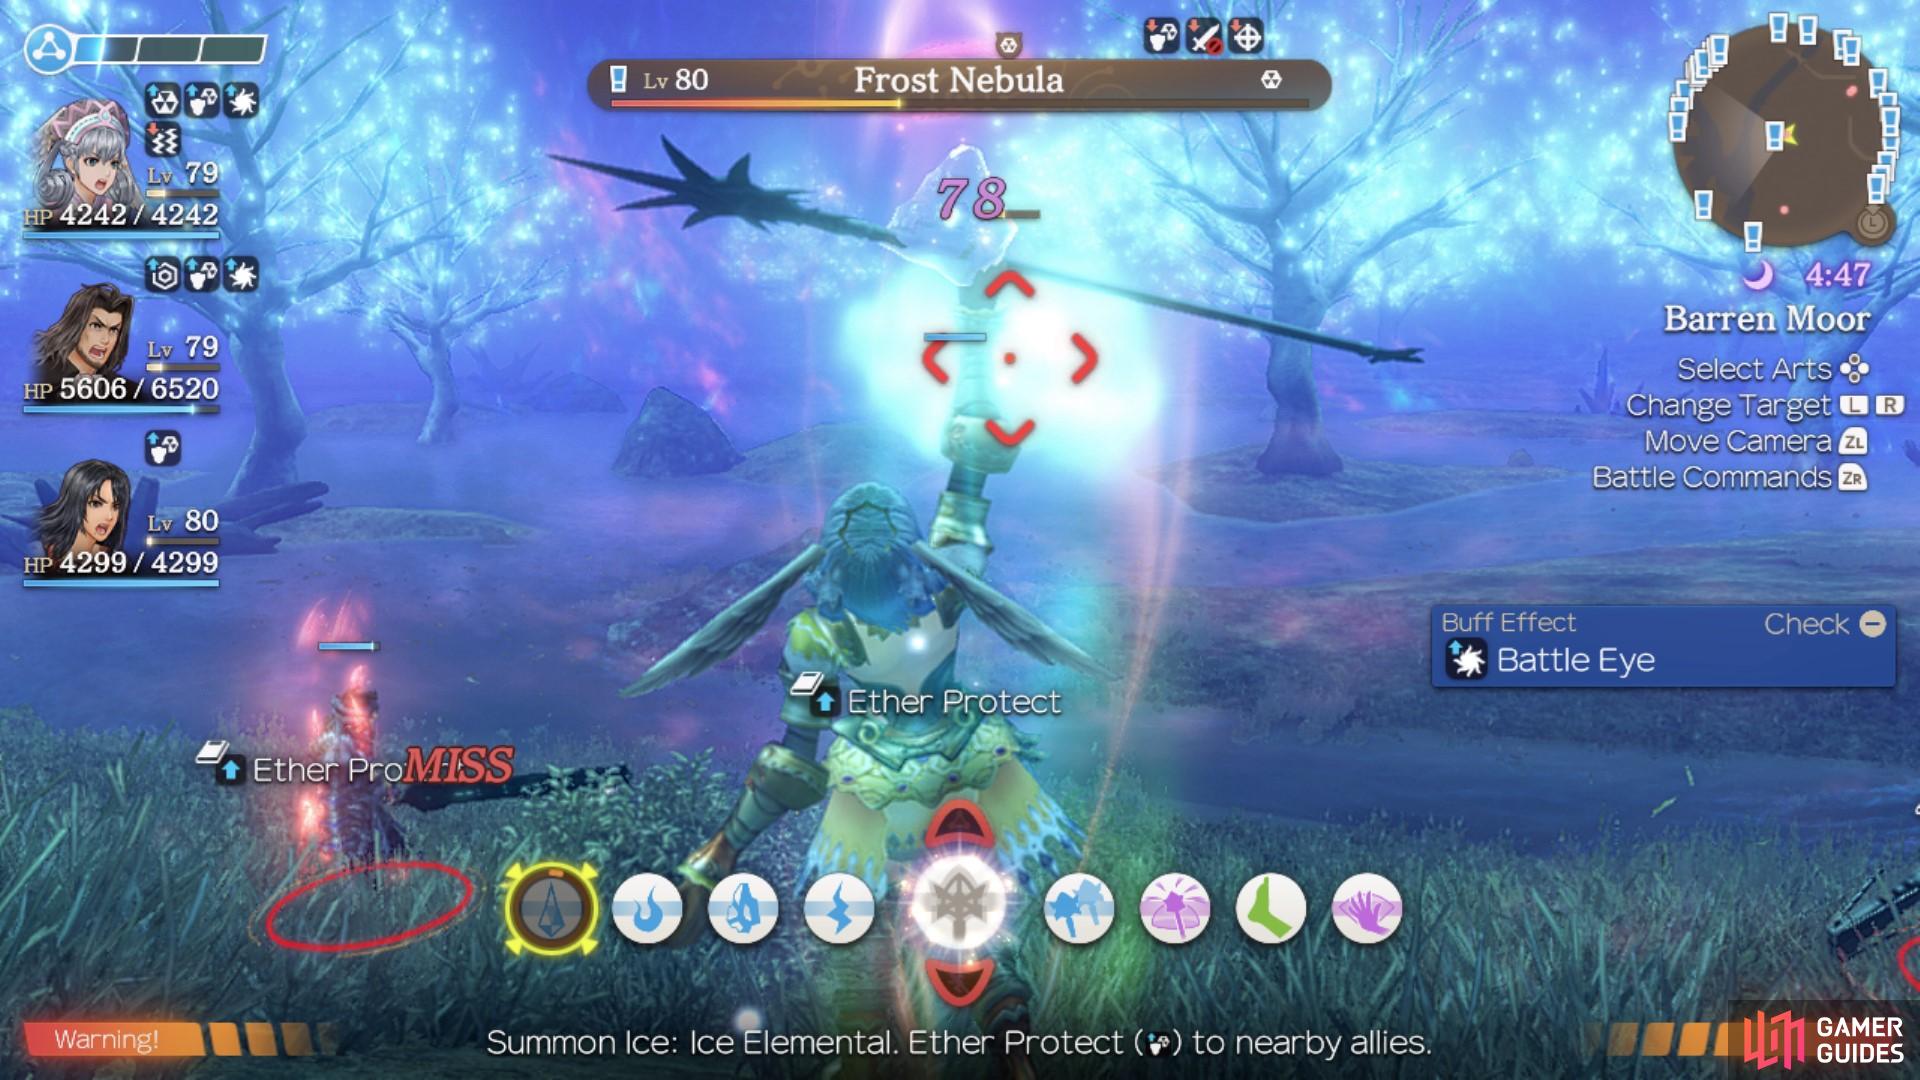
The Frost Nebula is found in Satorl Marsh when it is foggy.
Replica Monado 4
| Client | Rewards | Affinity |
|---|---|---|
| Vanea | 12000 EXP, | None |
After the attack on Colony 6, Vanea will offer to make 5 different replicas of the Monado. This replica requires 1 Demonic Everflame, 1 Mammut Horn and 1 Tirkin Elder Medal. The Demonic Everflame can only be obtained from the quest exclusive Demonic King Dragonia and the Superboss, Avalanche Abaasy. It is recommended that you aim to obtain the Demonic Everflame from the Demonic King Dragonia since the Avalanche Abaasy is the strongest enemy in the game. The Demonic King appears in Hope Farm during the final Colony 6 reconstruction quest, Defend Colony 6 - Demon. The Mammut Horn is dropped by Laeklit Mammuts near the Village Entrance in Makna Forest. The Tirkin Elder Medal is only dropped by the unique monster, Field Tirkin, that’s found near Crevasse Waterfall on the Bionis’ Leg.
Once you have all of the materials, return to Vanea and she will create the Monado Dogma. It has the same auto-attack damage rate as the Replica Monado, but it has an increased critical rate. However, it has no Ether defence or Physical defence and it also has a decreased block rate.
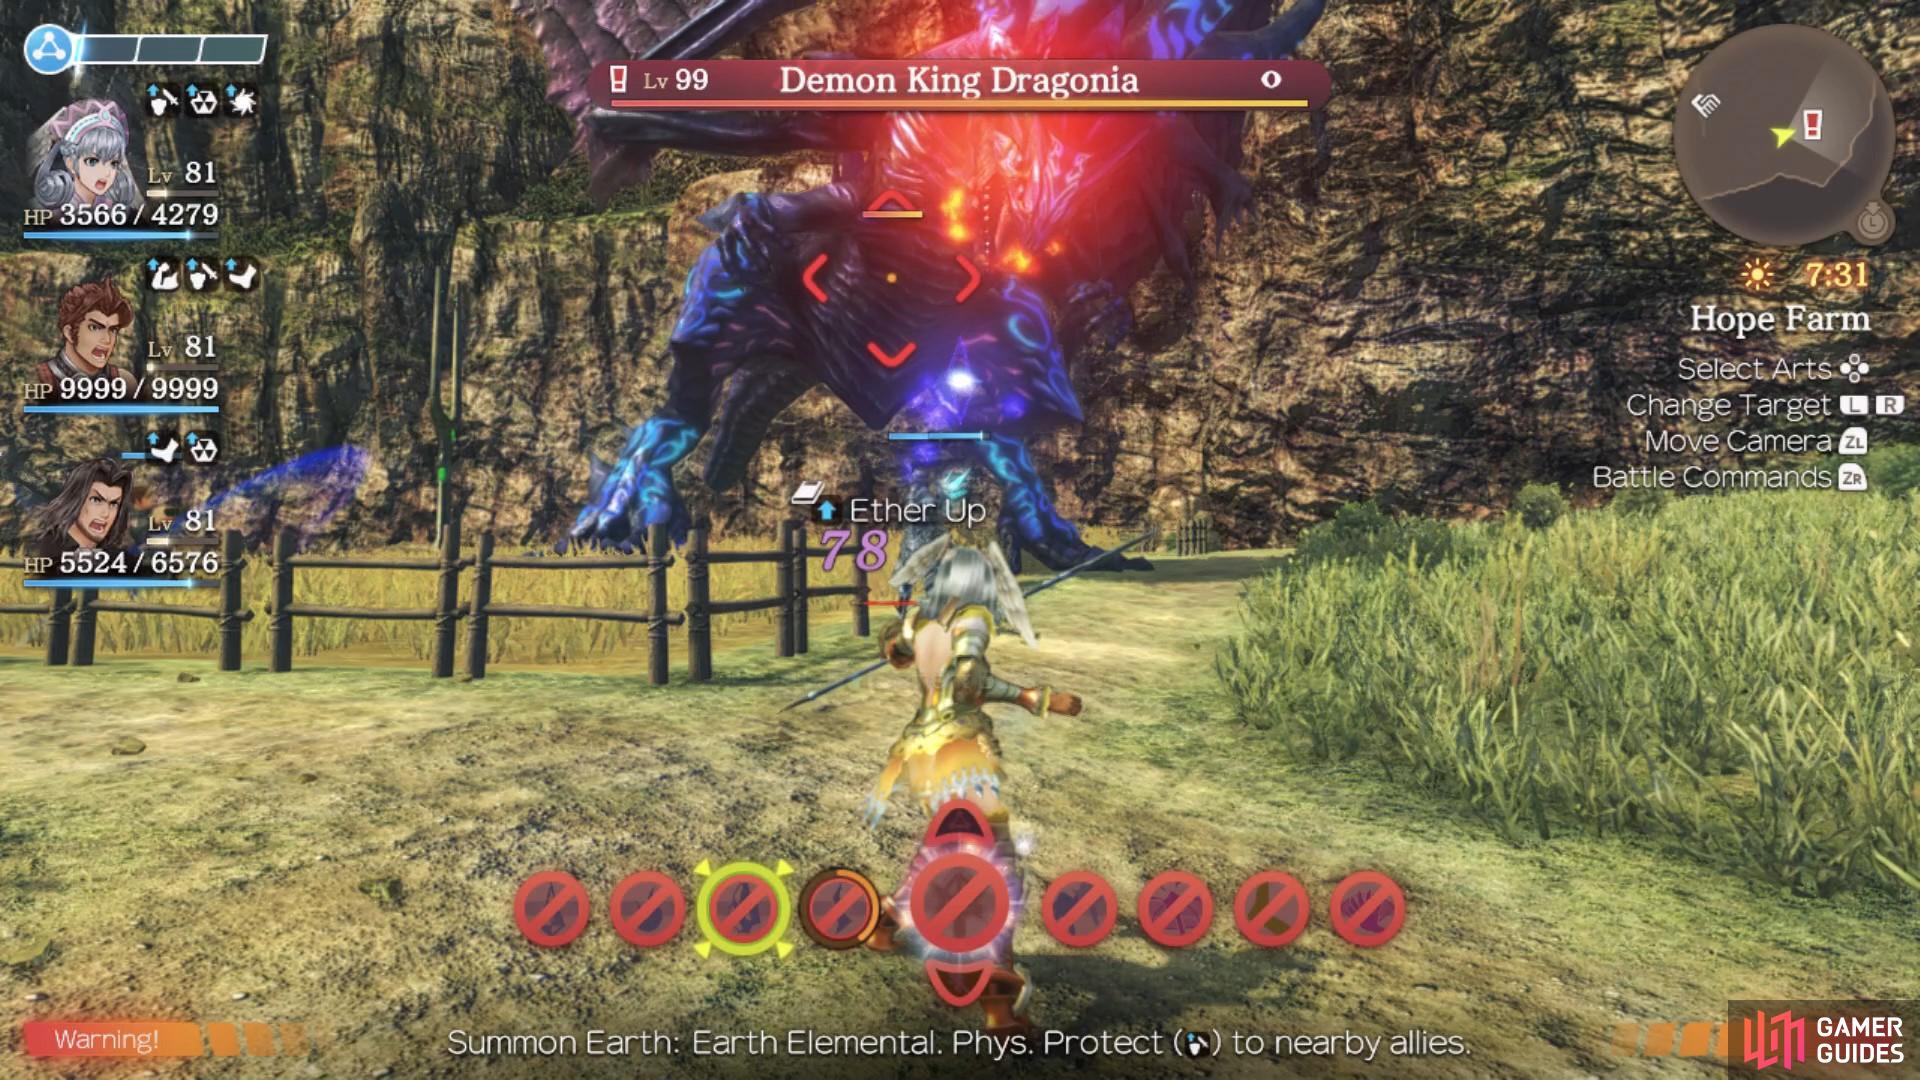
The Demon King Dragonia has A LOT of health, so fighting him will take some time.
Replica Monado 5
| Client | Rewards | Affinity |
|---|---|---|
| Vanea | 12000 EXP, Monado Saga | None |
After the attack on Colony 6, Vanea will offer to make 5 different replicas of the Monado. This replica requires 1 Yellow Slobos Rock, 1 Tokilos King Egg and 1 Diamond Brog Eye. The Yellow Slobos Rock can be obtained from the Glory Slobos and Gloria Slobos found on the Three Sage Summit on Valak Mountain. The Tokilos King Egg is dropped by Leg Tokilos found near Zax Guidepost on the Upper level of the Bionis’ Leg. Diamond Brog Eyes can be dropped by Young Brog found north of Heavenly Window in Tephra Cave.
Once you have all of the materials, return to Vanea and she will create the Monado Saga. It has an overall lower auto-attack damage rate than the Replica Monado. However, it sacrifices damage for overall higher Ether and Physical defence, as well as an increased Block rate.
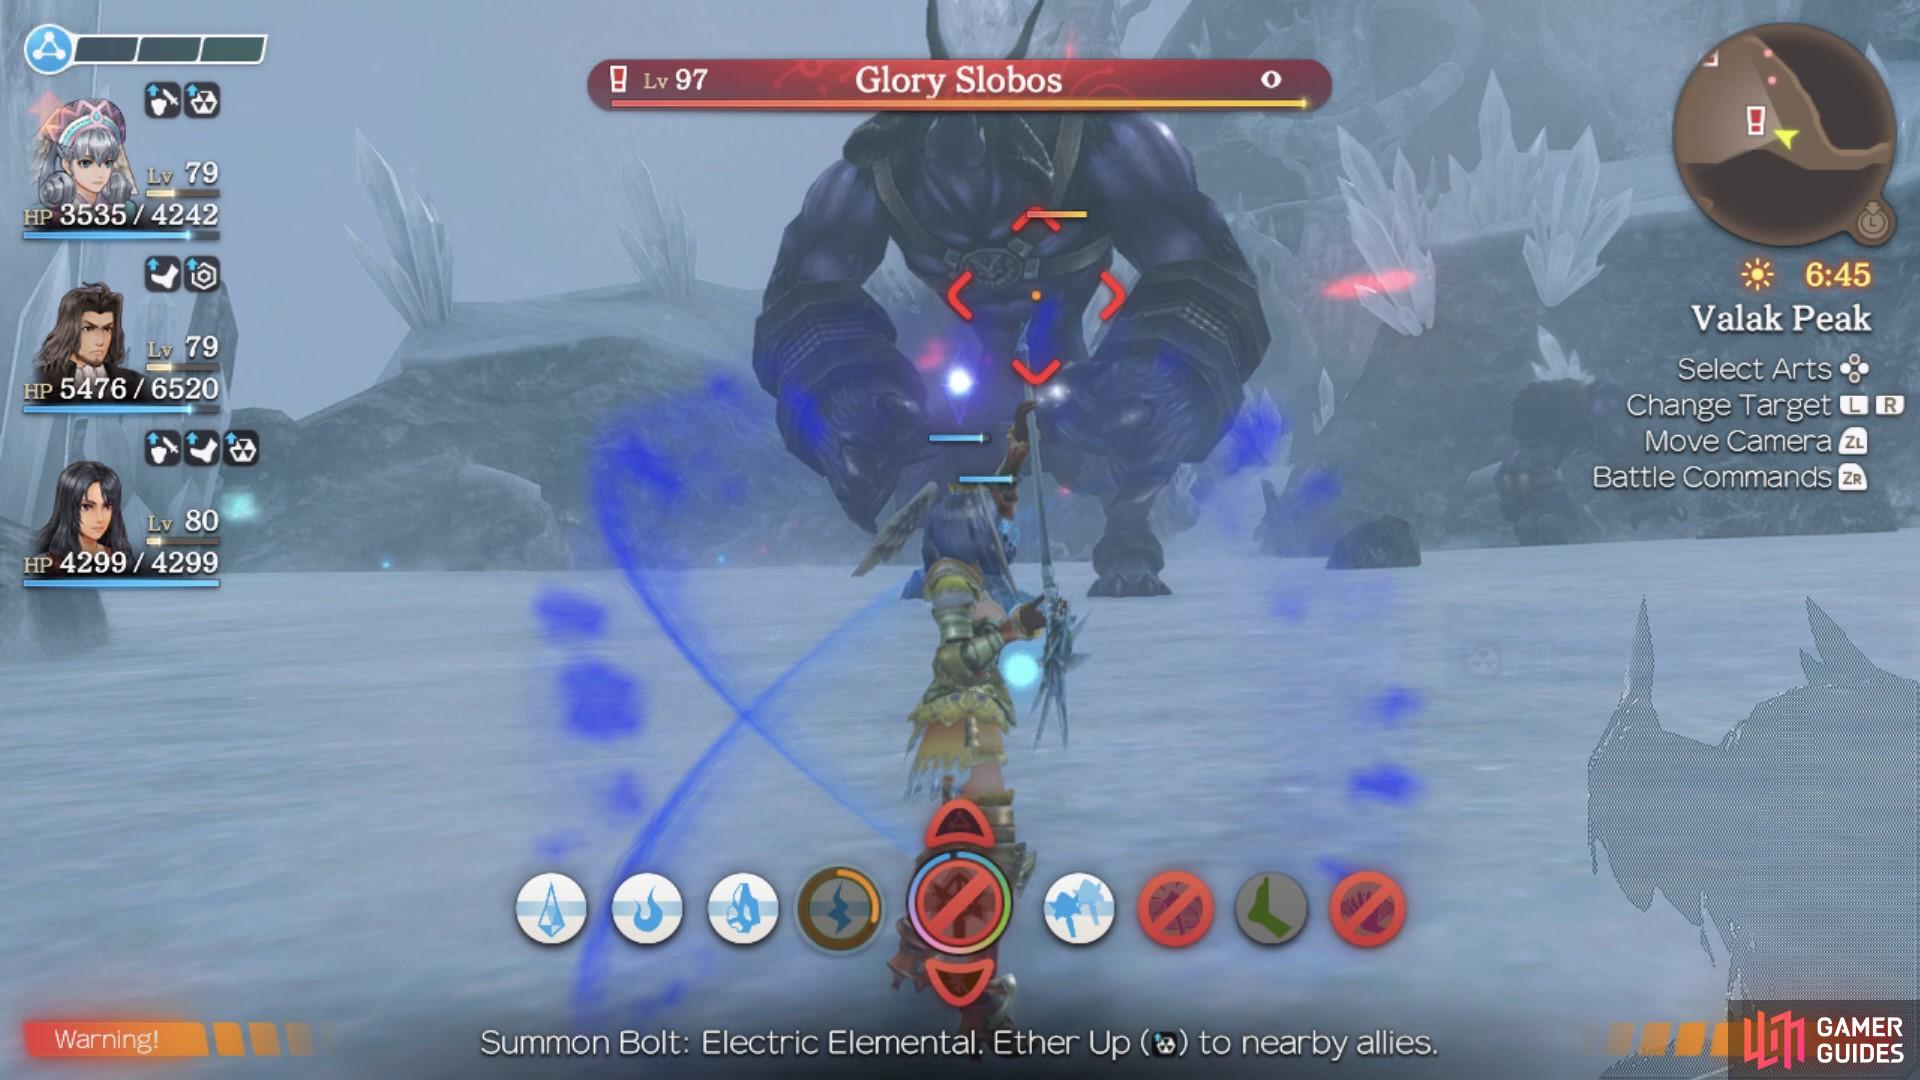
The Glory Slobos resides on the Three Sage Summit on Valak Mountain.
No Comments