


To Valak Mountain
Following the many scenes that take place at the end of Chapter 9, you’ll find yourself in control of Shulk alone as he searches for Dunban. Take the nearby transporter and make your way to the west where you’ll find Dunban and trigger a scene. Once you regain control, you’ll be reunited with everyone as Kallian requests your presence so go ahead and return to the Audience Chamber to trigger more scenes.
With a new destination in mind, Valak Mountain, make your way back to the Audience Hall and speak to Kallian once more where he’ll hand over the impressive Imperial Staff, one of the best weapons you can find for Melia until you reach the later stages of the game due to the three Slots it offers. Make your way back the way you came and leave Alcamoth via the Centre Gate to trigger another scene and when you regain control, head to the nearby pod and take it to a part of Makna Forest that was unavailable before where you’ll unlock the Pod Landing Site Landmark. Before you follow the path to the west, turn back and head east to find a Nopon Researcher that will offer you a Quest.
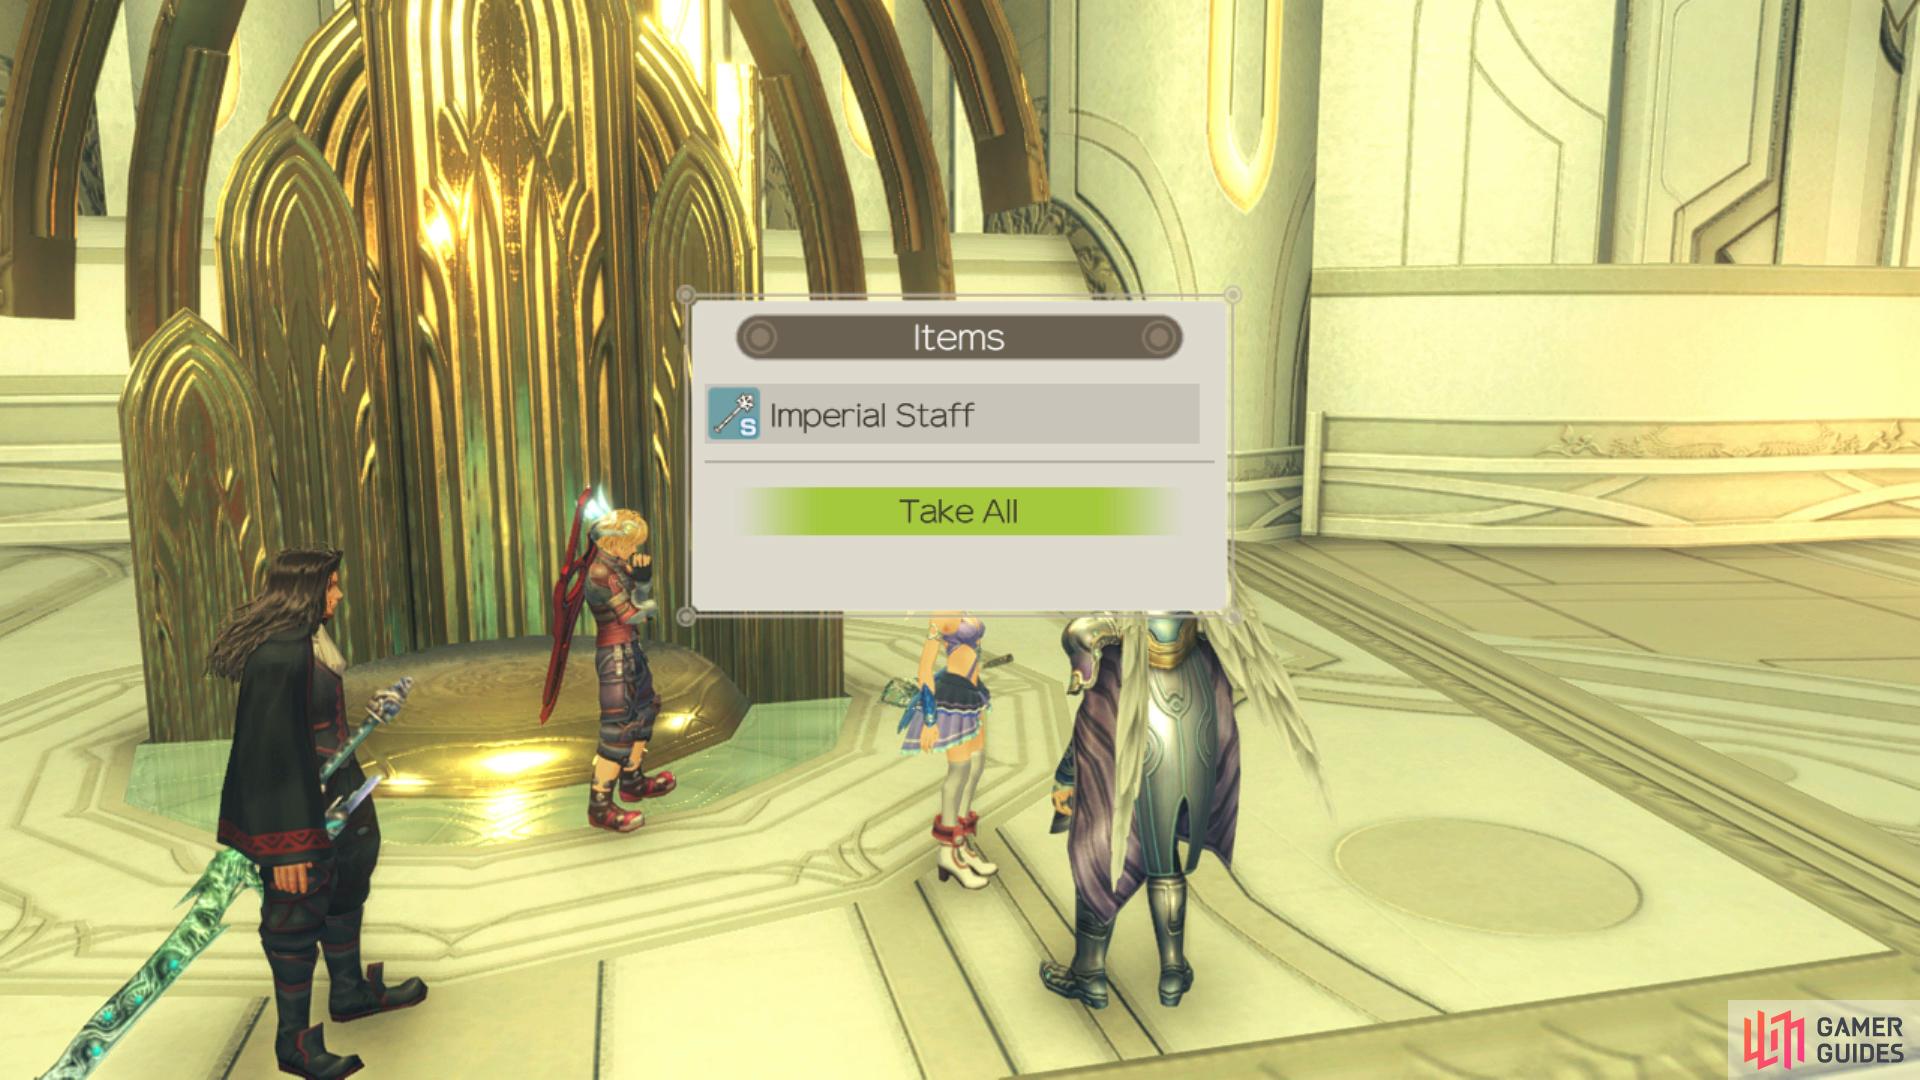
Speak to Kallian to obtain the excelent Imperial Staff for Melia
and complete the Bridge Repair Quest to open up more of Makna Forest.
Bridge Repair
He will ask you to fetch the materials he needs to fix Bridge Four and he needs 3 Rhogul Axe Crests which can be obtained from Mist Rhoguls and 5 Hode Planks from Hodes. Hodes are in abundance around Windmill Pavilion and Hode Lair in Makna Forest. Mist Rhoguls are native to Satorl Marsh and are found most commonly near the Altar of Fate. Once you have collected the items, head back to the Nopon in charge of the bridge repair to finish the quest. Upon completion, Bridge Four will be repaired and usable.
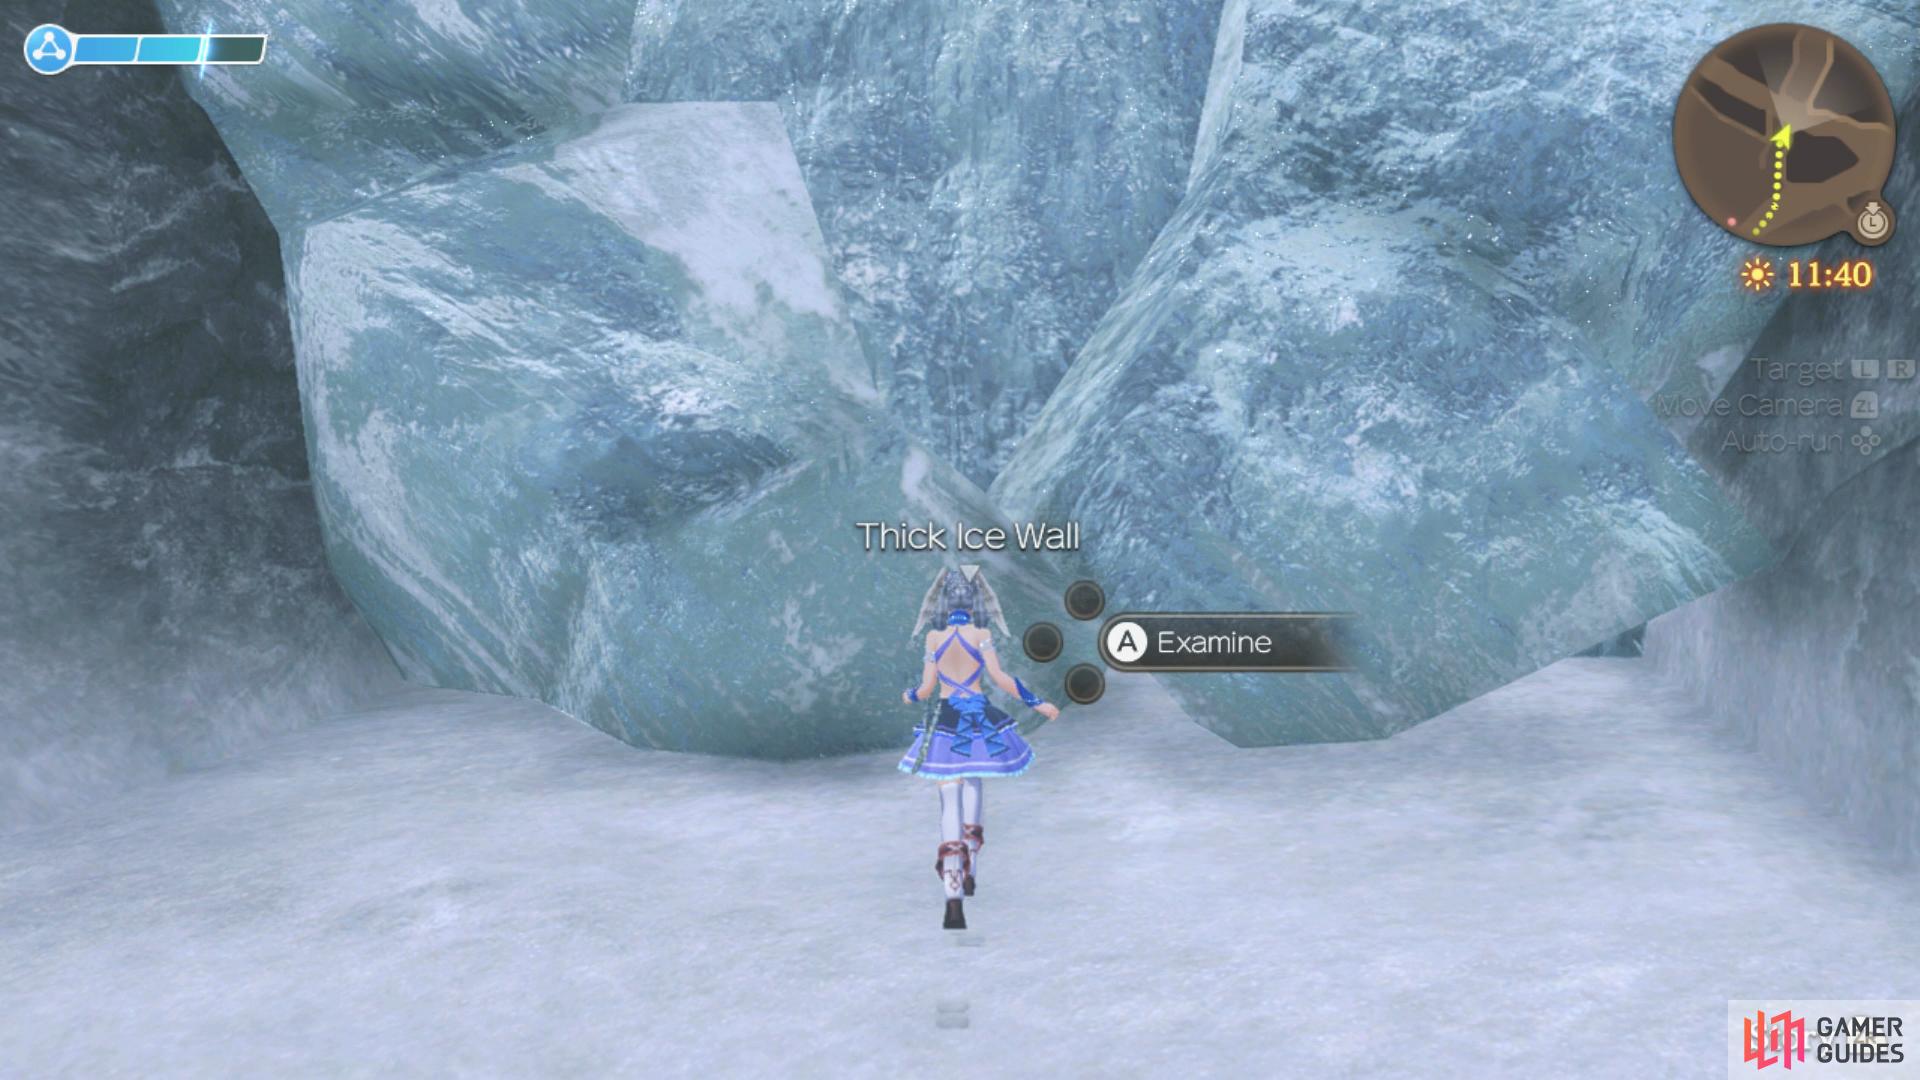
Be sure to step on the bridge after to unlock Repaired Bridge Four and then head west from the Pod Landing Site to head towards the Story Flag however make your way down to the southwest first to unlock the Secret Area, King Agni’s Tomb. Return to the northeast and head towards the Story Flag to unlock the Valak Pass Landmark which should complete your map for Makna Forest before you take the exit.
Valak Mountain
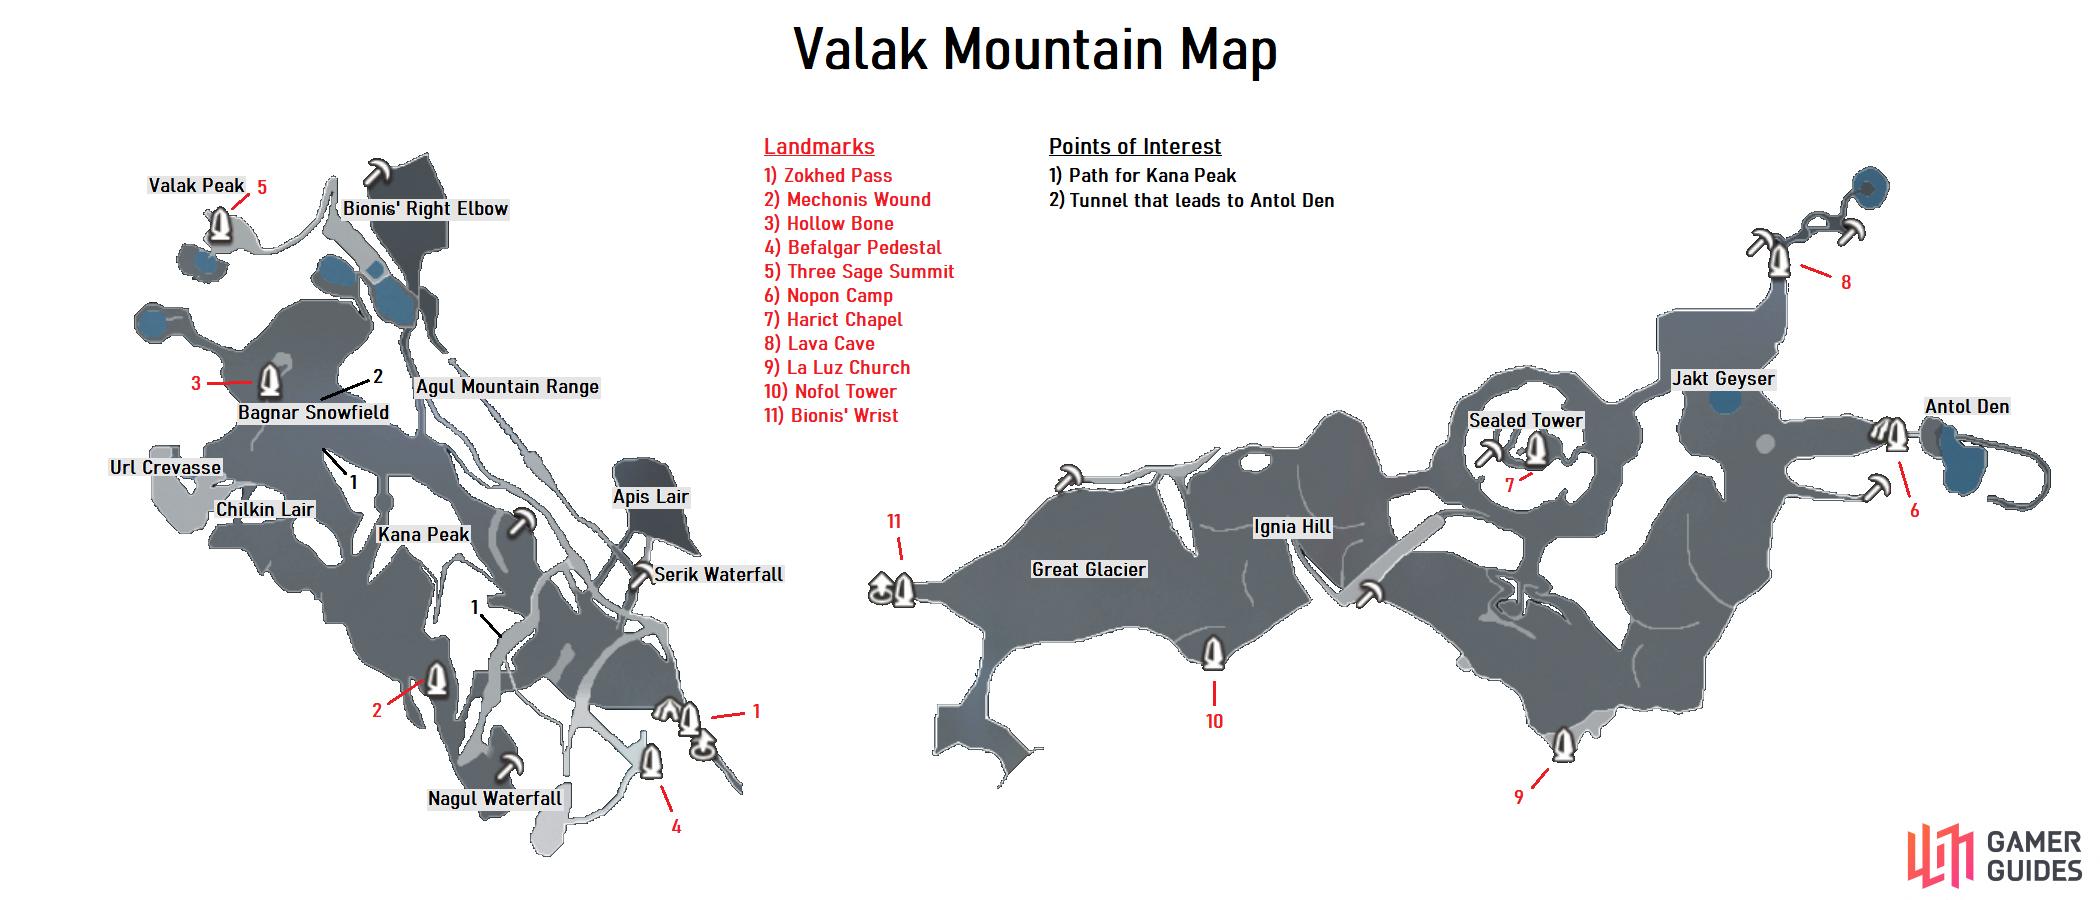
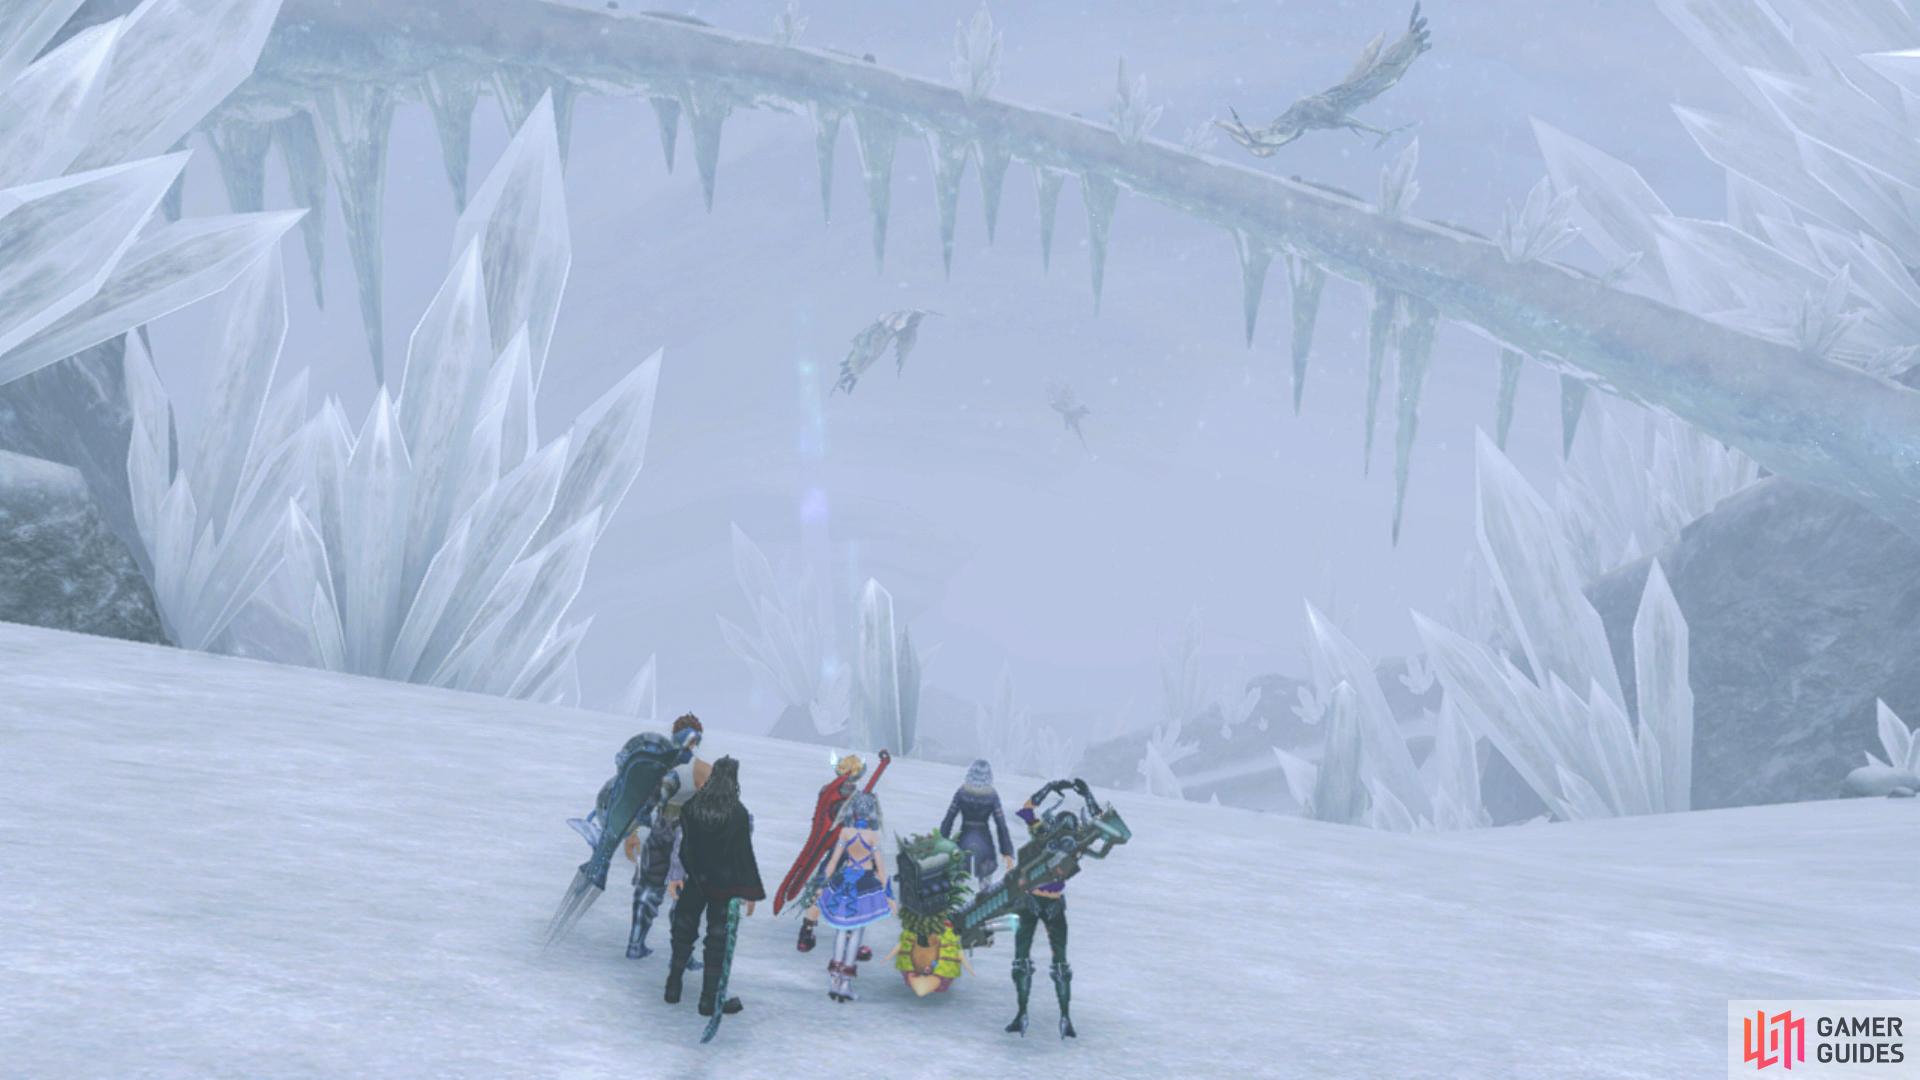
Once you regain control, you’ll unlock the Zokhed Pass Landmark and spot a small group of Nopon up ahead. Speak to them to pick up the Quests that they offer, four Monster Quests before you set off to explore this massive mountain. Valak Mountain is a huge area full of slopes, jumps and more and it’s quite the effort to fully explore it. What’s more, you’ll need an item you’ll soon get from a Story Quest to progress to some of the other parts of the area.
Begin by taking the slope down to the northwest and then heading along southwestern path as soon as possible to enter a cave and follow the path to the far southwest of the map (press the LS button in to help you here) to unlock Nagul Waterfall. Make your way back to the north of here on the west side, heading down the slope and you’ll unlock the Mechonis Wound Landmark. Continue down the slope to the north and you’ll eventually unlock Bagnar Snowfield first, then continue to the bottom of the slope on the west where you’ll spot a cave entrance, head inside to unlock Chilkin Lair.
Make your way through here to the northeast and when you return to the snowfield, make your way to the southern wall here (take a look at the map) and take the narrow slope up to the west and follow this higher area to the northwest to unlock Url Crevasse. You’ll find an Ice Flower you can pick here and then continue to the north to drop back down to the snowfield below. Continue to the east here to unlock the Hollow Bone Landmark and use the Area Map to warp to this new Landmark to discover it puts you right in front of a new cave.
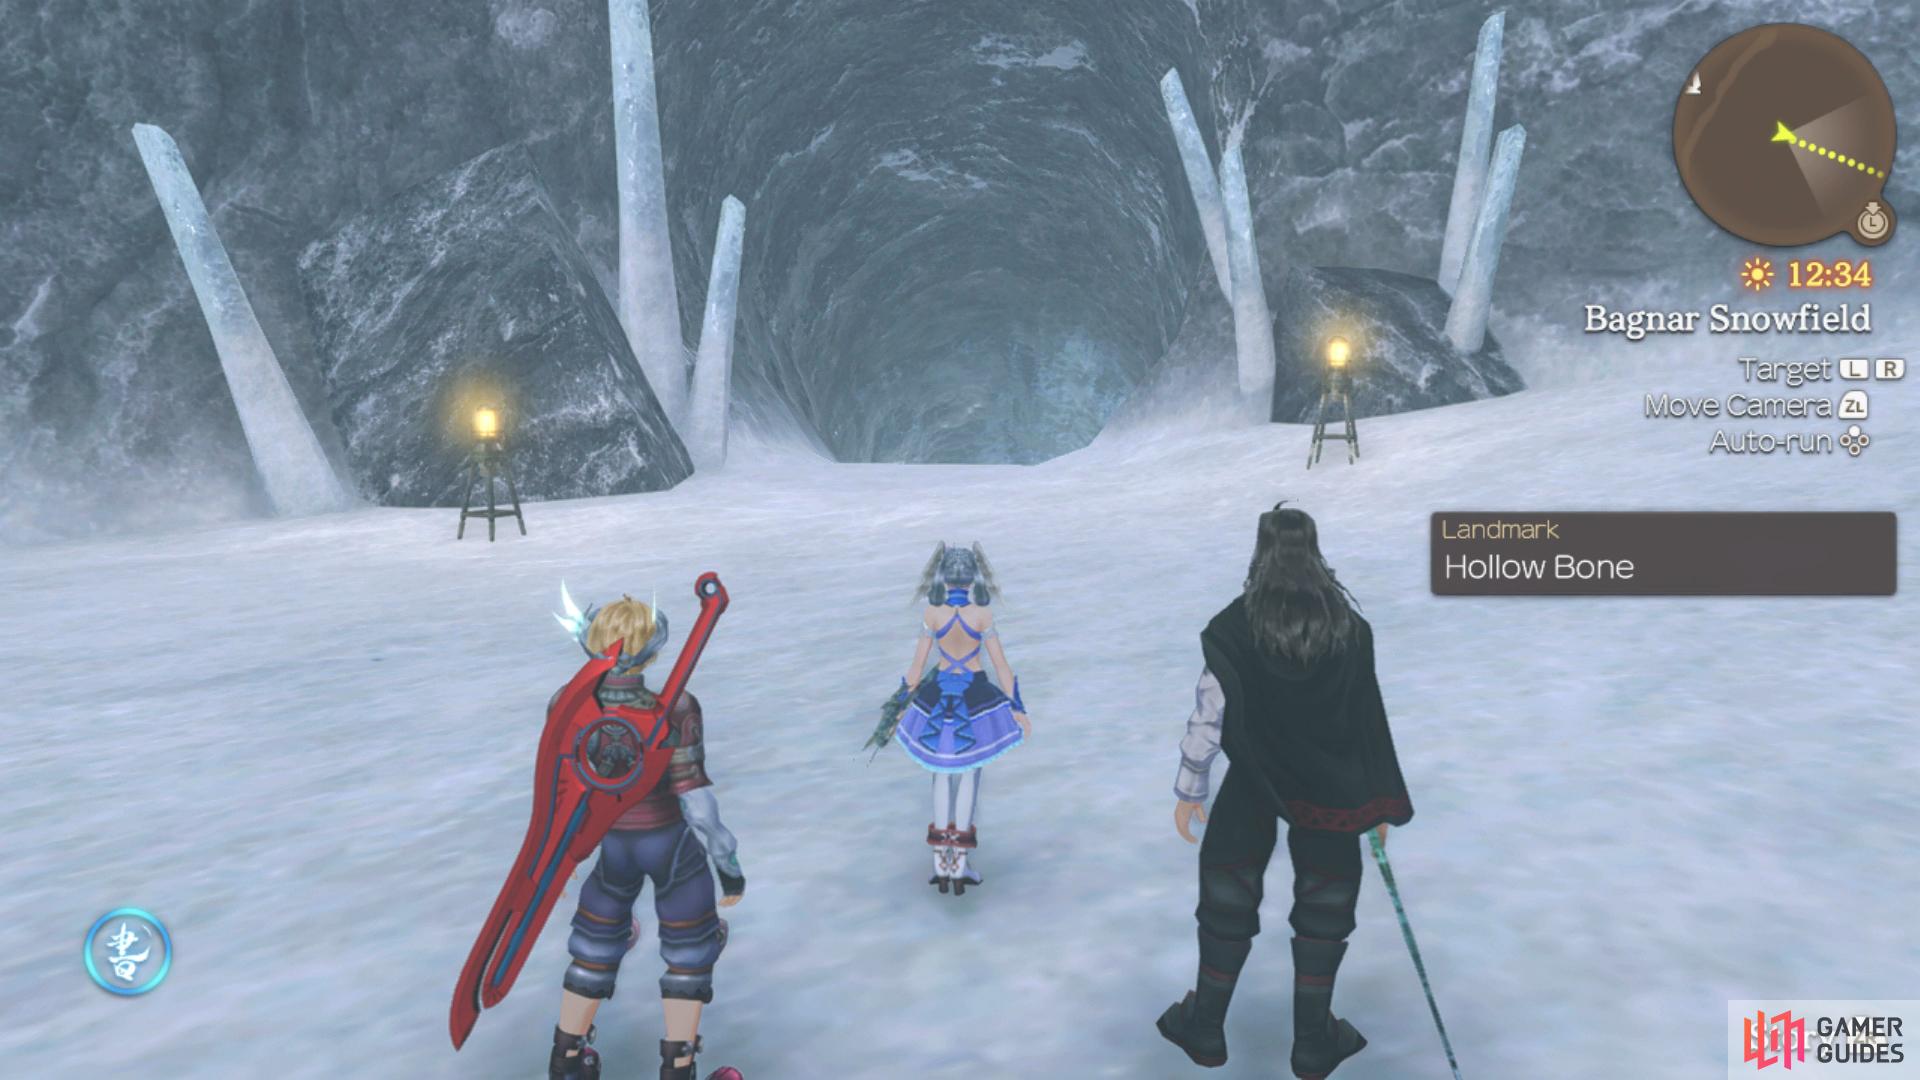
Warp to the Hollow Bone Landmark to find the entrance to an ice slide

jump at the end of the second gap to reach Antol Den above.
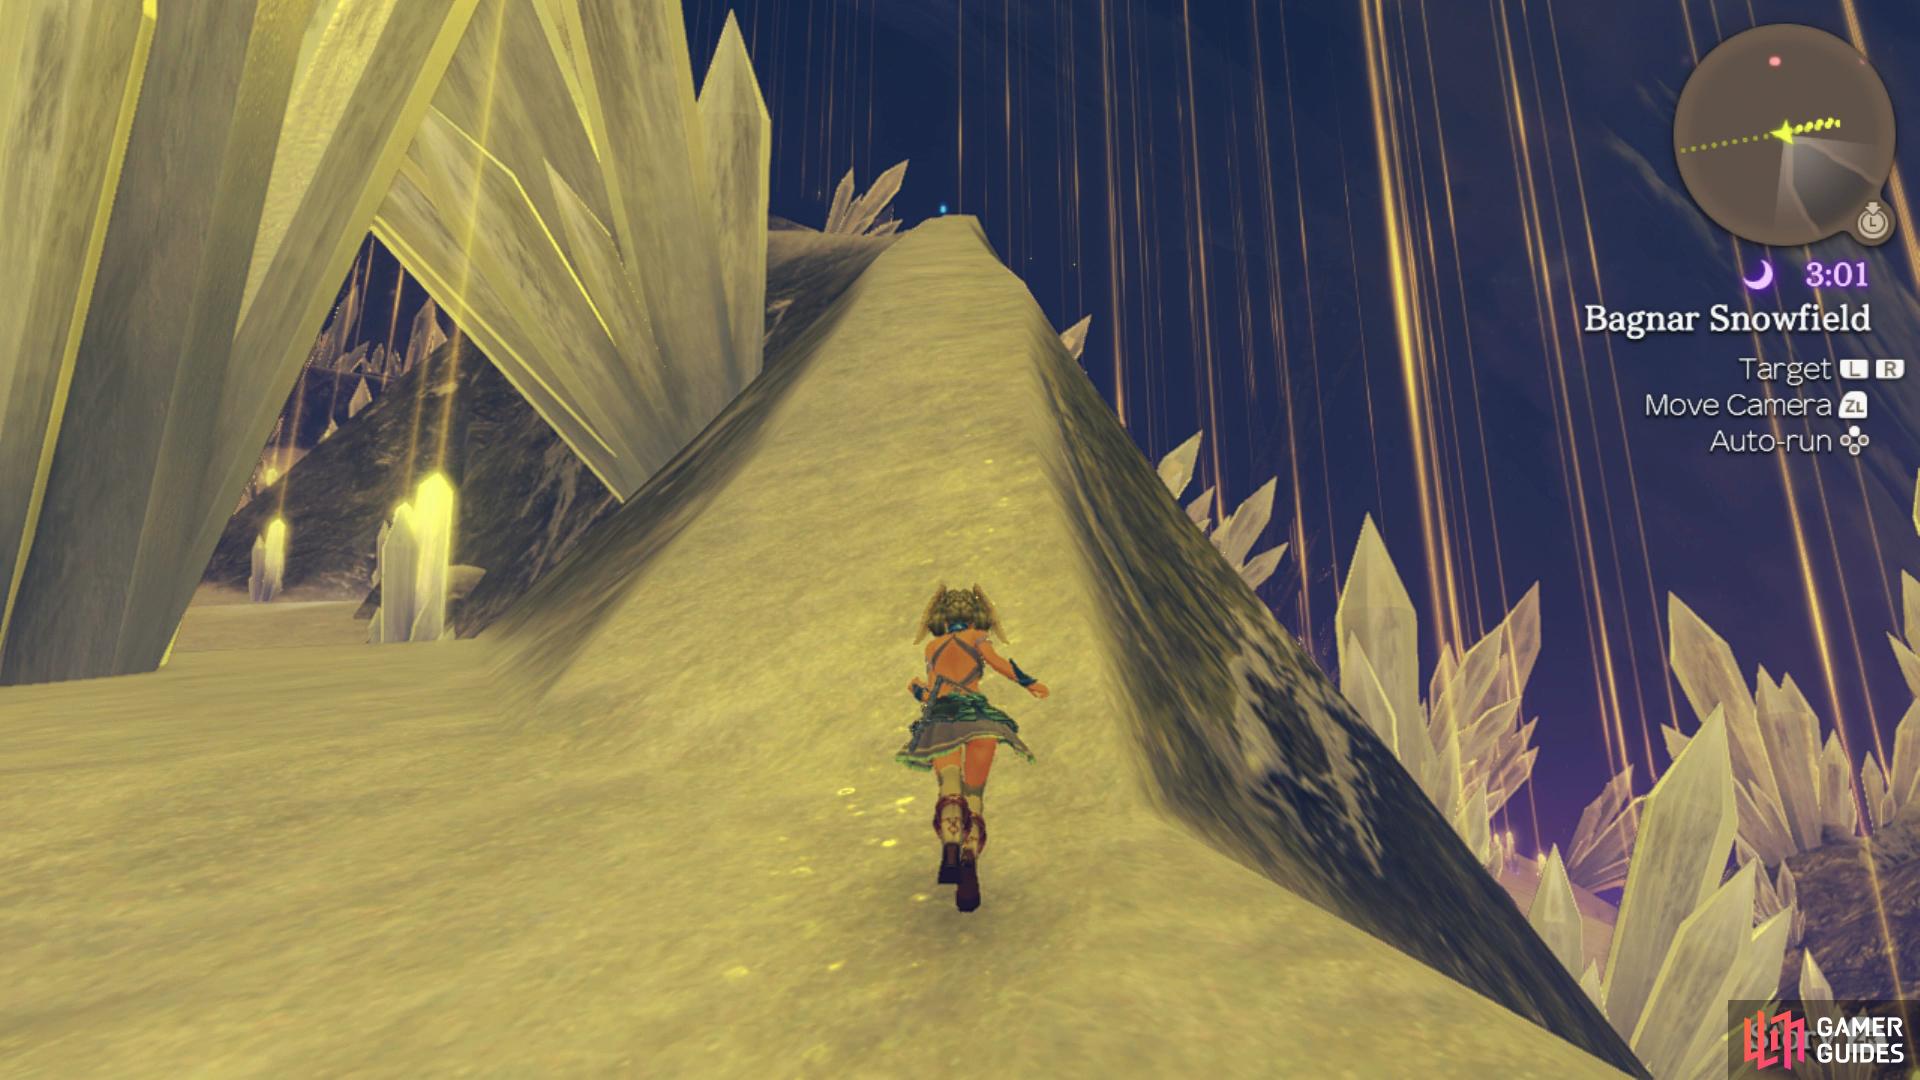
Head inside the entrance and you’ll notice a large Ice Slide, you’ll need to use this, performing two successive jumps, to reach a new area so return to this Landmark if you’re not successful. After you make the first jump, try to keep to the side for the extra bit of height it gives you and you should make it. If you don’t make it the first time after the first jump, continue through to unlock the Nopon Camp Landmark and speak to Dakuku to register him to your Affinity Chart. You’ll also find a Researcher here who offers the Chilkins and Antols Quest. This is part of a Quest line and you can start working on the enemies as you explore Valak Mountain.
At this point, return to the Hollow Bone Landmark if you didn’t make the jump and try again, eventually you’ll reach the Antol Den. You’ll find the Antols you need for the above Quest here and you’ll also find a Lv 47 Unique Monster, Barbaric Sitri. Whether you decide to fight it not, return to the Hollow Bone Landmark to continue exploration of the upper part of Valak Mountain.
Make your way to the northeast from the Landmark and you should reach another narrow slope that takes you up to the west and you’ll unlock Valak Peak. Return to the Hollow Bone Landmark once again and this time, head up to the east to reach the higher part of the slope and then continue to follow it to the east where if you look closely, you’ll find a small narrow path leading up a mountain, take this up to unlock Kana Peak and then follow this all the way to score some of the rarer Collectibles on Valak Mountain.
Once you reach the other side of the Peak, head north along the upper platforms here and at the intersection, head to the wall and then start going southeast until you reach the next intersection. This time, take the path leading southwest and you’ll reach yet another one so take the southern path and follow it to the end to climb a wall. Once you reach the other side, follow the path south and then take the narrow eastern path up and climb another wall to reach a Secret Area, Befalgar Pedestal.
Warp to the Zokhed Pass Landmark from here and while heading down the slope again, hug the northern wall. Shortly after passing a passage blocked by ice, you’ll come across another that you can head down, do so and you’ll unlock Apis Lair. Return now to the Hollow Bone Landmark once again and head along the large slope leading to the east while hugging the northern wall to find a narrow path leading north which will eventually lead to Bionis’ Right Elbow.
That’s all you can explore for the moment in the upper level of Valak Mountain so warp back to Nopon Camp and if you’ve not completed Chilkins and Antols yet, return to the upper level and do so. Speaking to the Nopon Researcher again here will give you the next Quest, Valak Mountain Research. This should be another easy Quest you can complete right now, start by warping over to Befalgar Pedestal where you can investigate the first area then make your way back up the narrow Kana Peak once more for the second. Return to the Researcher to turn the Quest in, your choice has no impact on Quests or rewards so go ahead and choose what you like here.
With that detour taken care of, continue your exploration of the lower mountain by heading west from the Nopon Camp and head north when you can to unlock Jakt Geyser and then go ahead and register the nearby Heart-to-Heart. Go ahead and stand in the geyser and it will shoot you up into the air where you can land in a pool of water in the upper part of the mountain. Leave the pool to the east and you’ll find another Nopon Researcher here who offers The Freezing Nopon, a Quest that requires you to collect materials from Porcu Hoxes, Ent Antols and a Noto Feris, keep this active while you explore Valak Mountain and return here to turn it in after you’re done.
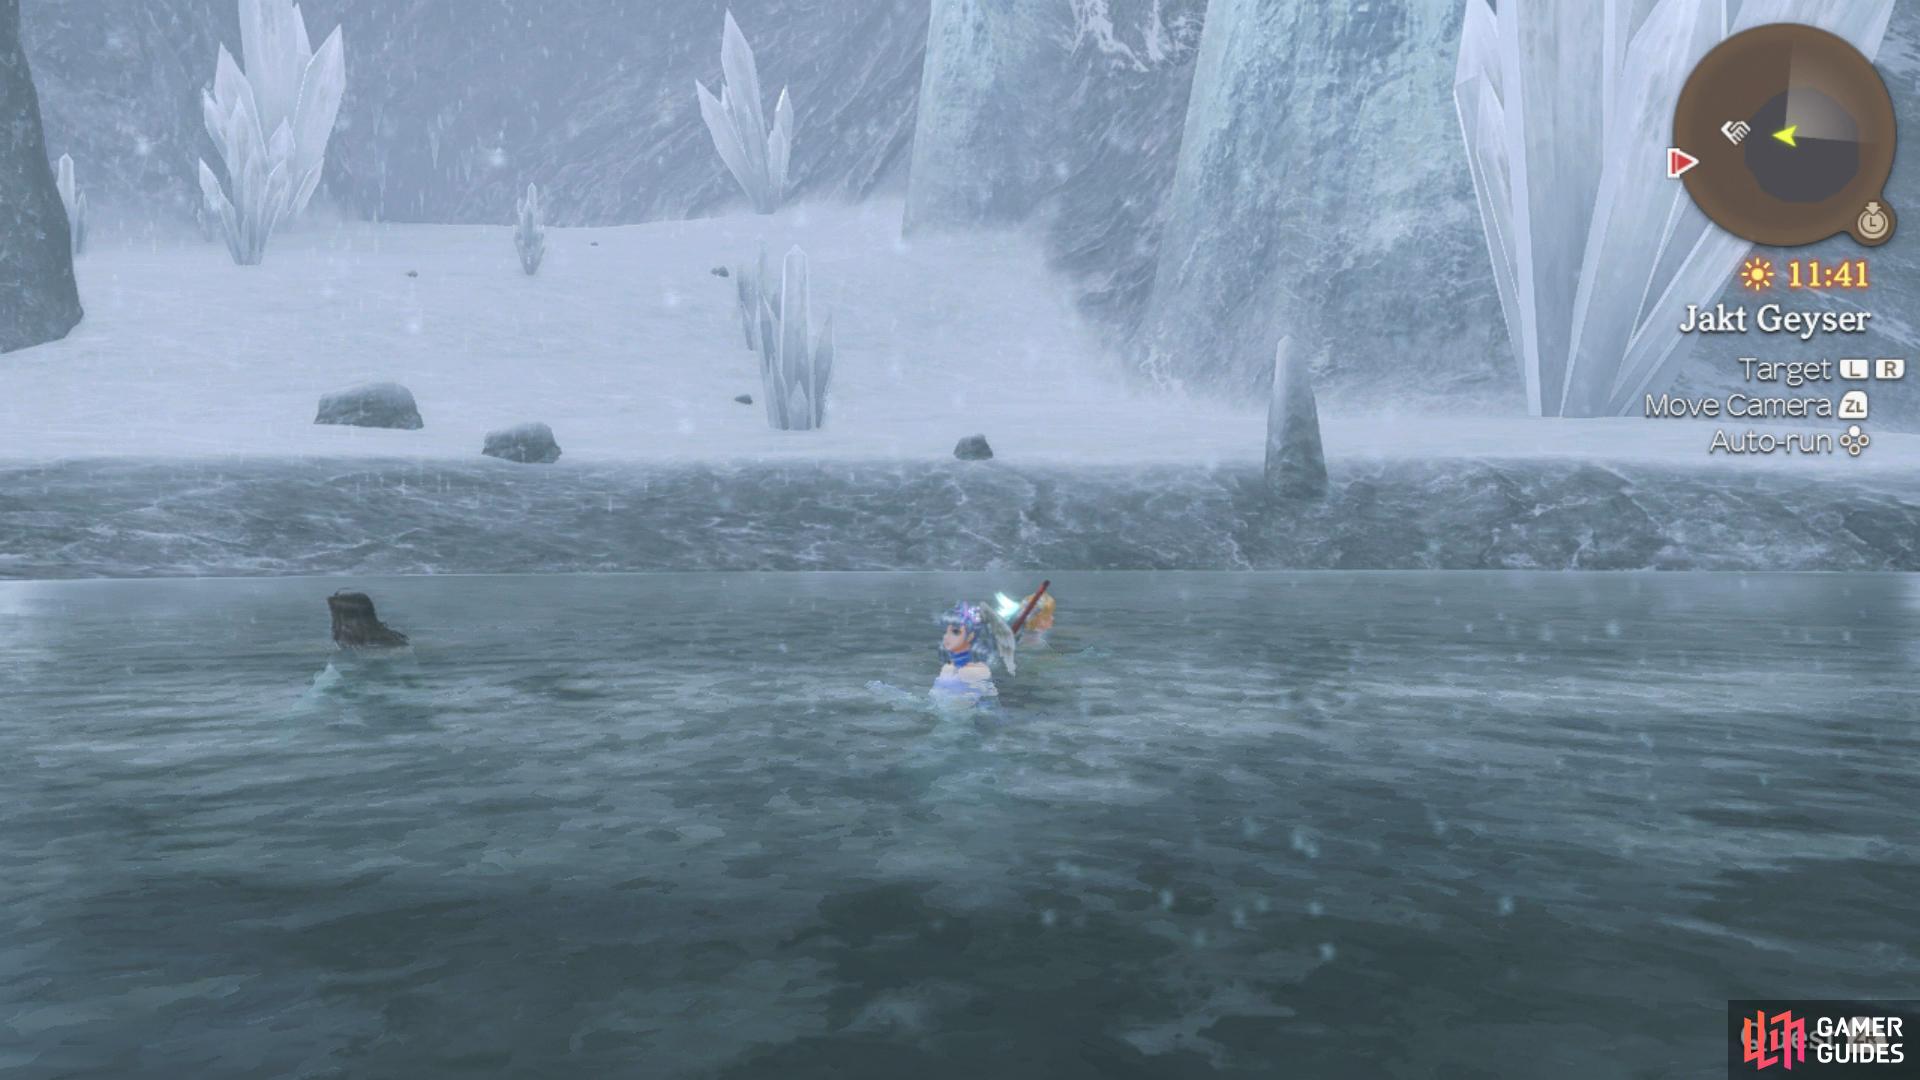
Stand in the pool of water at Jakt Geyser
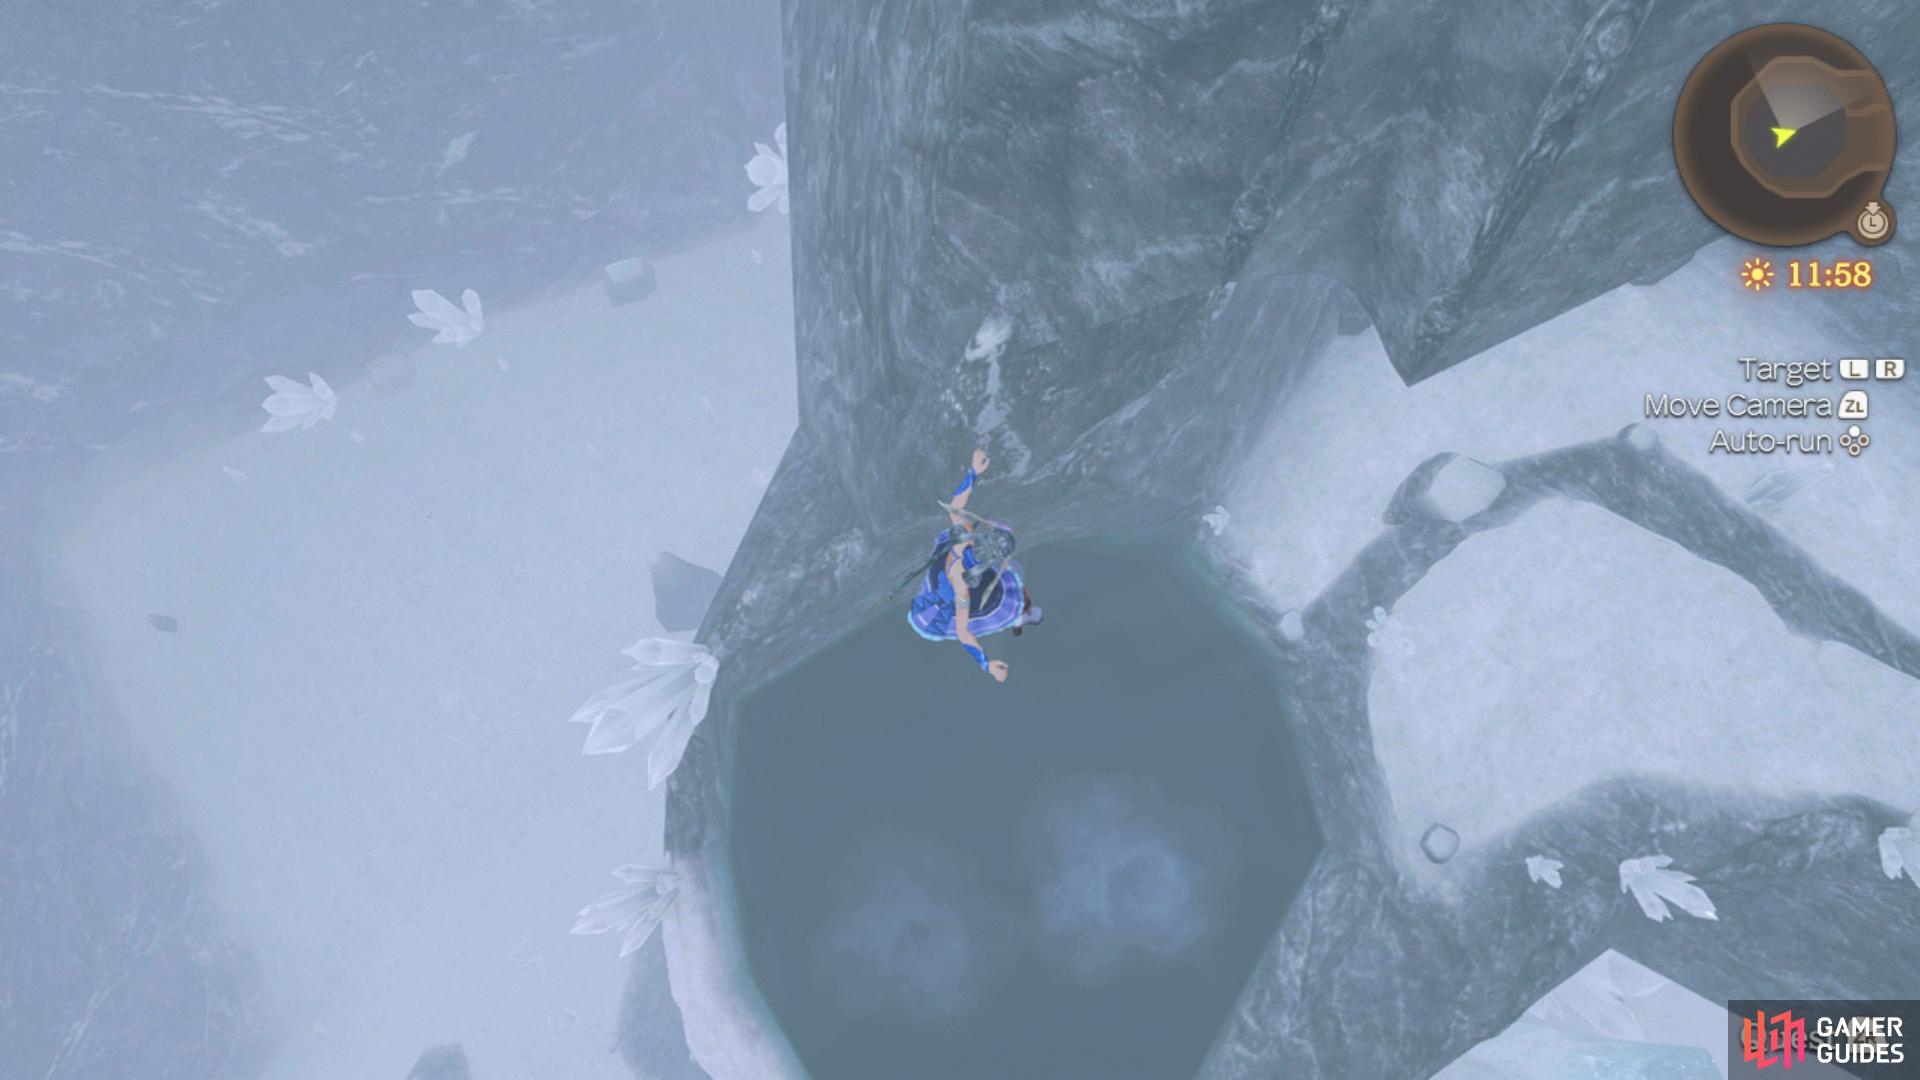
to have it shoot you up in the air and to a new area with a Quest.
Head back to the Nopon Camp once more, go north to where the Jakt Geyser is but this time continue to the northeast to unlock the Lava Cave Landmark where you’ll find many of the monsters you need for the Quest you just accepted along with some Ether Deposits. From the Lava Cave Landmark, make your way to the southwest now and follow the path to the tower in front of you, unlocking Sealed Tower, the Harict Chapel Landmark and triggering a cutscene once you reach the Story Flag.
The Magma Rock
In order to deal with the ice blocking the ruins, the party set out to find a Magma Rock. Thankfully, you can make quick work of this Quest by warping to the nearby Lava Cave Landmark and following the path to the northeast where you’ll find the Lv 45 Unique Monster, Conflagrant Roxael. Be wary of the Elementals that are situated here and be sure to watch for your party running into the lava. Upon defeat, you’ll obtain the Magma Rock you were searching for.
Before you head back to advance the story, you can now explore a new location on the upper reaches of the mountain. Warp back to Zokhed Pass, head down the slope while hugging the northern wall to find the ice covered entrance. Use the Magma Rock to remove it and then head inside to unlock Serik Waterfall and find an Ether Deposit. Now take the northwest path up the slope to unlock Agul Mountain Range which will eventually lead to another ice slide. Take this down to a part of the mountain with no ice and then save your game. You’ll now need to walk on to a second ice slide and jump just as you leave it, you may need to equip Light (or even none at all) armor to reduce your weight along with Quick Step Gems if you’re not able to make it. If you’re successful, you’ll hit the side of a climbable ledge so climb to the top and then follow the path all the way to the end where you’ll unlock the Secret Area Three Sage Summit.
That should be the last of the locations and Landmarks for the upper level of Valak Mountain so head back to Harict Chapel and approach the ice wall blocking the ruins to complete the Quest and trigger some scenes. Once you regain control, register the nearby Heart-to-Heart and then leave the area to the east and head as far south as you can and drop down, before heading southeast to find an entrance and a wall to climb. Once you reach the top, head west and you’ll unlock the La Luz Church Landmark.
Drop back down now and follow the western wall to the northwest to unlock Ignia Hill before heading southwest once you reach the larger snowfield to find the Nofol Tower Landmark. Head directly north from here and you’ll unlock Great Glacier and eventually discover another ice wall containing a Nopon Researcher behind it. Speak to him to accept the Bad Timing Quest.
Bad Timing
The Nopon Researcher can be found half way between the map marker for Ignia Hill and Great Glacier. Once you have found him, he will ask you to defeat 4 Cunning Chilkins so that he can escape the cave. Upon accepting the quest, the Chilkins will be behind you blocking the way out. After defeating them, talk to the Nopon Researcher again to complete the quest. Make your way back to the Nopon Camp Landmark now and you’ll find Dakuku now has a Quest for you.
Chilkin Changes
Dakuku will ask you to investigate the Chilkin Lair, which can be found south of Bagnar Snowfields. Once you have investigated, several level 39 Ent Antols will spawn. This has the potential to be a tough fight, since there are many Antols and a fair few Vangs flying around the lair as well. You can opt out of fighting if you wish as it is not required to complete the quest. Head back to Dakuku at the Nopon Camp to finish this quest.
The Balance of Power
Dakuku will only give you this quest if Dunban is party leader. He will ask you to defeat the Antol Leader, Barbaric Sitri and the new Chilkin Leader, Banquet Vassago. Both can be found in Antol Den, which can be tricky to get to. You will need to use the ice slide from Hollow Bone landmark to reach it. You must jump twice to reach it; the first time is early into the slide and the second time will be when you’re about to come to the end of the slide. It may take a few tries to get it, since the slide can be a bit difficult to maneuver down without tripping and taking fall damage. Once you’re up on the ledge above the Nopon Camp entry, you will spot several Ent Antols and their boss, the level 47 unique monster Barbaric Sitri. It will be quite a tough fight since he is a high level and there are a lot of Antols around. Be careful when fighting, since your positioning is key to minimising the amount of enemies you aggro. In fact, in one of the larger Bonterra Pods, the quest-exclusive level 48 Chilkin Leader, Banquet Vassago will be hiding inside. If the pod hears you, then he will burst out. If he does not burst out of the pod, then you may want to just attack it to release him. This fight also has the potential to be quite tough, as there may still be some Antols around for you to aggro, as well as some Chilkin enemy reinforcements that will join in later into the fight.

The Antol Leader, Barbaric Sitri
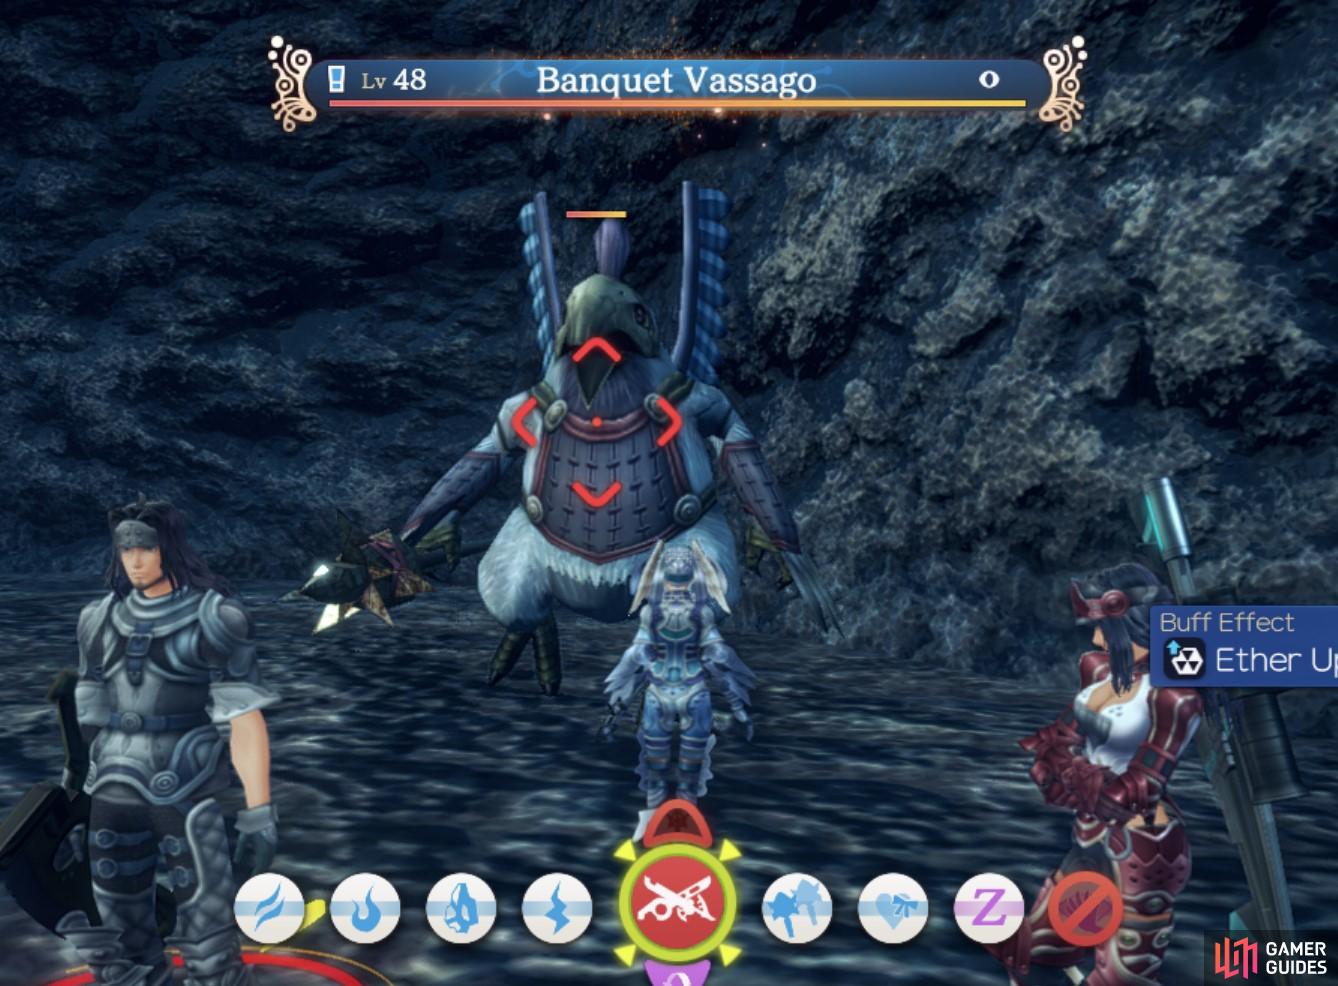
the Chilkin Leader, Banquet Vassago.
Once you have defeated both leaders, head back to Dakudaku to complete the quest. Upon finishing the quest, Dunban will unlock his fourth skill branch, Obstinence.
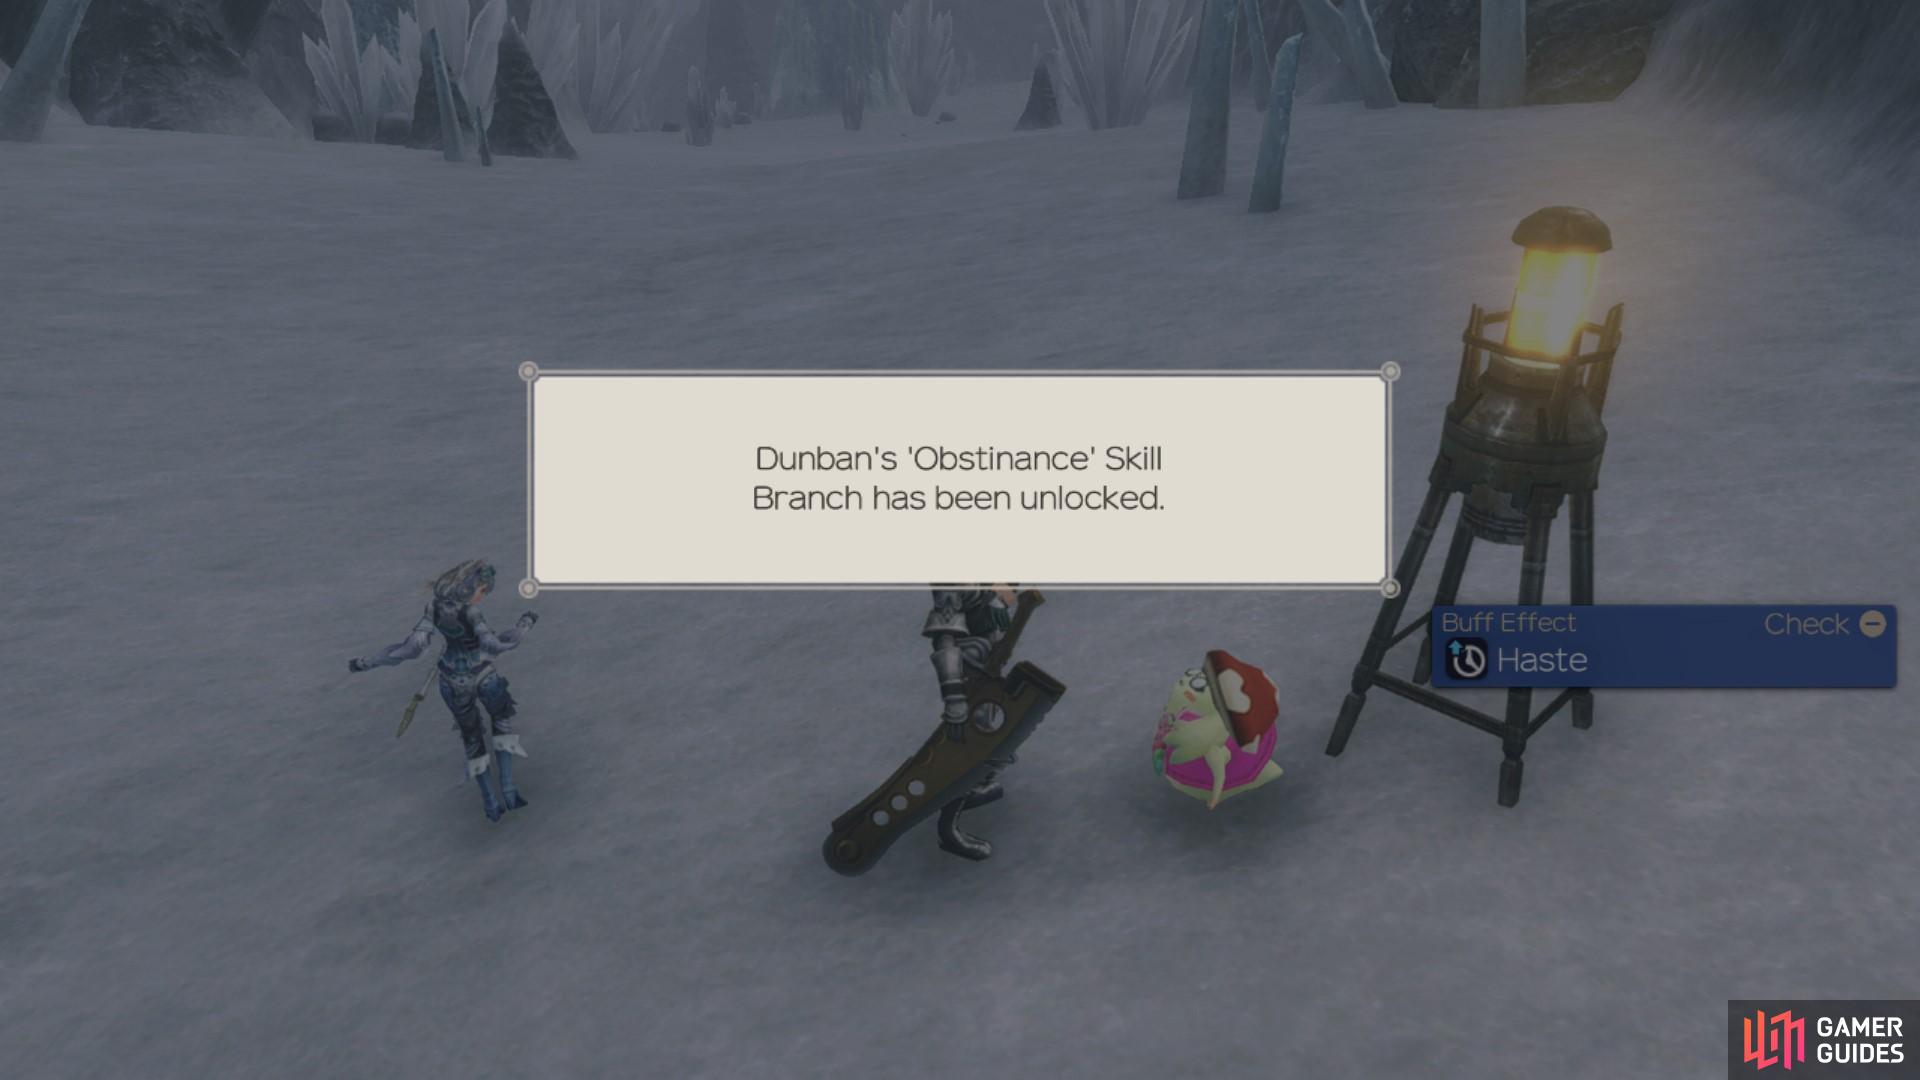
Completing this quest will unlock Dunban’s Obstinance Skill Branch.
You’ve explored all of Valak Mountain at this point so all that’s left is to head back to the Nofol Tower Landmark and make your way towards the Story Flag to trigger a scene.
Boss: Mumkhar
| Enemy | Level | Detection |
|---|---|---|
| Mumkhar | 48 | Sight |
You’ll finally have the opportunity to go up against Mumkhar in his Mechanised Homs state and being at Level 48 makes a huge difference, especially if you’re controlling Melia. This will grant her Summon Earth, one of her most useful Arts as when cast, it will inflict Poison on the target, the most deadly DoT in the game. What’s more, you should have the Poison Plus V Gem from an earlier Quest if you’ve been following this walkthrough so be sure to slot it right away. Outside of his Talent Art, all of Mumkhar’s Arts are all physical based and if you’re truly unfortunate, there’s a rare chance for him to use an Art that will inflict Death on a target that is Toppled, avoid being Toppled at all costs.
-
Corner - A buff that will grant Mumkhar the Invincibility status.
-
Eagle Slice - Physical based Art that deals major damage to targets in a line and inflicts Knockback.
-
Eagle Triple Combo - Physical based Art that deals moderate damage to a single target.
-
Fiery Pain IV - Mumkhar’s Ether based Talent Art that deals moderate damage to targets in a line and inflicts the Blaze debuff.
-
Massacre Lotus - An Art that is rarely used but will inflict Death on a target that is Toppled.
-
Super Spin - A Physical based Art that deals moderate damage to targets in a circle around Mumkhar with a chance to inflict Topple.
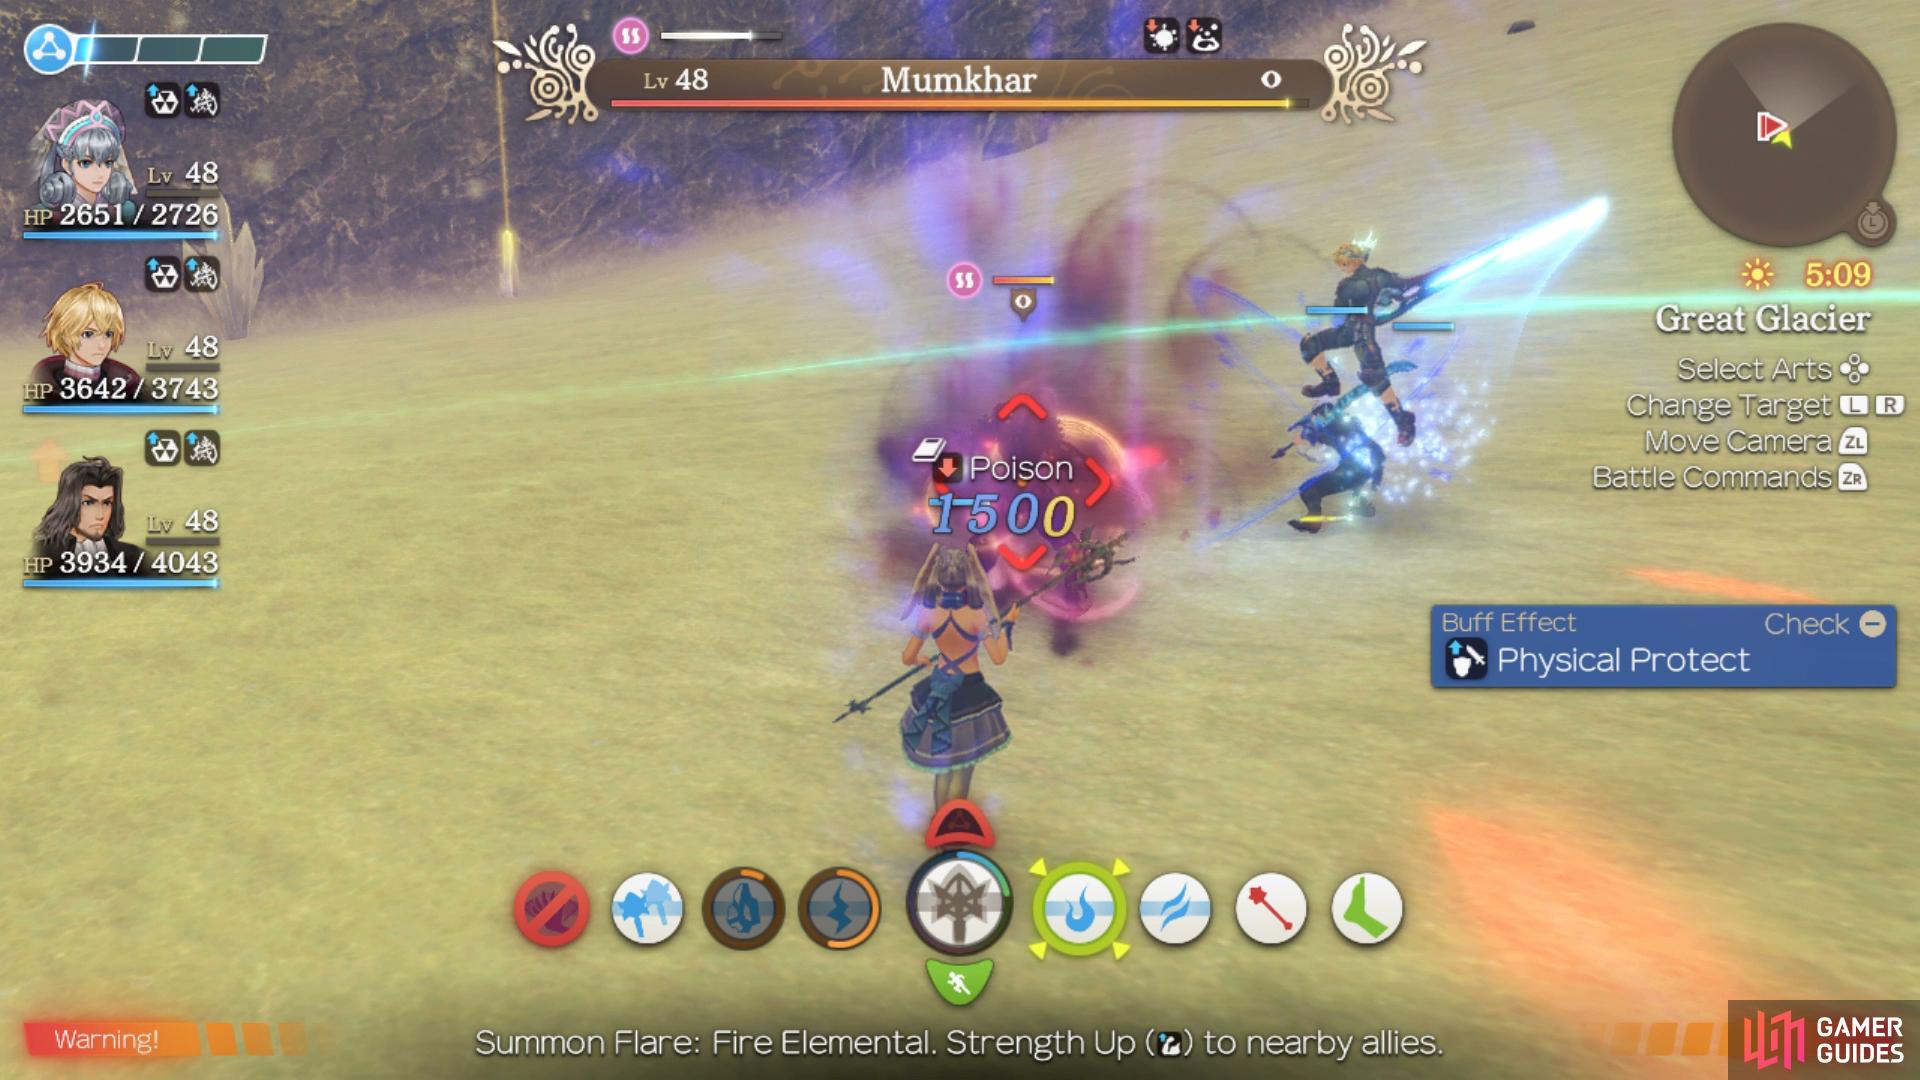
The main Art to watch out for here is Eagle Slice, this will really hurt the target that is struck by it however Super Spin can be deadly if you’re struck with Topple from it. Mumkhar attacks quickly so Dunban is your best bet for tank and your other party members should attempt to keep behind him if possible. Keep Poison and Blaze up on him at all times and try to keep inflicting the Topple Combo up and the battle will end once his HP drops below 20%.
Watch the numerous scenes that follow after your victory and bring this Chapter to a close.
No Comments