


One Year Later
The protagonist, Shulk, scavenges around in a nearby pile of Mechon scrap as he looks for parts that may be useful in weapon development. As he identifies a part, he discovers a crafty Krabble has made it his home and begins to attack. Thankfully, Shulk’s friend, Reyn comes to his aid and you’re forced into battle.
More tutorials will display here, the HP gauge of your targets can be found under their name while your own HP gauge can be found off to the left. You’ll also be given a rundown of Shulk’s current Arts, Back Slash is a positional Art that will deal increased damage from behind, pay attention to the circle to know when you’re in the right position. Light Heal can be used to recover the HP of either Shulk or Reyn, just be sure to choose the character with the directional buttons. As mentioned on the previous page, Arts have a Cooldown so you’ll have to wait for the circle to refill before you can use it again.
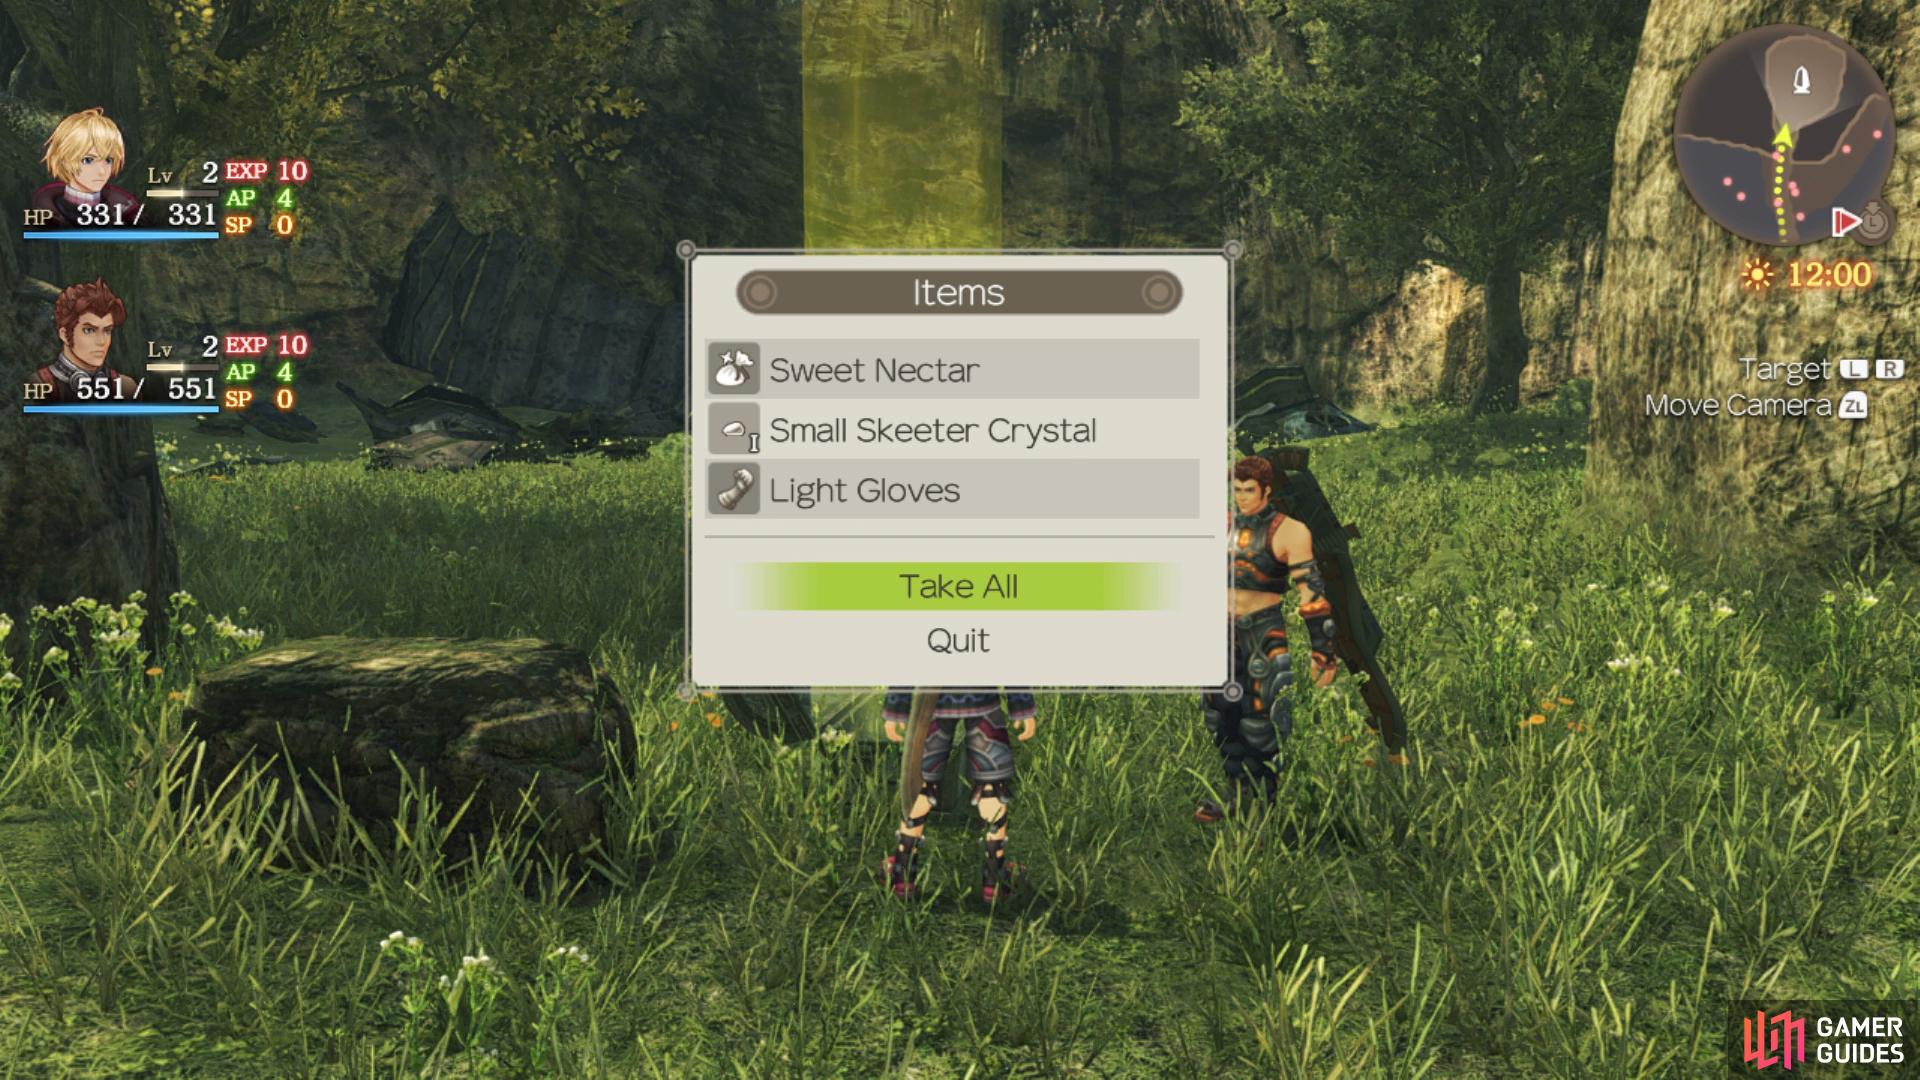
Finally, you’ll learn about Talent Arts, these are unique to each character and found in the center of their Battle Palette. Shulk has the Turn Strike Art that will inflict Break on your enemy, a status that can then be followed up by Topple from Reyn. You don’t need to worry too much about this right now but it will become an important aspect of the battle system later in the game. Once you defeat the Colony Krabble, it will drop a chest for which you can plunder.
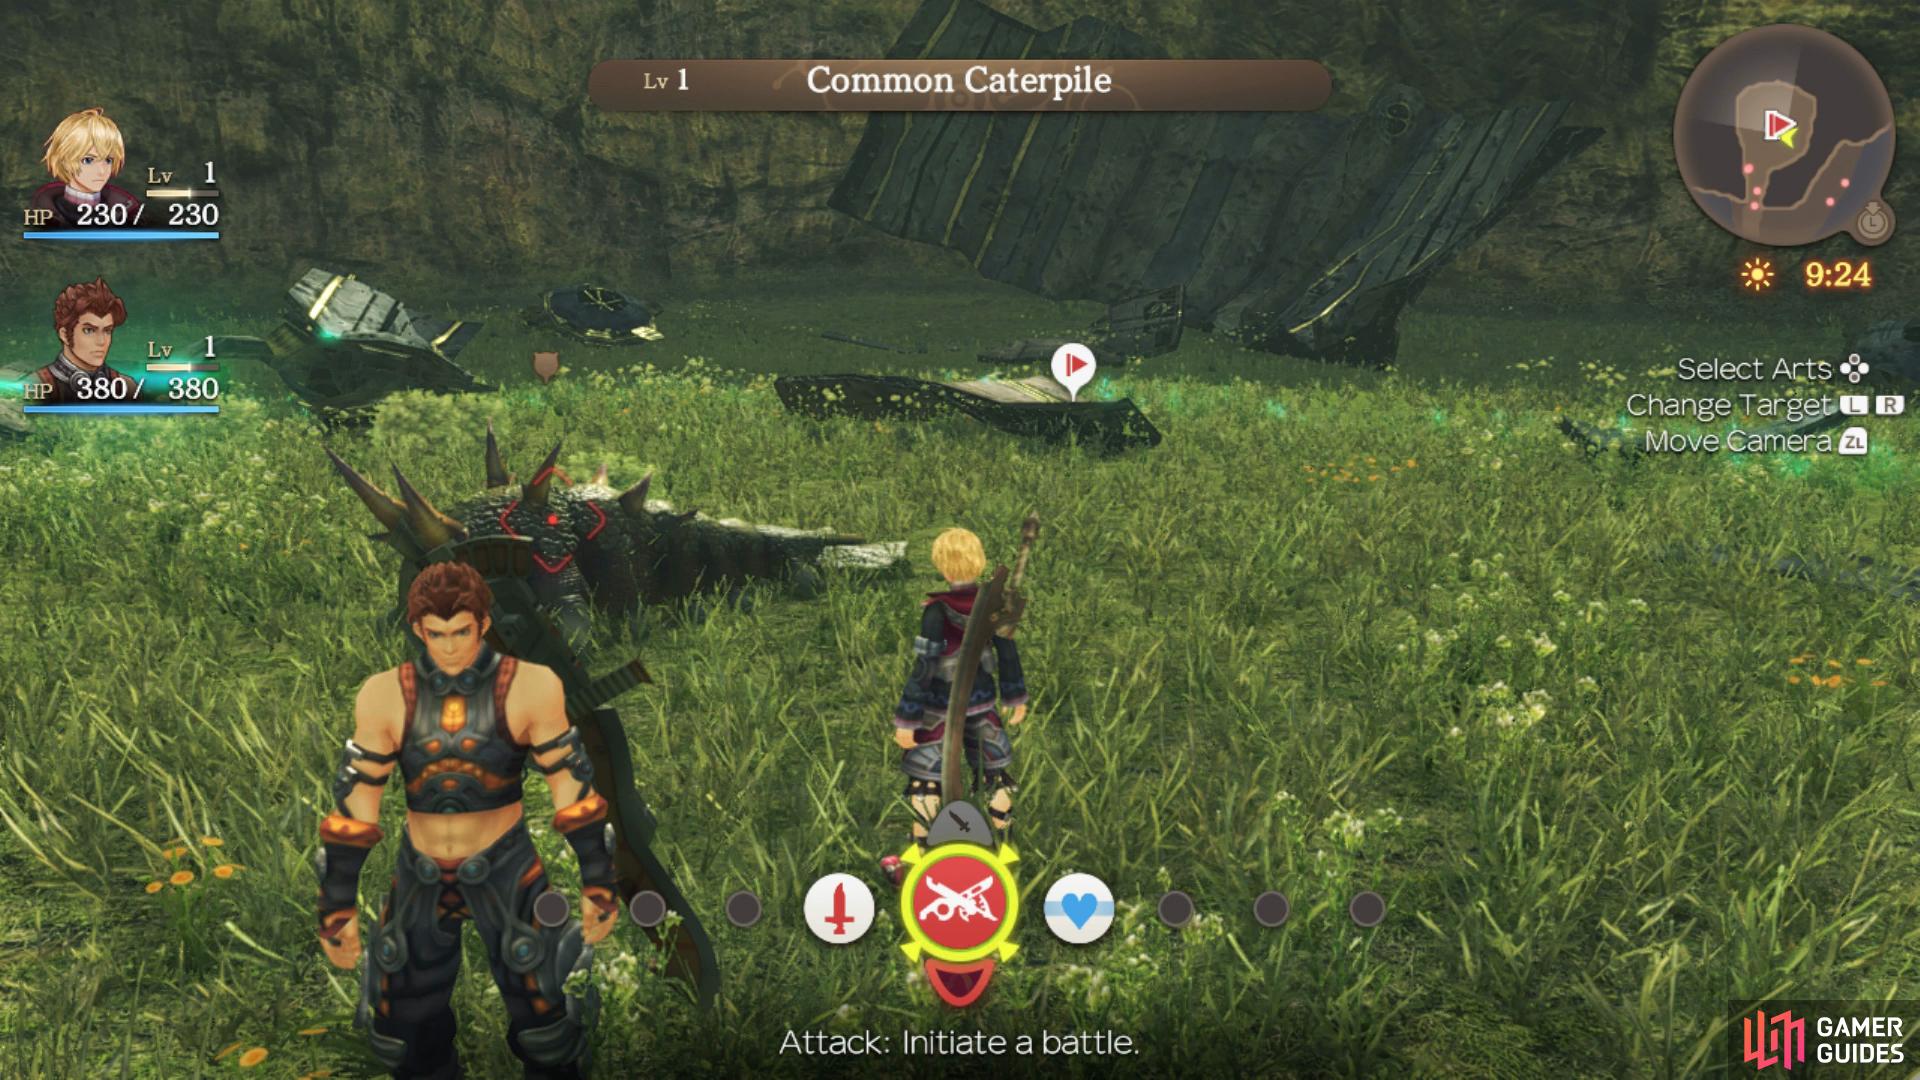
You’ll need to select a target and select the icon in the middle to engage the enemy
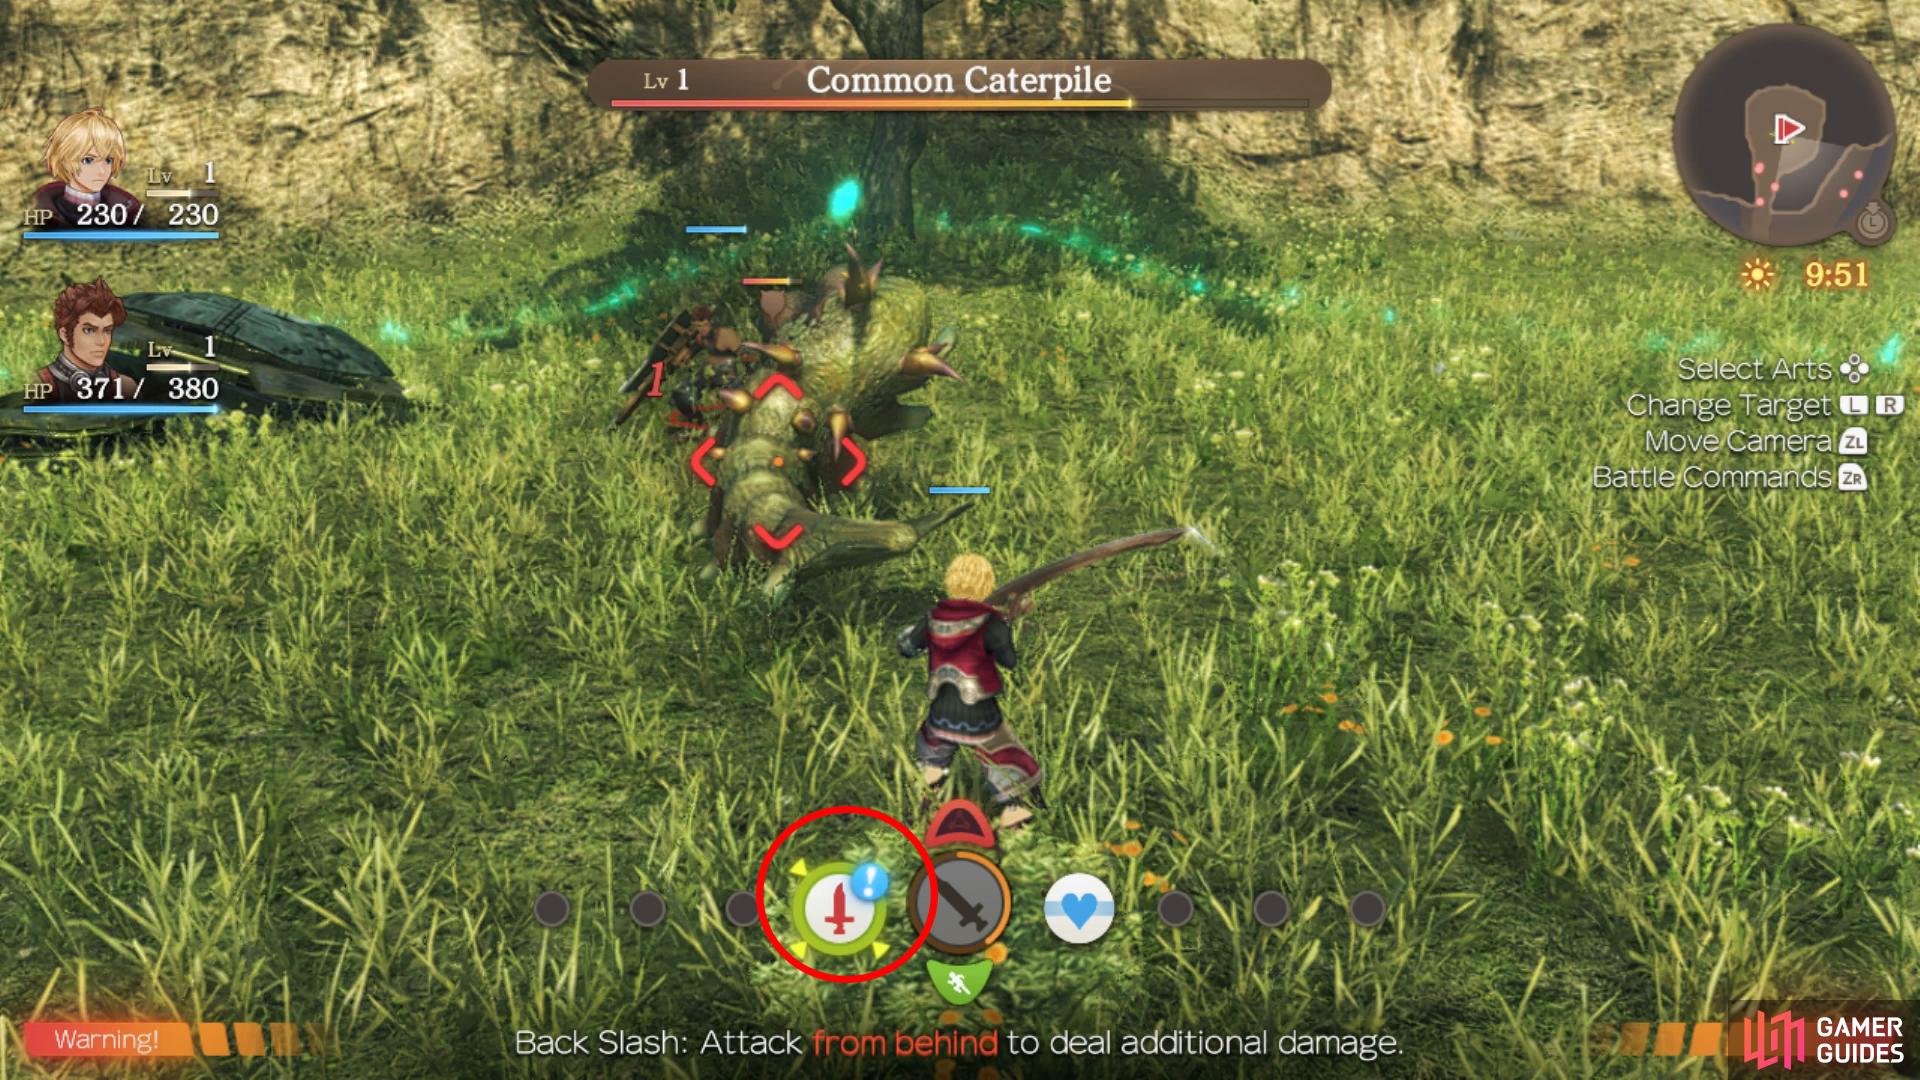
the UI will let you know when you’re in the correct position for certain Arts.
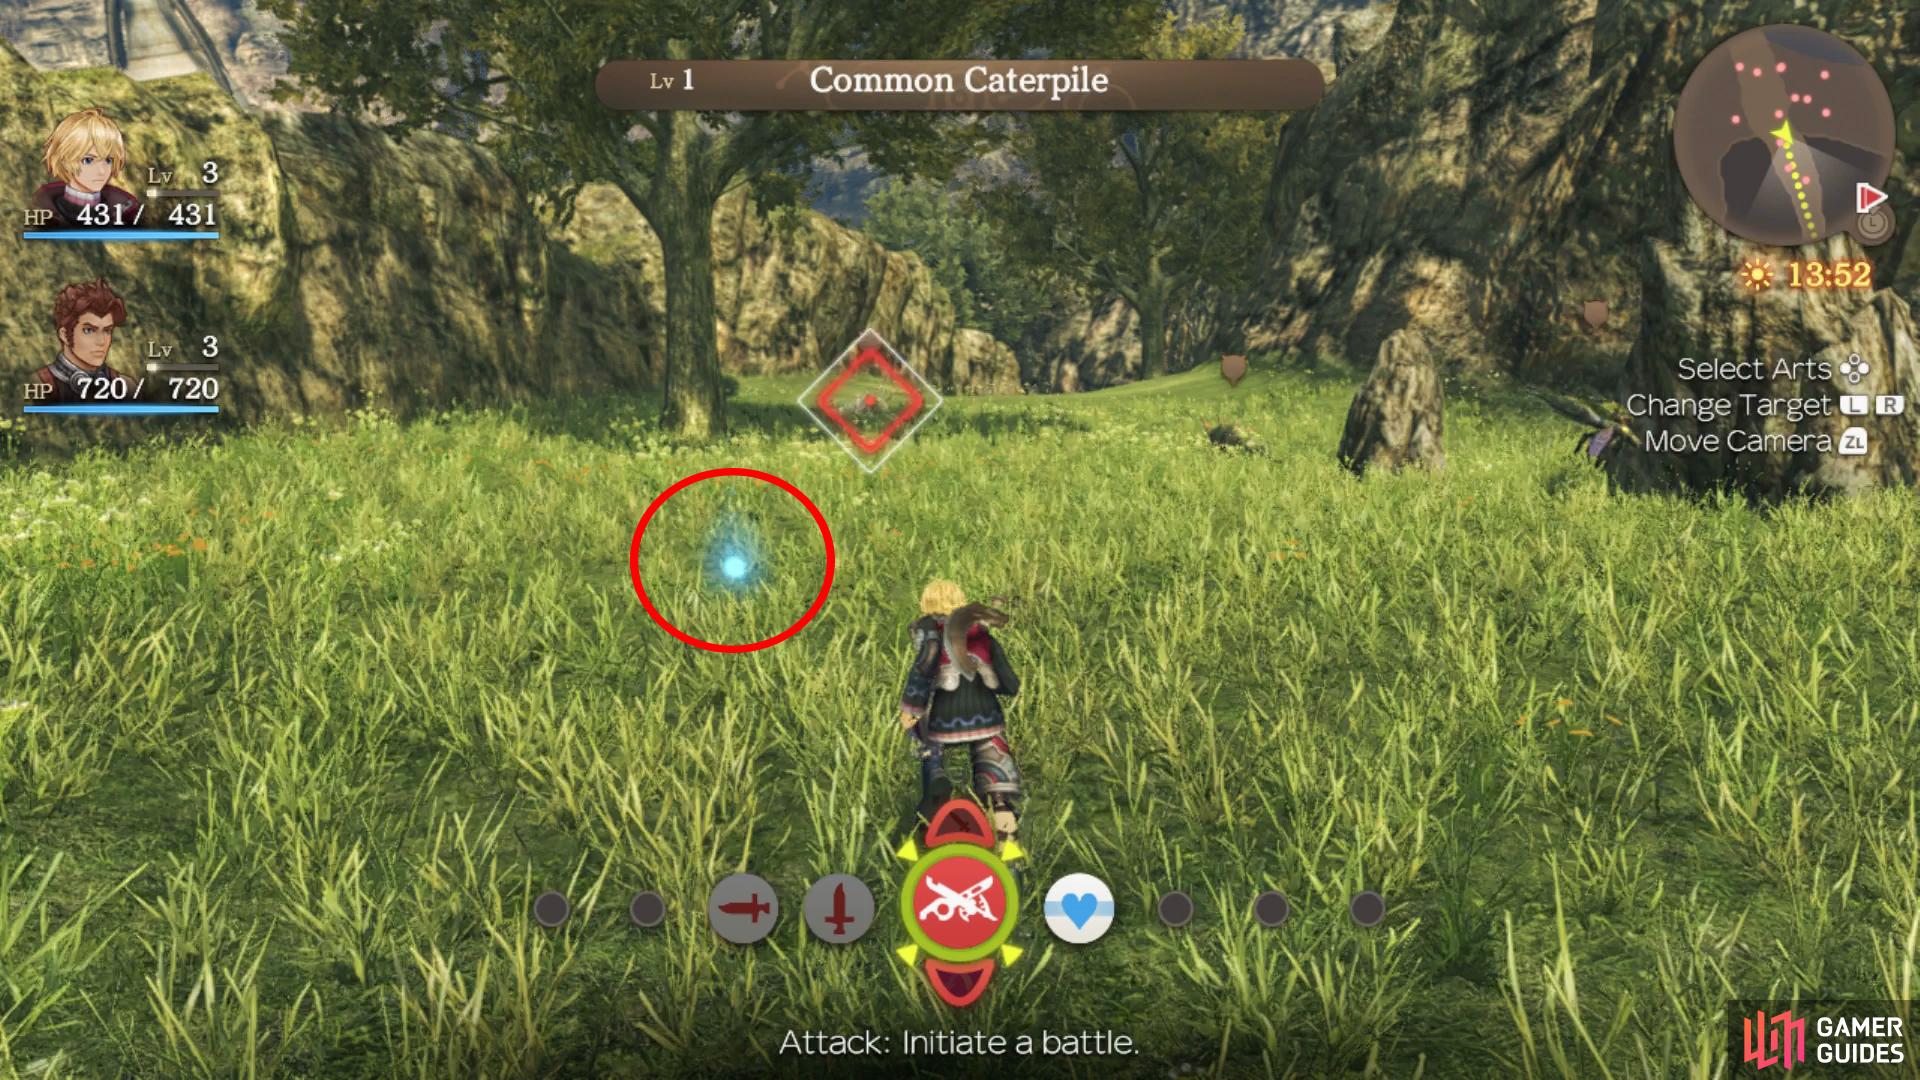
Loot the Wooden chest that drops and another enemy will appear, a Common Caterpile so target the enemy and engage it. You’ll learn more about the battle system here starting with the Aggro mechanic. Enemies will gain animosity towards an enemy (or Aggro) based on the damage dealt to them and you can identify the enemy’s target by the red ring that surrounds a party member. You can alter this by using certain Arts and you’ll want to keep the enemy engaged on a character you’ll designate a Tank (Reyn is built for this). This will also allow you to control the positioning easier, allowing for Shulk to get behind and make use of Back Slash.
Back to the Colony
With the battle over, watch the scenes that take place and you’ll get some more tutorials. You can display the guidance panel by pressing the [ZR] button, this will detail your current story objective and you’ll find a dotted line and marker on the map leading to its destination. What’s more, you can switch the map to a full-screen mode by pressing the [Left Stick] button. Additionally, you can save your game at any time outside of battle by accessing the System Menu, handy for when you’re about to take on a difficult encounter. Once the tutorials are done, you’ll be able to access the System Menu and you’ll find the Expert Mode here, a new feature to Definitive Edition.
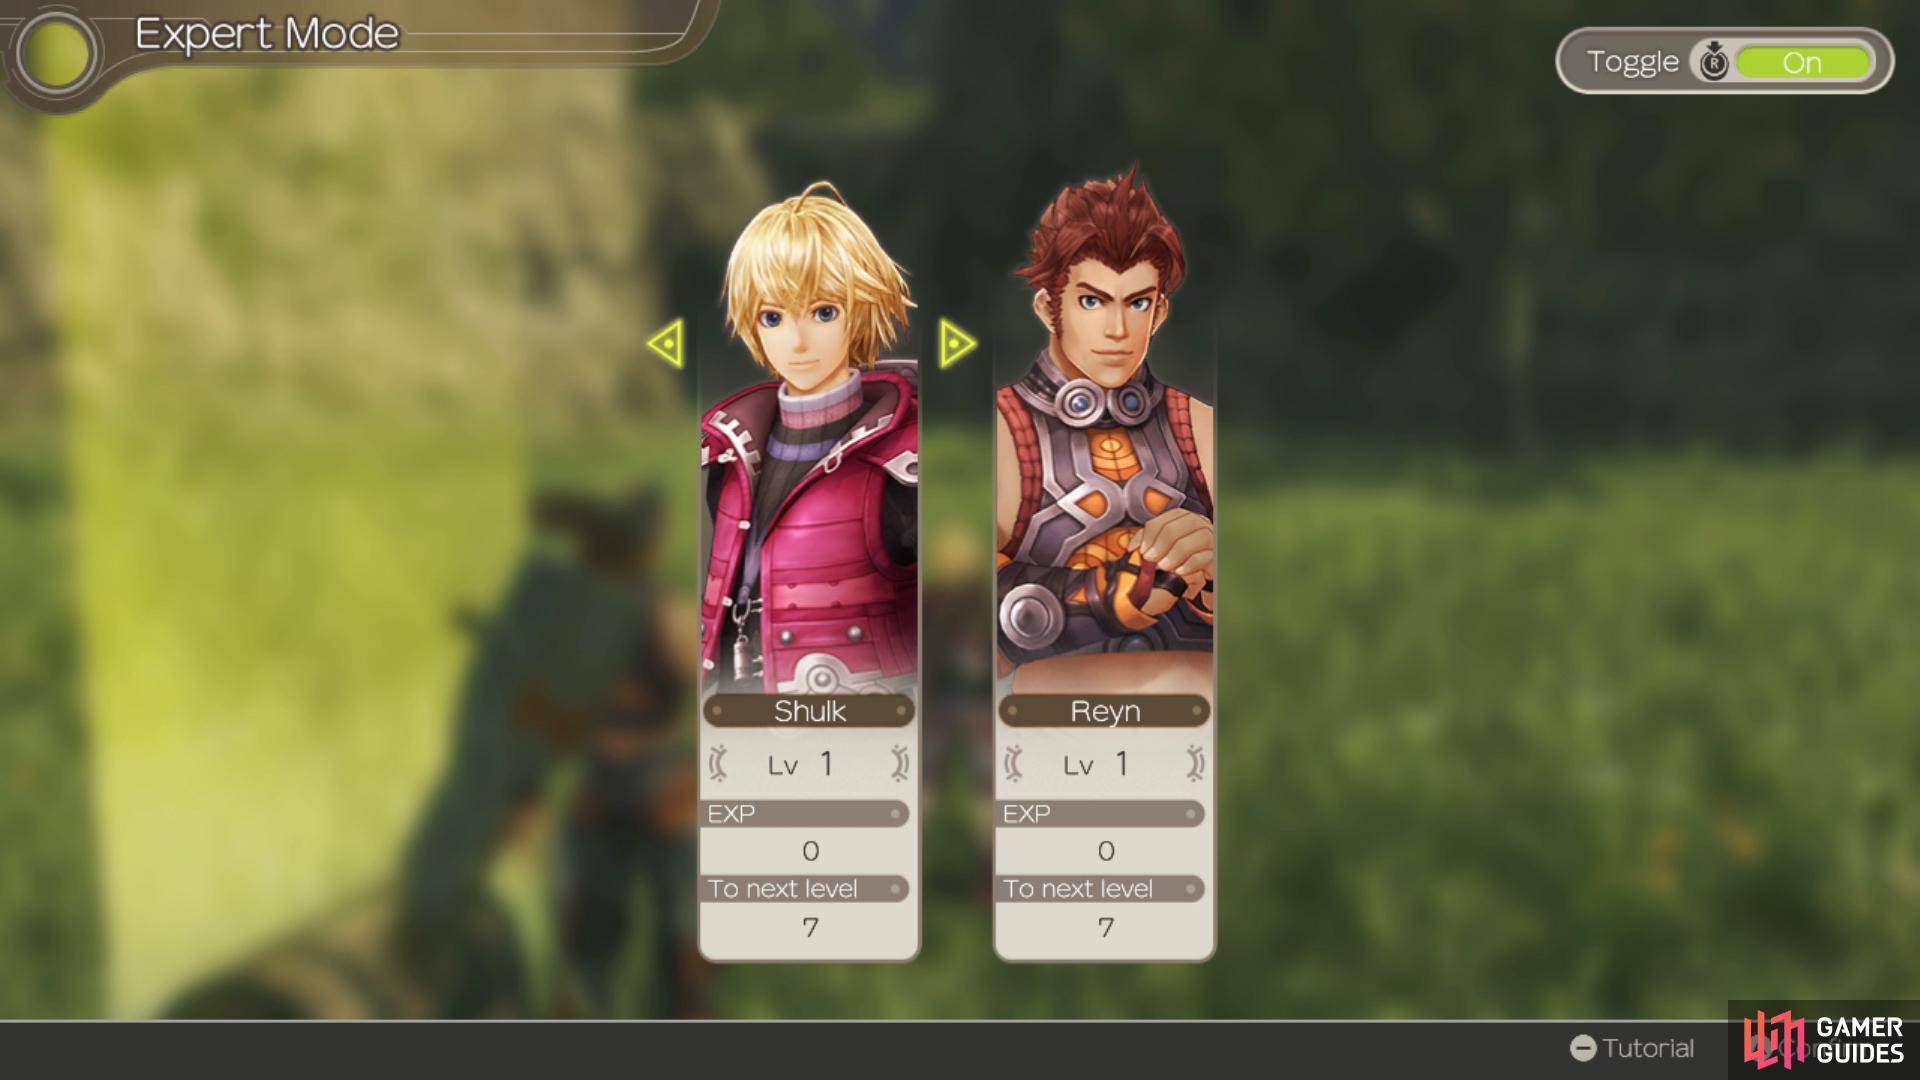
Expert Mode will allow you to more effectively control your party’s levels.
Once you’re done looking around the menus, take a look around the surrounding area and you’ll find plenty of enemies. These enemies won’t attack on sight so you can simply stroll past them if you wish but it’s a good idea to fight some battles and familiarize yourself with the controls a little more. Most enemies in Xenoblade have the possibility of dropping useful items, even weapons, so we suggest taking the time to battle enemies often.
All enemies can drop a number of useful items and equipment
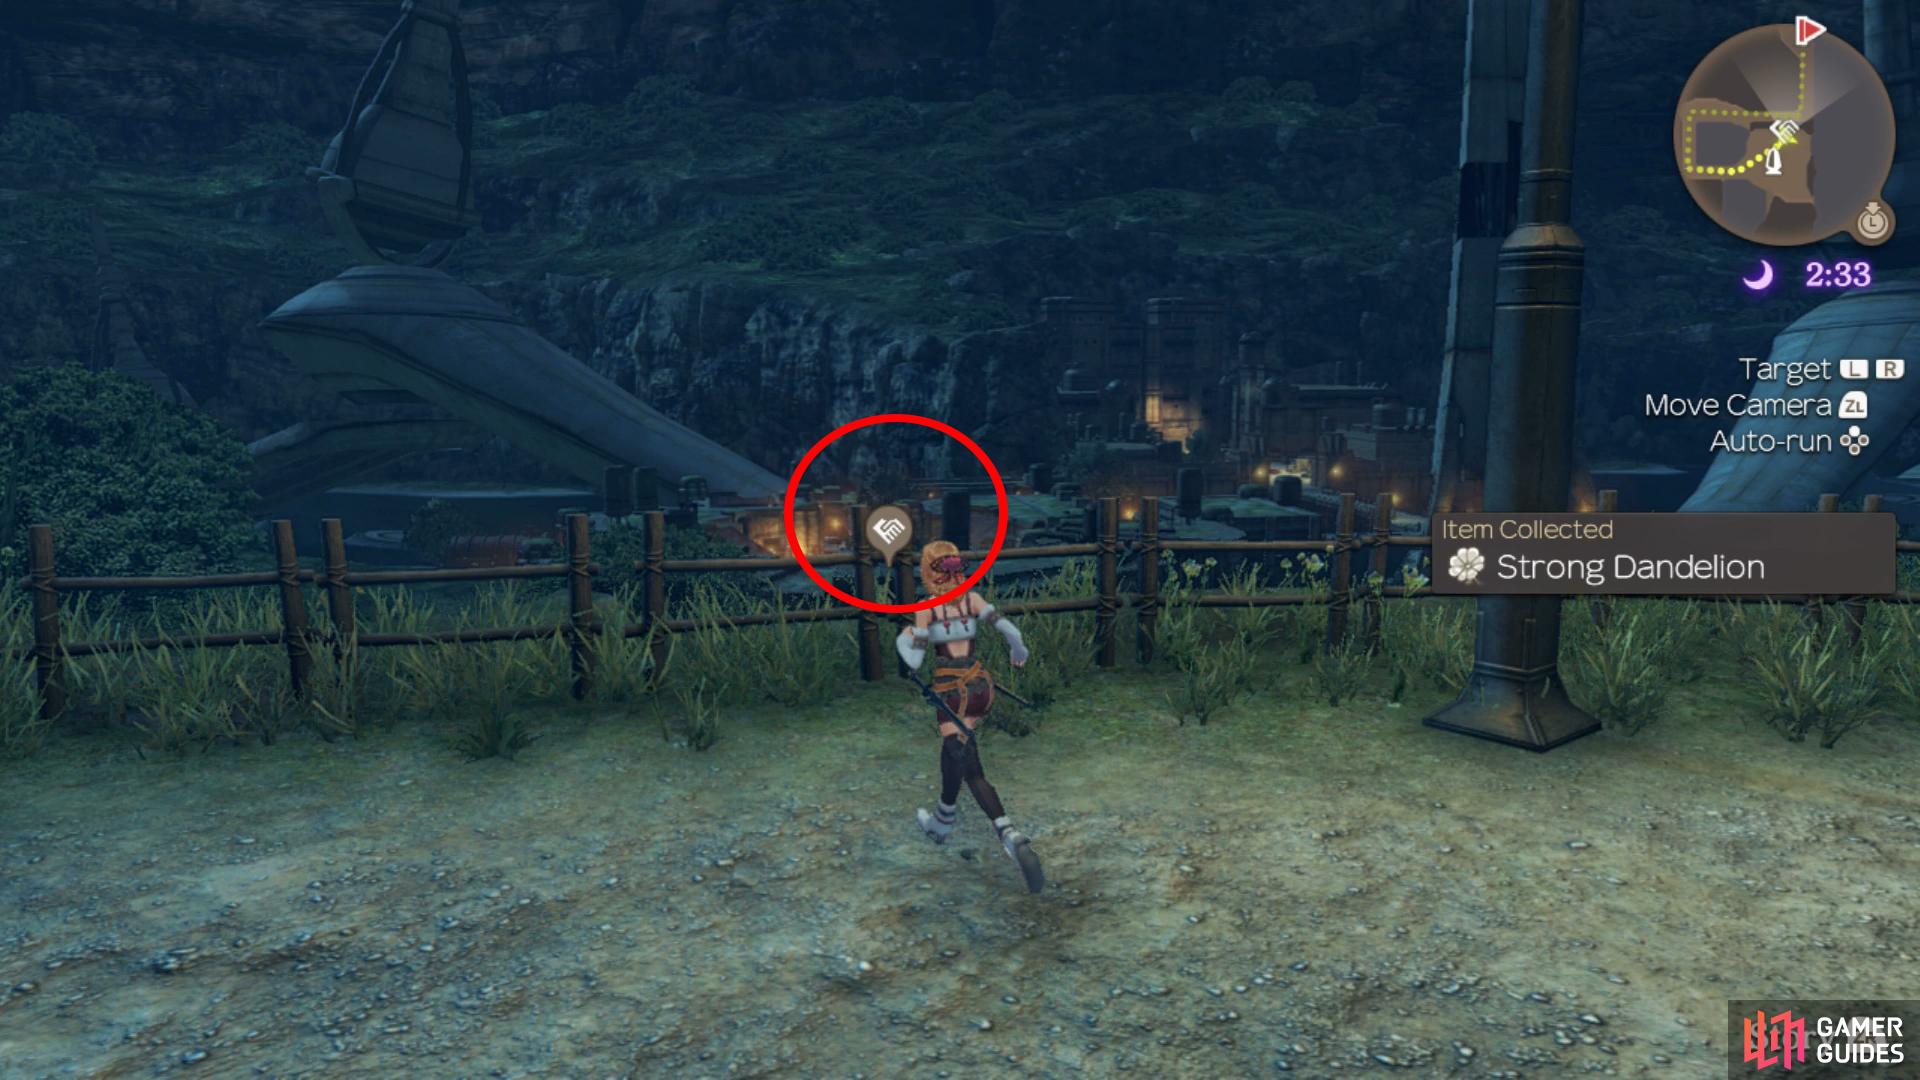
always be on the lookout for Collectables.
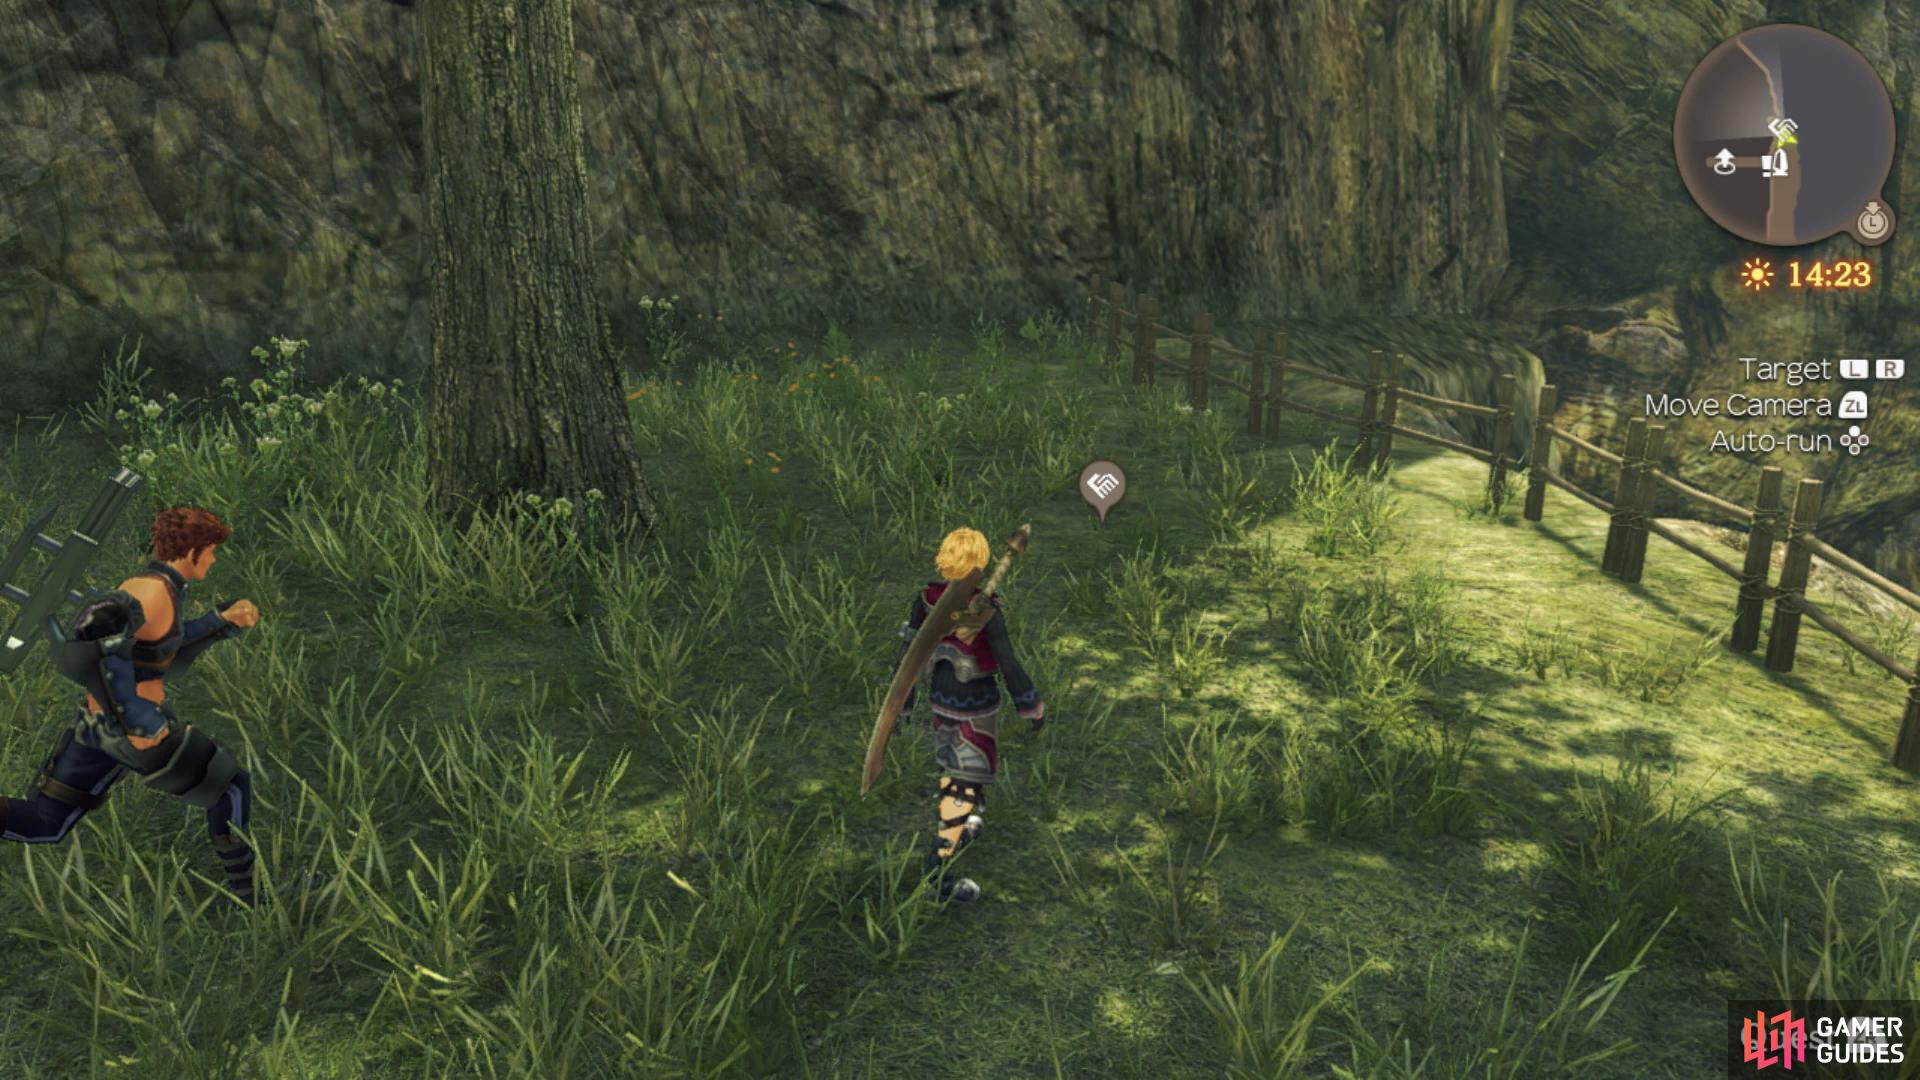
As you head down the path to the south you’ll come across your first Collectable in the form of a glowing blue orb. This will also unlock the Collectopaedia in the menu where you can obtain rewards based on completing the categories. This is a lucrative venture as some of the rewards you can obtain are very powerful and you’ll find a listing for every area in the game and you can find all the information for it in each area’s page of the Tour Guide section.
As you reach the bottom of the hill, a cutscene will take over and Shulk and Reyn will enter Colony 9.
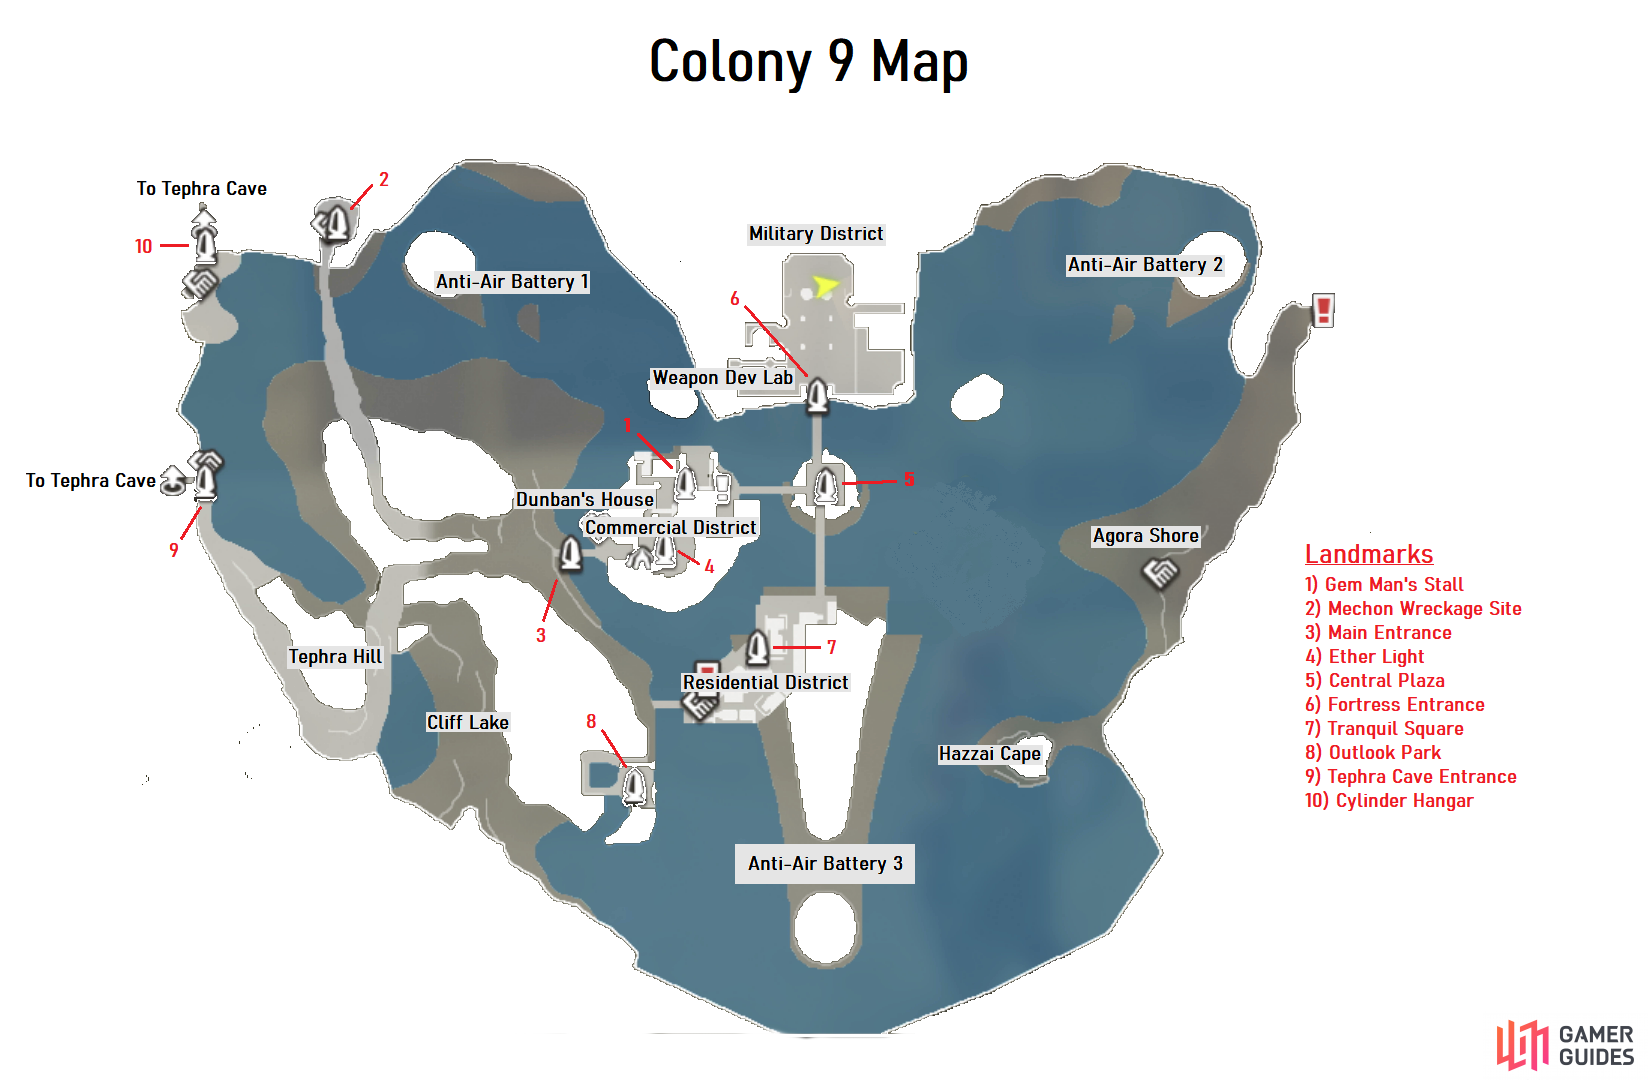
Colony 9
| Key Information | Details |
|---|---|
| New Quests | 40 |
| New NPCs | 45 |
| Heart-to-Hearts | 3 |
Once you gain control, you’ll be introduced to the various features of settlements in Xenoblade such as how to identify Shops, accept Quests and trading with NPCs. Xenoblade is a large game and there are well over 400 Quests in total, it’s easy to get overwhelmed and caught in a loop of never advancing the story but should you do, the boons are plentiful. This walkthrough will point out all new Quests as they become available and you can find all the information you could ever need on them over in the Quests section.
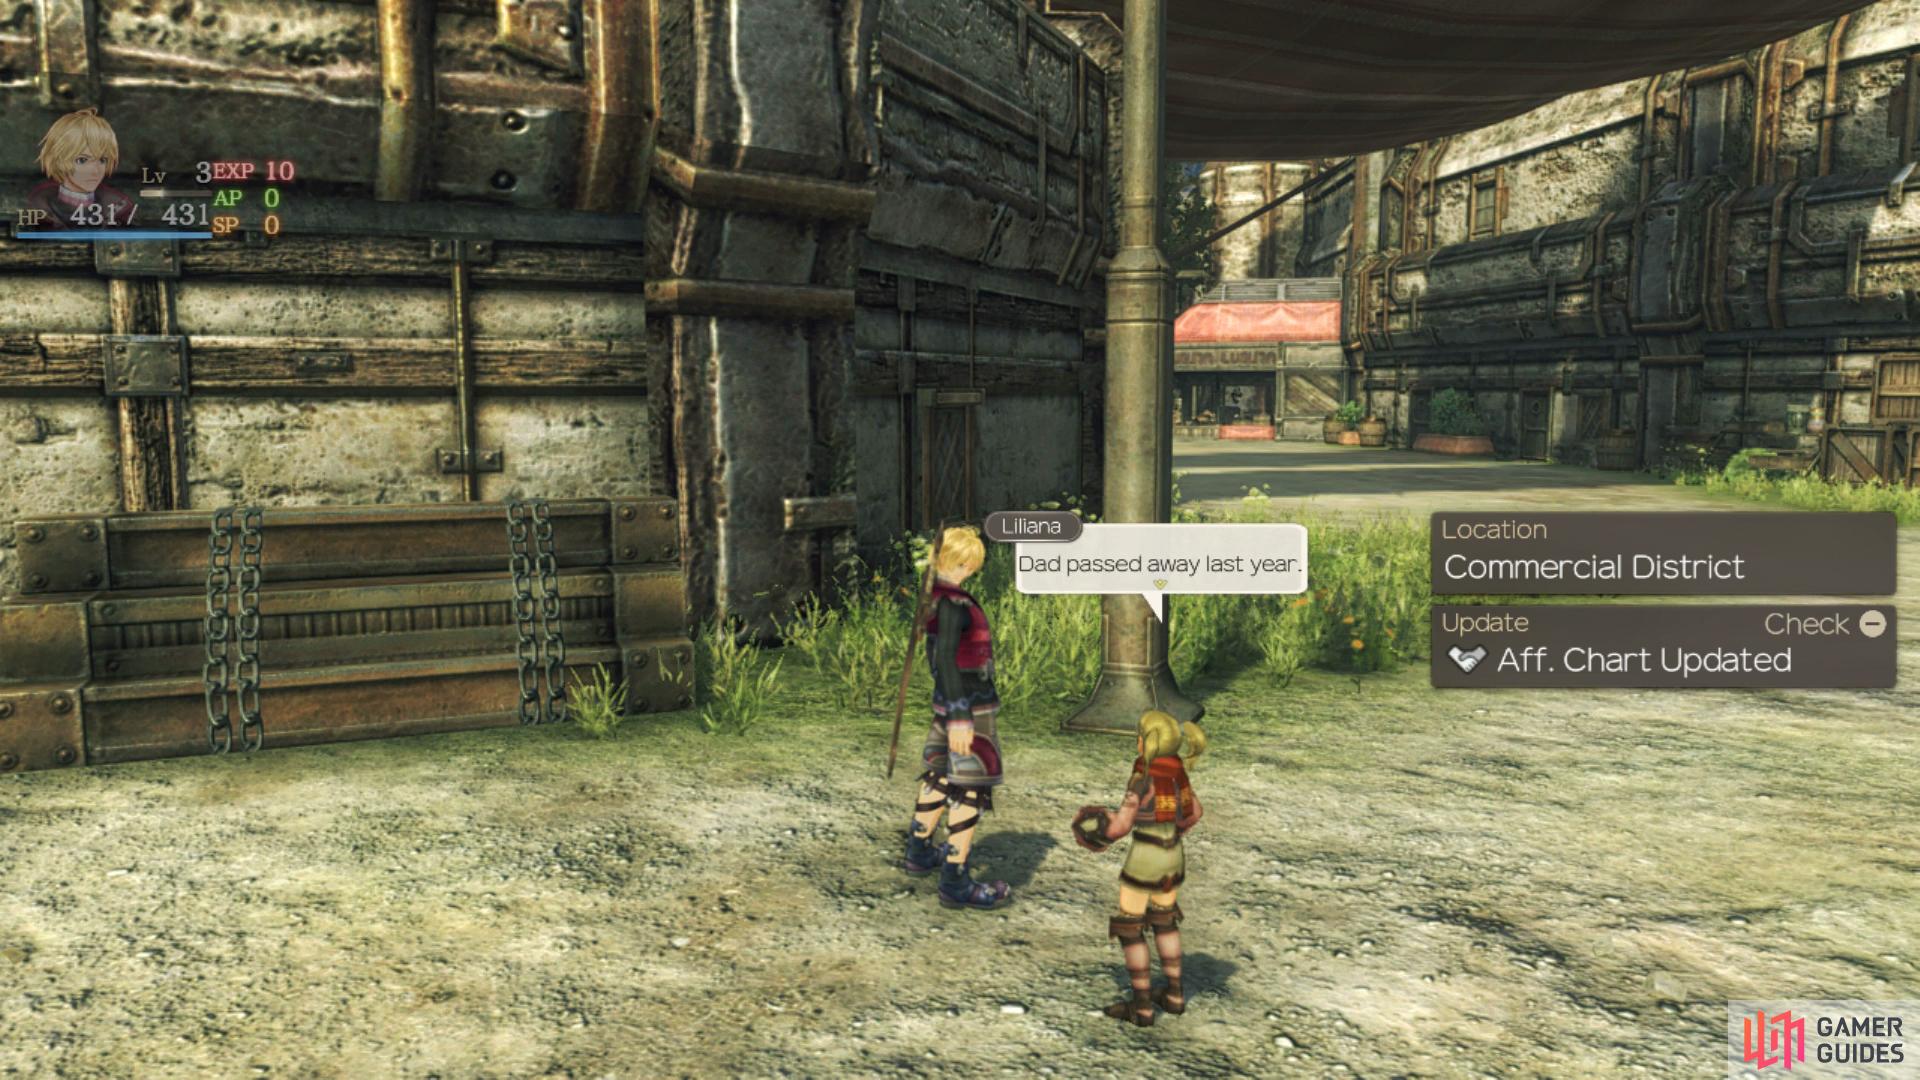
Head north from where you’re standing to unlock Dunban’s House and then if it’s still early in the day, you’ll find the first named person you can speak to, a young girl named Liliana and upon speaking with her, you’ll unlock the Affinity Chart. Upon looking closely at this, you may be daunted but worry not, the basics is covered below:
- Each Settlement has a Affinity Rating ranging from 0 to ☆5
- This will impact what Quests are available and the goods you can Trade with people
- Always speak to each named person twice to register them to the Affinity Chart
- Once registered, you can use the respective menu to see what items they will trade and even track them on the map
Building Affinity with the townspeople is important, this will lead to more quests and greater rewards.
As you can see, you’ll want to make speaking to every new named person your first action when you reach a new settlement. For now, head south from Dunban’s house to find Dorothy and then make your way east to unlock the Ether Light Landmark and find a shop. Hold on to your money for now but note that should you need any extra Gold, sell excess equipment first and then materials, just be wary that many are used for Quests.
Take a look around Ether Light and during the day you’ll find Sonia, Marcia (ignore speaking to her until you have Reyn back) and Giorgio in the central plaza while if you head north you’ll find Rocco. Head east a little from here to unlock the Gem Man’s Stall Landmark, then head north through the warehouse to the east of him before going west to find the skiving Miller. Return to the Gem Man’s Stall and head east and south to find Paola while you can reach Cheryl above (before 12:00) by taking the stairs in Ether Light and following the path.
Before heading across the bridge to the east, change the time in the Menu to 18:00 and head back along the upper path to find Oleksiy then drop back down to the south where you found Paola to find Sesame. Head north through the warehouse again to find Desiree (ignore her Quest again for now) while you’ll find Shura, Leopold and Sylviane in the plaza. Finally for Ether Light’s NPCs, switch to 21:00 and you’ll find both Rosemary (around the Gem Man’s Stall) and King Squeeze (where you found Miller skiving during the day).
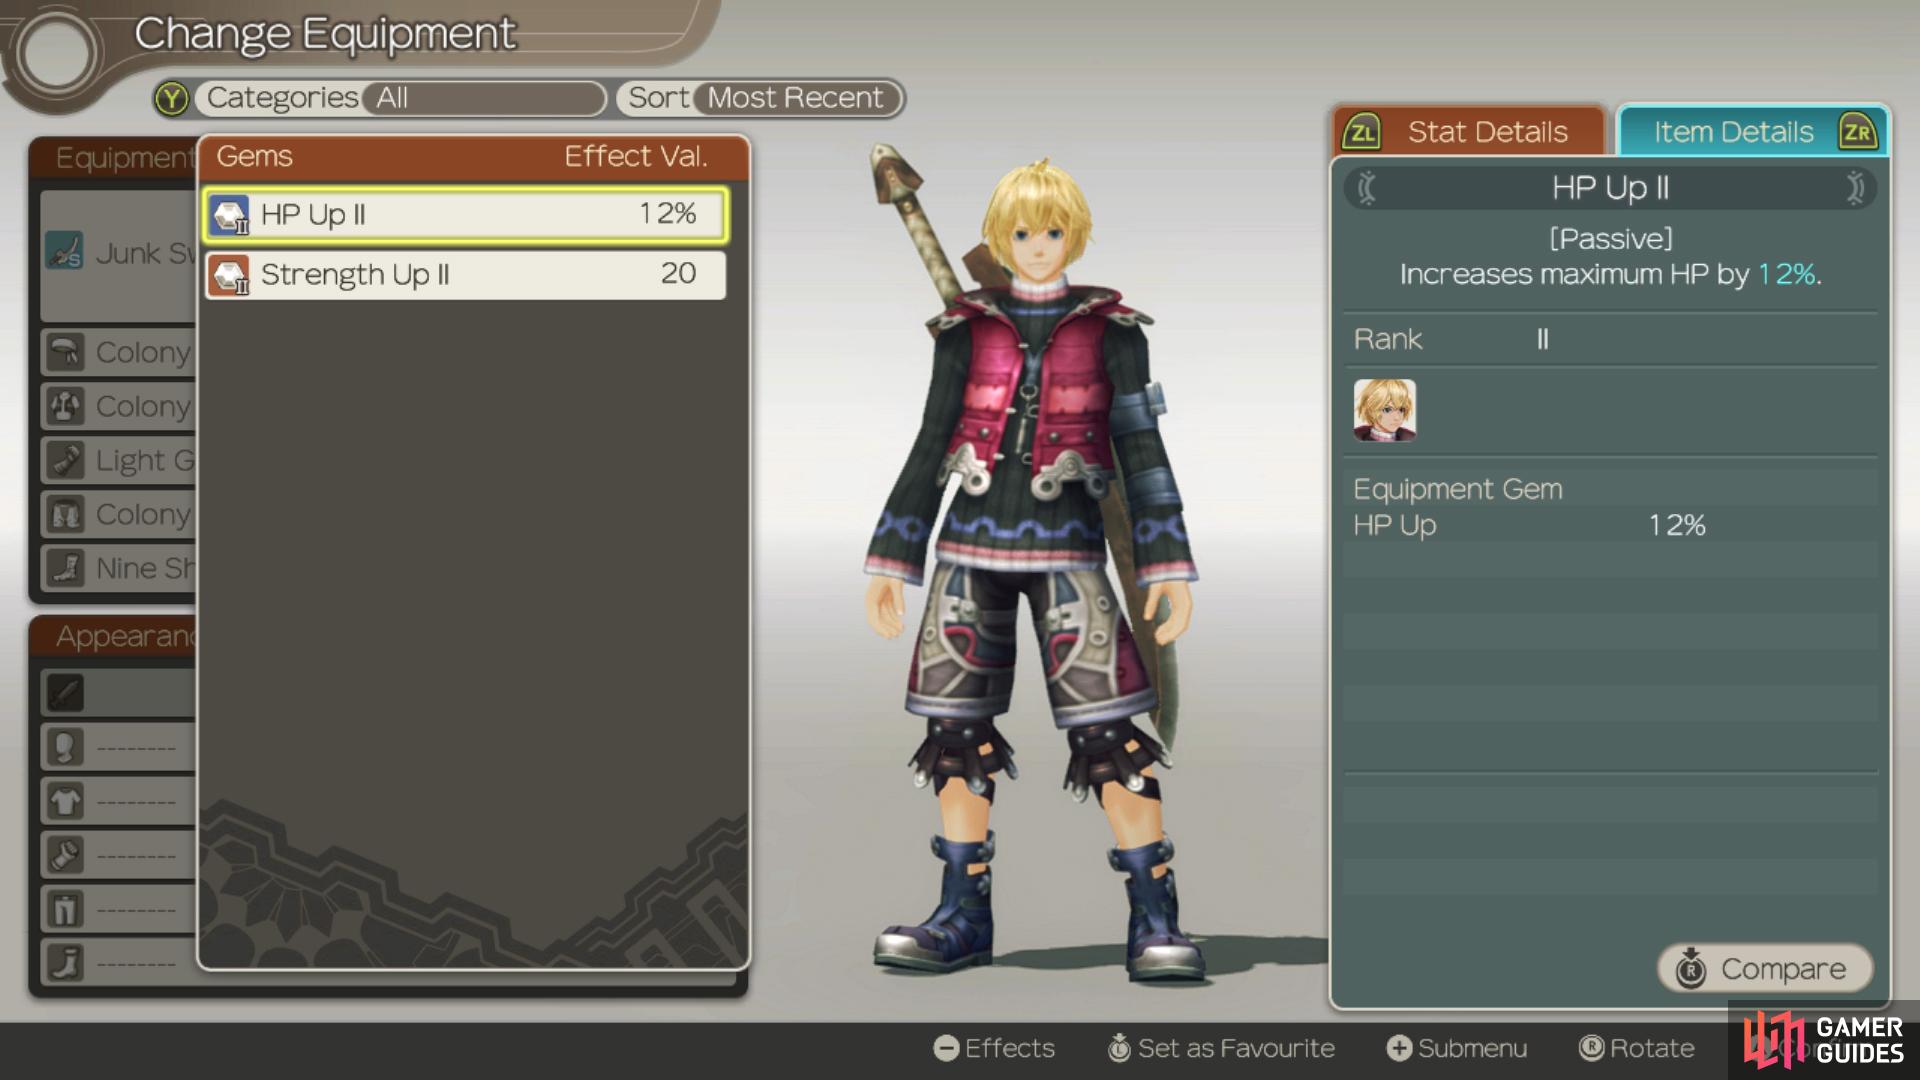
Gems are vital for taking your characters down specifc paths in their development.
Before you leave Ether Light, speak to the Gem Stall Man himself to learn more about Gems and he’ll hand over Strength Up II and HP Up II Gems for you to experiment with. Gems will allow you to augment your character’s abilities, really allowing you to create some interesting builds. For now, go ahead and slot the two Gems if you wish and then head east across the bridge to unlock the Central Plaza Landmark. While you’re here, it’s a good idea to advance the story a little by heading north, unlocking the Fortress Entrance Landmark and triggering a cutscene. Once you regain control, ignore everybody and head west in the Weapon Development Lab to trigger another cutscene.
Delivering Food
When play resumes, you’ll find yourself in control of Fiora with a food delivery for Shulk. Once again, ignore other distractions for now and make your way out of Colony 9 to the west and follow the path south and up the stairs to find Shulk mulling over the Monado. Following the cutscene, you’ll get a tutorial on Affinity Cries, when you see the the [B] button prompt, you can help out allies that are dispirited or suffering the effects of Daze and Topple. What’s more, this will increase the Affinity of these characters so be sure to activate it at any given chance.
Additionally, you’ll be taught about Heart-to-Hearts, you’ll be able to witness optional scenes by interacting with the icon in certain locations provided the Affinity is high enough between the two characters. What’s more, you’ll be given some questions to answer during them and selecting the correct ones will see a larger boost in Affinity. Without further delay, head over to the nearby Heart-to-Heart and activate it.
Take the stairs outside the Residential District to reach Outlook Park
you’ll also find your first Heart-to-Heart here.
| Heart-to-Heart | Characters | Location | Affinity | Answers |
|---|---|---|---|---|
| Sunrise in the Park | Shulk + Fiora | Outlook Park | Yellow | You and Dunban…, Kind of. |
You’ll also gain some tutorials on Burst Affinity and changing your party leader, all important pieces of information. When you’re ready, make your way back down the stairs and follow the dotted trail on the mini-map through the Residential District, Tranquil Square and finally back to the Weapon Development Lab to trigger another cutscene.
Questing around Colony 9
Once you regain control, Reyn will rejoin the party permanently and you’ll get a short tutorial on levelling up Arts and learning Skills. For Shulk, focus on Back Slash for the time being whereas with Reyn, focus on Wild Down and Hammer Beat. As for skills, with Shulk it’s a good idea to level his three tree’s evenly so switch to Intuition to begin with for the Agility bonus. For Reyn, consider Enthusiasm first so that he can learn to equip Heavy Armor.
With Reyn now back in the party, this is a good opportunity to start accepting Quests and registering the rest of the NPCs in Colony 9. From your current location, change the time to 06:00 and you’ll spot Dean walking forward, then speak to the Nopon Colony 9 Resident to the north as you climb the stairs to accept [Material Quest 1].
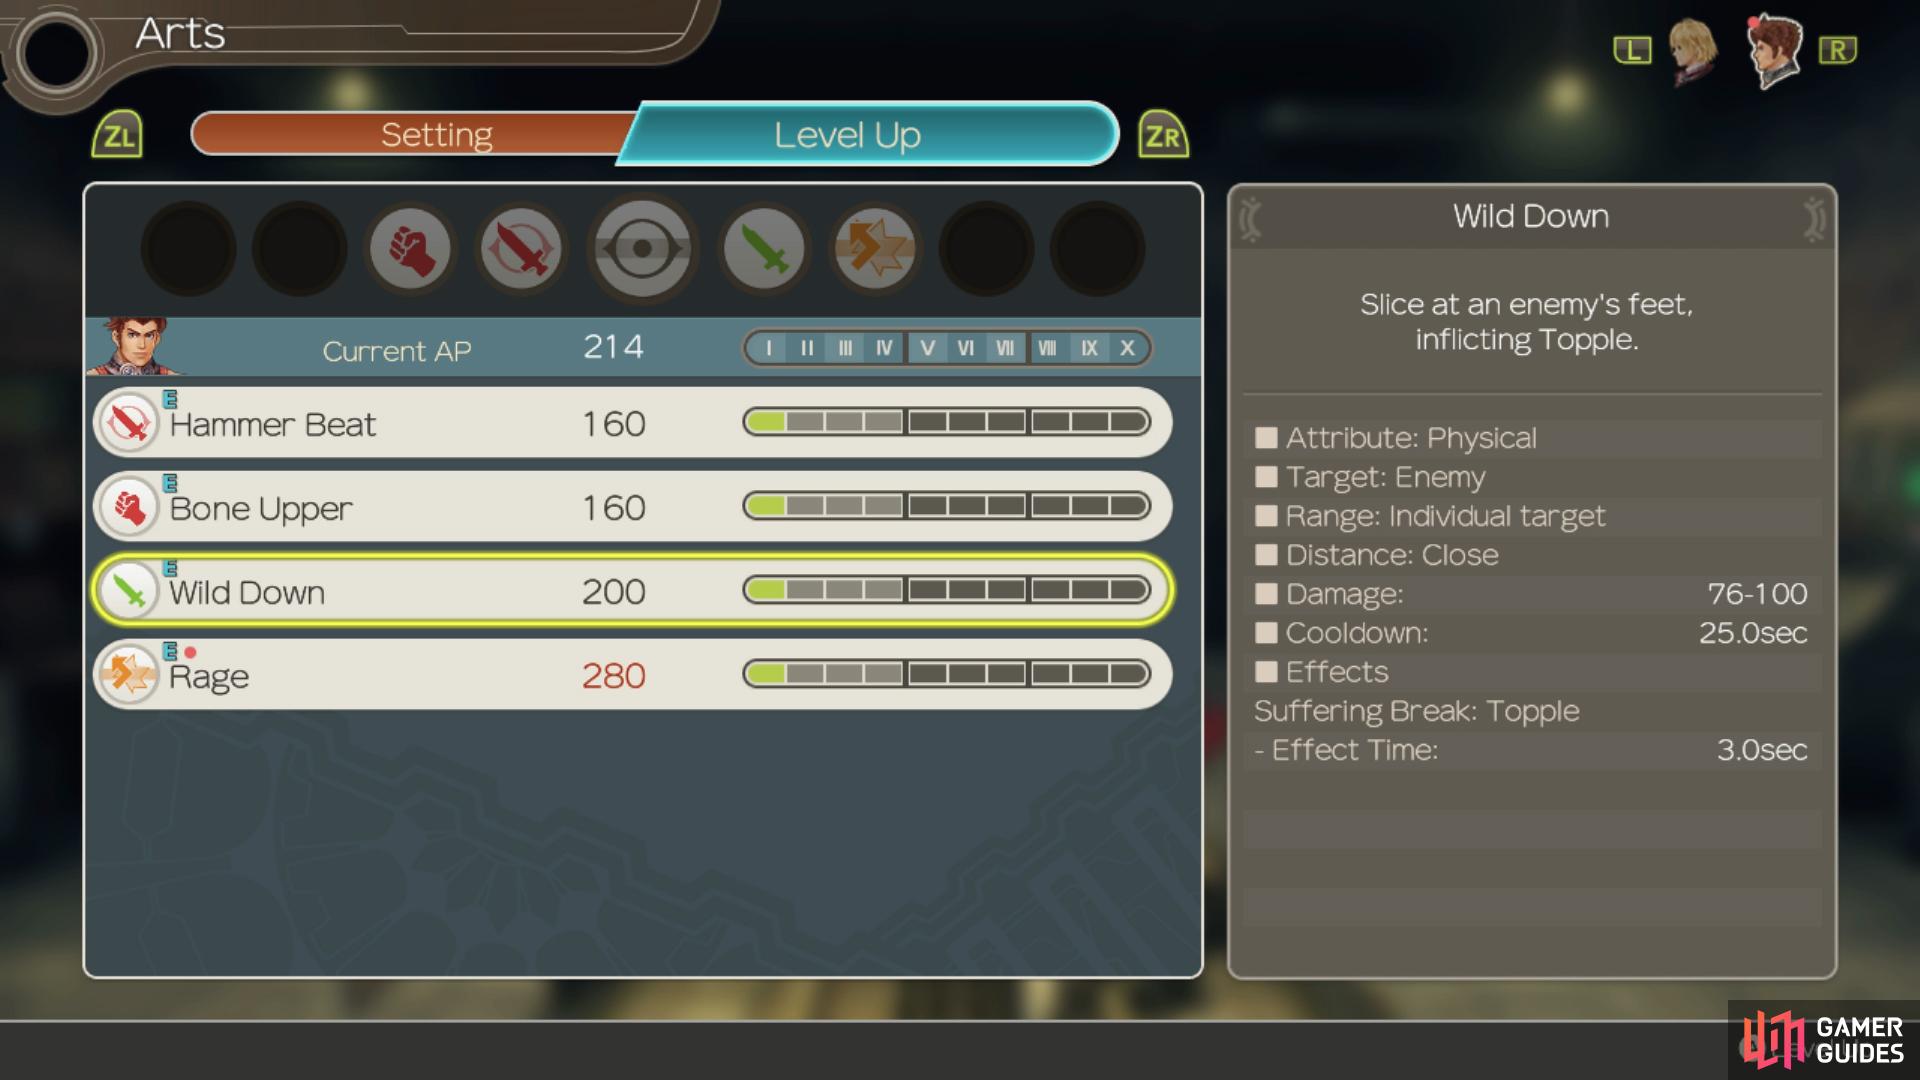
Reyn will use Wild Down (Topple) more the higher you level it
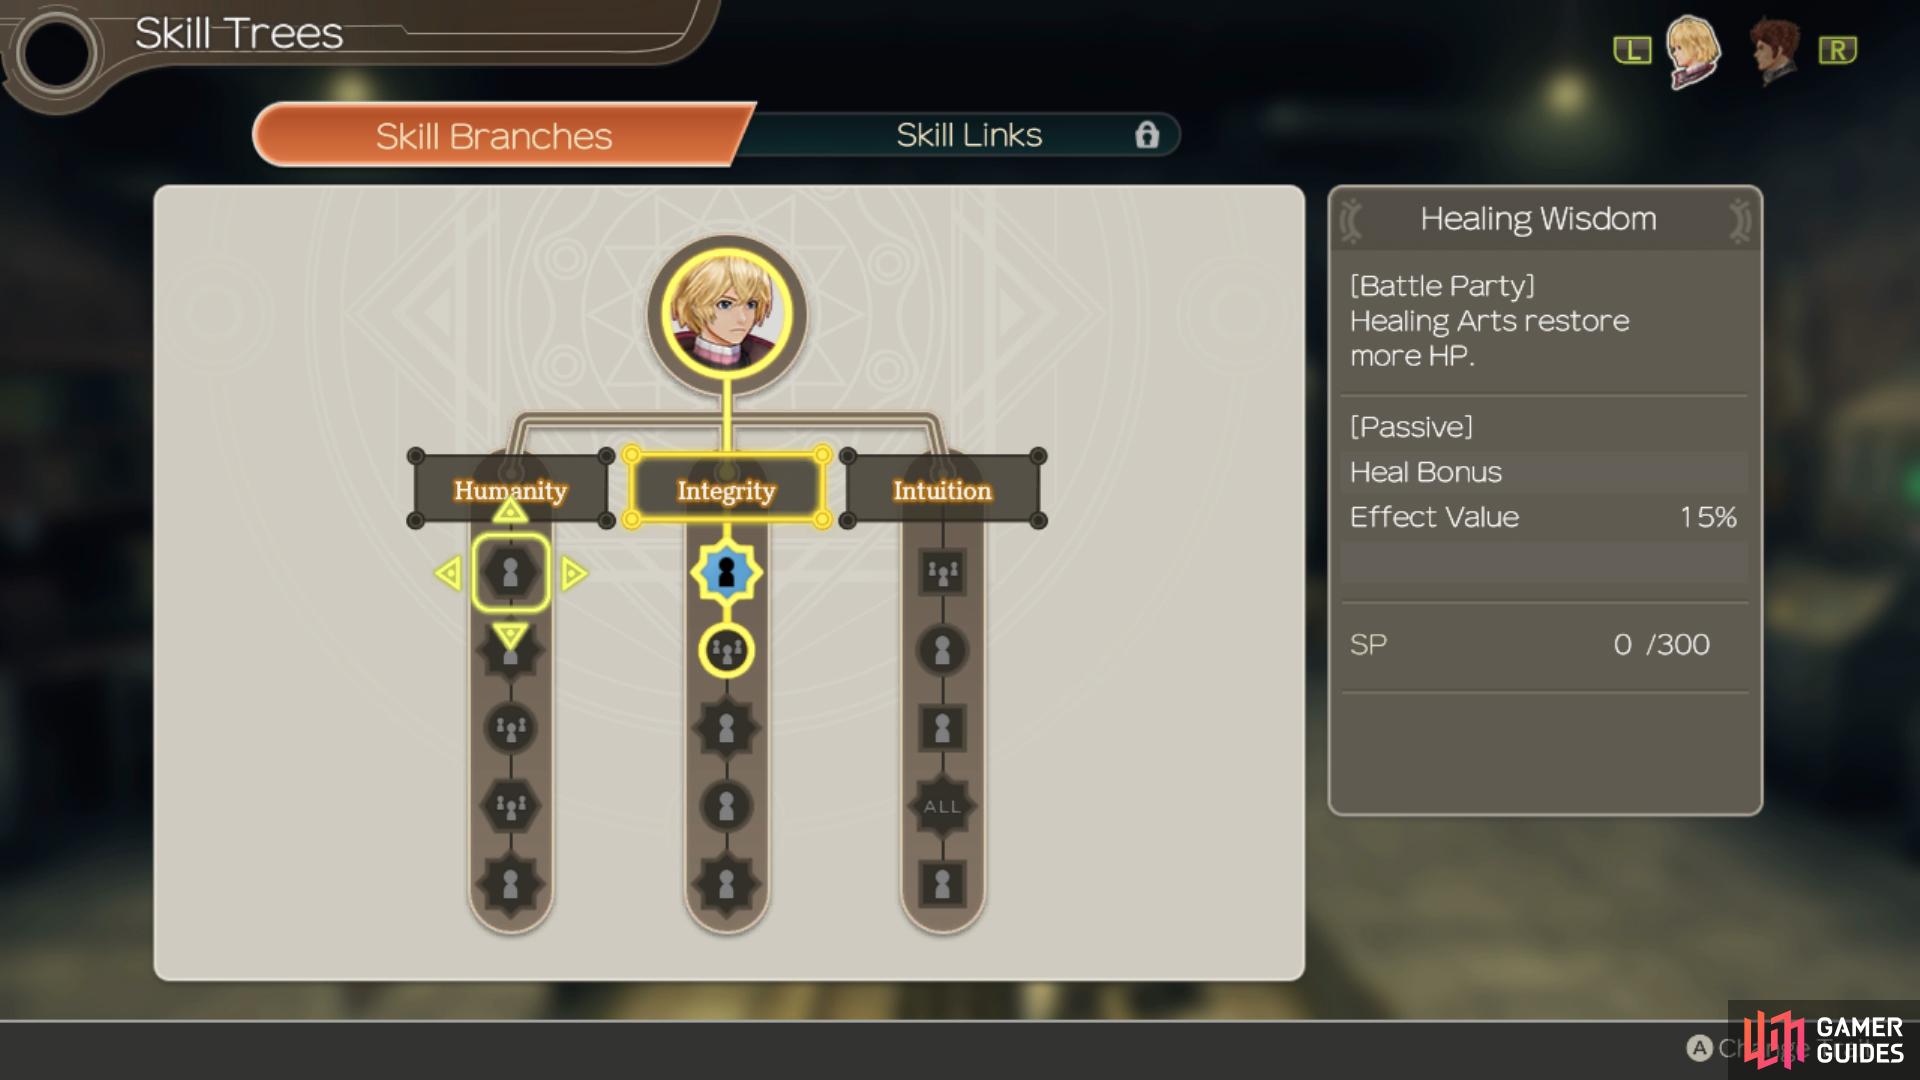
it’s better to learn many skills at lower cost than sticking to just one tree early on.
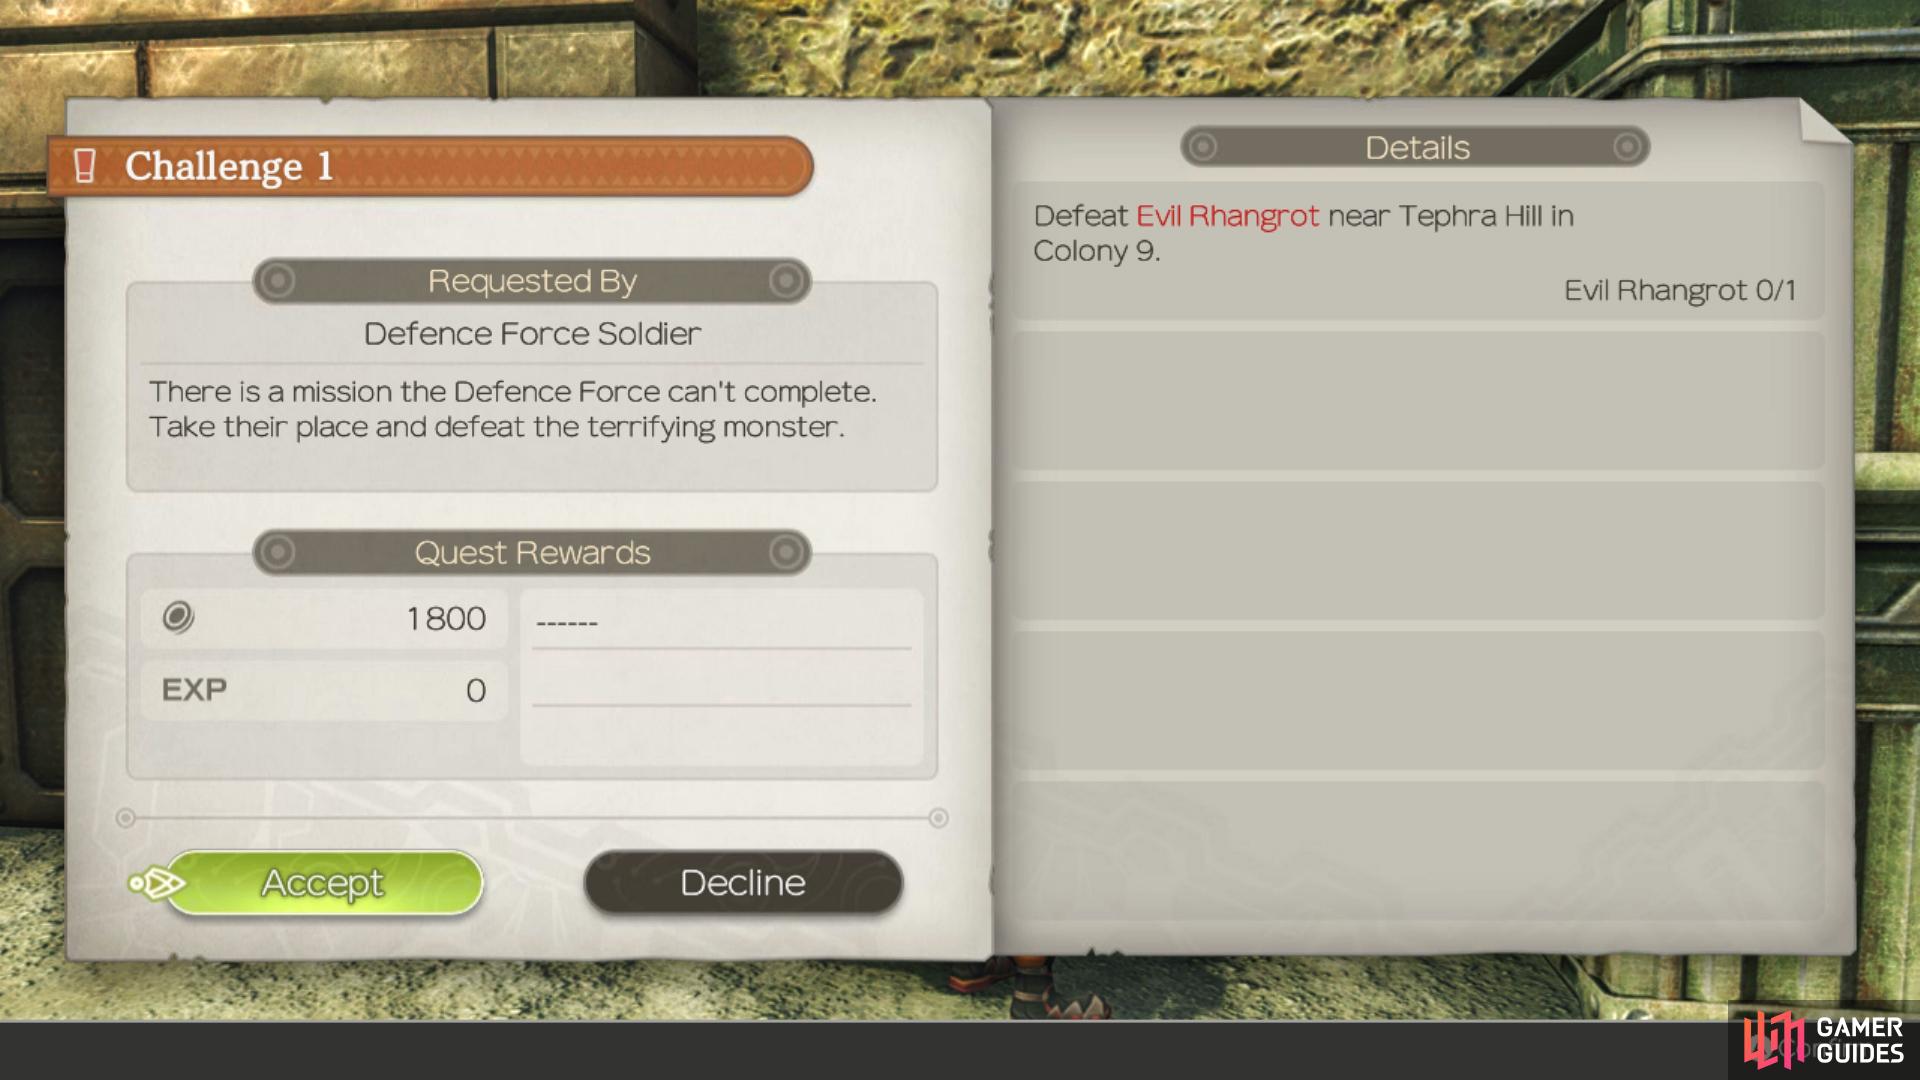
Head outside and you’ll find a Defence Force Soldier walking around who will offer three Quests Monster Quest 2 - Parts 1 - 3. Head north from here to find Raoul walking around while the retiree Jan patrols a little further north of him. Make your way to the northernmost part of this area now to find Emmy Leater and then head to the gate to find Kantz. Make your way down the eastern edge of the base now to find another Defence Force Soldier with a task, Challenge 1.
With the daytime NPCs added, switch time to 18:00 and around the Weapon Development Lab you’ll find Erik, Arnaut, Mefimefi and Perrine while outside in the square you’ll locate Andreas, Monica and Nic. Finally, before leaving this area, pick up three Quests from the Defence Force Soldier to the north, Monster Quest 1 - Parts 1-3 and Challenge 3 from the Soldier to the south.
With the Military District covered, head south to Central Plaza and accept the Quest in the southeast corner, [Search Quest 1]. Continue south from here to reach the Residential District and reset the time to 09:00 so you can start working on registering the daytime NPCs. Head west from the entrance and you’ll spot two Quests that you can accept, [Collection Quests 3 and 4], then speak to Kenny Rohan, Betty and Francoise near the Tranquil Square Landmark. Make your way southwest from here to find Suzanna and Narine and you’ll spot another next Heart-to-Heart, this one however isn’t accessible for now.
Many of the non-named people will give you simple Quests
but the ones from named people will offer Affinity Boosts when accepting and completing them.
Head to the southwest corner near here to find Lukas and Moritz then head up the stairs by the Heart-to-Heart to find Niranira who will offer the Lonely Niranira Quest. Ignore the Quest for now and continue east and search in the middle of the houses to find Jackson near the balcony. Return to the main path and head east to find two more Quests to accept, one from Dionysis The Key to a Long Life and [Search Quest 2] from a nearby Nopon. Finally, return to Suzanna now that you’ve created some Affinity links with her son to accept the Education-Minded Suzanna Quest.
Switch the time to 21:00 and starting near the Heart-to-Heart, speak to Minnie before making your way up the stairs to find Zukazu, Jolele and Jiroque. Head just to the east of Jolele to find Peppino and then accept [Search Quest 4] from the Resident nearby before heading to the north and accepting [Material Quest 4].
You’re almost done registering everything in Colony 9, travel back to Ether Light (still at night hopefully) and change the time to 18:00 to find a Quest to the northeast [Material Quest 2] and then head north to find Desiree and accept The Broken Watch Quest. Head through the factory to the north and follow it to the west to accept the [Collection Quest 2]. Switch the time to 09:00 now and speak to Marcia to accept the Biscuits for a Grandson Quest while you can also find [Collection Quest 1], Challenge 2, Challenge 4 and [Search Quest 3] nearby. Another Resident will offer Monster Quest 3 - Parts 1-4 and another, [Material Quest 3]. The final NPC to register is a tricky one, you’ll find Werner at the Mechon Wreckage Site (Fast Travel here) along with another unavailable Heart-to-Heart.
There are yet more Quests you can accept but you’ll have to clear some of these ones first to raise the Affinity Level of Colony 9. We won’t cover the details on how to complete the Monster Slaying and Collection Quests here, you’ll find some tips on them in their respective pages but read on ahead for the Unique Quests.
The Key to a Long Life
Dionysis has recently run out of medicine and asks you to collect some Medicinal Brog Oil for him. This can be obtained from defeating Brogs across Colony 9, or you can trade with Betty (at 1✰) or Leopold (at 2✰) for some. Once you have collected the oil, return to Dionysis to complete the quest.

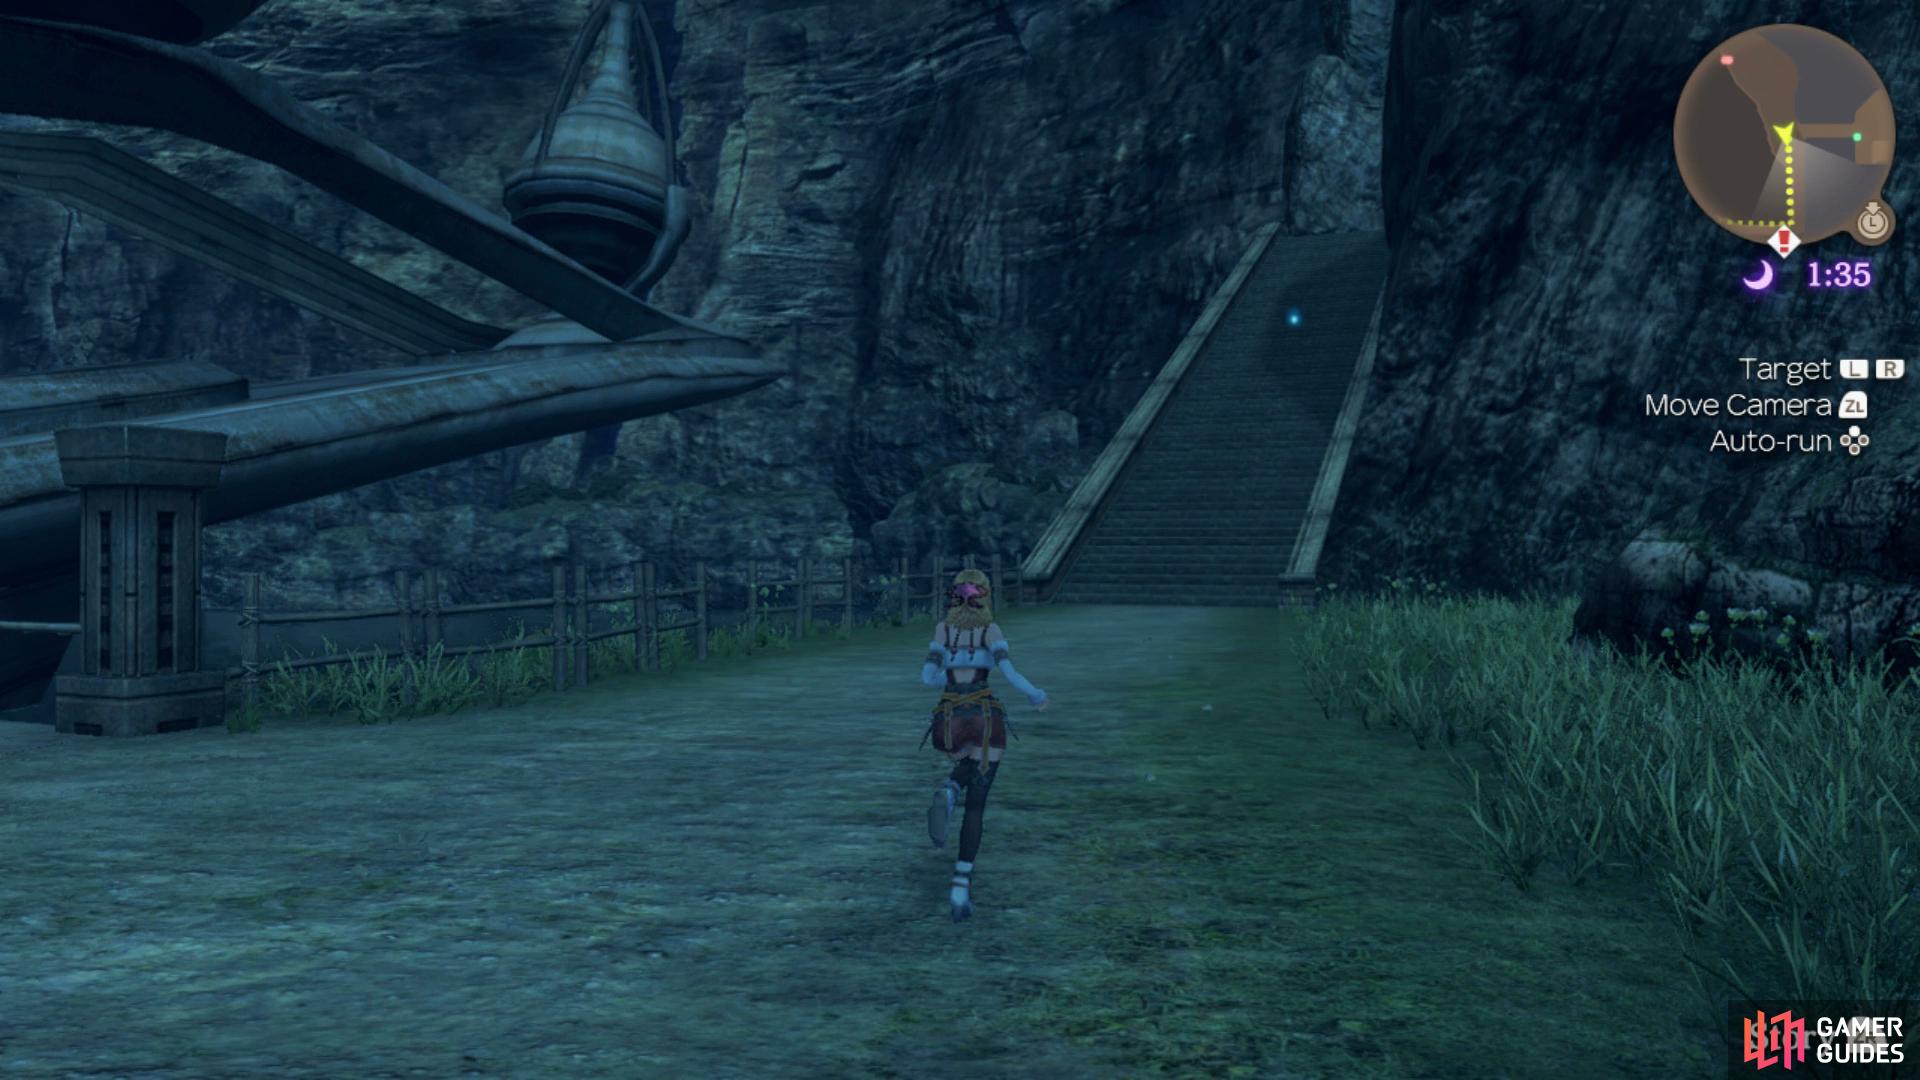
You’ll find Brogs just outside Colony 9 at night.
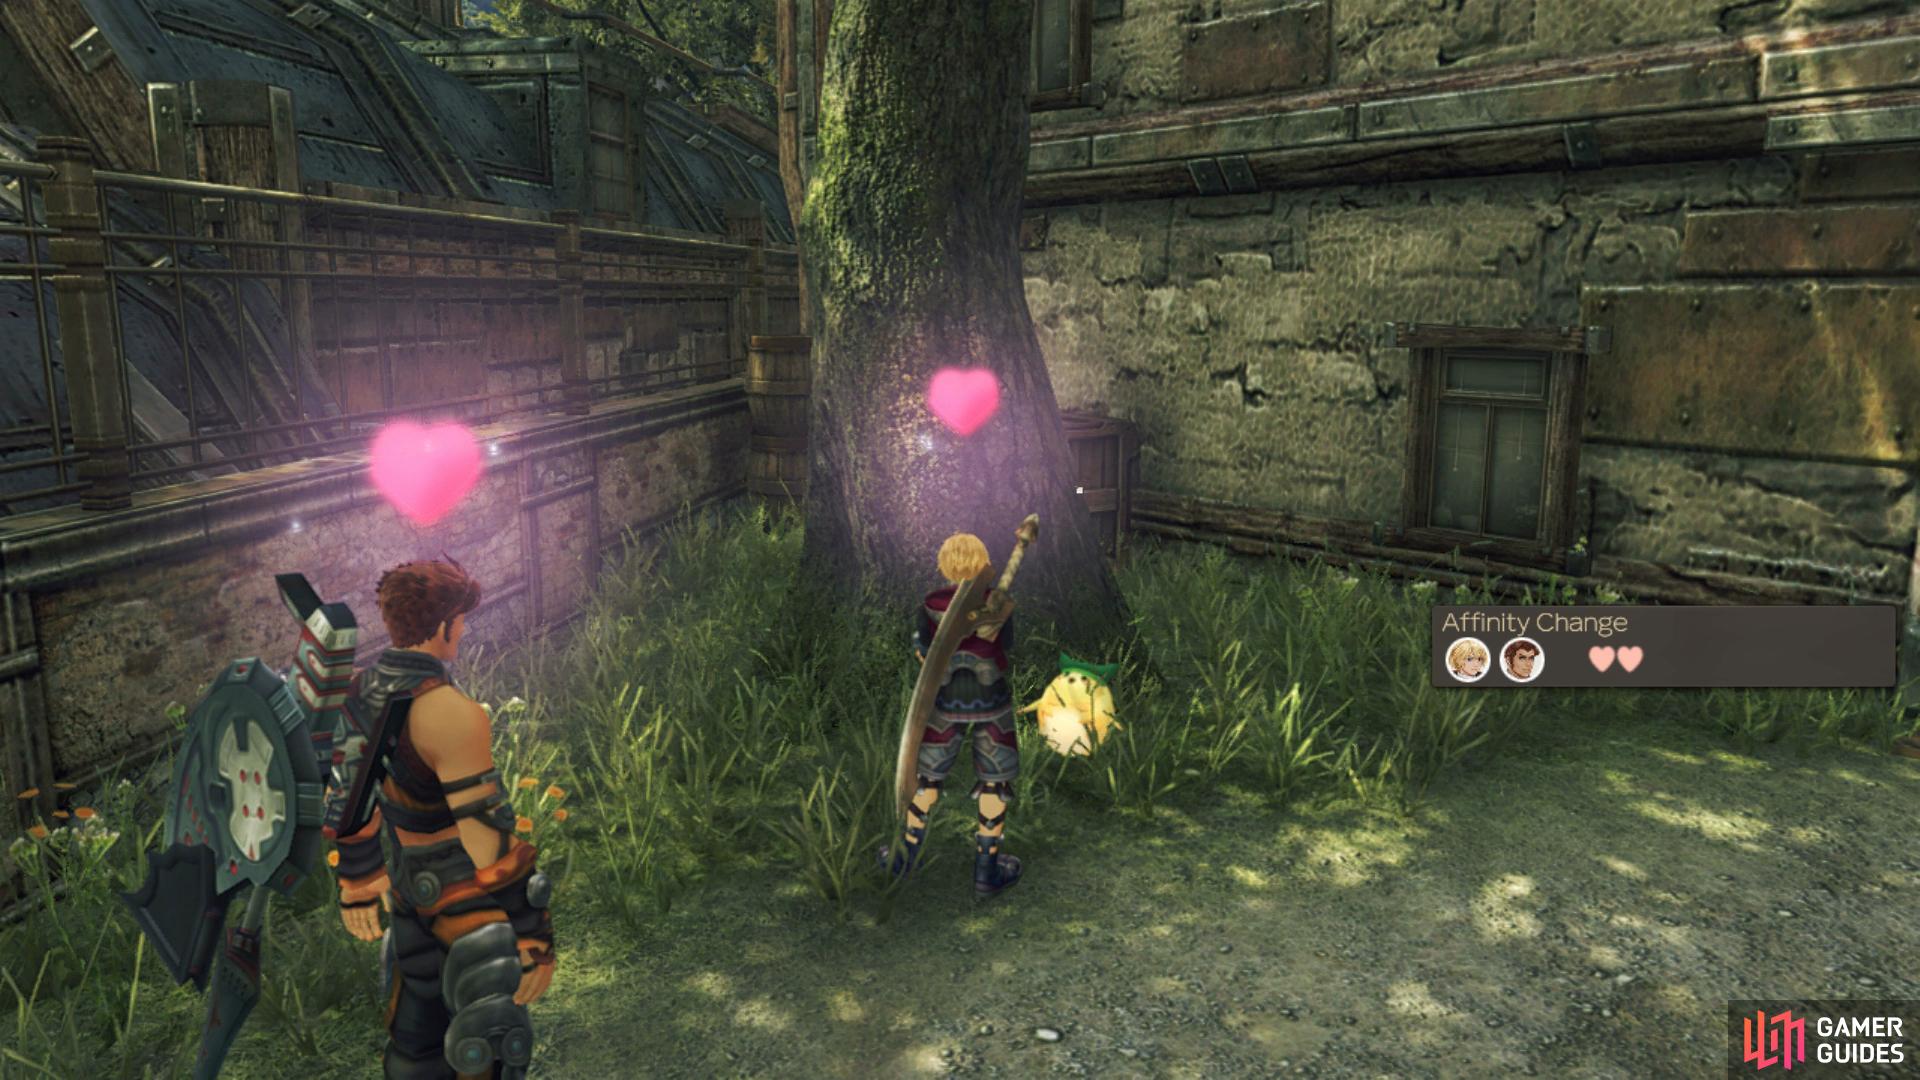
Biscuits for a Grandson
Marcia will ask you to take biscuits to her Grandson, Jiroque, who is training for a fight with his brother. He can be found in Tranquil Square from 18:00 to 03:00. When you find him, he’ll be punching a tree, in preparation for the fight. Jiroque will accept the biscuits and the quest will update, telling you to return to Marcia. Due to the difference in their active hours, changing the time in the Main Menu can be useful here. Head back to the shop in the Commercial District and talk to Marcia. She will thank and reward you, and upon completion, an affinity link between Marcia and Jiroque will be established, showing them to have a close relationship.
Education-Minded Suzanna
Suzanna is trying to get her son, Moritz, to study and wants to find some sweets to encourage him. She asks you to fetch her some Black Nectar, which can be obtained from Skeeters in Tephra Cave. Seeing as there’s more to do here in Colony 9 for now, consider trading with Kenny Rohan to get some Black Nectar. After collecting the nectar, head back to Suzanna to complete the quest.
Lonely Niranira
Niranira will tell you that he doesn’t have the courage to deliver his letter to the local Homs boy, Lukas, asking him to be his friend. He will ask you to deliver the letter for him. Lukas can be found playing near the Southwest bridge of the Residential District, from 09:00 to 15:00. Once you have delivered the letter, return to Niranira to complete the quest. Upon completion, an affinity link between Niranira and Lukas will be established, showing them as Kind Friends.
The Broken Watch
Désirée has broken her watch again, and needs you to fix it for her. You agree to take it back to the Weapon Dev. Lab to fix it, but when you get there you find out you will also require 3 Blue Chains because of how badly damaged the watch is. These parts can be found across Colony 9. Once obtained, head back to Shulk’s lab to repair the watch. To complete the quest, talk to Désirée and return the watch.
Making quests that involve Collectables Active will make them easier to find
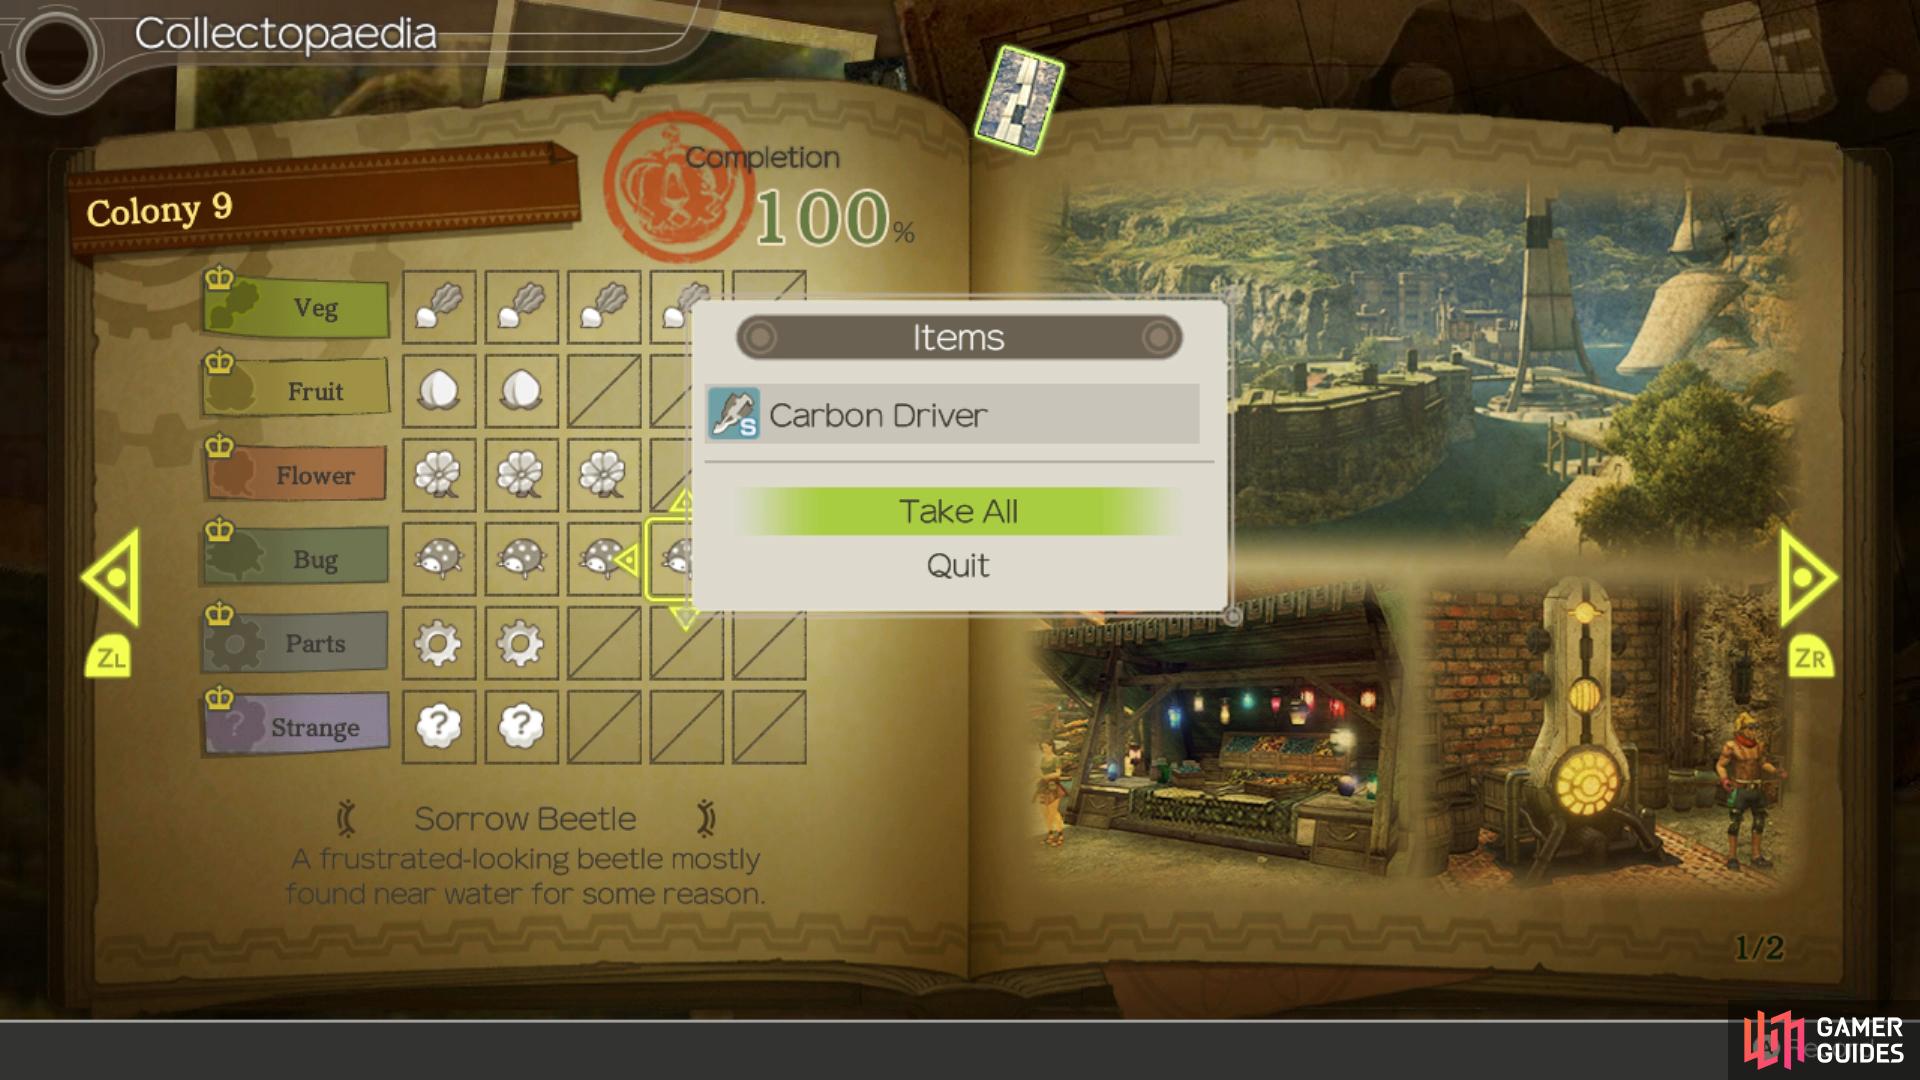
be sure to complete the entry for Colony 9 to obtain a useful weapon for Reyn.
While clearing these Quests along with the Monster Slaying and Collection Quests, be sure to pick up all the Collectables along the way, it’s entirely possible to complete the page for Colony 9 while you’re here and you’ll obtain many useful Gems and the Carbon Driver, a useful weapon for Reyn.
Once this is done, take a look at Colony 9, some more Quests have appeared due to increasing the Affinity in the area so make your way first to Ether Light during the day and speak to Giorgio to pick up A Curry Conundrum and then travel to Fortress Entrance and head north to find Emmy Leater who will give you A Young Captain’s Request.
A Curry Conundrum
Giorgio’s Curry Shop in the Commercial District of Colony 9 is running out of ingredients and he will ask you to collect 5 Dance Apples for him. You can find these relatively easily in the grassy landscapes of Colony 9. Upon finding the Dance Apples, return to Giorgio to complete the quest.
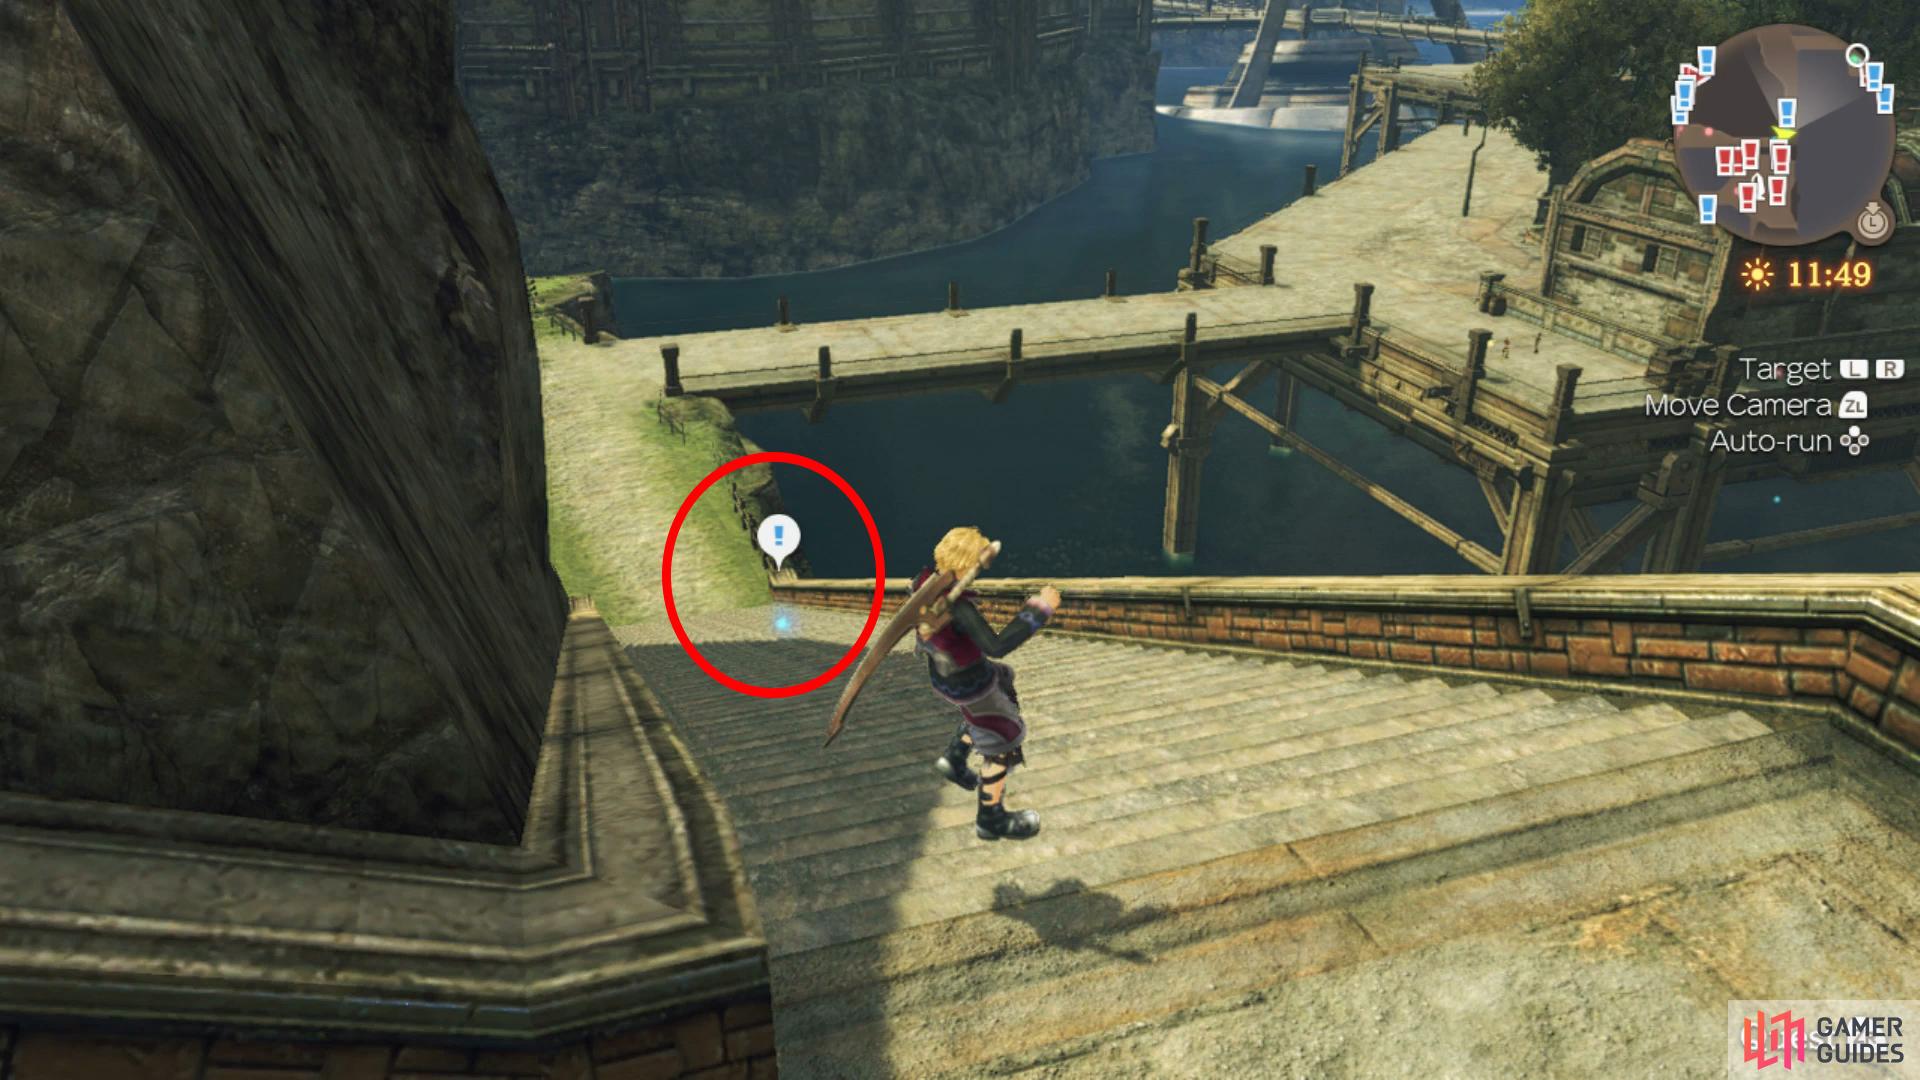
A Young Captain’s Request
Emmy will angrily tell you that her subordinate, Miller, is slacking off. She tells you he is somewhere in the Commercial District and asks you to find him. It is a little tricky to find Miller, so firstly, you’ll want to head to the Gem Man’s Stall landmark, then walk through the building to the right of the Gem Man. When you reach the ledge overlooking the water, turn to the left and you will see a lower level that you can jump down to. Walk straight ahead and you should find Miller leaning against a wall. When you approach him, he will agree to return to the Military District. Return to Emmy Leater to complete the quest. Upon completion, an affinity link between Emmy Leater and Miller will be established, showing them to have a dissatisfied relationship.
Upon completing these two Quests, if you’ve been following the Walkthrough, you should now reach ✰✰ for Colony 9 and with that comes a few more Unique Quests and better Trades from the people that live here. Make your way to the Gem Man’s Stall during the day to find Rocco who will give you Rocco’s Heartful Request while you can find Lukas to the southwest of the Residential District who will give you the Pride and Courage Quest.
Pride and Courage
In order to begin this Quest, not only does Moritz need to be registered on the Affinity Chart, but you also need to have completed Lonely Niranira and have the Colony 9 Area at ✰✰. Lukas will mention that Niranira was baited into going to Hazzai Cape to get a Krabble shell, so he wants you to go after him. Hazzai Cape is located east and a little south of the Residential District, so hop into the waters below and down, then around the Anti-Air Battery 3. You should have the quest marker to guide you to Hazzai Cape, but you want to be careful, as there are some level 70+ monsters on the eastern side of this place. Find Niranira and speak to him, then return to Lukas. Speak to him, then Moritz, then Lukas once more to finish.
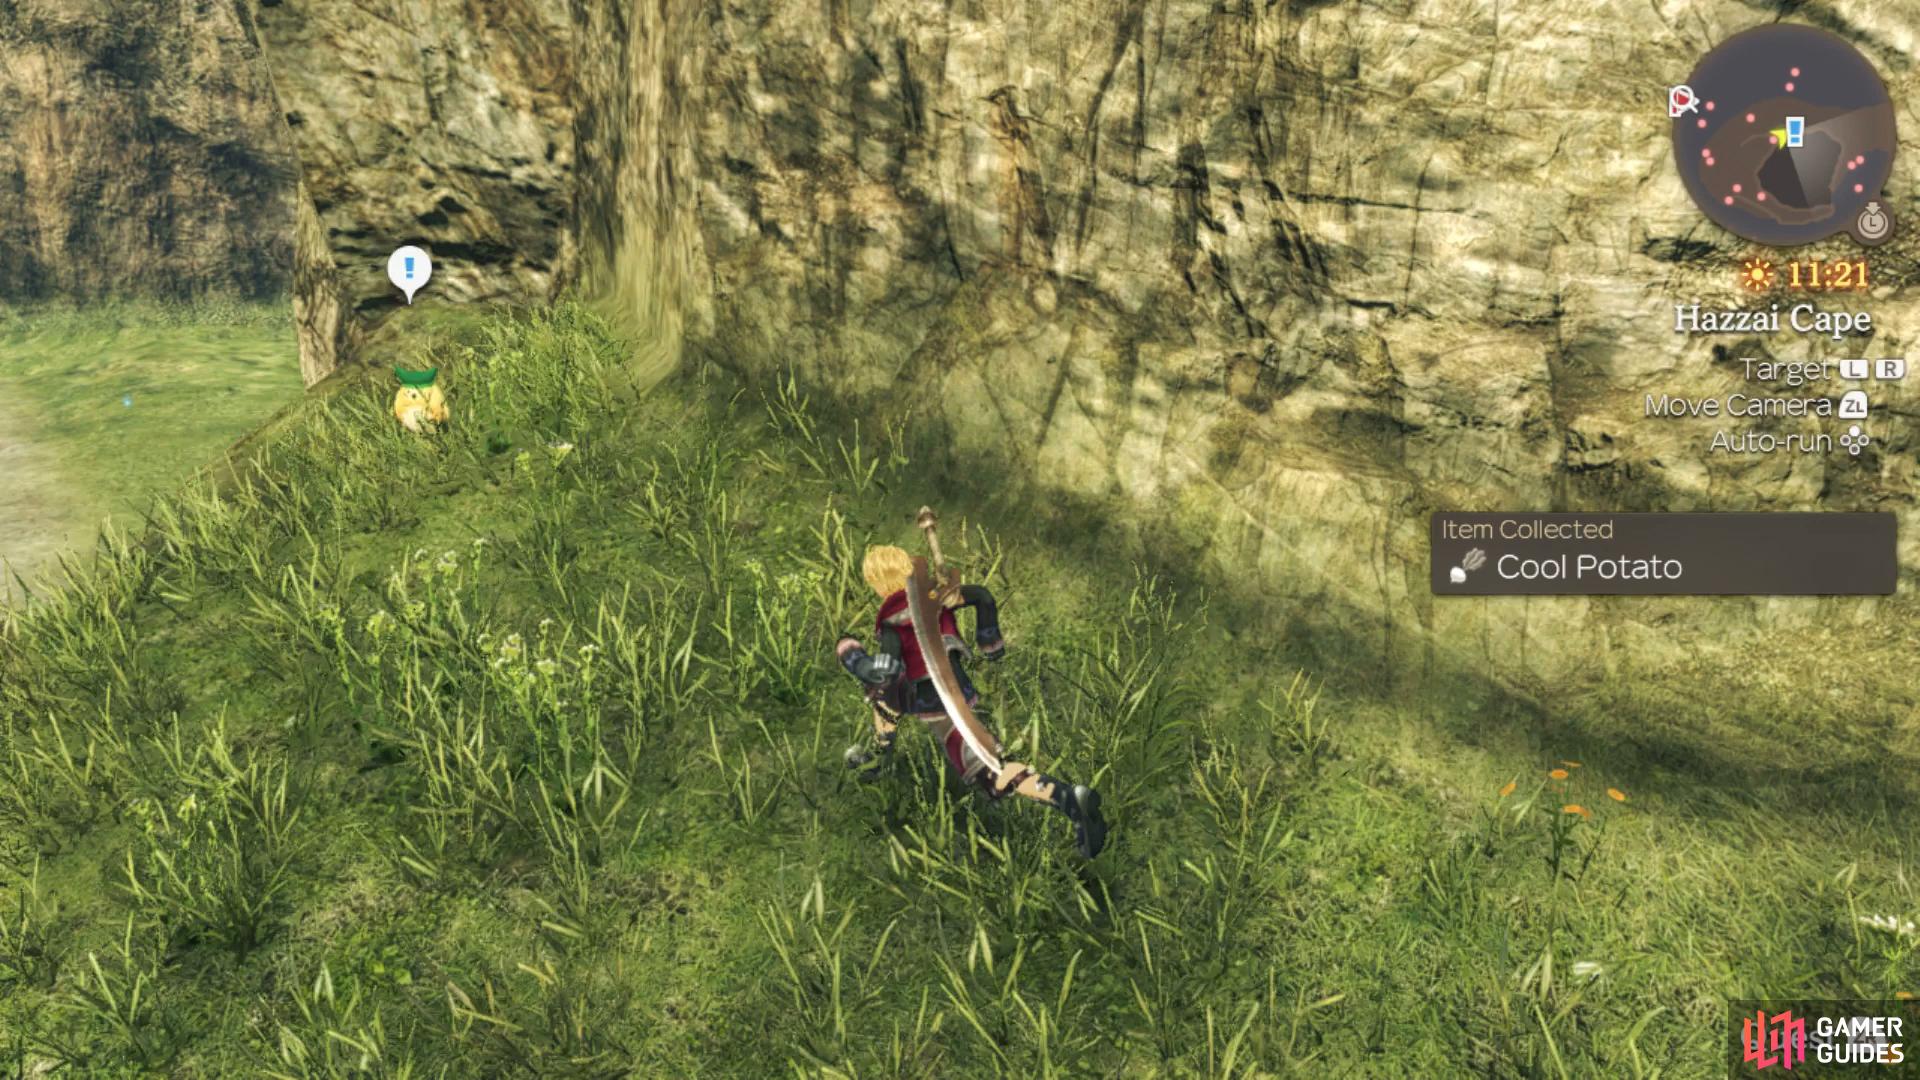
You’ll find Niranira on the island to the east of Colony 9.
Rocco’s Heartful Request
Rocco will explain to you that he accidentally broke his mother Sophia’s keepsake and cannot find anyone to fix it for him. You suggest that Dean in the Military District could help him and he asks you to take it to Dean for him. Once Dean fixes the keepsake, return to Rocco to complete the quest.
Dean’s Shady Request
Following the completion of the previous Quest, make your way back to Dean in the Military District during the day to accept this follow up. Dean requests your assistance in securing a date with his first love, Sonia. Make your way to Ether Light during the day and she’ll mention that she needs two Shin Gecko’s from Tephra Cave. You haven’t been there yet so hold on to this Quest for now as you’ll be heading there shortly.
With that accepted, you’ve achieved everything you can in Colony 9 for now so travel to Main Entrance and take the western path up the hill, following it around to reach the entrance to Tephra Cave where Fiora will force her way back into your party.
You’ll get a short tutorial on how the Party Gauge works here, this is your party’s morale and increases based on Bonus Effects or critical hits occuring. When a party member falls in battle, you can use 1 block of the gauge to revive them while if you have three blocks available, you can make use of Chain Attacks. The Chain Attack icon can be accessed by moving over to the Talent Arts Icon and pressing up or down. These are powerful attacks that can really change the tide of battle.
Be sure to head to the Menu before going inside and changing Fiora’s equipment and levelling her Arts, all of them are strong but pay extra attention to Hidden Thorn that will allow you to complete the Break-Topple-Daze combo. Just to the north of the cave, you’ll find another Heart-to-Heart you should be able to take part in.
You’ll need green Affinity between Shulk and Reyn for this Heart-to-Heart.
| Heart-to-Heart | Characters | Location | Affinity | Answers |
|---|---|---|---|---|
| Enduring Friendship | Shulk + Reyn | Tephra Cave Entrance | Green | When we had that big fight?, Of course. |
Finally, you’ll find a Defence Force Soldier standing near the entrance, speak to him to accept [Monster Quest 4 - Parts 1 - 3] that involve killing beasts in Tephra Cave. With that said, you’re ready to press on with the story so make your way into the cave nearby.
No Comments