

Boss: The Arsenal
| Enemy | Weaknesses | Notable Loot |
|---|---|---|
| The Arsenal | -- | Telluric Scriptures Vol. XIII |
| Barret | . |
|---|---|
| Weapon: | Light Machine Gun |
| Armor: | Cog Bangle |
| Accessory: | Champion Belt |
| Useful Materia: | Fire, Lightning, Healing, Revive, Steadfast Block, ATB Stagger, Magic Up, MP Up, HP Up |
| Aerith | . |
|---|---|
| Weapon: | Silver Staff |
| Armor: | Chain Bangle |
| Accessory: | Circlet |
| Useful Materia: | Fire, Lightning, Healing + Magnify, Revive, Magic Up, MP Up, HP Up |
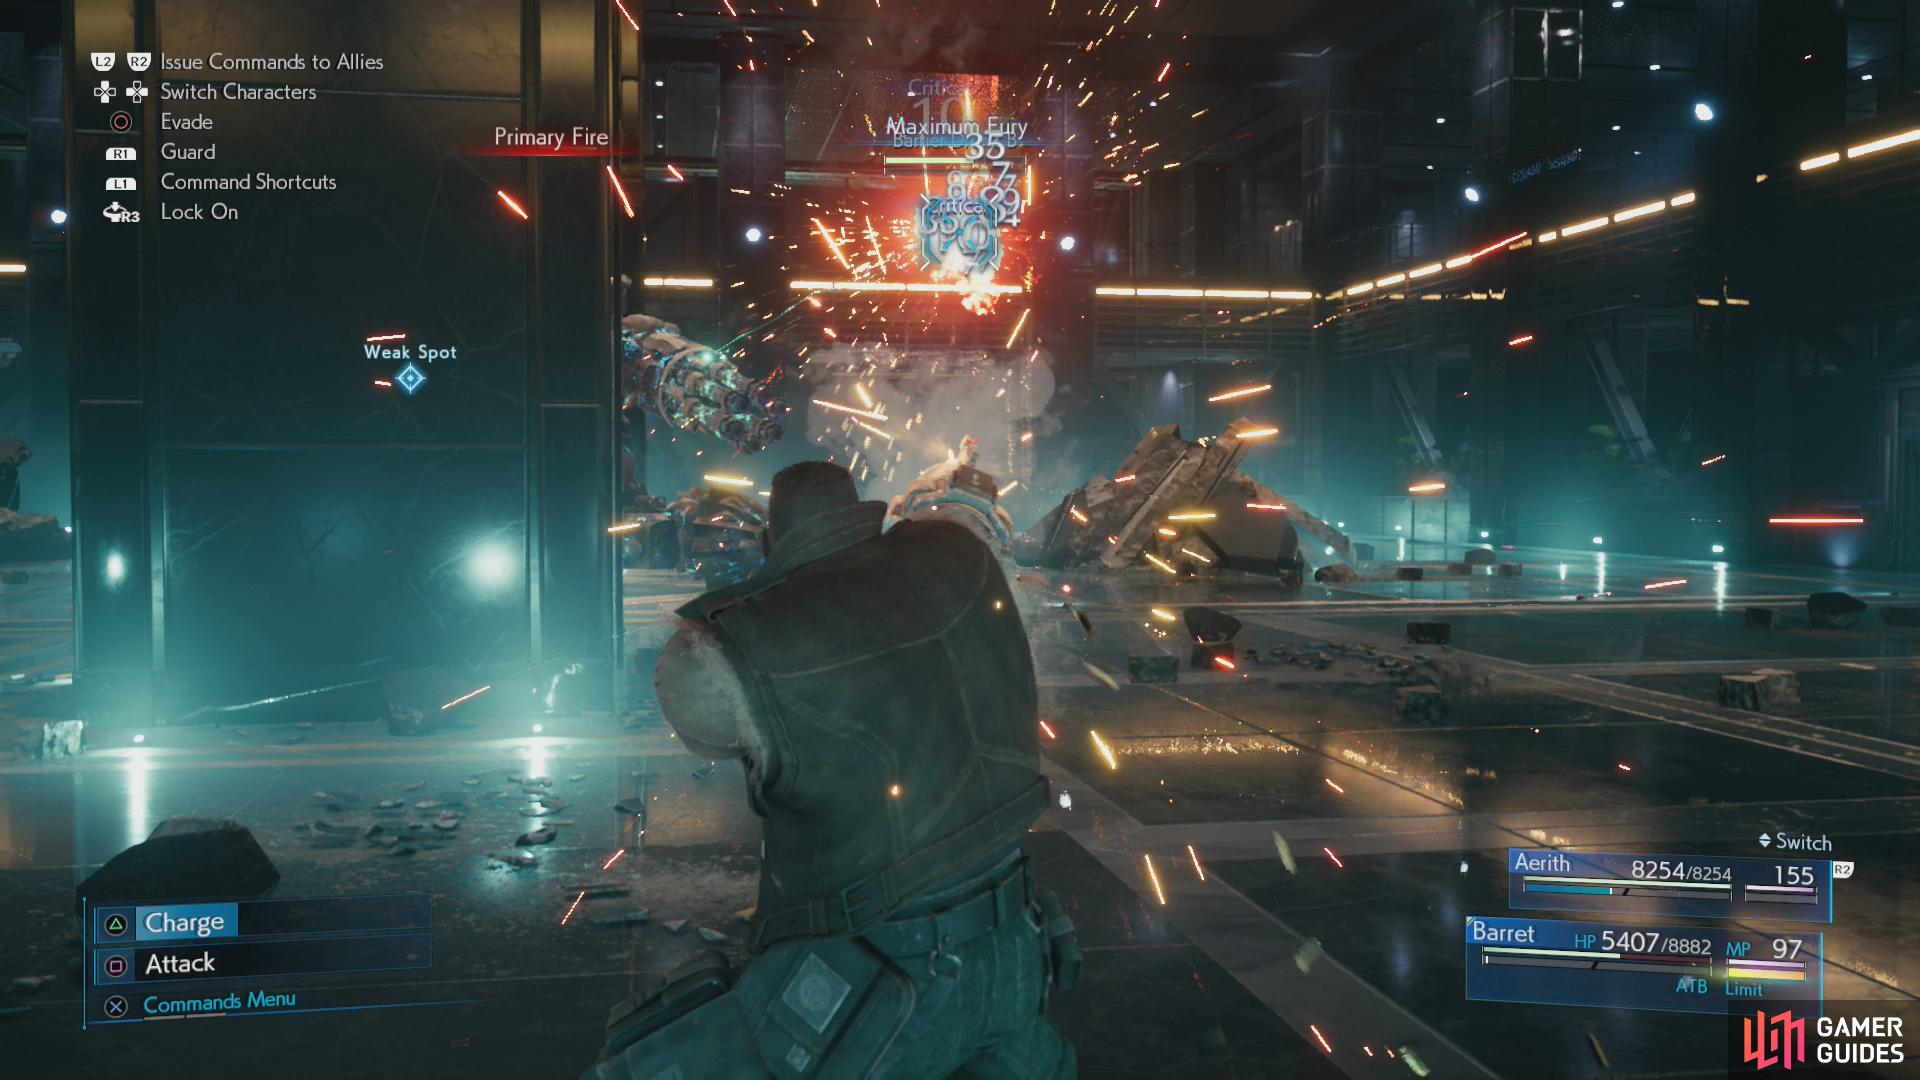
Have Barret shoot at the two side Barrier Drones,
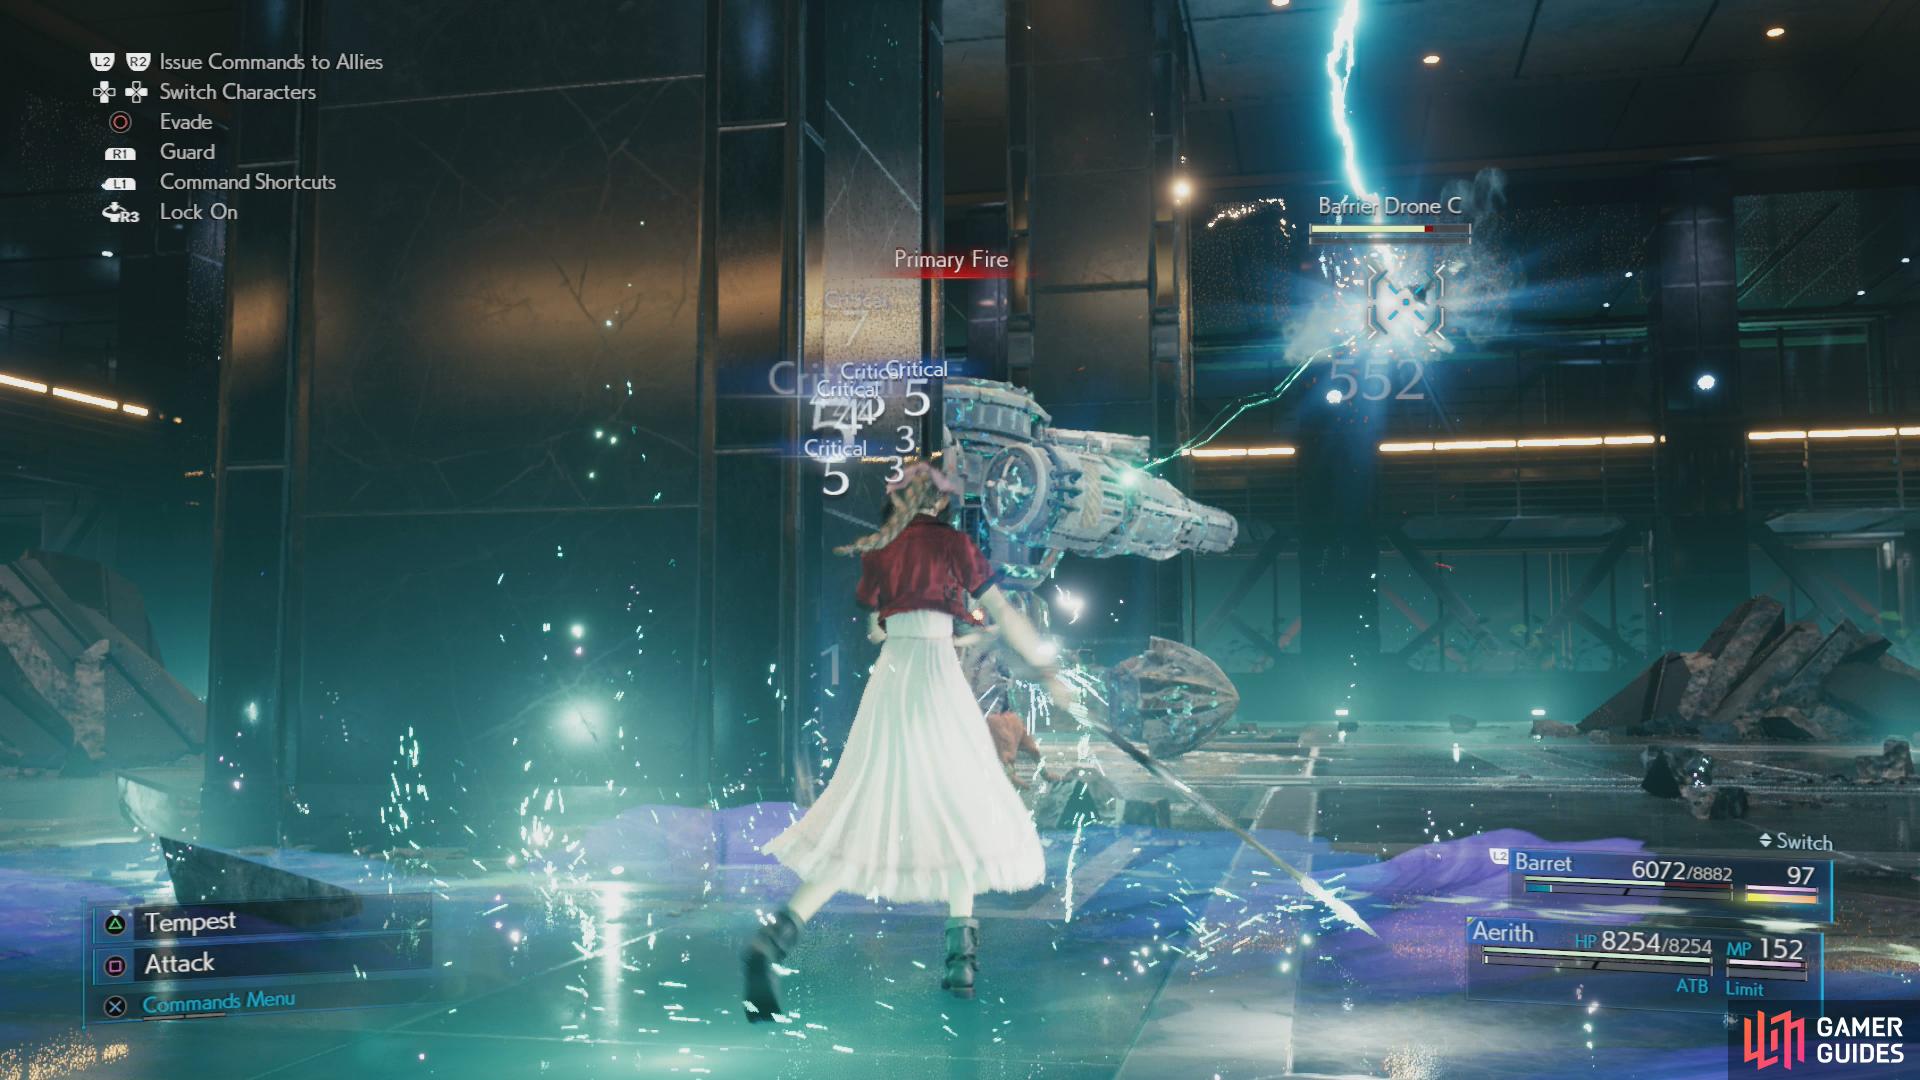
while Aerith should take potshots at the central one, or at a variety of targets, as her MP allows.
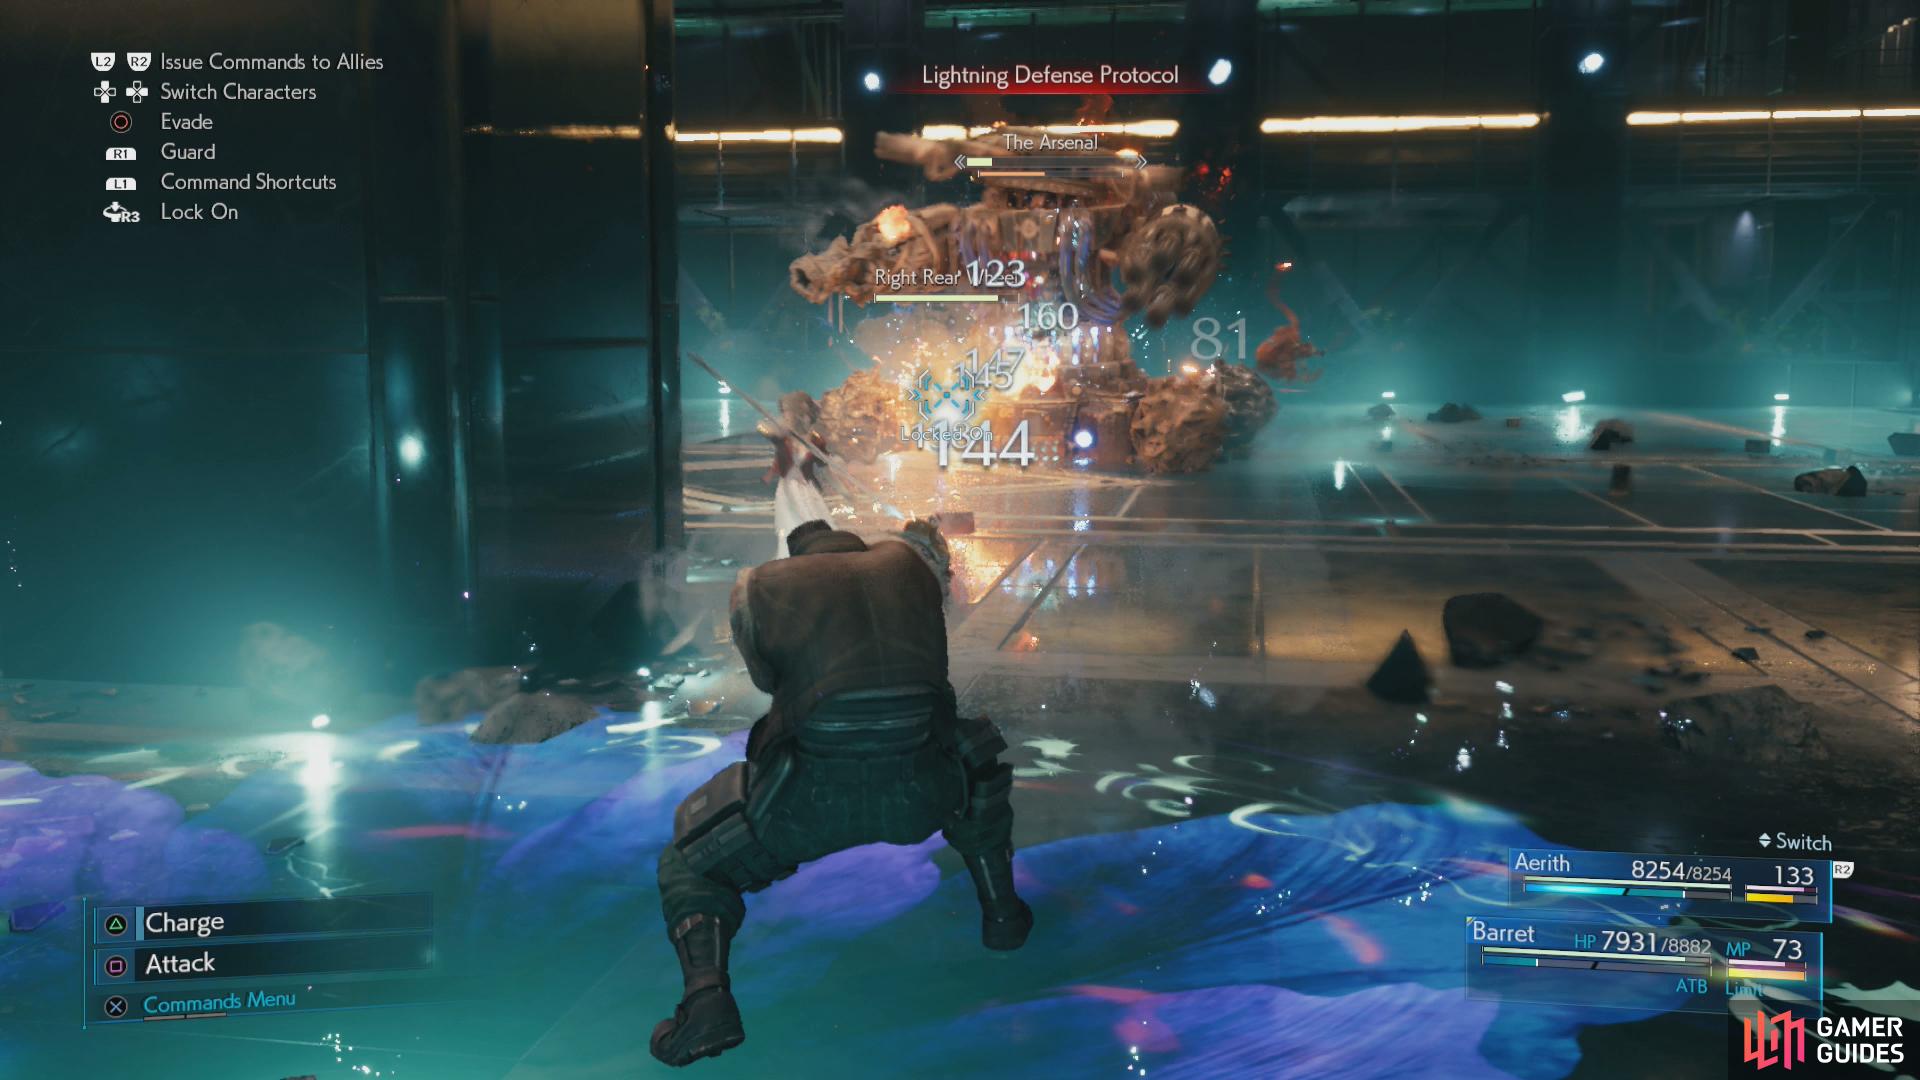
The Arsenal is perhaps the most interesting - and difficult- foe in Chapter 17, and while it hasn’t changed too much, the changes that have been made make this fight somewhat more interesting. Be absolutely sure you have at least two different types of elemental magic materia (Fire, Lightning, Ice, Wind) equipped, and be sure both characters are capable of functioning as competent casters. Barret will hopefully use his gun for most of this fight, but you’ll want him to have magical options as well. It’s one of the few fights where Barret might be better served with some Magic Up Materia and perhaps even a Circlet! This may well end up being one of the most magically intensive fights of the game, and there’s no real way to hone in on one element, so spread the materia around just in case.
The first phase isn’t really any different than it was before; hide behind pillars, mind the laser reticle, and use Barret to shoot the two side Barrier Drones, using normal attacks, “Overcharge” and “Maximum Fury” as the situation permits. These things will take a lot of damage this time around, so expect to be at this for a bit. Aerith, for her part, should contribute with Regen when you take damage, but she’ll also be responsible for destroying the middle Barrier Drone, which is easier to hit with magic (especially Thundara). Lay down an “Arcane Ward” and have her pelt the drones (especially the middle one) whenever she has full MP. The Arsenal’s attacks in this phase are as follows:
-
Aerial Strike: Technically not named, during this attack a laser will mark a reticle on the floor, shortly after which a blast will follow. This attack deals massive damage, and leaves a persistent globe of energy on the floor, dealing more damage if you come into contact with it. An area-denial attack, just move out of the way when you see it coming.
-
Homing Laser: Fires a volley of lasers in an arc. Each deals light damage, but getting hit by one could stagger you briefly enough to ensure more hits. Moderately homing.
-
Primary Fire: Charges up and fires a shell from its right cannon, deals massive damage.
-
Saturation Fire: Fires a barrage of bullets from its left cannon, deals moderate damage, but the number of projectiles adds up quickly.
-
Voltaic Discharge: Shoots several lines of electricity that spread out in a wedge from The Arsenal, deals heavy damage and stuns.
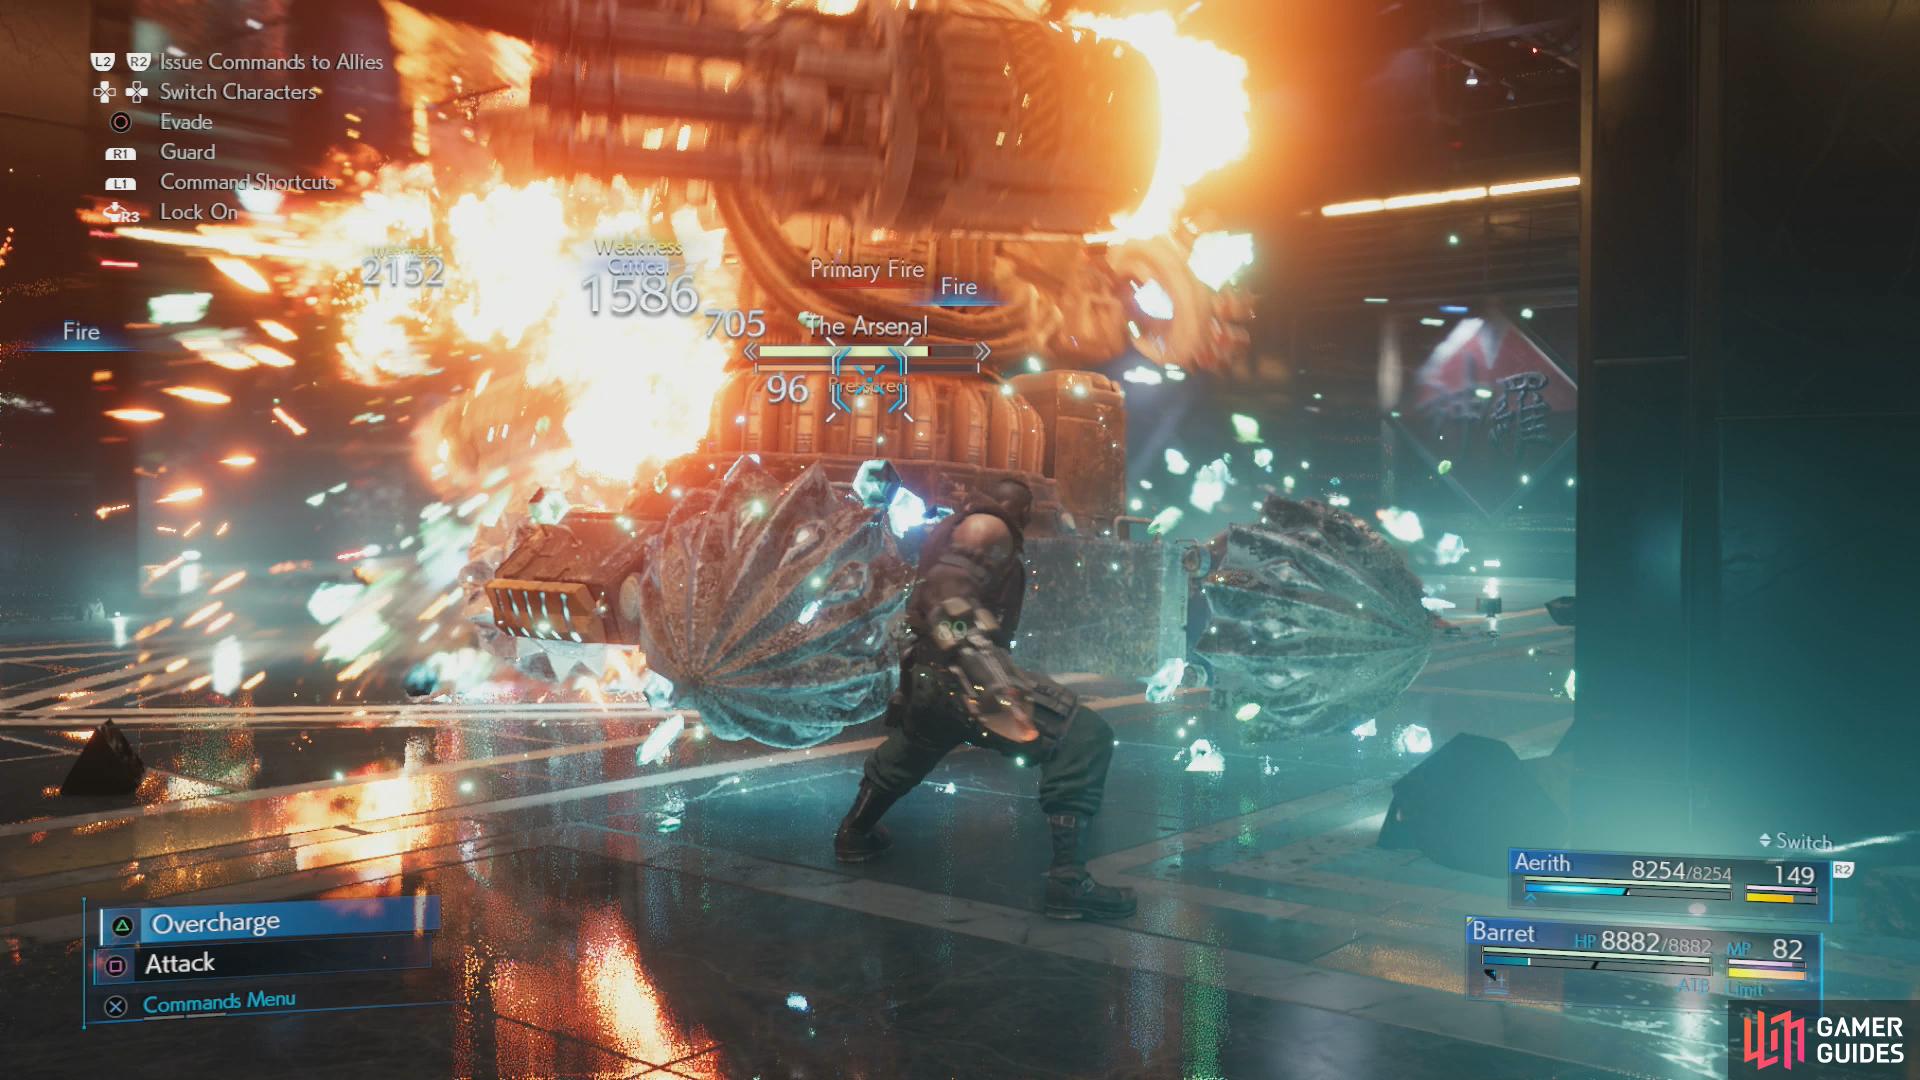
Use whatever element The Arsenal isn’t resistant to when its weakpoints are vulnerable to “Pressure” it,
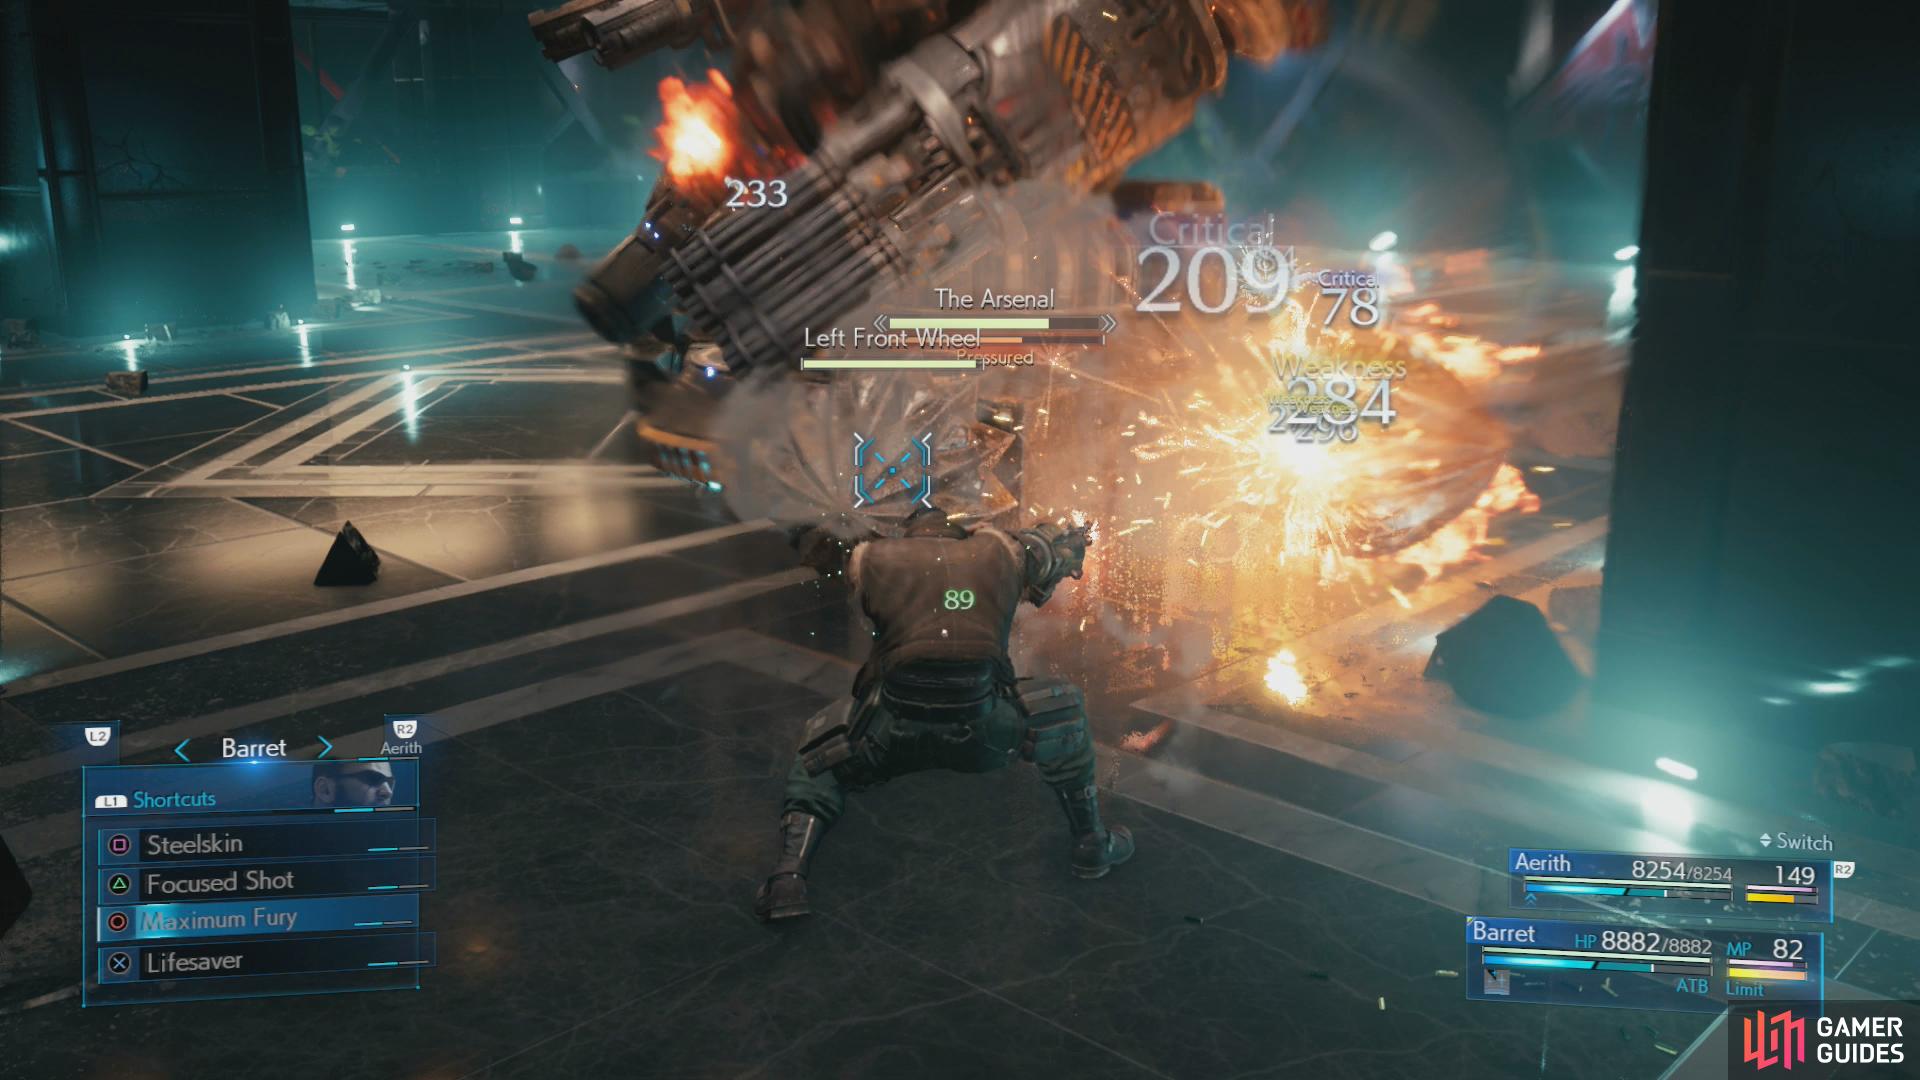
then target the wheels to inflict damage and Stagger.
Destroy all three Barrier Drones and the fight will advance to phase two. It’s here where The Arsenal will reveal one of its new tricks: “Elemental Defense Protocols”. It can use this for any element - and even physical damage - so you’ll need to note what it uses and switch to something else. Otherwise this phase is fairly similar to how it was in Normal difficulty, save The Arsenal’s weakpoints will take more damage to force it into a “Pressured” status, so consider using -ara tier spells with both Barret and Aerith whenever it’s vulnerable. For us, the number of attacks The Arsenal was vulnerable during seemed limited compared to Normal difficulty, and we were forced to use Fira whenever The Arsenal used its “Primary Fire” attack. However you manage it, once you deal enough damage to a weakpoint The Arsenal will become “Pressured” - quickly target The Arsenal’s wheels to inflict damage and Stagger.
(1 of 3) During the fight, The Arsenal will become heavily resistant to various elements (possibly including physical damage)
Hide behind pillars, hit weakpoints, target the wheels, then unload on The Arsenal when it’s Staggered. Repeat this process until The Arsenal is reduced to around 60% of its HP, at which point phase three will start. Your goal in phase three is nearly identical to phase two, save that The Arsenal now has a few new attacks:
-
Firewall: The Arsenal will shoot out two steams of flame, which form walls of fire along the floor, giving The Arsenal a clear line of fire on you - and offering no escape. Fire + Elemental does nothing to mitigate the damage of these flames, which, although minor, will prevent you from fleeing their confines.
-
Obliterating Laser: A succession of “Homing Laser” volleys, the individual damage per hit is minor, but getting stun-locked by this attack really adds up. Can be blocked.
-
Pulse Cannon: After a long charge-up, The Arsenal will unleash a blast of energy, dealing massive damage. You absolutely do not want to get hit by this attack - stay behind cover while it charges, then move to a new source of cover, as the old one will be destroyed by Pulse Cannon.
Once you’ve reduce The Arsenal down to around 15% of its HP it’ll move on to phase four. It only has one attack: “Cry Havoc”, a massive blast of energy that’ll probably wipe the party if it hits. You’ll get some rubble to hide behind for the first blast, but you’ll need to kill The Arsenal before the second hits (although weapon skills like “Reprieve” can keep you alive through one such attack, buying your more time). Keep in mind what element The Arsenal is immune to and hit your foe with -aga tier spells of an element it’s vulnerable to, perhaps laying down an “Arcane Ward” before you do so. Use limit breaks if you have them, do whatever it takes to put down The Arsenal before it gets a chance to unleash another attack.
For defeating The Arsenal you’ll obtain the Telluric Scriptures Vol. XIII Manuscript.
No Comments