

Lots of chatter at the start of this chapter, power through it, and continue on towards Wall Market, ultimately starting the side quest Chocobo Search. This chapter is much like chapters 3, 8 and 9 - lots of side quests, and where there are side quests, there are Manuscripts to earn:
| Cloud | . |
|---|---|
| Weapon: | Twin Stinger |
| Armor: | Chain Bangle |
| Accessory: | Circlet |
| Useful Materia: | Ice + Elemental (armor), Fire, Healing + Magnify, Revive, ATB Stagger, Magic Up, HP Up |
| Tifa | . |
|---|---|
| Weapon: | Purple Pain |
| Armor: | Cog Bangle |
| Accessory: | Champion Belt |
| Useful Materia: | Ice + Elemental (armor), Fire, Healing, Revive, ATB Stagger, HP Up |
| Barret | . |
|---|---|
| Weapon: | Light Machine Gun |
| Armor: | Cog Bangle |
| Accessory: | Champion Belt |
| Useful Materia: | Fire, Subversion, Healing, Revive, ATB Stagger, HP Up |
Missing Children
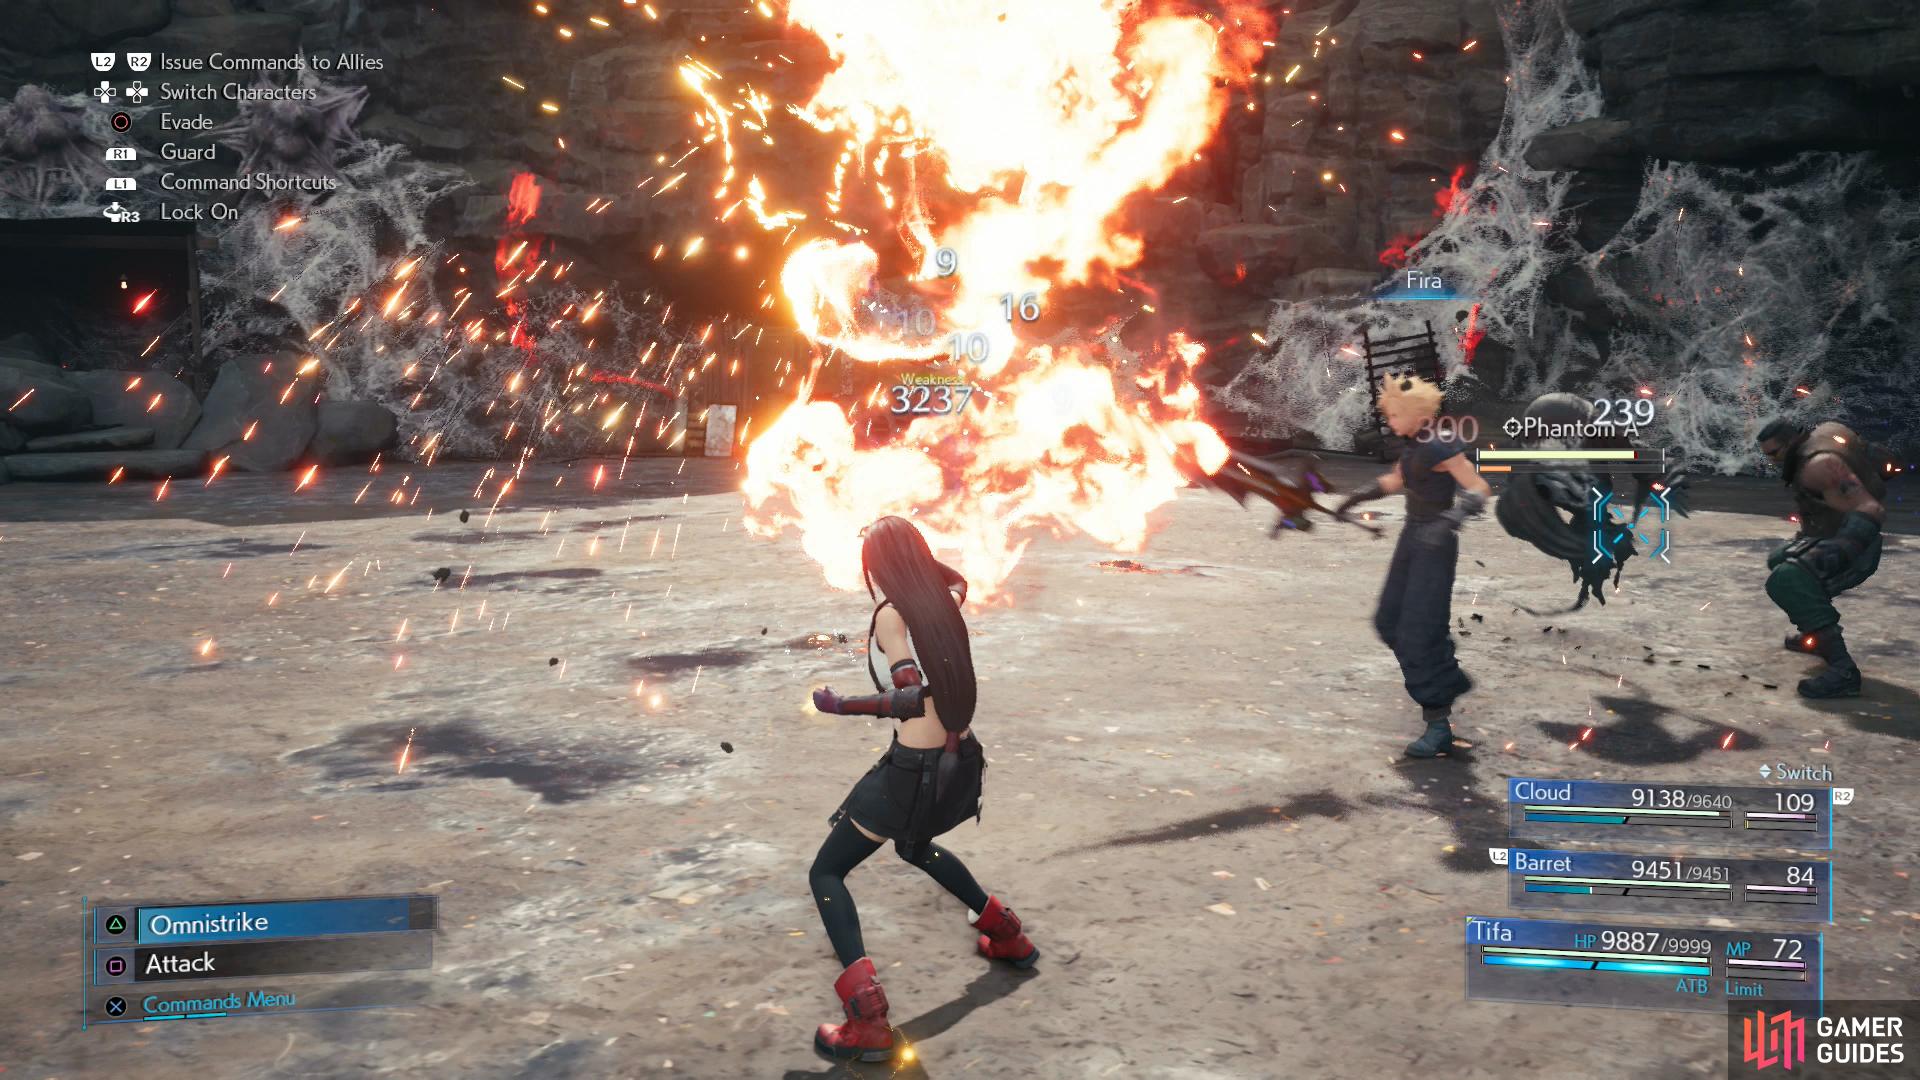
To earn the Manuscript for the quest Missing Children you’ll need to head to the Slum Public Cemetery and fight two Phantoms. While not terribly powerful foes, you’ll make your life easier if you equip Ice + Elemental (armor) and carry some Breach Materia and Fire Materia. As with Ghosts, Phantoms are annoying foes that like to phase in and out of existence, usually shortly after attacking. You’ll need to keep moving with your controlled character to avoid attacks and respond quickly when they appear to deal damage. You especially need to be wary of their “Frozen Claw” attack, as it can deal in excess of 3,000 damage per hit, and it’s not terribly uncommon. Keep moving to avoid it, unfortunately Ice + Elemental won’t effect it much, but at least it’ll neutralize their bouts of Blizzard/Blizzara. Hit them with Fira when they appear, and if they use Reflect to counter your spells, take it off with Breach to leave them “Pressured”. Alternatively, just keep attacking them until they’re Staggered, but be ready to take advantage of them with Tifa when they’re Staggered - a successful ki combo can shorten the fight significantly.
Defeat both Phantoms and you’ll obtain the Way of the Fist Vol. X Manuscript.
Chocobo Search
In the quest Chocobo Search there are actually two Manuscripts you can earn here:
| Cloud | . |
|---|---|
| Weapon: | Twin Stinger |
| Armor: | Chain Bangle |
| Accessory: | Circlet |
| Useful Materia: | Healing + Magnify, Revive, ATB Stagger, Magic Up, HP Up |
| Tifa | . |
|---|---|
| Weapon: | Purple Pain |
| Armor: | Cog Bangle |
| Accessory: | Champion Belt |
| Useful Materia: | Fire + Elemental (armor), Healing, Revive, ATB Stagger, HP Up |
| Barret | . |
|---|---|
| Weapon: | Light Machine Gun |
| Armor: | Cog Bangle |
| Accessory: | Champion Belt |
| Useful Materia: | Fire + Elemental (armor), Healing, Revive, ATB Stagger, HP Up |
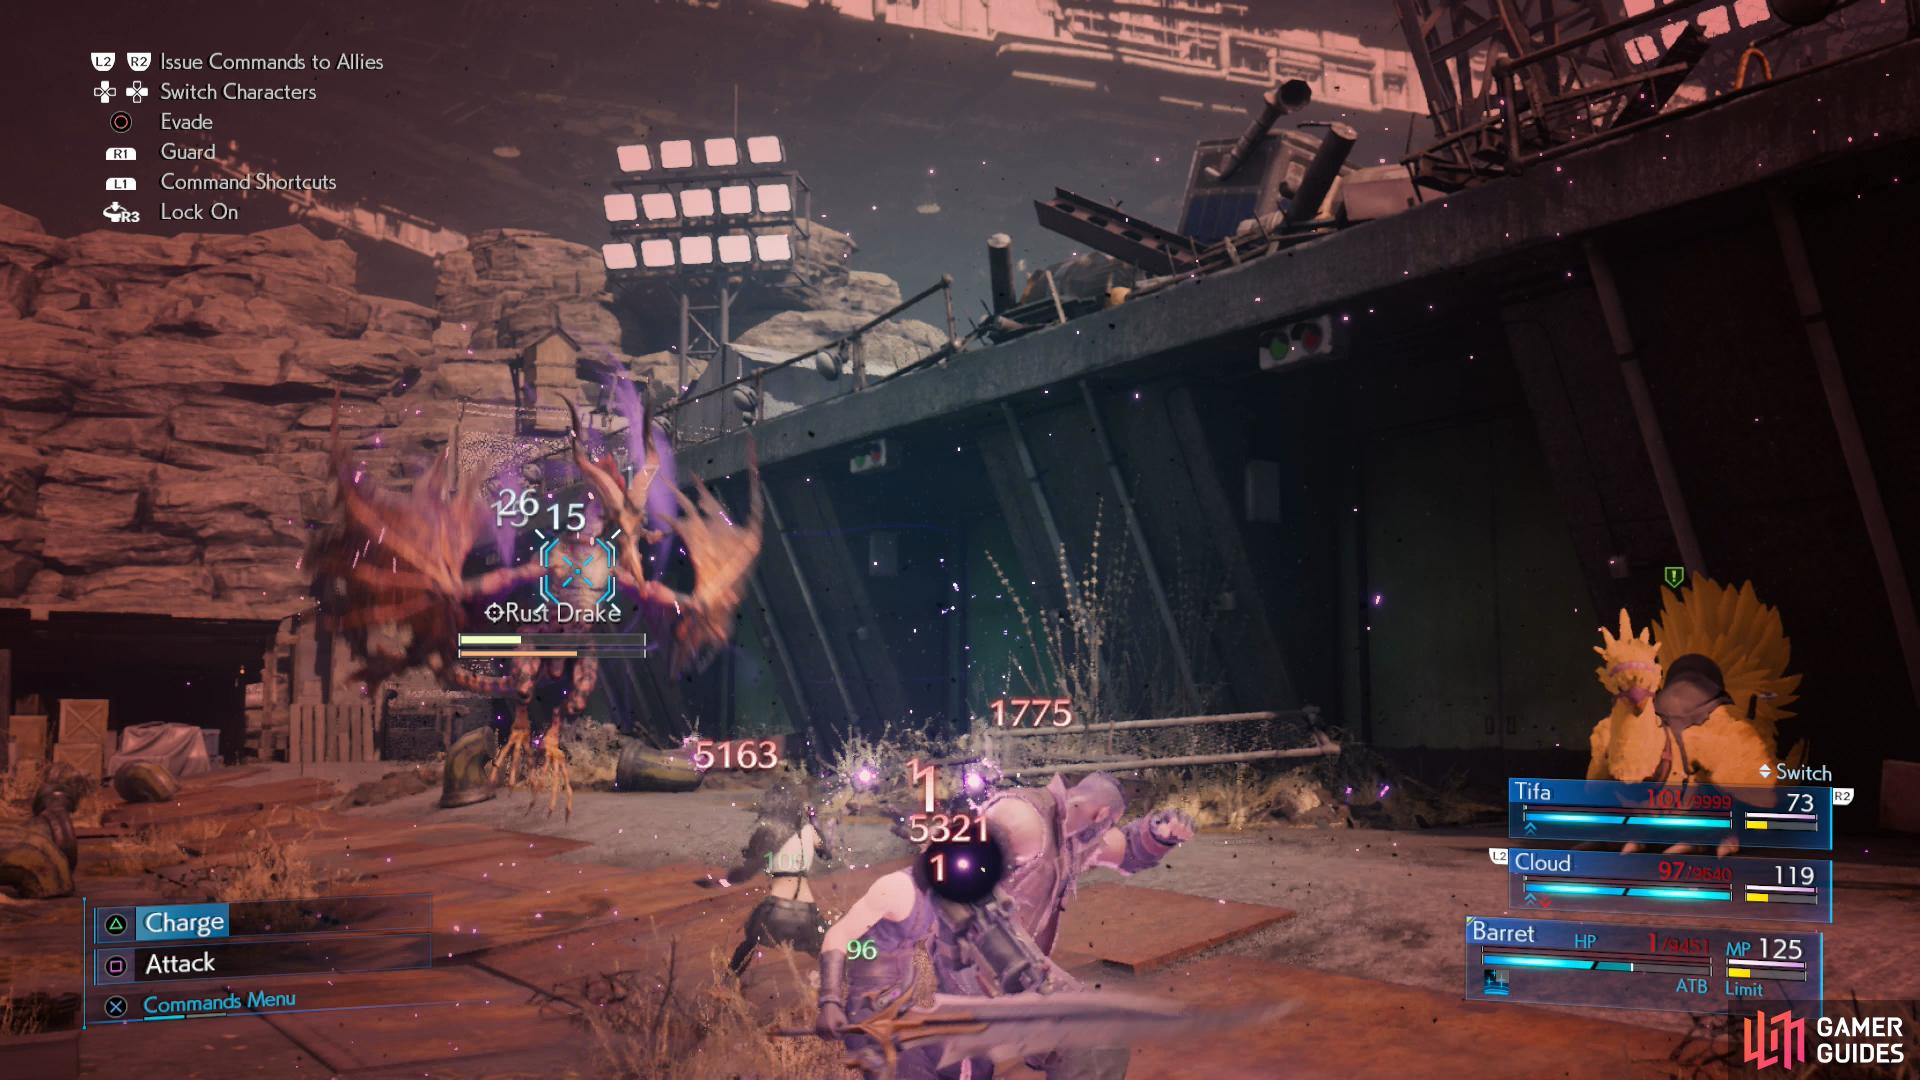
The Rust Drake will inflict heavy damage with attacks like “Gravity”, but since it’s proportional damage, it can’t kill you.
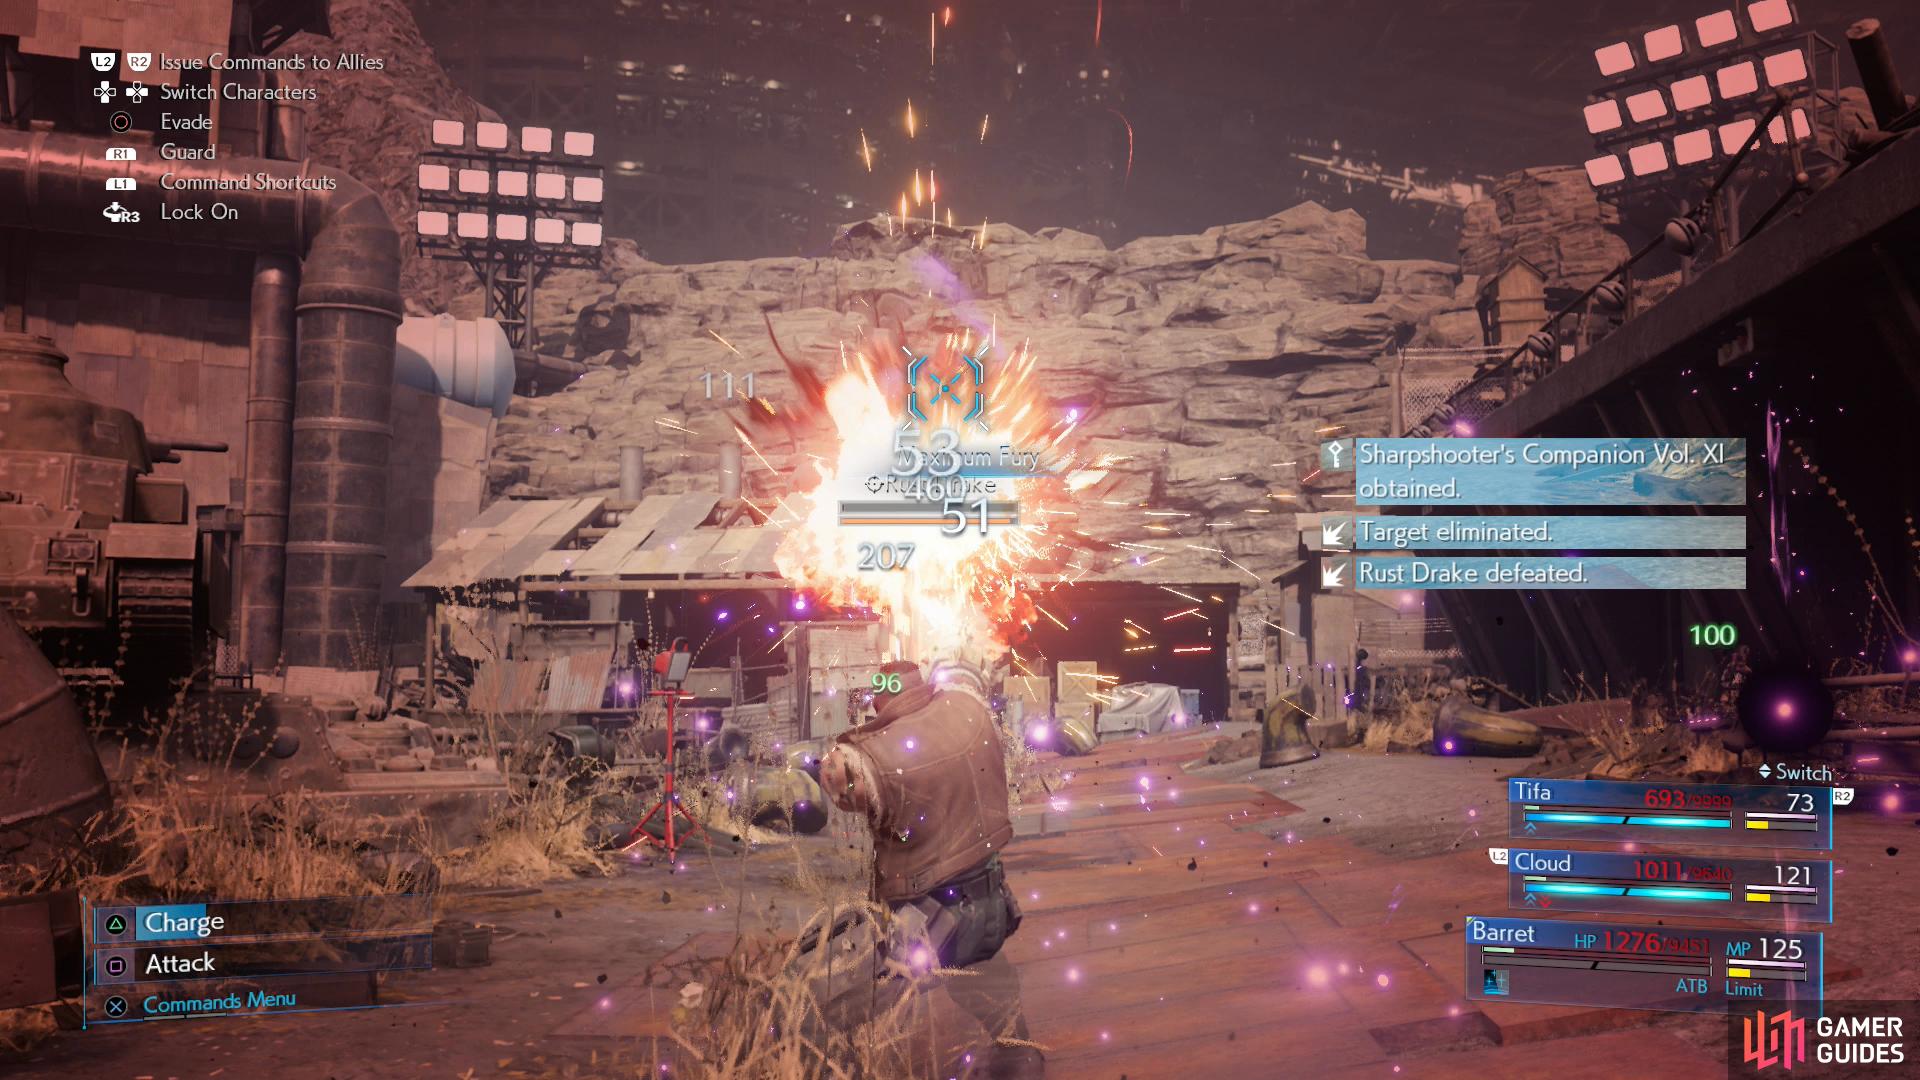
As long as you’re protected from fire and heal yourself with Regen, Barret should be able to just gun the flying menace down.
Head to Nuts ‘n’ Bolts Hills to find a scared Chocobo. Before you fight it, ensure you have Healing + Magnify and Fire + Elemental (armor). With those preparations in place you should find the fight with the Rust Drake much easier. It deals heavy damage with its “Black Hole” and “Gravity” attacks, but they’re both proportional damage attacks - they can’t kill you. Start out by casting Regen, and just keep shooting with Barret. If you have Fire + Elemental equipped, it’ll cause the Rust Drake’s fire breath attack to become a source of healing. Don’t worry about your HP (you can always return to a rest bench and heal) and gun the monster down to win the Sharpshooter’s Companion Vol. XI Manuscript.
| Cloud | . |
|---|---|
| Weapon: | Twin Stinger |
| Armor: | Chain Bangle |
| Accessory: | Circlet |
| Useful Materia: | Wind + Elemental (armor), Poison, Healing + Magnify, Revive, ATB Stagger, Magic Up, HP Up |
| Tifa | . |
|---|---|
| Weapon: | Purple Pain |
| Armor: | Cog Bangle |
| Accessory: | Champion Belt |
| Useful Materia: | Wind + Elemental (armor), Poison, Healing, Revive, ATB Stagger, HP Up |
| Barret | . |
|---|---|
| Weapon: | Light Machine Gun |
| Armor: | Cog Bangle |
| Accessory: | Champion Belt |
| Useful Materia: | Poison, Healing, Revive, ATB Stagger, HP Up |
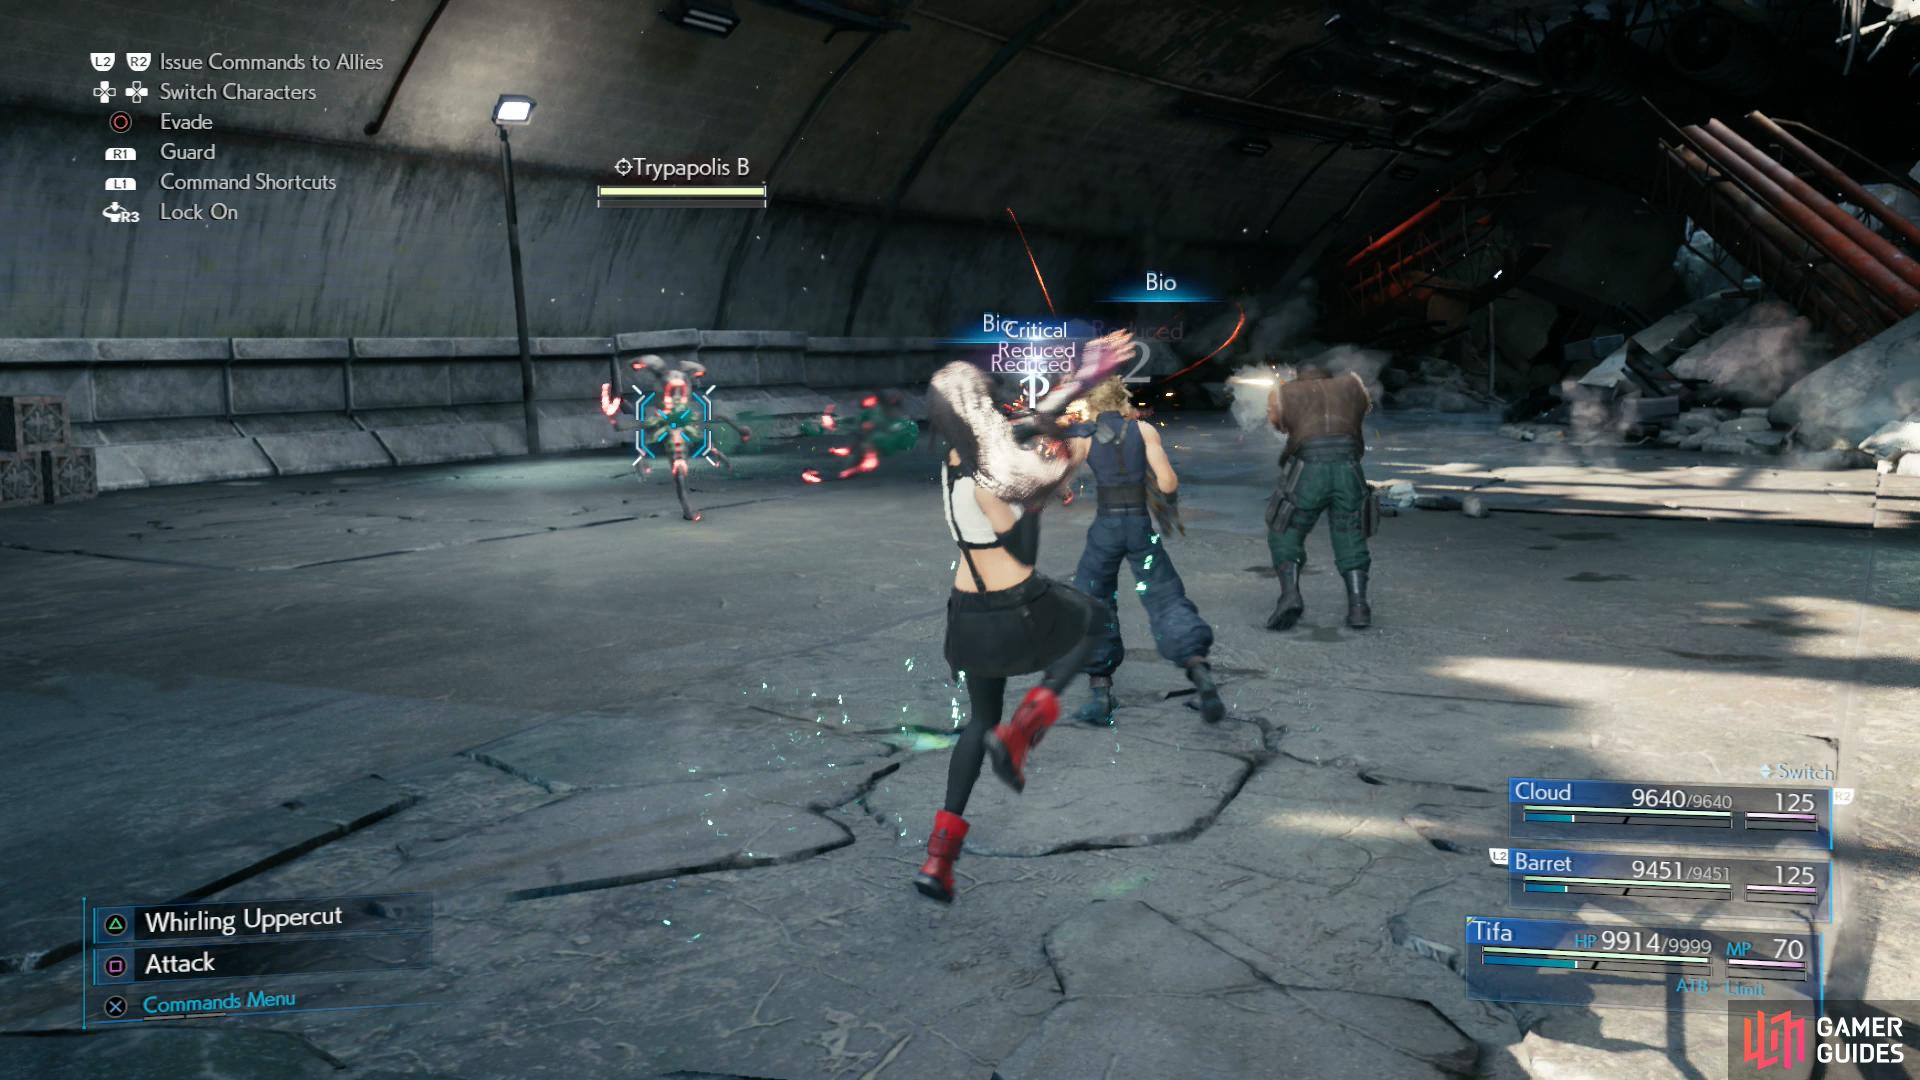
Next you’ll have to make your way to the Collapsed Expressway, where you’ll find a second Chocobo. Equip Poison Materia and perhaps Wind + Elemental (armor) before talking to the Chocobo, as you’ll have to fight three Trypapolis enemies. Hit them with Bio as the fight starts, then keep attacking. If one starts to cast Aeroga, hit it with a powerful attack like “Omnistrike” to interrupt it - in fact, spamming “Omnistrike” isn’t a bad idea for dealing damage to them. The best way to harm them is by defeating the Proto-Trypapolis clones they’ll create, but be wary, they’ll attempt to grapple foes and self destruct. For defeating these foes you’ll obtain the Way of the Fist Vol. XI Manuscript.
| Cloud | . |
|---|---|
| Weapon: | Twin Stinger |
| Armor: | Chain Bangle |
| Accessory: | Protective Boots |
| Useful Materia: | Subversion + Warding, Healing + Magnify, Revive, ATB Stagger, Magic Up, HP Up |
| Tifa | . |
|---|---|
| Weapon: | Purple Pain |
| Armor: | Cog Bangle |
| Accessory: | Protective Boots |
| Useful Materia: | Subversion + Warding, Healing, Revive, ATB Stagger, HP Up |
| Barret | . |
|---|---|
| Weapon: | Light Machine Gun |
| Armor: | Cog Bangle |
| Accessory: | Protective Boots |
| Useful Materia: | Healing, Revive, ATB Stagger, HP Up |

With Subversion + Warding materia you can ignore most of the Tonberry’s attacks and focus on Staggering it.
Once Staggered, Tifa can inflict massive damage with her ki abilities.
Malicious Goons
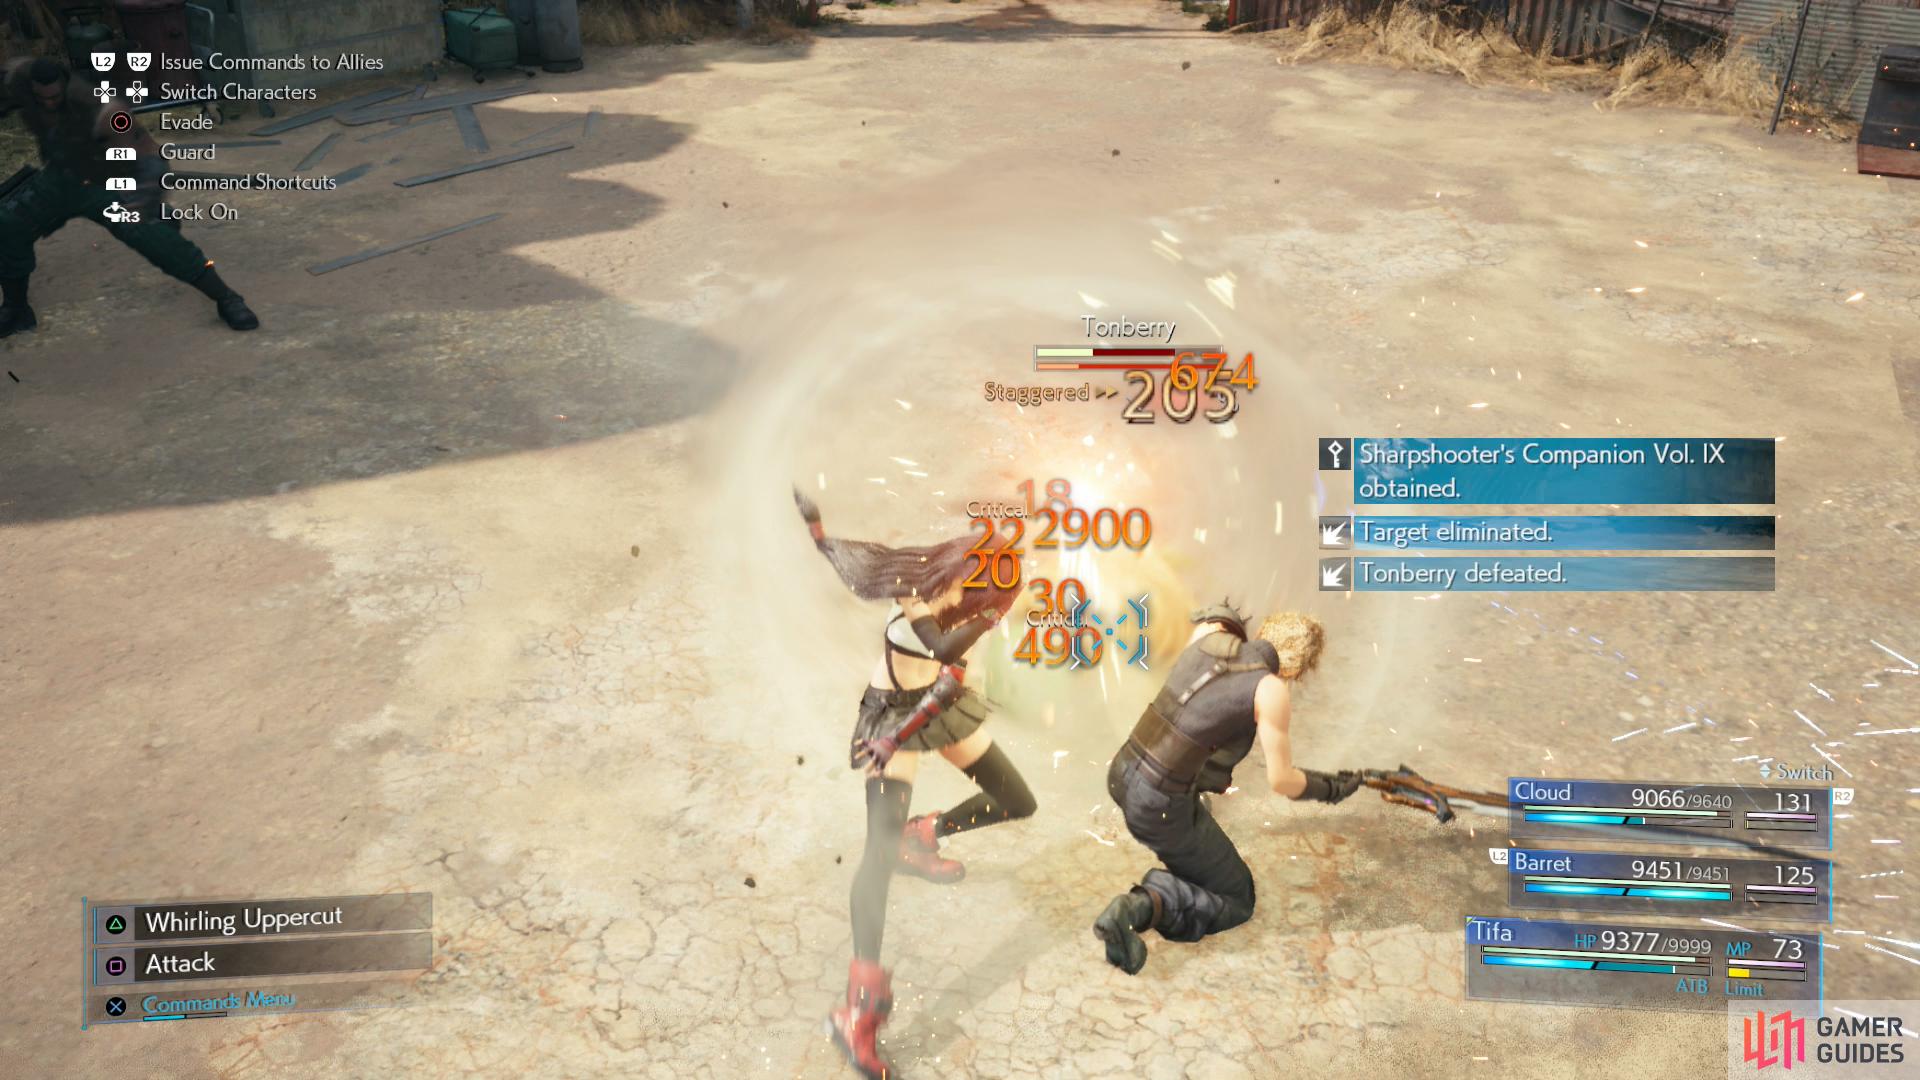
One of the easier Manuscripts to obtain, if you prepare anyways. Start the quest Malicious Goons by talking to Madam M, then head to the arena in Petal Lane (the road that connects Aerith’s house to the Center District). Here you’ll find the thugs mentioned by Madam M, and they’ll waste little time in siccing a The Tonberry on you.
These nasty critters can inflict “Instant Death” with a variety of attacks, most commonly “Chef’s Knife”. Equip Subversion + Warding on two of your attackers (we went with Cloud and Tifa), however, and you’ll be fine. You can also equip Protective Boots if you want to negate their ability to inflict “Stop”, in which case their only means of attack will be “Scourge” (sadly you can’t mitigate this attack’s ability to stun) and the brute damage inflicted by “Chef’s Knife”, which is pretty paltry.
Once in combat, attack with your protected characters, attempt to Stagger the Tonberry, and when it’s Staggered punish it to the full extent of your capabilities. It’s really that simple. Once it falls you’ll obtain the Sharpshooter’s Companion Vol. IX Manuscript.
| Cloud | . |
|---|---|
| Weapon: | Twin Stinger |
| Armor: | Chain Bangle |
| Accessory: | Circlet |
| Useful Materia: | Fire + Elemental (armor), Ice, Healing + Magnify, Revive, ATB Stagger, Magic Up, HP Up |
| Tifa | . |
|---|---|
| Weapon: | Purple Pain |
| Armor: | Cog Bangle |
| Accessory: | Champion Belt |
| Useful Materia: | Fire + Elemental (armor), Ice, Healing, Revive, ATB Stagger, HP Up |
| Barret | . |
|---|---|
| Weapon: | Light Machine Gun |
| Armor: | Cog Bangle |
| Accessory: | Champion Belt |
| Useful Materia: | Ice, Poison, Time, Healing, Revive, ATB Stagger, HP Up |
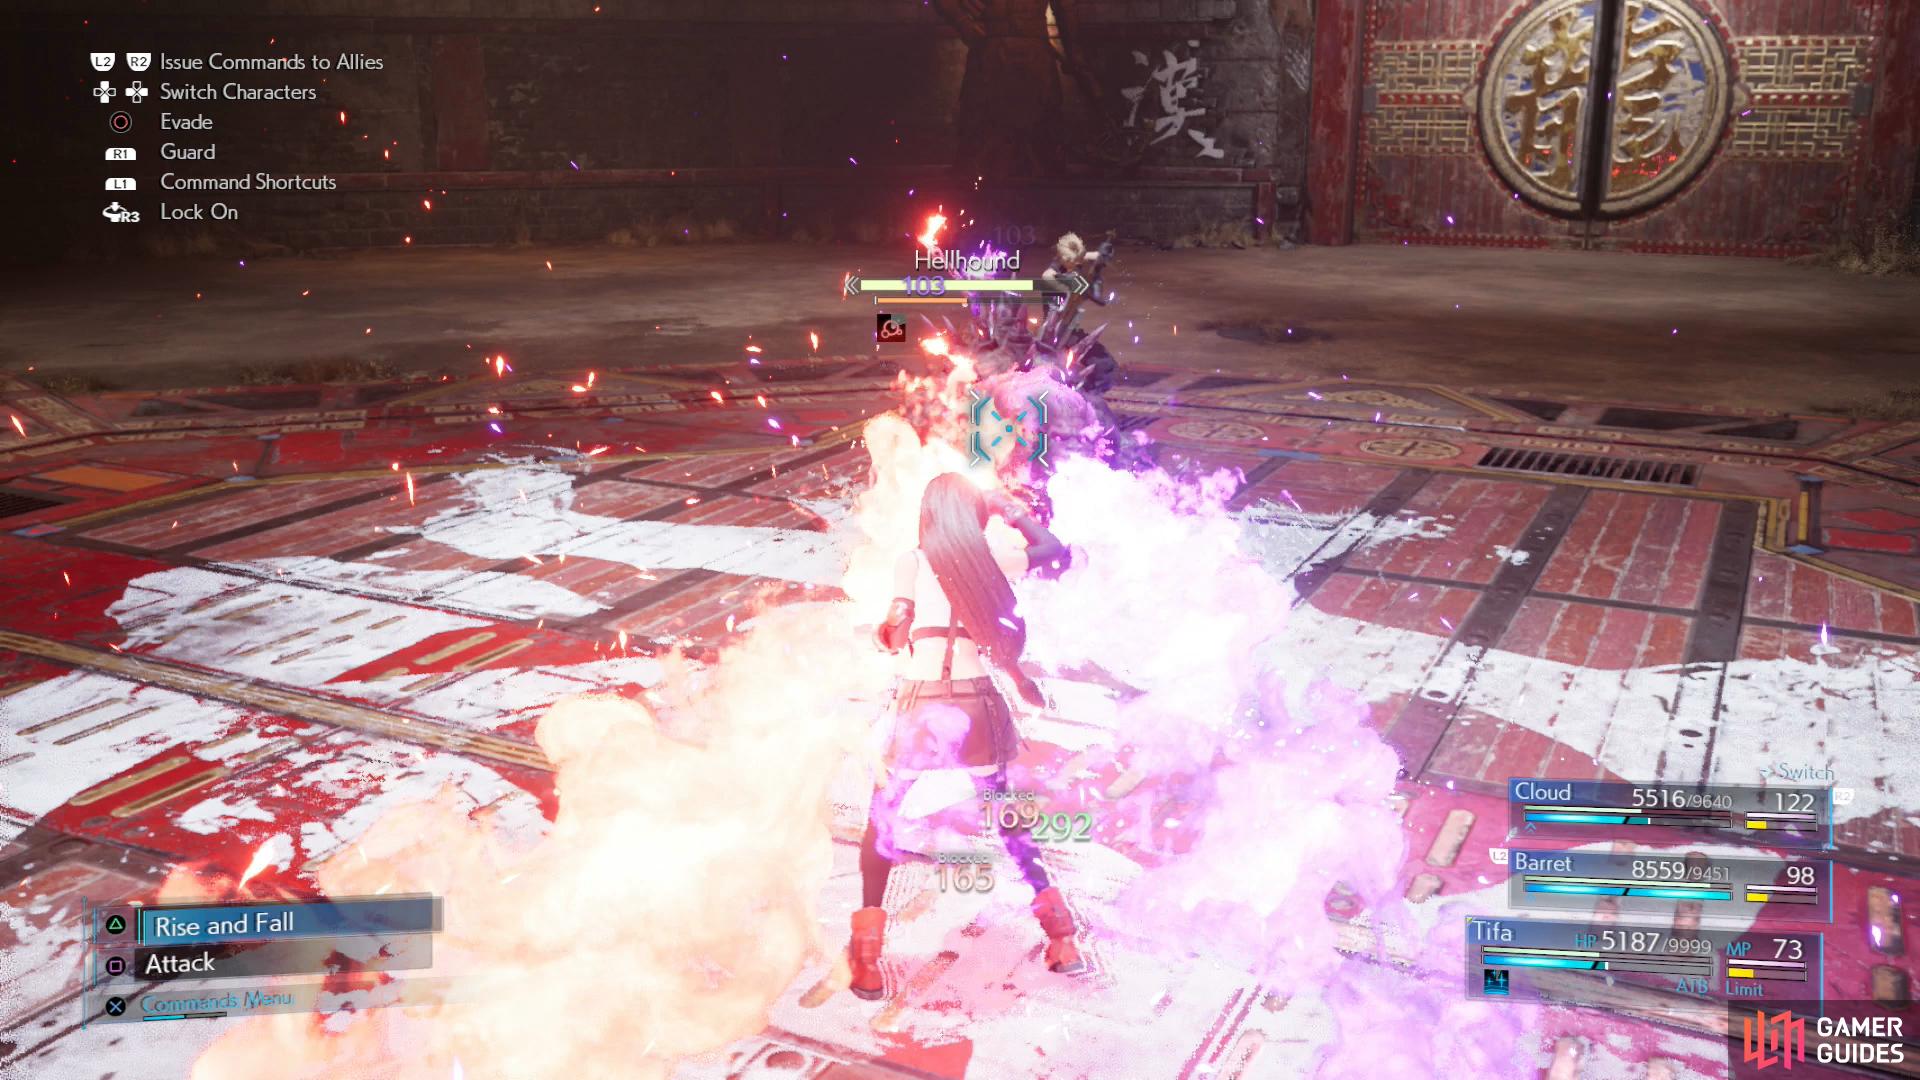
(1 of 5) Elemental materia will protect you from the orange flames, but not the purple flames.
Tomboy Bandit
For the quest Tomboy Bandit you’ll need to talk to Johnny at the southeastern end of the Sector 5 Undercity Station area, then head to the Sector 5 Church and talk to Kyrie. Once done, head to the Underground Colosseum in Sector 6 and start to special battle to find yourself in a fight with the Beastmaster and a Hellhound.
Fire + Elemental (armor) will help mitigate the Hellhound’s damage, but you should also considering bringing Ice Materia, Poison Materia and Time Materia. Dispatch the Beastmaster quickly (two “Omnistrikes” should suffice) then focus on the Hellhound. Inflict it with “Poison”, then lay into the Hellhound with physical attacks, preferably by a character protected from fire. The Hellhound will use two forms of flame, normal fire (orange) and an infernal purple flame, the latter of which will not be mitigated by resistance to fire. The former will, however, and it should provide some basic healing sufficient to hopefully mitigate some of the damage Hellhound deals, although Regen shouldn’t be abandoned. Attack, and whenever Hellhound is stationary hit it with Blizzara and it’ll become “Pressured”. Stagger it, then punish it with Tifa’s ki combo - repeat until you’re victorious.
For defeating the Hellhound you’ll obtain The Art of Swordplay Vol. XI.
| Cloud | . |
|---|---|
| Weapon: | Twin Stinger |
| Armor: | Chain Bangle |
| Accessory: | Champion Belt |
| Useful Materia: | Healing + Magnify, Revive, Barrier, Steadfast Block, ATB Stagger, Magic Up, HP Up |
| Tifa | . |
|---|---|
| Weapon: | Purple Pain |
| Armor: | Cog Bangle |
| Accessory: | Champion Belt |
| Useful Materia: | Healing, Revive, Barrier, Steadfast Block, ATB Stagger, HP Up |
| Barret | . |
|---|---|
| Weapon: | Light Machine Gun |
| Armor: | Cog Bangle |
| Accessory: | Champion Belt |
| Useful Materia: | Healing, Revive, Barrier, Steadfast Block, ATB Stagger, HP Up |
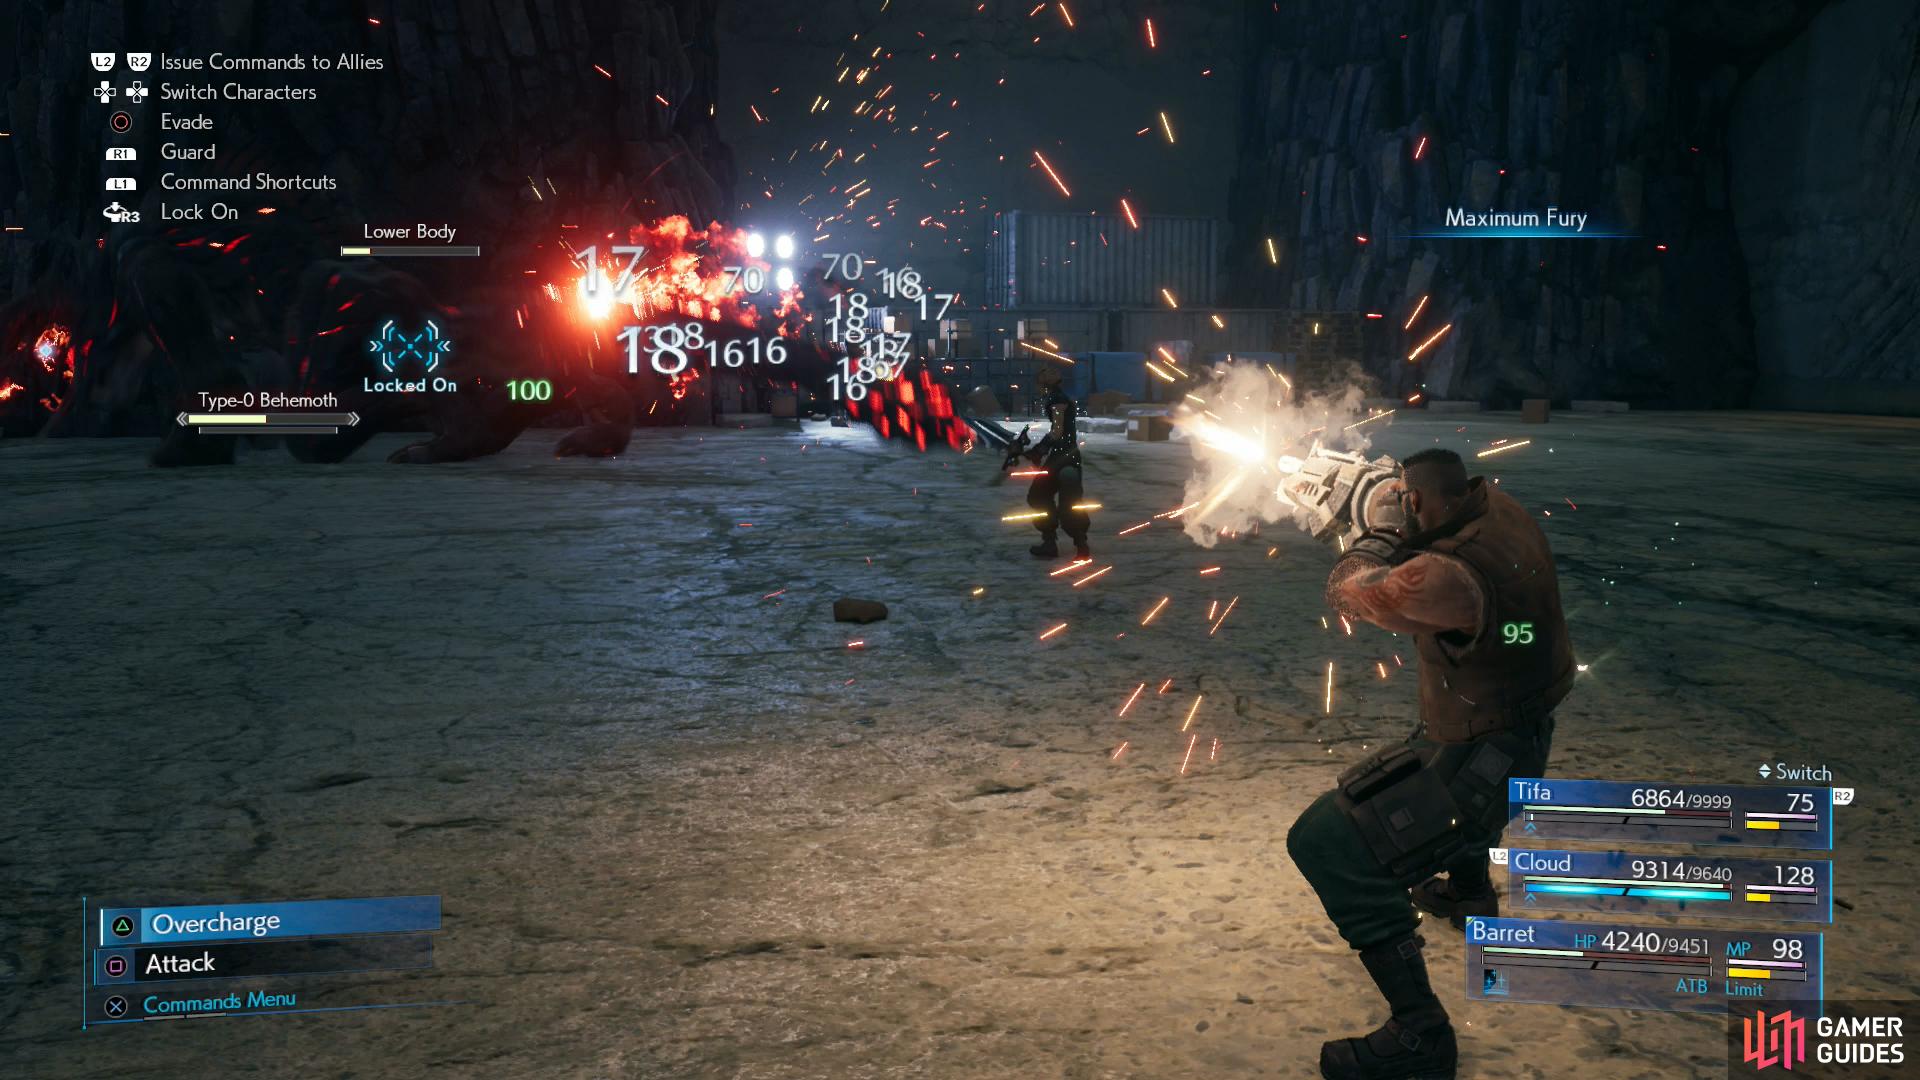
(1 of 4) Target the Behemoth’s upper and lower body, weakening both with the goal of disabling both at the same time.
Subterranean Menace
Probably the most difficult side quest in this chapter, for Subterranean Menace you’ll need to talk to Wymer in Evergreen Park, then descend into the Underground Laboratory. The most annoying part of this quest isn’t the fight with the Type-0 Behemoth, it’s actually all the encounters along the way. To reach the chamber where the Behemoth dwells you’ll need to get past several groups of enemies:
-
2x Varghidpolis and a Wrath Hound (you can actually just run past these enemies).
-
2x Mark II Monodrives and a Sweeper.
-
2x Bloodhounds.
-
3x Ringmaws.
Get past all those foes, then set your materia up for the fight with the Type-0 Behemoth. It’s not a terribly difficult foe, even on Hard difficulty. Don’t use offensive magic on it while its horns are intact, and you can’t damage the horns easily until it’s Staggered. Cast Regen on the part at the start of the fight, switch characters often to mitigate the enemy’s aggro and attack the upper body and lower body evenly, then try to take them both out. Doing this should Stagger the Behemoth, allowing you to attack the horns. When it activates “Rampage”, just run around and try to avoid fighting it - you’ll take more damage than you need to in this phase if you slug it out with the Behemoth, but wasting time will cause it to calm down - and keep healed and the Behemoth should fall before long. For defeating the Type-0 Behemoth you’ll obtain the Sharpshooter’s Companion Vol. X Manuscript.
| Cloud | . |
|---|---|
| Weapon: | Twin Stinger |
| Armor: | Chain Bangle |
| Accessory: | Circlet |
| Useful Materia: | Fire + Magnify, Healing, Revive, ATB Stagger, Magic Up, HP Up |
| Tifa | . |
|---|---|
| Weapon: | Purple Pain |
| Armor: | Cog Bangle |
| Accessory: | Champion Belt |
| Useful Materia: | Fire, Time, Healing, Revive, ATB Stagger, HP Up |
| Barret | . |
|---|---|
| Weapon: | Light Machine Gun |
| Armor: | Cog Bangle |
| Accessory: | Champion Belt |
| Useful Materia: | Fire + Elemental (weapon), Healing, Revive, ATB Stagger, HP Up |
Corneo’s Secret Stash
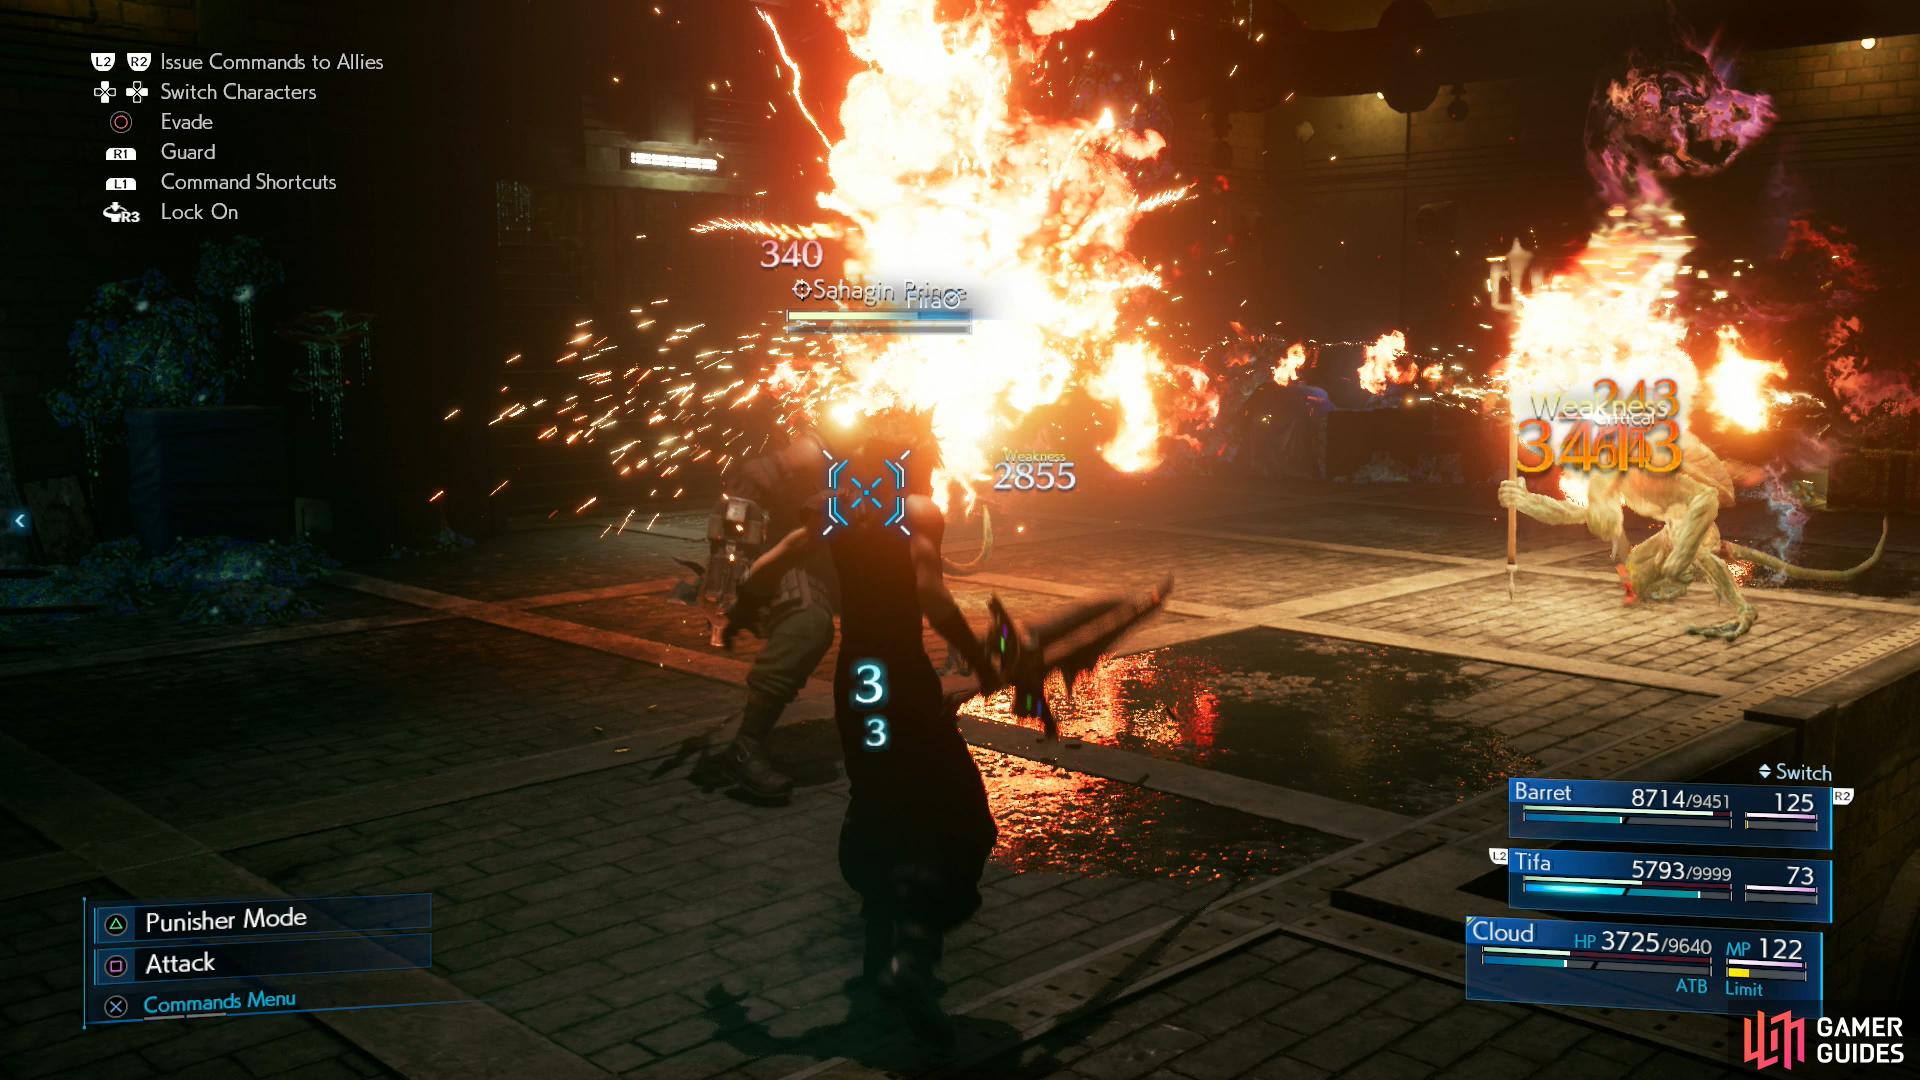
Head to the Sector 5 Church and talk to Damon outside to start Corneo’s Secret Stash. While you can start this quest early, it’ll be a while before you’ll finish it, as you’ll need to advance the main story considerably to do so.
Loot the first two caches along the northern end of the Collapsed Expressway - Caved-In Tunnel area (Sector 6) and in the Steel Mountain area (Scrapyard, Sector 5). Surprisingly you can score another chunk of Prayer Materia and another Circlet by doing this, which is oddly generous for Hard difficulty.
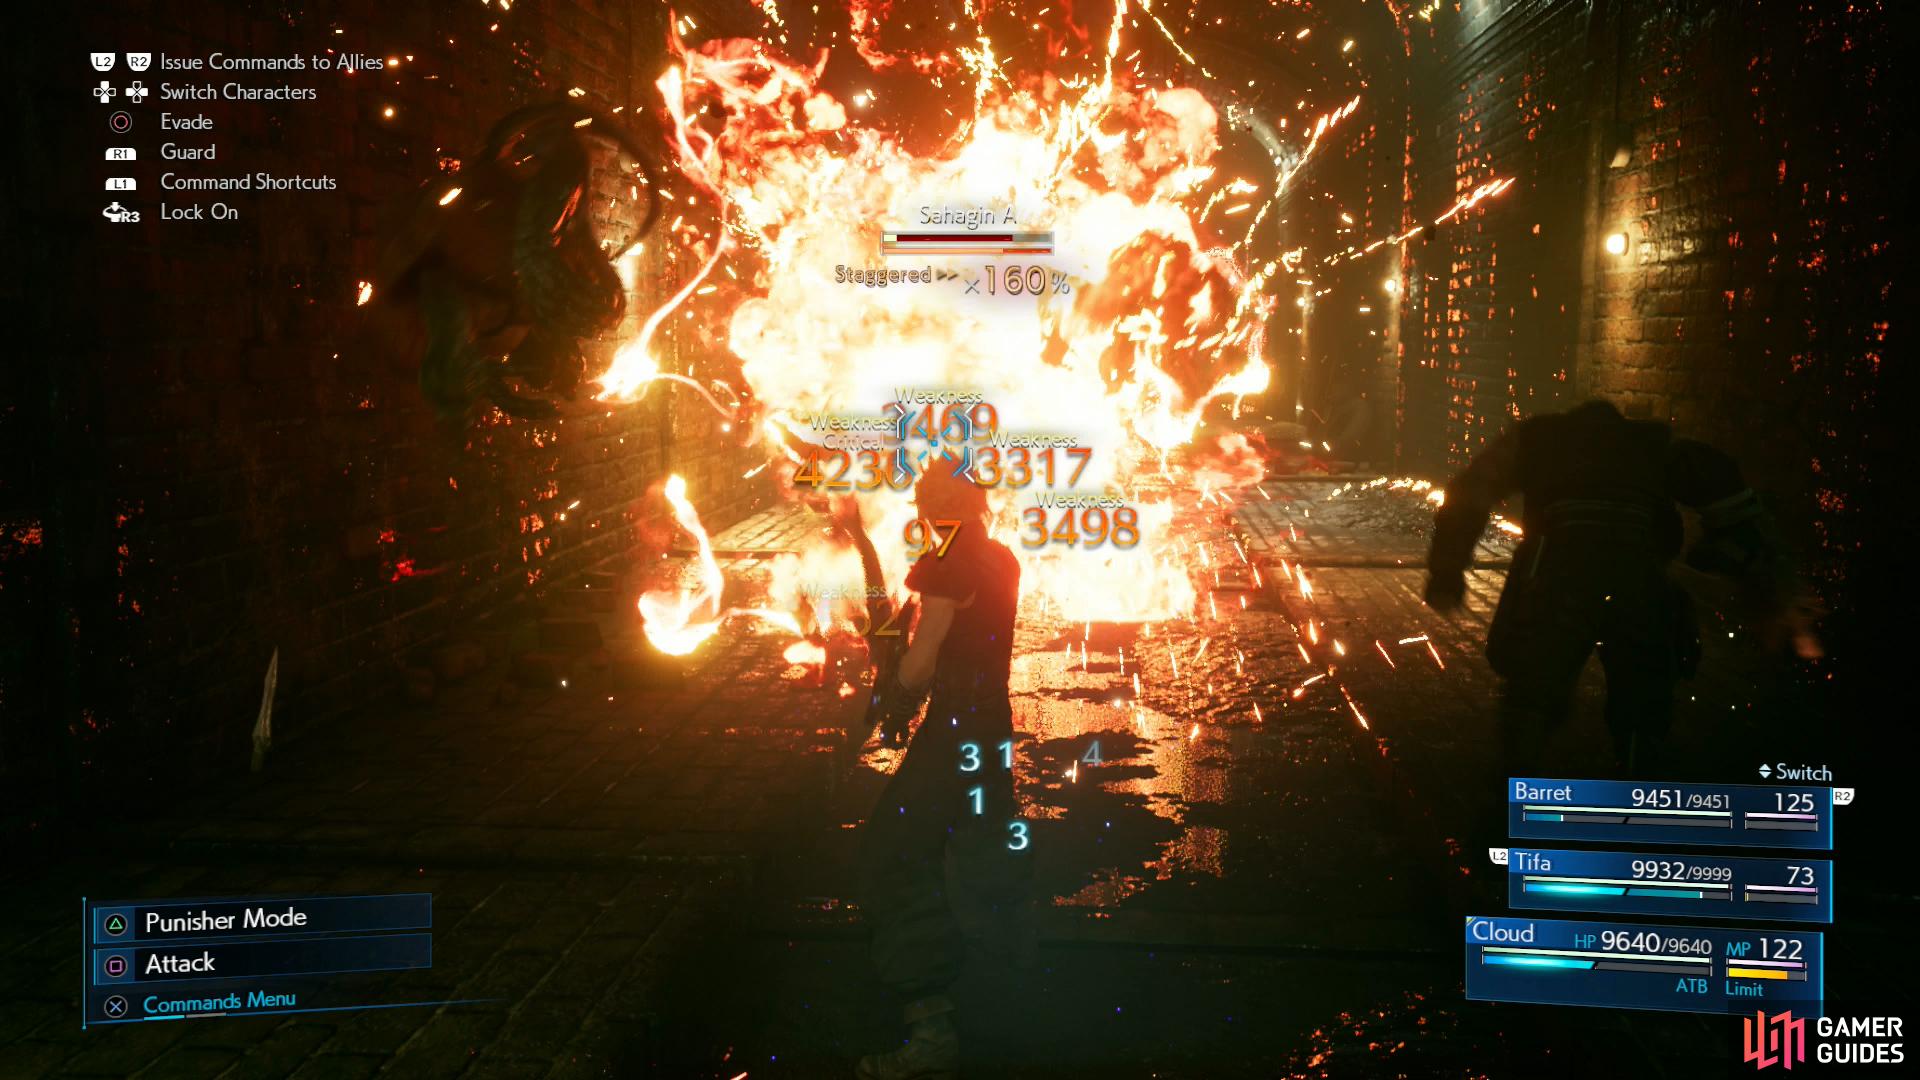
Descend into the Underground Waterway and fight through the linear passages ahead until you defeat the Mischievous Shoat, after which you can flip a switch near a ladder to drain some water, then explore the drained chamber to find the third stash. Alas, this one is guarded by a Sahagin Prince and two Sahagins. Blast them all with Fira + Magnify until the Sahagin are dead, then keep attacking the Sahagin Prince until it’s “Pressured”. Hit it with Stop, then quickly fill its Stagger gauge, after which you can finish it off with “Starshower”, “Rise and Fall” and “Omnistrike”, along with other powerful attacks.
For defeating the Sahagin Prince you’ll obtain the Way of the Fist Vol. XII Manuscript.
| Cloud | . |
|---|---|
| Weapon: | Twin Stinger |
| Armor: | Chain Bangle |
| Accessory: | Circlet |
| Useful Materia: | Fire + Magnify, Fire + MP Absorption, Healing, First Strike, ATB Stagger, Magic Up, HP Up |
| Tifa | . |
|---|---|
| Weapon: | Purple Pain |
| Armor: | Cog Bangle |
| Accessory: | Champion Belt |
| Useful Materia: | Fire + Elemental (weapon), Healing, Revive, ATB Stagger, HP Up |
| Barret | . |
|---|---|
| Weapon: | Light Machine Gun |
| Armor: | Cog Bangle |
| Accessory: | Champion Belt |
| Useful Materia: | Fire + Elemental (weapon), Healing, Revive, First Strike, ATB Stagger, HP Up |
Underground Waterway
-
Go through Corneo’s Mansion and descend into the Underground Waterway. As you progress through the sewers, defeat the various foes that you encounter, including Sahagins, Blugus, Wererats and Scissorclaws. We use Cloud as a dedicated caster-blaster, using a combination of Fire + Magnify and Fire + AP Absorption to dispatch most foes, then chip away at the surprisingly resilient Sahagin with powerful attacks like “Omnistrike”. If you went out of your way to obtain Gotterdammerung earlier, tossing it on Barret and letting him “Catastrophe” his way through this mobs also works.
-
You’ll get another rest bench after briefly passing through the Aqueduct 7-6 Trunk Line area, after which you’ll need to chase down the Abzu Shoat that makes off with Leslie’s “key”. Enemies ahead include Wererats, Sahagin, Blugus, Scissorclaws, and of course, Abzu Shoats. The same strategy applies, here, Fira + Magnify any time there’s a tempting cluster of foes, powerful attacks like “Triple Slash”, “Omnistrike” and “Maximum Fury” otherwise.
-
When you reach the Mischievous Shoat, treat it like a miniboss. Save your Fira + Magnify for when Abzu Shoat reinforcements arrive, after which blast them, then try to Stagger the Mischievous Shoat. Once Staggered, hit it with Tifa’s full boss-beating combo: “Starshower”, “Rise and Fall” and “Omnistrike” - it’s more durable than you think.
-
Now is the time to take a detour to complete Corneo’s Secret Stash, if you care to do so. Otherwise, follow Leslie, use the rest bench he leads you to, and continue on to fight the boss of the chapter, Abzu and Abzu Shoats. As usual, the Hard difficulty strategy for this boss will be found on its own page. For defeating Abzu and the accompanying Abzu Shoats you’ll earn the Way of the Fist Vol. IX Manuscript.
After escaping the Underground Waterway, you’ll just need to head to the southern end of the Urban Development District area to leave the slums behind and advance to Chapter 15.
No Comments