

After boarding the train at the Sector 7 Slums you’ll find yourself with time to spare before you reach your destination.
All Aboard for Sector 4
| Enemy | Weaknesses | Notable Loot |
|---|---|---|
| Slug-Ray | Lightning, Wind | Orb of Gravity |
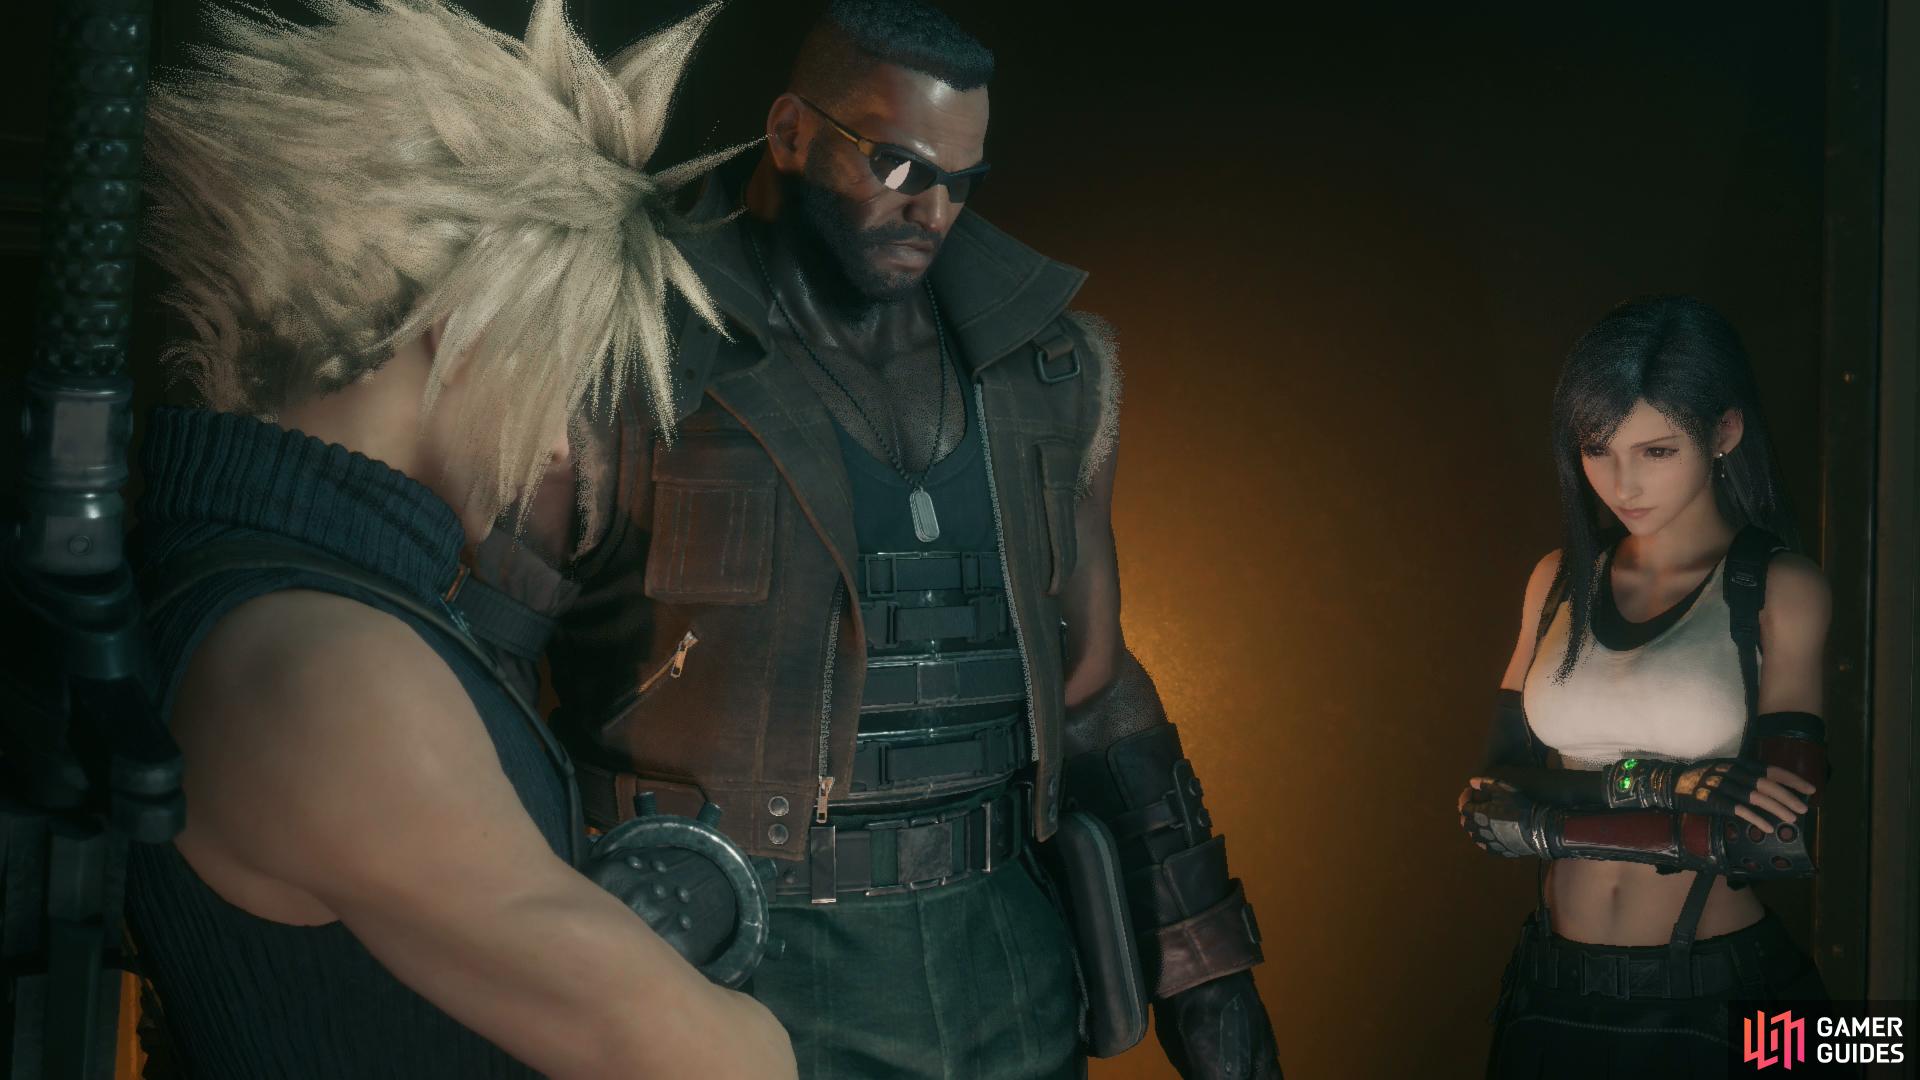
Head forward to speak to a very nervous Tifa and then head to the next car to check in on Barret, who just so happens to be involved in another confrontation with the Shinra Middle Manager. Cloud chastising Barret, Barret singing the Final Fantasy VII victory theme. What a scene… Once you regain control, head over to the nearby Materia and pocket it for a Healing Materia. Make your way back to Tifa now as the plan hits a snag.
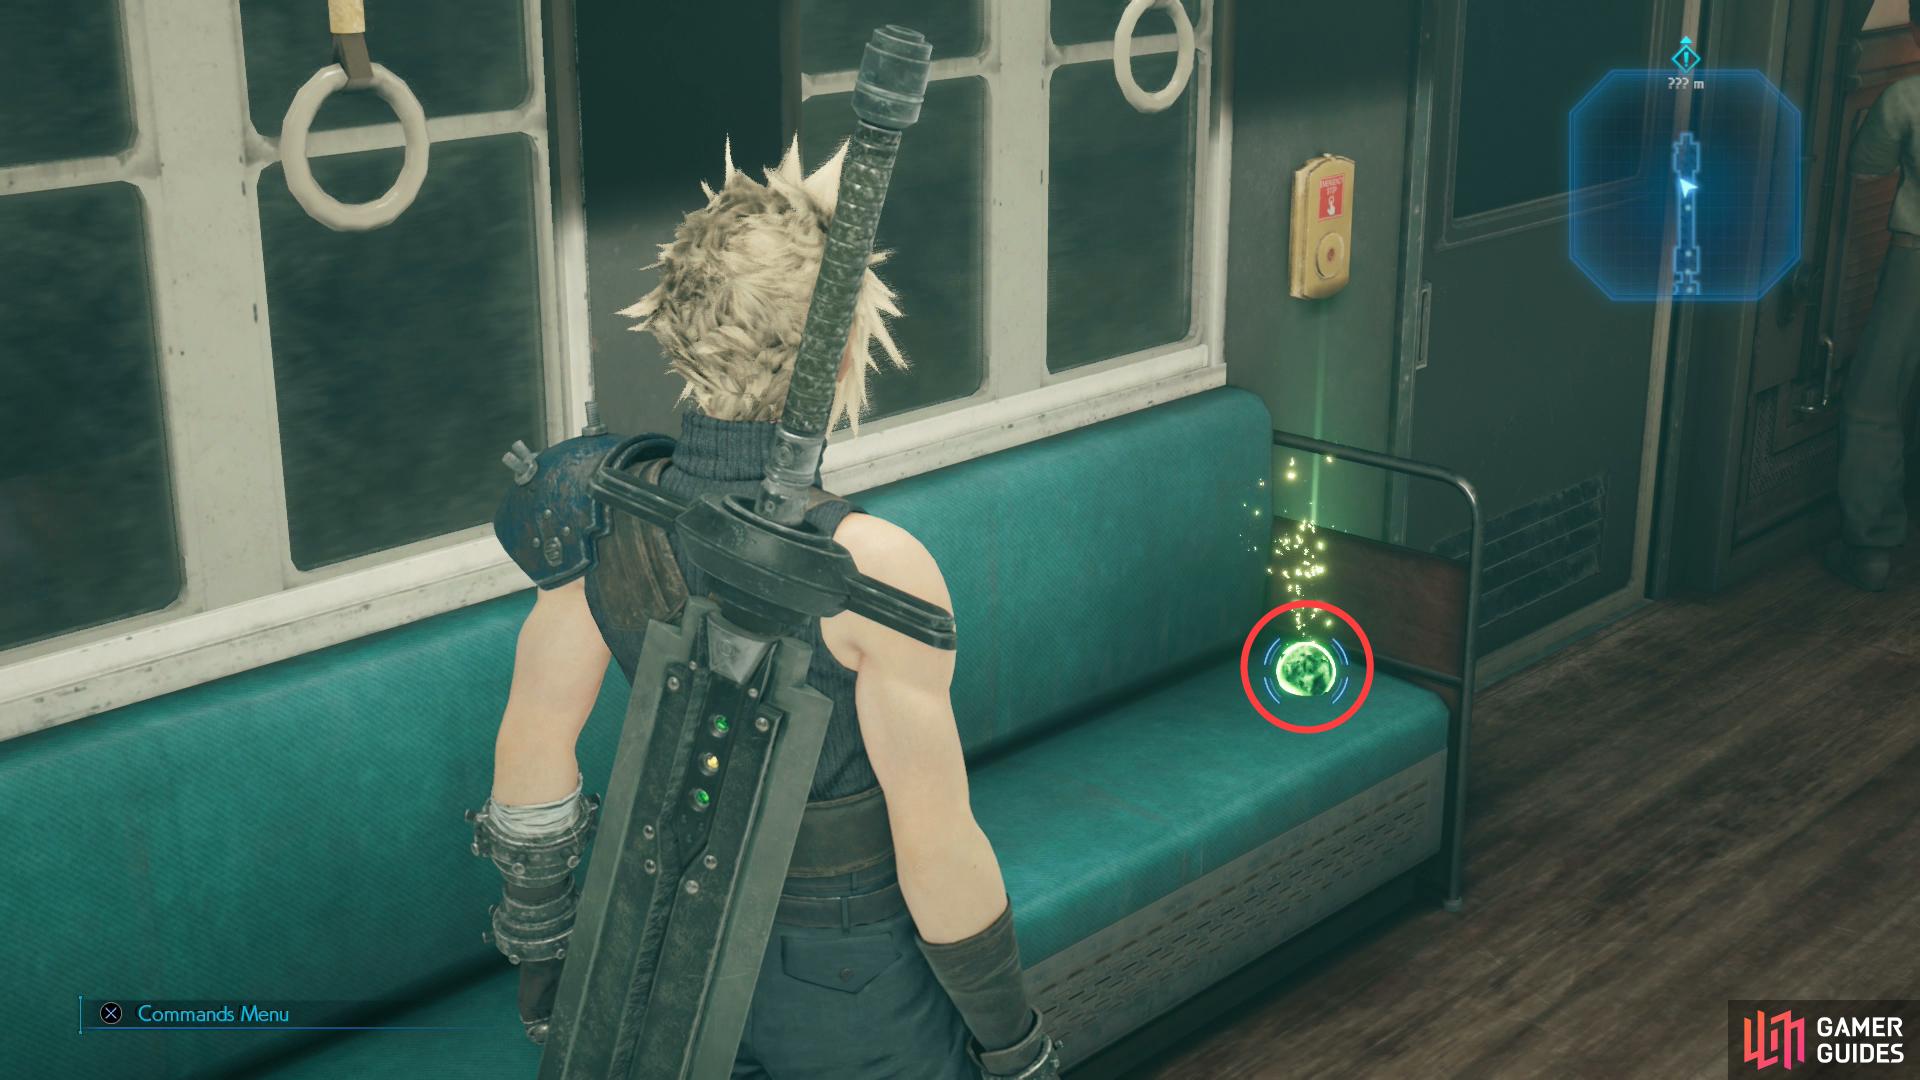
Grab some Healing Materia on the train,
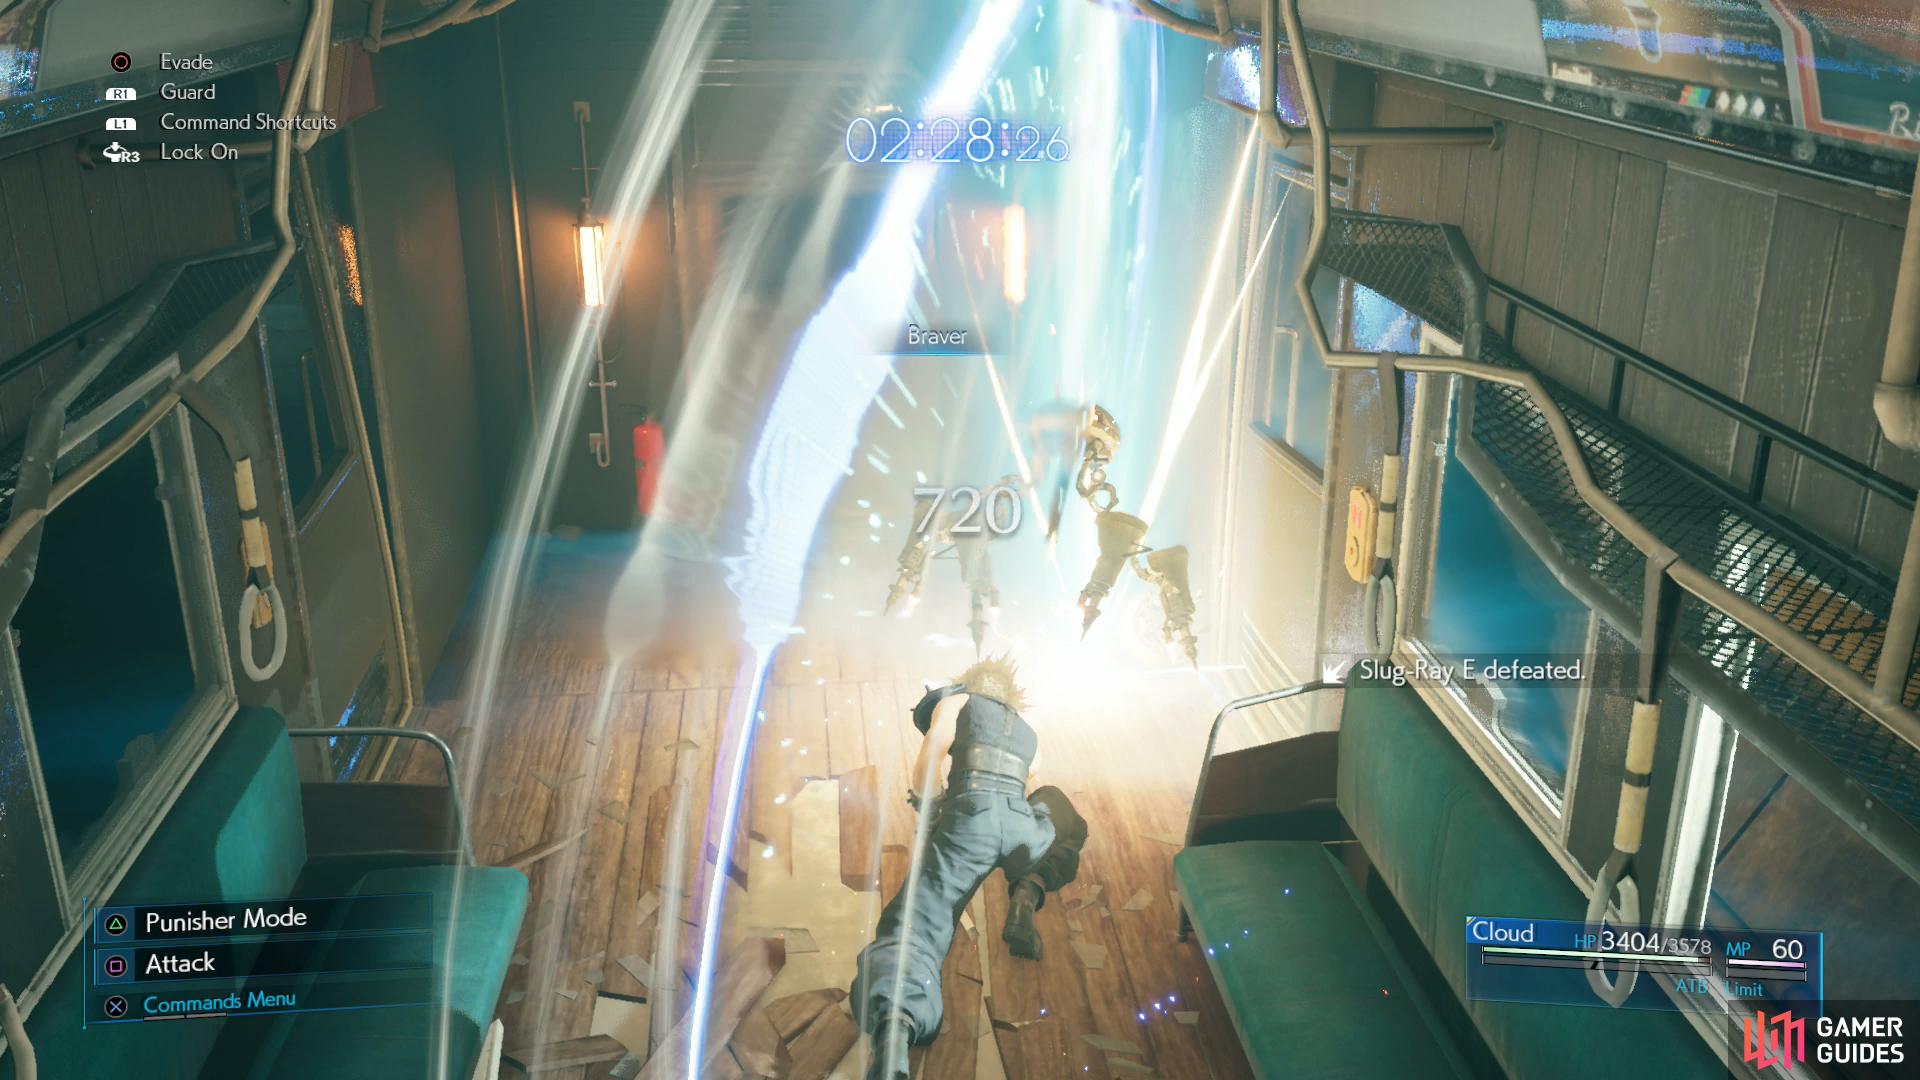
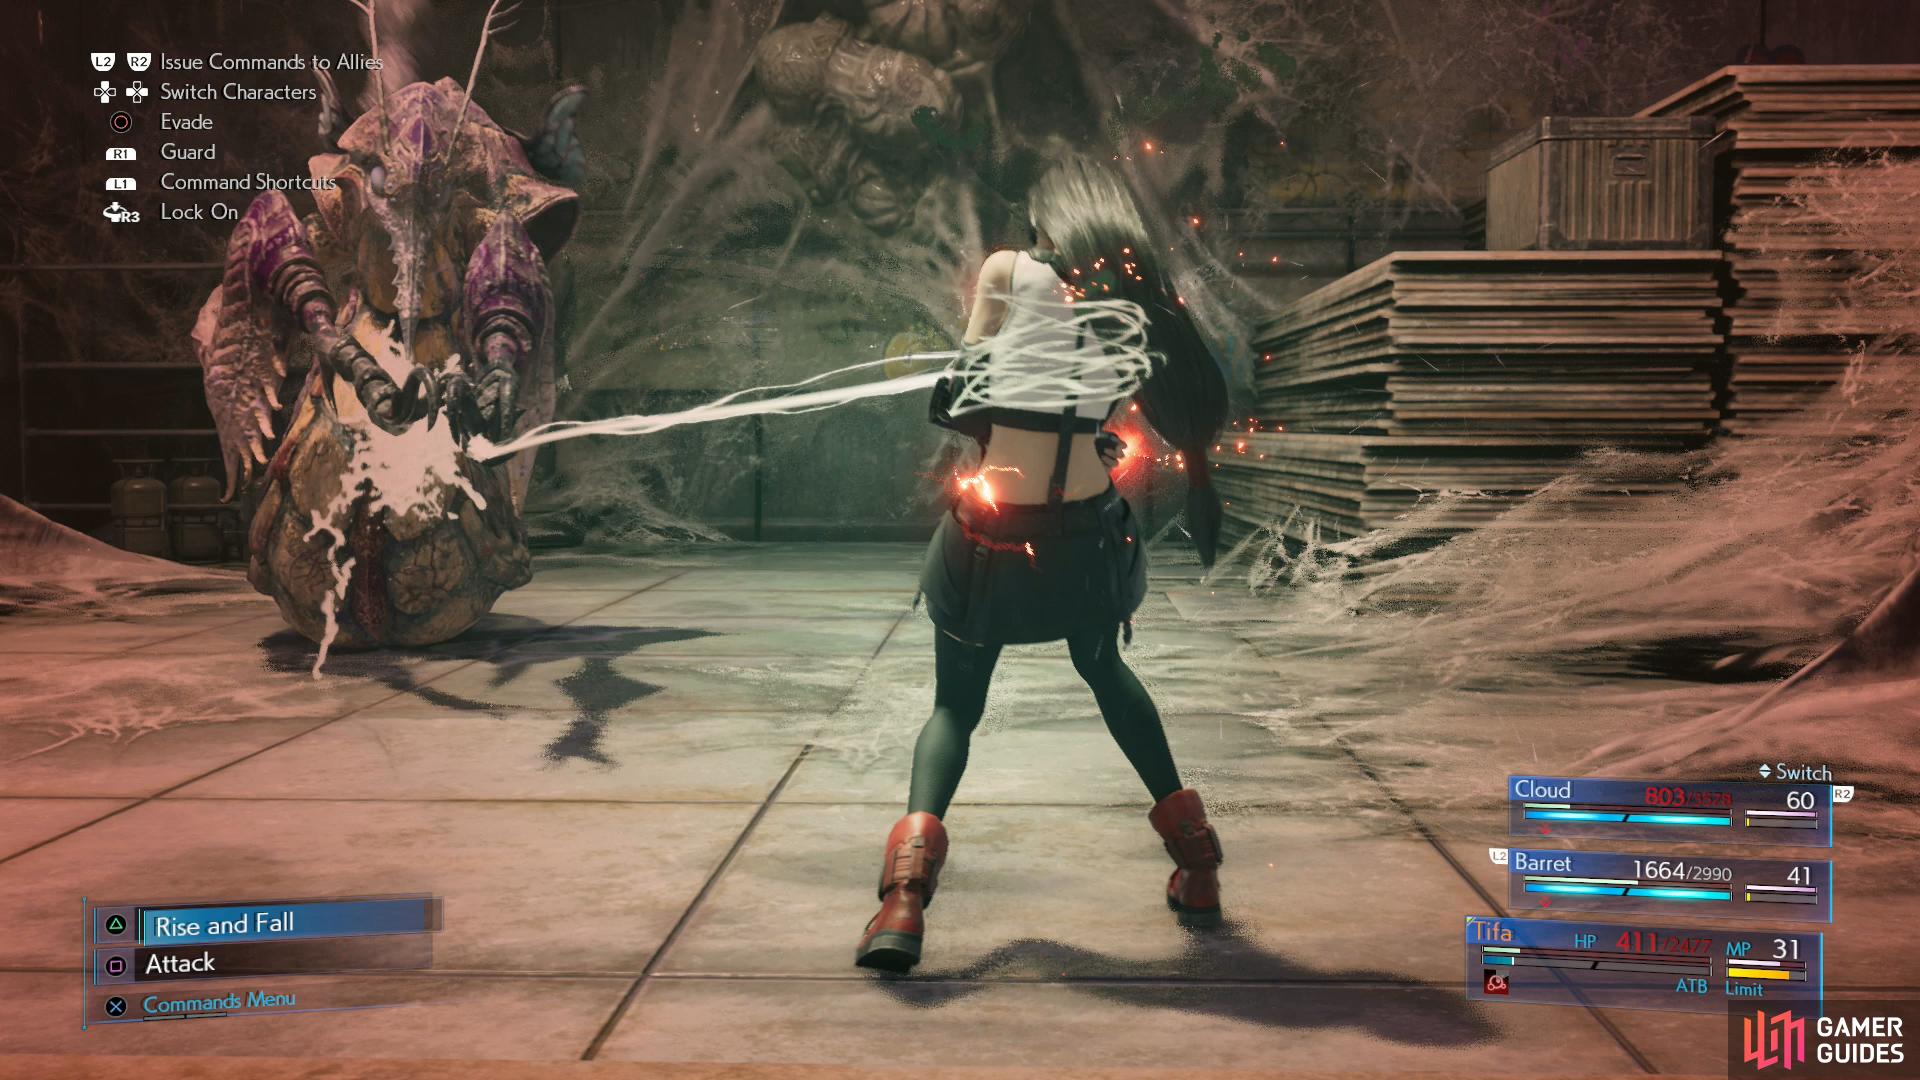
then fight off some Slug-Rays that invade the train.
You’ll find yourself (you only have Cloud available to you at this time) in battle against three Slug-Rays. These are unremarkable enemies that go down with a few sword strikes but you can make it even easier on yourself by using either Thunder or Aero. As you head towards the next car, you’ll be stopped in your tracks by another two Slug-Rays. You have three minutes to defeat these foes, but this is more of a nod at the original game’s timed train sequence than a time limit you’ll actually need to worry about - if it takes you anywhere near this long to defeat these foes, you might just be under-leveled. Once you take them down, proceed to the next car yourself and the group will be overwhelmed by the sheer numbers, leaving them to take drastic action. Once you land, Tifa will rejoin the party and you’ll need to dispatch another group of three Slug-Rays. If Cloud is dealing too much damage for you to Stagger them before they die, switch to Tifa - her attacks shouldn’t hit as hard, and she attacks faster, making her ideal for Staggering these bots.
Looking for a Friend
| Enemy | Weaknesses | Notable Loot |
|---|---|---|
| Slug-Ray | Lightning, Wind | Orb of Gravity |
| Security Officer | Fire | -- |
| Grenadier | Fire | -- |
Tifa and Cloud will be separated from Barret so the first order of business is to catch up to the Avalanche leader. Well, second order. He’ll be fine for a moment or two, right? Head south, then southwest down the tunnel to find a service door on the southern wall. Go through it and in a small room you’ll find some Shinra Boxes you can smash. If you keep following the tunnel southwest Tifa will pelt you with questions before ultimately demanding you turn back to help Barret. Worth a chuckle, eh? Return the way you came and note that to the northwest is a platform on which you’ll find a vending machine and a HP/MP restoring bench. How generous.
Railway Control C2 Vending Machine
| Item | Cost (Gil) |
|---|---|
| Potion | 50 |
| Phoenix Down | 300 |
| Antidote | 80 |
| Armor | Cost |
|---|---|
| Iron Bangle | 1,000 |
| Star Bracelet | 1,600 |
| Accessories | Cost |
|---|---|
| Power Wristguards | 800 |
| Bulletproof Vest | 800 |
| Earrings | 800 |
| Talisman | 800 |
| Revival Earrings | 500 |
| Materia | Cost |
|---|---|
| Healing Materia | 600 |
| Fire Materia | 500 |
| Ice Materia | 500 |
| Lightning Materia | 500 |
| Deadly Dodge Materia | 600 |
When you’re ready to move on, continue up the tunnel to the northeast. Keep a close eye to the east to spot a side path where you can smash another stack of Shinra Boxes and loot a chest containing 2 Hi-Potions. Head back to the tracks and continue your pursuit to the north where you’ll run into a group of Security Officers and Slug-Rays, focus on the nearby Slug-Rays before turning your attention to the grunts backing them up.
Continue following the tracks east and you’ll eventually catch up to Barret, who finds himself under fire on the other side of the fence. Head to the south side of the tunnel (opposite the fence) to find some stairs leading up and over to where Barret is battling against some Grenadiers and Slug-Rays. Dispatch the Grenadiers first followed by the Slug-Rays to reunite fully with Barret and have him officially rejoin the party. It’s been a while since you’ve had Barret with you so be sure to spend his SP (especially new Materia slots for his weapon!) and slot Materia on to him. First time you’ve had a full party, woo!
Find Stamp
| Enemy | Weaknesses | Notable Loot |
|---|---|---|
| Slug-Ray | Lightning, Wind | Orb of Gravity |
| Wererat | Ice | -- |
| Elite Grenadier | Fire | -- |
| Guard Dog | Ice | -- |
| Grashtrike | Ice | Spiderweb |
| Queen Grashtrike | Ice | Spiderweb |
| Flametrooper | Fire | -- |
| Sentry Launcher | Lightning | Orb of Gravity |
| Elite Security Officer | Fire | -- |
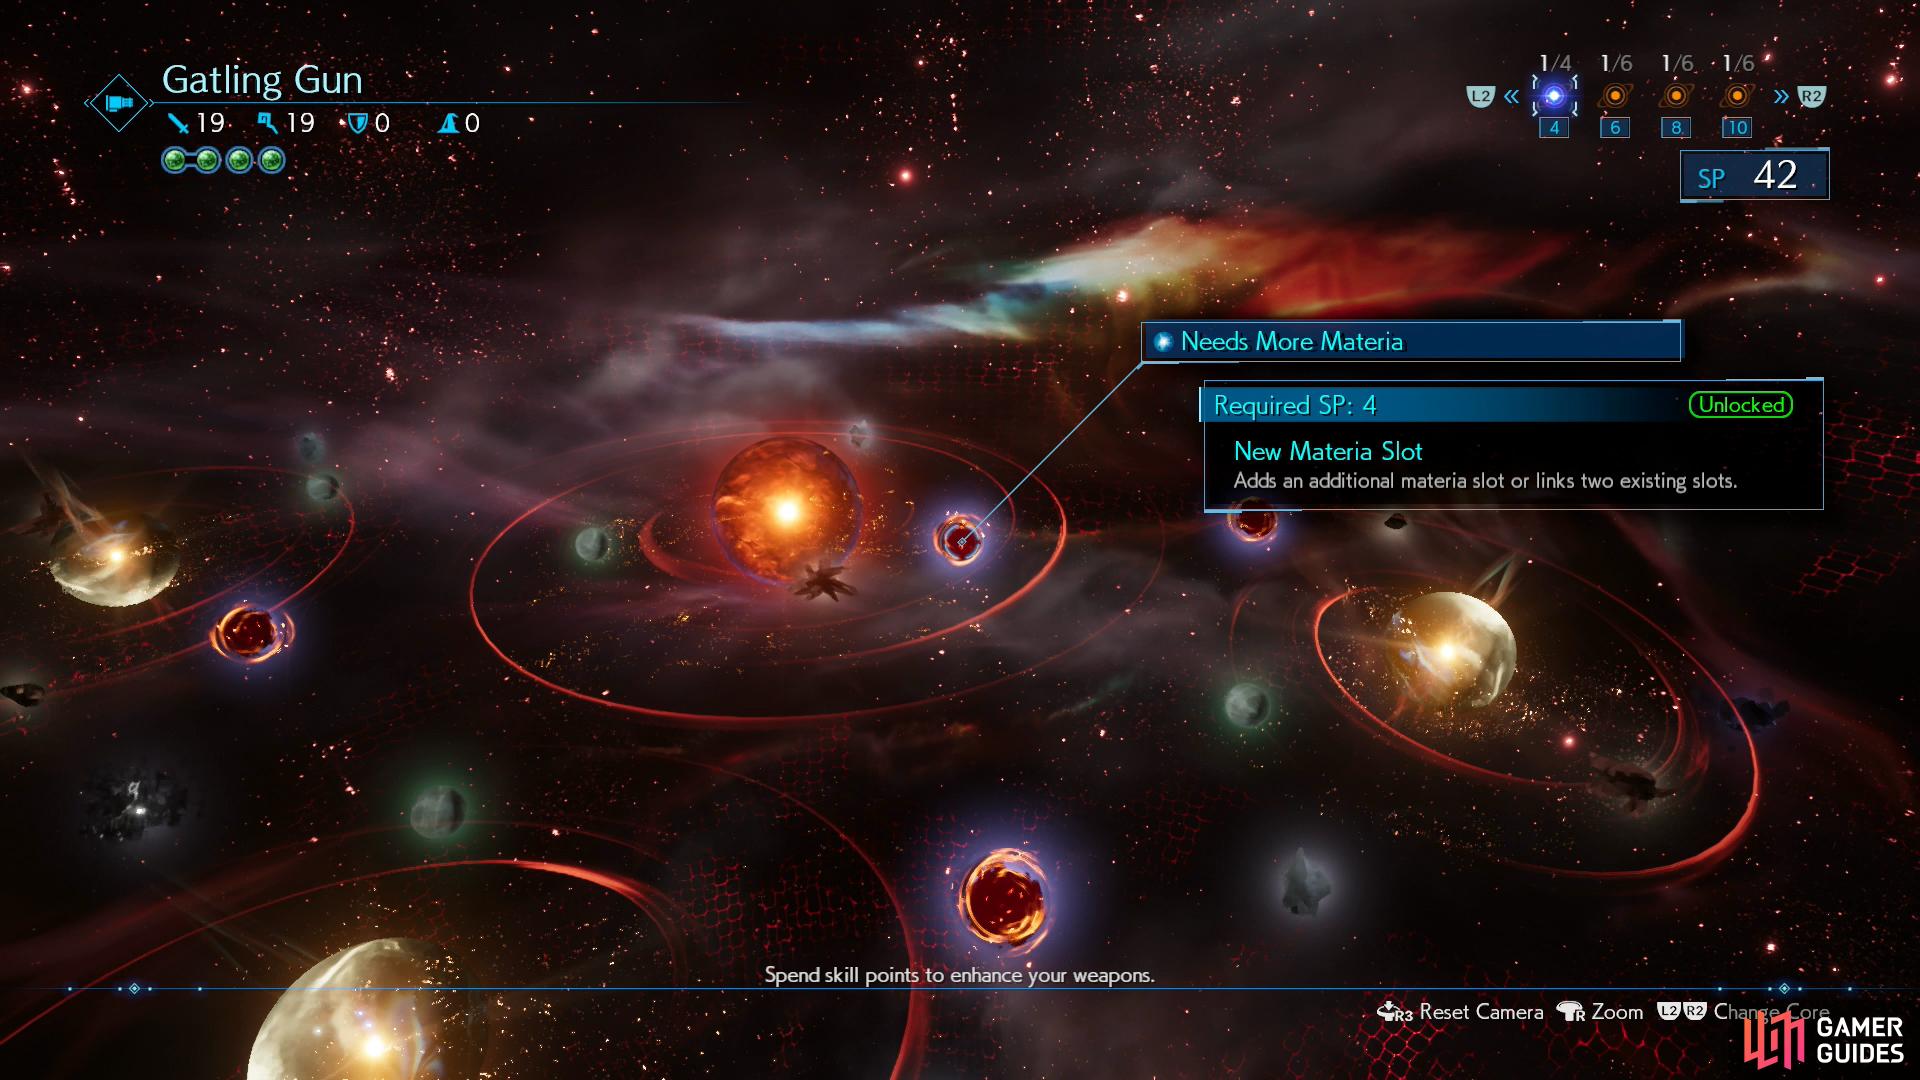
(1 of 4) Upgrade Barret’s weapon - he’s doubtlessly leveled since you last had him available, and hence has SP to spend.
Barret will lay out the details for Plan E: seek out the Stamp graffiti and use it to make your way to Mako Reactor 5. Begin by heading along this side of the tracks to the west and keep an eye out for another service door to the north - inside you’ll find a stack of Shinra Boxes and a chest containing an Elixir; these valuable restoratives will fully restore all HP and MP so be sure to hold on to these for extreme situations.
Return to the tracks and continue following them west to encounter another group of Slug-Rays, Barret is handy for these mechs and his Overpower will give you some easy ATB charges you can use to sling a Thunder spell at them. Once they’re defeated, climb the stairs to the south and follow them back east to find a group of easy to dispatch Wererats, a chest housing a Star Pendant and some more Shinra Boxes. This Accessory will protect the user from the Poison status, handy for some of the enemies you’ll face later in this Chapter.
Return to the tracks and continue following them west and you’ll encounter more Slug-Rays accompanied by a Guard Dog and an Elite Grenadier; be sure to deal with him first before handling the rest. Enter the room they rushed out of following the battle to find some more Shinra Boxes and a chest containing an Ether. Return to the tracks to smash some more Shinra Boxes and continue following the tracks to find the Stamp graffiti you’ve been seeking.

As you reach the top of the stairs, another group of Wererats will attack so put them down and break the Shinra Boxes then head down the next stairs (breaking another stack of Shinra Boxes along the way). After spotting the insects below, loot the chest containing 2 Antidotes and proceed down to the bottom to encounter a Grashtrike, large insects that can both Poison and Slow your characters. They’re weak to Ice which you should have equipped and the Poisona spell (from the Cleansing Materia) and Antidotes can help remove Poison (although it’ll remove itself after battle). What’s more, these insects can drop Spiderwebs, battle items that will allow you to inflict Slow on foes.
(1 of 4) The Queen Grashtrike can use various webbing attacks to slow you, or to inflict Bound and draw a character in for some cheap hits.
Open the chest in the southwest corner containing 2 Hi-Potions after defeating these enemies and take the stairs up and over to the next group of enemies - you’ll have two Grashtrikes to deal with here so be sure to make use of Blizzard to make short work of them. There’s another two stacks of Shinra Boxes here to smash and more stairs leading down to the south. The final group down here includes the Queen Grashtrike, a tougher insect that will spew Royal Webbing everywhere, stopping you in place. Focus on the smaller ones first, as they’re easier to exterminate and you’ll be less vulnerable if you get hit by Royal Webbing, after which turn your attention to the Queen. You’ll also have the opportunity to Summon here if things go south but you should have no issues putting her down provided you have Ice Materia equipped.
Search under the stairs you came down to find a passage leading east and you’ll find some Shinra Boxes and a chest containing 3 Phoenix Downs along with a Vending Machine and a bench so be sure to rest up before heading on. This Vending Machine sells Cleansing Materia, Poison Materia and Barrier Materia (1,500 Gil each), which is either the first time you’ve been able to buy this materia, or the first time you’ve ever seen it (Poison Materia). If you’ve got the cash, buying some of this Materia isn’t a bad idea.
Railway Control E2 Vending Machine
| Item | Cost (Gil) |
|---|---|
| Potion | 50 |
| Phoenix Down | 300 |
| Antidote | 80 |
| Armor | Cost |
|---|---|
| Iron Bangle | 1,000 |
| Star Bracelet | 1,600 |
| Accessories | Cost |
|---|---|
| Power Wristguards | 800 |
| Bulletproof Vest | 800 |
| Earrings | 800 |
| Talisman | 800 |
| Revival Earrings | 500 |
| Materia | Cost |
|---|---|
| Healing Materia | 600 |
| Cleansing Materia | 1,500 |
| Fire Materia | 500 |
| Ice Materia | 500 |
| Lightning Materia | 500 |
| Poison Materia | 1,500 |
| Barrier Materia | 1,500 |
| Deadly Dodge Materia | 600 |
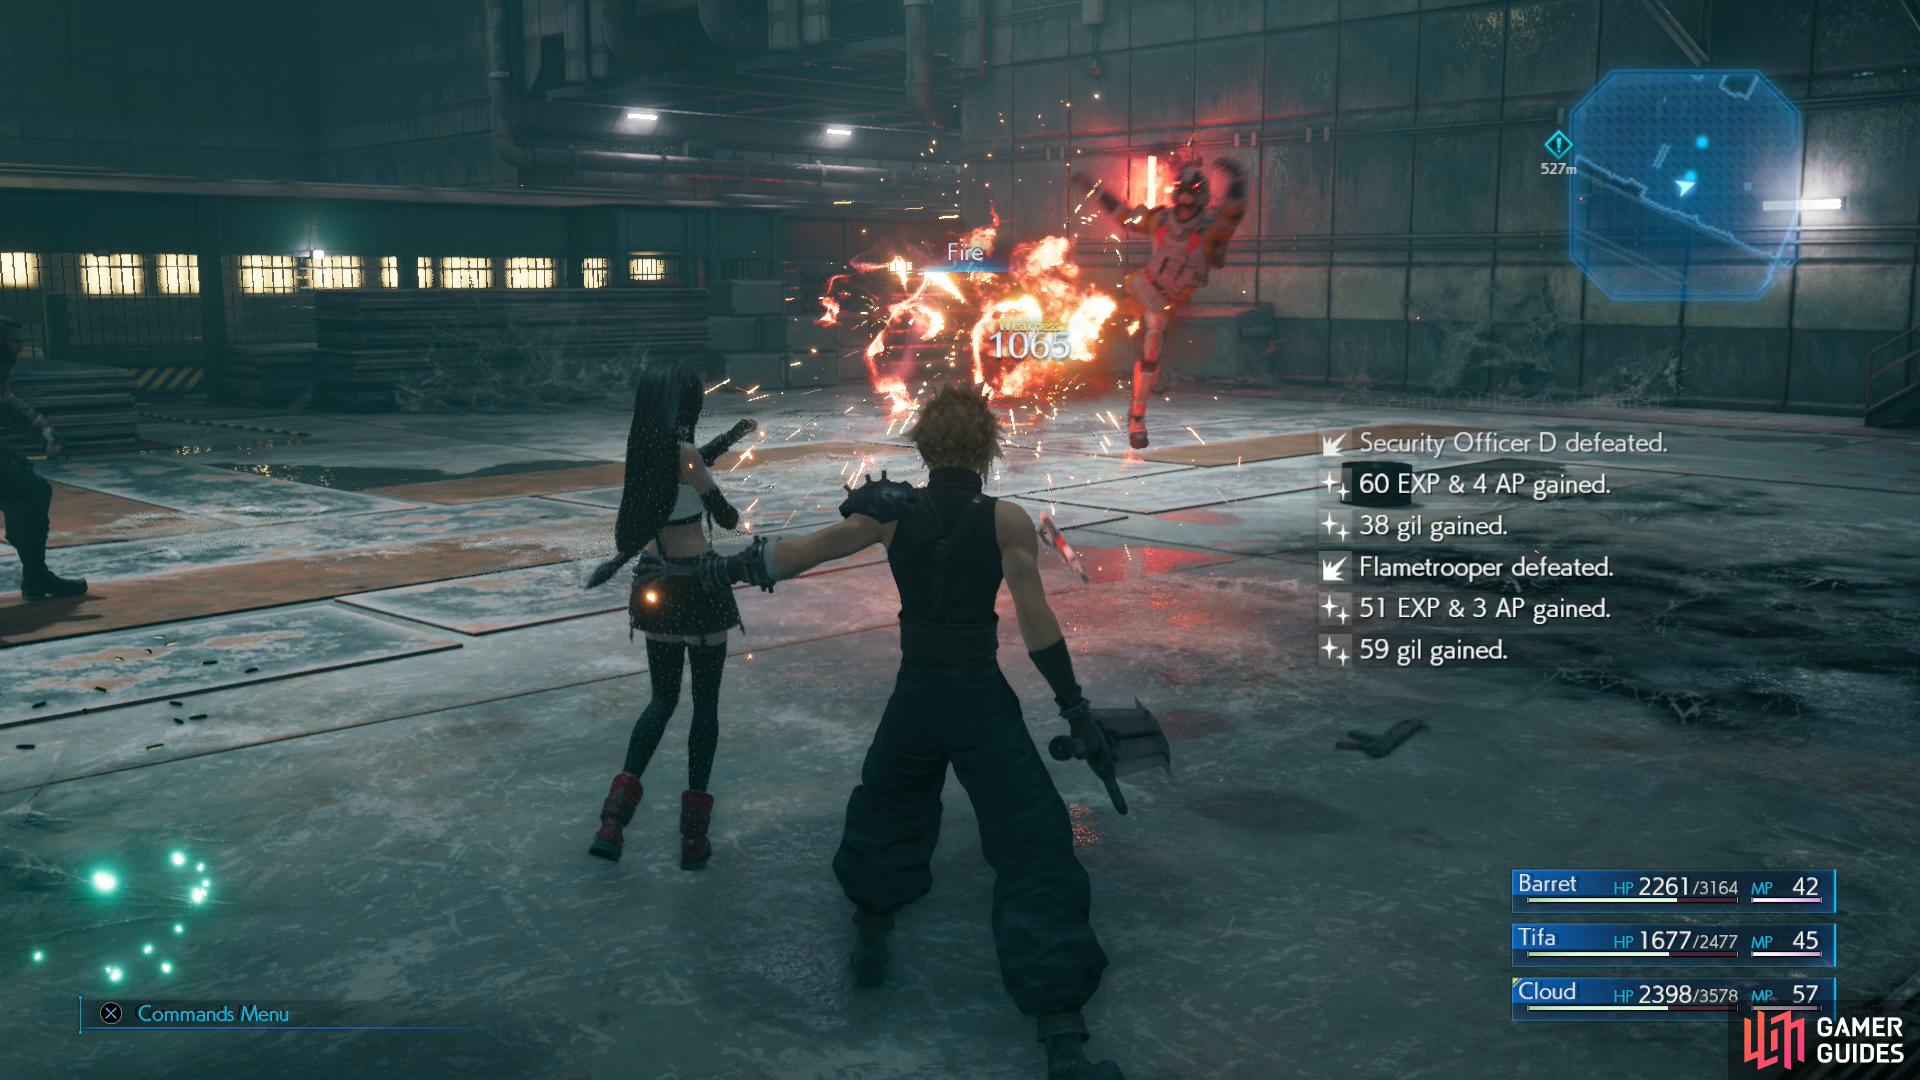
You’ll find another Stamp on the wall along the stairs to the southeast, so follow them up and over to the other side to spot some Shinra personnel cleaning up the mess caused by the insects. See? Shinra cares after all! These Flametroopers are a lot more difficult than your regular grunt and they’re somewhat resistant to physical attacks so that leaves you with two methods for taking them out. The first being Fire, their weakness, while the alternative is circling around the back of them and hitting their fuel tanks to cause it to blow. With the first group dispatched, break three stacks of Shinra Boxes and then continue west to find a gate leading back to the tracks.
Cross on over to the other side and the group will check their location on the nearby map. Break open the Shinra Boxes before returning to the tracks and continue your journey to the west while sticking to the eastern wall. You’ll find another Service door here - head inside and you’ll find yet more Shinra Boxes to destroy along with a chest containing a Leather Bracer. This offers superior Defense over the Iron Bangle at the expense of some Magic Defense along with an additional Materia slot, making it entirely superior to the Star Bracelet - consider giving this to the character you control the most in battle.
Return to the tracks once more and you’ll need to dispatch some Security Officers before taking the southern split further west. You’ll reach Railway Control but before following Barret and Tifa, head along the northern wall to find one final Service door, inside you’ll find more Shinra Boxes to break open. Return to Barret and Tifa to spot security up ahead. When you’re ready head forward to start the battle.
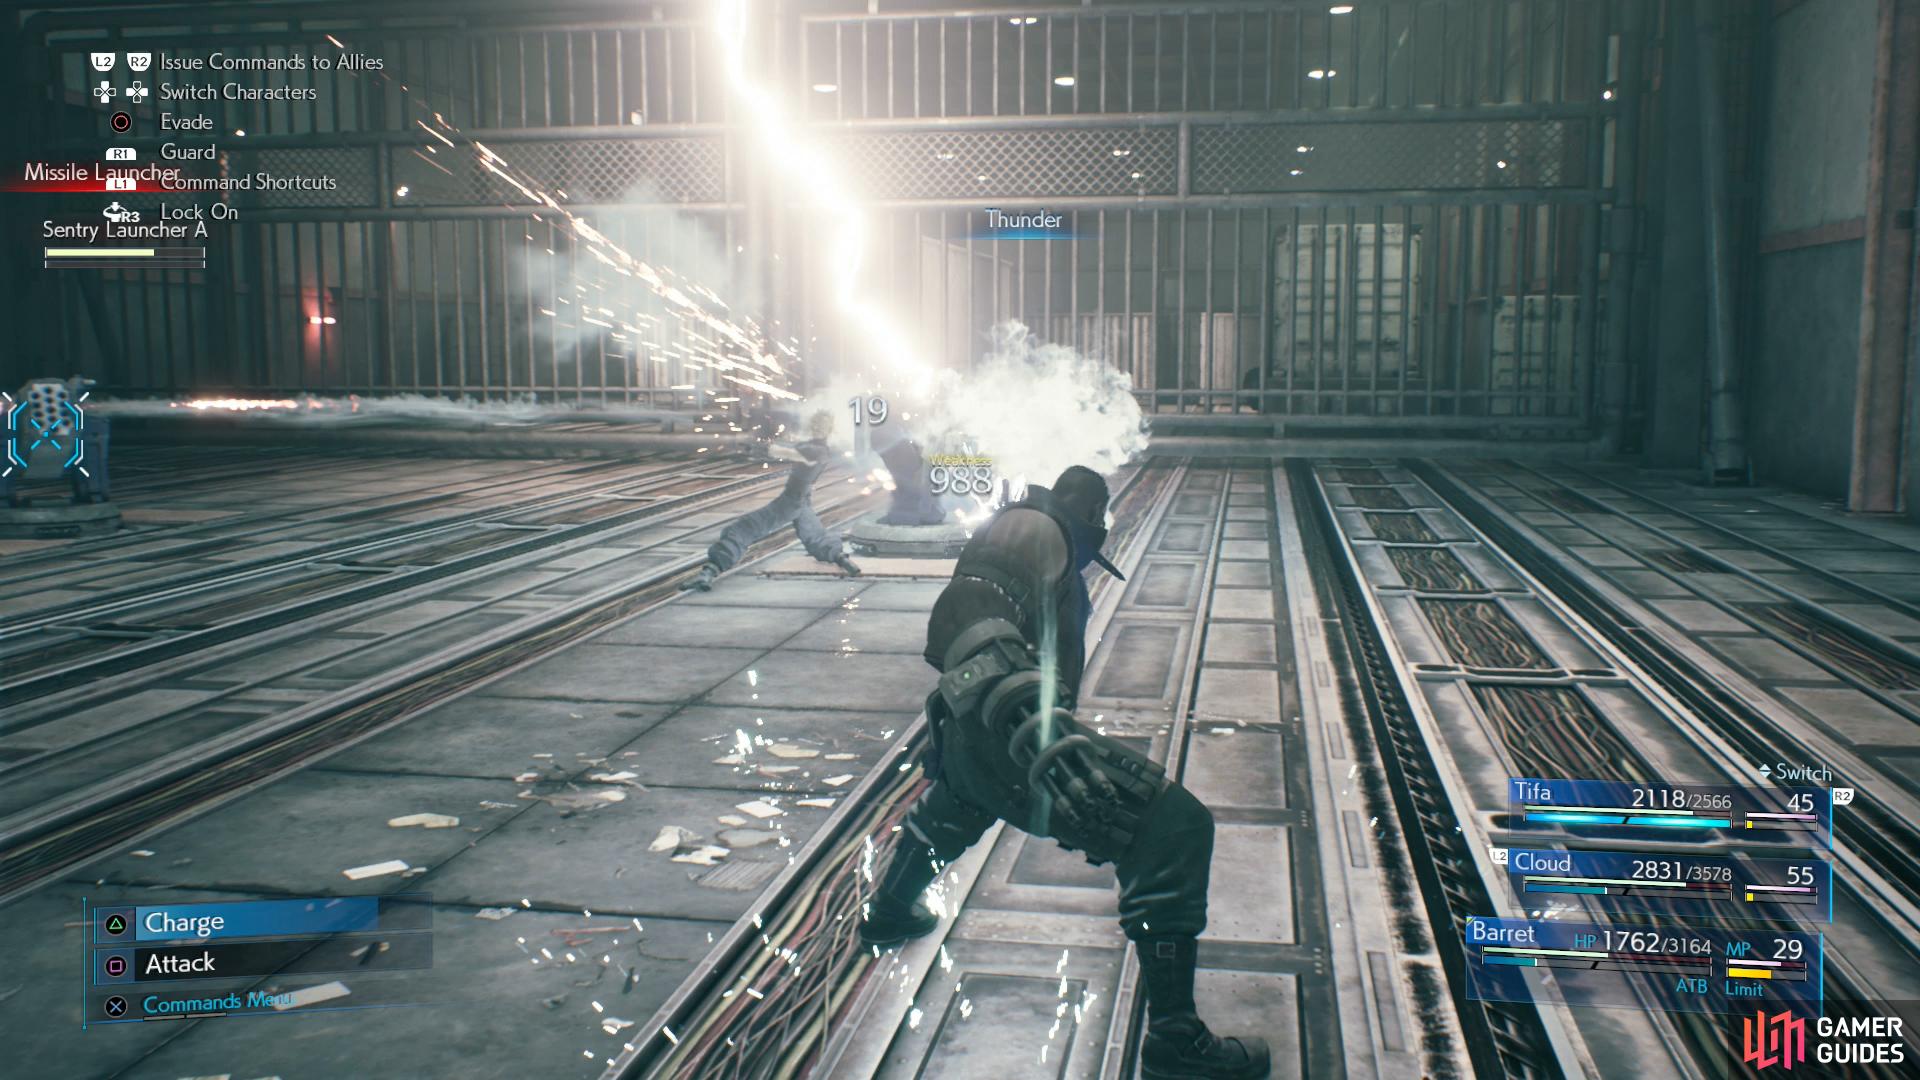
This can be a tough battle if you’re not careful and go rushing in blindly so pick your targets wisely. Focus your Fire user on the Flametroopers by casting Fire from a distance and then let whoever has Thunder pelt the Sentry Launchers. Keep your HP topped up because it’s easy to get caught in the crossfire of both the flamethrowers and missiles sent your way; it’s much easier to let the Flametroopers come to you.
Secret Passageway
With the security taken out, follow Barret up the stairs and follow the linear passageway to the west until you reach an intersection. Opt for the western door to locate a Lightning Materia and a Vending Machine selling the Stamp Music Disc. You can also buy limited quantities of Hi-Potions (3) an Ether (1) and a Phoenix Down (1) for a discount. Take a much needed rest on the bench here and be sure you have at least one Lightning Materia set to your characters. Once done, proceed north at the intersection now to run into a group of Shinra Grunts in the break room. Use the blue bench one more time if needed afterwards and then proceed north to encounter one last enemy between you and the way to Mako Reactor 5.
Former Rail Yard Vending Machine
| Item | Cost (Gil) |
|---|---|
| 28. Stamp (Music Disc) | 50 |
| Potion | 50 |
| Hi-Potion (Limit: 3) | 100 |
| Ether (Limit: 1) | 100 |
| Phoenix Down | 300 |
| Phoenix Down (Limit: 1) | 100 |
| Antidote | 80 |
| Armor | Cost |
|---|---|
| Iron Bangle | 1,000 |
| Star Bracelet | 1,600 |
| Accessories | Cost |
|---|---|
| Power Wristguards | 800 |
| Bulletproof Vest | 800 |
| Earrings | 800 |
| Talisman | 800 |
| Revival Earrings | 500 |
| Materia | Cost |
|---|---|
| Healing Materia | 600 |
| Cleansing Materia | 1,500 |
| Fire Materia | 500 |
| Ice Materia | 500 |
| Lightning Materia | 500 |
| Poison Materia | 1,500 |
| Barrier Materia | 1,500 |
| Deadly Dodge Materia | 600 |
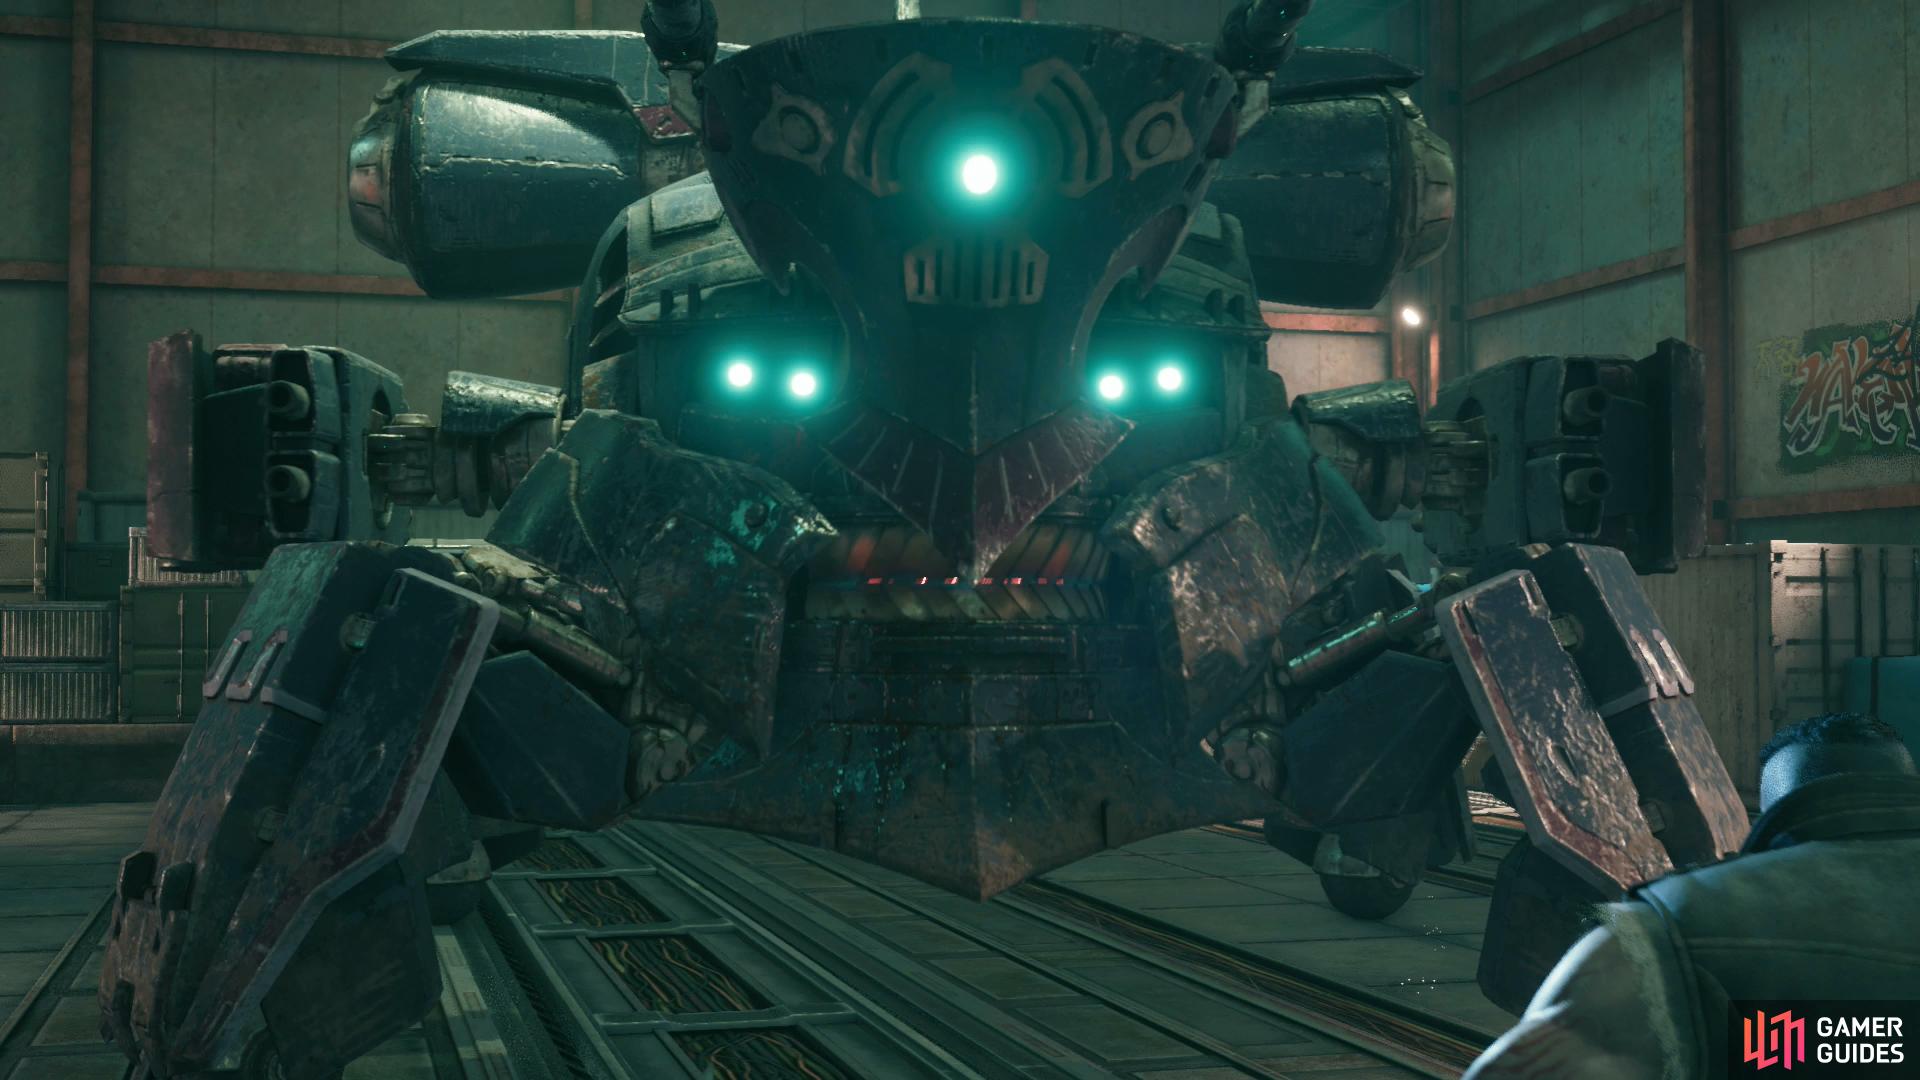
Boss: Crab Warden
| Enemy | Weaknesses | Notable Loot |
|---|---|---|
| Crab Warden | Lightning | Metal Knuckles |
Phase One
First the Scorpion Sentinel, now a mechanical crab? Shinra sure has a whimsical weapon designer. The Crab Warden is a large mechanical weapon that has a vast range of attacks available to it (many of which are fire elemental), which can be somewhat difficult to avoid given the relatively confined battlefield. Fortunately various cargo containers can provide cover, and the Crab Warden is incredibly slow… at least for now. As you may have come to expect, as a robotic enemy its main weakness is Thunder - if you have at least one character with Thunder (preferably three, and Thundara at this point isn’t unreasonable and much preferable to Thunder) this fight will be much easier. In addition to the main body of the Crab Warden it also has four legs you can attack, and these you should prioritize, as destroying them will significantly increase the Crab Warden’s Stagger meter. Once you Stagger it, a Generator will open up on the front of the machine, which you should target for increased damage.
In short, the first phase (and subsequent phases of the fight, with modifications) should be a matter of targeting legs, weapons and other ancillary parts with Thunder/Thundara until the Crab Warden is Staggered, then use your best offensive moves (Tifa’s chi abilities, Cloud’s Braver) to target the Generator.
It will begin the battle with rather simple abilities such as Target Lock that will focus all of the bosses attacks on that particular character; this is a good time to swap over to a different character, cast Barrier on the targeted character and make sure that your ally’s HP is topped up. Wildfire will shoot a stream of Fire at one character; this is easily avoided by dodging to either side of the stream. Finally, Charge will see the Crab Warden rush a character, often getting them caught up against the wall.
Phase Two
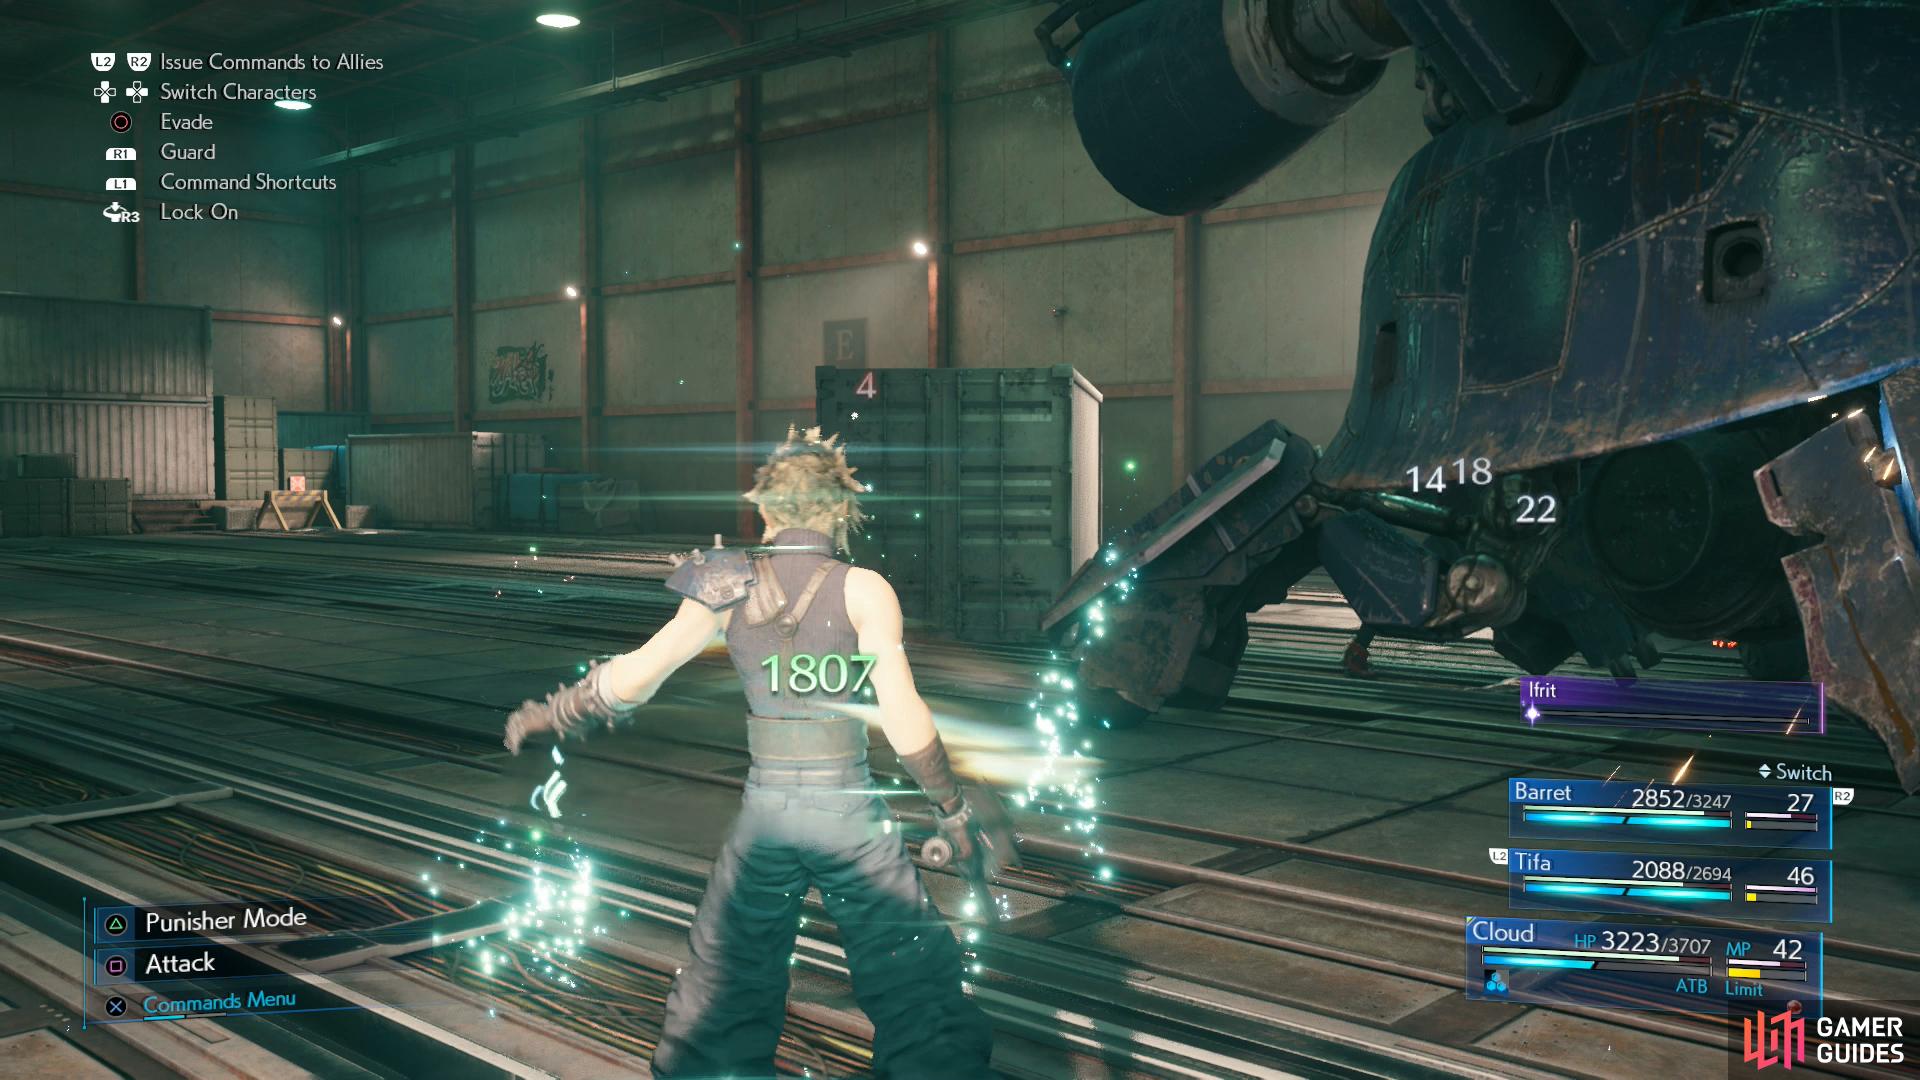
Once you take it below 19,000 HP (roughly down to 2/3 of its HP), the Crab Warden’s lights will glow yellow and it’ll unleash a group of Slug-Rays - be sure to focus on these first before returning your attention to the Crab Warden itself. Ideally you can take one out (or at least heavily damage one) with a single Thunder cast or Overpower attack. You should also have the opportunity to Summon Ifrit at this point so be sure to do so to give yourself an advantage, as his Radiant Plume attack will deal massive damage to all enemies around him. Once the Slug-Rays are defeated, however, the goal here is much the same as in the first phase: hit the limbs with Thunder/Thundara, then focus heavy attack on the Generator.

Phase Three
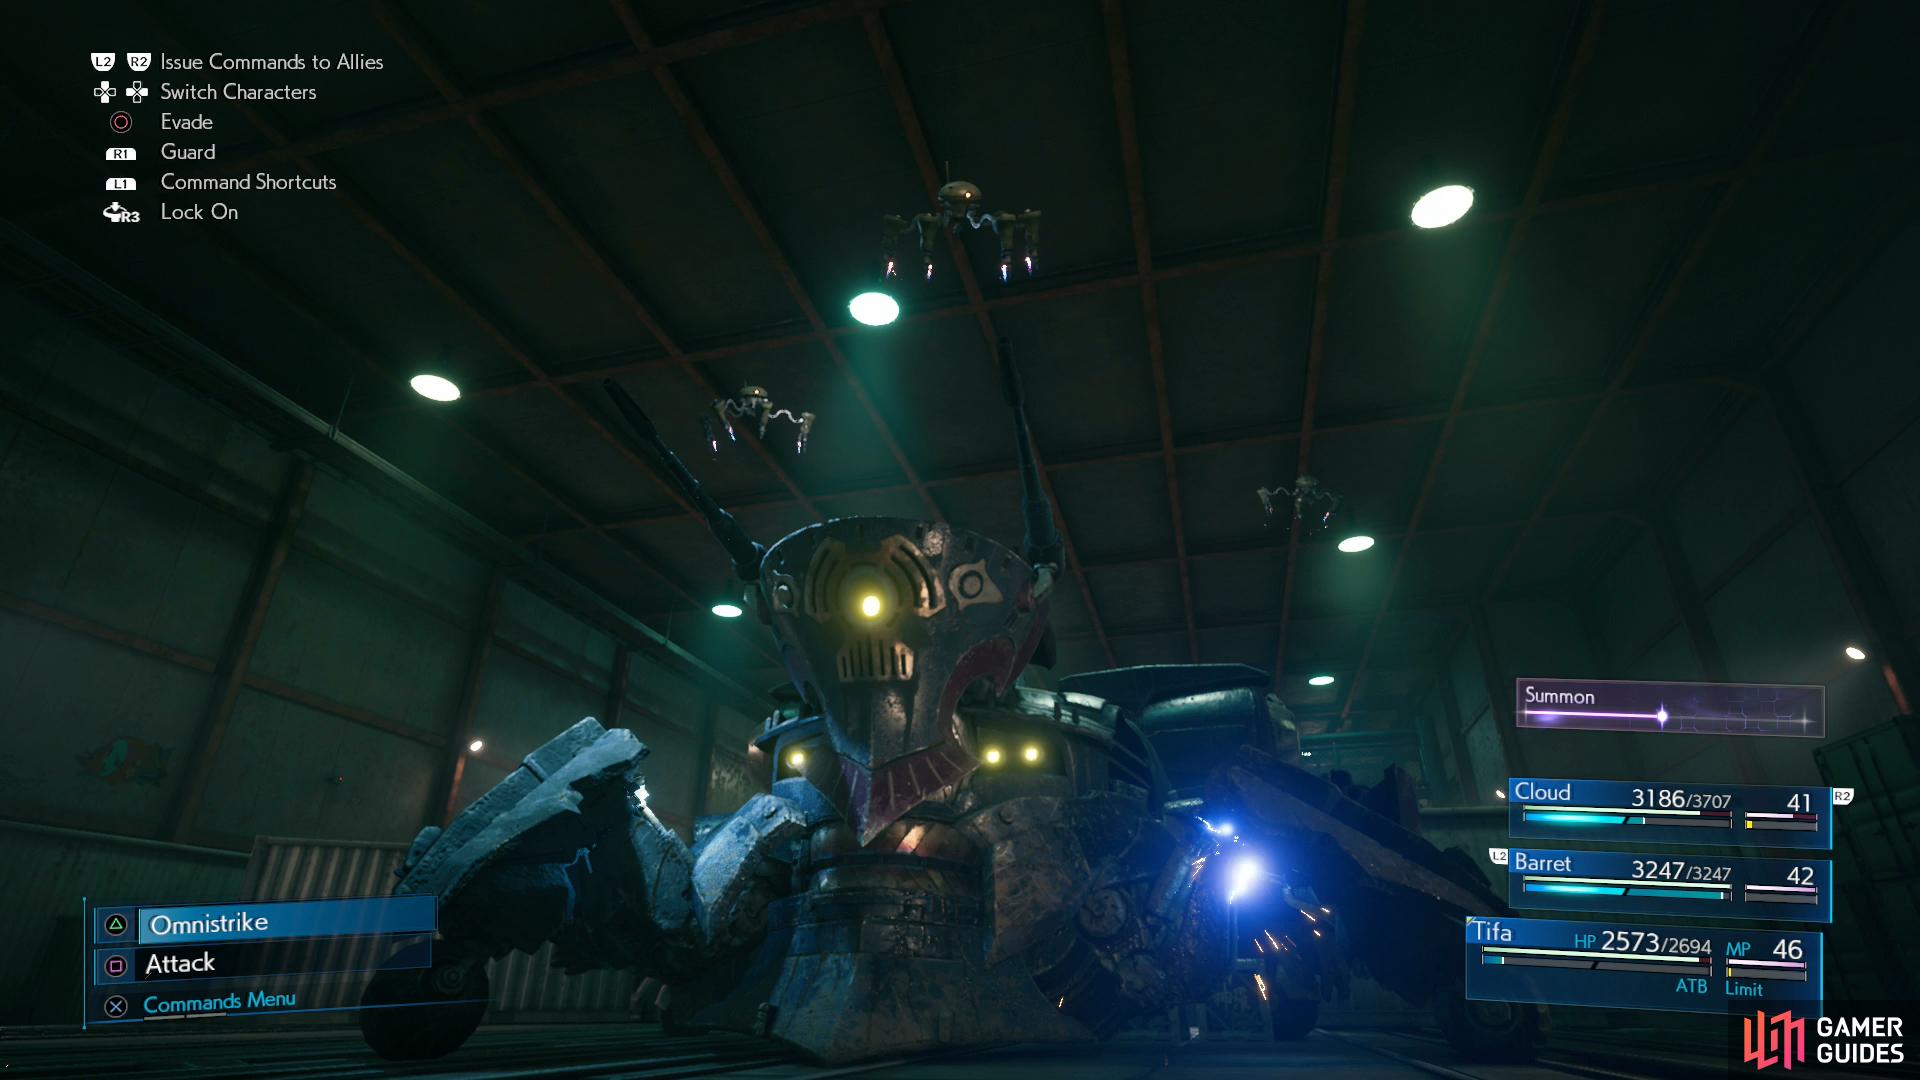
Take the Crab Warden down to it’s last 1/3 of it’s HP and it’ll enter it’s final phase, indicated by its light turning red. The Crab Warden is more aggressive and faster-moving in this phase than in the last one, so be sure to keep your characters healed. Otherwise, attack its Left Auxiliary Weaponry and Right Auxiliary Weaponry with Thunder/Thundara, and be watchful for its Surge attack. It’s hard to miss, as the entire floor will start glowing blue with charged electricity, and you’ll be instructed to get off the tracks to avoid taking massive damage. This seems to happen after destroying one of its auxiliary weaponry units - a necessary step towards Staggering, and hence defeating, the boss.
Once Staggered, the Crab Warden will recover incredibly quickly this time and you’ll be directed to destroy the Pilot, which is shielding the Generator. Do this and the Generator should remain open for the rest of the fight, although be wary, as the Crab Warden’s offense will be at its peak during these last, desperate moments.
Your reward for this difficult battle is some new gloves for Tifa, the Metal Knuckles. These are designed for pure Attack Power and they come with the useful Overpower Weapon Ability that will allow you to apply Pressure to enemies a lot easier, in turn making it easier to bring them into Stagger. Upgrade your new weapon and be sure to equip it on Tifa; the extra Attack Power will be welcome in the battles to come. Squeeze through the nearby gap when you’re ready and follow the path to the end to find an elevator bringing Chapter 5 to an end, obtaining the Plan E Trophy.
No Comments