

| Availability | Prerequisite |
|---|---|
| Chapter 14+ | Clear all Battle Intel Reports |
Pre-battle Preparations
Bahamut is one of the tougher challenges in the game and although you can choose to tackle him before the end of the story, we highly advise players to reach Chapter Select. You’ll gain increased EXP, Gil and AP once you gain access to Chapter Select allowing you to hit Level 50 in no time and level up some of the more important Materia a lot easier such as Elemental and Magnify. The main reasoning behind this is that Bahamut’s ultimate attack will deal massive damage to the party so you’ll want your stats as high as possible to survive the attack.
If attempting this after Chapter Select, access the battle on Chapter 17 so that you can go in with a team of Cloud, Barret and Aerith and be sure to equip Twin Stinger, EKG Cannon and Reinforced Staff. On Barret, slot the Magnify-Barrier materia (for Manawall), an Elemental-Wind on Cloud is useful while you’ll also want a maxed Fire materia on Aerith. Be sure that all of the characters have access to Healing and Revival materia too and then slot useful materia such as Cleansing along with HP Up and MP Up to help boost your stats. Finally, be sure to equip the Chain Bangle on one character with Cog Bangles on the others, most of Bahamut’s attacks are magic based.
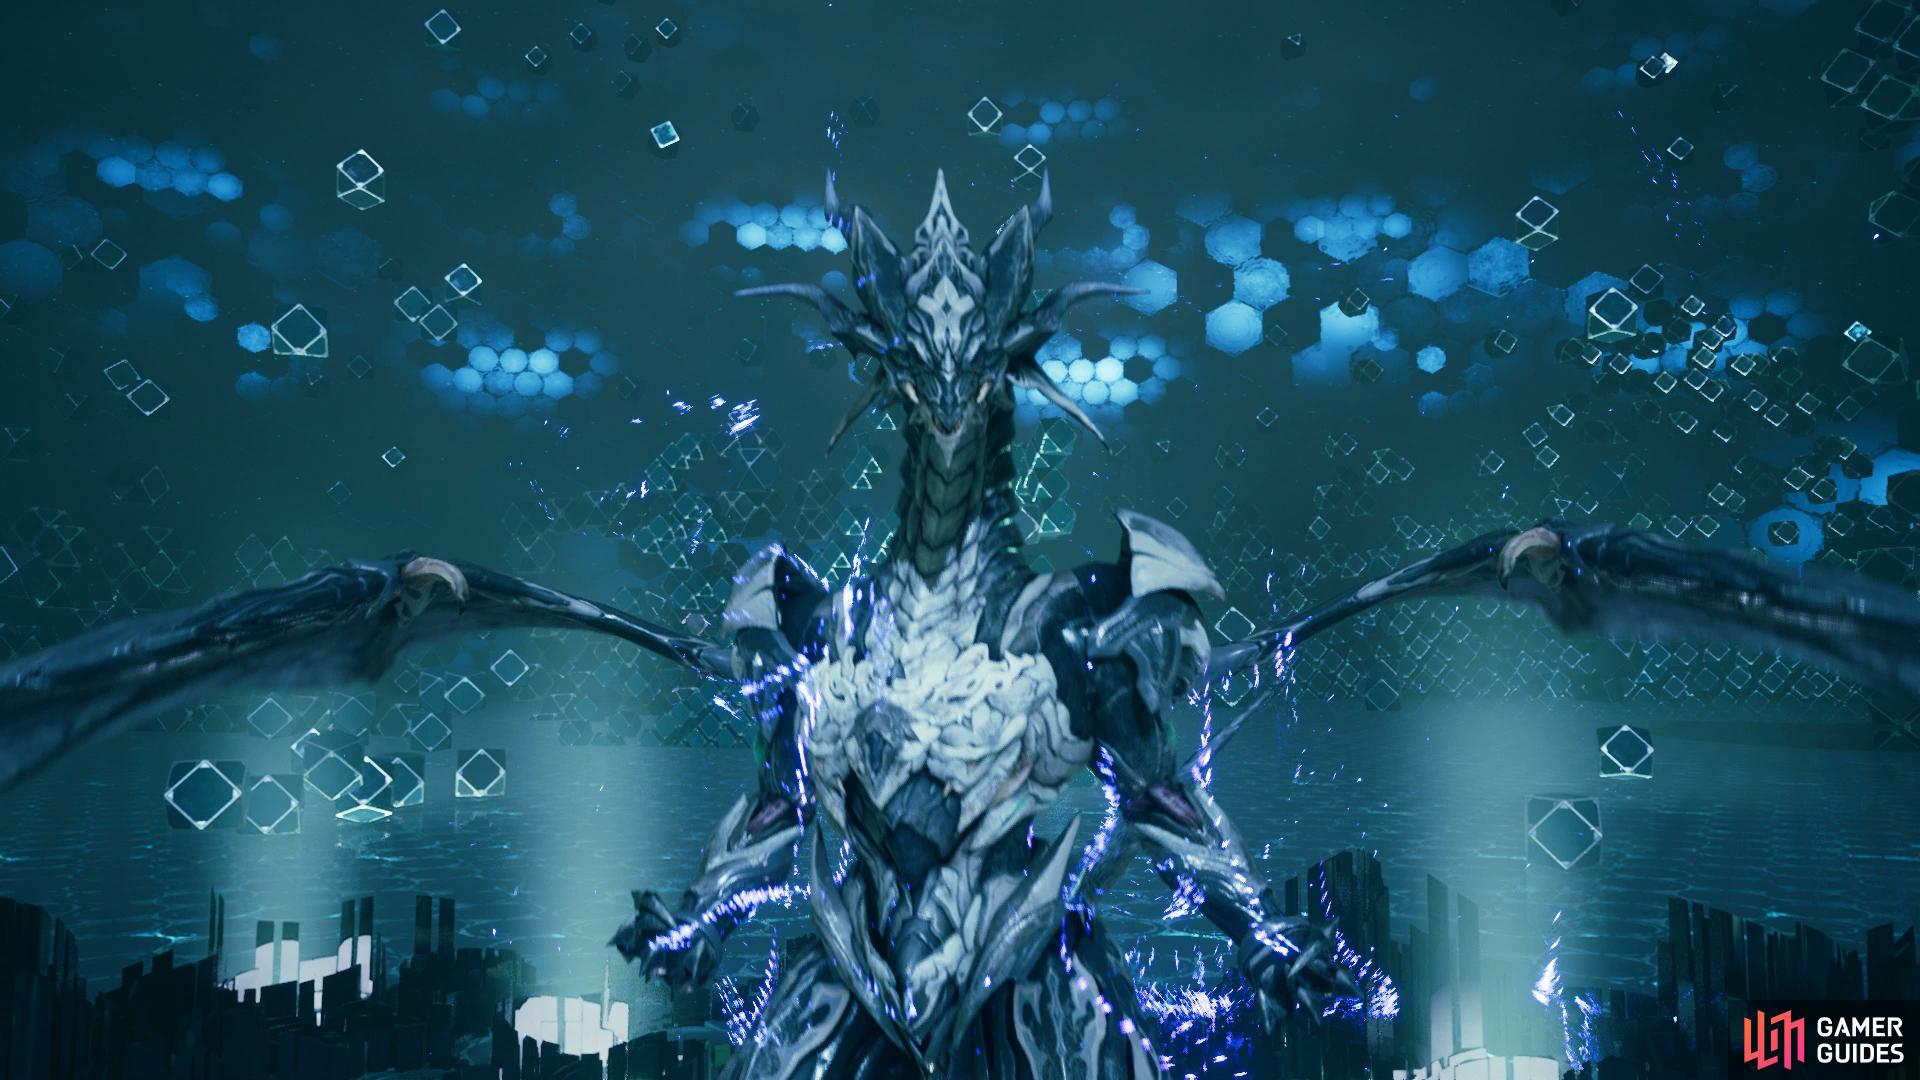
VR Mission: Bahamut
| Enemy | Weaknesses | Notable Loot |
|---|---|---|
| Bahamut | -- | -- |
Bahamut is the toughest battle on the Normal Difficulty and you’ll have to hope your HP values are high enough to survive the battle, similar to Leviathan. Most of Bahamut’s attacks are magical in nature so you’ll benefit from a high Magic Defense stat but don’t completely neglect Physical Defense as Bahamut’s physical attacks can still hurt.
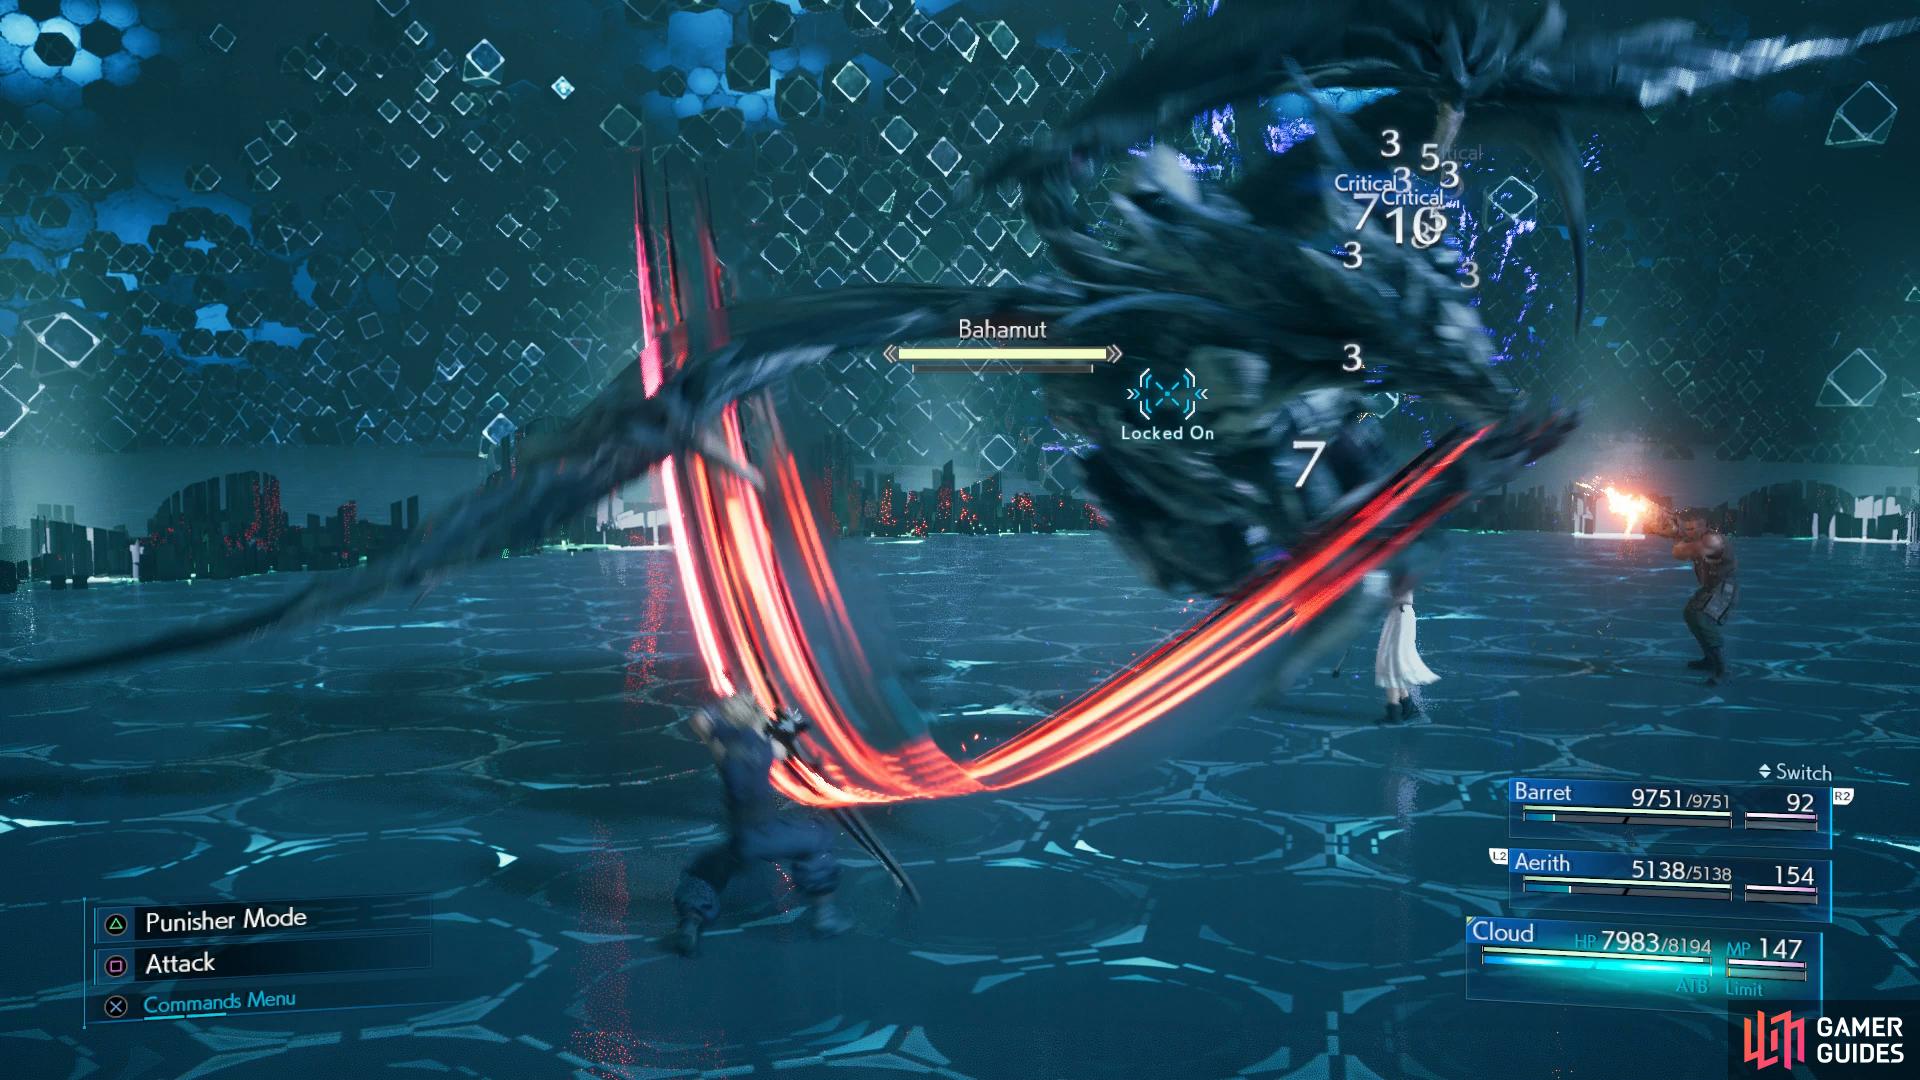
Bahamut will target your controlled character constantly and swoop in for a one-two physical attack, this is tough to dodge so instead, stand there and block the damage. He’ll also do a Spinning Attack at the same character, this once again should be blocked through and expect him to use this more than once. Often, he’ll follow this up with Flare Breath, a magical attack that will inflict Silence and Slow in a small area around the target, be sure to Esuna this if you have Cleansing set. Whenever you see Bahamut grab one of your characters, immediately switch over to one of your ranged characters (Barret or Aerith) and break them free or else they’ll suffer significant damage.
You may notice that throughout the battle, Bahamut will start charging an ability such as displaying Five above his head and then counting down at regular intervals. The whole battle comes down to this mechanic as once the countdown finishes, he’ll unleash Megaflare, a devastating attack that will wipe out an unprepared party so your main priority is to force Bahamut into Stagger while he’s counting down to cancel it. If you feel you won’t be able to Stagger him in time, be sure to use Magnify-Manawall on the party to limit and hopefully survive Megaflare, allowing you to revive anyone who fell.
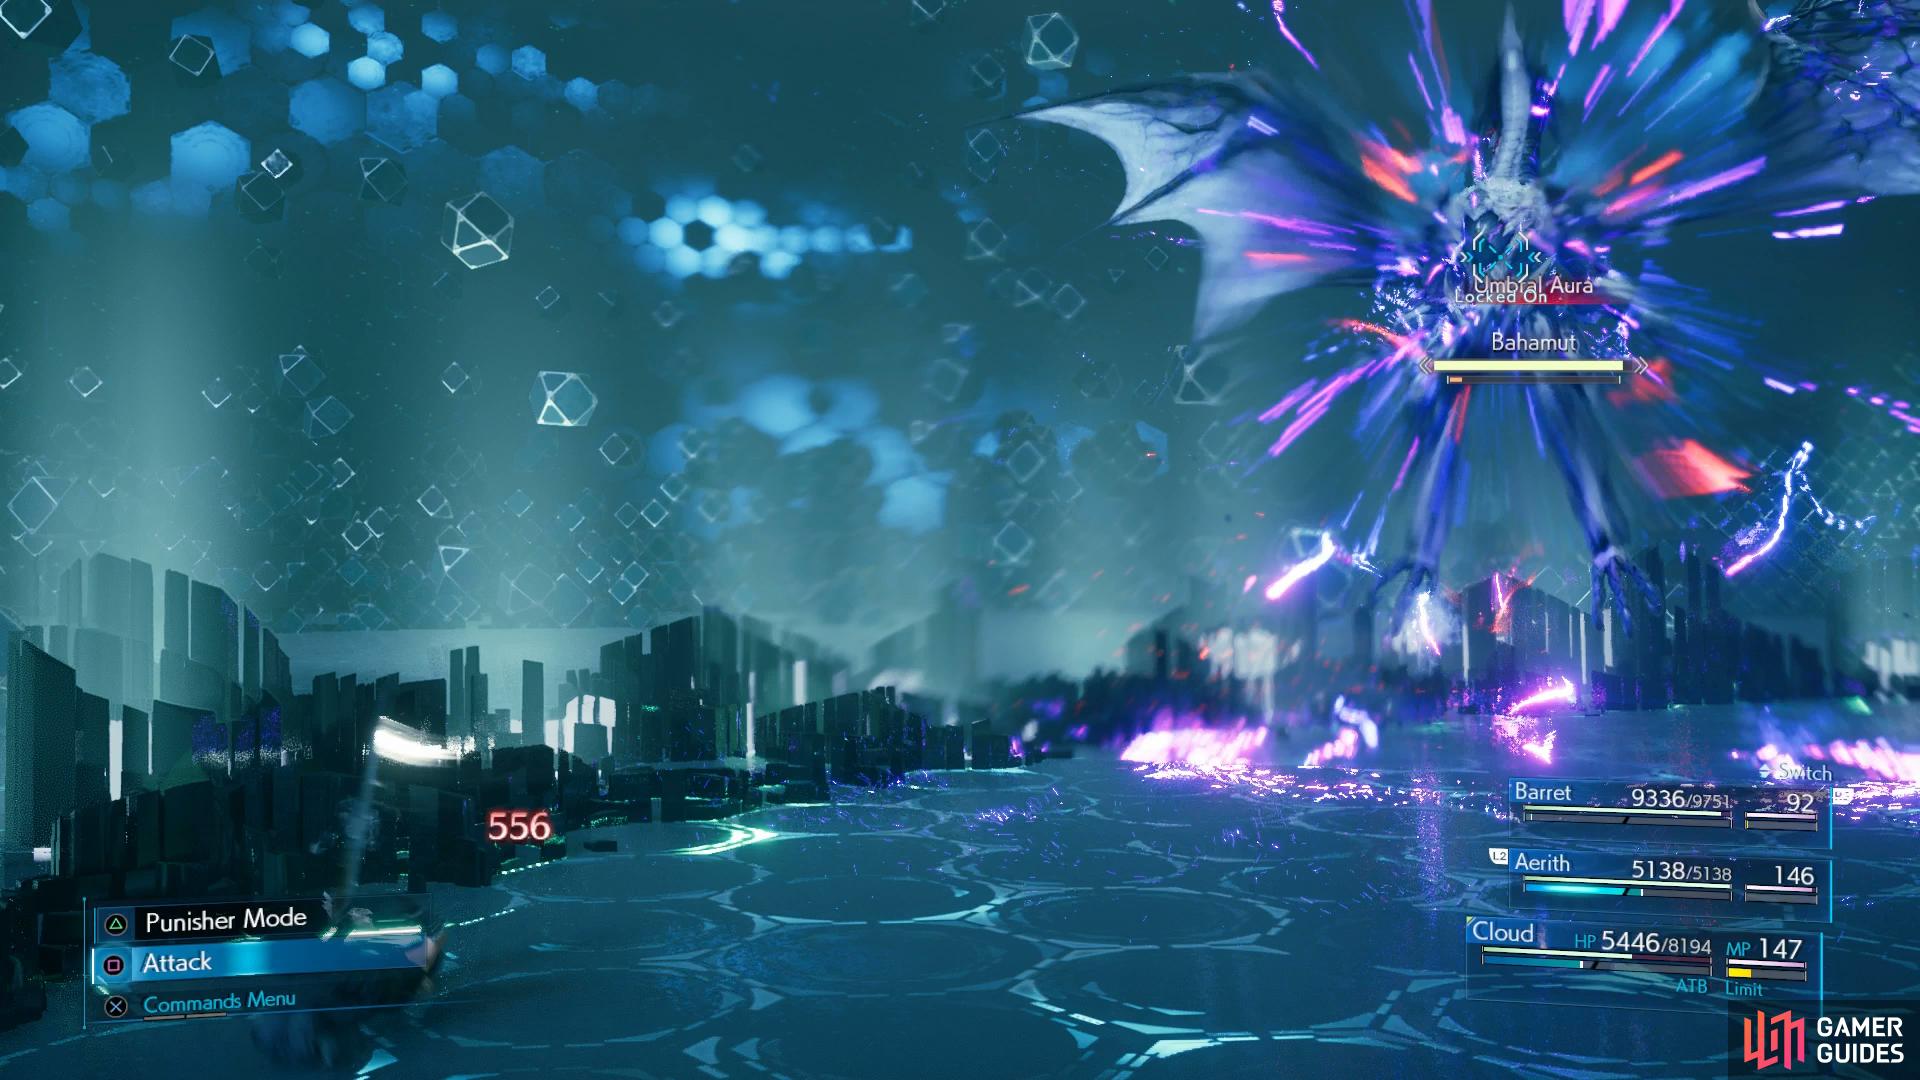
Umbral Aura is cast at regular intervals and will errect a purple field around Bahamut, preventing you from getting close without taking constant damage with melee characters, this is a prime time to switch to Barret or use Firaga with Aerith, especially with Arcane Ward. The interesting thing about Firaga in this battle is that although Bahamut has no real weakness, this spell will make him reel, allowing you to essentially stunlock him in place, making the battle a lot easier than it need be.
Umbral Inferno is a wide ranging magical attack that will hit all party members, once again, it’s better to just block through this attack rather than attempting to dodge it and then heal up after. Umbral Strikes on the other hand, will focus on one character, usually at range, and launch two large orbs at the victim, dealing significant damage. Claw Swipe is a little easier to dodge however, once he’s readied the attack, he’ll rake the ground, releasing three shockwaves towards you however you should be able to dodge through the middle of it. As Bahamut counts down, the range of his Umbral Aura grows in size, making it increasingly difficult to avoid stepping inside and taking damage.
You’ll start seeing Umbral Frenzy once the countdown lowers further, unlike his other abilities, this is a Physical based attack and will see Bahamut perform a flurry of swipes on the target, dealing massive damage so remember to heal up following it. Umbral Gaze is used sparingly but when he does use it, it will inflict Stop on the target, be sure to cure this as soon as possible because you can ill afford to have a character out of action. Finally, Divebomb will have Bahamut take to the skies and swoop down on you, dealing massive damage should he connect, you cannot block through this attack so keep on the move and try to dodge at the last moment.
Remember to make use of your Summon as it becomes available, anything that drives up the Stagger gauge is useful here and the extra damage is always welcome. Of course, Limit Breaks are also useful, especially Aerith’s Level 2 one, Planet’s Protection, to help soak up some of the damage. Keep up your assault with Focused Attacks and Firaga (on Normal Difficulty you can use Ethers to replenish the MP you’ll be using here) and you should Stagger him before Megaflare. This is your cue to unleash Limit Breaks (Ascension is especially useful here), Infinity’s End, Ray of Judgment (Aerith) and Maximum Fury (Barret). Bahamut will return to casting MegaFlare from Five again following this so you’ll have to focus on Staggering it again, an optimised party can expect to deplete Bahamut’s HP in around two Stagger cycles.
No Comments