

A Train Wreck
When you’re back in control of Cloud, look around to notice that they’re giving you a rest bench and a vending machine right at the start. How nice of them. Use the rest bench to recuperate, then do whatever shopping you might need to do - the vending machine doesn’t really have anything new in it.
Once done, continue west, smash some Shinra Boxes, then climb a ladder to reach the top of a train car, and after some chatter climb down another ladder to the west. Back on the ground, follow the girls west and after some chatter head up some stairs into a train car and exit to the north. Outside you’ll encounter your first enemies in this chapter - don’t get excited, just some Wererats.
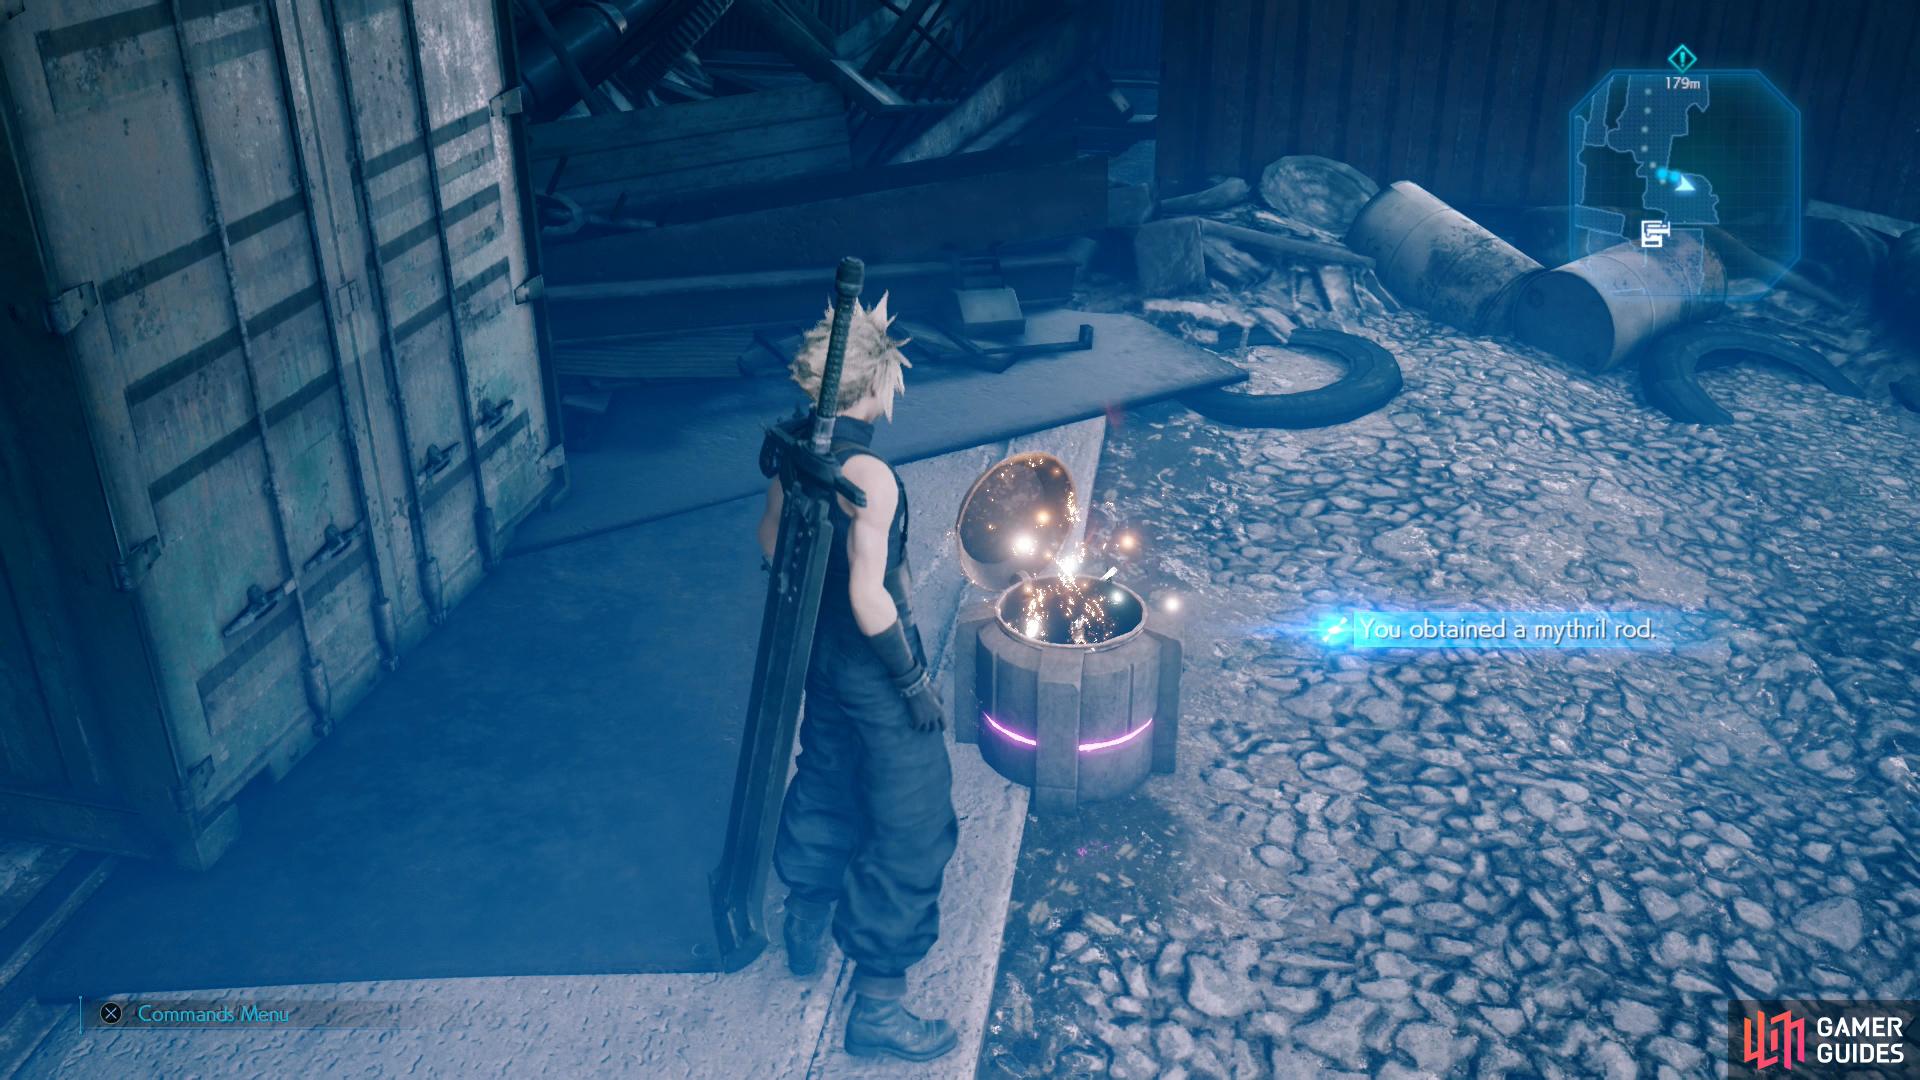
Kill them and note that you have two ways you can proceed: either enter a train car to the east, or climb a ladder to reach the top of shipping cars. Go into the train car, first, turn south and smash some Shinra Boxes, then exit to the east and turn south. Head past some shipping containers, smash some more Shinra Boxes, then turn west to find a purple chest - and you know what purple means: a new weapon. This chest just so happens to contain a Mythril Rod, a weapon for Aerith with exceptional Magic Attack that can also teach the “Ray of Judgment” ability. You’ll want that one, so remember to upgrade it and equip it to learn its ability.
Return back west through the train car, climb the previously neglected ladder, then descend down another ladder to the north and head across the ground to the east. Something goes bump in the night, so approach the building to the east only to have a new foe emerge: a Cripshay. Three of them, rather. Not too tough, their “Deadly Spike” can knock you down and deal a decent amount of damage, and they also have an attack that can inflict “Bound”, but nothing you haven’t dealt with before. They’re weak to ice, but they’re not so resilient that you can’t settle for just attacking them with Cloud and/or Tifa. As may be expected, their physical attacks are easy enough to block and counter via Punisher mode.
Defeat this new foe, smash some Shinra Boxes to the north, then enter the building the Cripshays emerged from, crawling under some collapsed metal to the north. Once through, immediately turn west and smash some more Shinra Boxes, then exit to the north. Turn west, enter a train car and sidle your way to the northwest, exit the train car, head east and defeat a mixed group of Cripshays and Wererats.
After the fight you’ll again find yourself with options: you can climb a ladder to the northeast, or enter a train car to the east. Once again, go through the train car first, exit to the south, then loot a chest for… 1 Gil. If the earlier light show didn’t convince you, the laughter and appearance of more graffiti should - this place is definitely haunted. Backtrack through the train car, climb the ladder you neglected earlier then descend another ladder to the east.
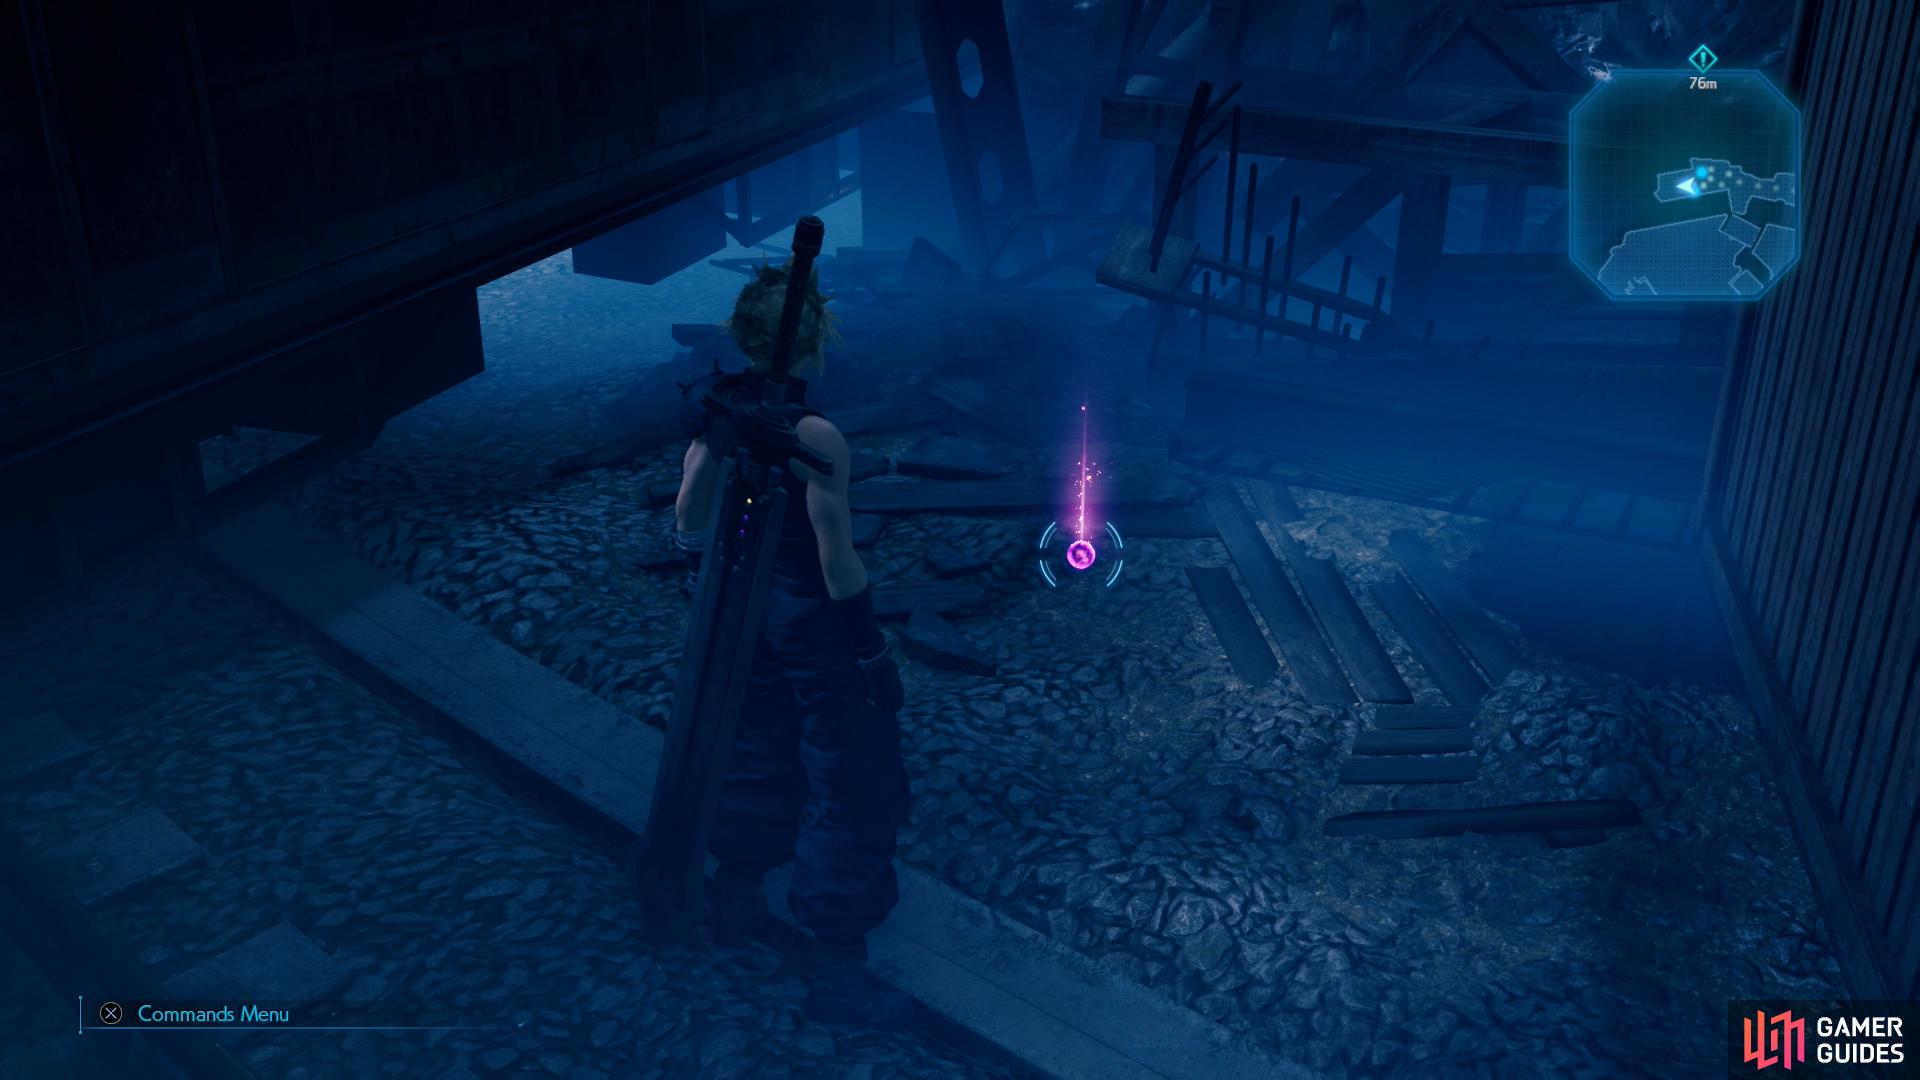
When you reach the ground, fight off a small horde of Cripshays and note there’s no going back due to the totally insurmountable impediment of the ladder being too short. Drat. Continue east, then north, smash some Shinra Boxes, then continue north and northwest, smash another cluster of Shinra Boxes and note a ladder to the north. Before you climb this ladder, head west around a train car to the south to find an orb of HP Up Materia just waiting for somebody to claim it. Oblige the poor magical ball, then return to and climb the ladder.
Continue north across a walkway made of rubble and after you reach an overturned train car you’ll witness a scene. Now inside the train car with spooky stuff occurring regularly, keep going north and once outside turn west to find the girls standing near a warehouse door. Approach to witness another scene, after which free yourself from their grasp, smash some Shinra Boxes hiding to the west, then enter the haunted warehouse to the north.
| Enemy | Weaknesses | Notable Loot |
|---|---|---|
| Ghost | Fire | Turbo Ether |
| Cripshay | Ice | -- |
| Lesser Drake | Wind | Orb of Gravity |
Pass Through the Maintenance Facility
Head north through the warehouse and you’ll be able to see the ghosts running about. Aerith seems to have an uncanny knack for the supernatural, so follow her north and she’ll attempt some diplomacy. When it goes awry you’ll be facing a new foe: a Ghost.
Ghosts require you to pay attention, as they’ll use one of two abilities in response to your attacks: “Shield” to counter physical damage and “Reflect” to counter magic. Reflect in particular is dangerous, as it can… well, reflect your own spells back at you. Keep an eye on the icons under the Ghost’s Stagger meter - if there’s a diamond-shaped shield, the Ghost has Reflect on, if there’s a rounded shield, it’s using Shield. Having your physical damage nullified by Shield is annoying, but having your spells reflected is dangerous, so lead with your physical attackers and only respond with magic - they’re weak to fire - if they use Shield. Ghosts can also “Possess” characters, taking control over them momentarily to use the spells at their disposal. This can end very poorly for you, especially if they possess a magically potent character like Aerith and use a high-tier offensive spell, but Ghosts aren’t the most discriminating bunch - they’re just as likely to use restorative magics you have equipped.
Defeat the Ghost, and after a scene you’ll find the way north blocked. Head south, instead, defeat some Cripshays. Once done, continue south and a train to the east will light up, inviting you aboard. This… seems like a bad idea, but you really don’t have any other options.
Board the train and make your way north before exiting to the west, spooky ghost antics aside. Once off the train, continue west up some stairs, then turn north to witness some ghost graffiti. Ignore it, as the door indicated won’t open, and a bit to the east you’ll find a control panel which also doesn’t work. Keep going east until you find some stairs, descend them, kill a new old foe - a Lesser Drake - and loot a chest to score a Gothic Bangle, which has good combined Defense and Magic Defense, but still only three sockets.
Head back up stairs and, process of elimination, enter the door to the north. Inside the room beyond you’ll have to fend off two Ghosts in relatively cramped quarters. Start out with melee attacks and switch to magic when they put up their “Shields”. Smash some Shinra Boxes, then exit to the west and continue north and west until you reach another building. Ignore the path north for now and instead enter the building, where you’ll have to find another Ghost. Defeat it, smash some Shinra Boxes to the north, then go through a door to the south. not much going on in here, if you open the door to the south you’ll unlock a shortcut back near the elevator, while if you go through the door to the east you’ll find a chest containing 2x Mega-Potions.
Make your way back through the building and exit through a door to the north, then continue north to find two sets of stairs, one flight leading up (east) and one leading down (west). The door atop the eastern stairs is locked (although there are some Shinra Boxes you can smash up there), so go downstairs first, head north around some beams and loot a chest containing 3x Echo Mists. After you gather this treasure, make your way south and climb a ladder, then cross some convenient shipping containers to the east and descend another ladder to reach the northeastern edge of this warehouse.
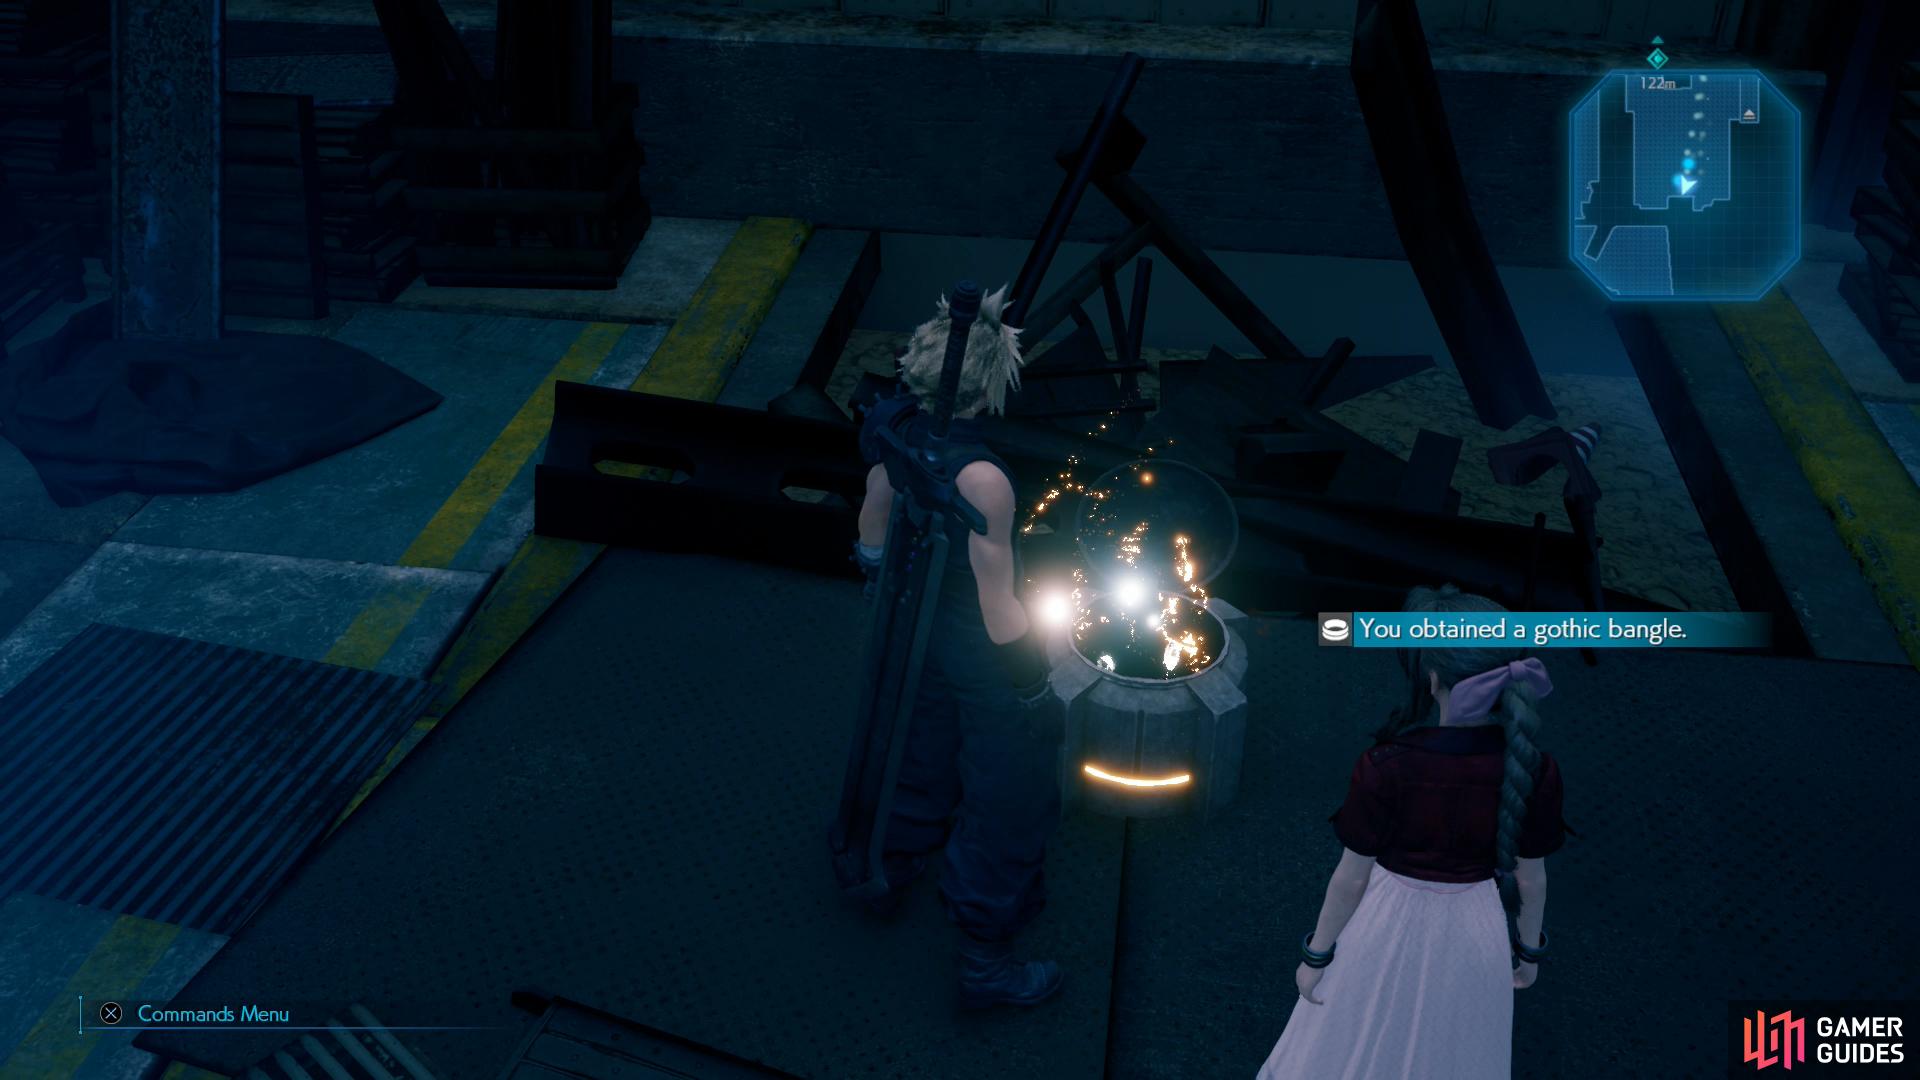
Loot a chest to score a Gothic Bangle.
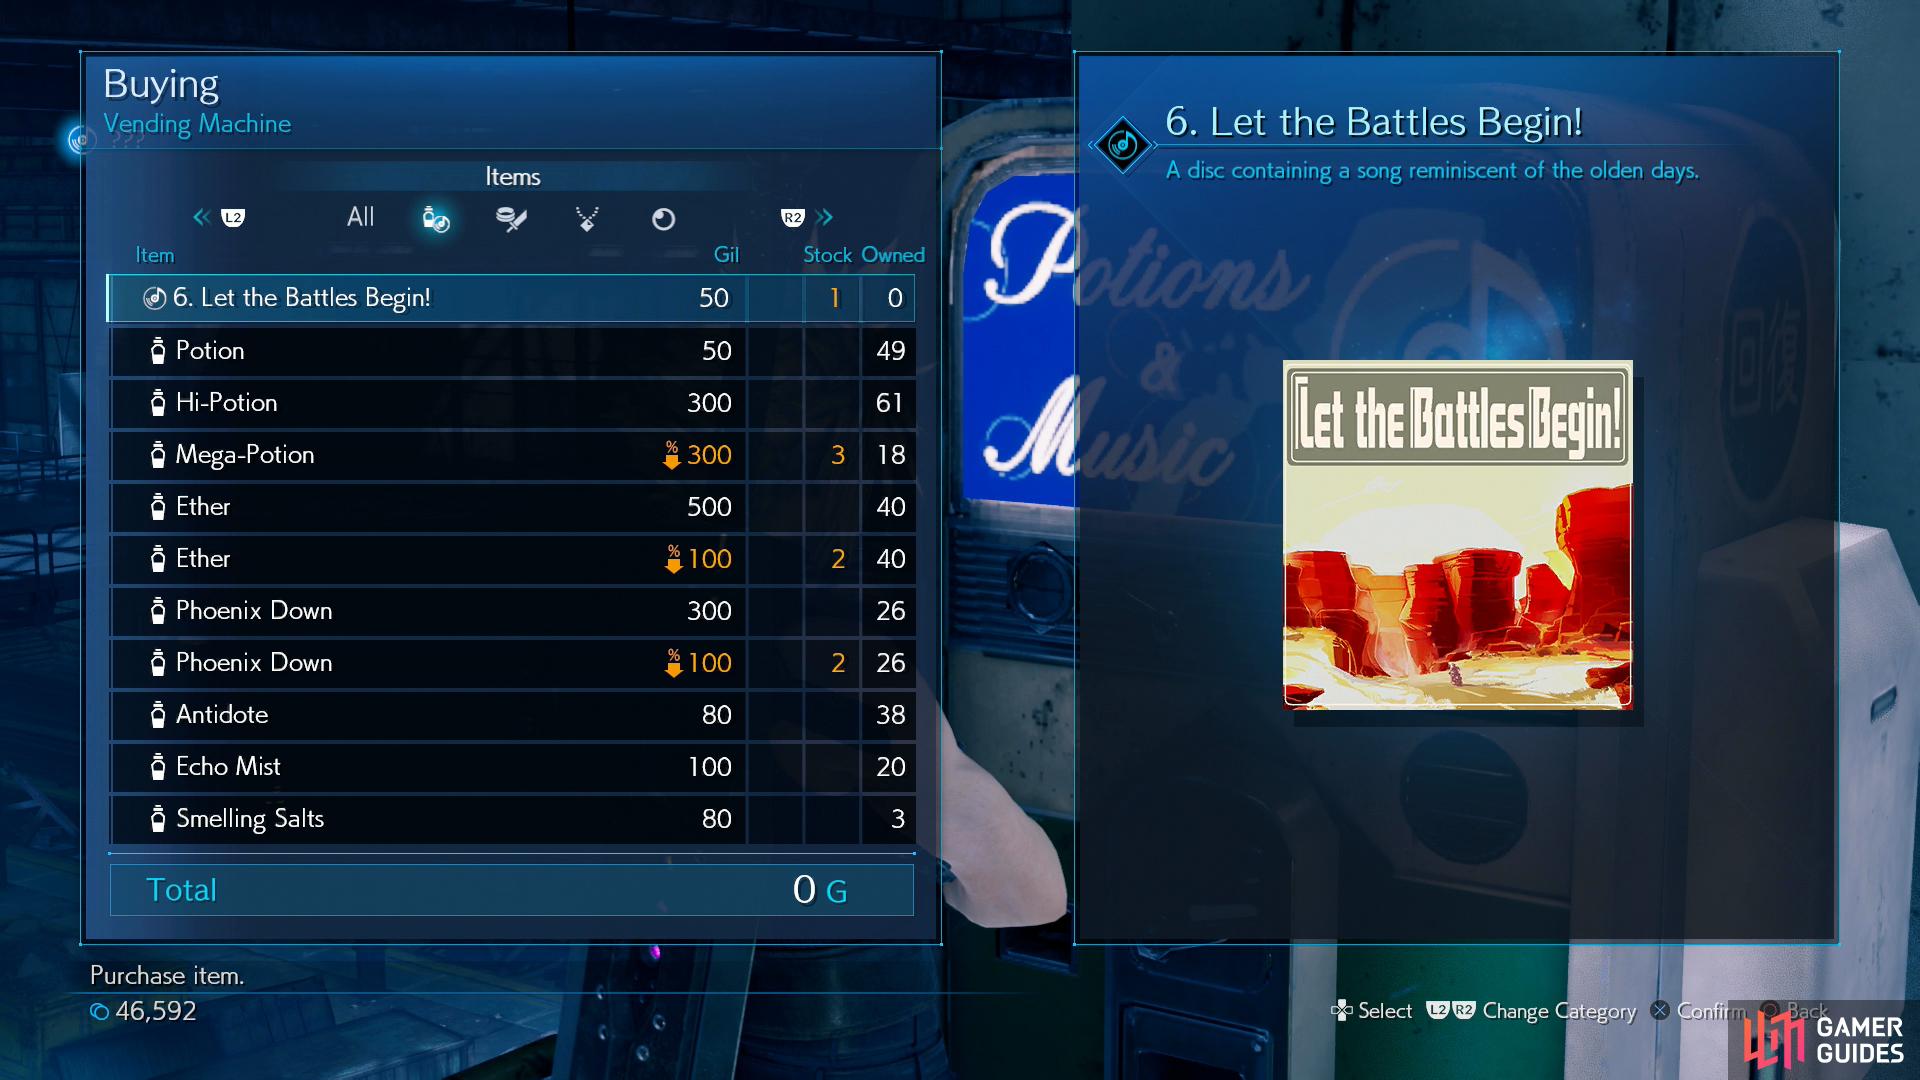
You can buy the “Let the Battles Begin!” Music Disc from a vending machine.
Unfortunately this ladder is another short one, making this a one-way trip. Not like you have any other options, right? Venture north a bit and dispatch three more Cripshays, smash some Shinra Boxes, then ascend a flight of stairs. From here you can continue west up some stairs to reach the control room, outside of which is a rest bench and a vending machine. Buy the 6. Let the Battles Begin! Music Disc from the vending machine, and consider picking up the discounted 3x Mega-Potions (300G), 2x Ethers (100G) and 2x Phoenix Downs (100G). Before you continue on into the control room, however, there’s treasure to be gained.
First, head south past the stairs and turn west to find a chest containing 1,000 Gil. Next, go through the door to the south and in the room beyond you’ll find two more doors. Through the door to the west you’ll find some Shinra Boxes to smash, while through the door to the south you’ll find a chest containing a Moogle Medal. Well, they can’t all be winners.
Return back to the rest bench and vending machine, then head into the control room. Before you fiddle with anything, it’s time to prepare for an upcoming fight. This battle isn’t too hard, although you’ll be well-served by making sure everybody has Fire Materia equipped. Like with Apzu, this upcoming foe is weak to fire, so putting Fire + Elemental on Tifa’s weapon will help. Ensuring that everybody has Healing Materia won’t hurt, either, and Heal + Magnify might come especially useful. Finally, consider pairing Binding + Warding on your top caster’s armor to help mitigate Silence.
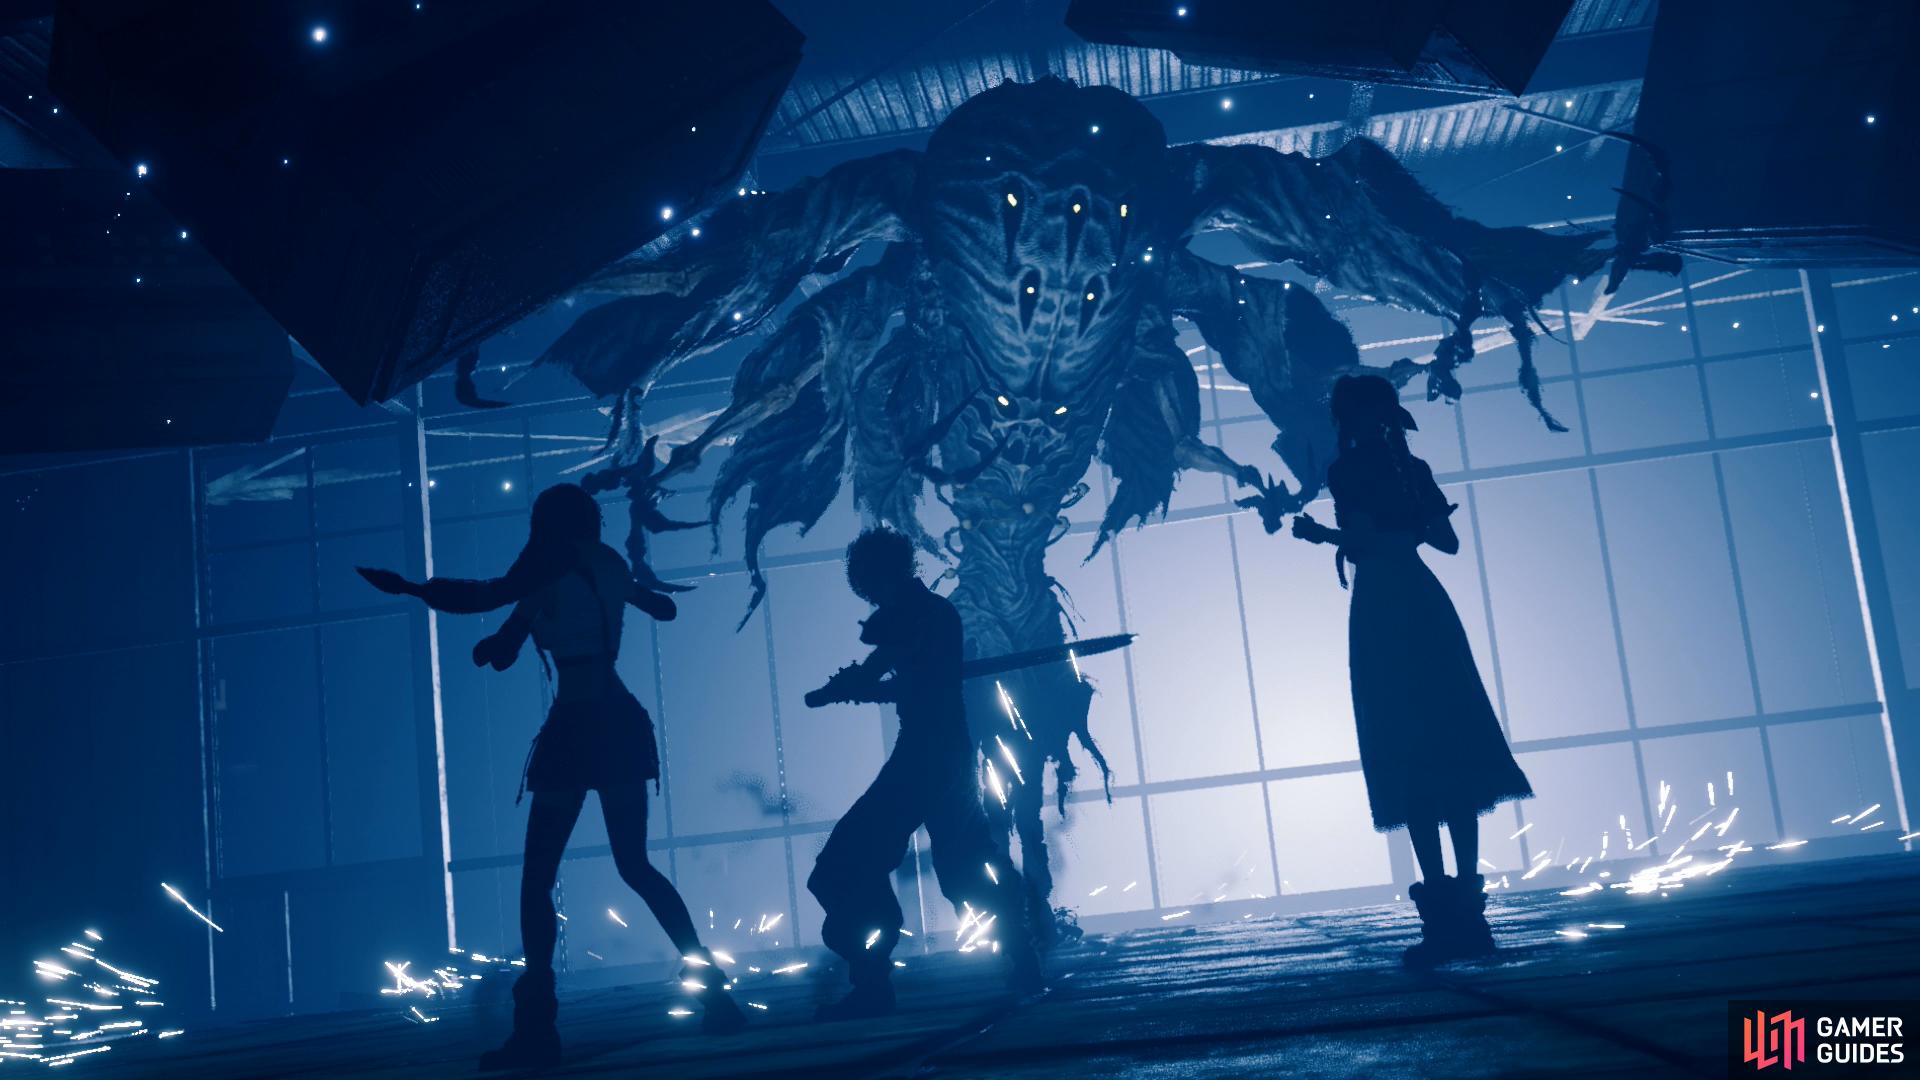
When you’re ready, enter the control room and activate a console to the north. The supernatural forces at work in the Train Graveyard will intensify and ultimately coalesce into a dangerous entity: a Ghoul
Boss: Ghoul
| Enemy | Weaknesses | Notable Loot |
|---|---|---|
| Ghoul | Fire | -- |
(1 of 5) The Ghoul’s Telekinesis ability can either bludgeon at close range, or toss projectiles.
Phase 1
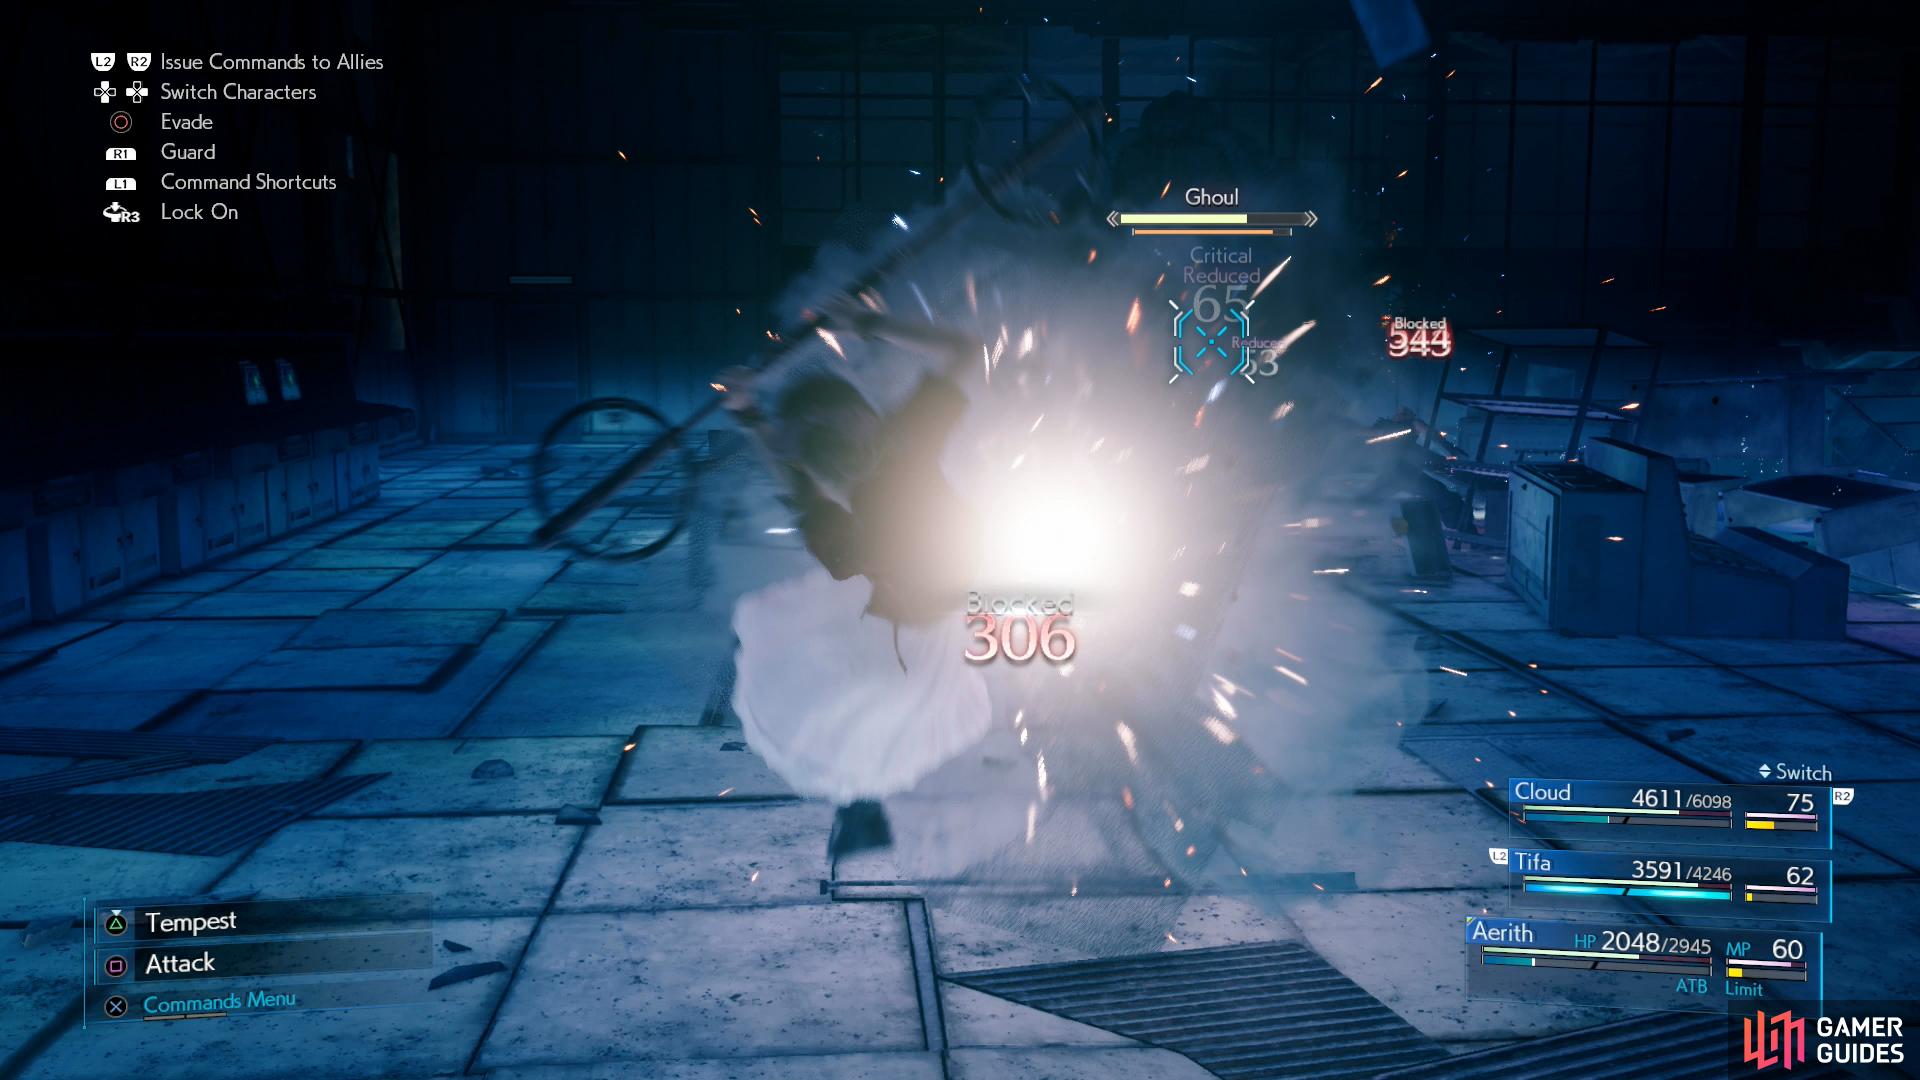
The Ghoul is, in many respects, an over-powered Ghost, and like the constituent Ghosts that comprise it, the Ghoul can - and frequently will - shift between a corporeal state and an incorporeal state. When manifested as a physical entity, physical attacks will work, when not, you’ll need to resort to magic. The Ghoul is weak to fire and healing magic, so hit it with Fire or Cure while it’s incorporeal to force it to manifest again as well as “Pressure” it. In a physical state your physical attacks - including “Focused” abilities - will work on it, and while building up its Stagger bar is a good goal, the boss will steal your first Stagger period, as the Ghoul will shift to phase two at or shortly after being Staggered for the first time (likely when it’s been reduced to around two-thirds or half its HP).
So, attack with Cloud and Tifa while it’s physical to build up those ATB bars, hit it with magic when it goes incorporeal, and when “Pressured” from your magic attacks try to build its Stagger bar. Simple stuff. Unfortunately Ghoul has the nerve to fight back. It’s most common attack routine involves Piercing Scream (which can stun characters) followed by Telekinesis, where the Ghoul will fling various office adornments at you, either smashing a character in melee for heavy damage (around 1,000) or flinging several items at various characters (500~ damage each). These projectiles can be blocked, and the Ghoul seems to have trouble hitting opponents that are very close.
Other attacks aren’t given a fancy name, but can still be annoying. Ghouls has two un-named melee attacks, a swipe accompanied by a red glow that can inflict “Silence” and an attack accompanied by a blue glow that doesn’t seem to do much initially, but beware the glowing blue line left on the ground after the attack, as after a short delay the line will erupt, dealing heavy damage (1,000~) to any character standing on it. In addition to that it has a “Phantasmic Fury” attack which it’ll perform while incorporeal, noteworthy that it can inflict “Bound”.

The most annoying aspect of this fight (save for the debris scattered around) is the fact that the Ghoul will not only turn incorporeal, but it’ll also shift around. Often the two are linked, and in any event it’ll likely cause you to miss some attacks. Just something you’re going to have to anticipate and come to terms with.
Phase 2
As mentioned earlier, when the Ghoul is Staggered for the first time it’ll soon shift to phase two, vanishing for a moment and rearranging the debris around the battlefield. In its second phase… surprisingly little changes. The Ghoul will use most of the same attacks as before, but it’ll also start using “Balefire”, conjuring numerous bluish-white flames that move about and will explode upon coming into contact with a character. A nuisance, to be sure, but honestly one of the least impressive phase shifts of any boss we’ve seen.
Largely you just need to keep your characters healed and follow the same strategies as before - physical attacks to charge ATB when it’s corporeal, magic attacks when it’s incorporeal to “Pressure” it and force it to turn corporeal again, then use “Focused” attacks to drive up its Stagger gauge. This time, focus on charging Tifa’s ki levels so when the Ghoul gets Staggered you can finish it off with Rise and Fall and Omnistrike.
Defeating the Ghoul will earn you a chunk of Subversion Materia, which will allow you to cast spells like Breach and Dispel, the former of which will remove buffs like Barrier, Manaward, Reflect and Shield while the latter will remove all buffs. When paired with Warding Materia it’ll also offer protection against Instant Death effects. Useful stuff, to be sure.
Leave the control room and return south to the previously inoperable control panel, which is now functional. Lot of effort you had to go through because some ghosts wanted to “play”, but at least you can move on. Use the control panel to lower some train cars, then head down to the bottom floor via the stairs to the southwest. Enter the train car to the east, then head north through the new car, ultimately exiting to the west. From here head north, then west to find two Lesser Drakes. Defeat them, turn south, loot a chest containing 3x Echo Mists, then turn north and smash some Shinra Boxes before returning back east to board a new train car north of the one you exited.
Continue north, then exit to the east to witness some scenes. After they’re over, continue north to spot a door you can squeeze through, and a rest bench to the east. Rest up, then exit the warehouse.
Back Amongst Friends
| Enemy | Weaknesses | Notable Loot |
|---|---|---|
| Ghost | Fire | Turbo Ether |
| Cripshay | Ice | -- |
| Wererat | Ice | -- |
| Lesser Drake | Wind | Orb of Gravity |
| Cerulean Drake | Wind | Orb of Gravity |
Smash some Shinra Boxes to the northeast, then use a conveniently well-lit console to the northwest. This will start a nearby turntable to start moving… and provoke a large group of enemies. First up you’ll have to fend off some Wererats - nothing Triple Slash can’t handle. After them you’ll need to fend off a pair of Ghosts and a trio of Cripshays. Be aggressive with your MP here to put these foes down - you have a rest bench nearby, no reason to fight conservatively.
Defeat the enemies, then cross the turntable to the northwest, and when you reach solid ground on the other side, note the ladder ahead, then turn west and plunder a chest to find a Hi-Potion. Return to the previously-neglected ladder, climb it, then continue northwest to find another ladder leading down. It’s another short ladder, so once you drop down don’t expect to come back.
Drop down the ladder, then climb another ladder to reach a locomotive. Activate it and watch some scenes, where convenient radio chatter confirms Tifa’s worst fears. Well… perhaps not worst, but at this point it’s really only a matter of time…
Exit the locomotive and climb a ladder to the north, then follow the linear path ahead until you find another ladder leading down. Drop down (one way, again), then board another train to the north and exit to the east. Head northeast to find another ladder leading to a locomotive, which you can activate. After it moves, disembark and head around the northern end of the locomotive to find a treasure chest containing 2x Mega-Potions. Next make your way southwest from the locomotive, past two now-lit up train cars where you’ll find an old foe - a Cerulean Drake, which is joined by a Lesser Drake. Flying enemies were a mistake. Oh well, use Aero to put them down, then head south to smash some Shinra Boxes.
Ignore the ladders you see on nearby train cars and venture west to find some more Shinra Boxes to smash, then head northeast to find the ladder to another locomotive. Board it, operate it and after it moves abandon it and return back south and east to the lit-up train car. Climb a ladder and move along the roofs of these train cars until you find another ladder to the northeast. Surprisingly not a one-way ladder, this time, and it’ll lead near a rest bench and a vending machine. Buy another collection of discounted restoratives - 3x Mega-Potions (300G), 2x Ethers (100G) and 2x Phoenix Downs (100G) - if you have the Gil, rest up, then continue northwest.
Of course, the rest bench and vending machine should raise alarms, as they often precede boss fights. So it goes here. The boss ahead is weak to ice, but wind can also be useful, so be sure to have those two materia equipped. Have Tifa equip Ice + Elemental, and consider equipping Headband accessories to protect yourself from “Sleep” - the nearby vending machine sells them for 1,500 Gil each. Most importantly, equip your Steal Materia on a character - we chose Tifa, because her ATB gauge charges faster.
When you’re ready continue forward, and after some scenes you’ll find yourself confronting the source of these black whirlwinds…
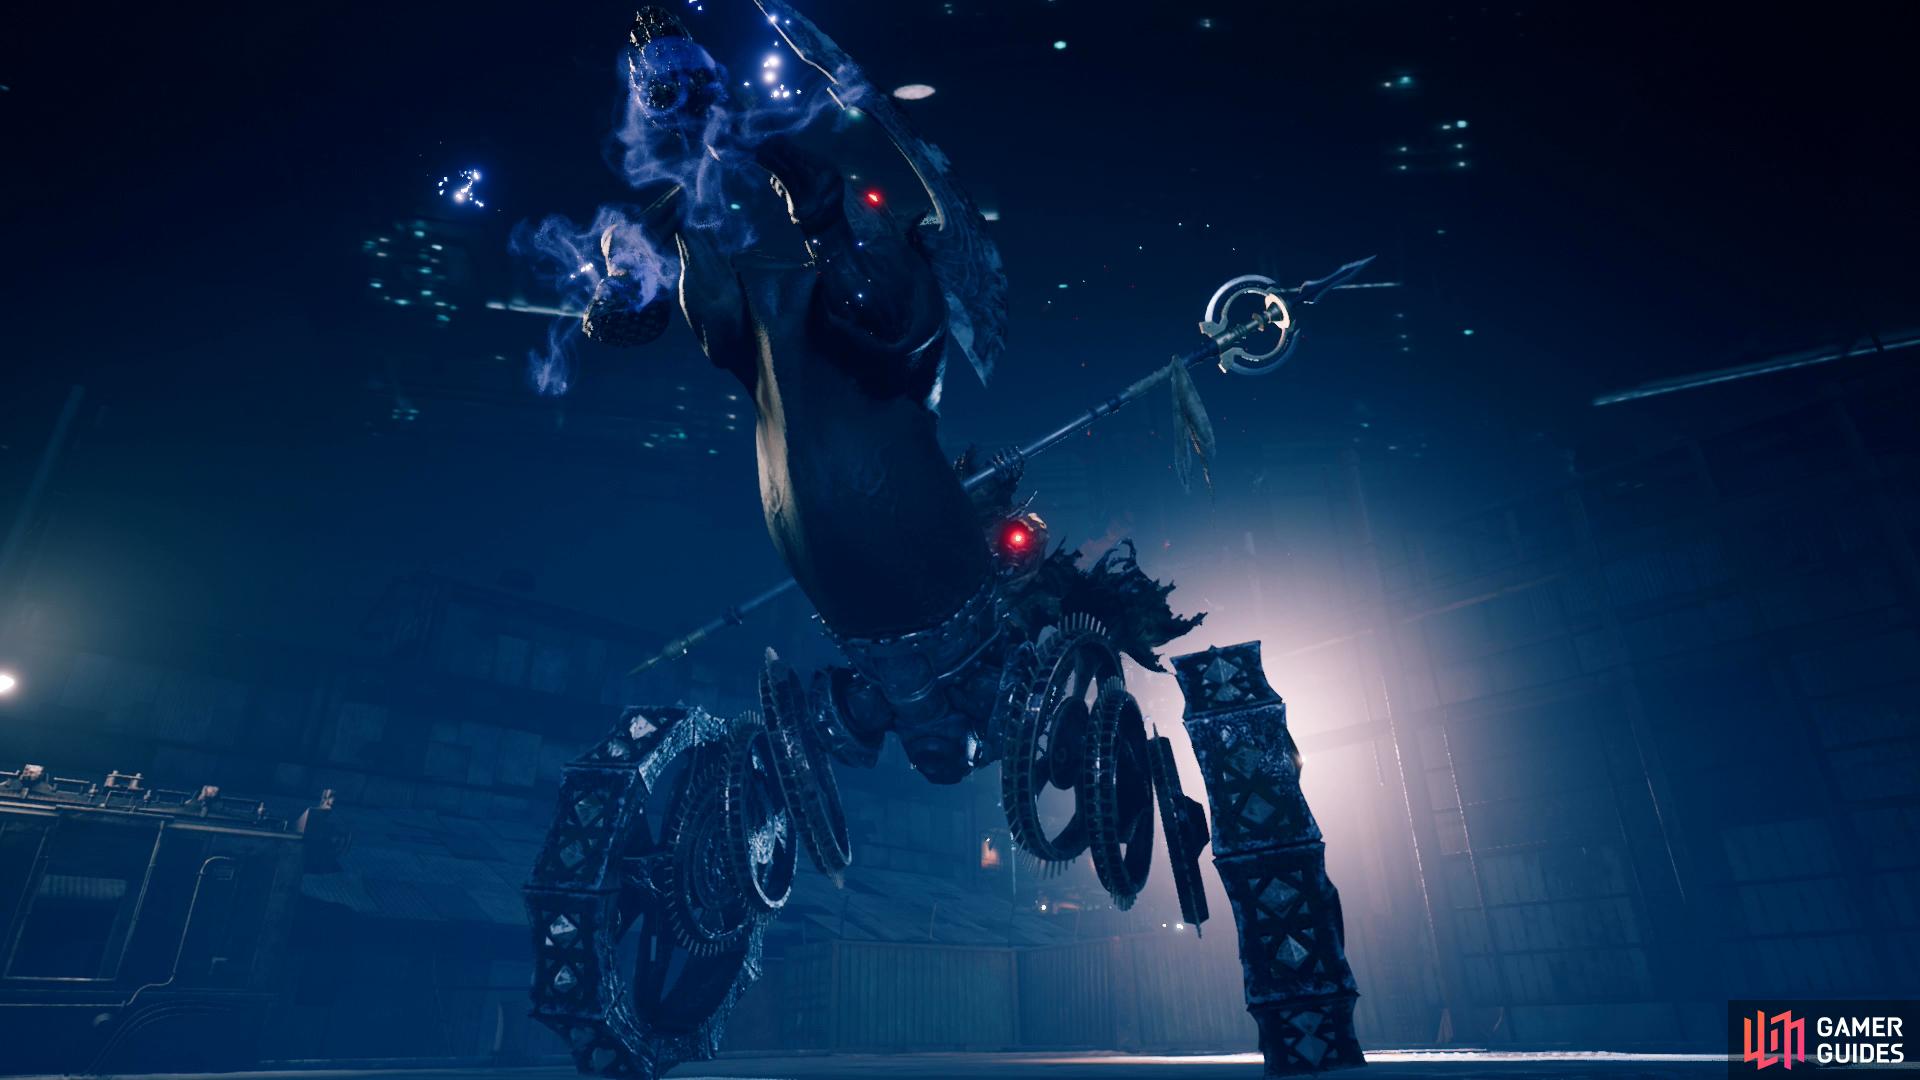
Boss: Eligor
| Enemy | Weaknesses | Notable Loot |
|---|---|---|
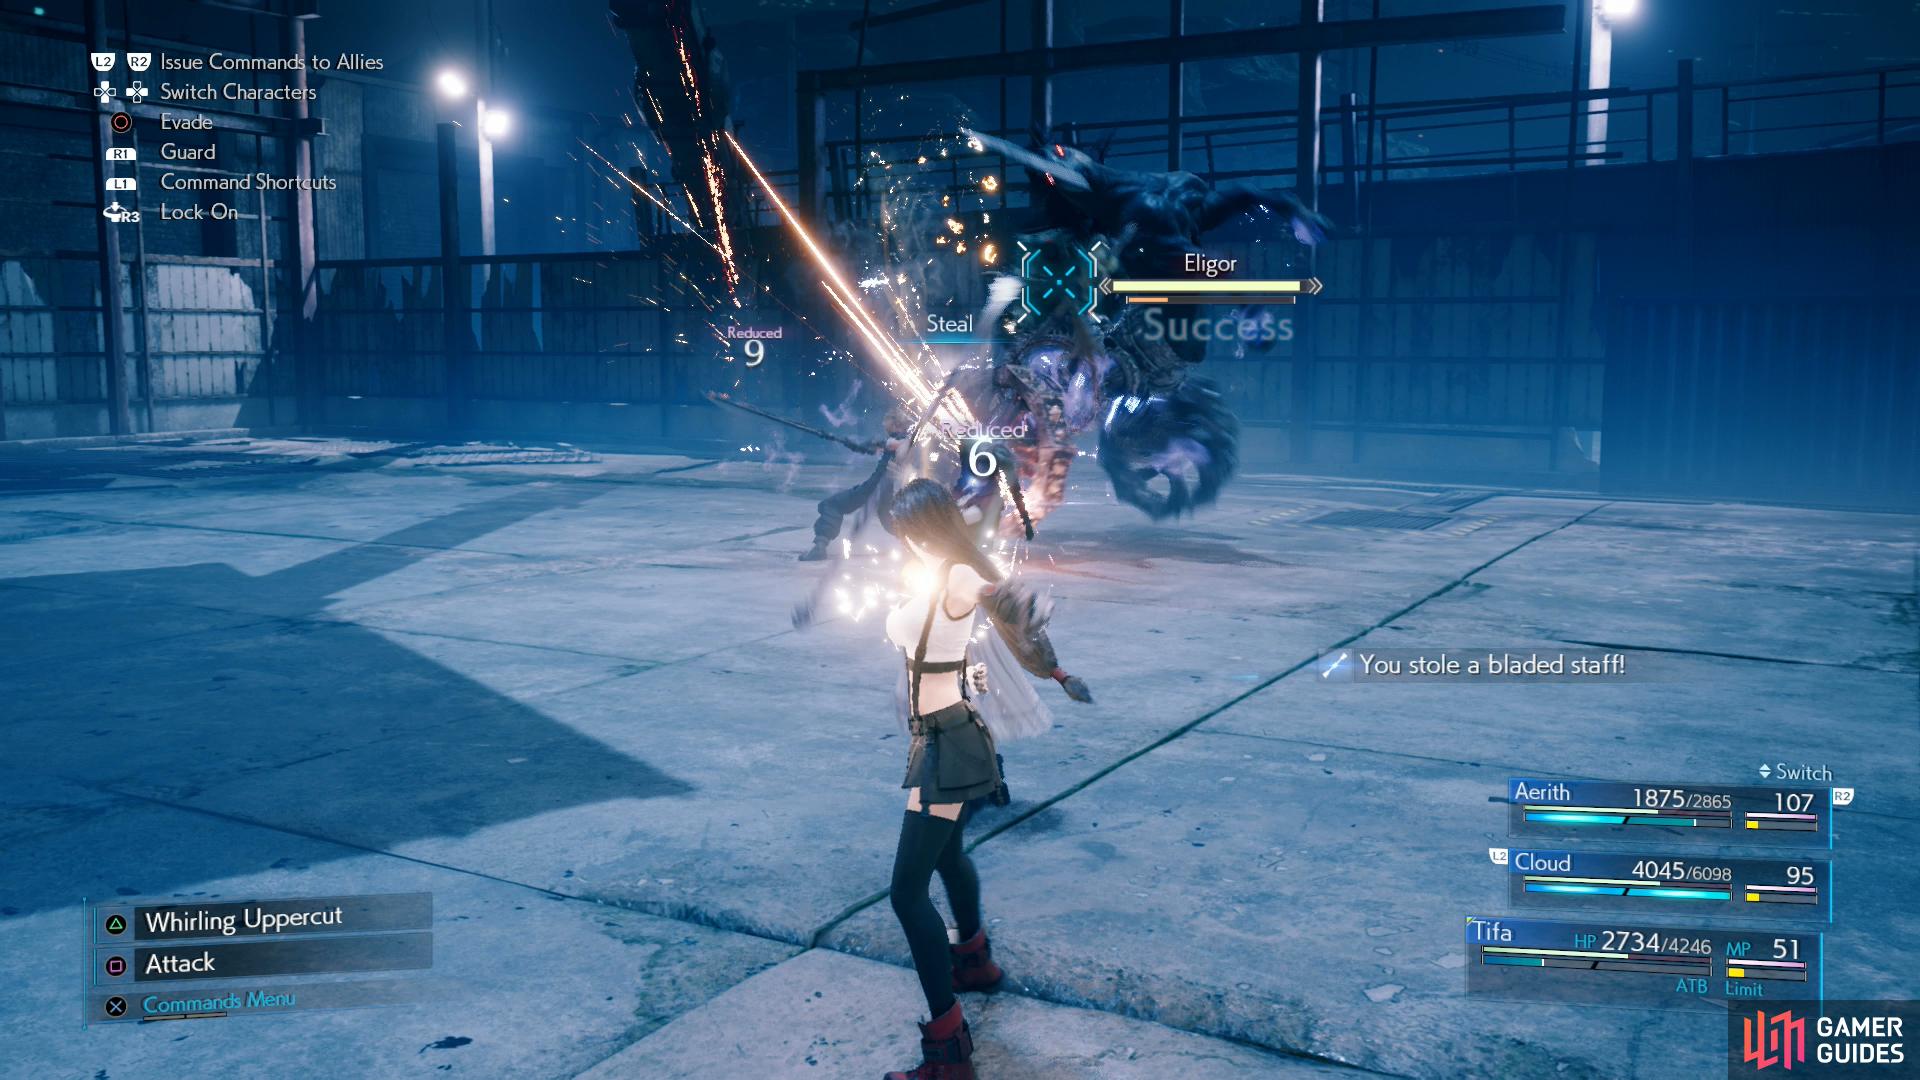
| Eligor | Ice | Bladed Staff |
Phase 1
Before doing anything, note that you can steal a Bladed Staff from this boss. Don’t worry about prosecuting the fight too aggressively at first, just chase the boss with Tifa, build up your ATB gauge, and use every segment to steal until you get this weapon. It won’t drop, so if you don’t steal it before this fight is over, you won’t get it this playthrough.
That out of the way, you may be fooled into thinking that because this boss is weak to ice (and situationally to wind) you should have Aerith drop an Arcane Ward and pelt your foe with Blizzard/Blizzara. Disabuse yourself of that notion, however, as this is a Tifa fight, not an Aerith fight. Guess those pre-battle scenes shook her up? Or, more accurately, Eligor is mobile and Blizzard and Aero are the least accurate spells in the game, making them a nuisance to use. Not that they can’t have an effect, but in practice Tifa with Ice + Elemental on her weapon will be more effective in most situations.
In the first phase of the fight Eligor will use basic attacks, including a stomp and various scythe sweeps. Named attacks including “Sweeping Gaze”, a sweeping laser attack that can inflict “Sleep” and “Silence” (Headbands will make this fight might less annoying) while Trample is a charge attack that allows for a fair amount of course correction on Eligor’s part.
We simply take control of Tifa and endeavor to remain behind Eligor as much as possible, which protects us from most of its attacks. Just avoid attacking the wheels, as they’ll deflect your attacks to very little effect. Charge your ki when you build up ATB gauges, and when Eligor is “Pressured” from your melee attacks (and perhaps the odd Blizzard from Aerith when Eligor is stationary) use “Focused” attacks to Stagger Eligor, then let loose with Rise and Fall and Omnistrike.
Once you reduce Eligor to 2/3 of its HP it’ll change tactics.
Phase 2
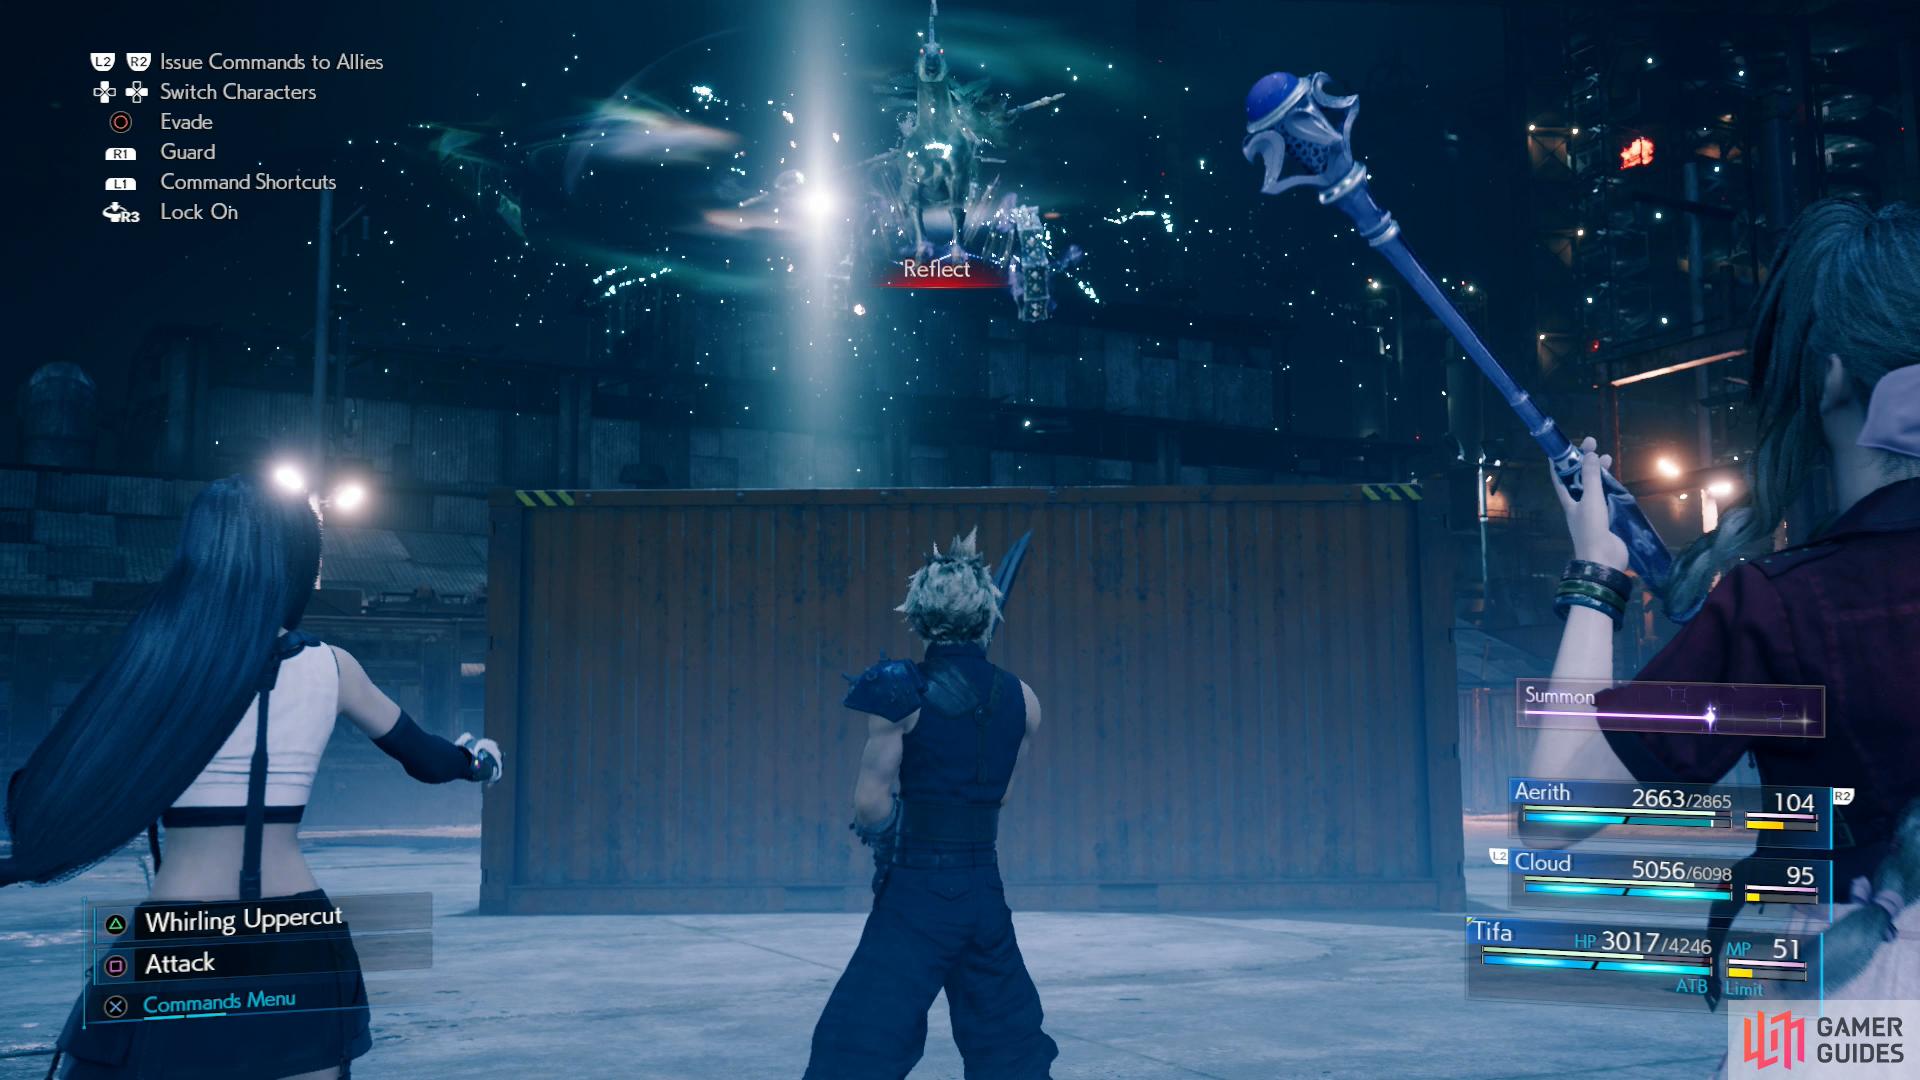
At the start of this phase Eligor will take to the skies, cast “Reflect” and start to fly around, randomly striking with lightning javelins (almost always targeting your controlled character - keep moving to avoid and watch for lighting spots on the ground to know where they’ll hit). You can use your newfound Subversion Materia to cast Breach and remove Reflect, but honestly spells have been of dubious value so far this fight, and Eligor’s Reflect spell will wear off before long on its own.
In addition to unnamed lightning javelin attacks, Eligor will periodically use Piercing Gaze - another laser attack - and Javelin Bolts. The latter is the more interesting attack for a variety of reasons. It has a large area-of-effect, throughout which numerous lightning javelins will strike the ground. Watch the lightning spots on the ground and avoid them to mitigate damage. More interesting, however, is the fact that Eligor will remain stationary for a good period of time during this attack, giving you the change to retaliate.
To do this, take control of Tifa and try to stay away from Eligor as he flies around, and when he stops to use his Javelin Bolts attack (hopefully targeting Tifa) you’ll be able to respond. Since Javelin Bolts has a fixed area of effect, if you stayed away from Eligor you’ll be able to close with him during this attack and lay into him with aerial attacks. It’s slow, but it’ll build up Eligor’s Stagger gauge slowly but surely, and if you manage to “Pressure” Eligor he should get grounded. Failing (or in addition to) that you can try to pelt Eligor with Aero spells while he’s stationary for his Javelin Bolts attack, which will also ground Eligor. Once grounded, keep attacking, try to Stagger the boss, then punish him.
Phase 3
Once Eligor is reduced to 1/3 of its HP phase three will begin. Eligor is grounded again, but he seems to have enjoyed his aerial antics, as he’ll attempt to recreate them here, except instead of flying around he’ll ride around swinging his scythe. While he does decent damage with these scythe attacks (enough to deter you from using Punisher mode counterattacks - it’s an attrition fight Eligor will probably win) the circle Eligor rides around in is fairly wide and inflexible; you can usually just sit in the corners or in the middle of the battlefield to avoid his scythe attacks altogether. Eligor will, however, continue to use his lightning javelin attacks, so be wary of those.
In addition to his drive-by scythe attacks he’ll stop to use “Javelin Bolts”, “Piercing Gaze” and a new attack, “Winds of Gehenna”, which pushes characters back before striking with a potent laser strike.
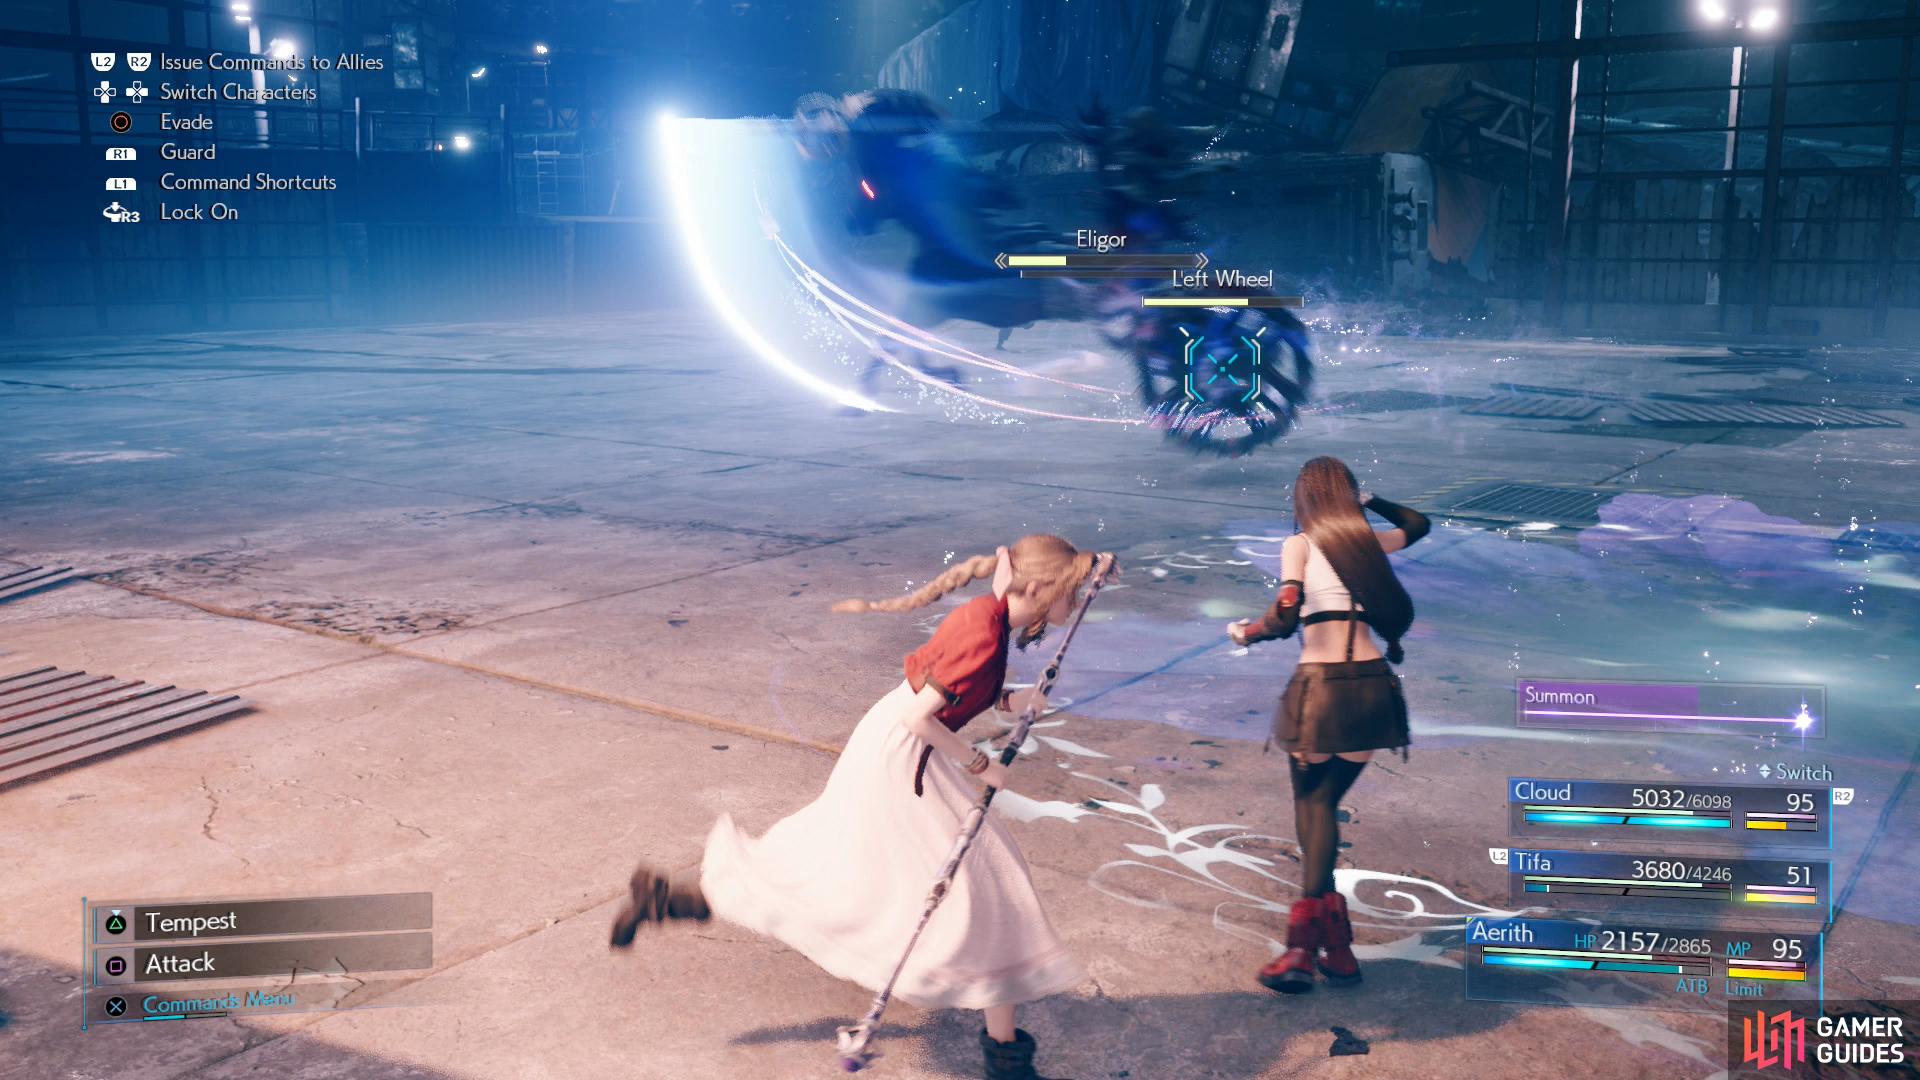
Just like in the last phase, when Eligor stops riding around is when you can attack, and in phase three Eligor’s wheels are now targets - for some reason they no longer deflect attacks. While getting behind Eligor and attacking works fine as it did in the first round, destroying Eligor’s wheels will fill the Stagger gauge and “Pressure” him. Once Staggered, finish Eligor off with Tifa’s ki abilities, and if that doesn’t quite do the trick, your summon gauge has almost certainly filled - summon Shiva and keep up the pressure, and if your attacks don’t do it, Shiva’s “Diamond Dust” ultimate attack should do it.
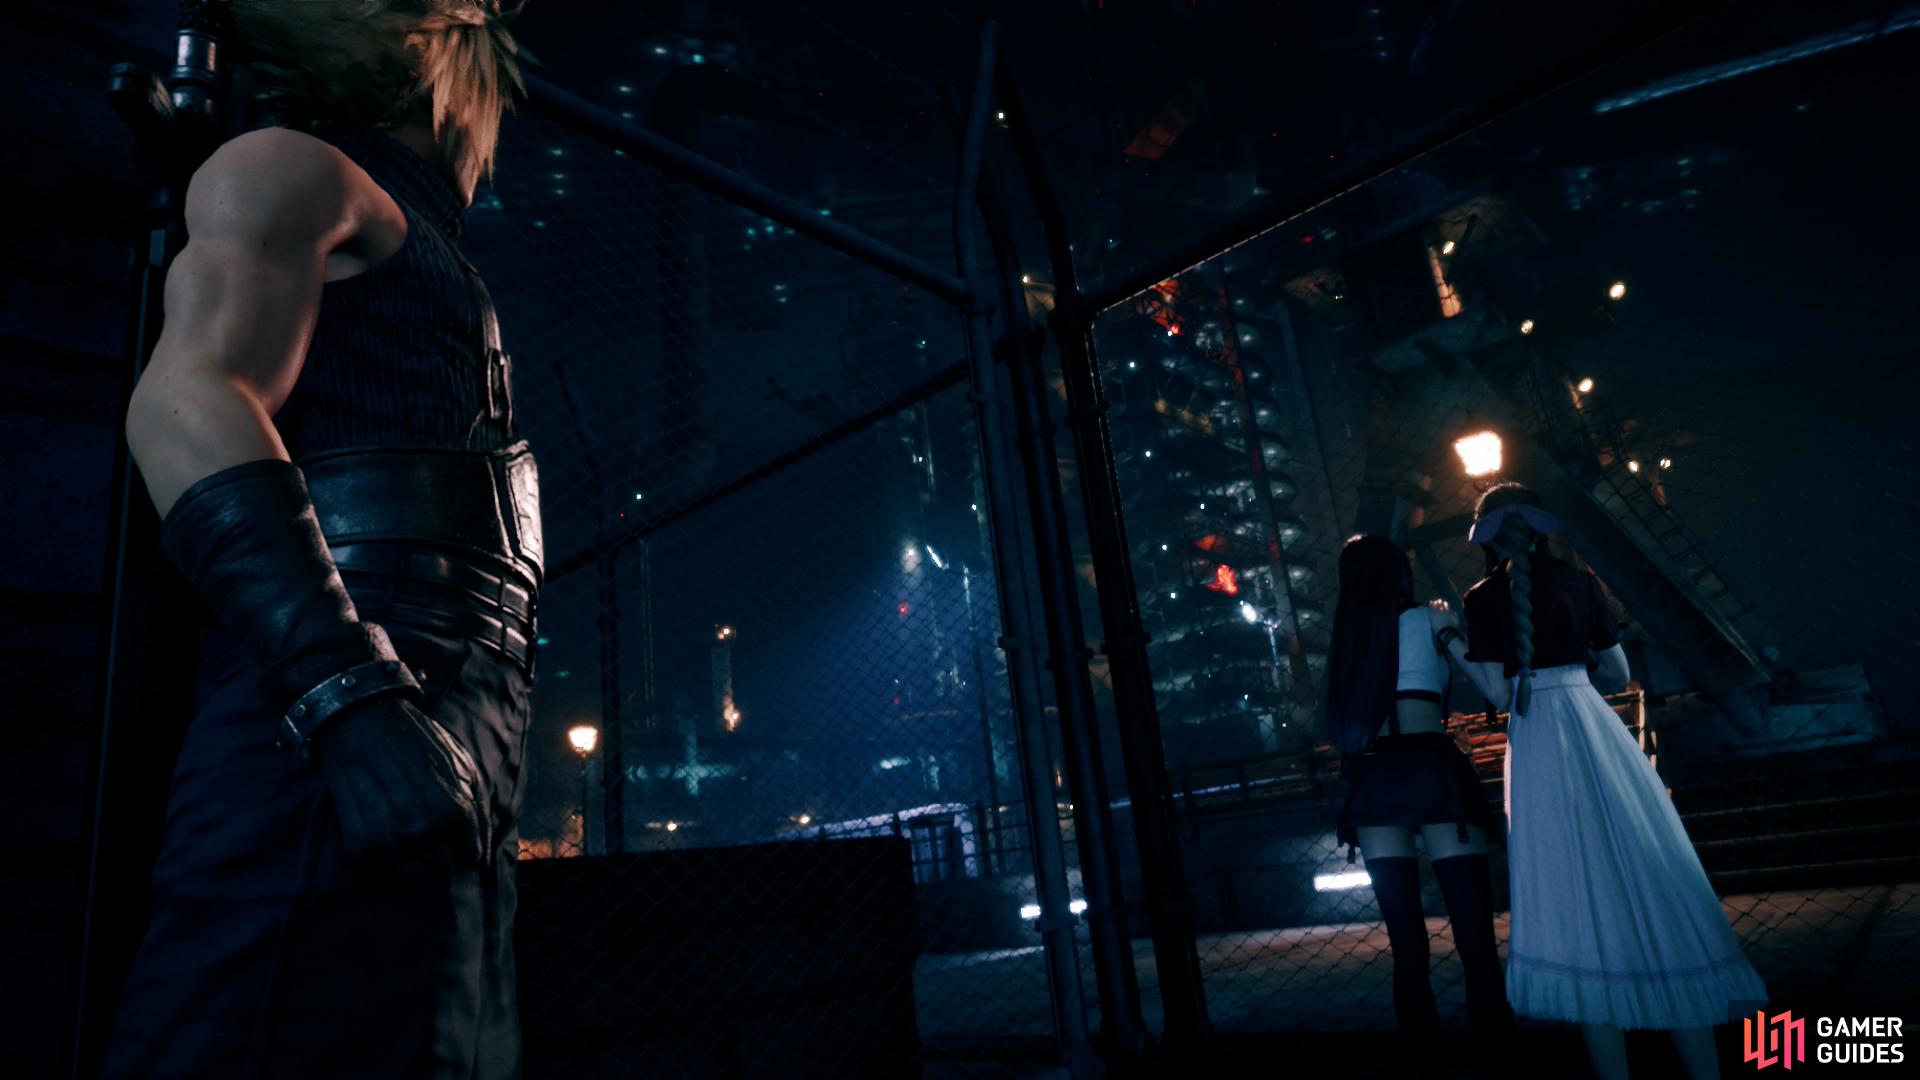
Defeat Eligor, then continue northwest and northeast to finally each Sector 7, and with it, the end of Chapter 11, obtaining the Paranormal Investigator Trophy.
No Comments