

Chapter 10 starts out with a fight against - Abzu, after which it’s a fairly linear dungeon where you’ll need to fight your way through trash mobs. Most of the enemies ahead are weak against ice, save for the Sahagin, which is weak against fire. Coincidentally, Sahagin are also the most powerful of the trash mobs you’ll face, and are especially troublesome near the end of the chapter when you’ll have to fight them in numbers. Because of the area-of-effect properties of fire spells and its reliability as a general offensive spell, we stick with Fire + Magnify as one of our primary sources of offense. We’re not worried about Staggering foes, we just want to push through them with as little fuss as possible.
| Cloud | . |
|---|---|
| Weapon: | Twin Stinger |
| Armor: | Cog Bangle |
| Accessory: | Champion Belt |
| Useful Materia: | Fire + Elemental (weapon), Healing, Revive, First Strike, Steadfast Block, ATB Stagger, Magic Up, HP Up |
| Aerith | . |
|---|---|
| Weapon: | Silver Staff |
| Armor: | Chain Bangle |
| Accessory: | Circlet |
| Useful Materia: | Fire + Magnify, Healing, Revive, First Strike, ATB Stagger, Magic Up, HP Up |
| Tifa | . |
|---|---|
| Weapon: | Purple Pain |
| Armor: | Cog Bangle |
| Accessory: | Champion Belt |
| Useful Materia: | Fire + Elemental (weapon), Healing, Revive, Steadfast Block, ATB Stagger, HP Up |
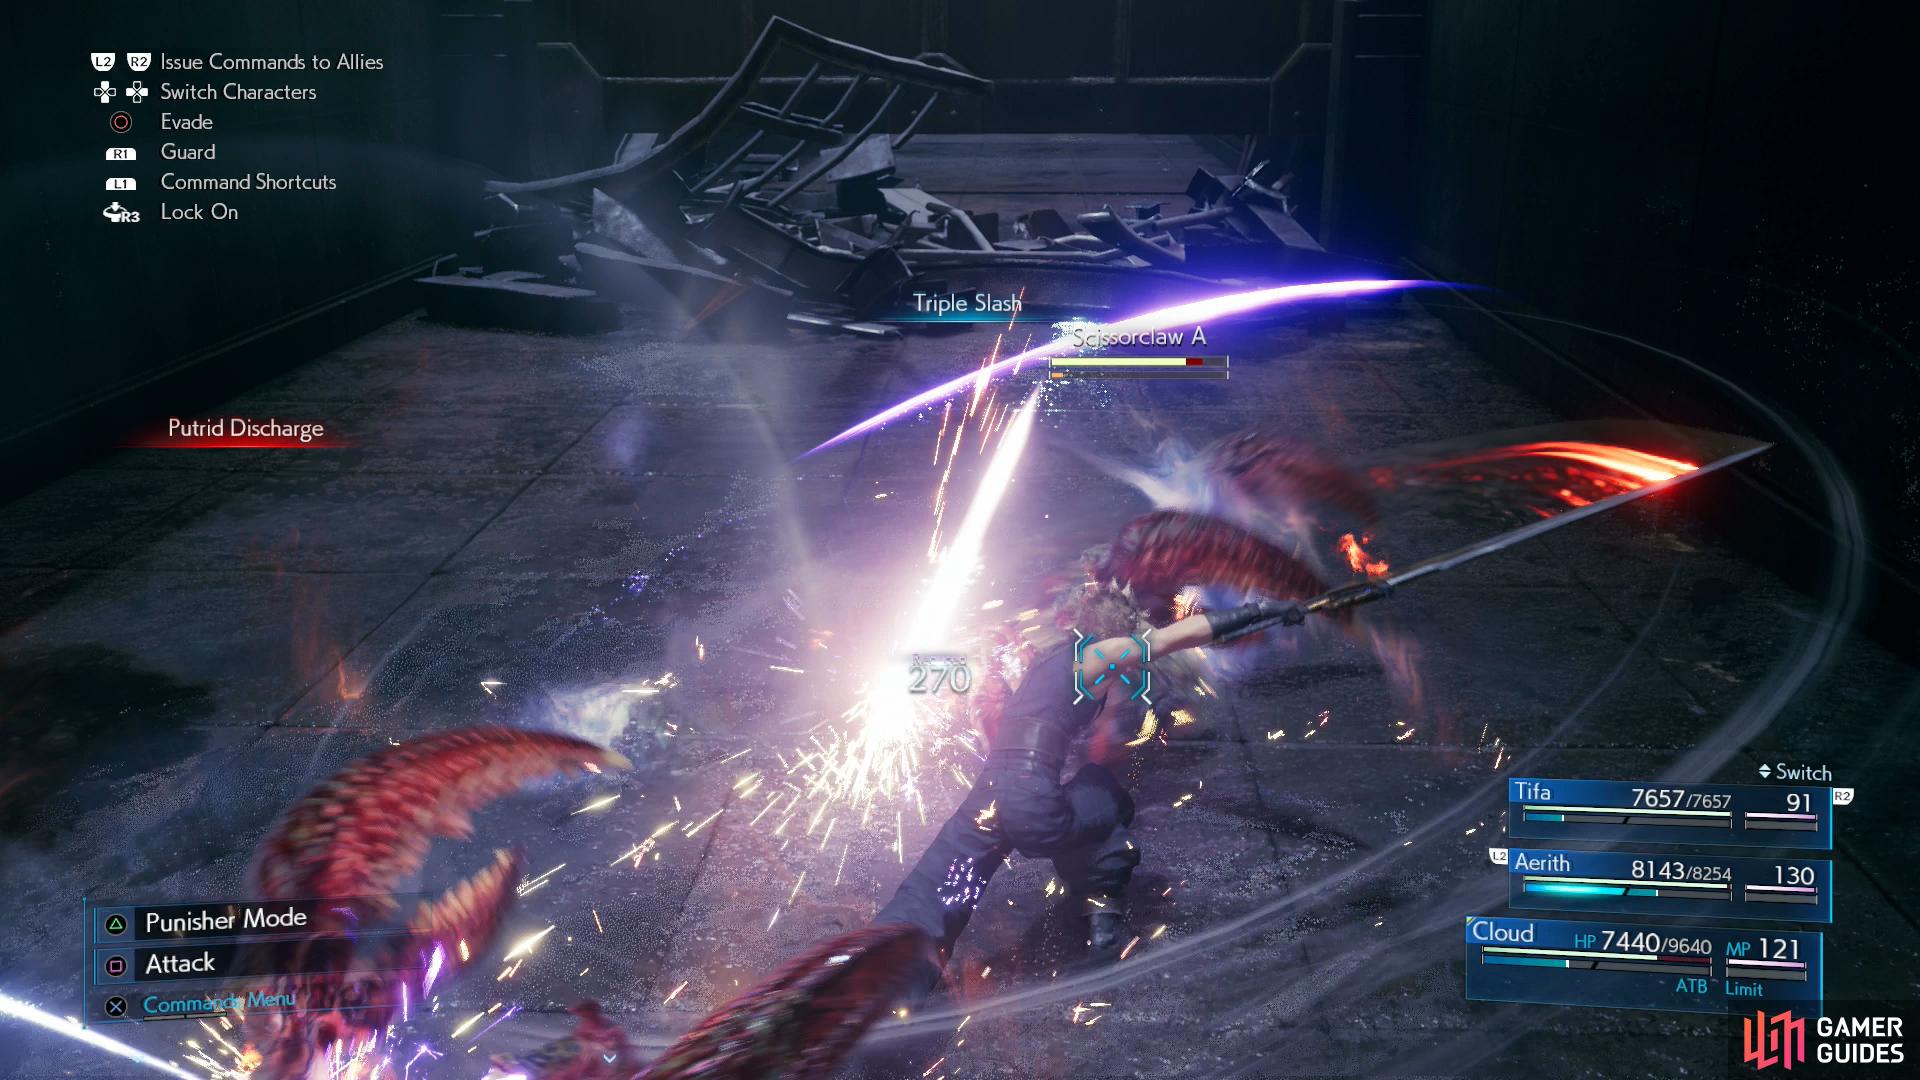
(1 of 4) “Triple Slash“ is a quick and cheap way to damage foes - starting out every fight with it is a good idea.
-
Your first fight will be against a lone Sahagin. No real struggle here, hit it with Fire (and Fire + Elemental enhanced weapons) to take it down.
-
After the first Sahagin fight you’ll need to open a sluice gate to drain the water. Proceed to the Aqueduct 2 area and use a rest bench, then press on. There’s also plenty of Shinra Boxes lying around if you need to recover MP post-Abzu.
-
Next you’ll face three Wererats in a chamber. Nothing special about these monsters, we just use Cloud’s “Triple Slash” to eliminate them. Cloud’s “Triple Slash” will join Aerith’s Fire + Magnify as our main tools for fighting through this area, and it’s generally a good idea to use it at the start of each battle.
-
In the next chamber await more Wererats and a Scissorclaw. When the Scissorclaw guards it’ll be heavily resistant to damage - even magical attacks - so target them first to spare yourself some bother.
-
Ahead lie the dark rooms of the Settling Basin Corridor. Flip the breaker, defeat two more Scissorclaws, then pick up the Key to the Sewers to advance to the Sector 7-6 Main Aqueduct.
-
Ladders, sluice gates and monsters. Here you’ll encounter the Blugu, who can inflict “Sleep” with their “Sleep Spume” attack. Takes them a while to use it and you can avoid it just by not standing in front of them. Or better yet, kill them before they can use it - Fire + Magnify and “Triple Slash” is still working just fine.
-
Make your way through the aqueduct, killing the varied enemies you find here. The Poison Materia from the first playthrough is still here, if you care to grab it, otherwise it’s just a matter of climbing ladder, flipping switches, and eventually walking across the top of a sluice gate and later an improvised bridge.
-
Eventually you’ll reach the Aqueduct 1 area, which is another series of interconnected chambers filled with foes. On the plus side you’ll get another rest bench to use. The Warding Materia from the first playthrough is gone, replaced by Healing Materia as a poor consolation prize. That being the case, you really have no incentive to explore, so just make your way through as quickly as possible.
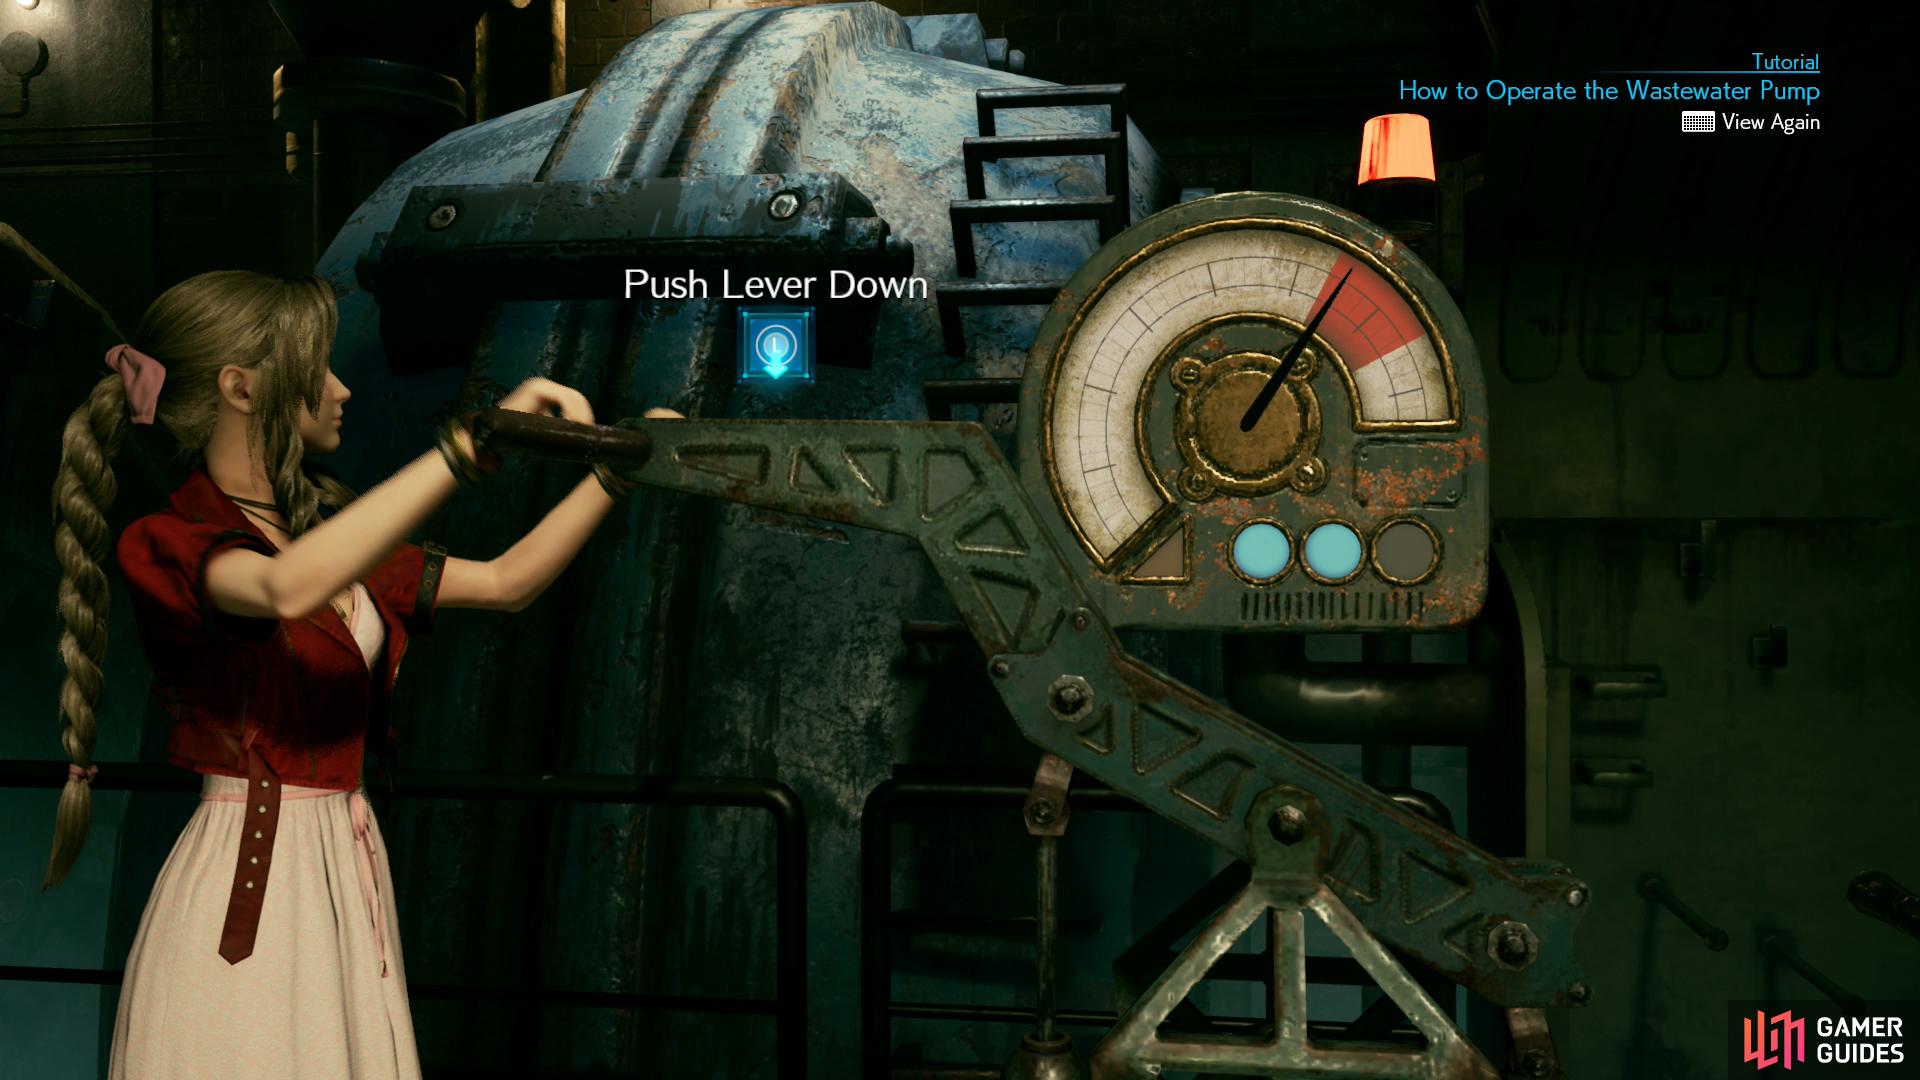
Succeed at the pump minigame again,
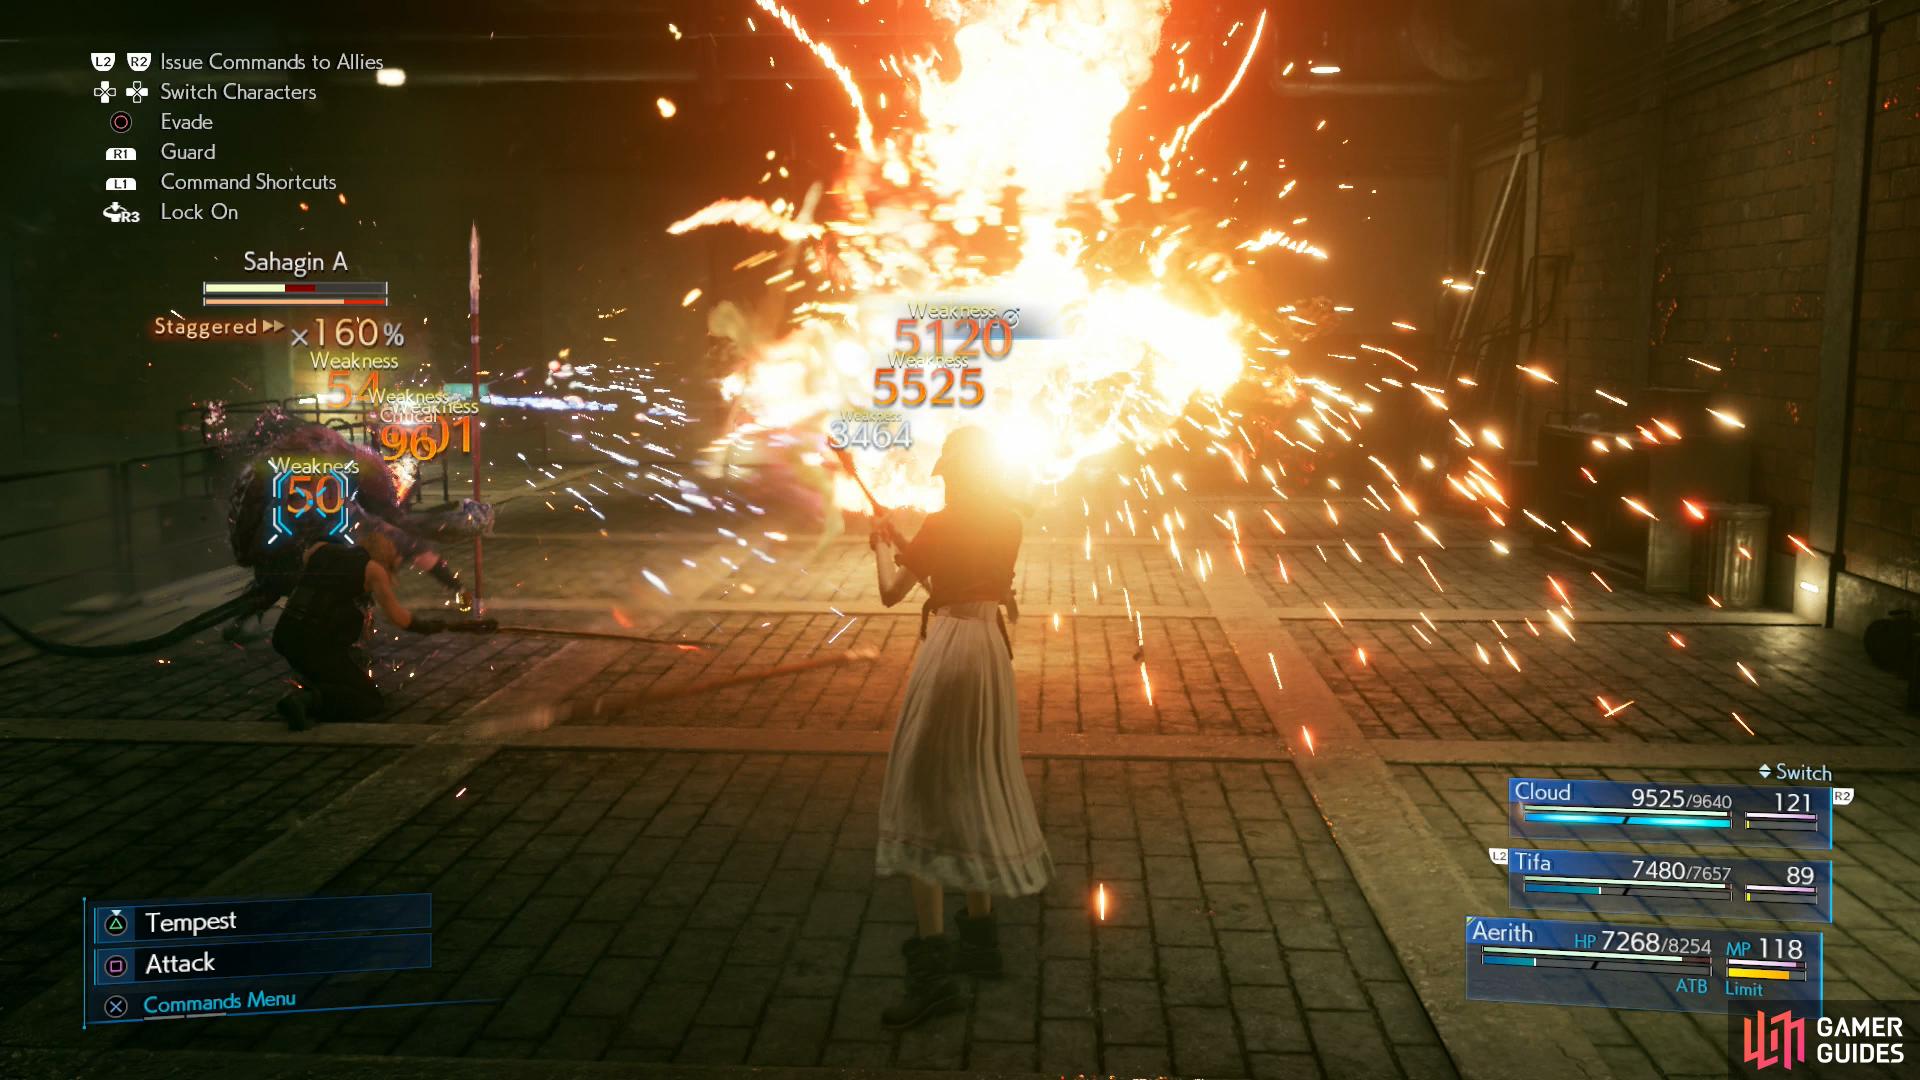
then fight your way through numerous Sahagin - using Fira instead of Fire will help secure victory.
-
When you reach the Primary Treatment area you’ll have to do the pump minigame again. It’s more of a time-waster than a test of skill.
-
The final run consists of several fights: 2x Sahagin, a Sahagin and 2x Blugus and 3x Sahagins. We make the only innovation of the chapter here - we use Fira instead of Fire on the Sahagin. Its damage should help combat the sheer numbers you’re facing, and you’d be wise not to underestimate the Sahagin, as multiple synchronous “Jump” attacks can deal impressive damage quickly.
No Comments