

| Enemy | Weaknesses | Notable Loot |
|---|---|---|
| Unknown Entity | Blizzard | -- |
A Way Out
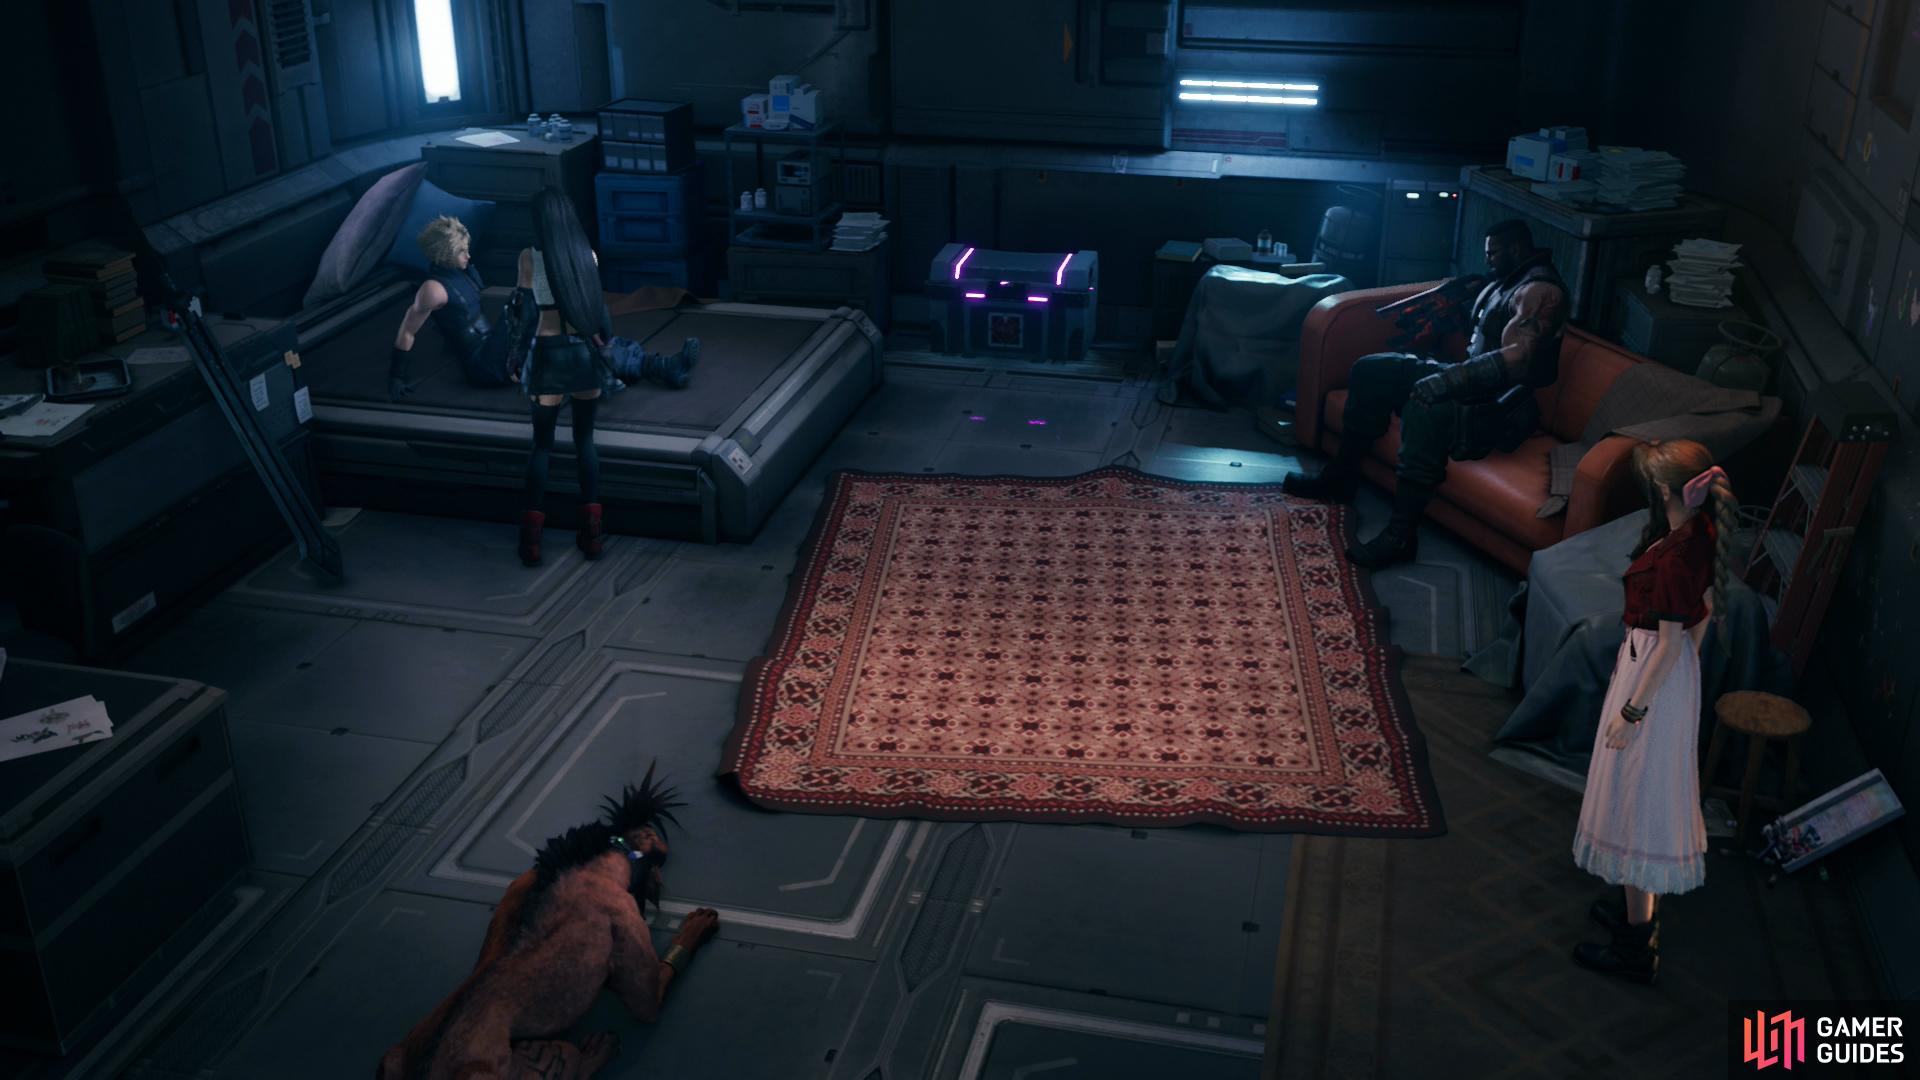
As soon as you’re in control of Cloud in this chapter, head south and loot a chest to score Aerith’s sixth and final weapon, a Reinforced Staff. Upgrade it and equip it, if you wish, then talk to Aerith for a lengthy scene. After it, head over to the monitors near Tifa, then watch another scene - the main branch of AVALANCHE is complicating your escape effort, but at least now you have an escape plan, something conspicuously lacking up until this point.
After those two scenes you’ll be in control of a party consisting of Cloud, Aerith and Tifa, so be sure to re-equip them properly. When you’re ready, exit the room and head east down the hallway. Search the first room to the north as you go to find a chest containing an Enfeeblement Ring, while in the second southern chest you’ll find a Phoenix Down. A third chest containing an Ether can also be found just before the door to the east. Awfully generous hallway…
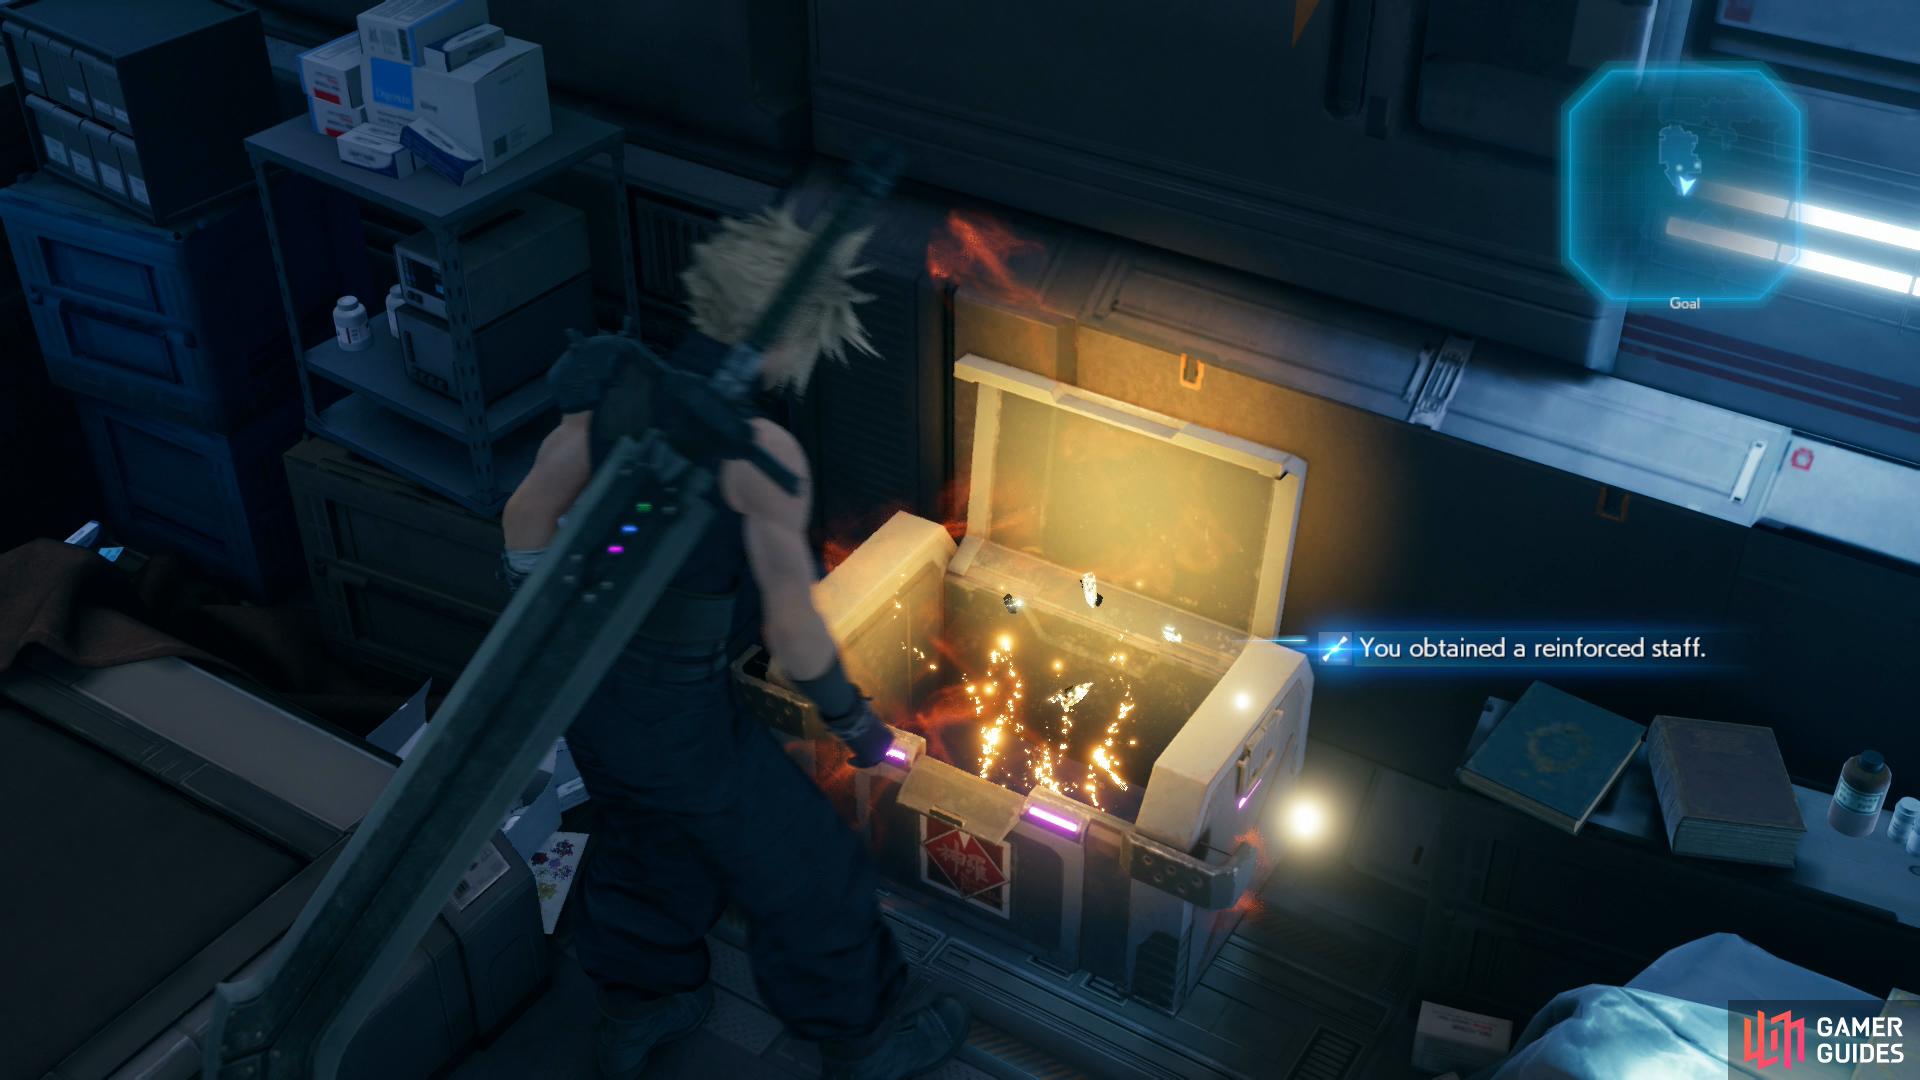
Loot a chest in Aerith’s room to score a Reinforced Staff,
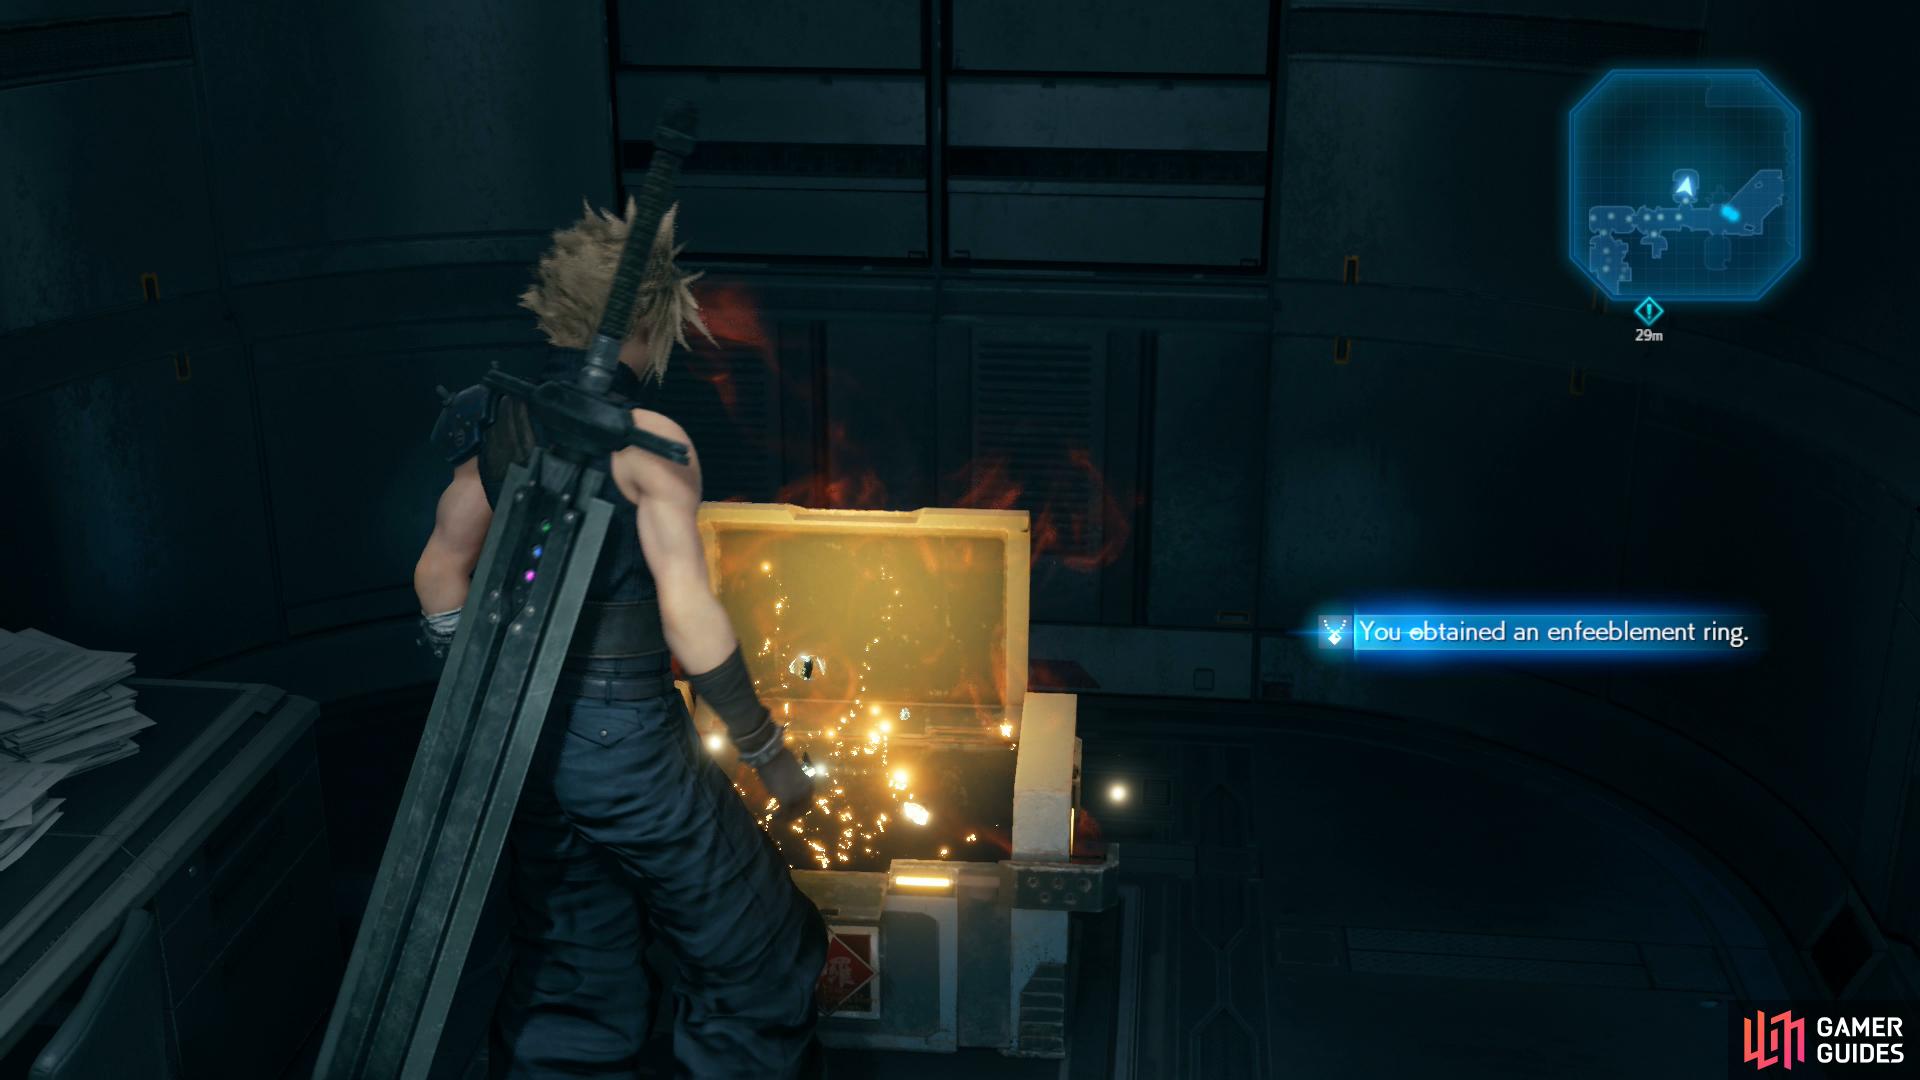
while another chest in a room nearby will yield an Enfeeblement Ring.
Go through the door to the east and if you turn north you’ll eventually be at the room with a vending machine and rest bench, should you feel compelled to do some shopping. Follow the girls back to the room where you fought Specimen H0512 along the southern end of the level and use the elevator to ride down to the lower floor, then head down some stairs to the southeast to encounter some Unknown Entities. These ones are stronger than the ones you encountered in Chapter 13, and without the Failed Experiment they’ll be keen to turn their magic on you. Blizzard + Magnify will do wonders here, otherwise be prepared for some painful Thundaga strikes.
After the fight, head upstairs and turn east to enter the control room, then continue east to find the “Employee Break Room”. You know, for when you need to chillax after some morally dubious biological experiments. Anywho, use the vending machine and rest bench if you need to, then return to the control room and head north, using the elevator at the end. Fortunately Cloud makes it without incident this time… although just barely. This moment of sanity only lasts until you follow the linear walkway and encounter Hojo’s dark secret.
| Enemy | Weaknesses | Notable Loot |
|---|---|---|
| Monodrive | Wind | -- |
| Mark II Monodrive | Wind | Turbo Ether |
| Unknown Entity | Blizzard | -- |
| M.O.T.H. Unit | Lightning/Wind | Iron Maiden |
Find the Others
Watch some scenes and when you regain control of Cloud he’ll be on his own in “The Drum - Level 2” area. Continue north, pull a lever, then cross some specimen canisters to the north, head downstairs, then descend a rubble ramp and follow the linear path beyond, stopping only to swat aside of couple of Monodrives, which shouldn’t be a serious threat anymore. Beyond (west of) the Monodrives you’ll find another walkway; take a fork to the north to find an orb of Poison Materia on the ground.
Continue working your way counter-clockwise through the level, crouch under a pipe and put down two Unknown Entities. Red XIII will join you from here on out, although if you were expecting a fully fleshed out character from him… well, you’re one game too soon. He’s only a “guest character”, who will fight strictly under AI control. He can’t be equipped, commanded, or controlled.
Defeat the monsters, then head up some rubble to the north, ascend some stairs and when you reach a platform you’ll get a tutorial about Red XIII’s out-of-combat capabilities. Note the two paths before you - you can send Red XIII south, but first head north and leap across some pods to find a precariously-perched chest containing a Phoenix Down. Backtrack and press [TRIANGLE] to send Red XIII across the gap, then lead across the pods he deploys. Good doggie!
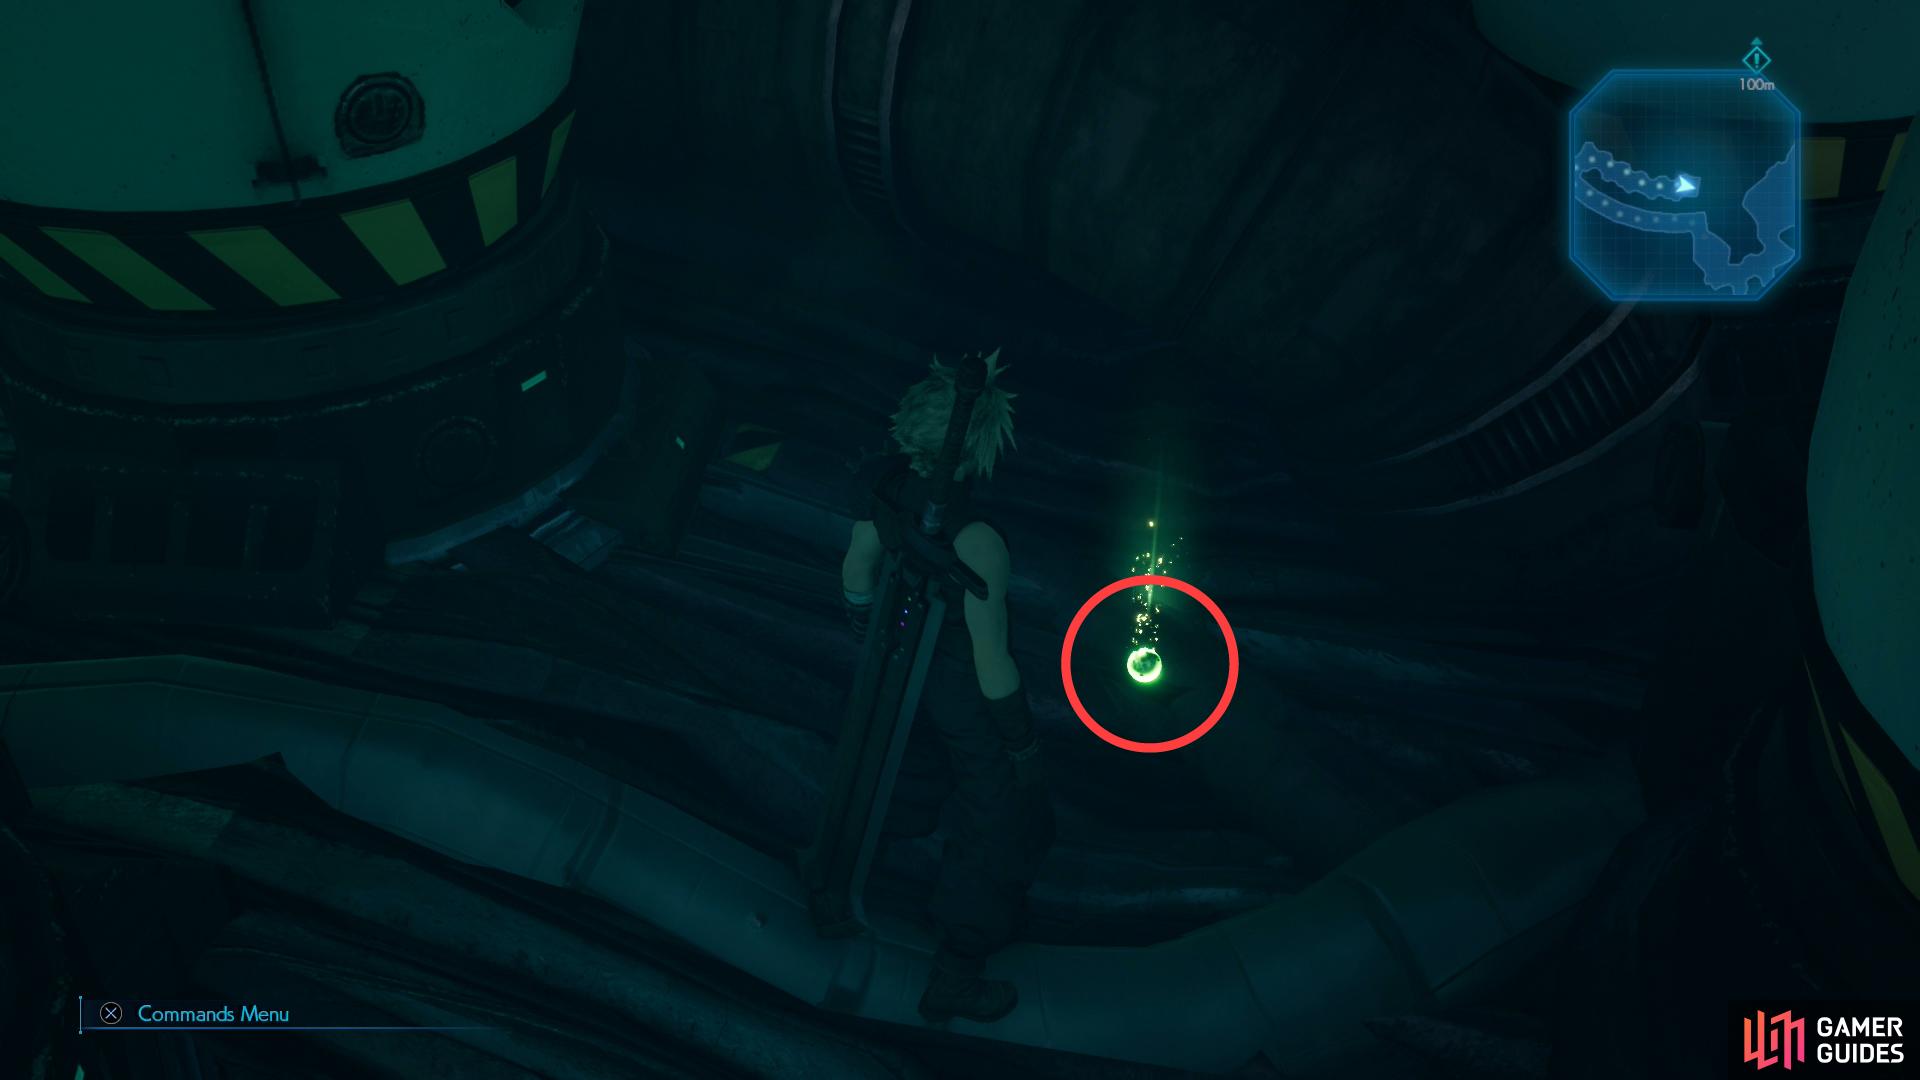
Grab an orb of Poison Materia.
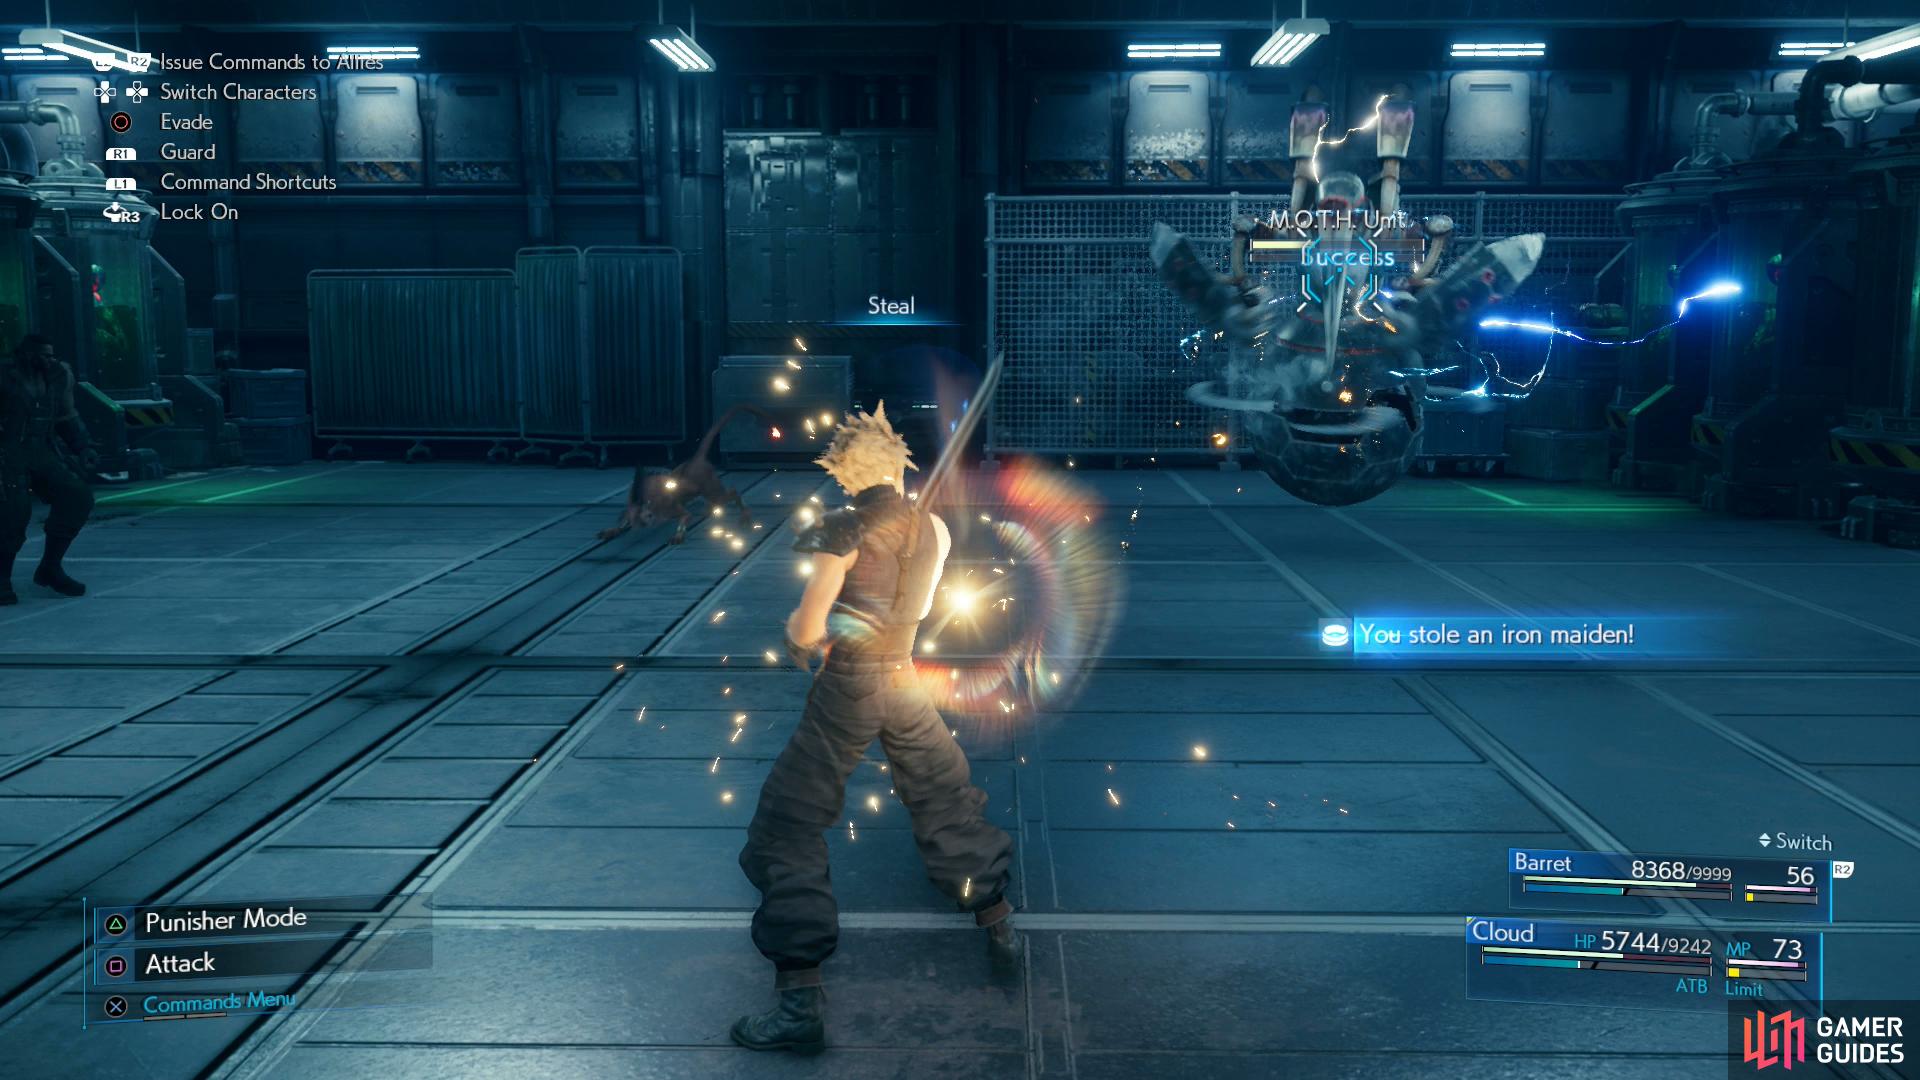
You can steal Iron Maiden armor from M.O.T.H. Unit enemies.
Smash some Shinra Boxes and note two doors to the west; go through the northern-most one first to find a rest bench and a vending machine, the latter of which sells some discounted restoratives (3x Mega-Potions and 2x Phoenix Downs). Exit the safe room and head through the southern door, up some stairs, then squeeze through another door to reunite with Barret, who is having a disagreement with some Monodrives. Consider re-equipping Barret before you head through the door, as you’ll be committed to a series of fights once you go through.
The first round of foes consists of some Monodrives and 2x Mark II Monodrives. Against the latter, just remember to use magic if/when they become immune to physical attacks. Next you’ll need to put down two Unknown Entities, followed by a new foe, a M.O.T.H. Unit. Surrounded by spinning blades, it’s a danger to all who get close… but those same blades also provoke Cloud’s Punisher mode counterattack, so you can just switch to Punisher mode and creep forward with Cloud to enjoy a steady stream of counterattack-fed ATB gauges. Use these ATB gauges to pelt it with lightning magic, steal an Iron Maiden, or both, as you prefer.
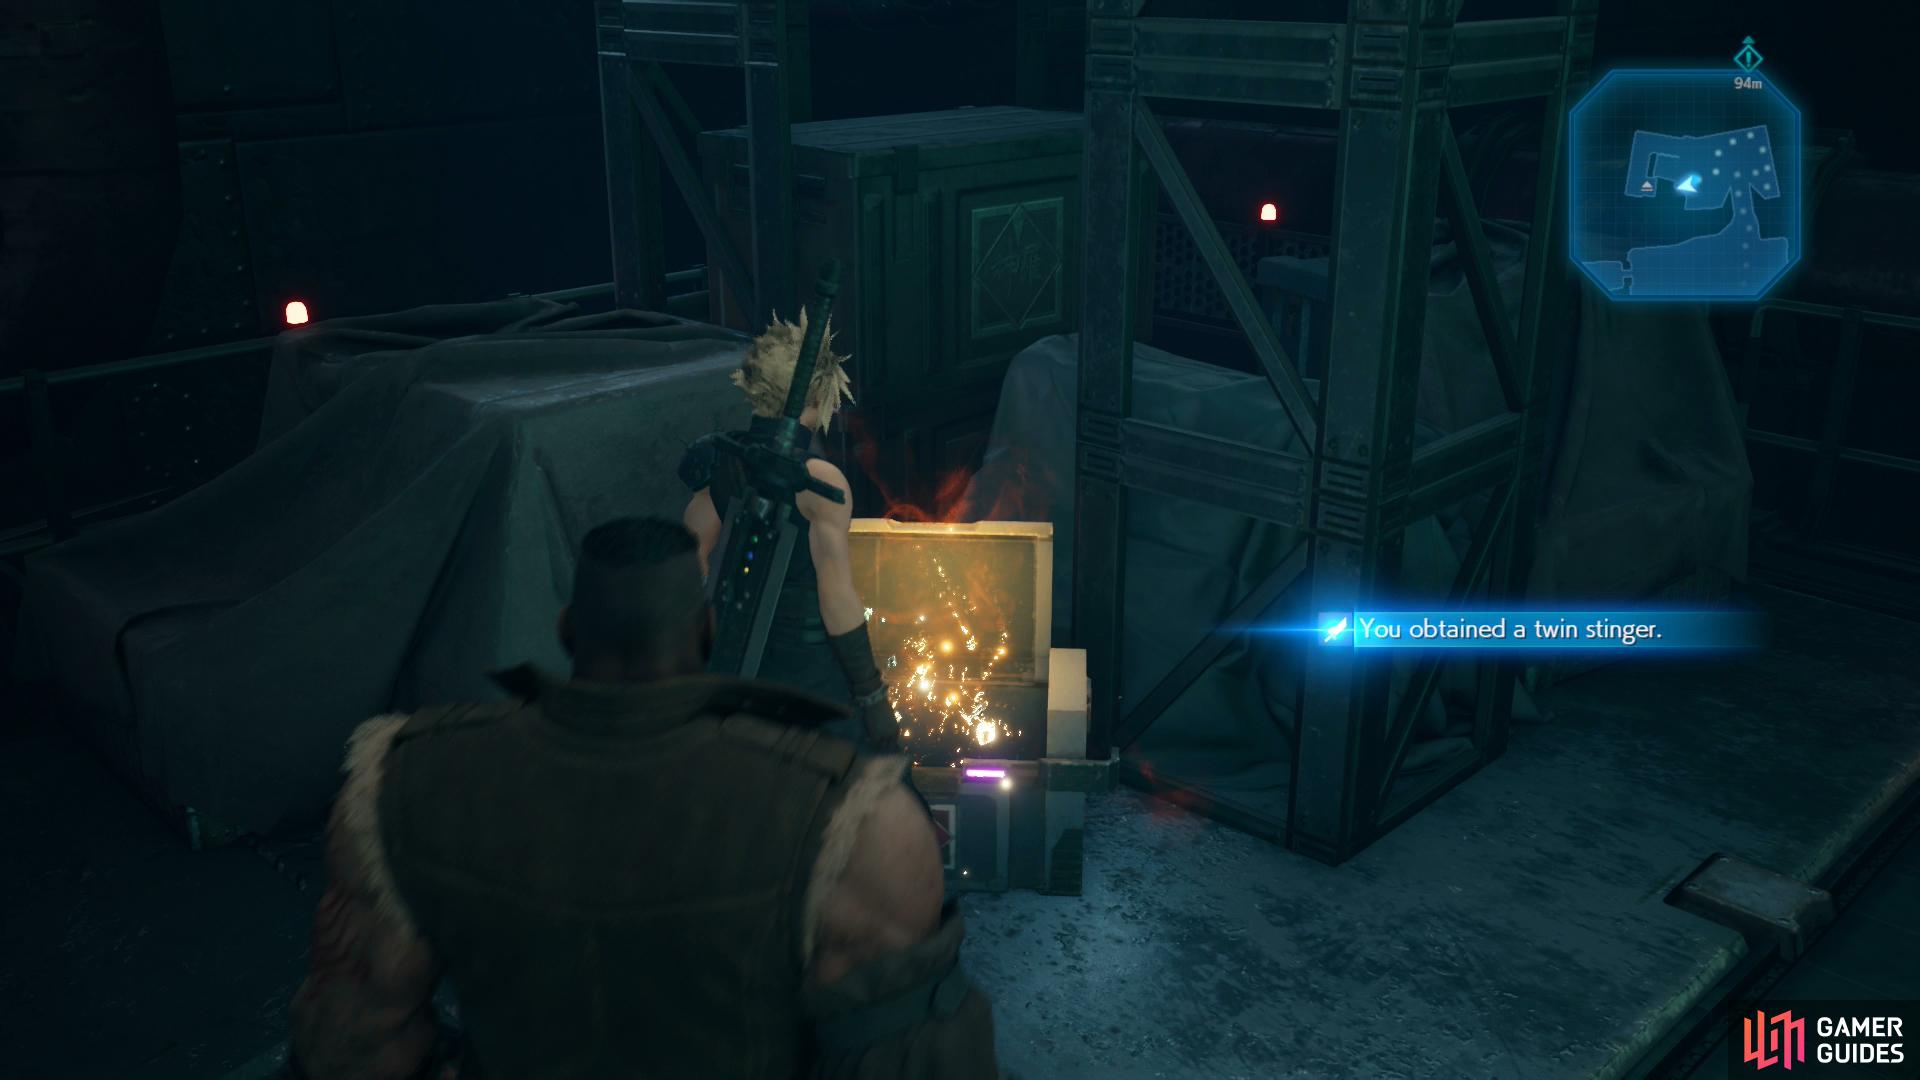
Grab the Twin Stinger weapon out of a chest,
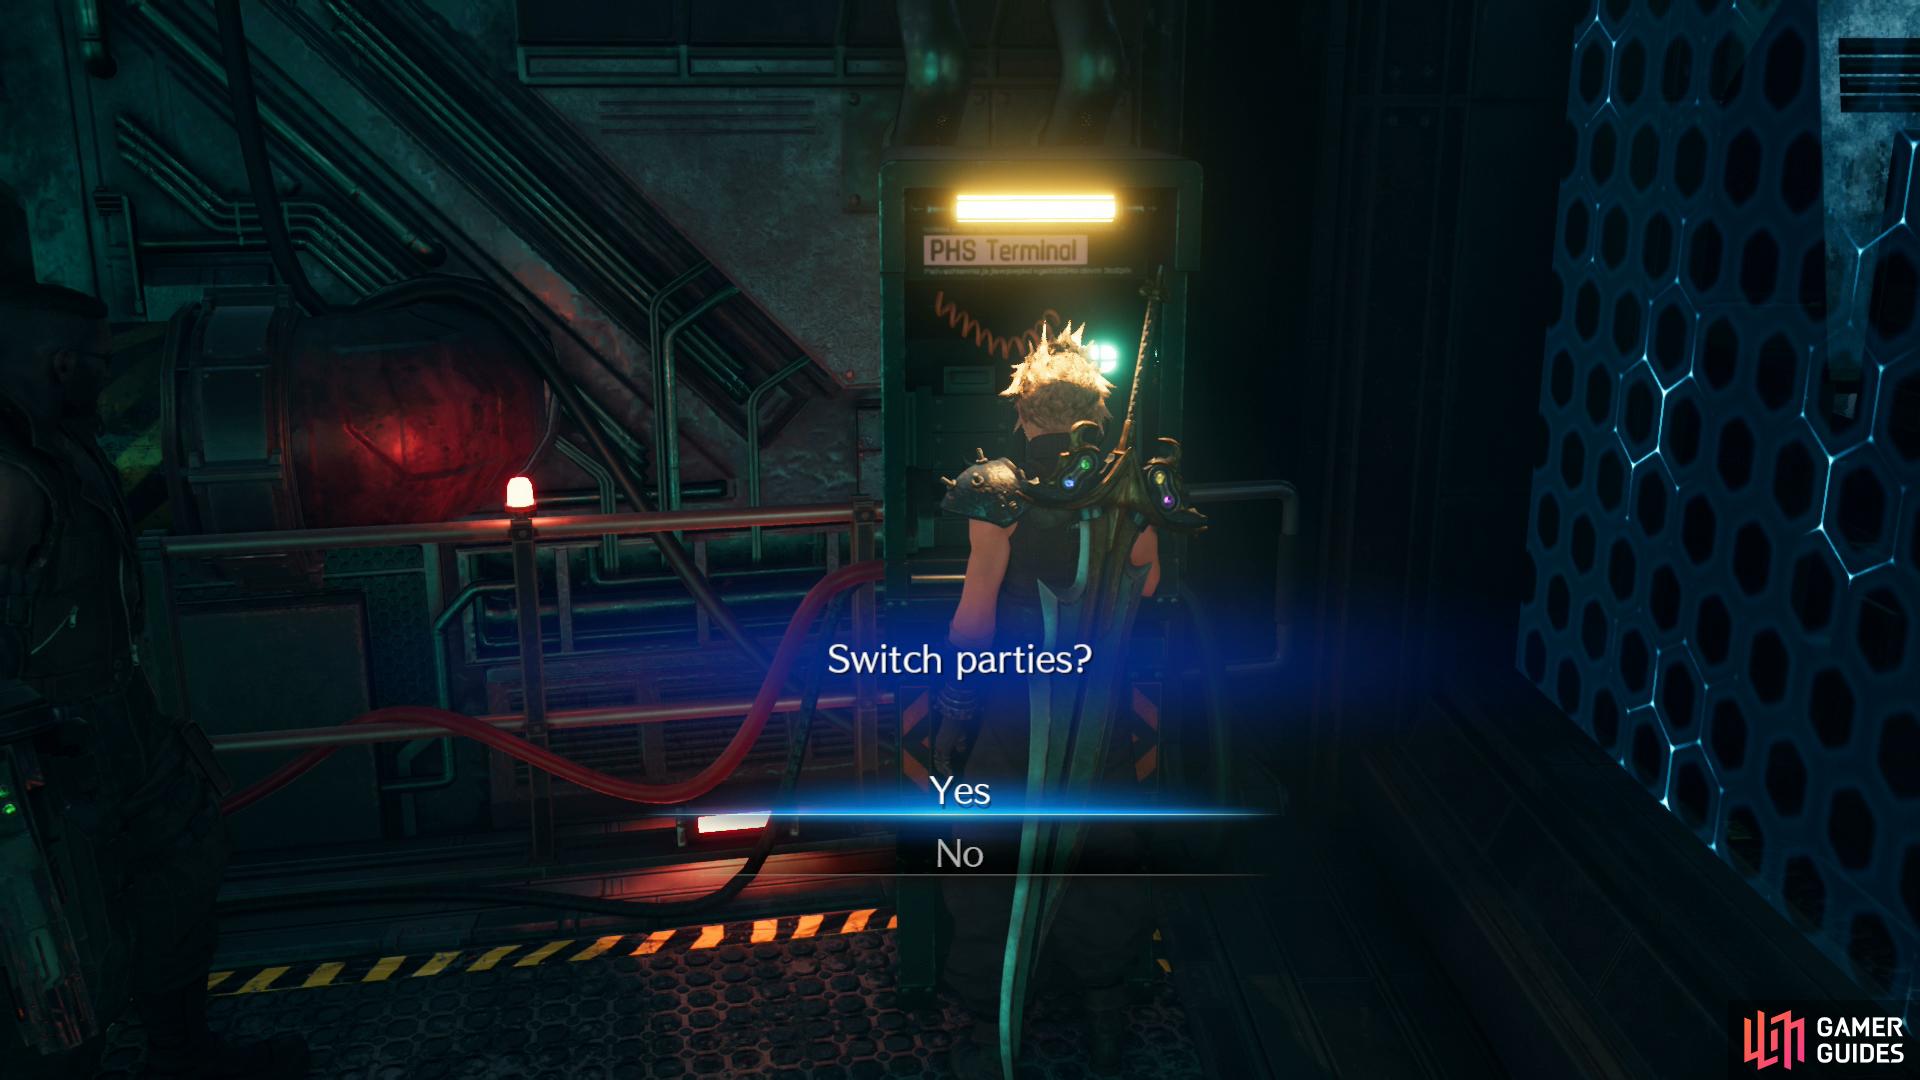
then use the PHS Terminal to switch parties.
Defeat your foes, return to the safe room and rest up, then then head through a doorway to the north. It’ll seal behind you when you pass through, so no backtracking. Loot a chest to the west to score the Twin Stinger weapon for Cloud - his sixth and final weapon. Do yourself a favor: upgrade it, equip it, and make use of its Counterstance ability, especially if you have any hard difficulty aspirations. It’s good stuff.
Anywho, continue upstairs and when you reach a platform look north to spot an orb of magic materia taunting you. This materia never learns… Send Red XIII across the wall to the east and cross the pods he deploys after a scene. Once across, head north into a room to find a chest containing 3,000 Gil, then continue north past the force-field enclosed control room the girls are in to find a terminal… presumably what they’re making a fuss about. Access the “PHS Terminal” for some chatter, after which you’ll be prompted to switch parties.
Looks like you’re stuck playing Hojo’s game.
| Enemy | Weaknesses | Notable Loot |
|---|---|---|
| Shock-Ray | Lighting | Orb of Gravity |
| Blast-Ray | Lighting | -- |
| Unknown Entity | Blizzard | -- |
| Bloodhound | Ice | -- |
| Zenene | -- | -- |
| Sentry Launcher | Lightning | Orb of Gravity |
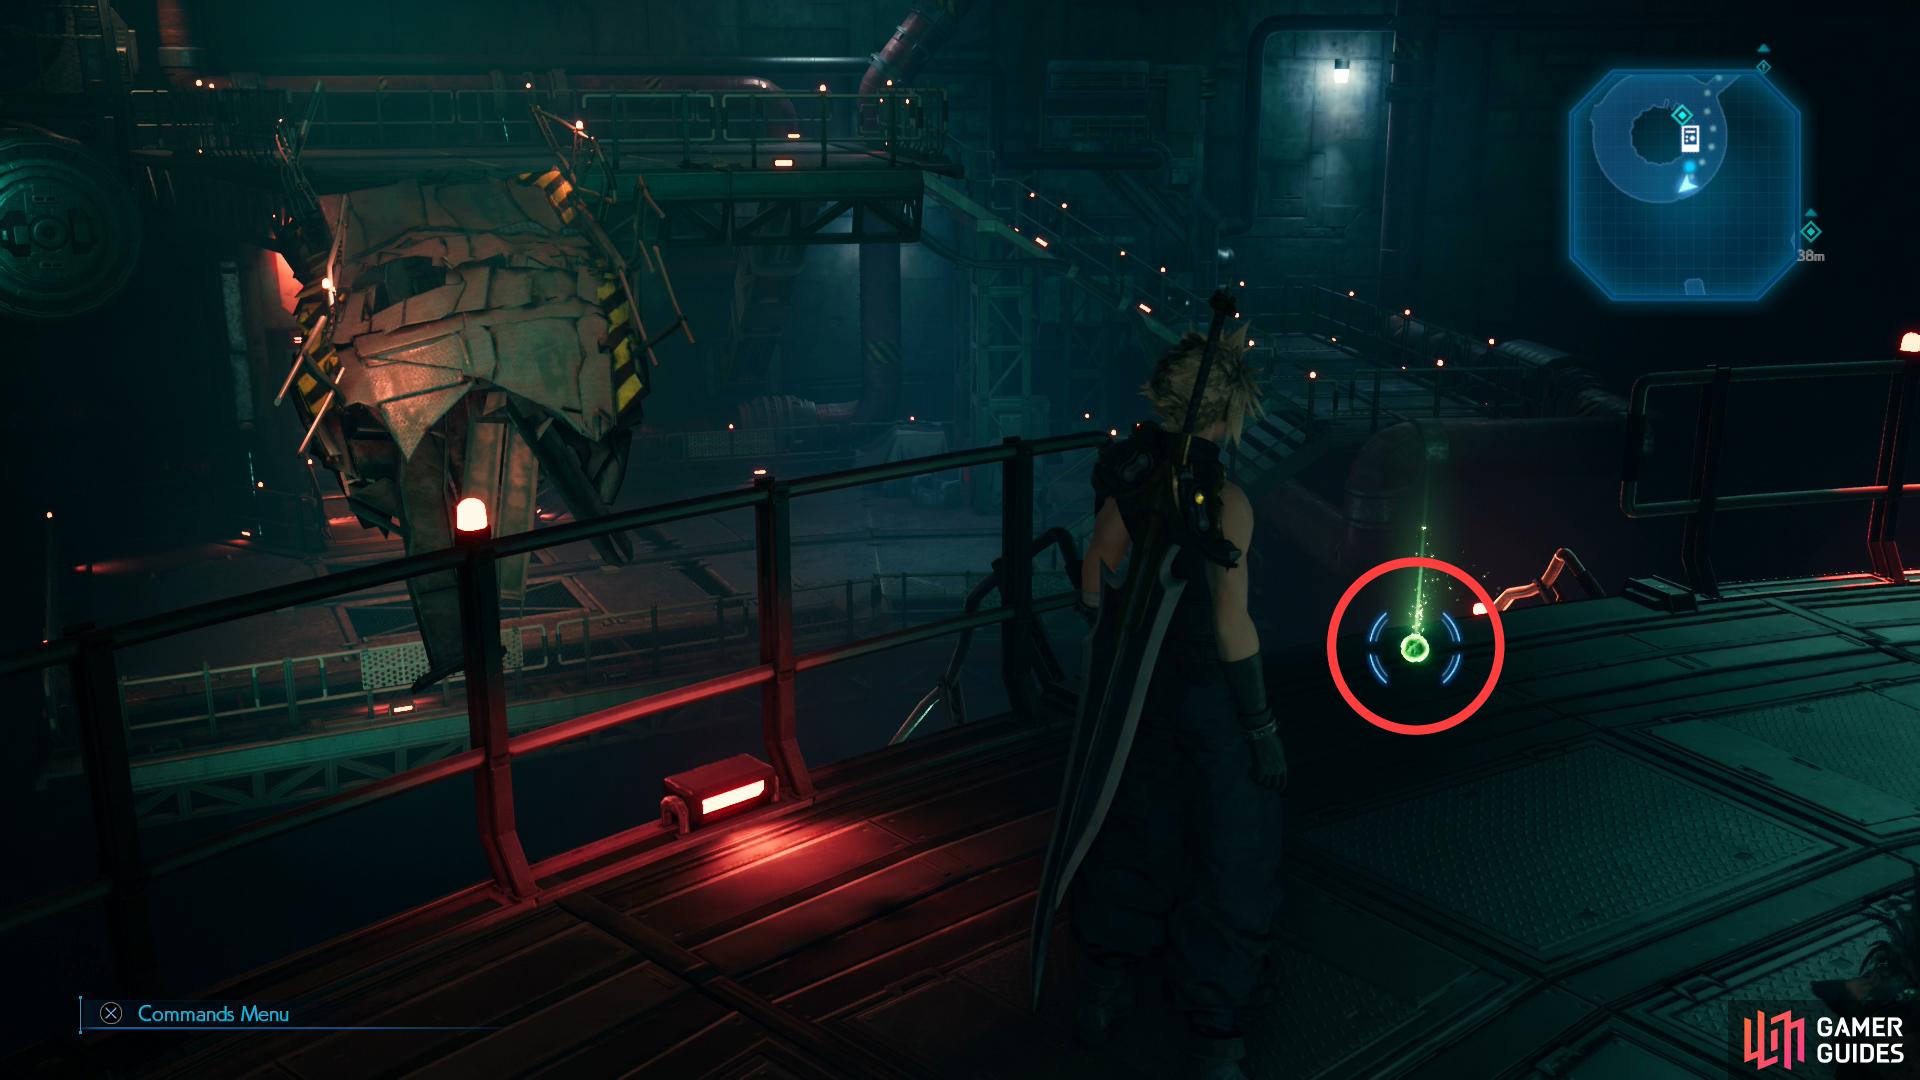
Grab an orb of Time Materia,
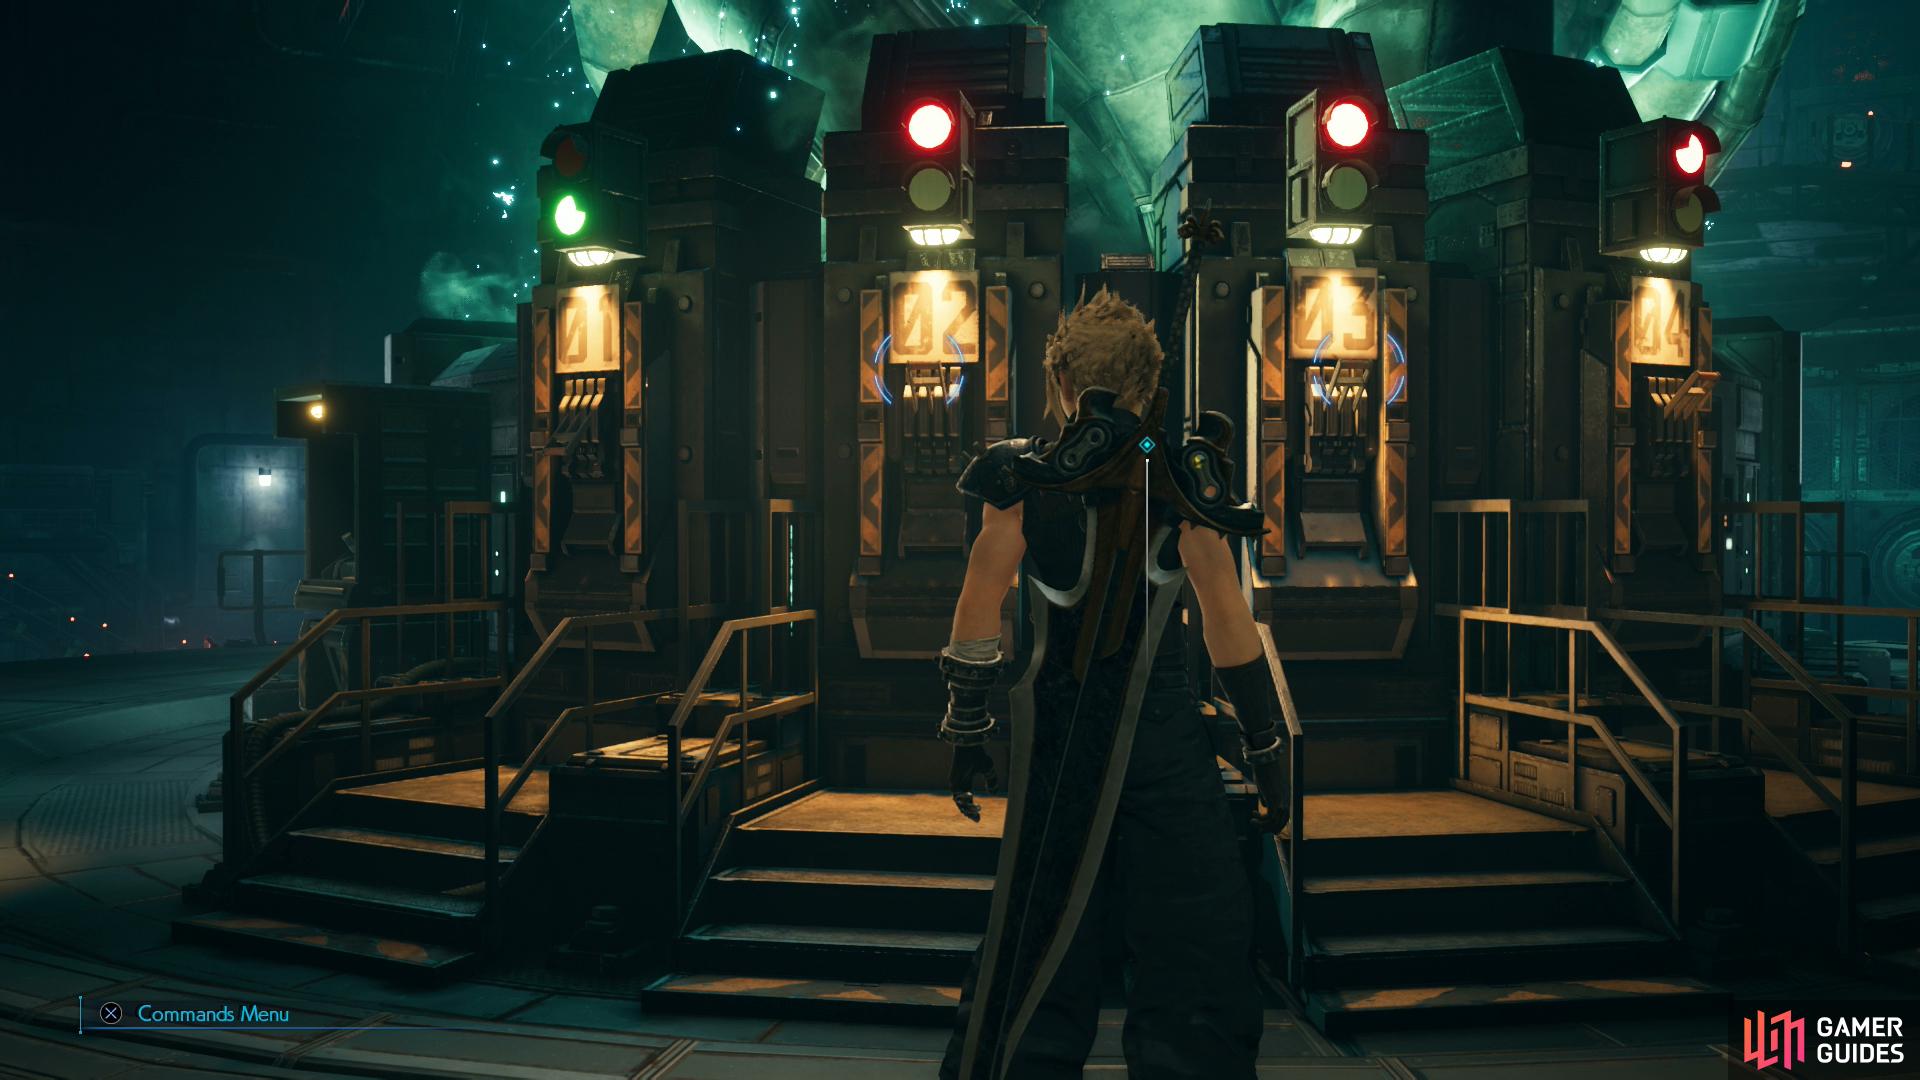
on the central platform you’ll find a series of switches, which open up the doors to various wards.
Find the Others - 3rd Ward
Switch to the girls (you don’t need to fiddle with their materia just yet) and head up some stairs to the southeast, smash some Shinra Boxes, then exit to the southwest. Smash some Shinra Boxes in the hallway ahead and continue until you reach the door to the 3rd Ward. To the southeast you’ll find another PHS Terminal and a safe room, complete with a rest bench and vending machine where you can buy more discounted restoratives (3x Mega-Potions and 2x Phoenix Downs), while to the north is a lever. Shop and rest, then pull the lever and continue across the pods to find a chest containing an Ether, then backtrack, use the PHS and switch back to the boys.
Make sure Cloud and Barret have materia equipped, then head north across some pods to reach a platform where you’ll be ambushed by 2x Shock-Rays and a Blast-Ray. Defeat them, pull a lever, then continue across a bridge to the southwest to reach the central area, where you can pick up that magic materia you spotted earlier - an orb of Time Materia, as it turns out.
Grab it, then inspect the machinery in the center of the platform to find a PHS Terminal and three switches. Right now, 01 is active (hence the green light) while 02, 03 and 04 are not. Since the girls are at the 3rd Ward door, pull the 03 lever to open the door near the girls. Switch to the girls, make sure their materia are in order (Ice + Magnify will serve you well), and when you’re ready head southeast through the 3rd Ward door. Smash some boxes, enter a room to the east, pull a lever, then head outside and continue north to encounter three Unknown Entities. Dispatch them (Ice + Magnify should do the trick), after which slide through a door to the east.
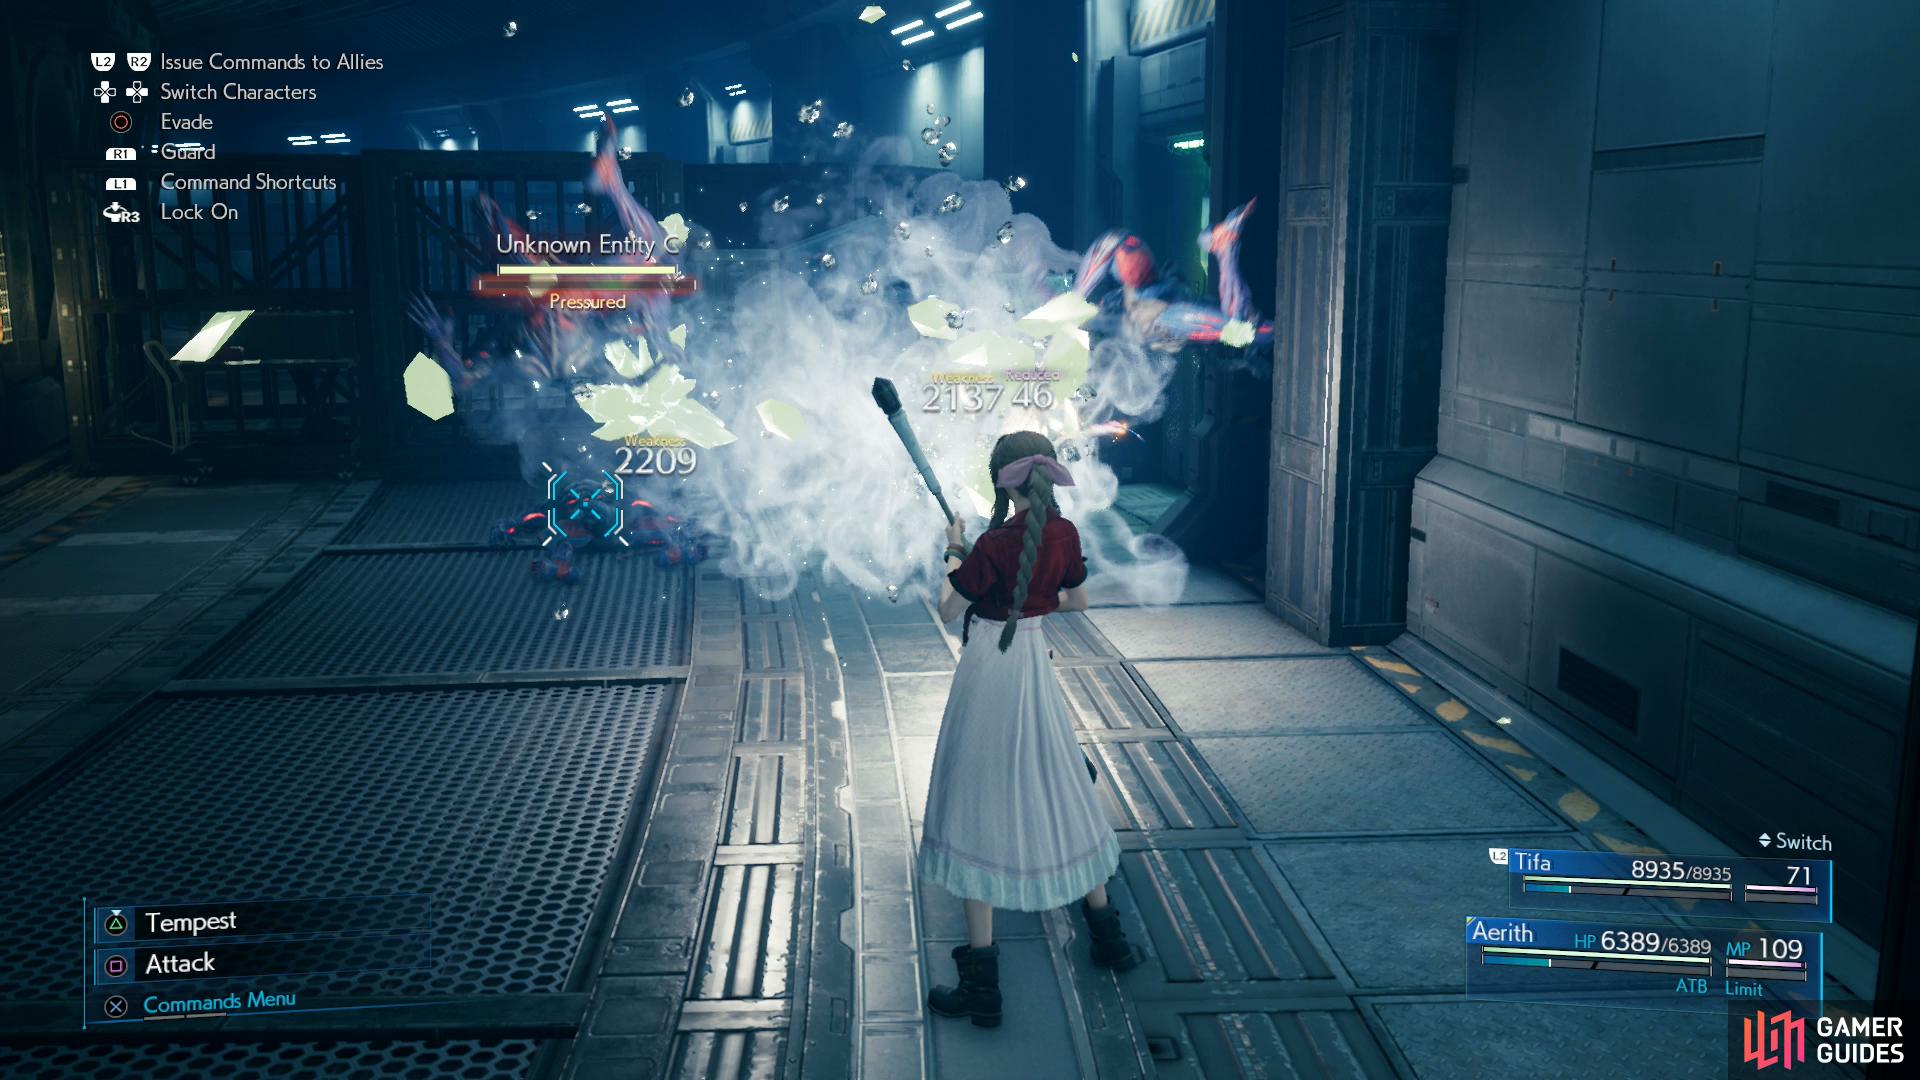
Ice + Magnify will serve you well in the 3rd Ward.
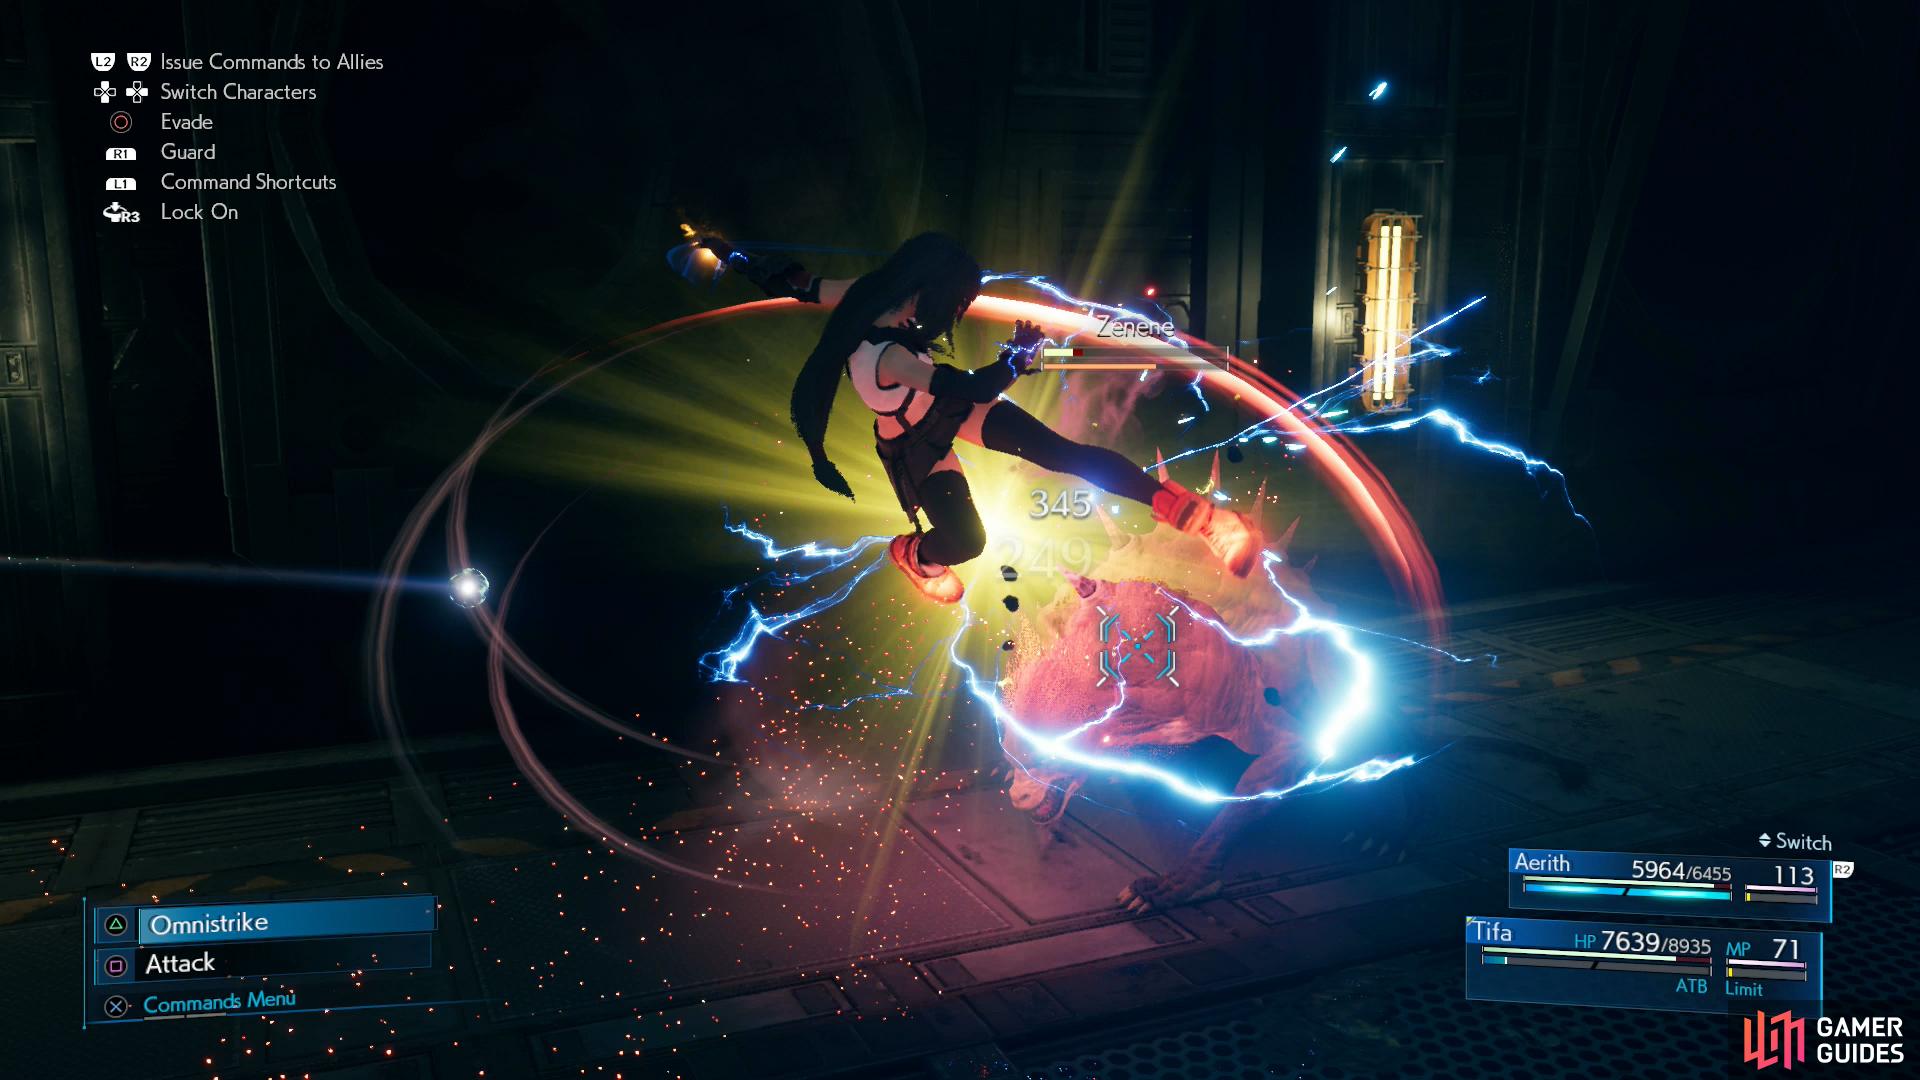
On its own, a lone Zenene can be easily brought down by Tifa’s ki abilities.
You’ll find yourself in a room filled with cages… and apparently sorrow. Make your way east, then north, stopping to turn right (east) and search behind a cage to find a chest containing a Mega Potion. Continue north and west, note a dog in a cage, then exit the room, turn north and enter another cage-filled room to the east. This room’s cages aren’t empty, and the mutt if the mutt in the previous room was a hint, this is an alarm klaxon. Sure enough, as you pass through the room the cages will open and you’ll be assailed by several Bloodhounds. Again, Ice + Magnify will simplify this fight, and while these foes aren’t terribly strong, your characters also aren’t the best for dealing with them. Always miss that Punisher mode when it’s gone…
Kill the mutts and search the northern end of the room for some clutter you can crouch under, smash some Shinra Boxes to the north, then continue through the room beyond to reach another door. In the hallway beyond turn southeast and loot a chest containing 5,000 Gil, then head north to find a new foe - a Zenene.
Not weak to any element (although resistant to fire), the Zenene is an odd foe that mostly uses low-damage physical attacks along with “Ghenghana” and “Mephitic Shower”, both of which can inflict “Poison”. If the fight drags on too long, they’ll charge themselves with noxious energy and will become capable of inflicting “Poison” with their normal attacks, which will deal increased damage in this state. A single one isn’t strong or sturdy enough to warrant Star Pendants - just charge up Tifa’s ki and dispatch it with a “Rise and Fall” and “Omnistrike” combo. Once done, continue through a door to the north, pull a lever, return to the hallway and continue west.
Go through the first doorway to the right (north) you find, turn west, smash some Shinra Boxes near some stairs, then ascend some stairs to find yourself on a balcony overlooking a room occupied by sleeping critters. Cross some pipes to the southwest, then try your luck with a smaller pipe to the southeast. Predictably it fails, and you’ll end up on the floor fighting two Zenenes. One was a nuisance, two are a threat - swapping Ice + Magnify out for something more reliable (like Lightning + Magnify) isn’t a bad idea, and equipping Star Pendants suddenly looks appealing.

Open a chest to score a Force Bracelet,
Arcane Ward and lightning magic will dispatch a trio of Sentry Launchers quickly and easily.
However you go about it, defeat the Zenenes, then flip a switch to the northeast to open a door. Not only does this facilitate quicker backtracking, but you can now loot a chest inside a cage near the door you opened. Your prize? A Force Bracelet, which boasts four materia sockets - two pairs of linked sockets - at the expense of low defenses. If that’s not enough treasure, backtrack into the room where you fought the two Zenenes, climb a ladder to reach a balcony on the southern end of the room, then cross some pipes to the northeast to find a chest containing a Mega-Potion. They all can’t be winners.
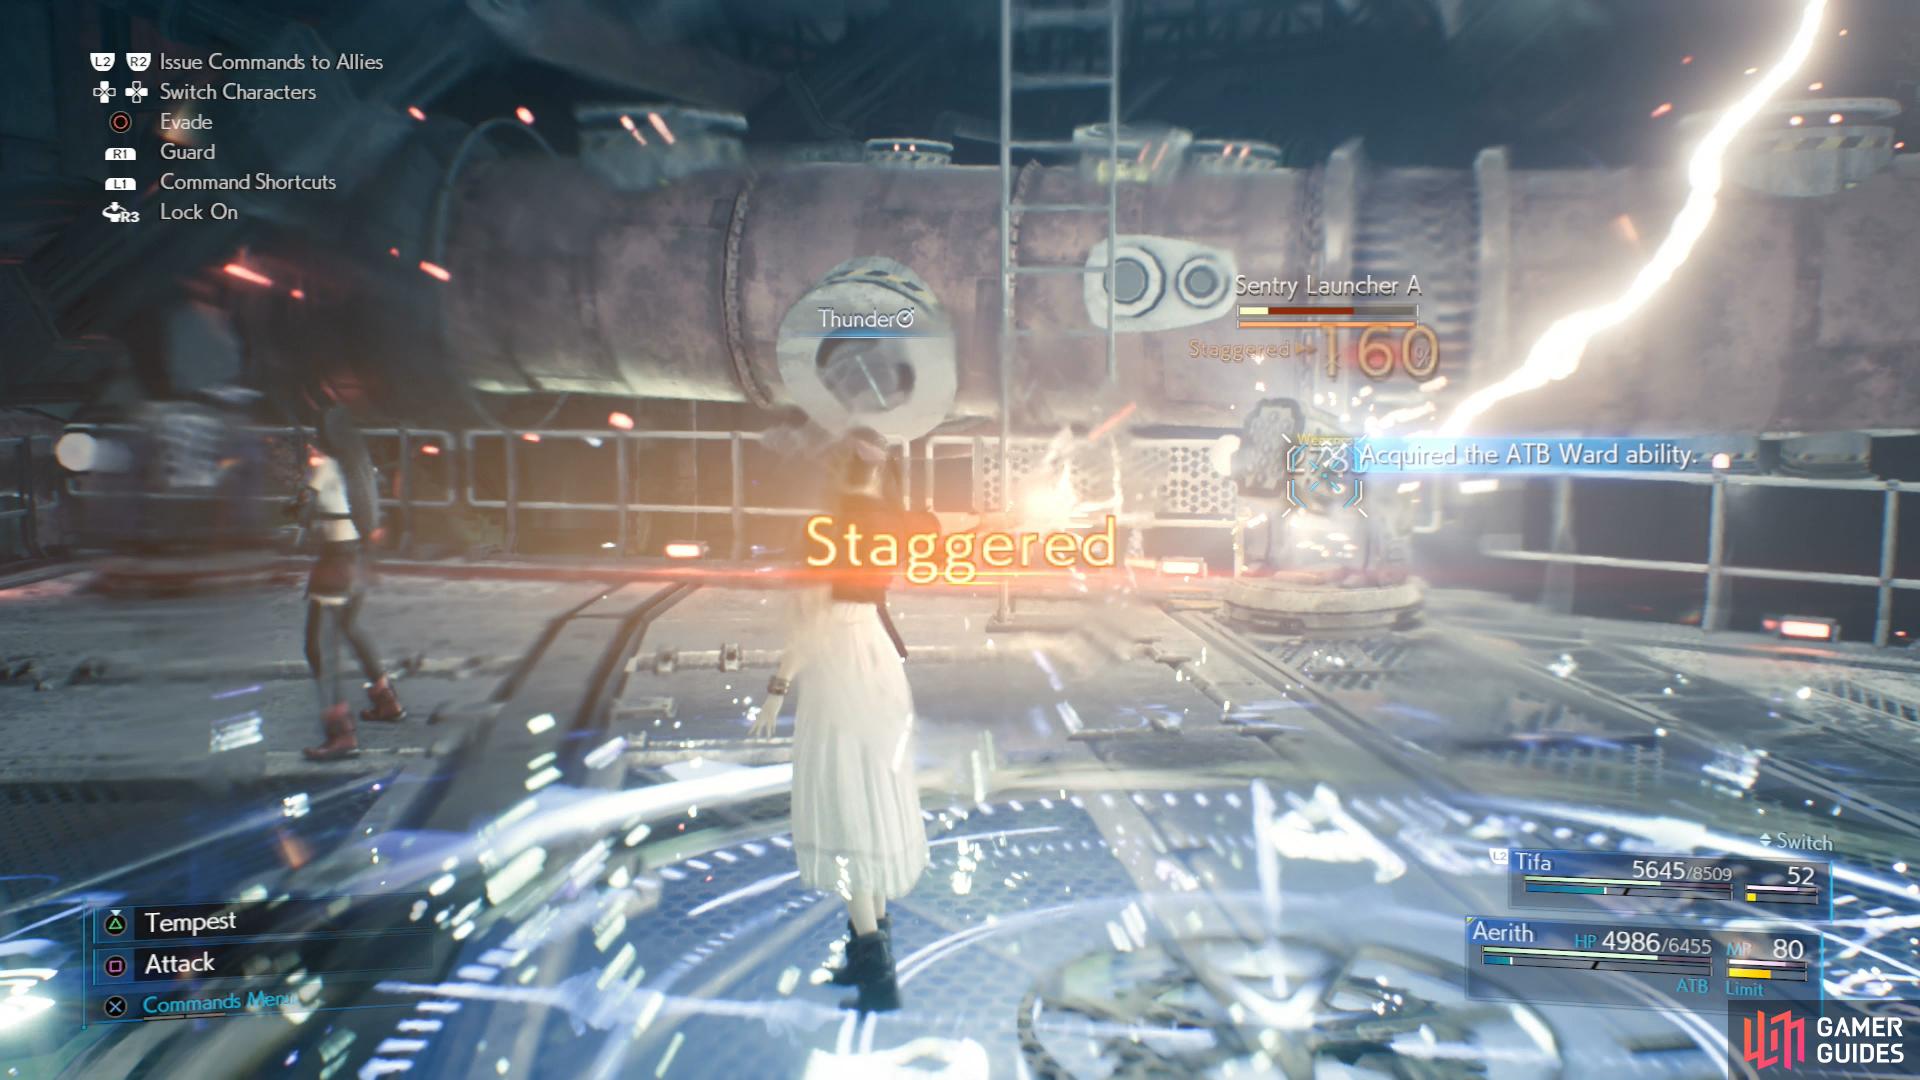
Crouch under a door to the southwest, then turn southeast to leave the hallways and chambers on the periphery and return to the massive chamber where Jenova is kept. Equip Lightning + Magnify, head down some stairs to the south, then head down some more stairs to the south to find a chest containing a bottle of Ether. Backtrack upstairs, then continue north to find a trio of Sentry Launchers guarding a ladder. These foes can actually be somewhat annoying for Aerith and Tifa - we focused on charging Aerith’s ATB with normal attacks, threw down an “Arcane Ward”, then used Thundara + Magnify to significantly weaken the machines, after which they were easy enough to finish off.
Climb the ladder they guarded, flip a switch to deploy more pods, then leap across the pods to the southeast to find a platform with some Shinra Boxes you can smash, as well as a PHS Terminal you can use to switch back to the boys.
| Enemy | Weaknesses | Notable Loot |
|---|---|---|
| Zenene | -- | -- |
| Shock-Ray | Lighting | Orb of Gravity |
| M.O.T.H. Unit | Lightning/Wind | Iron Maiden |
| Sledgeworm | Lightning | -- |
| Brain Pod | Lightning | -- |
| Enhanced Shock Trooper | -- | -- |
| Unknown Entity | Blizzard | -- |
| Slug-Ray | Lighting, Wind | Orb of Gravity |
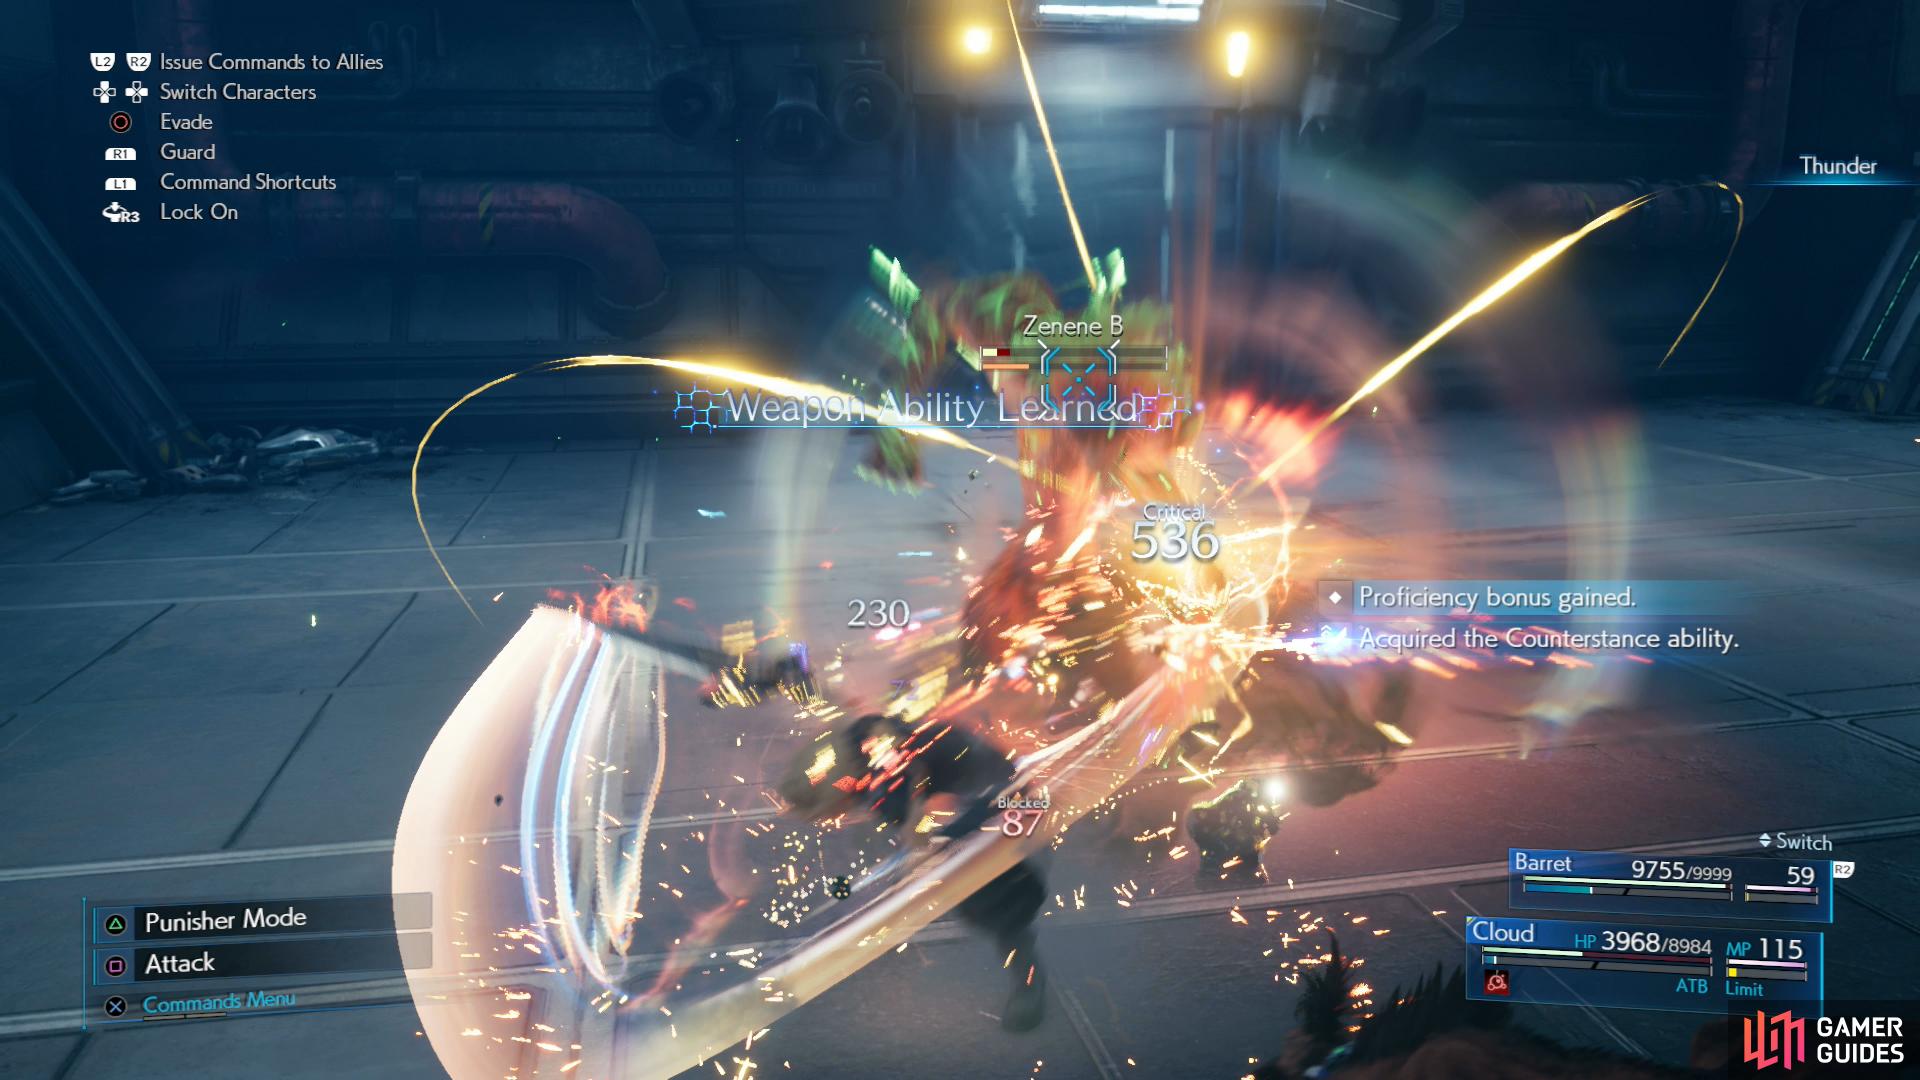
Cloud’s Punisher mode counterattacks and Counterstance abilities makes fighting Zenenes much easier.
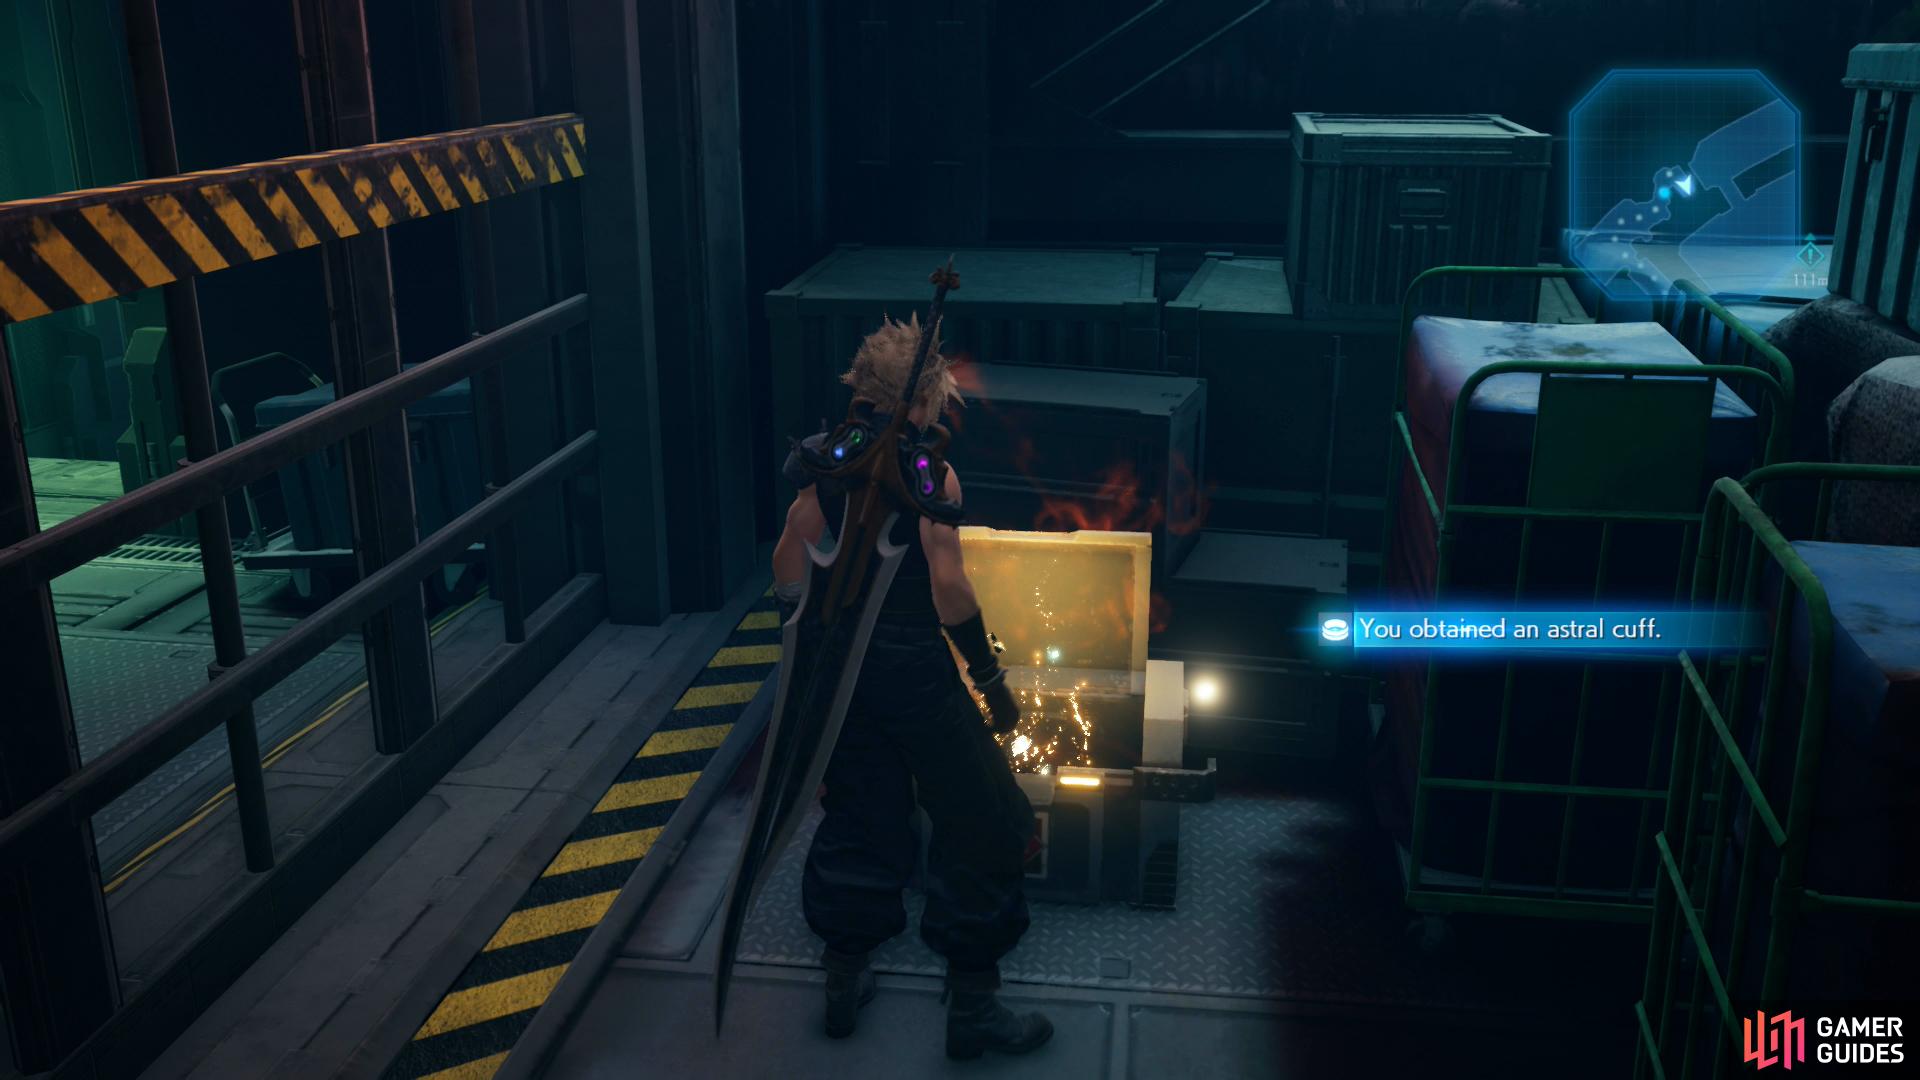
Loot a chest to obtain some Astral Cuff armor.
Find the Others - 2nd Ward
As Cloud, pull the 02 switch to open the corresponding ward door, cross the bridge to the northeast, then leap across some pods to the northwest. On the platform beyond said pods, loot a chest containing a Mega-Potion, then head into the safe room nearby. Buy the discounted restoratives (3x Mega-Potions and 2x Ethers), rest up, and make sure they’re equipped with materia.
When you’re ready, head through the 02 door to reach the 2nd Ward. In the first room smash some Shinra Boxes, then continue on until you find yourself in a room where you’re forced to fight two Zenenes. Much easier with Cloud’s Punisher mode counterattacks. Go through a doorway to the southwest, then turn northwest to reach a hallway. Turn right (northeast) to find a chest containing an Astral Cuff, the Magic Defense alternative to the Iron Maiden Armor. Continue down the hallway to the southwest, smash some more Shinra Boxes, then head through a doorway to the southeast.
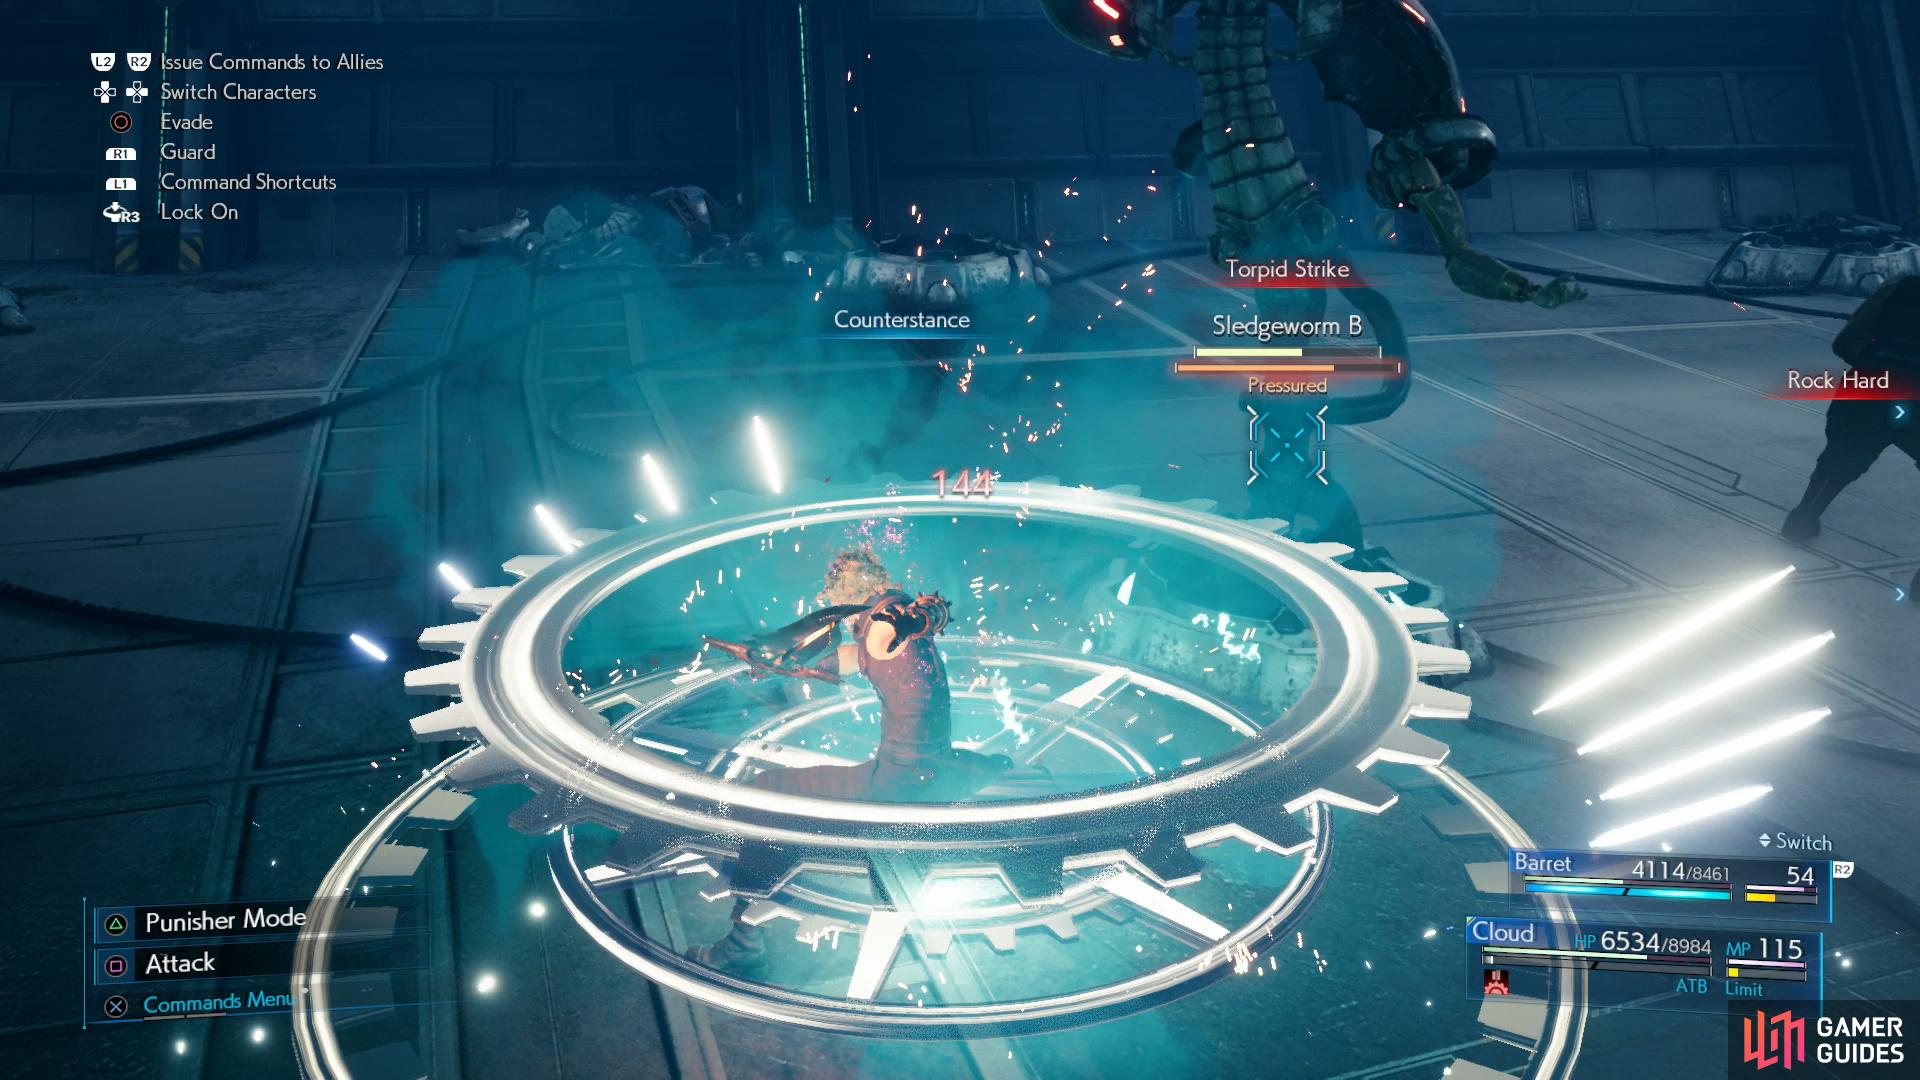
In this room you’ll encounter some Shock-Rays and a M.O.T.H. Unit. Steal another Iron Maiden armor if you wish, and after Hojo leaves exit to the southwest. When you reach the hallway, smash some Shinra Boxes at either end, then continue into another chamber where Hojo will - after some scenes - sic some Sledgeworms. Strewn across the floor are ten devices from which the four Sledgeworms in this chamber can pop up, attack, then retreat down only to surface elsewhere. Yeah, you’re basically playing a lamer version of whack-a-mole here (not to be confused with whack-a-box, which has surprisingly little in common with whack-a-mole).
Wait for one to pop up, hit it with Thunder, then attack as much as you can - repeat until one is Staggered, then destroy it. Barret’s “Overcharge” and “Maximum Fury” are also useful for fighting these ridiculous enemies. Just be wary of them, as they’re fond of popping up behind you and trying to strike you with “Torpid Strike” (inflicts “Stop”) and a hammerblow that inflicts “Poison”. If they successfully inflict “Stop” they may combo into “Killing Strikes”, which unleashes numerous, high-damage strikes on the stricken target. They also have ranged attacks, but these do relatively little damage.
Continue under the door to the east, head upstairs, and when the three boys are reunited continue north to find some Shinra Boxes you can destroy, as well as a chest containing 2x Remedies. Backtrack south to reach a room with some stairs; ignore them temporarily and loot a chest in the southwestern corner to score a Chain Bangle. As far as armor goes, this thing has it all: four materia slots (two linked pairs) and decent Defense and Magic Defense. Puts the Force Bangle to shame, that’s for sure.

At some point during the fight the Brain Pod will use a Flash Bang attack, summoning a host of fellow Brain Pods.

This mob of enemies should fall quickly to Cloud’s Punisher mode counterattacks.
Head upstairs and into a room, smash some Shinra Boxes, then exit through a door to the south and into a room full of medical equipment. After some chicanery you’ll find yourself facing off against a new foe, a Brain Pod. They can inflict a variety of debuffs, including “Poison” with their “Toxic Waste” and “Noxious Whirl” attacks, respectively, as well “Stop” with the spell of the same name. Shoot at it with Barret from a safe distance and it’ll eventually use its “Flashbang” attack, after which you’ll find yourself surrounded by about… oh… a dozen more Brain Pods, who simultaneously unleash “Noxious Whirl”. They’re too far away to hit, but it’s a threat for what’s to come. Switch back to Cloud, have him enter Punisher mode and use “Counterstance” - between the two, one of the Brain Pods is bound to do something stupid to provoke Cloud. They’ll go down pretty quickly after this, but you can always use lightning magic to speed things up.
Put the Brain Pod down, then exit through the door to the northeast to return back out to the Jenova chamber. Smash some Shinra Boxes to the east, then ascend some nearby stairs, destroy more boxes, climb more stairs and you’ll reach the door to the 4th Ward. Enter a safe room near the sealed 04 door, buy some discounted restoratives (3x Mega-Potions and 2x Ethers), rest at the rest bench, then exit and head down some stairs to the northwest. Crush another pile of Shinra Crates, then note a gap to the north that you can Red XIII across.
Before you do, however, re-equip Tifa and Aerith, as you’ll be switching to them shortly. once done, send Red XIII north to deploy some pods, defeat two Unknown Entities (Cloud and Barret shouldn’t need materia for this) and after some scenes you’ll need to cross the pods Red XIII deployed and use the PHS Terminal to switch to Tifa and Aerith.
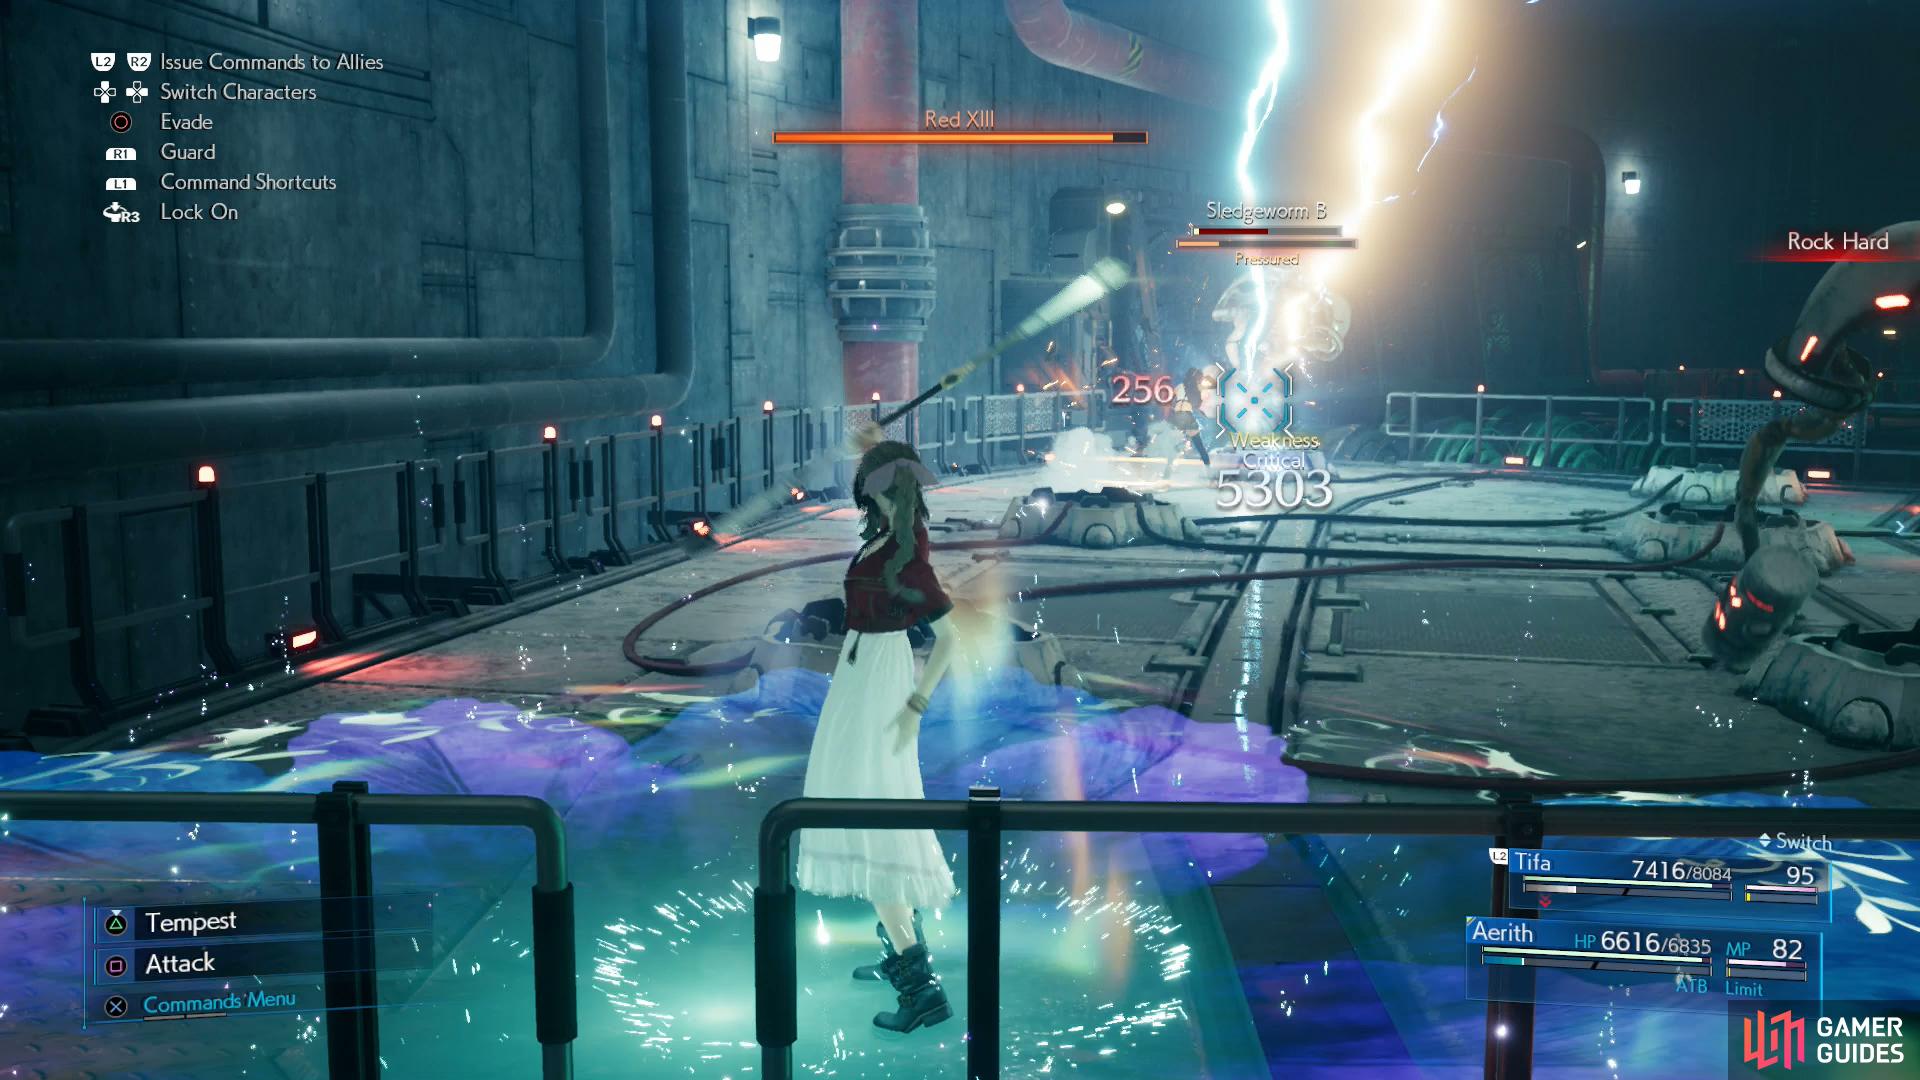
(1 of 3) Arcane Ward and Thundara will get you past the Sledgeworms and Enhanced Shock Troopers.
Now in control of the girls, cross some pods to the northwest to reach a platform occupied by a pair of Sledgeworms. Don’t waste more time with them than you need to - lay down an Arcade Ward with Aerith, then cast Thundara, hopefully knocking out at least one of the Sledgeworms, and repeat the process to kill the other one. Once both are dead, descend a ladder to encounter two Enhanced Shock Trooper, which can be defeated much the same way as the Sledgeworms earlier were.
Crouch under some pods to the southwest to reunite with Red XIII, where you’ll have to put down several Unknown Entities. Ice + Magnify should set them straight in short order, after which Red XIII will be out of danger and you’ll be tasked with opening the door to the 4th Ward.
Continue south and head down some stairs, send Red XIII across a gap to the north and leap across the pods he deploys. After some chatter, pull a lever to provoke some Slug-Rays and Shock-Rays, then cross a bridge to the southeast to reach the central platform. Pull the switch 04 to open the corresponding door, then switch parties once again.
Find the Others - 4th Ward
As Cloud, go through the 04 door, up some stairs and into a pipe, during which Barret and Cloud will have a rather nice chat. Aww… In the pipe turn southeast to find a chest containing 2x Mega-Potions, then head northwest to reach a switch. Pull it to open a nearby door, beyond which is a suspiciously large chamber. Before you continue, equip Lightning + Elemental on both character’s armor, then continue into the chamber, working your way up to a platform on the northern end of the room and through another door. Inside the next segment of pipe, watch a scene after which you’ll find yourself in a fight.
Boss: Swordipede
| Enemy | Weaknesses | Notable Loot |
|---|---|---|
| Swordipede | -- | Force Bracelet |
Phase 1
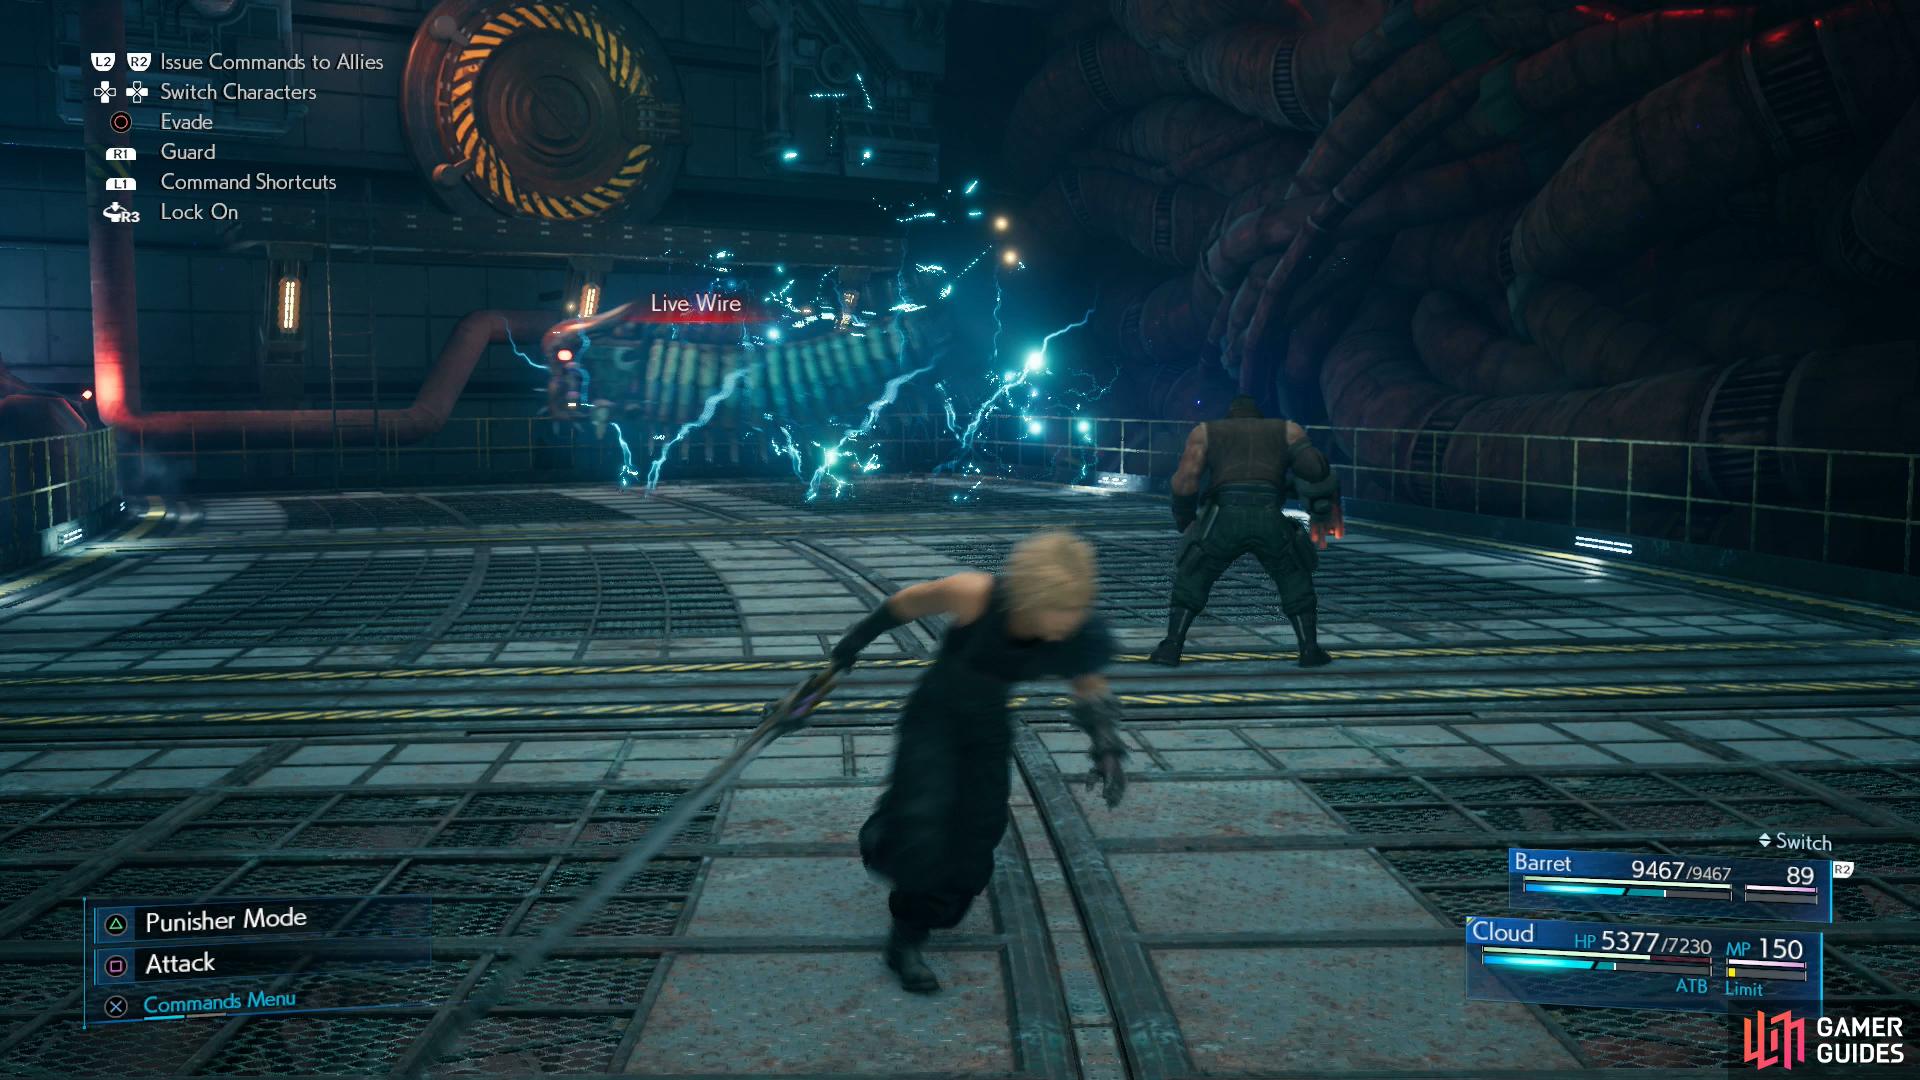
An odd snake-like foe, albeit a mechanical one rippling with blades, most of the time it’s content to float along at an easy pace. Coming into contact with its head counts as an “attack”, and is something you can bait with Cloud’s Punisher mode or “Counterstance”, but sword attacks seem generally ineffective, so you’re better off just using Barret to pelt it from afar. Two “Maximum Fury” attacks should be all it really takes. Its named attacks this phase include:
-
Sawblade: A moderate damage charge attack.
-
Live Wire: Swordipede charges itself with electricity and meanders around at a faster pace than usual. Just keep your distance to avoid damage.
-
Energy Volley: Swordipede flies into the air and bombards the battlefield with balls of energy.
Reduce Swordipede’s HP to around 60% and it’ll go haywire, ultimately ending up in the central chamber with Aerith and Tifa. You can hold down [SQUARE] during the scene between the phases to access the menu… say if you wanted to switch out materia between Cloud/Barret and Aerith/Tifa. This is an important feature to keep in mind for upcoming fights, as well.
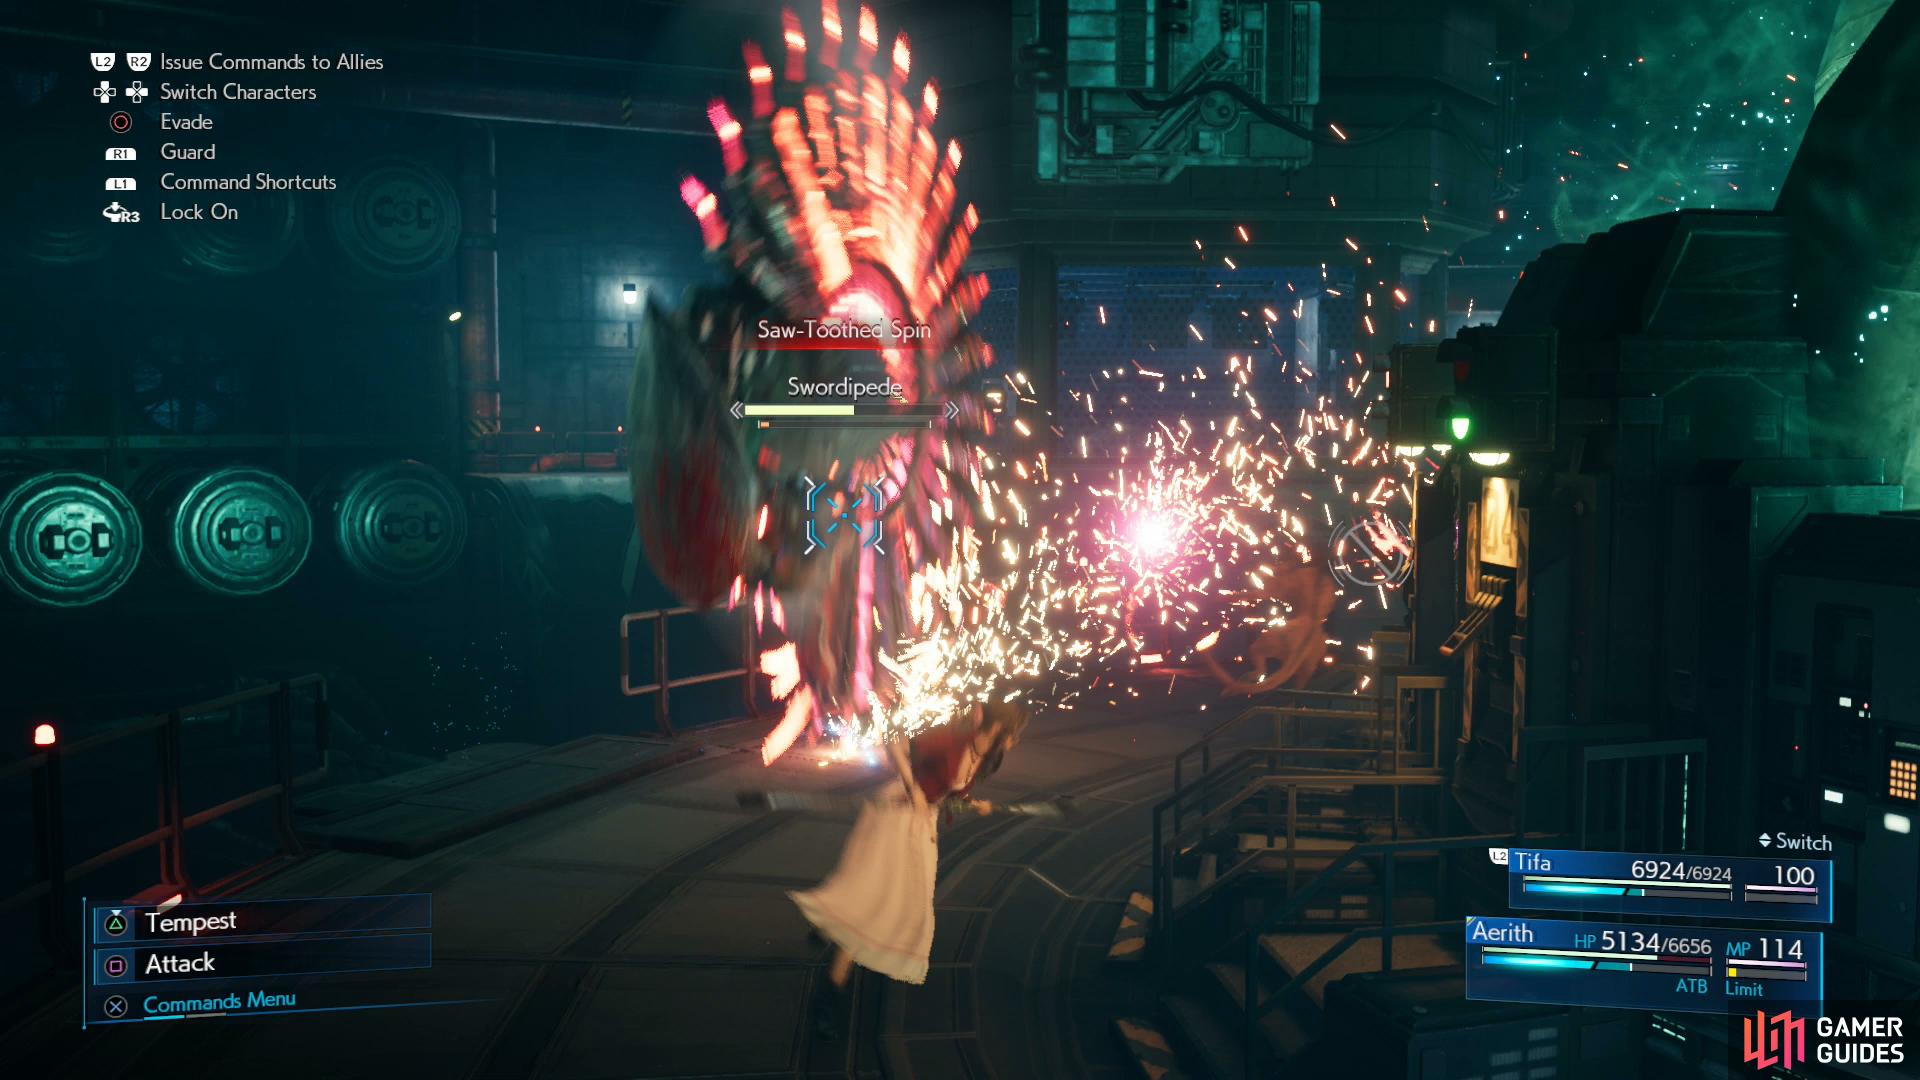
(1 of 3) During its “Saw-Toothed Spin” attack, Swordipede will spin around the battlefield, dealing heavy damage if it hits.
Phase 2
The Swordipede’s attacks and abilities are largely the same, but the circular fighting area and the characters you’re controlling make for a somewhat different encounter. Swordipede can still use its “Livewire” and “Energy Volley” attacks, both of which you can avoid just by running away from it. It also has a new “Saw-Toothed Spin” attack, where it’ll spin around the battlefield several times, dealing heavy damage if it lands a hit. After “Saw-Toothed Spin” it’ll become “Pressured”, but your AI is not up to the task of regularly dodging this attack - you can use Barrier to protect yourselves when you see it coming, but you’re better off focusing on offense to make this phase of the fight as short as possible.
To that end, we lay down an “Arcane Ward” with Aerith and just pelt Swordipede with elemental magic (Thunder, to ensure it hits) every time it passes by, attacking to charge ATB in the meantime. If you can Stagger it, wonderful, but a magic-focused Aerith will whittle down Swordipede’s HP in just a few passes. No need to make things complicated when simple tactics work well enough.
Once Swordipede is defeated you’ll score a Force Bracelet.
Make your way northwest and ride an elevator, enter a pipe, turn southwest and flip a switch two reunite the two parties. Now controlling Cloud, return up the pipe the girls came down and ride the elevator, then make your way southeast to a circular walkway. Work your way around it and you’ll find that a certain specimen is missing… follow the trail of energetic, purple liquid northeast to an elevator, and when you attempt to summon it you’ll be given a point-of-no-return warning.
Your companions aren’t lying: past this point are the game’s final boss fights. If you want to grind, level up, or basically do anything except plow through to the end of the game, you’ll want to decline to ride the elevator. As Red XIII points out you can ride the other elevator back down, presumably to pick fights with enemies in the Drum, which will respawn regularly. You should really only bother doing this if you need to in order to obtain the Gil necessary to kit out all four characters with materia, or if you cannot defeat the upcoming bosses for some reason (making a HARD SAVE here is a good idea). If it’s just min-maxing you’re concerned about, you should go ahead and continue through the story, as it’ll be quicker in the long run.
Anyways, the choice is yours. When you’re ready, ride the elevator up to the 69th floor. Follow the purple trail up to the president’s office on the 70th floor and you’ll hear somebody calling for help. Exit to the east, use a rest bench, buy some discounted restoratives - 3x Mega-Potions (300 Gil), 2x Ethers (100 Gil) and 2x Phoenix Downs (100 Gil) - and consider equipping Healing + Magnify materia and Time + Warding materia or Protective Boots before responding to the call for help. Watch the scenes that follow and you’ll find yourself in another fight.
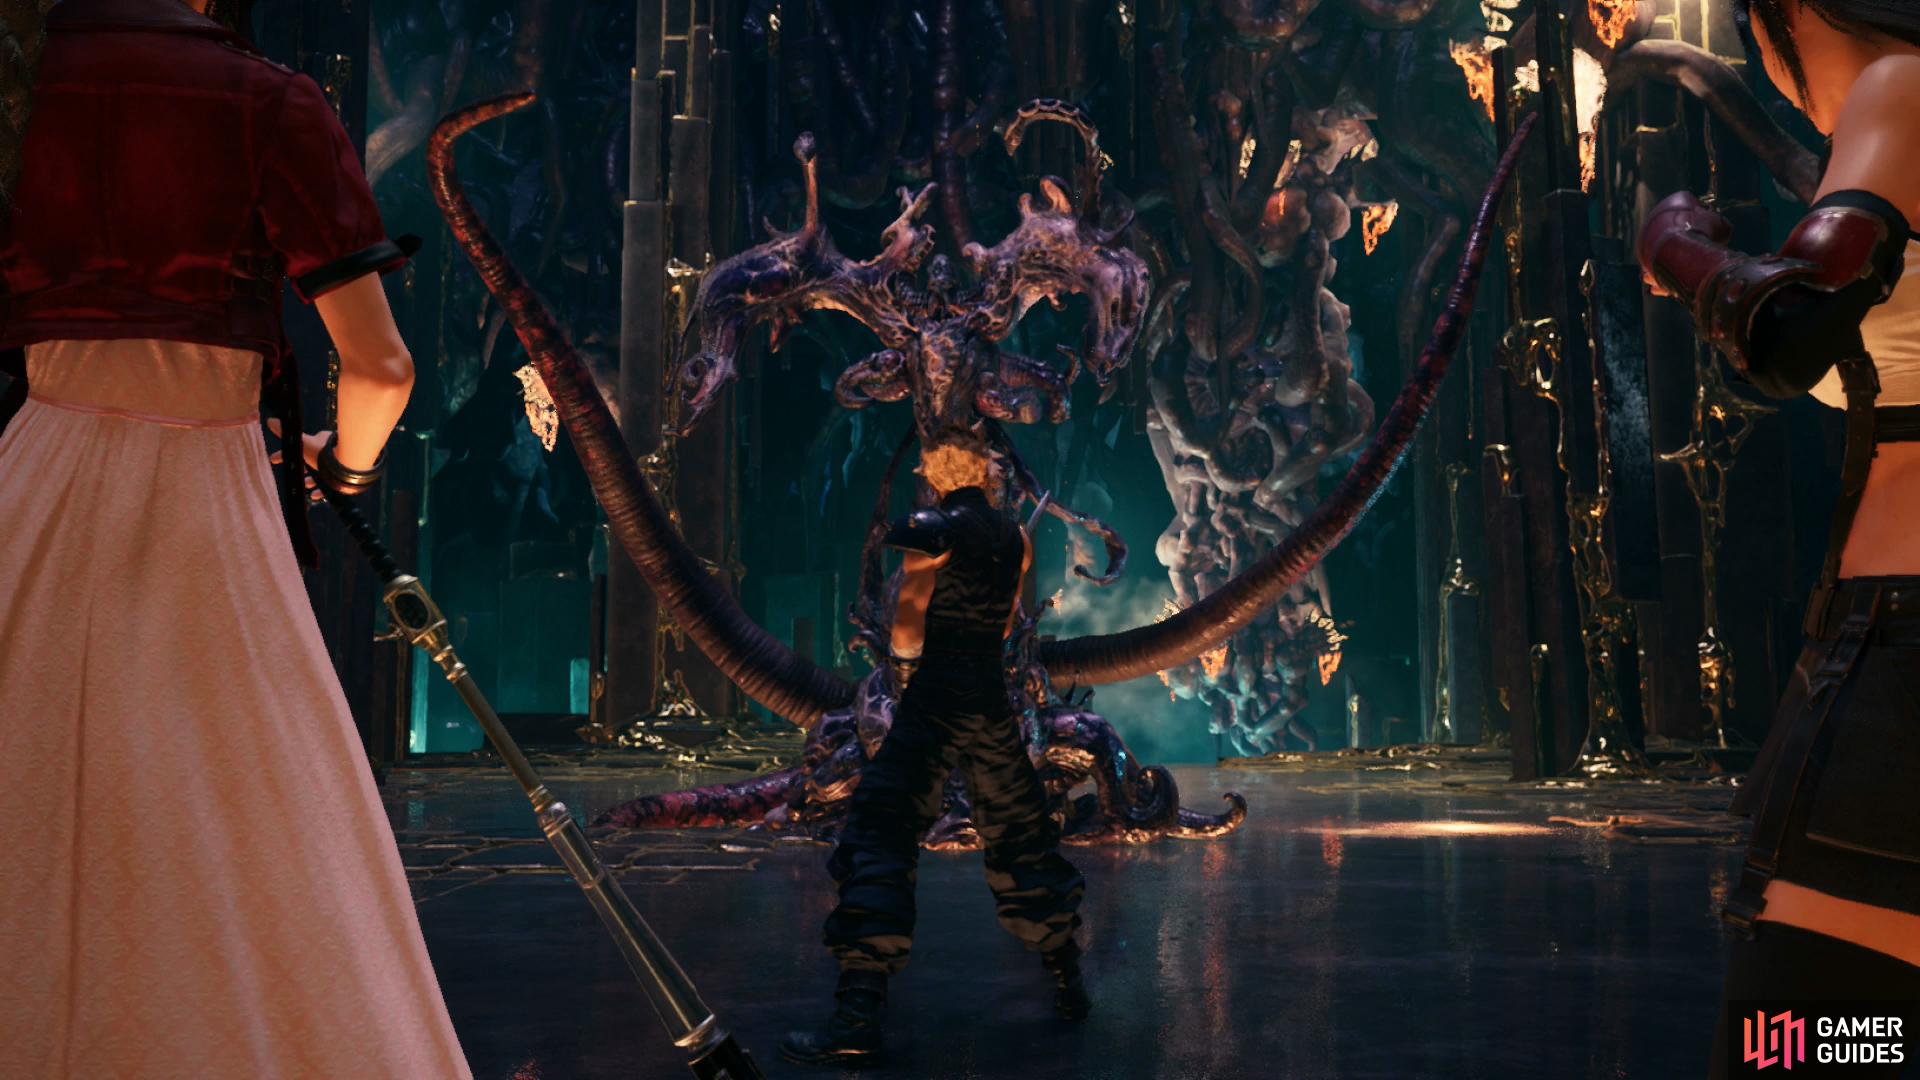
Boss: Jenova Dreamweaver
| Enemy | Weaknesses | Notable Loot |
|---|---|---|
| Jenova Dreamweaver | -- | Astral Cuff |
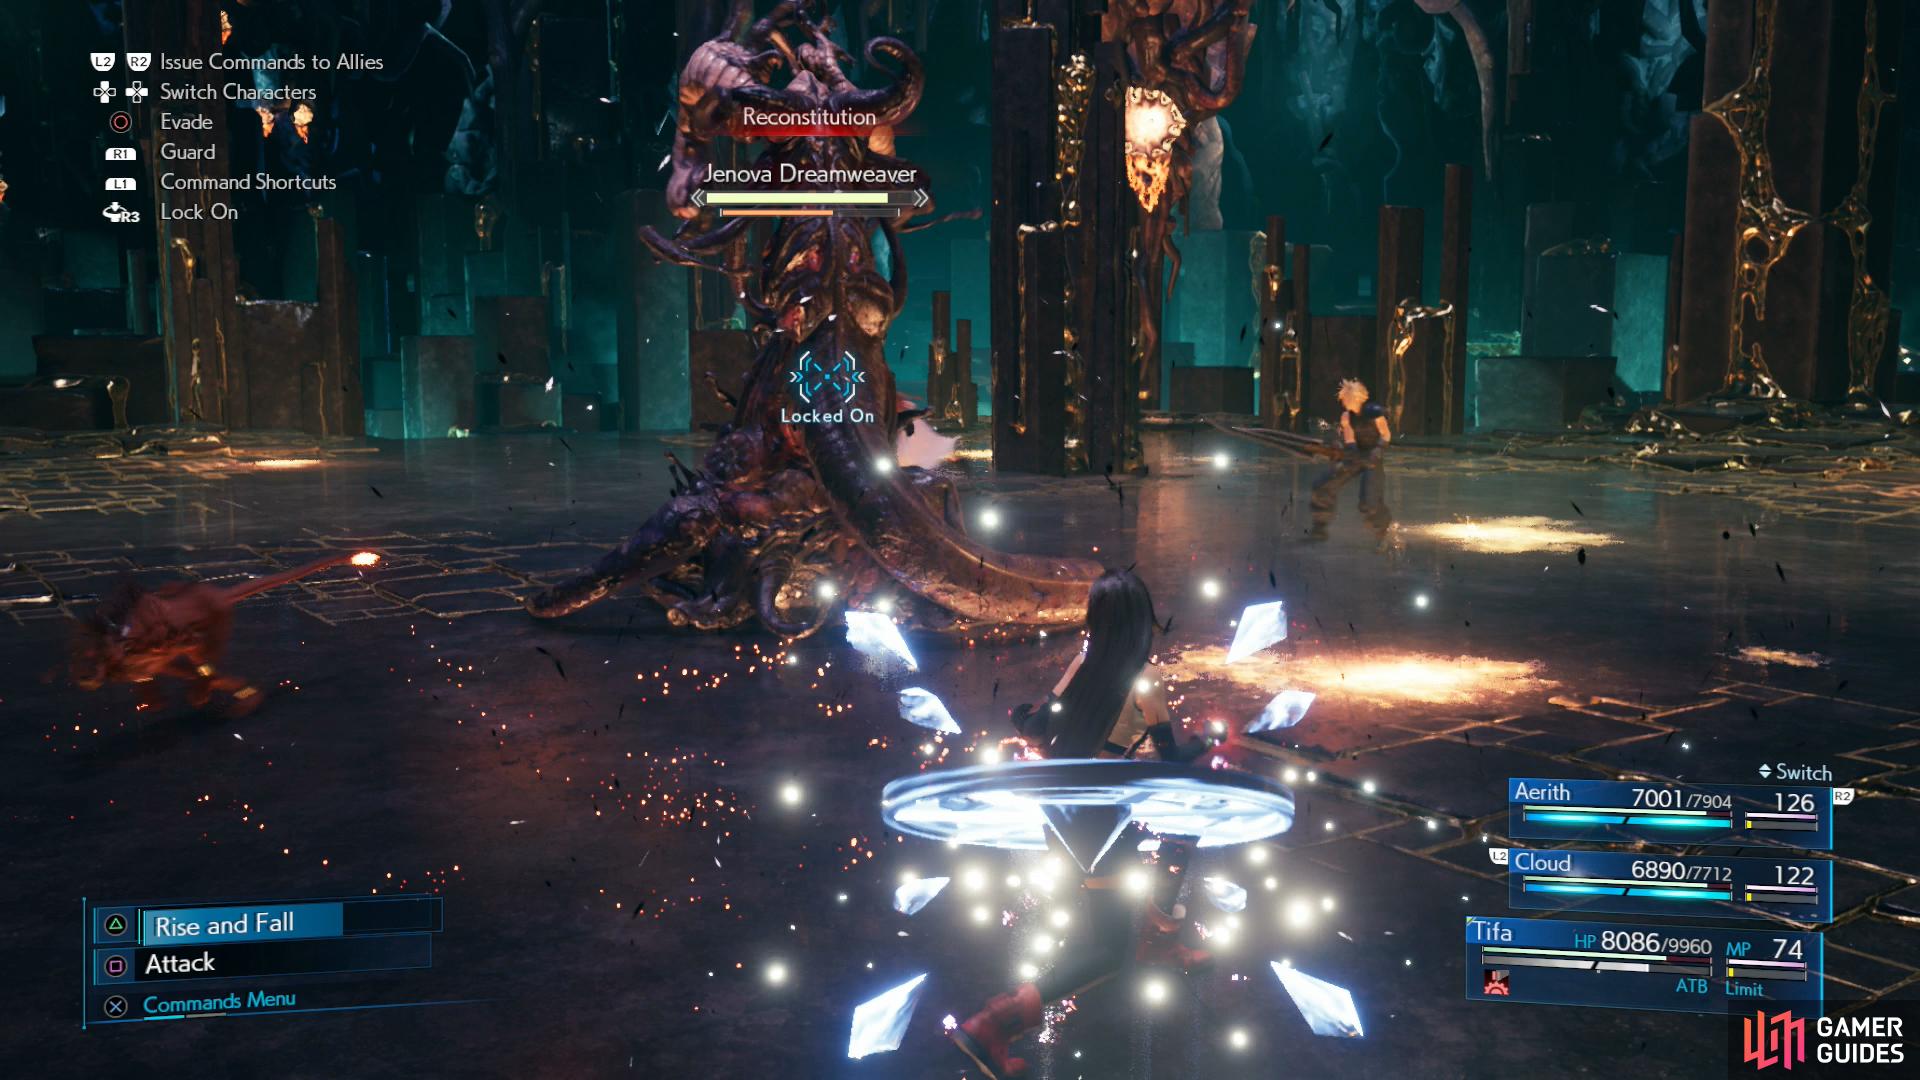
Phase 1
At the start of the battle, Jenova Dreamweaver won’t prove to be a very dynamic foe. She’s resistant to magic, so Aerith will in most situations be better off left to her own devices, accumulating ATB for when you need to heal. Tifa and Cloud should focus on attacking Jenova’s tentacles, which will deprive Jenova of certain attacks and perhaps induce “Pressure”, which you can then take advantage of to build Jenova’s Stagger gauge. Cloud’s “Braver” ability is surprisingly useful here, as it has a high chance of destroying a tentacle outright while also damaging Jenova’s body. After a period of time Jenova will restore damaged tentacles by using “Reconstitution”.
Jenova’s attacks during this phase include:
-
Cast Aside: An area-of-effect attack centered on Jenova, deals moderate damage and repels attackers.
-
Quietude: Shoots out bolts of energy that deal light damage. Can inflict “Silence”.
-
Vengeance: Shoot a beam of black energy at a target. Deals heavy damage, but can be blocked or countered with “Counterstance”.
This covers the named attacks, but Jenova can also use spells like Fira, Aero and Bio. Jenova can also use a variety of tail and tentacle whips, assuming they’re intact, as well as create miasmas that travel along the ground and inflict “Stop” on any who stay within their area too long. She can, as the fight goes on, create a great number of these miasmas, and while they’re easy enough to out-run, they’re a serious distraction that makes immunity to Stop a welcome boon for this fight.
Phase 2
Reduce Jenova Dreamweaver’s HP to around 75% and she’ll shed her Stagger gauge and begin phase two, which is similar to phase one save she’ll now use several new attacks:
-
Mourning Wail: Similar to “Cast Aside”, it’s an area-of-effect attack centered on Jenova. Its area is much larger, however, and it lasts for a good while, dealing damage as long as a character remains in its effect. Retreat, switch to Aerith, and keep attacking.
-
Rejection: Used when Jenova enters a “Pressured” status, she becomes immune to magic attacks and will respond to any physical attacks with a high damage counterattack. You can use Breach to take down her barrier, then hit her with magic (Aerith’s “Ray of Judgment” also works well at driving up Stagger) or just wait out this ability - it’s not a bad opportunity to heal, if nothing else.
-
Resolution: Used when Jenova enters a “Pressured” status, she becomes immune to physical attacks and will respond to any magical attacks with a high damage counterattack. You can use Breach to take down her barrier, then hit her with “Focused” attacks or just wait out this ability - it’s not a bad opportunity to heal, if nothing else.
Reduce Jenova’s HP to around 50% to start the next phase of combat.
(1 of 4) During phase three, Jenova will use variety “Dreams” attacks, inspiring her tentacles to respond.
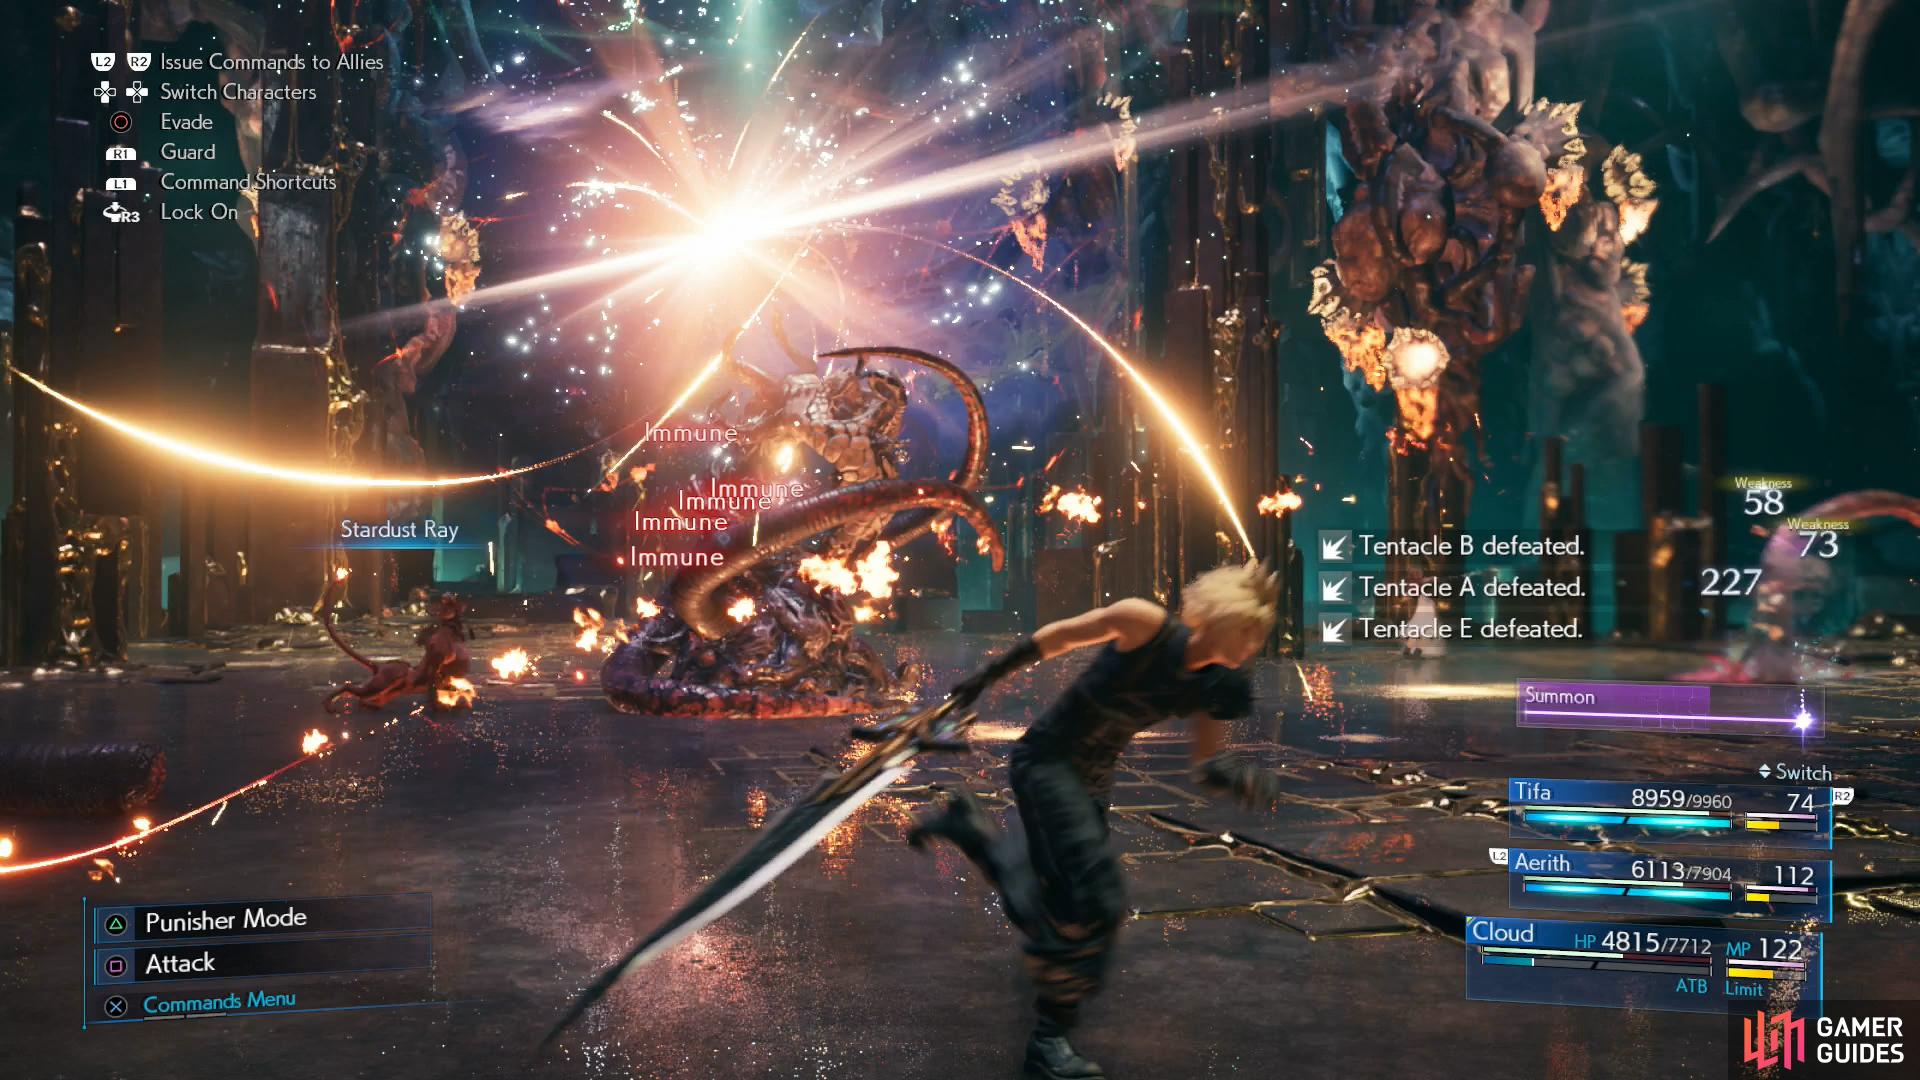
Phase 3
A change of pace, for this phase Jenova will use her “Thanatos Deprived” ability, which renders her immune to all damage. She’ll then deploy several tentacles around the battlefield, which you’ll need to destroy quickly. She won’t attack directly during this phase, but she’ll use her tentacles to do so:
-
Dream of Quietude: Shortly after this, Jenova’s tentacles will all use “Quietude”, sending out a bolt of energy that deals light damage and inflicts “Silence”.
-
Dream of Fire: Shortly after this, Jenova’s tentacles will all cast Fire.
-
Dream of Vengeance: This attack takes a while to charge up, after which all of Jenova’s tentacles will use a full-strength “Vengeance” attack.
The less tentacles Jenova has at any given time, the weaker her attacks will be. “Dream of Vengeance” is especially potent, so you’ll need to take your task seriously and destroy as many tentacles as possible while it’s charging. Cloud’s “Triple Slash” ability works well at destroying tentacles. Destroying Jenova’s tentacles will drive up her Stagger gauge, and once it’s nearly filled she’ll ready either “Rejection” or “Resolution”. Tear her shield down with Breach, or just use a “Focused” attack and take the counterattack - once she’s Staggered, deal as much damage as you can as quickly as possible.
Phase 4
Once reduced to around 25% of her HP the final phase of the fight will begin. Similar to the first two phases, Jenova’s body and tentacles can now be attacked, as she dispenses with her “Thanatos Deprived” ability. Jenova is much more aggressive this time around, and will now cast more powerful spells like Firaga, Aeroga and Biora. She can now also teleport around the battlefield and deploy vile, black rain which drains your MP. Otherwise, all her attacks are things you’ve seen before, but the floor tentacles have remained, and she’s capable of using “Dream” attacks in conjunction with other abilities from phase one and two, making this phase rather hectic.
Attack Jenova as much as possible, aiming to destroy the attached tentacles and inflict Stagger. There are no more phases left, so if your Summon gauge fills, use it. Same goes for limit breaks, although you may wish to save those for when you inflict Stagger.
Keep up the pressure and when she’s defeated you’ll obtain an Astral Cuff.
Watch the scenes that follow and you’ll be back in control of Cloud. Head east to return outside, use the rest bench, then continue to the western end of the roof to find another rest bench and vending machine. Use the latter to buy some discounted restoratives - 3x Mega-Potions (300 Gil), 2x Ethers (100 Gil) and 2x Phoenix Downs (100 Gil) - then climb the ladder nearby to trigger some more scenes. Make sure Cloud is self-sufficient - you’ll want to ensure he has Healing Materia and perhaps Chakra Materia, and Poison and Elemental + Lightning on his armor won’t hurt, either - then head north to the helipad to trigger more scenes.
Boss: Rufus and Darkstar
(1 of 5) Most of Darkstar’s attacks can be countered, save for the Thunder/Thunderclap combo,
Phase 1
Since this fight pits Cloud against Rufus and his pet, Darkstar, it’s obviously not going to be the sort of tactical fray that’ll see you utilizing multiple characters in different roles to defeat a big bad - the way most boss fights are. Instead, to succeed here you’ll have to utilize Cloud well, and despite the impressive list of attacks at your enemy’s disposal, two moves, some timing, and a bit of running about are all it will really take to win.
First, you’ll largely be ignoring Rufus while Darkstar is around, as it’ll simply use Curaga to restore any damage done to its master. It’s also fairly difficult to damage until, as the in-game description puts it, “its link with Rufus is broken.” Counterattacks will do that quite nicely, so your tactic for this first phase should be to run around at moderate distance - close enough that you may provoke Darkstar, but not too close that you can’t avoid attacks - and when you see it about to attack, switch to Punisher mode or use “Counterstance” to counterattack.
This will deal some damage and inflict “Pressure”. Quickly take advantage and score some hits (use “Focused Thrust” if you have the ATB to spare) on the fallen mutt, but don’t get too greedy, as Rufus will charge in and attack before long. Repeat this process until Darkstar is Staggered, then try to reduce its HP as much as possible. Sometimes passing on opportunities until you have two ATB segments ready for Darkstar’s upcoming Stagger period is worth the wait. Rufus won’t give you much time to attack, and landing one good “Braver” on Darkstar is worth the effort.
When you successfully counter one of Darkstar’s attacks, you may think you’ve been hit - don’t fret, the counter animations for this fight are unusually elaborate and, frankly, satisfying. Darkstar can also be pressured by casting Bio on it. The damage isn’t great, but it’s nice to see victory closing in even when you’re forced to run about and wait for your enemies to act.
Enemy attacks in this phase include:
-
Corkscrew: A charge attack, counter it when you see it coming.
-
Subdue: A grapple, Darkstar will inflict “Bound” if it hits. One of Darkstar’s few unblockable attacks, you’ll need to dodge it.
-
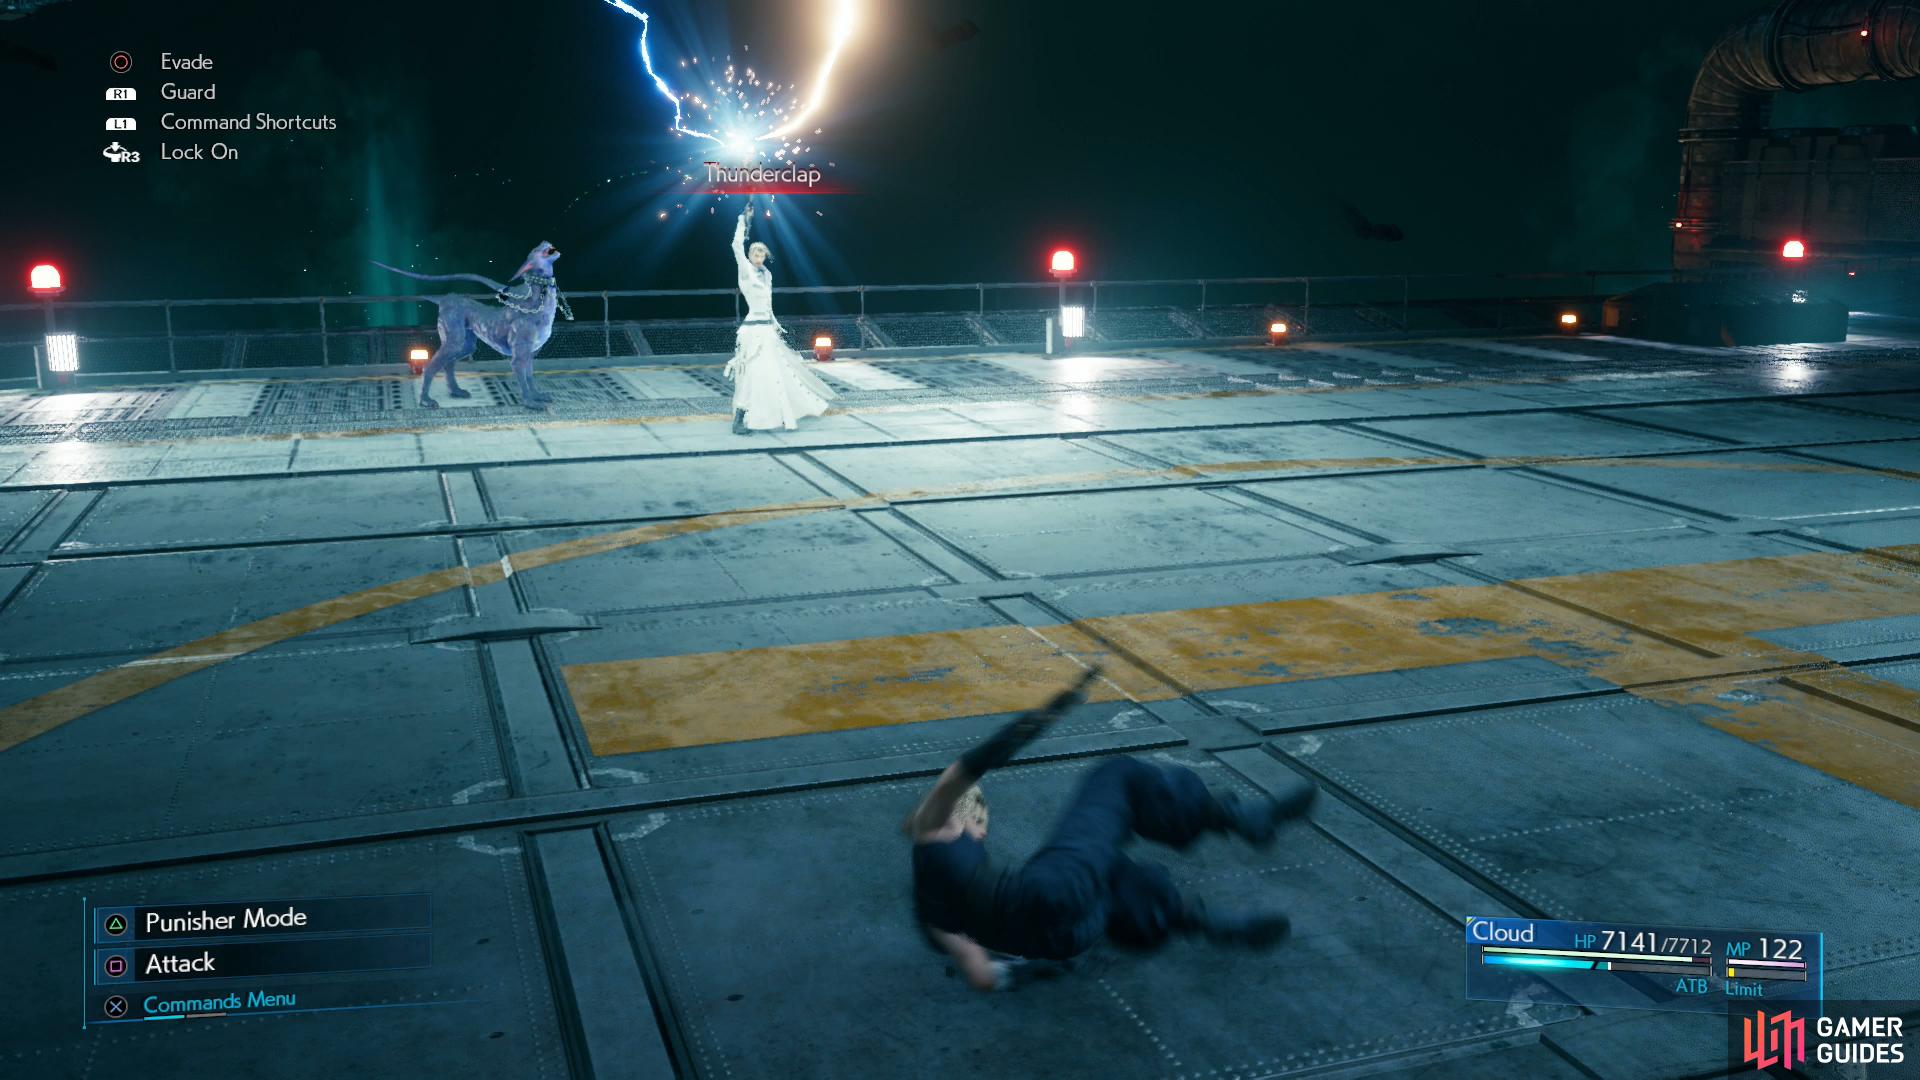
Thunder/Thunderclap: When you see Darkstar cast Thunder, just keep running a wide circle around Rufus. This attack isn’t directly aimed at you, but rather at Rufus, charging up his gun and provoking his “Thunderclap” attack. Elemental + Lightning will mitigate, negate or even absorb damage, but otherwise simply running should avoid it.
-
Whirlwhip: Standard Guard Dog attack, it’ll attack with its tentacles. Can be countered easily enough.
In addition both Rufus and Darkstar have unnamed physical attacks they’ll use. Rufus’s attacks with his shotgun will largely be made to relieve Darkstar when it’s being attacked during this phase. Both will use “Follow-Up” to deal extra damage when you make a mistake. “Heel” summons Darkstar back to Rufus and restores their link, and “Reload” is a necessary action following one of Rufus’s other attacks, during (and shortly after) which he’s immobile and vulnerable. This will play a role shortly…
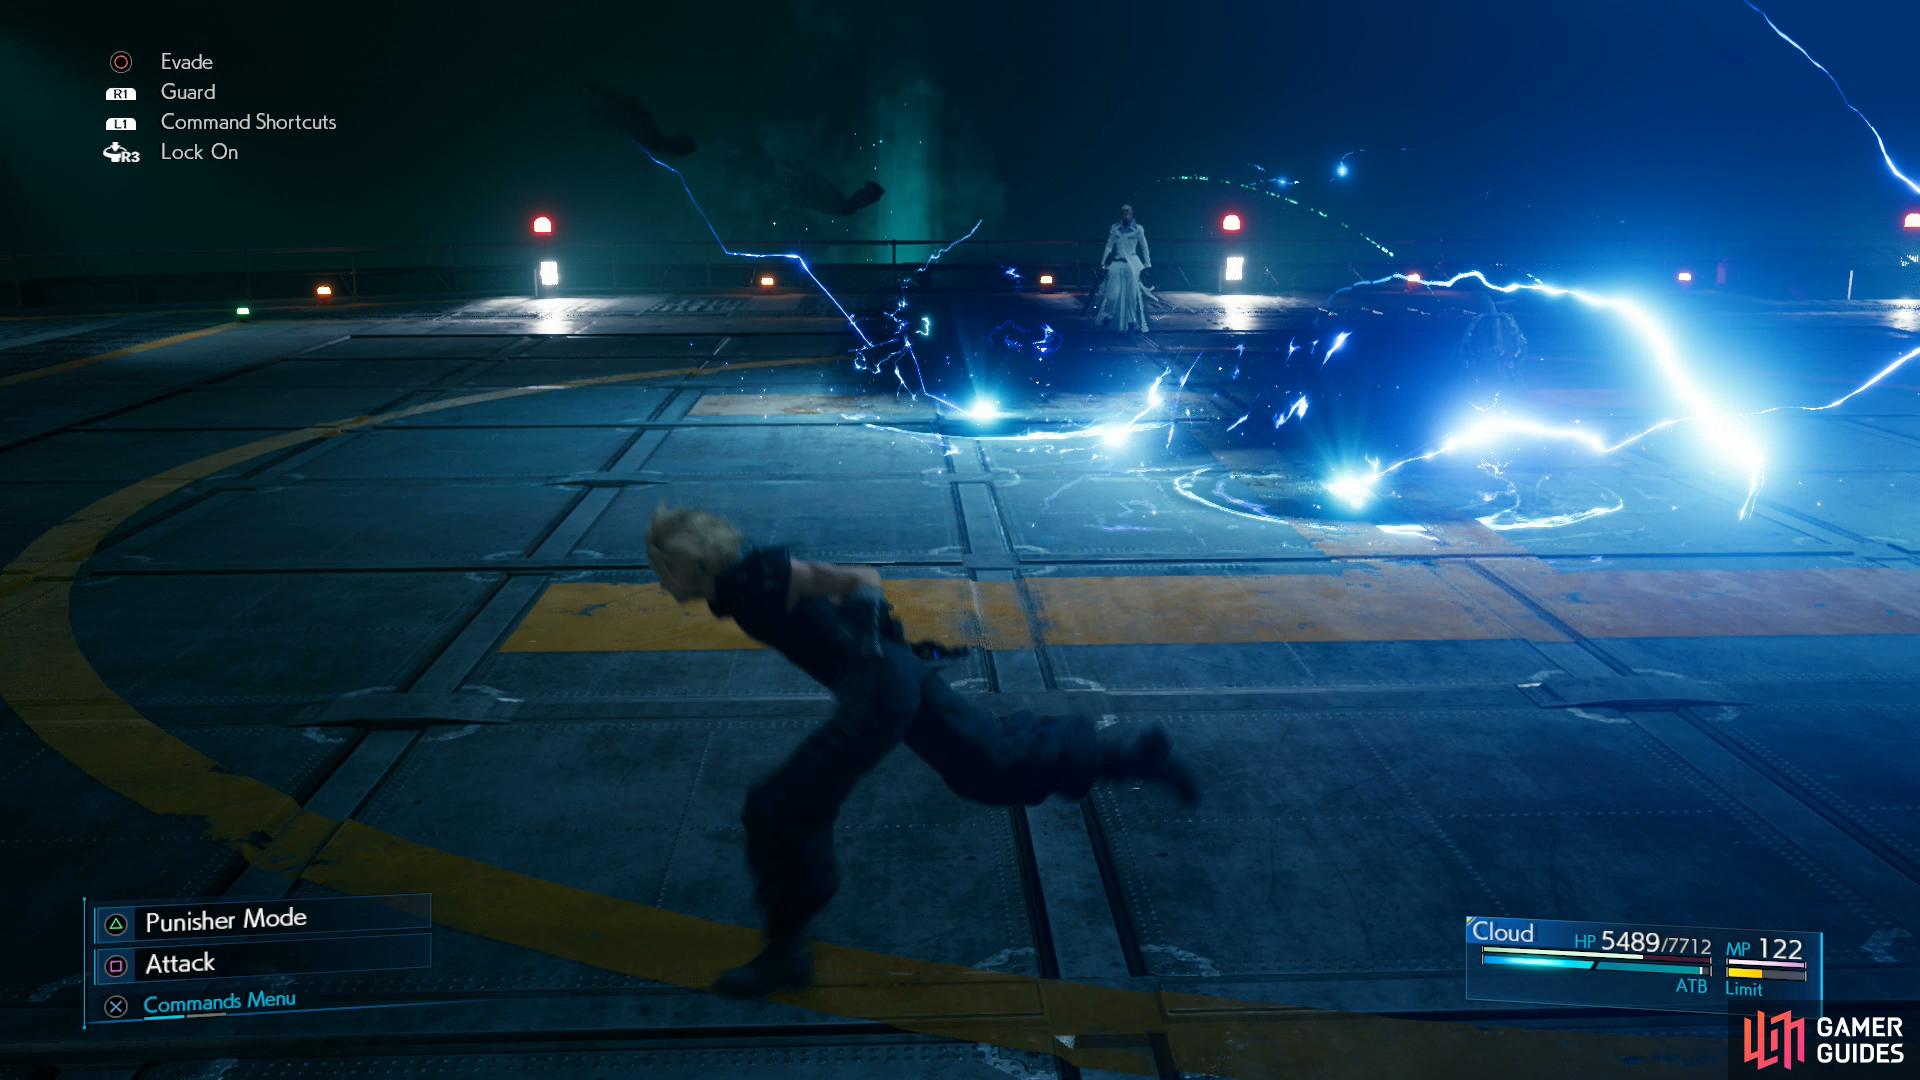
(1 of 3) In phase two, Rufus will become more active, using the area denial attack “Tread Softly”.
Phase 2
Reduce Darkstar’s HP to around 50% and phase two will begin. Rufus will send his helicopter away, indicating his determination to keep fighting, despite what he says about his appraisal of the fight. This phase is much like the last one, save Rufus is far more active. Despite that, you’ll want to eliminate Darkstar to move things on, but attacking Rufus might be the key to achieving that end, as you’ll see. Darkstar will still attack, and can still be countered, but Rufus’s own offense makes this much trickier. His new attacks are as follows:
-
Bright Lights: Usually used in conjunction with other moves, like “Up in Smoke” and “Tread Softly”, this opportunistic attack deals heavy damage. He’ll rarely catch you with it unless you’ve been debilitated or distracted by another attack.
-
Guns Akimbo: Rufus fires a barrage from his guns. Just keep running to avoid the shots and when he stops try to close in on him - he’ll “Reload” immediately after the attack, and if you can catch him with a “Braver” during this period it’ll knock him back, prevent him from acting for a while and also “Pressure” Darkstar. Much win.
-
Think Fast: Rufus deploys explosives around him. It’s a quick, short-ranged attack and another reason why you shouldn’t tread too close.
-
Tread Softly: Rufus will shoot some projectiles up in the air, which quickly crash down in front of him, forming three electrical globes on the ground. They deal only minor damage, but they’ll stun you if you run into them, allowing full-up attacks (“Bright Lights” or “Guns Akimbo”). They serve as area-denial hazards more than anything, and provide a good incentive for you to keep your distance.
-
Up in Smoke: Shoots a gas munition that obscures vision. Rufus will often follow up by shooting “Bright Lights” or “Guns Akimbo” into the smoke. Just keep moving to escape the smoke.
Generally the tactic of circling Rufus and Darkstar and picking your spots still works, although the spots you’ll pick are a bit different. If Darkstar moves to attack the good old counterattack response works fine, but if Rufus whiffs an attack and you have the ATB to spare, charge in and hit him with “Braver” during or shortly after his “Reload”, then turn your attention to Darkstar.

(1 of 4) Attacking Rufus when his guard is up will result in your attacks being parried harmlessly aside.
Phase 3
Defeat Darkstar and Rufus will send the hound away rather than let it fall victim to more abuse. The rest of the fight is Rufus vs. Cloud, mano a mano. Rufus will use many of the same attacks this round as last round, including “Bright Lights”, “Guns Akimbo”, “Think Fast” and “Up in Smoke”. He’ll also dash about, and if you get too close he’ll shoot you with his shotgun. Furthermore, if you attack while his guard is up he’ll give Cloud a taste of his own medicine by evading and counterattacking.
The trick to this fight is simple; run around, keep your distance from Rufus, wait for him to use - and miss with - a named attack, then run up and hit him with “Braver”. This will instantly Stagger Rufus, at which point you should immediately switch to Punisher mode, get off a flurry of blows to deal damage and charge your ATB, and hit Rufus with another “Braver”. Doing this a few times should end the fight.
Immediately after the fight with Rufus and Cloud you’ll be treated to more scenes. When Barret and Aerith appear, be sure to hold down [SQUARE] to access the menu! Another fight is upcoming, and you’ll want to switch out materia. Be sure they both have access to Elemental + Fire on their armor, they have some HP Up Materia, allowing them to endure a bit of damage, and Healing and Revive on both won’t hurt either (we give Aerith Healing + Magnify for obvious reasons).
Boss: The Arsenal
| Enemy | Weaknesses | Notable Loot |
|---|---|---|
| The Arsenal | -- | -- |
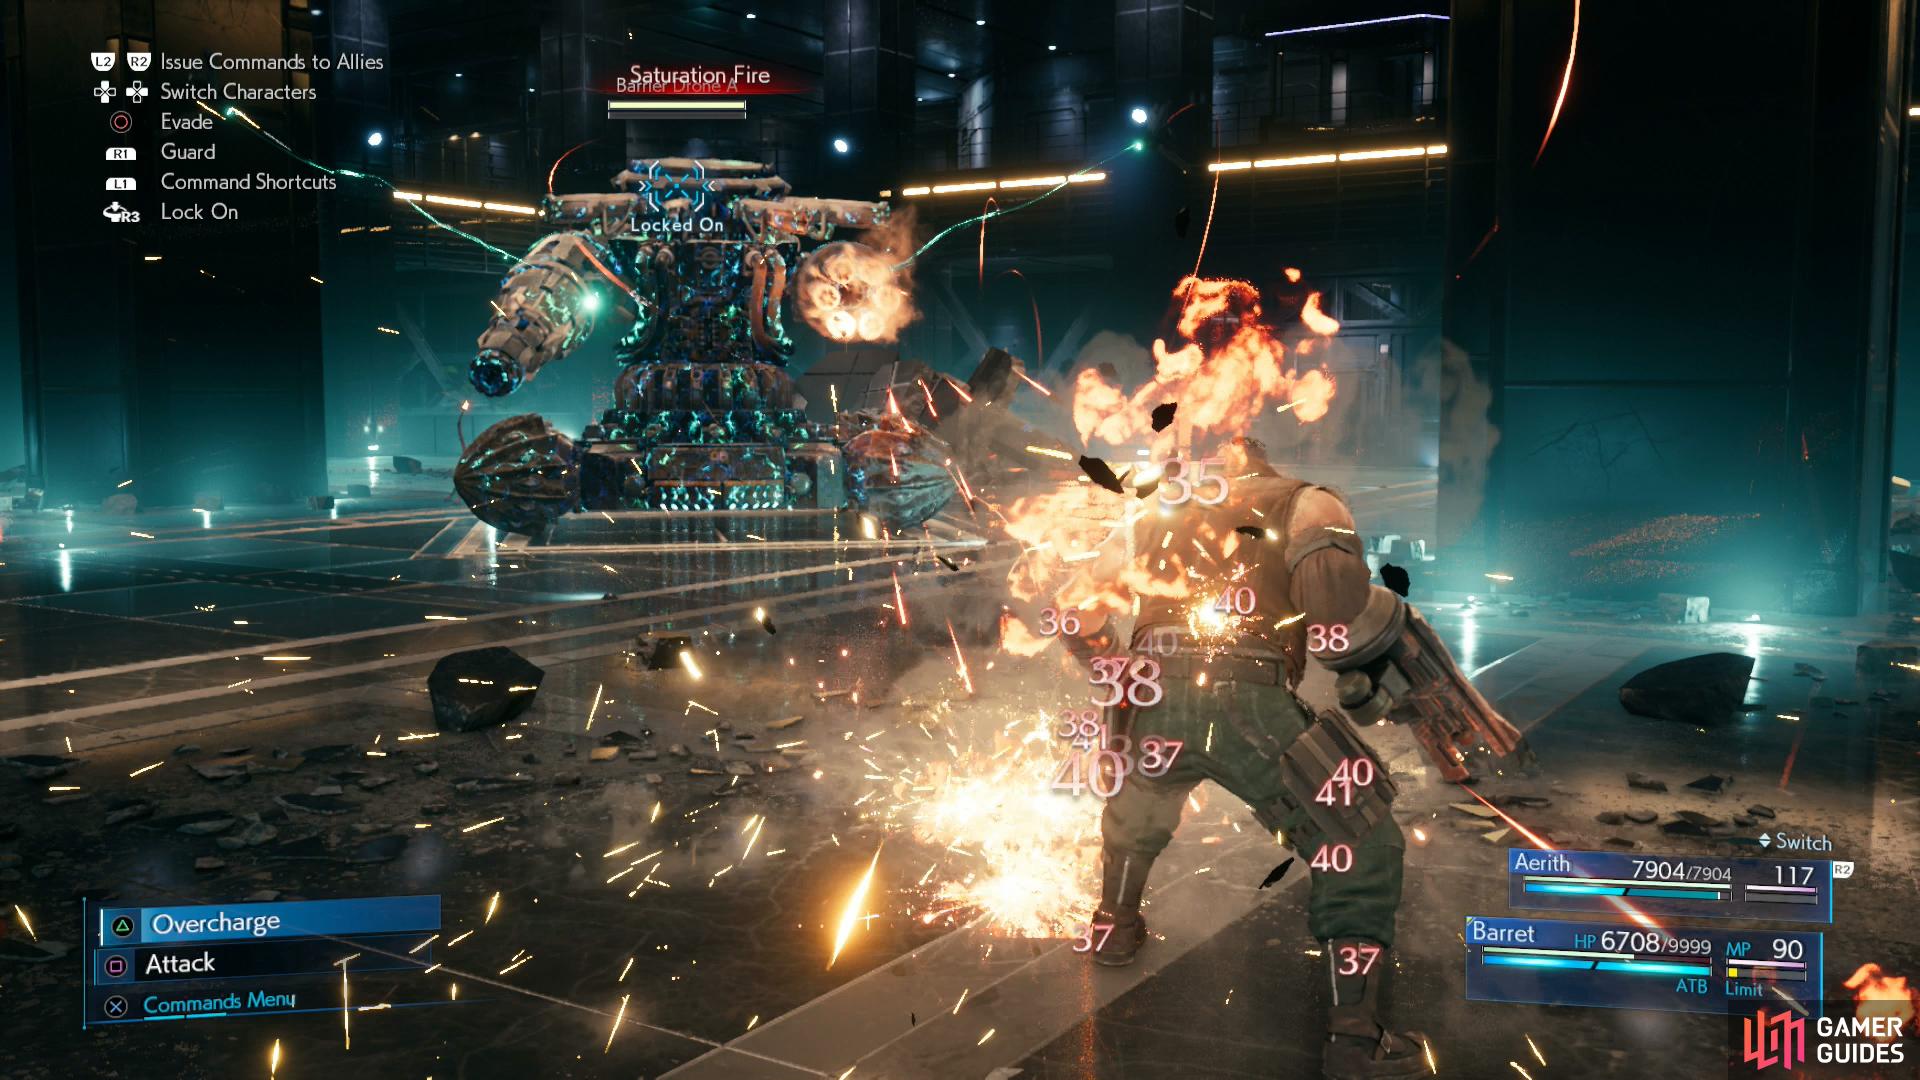
(1 of 6) The Arsenal can attack with its two side cannons, using either “Primary Fire” or “Saturation Fire”.
Phase 1
The first phase of this battle isn’t too difficult; you start behind a mound of debris which will block most of The Arsenal’s attacks, but you need to move to the nearby pillars as the debris will only absorb so much damage before being destroyed. Take control of Barret and get behind the pillar when you can, then focus on taking shots at the Barrier Drones. Often you can shoot at them without exposing yourself, but certain attacks can still hit you, depending on your positioning. Still, there’s plenty of downtime between attacks to allow for a full attack volley, “Overcharge” attack or “Maximum Fury”. You can also switch characters during The Arsenal’s attacks, during which the robot is committed and cannot switch targets. Aerith can use “Arcane Ward” and elemental magic (again, we prefer Lightning Materia for its accuracy) to good effect here, although you’ll want to be careful not to use too much MP.
While doing this The Arsenal will rotate between the following attacks:
-
Aerial Strike: Technically not named, during this attack a laser will mark a reticle on the floor, shortly after which a blast will follow. This attack deals heavy damage, and leaves a persistent globe of energy on the floor, dealing more damage if you come into contact with it. An area-denial attack, just move out of the way when you see it coming.
-
Homing Laser: Fires a volley of lasers in an arc. Each deals light damage, but getting hit by one could stagger you briefly enough to ensure more hits. Moderately homing.
-
Primary Fire: Charges up and fires a shell from its right cannon, deals heavy damage.
-
Saturation Fire: Fires a barrage of bullets from its left cannon, deals minor damage, but the number of projectiles adds up quickly.
-
Voltaic Discharge: Shoots several lines of electricity that spread out in a wedge from The Arsenal, deals moderate damage and stuns.
All of these attacks can be avoided by simply hiding behind a pillar. The “Homing Laser” attack will force you to hug said pillar, while “Aerial Strike” may flush you out temporarily. “Primary Fire” and “Saturation Fire” can only harm you if you’re exposed to the gun performing the attack, while “Voltaic Discharge” isn’t terribly difficult to avoid even out of cover.
Destroy all three Barrier Drones and the fight will advance to phase two.
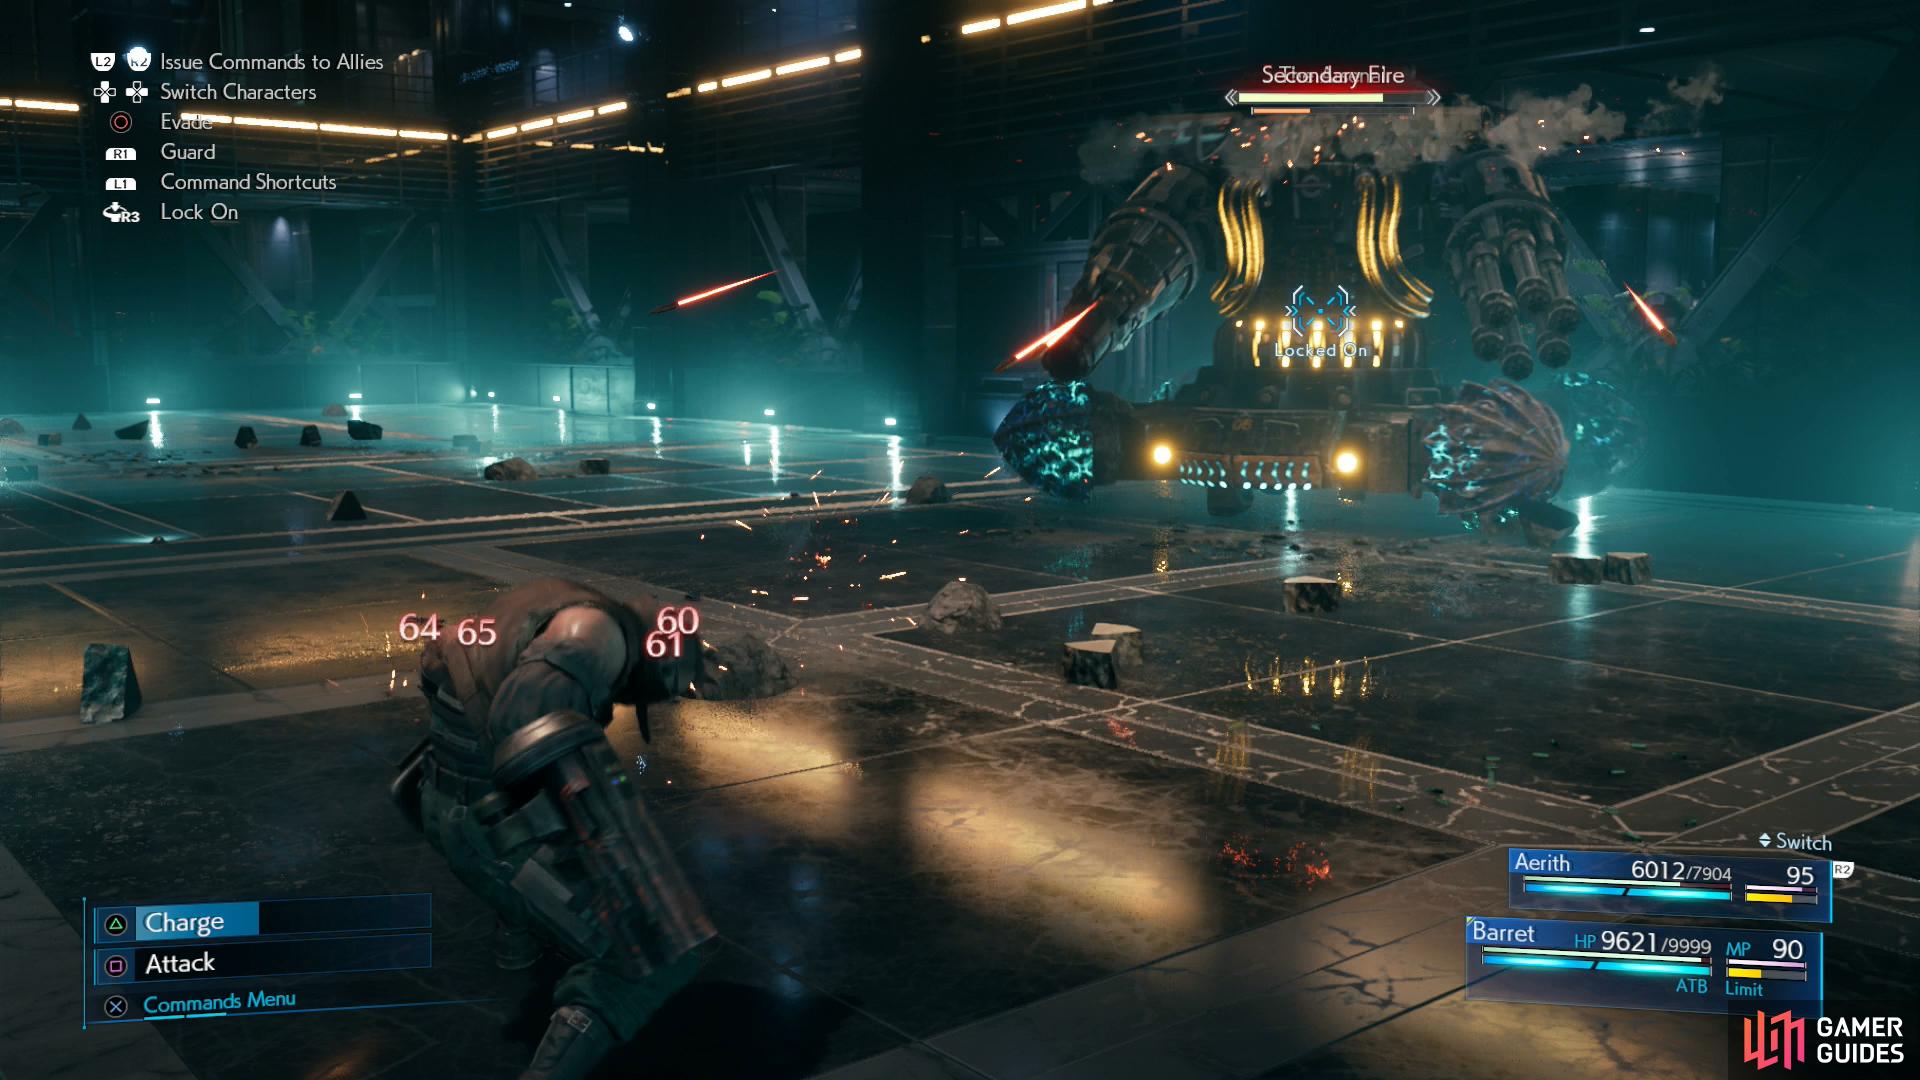
(1 of 4) In phase two the Arsenal will use “Secondary Fire”, which is something of a mix of “Primary Fire” and “Saturation Fire”.
Phase 2
In phase two, The Arsenal will abandon the stationary approach which caused it so fare so poorly and will use its wheels to actually… you know, move. This includes the odd bit of motion as it readies attacks (which include all of the attacks from the last phase), but most of its motion will come from its “Charge” attack, which, as the name implies, is a forward dash at high speed, dealing moderate damage if it connects. Otherwise the only new attacks The Arsenal has are “Firewall”, which creates a wall of fire that boxes you into a narrow area, and “Secondary Fire”, which is somewhere in between “Primary Fire” and “Saturation Fire”, shooting out multiple rounds that deal… well, still pretty little damage, individually.
The Arsenal’s mobility is a nuisance, but a minor one - you can continue to hide behind the pillars to avoid its attacks, you’ll just have to be ready to scramble around to keep the pillar between you and The Arsenal. The real trick to this phase is the fact that you can now only target the body, and the four wheels, the former of which takes little damage from most attacks and the latter take even less. The only way to really damage The Arsenal is to wait for it to attack, at which point the weapon its using will become a weak point. This mostly applies to “Primary Fire”, where you can target the “Main Cannon” and “Homing Laser” where you can target the “Laser Cannon”. Stick to Barret, keep attacking to charge his ATB, and when you see it use one of those attacks command Aerith to hit the offending component with Thunder. Ideally this will leave The Arsenal “Pressured”, at which point target The Arsenal’s wheels with “Maximum Fury” to damage - and hopefully Stagger - it.

Phase 3
Deplete The Arsenals HP to around 60% of its maximum and it’ll move to phase three, which is similar to phase two save for the fact it’ll now use its “Pulse Cannon” attack. Don’t even think about weathering it - hide behind cover during its long charge time. You can only do this a few times, however, as it’ll destroy what you’re hiding behind each shot. Otherwise The Arsenal will use “Firewall” to try and isolate you, followed by one of the aforementioned attacks. Hit whatever component it exposes during this latter attack to halt its offense and “Pressure” it, then target the wheels to dish out damage.
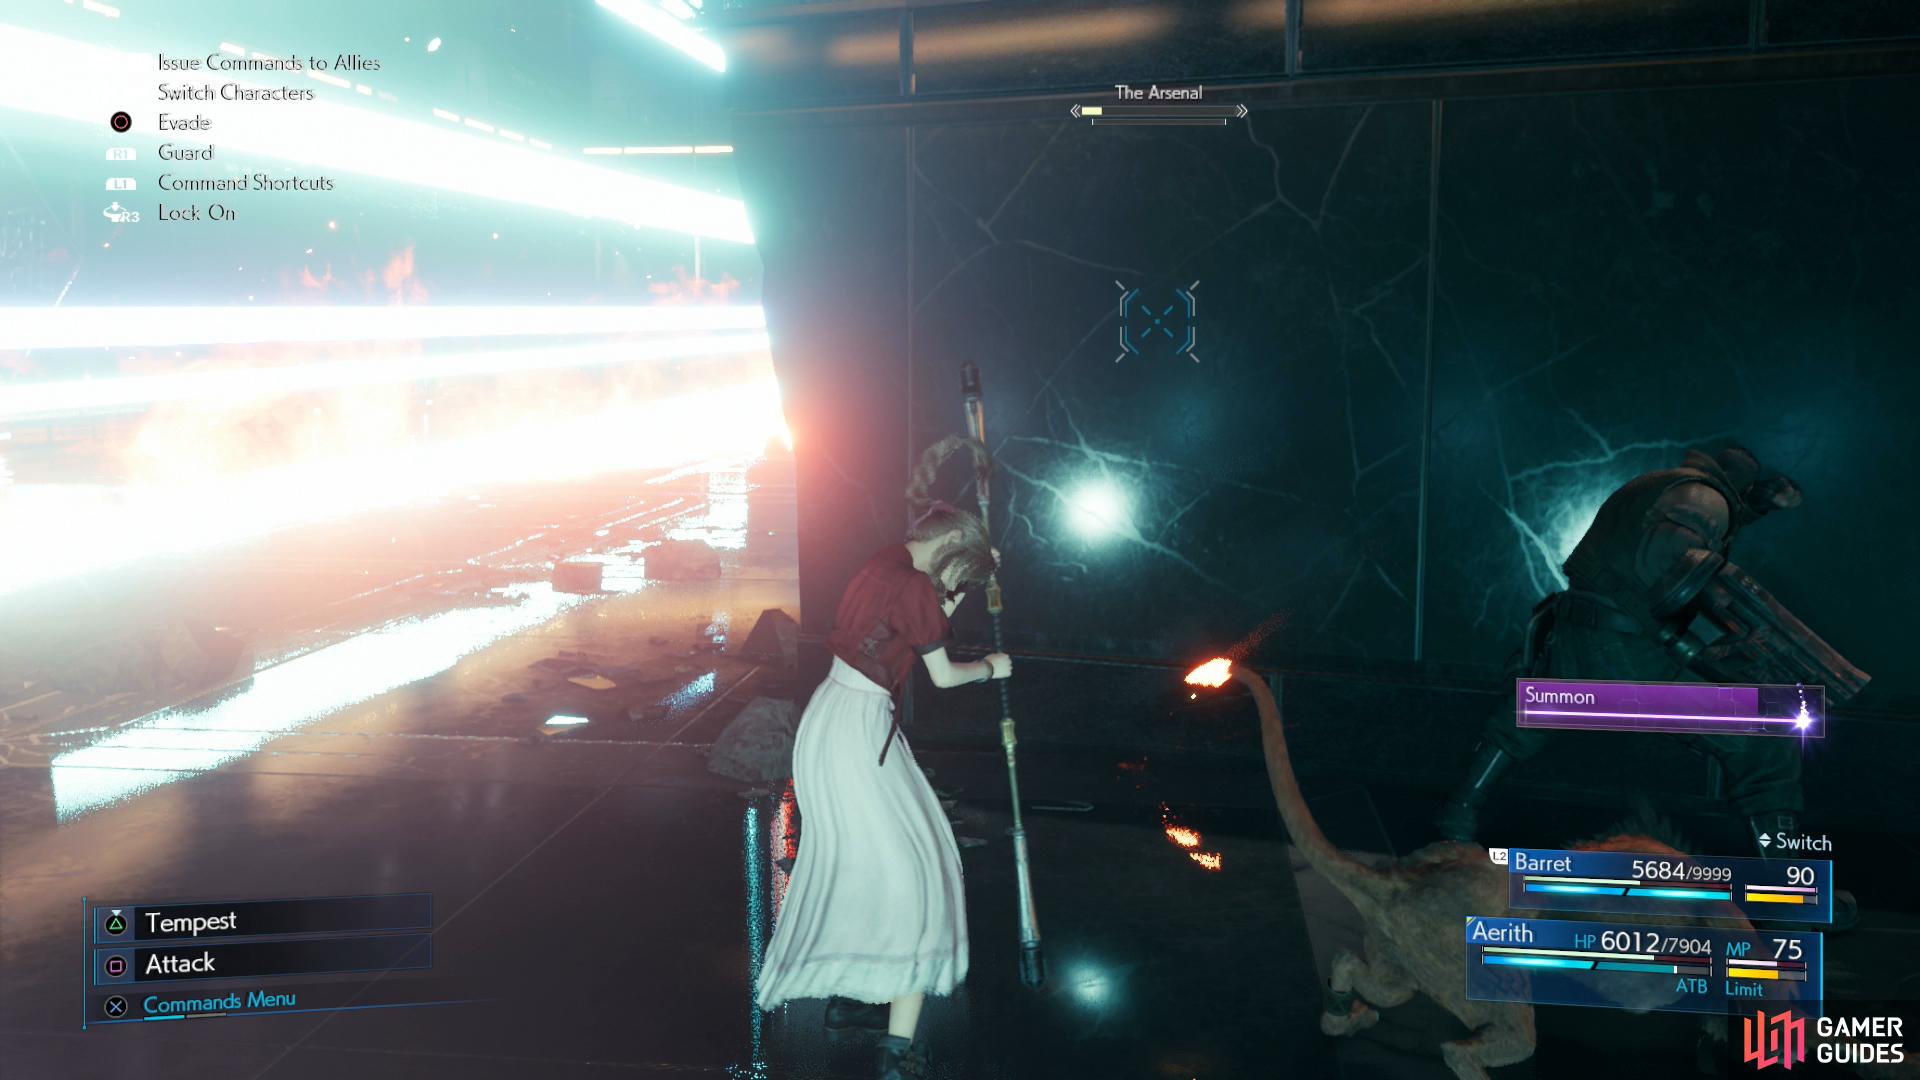
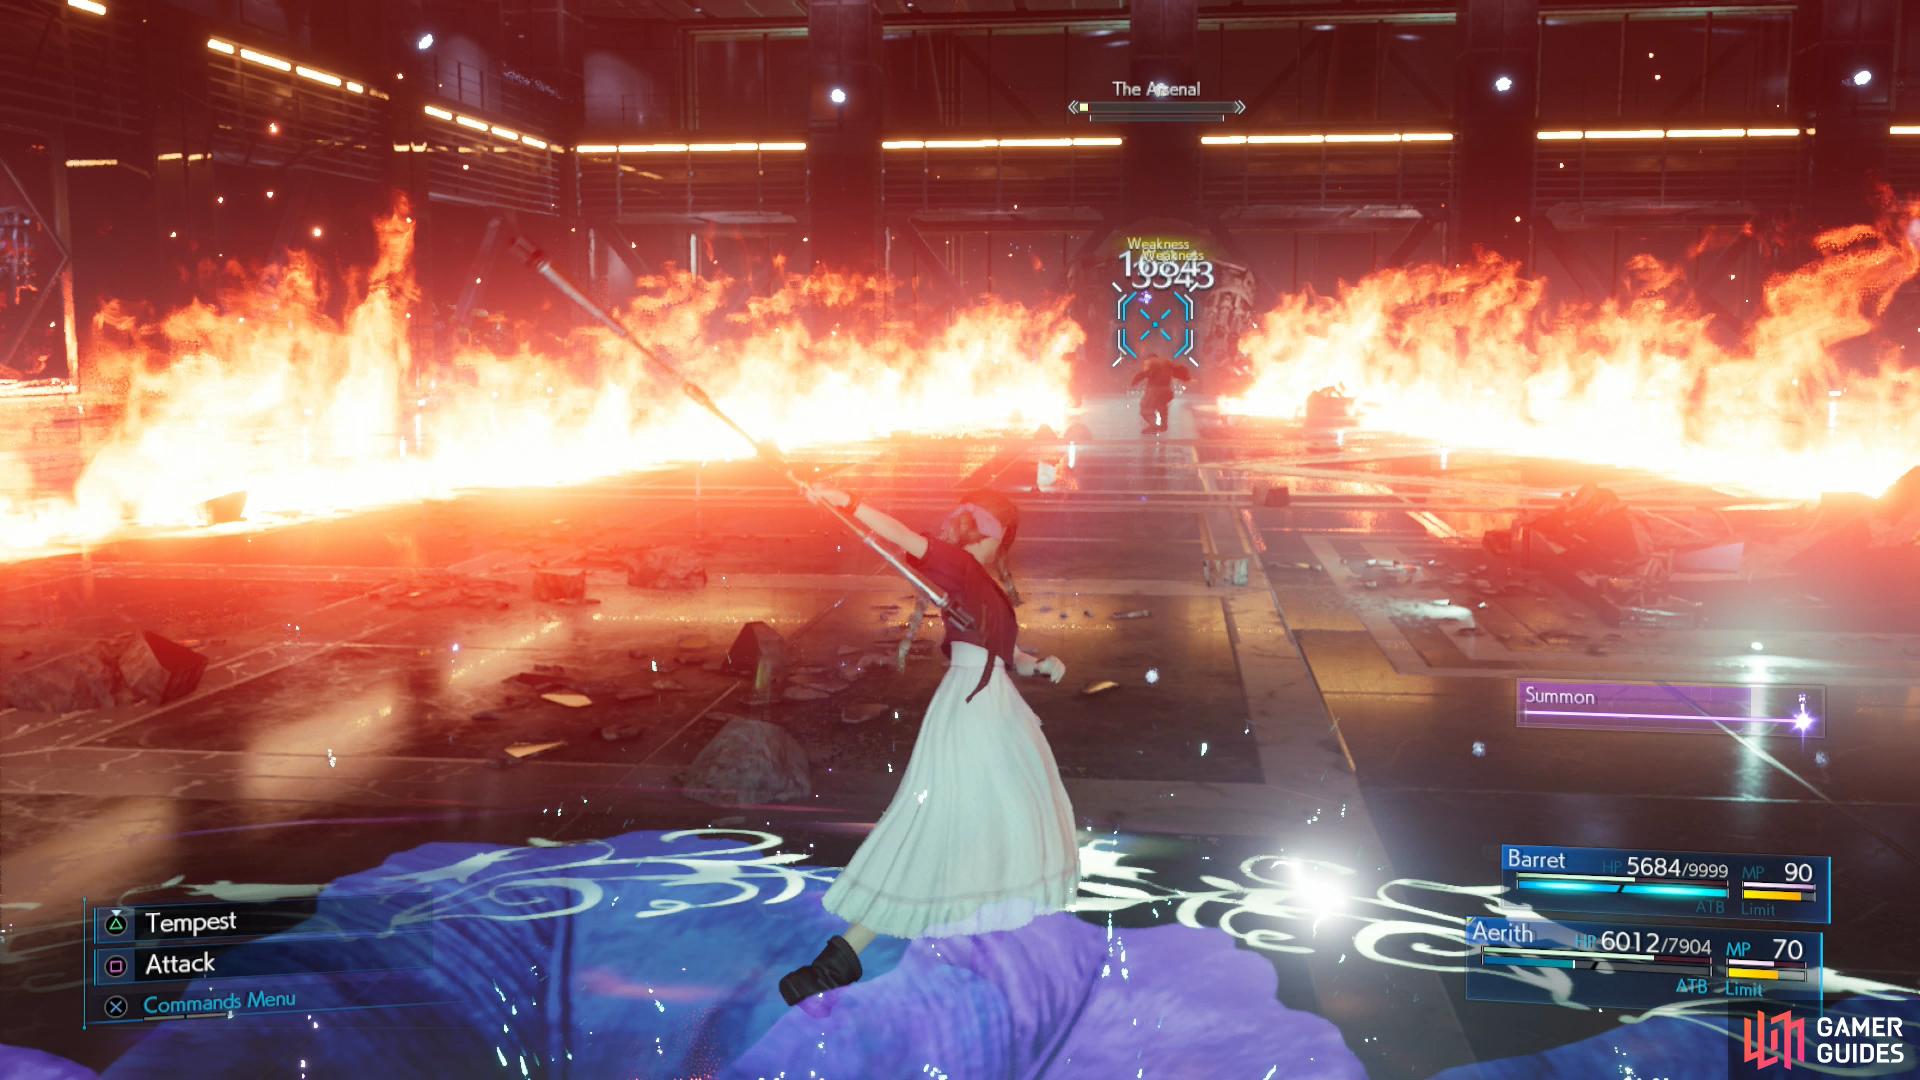
At the start of phase four, The Arsenal will use its ultimate attack, “Cry Havoc”.
You’ll be able to evade the first one by hiding behind cover, but you’ll need to destroy it quickly before it can attack again.
Phase 4
Repeat the above process until The Arsenal has a mere 15% of its HP left, at which time it’ll go all-out by using its “Cry Havoc” ultimate attack. You’ll be able to dodge the first blast by hiding behind some rubble, but you’ve no second source of cover; use your summon gauge and/or limit breaks if you have them, drop an “Arcane Ward” with Aerith and pelt it with your strongest spells, while having Barret use “Maximum Fury”. Defeat it before it gets a second shot off, or your struggles thus far will have been for naught.
Watch the scenes that follow and Chapter 17 will end, obtaining the Emerging from Chaos Trophy in the process.
No Comments