

| Participants | Cost | Rank | Rounds | Reward |
|---|---|---|---|---|
| Any Three Characters | 600 gil | 6 | 5 | Refocus Materia |
Pre-battle Preparations
This is a particularly nasty set of encounters that you can make a little easier for yourself with a little preparation. We suggest going with a party of Cloud, Barret and Aerith and making sure that every character has access to both Healing and Revival Materias as you’ll find yourself needing to revive often here. Setting Elemental-Fire to one or two of your character’s armor is useful and you can potentially help yourself against Tonberries by setting the Warding-Subversion combo, the higher the level of Warding, the more resistance you’ll gain to Instant Death (up to 100% at MAX). Finally, the final Enemy Skill can be acquired from the final monster in this matchup so be sure to set it if you’ve yet to learn it.
Round 1/5
| Enemy | Weaknesses | Notable Loot |
|---|---|---|
| Bomb | -- | Molotov Cocktail |
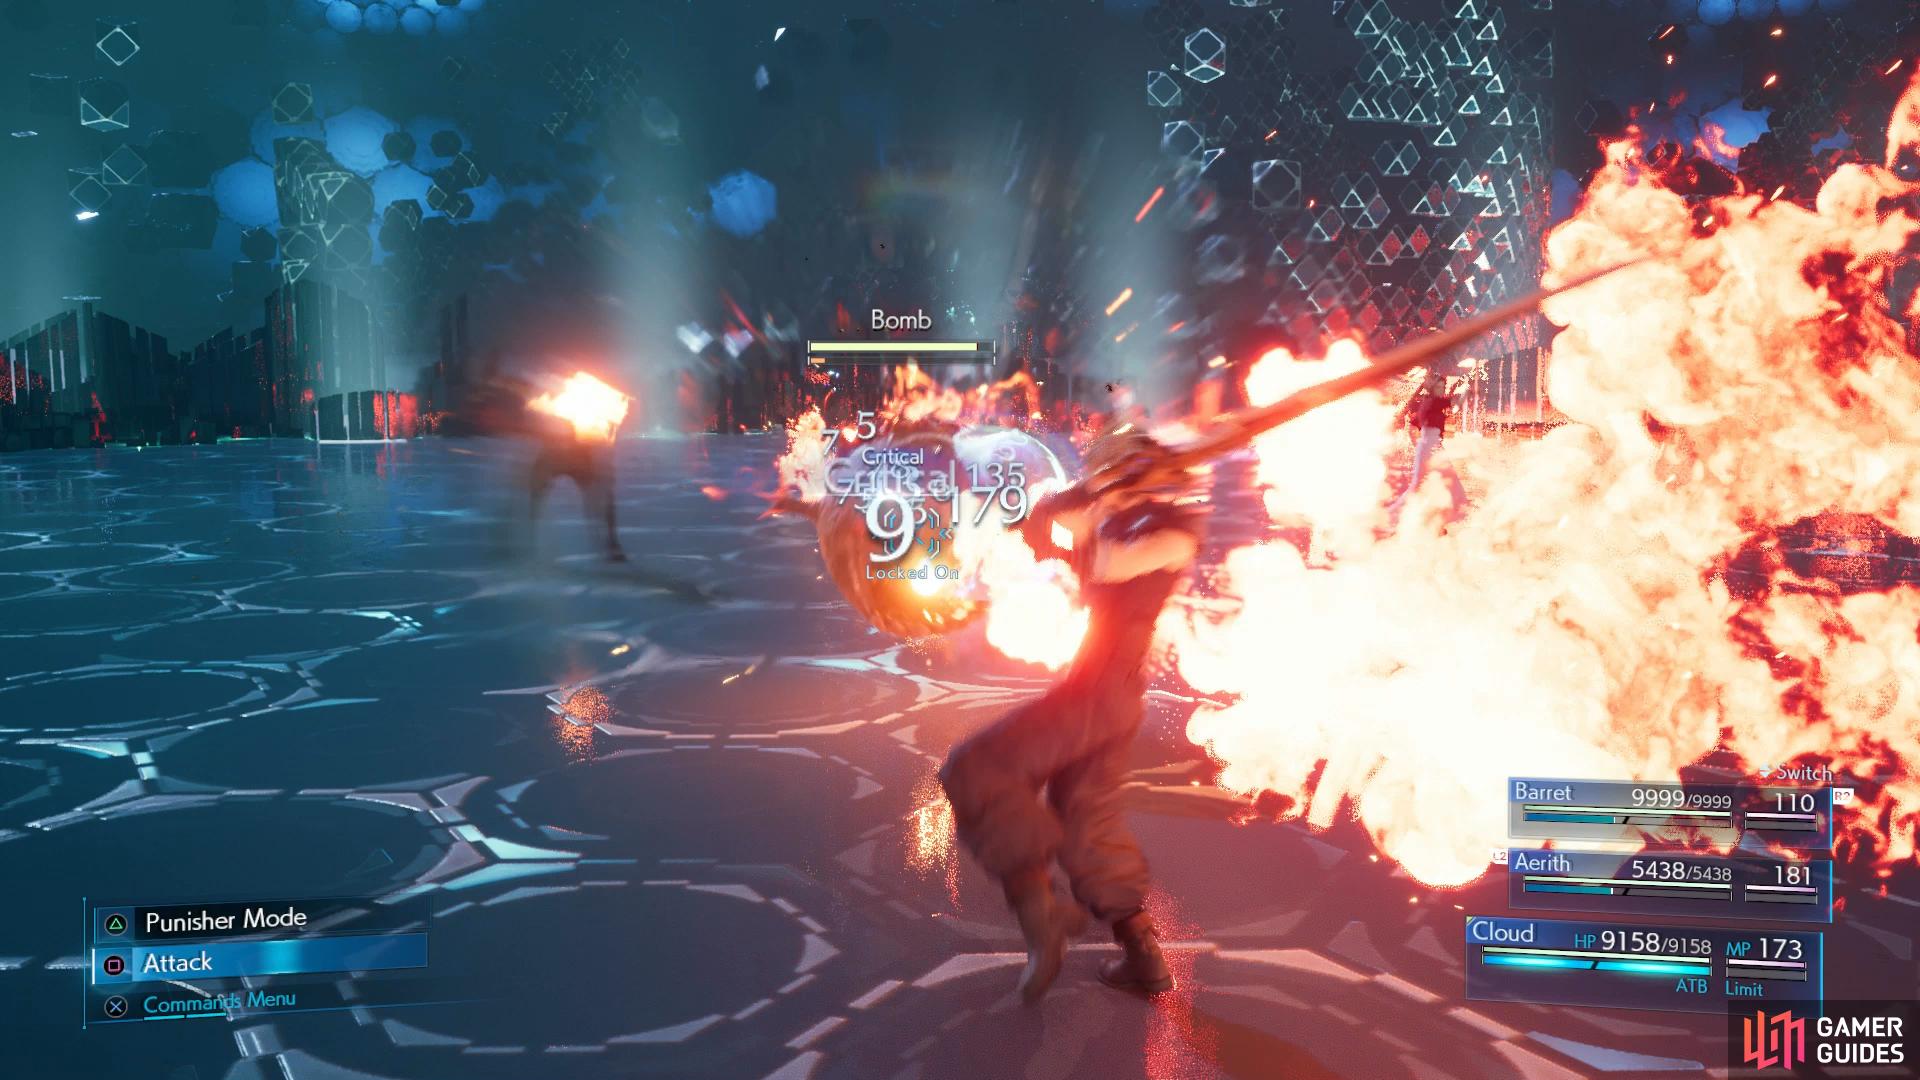
Attack the Bomb while it’s flames are present.
A rather simple battle to get things underway, you’ll be up against a Bomb and if you set Elemental-Fire, you’ll have an easier time dealing with it. Watch out for when the Bomb blows a stream of Fire, this is your cue to strike it and build up the Stagger gauge but remember to stop attacking whenever you see Inflame. This aside, this should be nothing more than a simple warm up.
Round 2/5
| Enemy | Weaknesses | Notable Loot |
|---|---|---|
| Tonberry | -- | Elixir |
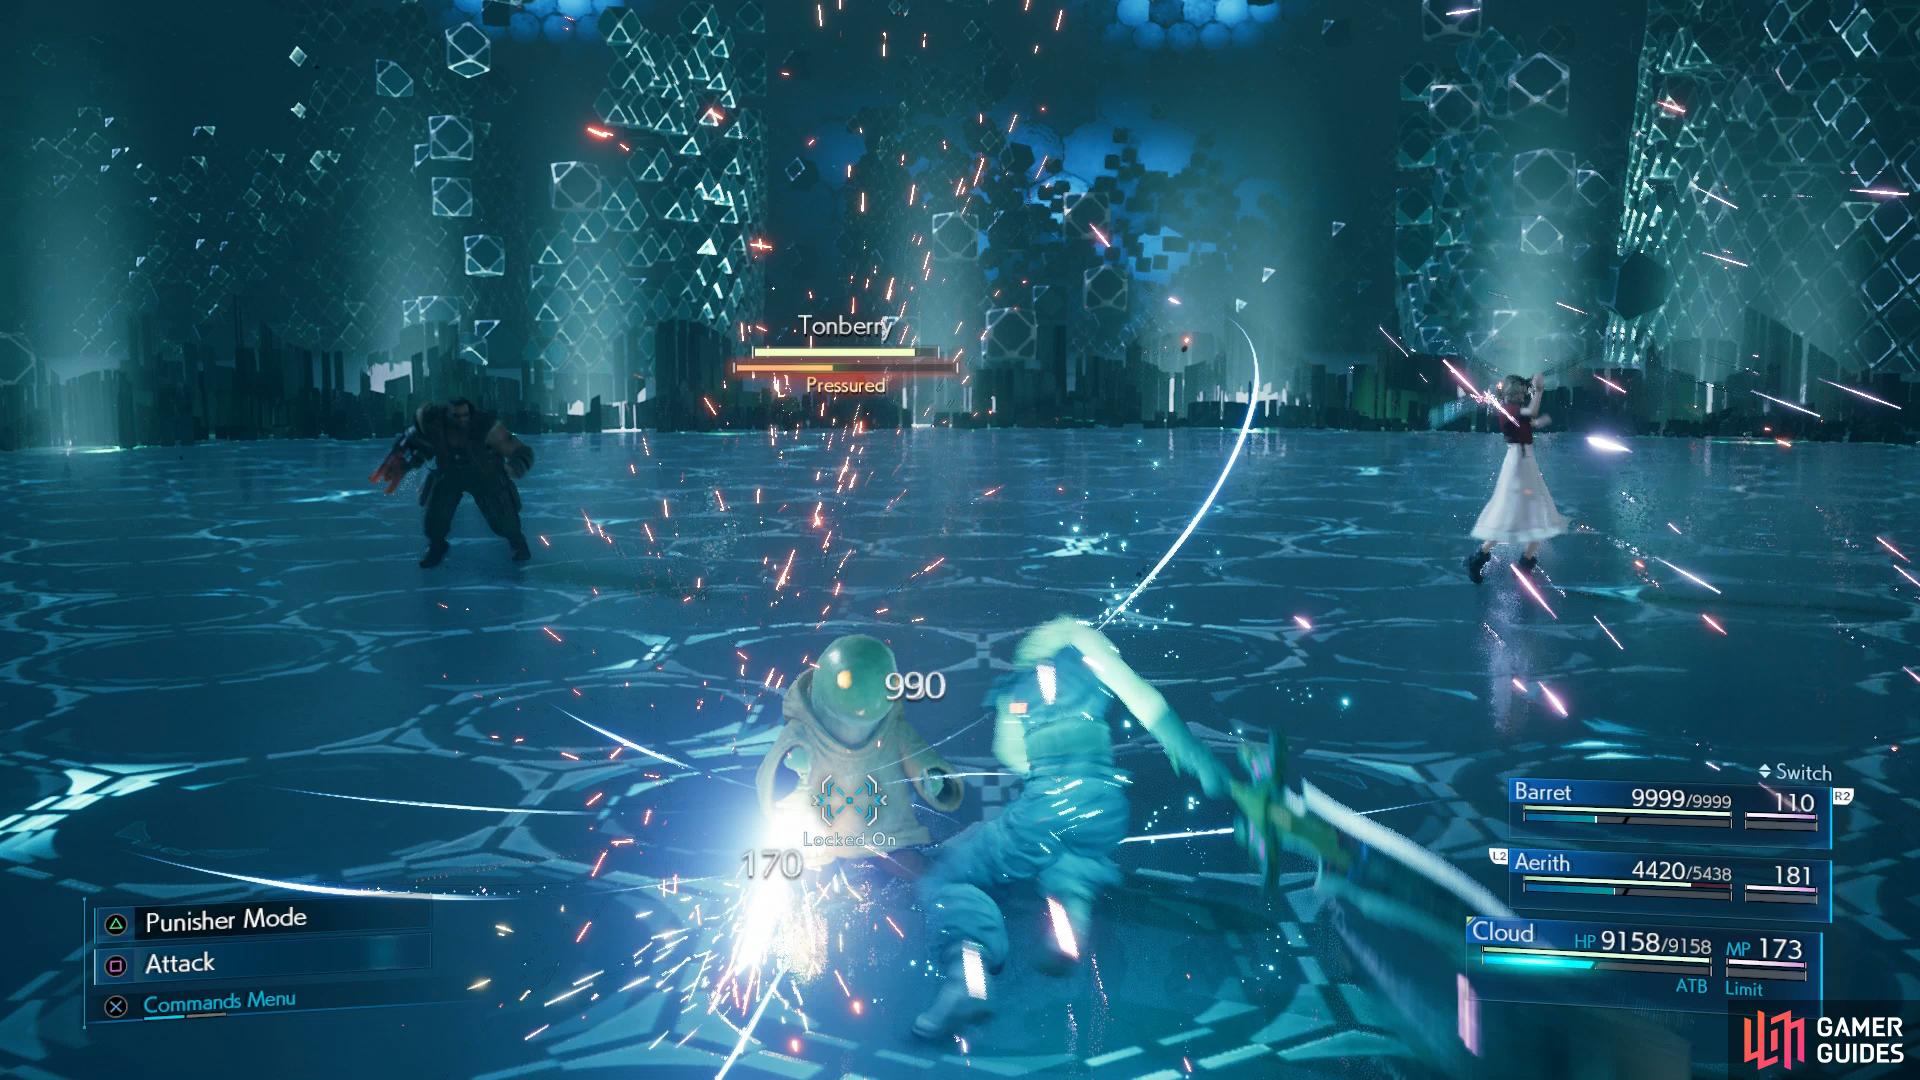
Evade Chef’s Knife to Pressure the Tonberry.
The difficulty ramps up a bit with your next encounter, a deadly Tonberry and this is where your preparation will pay off. If you took the time to level the Warding Materia and paired it with Subversion then you’ll be resistant to all but Bone-Deep Grudge and Scourge, making this a lot easier. If you didn’t bring that along, hopefully every character has Revival Materia set, you’ll be using it a lot so forego healing after your Raise as most of Tonberry’s attacks are Instant Death. As for dealing with it, bait it into Chef’s Knife with Cloud and dodge at the last moment, this will Pressure it and open it up to Stagger.
Round 3/5
| Enemy | Weaknesses | Notable Loot |
|---|---|---|
| Type-0 Behemoth | -- | -- |
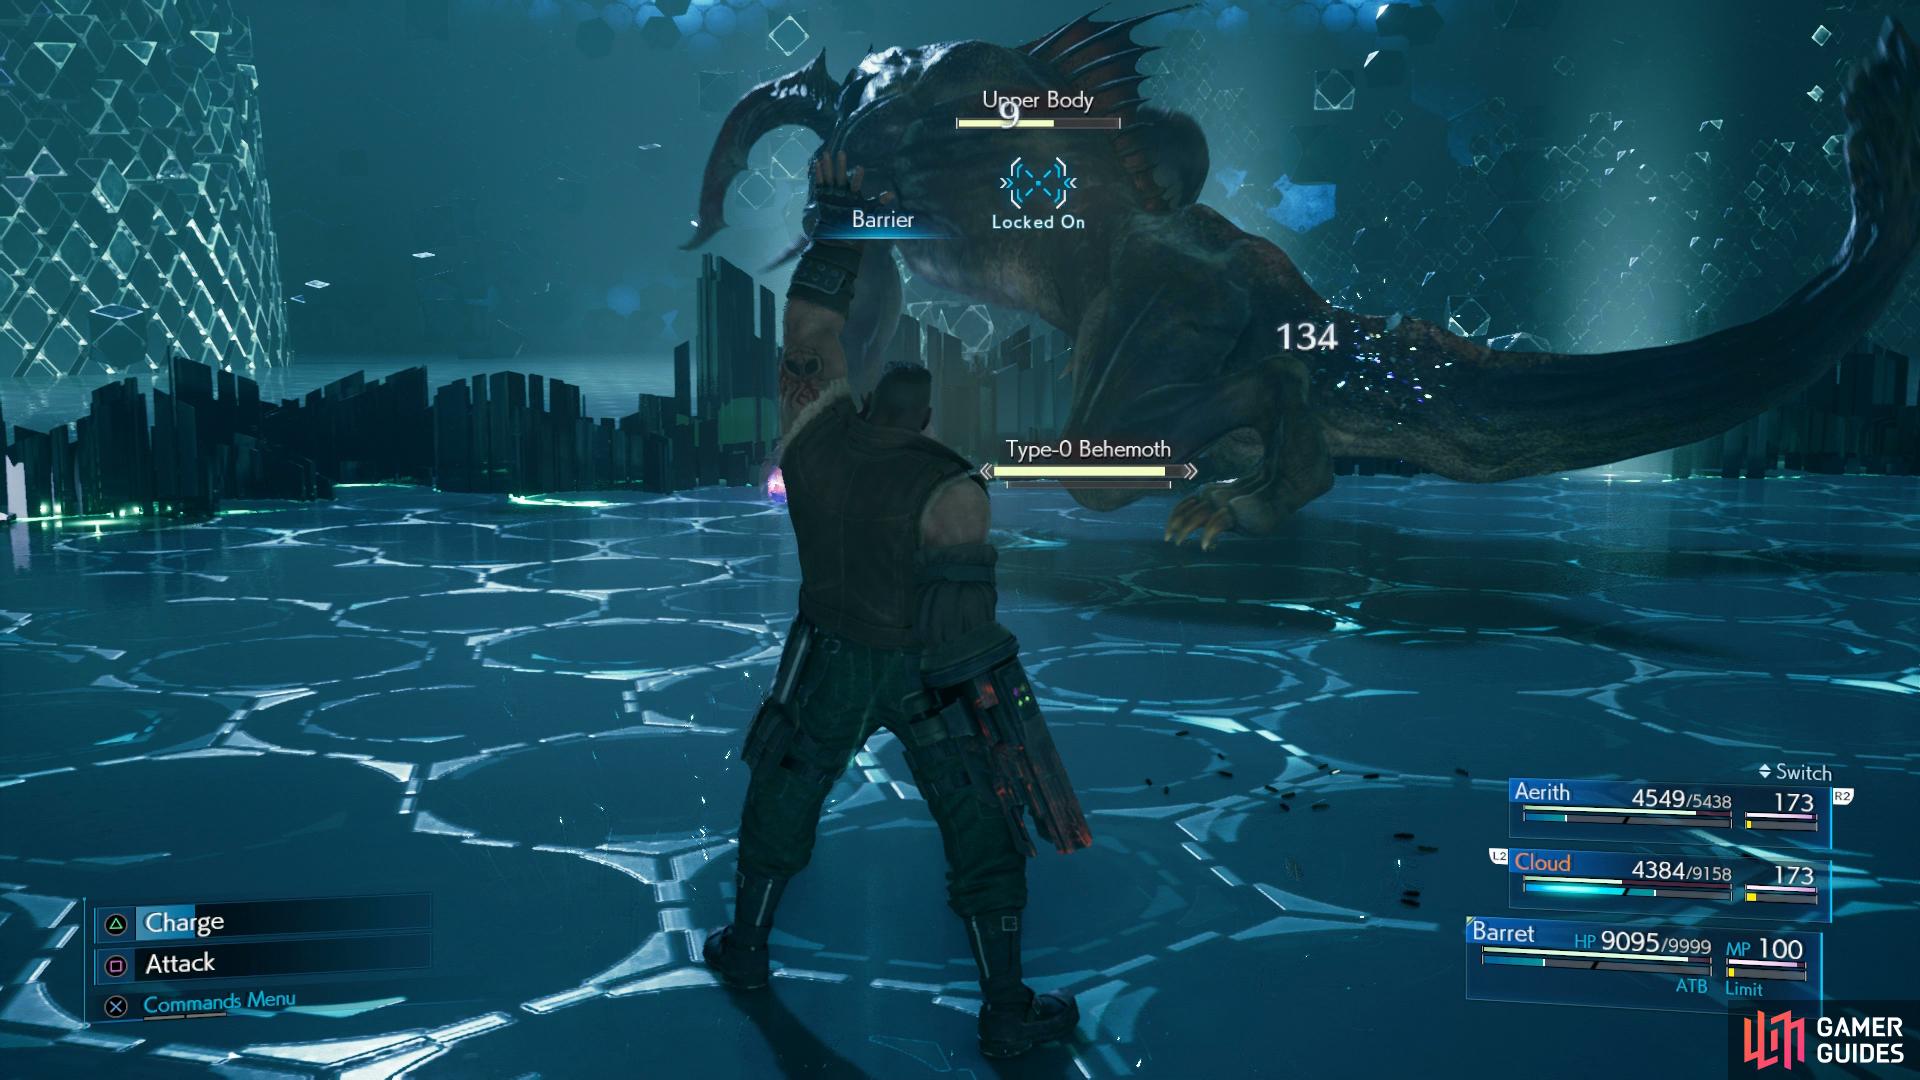
Cast Barrier on your party to limit the physical damage Behemoth deals to you.
Next up is a Type-0 Behemoth who is far more deadly on Hard than he was when you faced him the last time. Most of the main pointers are still true here, with the Horn not broken, Behemoth is completely resistant to all magic and using magic will see him counter with Counter Flare. Outside of this, all of Behemoth’s attacks are Physical in nature so it can help to cast Barrier on your characters to help lessen some of the damage you’ll receive.
Once again, you’ll need to focus on taking down its Upper and Lower Body to bring it to Stagger at which point you can use Infinity’s End to deal some significant damage, more if you have a Limit Break or two available. Cloud is useful to control here, his Triple Slash will hit multiple parts of Behemoth at a time, allowing you to keep both HP values around the same. Like last time, Behemoth is incredibly dangerous once it Enrages, forego offense at this point and focus on keeping away from it, if you haven’t yet, this is the time to use Barrier. Finally, if you’re to use a Summon in this Combat Sim, this is the round to use it on, Behemoth is by far the toughest opponent.
Round 4/5
It’s easy to underestimate Round 4 after defeating the Behemoth in the previous round but you’ll still need to pay attention. Be sure to focus on taking out the Bomb first, if you have Elemental-Fire on Cloud’s Armor, you should be able to resist or absorb all of its attacks but keep an eye on your other party members and Raise them if the Tonberry should get to them. While attacking the Bomb, keep an eye for the Tonberry approaching your controlled character too, if it gets too close, retreat. Once you’re left with just the Tonberry, it becomes the same strategy as Round 2 to take it out.
Round 5/5
| Enemy | Weaknesses | Notable Loot |
|---|---|---|
| Malboro | -- | -- |
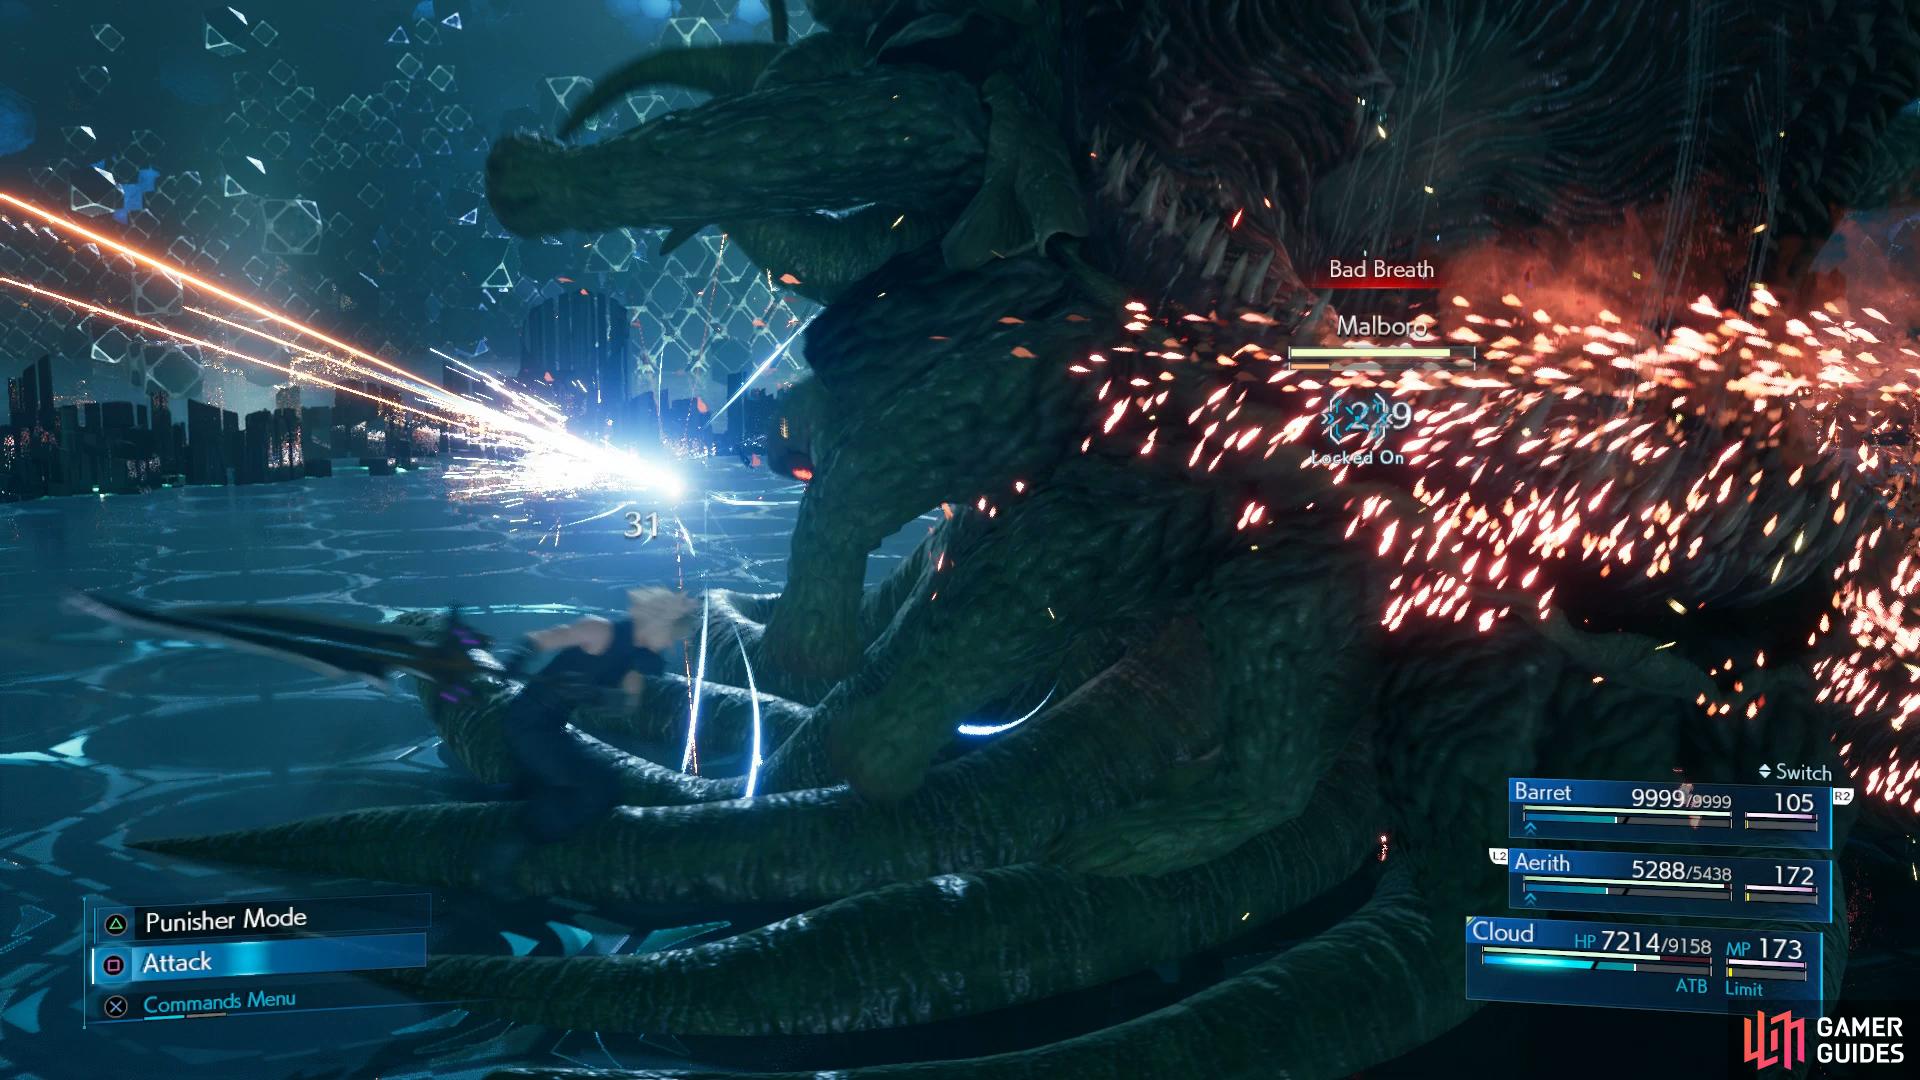
Be sure to stick around and learn Bad Breath if you have Enemy Skill set.
In a rather surprising twist, the final round against the Malboro is actually the easiest, despite it’s gargantuan presence. As mentioned in the warning above, you can learn the final Enemy Skill in the game needed for the Master of Mimicry Trophy if you set Enemy Skill and thats where most of the damage will come from in this battle, waiting around to learn it. Malboro can only attack from the front, that makes his back and sides the perfect place to attack from, even if it’s easier to Stagger it by attacking when it’s mouth is open.
As expected, Bad Breath will apply all manner of nasty status ailments on you should you get struck by it, thankfully there’s more than enough of a wind-up to the attack to allow you to get out of the way of it. You’ll find your characters most likely inflicted with the Poison status effect due to all of Malboro’s attacks inflicting it but this can be easily remedied by having Aerith cast Regen on the whole party. Outside of this, you can attack from the sides and back with Cloud or from a distance with Barret and Aerith and defeat this simple beast. As an additional reward, you’ll also obtain the That’s the Smell Trophy for besting a Malboro.
No Comments