

Boss: Rufus and Darkstar
| Cloud | . |
|---|---|
| Weapon: | Twin Stinger |
| Armor: | Chain Bangle |
| Accessory: | Champion Belt |
| Useful Materia: | Lightning + Elemental (armor), Healing, Poison, Steadfast Block, ATB Stagger, HP Up |
(1 of 3) With Lightning + Elemental on your armor, you’ll absorb Rufus’s “Thunderclap” attack.
Honestly, not much has changed with Rufus and Darkstar save their damage output, and even that’s not nearly as impressive as what other bosses have been capable of. Make sure Cloud has Lightning + Elemental in his armor and Healing Materia, otherwise you can stick with the staples, embellishing with Poison, Barrier or Time, as your taste dictates.
At the start of the fight, work on hitting Darkstar with Bio, then buff yourself with Regen should you feel the need. Neither are strictly necessary, but the extra damage “Poison” inflicts on Darkstar will make the moments of waiting and dodging easier to bear, and Regen should be all the healing you really need, considering the low damage output of your foes. Wait for Darkstar to attack, then switch to Punisher mode, block and counter, then try to score some hits on the downed dog. Rufus will be around shortly to assist his pooch, so if you want to dispense with Staggering and just hit Darkstar with “Braver” every time you get the opportunity, it’s a fair strategy. Attacking Rufus at this point will just lead to him countering and Darkstar healing its master, so don’t waste your time.
The attacks you’ll face in this phase are as follows:
-
Corkscrew: A charge attack, counter it when you see it coming.
-
Subdue: A grapple, Darkstar will inflict “Bound” if it hits. One of Darkstar’s few unblockable attacks, you’ll need to dodge it.
-
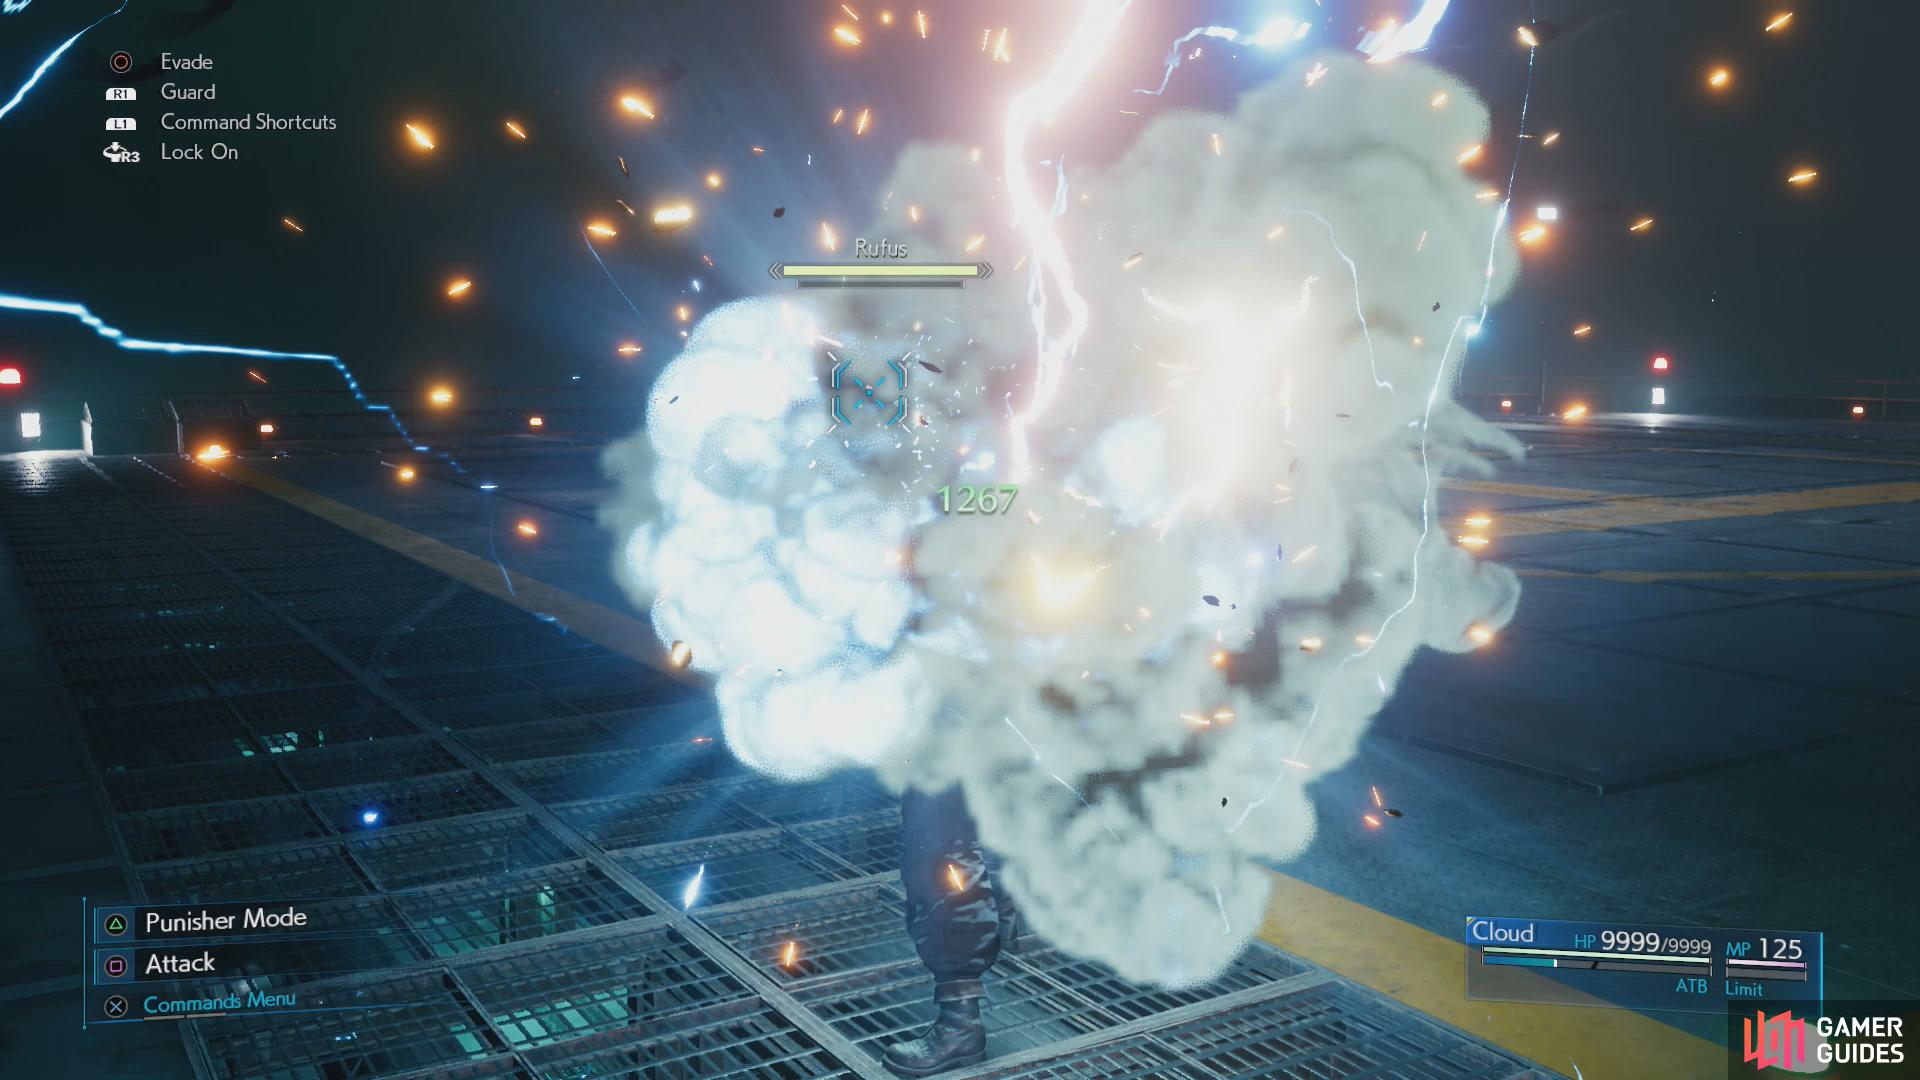
Thunder/Thunderclap: When you see Darkstar cast Thunder, just keep running a wide circle around Rufus. This attack isn’t directly aimed at you, but rather at Rufus, charging up his gun and provoking his “Thunderclap” attack. Elemental + Lightning will mitigate, negate or even absorb damage, but otherwise simply running should avoid it.
-
Whirlwhip: Standard Guard Dog attack, it’ll attack with its tentacles. Can be countered easily enough.
Once Darkstar has been reduced to 50% of its HP, phase two will start and Rufus will step up his offense, introducing the following attacks:
-
Bright Lights: Usually used in conjunction with other moves, like “Up in Smoke” and “Tread Softly”, this opportunistic attack deals heavy damage. He’ll rarely catch you with it unless you’ve been debilitated or distracted by another attack.
-
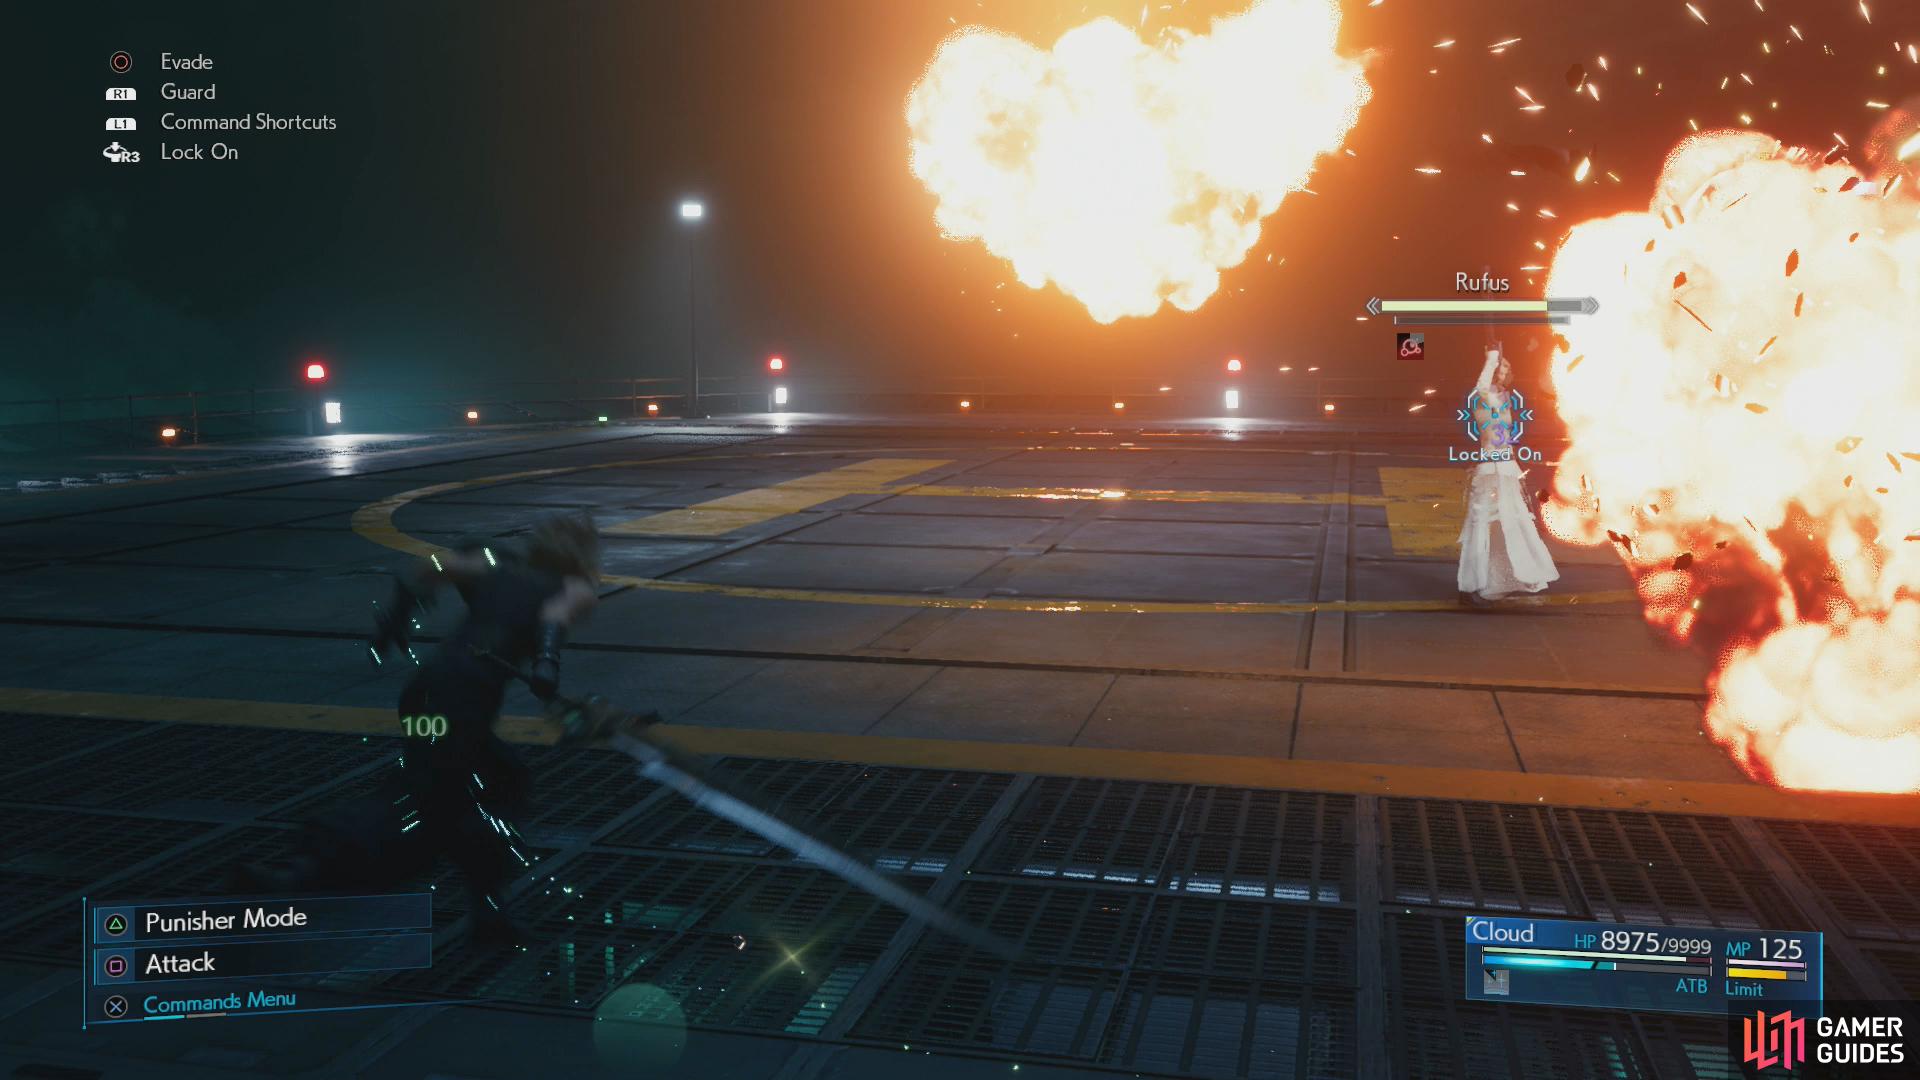
Guns Akimbo: Rufus fires a barrage from his guns. Just keep running to avoid the shots and when he stops try to close in on him - he’ll “Reload” immediately after the attack, and if you can catch him with a “Braver” during this period it’ll knock him back, prevent him from acting for a while and also “Pressure” Darkstar. Much win.
-
Think Fast: Rufus deploys explosives around him. It’s a quick, short-ranged attack and another reason why you shouldn’t tread too close.
-
Tread Softly: Rufus will shoot some projectiles up in the air, which quickly crash down in front of him, forming three electrical globes on the ground. They deal only minor damage, but they’ll stun you if you run into them, allowing full-up attacks (“Bright Lights” or “Guns Akimbo”). They serve as area-denial hazards more than anything, and provide a good incentive for you to keep your distance.
-
Up in Smoke: Shoots a gas munition that obscures vision. Rufus will often follow up by shooting “Bright Lights” or “Guns Akimbo” into the smoke. Just keep moving to escape the smoke.
Generally the tactic of circling Rufus and Darkstar and picking your spots still works, although the spots you’ll pick are a bit different. If Darkstar moves to attack the good old counterattack response works fine, but if Rufus whiffs an attack and you have the ATB to spare, charge in and hit Darkstar with “Braver” during or shortly after Rufus’s “Reload”.
Keep your distance from Rufus and wait for an opening…
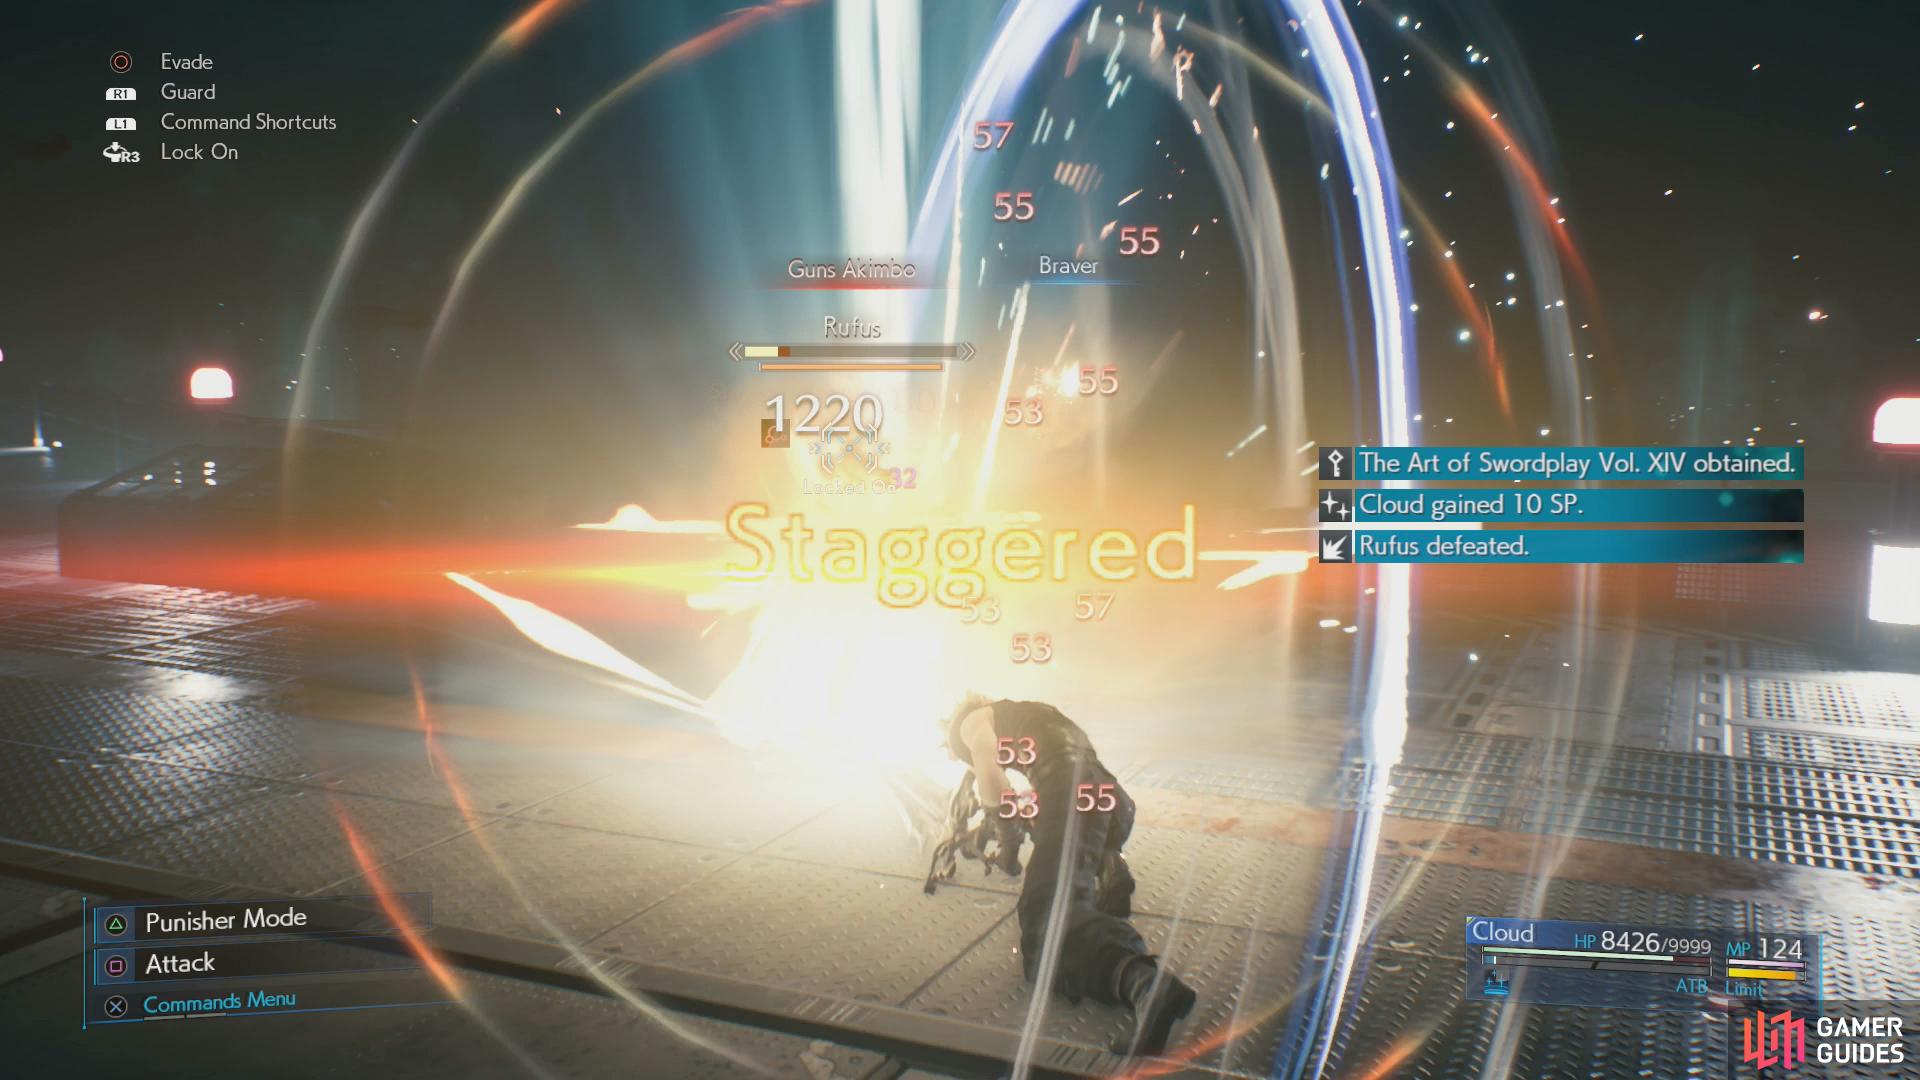
and hit Rufus with “Braver” to instantly Stagger him.
Defeat Darkstar and you’ll finally go one-on-one with Rufus, who will no longer have Darkstar to heal him. This phase really hasn’t changed much since Normal difficulty, just run around trying to avoid Rufus as he gun-dashes around. If he gets too close he’ll attack, and if you strike at Rufus directly he’ll parry and counterattack. Instead you’ll need to wait for him to launch a named attack (these are largely the same as in phase two, see above), and immediately afterwards you’ll need to close and hit Rufus with “Braver” before he can use “Reload” and get his guard back up. You’ll need to tread a fine line between staying far enough away to avoid provoking shotgun blasts but remaining close enough so that you can hit Rufus with “Braver” when there’s an opportunity. On the plus side, Cloud has no other battles this chapter, so you can use all the MP you need healing until you get the timing down, and failing that, use Bio on Rufus to deal consistent (albeit limited, due to Rufus’s resistance to “Poison”) so you’re at least making progress while you wait for your opportunity.
Once you land a “Braver” Rufus will become immediately Staggered, allowing you to punish him. Quickly switch to Punisher mode, lay into Rufus, and finish with “Triple Slash” - it should only take two such Stagger sessions to defeat Rufus.
For defeating Rufus in Hard difficulty you’ll obtain The Art of Swordplay Vol. XIV.
No Comments