

This chapter starts with an awful lot of walking and talking. Eventually, however, you’ll make it to the Collapsed Expressway, where the first part of combat in the chapter occurs. You’ll find foes weak to just about ever element here, but we’ll stick with Fire + Magnify to deal with the weakest, and keep Lightning around for some of the stronger foes. Cloud will be our caster here, as he’s not only the best at it (after Aerith of course), but you don’t need to worry about his MP this chapter. He won’t be around for the second half of the chapter, anyways.
| Cloud | . |
|---|---|
| Weapon: | Twin Stinger |
| Armor: | Chain Bangle |
| Accessory: | Circlet |
| Useful Materia: | Fire + Magnify, Lightning, Healing, Revive, First Strike, ATB Stagger, Magic Up, HP Up |
| Tifa | . |
|---|---|
| Weapon: | Purple Pain |
| Armor: | Cog Bangle |
| Accessory: | Champion Belt |
| Useful Materia: | Lightning, Healing, Revive, ATB Stagger, HP Up |
| Barret | . |
|---|---|
| Weapon: | Light Machine Gun |
| Armor: | Cog Bangle |
| Accessory: | Champion Belt |
| Useful Materia: | Lightning, Healing, Revive, First Strike, ATB Stagger, Magic Up, HP Up |
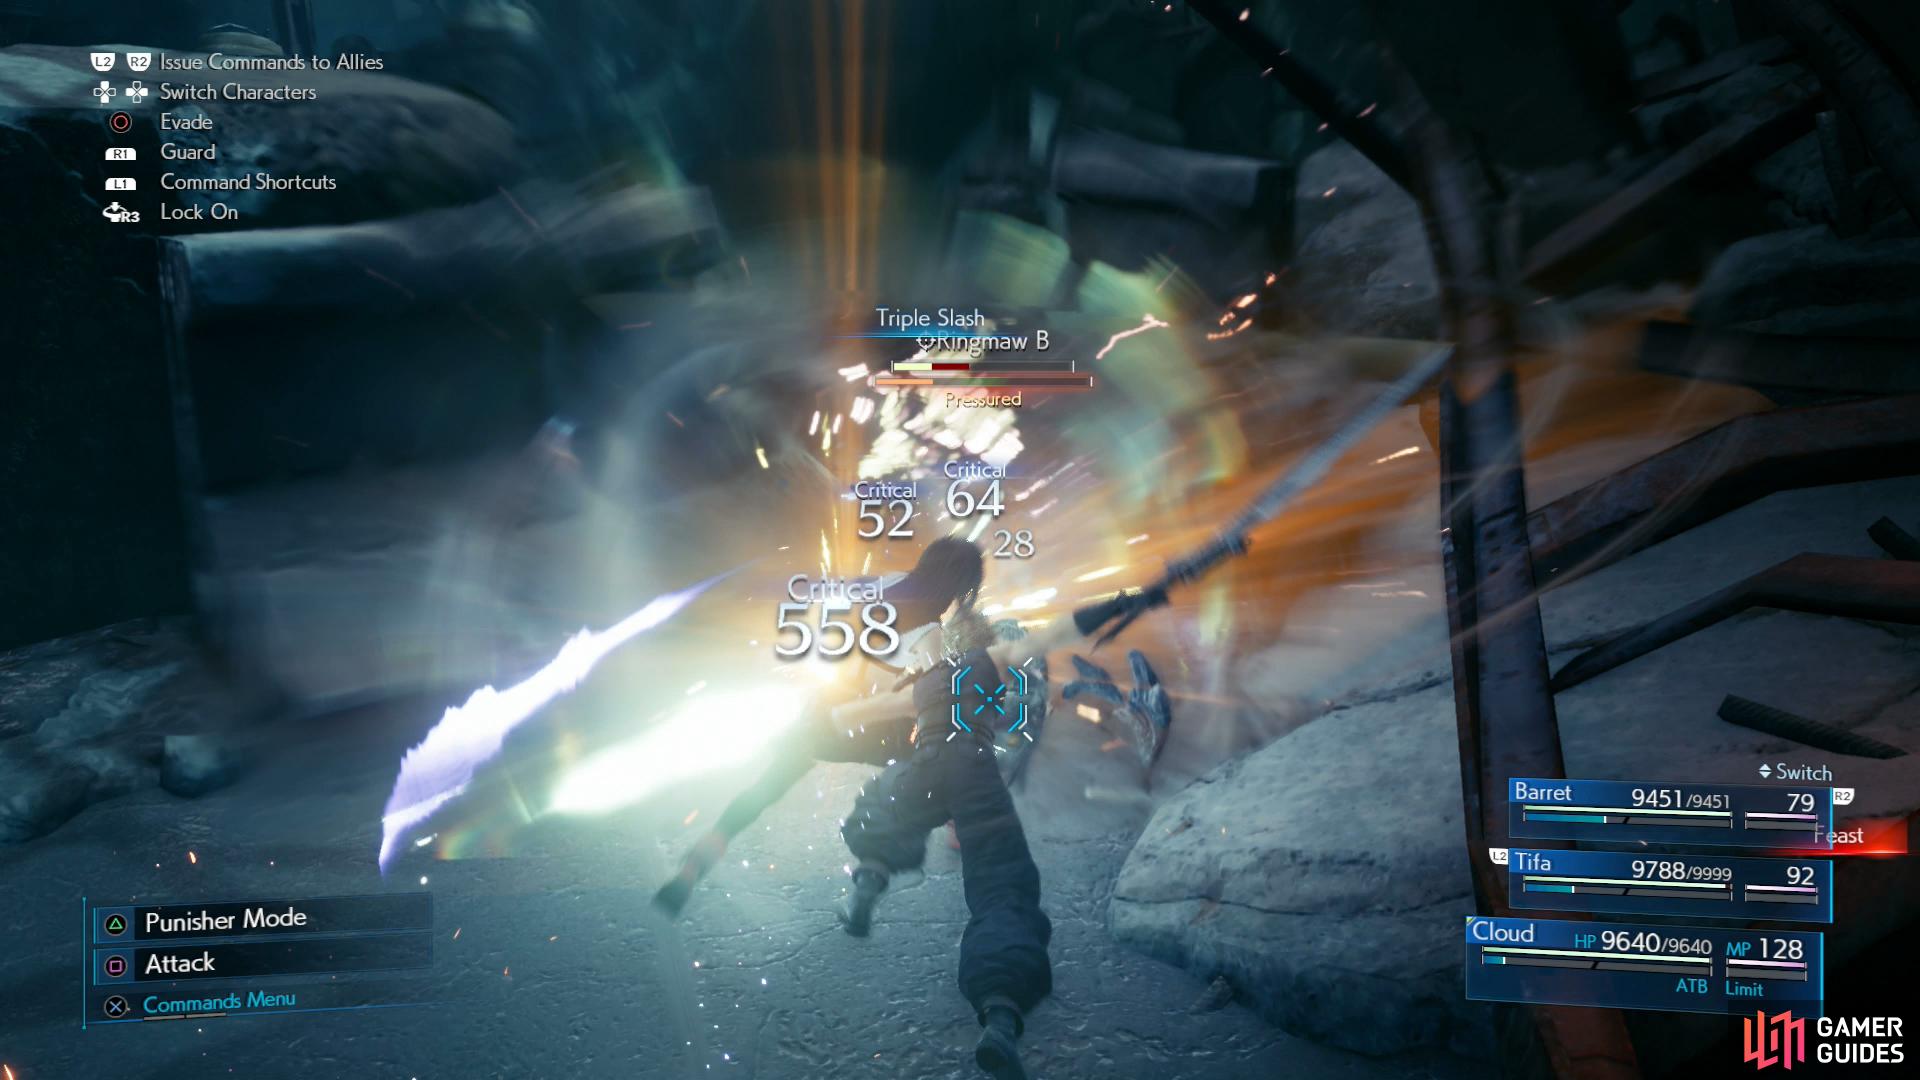
(1 of 3) Once again, “Triple Slash” will prove useful in cutting your way through the trash mobs ahead.
-
Defeat a several Gorgers, followed by some Ringmaws. They’re palette-swaps, and both groups can be dispatched easily enough with “Triple Slash”.
-
Despite the novelty, the new Varghidpolis enemies don’t offer much challenge, not even while being accompanied by a pair of Terpsicolts. Blast them with Fira + Magnify, then cut down any survivors.
-
The most annoying fight of this section lies ahead, where you’ll have to put down a Smogger and a Sweeper Prototype. Concentrate fire (or Thunder, specifically) on the Smogger, as you don’t need it debilitating characters, then dispose of the isolated Sweeper Prototype, which is far sturdier than the Smogger. Lightning works well against both foes.
-
Up next are a series of encounters with Bandits, the Three B’s - Beck, Butch and Burke and a Grungy Bandit. Fire + Magnify will defeat everything relatively cleanly save for the Grungy Bandit, and once isolated it should be a simple matter to dodge its attacks, Stagger it, then finish it off. You can steal a Champion Belt from it, should you need another one.
After this you’ll reach Evergreen Park, where you’ll find a rest bench. Use it, then advance the story until you’re in control of Barret in the Underground Lab. Be sure Barret has the Chain Bangle and appropriate materia for the solo section ahead.
| Barret | . |
|---|---|
| Weapon: | Light Machine Gun |
| Armor: | Chain Bangle |
| Accessory: | Champion Belt |
| Useful Materia: | Ice + Elemental (weapon), Healing, First Strike, Steadfast Block, ATB Stagger, HP Up |
-
The first few fights against Bugaboos and Wererats shouldn’t require any strategies - just blast them with your gun.
-
For the following Bloodhounds and Gorgers, we just rely on Ice + Elemental on Barret’s weapon. His physical attacks should be more than strong enough to see him through without too much fuss. If you take more damage than you’d like you can always run back to the rest bench at the start. Don’t be afraid to use healing if you need it - there are plenty of Shinra Boxes around should you need to recover MP.
| Tifa | . |
|---|---|
| Weapon: | Purple Pain |
| Armor: | Cog Bangle |
| Accessory: | Champion Belt |
| Useful Materia: | Lightning, Healing, Revive, First Strike, ATB Stagger, HP Up |
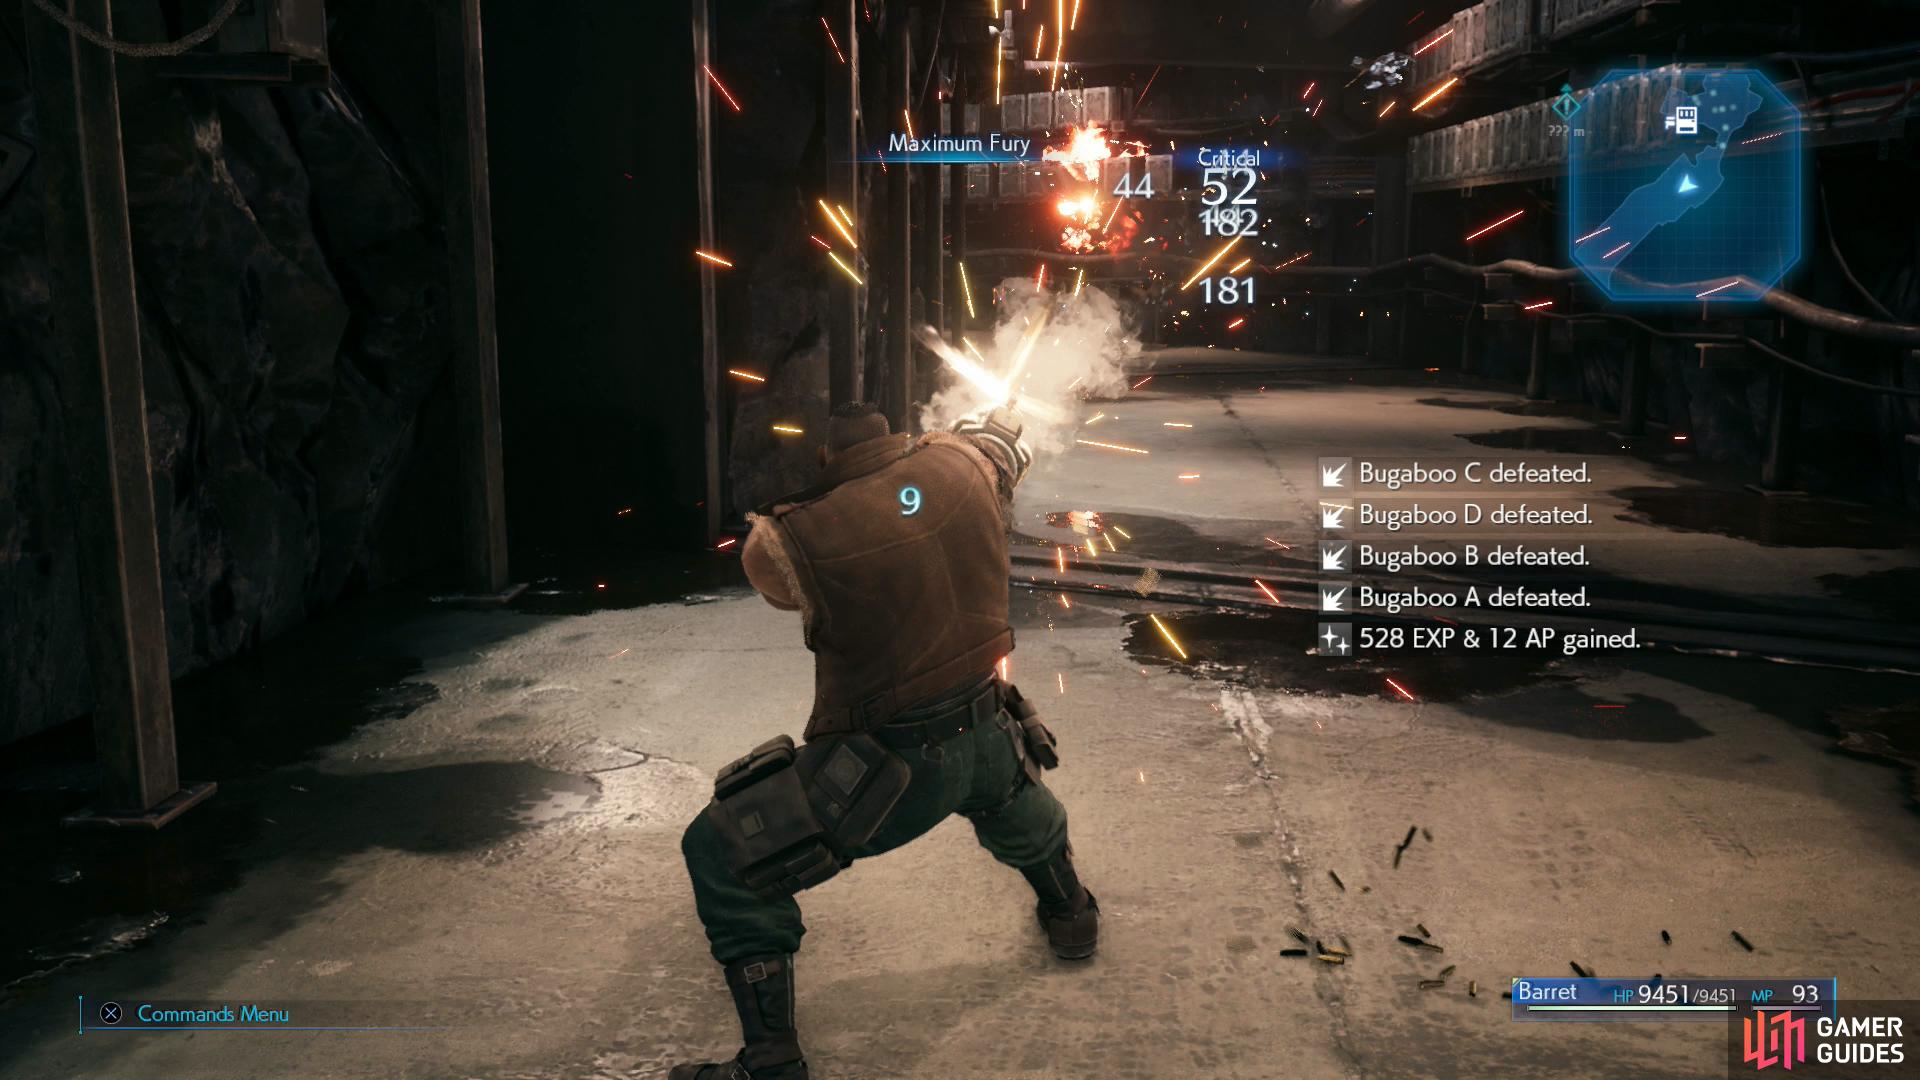
(1 of 3) Barret can shoot through most of the early enemies in the Underground Laboratory.
-
After you reunite with Tifa, Barret will be much less vulnerable, and you’ll need to worry less about the quick-kill victory. We dispense with Ice + Elemental on our weapons for now and instead shift to more familiar strategies: Ice + Magnify and Lightning (perhaps paired with MP Absorb).
-
Destroy some fans, defeat some Bloodhounds, then loot the cages to get another orb of Ice Materia. Sadly, the second piece of Warding Materia has now been replaced by another **Healing Materia.
-
The fight with the Monodrives and a Cutter is the most difficult non-boss fight of this chapter. Equipping Binding + Warding on at least one of your characters isn’t a bad idea, as it’ll prevent them from being “Silenced” and the attending difficulties that come with that. Shoot the Monodrives down with Barret, then focus on the Cutter. We used Barret to tank, blocking the Cutter’s attacks while casting Thunder whenever Barret had an ATB segment filled. Not very glamorous, but it gets the job done.
-
Up next is a platform occupied by two Varghidpolis and a Bloodhound. They can be gunned down with normal attacks easily enough, although Ice + Magnify will speed things up. The swarm of Bugaboos on the next platform are little more than fodder for Barret’s “Maximum Fury”.
-
Continue on and you’ll reach another rest room, which is just before the boss battle. The hard mode version of the Failed Experiment. This boss as its own Hard difficulty page, as usual. Defeating the Failed Experiment in Hard difficulty will earn you the Sharpshooter’s Companion Vol. VIII Manuscript.
No Comments