

You’ll pick up this quest in Chapter 14 after hearing Kyrie’s speech in the Sector 5 Slums. Take the northern exit out of the Slums to find the Shinra Reporter, Damon, again. Although this is one of the earlier Quests you’ll pick up, it will most likely end up being the final one you finish due to needing to progress the Main Scenario to finish it.
It appears that the Angel of the Slums has struck again and this time, she’s taken the Vault Key to Corneo’s Secret Stash. To begin the Quest, you’ll need to track down the Key and this can be done by heading to the Sector 5 Undercity Station Chocobo Post and speaking to Johnny to begin and complete the Tomboy Bandit Quest. Part of your reward from this Quest is the Vault Key, granting you access to three different Vault locations.
Corneo Vault #1 - Steel Mountain
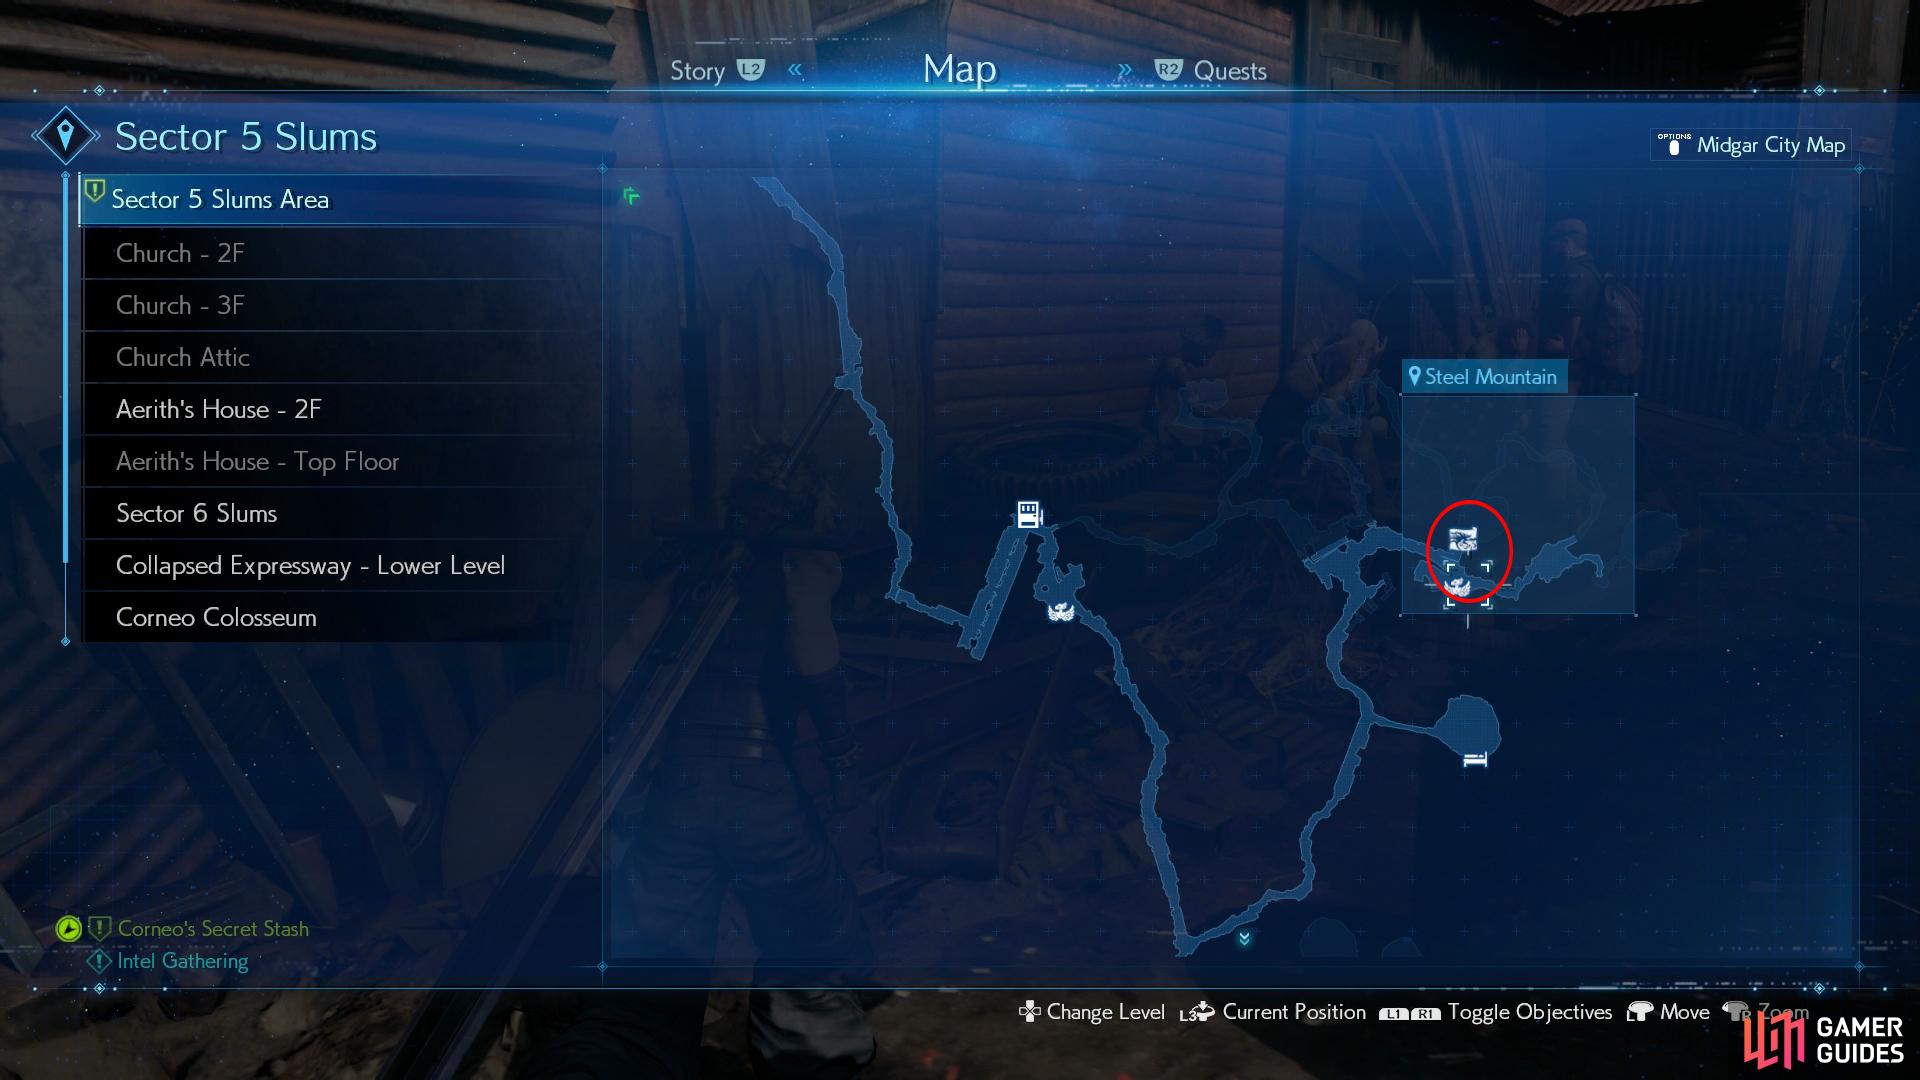
Make your way over to Steel Mountain for the first Vault
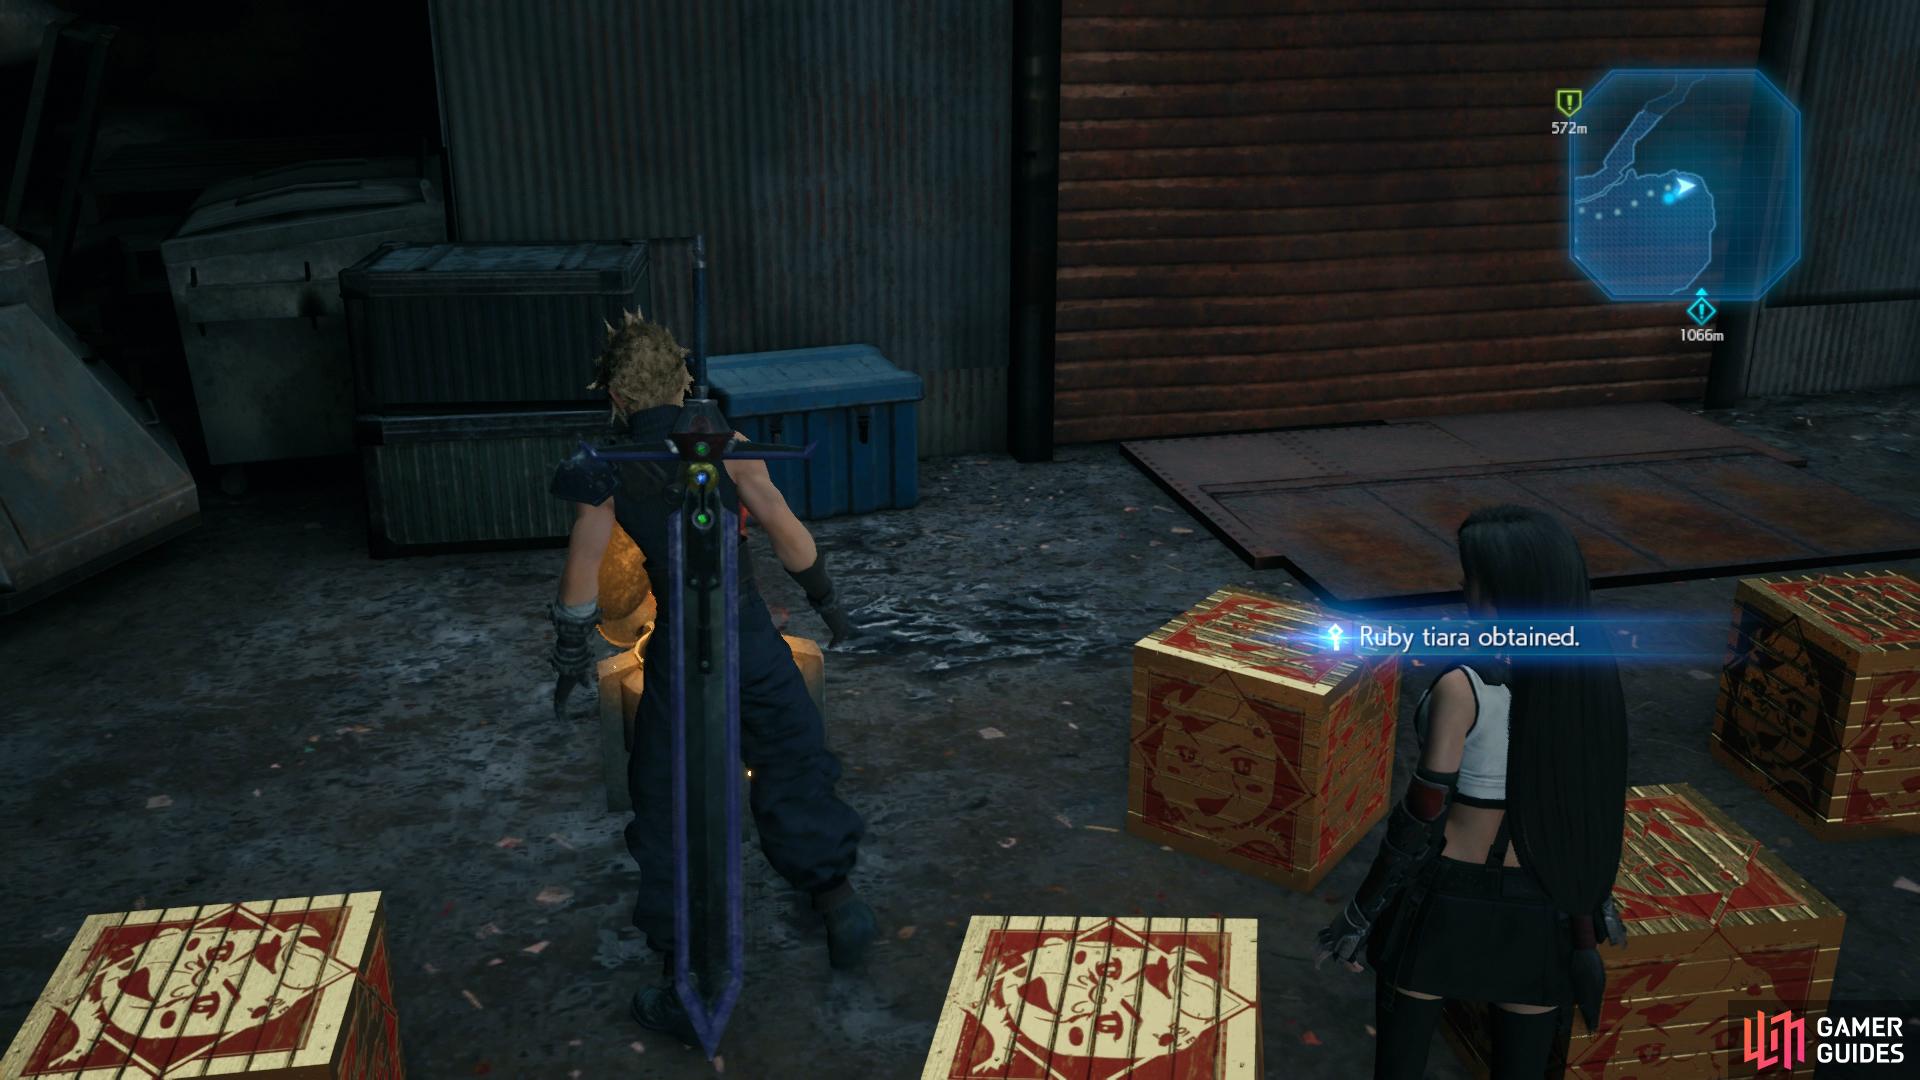
you’ll find the Ruby Tiara amongs the chests here.
The first one is the closest and easiest one to track down, make your way to a Chocobo Post and head for the Sector 5 Slums again before taking the northern path out. At the first intersection, head east and then continue north at the next to reach a more open area with some Lesser Drakes. Once they’re defeated, continue along to the east to find a Chocobo Post (you can only board here, not travel to it) and to the north of that, the first Vault.
Inside, you’ll find a Prayer Materia on the ground and several chests containing 3 Molotov Cocktails, a Circlet, 4 Adrenalines, 2 Moogle Medals, 2 Maiden Kisses, 3,000 Gil and the Ruby Tiara, the Item you’re looking for. What’s more, the Corneo Boxes you can smash here contain higher quality items than their Shinra counterparts, you can expect to get items such as Elixirs and large quantities of Moogle Medals.
Corneo Vault #2 - Collapsed Expressway
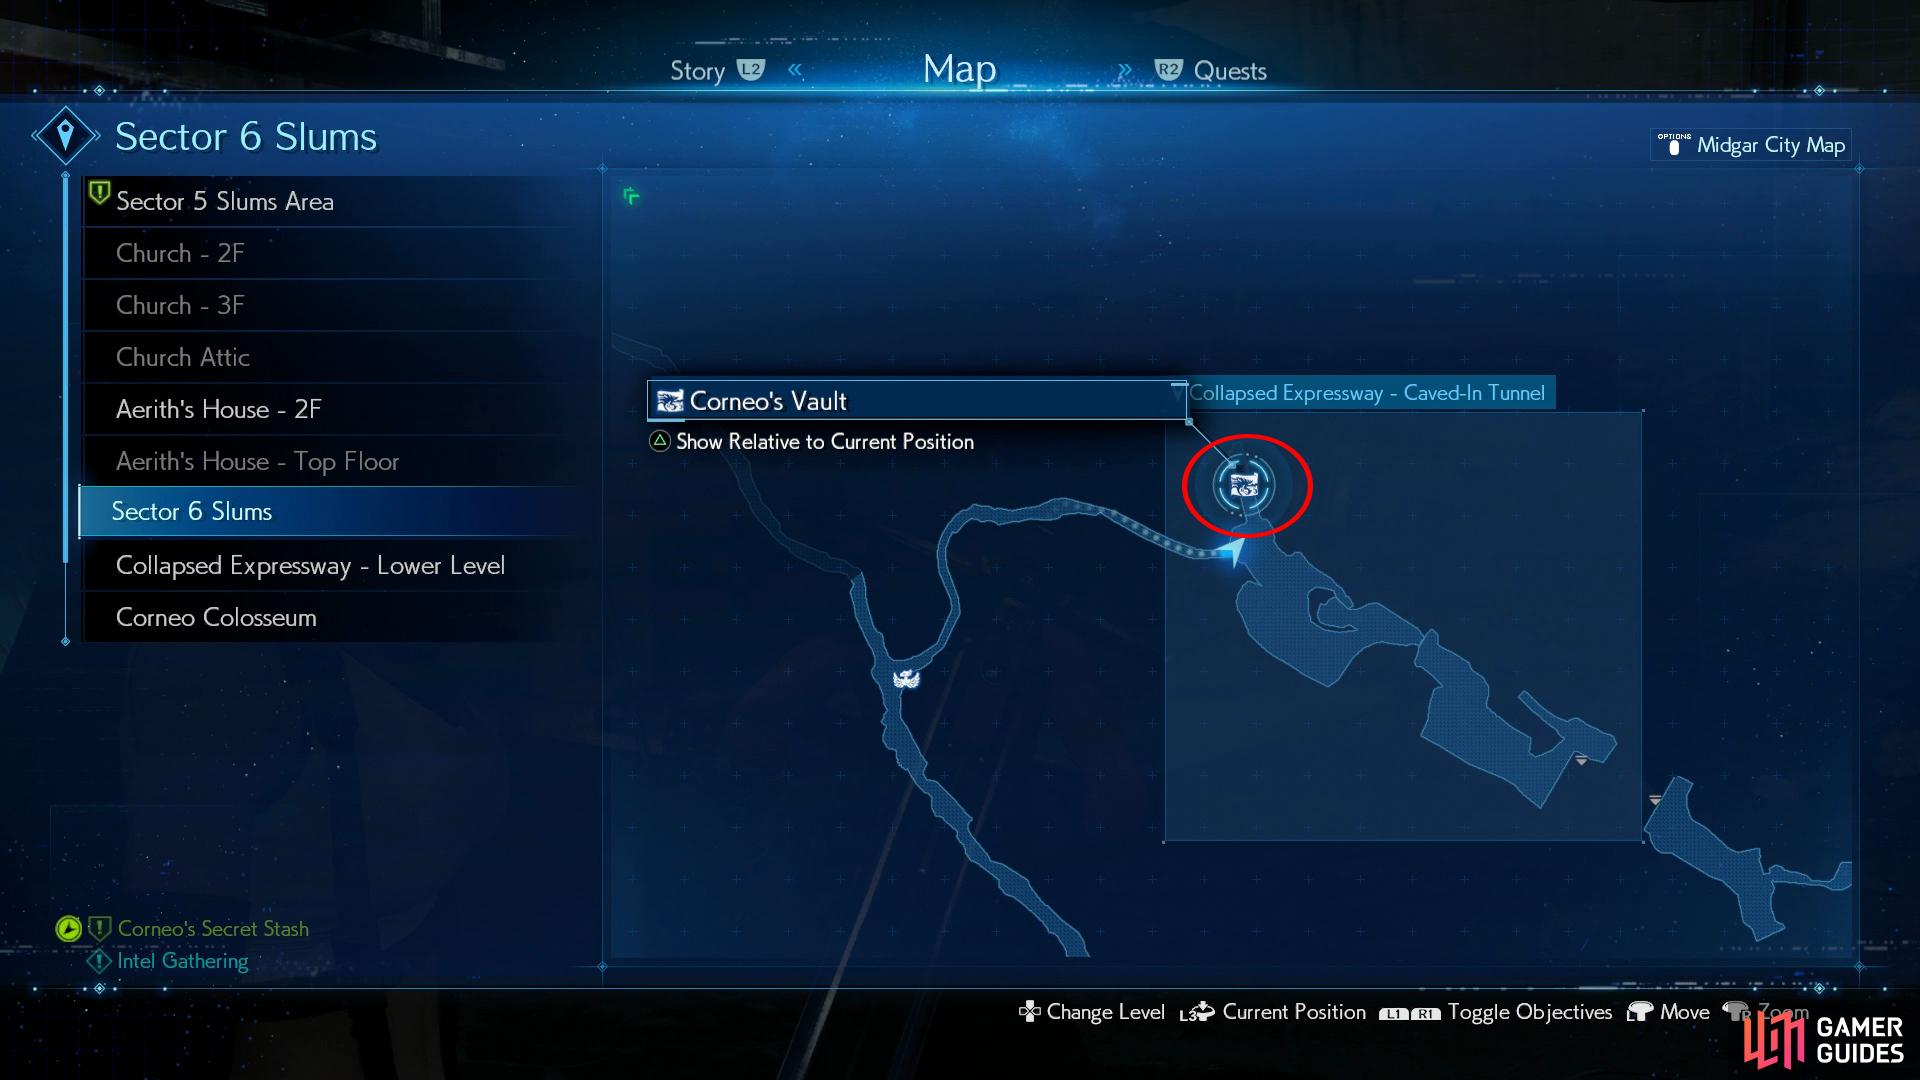
Head to the entrance of the Collapsed Expressway for the second Vault
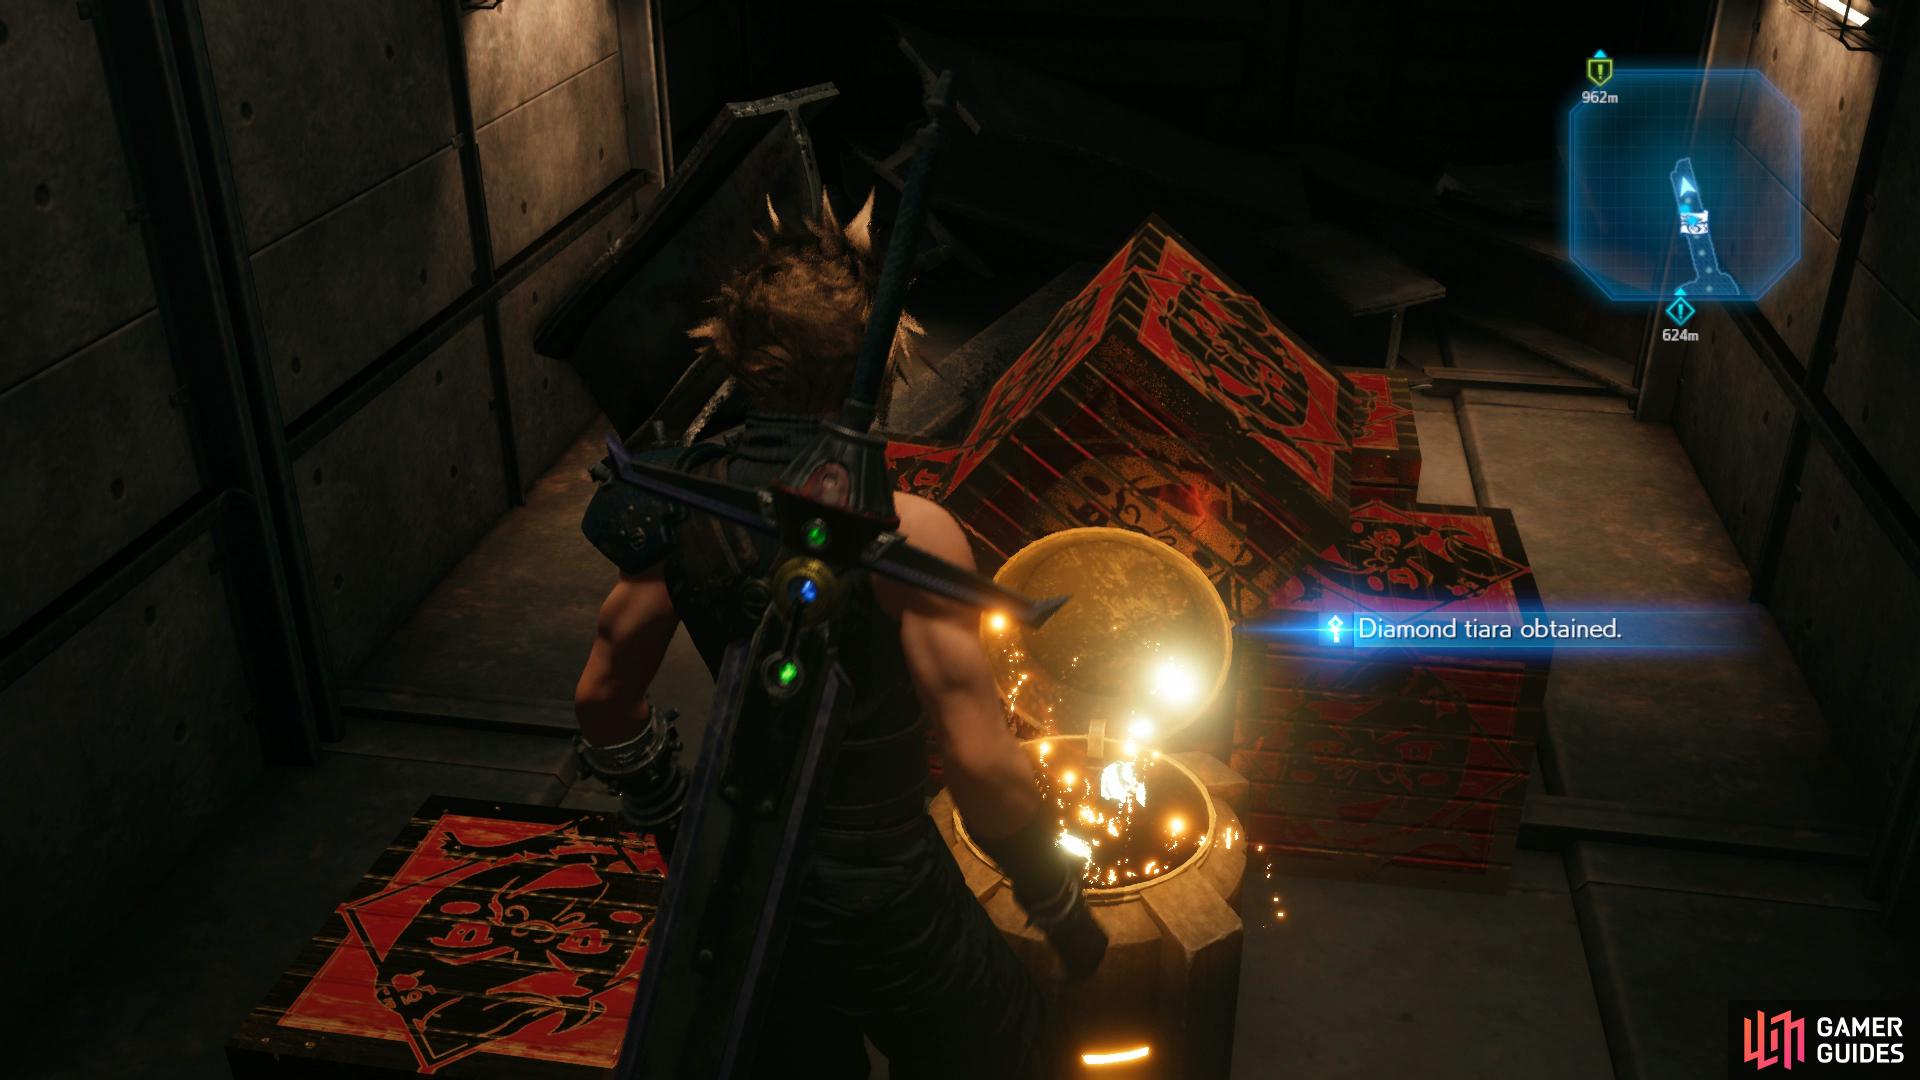
the Diamond Tiara awaits you here.
Use the nearby Chocobo Post and make for the Collapsed Expressway - Entrance to the south. Take the path to the east and as soon as you enter, you’ll find the next Vault to the north. Although this one is smaller than the previous one, you’ll still find the Diamond Tiara you’re here for along with another stack of Corneo Boxes.
Corneo Vault #3 - Sewer
(1 of 3) Follow the main scenario until after you get the item back from the Shoat and pull this lever
The final Vault is the trickiest to find, this requires you to progress the Main Scenario to the point you reach the end of the Sewers. After you finish the chase against the Mischievous Shoat and Leslie attempts to climb the ladder at the end of the Former Disposal Area, you’ll find a switch to the right of it. Hit this switch to drain the water back to the south and return to where you tried to block the Shoat, you’ll find the final Vault here but ensure you have Fire materia slotted before you head down there.
| Enemy | Weaknesses | Notable Loot |
|---|---|---|
| Sahagin | Fire | Adrenaline |
| Sahagin Prince | Fire | -- |
You’ll be up against two Sahagins along with the deadlier Sahagin Prince that can catch you off guard if you’re not careful. To make matters worse, you’ll only have a small area for the battle so you’ll want to be quick about using Fira spells to take down the lesser Sahagins before tackling the Prince.
The Prince has a few nasty tricks up its sleeve, not least the Salientian Curse ability, once you see it casting, start rolling away as it will cause an area of effect at your location, turning anyone unfortunate enough to be inside it transformed into a Toad. It’s difficult to Stagger this Sahagin too but you’ll notice after some time has passed that it’ll enter a Counterattack Mode and whenever you strike him during that period (preferably with Fire spells), you’ll cause the Stagger gauge to rise, just be wary of the Counterattack it shoots back at you, avoid this by rolling to the side.
Once the area is clear, you can loot the chests to obtain an Elixir, an Enfeeblement Ring and the Emerald Tiara, the final item you was looking for. You’ll have to wait until you finish the Sewer area but as soon as you return to the surface, you can return instantly to Marle to hand over the goods and complete the Quest to obtain The Art of Swordplay Vol.III which will increase Cloud’s SP by 10.
No Comments