

Through the Rubble / Words of Hope
After prying yourself from the devastation left in Shinra’s wake, crawl southwest under some debris then help Tifa push some rubble aside to reunite with Barret, who is actively trying to ruin his good hand in his grief. Watch the scene that follows, then make your way northwest, then north past the survivors from Sector 7. Along the way another scene will occur where Cloud confirms their destination before having a bit of an episode.
When Cloud comes to you’ll be just south of the entrance to Wall Market. Follow Barret into Wall Market, then up the road to the north, past the materia store and Madam M’s massage parlor. You can stop at the hotel and the aforementioned materia shop if you wish, but at this point there’s little reason to do anything but follow Barret north to Sector 5.
When you reach the Sector 5 Slums, note that you can go shopping freely here - even chat with Chadley to pick up and turn in new Battle Intel Reports, but we’ll save all that for later, for now, just head southwest through the slums to reach Aerith’s house. Watch the scenes that follow (we suspect you can navigate upstairs without direction, right?) after which the party will resolve to head back to Sector 7. What’s left of it, anyways. Before you leave Aerith’s house, head upstairs and enter the room Marlene’s sleeping in and loot a chest containing a Mythical Amulet, an accessory that strengthens summons.
Checking on Friends
With the obligatory story bits done for now, you’re free to see to some side content - namely Chadley’s new Battle Intel Reports and some shopping.
Chadley, Chapter 13
Chadley can be found near the materia shop in the Sector 5 Slums, and when you talk to him he should give your Battle Intel Reports #15-19.
| Battle Intel | Conditions | Reward |
|---|---|---|
| Combat Simulation: Leviathan | Defeat Leviathan. | Leviathan Materia |
| Monster Bio Pt. 4 | Assess 30 enemy types. | Enemy Skill Materia |
| Weapon Abilities | Acquire all 16 weapons abilities. | Skill Master Materia |
| MP Consumption | Master all 12 types of magic materia. | MP Absorb Materia |
| Monster Variants Pt. 2 | Defeat monsters of 10 unique varieties. | HP Absorption Materia |
Up until this point it was possible to have most of Chadley’s Battle Intel Reports completed before you got them… or shortly thereafter, in the case of the first batch in Chapter 3. These ones, however, will take more work. It’s feasible to defeat Leviathan at this point, although it’ll be easier with some preparation - purchasing some Sorcerer’s Armlets and mastering an orb of Barrier Materia, specifically - and you may have already completed Monster Bio Pt.4 if you’ve been diligent about scanning foes.
On the other hand, you’ll need to at least collect two more weapons and master their abilities to complete Weapon Abilities. At this point in time you could have obtained up to fourteen weapons - if you neglected to master any abilities on Aerith’s weapons, you’ll obviously be waiting longer (you can potentially finish this by Chapter 14). You don’t yet have all the magic materia required to complete MP Consumption, nor is it really worth your time to grind out all this materia (looking at you, Revive Materia). Finally Monster Variants will, of course, require you to progress through the game and fight more monster types. Suffice to say you’re not completing these now, and frankly, you might not even care to bother to do so until after you beat the game. Anything you can miss the first time around (or purposefully delay, as the case may be) can be done after completing the main story, so there’s really no need to fret about these Battle Intel Reports.
We’ll leave the completion of these up to your own initiative, although you really should be able to obtain that Enemy Skill Materia from Monster Bio Pt.4 before long. We’ll discuss Enemy Skill Materia more when you actually can make use of it.
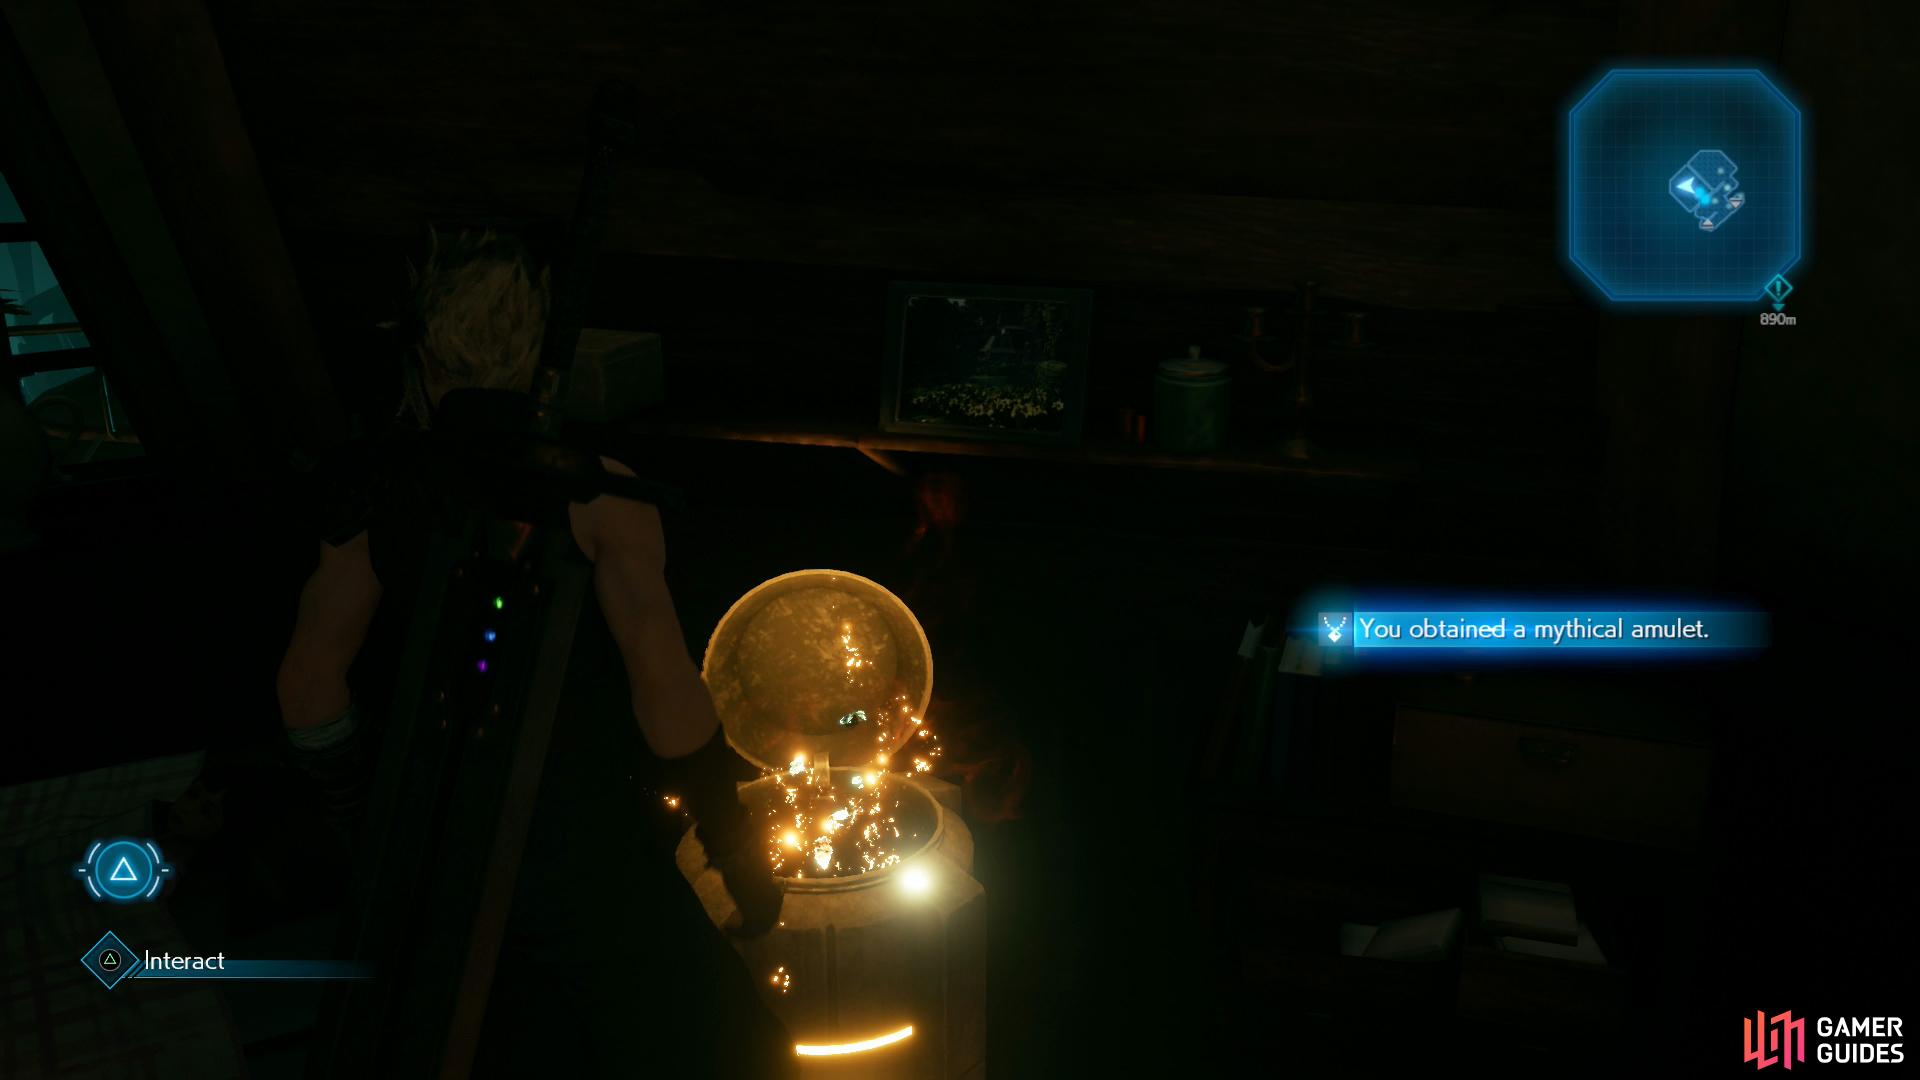
Grab the Mythical Amulet from Aerith’s House.
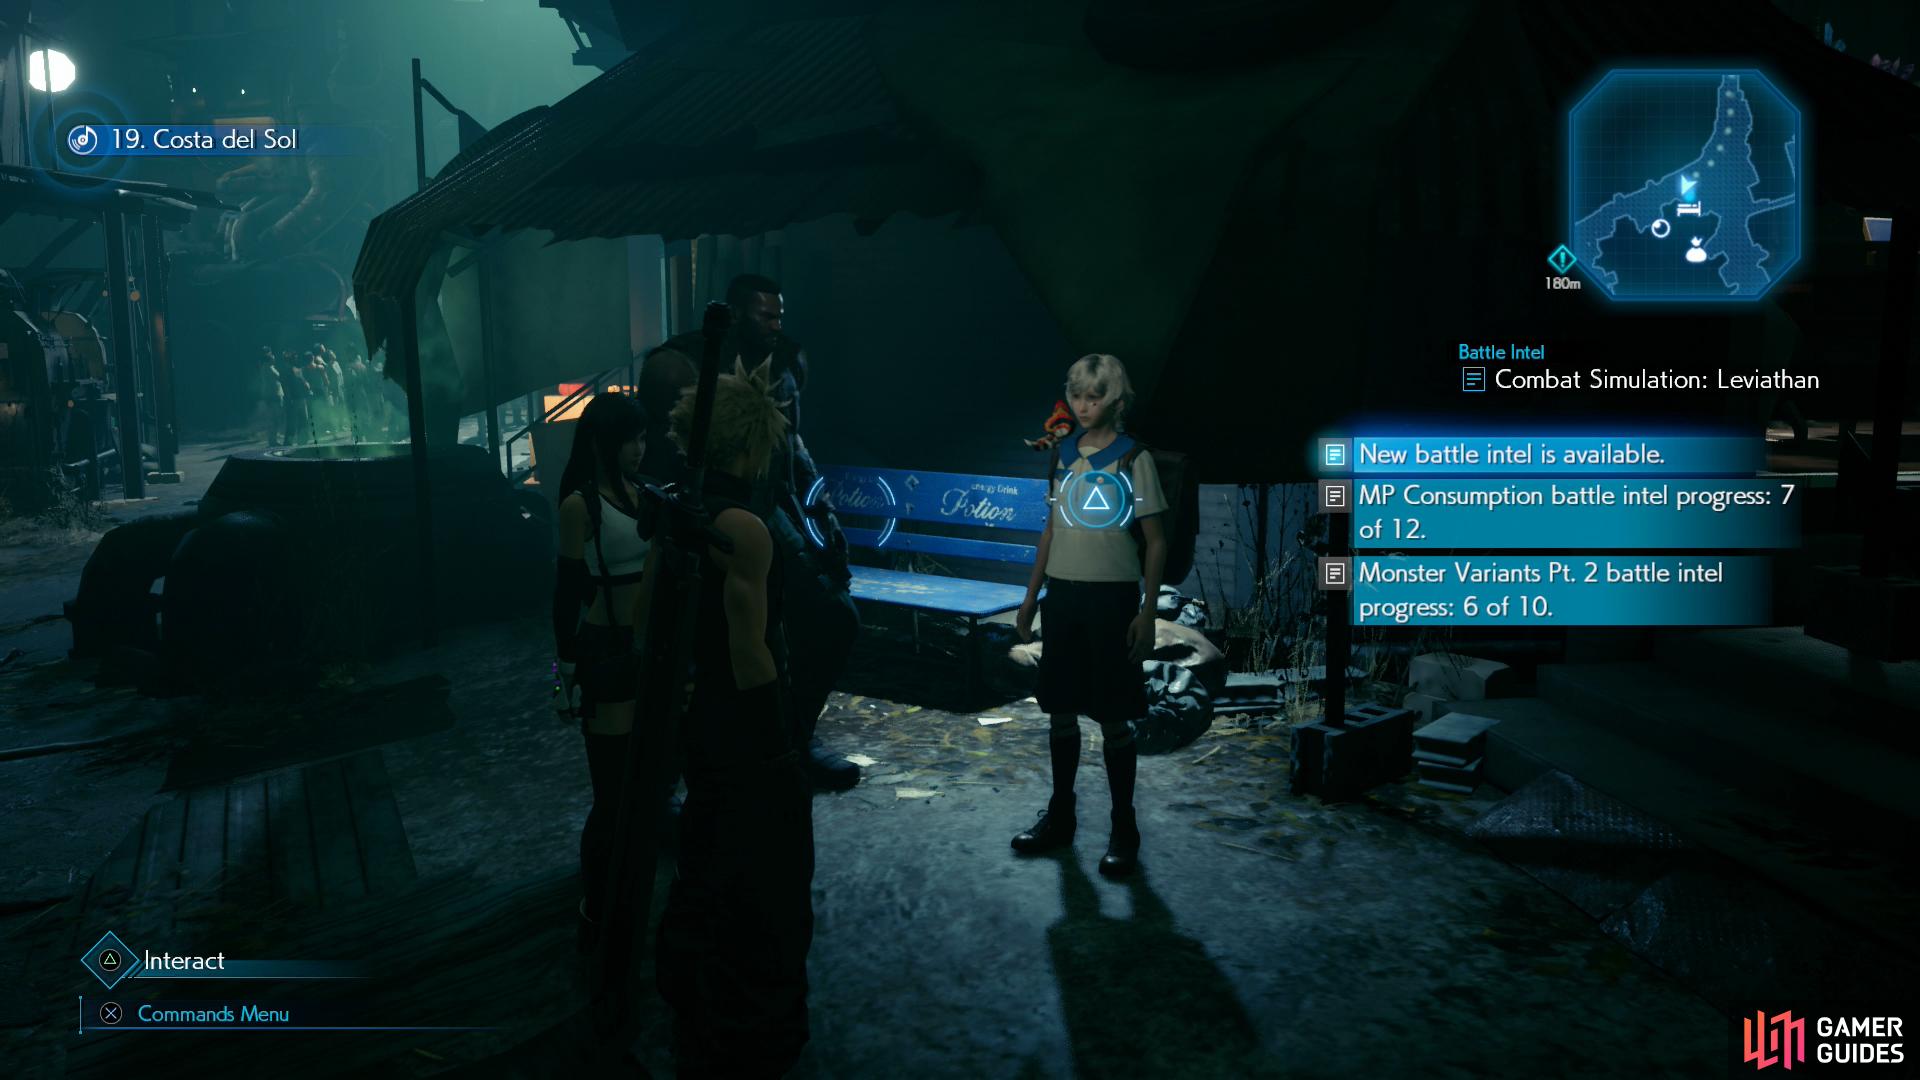
Chadley should give you a new batch of Battle Intel Reports when you talk to him in the Sector 5 Slums.
Sector 5 Slums Weapon Shop
The item shop and materia shop have wares you’re familiar with, but the weapon shop has some (potentially) new weapons and armor you can buy:
| Weapon | Cost (Gil) |
|---|---|
| Nail Bat | -- |
| Sonic Strikers | – |
| Arcane Scepter | – |
| Mythril Rod | – |
| Armor | Cost (Gil) |
|---|---|
| Gothic Bangle | 3,000 |
| Magician’s Bracelet | 4,800 |
| Heavy-Duty Bracer | 4,800 |
| Sorcerer’s Armlet | 4,800 |
All the weapons you can buy are weapons you could have found or earned elsewhere, but if you missed them before, be sure to pick them up now. The Gothic Bangle also isn’t new, and you could have stolen a Magician’s Bracelet and a Heavy-Duty Bracer from Reno and Rude, respectively. This makes the Sorcerer’s Armlet the only item guaranteed to be new, and while its three materia slots don’t inspire much awe, it does give its user a significant boost to their Magic Defense - a useful boon when fighting Leviathan.
Buy what you will, after which you’ve got little choice but to make your way to Sector 7. To do this, follow the road connecting the Sector 5 Slums to Wall Market southeast until you reach a fork - Cloud will point out the tunnel to the left (east) when you approach. You should recognize this route - the Collapsed Expressway you traveled with Aerith in Chapter 9 - although it’s somewhat worse for wear after the recent collapse of Sector 7.
You won’t have to put up with mechanical arms and whatnot this time, but there are numerous enemies along the way, including several new specimens… and with new enemies comes new opportunities.
| Enemy | Weaknesses | Notable Loot |
|---|---|---|
| Gorger | Ice | -- |
| Ringmaw | Ice | -- |
| Varghidpolis | Ice | -- |
| Terpsicolt | Ice | -- |
| Sweeper Prototype | Lightning | -- |
| Smogger | Lightning | -- |
| Bandit | Fire | -- |
| Beck | Fire | -- |
| Butch | Fire | -- |
| Burke | Fire | -- |
| Grungy Bandit | Fire | Championship Belt |
Many enemies on the Collapsed Expressway are weak to Blizzard.
You can learn the “Self-Destruct” enemy skill from Varghidpolis enemies.
Follow the linear tunnel east and north, smash some Shinra Boxes and crouch under some debris to reach the Collapsed Expressway, then climb a ladder to the southeast to encounter several Gorgers. Nothing novel here, eradicate them, continue southeast, smash some Shinra Boxes, descend a ladder, pass by one of the old mechanical arm puzzles and ascend another ladder, smash yet another collection of Shinra Boxes, then continue southeast and slip through a narrow passage.
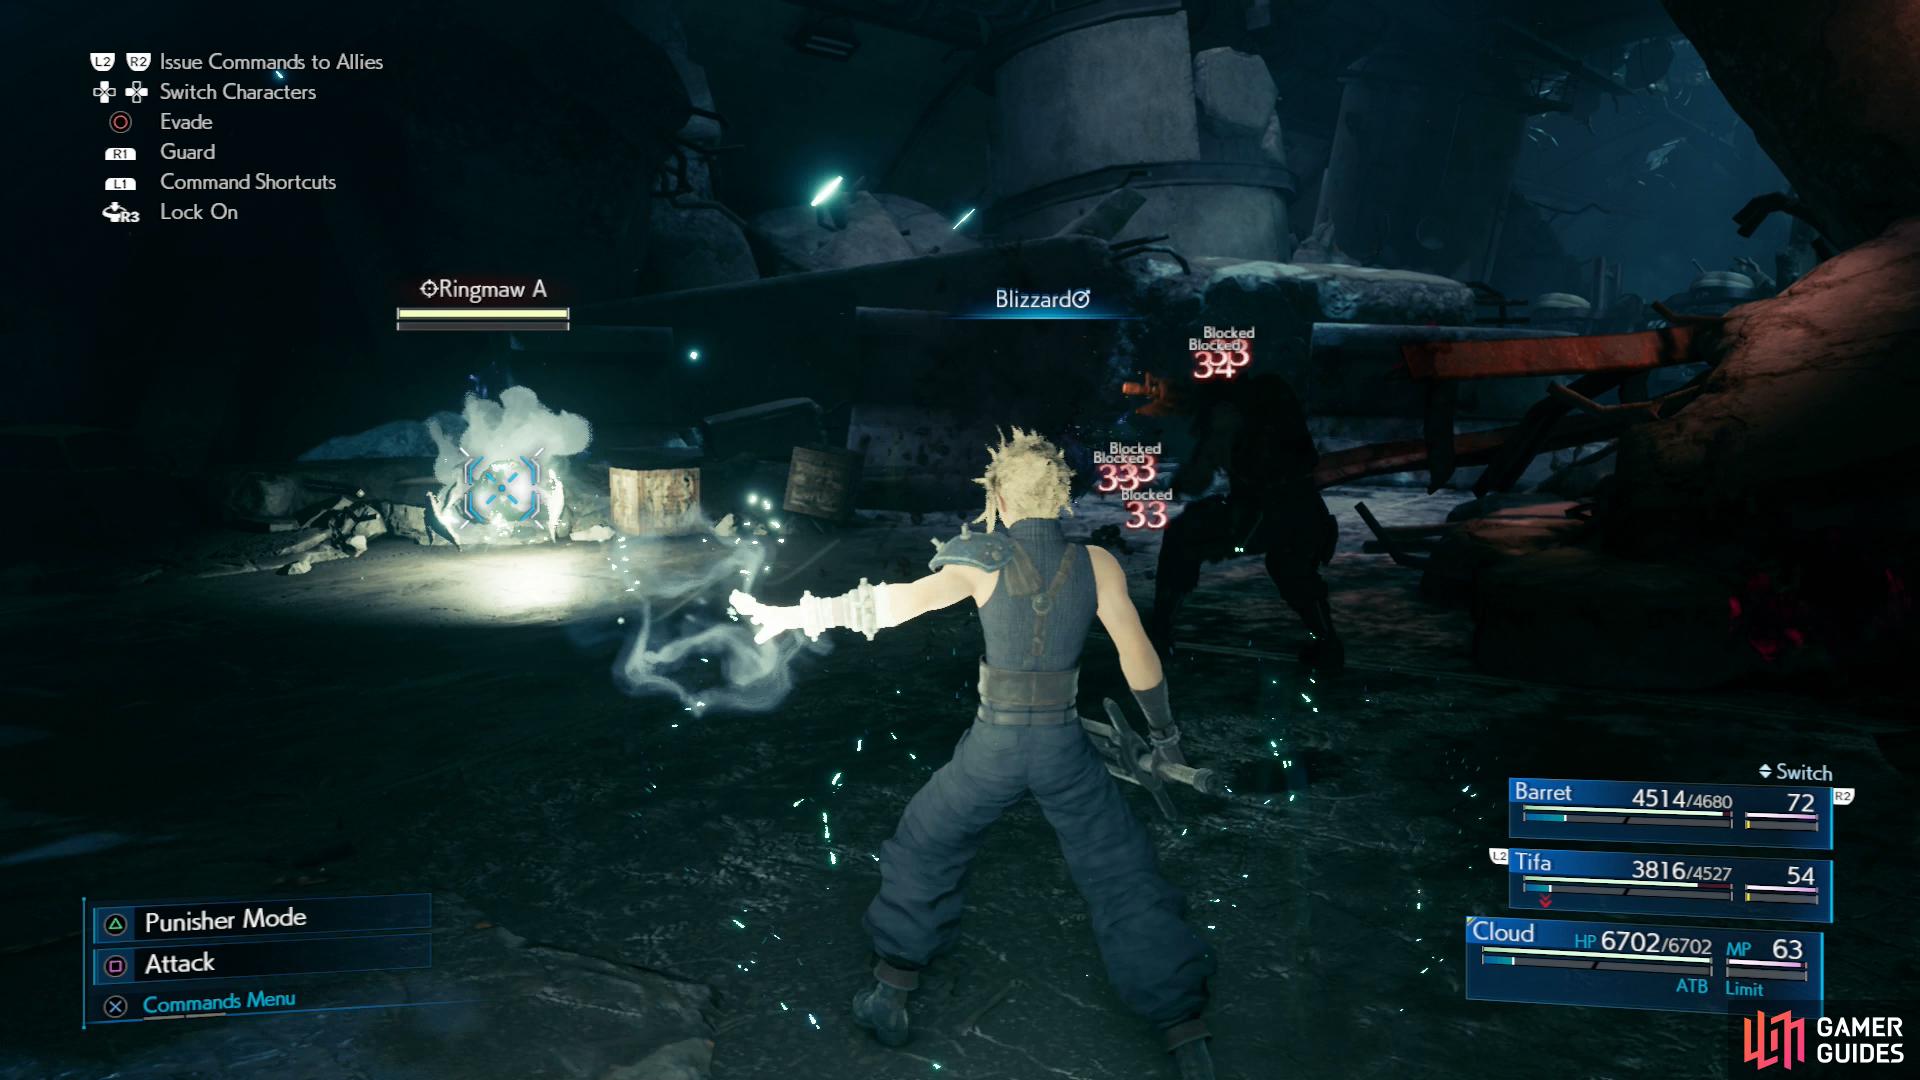
Loot a chest ahead of you to score a Mega-Potion, then continue around some rubble to the southeast, beyond which you’ll encounter a new foe, a Ringmaw. As palette-swaps of the Gorger, it’s no surprise that the Ringmaw shares many of the same mannerisms and attacks, including “Feast” and “Sickle Strike”, not to mention the ability to spew poisonous projectiles. Unlike Gorgers, they can also use “Rejuvenate” to regain HP and, as their Enemy Intel page suggests, will buff up if you neglect them too long. They’re still fairly easy to dispatch with normal attacks, or failing that, Blizzard.
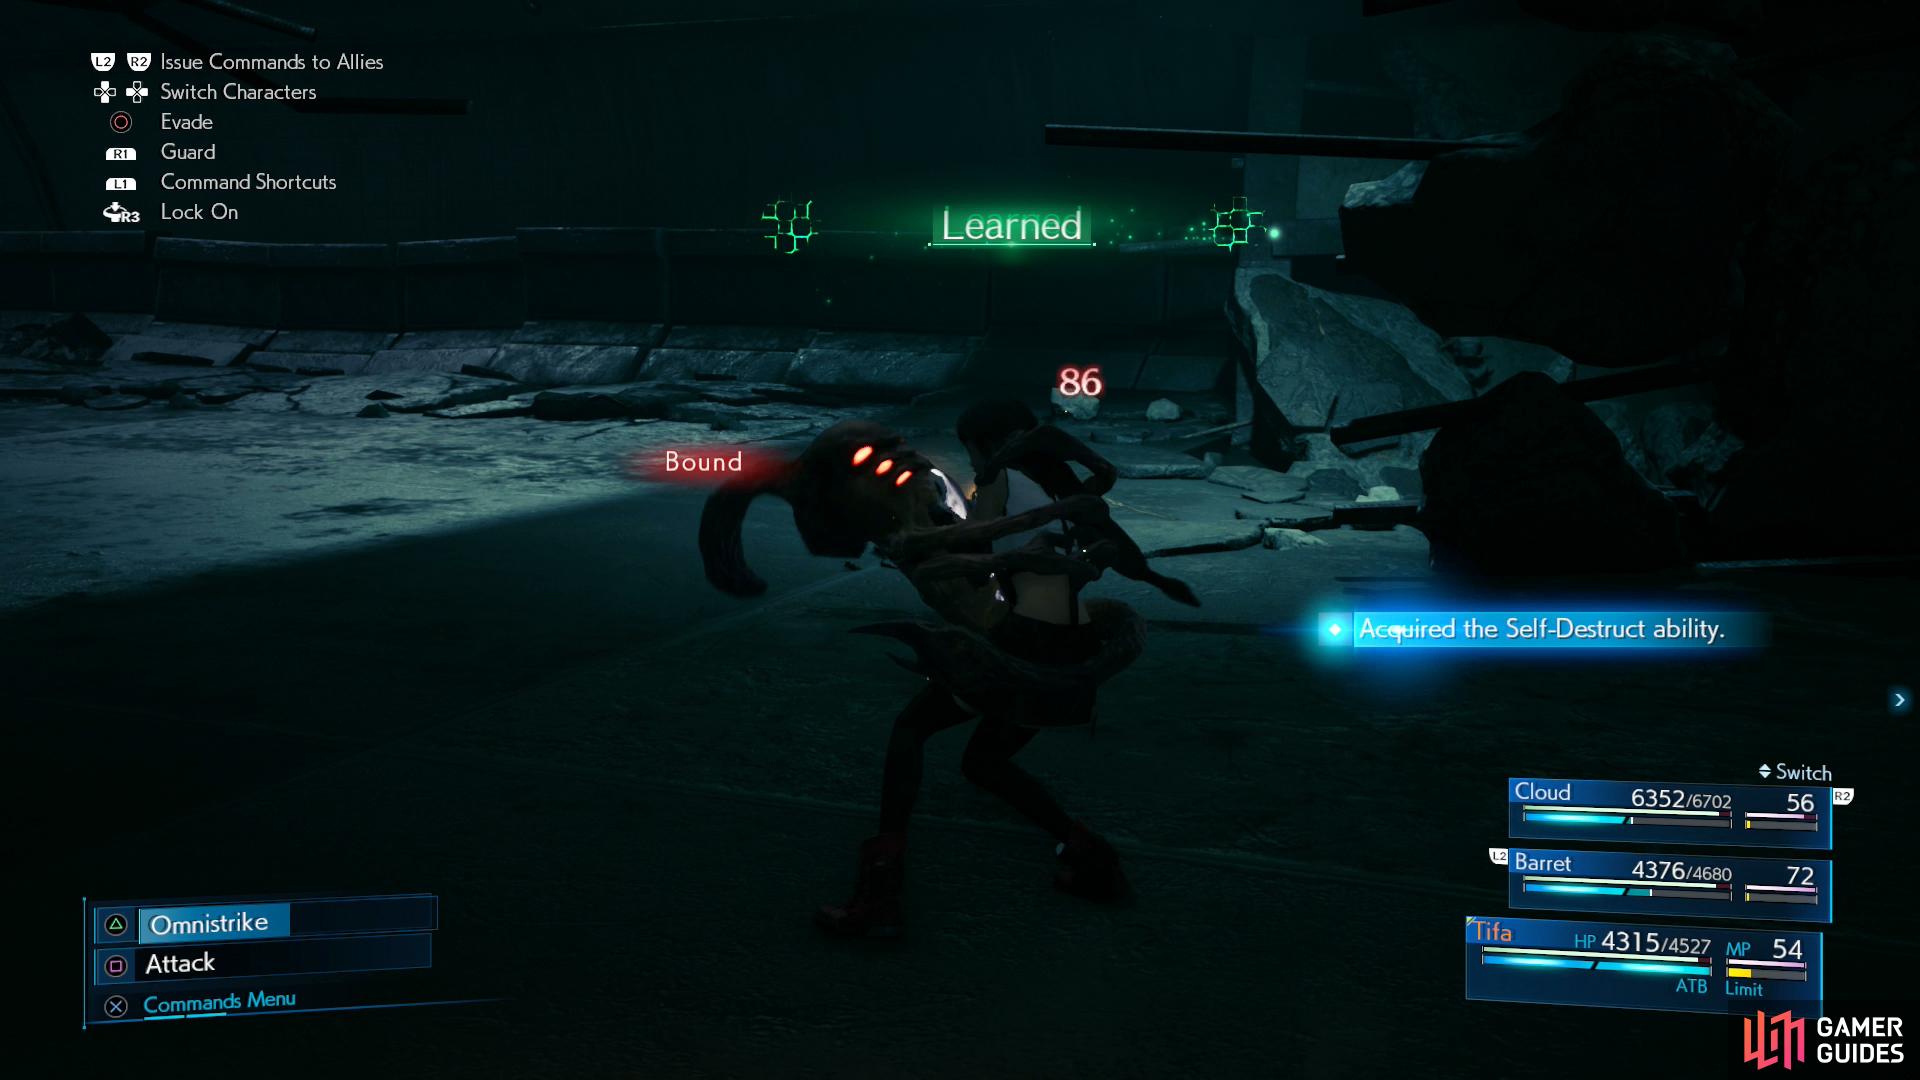
Continue southeast and the road will split - it doesn’t really matter which route you take, they both rejoin shortly, and when they do you’ll find yourself confronted by a new foe, the Varghidpolis. Like the last two foes, they’re weak to ice, so a Blizzard + Magnify combo should all but end the fight. That said, you can learn the Self-Destruct enemy skill from them, which warrants some explanation.
With the Enemy Skill Materia equipped you can learn new enemy skills and cast learned enemy skills. To do this you need merely be targeted by said enemy skill, which can sound simpler than it really is in practice, as some enemy skills will only be used under certain conditions. In this case, the Varghidpolis can use the skill “Apoptosis”, which will teach the series-staple “Self-Destruct” enemy skill. They tend to do this when they’re low on HP or otherwise pressured, although we were able to learn this enemy skill by simply equipped the Enemy Skill Materia onto a character, taking control of them in combat, and waiting. These foes will respawn over time, and many enemies teach “Self-Destruct”, so if you don’t get it here, you don’t need to worry too much.
Enemy Skill or no, once the Varghidpolis are dead continue southeast to find another batch of foes - two Varghidpolis’s and two Terpsicolts. All are still weak to ice, so you can do worse than Blizzard + Magnify. After the fight, switchback to the northwest, then southeast, smash some Shinra Boxes near a rubble-covered machine and continue southeast.
Further south you’ll find a clearing where a Smogger and a Sweeper Prototype prowl. Both are weak to lightning, to hit them with Thunder when you can, but focus on the Smogger first, as the Sweeper Prototype has far more HP, and it’ll be easier to concentrate on without the Smogger spewing debuffs.
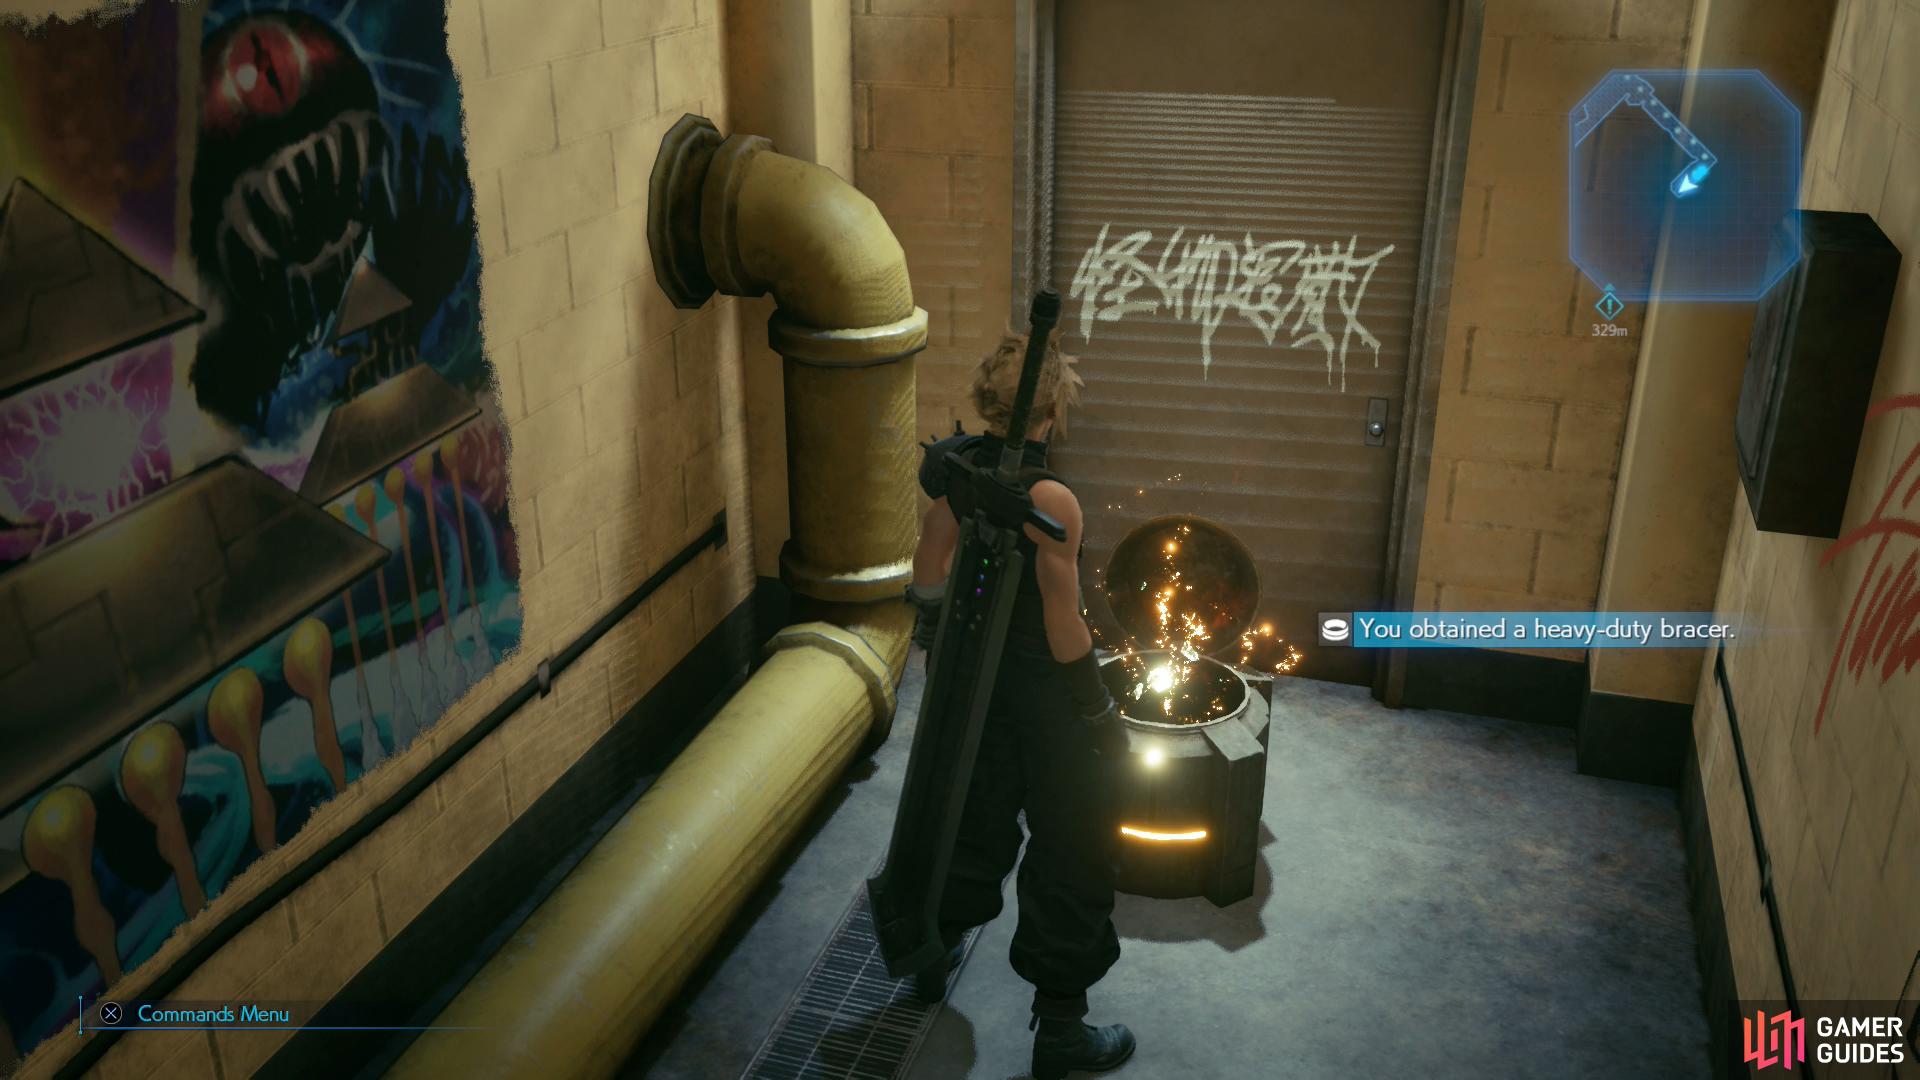
Obliterate the bots, smash some Shinra Boxes to the east, then continue south to find a ladder. Descend it and crawl under a collapsed train car to the south, head through a doorway to the southeast and loot a chest containing a Heavy-Duty Bracer. Backtrack outside, smash some Shinra Boxes, then continue southwest around a train car to encounter some Bandits. You should know how these fight by now, annoying shock traps, a “Swing Away” attack and a weakness to fire. You can probably take these down with normal attacks.
Continue southwest to encounter some more Bandits. Cut them down, and after the fight head onto the northern track and follow it northeast to find a chest containing an Ether.
Backtrack southwest to find a third ground of bandits… but not just any bandits. That’s right, the Three B’s - Beck, Butch and Burke - are back. Before you engage, save your game and equip your Steal Materia - there’s an uncommon new specimen of foe here that has a drop worth stealing. This foe, the Grungy Bandit, is a bit of a tank, which works well enough as you’ll want to steal a Championship Belt from him. After this, eliminate the three B’s (they’re weak to fire, so Fire + Magnify works well), then focus on the Grungy Bandit, who has quite a lot of HP. Attack him from behind and evade his attacks to “Pressure” him, then try to inflict Stagger before finishing him off with your most powerful attacks. Standard stuff.
Conquer the bandits, then continue southwest until you reach a ladder, stopping to loot a chest to the left (Orb of Gravity) along the way.

Buy the “On Our Way” Music Disc,
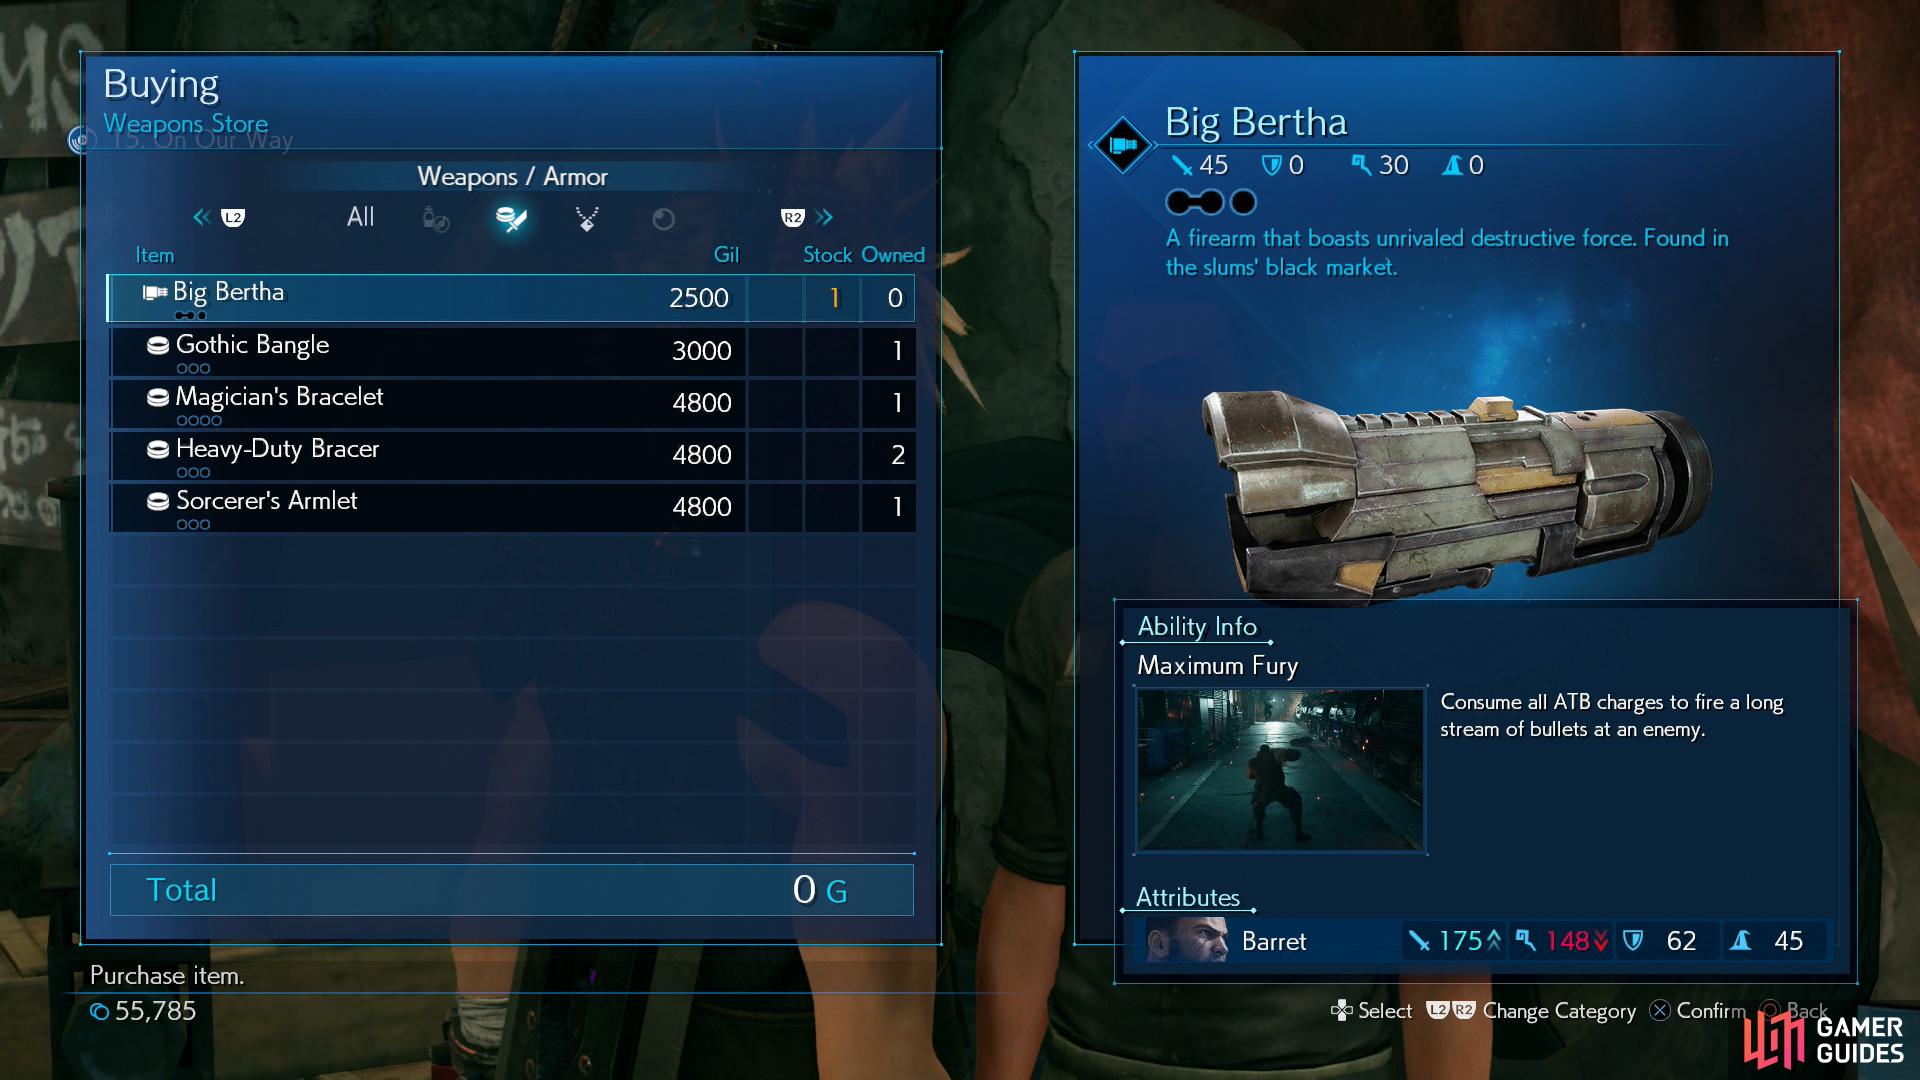
and the Big Bertha weapon for Barret.
Climb the ladder, defeat a group of Ringmaws, then continue south and descend a ladder, pass another mechanical arm puzzle and climb a pair of ladders. Follow the linear path south past some Sector 7 survivors, crouch under a fence and continue on to reach the Evergreen Park. You’ll find some familiar faces here, including many of the merchants from Sector 7 who are somehow capable of offering their wares to you. Most of the stuff they’ll sell isn’t terribly new or interesting, but you should buy the 15. On Our Way Music Disc from the item vendor and Big Bertha - a new gun for Barret - from the weapon vendor.
Rest up at the nearby rest bench, then head to the southwestern end of the playground to find the tunnel that supposedly leads to Sector 7.
Crawling to the Surface / Home is Where the Heart Is
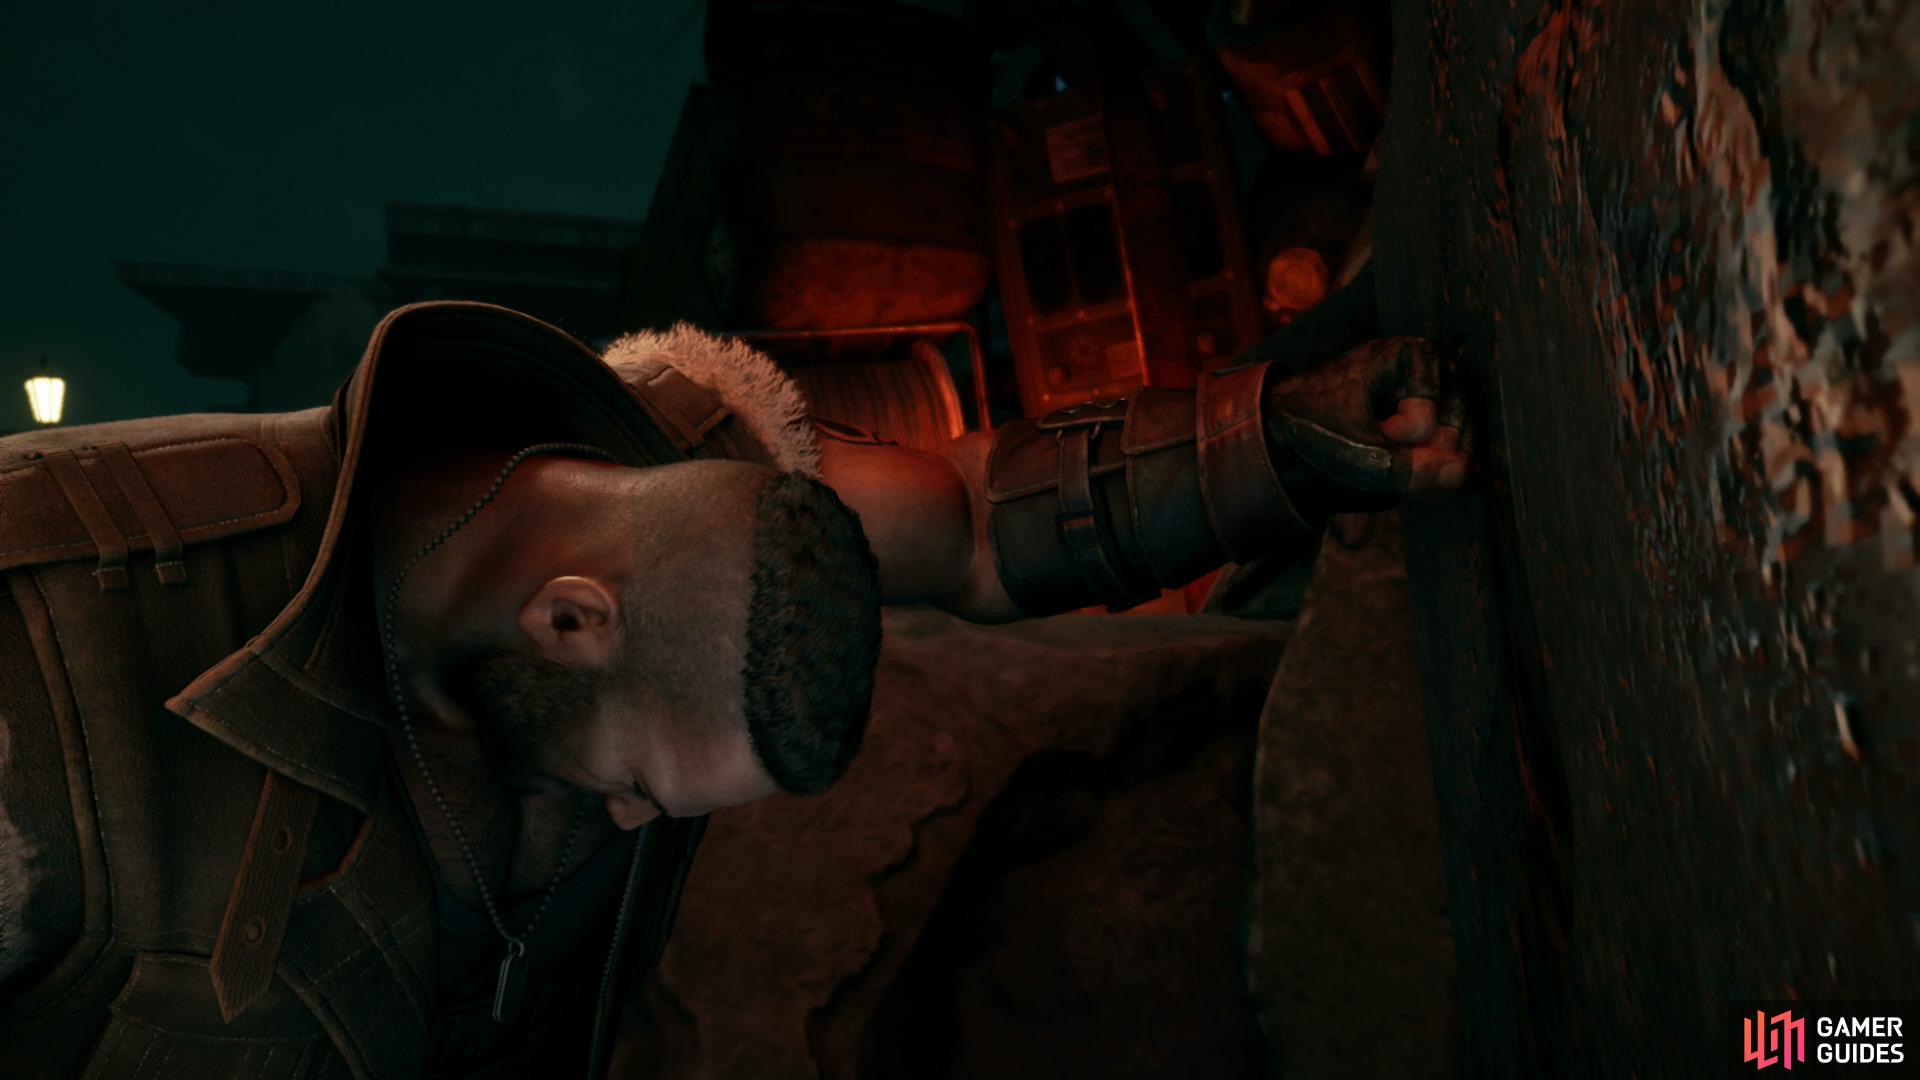
Only one way to find out. Enter the tunnel (you can return once you enter, surprisingly, so no need to worry) then follow the linear path ahead and climb another ladder. Continue down the tunnel ahead and when you get outside watch a scene, after which make your way east over the rubble to reach the ruins of Seventh Heaven.
Watch a scene, then help Barret move some debris. Follow Wedge’s cat southeast, jump into a hole in the ground, then follow the linear path ahead until you find yourself in… some underground Shinra installation? The existence of such a place was hinted at during the side quest On the Prowl, but this confirms the rumors. Make your way towards Wedge and watch some scenes, after which you’ll find yourself somewhat deeper in the installation.
In Solitude / Finding Wedge
| Enemy | Weaknesses | Notable Loot |
|---|---|---|
| Bugaboo | Wind | -- |
| Wererat | Ice | -- |
| Bloodhound | Ice | -- |
| Gorger | Ice | -- |
| Monodrive | Wind | -- |
| Cutter | Lightning | -- |
| Varghidpolis | Ice | -- |
When you see a blue indicator pop up,
it means there’s some debris nearby that Barret can destroy.
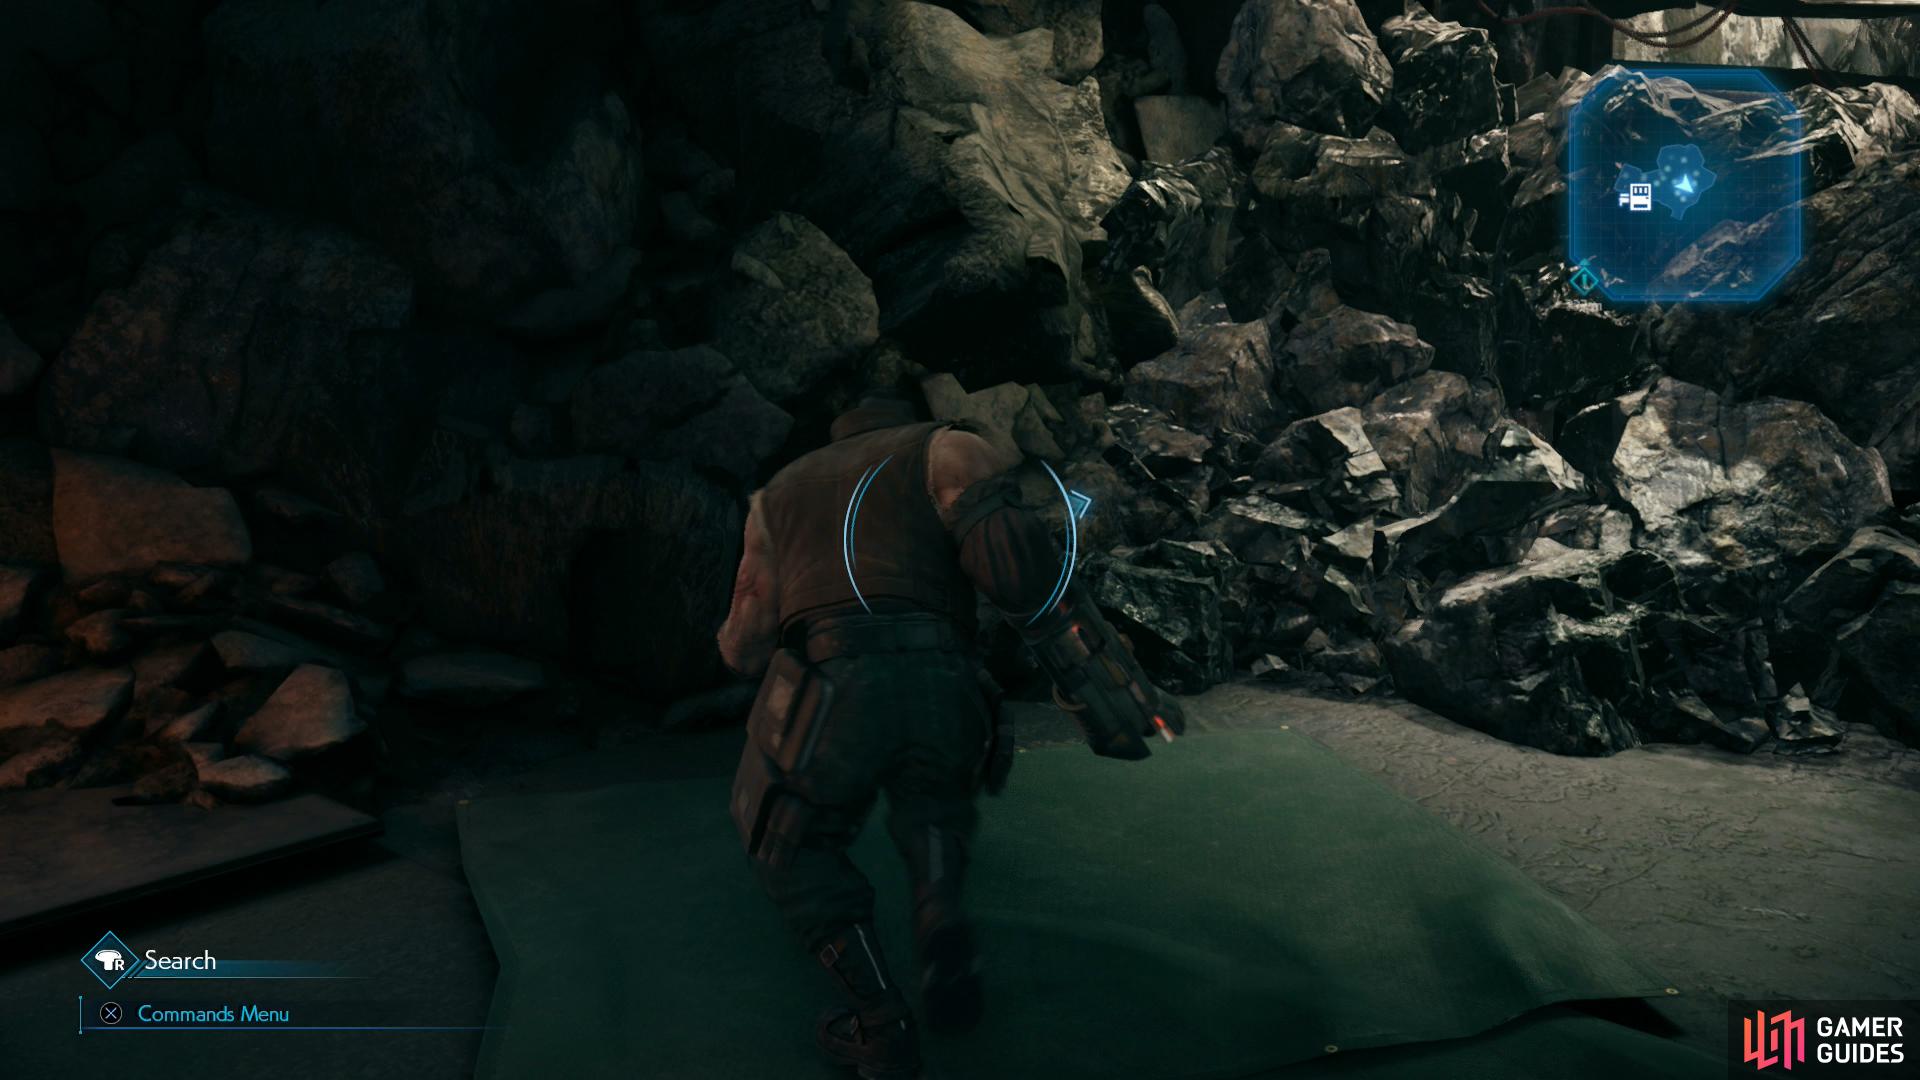
Now in control of Barret, you’ll get a tutorial informing you that Barret can destroy certain obstacles with his gun. Where does he get all that ammunition from, anyways? And how does his gun not overheat or wear out? Must be some pretty awesome materia at play. Anywho, note the rest bench and vending machine nearby, the latter of which doesn’t hold anything you haven’t already seen before.
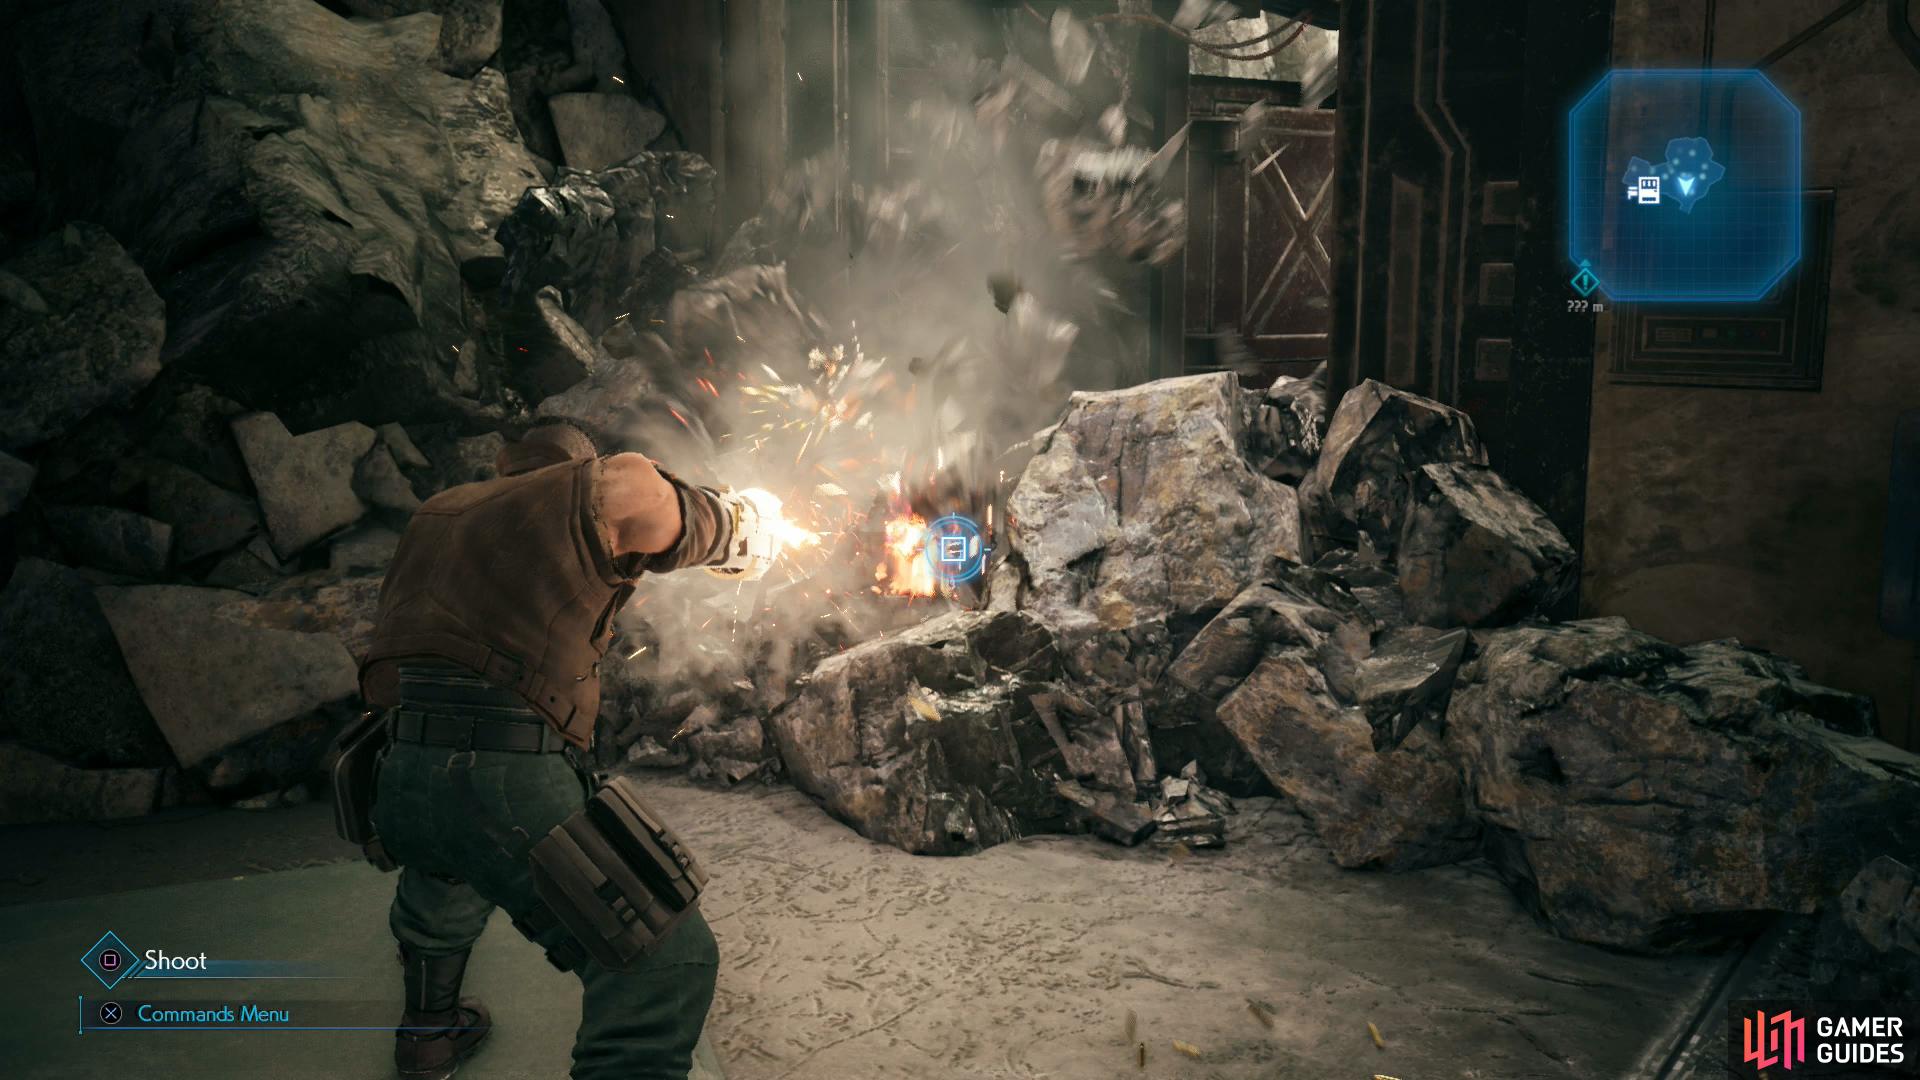
When you’re ready to move on, approach some rubble to the south and press [SQUARE] when prompted to blast it out of your way. Continue south into a tunnel and you’ll find yourself confronted by a new foe - the Bugaboo. They’re weak to wind, but… there’s really not much to say about them, aside from pointing out how featureless these foes are. They deal little damage, attack infrequently, have no apparent abilities, drop no items and have a minuscule amount of HP. Basically, they just exist so Barret can indulge in some target practice. Shoot them to bits, then continue down the tunnel, shooting the rows of Shinra Boxes on shelves as you go for the odd bit of loot. Further on you’ll encounter several Wererats, which believe it or not are more worthy foes than the Bugaboos were, and even further on you’ll need to swat aside another batch of Bugaboos.
Shortly after the second swarm of Bugaboos you’ll find some debris to the south you can destroy, as well as another mound of destructible debris at the end of the tunnel to the east. Do the latter first, as it’ll reveal a chest containing 2,000 Gil as well as some more Shinra Boxes to shoot up, then return back to the main tunnel and destroy the debris to the south. Continue past the debris and you’ll encounter two Bloodhounds. You faced these before, but then you had the benefit of a companion, not to mention access to Cloud’s Punisher mode. Barret will have to make do with Blizzard (the Bloodhounds are weak to ice) and “Overcharge”, although if you fill up both ATB segments, don’t be shy about using “Maximum Fury”.
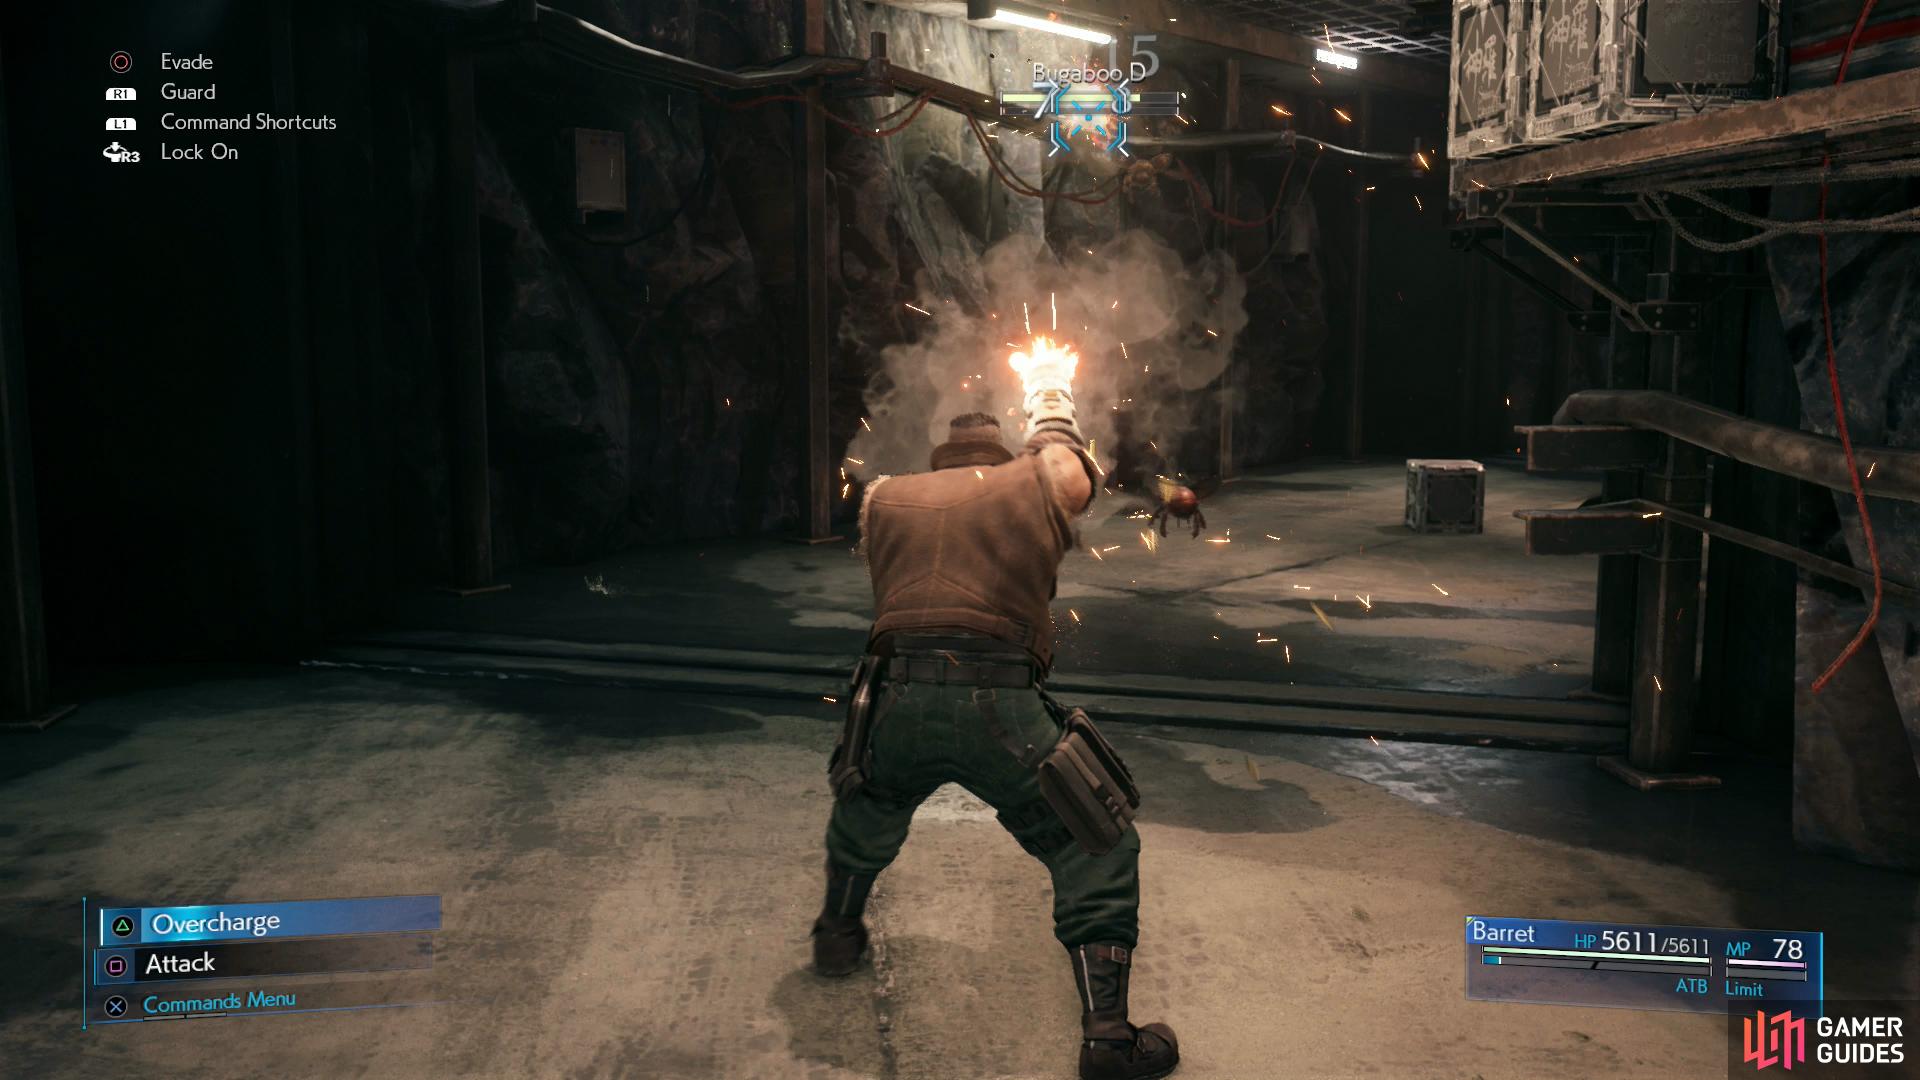
(1 of 3) Fighting with Barret alone isn’t ideal, but the Bugaboos won’t give you much trouble, at least.
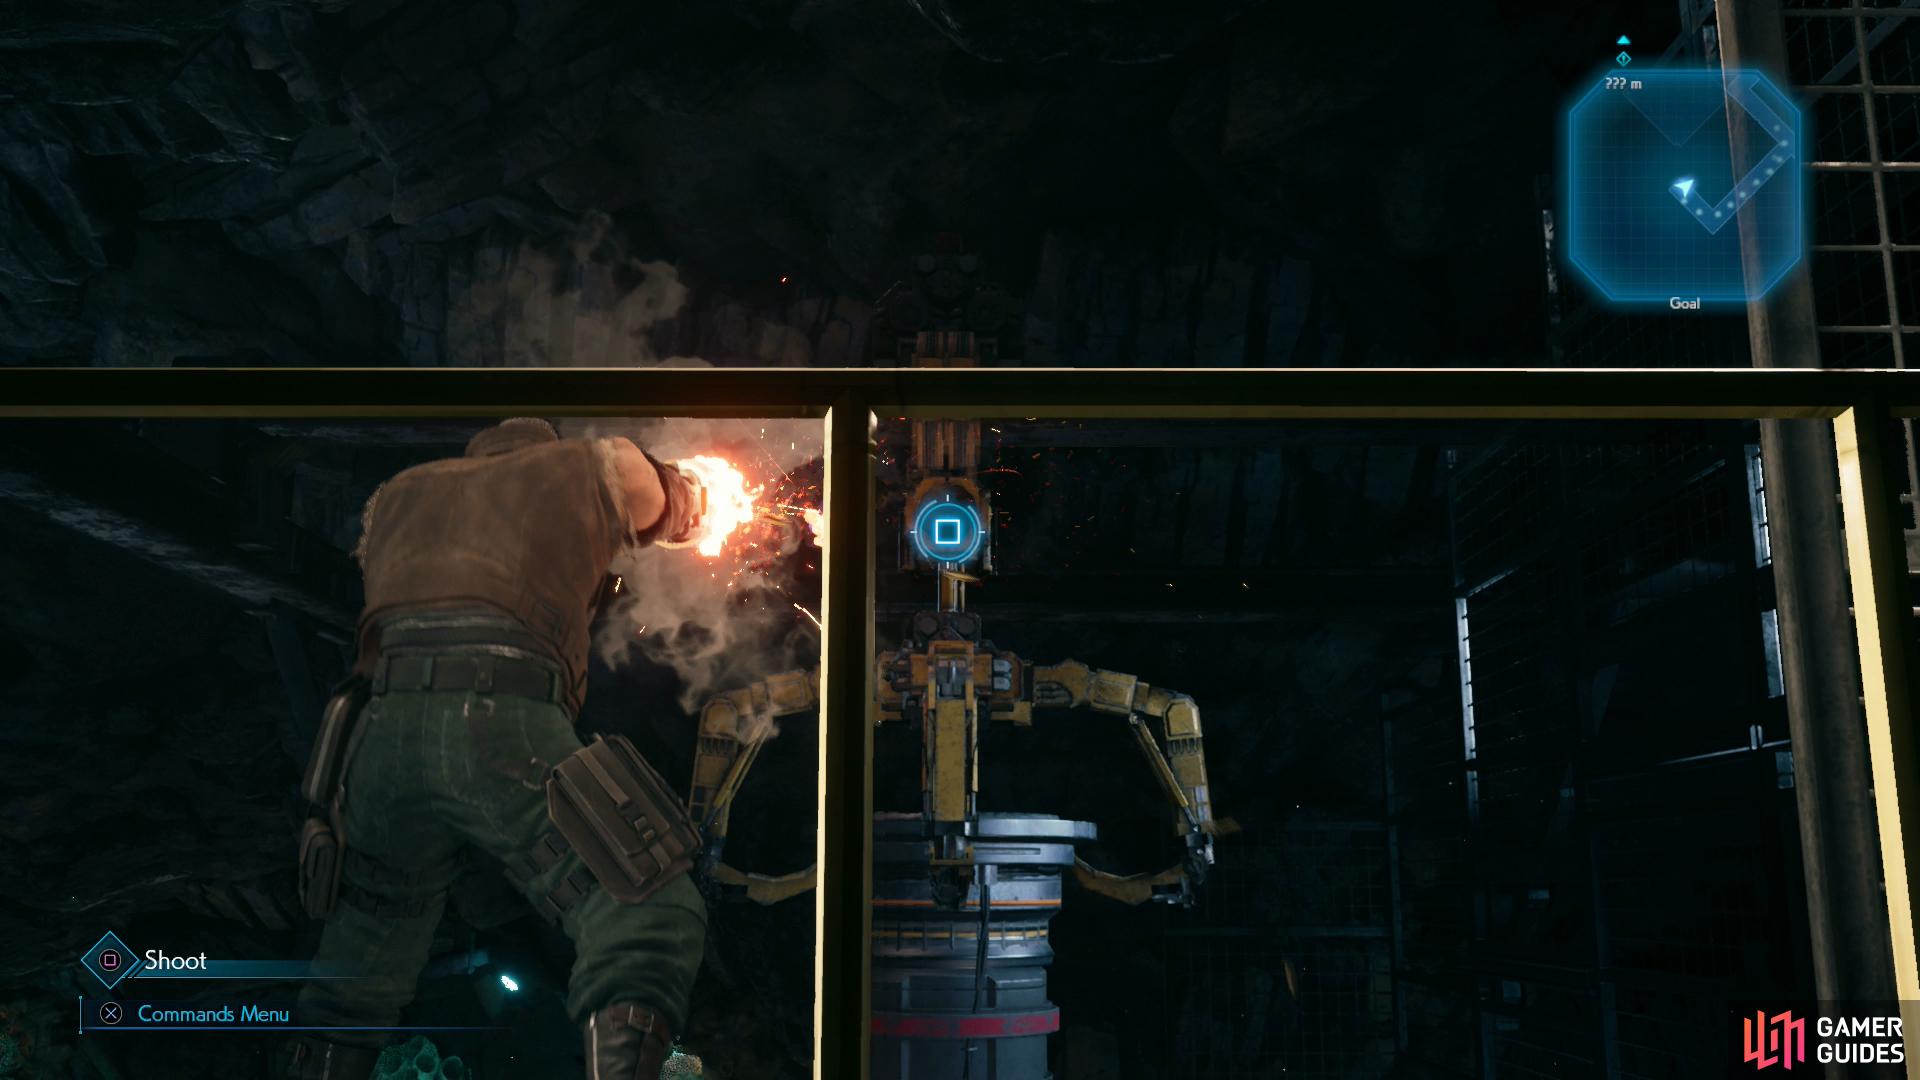
Defeat the mutts then climb a ladder to the south to reach some catwalks. Ignore some stairs to the east for now and head down an adjacent catwalk to the north, kill some more Bugaboos, then destroy a machine to drop another section of catwalk, allowing you to loot a chest containing 2x Mega-Potions. Backtrack to the previously-neglected stairs and ascend them, note a door to the east through which the roaring of some beast can be heard, then make your way north, defeating some more Bugaboos and a Bloodhound. Climb a ladder, then follow a catwalk into another passageway to the east.
Two paths are open to you… being generous with the word open. In any event, there’s a debris pile to the south and north that you can shoot your way through. Go north first, boot a chest to convince it to part with a Healing Carcanet (boosts the effectiveness of healing items, spells and abilities) then destroy the Shinra Boxes before you shoot a hole in the rubble to the south.
Beyond the rubble to the south you’ll encounter another slums staple - the Gorgers. Somebody must like these things, because they’re everywhere. They can actually be somewhat dangerous to a lone Barret, too, what with their ability to inflict poison and their “Feast” attack. Probably not likely to kill you, but they can inflict undue damage. Defeat them, then continue on to find another Gorger and its pet Bugaboos. Crush them, too, and afterwards shoot a fan so you can safely reach a ladder behind it (to the north).
You’ll surface in a tunnel that’s remarkably similar to the previous ones. Shoot some Shinra Boxes off the shelves, defeat another mixed group of enemies (Wererats and Bugaboos) then continue on until you find some stairs to the southwest. Ascend until you spot Tifa, who is futilely fending off a never-ending swarm of Bugaboos. Ascend some more stairs to the southwest and follow the catwalks until they terminate, turn northeast and shoot another mechanical arm until it drops its payload, destroying the Bugaboo nest in the process. Backtrack down the stairs to the fork and head downstairs (northwest), following the linear path ahead to reunite with Tifa, a matter only complicated by the remnants of the Bugaboo nest - this is merely a formality, however.
Follow a walkway and some stairs to the northeast and you’ll spot three fans you can destroy. First, smash some Shinra Boxes to the southwest, then turn your attention to the fans. If you destroy the southwestern-most one you can reach a caged-in area with a chest containing an Ether, while if you destroy the northeastern fan you can reach a separate caged-in area housing some more Shinra Boxes. Destroy the central fan and you’ll encounter two more Bloodhounds. Defeat them, then note two cells to the northwest. Shoot the door off the northeastern one to score an orb of Ice Materia, then pop open the southwestern door to find more Shinra Boxes and a chest containing a Turbo Ether. Head up some stairs to the southwest to find… more cells! You can only blast your way into the first one, and you should definitely do so, as you can smash some more Shinra Boxes and score another orb of Warding Materia inside. Do so, then continue following the walkway between the cells to reach another ladder.
Up on the platform the ladder leads to you’ll encounter two old foes, two Monodrives and a Cutter. The first two foes are weak enough to be defeated by normal attacks, while the Cutter is weak to lightning, and its saw blade arms can be destroyed to “Pressure” it. Destroy them, then descend a ladder to the northeast and make your way northeast to reach a platform occupied by a Bloodhound and two Varghidpolis enemies. All of them are weak to ice, so Blizzard + Magnify is a great way to start things out.
Dispatch these pests and continue along various staircases and across platforms until you reach a larger platform occupied by a veritable swarm of Bugaboos. Their numbers don’t make them any more dangerous. Kill them, then climb yet another flight of stairs to the northeast to find yourself in a room with a rest bench and a vending machine. Buy the 14. Main Theme of FFVII Music Disc and the assorted discounted restoratives - 3x Mega-Potions (300G), 2x Ethers (100G) and 2x Phoenix Downs (100G) - rest up, then see to your gear.
Once again, a rest bench and a vending machine (especially one with discounted items) is the prelude to a boss battle. You’re really going to want to have Shiva equipped on somebody, along with Ice + Elemental and Ice + Magnify. Resistance to poison will also help, but it’s not vital. Chakra is useful for getting rid of poison and for some light-to-moderate healing in a pinch, as is Prayer. Both of these should be seen as supplemental to Healing Materia, however. You can also equip some Steal materia to nab an orb of Poison Materia from the upcoming boss, but this is a really dubious gain.
Boss: Failed Experiment
| Enemy | Weaknesses | Notable Loot |
|---|---|---|
| Failed Experiment | Ice | Poison Materia (Steal) / Mythril Claws (drop) |
Phase 1
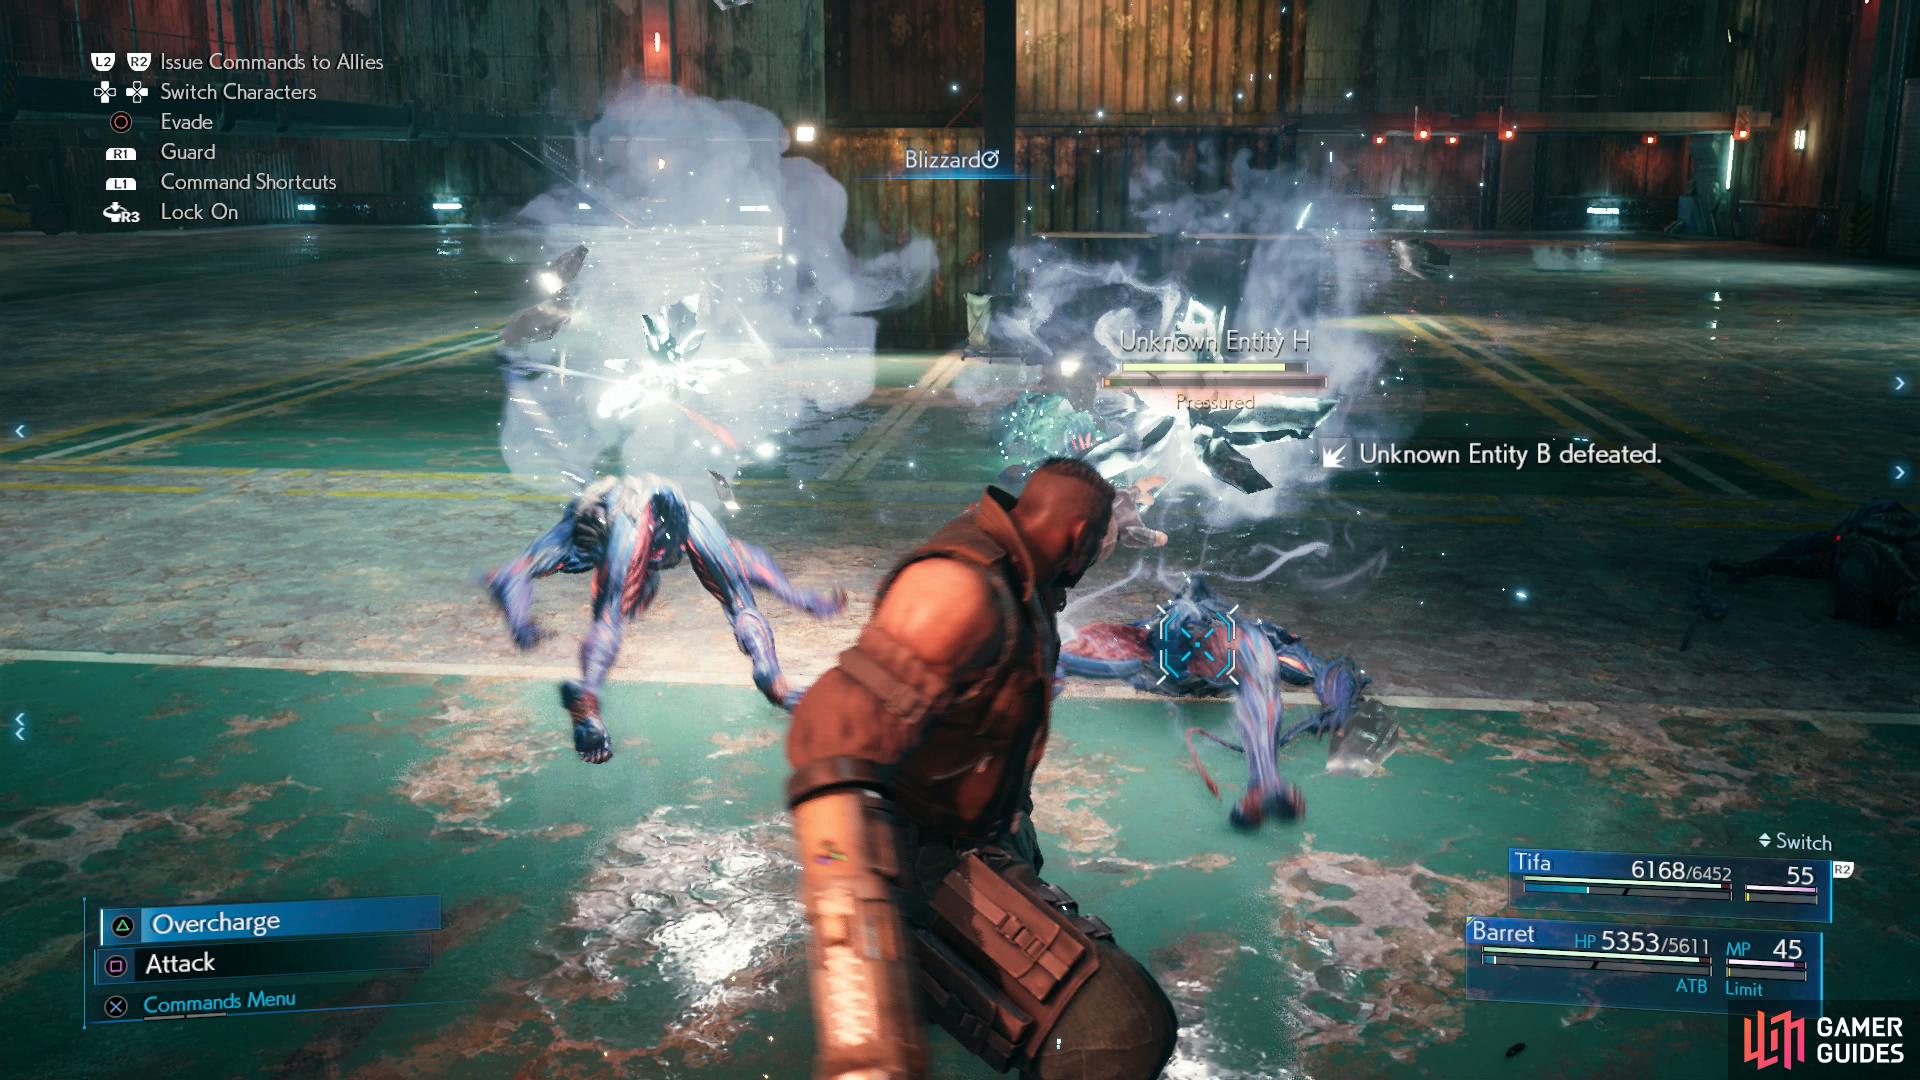
When you’re ready, continue through a doorway to the northeast. Watch the scene that follows and you’ll find yourself in a fight with another new foe - the Unknown Entity. They’re not terribly powerful or sturdy, and they can be “Pressured” by attacking from behind, but since they’re numerous and they’re weak to ice, Blizzard + Magnify is once again the way to go. Don’t expend too much MP, however - the battle’s just getting started. Honestly Tifa armed with Ice + Elemental can probably just punch all of them to death, using her ATB to charge her ki and heal (via Prayer) as needed.
Once the first wave is done, another will appear, followed by a third, both of which includes ranged attackers. Defeat the first two waves, but ignore the third - you just want to make your way up some stairs, triggering a scene - and the arrival of the real boss, the Failed Experiment.
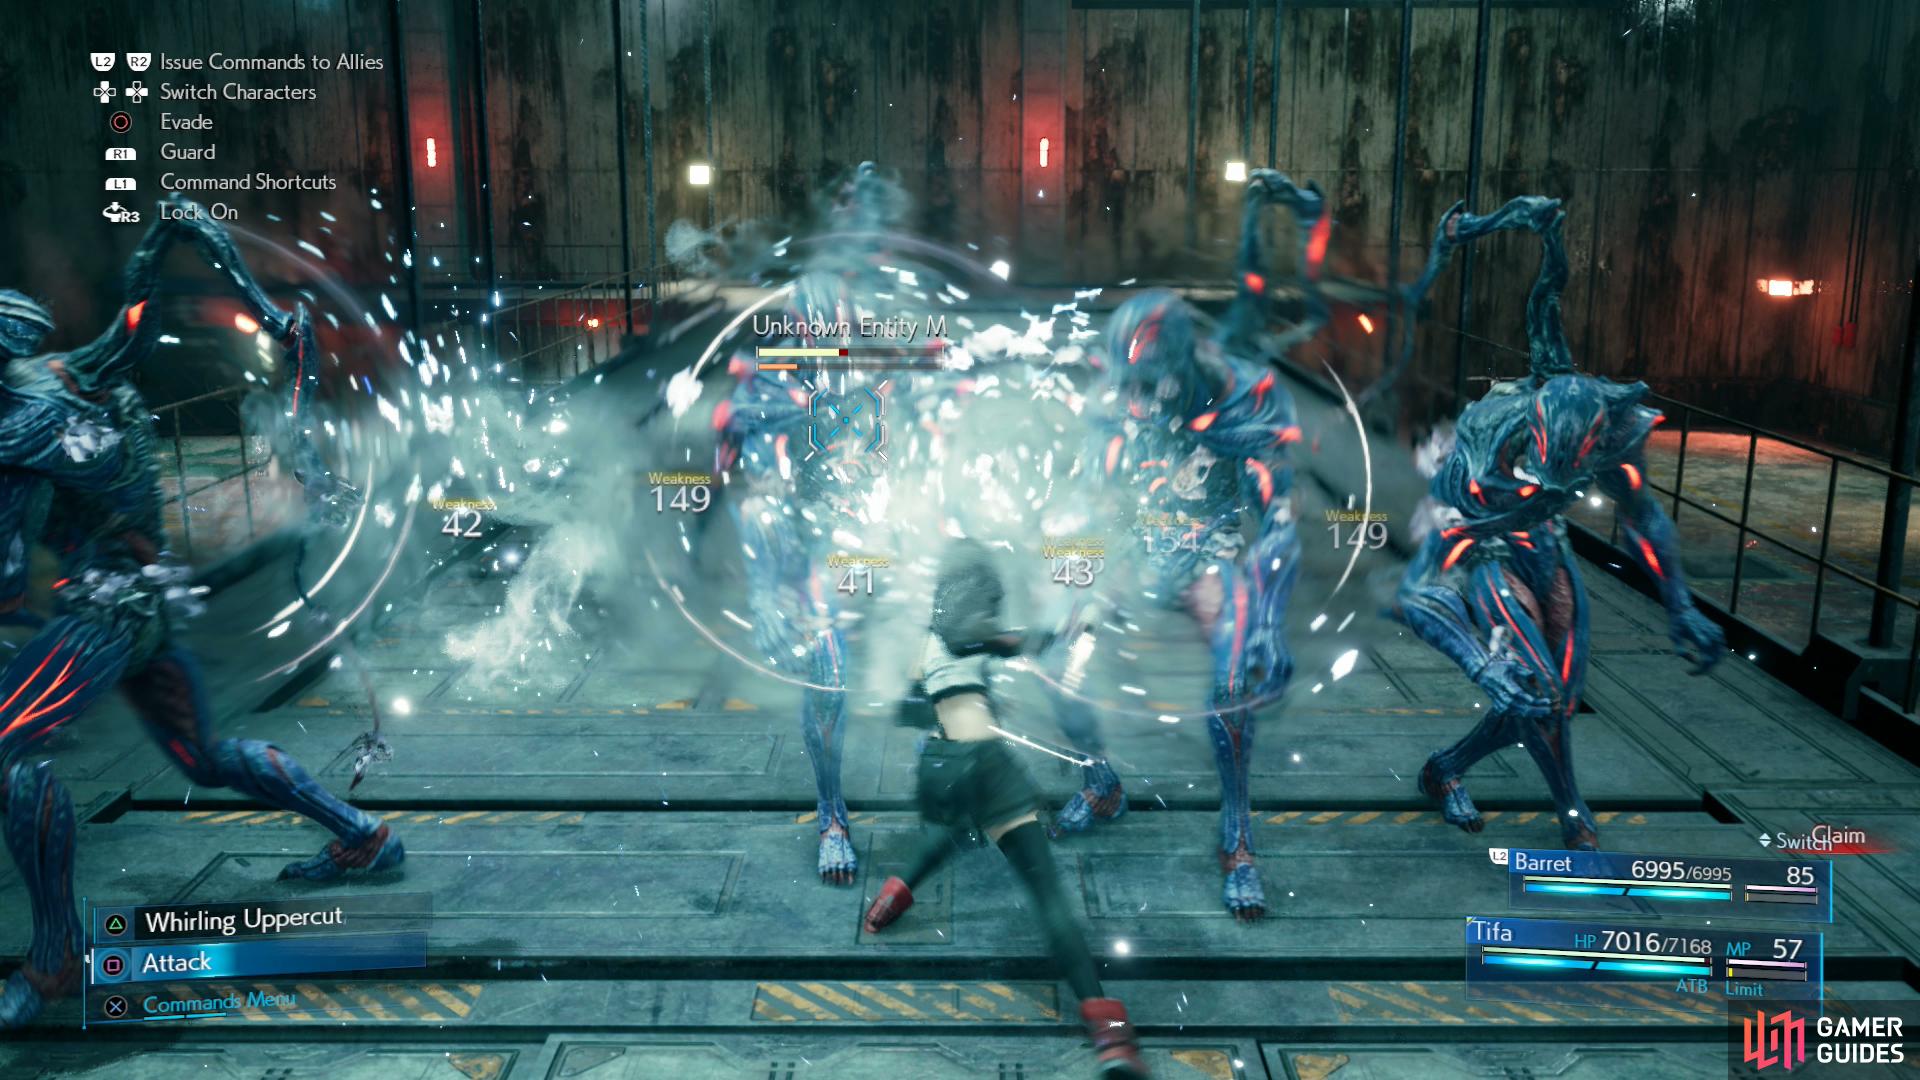
(1 of 3) You can use the Unknown Entities to charge your ATB, but they’re really just distractions.
Phase 2
This boss seems more complicated than it really is… at least outside of hard difficulty. But that’s a struggle for another part of the guide. Right now your party is split, with Barret being on the floor and Tifa on the walkway. Tifa’s rather limited, although you can use her to try and steal an orb of Poison Materia from the boss, if you wish - now is as good a time as any to bother.
When you’re ready to get serious about defeating the boss, switch to Barret and target it’s Appendage. Destroy with ranged attacks (Blizzard is, as always, finicky) and when you do the Failed Experiment will become “Pressured”, kneeling down and taking no action for quite a long while. Hit it with “Focused” abilities to drive up its Stagger gauge - you probably won’t be able to accomplish too much here, as Tifa is fairly limited in how she can fight, but any damage/stagger you can inflict now will help out later.
The Failed Experiment will use a few attacks here, including “Fling” and “Demolish”, the former uses any nearby Unknown Entities as projectiles while the latter destroys a section of walkway. Eventually the Failed Experiment will work through enough of the walkway to compel Tifa to jump down to the floor with Barret.

The Failed Experiment will use its minions as projectiles,
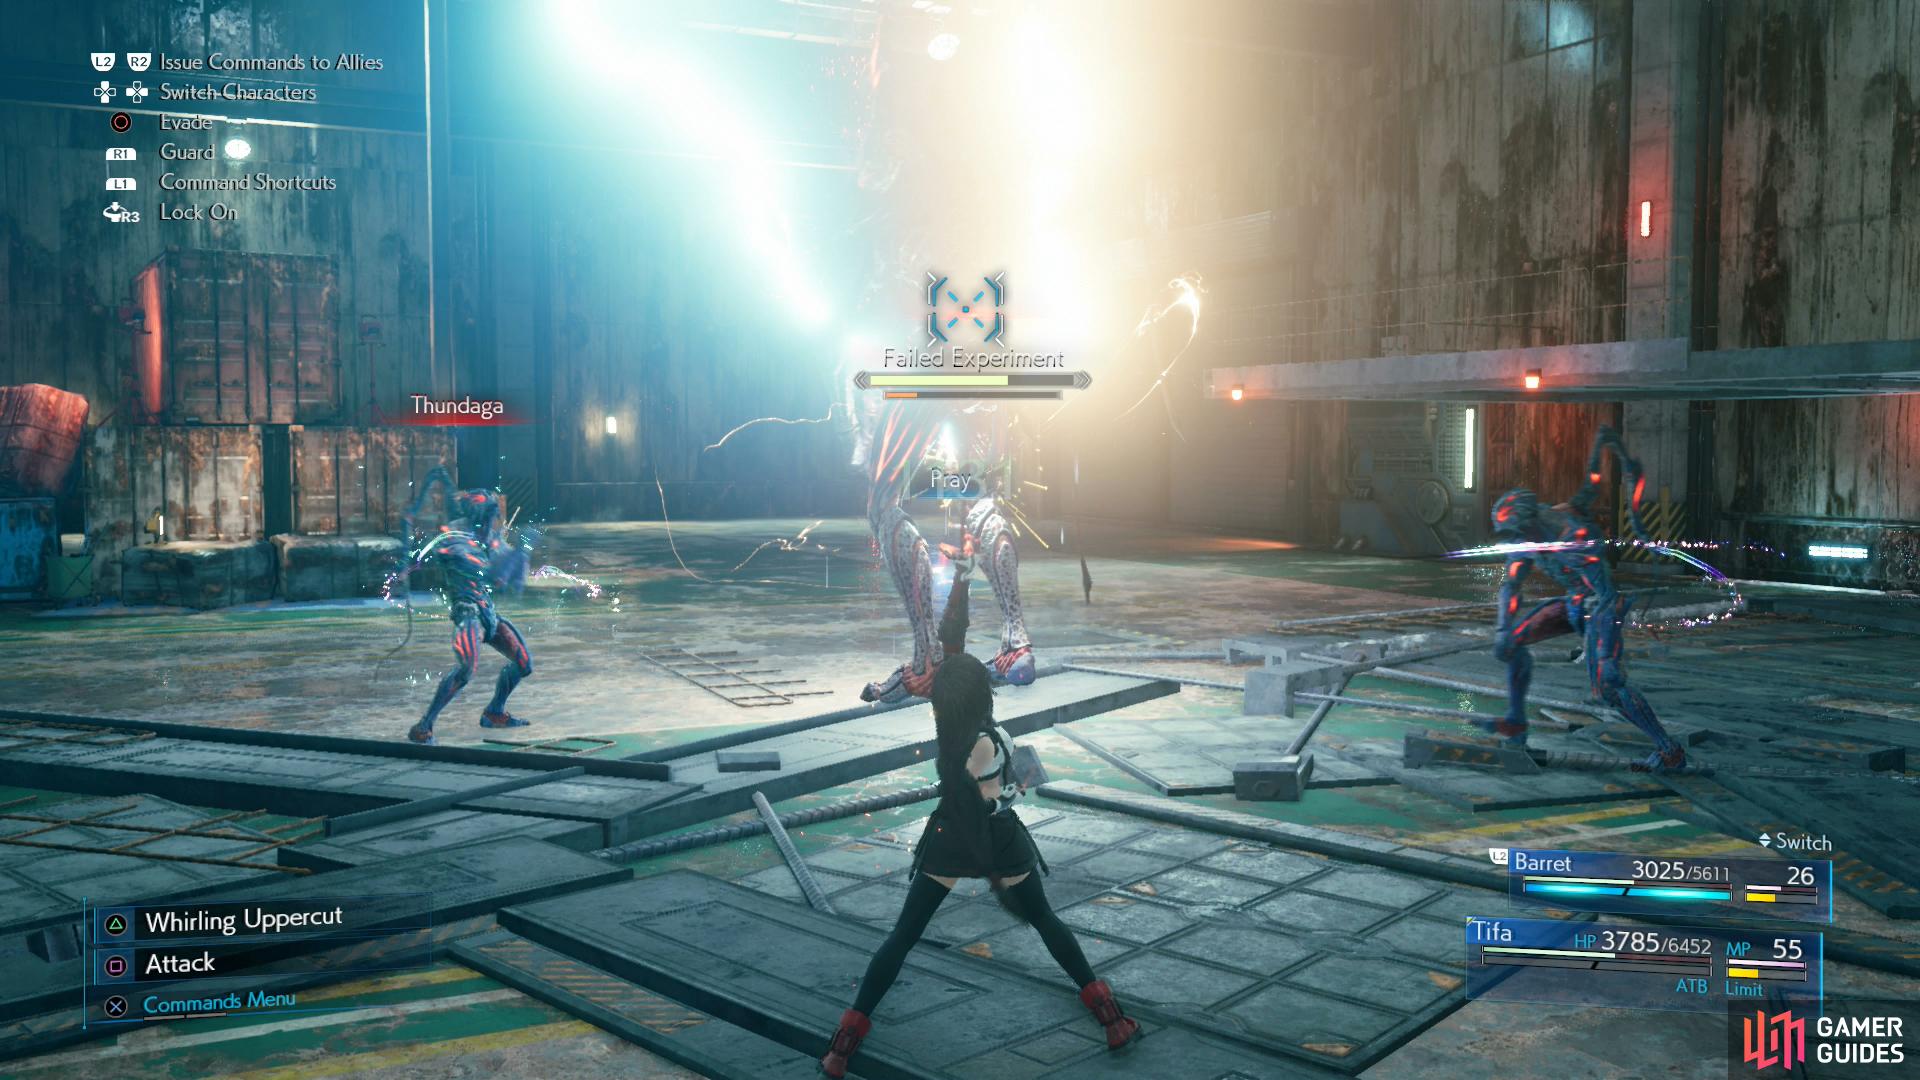
and to charge itself via Thundaga.
Phase 3
Now the battle begins in earnest. The Failed Experiment is now free to use its full range of attacks, but on the other hand, so are you. First, note that there will likely be a horde of Unknown Entities near the Failed Experiment when this phase starts - thin the herd with Blizzard + Magnify. Unknown Entities aren’t too troublesome and are actually useful for charging ATB, but they can get in the way of your attacks and they can be utilized by the Failed Experiment in a variety of ways, so you want to keep their numbers down.
Aside from the familiar “Fling” attack that utilizes Unknown Entities (the Failed Experiment can gather said living projectiles with the “claim” ability), the Unknown Entities can be provoked into charging up the Failed Experiment with Thundaga. In addition, the Failed Experiment can buff itself and the Unknown Entities with “Defensive Action” (bestows Shield to the Unknown Entities), “Reflective Action” (bestows Reflect) and “Voltaic Action”, the latter of which charges up the Failed Experiment. Should the Failed Experiment run low on Unknown Entities, it can summon more with “Rally”.
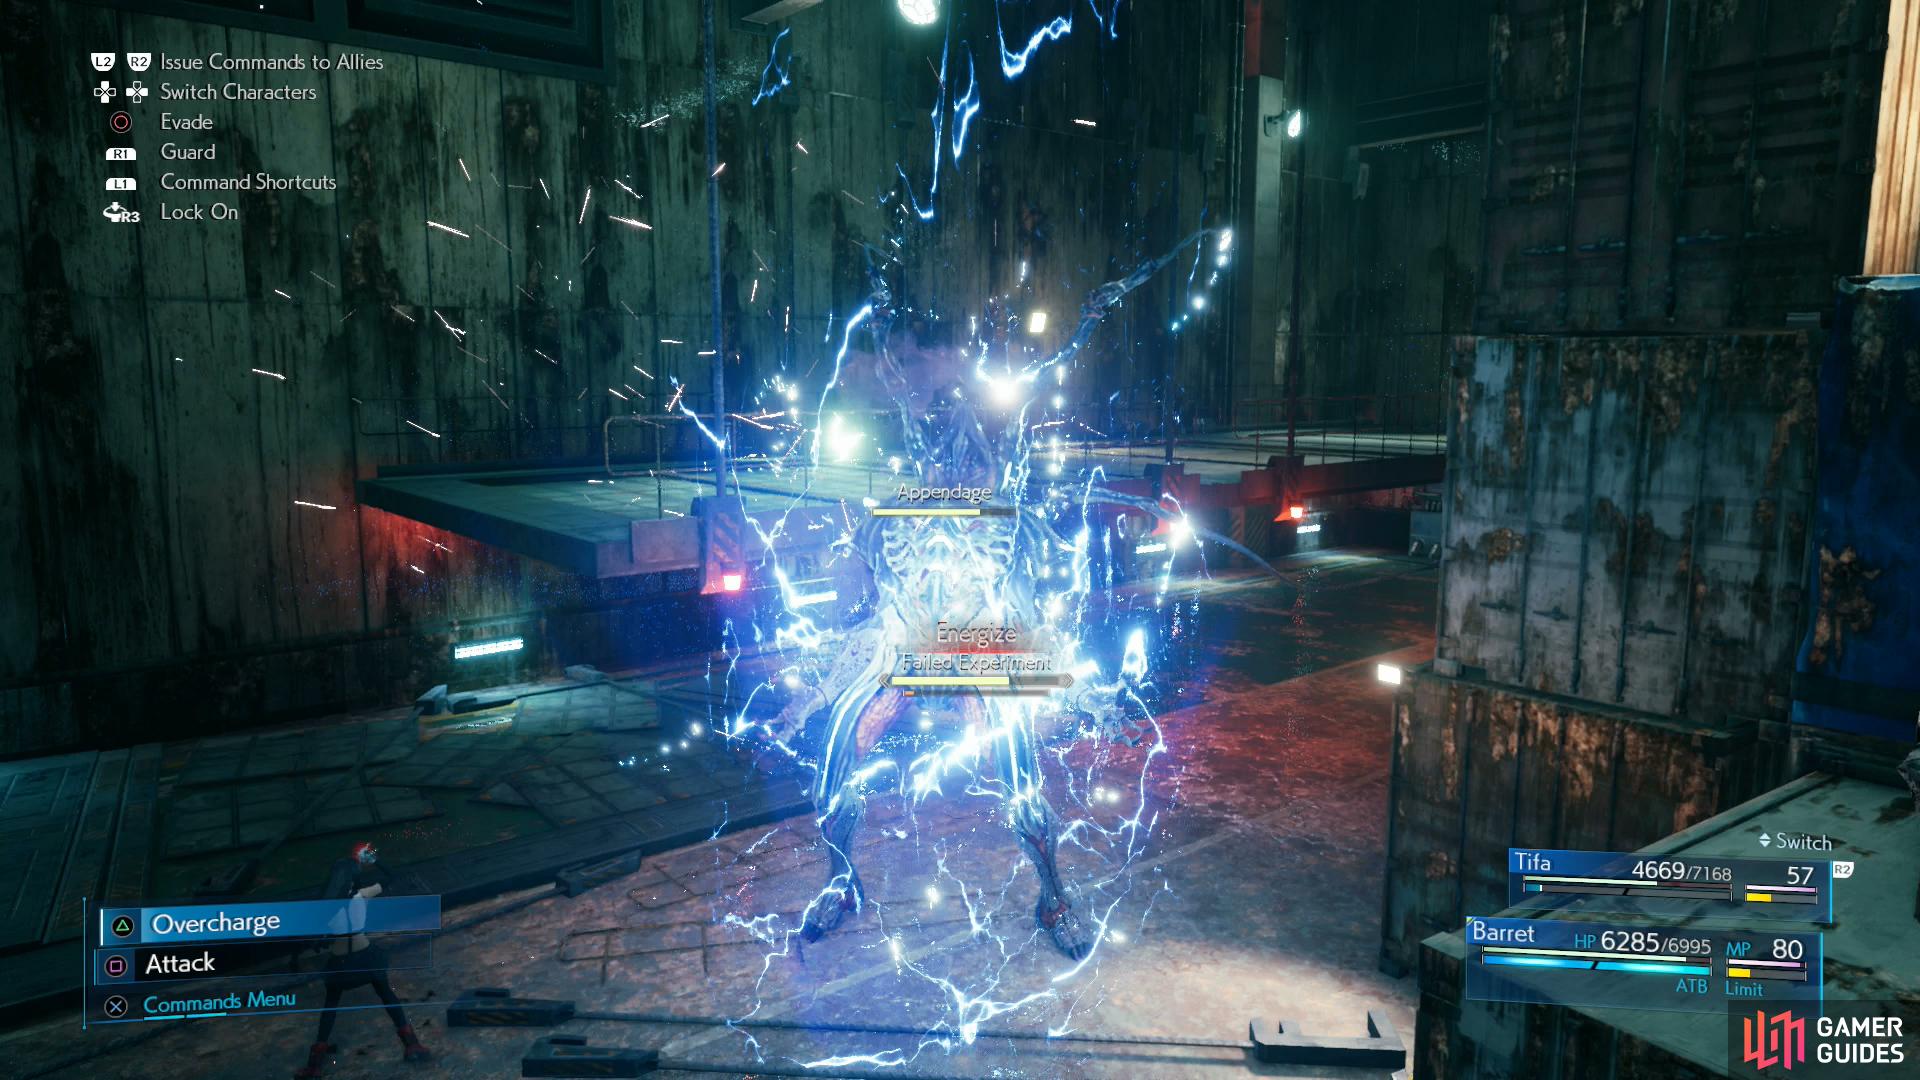
(1 of 4) Even without the use of its minions, the Failed Experiment can charge up with “Energize”.
The Failed Experiment can be charged up via the Unknown Entity/Thundaga combo (“Voltaic Action” seems to just provoke the Unknown Entities to cast Thundaga), but failing that it’ll also use “Energize to charge itself up. When charged up it’ll add lightning damage to some of its attacks and gain access to “Livewire” and “Plasma Discharge”. Its various attacks include:
-
Fury: The Failed Experiment will crouch down and flail its tentacles about, hitting all foes nearby.
-
Ground Slam: The Failed Experiment smashes the ground, dealing heavy (1,500~) damage in an area - sometimes it’ll perform a leap before using this attack.
-
Intimidate: An area-of-effect attack that stuns characters. Not harmful in itself, but it lasts more than long enough for a follow-up attack.
-
Livewire: Only when charged up, the Failed Experiment will create an electrical area-of-effect burst centered on itself.
-
Plasma Discharge: This well-advertised attack will cause the Failed Experiment to shoot orbs of plasma in multiple directions. When you see it coming, just hide behind some shipping containers.
-
Toxic Volley: The Failed Experiment will spew toxic globs that form a persistent mist where they land. If you’re poisoned, cure it with an Antidote, Poisona or Chakra… assuming you’re not outright immune or resistant thanks to Warding Materia or a Star Pendant.
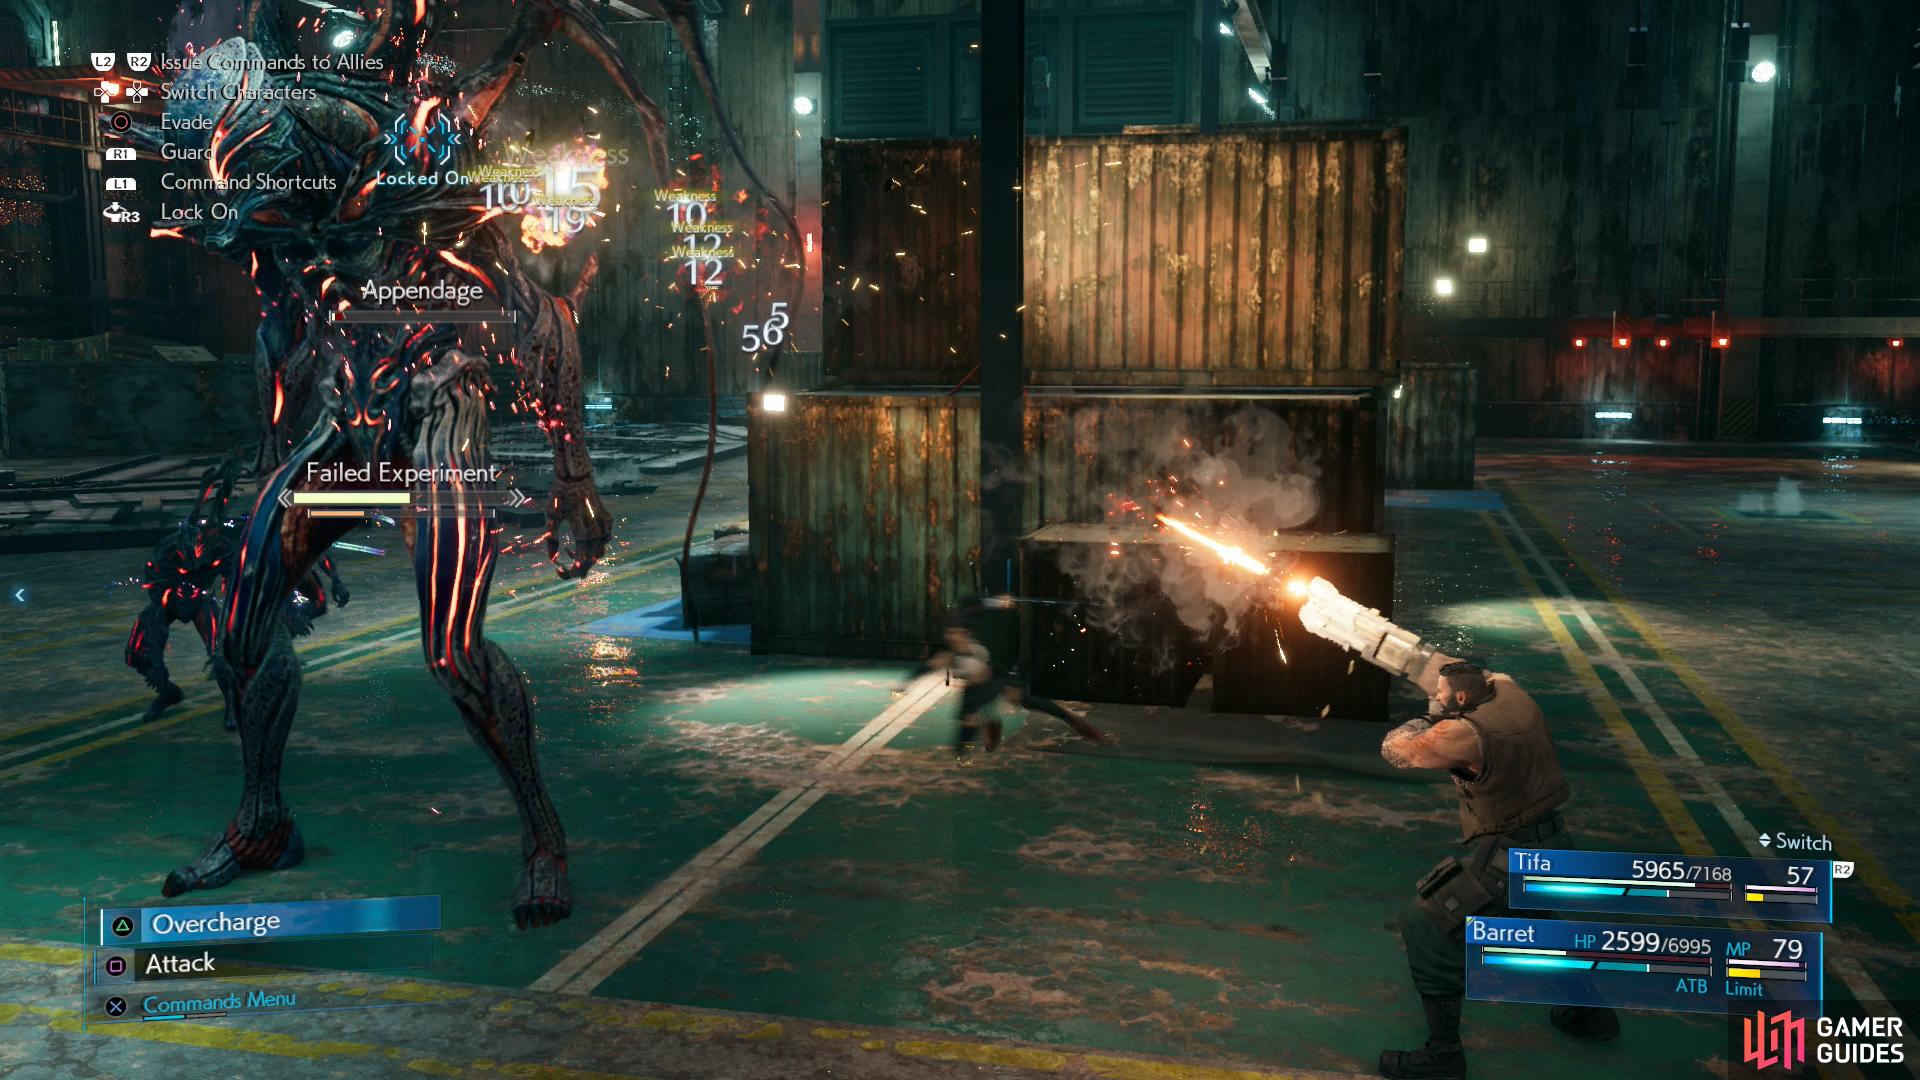
Tifa should be used to charge her ki, provide healing (via Pray or Healing Materia, depending on the necessity) and draw aggro, but otherwise the business of “Pressuring” the Failed Experiment falls to Barret, who can more easily target its back Appendage. Shoot it until it’s destroyed (Overcharge deals significant damage) then switch back to Tifa and pummel the Failed Experiment with Focused Strike until your foe is Staggered. It’s Stagger period, as mentioned before, is quite long - almost certainly long enough for Tifa to hit the Failed Experiment with “Rise and Fall” and “Omnistrike”, recharge her ki, then hit those two attacks again. Doing so should deplete the Failed Experiment’s life bar considerably, and if it lives long enough to recover from being Staggered your summon gauge should be charging. Summon Shiva if necessary and finish the Failed Experiment off with “Heavenly Strike” or “Diamond Dust”.
Whether you stole the Poison Materia or not, you’ll gain the Mythril Claws weapon for Tifa at the end of this fight, which should be the last weapon you need to master to complete the Weapon Abilities Battle Intel Report.
After the fight, Cloud will arrive, fashionably late. Shoot a wall with Barret to make a gruesome discovery, after which you’ll wake up outside of the lab. Make your way northwest and a scene will occur, after which this chapter will end, awarding the Broken Dreams Trophy in the process.
No Comments