

It’s been quite a journey - especially if you weren’t expecting anything so complicated given the original game - but you’ve finally made it into Reactor 5.
Reach Mako Storage
| Enemy | Weaknesses | Notable Loot |
|---|---|---|
| Monodrive | Wind | -- |
| Slug-Ray | Lightning, Wind | Orb of Gravity |
| Sweeper | Lightning | -- |
| Laser Cannon | Lightning | -- |
Head west across a walkway then turn south and wait for Barret to complain. Tifa will spot a way down, so head over to her and the team will make their way into the depths of the reactor via an unconventional path. Happened in the original, though, so we’re glad to see it! It’s the little things, you know? Venture south around the base of the massive pipe you slid down, then turn east to find a chest containing 3x Hi-Potions. Continue south and you’ll find a disabled prototype mech that draws some speculation from Barret. Hopefully we won’t have to fight that? Thanks for the jinx, Barret!
Continue south through two doors, kill several Monodrives in the room beyond (been a while since we’ve seen these!), smash some Shinra Boxes on a balcony to the south, then turn east and descend a ladder. Once you reach a lower platform turn south and loot a chest to score 2x Echo Mists (cures the Silence status), then continue across a walkway to the southeast and south. Smash some Shinra Boxes, descend some stairs to the west and dispatch some Monodrive and Slug-Rays, then loot a chest to the north to score an Ether.
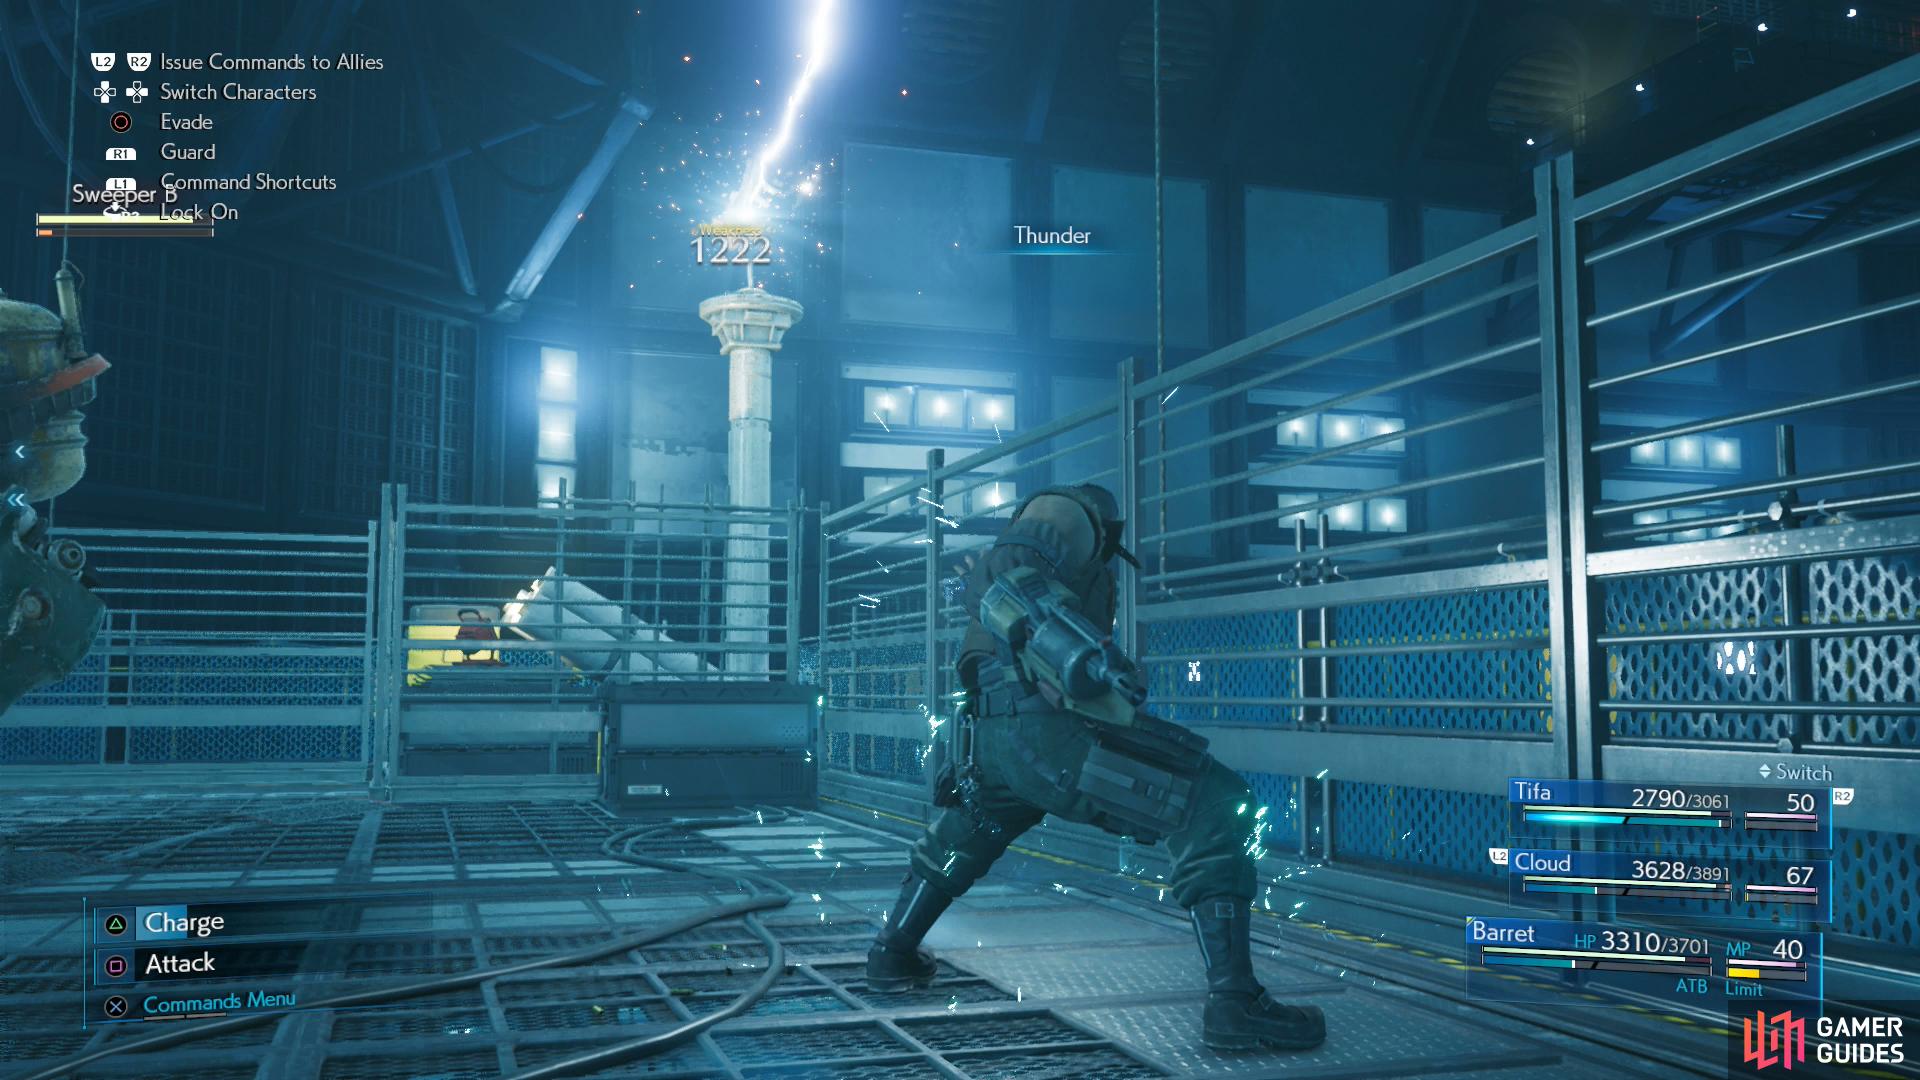
Take the Laser Cannons out with Thunder, or other ranged attacks,
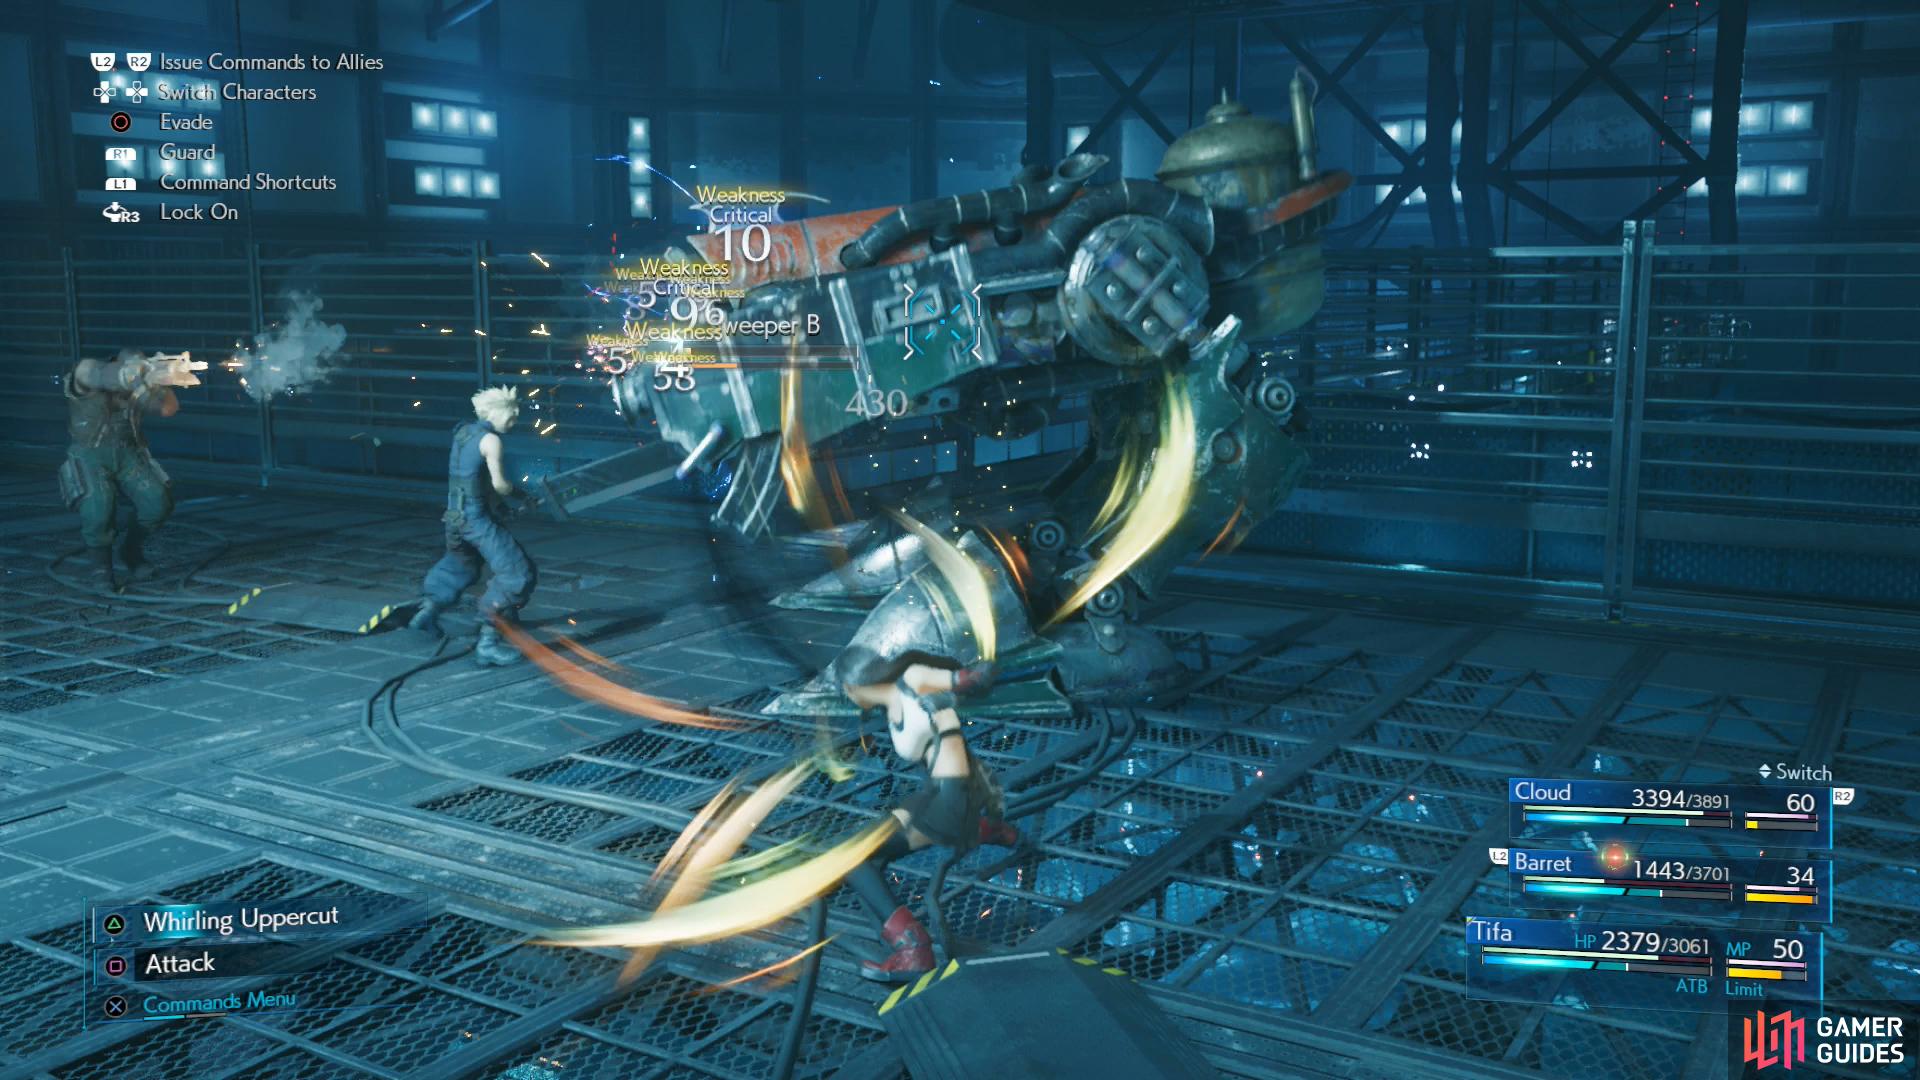
then focus on the Sweepers.
Another ladder beckons to the west, so descend it and continue west, and when you reach a “T” intersection you’ll be ambushed by two Sweepers and two Laser Cannons. The Laser Cannons are your typical turret, weak to lightning and only capable of being Staggered by spells. Take the Laser Cannons out quickly with Thunder spells, then focus on the Sweepers, which are harder to Stagger than previous ones were. Hit them with Thunder to leave them “Pressured” then Focused Thrust to build up the Stagger meter. Once the bots are beaten, smash some Shinra Boxes and climb down a ladder to the north.
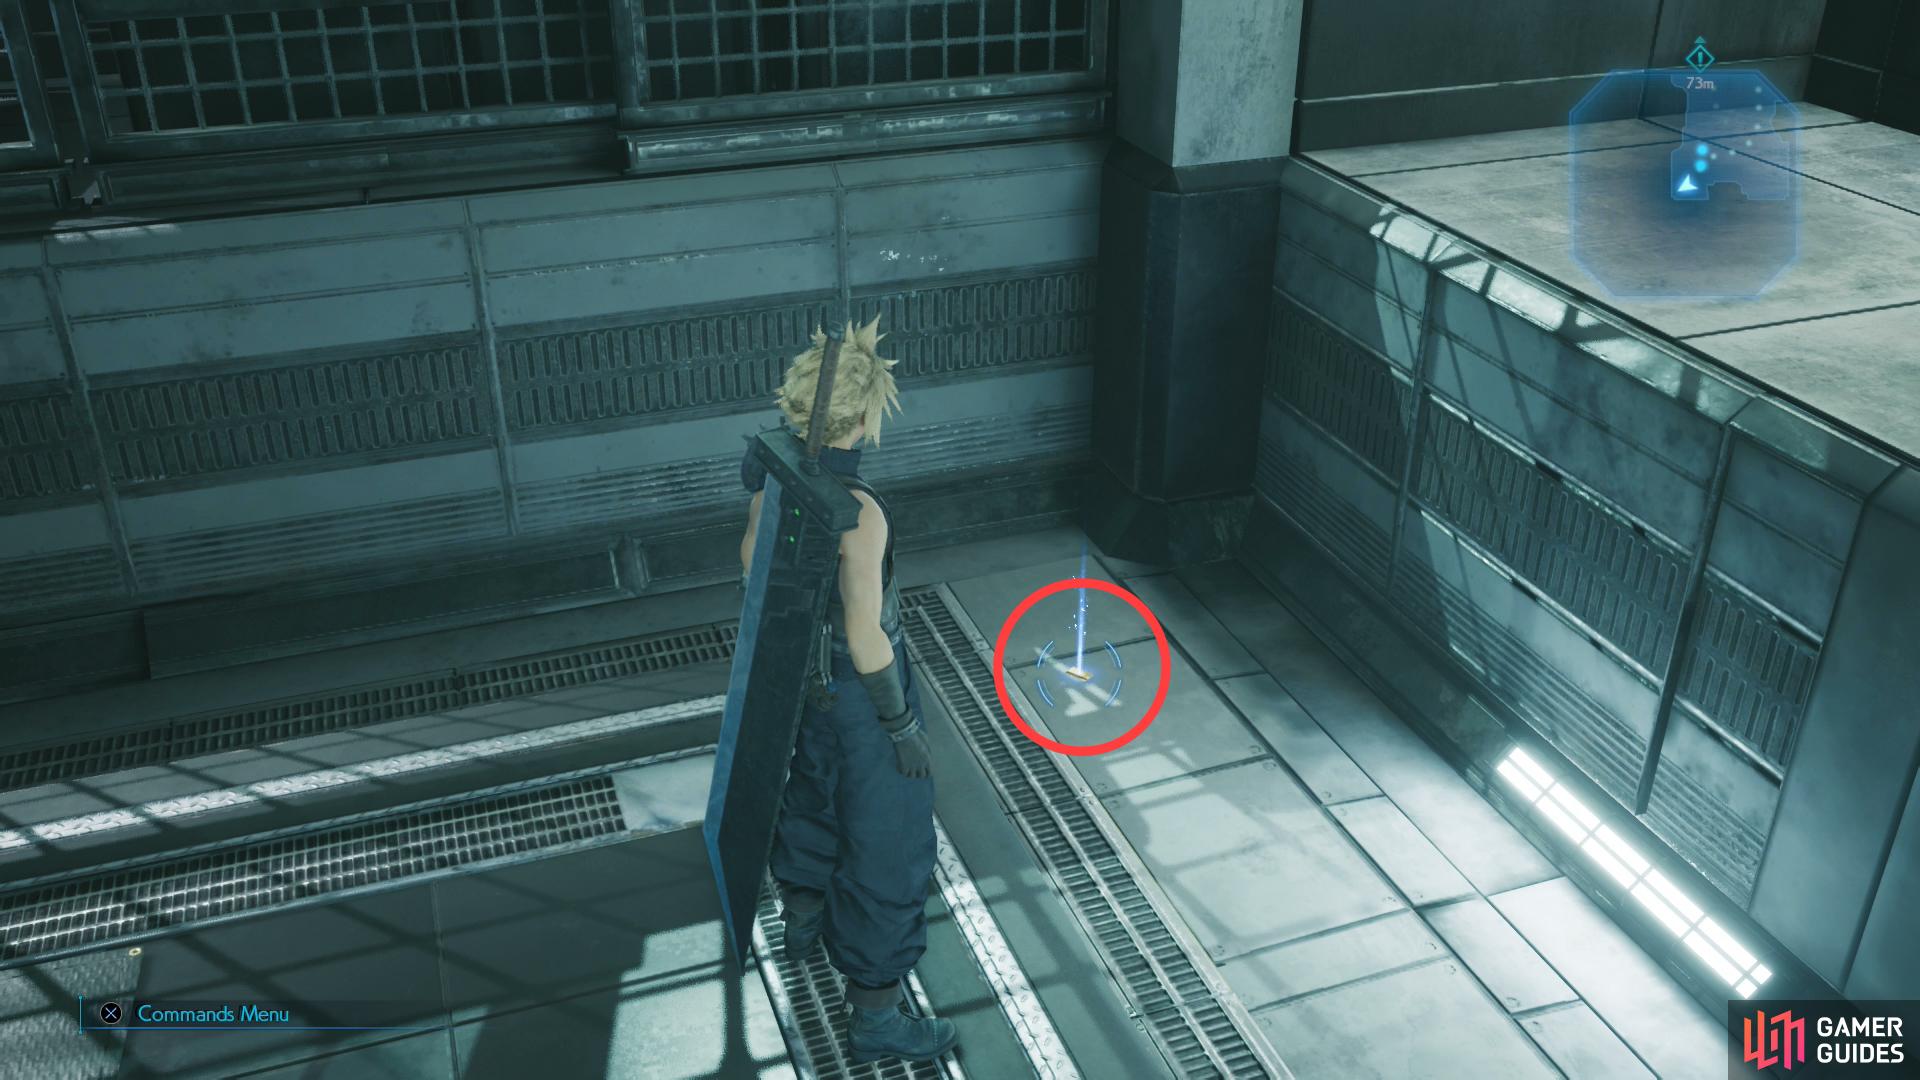
Follow the linear walkway ahead and when you see a ladder to the south, continue east to find a chest containing a Bulletproof Vest, a Defense-boosting accessory. Once it’s yours, climb down a ladder to reach the bottom of the reactor, then venture south to the reactor core. As you approach you’ll get a scene; plant the bomb, then retreat back north to the ladder for more scenes. Suffice to say, things are not going as planned… for you, anyway.
Sentenced to Death
| Enemy | Weaknesses | Notable Loot |
|---|---|---|
| Shock Trooper | Fire | -- |
| Elite Shock Trooper | Fire | -- |
| Security Officer | Fire | -- |
| Elite Security Officer | Fire | -- |
| Monodrive | Wind | -- |
| Laser Cannon | Lightning | -- |
| Elite Grenadier | Fire | -- |
| Riot Trooper | Fire | -- |
| Elite Riot Trooper | Fire | -- |
| Cutter | Lightning | -- |
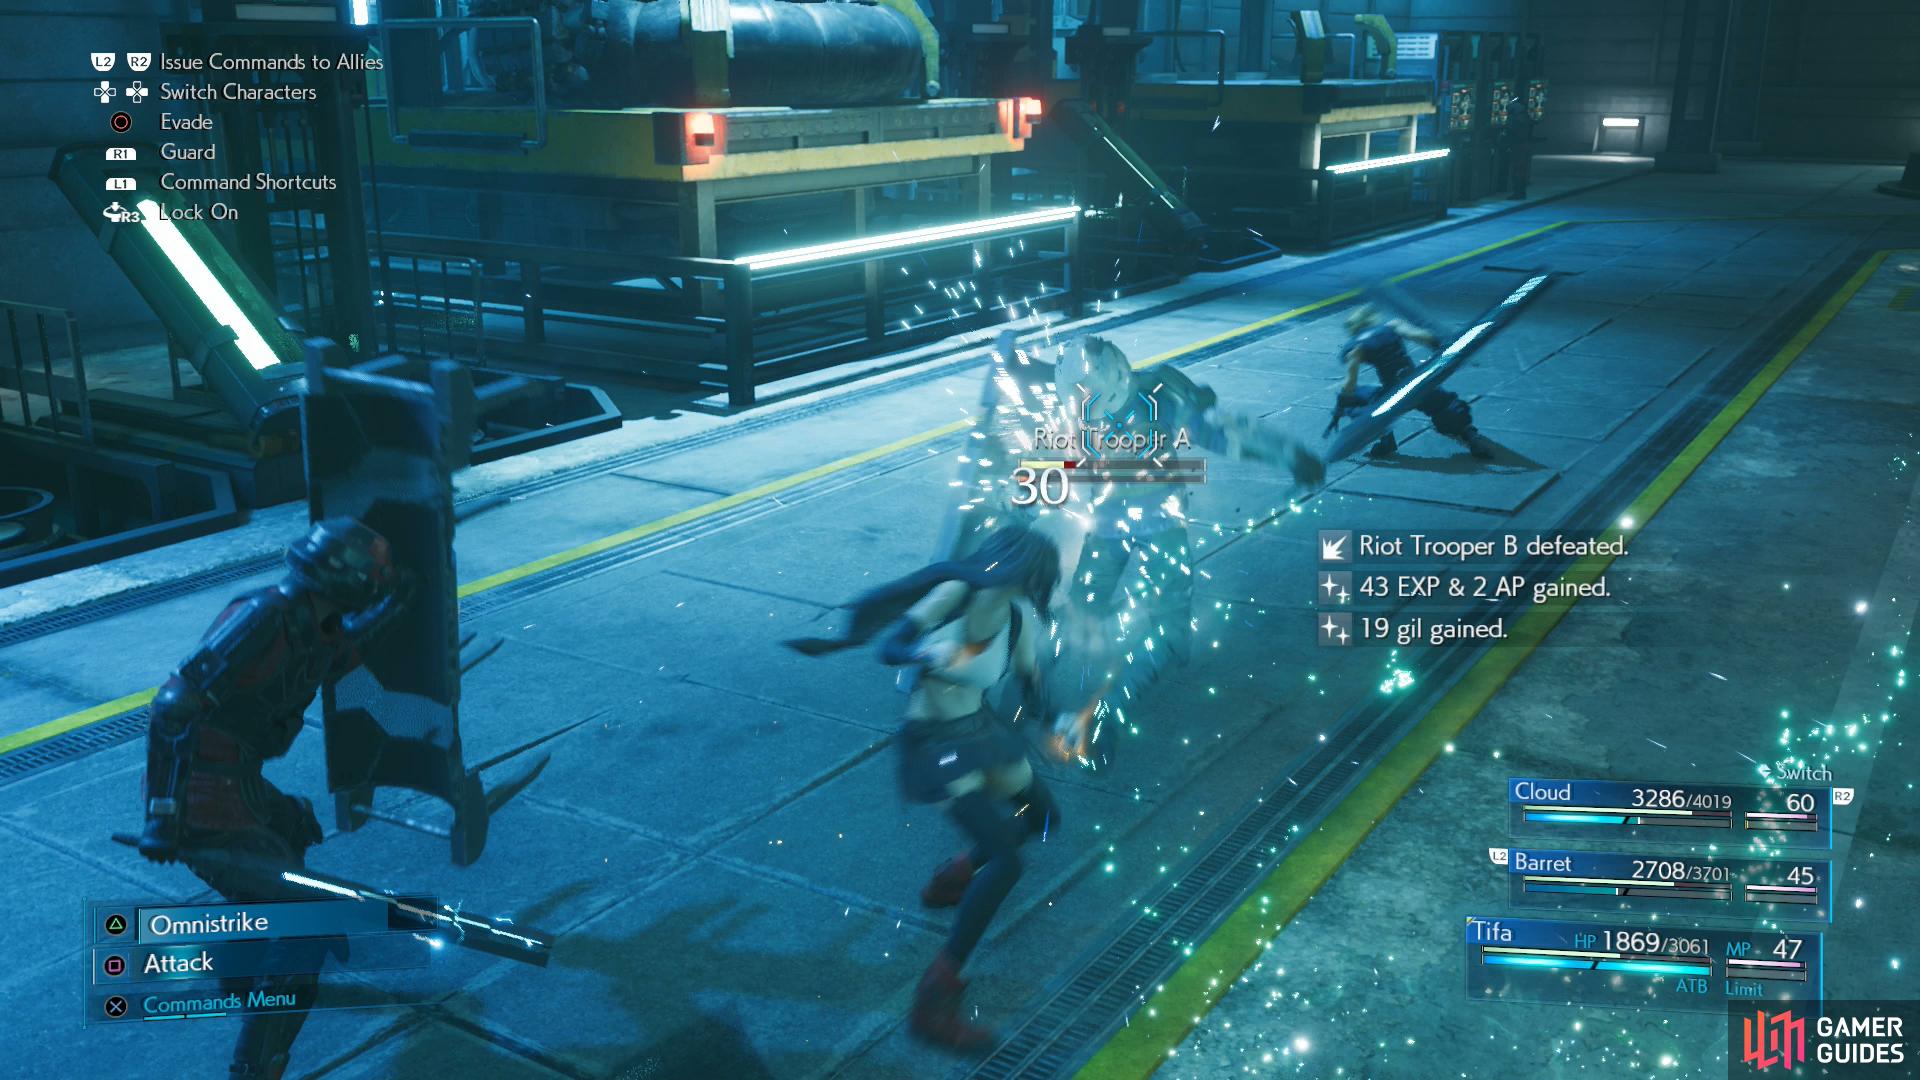
When you’re back in control you’ll have to fend off some Shock Troopers and an Elite Shock Trooper. Cloud’s Punisher mode is as effective here as it ever was, although the Elite Shock Trooper and playing with a full party both present some complications - it’s more difficult to get your foes to actually focus on Cloud. Compounding this is the fact that the Elite Shock Trooper comes with a ranged attack - “Pulse Shot”, which he’s more than happy to stand back and use if you insist on being stationary. That being the case, you’ll need to be more aggressive with Cloud. Dodge-roll up to enemies, give them a few love-taps to remind them who to aggro, then switch to Punisher mode. Failing Cloud’s Punisher mode, all the Shock Troopers - elite or otherwise - are weak to fire.

B8 Facilities
Defeat the foes and Barret will decide to take these lemons and make some lemonade. If Shinra wants propaganda, he’ll give it to them - starting by smashing up their pretty robot upstairs. Continue through a pair of doors to the north, smash some Shinra Boxes, then go through another set of doors to reach a room where some Security Officers (led by several Elite Security Officers) were prepping the robot - Air Buster. The limited space makes this place great for the improved damage and ferocity of Punisher Mode, so roll into the midst of your foes and unleash Cloud.
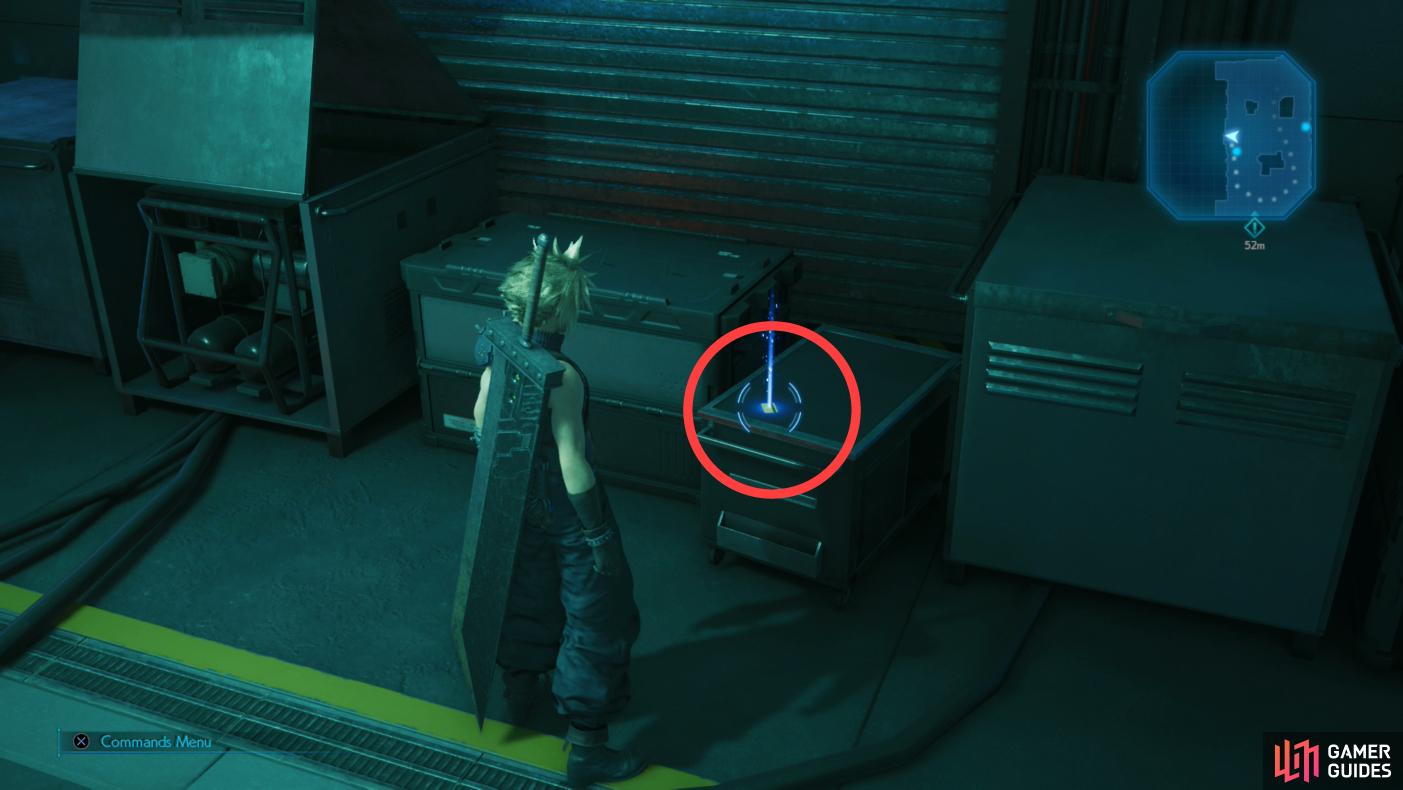
When the Shinra troopers are all defeated, follow Tifa to some monitors to the north to get a glimpse of your future foe. Follow Barret south to another, smaller console, after which you’ll need to search for a keycard. Your companions won’t be much help here, so head to the western side of the room to find a Sector 5 Reactor Keycard on a table, then return east to Barret’s console.
Here you’ll be introduced to the objectives that’ll be taking most of your attention throughout the rest of the chapter. As you proceed through the reactor you’ll find multiple rooms like this one, each with different consoles controlling the fate of various components for Air Buster. Of course, each console will require a keycard - the more keycards you find, the more components you discard, the easier the fight with Airbuster will be. There might not be enough keycards for everything, though, so you’ll have to choose which components to dispose of. That’s the overview, but unfortunately the “choice” part doesn’t come until later, as right now you don’t have a choice. Use the console and discard the “M-Unit”, (you can’t proceed until you do so) then head to the northern end of the room and use the console to open the door.
B7 Facilities
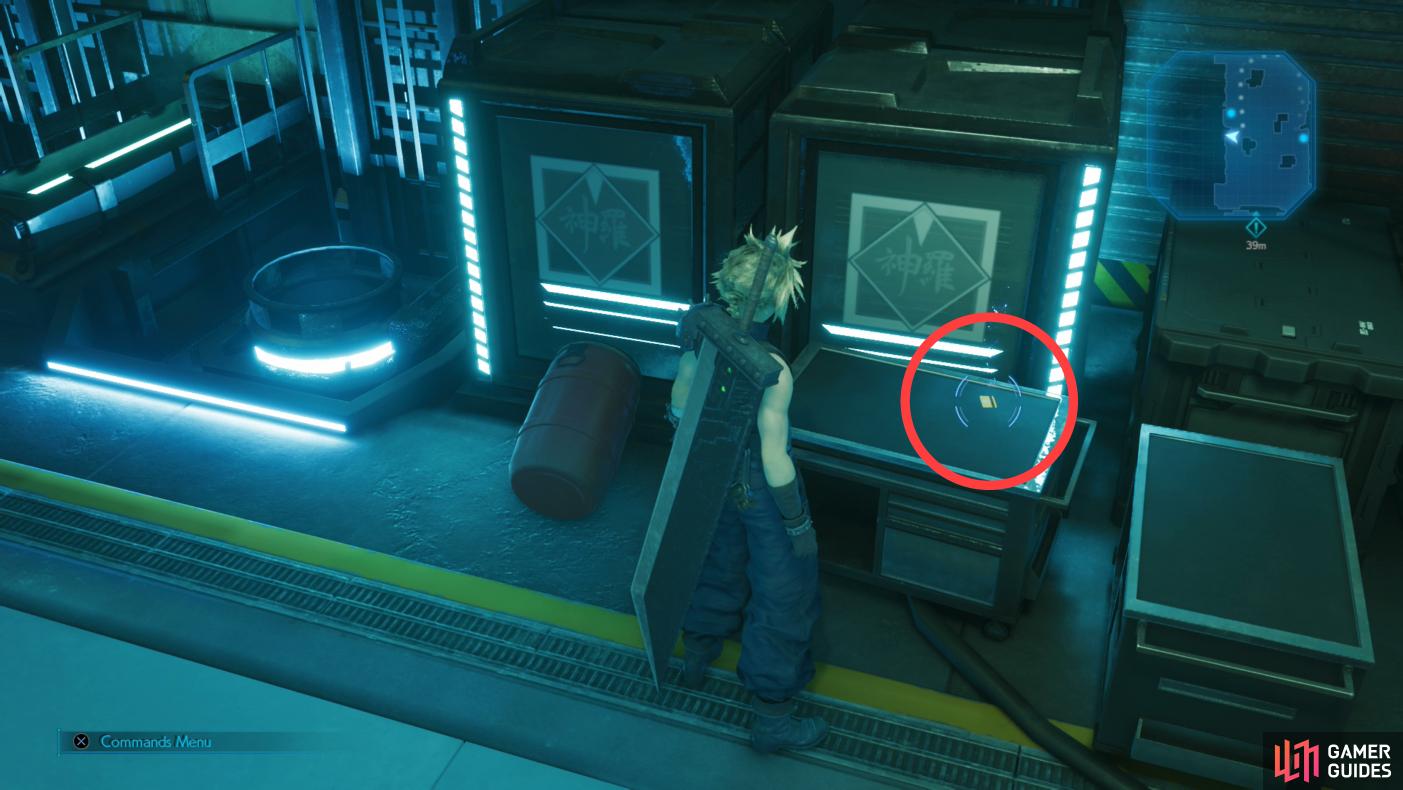
Continue north until you reach a room occupied by two Monodrives and two Laser Cannons - this time you don’t need to use Barret to hit the Laser Cannons, so that’s novel. Dispatch the bots, then head up another tunnel to the south. Go through a doorway to reach another room occupied by Security Officers and Elite Grenadiers. Dispose of the rabble, then search the room for loot. This time there are two consoles and only one keycard, meaning you’ve got a choice to make. First, search the western side of the room to find another Sector 5 Reactor Keycard on a table, then smash some Shinra Boxes in the northwestern corner of the room to find a poorly hidden orb of Lightning Materia. The meaning of this bit of materia should be fairly unambiguous - they gave it to you because you’ll need it.
Grab the aforementioned loot, then look at each console. The eastern one - near Barret - governs the supply of “Big Bombers”, a type of munition that Air Buster comes equipped with, while the western one - near Tifa - supplies “AI Programming Cores”, which governs the use of Airbuster’s “fingerbeams” attack. Big Bombers deal more damage, fingerbeam lasers can stun, but frankly, Airbuster has more dangerous attacks than either of the aforementioned ones, so don’t expect the outcome of the fight to swing much on either of these choices. There’s more to consider, however - each Big Bomber or AI Programming Core you divert will potentially allow you to claim said item yourself later on, with Big Bombers being single-use items that deal decent damage and AI Programming Cores selling for 500 Gil. At this point in the game, we rather favored the latter, and thus opted to disable an AI Programming Core.
Make your choice, use the console near the southern door, then exit the room. As you do, Barret will muse about plundering the discarded components, before trying to use the free air time Shinra is providing to spew some of his own propaganda. Does he not know that “live” television is usually aired at a slight delay so such material can be intercepted? Silly guy.
Pick up a third keycard in the hallways,
then continue to the B6 Facility room to find a fourth keycard.
B6 Facilities
Head up a tunnel to the south and when you reach a small chamber defeat an Elite Shock Trooper and two more Laser Cannons, search the southwestern corner of the chamber for a spare Sector 5 Reactor Keycard, then head up another tunnel to the north.
Go through another set of doors to reach the B6 Facility room, where a gaggle of Elite Security Officers await. Put them down, search a table to the west for another Sector 5 Reactor Keycard, then examine the consoles near Barret and Tifa for your choices: near Tifa is another AI Programming Core, while near Barret is a console for an M-Unit (north) and a Big Bomber (south) round. Pick a console to dispose of one and save the spare keycard for later - you’ll get more options later, so just expend what keycards you need to progress and hold onto any excess ones.
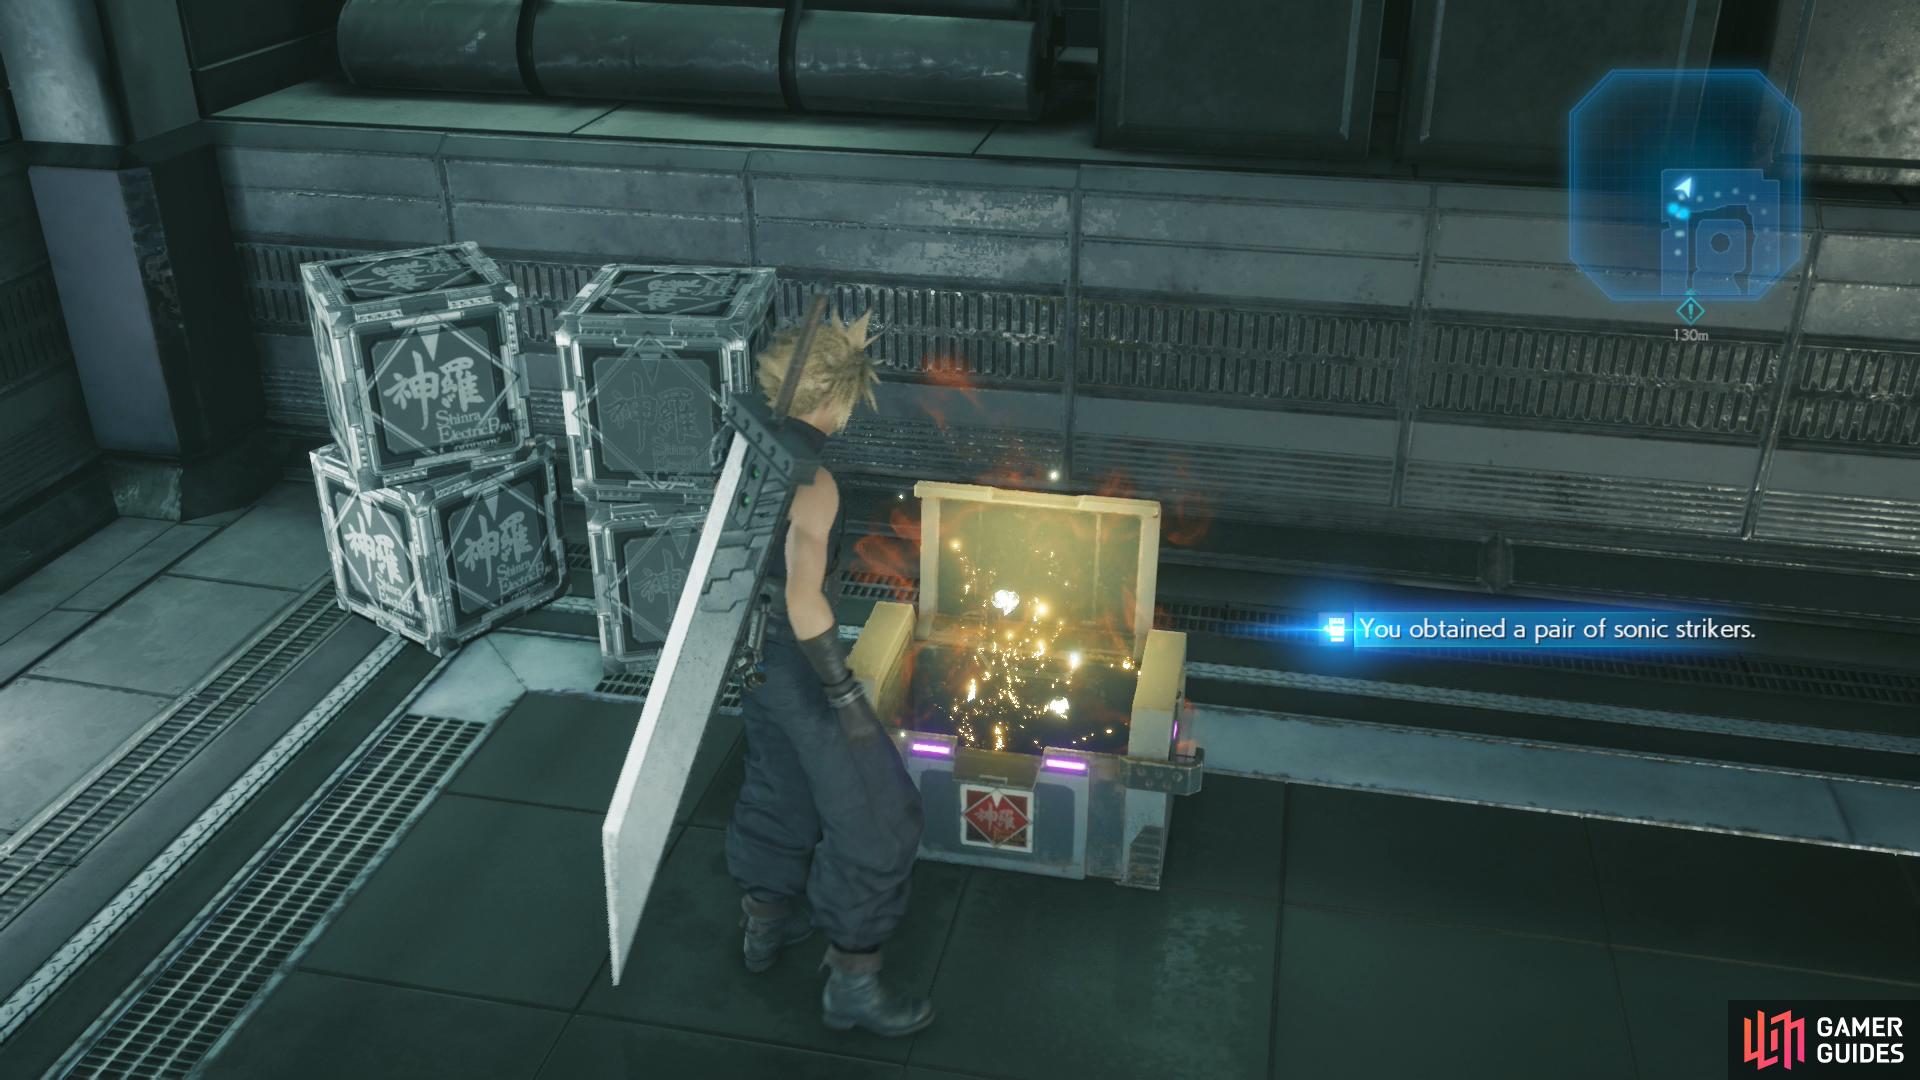
Use a console to the north to open the door, then after some chatter continue out into another hallway. In the curiously vacant chamber at the top of the ramp, search the northwestern corner to find a chest and some Shinra Boxes, the former of which contains Sonic Strikers, a new weapon for Tifa. Lucky girl. Starting with four materia slots and improving her ability to inflict Stagger, these are awfully tempting weapons to put on Tifa’s hands.
B5 Facilities
Continue up a ramp to the south, enter the B5 Facility room, defeat some Elite Security Officers and Elite Grenadiers, then search the northwestern corner of the room for a Sector 5 Reactor Keycard and a table to the east for another Sector 5 Reactor Keycard. Two new keycards, four new terminals. Your choices this time are another M-Unit, a Big Bomber shell (near Barret) and two AI Programming Cores (near Tifa). Discard one, then continue south to find a console that controls the door. Getting close to the end, and you should have two keycards to spare. Now is the time to use them, as you shortly will lose the ability to do so, and the number of consoles in this room should allow you to dispose of whatever items you wish.
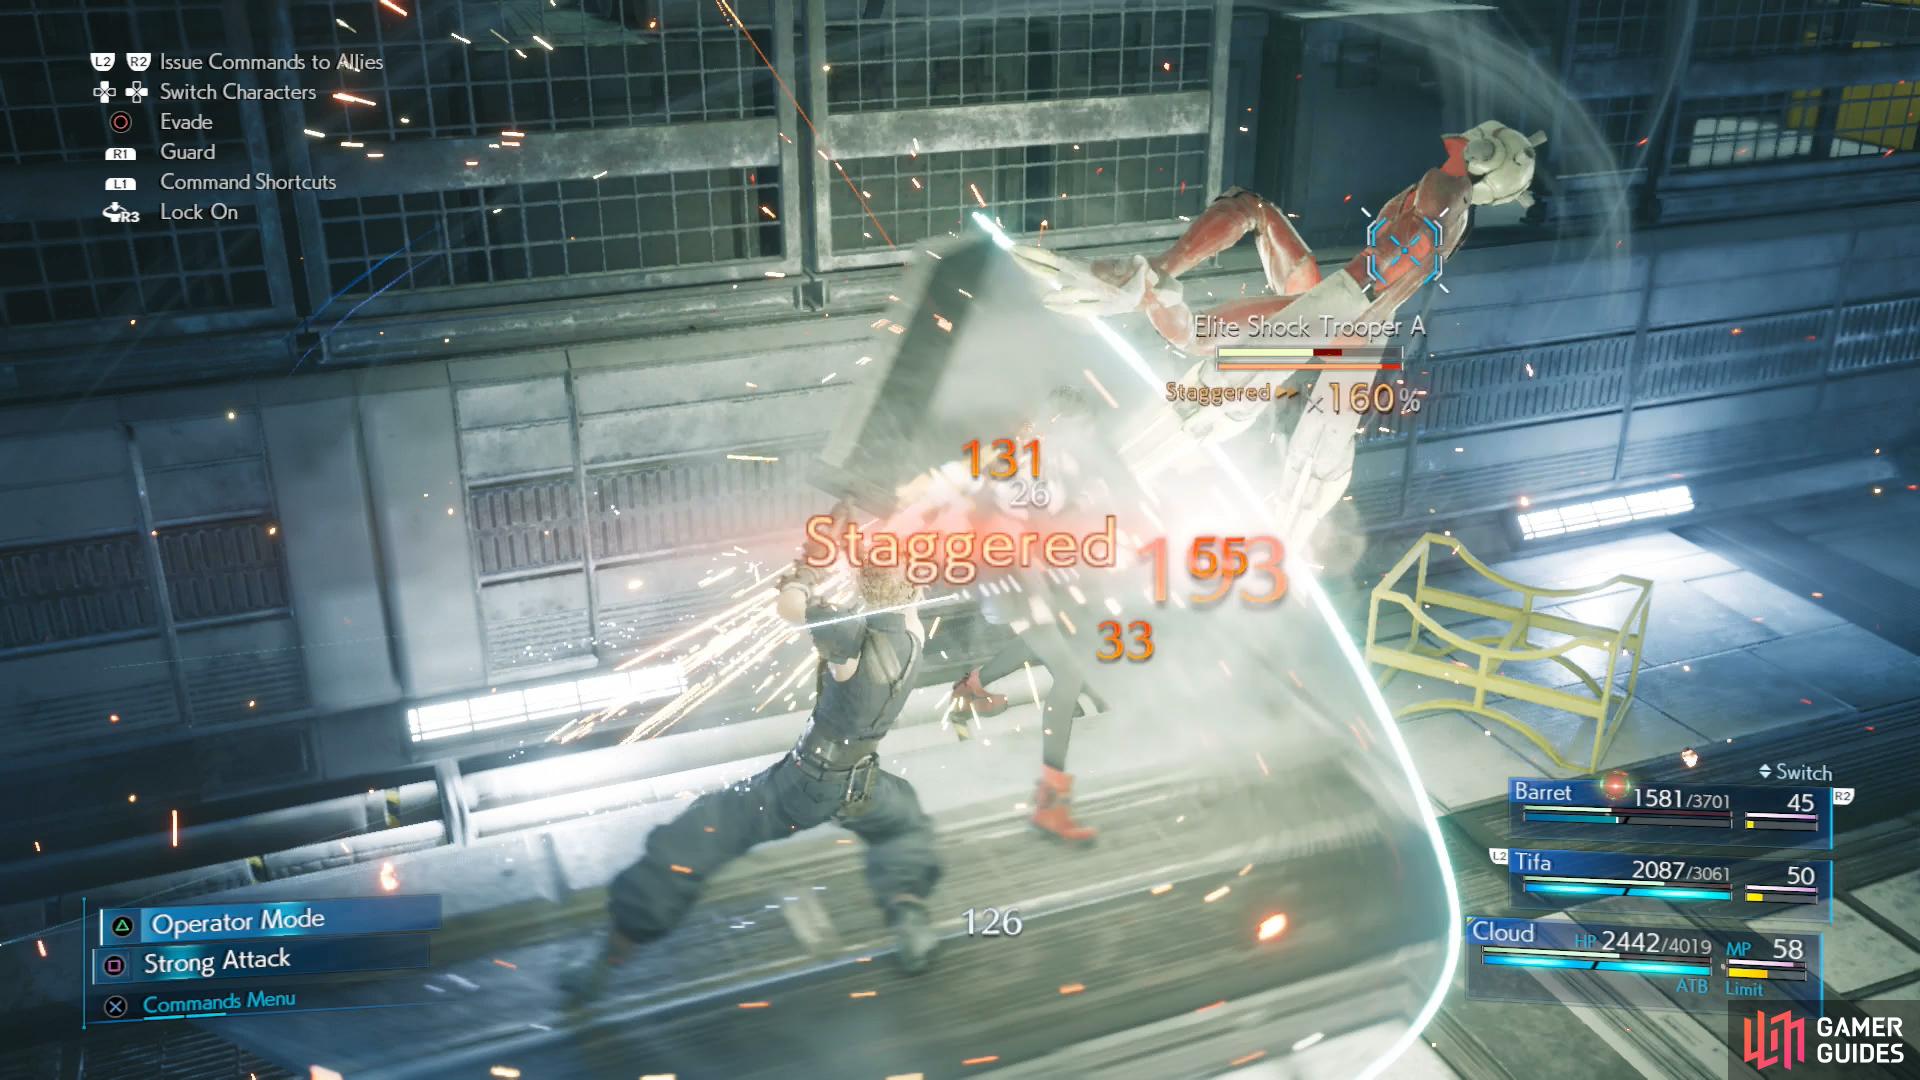
(1 of 3) Punisher will still work against Elite Shock Troopers, although you may have to be more aggressive than usual to provoke a counterable attack.
Exit the B5 Facility room and in the hallway beyond you’ll have to fight two Elite Shock Troopers, and in these hallways they’ll show off how annoying they can be, using the walls and ceiling to attack from out of reach; they make the limitations of Punisher mode - and the need to switch characters in face of adversity - painfully obvious.
Defeat the Elite Shock Troopers, follow the linear path ahead and go through some doors to reach the room where you first faced some Monodrives. Use a console to the north and if you have any keycards left, Barret will warn you to use them now. Fair warning, if you choose to proceed your choices - or lack thereof - will be locked in, and you won’t be able to use the previous consoles to discard any more components.
Armory
When you’re ready to advance, use the console to open the door then continue through a tunnel to the north. Go through some more doors to reach the Armory, where you’ll find resistance in the form of an Elite Grenadier (he can’t be defeated until he’s done with his task, so just ignore him) Riot Troopers and Elite Riot Troopers, the latter of which, like the Elite Shock Troopers, seek to humble Cloud’s Punisher mode. In this they do a far better job than the Elite Shock Troopers, as they’re fairly conservative about using counterable attacks, preferring to use their “Riot Shield” ability, which can’t be countered, and their “Truncheon” ability, which is a ranged attack. Either slip behind them to attack, or just cast Fire, against which they have no defense.
Vanquish your foes, then head over to Tifa to spot a terminal showing Airbuster’s current capabilities, depending on what you discarded earlier.
Neat.

With no clear way forward, head back south towards the door, only to have your attention drawn by the arrival of a new foe: a Cutter, a specialized Sweeper that derives its name from well, rather obvious sources. It deals fairly hefty damage with its saw-blade arms, but it’s great strength -and namesake - is also something of a liability, as if you can destroy (or heavily damage) an arm you’ll knock it down and leave it vulnerable to Staggering. Beat up on it a bit, charge your ATB, and when you feel confident, target an arm with a shot of Thunder or two to knock the Cutter down, send it into a “Pressured” state and hopefully destroy said arm. Once done, use abilities like Focused Thrust or Focused Strike (courtesy of Tifa’s new Sonic Strikers“ to Stagger it, then finish it off with powerful attacks like chi abilities or Braver.
Trash the Cutter, then head over a stack of panels and ascend the ramp the Cutter guarded. Make your way south through a cluttered room, smashing some Shinra Boxes and looting a chest for an Ether as you go. Continue up stairs and through cluttered rooms, smashing some Monodrives (and perhaps some more Shinra Boxes) as you go. Pass through some more doors and ride an elevator up, where the party will have a bit of a pep-talk. Seems like Barret’s starting to accept Cloud. Aw…
(1 of 4) Pull some levers synchronously to open the way forward - and perhaps to some treasure.
Storm the Gates
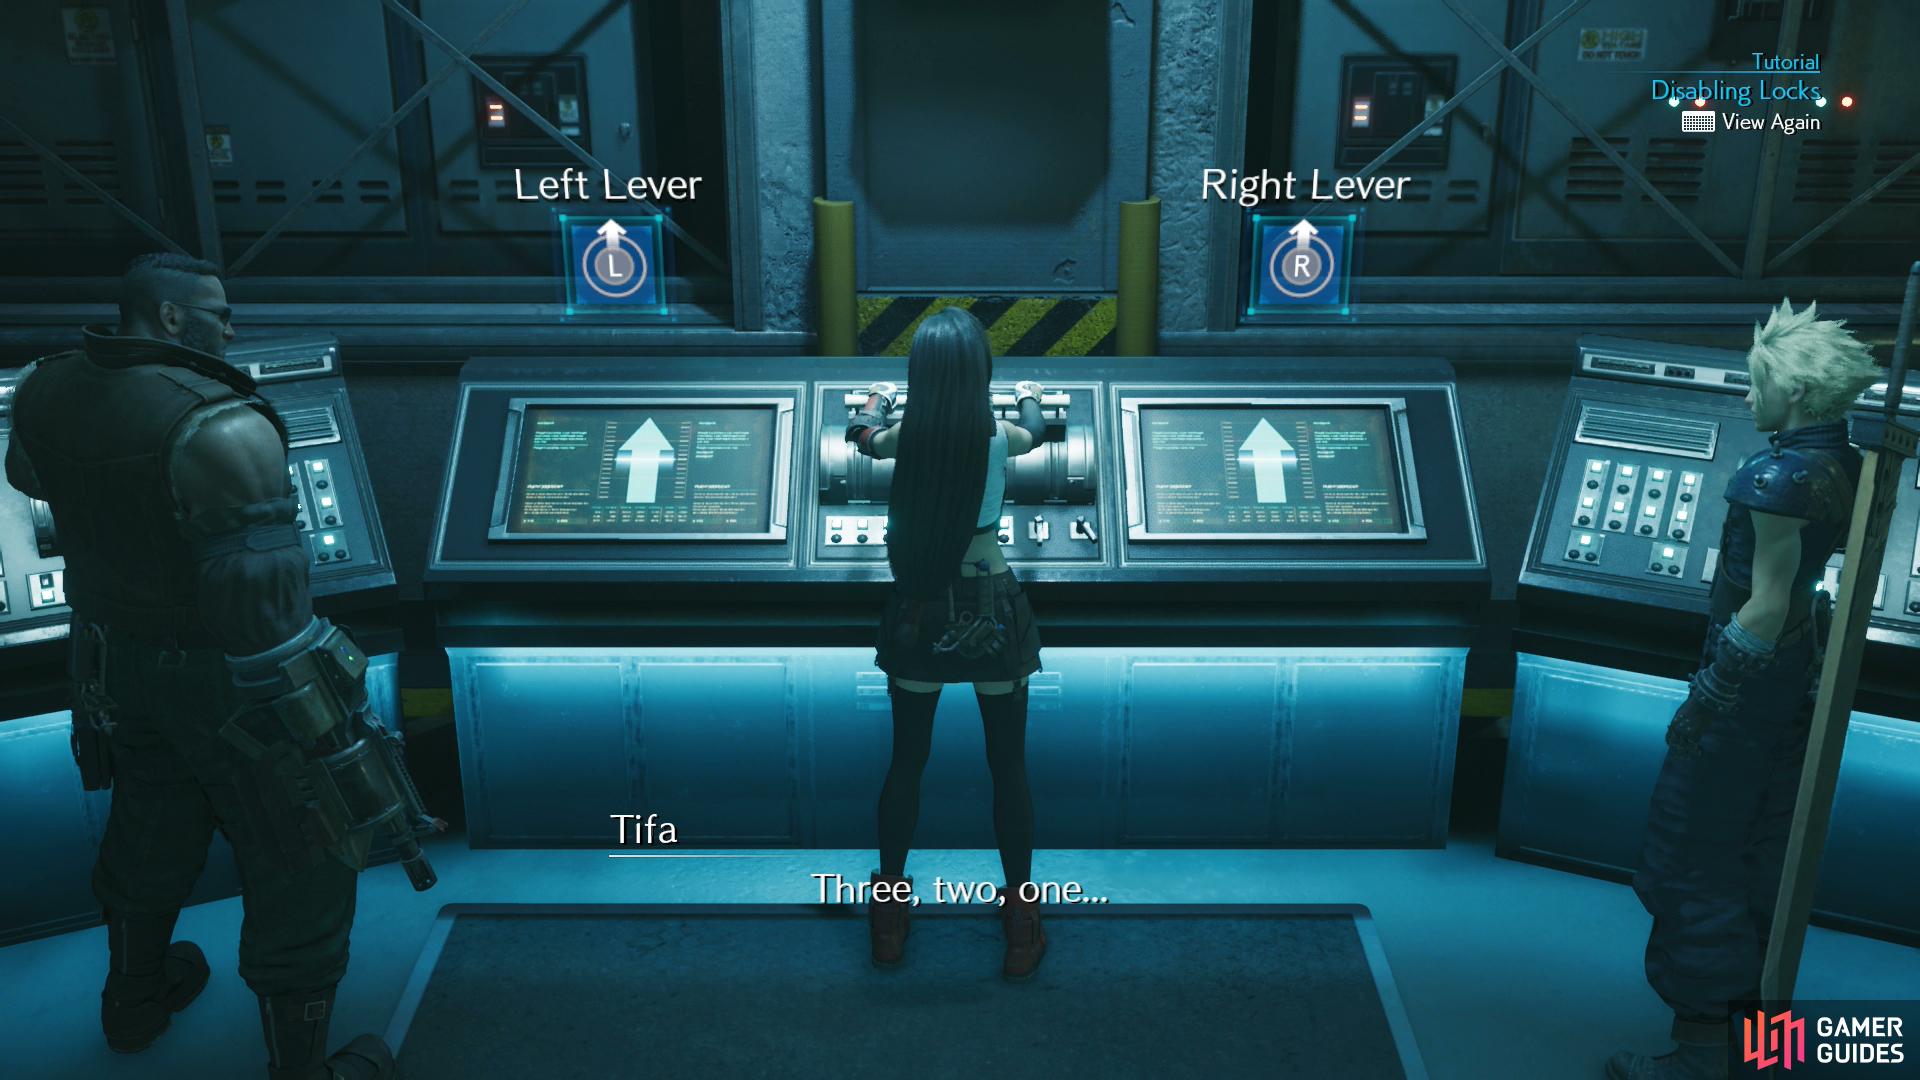
When the elevator stops, continue north and use a console and Cloud will mention the nearby “faulty equipment storeroom” is nearby. Whether you care to get some extra loot (who doesn’t?) or you just want to continue, head into the room to the east and man a series of consoles with four levers shared between them. For some reason, Shinra has an odd manual override system that requires synchronized lever-pulling, and fortunately three people are just enough to manage this.
Pay attention to Tifa’s terminal, as it’ll tell you what direction to move Barret and Cloud’s levers, which are controlled by your controller’s analog sticks. It’s not that complicated, you either move them up or down when Tifa does, and she’ll even give you a little countdown to help get the timing right - just move shortly after she starts and you’ll be fine, as there’s some margin for error. Speaking of error, you can botch this repeatedly without suffering any consequences, so at least there’s that.
Succeed at one lever pull and the way forward will be opened, but examine a console to the east (marked on your map as Discovery: Waste Disposal) and you’ll learn that you can access the “treasure vault”, as Barret puts it, by succeeding at several (four) synchronous lever pulls. Same rules as before, pay attention to the monitors on either side of Tifa to see which way you have to pull Barret and Cloud’s levers, use her countdown and movements to get the timing right and after three successful pulls you should be in. You fortunately do not have to succeed at multiple synchronized lever pulls in a row - just pass four amidst however many failures it takes and you’ll get into the treasure vault. This will also earn you the trophy In Lockstep.


Go through the doorway to the east and turn south to score some Magic Up Materia, which boosts the equipped character’s Magic score - hence their damage output and healing with spells - by 5% per level. Considering how useful magic is in this game, we recommend equipping it straight away. Once done, pull a lever near a gate to reveal the discarded Airbuster components: each Big Bomber disposed of will earn you a Big Bomber item (500 damage, AoE, single-use item), each AI Programming Core discarded will earn you an AI Programming Core (sells for 500 Gil) and the M-Units will earn you either 2x Hi-Potions, 2x Ethers or 2x Phoenix Downs.
Grab whatever spoils you can, then return to the room to the west and head through the now-opened doors to the north. Here you’ll find a vending machine and a rest bench - very timely, considering the boss is just up ahead. The vending machine sells the 2. Bombing Mission Music Disc, as well as 3x Mega-Potions (restores 1,500 HP), 1x Ether and 1x Phoenix Down at reduced rates. Also new for sale are Mesmeric Armlets, should you prefer them to Leather Bracers. Restore your HP/MP by resting, buy whatever items you think you’ll need, equip Lightning Materia on every character, and make a hard save. If the fight ahead is too tough for you, you can do some grinding by running about the earlier parts of this chapter, but considering how few enemies have respawned (basically only the Elite Shock Troopers outside of the B5 Facility room, some Slug-Rays in the Armory, and some Monodrives) this is a pretty barren grinding environment. Alas, you’ve yet to have an opportunity to grind as good as Scrap Boulevard.
When you’re ready to test your mettle, head through a doorway to the west of the rest area, then venture north to an iconic three-way intersection just outside of Reactor 5. After some chatter you’ll end up finally facing Shinra’s long-teased mobile weapons platform - Airbuster.
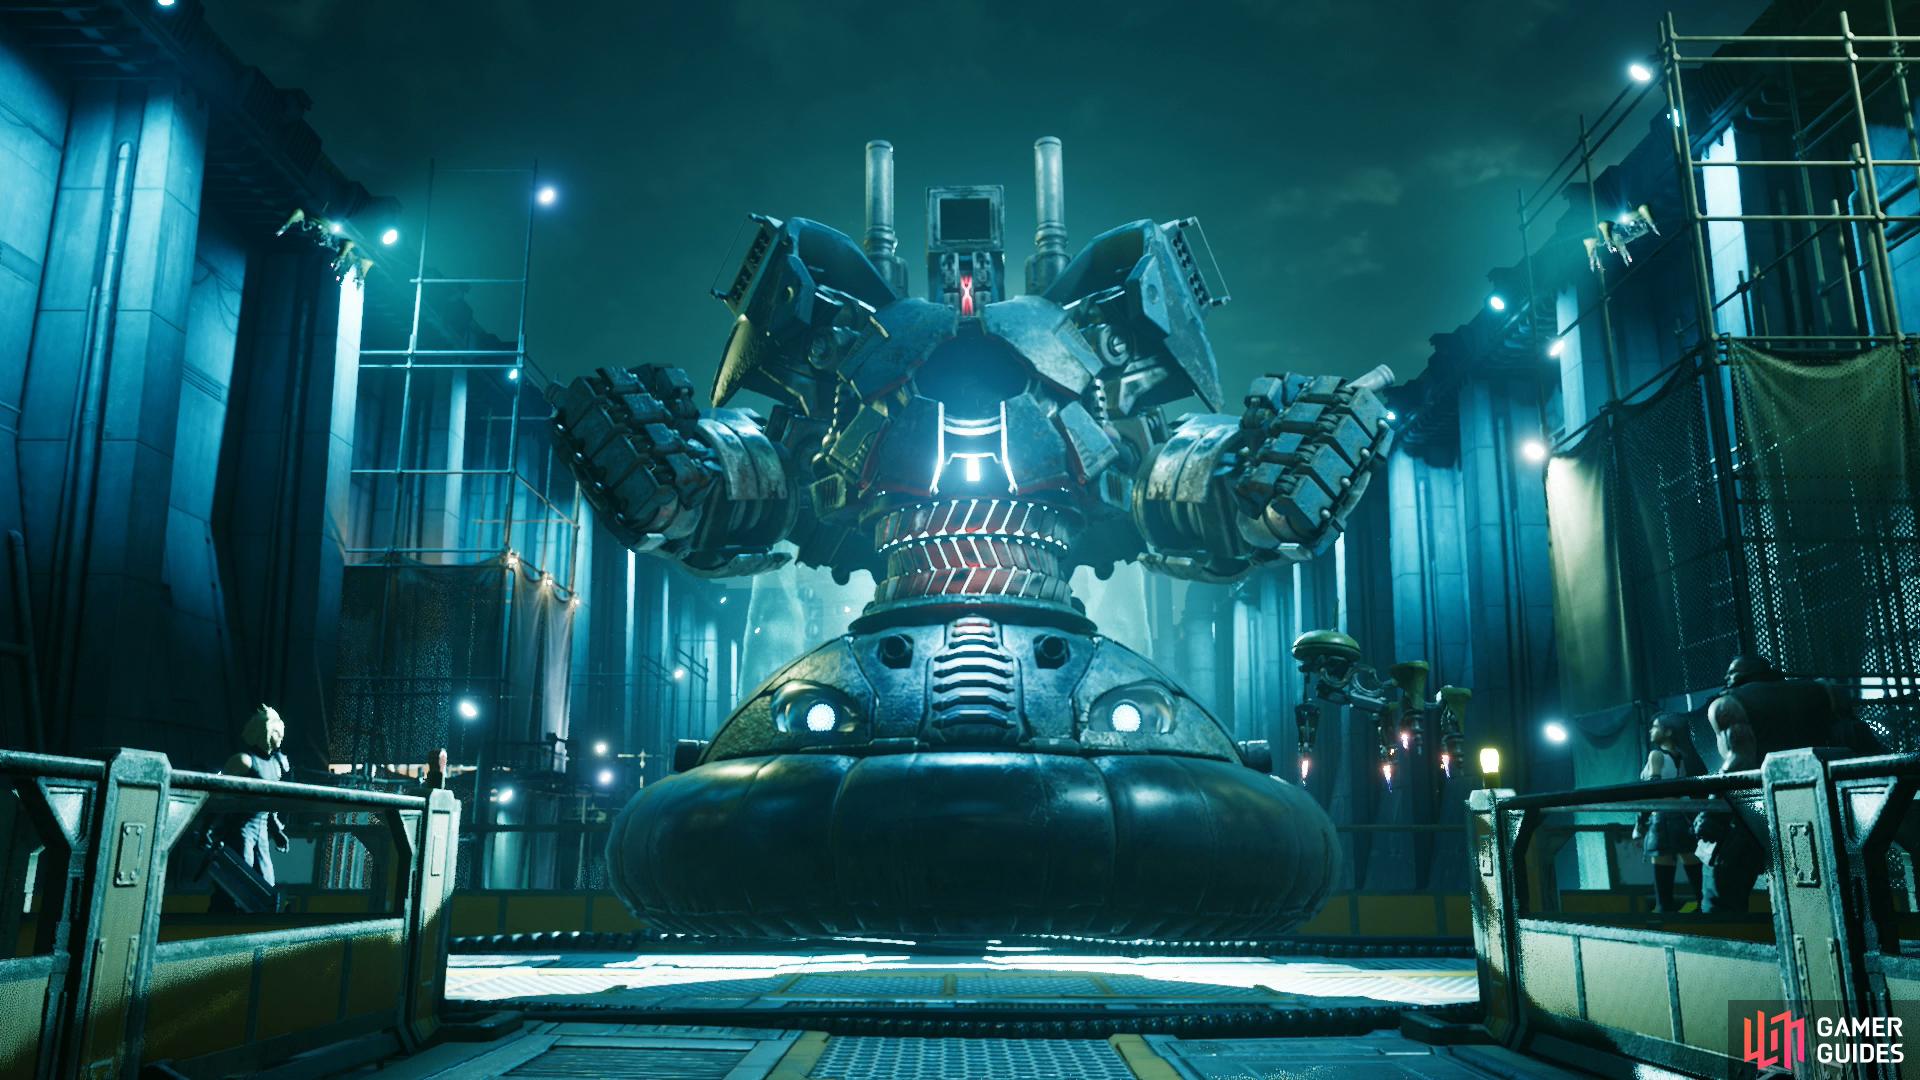
Boss: Airbuster
| Enemy | Weaknesses | Notable Loot |
|---|---|---|
| Airbuster | Lightning | Titanium Bangle |
Phase 1
The fight with Airbuster starts out like in the original game, with Cloud on one side and Barret and Tifa on the other. This time you don’t really have to worry about which way it’s facing too much, as your damage output nor Airbuster’s offensive capacity seems terribly affected one way or the other. Whatever way Airbuster is facing he’s more than capable of responding to attacks with machine gun barrages, back-facing cannons, Shock Pulses (an AoE attack centered on itself - roll away if you see blue-white electricity under Airbuster), and Shock Mines (globes of blue-white electricity - avoid them else they’ll stun you). On the plus side, while Airbuster can keep up a constant stream of offense, he’s not likely to focus on any character too much or deal heavy damage with any of its current attacks, so simply backing off and healing should keep any character safe.
Your own strategy should also not be affected by Airbuster’s attacks: hit it with Thunder (it’s weak to lightning) to “Pressure” Airbuster, then use Stagger-inducing moves (anything with “Focused” in the name). Charge up Tifa’s chi while you do this, and when Airbuster is staggered, unleash your most powerful attacks. Take it down to around 80% of its HP bar (roughly down to 26,000 HP) and it’ll move onto Phase 2.
Phase 2
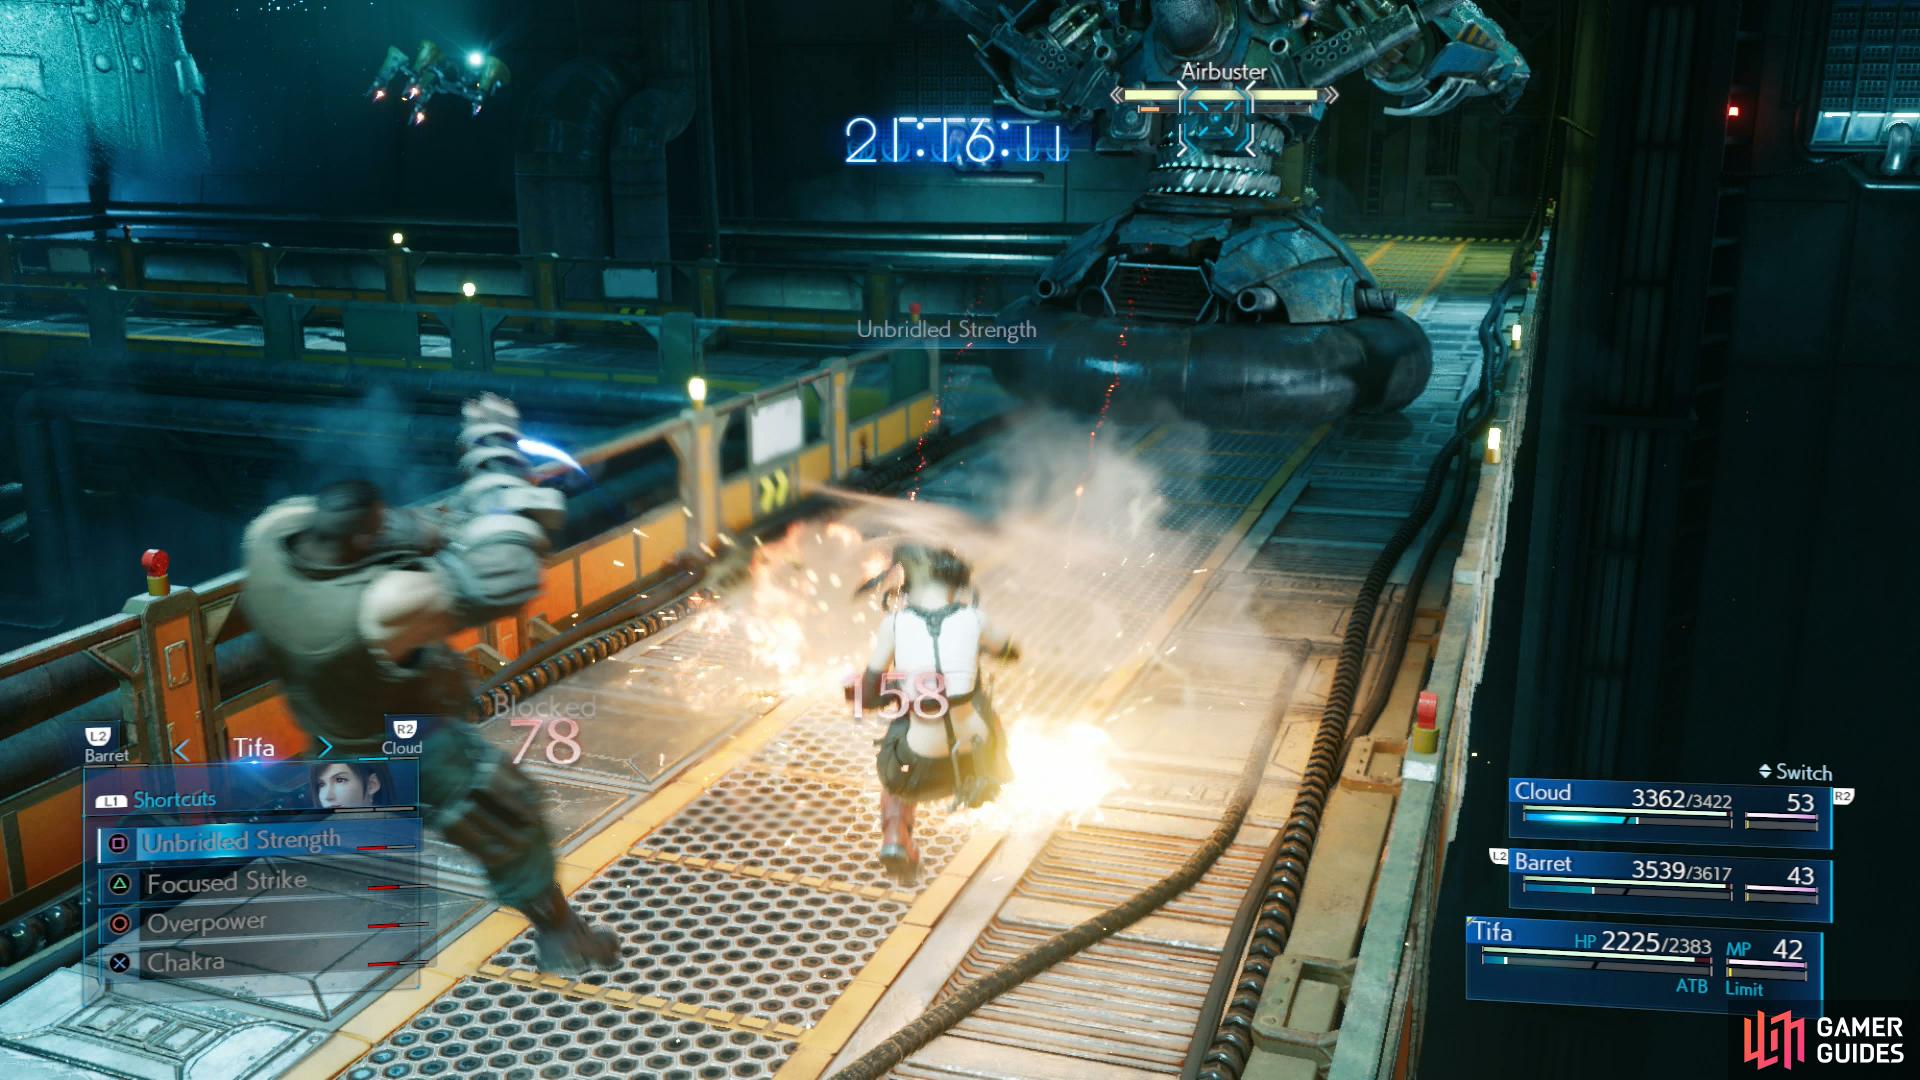
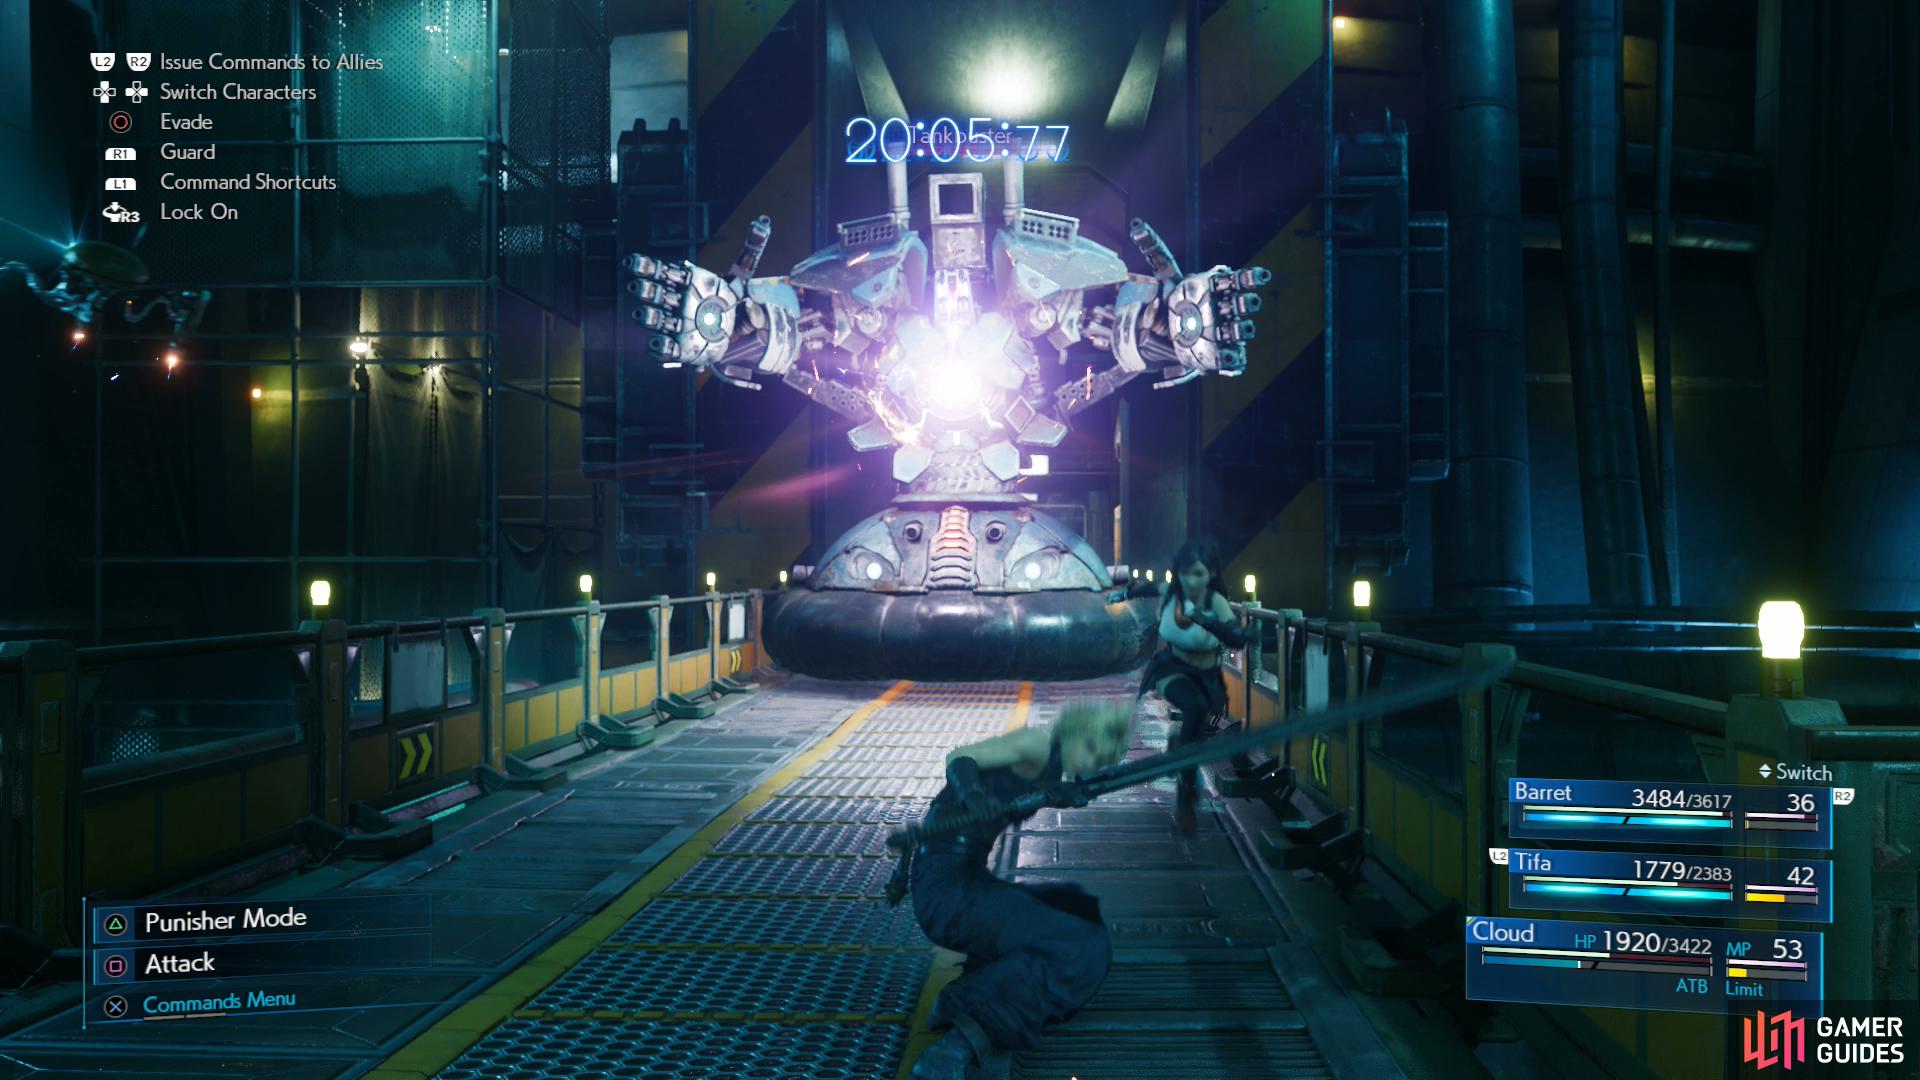
Airbuster will now move onto the bridge near the reactor, keeping its back away from you and forcing your party to attack on a somewhat narrow front. While this might seem like it should limits its offense somewhat, that is sadly not the case, as it can now focus the best part of its arsenal on you without having to compromise by responding to attacks from multiple directions.
Arguably its most potent attack in this phase is its “Tankbuster” attack. When Airbuster spreads its arms and emits purple light from its chest, flee away from it and seek shelter on the adjacent walkways, as Airbuster will only direct its Tankbuster attack straight forward, for now… Other new attacks include “Burning Hands”, where Airbuster sends torrents of fire from its hand (moderate damage and range), various laser attacks, including the “Finger-lasers” you could have mitigated by discarding AI Processor Cores earlier and of course the iconic “Big Bomber”, which might not be as powerful as “Tankbuster”, but it can be a lot harder to dodge, especially since Airbuster isn’t above lobbing one at a stunned target. Just try to avoid letting more than one character get hit and heal up afterwards. Returning attacks include the Shock Pulses and Shock Mines.
At some point during the fight, Airbuster will send its hands away to operate independently via its “Divide and Conquer” attack, each one moving to opposite ends of the adjacent walkways. Airbuster and its hands are all more dangerous in close combat, and all will resort to less-threatening - but still annoying - ranged attacks if left to their own devices. A particularly rude attack its hands can perform is “Grapple”, which will “Bound” a character and drag them to the center of the “T”-intersection, where Airbuster will obligingly use its Buster Laser.
If you ignore the hands, they’ll eventually fly back over to Airbuster and start discharging streams of lightning in front of Airbuster, which can prove fatal if you get a character stuck between the hands. This should be enough incentive not to ignore them and if not, Airbuster seems fairly resistant to Stagger while its hands are away, for whatever reason. Chase one of the hands and when they separate, use Thunder to inflict “Pressure”, then “Focus” abilities to Stagger, after which try to do as much damage as possible. Once one of the two hands has been defeated, they’ll return to Airbuster and you’ll find the bot much more receptive to Stagger.
Airbuster’s attacks aren’t light, and many of them can deal between 500-1,000 damage, so don’t be afraid to just perform normal attacks for longer than usual to build up ATB bars, switch between characters so as many of them have ATB segments as possible, and use Cura if you have it to restore large amounts of HP at once. Also keep in mind that spells and abilities can be interrupted by attacks that stun, knock back or knock down your characters, so having multiple potential healers available means you can pick the least-threatened one. Getting knocked out of an essential Cura mid-cast can have a tremendous negative impact on your survival odds.
Once the hands have returned to Airbuster, focus on the bot again and use the same tried-and-true tactics to damage it - Thunder to “Pressure” it, “Focused” abilities to Stagger it, heavy-hitting attacks like chi abilities and Braver to damage it, as well as Thunder. You’ll likely fill your limit gauge(s) and/or summon gauge during this phase, but don’t expend them yet - save such powerful attacks for phase 3, which starts when Airbuster has been reduced to around 50% of its HP (16,000 HP).
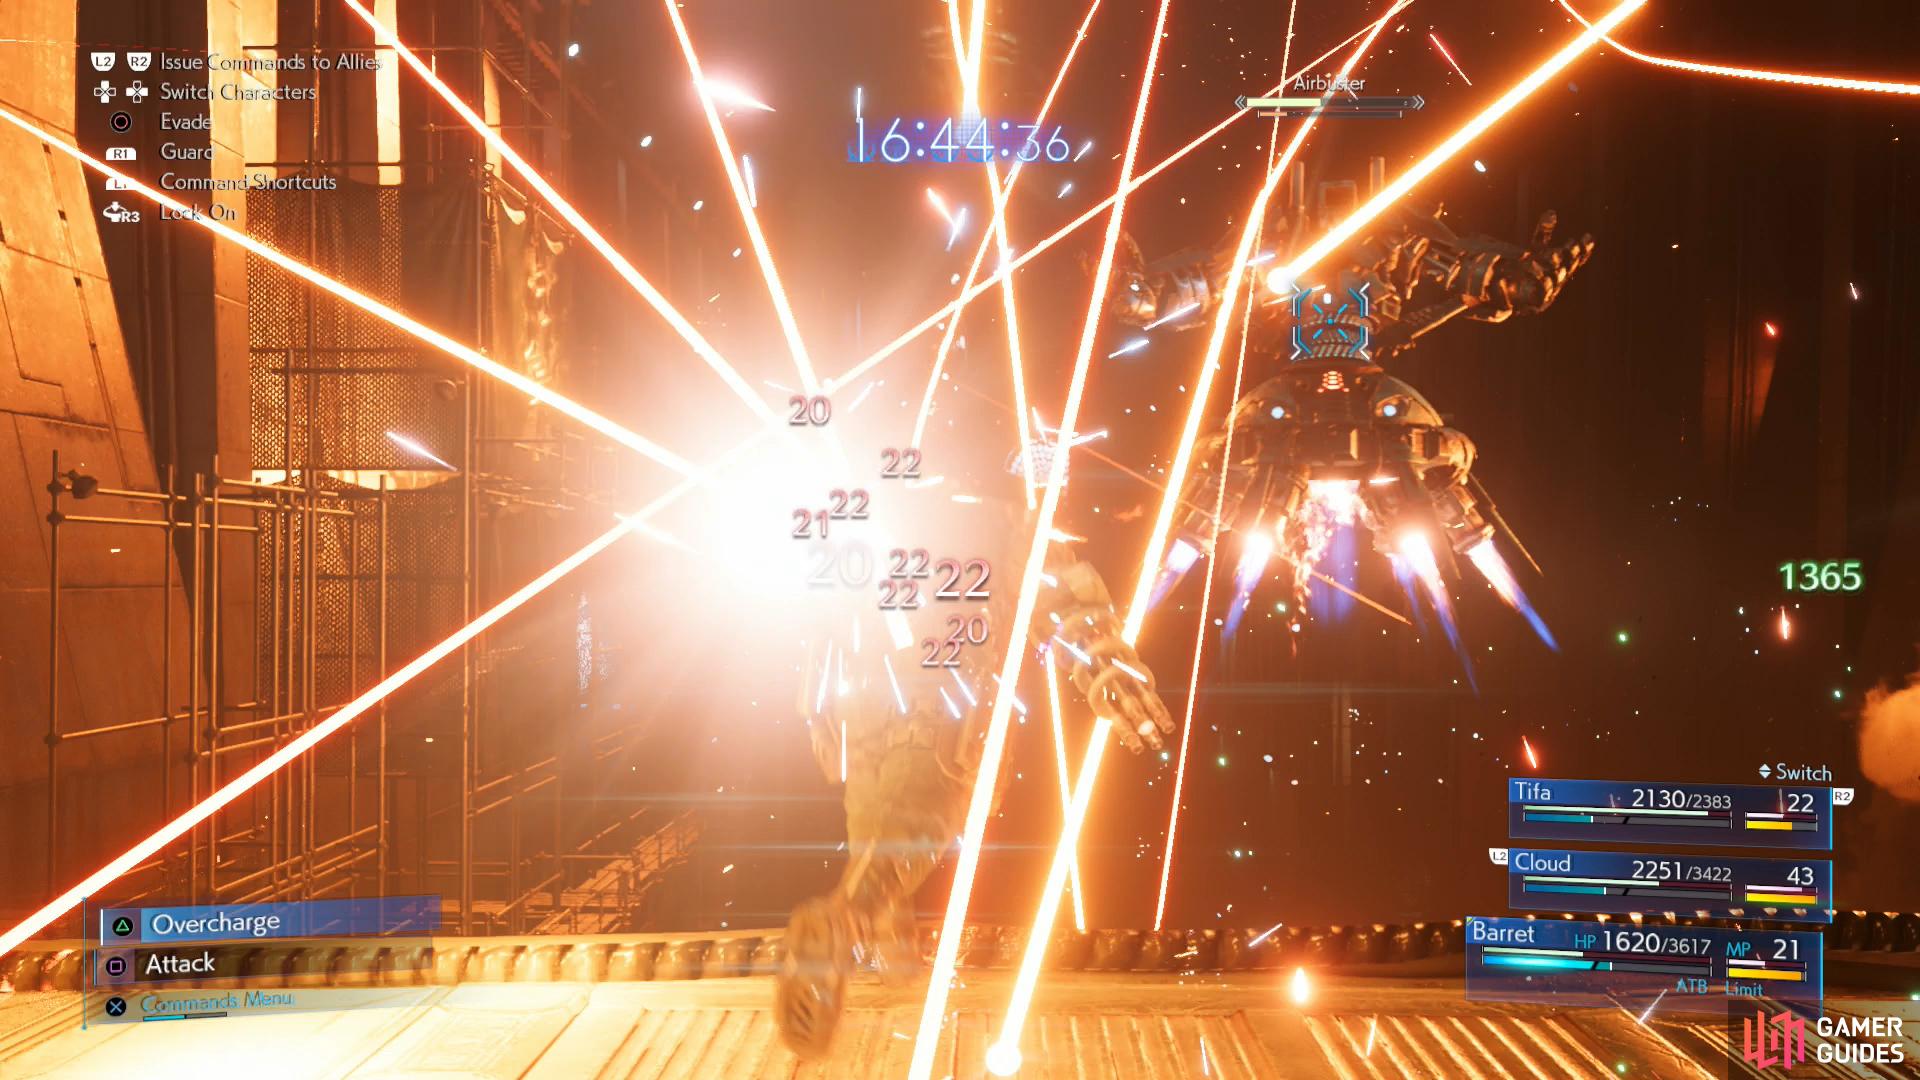
(1 of 5) While Airbuster flies around it’ll resort to ranged attacks, like shooting laser barrages,
Phase 3
Here’s where things get fun, as Airbuster takes to the skies. It’s not a terribly graceful flier, but Airbuster will now direct its full arsenal on you. There are two sub-phases to this phase of the fight: when Airbuster is flying out of reach, take control of Barret and shoot Airbuster to charge Barret’s ATB and dish out what damage you can. It’ll shoot out laser, Shock Mines and sweeping lines of Shock Bolts, which can stun you and deal pretty decent damage if they hit. Dodging is important, as is dealing what damage you can, but you should also use this time to prepare for the next sub-phase by healing and charging your chi levels.
Eventually Airbuster will fly in close, allowing Tifa and Cloud to attack. Your own strategy should be fairly simple - use Thunder and “Focused” abilities to Stagger Airbuster, if possible, hit it with limits, and use your summon. It won’t remain close forever, and just because it’s close enough to reach doesn’t mean it’s safe, but if you want to defeat Airbuster in the (rather generous) time limit, you’ll probably want to brave the hazards and rely on more than Barret’s pea-shooter.
When up close, Airbuster’s offense will increase considerably, as it’ll use pretty much every attack you’ve seen thus far, including “Burning Hands”, “Finger-lasers”, “Big Bomber” and “Tank Buster”, to name a few of the more fearsome ones. Airbuster will also use its “Buster Beatdown” attack, punching the walkway furiously in front of it, potentially hitting an unwary character multiple times.
Weather its attacks, keep your characters healed and hit Airbuster with everything you’ve got. Once Airbuster is defeated you’ll score a Titanium Bangle - watch the scenes that end Chapter 7 and you’ll obtain the Trapped like Sewer Rats Trophy.
No Comments