
As you make your way through the Mountain Pass from the Wilderness region in Baldur’s Gate 3, you’ll encounter an NPC named Lady Esther just northeast of the Trielta Crags waypoint. She’ll ask you to help her steal a Githyanki egg from the Githyanki Creche, which is located beneath the nearby ![]() Rosymorn Monastery. You can offer to do this for a reward, or you can refuse. However, if you happen to have an Owlbear egg in your inventory, you’ll get a third option to deceive the Society of Brilliance, who Lady Esther is working for, and she will agree to it. On this page we’ll explain all the consequences of each choice that you can make, so that you can make the right decision based on your roleplaying preferences.
Rosymorn Monastery. You can offer to do this for a reward, or you can refuse. However, if you happen to have an Owlbear egg in your inventory, you’ll get a third option to deceive the Society of Brilliance, who Lady Esther is working for, and she will agree to it. On this page we’ll explain all the consequences of each choice that you can make, so that you can make the right decision based on your roleplaying preferences.
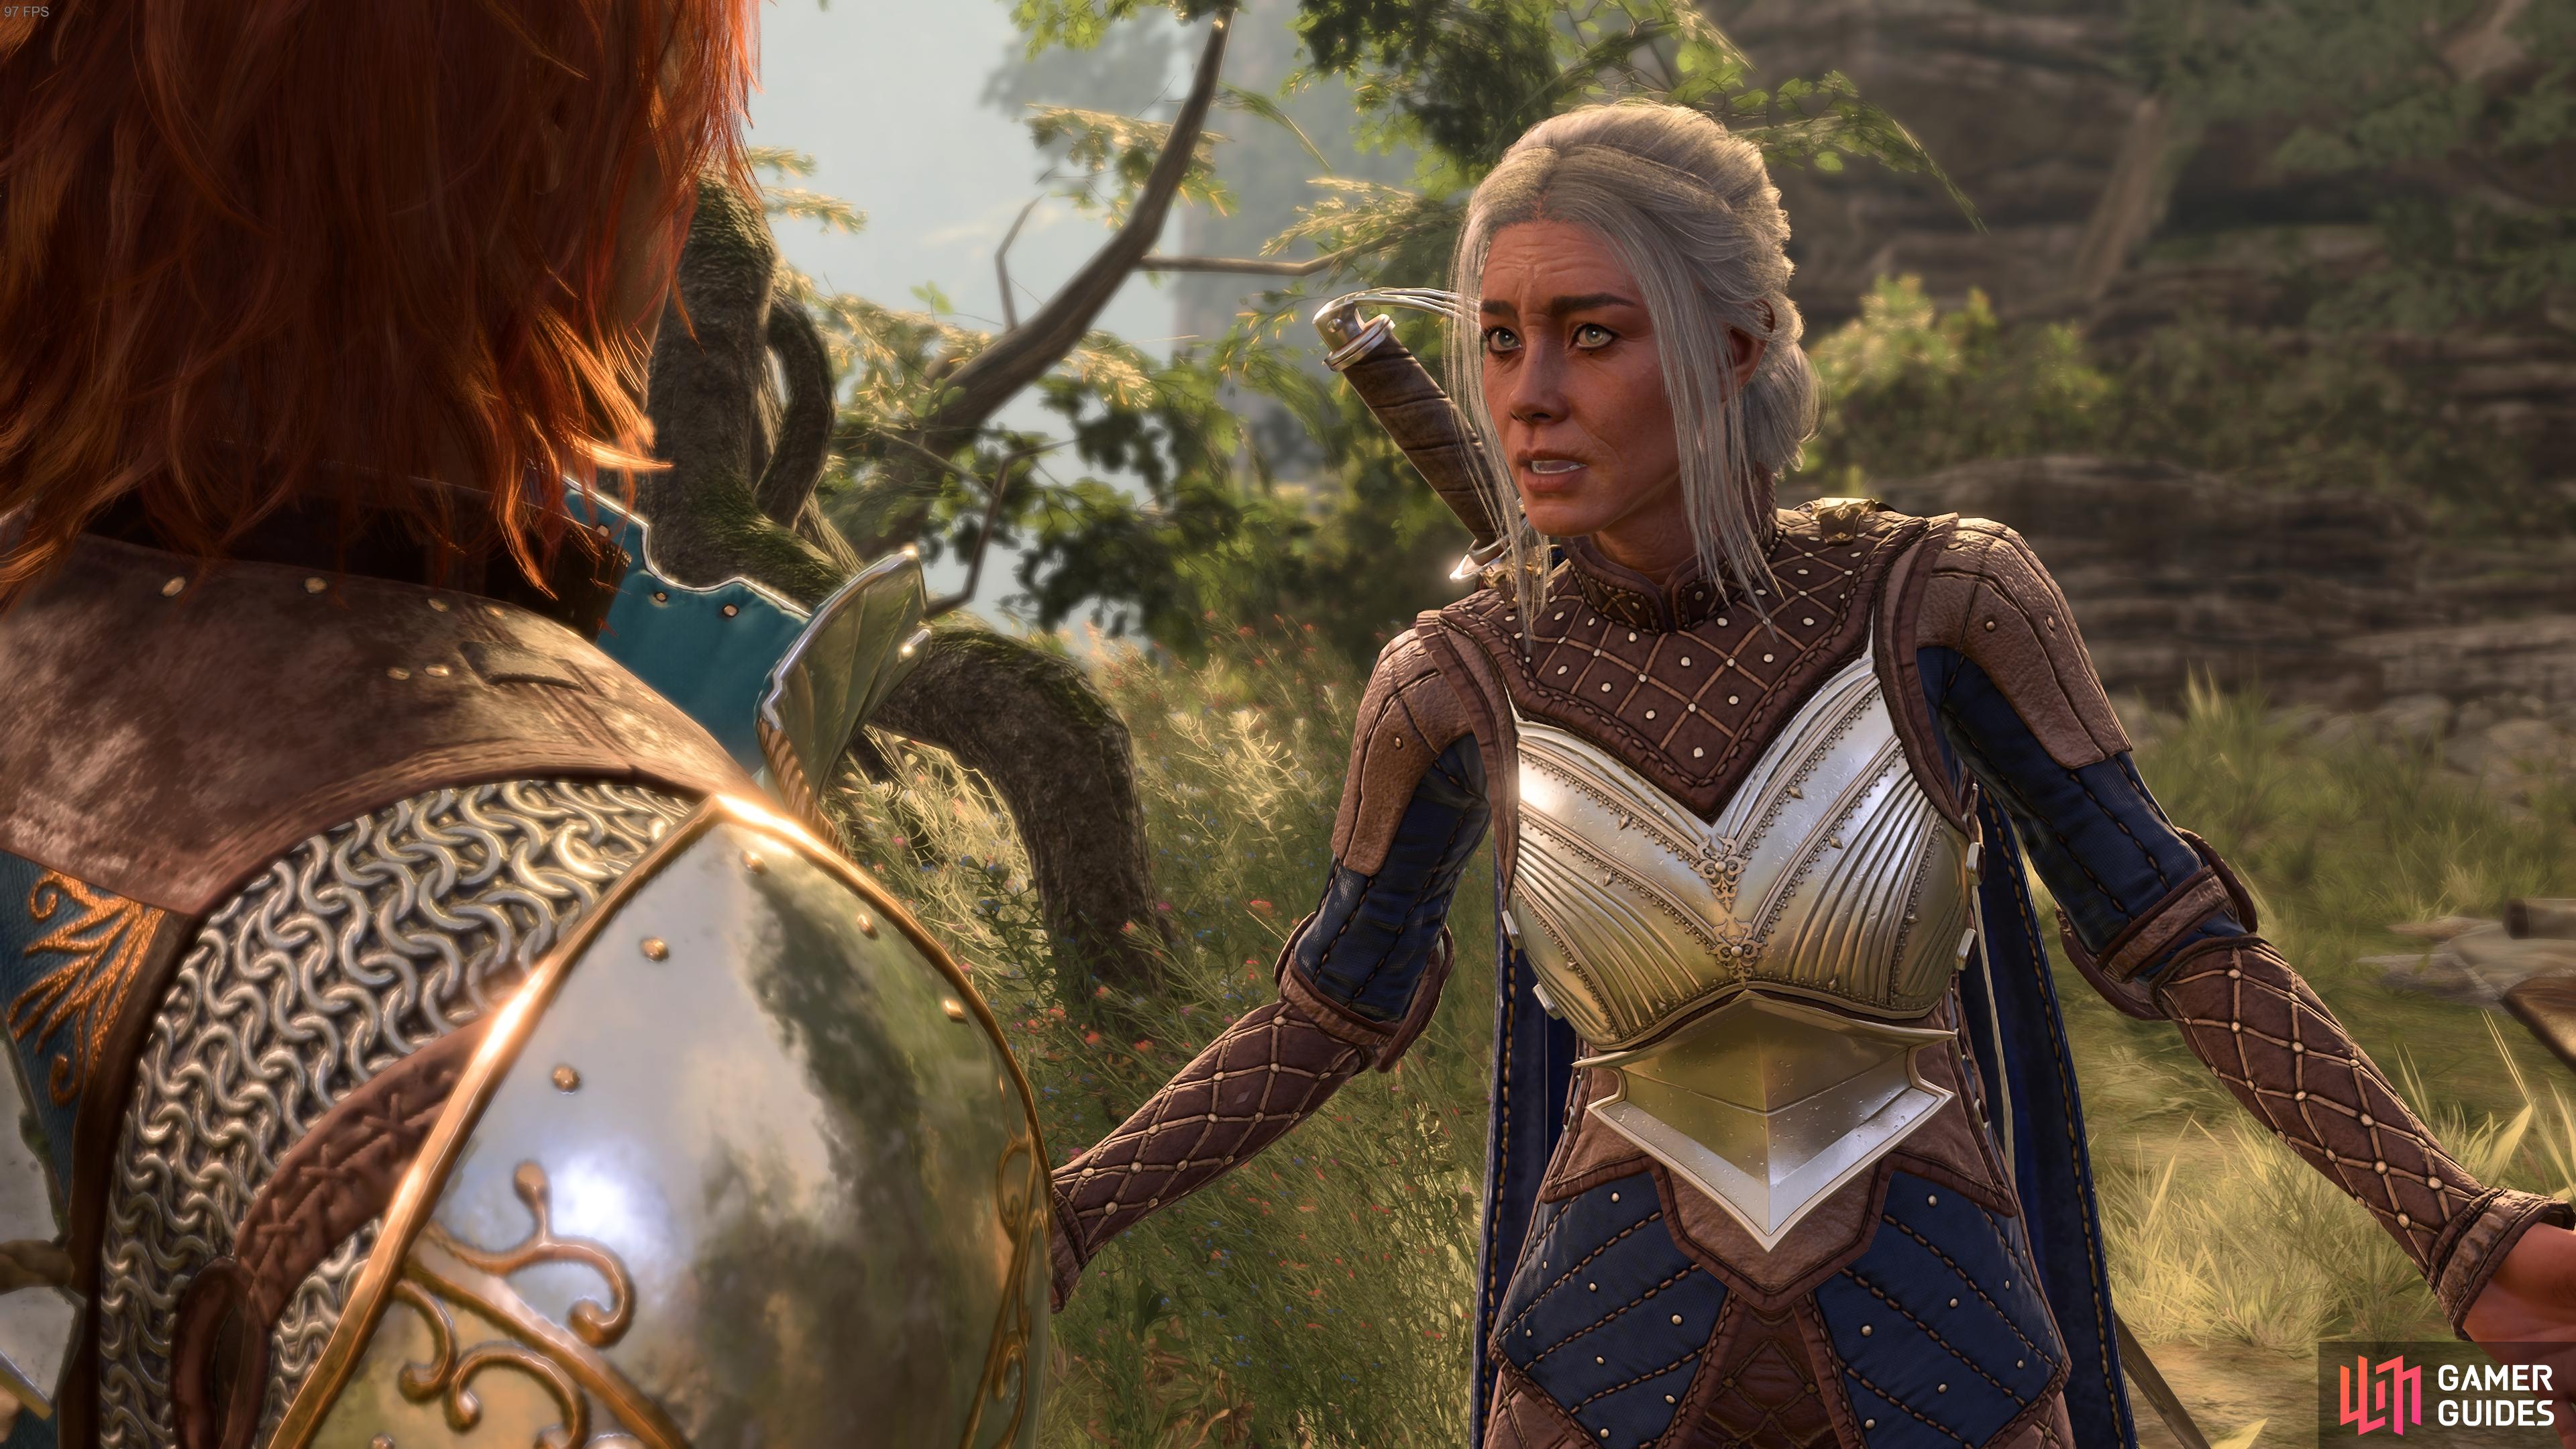
Lady Esther in the Mountain Pass, Baldur’s Gate 3.
Where to Find Lady Esther in the Mountain Pass
To find Lady Esther, you’ll need to take the ![]() Mountain Pass route as you make your way from Act 1 to Act 2. The alternative route is through the
Mountain Pass route as you make your way from Act 1 to Act 2. The alternative route is through the ![]() Underdark, and if you’ve already taken this there’s no need to worry. You can still fast travel back to the
Underdark, and if you’ve already taken this there’s no need to worry. You can still fast travel back to the ![]() Wilderness, and from there make your way to the far northwestern part of the map, where
Wilderness, and from there make your way to the far northwestern part of the map, where ![]() Waukeen’s Rest is located. Follow the road from this small settlement further northwest, until you cross the bridge where the Githyanki Inquisitors are waiting with the large red dragon. After the scene with them, you can cross the bridge and enter the Mountain Pass.
Waukeen’s Rest is located. Follow the road from this small settlement further northwest, until you cross the bridge where the Githyanki Inquisitors are waiting with the large red dragon. After the scene with them, you can cross the bridge and enter the Mountain Pass.
Location of the Trielta Crags Waypoint
Once you’re in the Mountain Pass region, follow the road northwest until you reach the Trielta Crags waypoint. This will be just off the road to your right, so it’s difficult to miss. From here, continue down the path to your right (heading northeast) and you’ll soon hear Lady Esther beckoning you where she’s set up camp in a little enclave here.
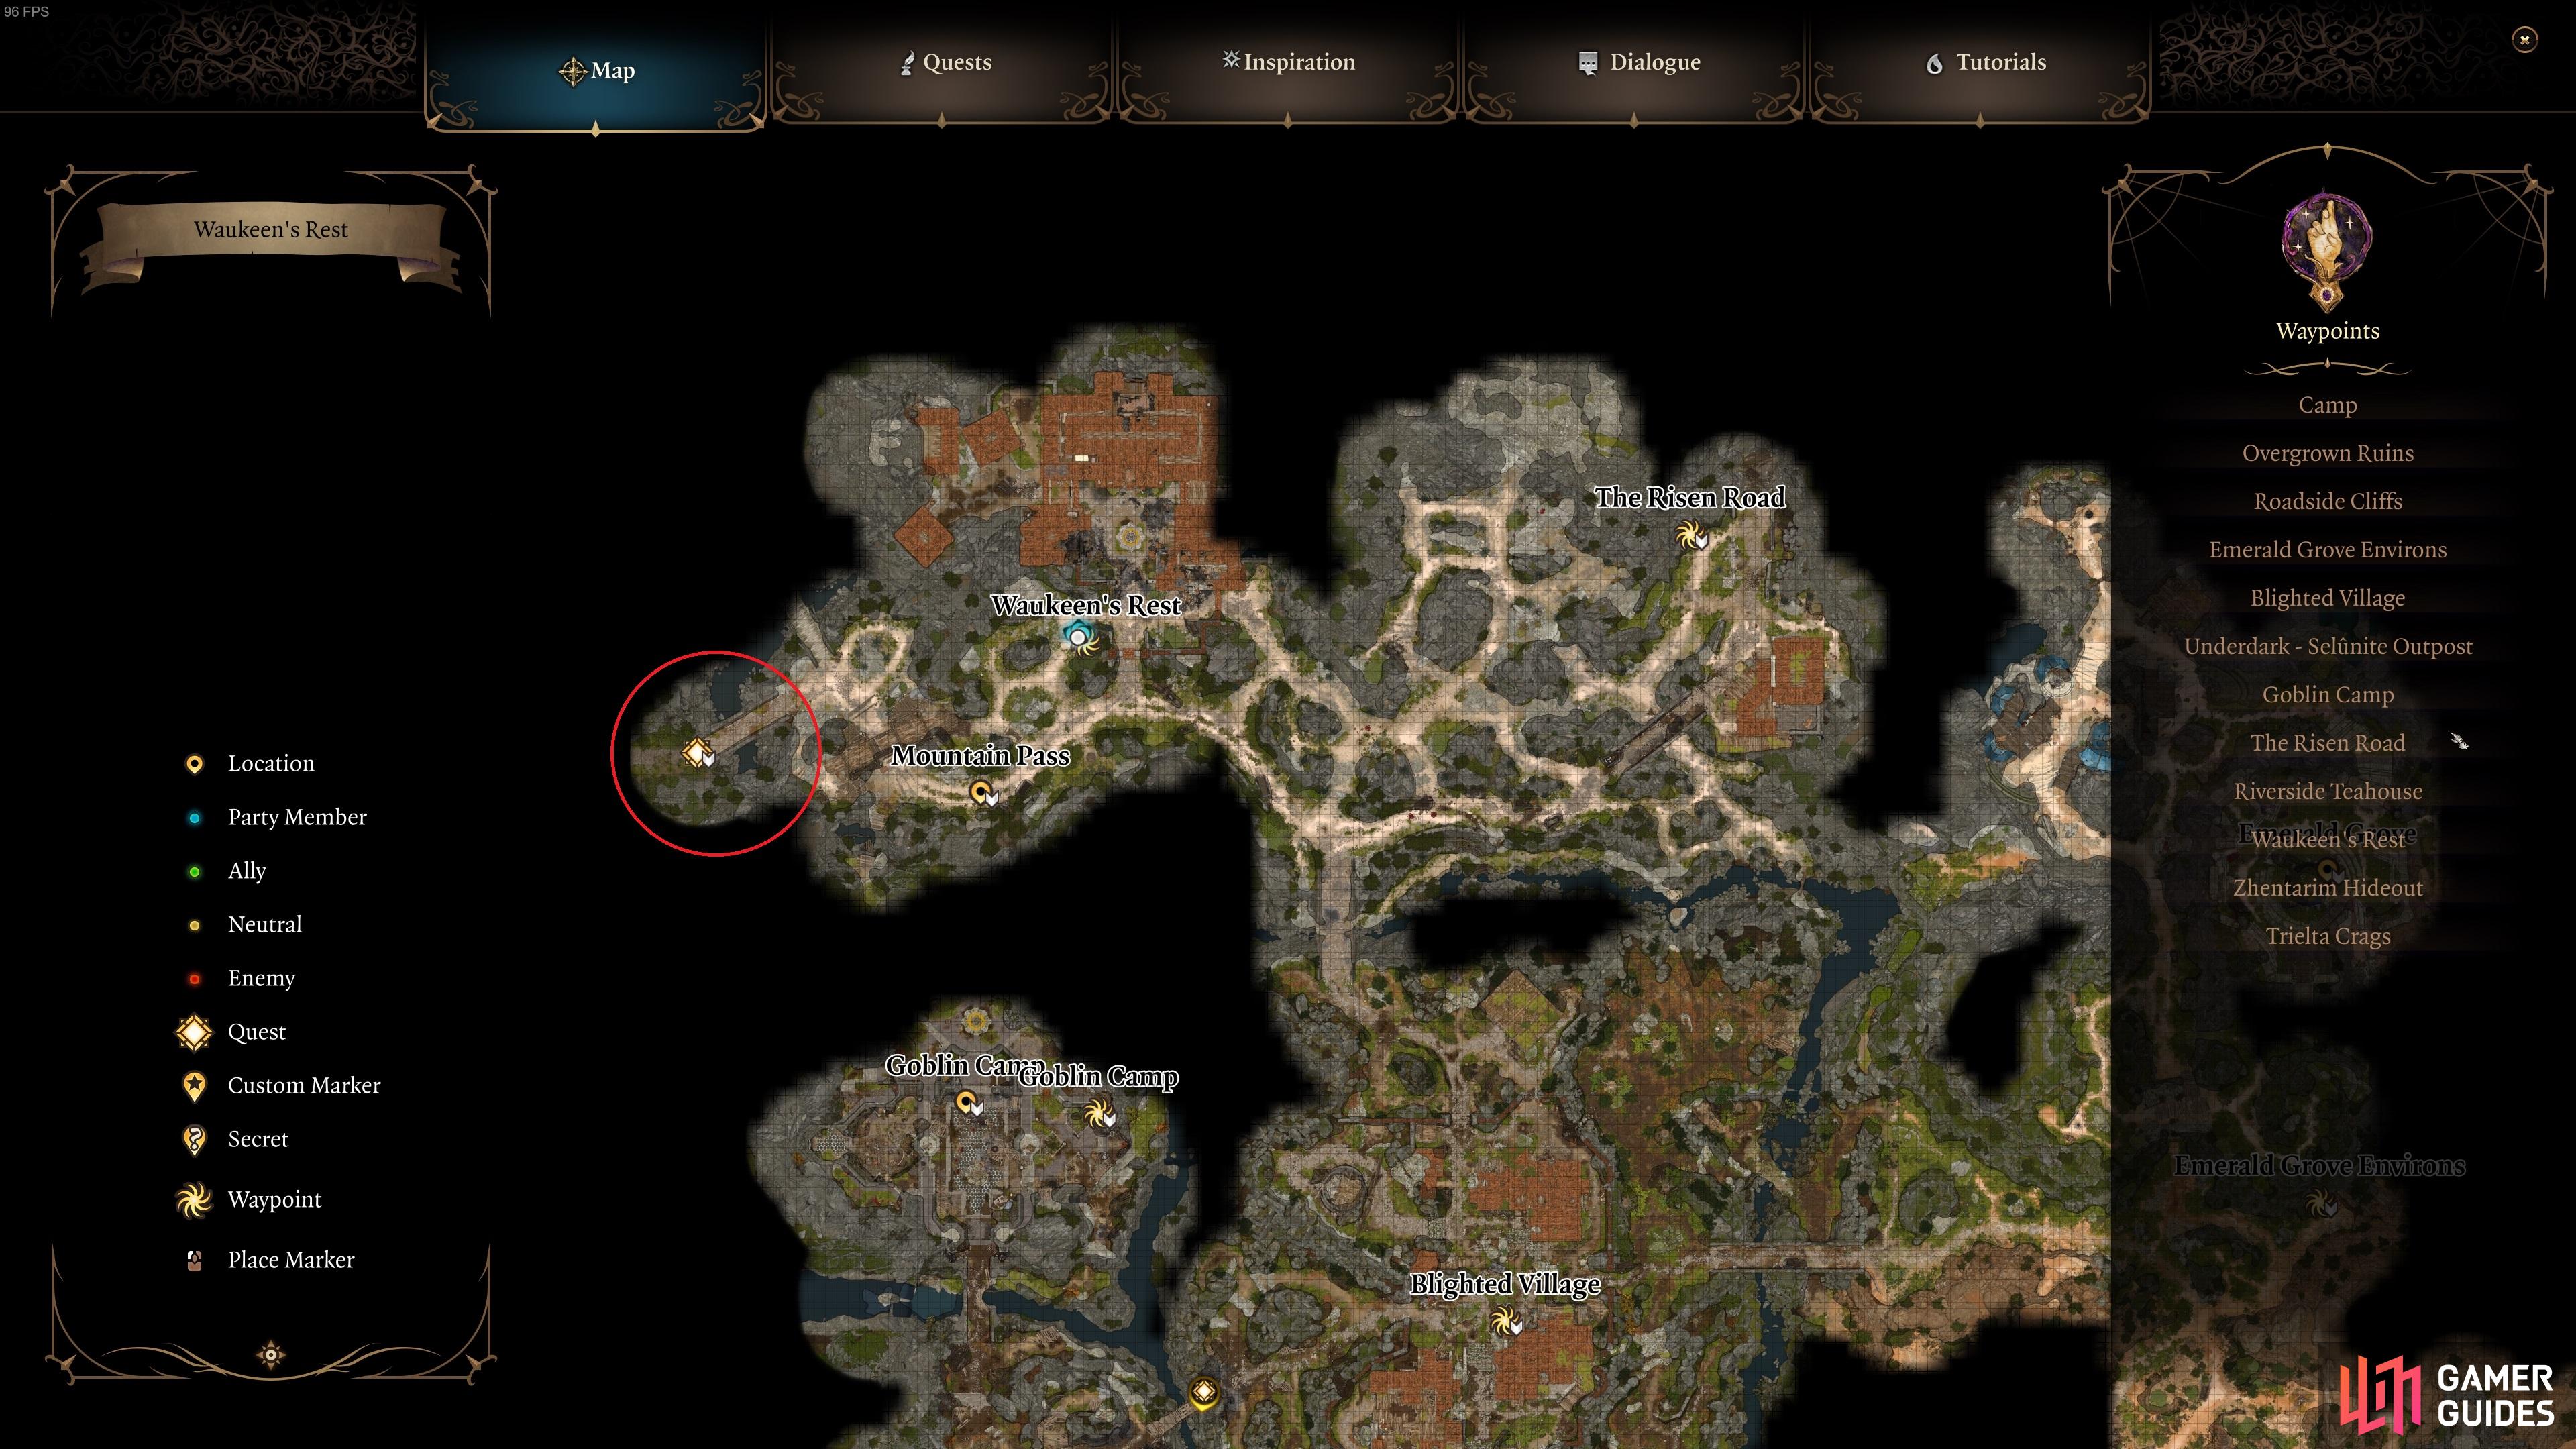
The location of Waukeen’s Rest, in the far northwest of the Wilderness map.
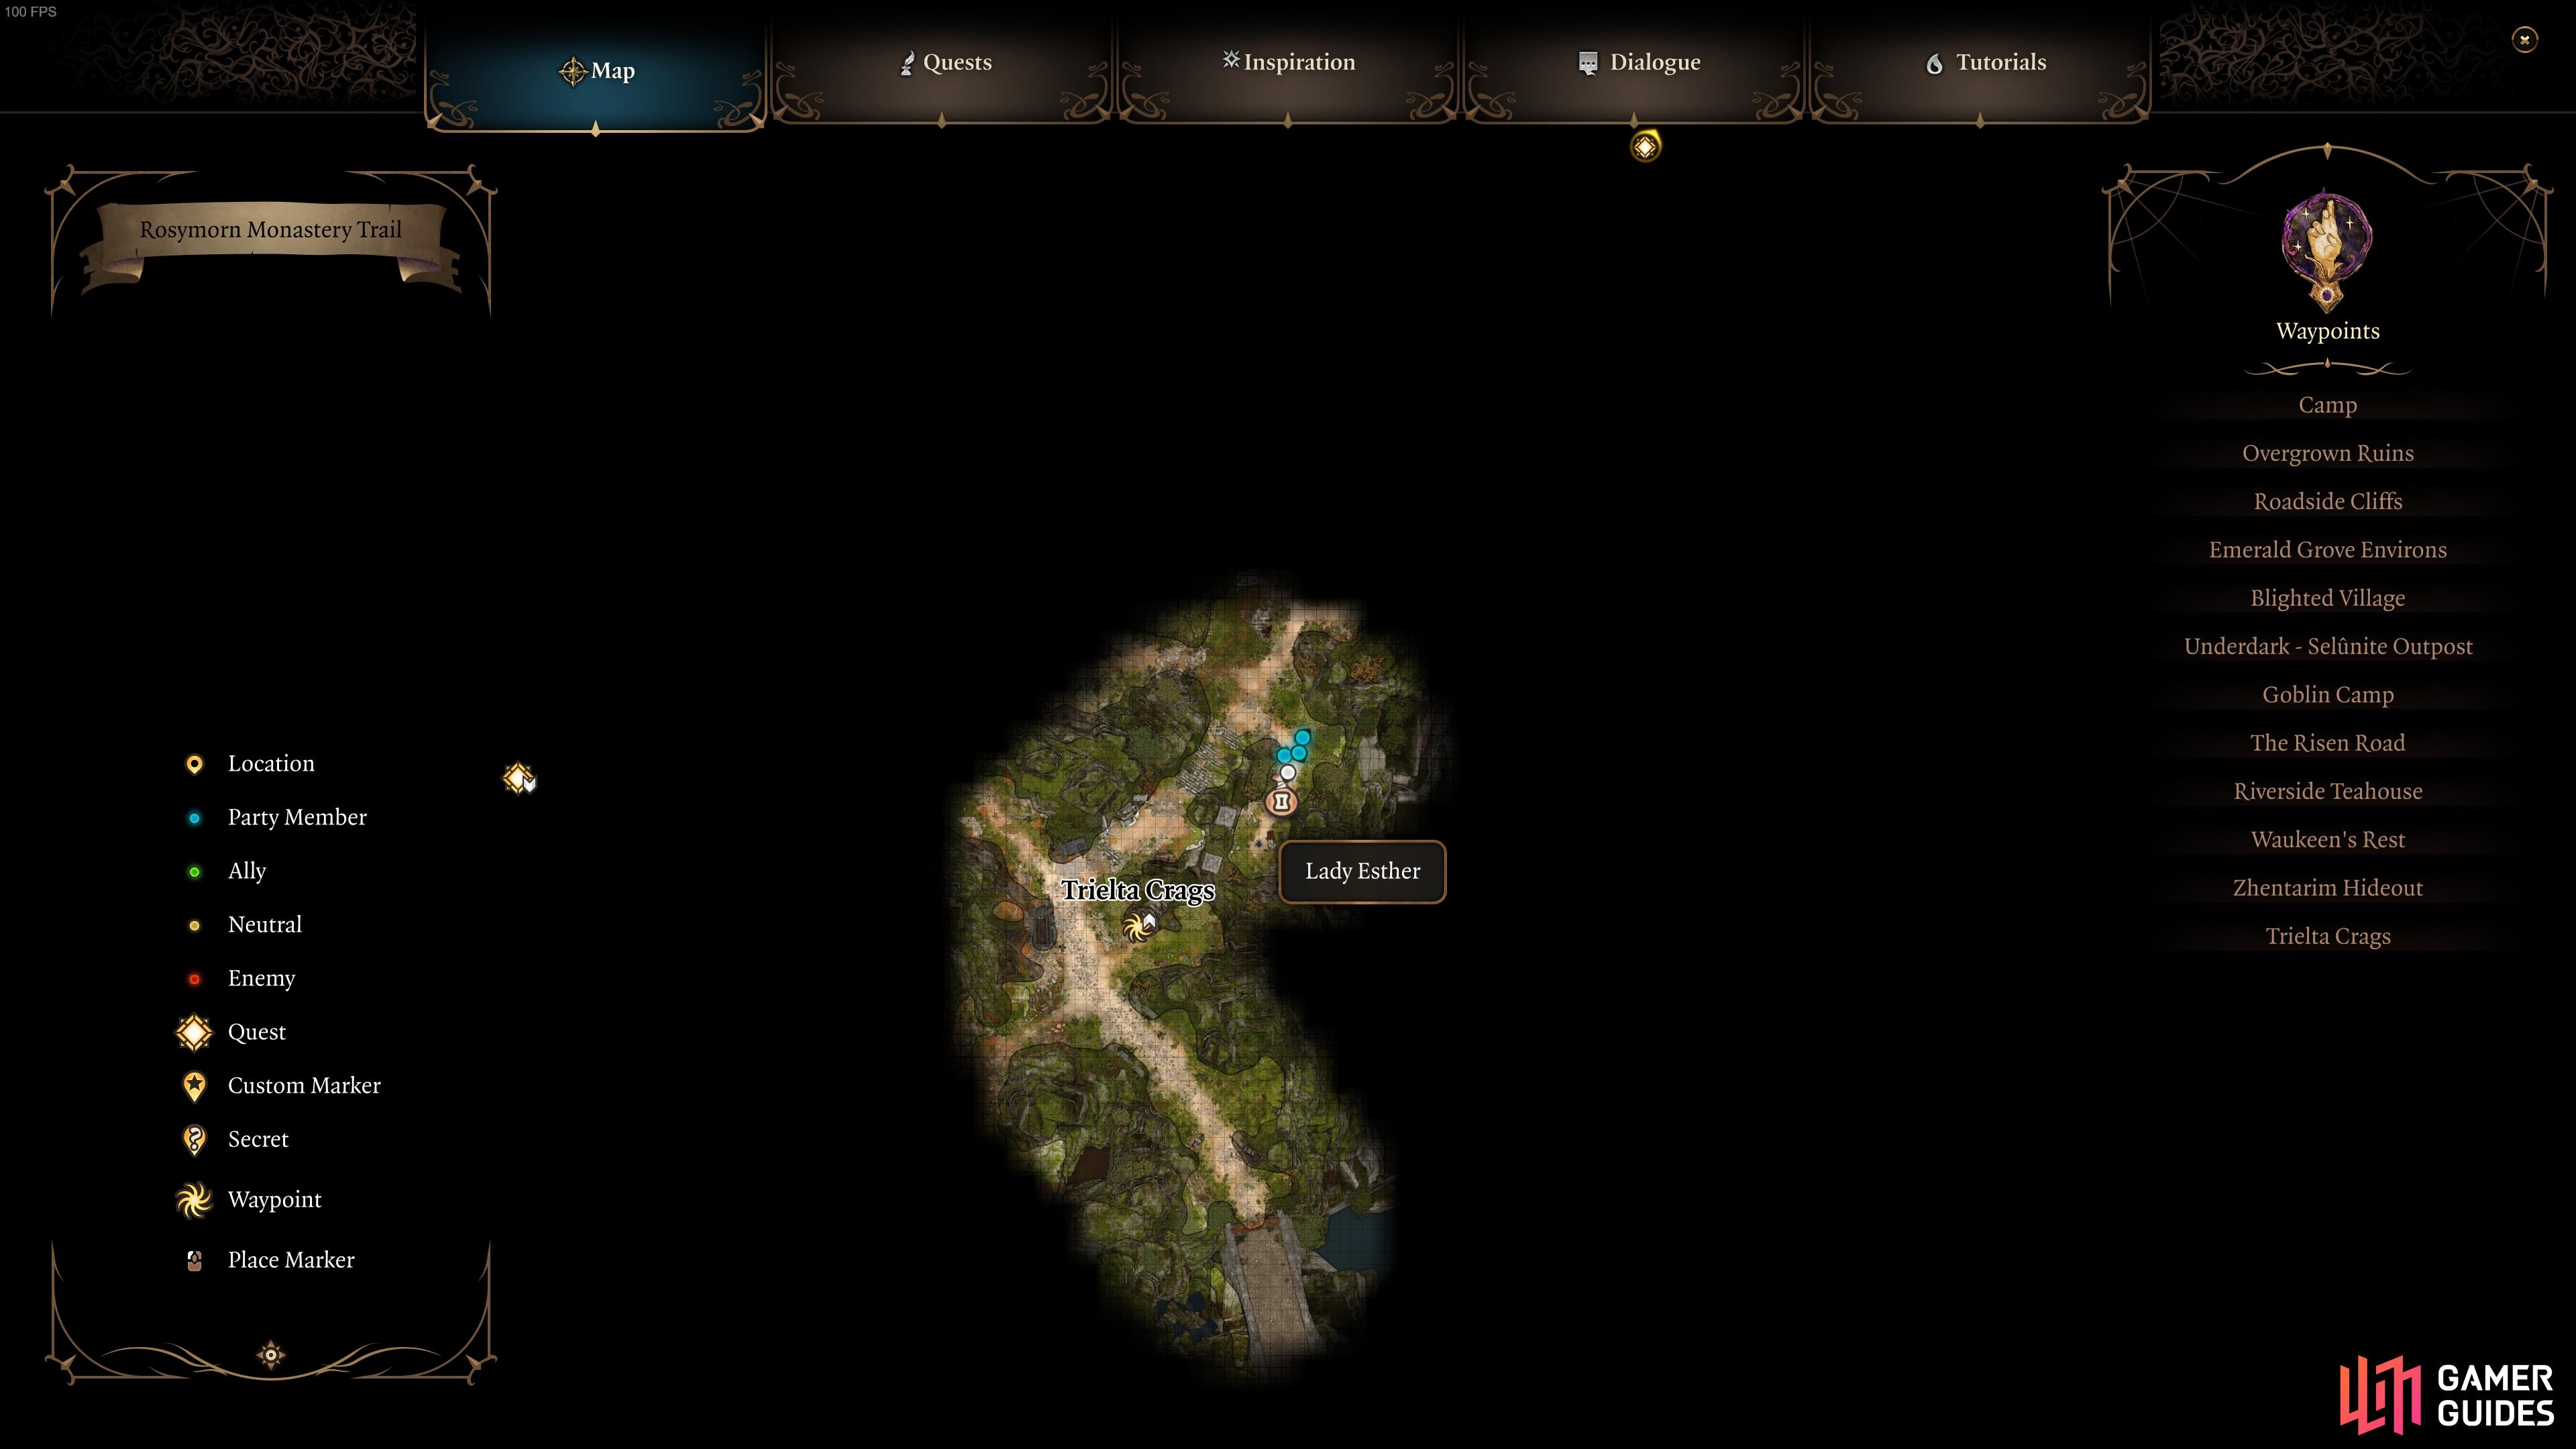
Once you’re in the Mountain Pass, continue northwest until you reach the Trielta Crags waypoint.
Lady Esther Dialogue Choices - Githyanki or Owlbear Egg?
Now that you’ve found Lady Esther in the Mountain Pass, you can introduce yourself and find out what she’s doing here. You’ll soon discover that she has been asked to retrieve a Githyanki Egg by the Society of Brilliance. This society is based in Baldur’s Gate, and they intend to incubate the egg before raising its spawn in their “tradition”. Lady Esther suggests that their tradition relates to raising the Githyanki in a “peaceful, nurturing environment to overcome its violent nature”, but with no direct experience of this mysterious society, it’s worth being cautious about these claims.
Should You Give Lady Esther the Githyanki Egg?
If you’re willing to trust that Lady Esther is telling the truth (or has been truthfully informed by the Society of Brilliance), you can go ahead and agree to steal the egg from the Githyanki Creche for her. However, if you do this then you might want to try to persuade her to pay you up front first. This will require a successful persuasion check with a fairly high class difficulty, so make sure that you speak to her with the character that has the best Charisma / Persuasion stats in your party. If you succeed, you’ll get around 260 gold up front.
The process of stealing the Githyanki egg can be difficult, depending on how powerful your party is at this point, or whether you can convince the Githyanki inside the Creche to let you pass without issue. The latter option is preferable, since you’ll have the opportunity to learn a bit more about their culture and even speak with a merchant located within the Creche, who has some decent items to sell (or steal!). It’s a good idea to make a manual save before you enter the Rosymorn Monastery / Githyanki Creche so that you can start again if you fail the roll checks, or if you come into difficulty with the combat encounters. The Creche is filled with Githyanki warriors, so it’ll take you some time to clear it if you choose the option of violence from the beginning.
Githyanki Egg Consequences
In the scenario where you entered the Githyanki Creche by convincing them to let you through with dialogue roll checks, you may still need to kill a few of them once you enter the Hatchery section of the ![]() Creche Y’llek (the Githyanki name for their Creche). In the Hatchery you will find three or four guards watching over the Githyanki egg at the back of the room. One of these is Varsh Ko’kuu, the Custodian of the Hatchery, who is much tougher than the others. To reach the egg you will need to jump over some of the rock platforms through the pools, and along the way you’ll also encounter some Repulsion Mines.
Creche Y’llek (the Githyanki name for their Creche). In the Hatchery you will find three or four guards watching over the Githyanki egg at the back of the room. One of these is Varsh Ko’kuu, the Custodian of the Hatchery, who is much tougher than the others. To reach the egg you will need to jump over some of the rock platforms through the pools, and along the way you’ll also encounter some Repulsion Mines.
All in all, the process of even reaching the egg can be a tricky one, and it’s made even more difficult by the fact that the Githyanki guards are positioned in such a way as to make sneaking or hiding extremely difficult. There are ways to distract them if you separate your party members and position them in ways which draw the attention of the guards away from the egg, but this will only work for a short duration, and there’s a good chance that you’ll still be caught in the process.
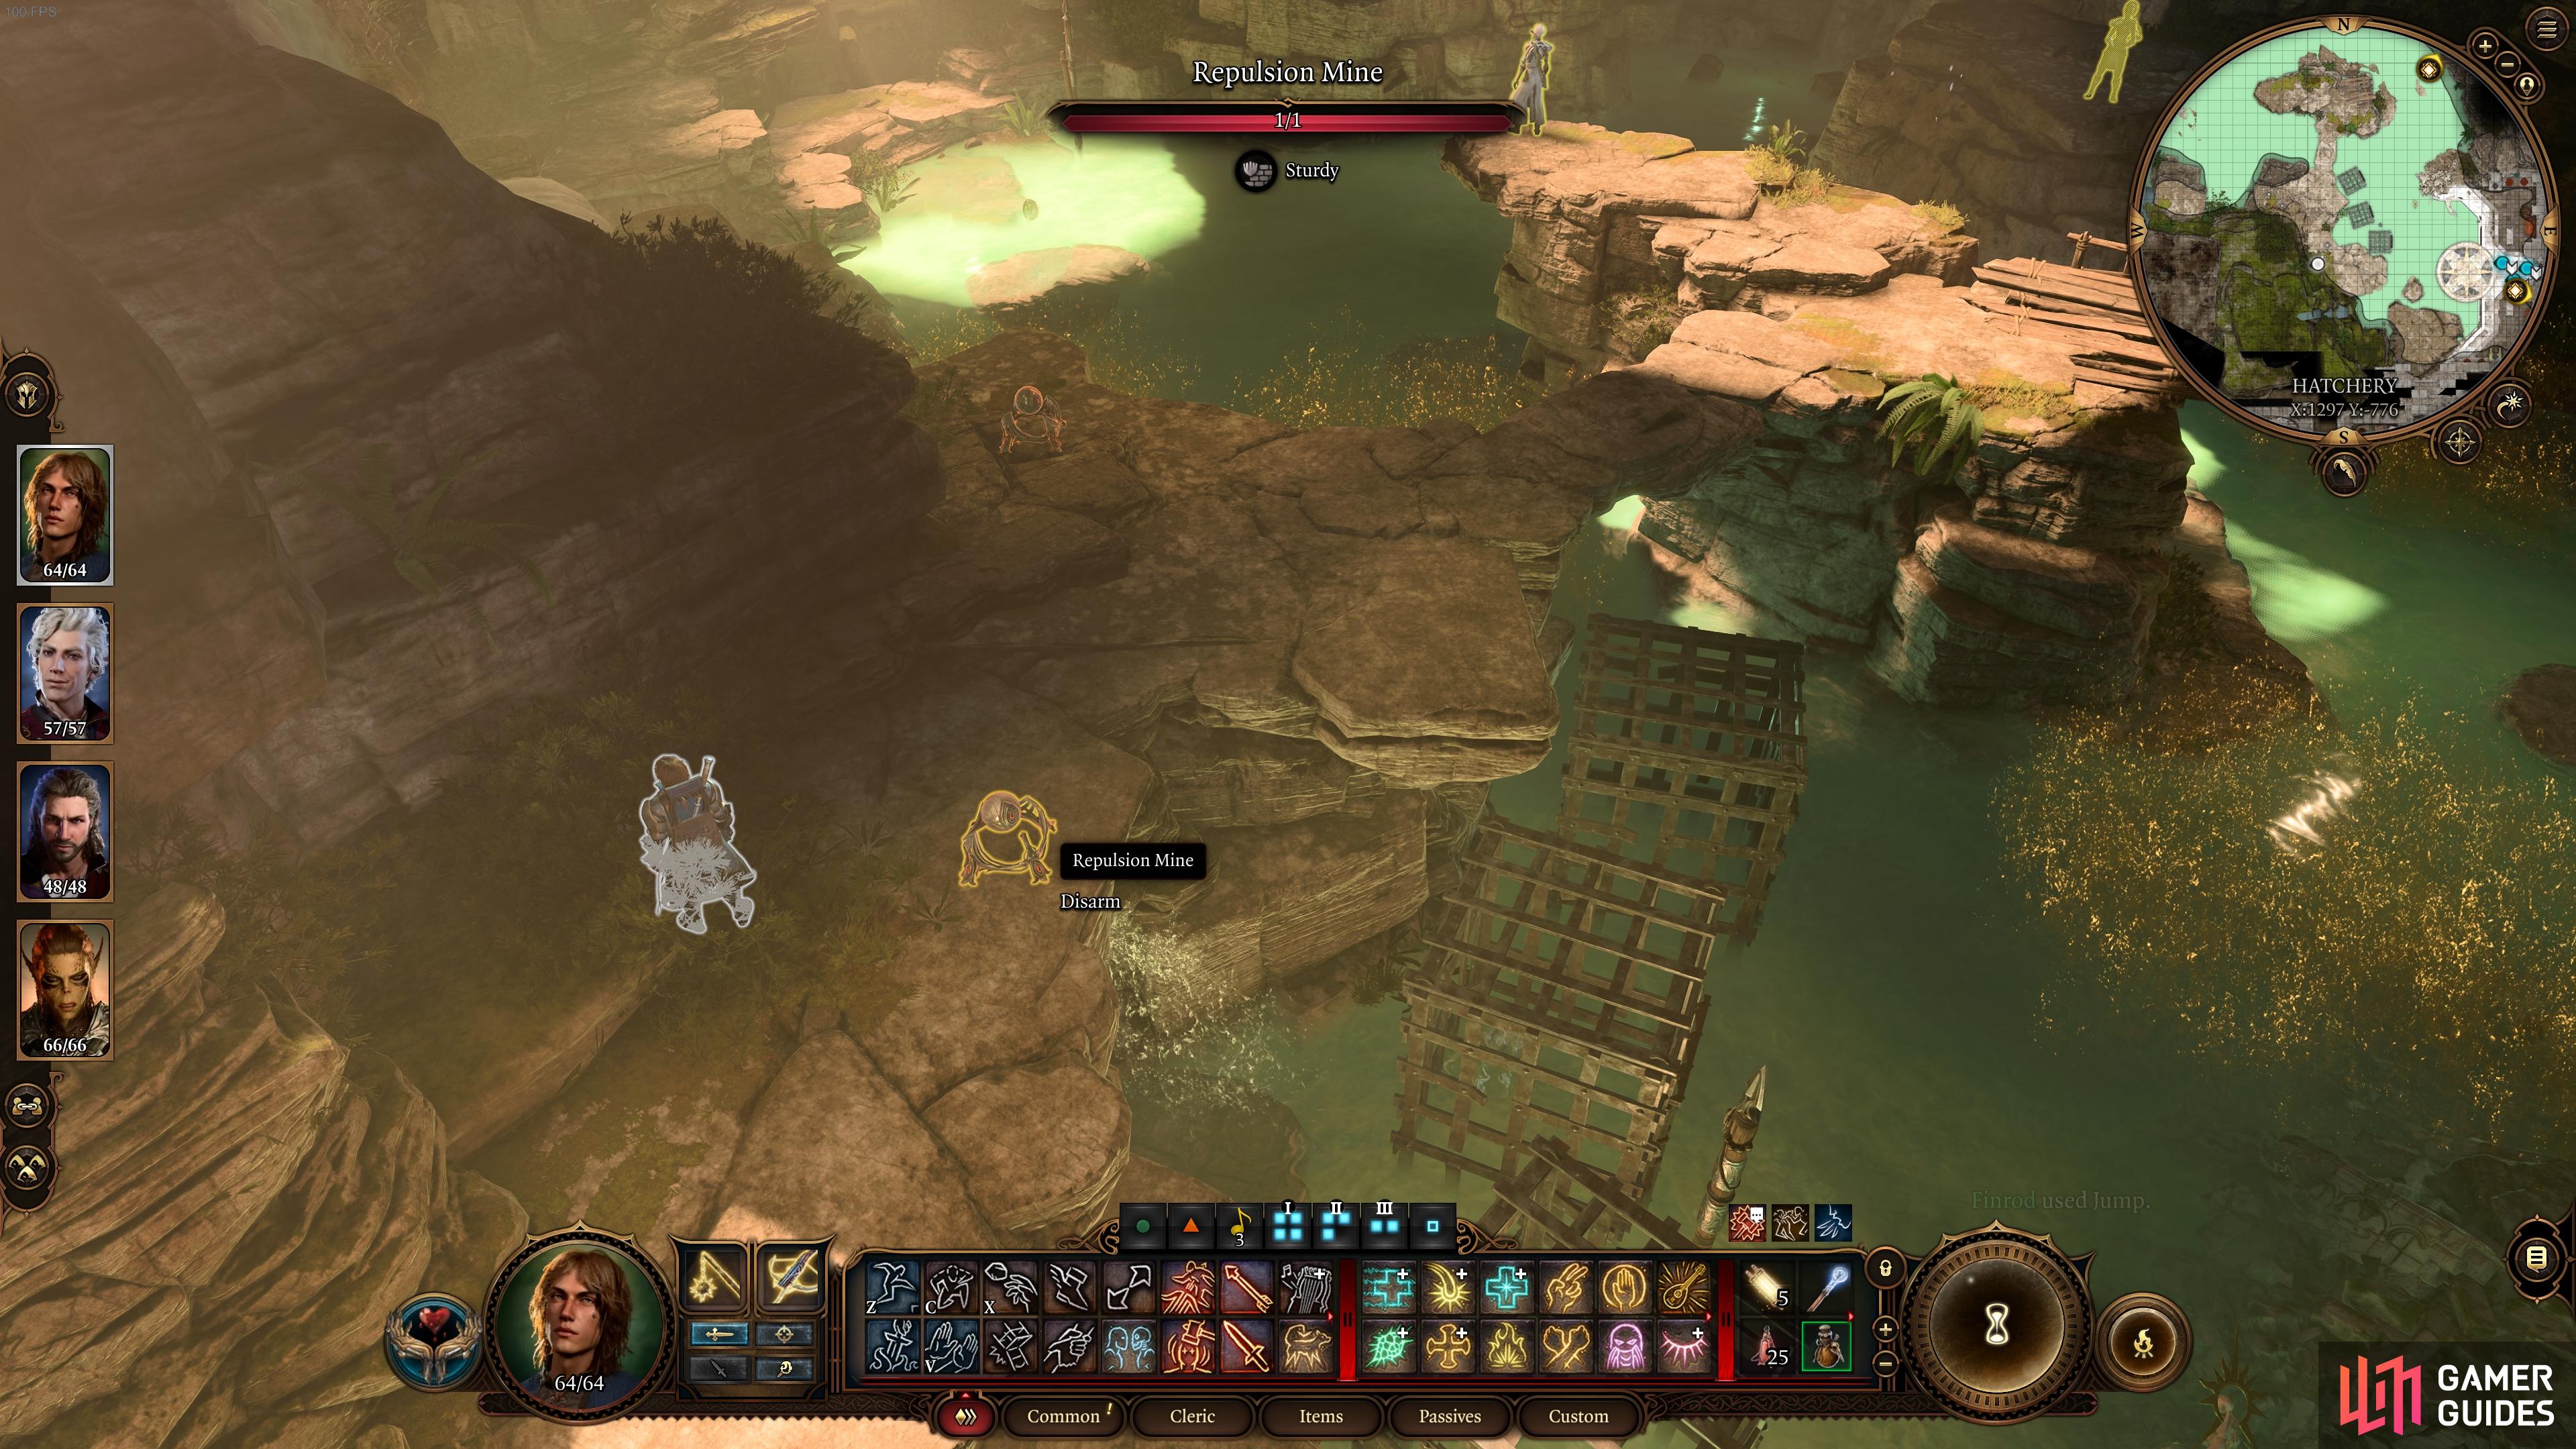
Be careful to avoid the Repulsion Mines in the Hatchery as you make your way to Varsh Ko’Kuu.
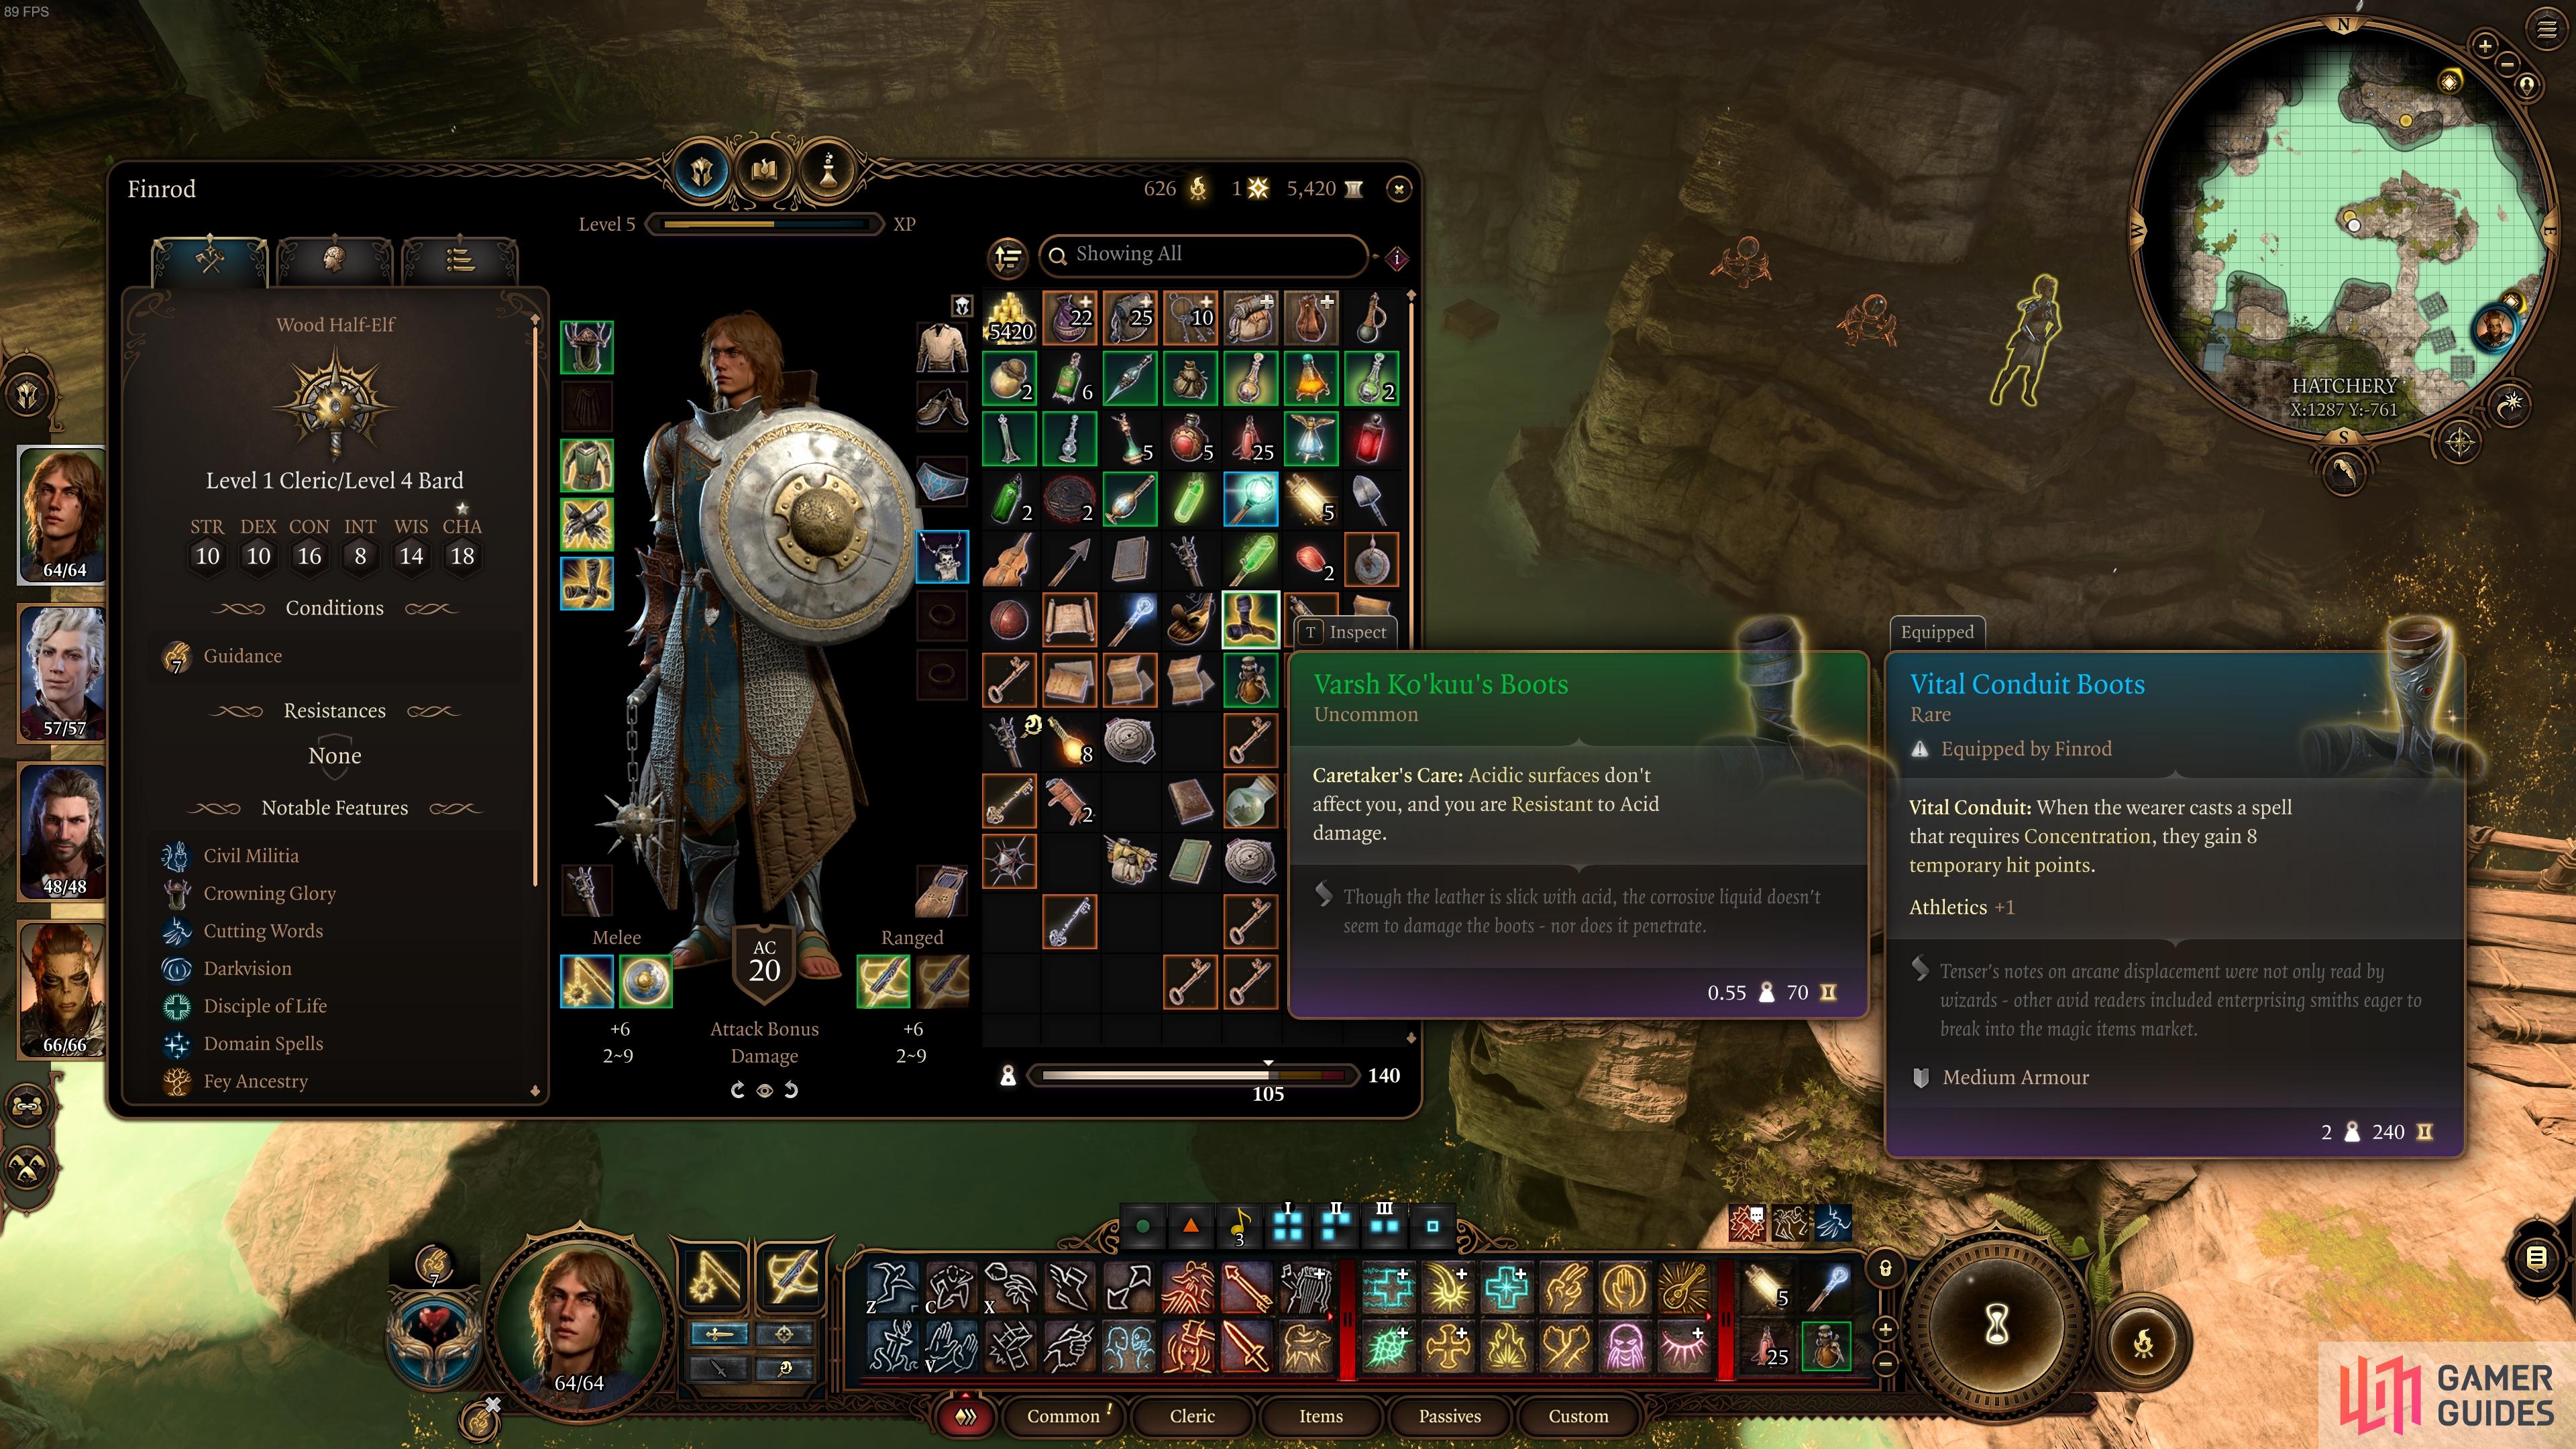
You can get Varsh Ko’Kuu’s boots by killing him or persuading him to let you take the egg.
The option to fight these Githyanki is easier than sneaking, so long as your party is of a sufficiently high level (at least 4+) and well equipped. You can fight the Githyanki in the Hatchery without alerting the rest of the Creche, but you should close the Oak Door at the entrance to make sure that no patrols come wandering in. There’s plenty of time to position your characters in optimal places to surprise the Githyanki here, so you should have the advantage.
If you don’t want to sneak or fight, there is a third option which involves some dialogue checks with Varsh Ko’kuu. This is by far the easiest option, since you can make a manual save to make sure that you pass the dialogue checks. If you do this you’ll get the egg without having to spill any blood, and you can still walk through the acid water without taking any damage, since you get Varsh Ko’kuu’s Boots. To make this work, use the [Persuasion] dialogue options, and then respond to Varsh Ko’kuu’s question about what you’ll do with the egg using one of the options below:
- I’ll raise it as if it were my own flesh and blood.
- I’ll find another creche. One that’s more forgiving.
Needless to say, if you say that you’ll make the best omelette you’ve ever tasted or ask how much they sell for, Varsh Ko’kuu won’t be best pleased.
After persuading the Githyanki or killing them, all you need to do is take the egg from the water and then teleport back to the Trielta Crags waypoint, where Lady Esther will be waiting. She’ll take the egg and thank you, indicating that she’ll see you at Baldur’s Gate when you make it there. You might think that this is a positive outcome if you don’t care for the Githyanki, but there’s more to this story than you might expect, as we reveal in the spoiler below.
If you take the Githyanki egg and give it to Lady Esther, she’ll bring it back to the Society of Brilliance in Baldur’s Gate. However, this will result in a tragic end for everyone involved. It turns out that the society abuse the young Githyanki, causing it to lash out and kill some of them, including Lady Esther.
If you don’t want to be responsible for the above outcome, you can actually choose to keep the egg for yourself. It has a weight rating of 20, so it’s best to send it back to your camp chest. We haven’t yet discovered what you can do with the egg (if anything) by keeping it for yourself, but we’ll be updating this page with that information as soon as we know more.

You can approach the Githyanki egg safely wearing Varsh Ko’Kuu’s boots.
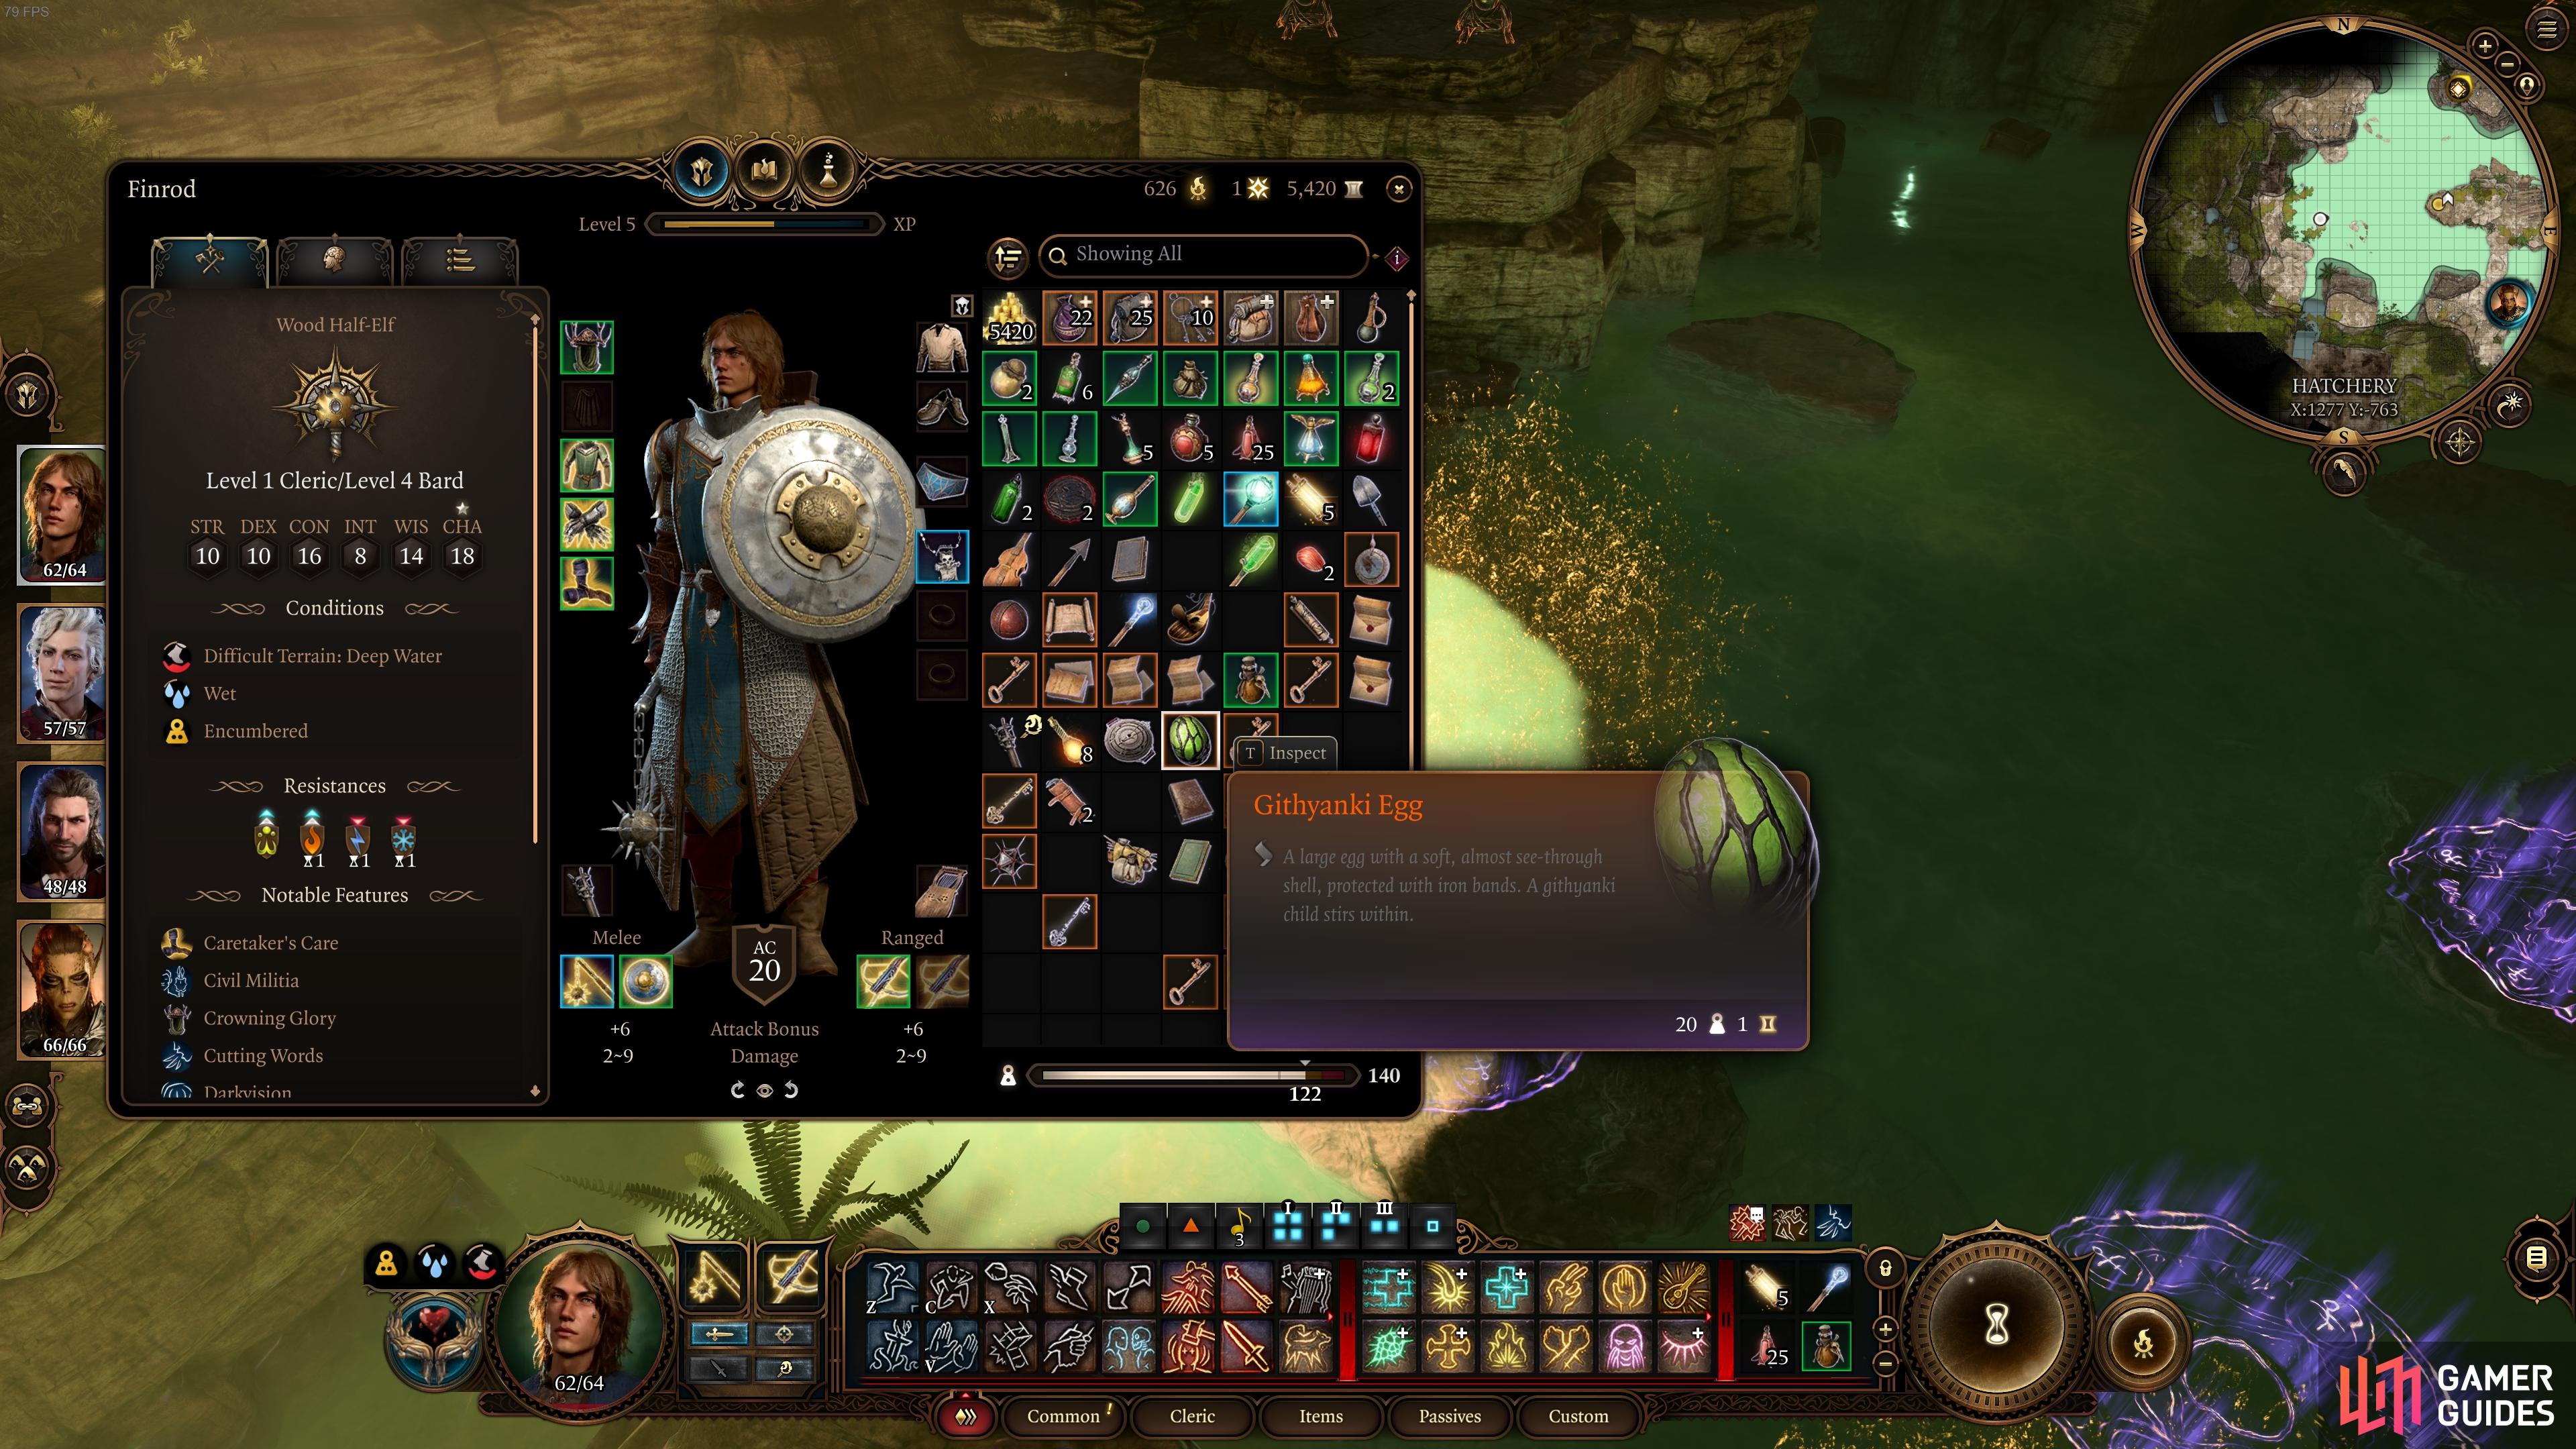
The Githyanki egg weighs a fair bit, so it’s best to send it to your camp chest once acquired.
Owlbear Egg Consequences
There is another path that you can take for Lady Esther’s request, but this requires you having an Owlbear egg in your inventory. You can get one of these from the Owlbear Cave in the Wilderness region, and you can read more about how to do this on our Owlbear Nest Walkthrough: Owlbear Egg & Chest page. Assuming you have the egg, all you need to do is offer to give it to Lady Esther, pretending that it’s a Githyanki egg. She will be suspicious of its origin once you produce the owlbear egg, but you’ll have three options for roll checks to convince her:
- [Nature] The curves, the coloration, the size - looks right to me.
- [Deception] No, but this owlbear egg is worth much more. And it can all be yours.
- [Persuasion] Of course not. It’s from an owlbear. But I bet your employers won’t know the difference.
The [Nature] roll check is the most difficult here, but if you succeed Lady Esther will believe that it’s a Githyanki egg, and she’ll take it back to the Society of Brilliance with that assumption. The [Deception] check is more of a personal offer rather than a deception, since you can convince Lady Esther to keep it for herself, but she’ll still have nothing to give to the society. The [Persuasion] option is more cooperative, letting her in on the deception and convincing her to present it to the society as a Githyanki egg, without them knowing any better.
Regardless of your choice, it doesn’t come without consequences. If you want to know these in advance, see the spoiler below.
If you give the Owlbear egg to Lady Esther for her to take it back to the Society of Brilliance, the outcome will be similar to what happens if she takes the Githyanki egg: the Owlbear will hatch and it will slaughter everyone in sight, including Lady Esther. If you want to avoid this, don’t give her either egg.
Best Outcomes for Lady Esther and the Githyanki / Owlbear Egg
The best outcome for this quest will vary depending on your roleplaying preferences, and what you think of Lady Esther. If you want to avoid the consequences noted in the spoilers above, it’s best not to give her either the Githyanki egg or the Owlbear egg. You can still get both of these for yourself and keep them stored in your camp chest until you find a use for them, or until you want to sell them for a decent amount of gold. If you’d rather see exactly what happens by giving Lady Esther either egg, you can read the spoilers above.
With all that said, there’s still the option to keep both eggs, kill Lady Esther and loot everything that she has to sell. But only a truly evil character would do that, right?
More Baldur’s Gate 3 Guides
If you’re looking for more BG3 guides, be sure to check the links below.
No Comments