
Near the end of Baldur’s Gate 3, you’ll need to collect all three Netherstones to stop the evil looming above the city, and one of these Netherstones will be in the hands of Lord Gortash. Before you pry it from his cold dead hands, there are a few things you may want to do first to make your life easier. Read below to find out about where you can find Lord Gortash, should you have an alliance with him, and how to defeat him if you don’t.
Will Lord Gortash be friend or foe? Read out below to find out more!
Lord Gortash Location
Let’s start off with where you can find Lord Gortash. As you progress through Act 3, you’ll soon find out that he’s having an audience in the ![]() Wyrm’s Rock Fortress where he will become Archduke of the city. At some point, he will formally invite you to be a part of the ceremony as well as offer you some important choices you must make, but more on that later. Although you can find him in Wyrm’s Rock, some variables will change his exact location.
Wyrm’s Rock Fortress where he will become Archduke of the city. At some point, he will formally invite you to be a part of the ceremony as well as offer you some important choices you must make, but more on that later. Although you can find him in Wyrm’s Rock, some variables will change his exact location.
If you’ve just arrived at Wyrm’s Rock, he will be in the throne room, but if you speak to Orrin first, she’ll ask you to kill him for her as she is bound to not do it herself. This will change his location, and he’ll be above the throne room which can be accessed via a door on the west side of the room which leads to scaffolding, or the passageway (stairs) in the northwest. Before you even attempt to do any of this, we highly recommend you disable the Steel Watch via the Steel Foundry quest. Otherwise, these mechanical monsters will roam the rooftop where Gortash can be found on top of the fort.
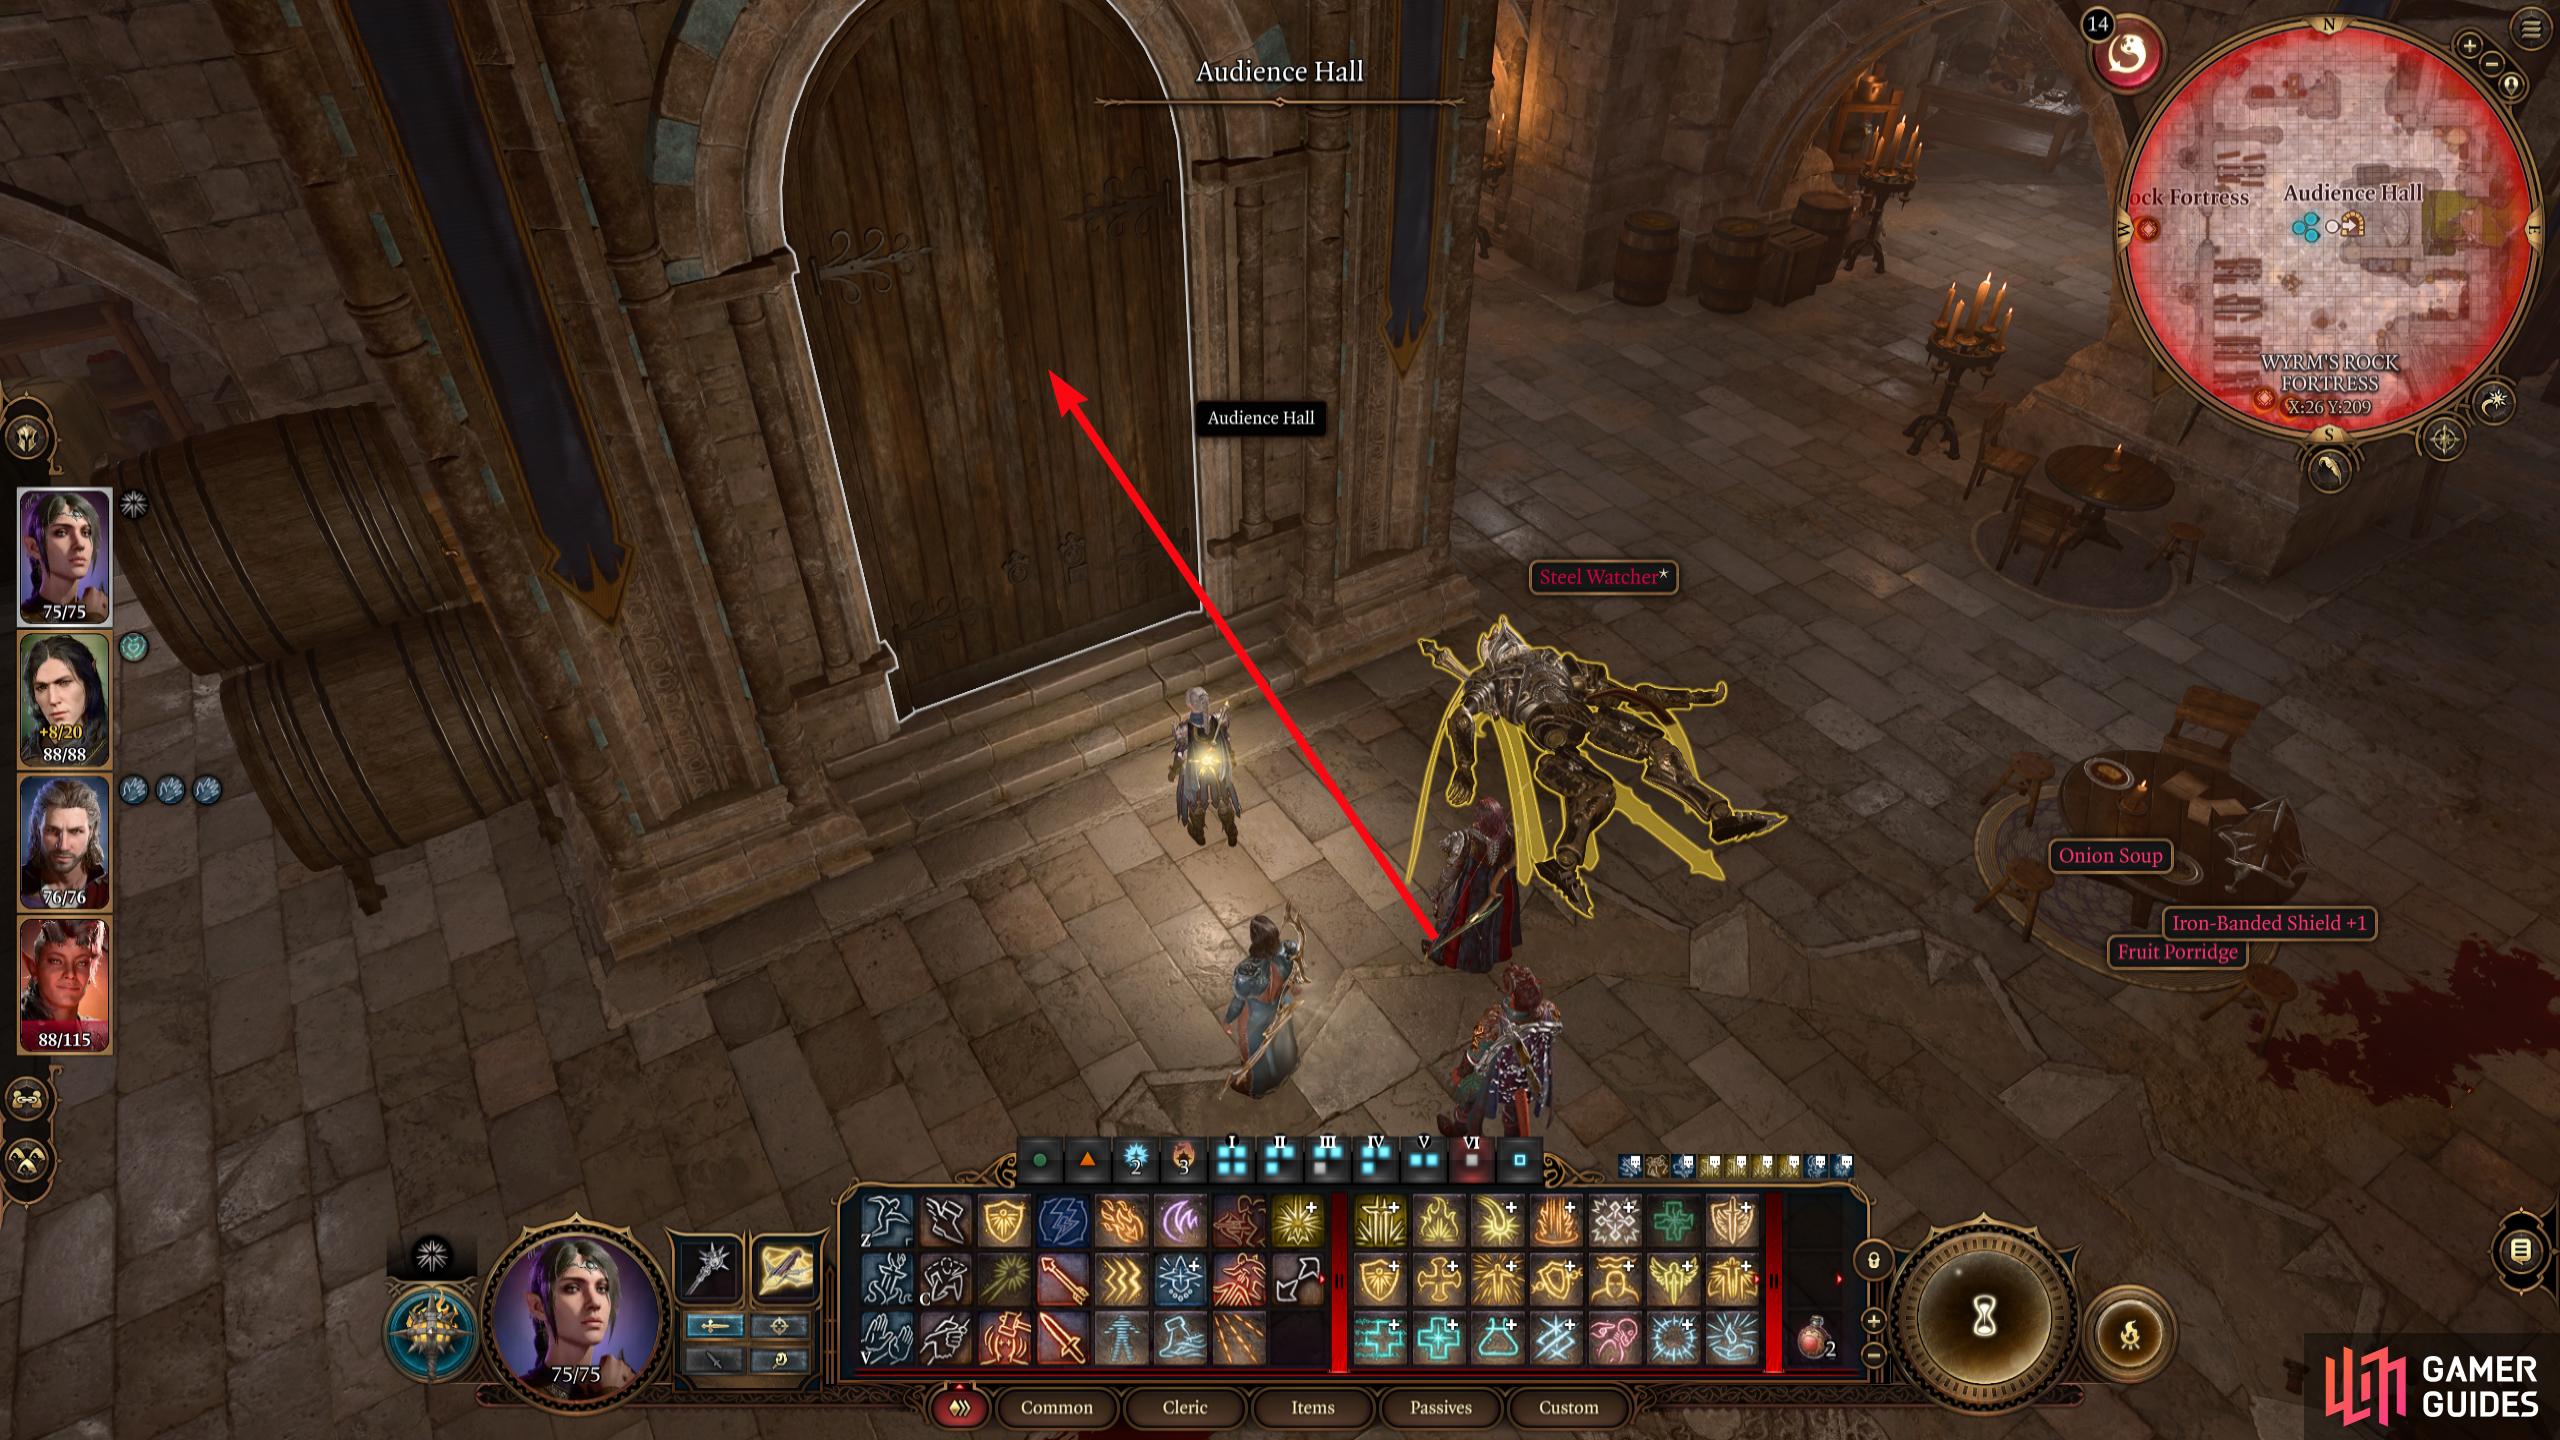
(1 of 5) Head into the Audience Hall where you’ll find Gortash if you haven’t spoken to him yet.
Lord Gortash Alliance - Yes or No?
Now, you know where you can find him, but should you take him up on his alliance offer? Well, his offer is for you to kill Orrin because, like her, he can’t do it himself. We recommend telling him you’ll think about it, but refuse the offer later on as getting to Orrin is a lot more difficult than getting to Gortash. So you should accept Orrin’s offer when you get the chance.
If you ignored Lord Gortash at Wyrm’s Rock when you first got there then proceeded to save the Duke and disable the Steel Watch, Gortash will be hostile to you without even giving you the option to have an alliance.
Lord Gortash Boss Guide Strategy
This is an explosive battle (literally) and somewhat strange. The room (at the top of the fort) is jam-packed with traps, especially near the entrance to the room, and sometimes Gortash will sprint straight toward your party near the doors, activating the traps which will cause them to explode; dealing significant damage to himself and your party. For such a prominent character in the game, you’d expect more from the battle as it feels on the slightly easier side, but if you fight him properly (and he doesn’t try to end himself first), he and his allies can deal significant damage to you, which can make the battle a bit more challenging, so you still have to respect him.
Right, if he isn’t dead in the first two turns from his silly antics, you’ll be facing the real battle. Before you start the conversation preceding the battle, disarm both traps on either side of the room entrance from the statue room, as this is a great place to leave your mages/low AC characters. Now move one of your higher AC characters to the middle of the entrance, and talk to Gortash with the other.
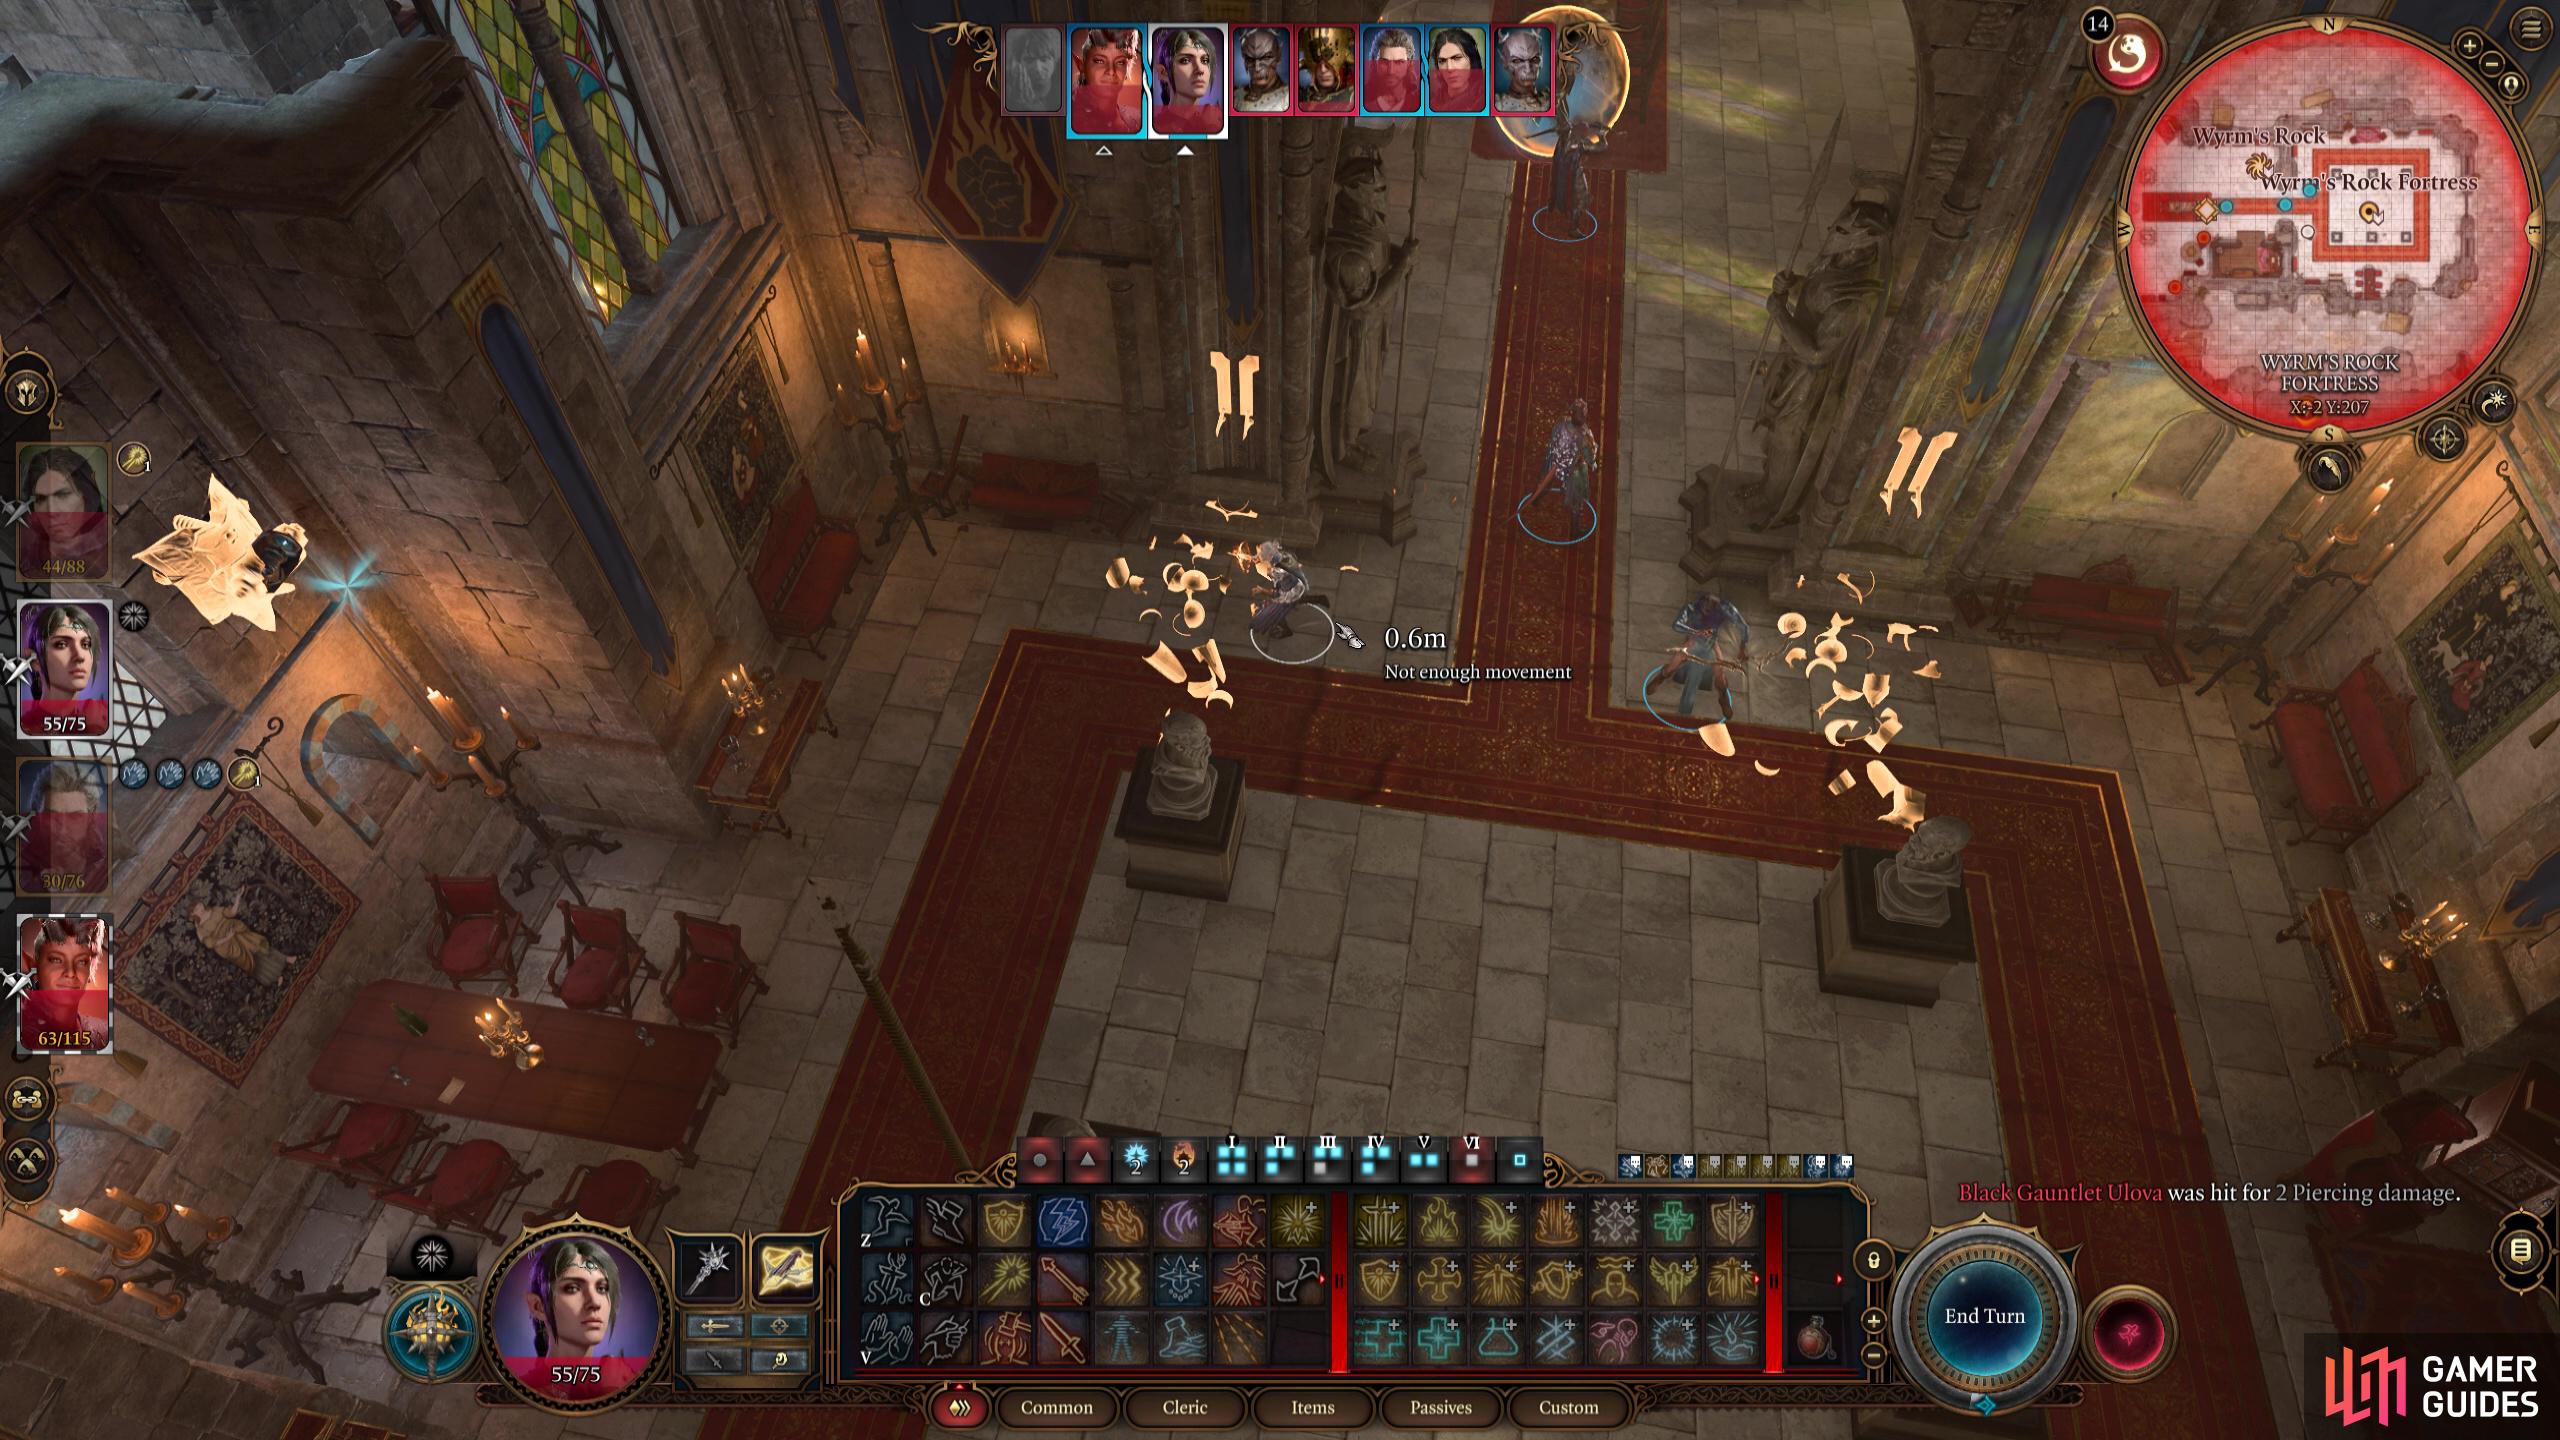
Set your party up like this, with the lower AC members on either side of the door. Make sure you disarm the traps first!
At the start of the battle, focus on taking down the additional enemies first.
If you told Gortash that you would think on his offer earlier, he will still think that you’re thinking on it even after you’ve disabled the Steel Watch, and saved the Duke which is why we think it may be a bug. Either way, say to him either “Say goodbye, Gortash” or if you have Karlach “Karlach, stop this. You’re burning too hot” and the battle will begin.
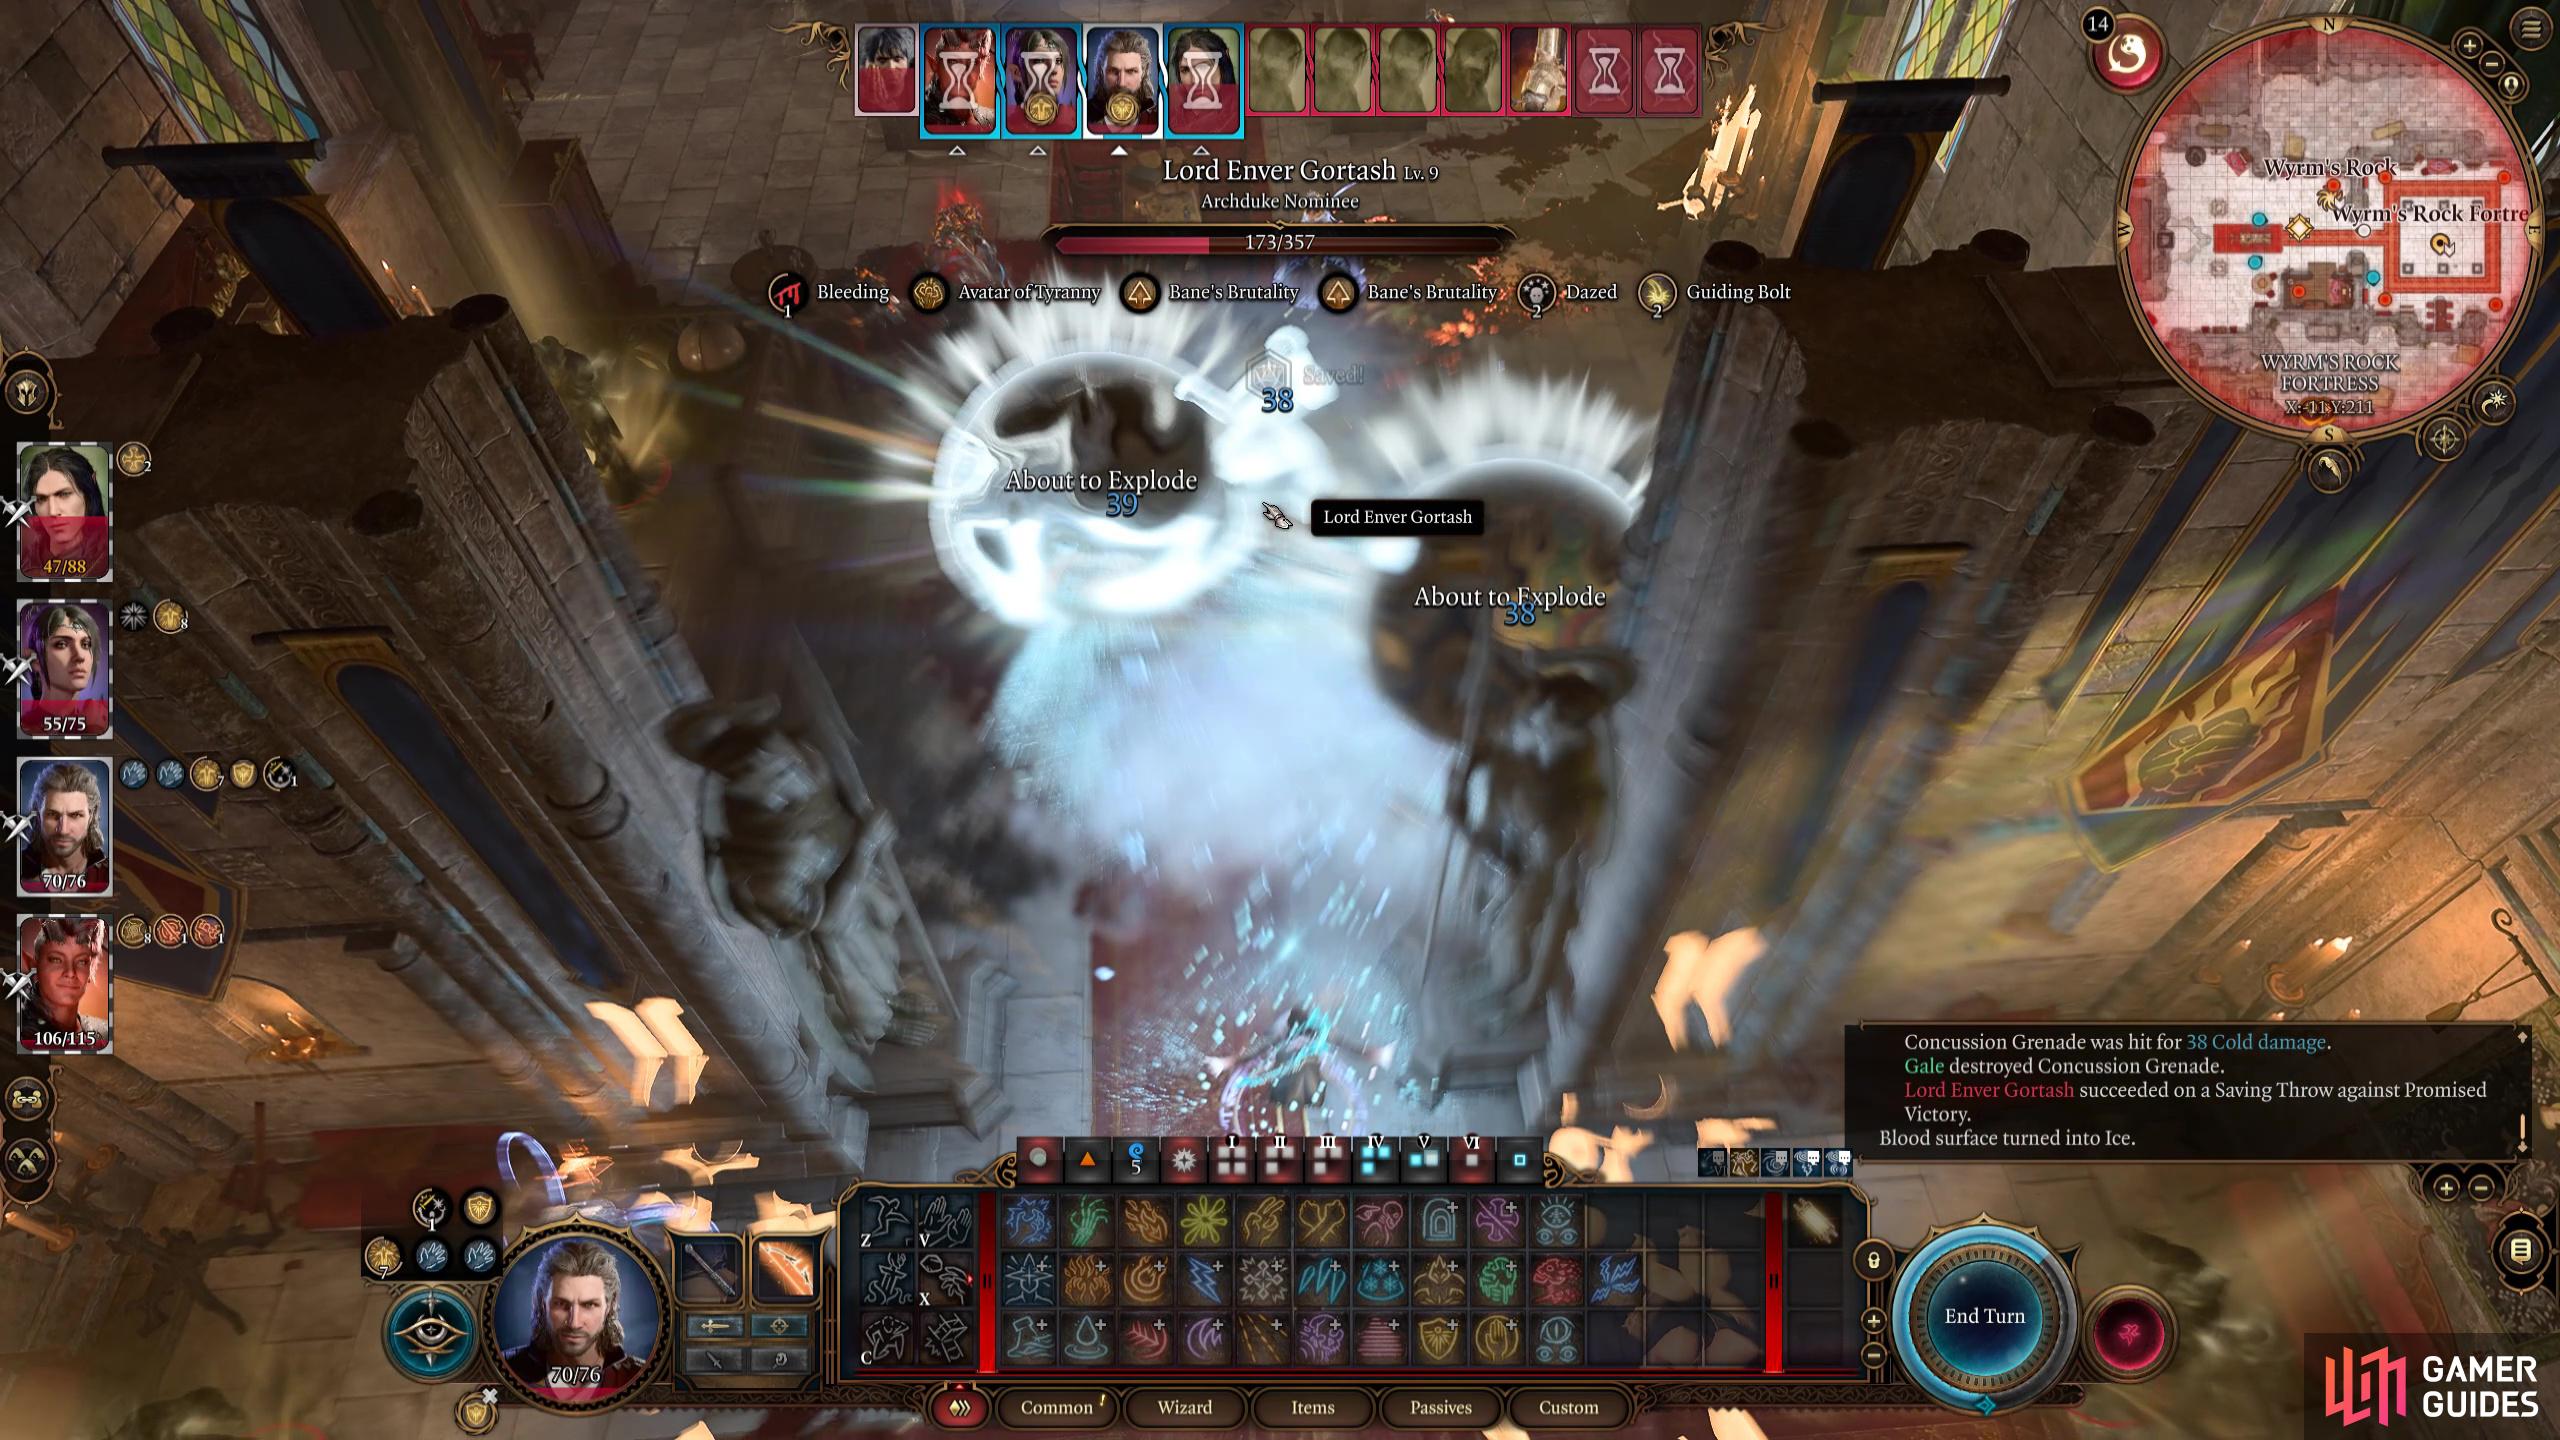
Lord Gortash will start the battle by gaining the Shell of Resistance shield on him from the “traps” at the back which grants him immunity to Thunder damage and Resistance to elemental damage. This only lasts one turn, so save your hard-hitting spells for the next turn. He comes equipped with a Crossbow as well as a feat called Crossbow Expert: Point-Blank which allows him to make crossbow attacks without receiving Disadvantage. Then he has a few more feats that give him various bonuses such as Authority which gives him Advantage on Intimidation and Insight checks, Advantage on Saving Throws on Charm and Frightened (Dark Devotion), immunity to Frightened and other emotion-altering conditions (Dauntless), and other various feats that increase his resistance or increase his unarmed attacks.
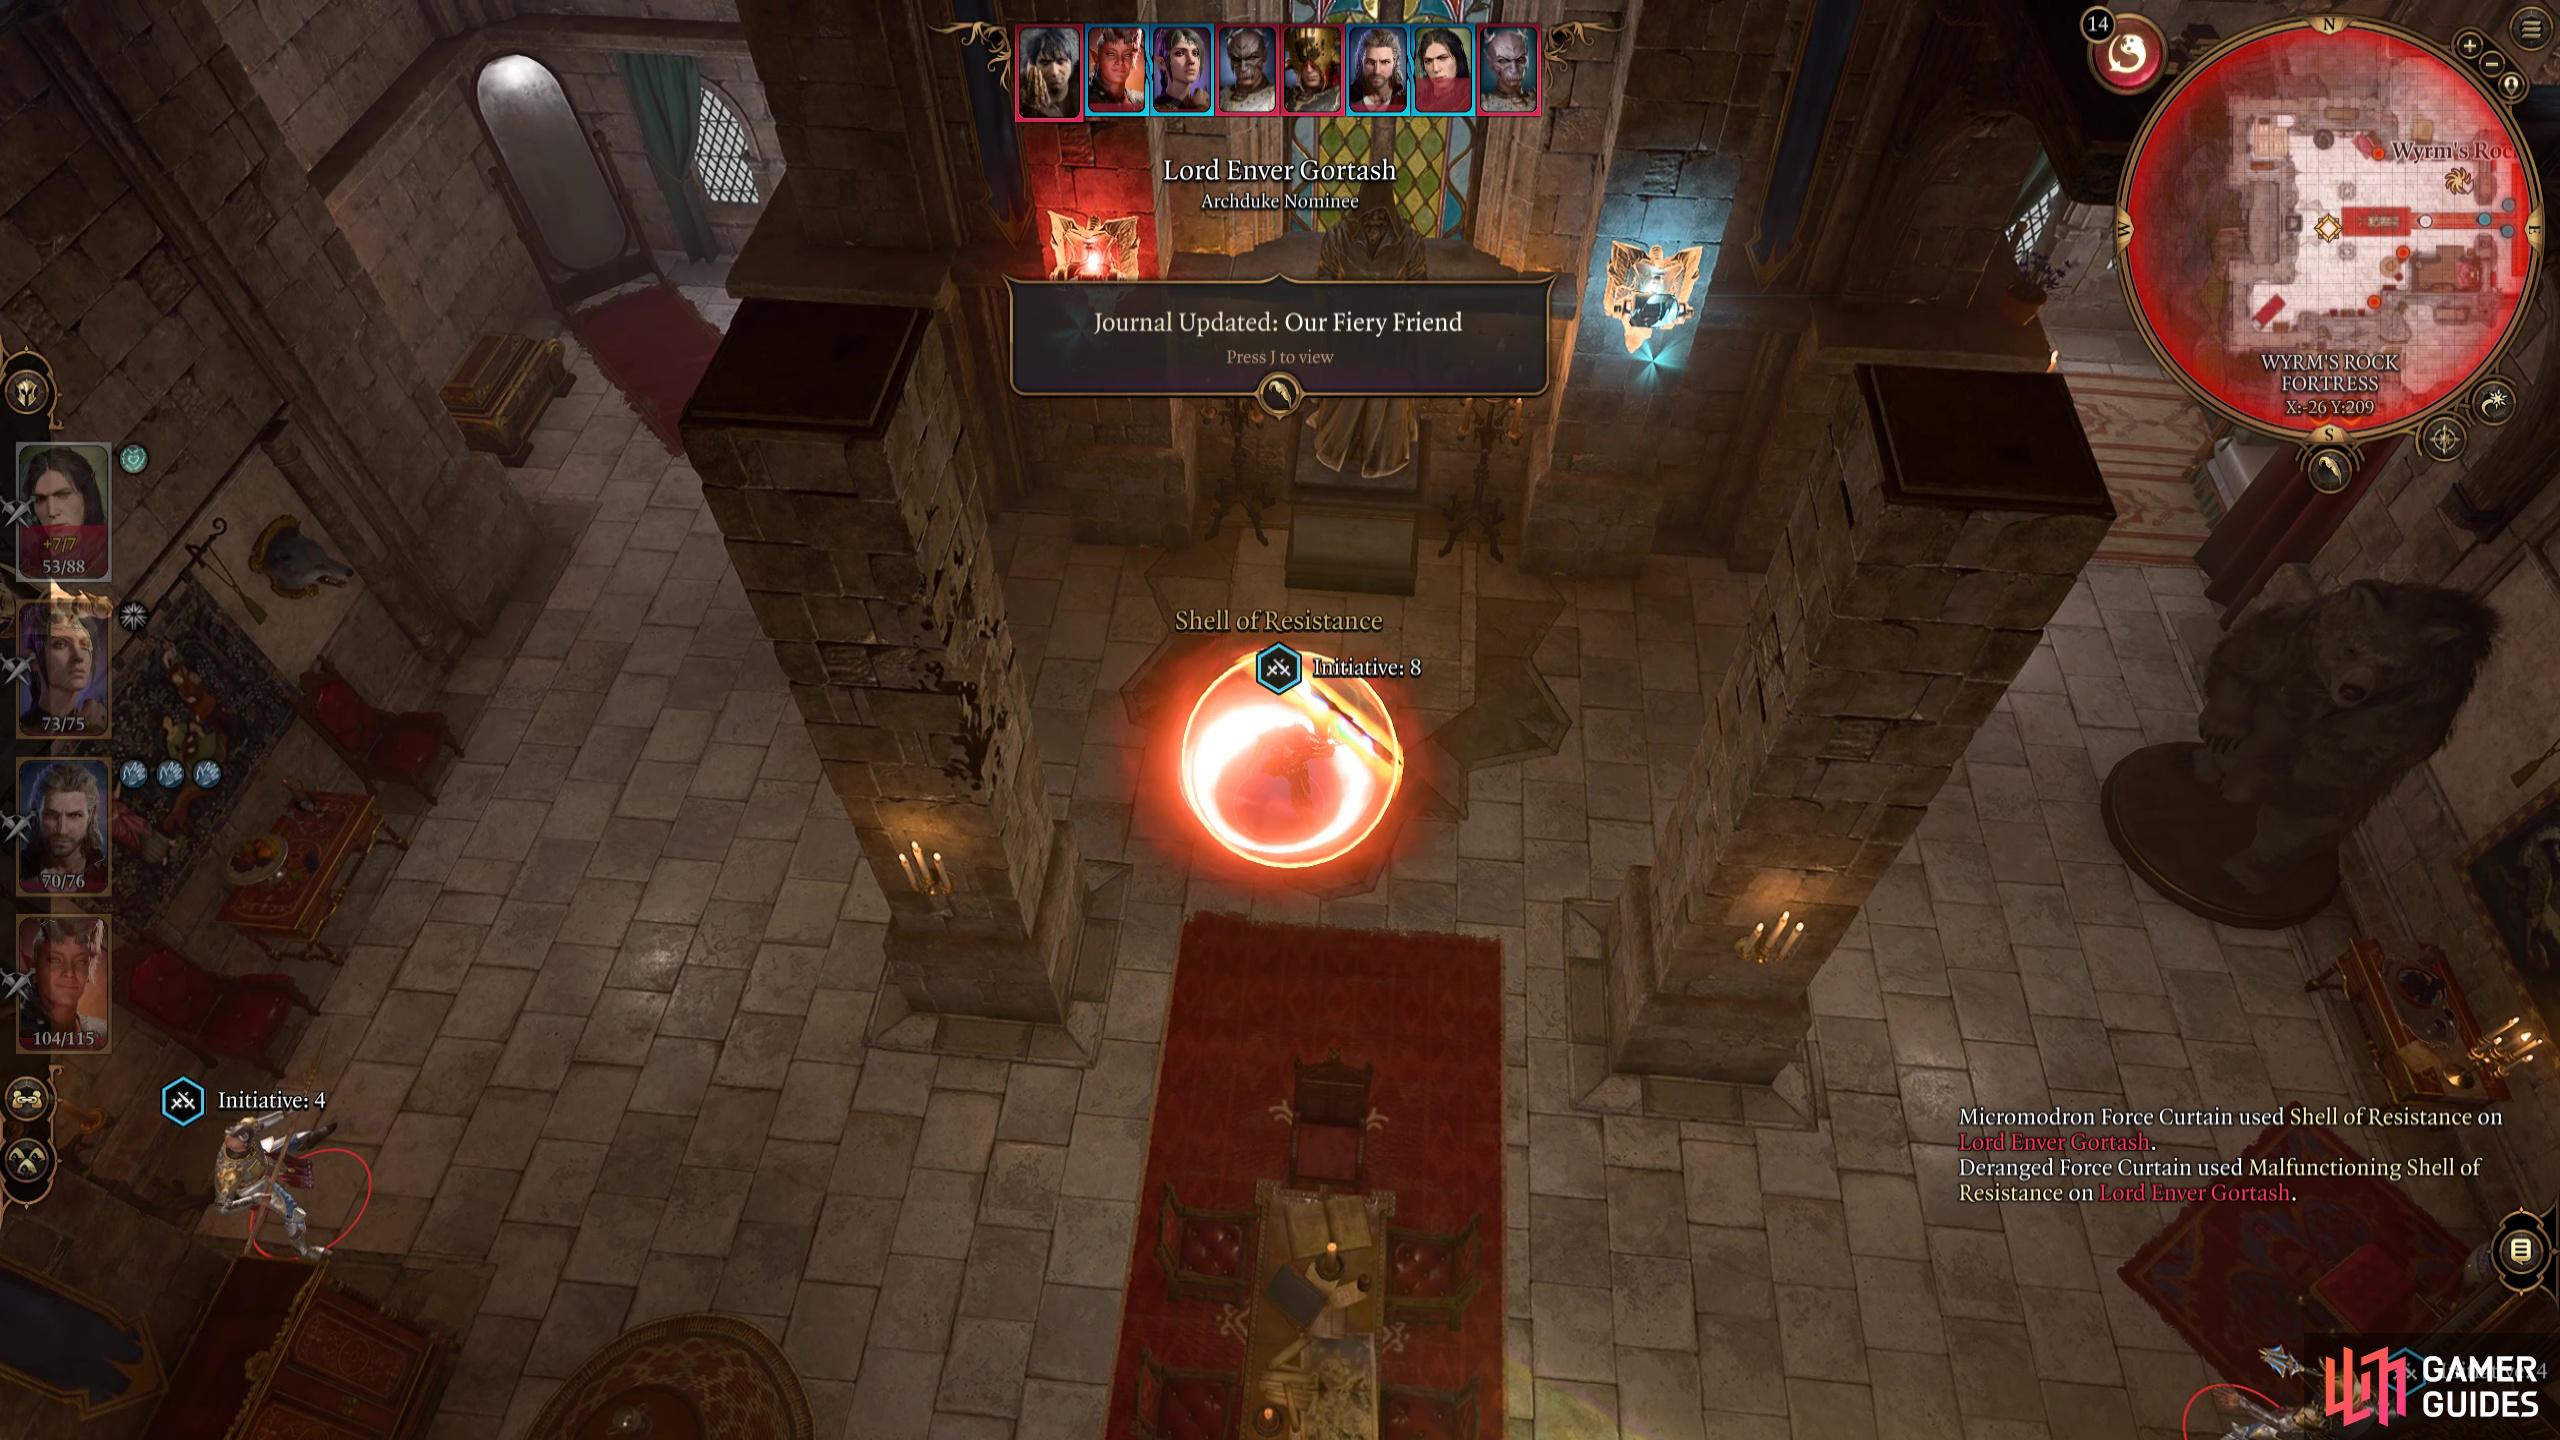
The “traps” at the back of the room will frequently give Gortash “Shell of Resistance”. This will make him immune to Thunder and resistant to other elemental damage.
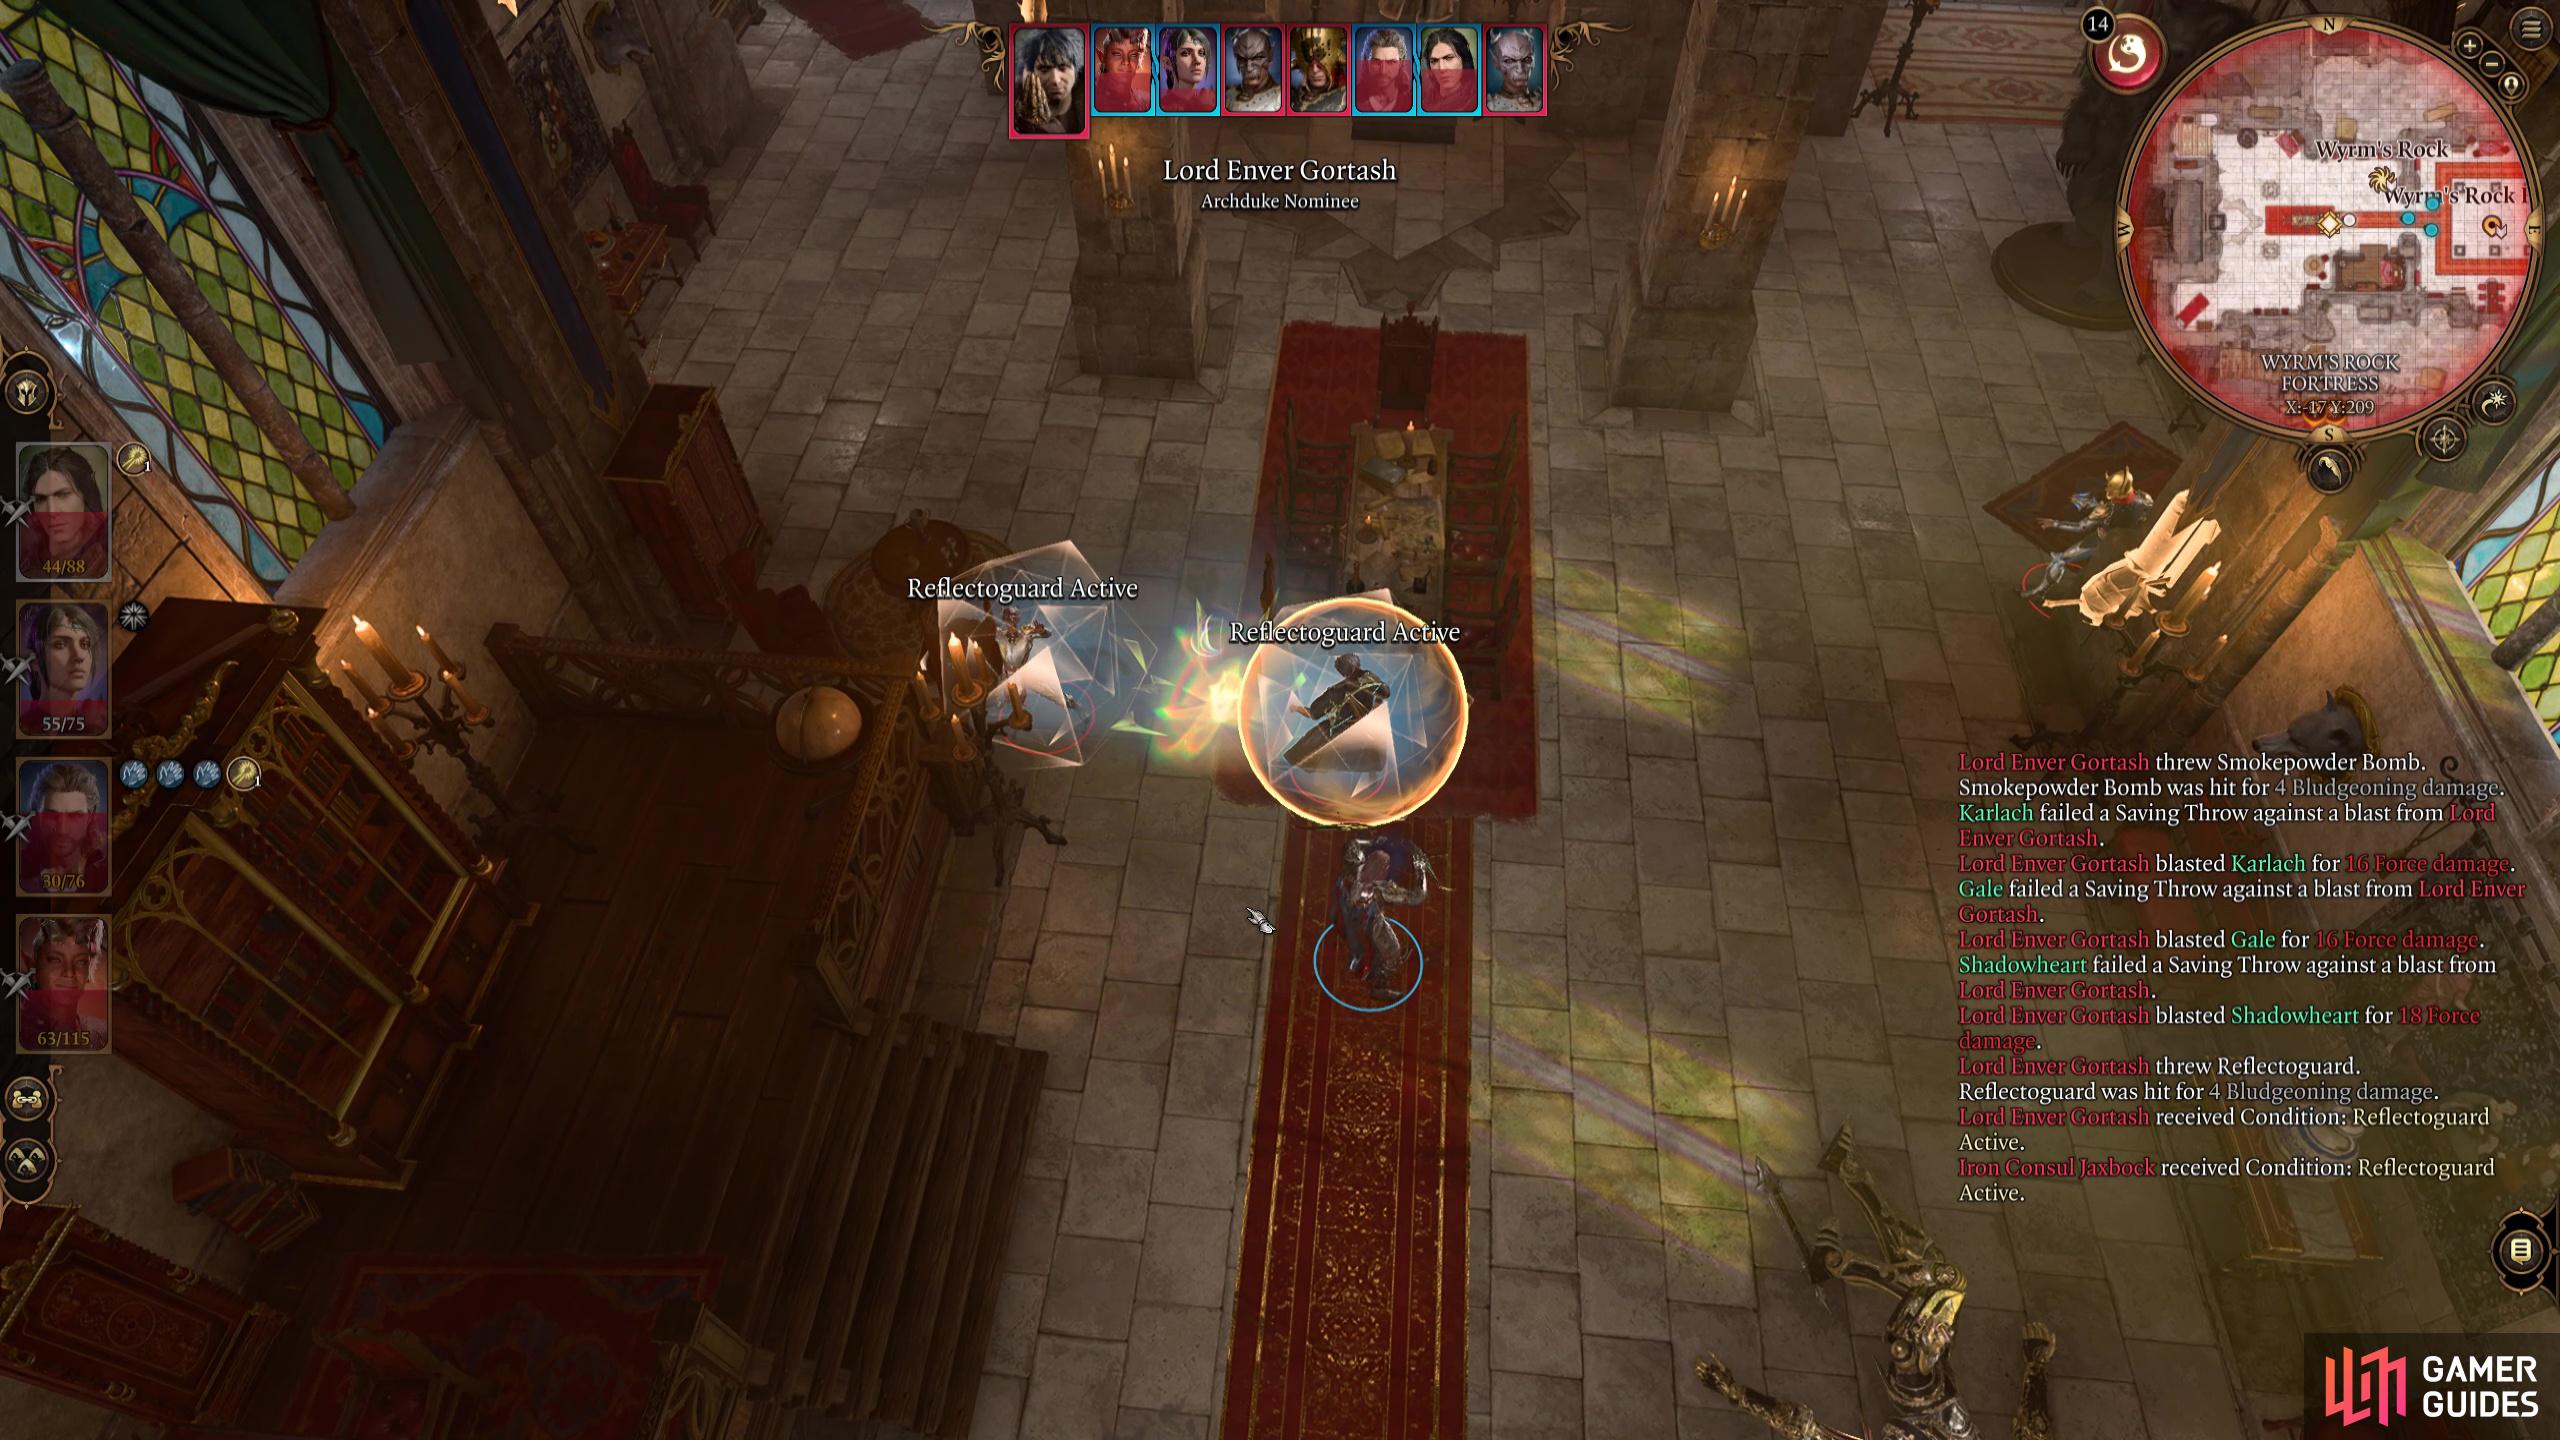
On the other hand, Reflectoguard will deflect any projectile back at you.
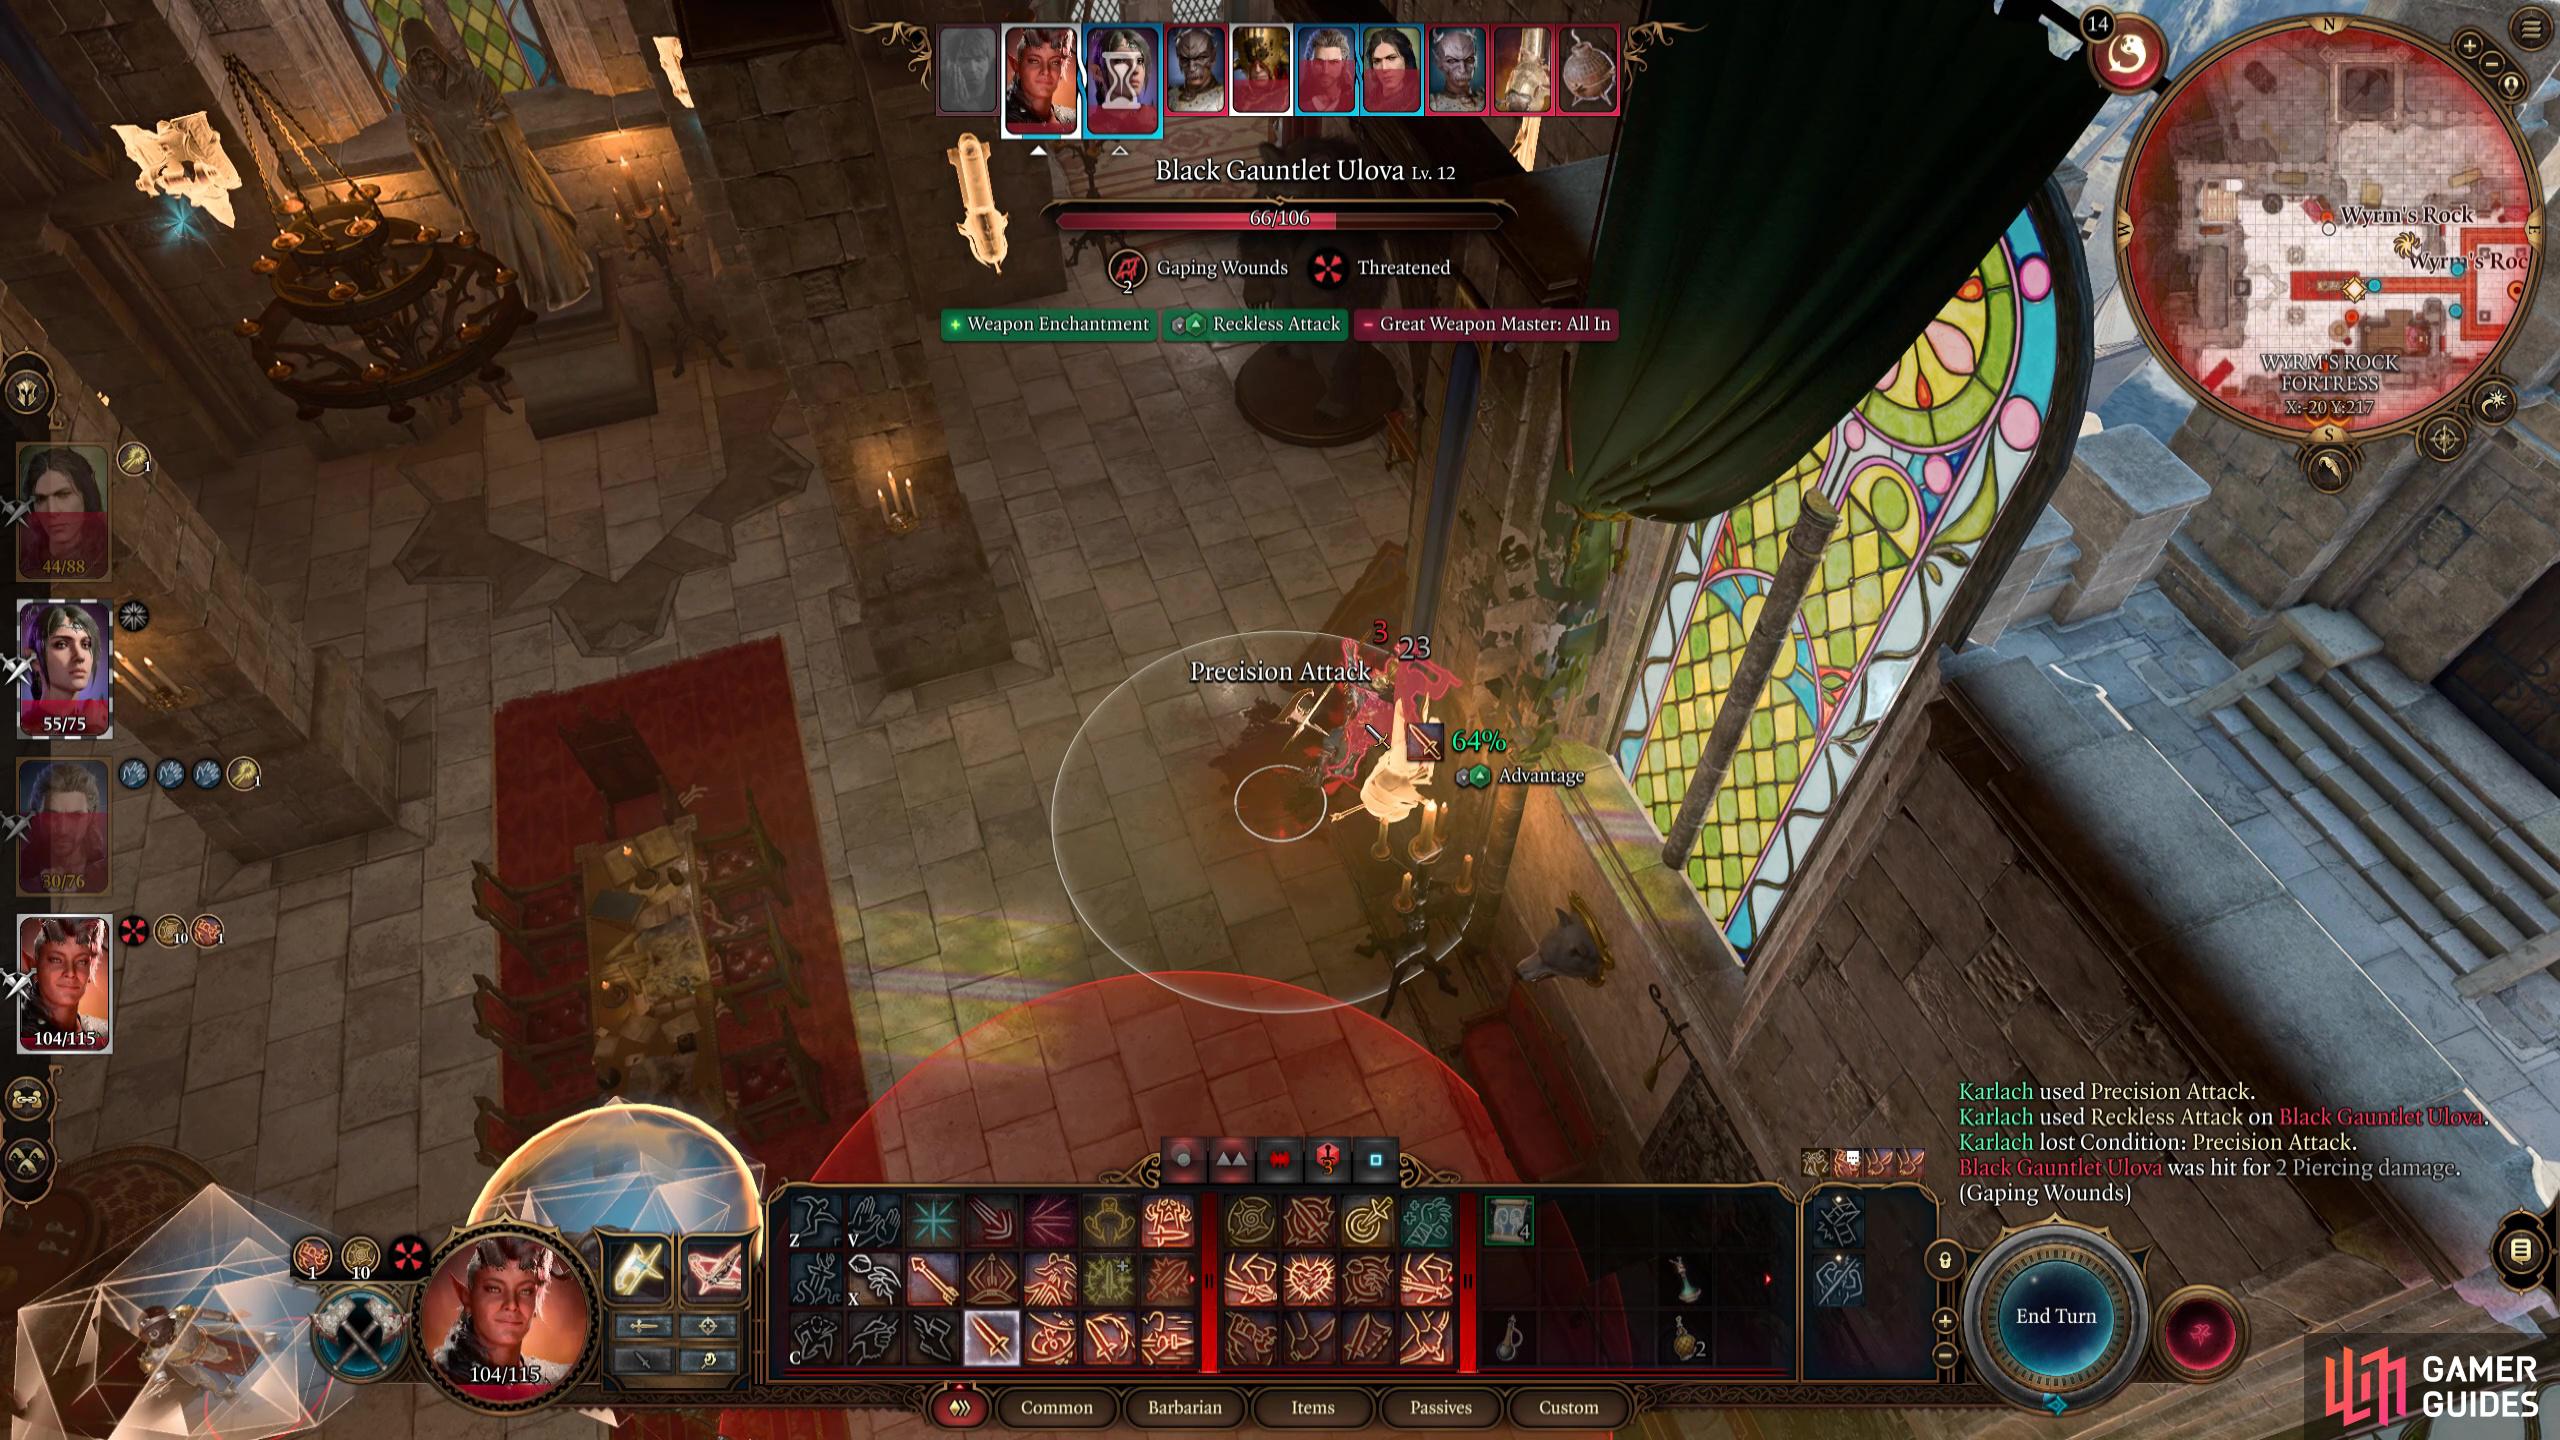
Other than Gortash, you’ll also have to battle three more human enemies who are: Black Gauntlet Ulova, Iron Consul Lo, and Iron Consul Jaxbock. At the start of the battle, Gortash will most likely cast Reflectoguard to himself and one of his allies which will send back any projectile sent to them for two turns. When you get a turn, focus on taking down Gortash’s allies first as they can become a pain to deal with later on. Thankfully, it should only take you a couple of turns to do this.
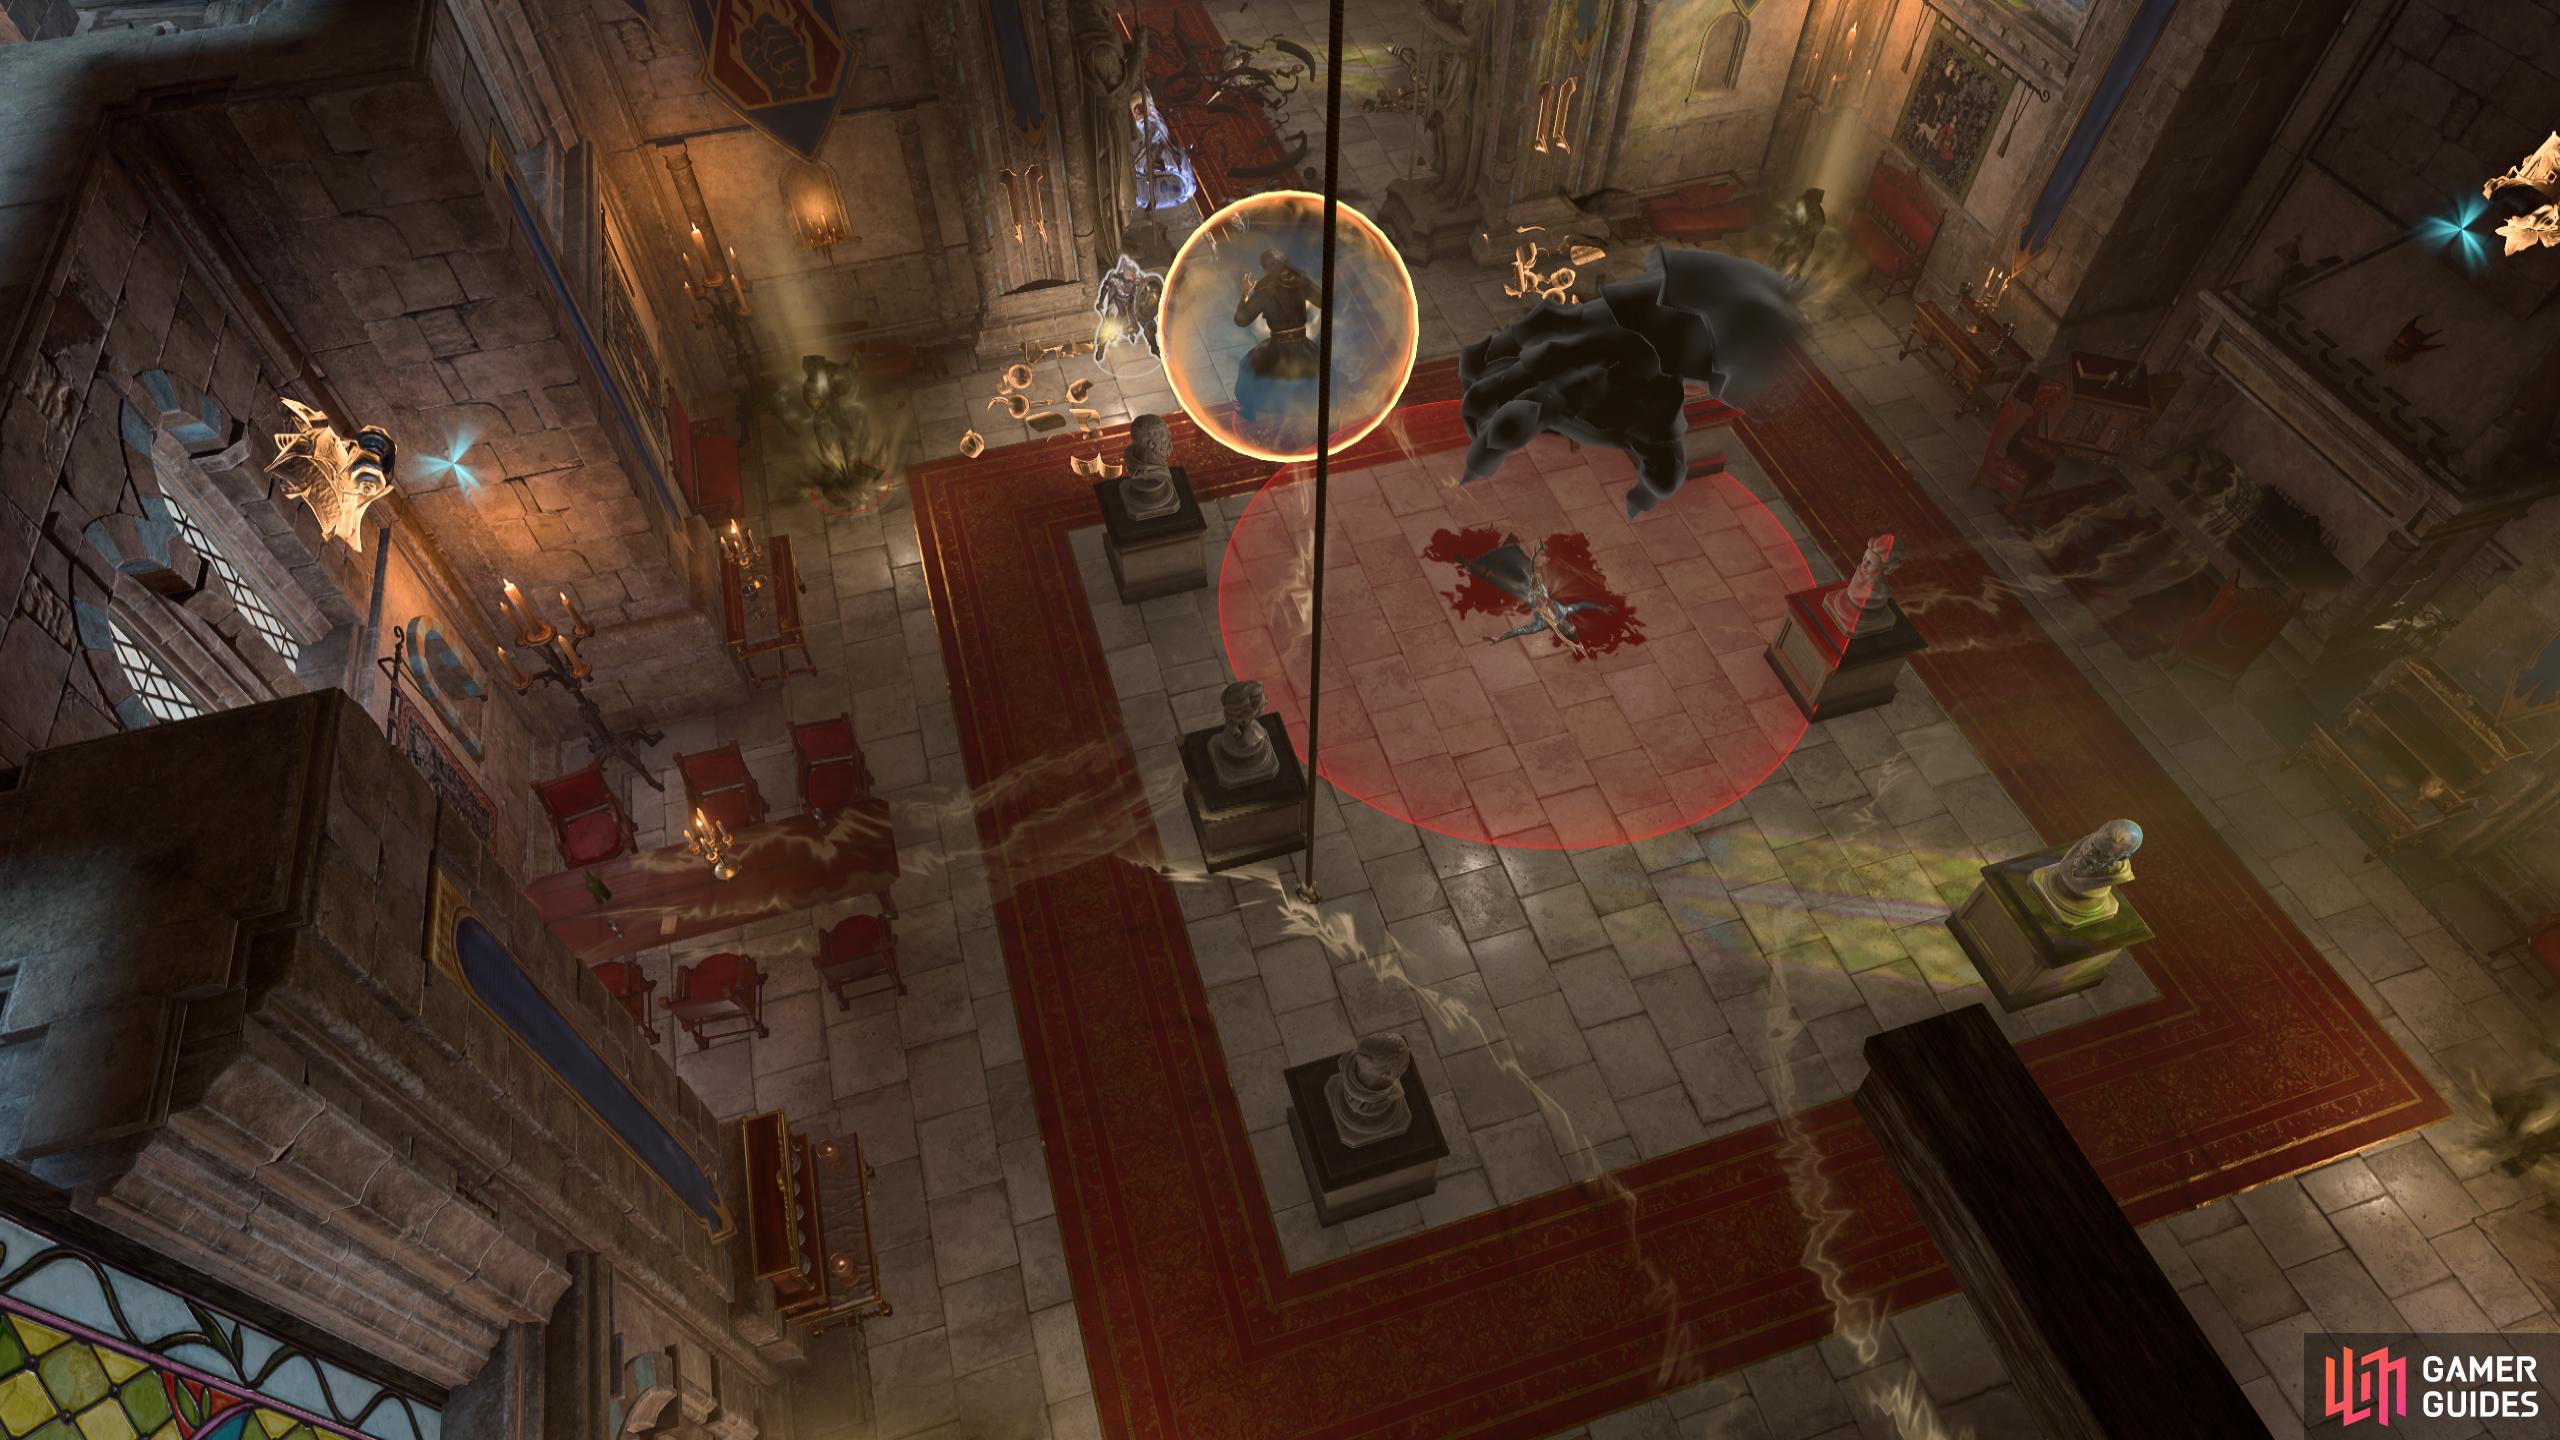
When you run into the room, the traps near the entrance will fire out Concussion Grenades onto the floor which will explode a turn or so later. The reason we didn’t tell you to disarm these earlier is because these can work in your favor due to Gortash and his allies running into them and when these explode, they can deal respectable damage to anyone in their proximity, so make sure you’re not inside the red circle when they detonate. It’s worth noting that the Iron Consul enemies will shoot the grenades with a ranged attack causing them to explode on you if you’re inside the circle.
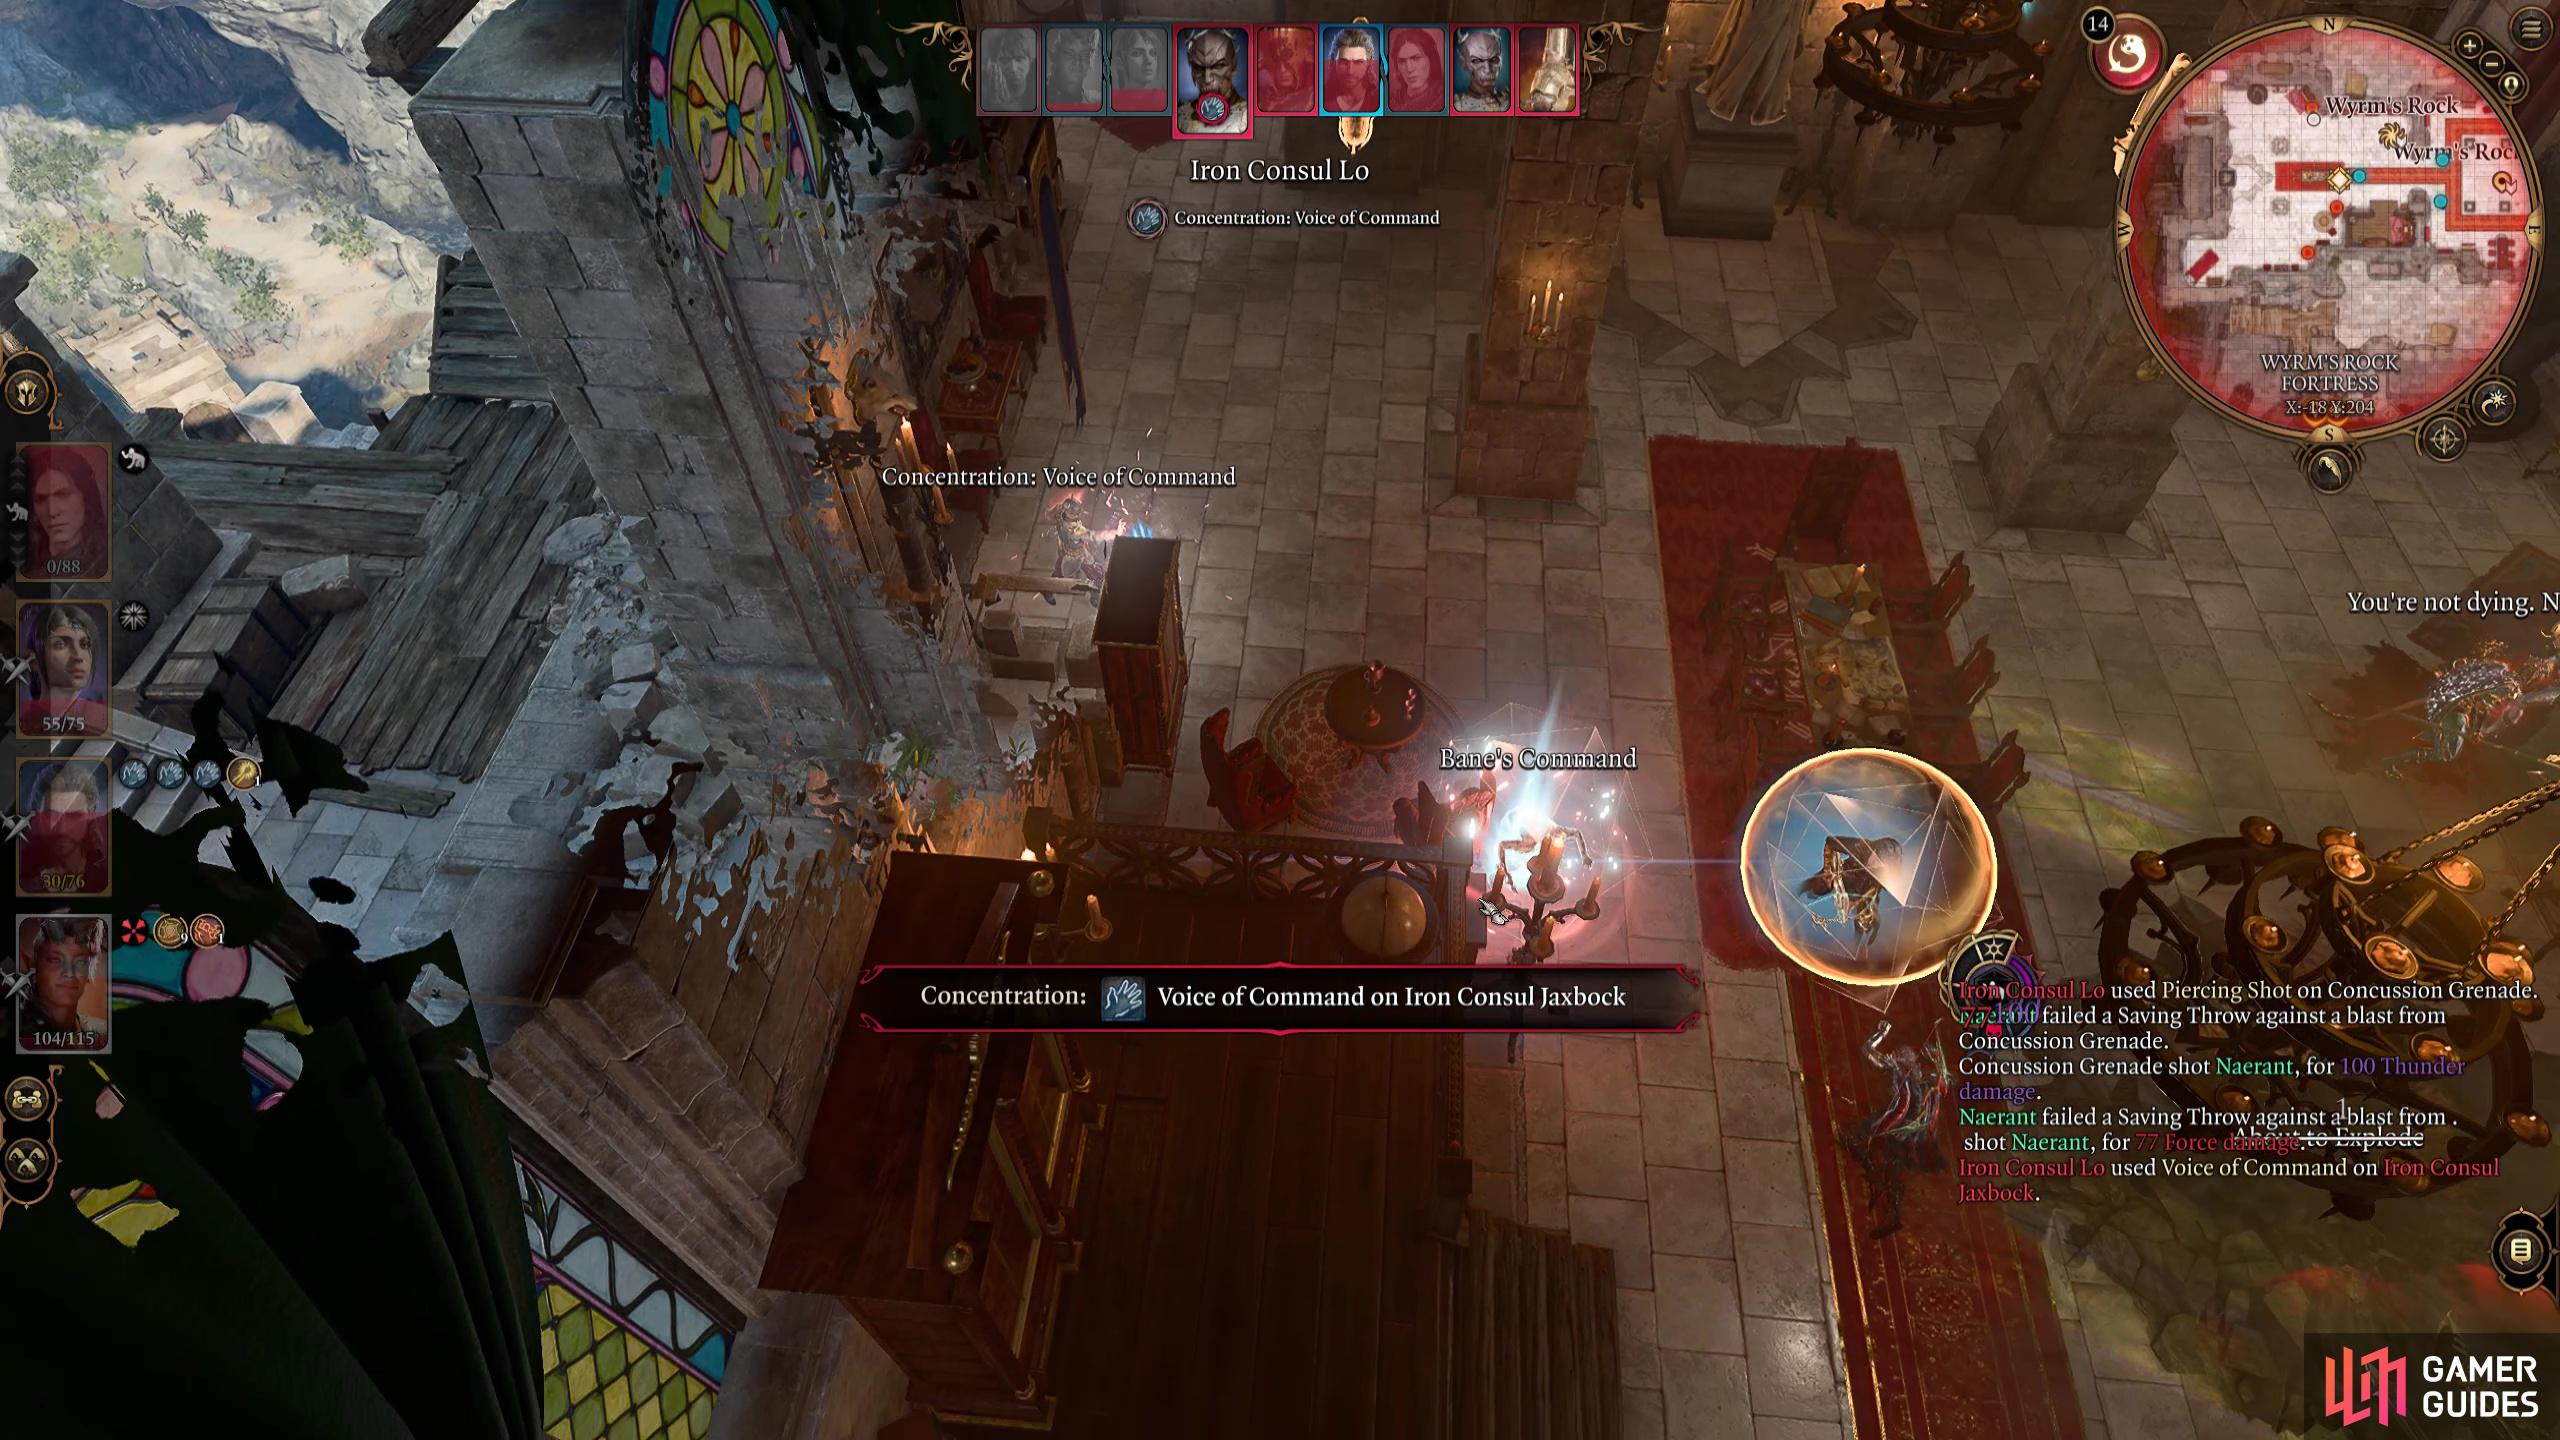
Gortash’s allies will regularly cast Bane’s Command.
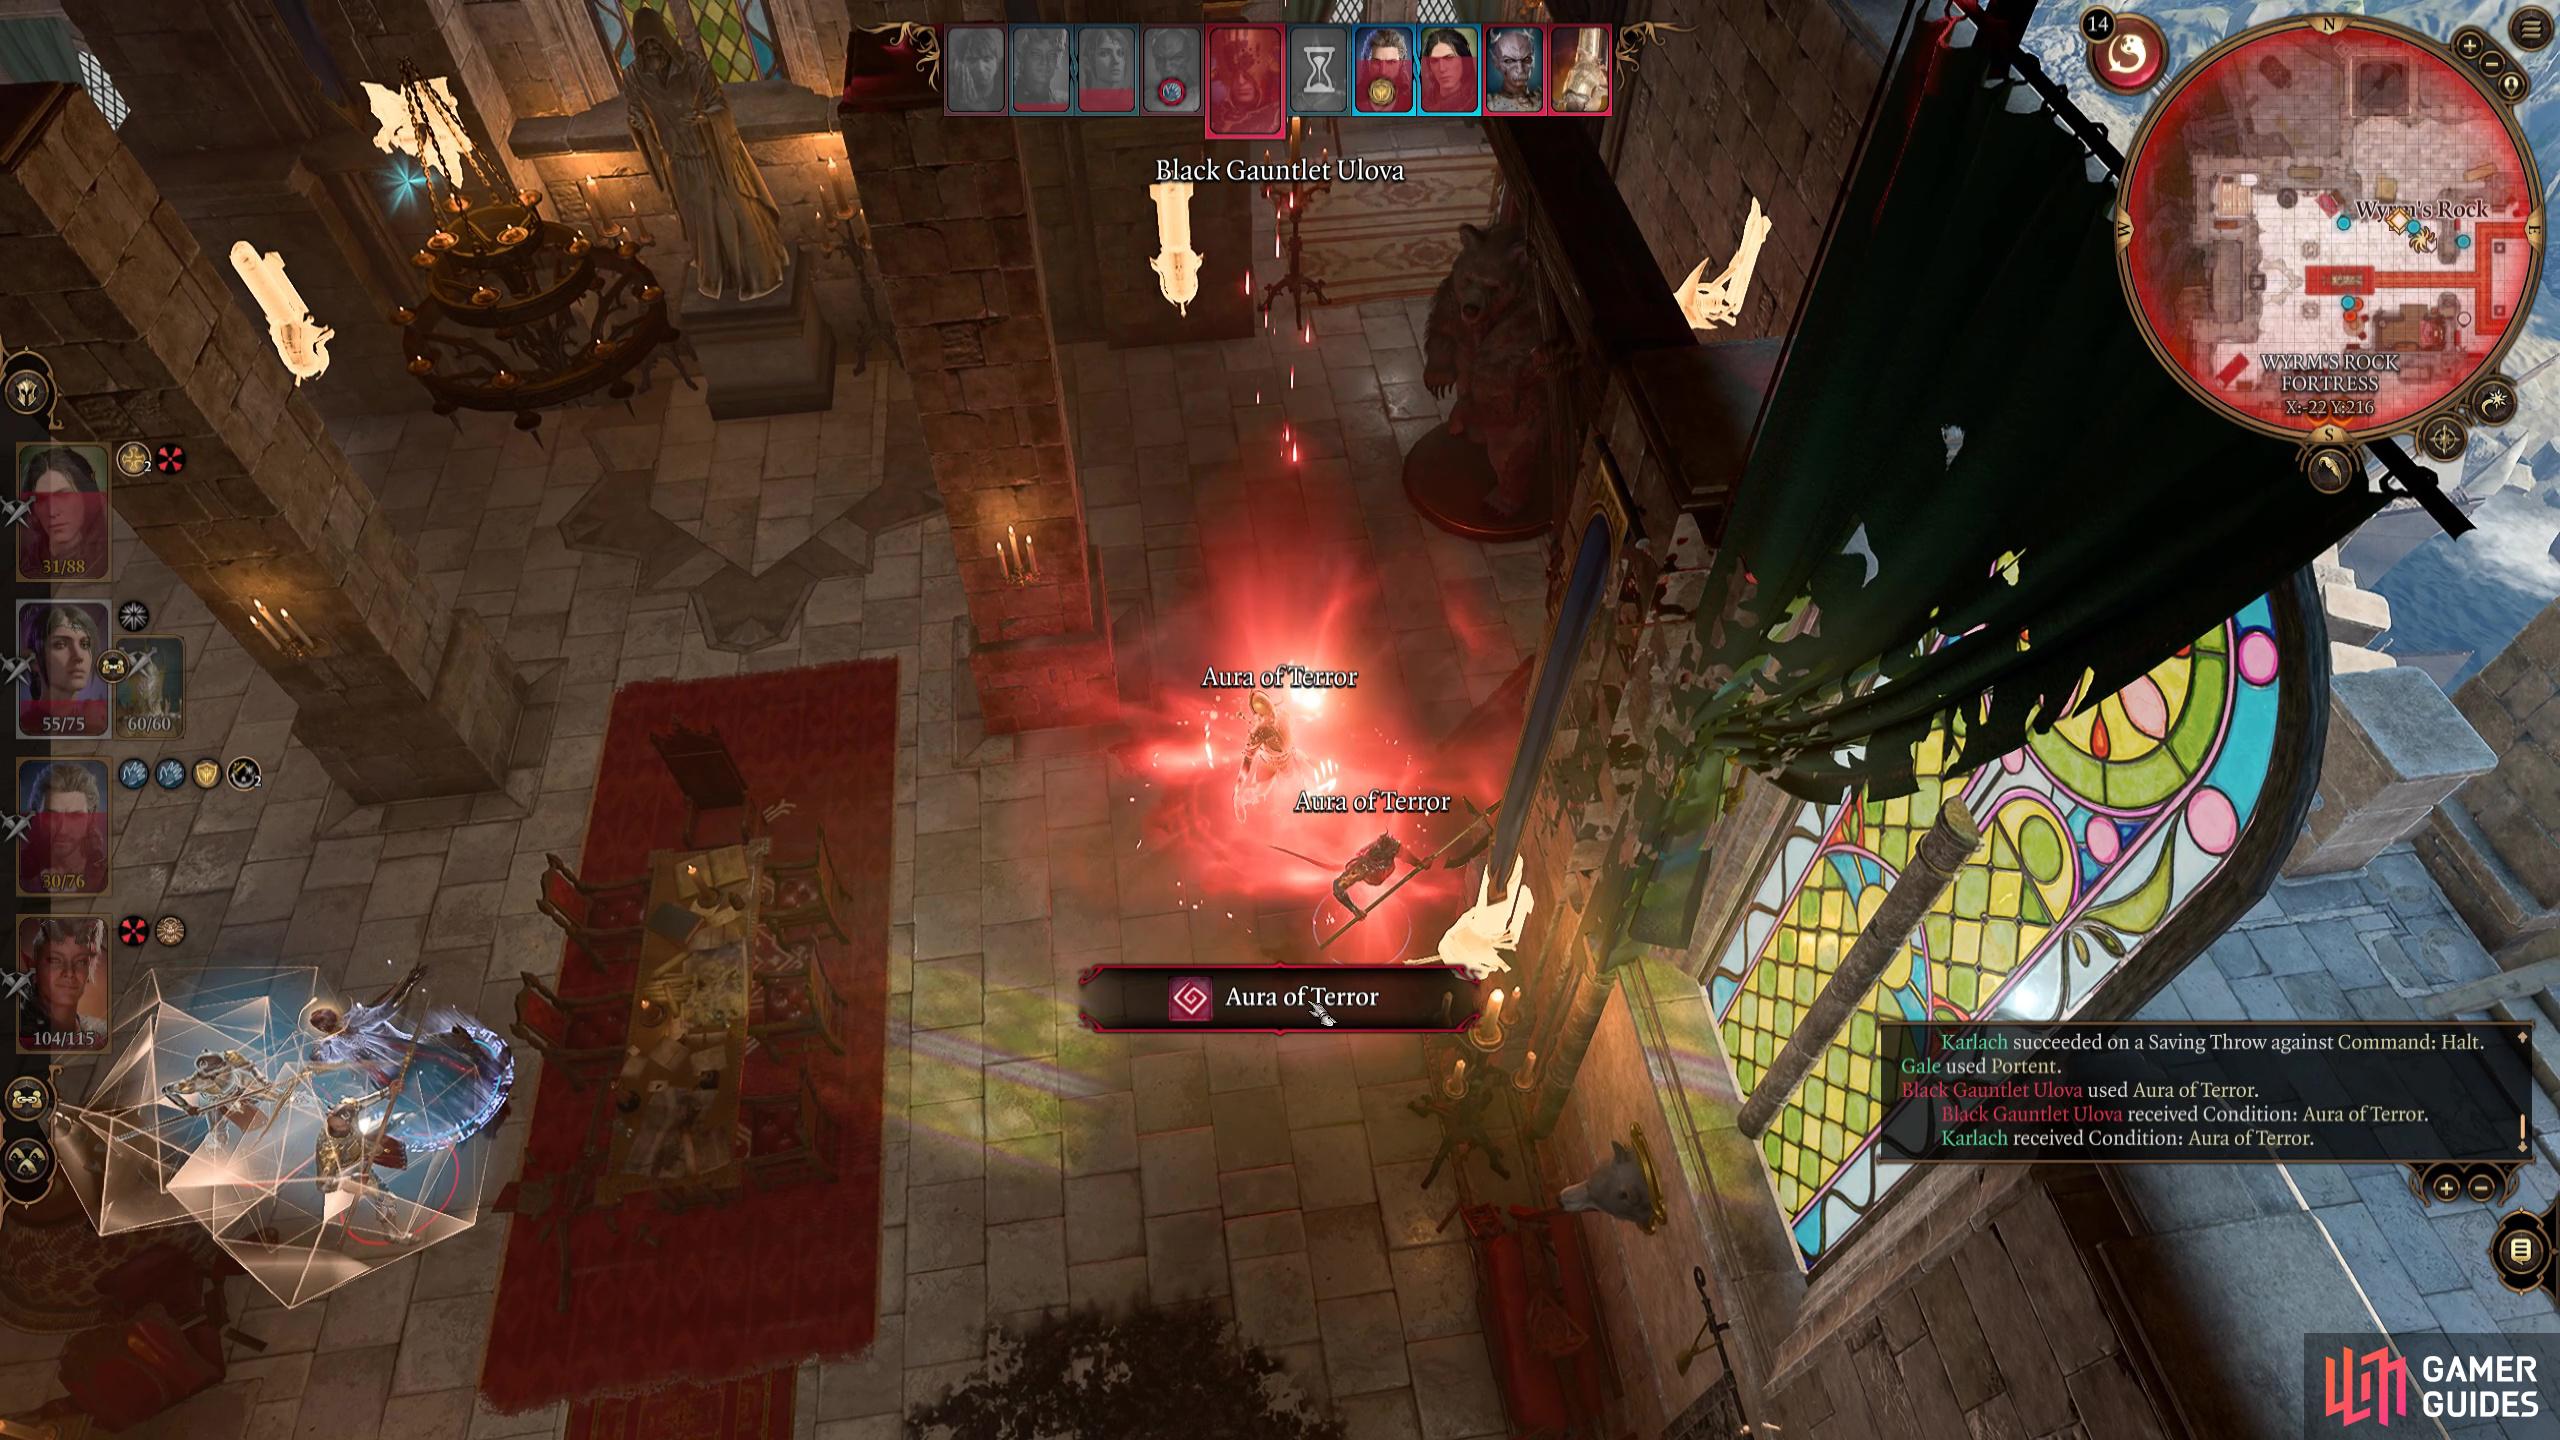
Or Aura of Terror. This is why you want to take them out as soon as possible.
Throughout the battle, Gortash’s allies will regularly cast Bane’s ![]() Command and/or Aura of Terror. Bane’s Command will give their attacks a chance to Frighten as well as deal more damage while the latter will place an aura around the spellcaster which will give you Disadvantage on both attack rolls and saving throws if you’re within 3m of them. When you drop Gortash’s health to around half HP, he’ll immediately use “Invoke the Black Hand” which grants him Avatar of Tyranny.
Command and/or Aura of Terror. Bane’s Command will give their attacks a chance to Frighten as well as deal more damage while the latter will place an aura around the spellcaster which will give you Disadvantage on both attack rolls and saving throws if you’re within 3m of them. When you drop Gortash’s health to around half HP, he’ll immediately use “Invoke the Black Hand” which grants him Avatar of Tyranny.
This does a few things to him. First, it’ll give him 150 temporary hit points (Tactician Difficulty), then it’ll place numerous manifestations around the room which grant him “Bane’s Brutality” which gives him +1 Strength anytime he’s within their large aura. Finally, he’ll cast “Tyrant’s Bindings” which will attempt to chain the party to himself. If you fail the saving throw, you’ll receive the Chain of Tyranny debuff which reduces your movement by half while also dealing 8d8 Force damage when the chain breaks the following turn.
Avatar of Tyranny will give Gortash up to 150 temporary hit points as well as some new attacks.
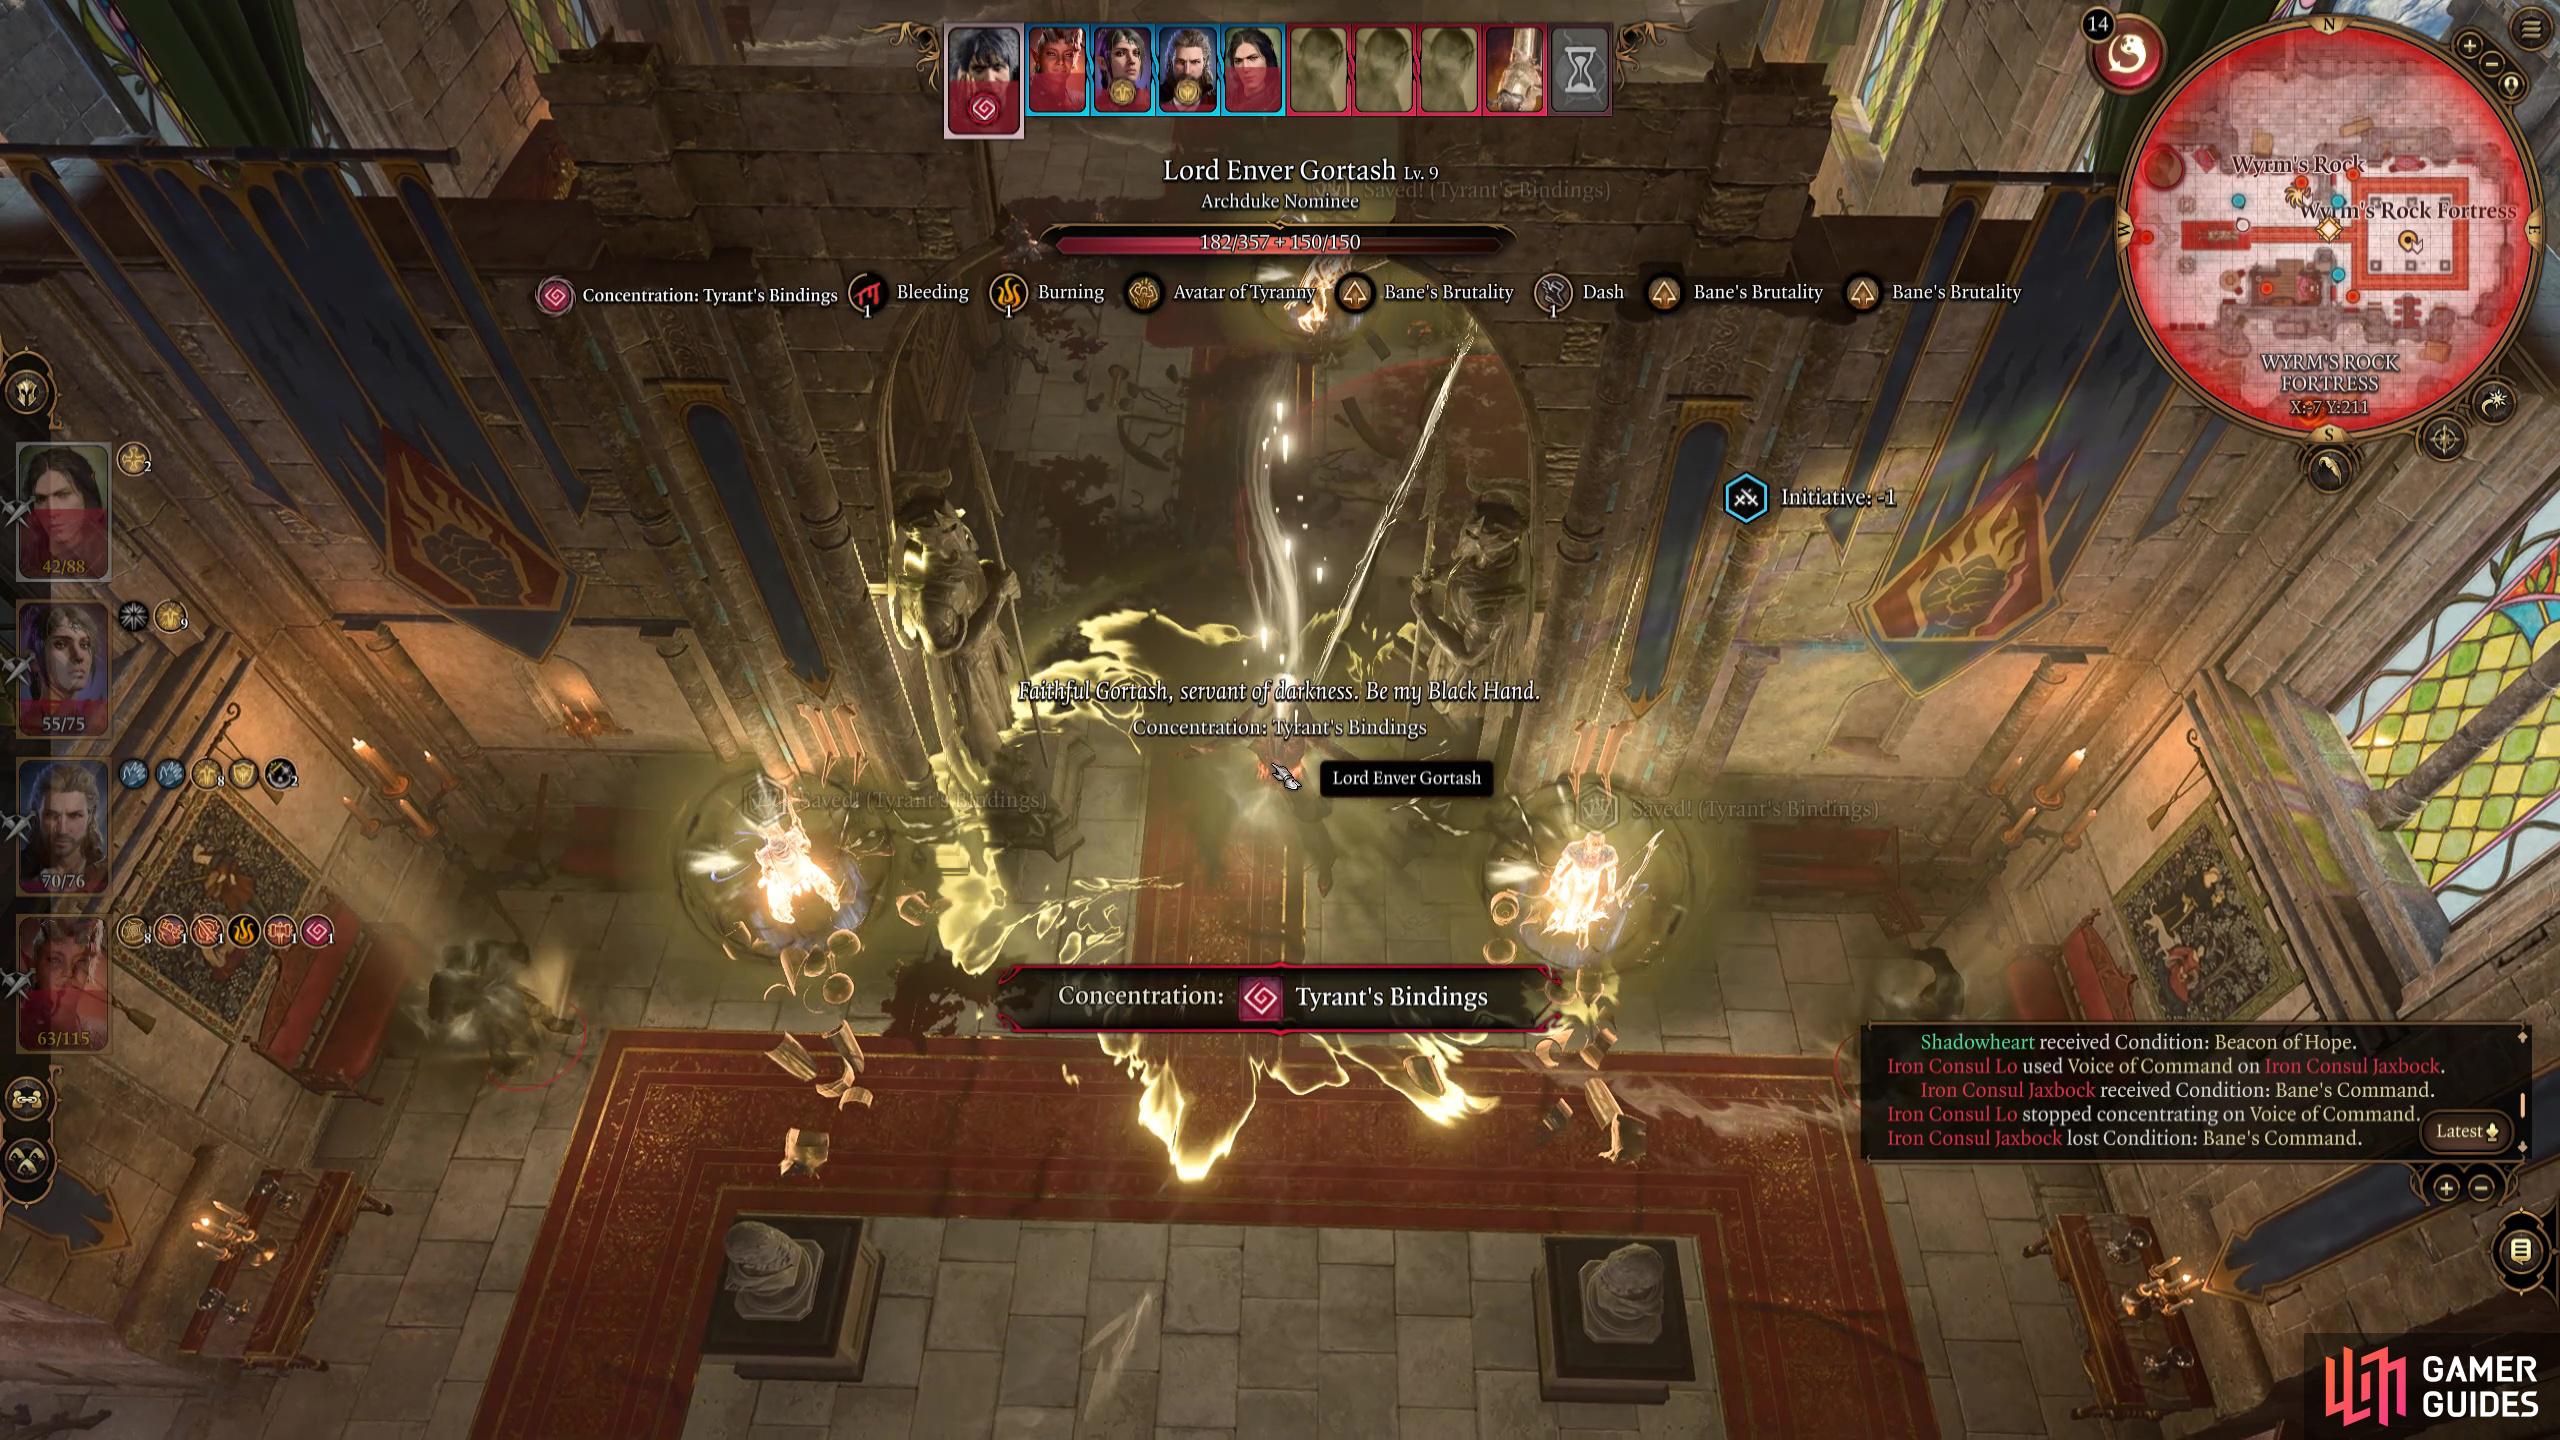
One of these attacks will be the powerful Tyrant’s Bindings.
This is obviously a big problem, but fortunately, it is a concentration spell, so enough attacks on him should break his concentration, allowing him to reroll the Saving Throw against it. If he passes the roll again, make sure the person who has it is fully healed, and/or has some resistance to Force damage. This stage of the fight becomes a bit more difficult as Gortash begins to use Empowered Unarmed Strike which will deal significant damage as well as Dazzling Light which will hit everyone in a line for 4d10 Radiant damage with a chance to Blind. Then you have the spell “The Closed Fist of Bane” where a giant hand will hover above the selected target before dropping at the end of the turn for up to 100 damage. Gortash will continue casting this each turn, so make sure you’re not standing in the red circle at the end of the turn.
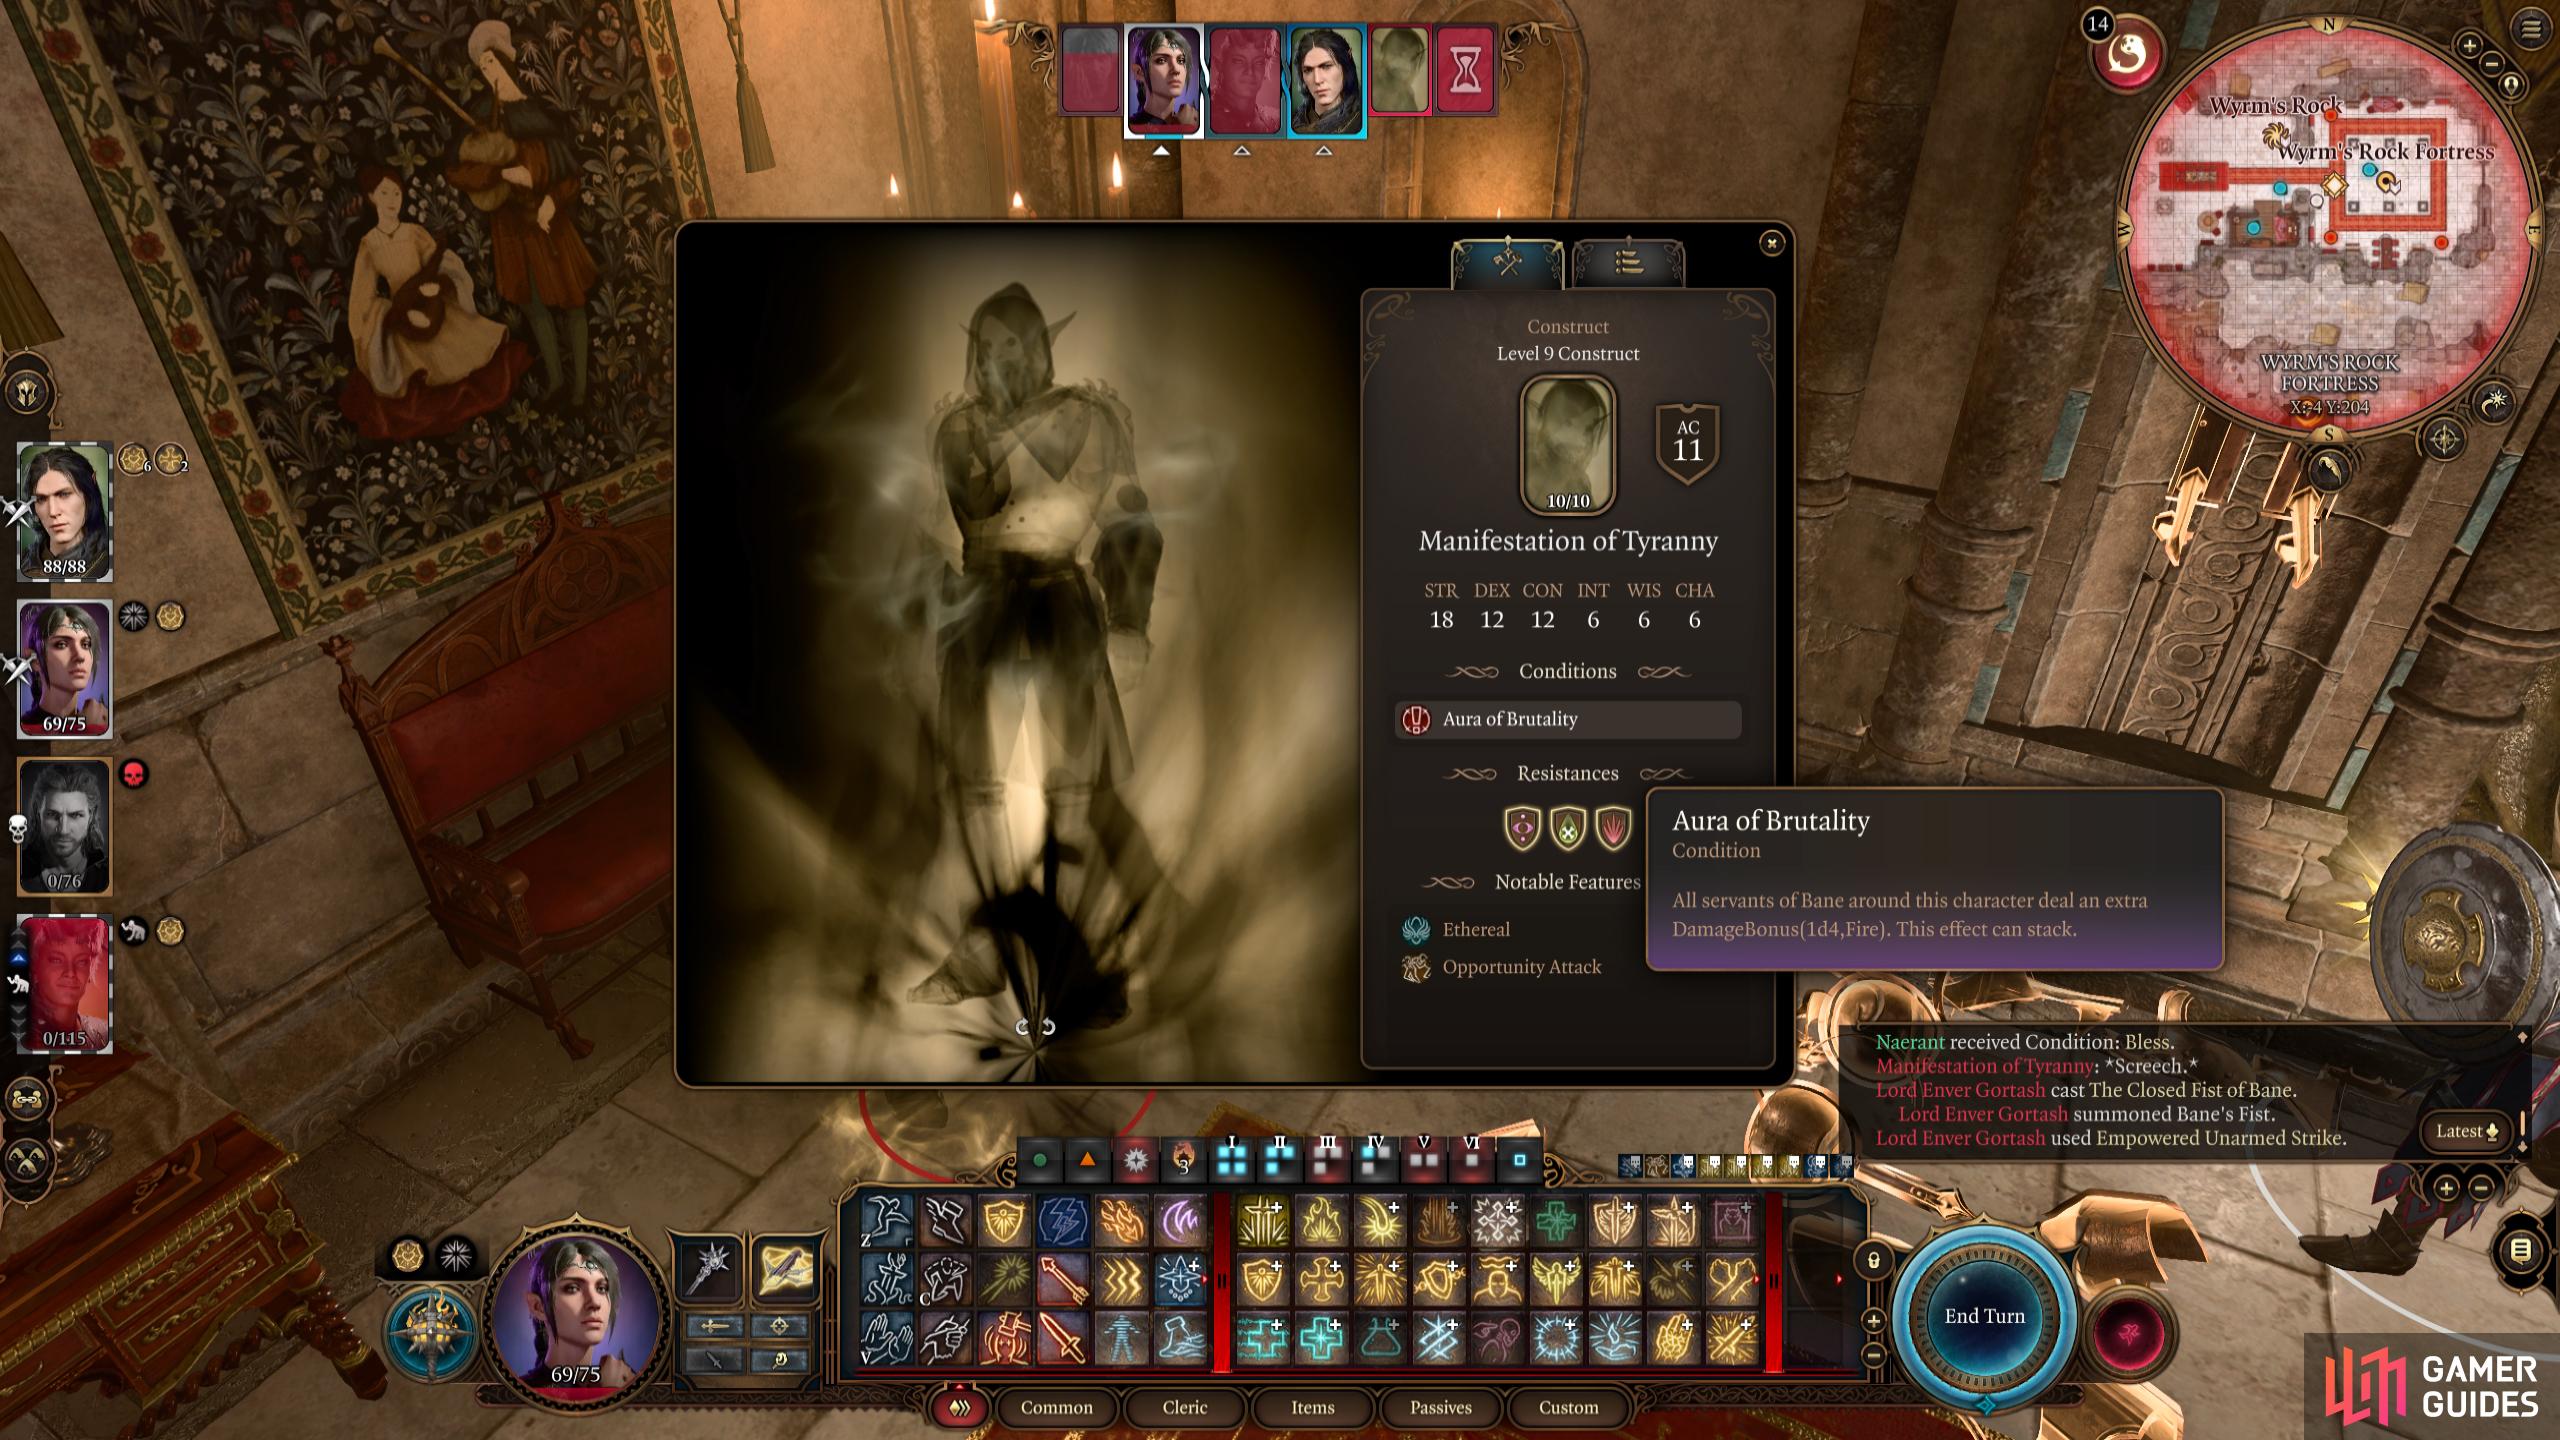
When Gortash uses Avatar of Tyranny, numerous Manifestations will appear around the room. These will give him +1 strength each time he is in their aura. This stacks.
He will also use Closed Fist of Bane every turn which will crash down at the end of his current turn.
Although the battle becomes tougher, you can still defeat him pretty easily. He takes significant damage from most melee attacks, especially of the radiant variety such as Divine Smite while he also takes a moderate amount of damage from magical attacks as long as it isn’t ![]() Fire. But, if you want to speed up the process of killing him, you can lure him in front of the entrance, so he gets hit by both of the Concussion Grenades. A nice tip is to get him in the area-of-effect of both grenades then hit him with an area-effect attack that hits both him, and the grenades. If he doesn’t resist much of the damage, this can deal upwards of 150+ damage. Finally, if the Shell of Resistance is causing you a problem, you can shoot the traps at the back of the room (near the statue) to stop him getting the buff.
Fire. But, if you want to speed up the process of killing him, you can lure him in front of the entrance, so he gets hit by both of the Concussion Grenades. A nice tip is to get him in the area-of-effect of both grenades then hit him with an area-effect attack that hits both him, and the grenades. If he doesn’t resist much of the damage, this can deal upwards of 150+ damage. Finally, if the Shell of Resistance is causing you a problem, you can shoot the traps at the back of the room (near the statue) to stop him getting the buff.
Lure Gortash in front of the door then hit him with Cone of Cold or another AoE.
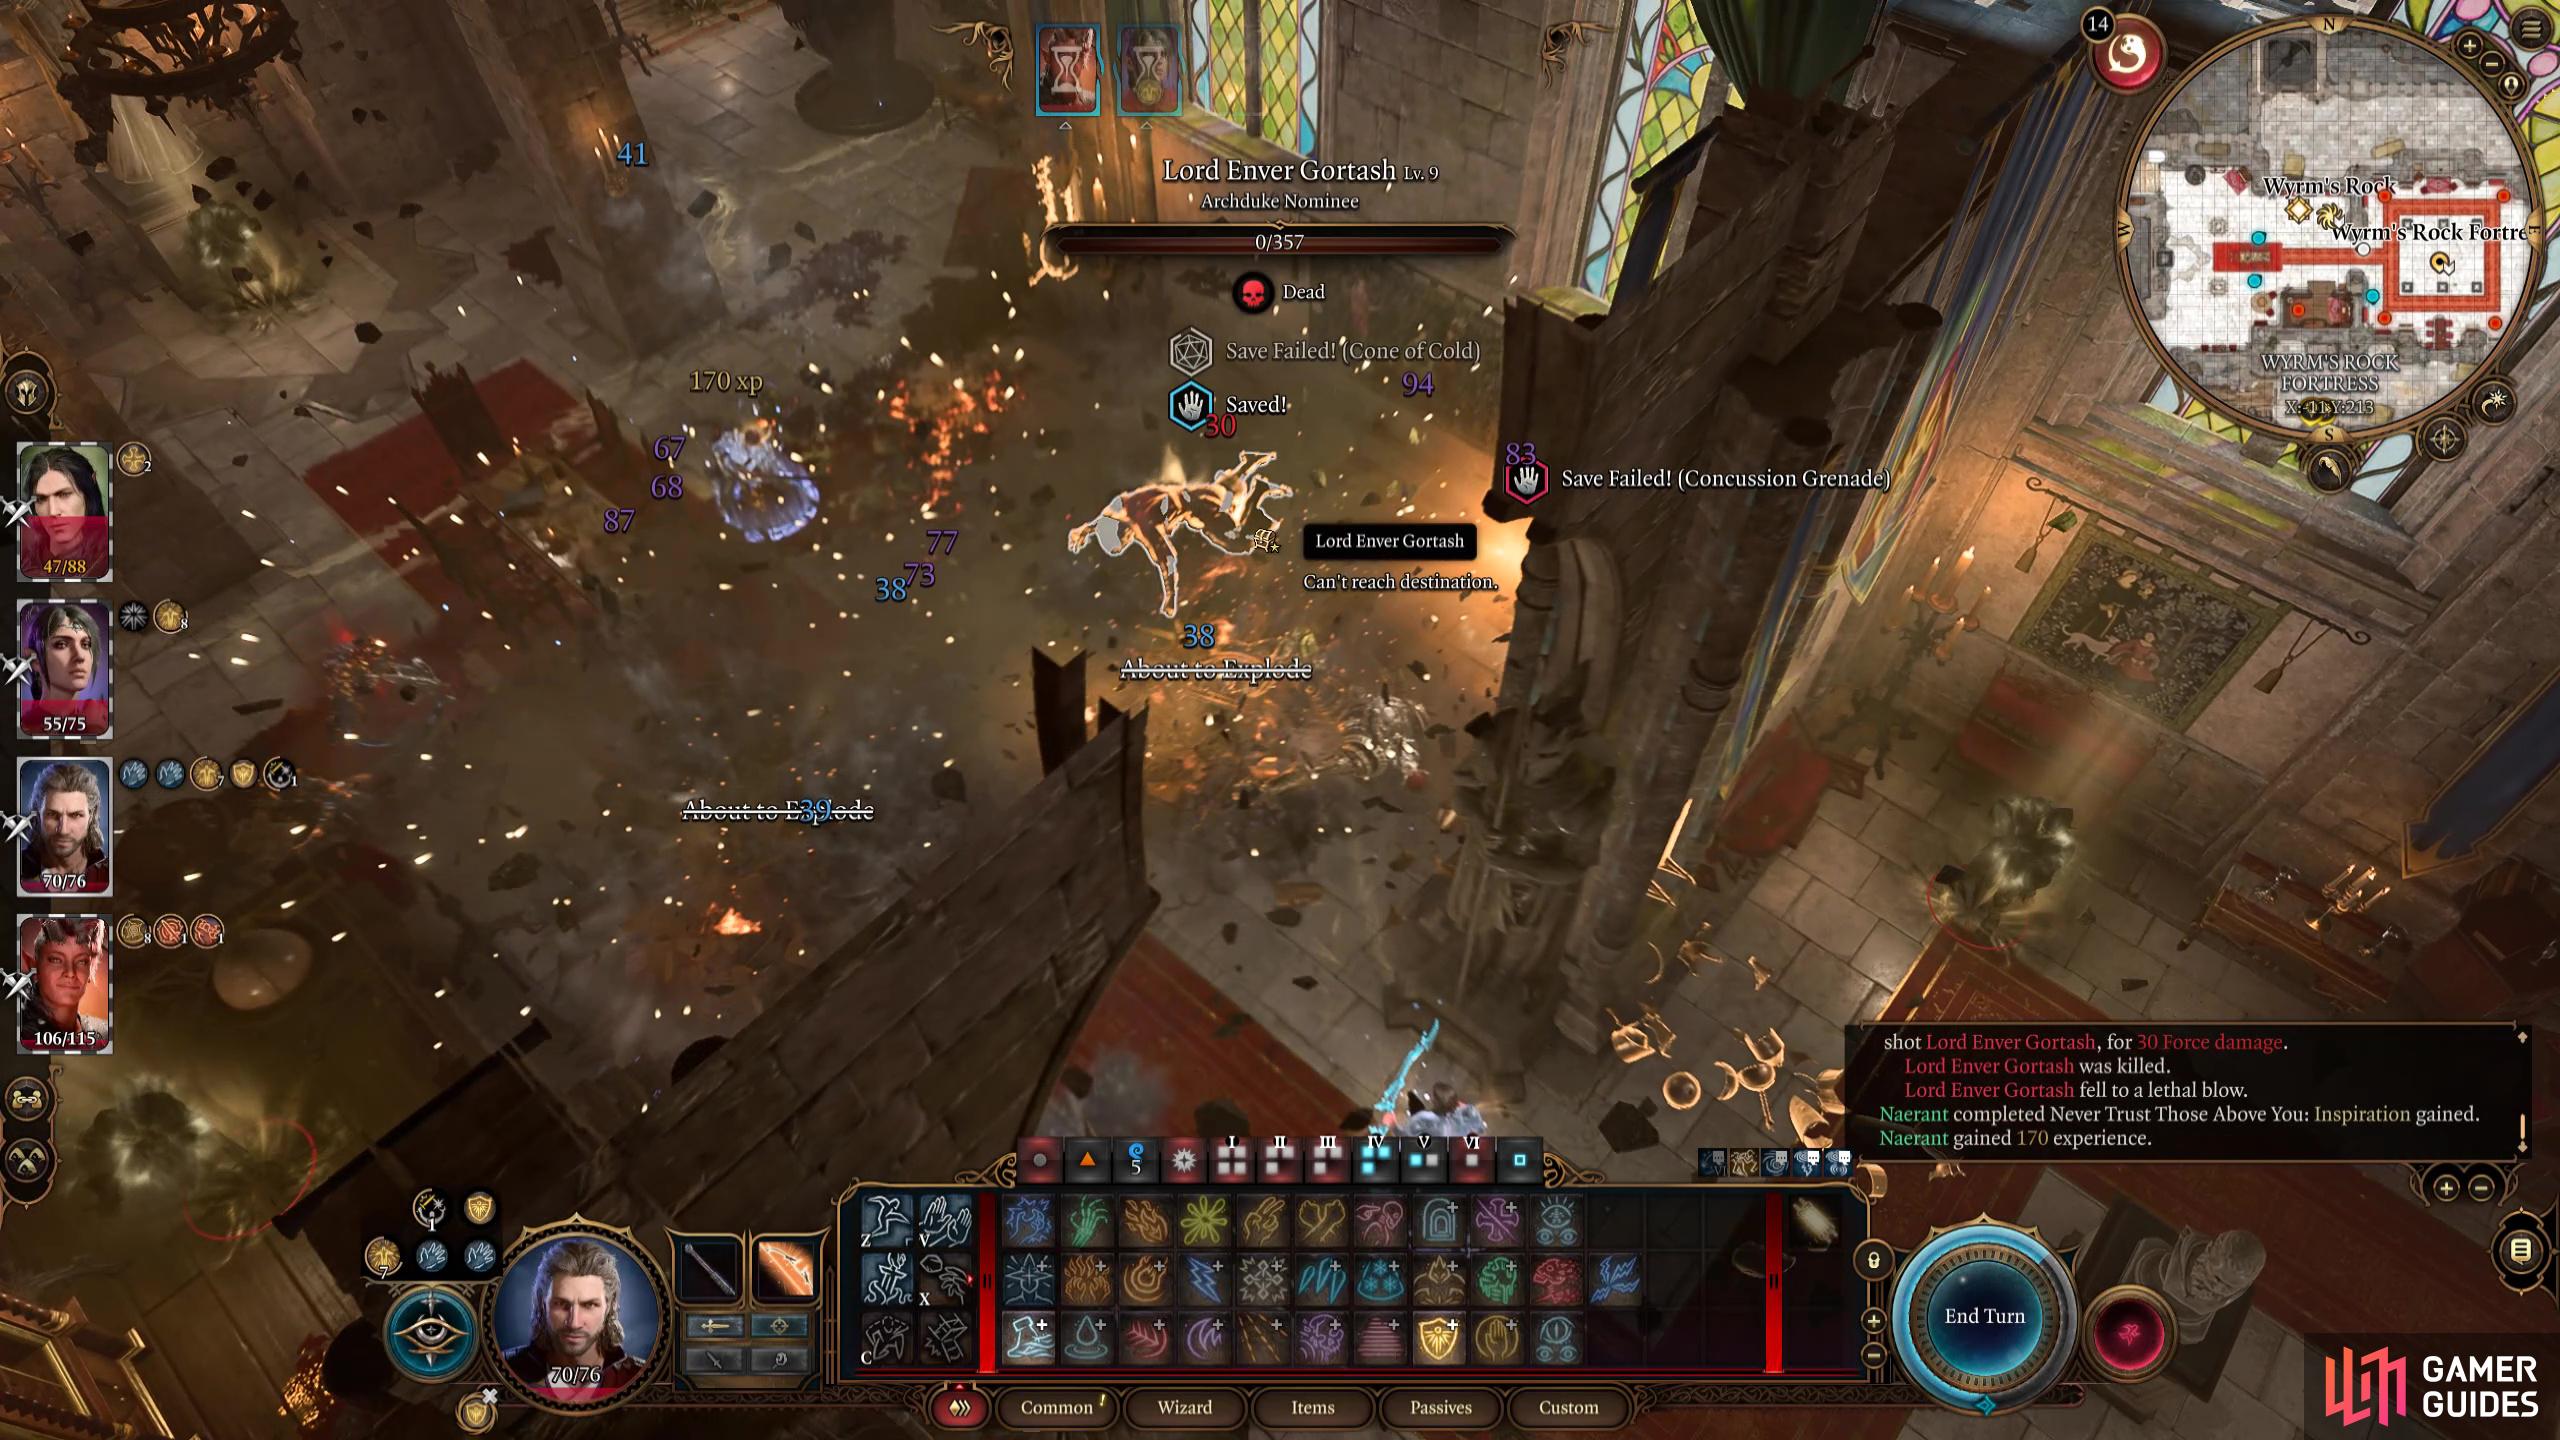
This can deal massive damage to him!
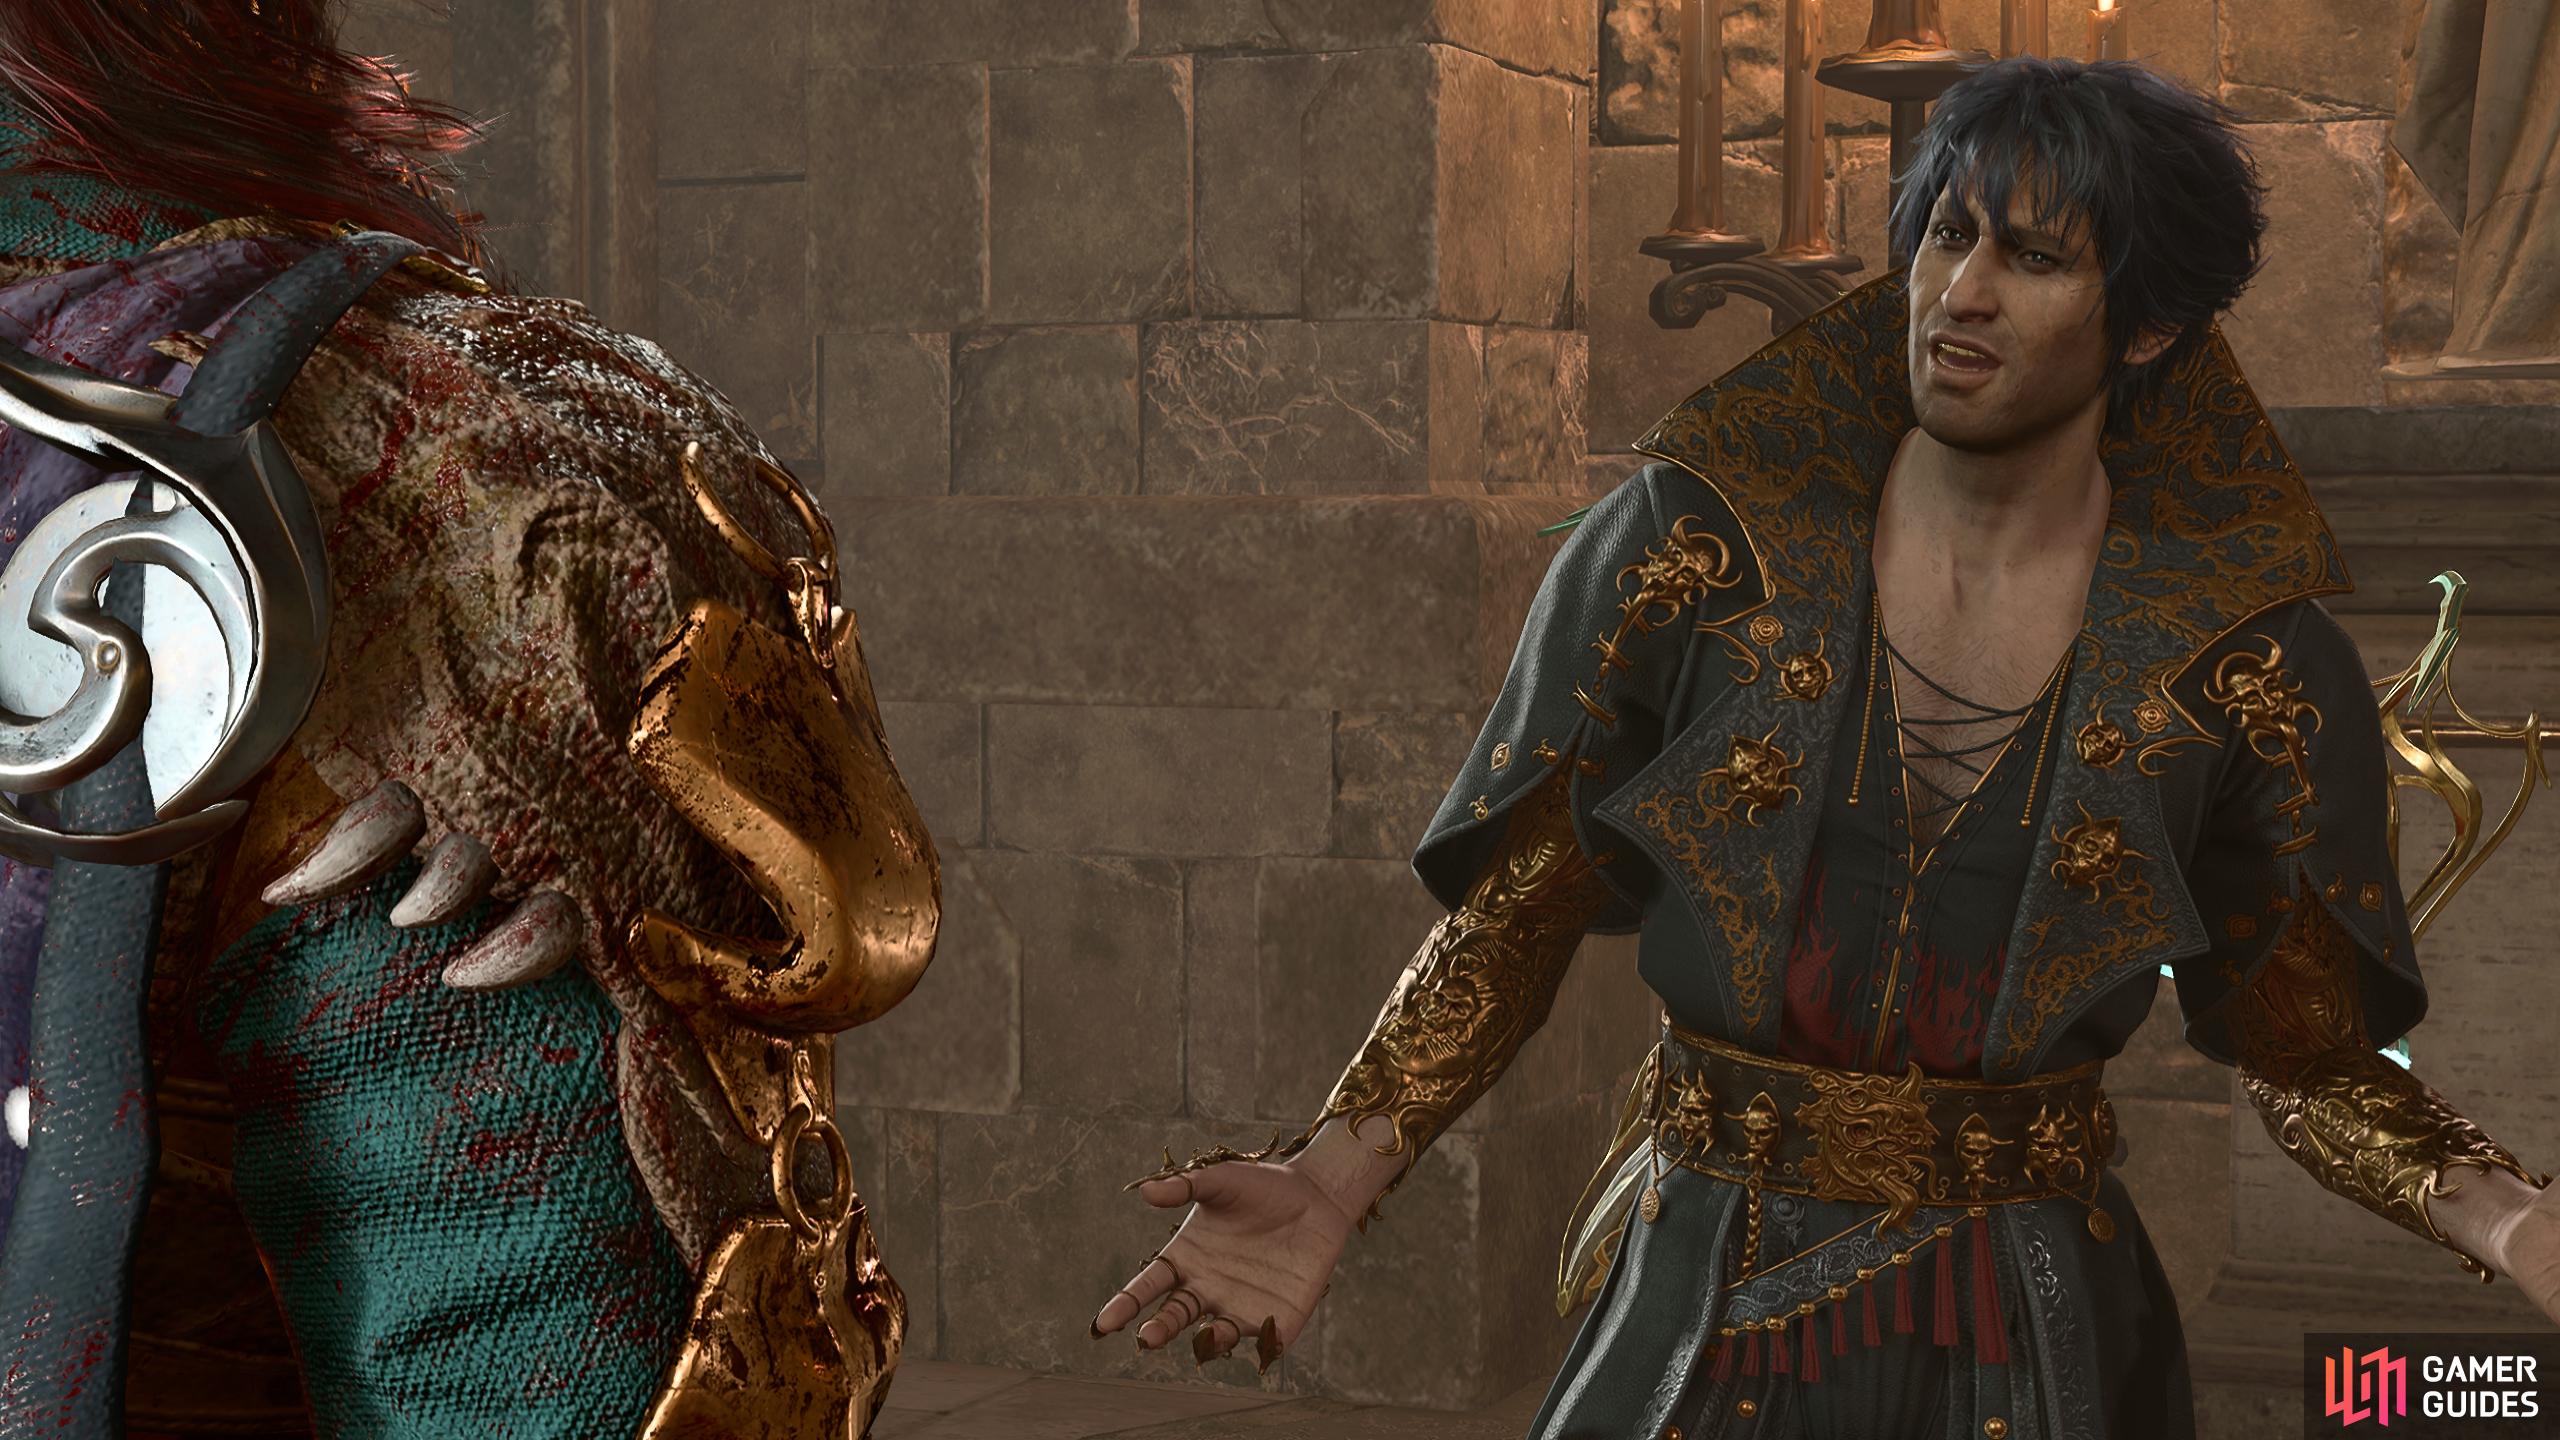
Once he’s defeated, Karlach will have an ! above her head. After speaking to her, she’ll tell you that she wants to make sure Gortash is dead. Inspect his body to get the ending of Karlach’s quest, and some loot including the awesome ![]() Helldusk Boots among other goodies. Finally, once you loot the Netherstone of Gortash’s body you’ll get a short scene with The Emperor and the main quest will update.
Helldusk Boots among other goodies. Finally, once you loot the Netherstone of Gortash’s body you’ll get a short scene with The Emperor and the main quest will update.
No Comments