
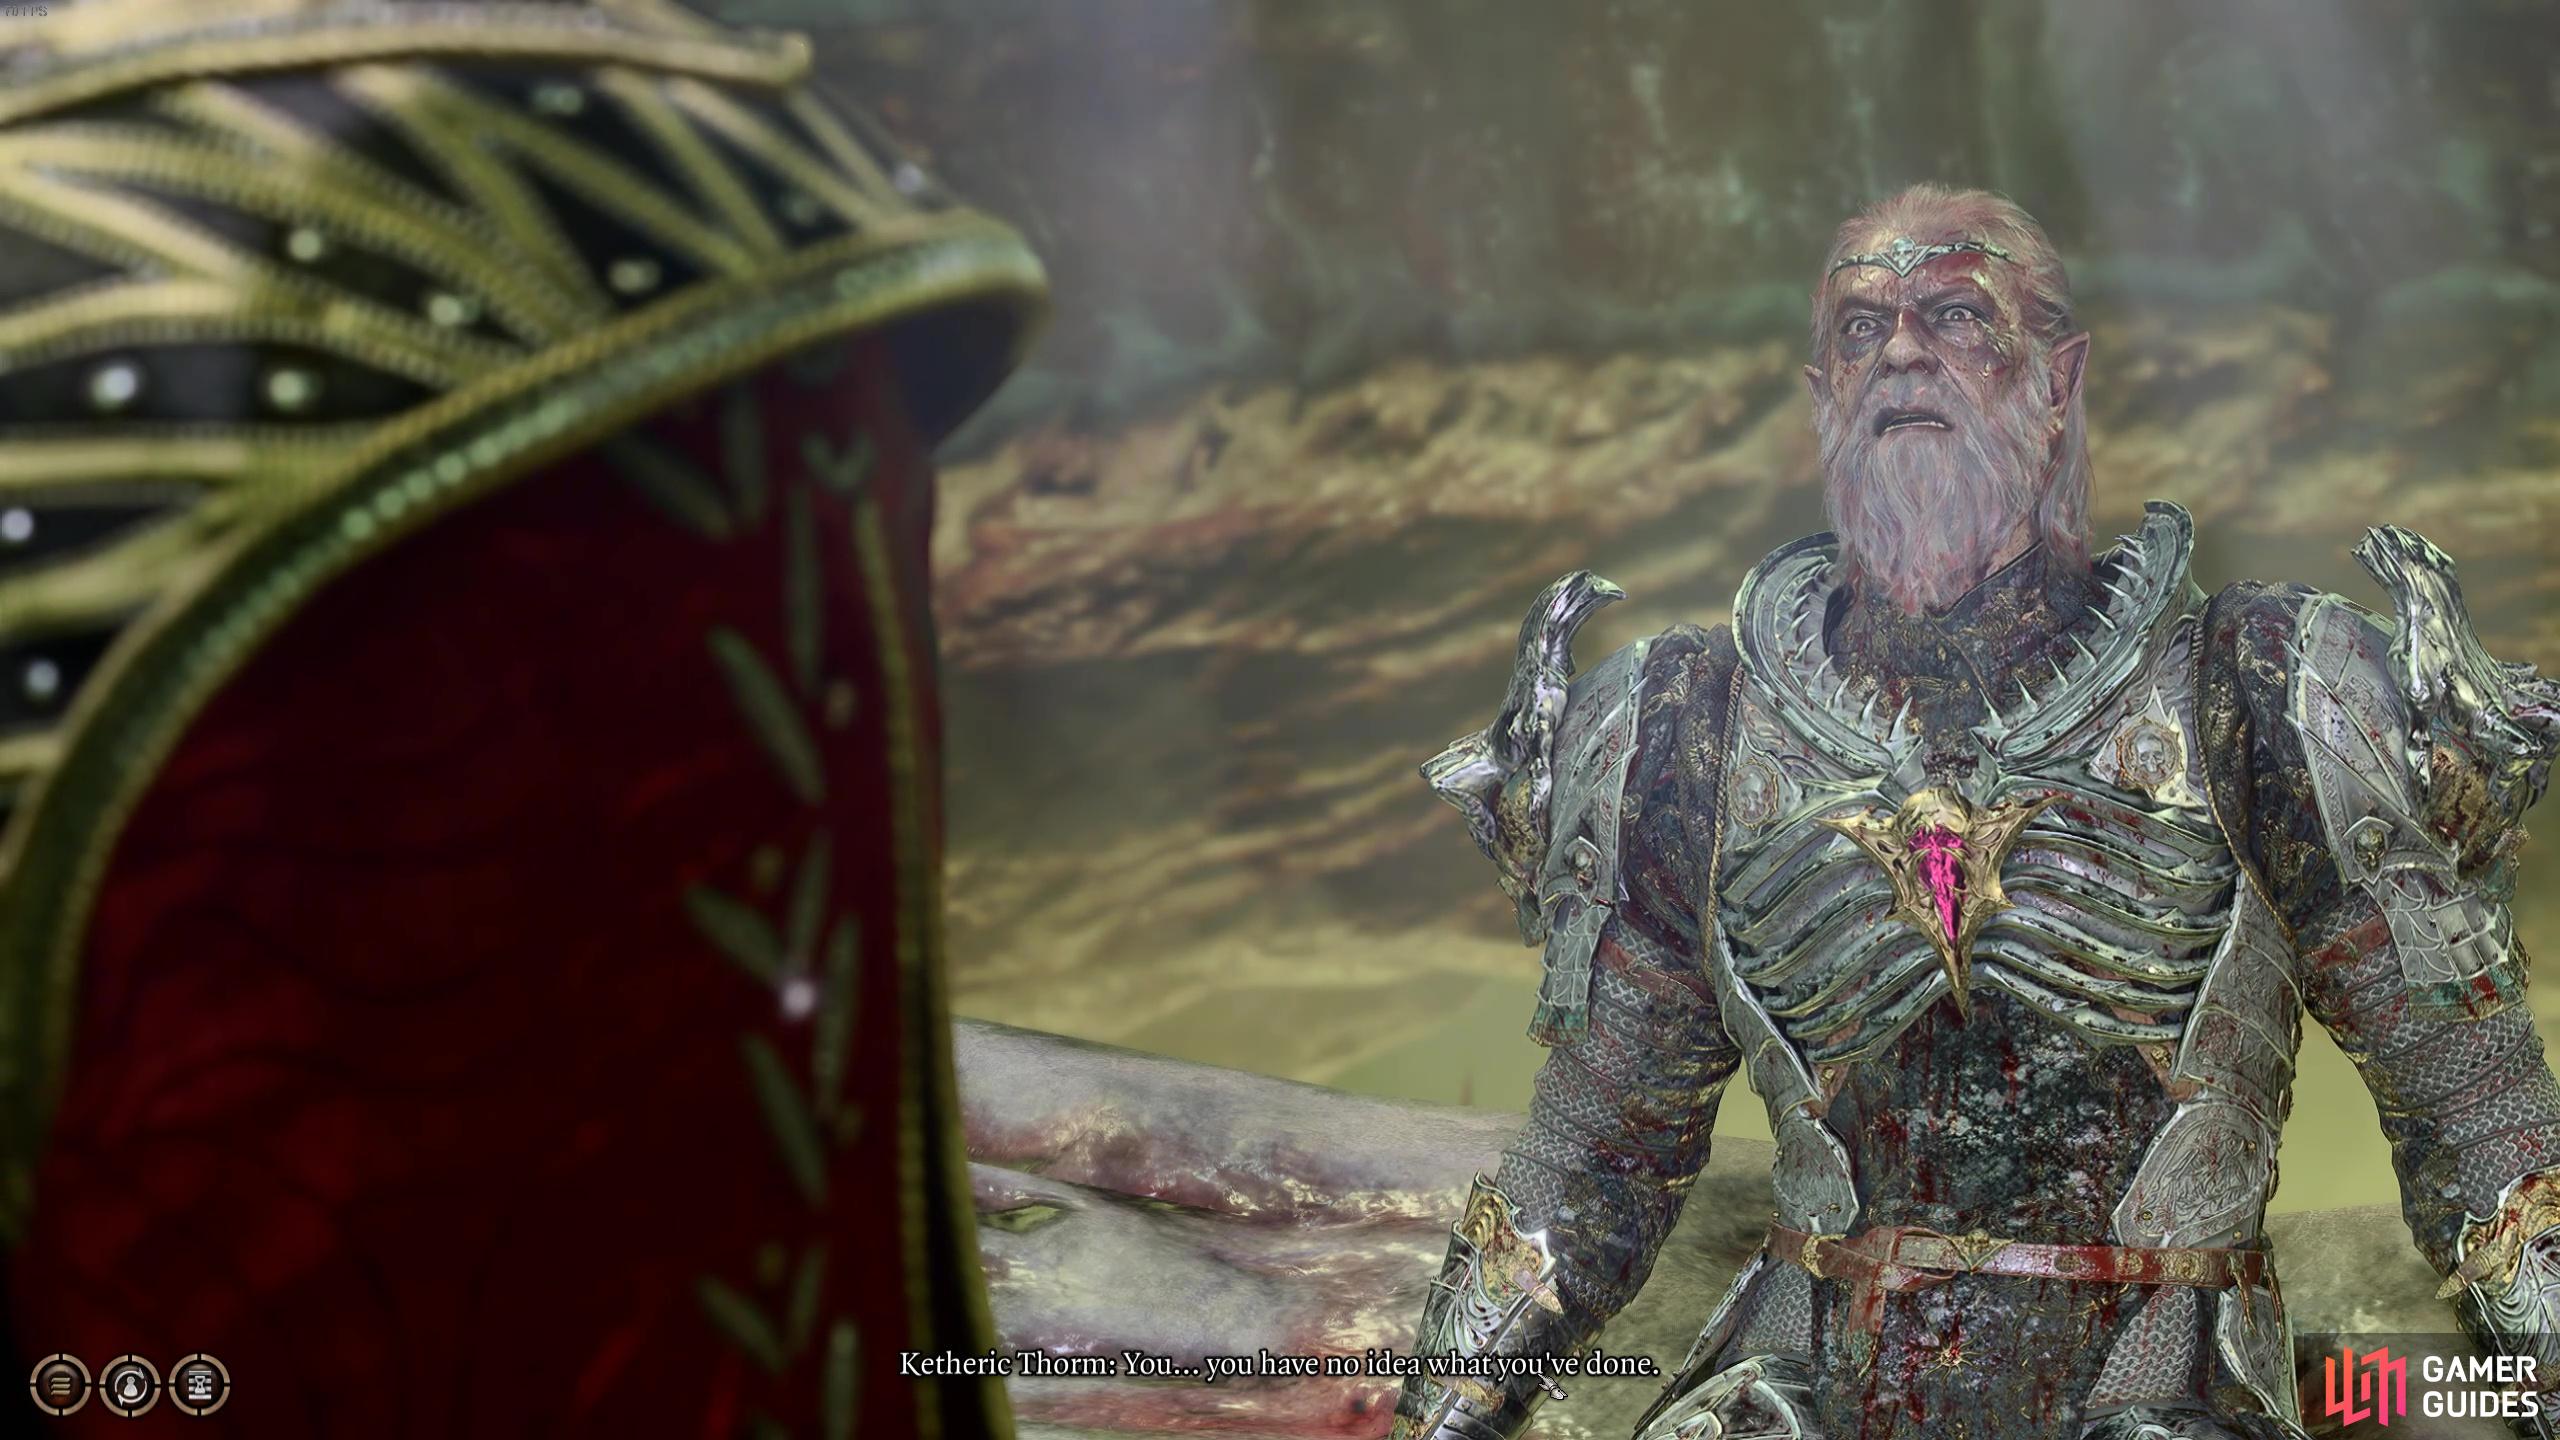
After the fight at Moonrise Towers Rooftop, Ketheric Thorm flees the area and heads down to the depths beneath the towers. Jaheira tasks you with heading down into the ![]() Mind Flayer Colony below to find and defeat Ketheric for good! This page details where to go to find Ketheric and also provides all the information you’ll need for beating him in the final boss fight!
Mind Flayer Colony below to find and defeat Ketheric for good! This page details where to go to find Ketheric and also provides all the information you’ll need for beating him in the final boss fight!
It’s time to face Ketheric Thorm one last time in the Mind Flayer Colony!
If you haven’t faced him at ![]() Moonrise Towers yet, head over to our guide for more information on combat strategy including how to beat Disciple Z’rell!
Moonrise Towers yet, head over to our guide for more information on combat strategy including how to beat Disciple Z’rell!
Where to Find Ketheric Thorm in the Mind Flayer Colony
There are a fair few different things to see and do in the Mind Flayer Colony, but for the sake of brevity, this page will just offer a guide on where to go to find Ketheric Thorm. If you’re looking for more information on the !Necrotic Laboratory for example, you can head over to our guide!
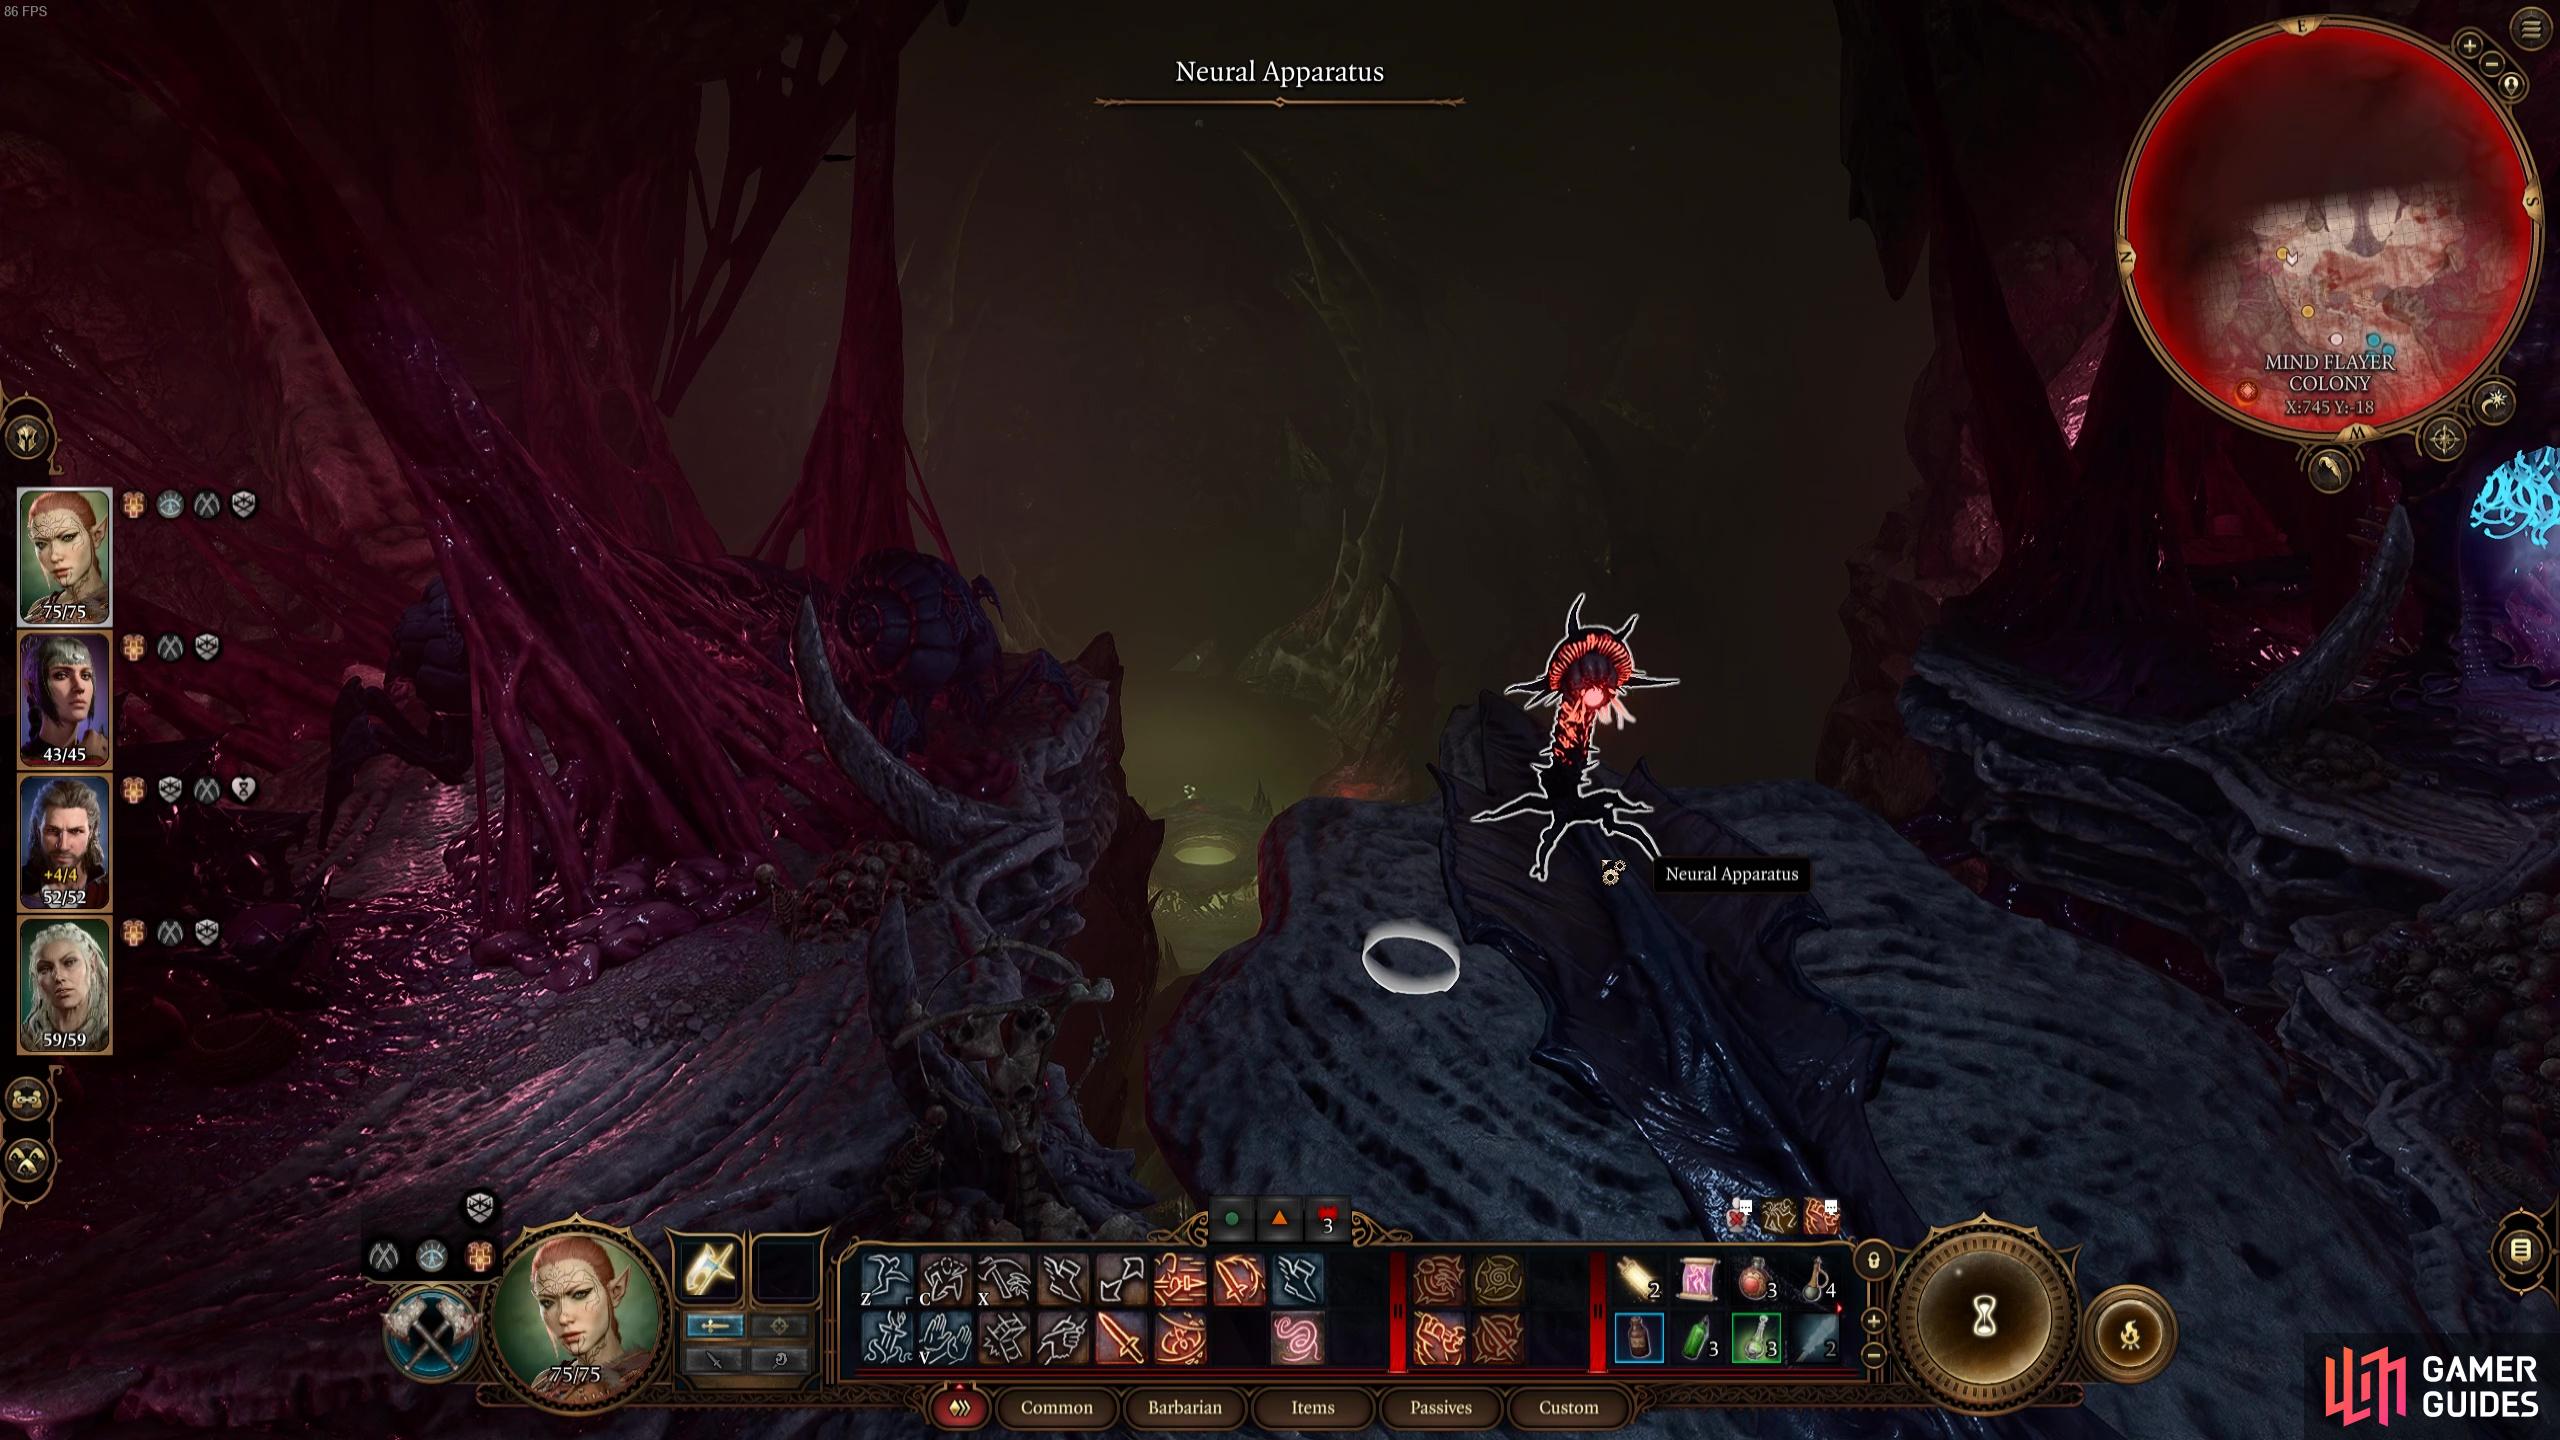
Firstly, you’ll need to jump down the tunnel from the rooftop, where you’ll then find yourself in the Mind Flayer Colony. Head east and destroy the sinews blocking your way. Then, at the crossroads, take the path heading east (the left fork) and pass through the fleshy door near the skeletal banner and ominous green brazier.
In this next room, locate the Neutral Apparatus and walk onto the platform then interact with it. It’ll act like an elevator of sorts that’ll take you down to a lower area.
You’ll then be faced with another fleshy door. Here you’ll get a warning from the Narrator that if you’ve not helped Wyll with his mission from Mizora that he’ll be killed and doomed to a miserable afterlife in Mizora’s servitude. If you haven’t sorted these things out and you care about Wyll’s fate, we recommend turning back now. If you don’t particularly mind or you haven’t even got Wyll in your camp/party, then proceed on in!
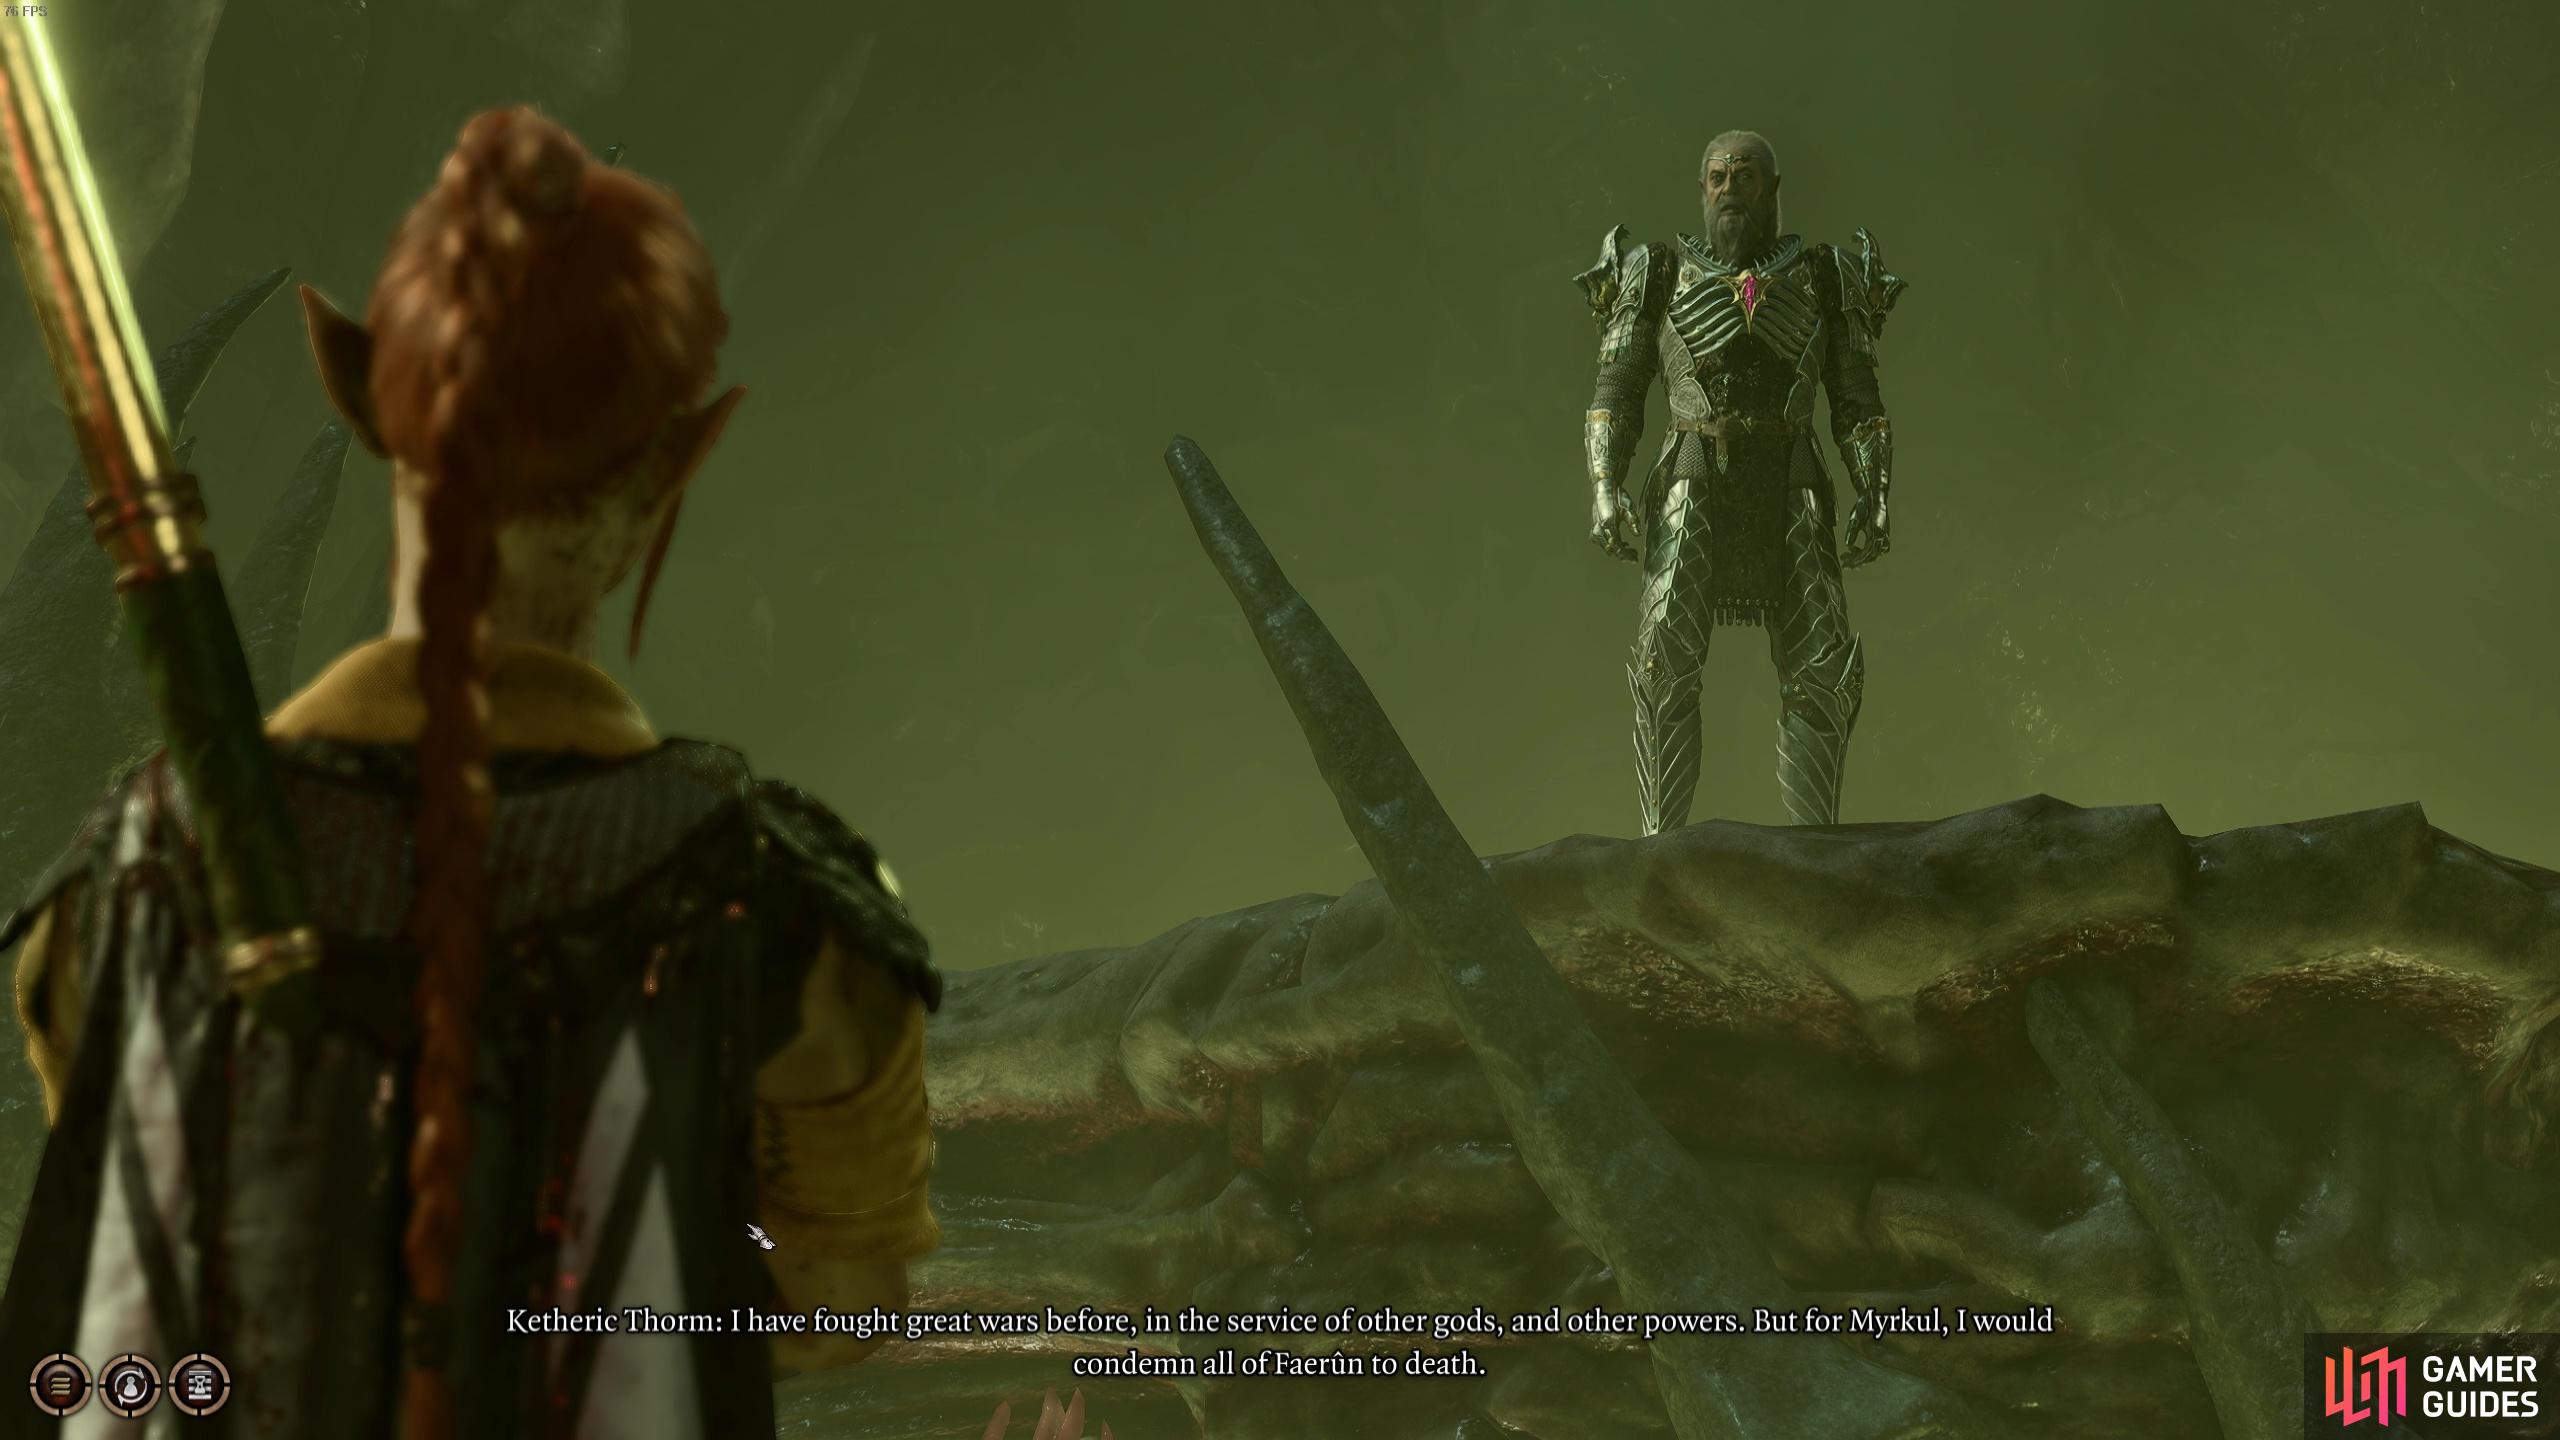
Once you’re ready, head through the door and you’ll witness a pretty lengthy cutscene regarding the big baddies of the game (we won’t spoil it for you here!). After, you’ll be able to interact with and face Ketheric once again!
Boss Fight: Ketheric Thorm Phase 1
Will this Ketheric guy ever die?
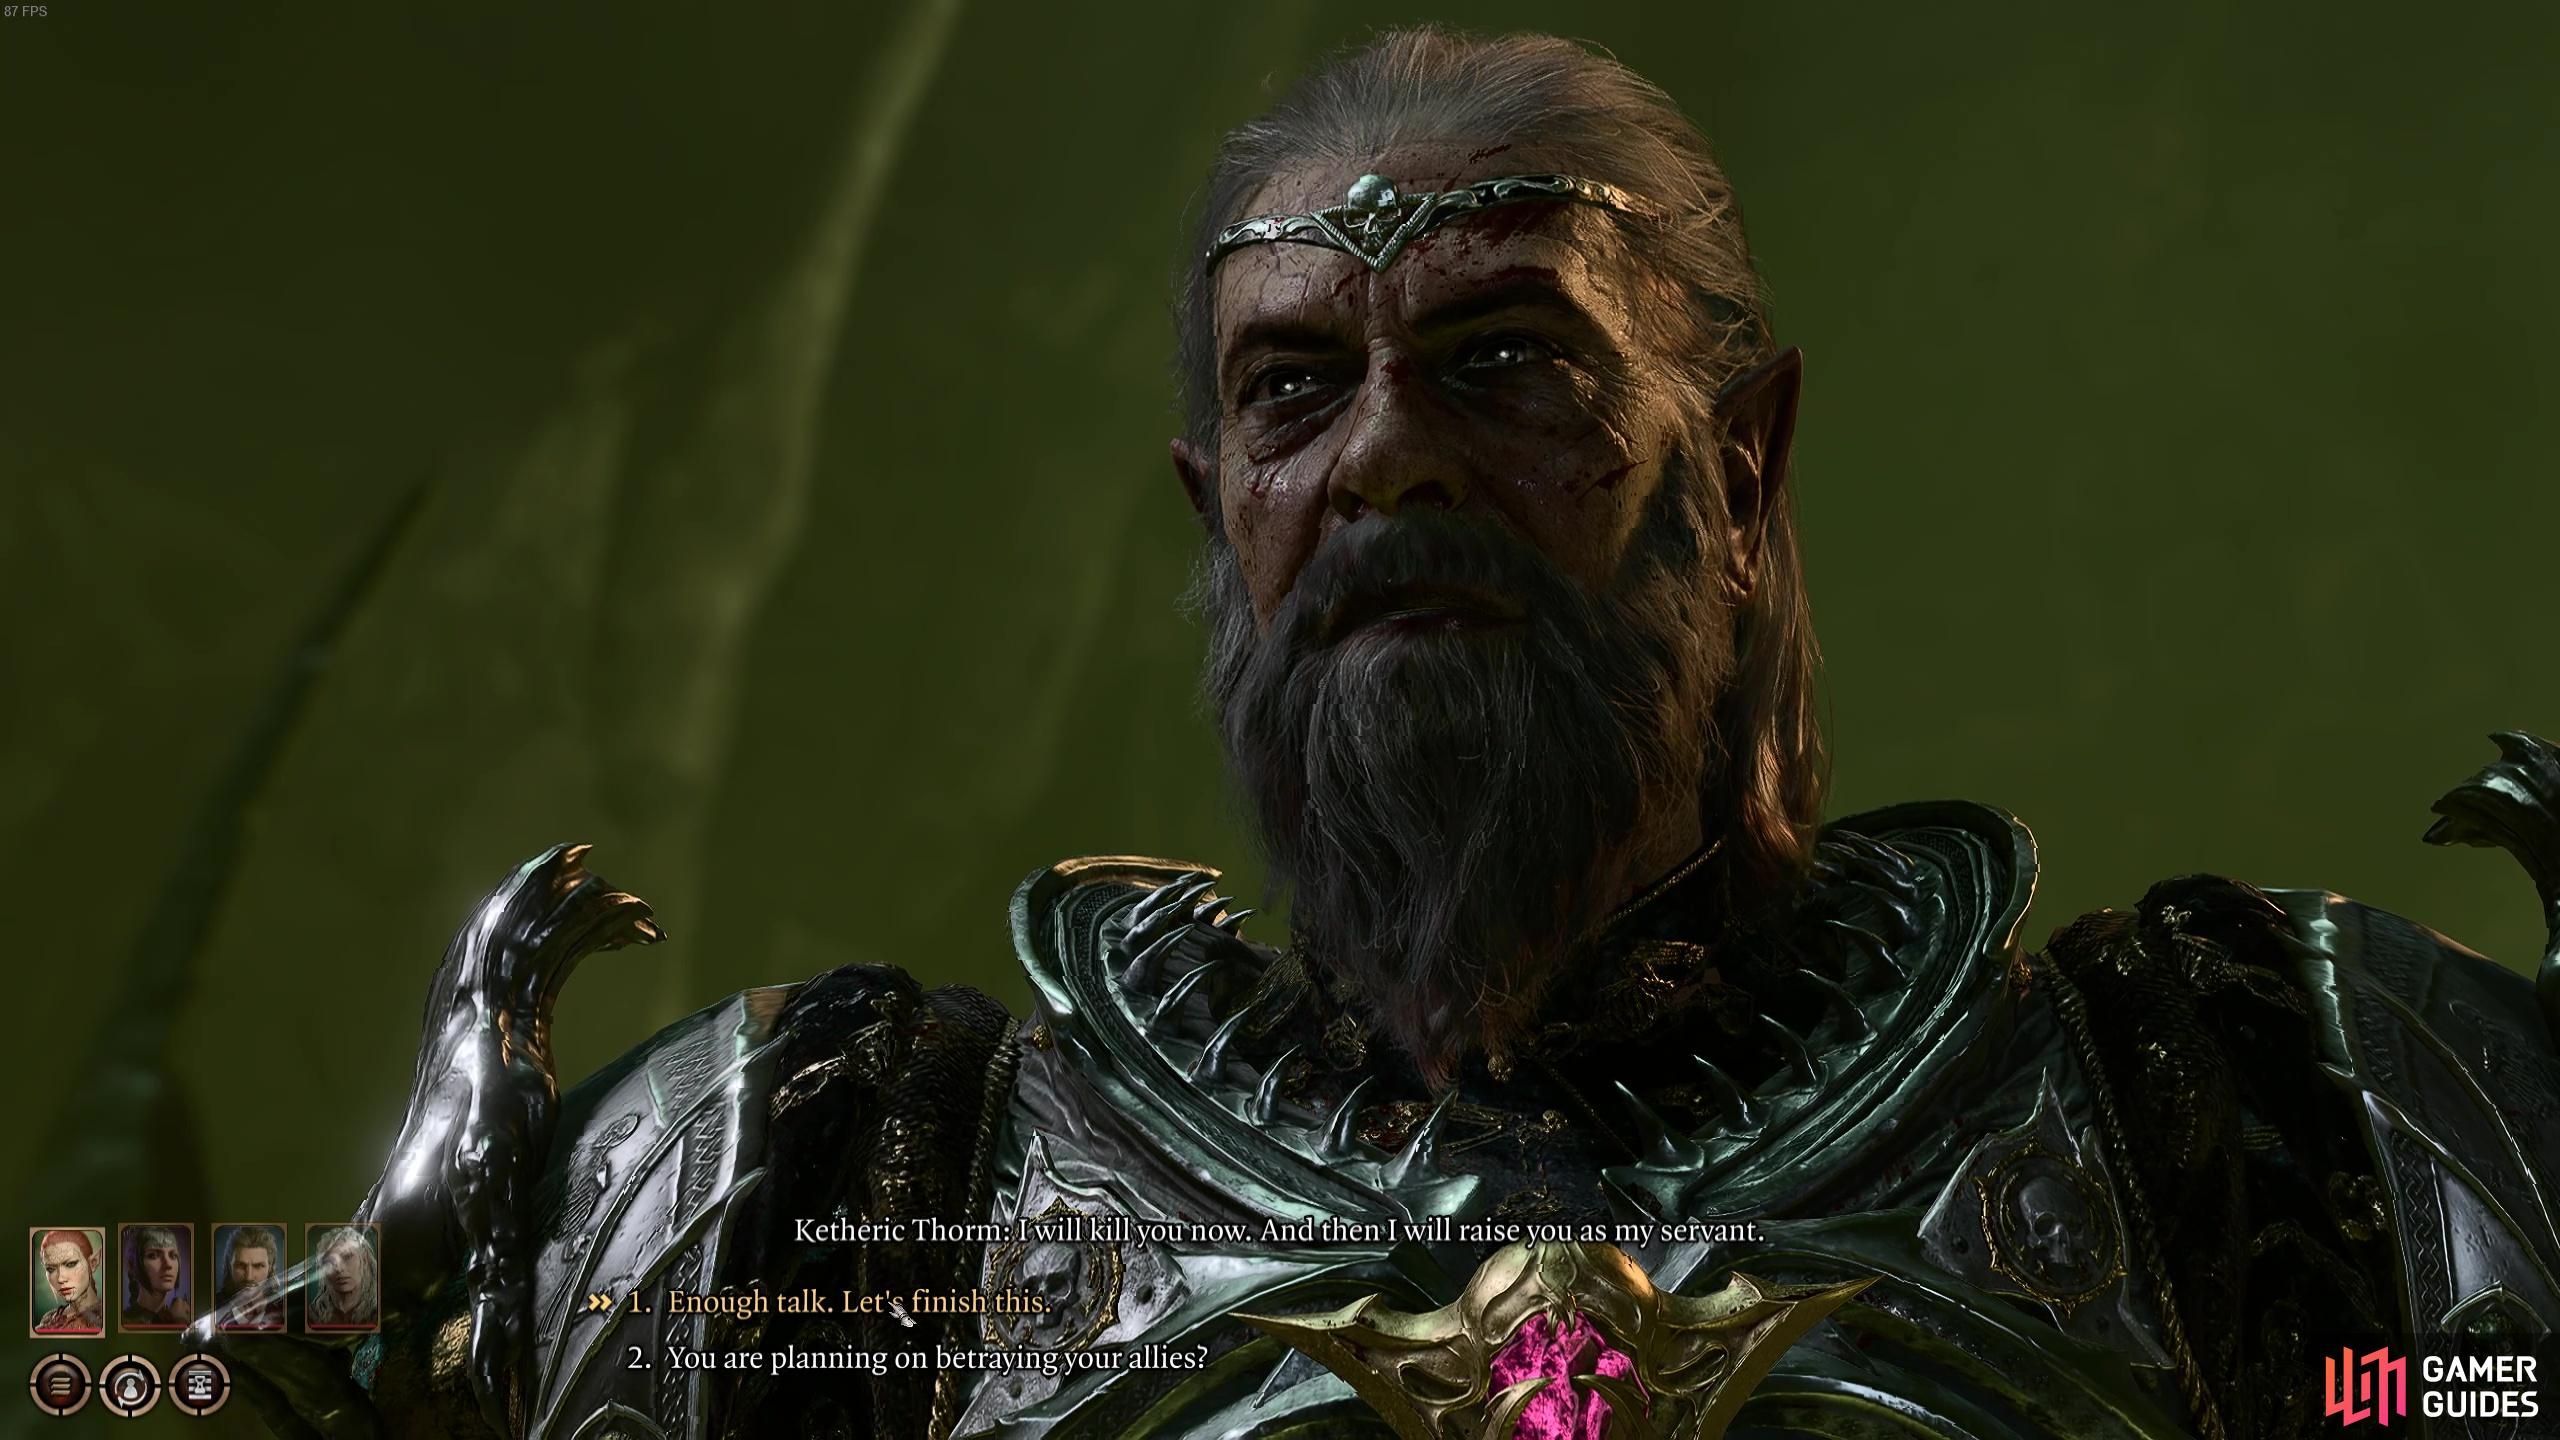
Ketheric starts off with only about half his HP bar but still has the high armor class of 22. However, before you can do any sort of damage to Ketheric, you’re first going to need to free Aylin who’s found in the top right corner of the room. Until she’s been freed, he is impervious to any damage whatsoever! It’ll probably take your character around two turns before you can free her, meaning you should use your first round of combat to deal with some of the additional enemies, such as the Necromites and the Mind Flayer. The Mind Flayer can actually be quite a problem in this fight as he possesses the ability to cast ![]() Dominate Person, which he will often use on Aylin. Having Aylin on the enemy team can be quite devastating, so getting the Mind Flayer out of the picture quickly can be really beneficial to the fight. Additionally, you could also
Dominate Person, which he will often use on Aylin. Having Aylin on the enemy team can be quite devastating, so getting the Mind Flayer out of the picture quickly can be really beneficial to the fight. Additionally, you could also ![]() Counterspell the Dominate Person spell but this is reliant on having a spellcaster that knows the spell and also having the available spell slots.
Counterspell the Dominate Person spell but this is reliant on having a spellcaster that knows the spell and also having the available spell slots.
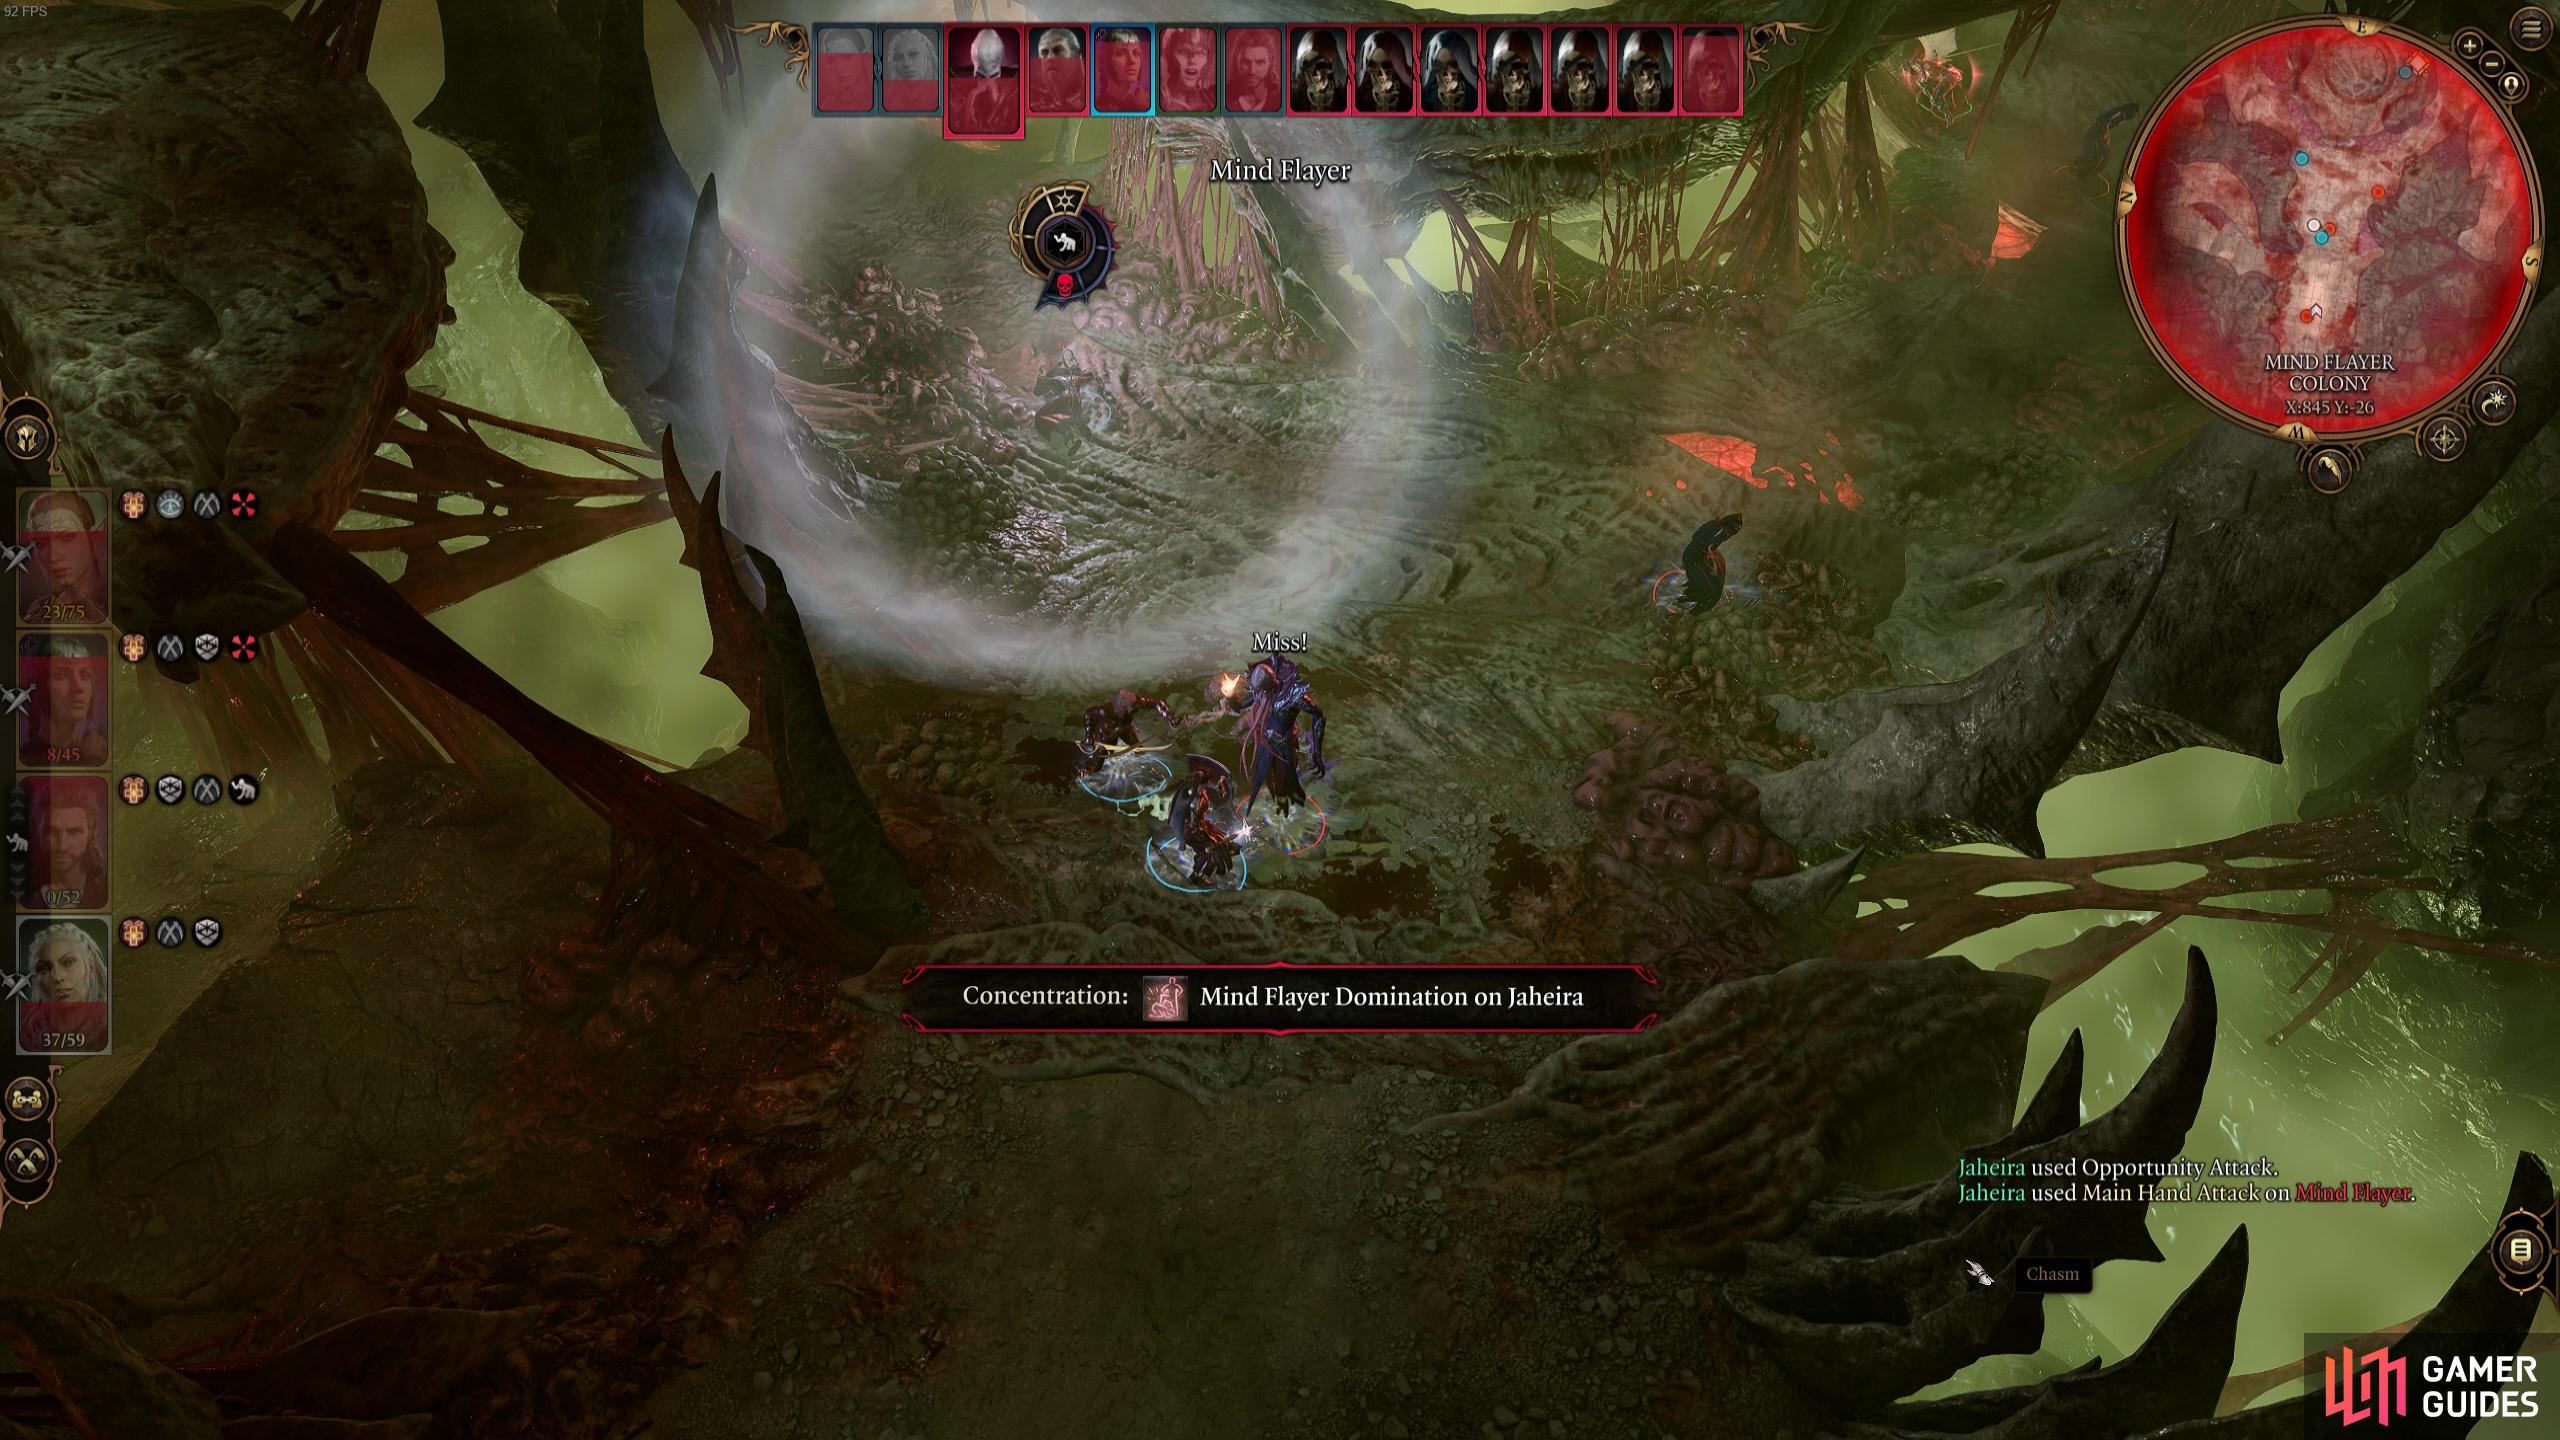
The Mind Flayer’s Dominate Person spell will put your allies under enemy control if they fail a DC roll.
In this fight, Ketheric works quite similarly to the last fight in the fact that he uses Deadly Orders a lot to control his Necromite minions and get them to focus one target at a time. This feels more punishing during this fight as there’s the Mind Flayer and a ton of Necromites to contend with. Plus Ketheric will make one or two new Necromites every turn. Ouch! Thankfully, they don’t continue attacking downed characters so you won’t have characters dying on you as a result of these orders. If you’re desperate to keep them alive, Cleric spells like ![]() Sanctuary,
Sanctuary, ![]() Death Ward or
Death Ward or ![]() Feign Death can help.
Feign Death can help.
Once Aylin is free, we found that keeping her healthy was really beneficial as she has great movement speed and some pretty strong attacks to help deal with both Ketheric and the lesser enemies. She can’t die as she’s immortal but when she’s downed she won’t get a full turn the next time she gets up so she feels pretty weak in that sense. As long as you ensure she’s got high enough health to withstand Ketheric’s attacks she’s quite a valuable ally!
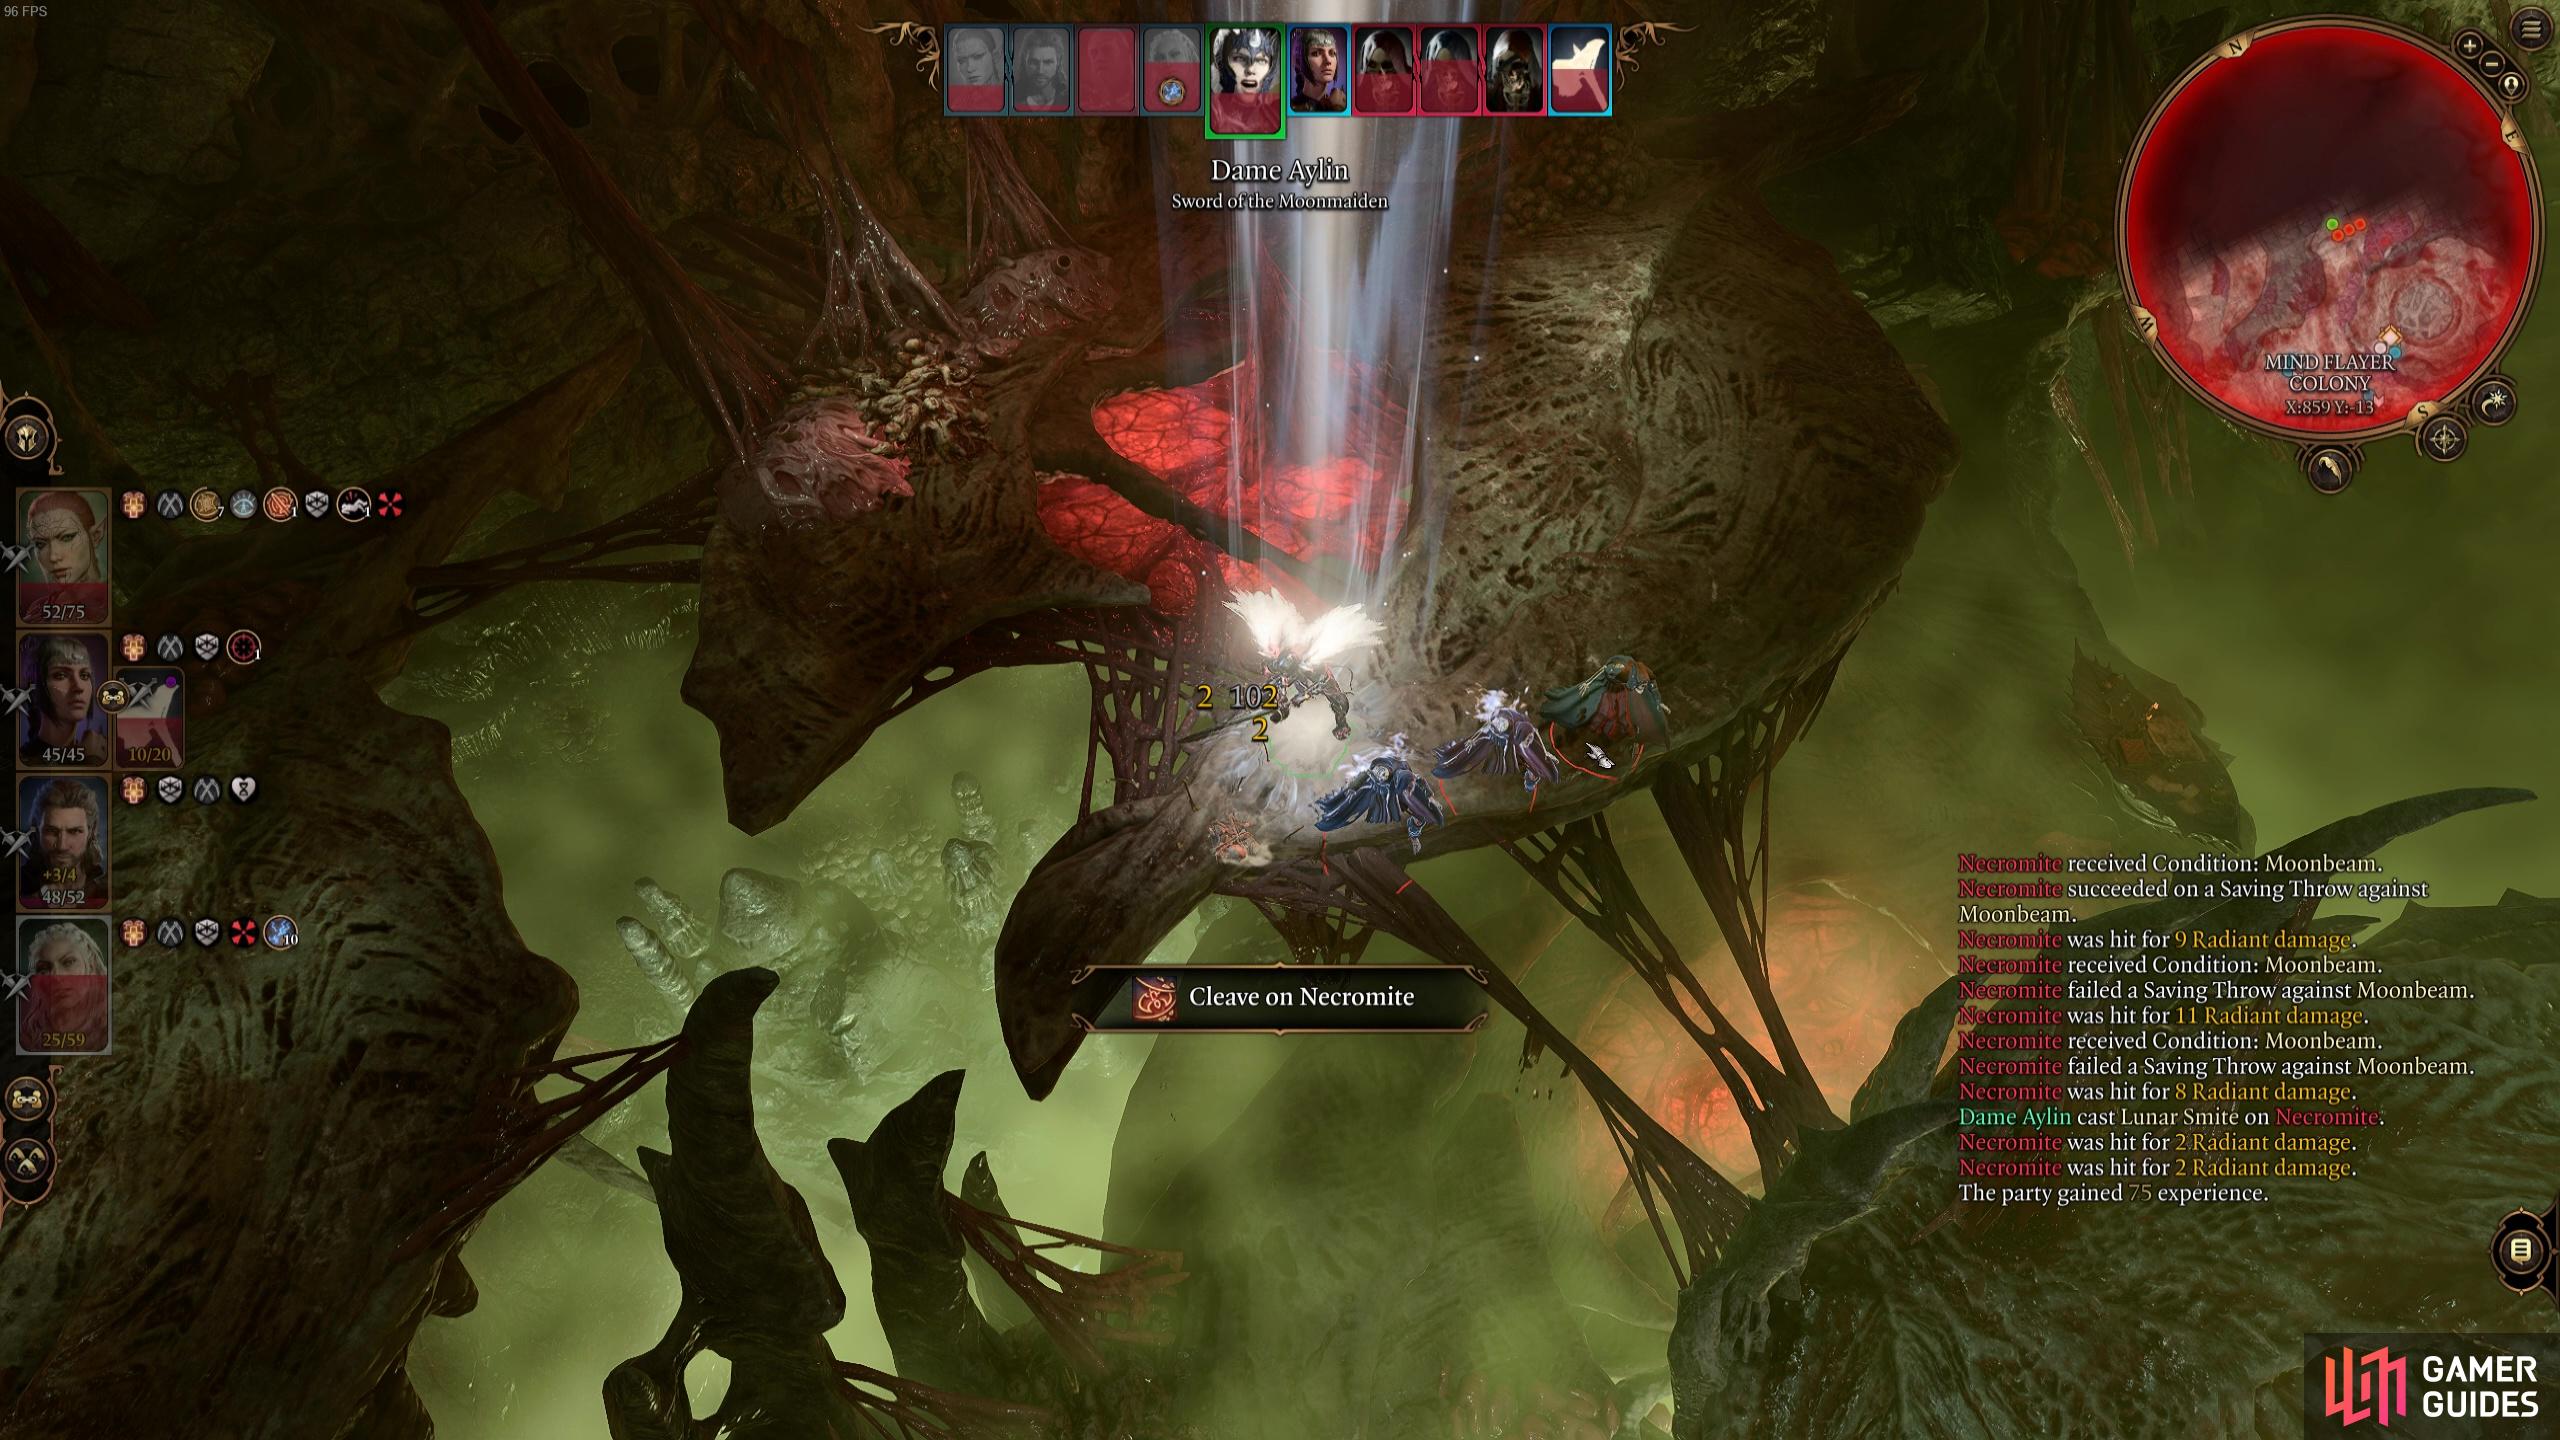
Aylin’s moonbeam can help take out the weaker enemies in one go!
One of the most effective spells we used during this fight was the Cleric’s ![]() Guardian of Faith. Since Ketheric has a ton of things he can do in a turn, the Guardian will respond with a huge attack each time and it can do tons of damage just whilst Ketheric is having his turn! It uses an attack called Strike of the Guardian, which deals 20 Radiant damage and even on a dex save, enemies still take half damage. Other big AoE attacks such as Wall of Fire or
Guardian of Faith. Since Ketheric has a ton of things he can do in a turn, the Guardian will respond with a huge attack each time and it can do tons of damage just whilst Ketheric is having his turn! It uses an attack called Strike of the Guardian, which deals 20 Radiant damage and even on a dex save, enemies still take half damage. Other big AoE attacks such as Wall of Fire or ![]() Fireball can also be great for doing damage here.
Fireball can also be great for doing damage here.
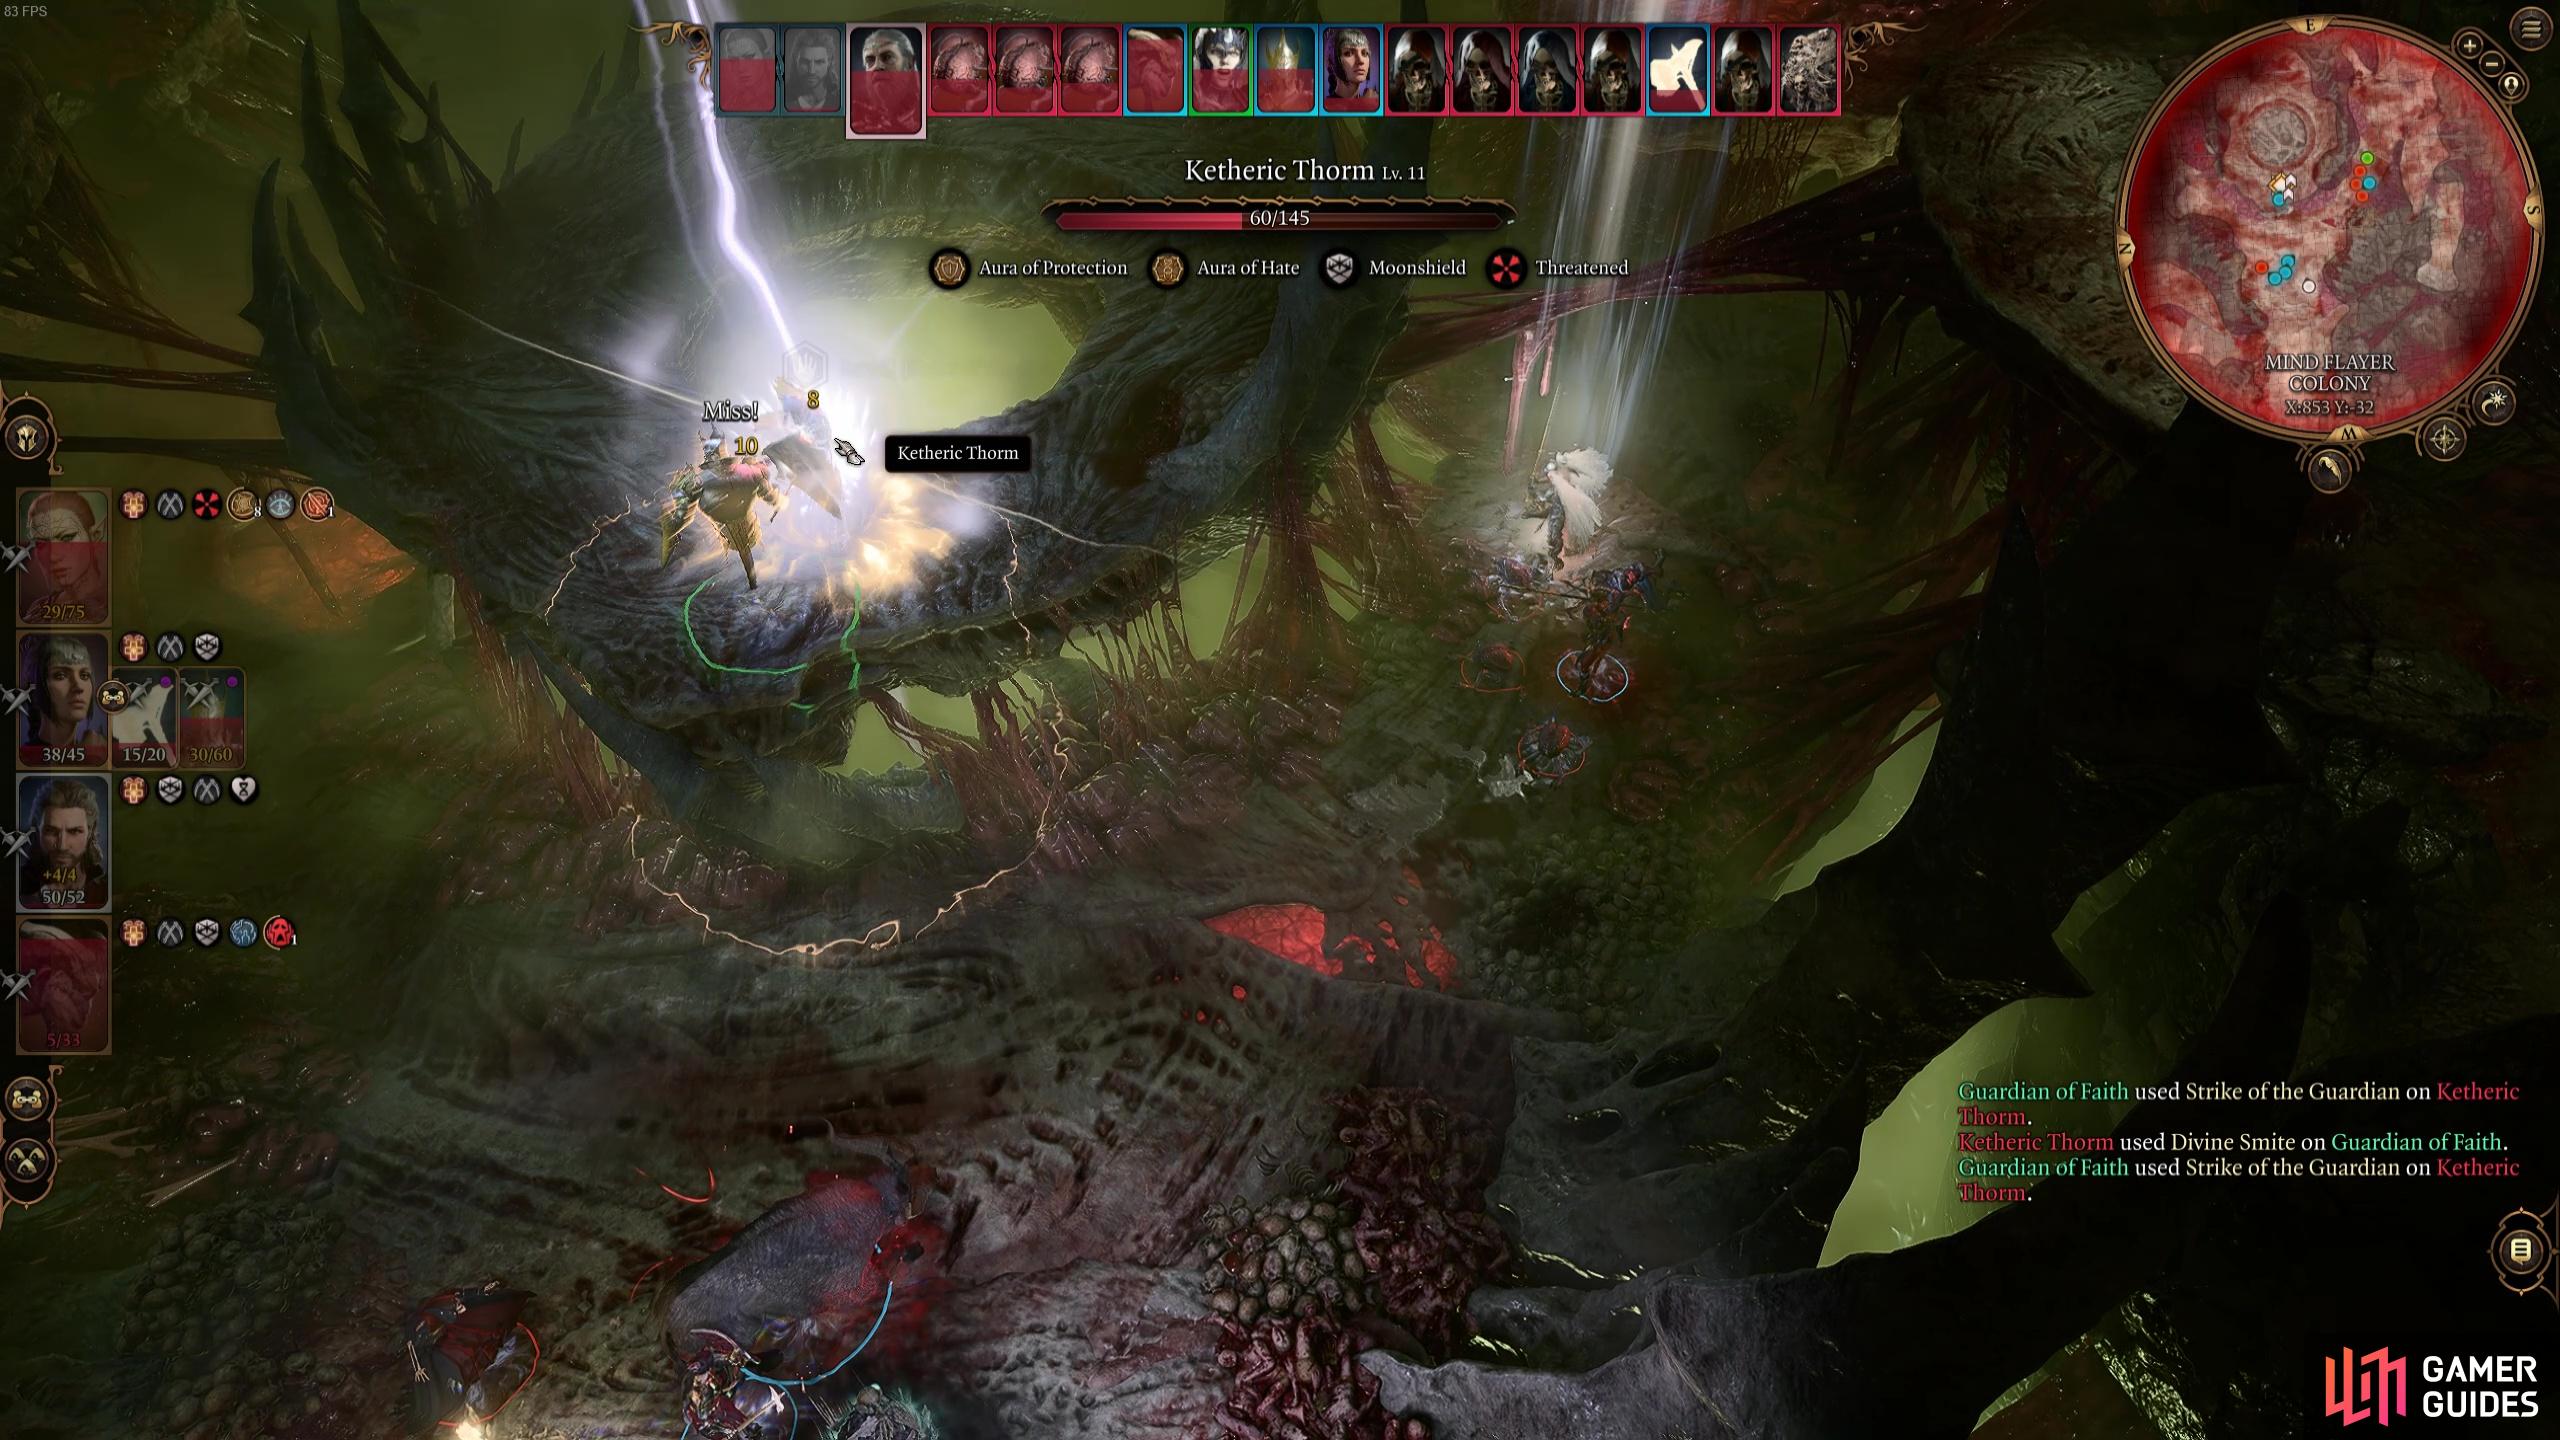
The Guardian of Faith responded to each of Ketheric’s attacks with its own strikes that deal 10~20 radiant damage each time!
In general, you shouldn’t find it too difficult to do damage to Ketheric so long as Aylin is in the picture and you have plenty of spell slots to unleash a barrage of big spells and healing to keep the party sustained against the Necromites’ poking damage.
When you do whittle down Ketheric’s health bar again, you’ll trigger another cutscene….
Boss Fight: Apostle of Myrkul Phase 2
You thought Ketheric Thorm would go down that easily? Unfortunately not! The final phase of this fight involves going against Ketheric in a terrifying Apostle of Myrkul form. He has 225 Health (Balanced mode) but does not move from the center of the arena. He also has an armor class of 19 (so less than normal Ketheric!). He takes half damage from necrotic, cold and poison damage so you should avoid doing those kinds of damage if possible.
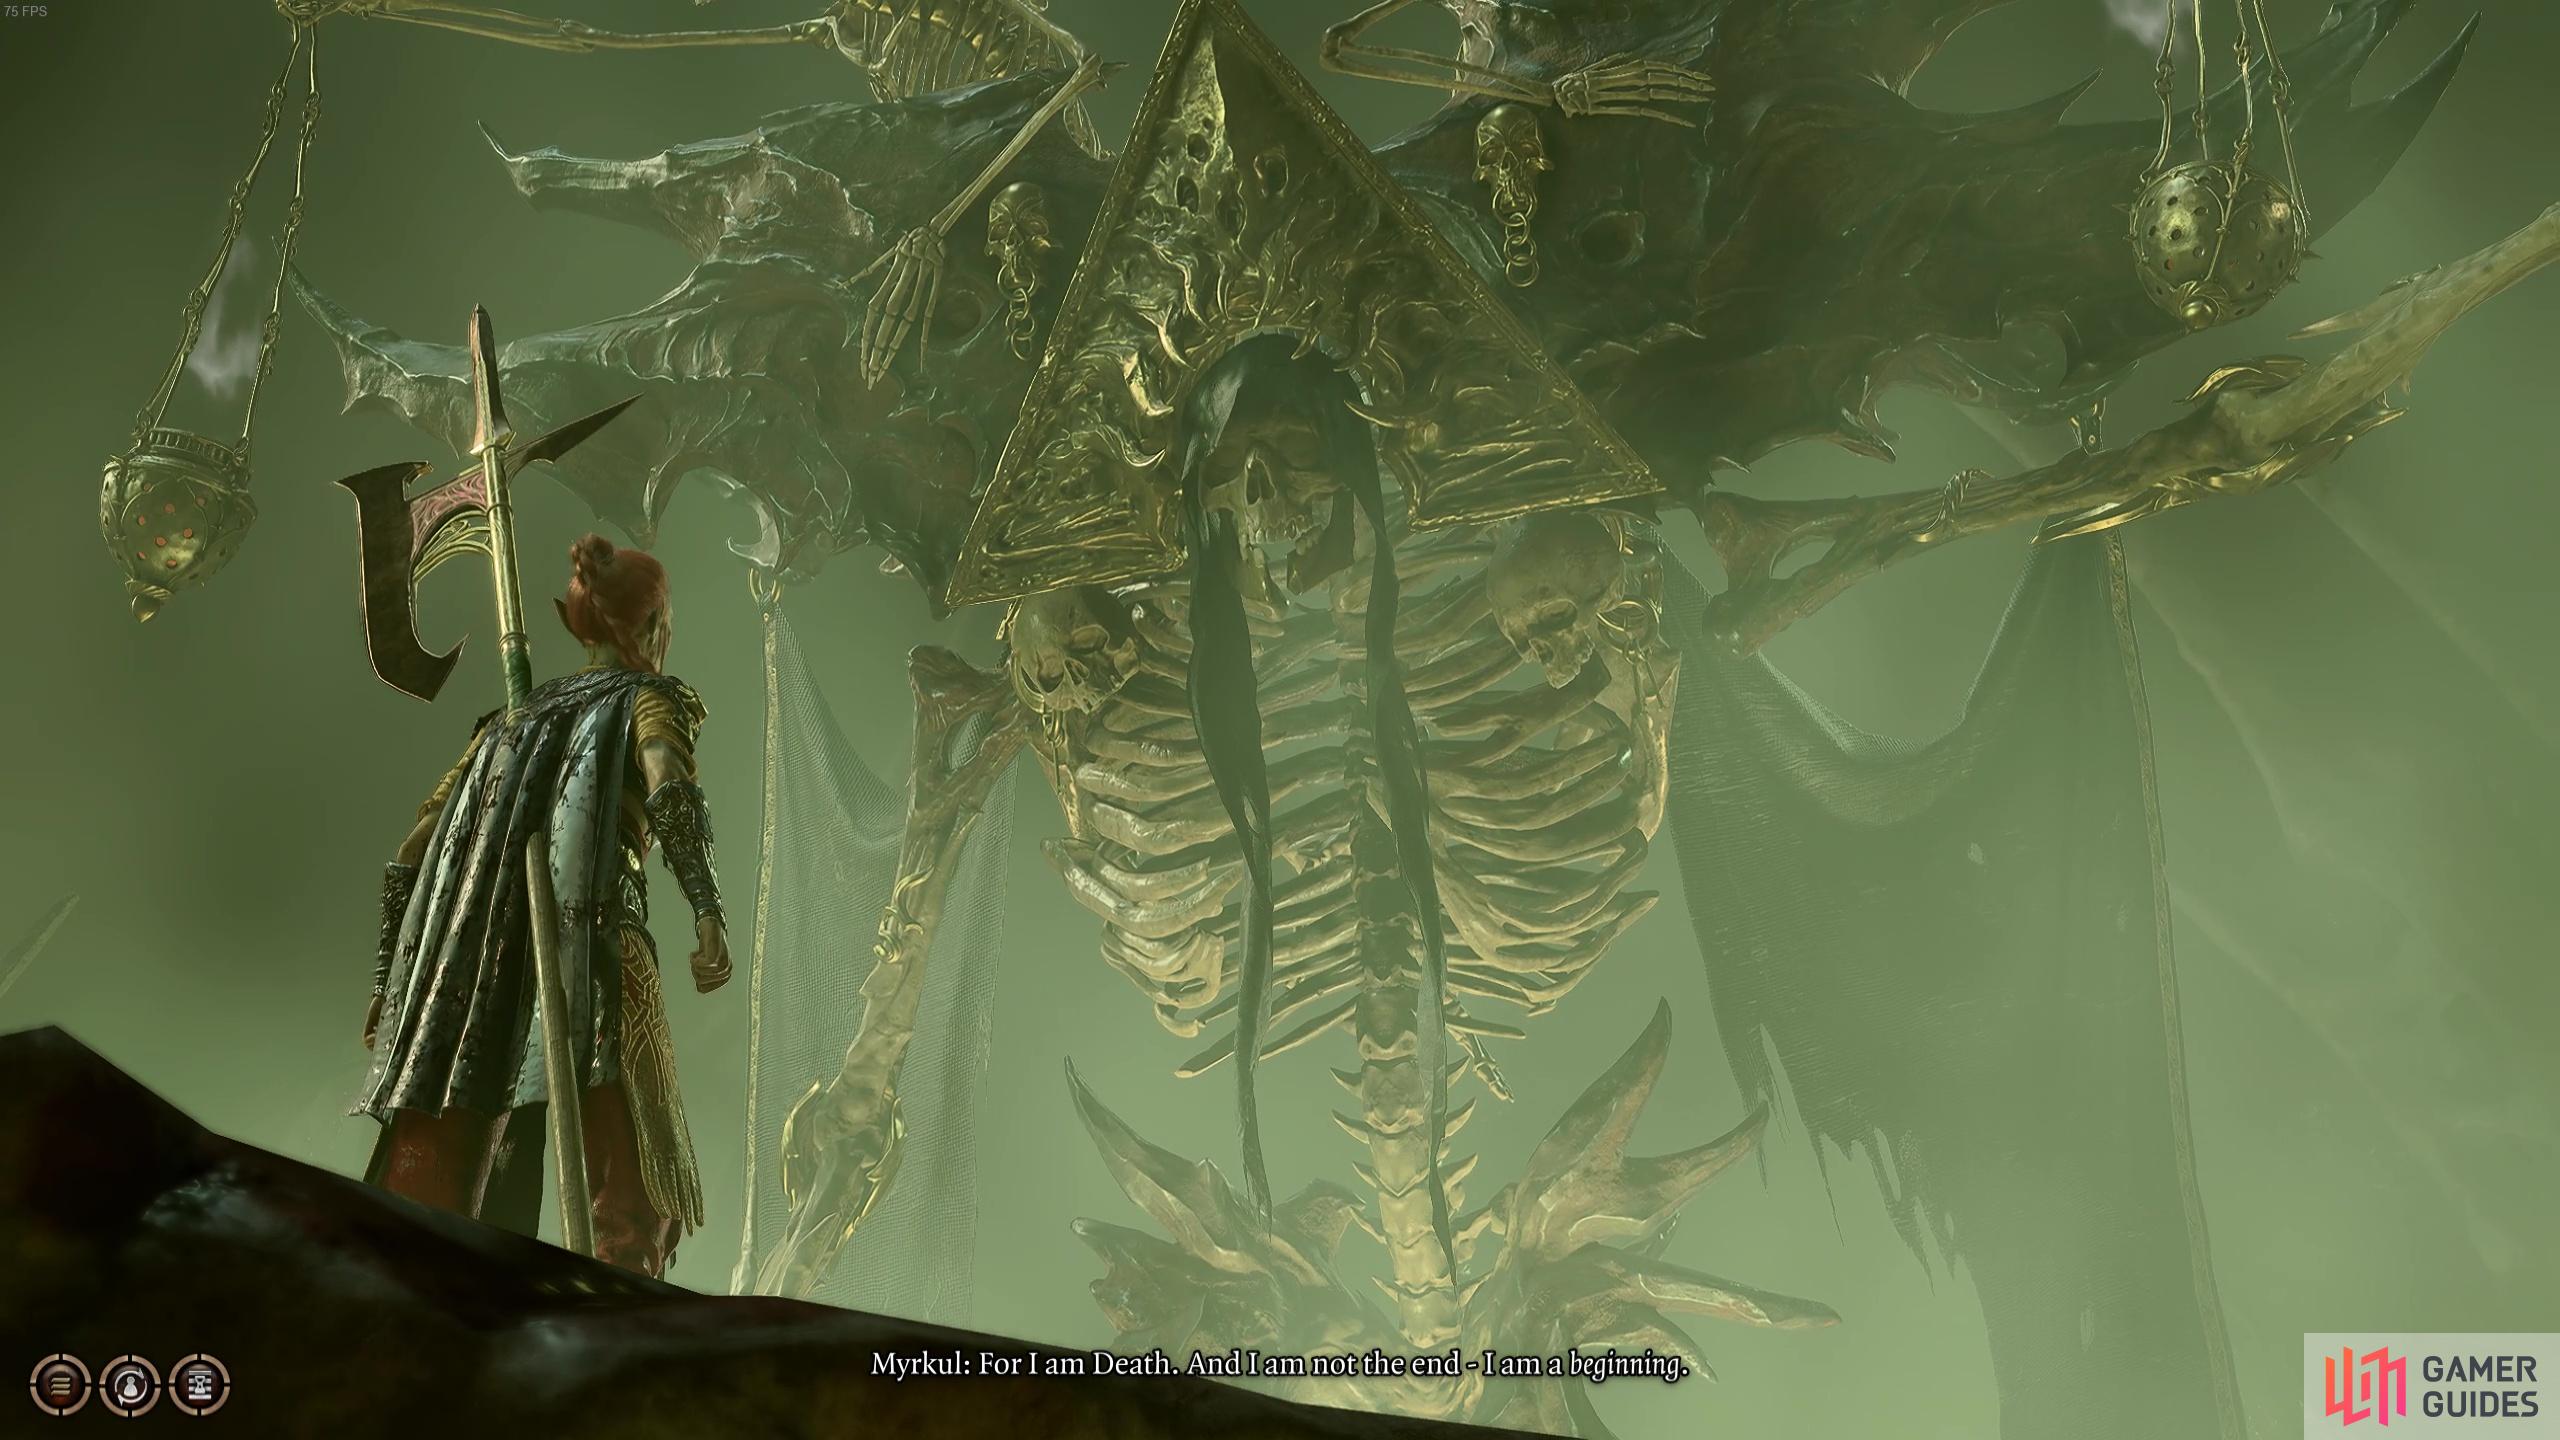
Ketheric Thorm’s final form is as the Apostle of Myrkul, God of Death.
Unfortunately for your close combat party members, they’ll have to endure Myrkul’s Presence, which means that whenever they’re nearby they’ll become Bone Chilled, preventing healing and also dealing Necrotic damage. All is not lost, however, because if you do need to heal, simply exit the circular upper platform area and then your active condition will be lost and you can heal again. This goes for downed characters as well - you won’t be able to revive them if they’re in the upper circular area. It’s important to make the most of this as the Apostle of Myrkul naturally has some really powerful attacks that could wipe a party in one turn. Additionally, you could also keep your spellcasters or ranged party members on the platform to the right (where the Necromites are) and they’re safely out of the ![]() Bone Chill zone.
Bone Chill zone.
His most devastating attack is his ability to perform the iconic spell Finger of Death. In order to do this, he’ll have to consume a Necromite from nearby (he makes a bunch of them) and then he’ll be able to cast the incredibly powerful Level 7 spell that, on a failed constitution save, does a whopping 7d8+30 necrotic damage. If the target is killed, they’ll become a zombie under the caster’s command.
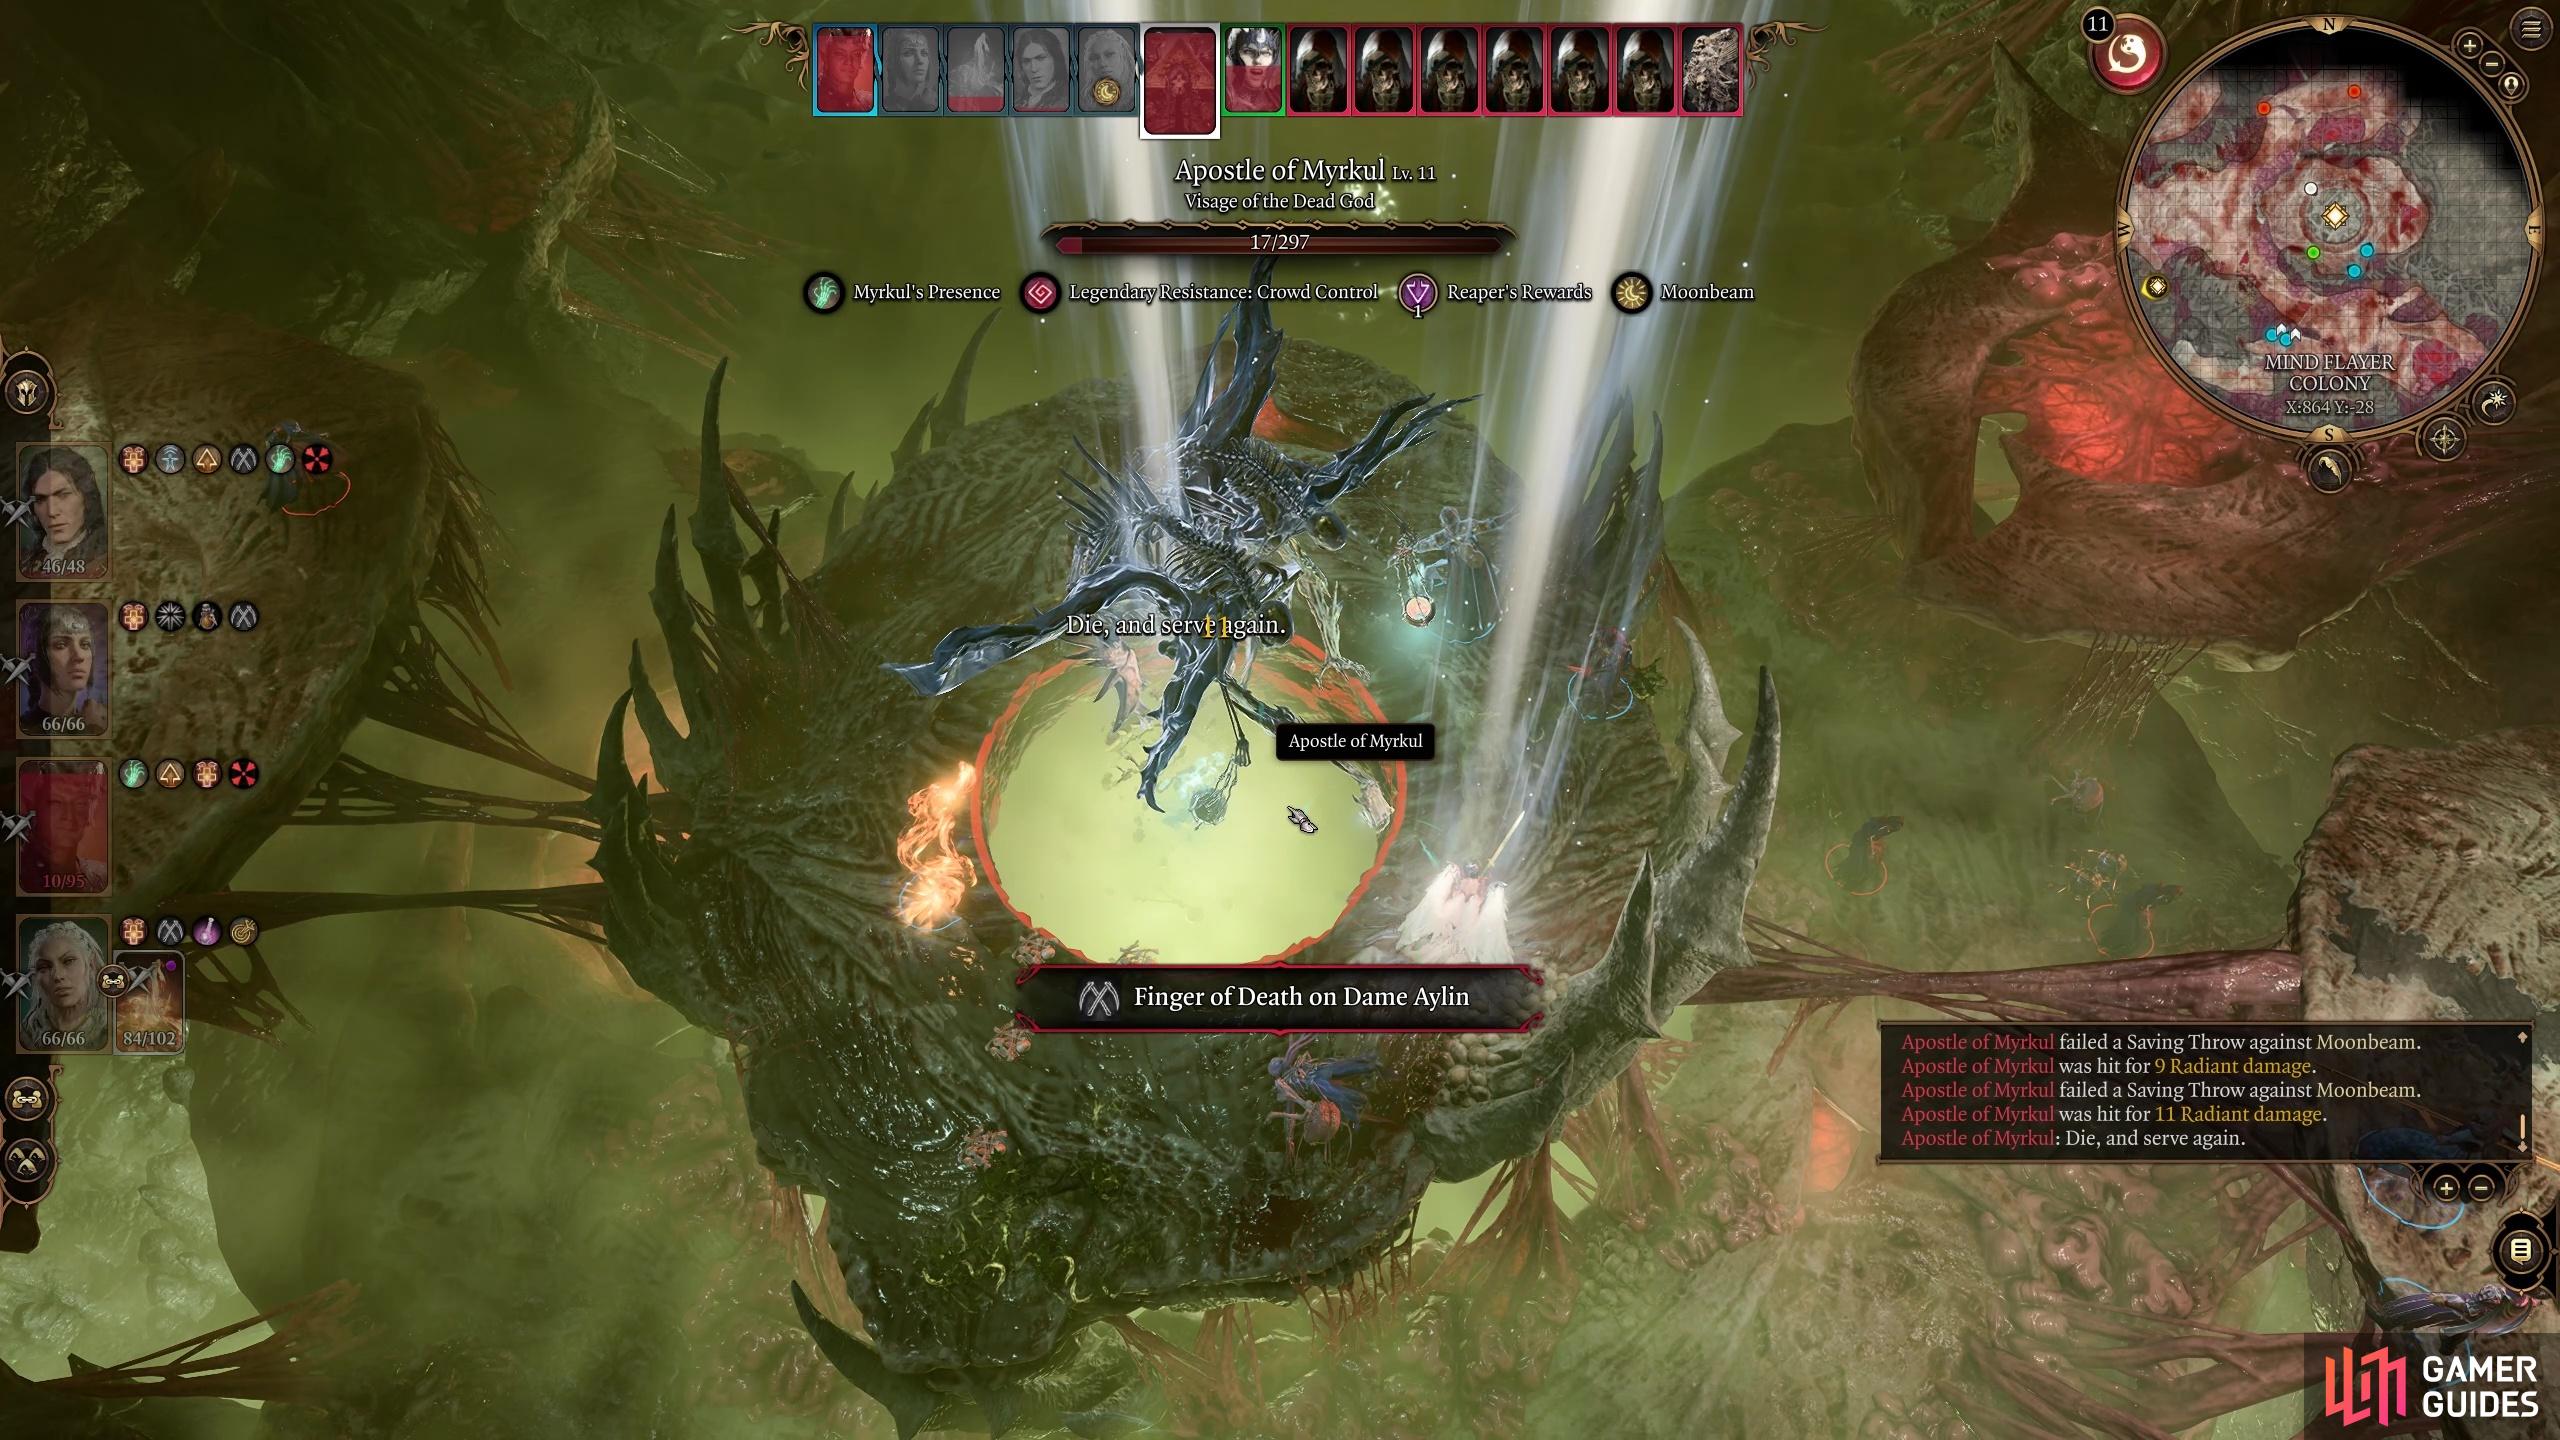
The Apostle of Myrkul’s biggest attack is his Finger of Death spell but you can seemingly avoid it by finishing the battle quickly.
If you manage to do this fight without him consuming any Necromites, you’ll get the Trophy No Free Lunches. We didn’t necessarily do anything to prevent him from consuming Necromites, but hitting him with huge attacks and defeating him quickly can definitely help avoid this devastating attack.
For the most part, we didn’t find this final phase too challenging given that the Apostle of Myrkul can’t move and it means you can safely disengage from the fight if needed. Use Spellcasters to cast huge damage spells to chunk his health and you should have no real issues defeating him in a few turns.
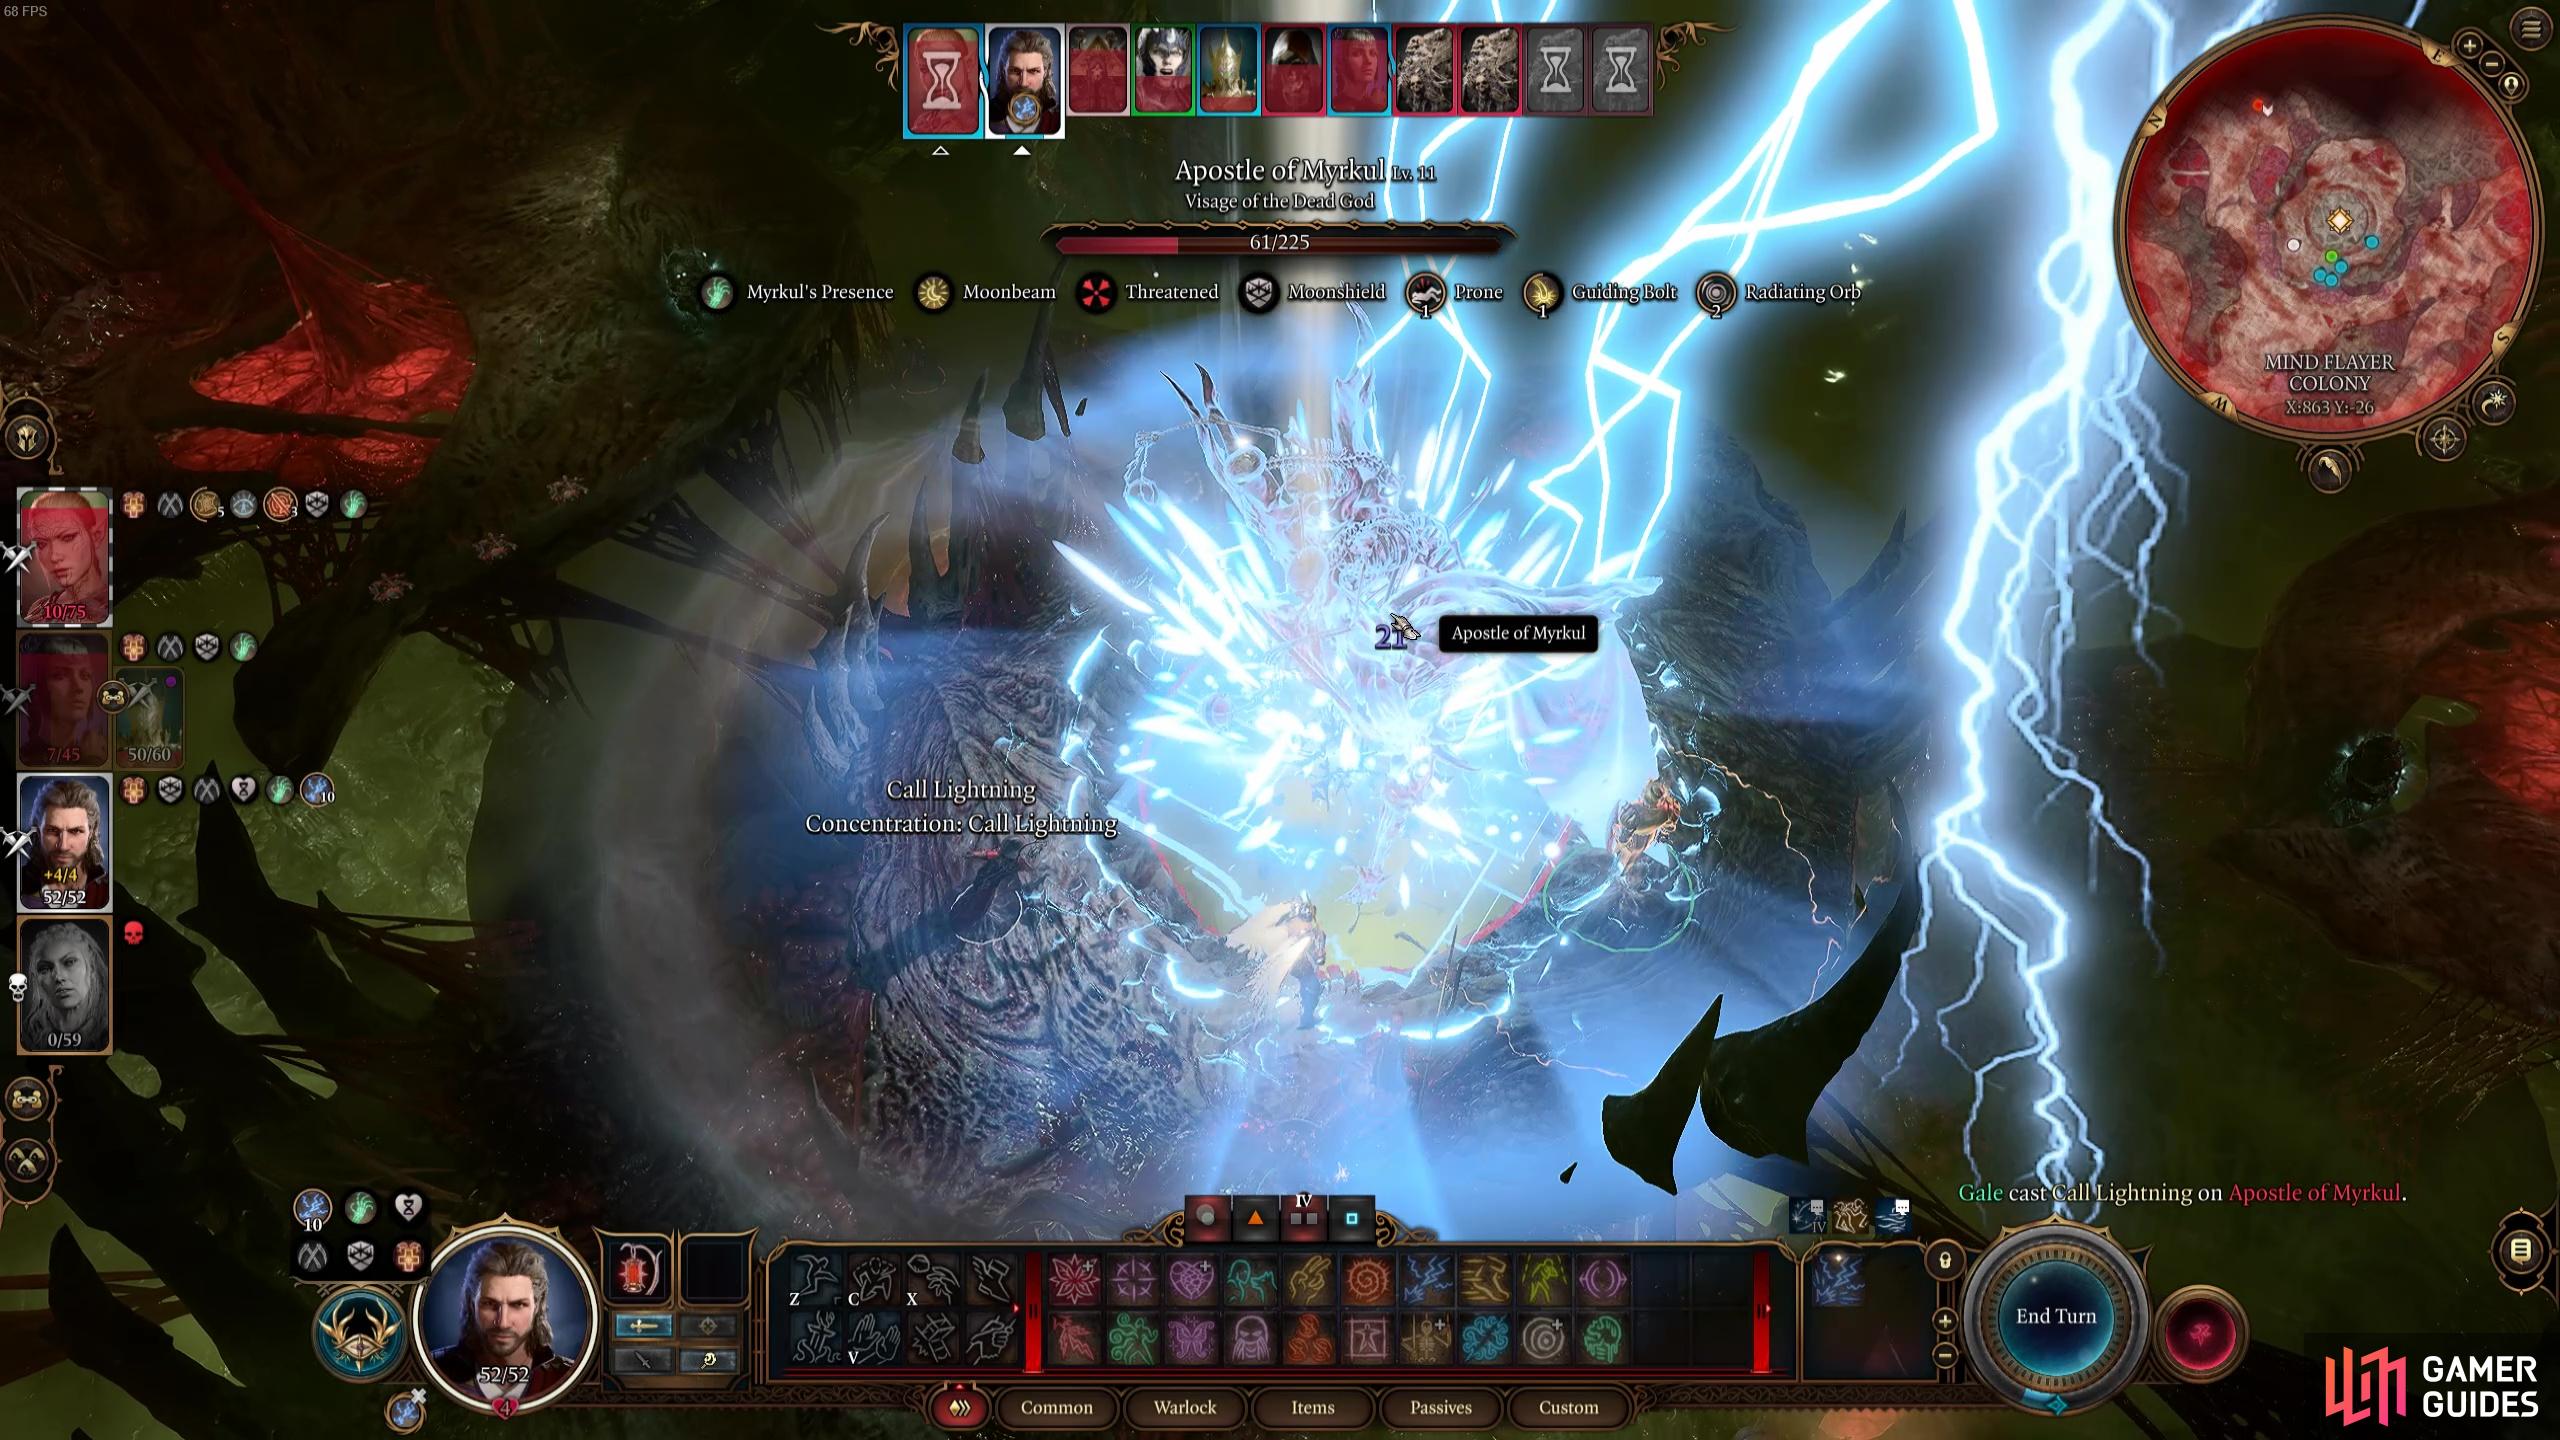
Huge spell attacks such as Call Lightning can be really powerful here.
Don’t be too worried about bringing your melee fighters into close combat either. The Bone Chill is annoying, but getting off a few strong physical attacks definitely outweighs the negative. He also has some really strong melee attacks that knock players off the upper platform but sometimes this feels quite beneficial as it gives your characters an opportunity to heal and then you can just jump back up again!
Additionally, you’ll also have Aylin’s help during this fight too, and she can still do bunches of damage with Moon Beam and weapon attacks. As long as she has enough health and isn’t getting downed every turn (she is immortal so won’t ever die), then she can do a lot with her turn!
Once you’ve defeated the Apostle of Myrkul, you’ll get another little cut scene and then you’ll be prompted to loot Ketheric Thorm’s body.
He has some great gear to pick up including his armor ![]() Reaper’s Embrace which reduces all incoming damage by 2 and also has the ability Reaper’s Rigidity. You can also pick up
Reaper’s Embrace which reduces all incoming damage by 2 and also has the ability Reaper’s Rigidity. You can also pick up ![]() Ketheric’s Shield which gives you a +1 bonus to Spell Save DC and spell attack rolls. And finally, don’t forget to pick up Ketheric’s Warhammer which is a versatile warhammer that does 1d10
Ketheric’s Shield which gives you a +1 bonus to Spell Save DC and spell attack rolls. And finally, don’t forget to pick up Ketheric’s Warhammer which is a versatile warhammer that does 1d10 ![]() Bludgeoning damage and 1d4 Psychic damage.
Bludgeoning damage and 1d4 Psychic damage.
No Comments