
The ![]() Find the Blood of Lathander quest in Baldur’s Gate 3 is one that you’ll acquire when you first visit the
Find the Blood of Lathander quest in Baldur’s Gate 3 is one that you’ll acquire when you first visit the ![]() Rosymorn Monastery, which is located in the
Rosymorn Monastery, which is located in the ![]() Mountain Pass region. To start the quest, you need to interact with a plaque named the Holy Blood of Lathander, which can be found beneath a statue in the central chamber of the monastery, in the room behind the main entrance doors. You will then need to solve a puzzle using ceremonial weapons within the monastery, before finding a secret chamber behind some statues in the Inquisitor’s Chamber of the Githyanki Creche. There will be a final puzzle involving Lathanderian traps which leads to
Mountain Pass region. To start the quest, you need to interact with a plaque named the Holy Blood of Lathander, which can be found beneath a statue in the central chamber of the monastery, in the room behind the main entrance doors. You will then need to solve a puzzle using ceremonial weapons within the monastery, before finding a secret chamber behind some statues in the Inquisitor’s Chamber of the Githyanki Creche. There will be a final puzzle involving Lathanderian traps which leads to ![]() The Blood of Lathander legendary mace. We’ll take you through each step in detail on this page.
The Blood of Lathander legendary mace. We’ll take you through each step in detail on this page.
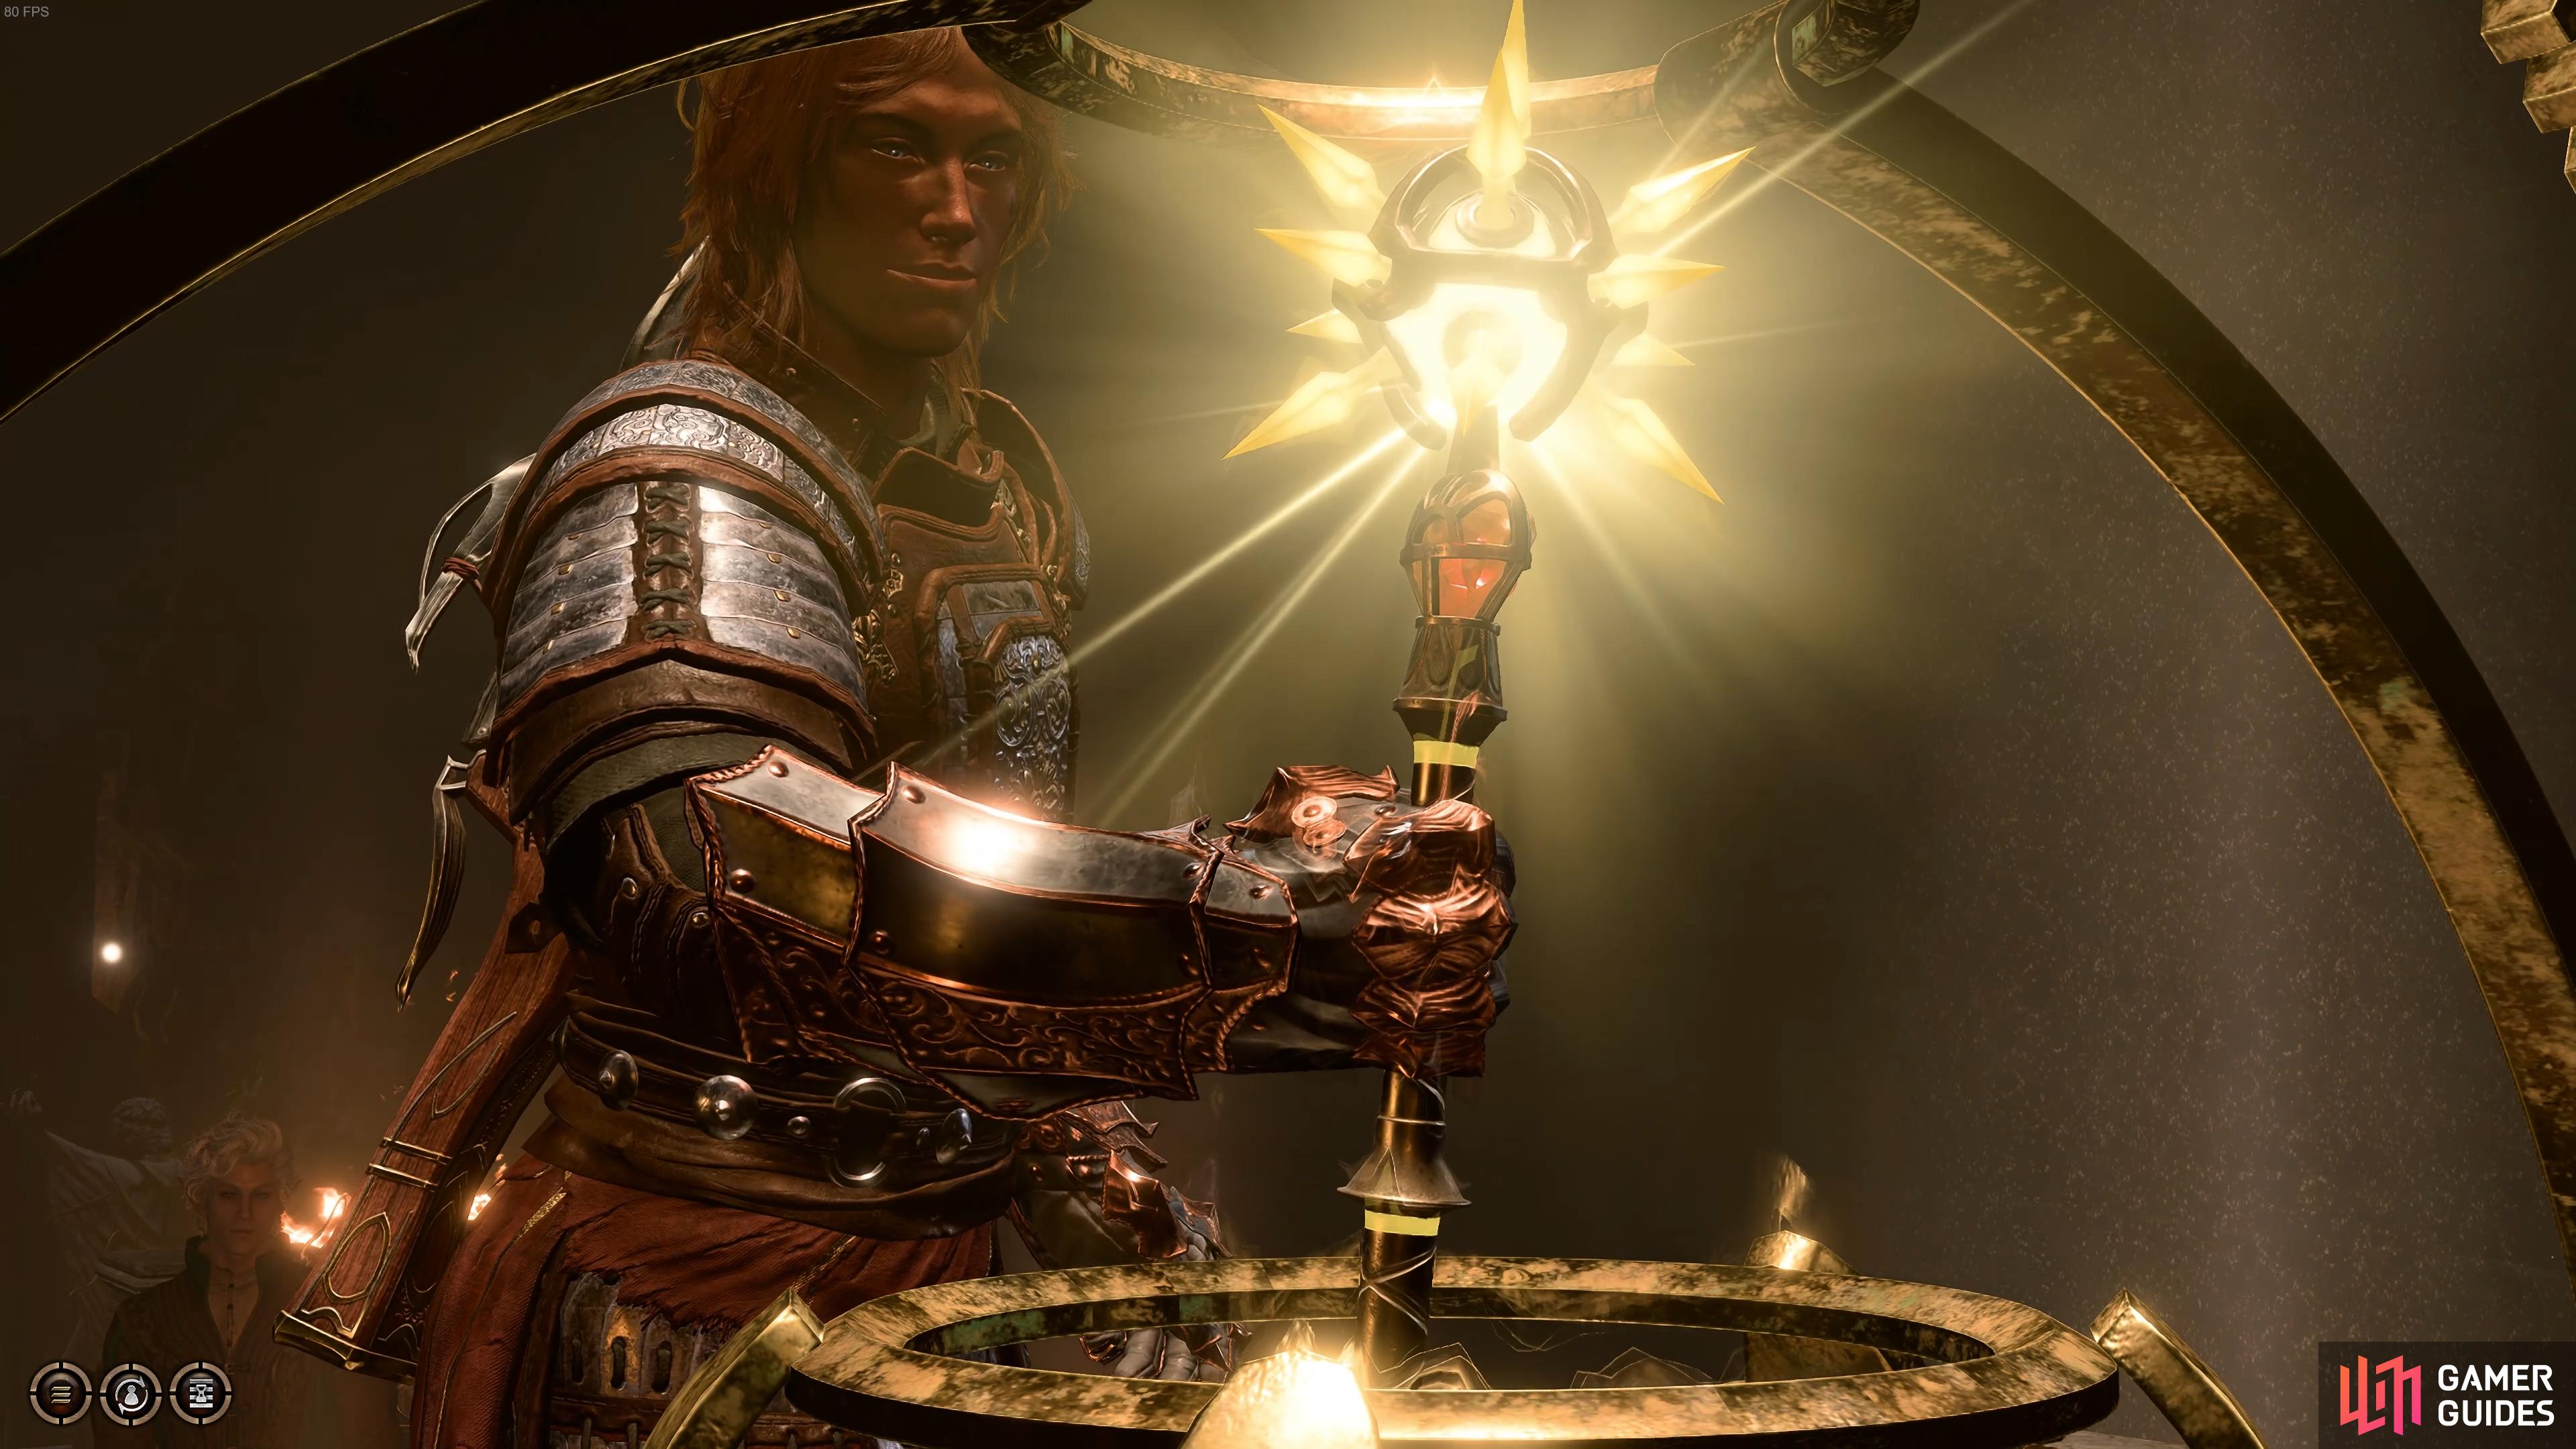
The Blood of Lathander legendary mace, Baldur’s Gate 3.
How to Start the Find the Blood of Lathander Quest in BG3
If you want to get your hands on The Blood of Lathander legendary mace, the first thing you’ll need to do is start the Find the Blood of Lathander quest. To do this, make your way to the Mountain Pass region, which can be found over a bridge in the far northwestern part of the ![]() Wilderness map, as shown in the screenshot below. Once there, cross the bridge to reach the first region of the Mountain Pass, known as the Trielta Crags.
Wilderness map, as shown in the screenshot below. Once there, cross the bridge to reach the first region of the Mountain Pass, known as the Trielta Crags.
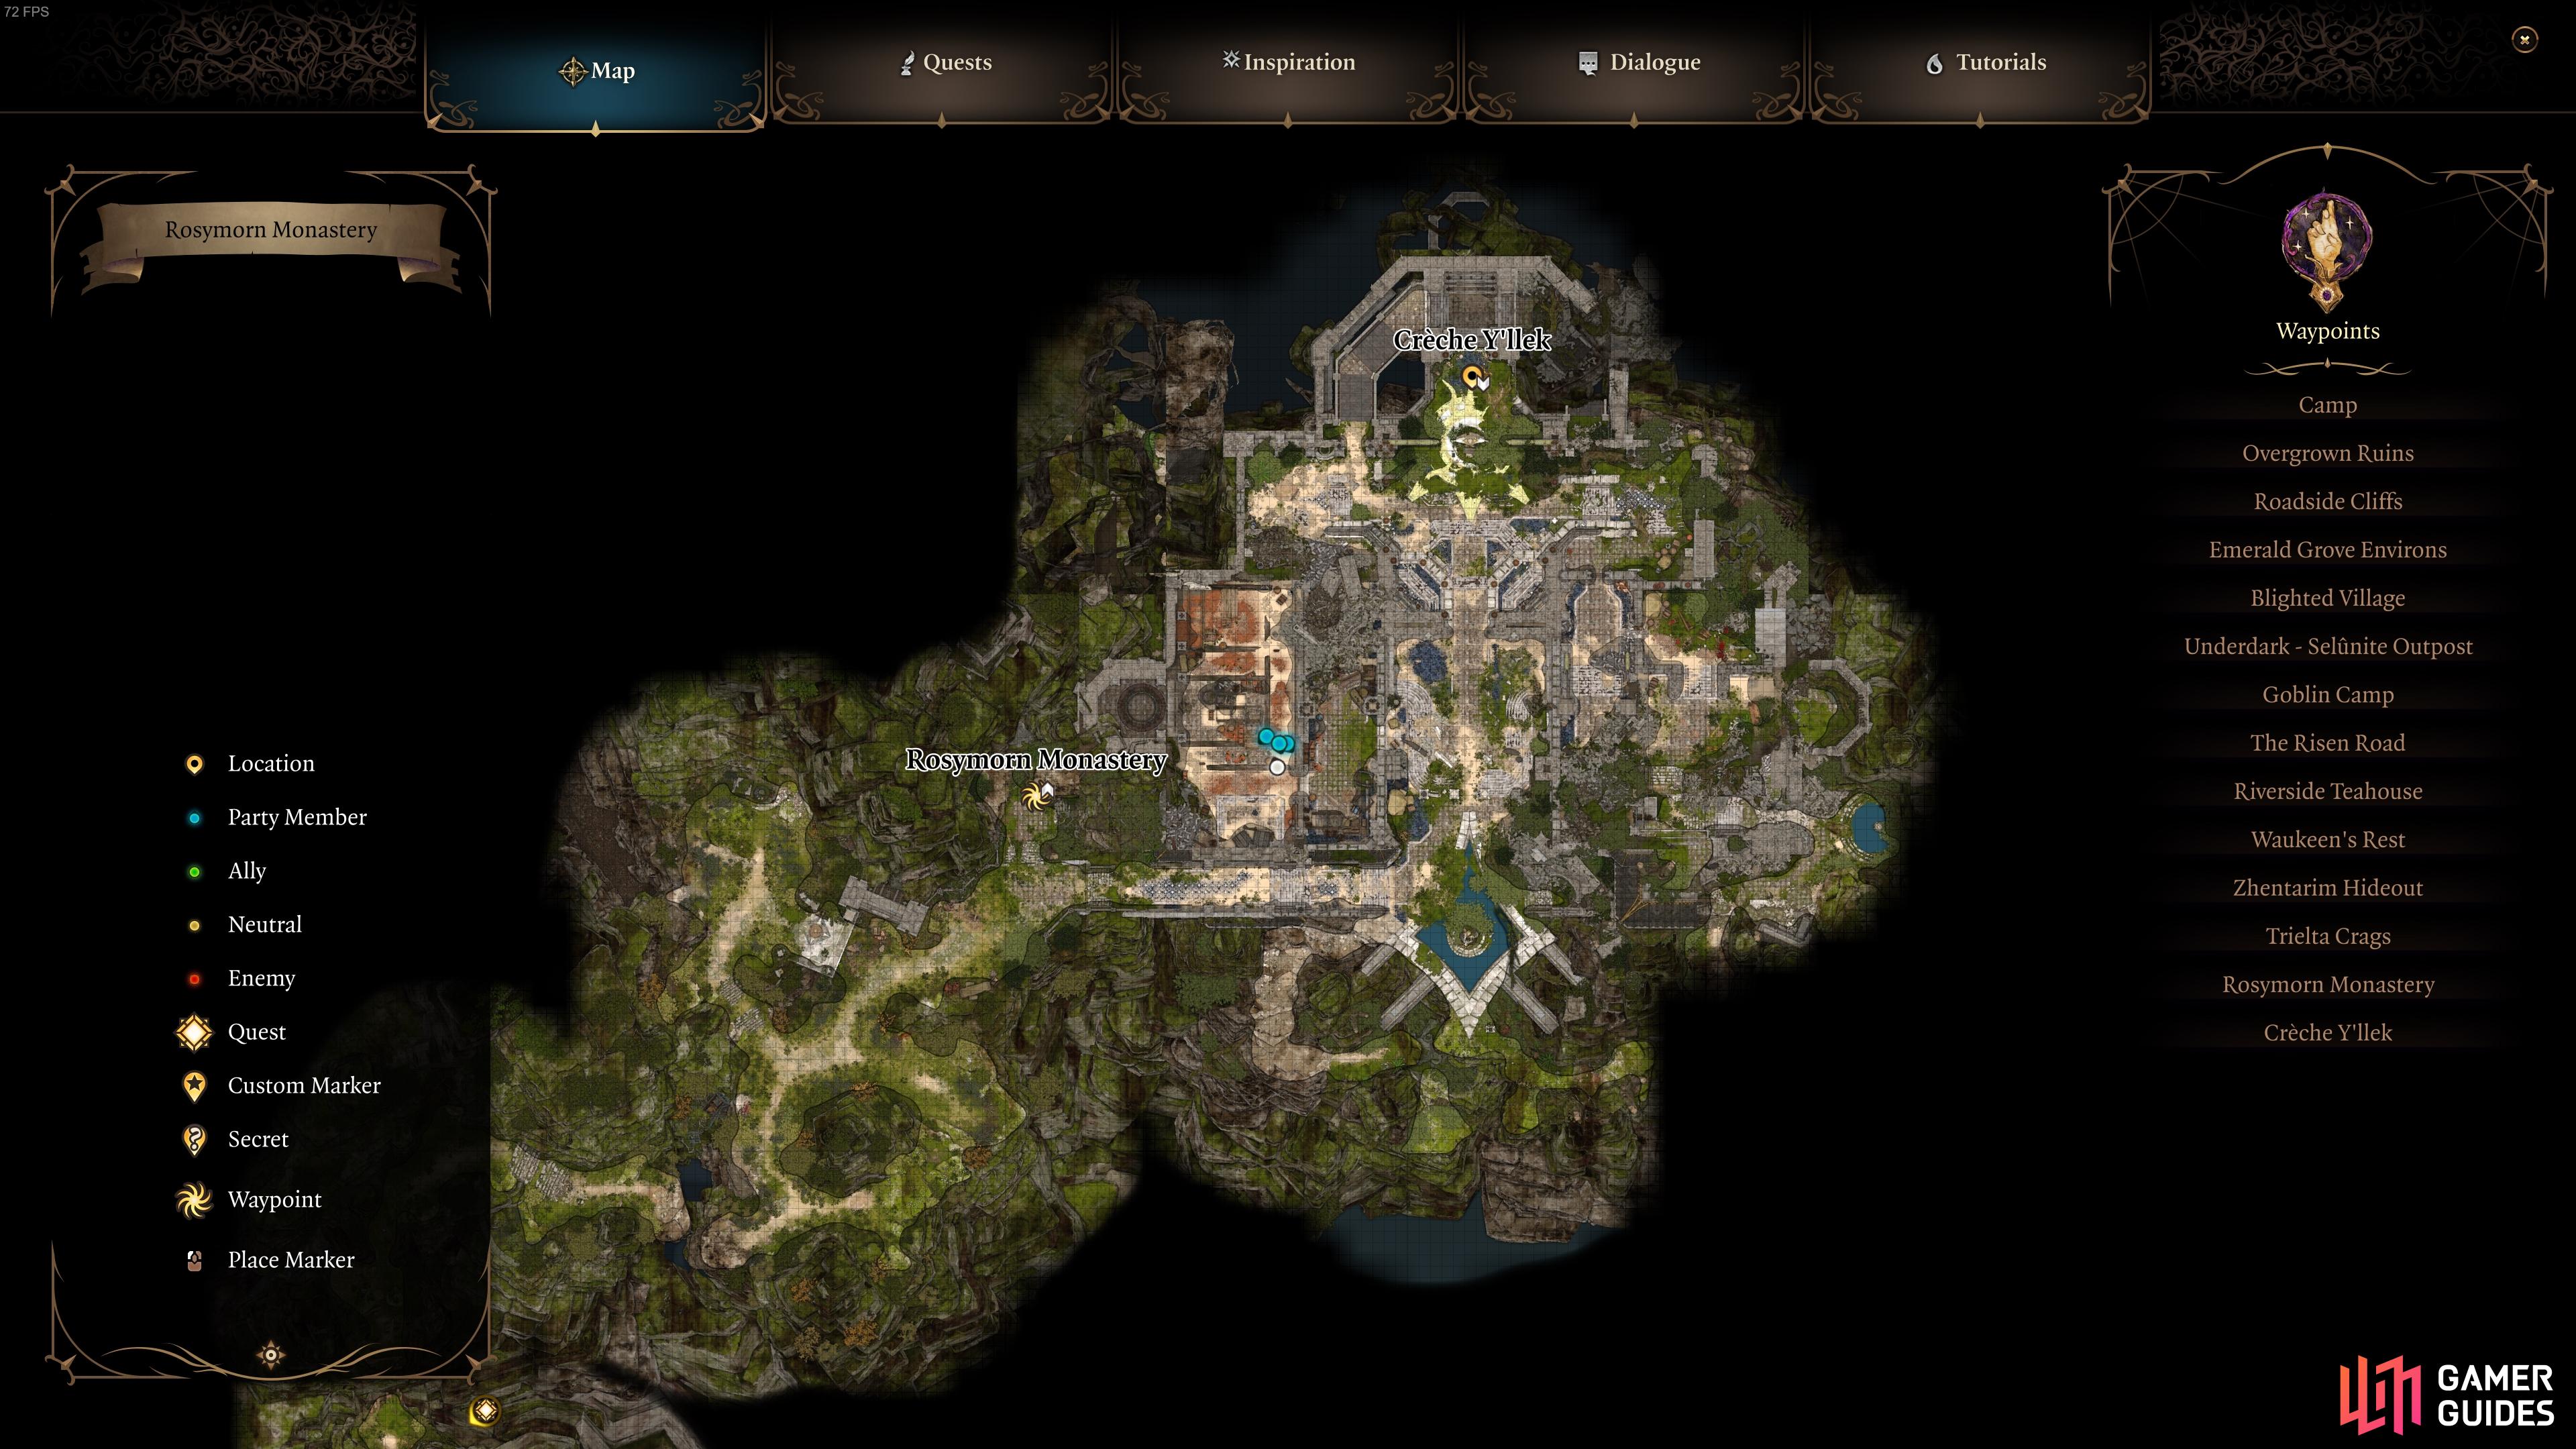
As you head northwest on the Mountain Pass road, you’ll soon find the Trielta Crags waypoint. From here, you can continue north, following the linear paths which lead to the Rosymorn Monastery. If you want to see a map of this region for some context regarding where you need to go, we’ve provided one below.
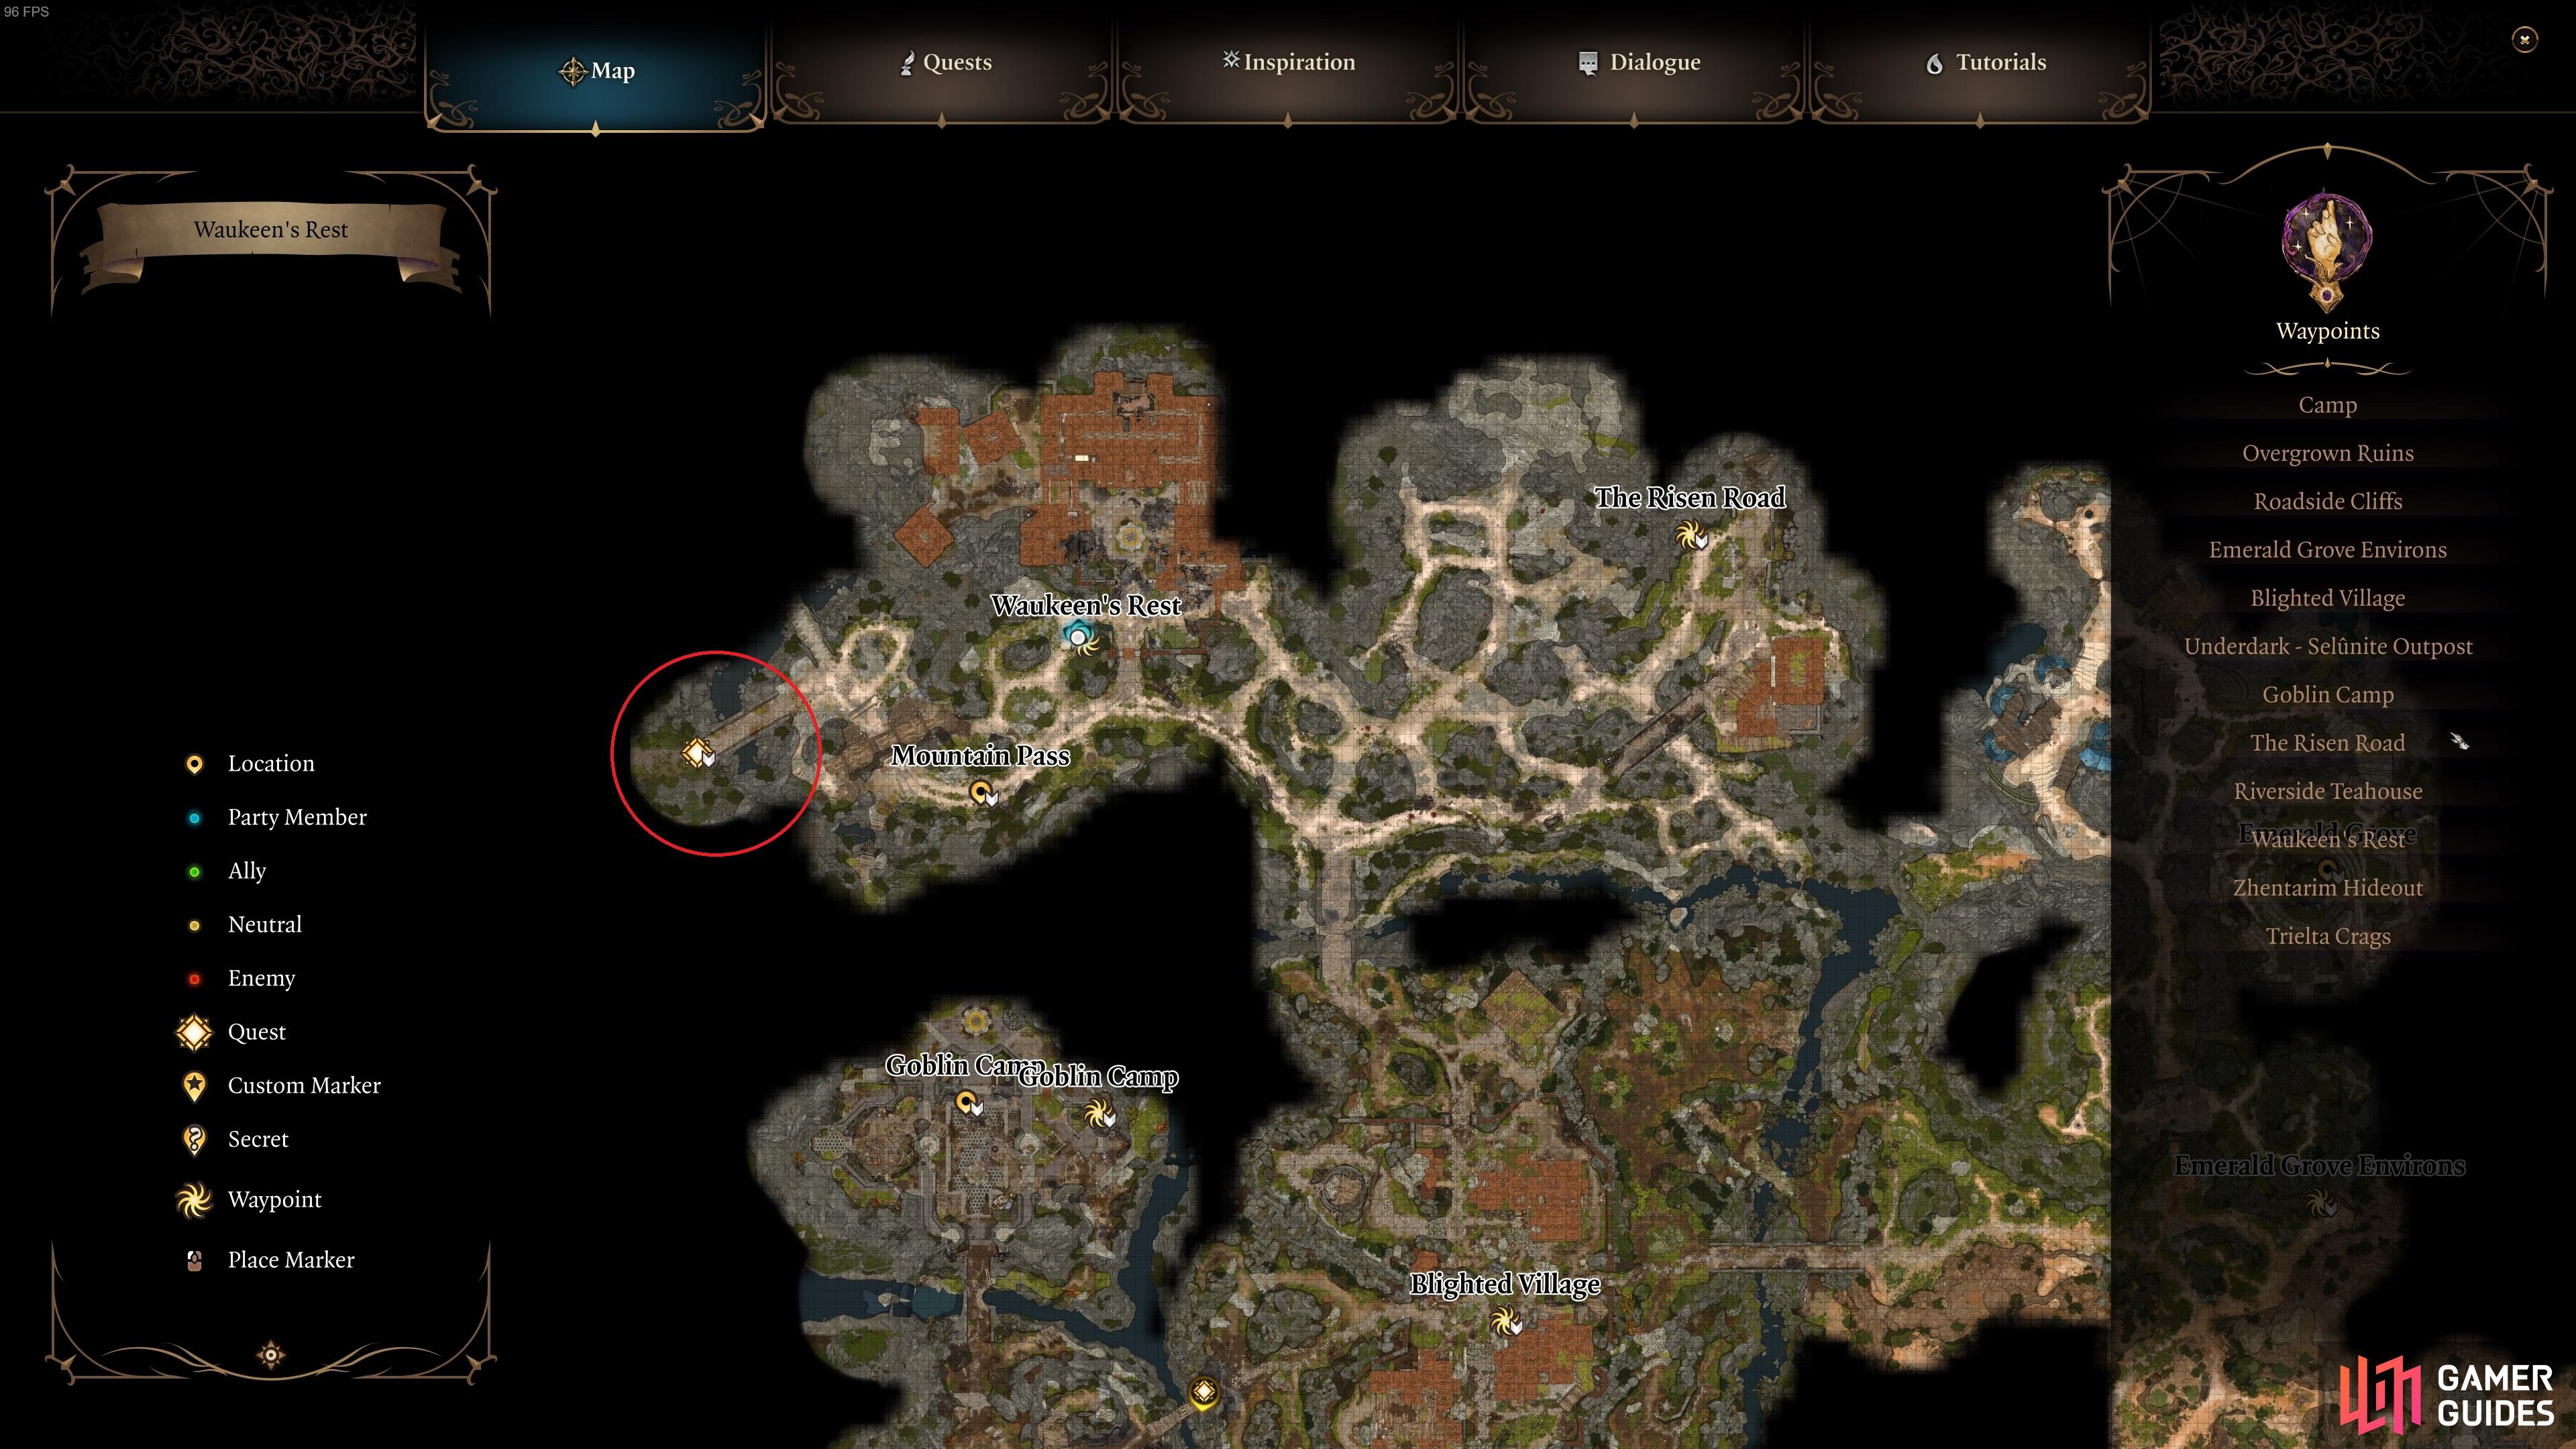
Travel to the far northwestern part of the Wilderness map to reach the bridge that leads into the Mountain Pass.
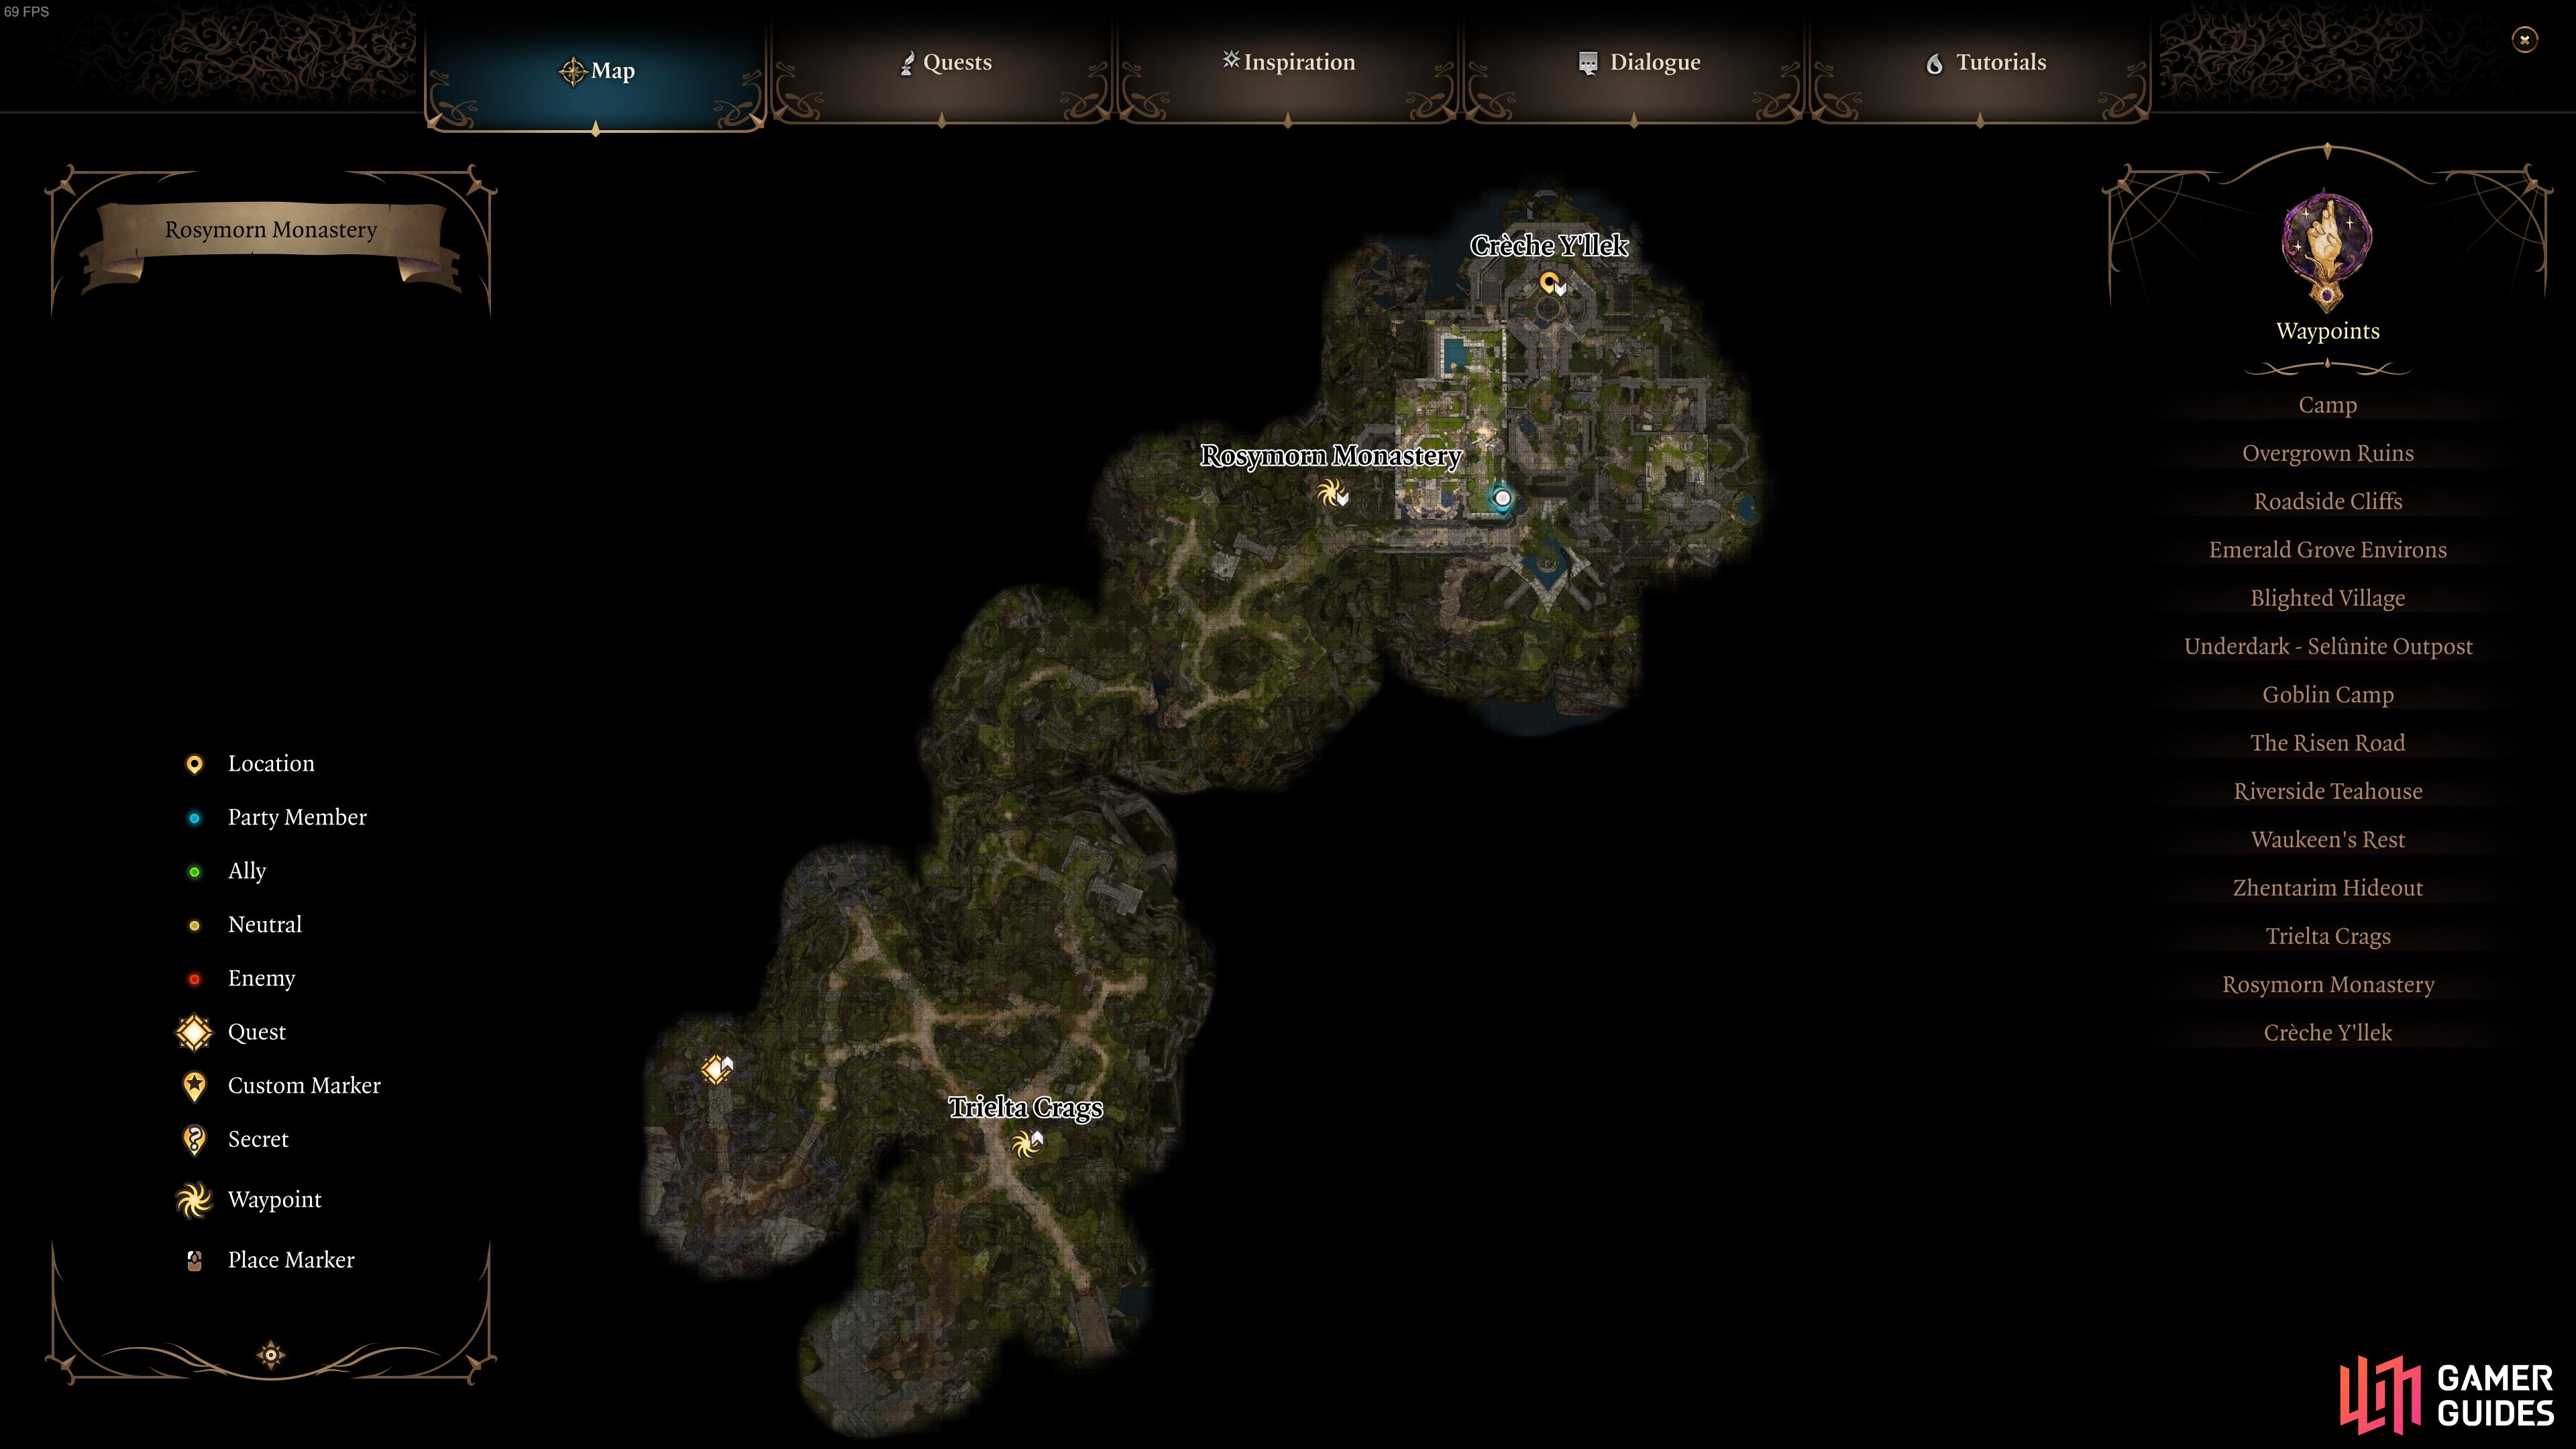
You can head north from the Trielta Crags to reach the Rosymorn Monastery.
How to Get Inside Rosymorn Monastery
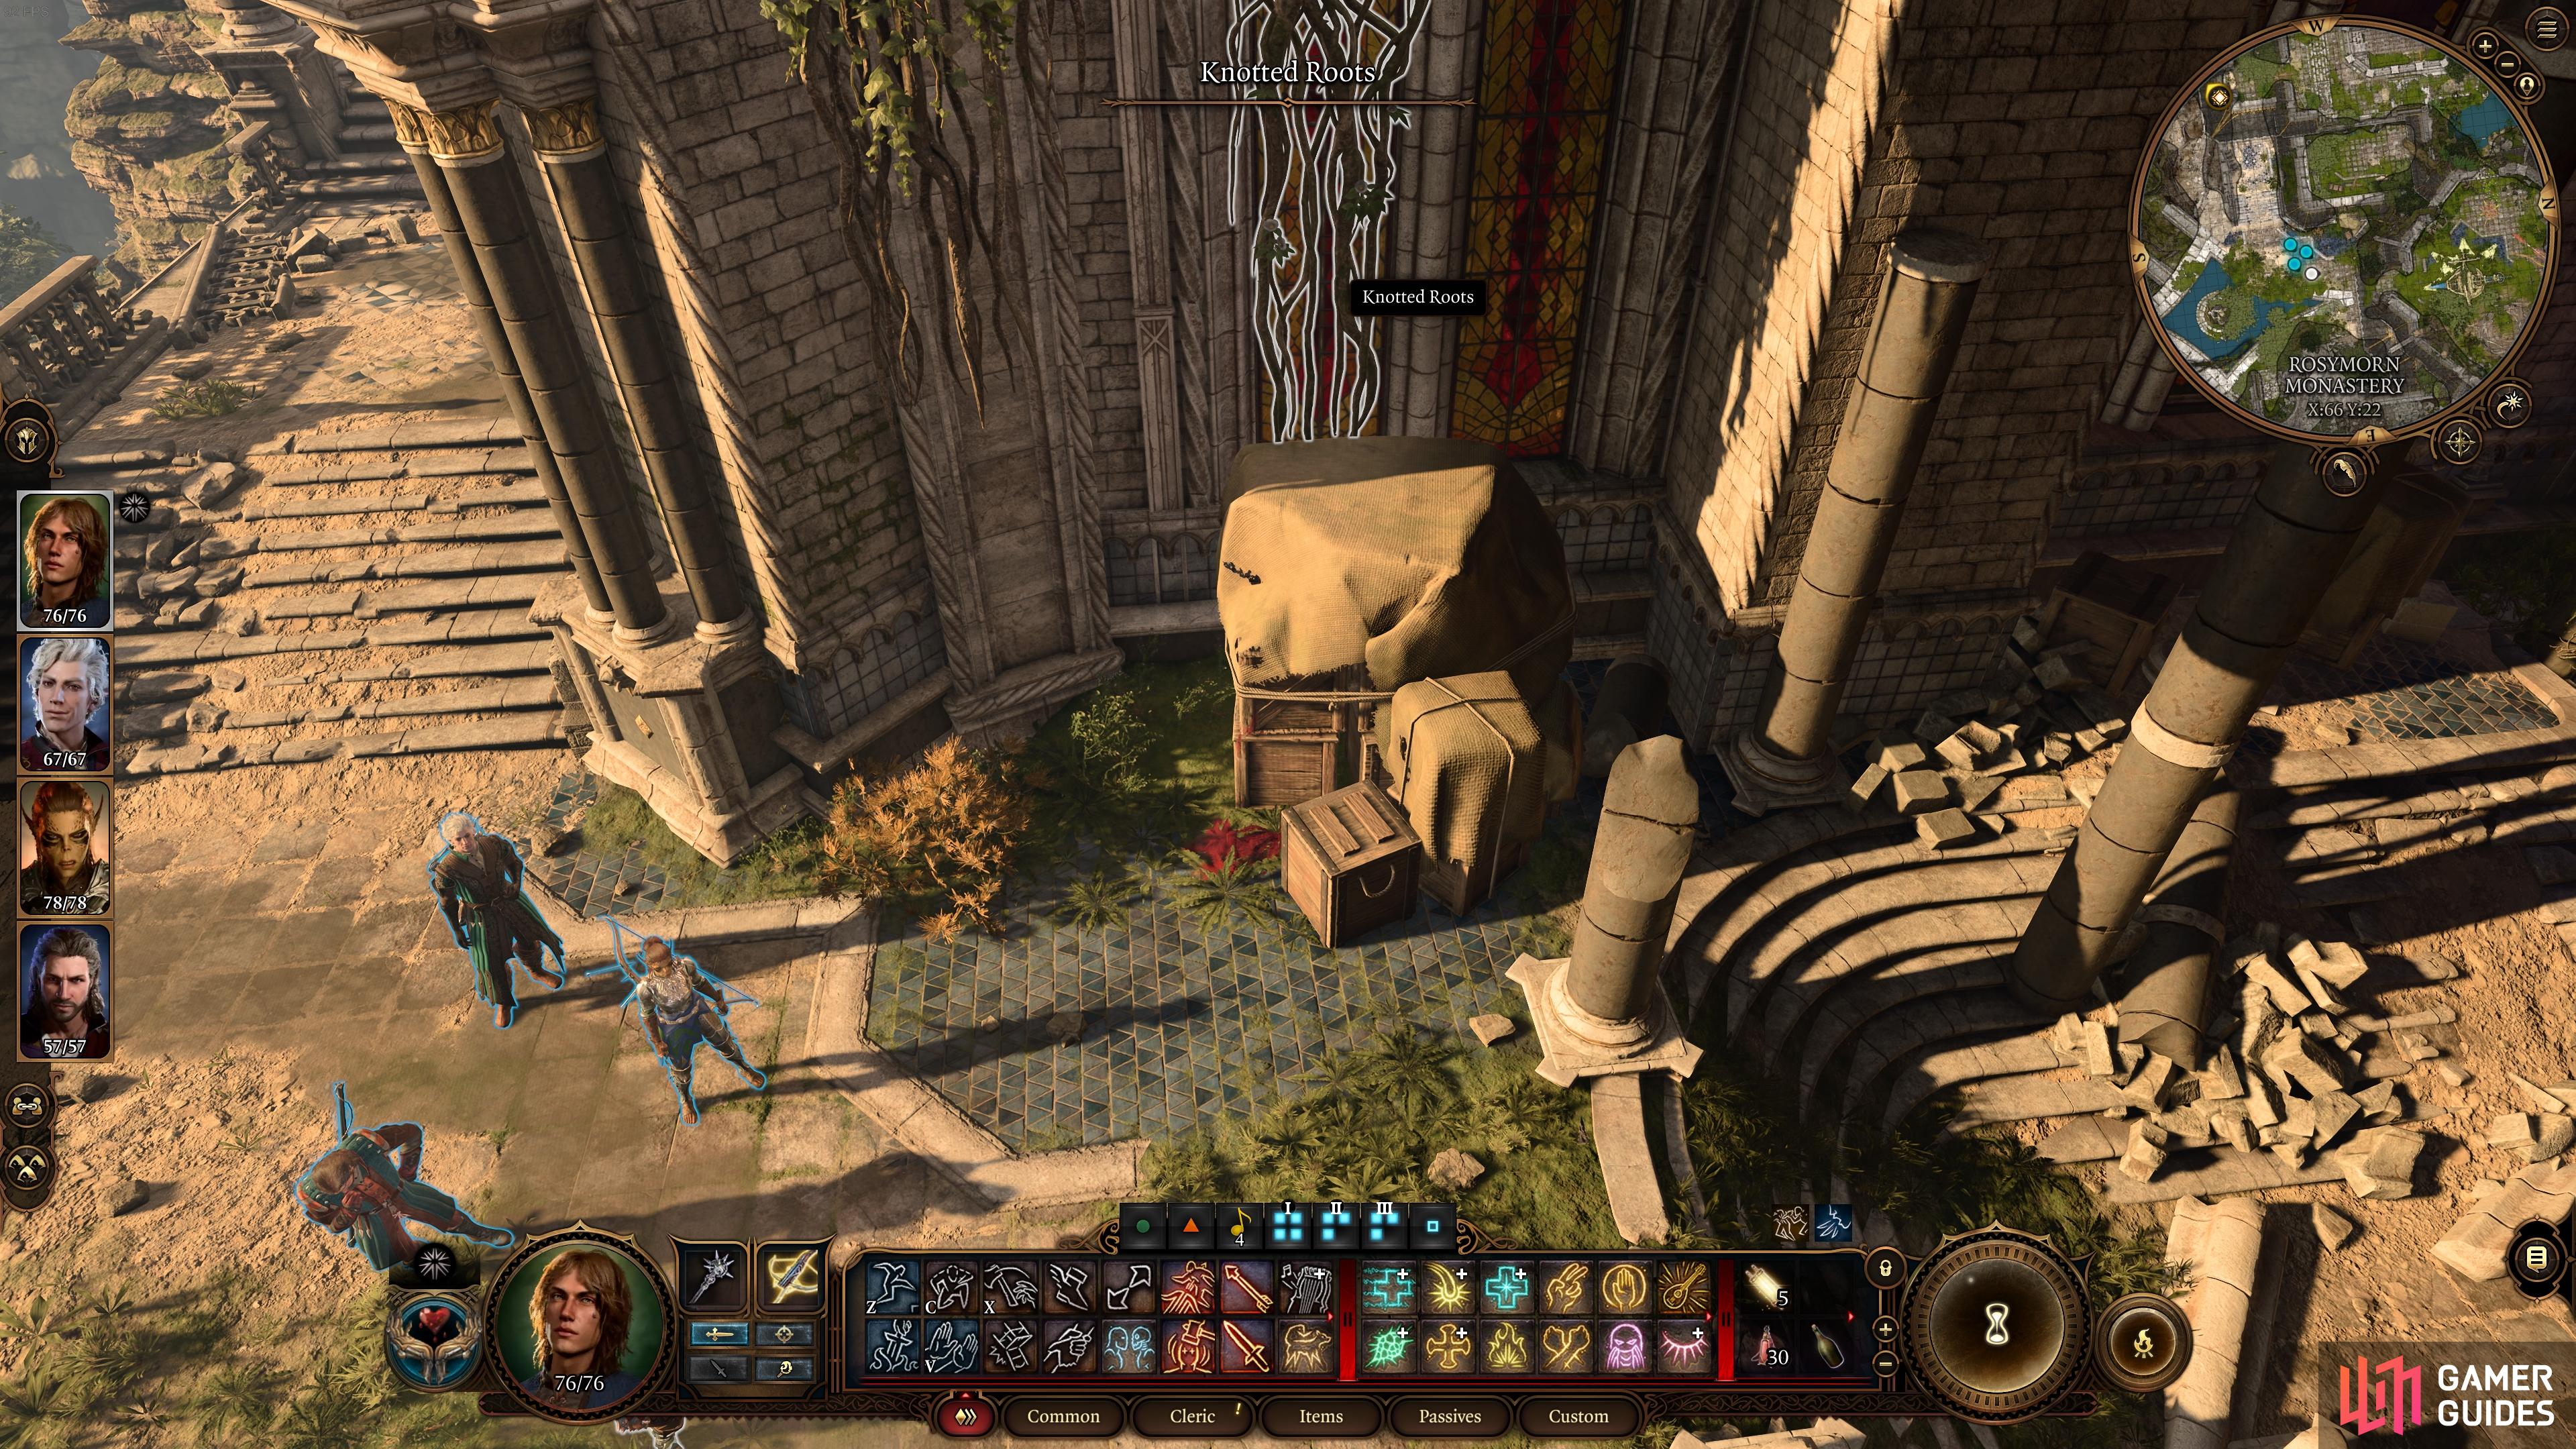
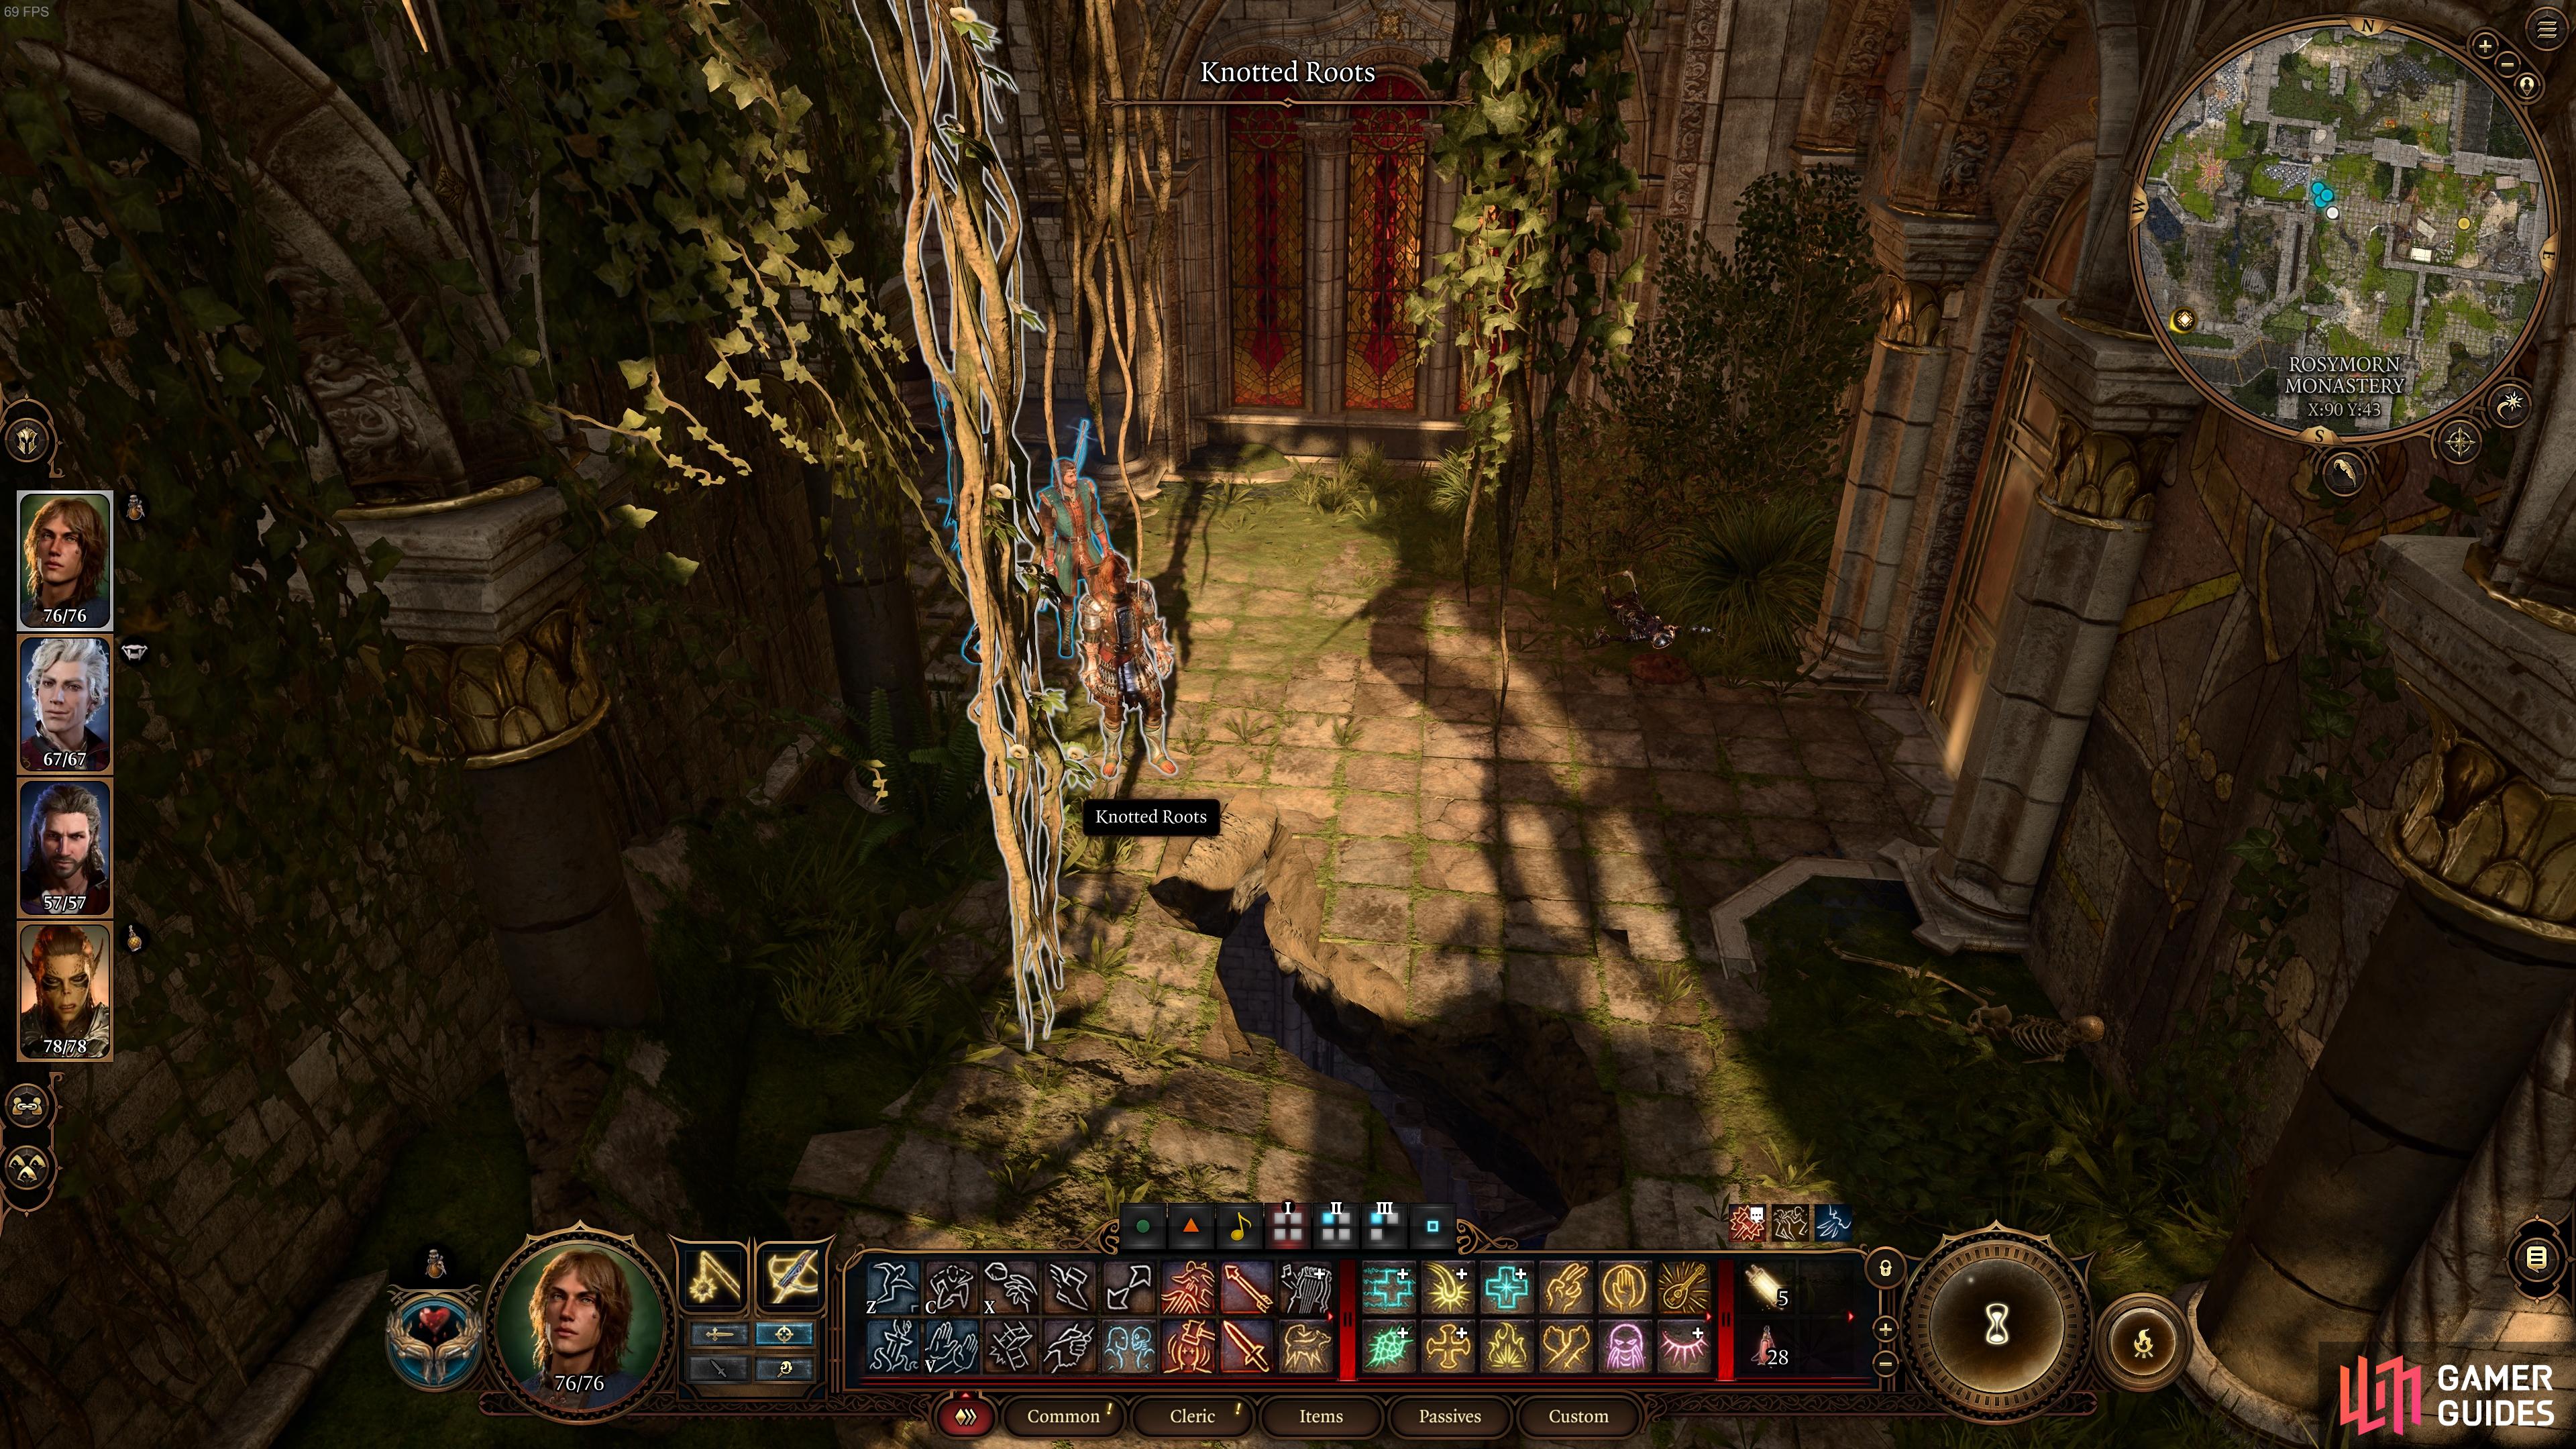
Once you reach the Rosymorn Monastery, there will be a brief cutscene outside the main entrance. After this, you’ll find that the main entrance doors are locked, and the locks can’t be picked, so you’ll need to find another way inside. As you’re standing in front of the main entrance doors (looking north), look to your left (westwards) to find some boxes with Knotted Roots above them. You need to interact with these roots to climb them and reach a balcony, from which you can get inside the monastery.
Find the Rusty Mace and the Holy Blood of Lathander Plaque
Head north once you’re on the balcony, then turn right (east) when you see a wooden barricade ahead. You’ll notice a room to your left with a Stained-Glass Window on the ground in the center of it, but you can ignore this for now. Continue east and jump over the gap where the tree roots have burst through the ground, then turn right (south) and go through the door to your left (east). Do not go through the Enchanted Door here yet.
There will be some broken stairs in this next room, with a talking bust at the bottom of them. Make your way down and beyond the bust as you turn northwards. Turn left (west) at the bottom of the last set of stairs, and destroy the barricade using a fire-based spell such as ![]() Fire Bolt, or just use a sufficiently powerful bludgeoning weapon instead. Either way, once you’re on the other side, look to your left (south) to find a skeleton at the top of the stairs, with a Rusty Mace next to it. This mace is actually an important item that you’ll need for the puzzle ahead, so pick it up and keep it safe in your inventory.
Fire Bolt, or just use a sufficiently powerful bludgeoning weapon instead. Either way, once you’re on the other side, look to your left (south) to find a skeleton at the top of the stairs, with a Rusty Mace next to it. This mace is actually an important item that you’ll need for the puzzle ahead, so pick it up and keep it safe in your inventory.
Now that you have the Rusty Mace, go back down the stairs and through the door to the north. This leads to the central chamber of the monastery, on the other side of the main entrance doors. You should interact with the doors now to make entering this part of the monastery easier on future visits. However, the main reason you’re here is to start the Blood of Lathander quest, and you can do this by interacting with the Holy Blood of Lathander plaque which is beneath the large statue located directly opposite from the main entrance doors.
How to Complete the Stained-Glass Window Puzzle in Rosymorn Monastery
Now that you’ve started the Find the Blood of Lathander quest, you can move on to solving the first puzzle associated with it. You’ll find this in the room with the Stained-Glass Window that we mentioned earlier, just to the left (north) of the gap in the ground where the tree roots have grown. If you already have a rough idea of how this puzzle works, and you just want to know which weapons go on which pedestal, you can see the overview using the table below. If you want a bit more detail, we’ve provided that further down for each ceremonial weapon and its associated keeper.
| Item | Keeper | Pedestal |
|---|---|---|
| Ceremonial Longsword | Dawnmaster Welkinglory | Northwest |
| Rusty Mace | Dawnmaster Stockhold | Southeast |
| Ceremonial Warhammer | Dawnmaster Seed | Northeast |
| Ceremonial Battleaxe | Dawnmaster Vaseid | Southwest |
Ceremonial Longsword - Dawnmaster Welkinglory
You’ll notice a Ceremonial Longsword on the pedestal to the northwest of the Stained-Glass Window, and reading the plaque will reveal the name “Dawnmaster Welkinglory”. This part of the puzzle has already been placed, but you get an idea of what to do with the other pedestals from it: you need to place specific ceremonial weapons on each of them. If you interact with the Stained-Glass Window you’ll have the option to look more closely at the depictions of Dawnmaster Welkinglory (wielding a longsword), Dawnmaster Seed (wielding a warhammer), Dawnmaster Stockhold (wielding no weapon), and Dawnmaster Vaseid, whose depiction is shattered.
Ceremonial Mace / Rusty Mace - Dawnmaster Stockhold
For the southeastern pedestal, you need to place the Rusty Mace that we picked up earlier. If for whatever reason you don’t have this specific mace, another mace should do. We tried using other random weapons, but the pedestal cast us back while inflicting minor damage each time. It seems to require a mace at the very least, but it may also accept other bludgeoning weapons.
Although the Rusty Mace mentioned above will be suitable for the puzzle, you can find the actual Ceremonial Mace in another part of the Rosymorn Monastery, but it will require a bit more work. To find it, you need to go to the large room in the southwestern part of the monastery, where you’ll find numerous Kobold enemies. The room is filled with alcohol and potentially explosive barrels, so you can use this to your advantage and kill many of them at once. At the same time, you should be cautious of standing too close to said barrels, lest you get caught in an explosion yourself.
Once you’ve killed all the Kobold enemies in the room, you need to go through and loot each of them. One will be carrying the Ceremonial Mace, as shown in the screenshot below. You can actually see the mace on the corpse of the relevant Kobold Looter, so it’ll help if you look for this rather than loot each individual body.
If you’re unsure of how to get to the room with the Kobold Looters, you need to turn right (west) as you’re leaving the room with the Stained-Glass Window puzzle, then turn right again (north) and smash through the wooden barricade. From this balcony area you can jump to the rocks to the northwest, then follow them down to the south where there’s a large hole in the corner of the room, leading to the Kobold Looters.
Ceremonial Warhammer - Dawnmaster Seed
The northeastern pedestal requires a Ceremonial Warhammer, which you can find in a Giant Eagle’s nest at the top of Rosymorn Monastery. To reach it, go outside the room with the Stained-Glass Window and turn left (east). Jump over the gap in the ground and turn right (south), looking directly up to your right from here again. You should see some Knotted Roots opposite the Enchanted Door here, which you can climb to reach the rest.
If stealing isn’t for you, there are other options here. You can approach the nest with all of your party, which will trigger a cutscene during which you’ll have the option to calm the Giant Eagle using [Animal Handling]. If this fails, the creature will attack and you’ll need to kill it. If you have the ![]() Speak with Animals spell, however, you can actually try to convince the eagle to let you by. Failing that (and attempted stealing), killing it is the only option.
Speak with Animals spell, however, you can actually try to convince the eagle to let you by. Failing that (and attempted stealing), killing it is the only option.
Once you have the Ceremonial Warhammer, all you need to do is take it back to the room with the Stained-Glass Window and place it on the pedestal to the northeast.
Climb the Knotted Roots opposite the Enchanted Door to reach the Giant Eagle’s nest.
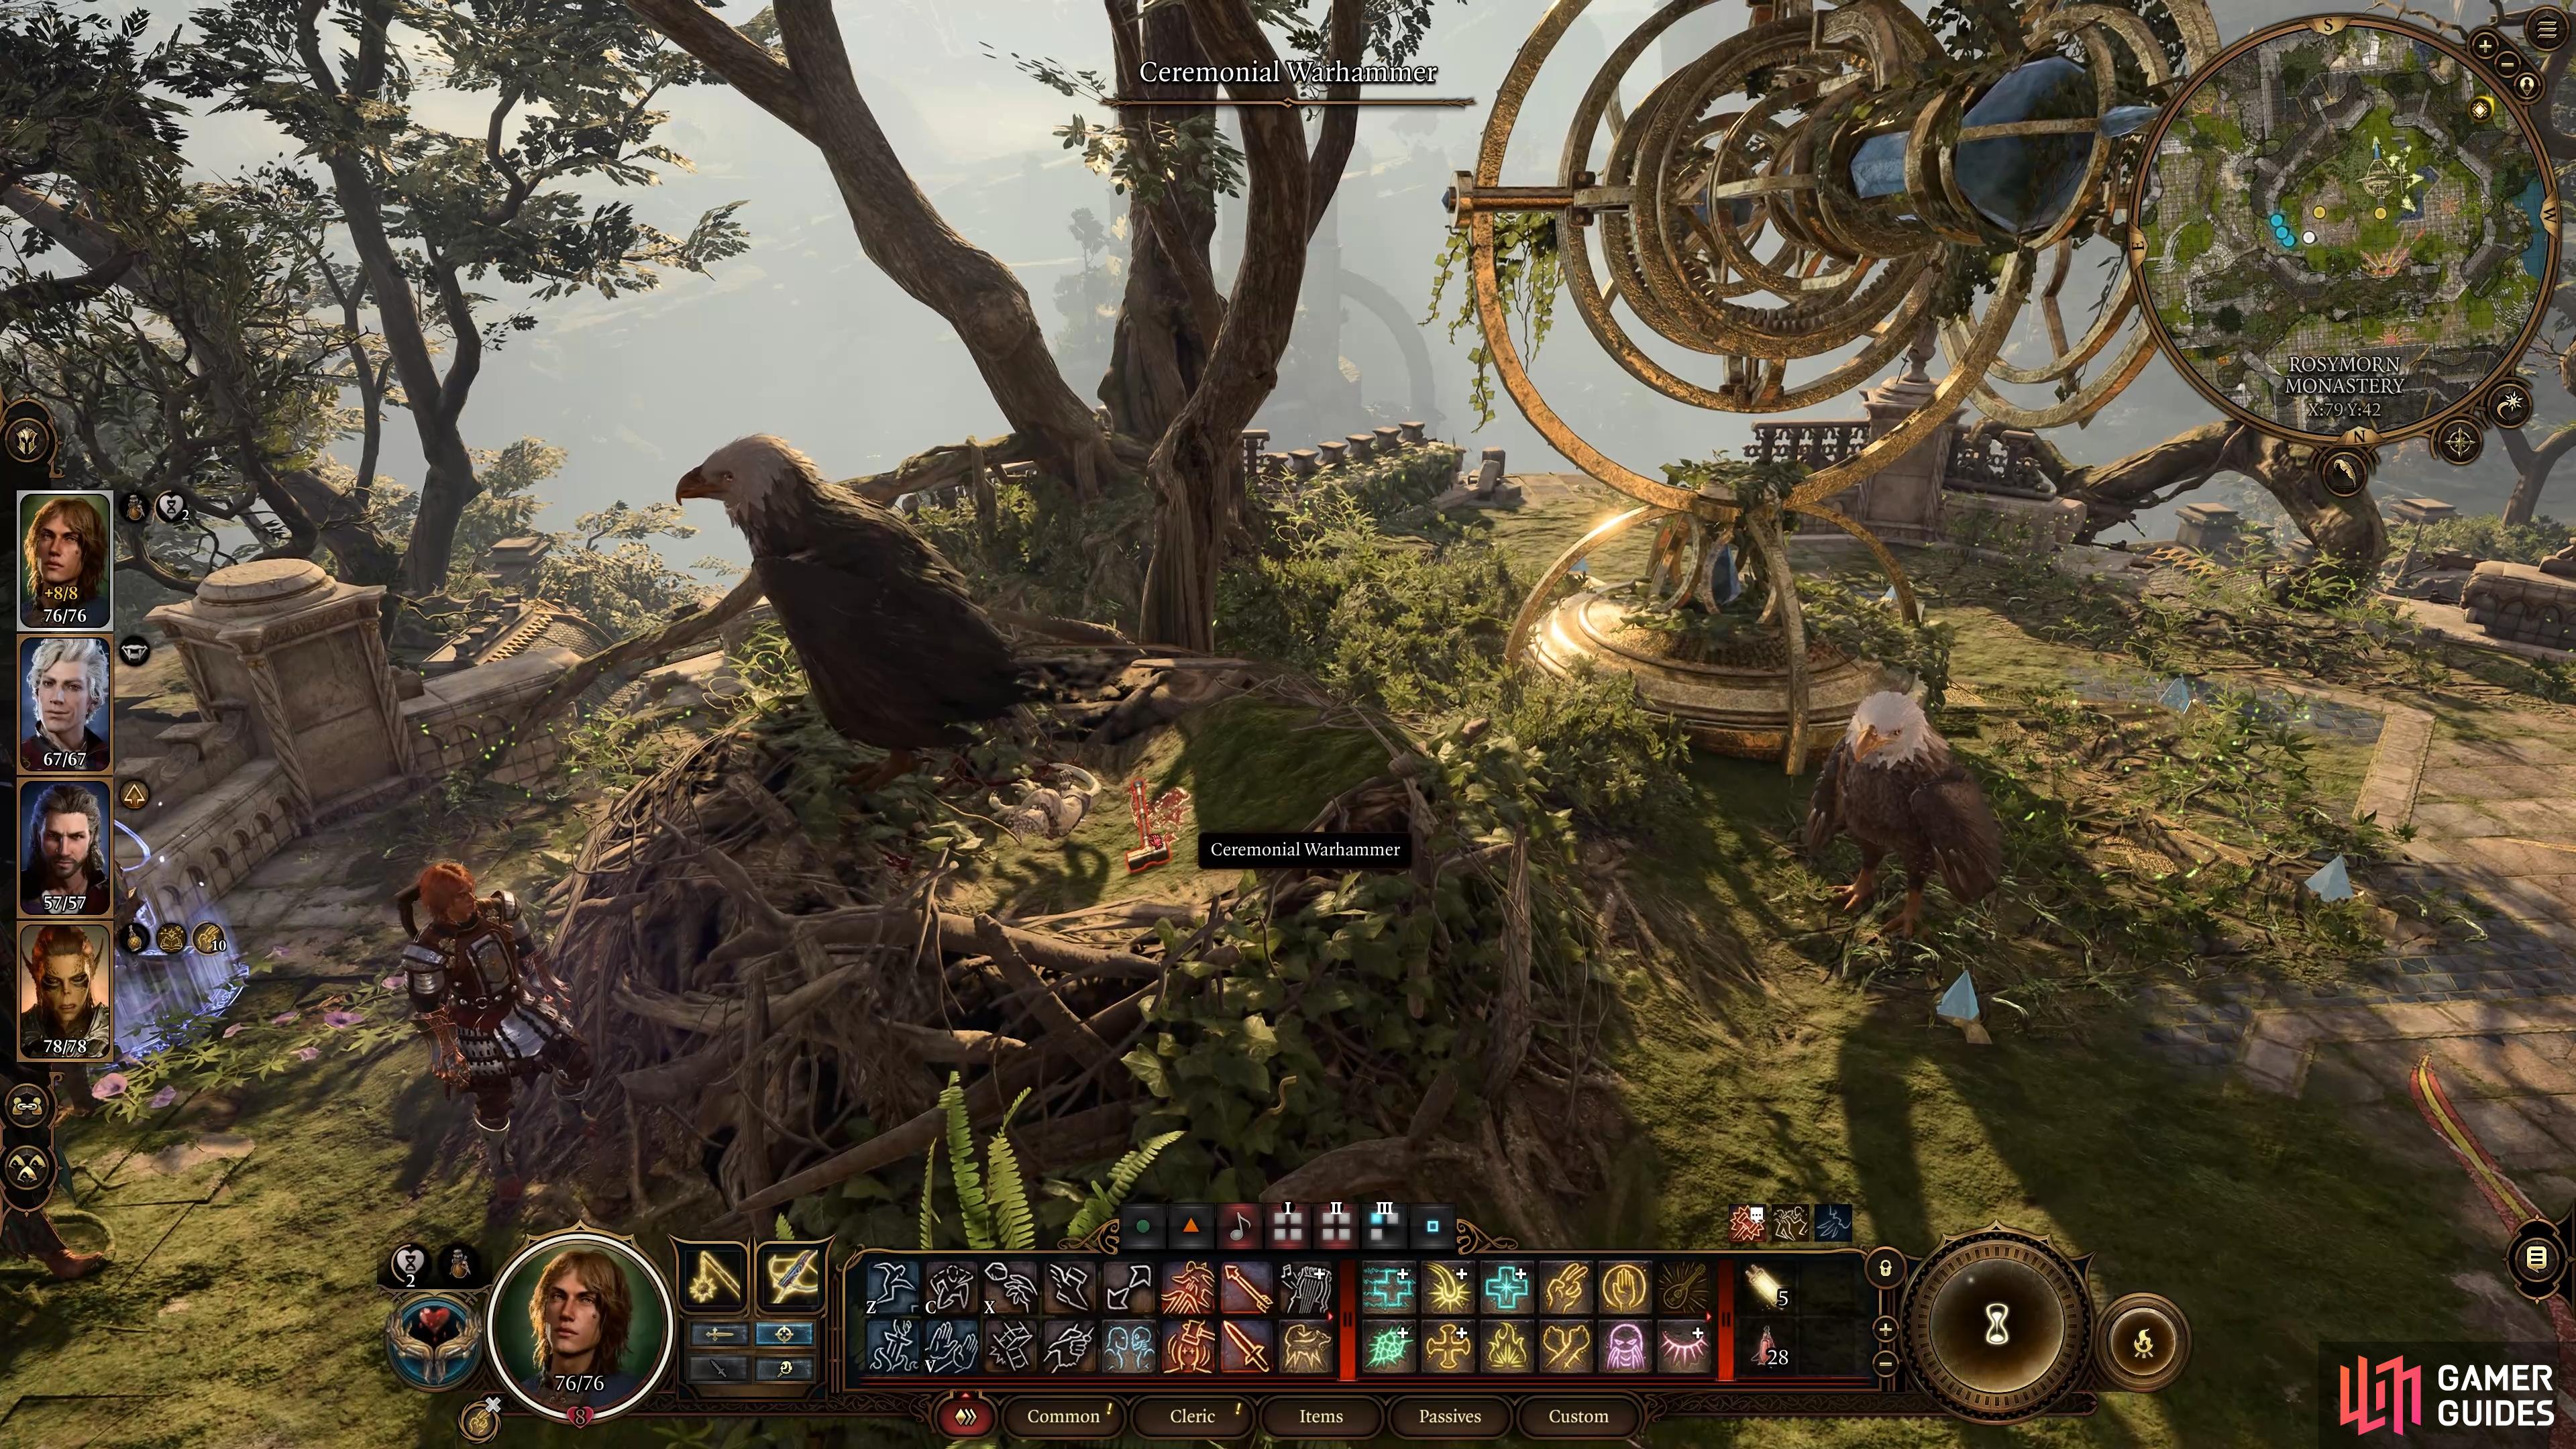
You’ll find the Ceremonial Warhammer in the nest on top of the Rosymorn Monastery.
Ceremonial Battleaxe - Dawnmaster Vaseid
The Ceremonial Battleaxe is the last item that you need to place to complete the puzzle. To find this, go back to where you found the Enchanted Door (just opposite the Knotted Roots that you used to reach the Giant Eagle’s nest), then head around the corner to the east, through the regular door. As soon as you’re on the other side, look to the north to see a Crumbling Wall. You need to smash through this using a powerful spell such as ![]() Eldritch Blast, or you can use any weapon which inflicts bludgeoning damage. Alternatively, if you have any bombs to throw, these will work too.
Eldritch Blast, or you can use any weapon which inflicts bludgeoning damage. Alternatively, if you have any bombs to throw, these will work too.
However you do it, once the wall has been destroyed you’ll notice a ![]() Guardian of Faith on the other side, with the Ceremonial Battleaxe lying just below it. There’s no way out of this other than to fight the Guardian here, but it won’t attack until you strike first, or until you try to loot the Battleaxe. You’ll notice a circular aura around the Guardian, which indicates the space within which it will get a free counterattack if you strike within it. Ideally, you want to position your characters outside of this circle and strike it using ranged attacks to avoid this.
Guardian of Faith on the other side, with the Ceremonial Battleaxe lying just below it. There’s no way out of this other than to fight the Guardian here, but it won’t attack until you strike first, or until you try to loot the Battleaxe. You’ll notice a circular aura around the Guardian, which indicates the space within which it will get a free counterattack if you strike within it. Ideally, you want to position your characters outside of this circle and strike it using ranged attacks to avoid this.
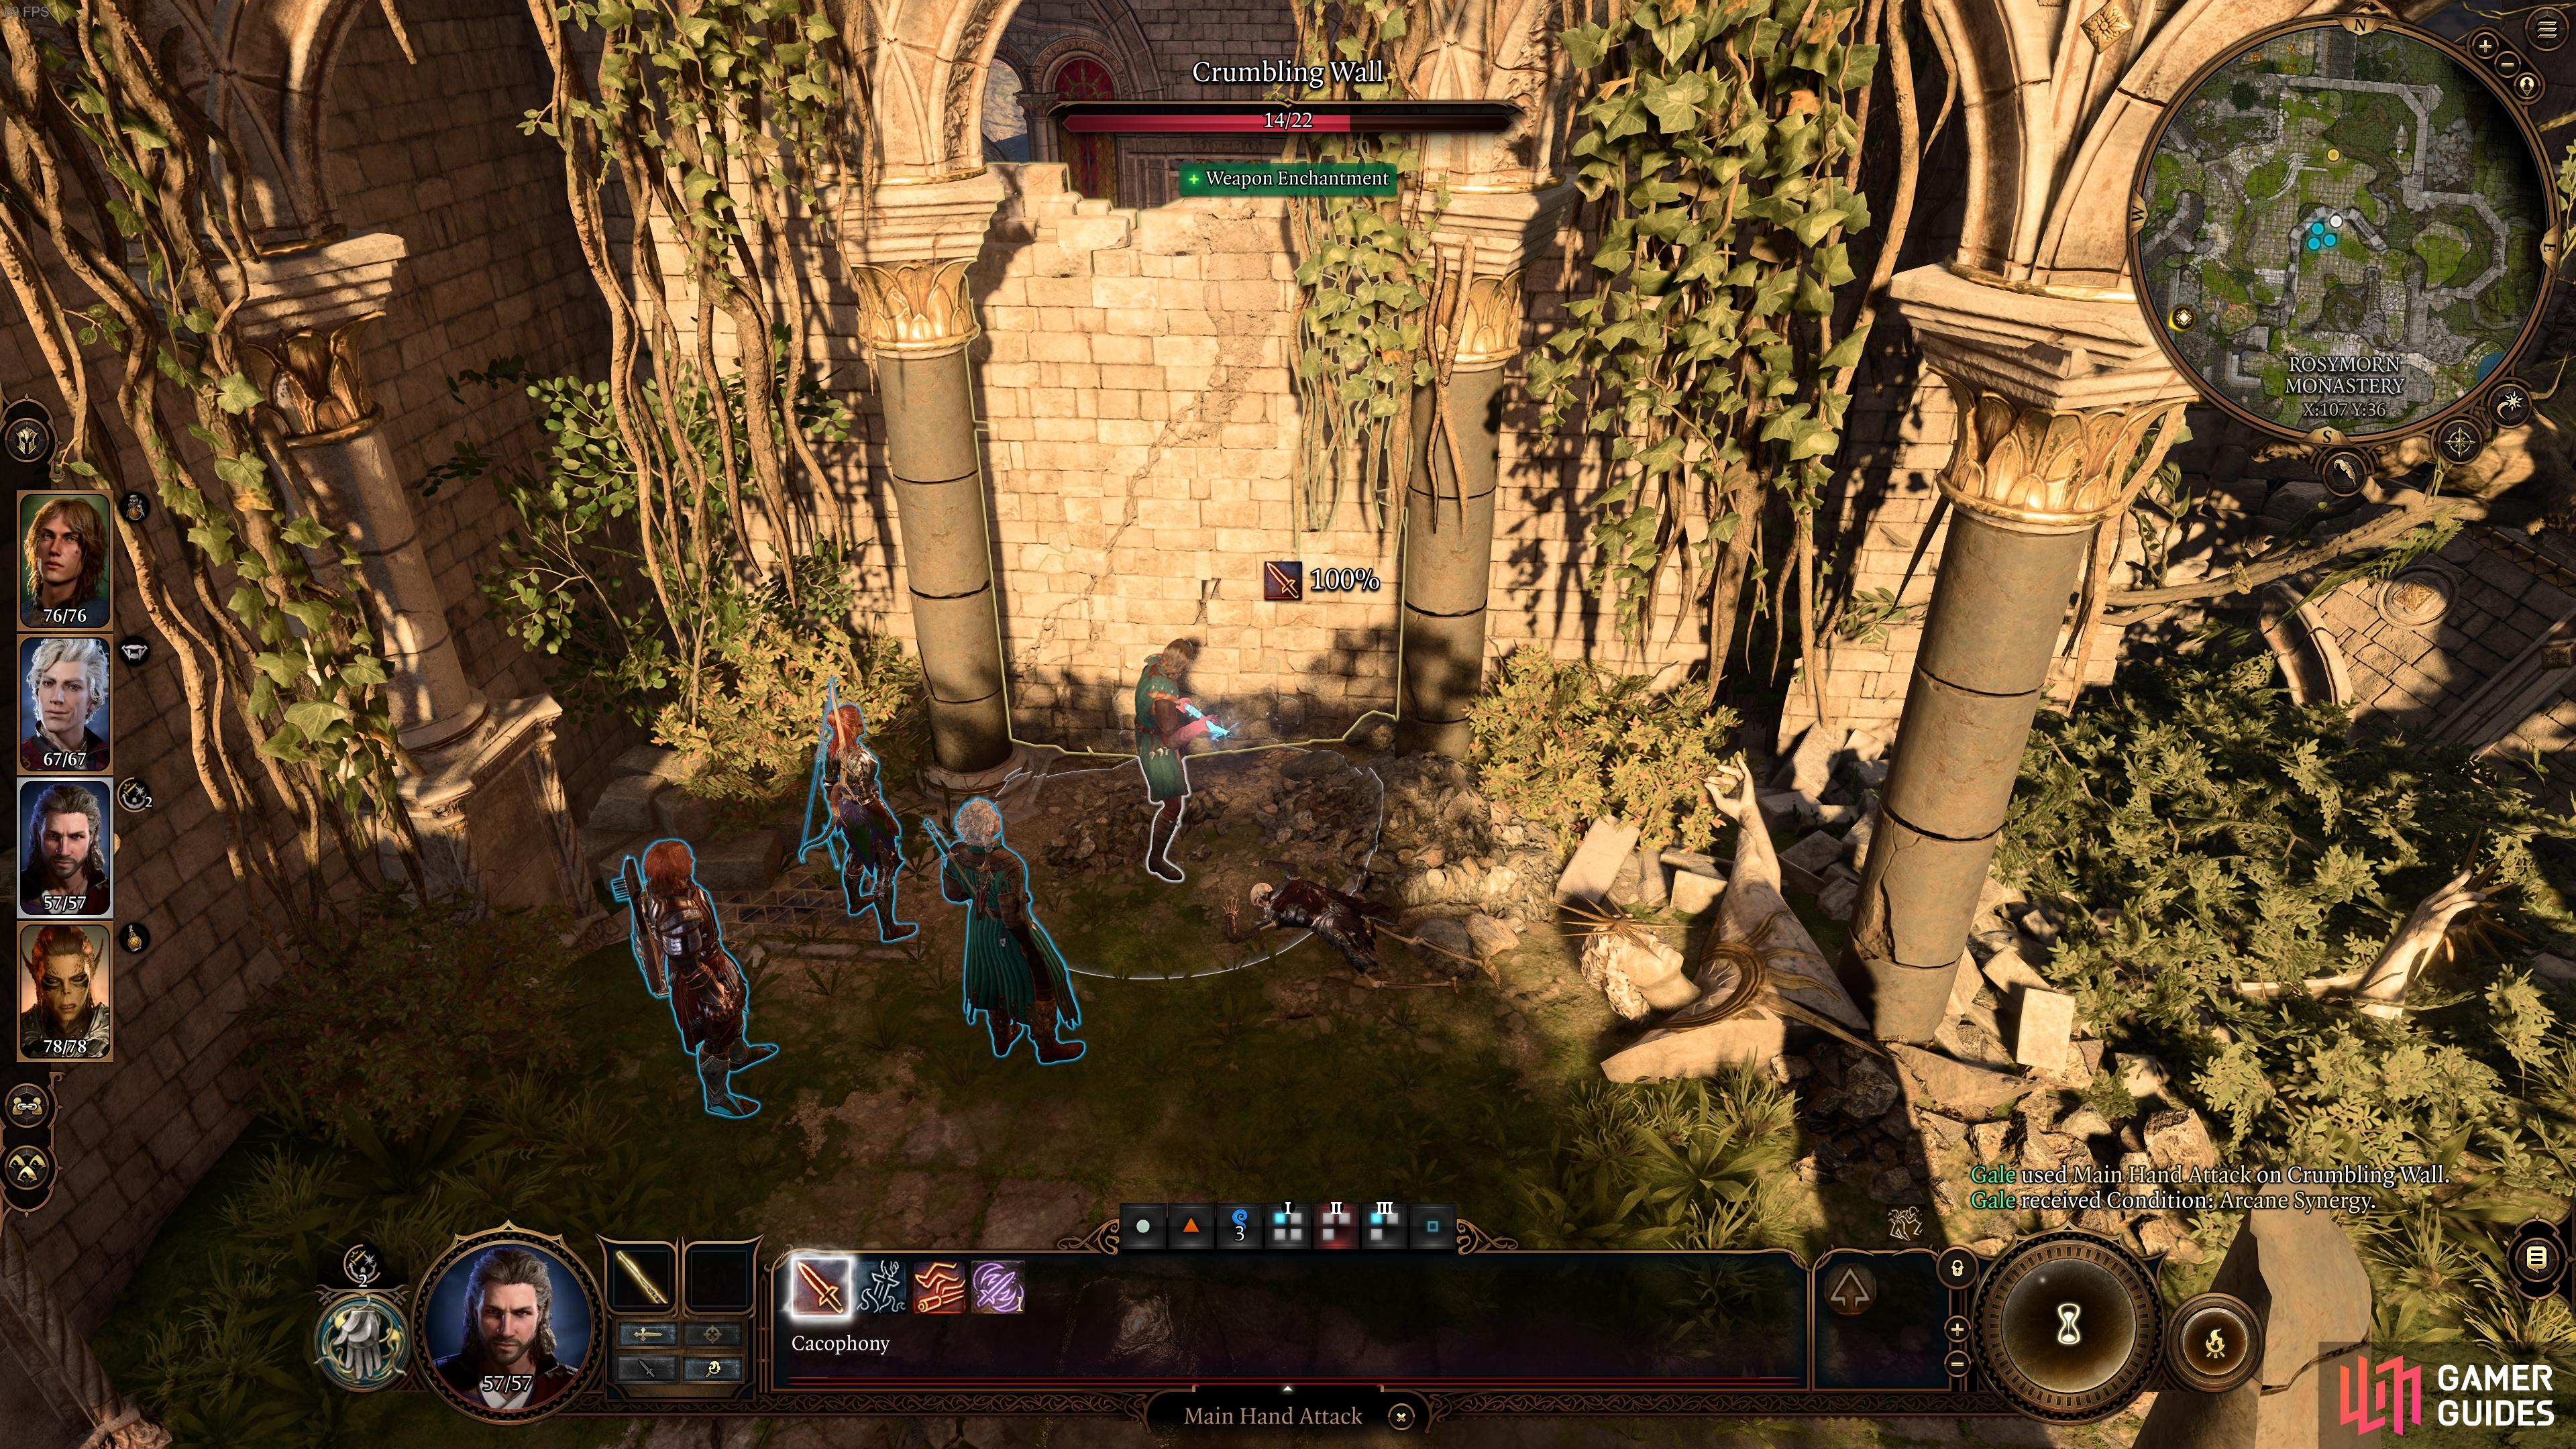
Smash through the crumbling wall to gain entrance to the room behind the Enchanted Door.
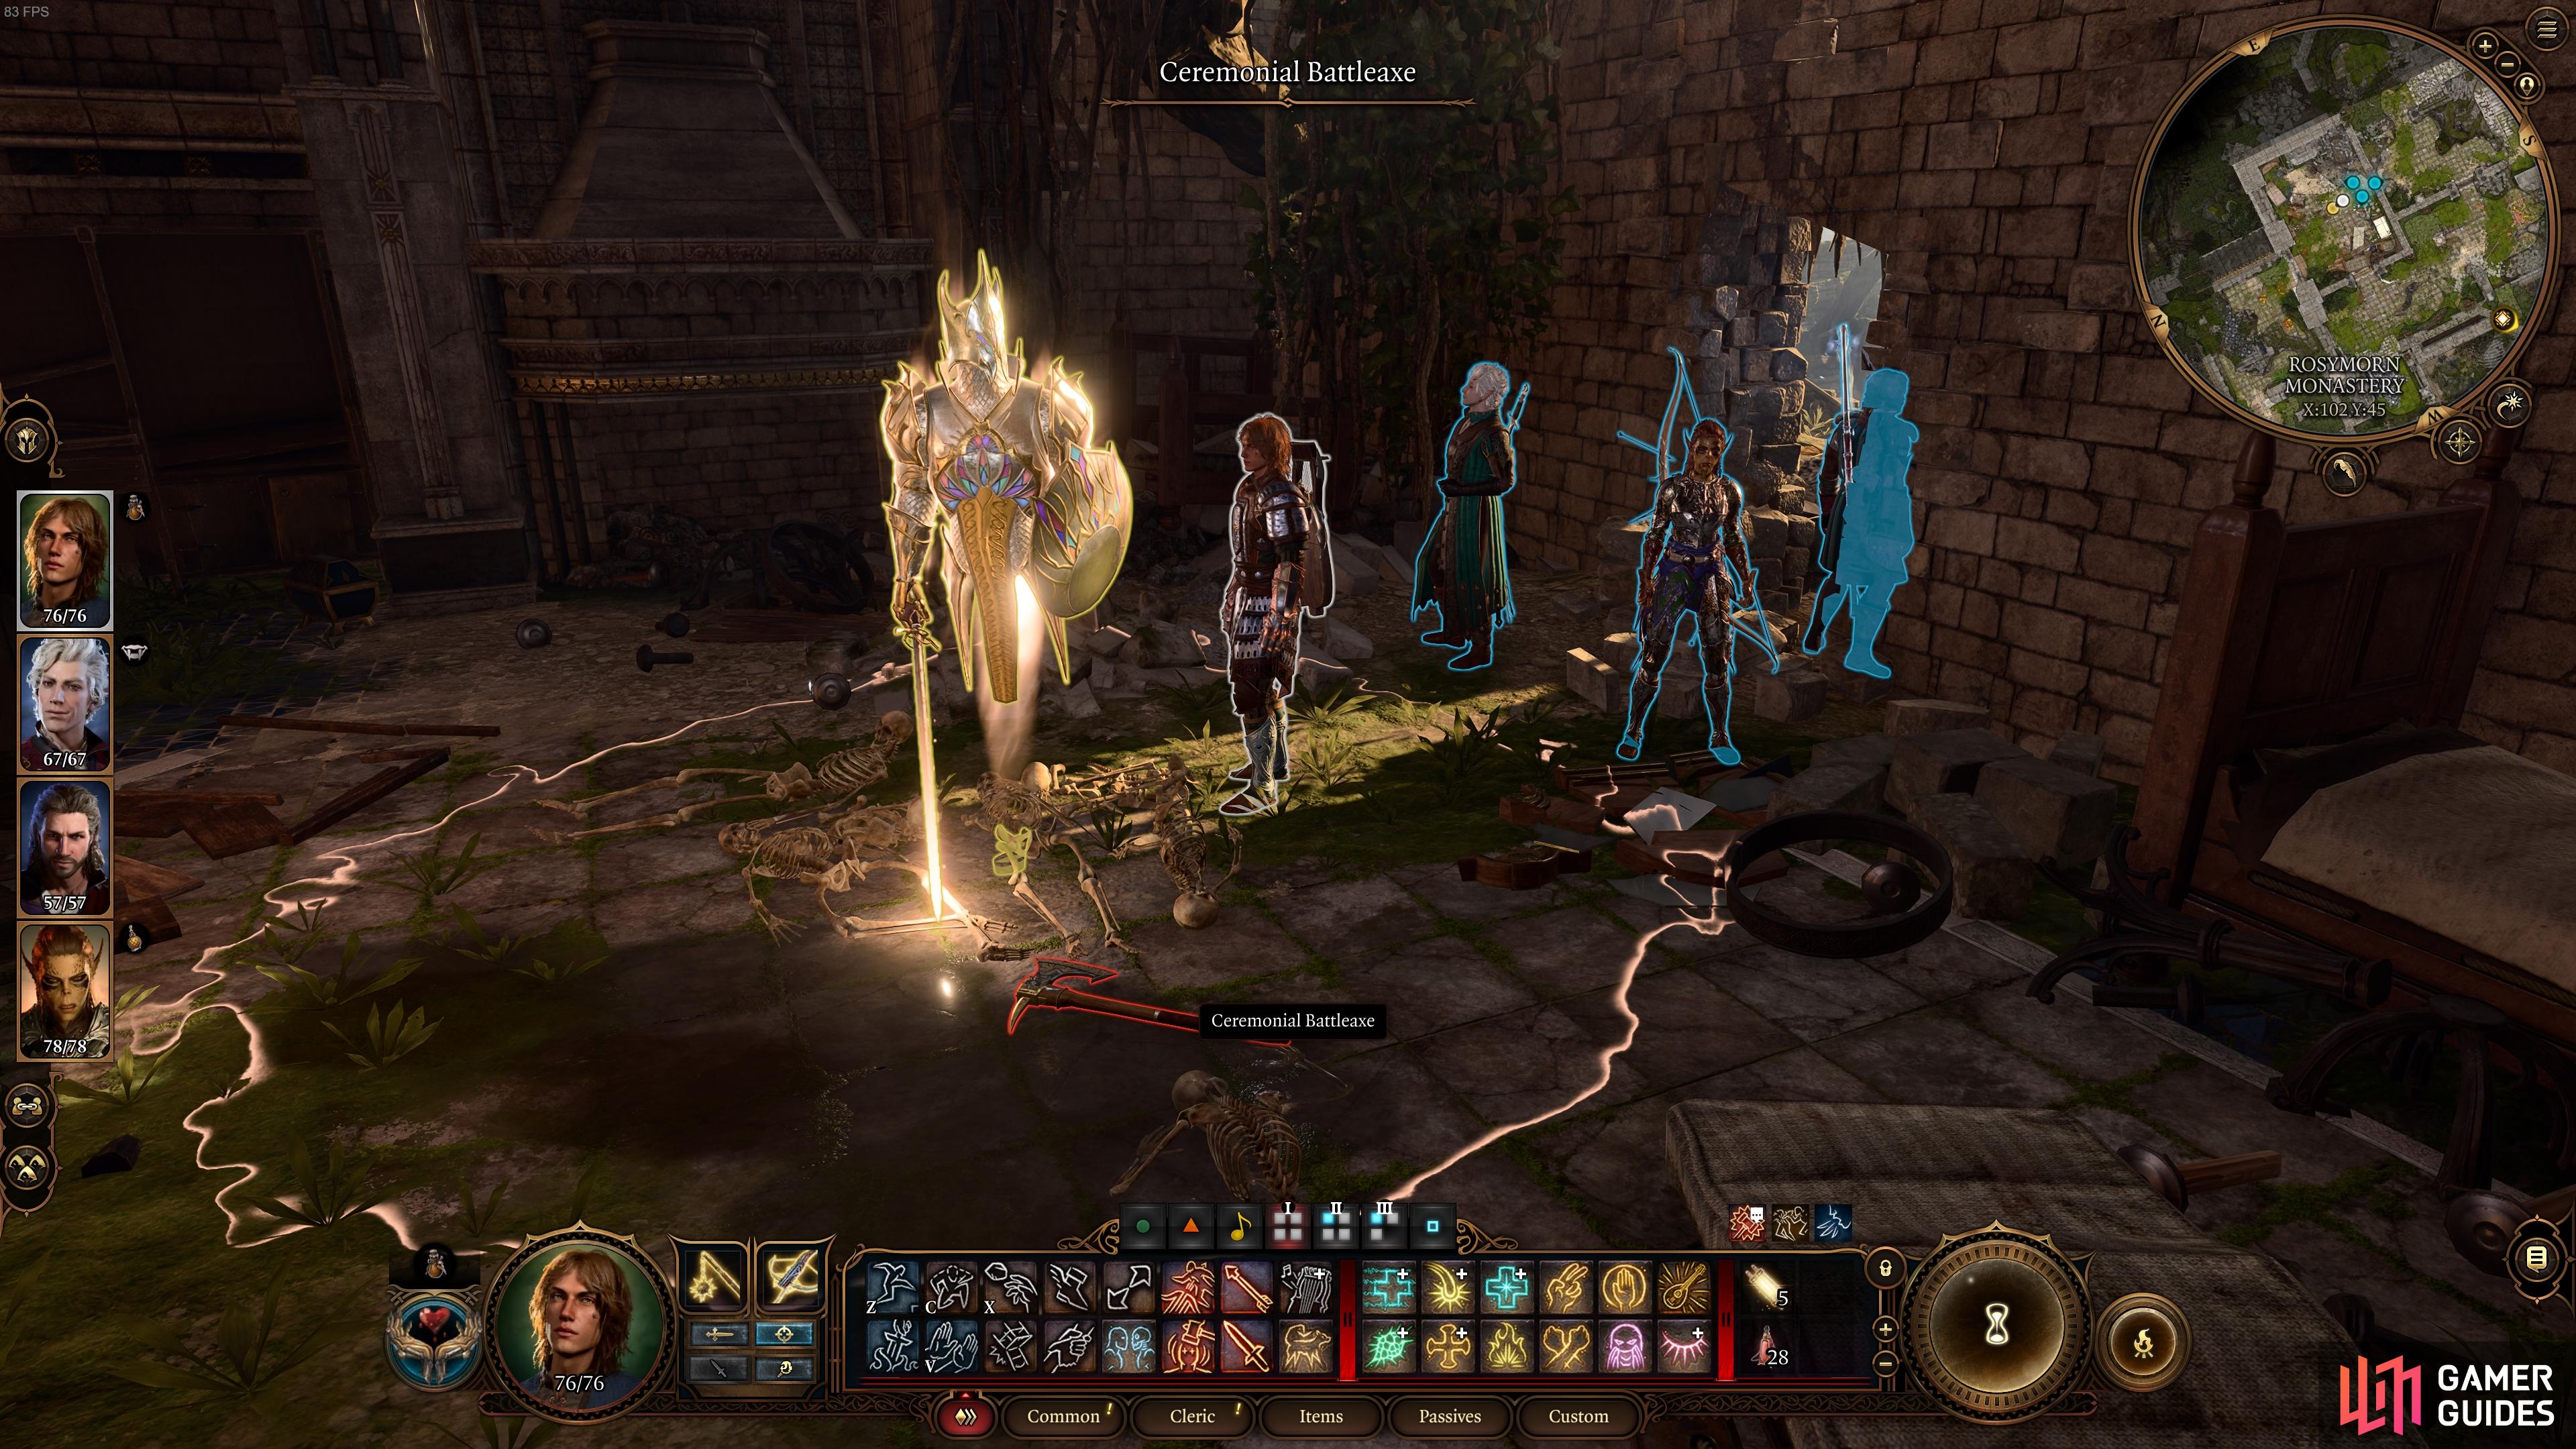
You’ll notice the Ceremonial Battleaxe on the ground in front of the Guardian of Faith.
The Guardian isn’t too difficult to beat, but it can hit hard if you’re level 5 or below, so be ready to use some heals or buffs where necessary. Once you have the Ceremonial Battleaxe, return to the room with the Stained-Glass Window and place it on the pedestal to the southwest to complete the puzzle.
Loot the Dawnmaster’s Crest and Enter the Creche Y’llek
After placing all of the items on the pedestals, you’ll notice a wall open up to the north, revealing a pouch that contains the Dawnmaster’s Crest. This is a crucial item that you’ll need to obtain The Blood of Lathander mace with fewer issues later on. Speaking of which, you’ll need to go through the Find the Githyanki Creche quest in the ![]() Creche Y’llek before you can reach this part of the puzzle. You can see a detailed guide for this on our Find the Githyanki Creche Walkthrough page.
Creche Y’llek before you can reach this part of the puzzle. You can see a detailed guide for this on our Find the Githyanki Creche Walkthrough page.
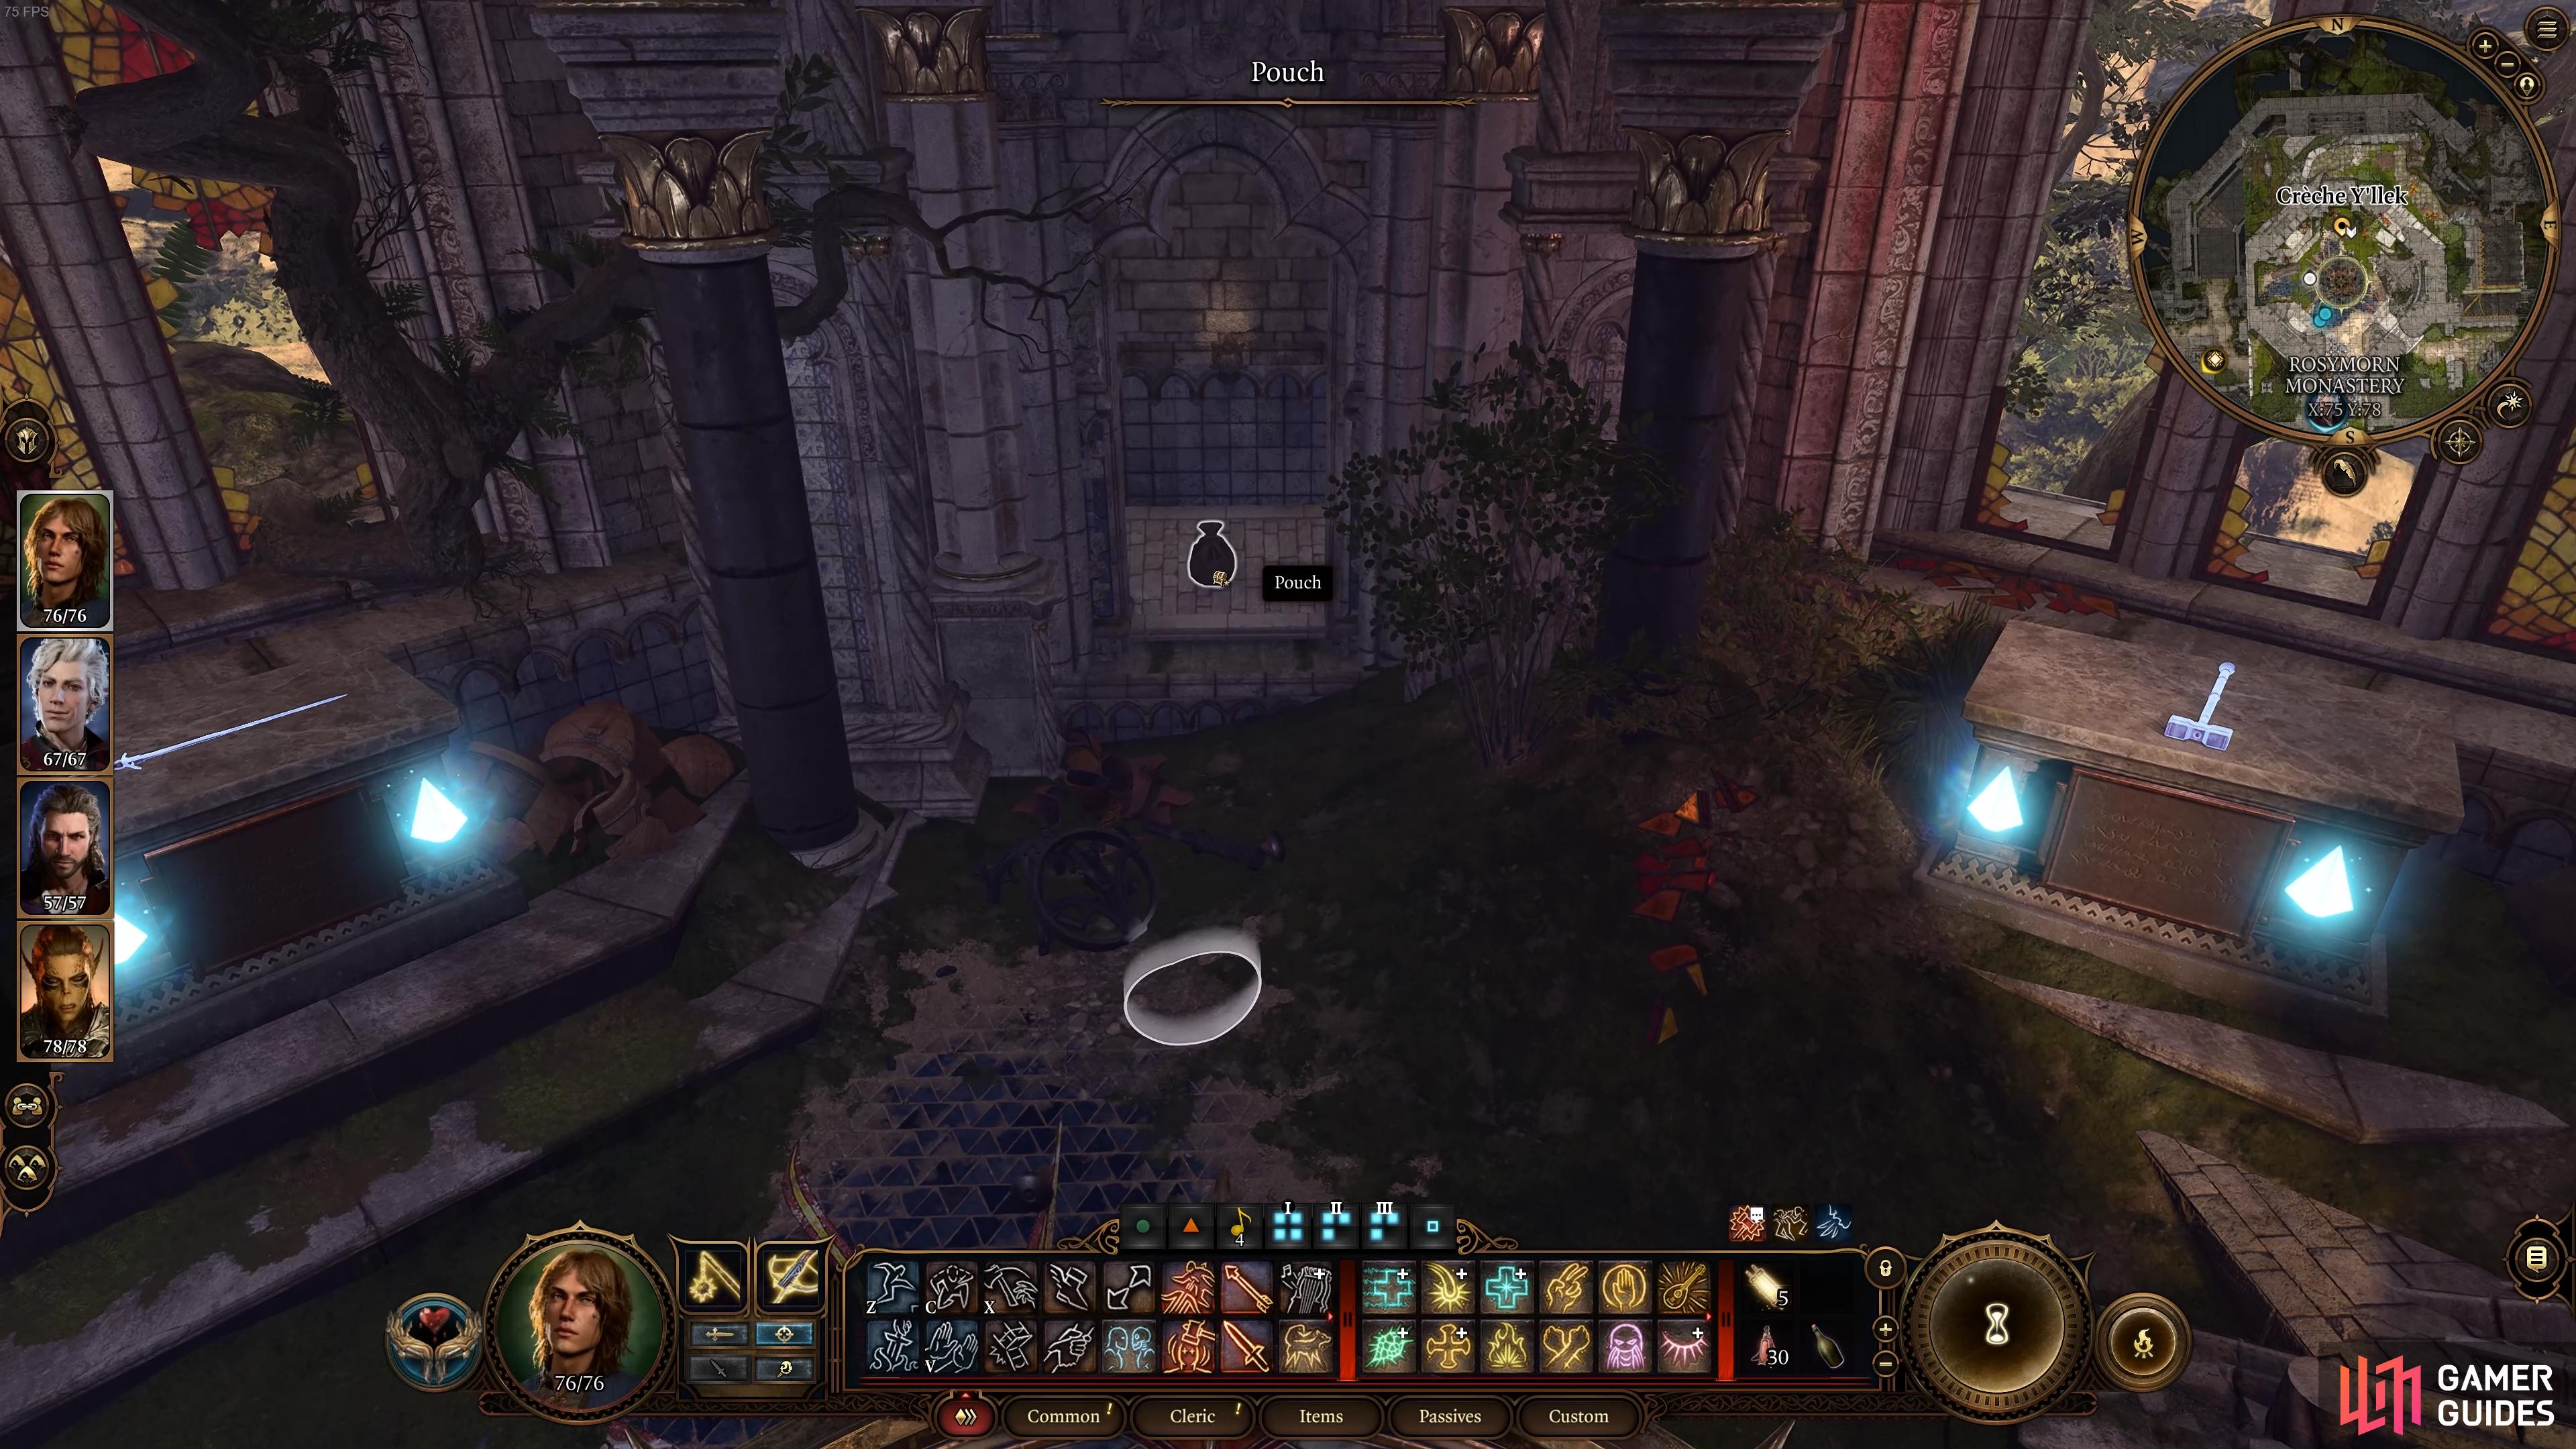
Look for the pouch which is revealed to the north after completing the puzzle in Rosymorn Monastery.
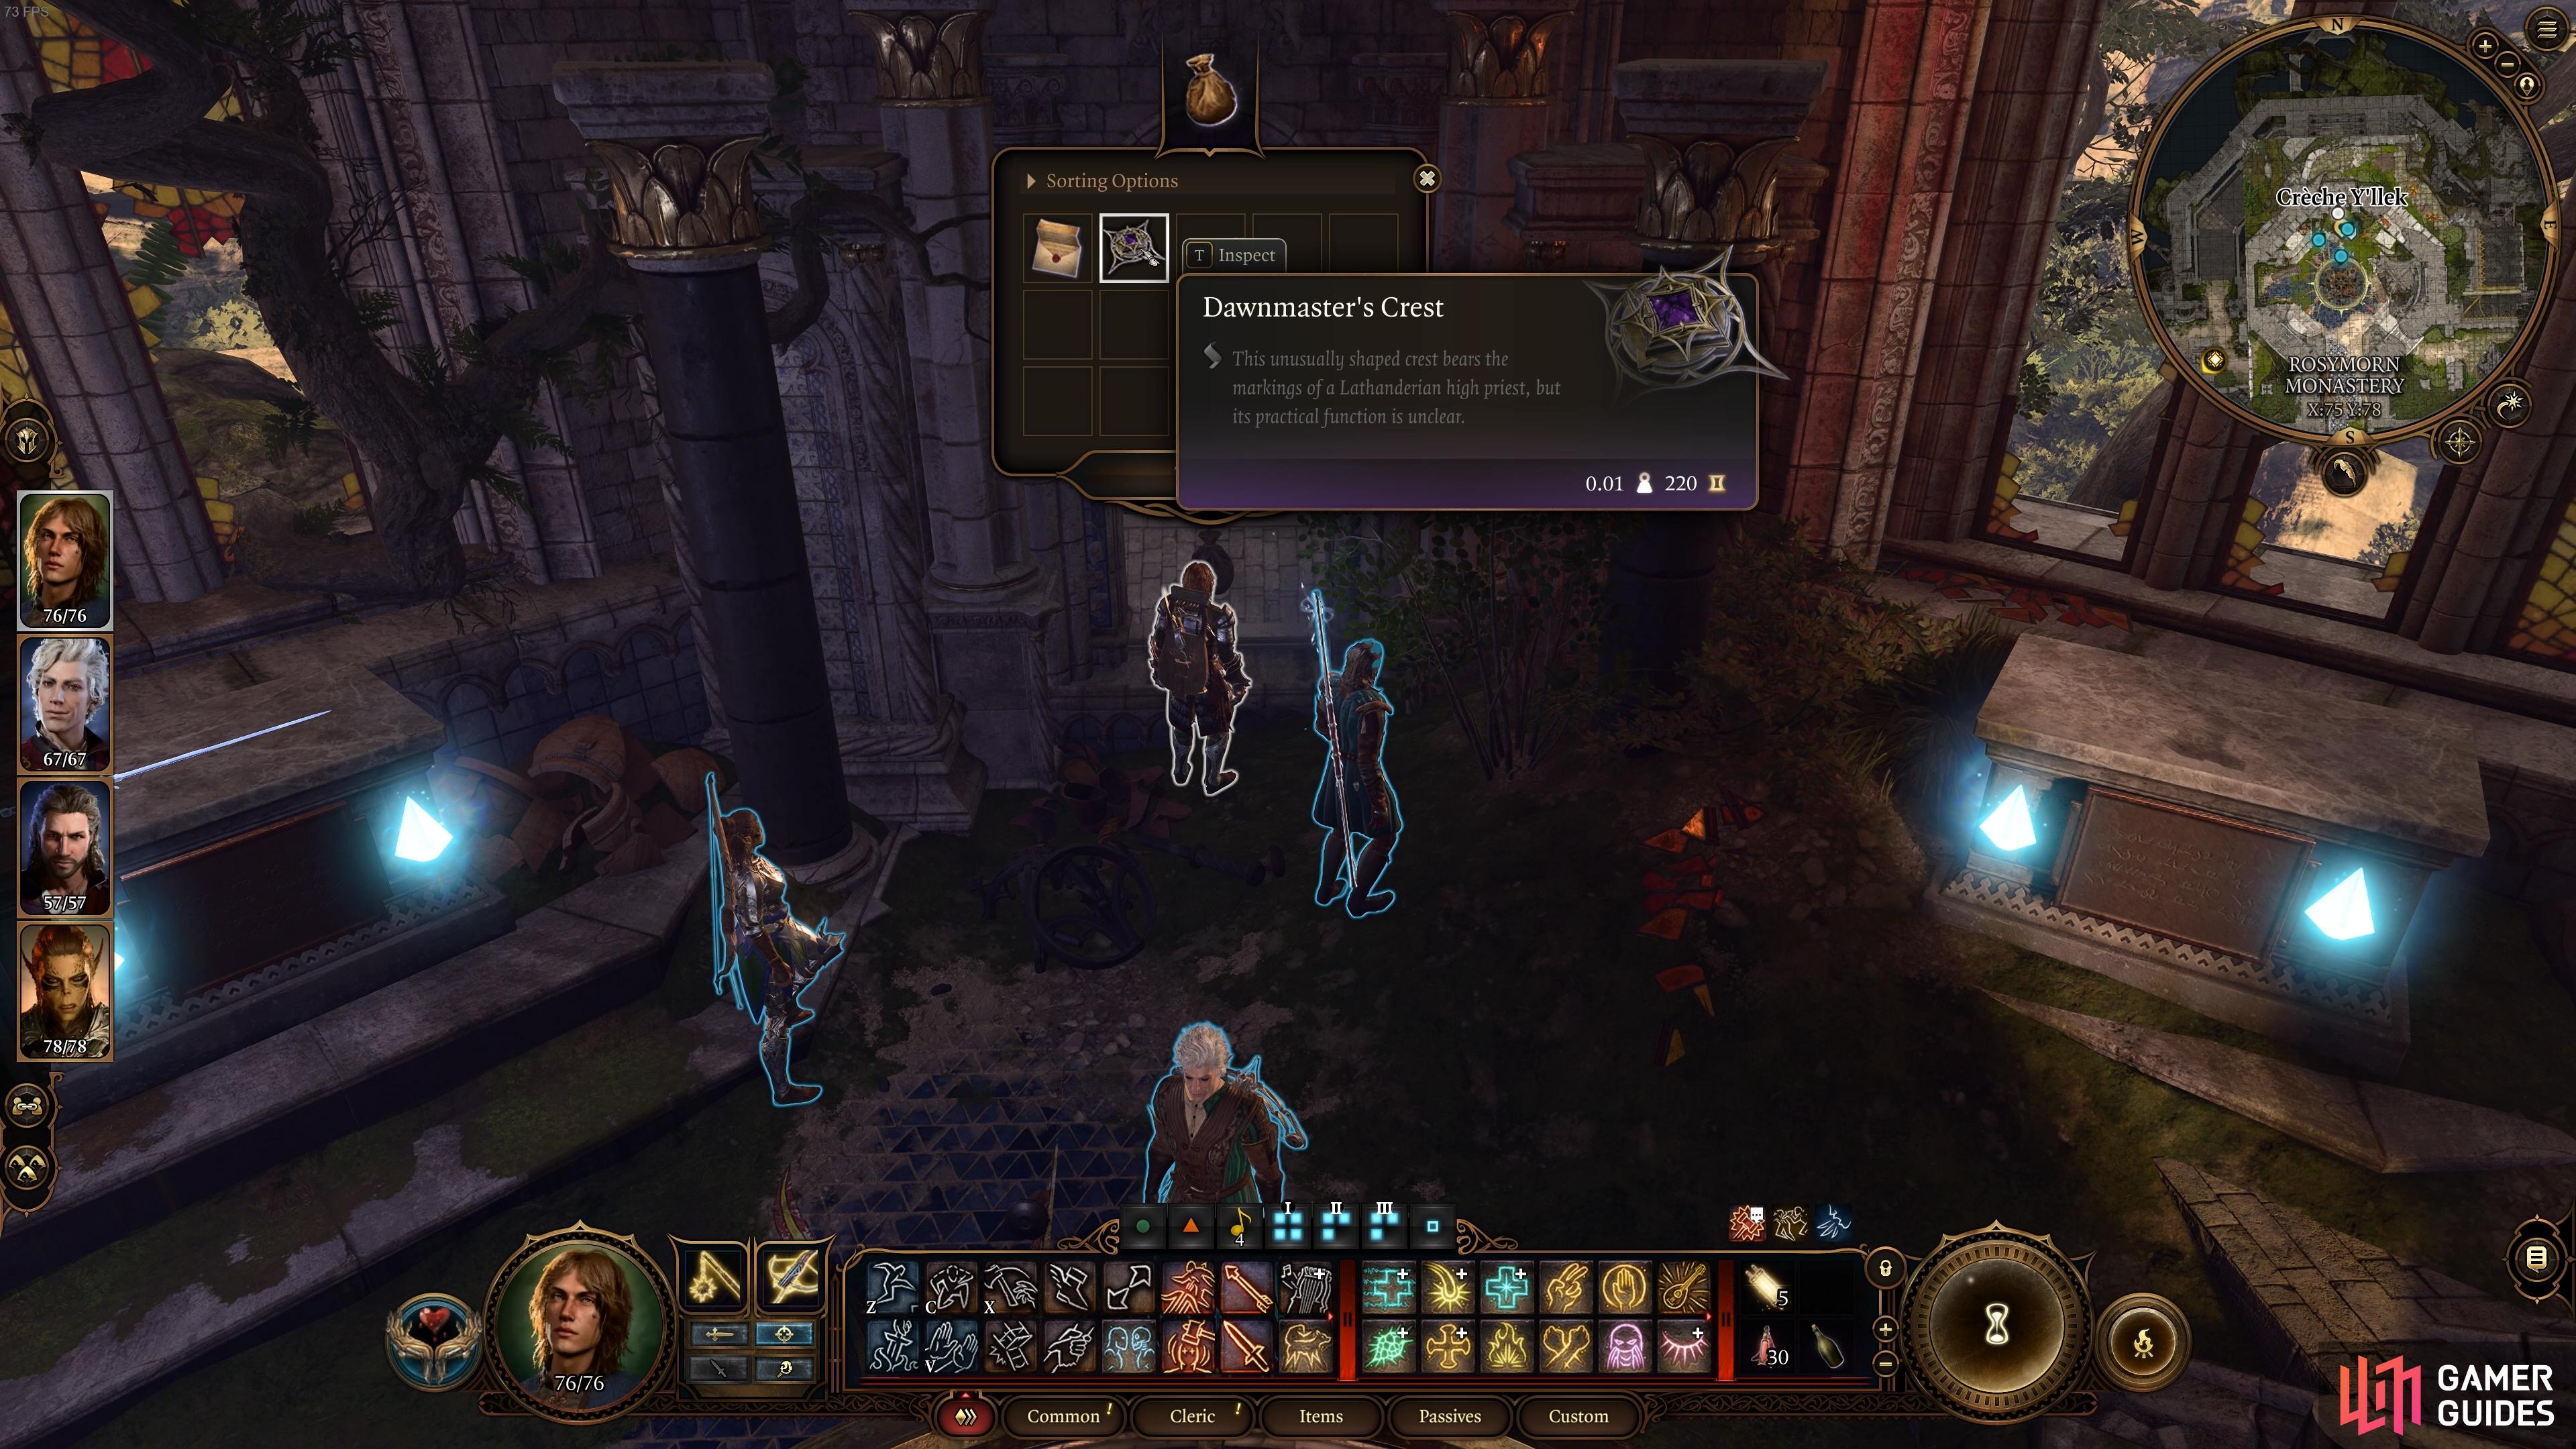
You’ll get the Dawnmaster’s Crest from this pouch, which will be useful later.
Creche Y’llek - Inquisitor’s Chamber - Lathander Statue Puzzle
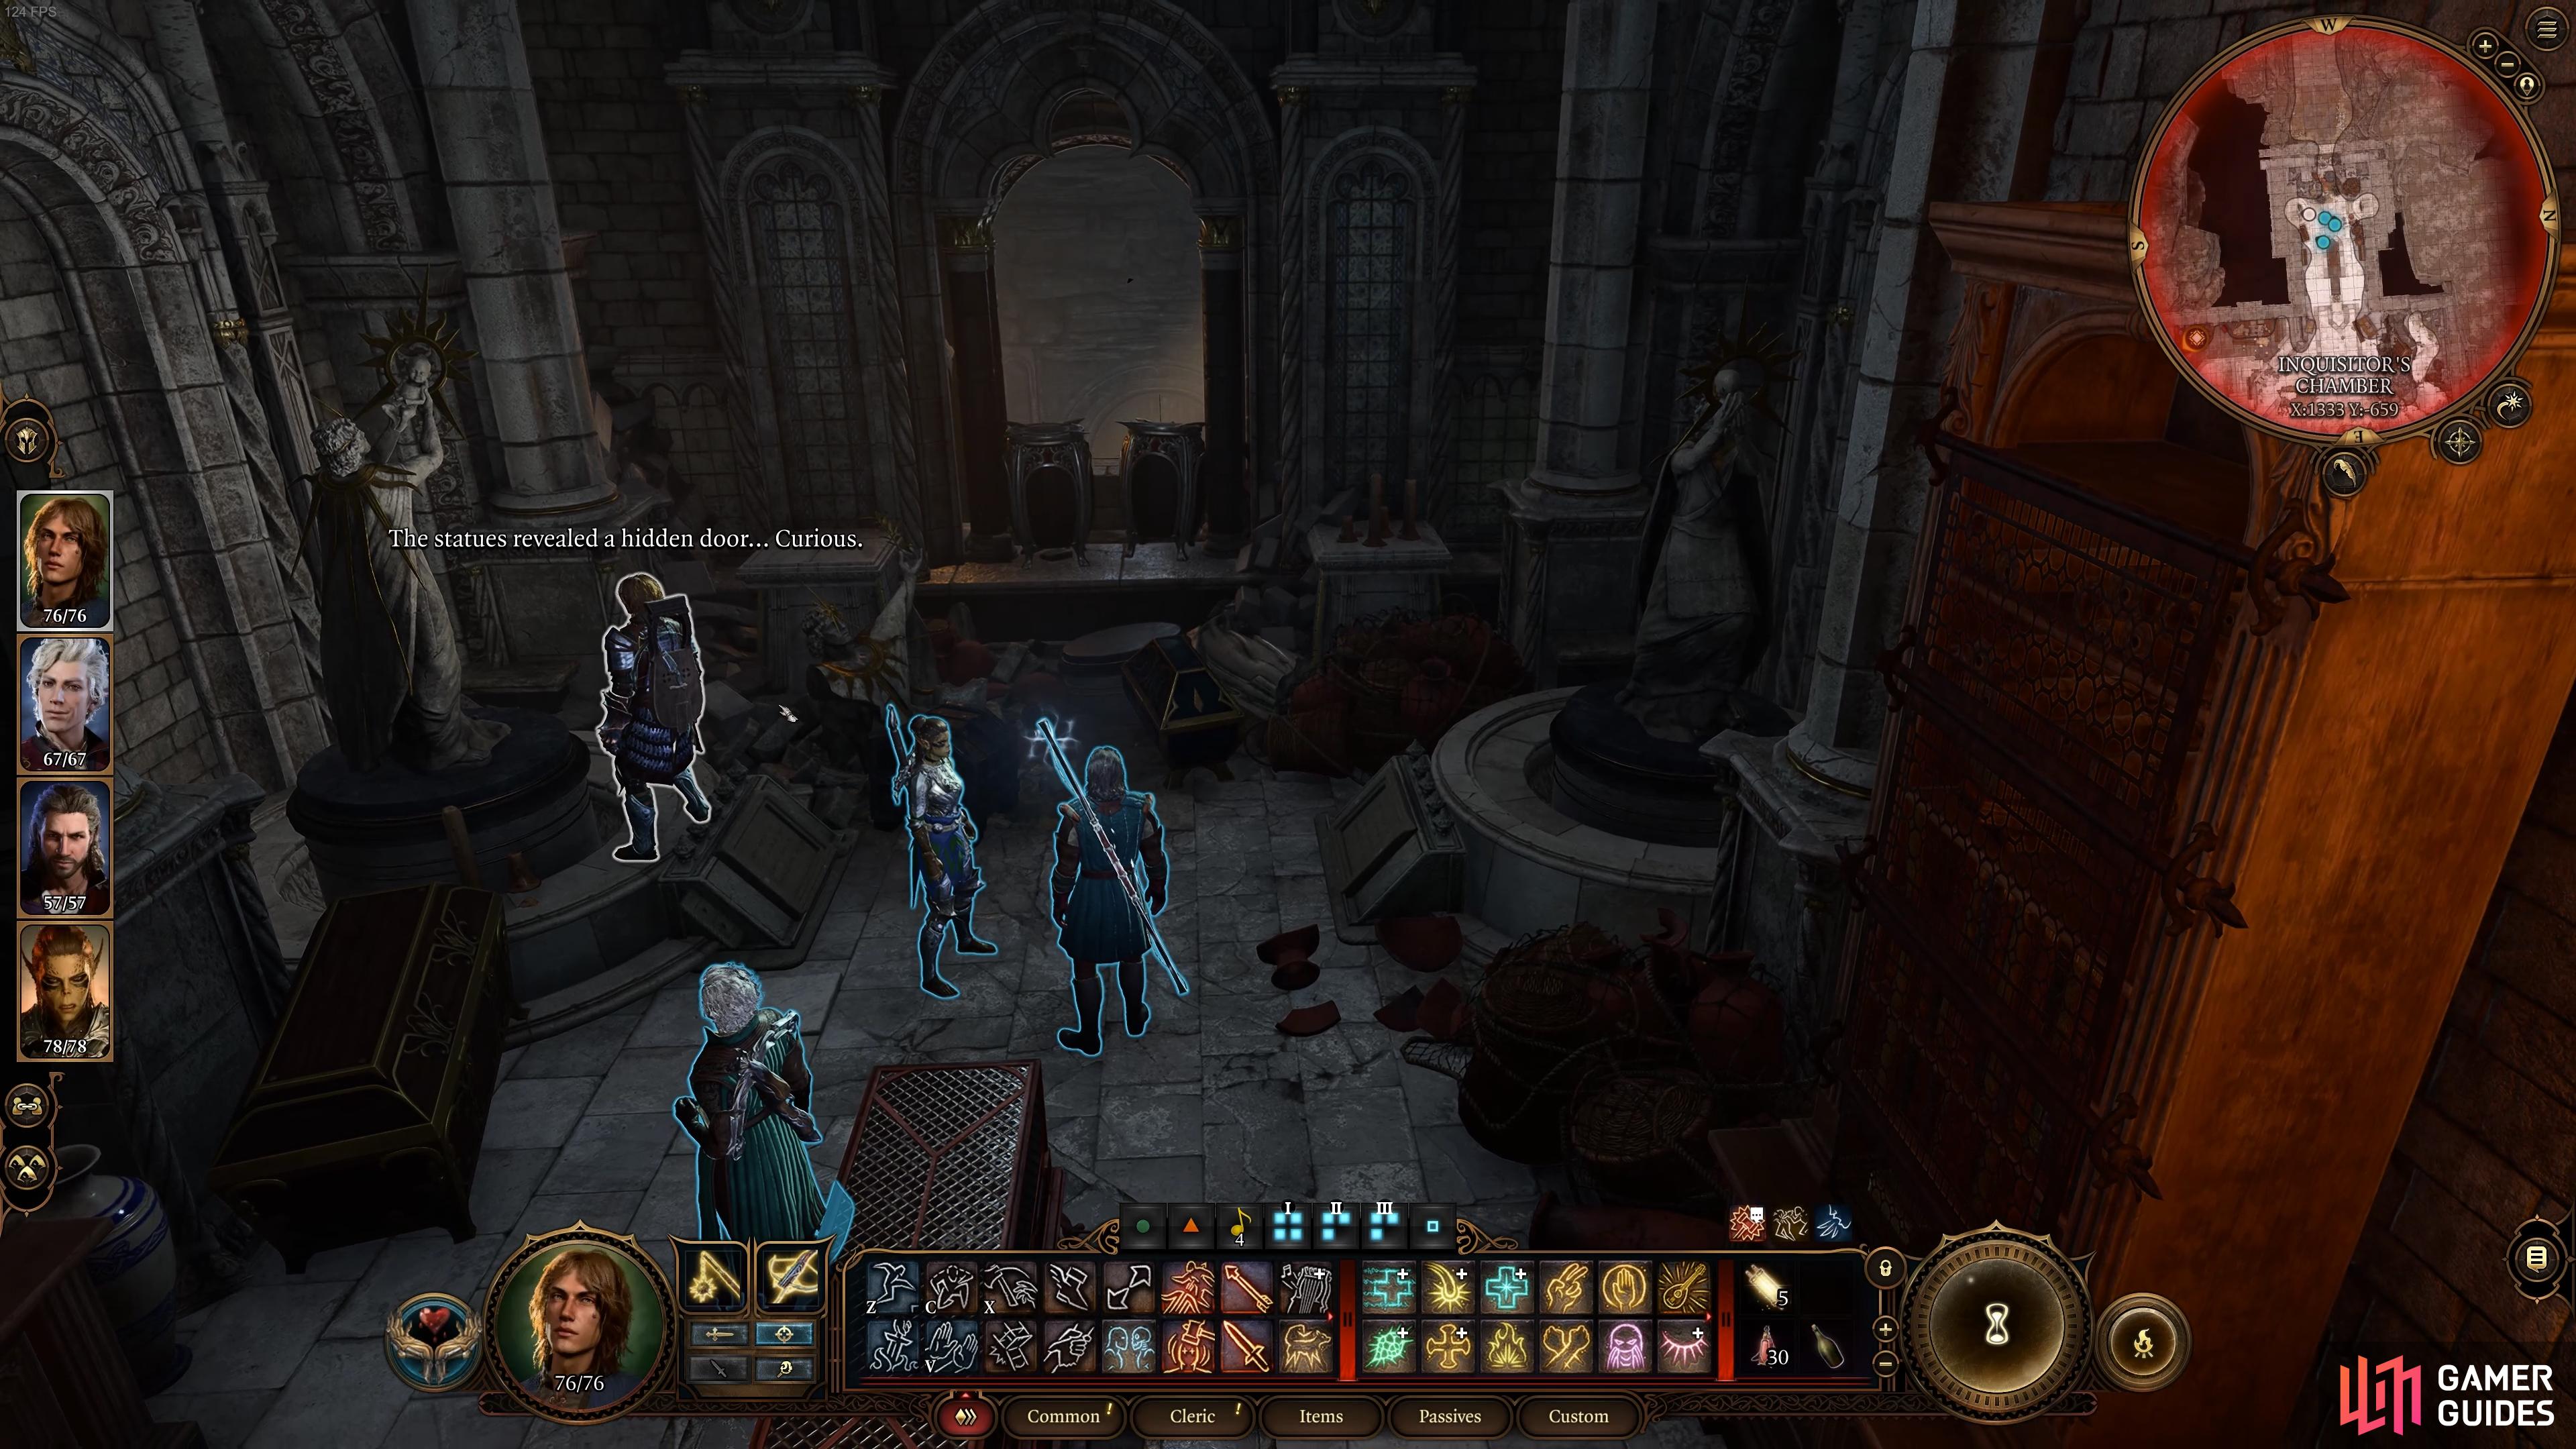
Once you’ve gone through all of the Creche Y’llek using our guide linked above, you should find yourself in the Inquisitor’s Chamber, in the far northern part of the creche. After looting everything, you’ll notice two statues of Lathander on the western side of the room. You need to move these in a specific direction to unlock a secret passage, but one of them won’t budge.
How to Move the Statue of Lathander
The first thing you should know about these statues is where you need to position them. The one to the north needs to be facing east, while the one to the south needs to be facing west. The statue to the north can be repositioned immediately by interacting with it so that it moves incrementally towards the east.
The statue on the southern side, however, needs a bit more of a push. If you pass the athletics check when attempting to move it, this will happen automatically. If you fail the athletics check, there are two main options: you can strike it with a melee attack using your strongest character to budge it, or you can throw a bottle of grease at it to loosen the mechanism. Either way, once you get the statue moving, you need to face it westwards.
Once you’ve positioned both statues facing in the correct direction, the secret passage should open on the western wall. All you need to do now is shift the Decorated Barrels and continue down through the Daybreak Gate to the Secret Stairway.
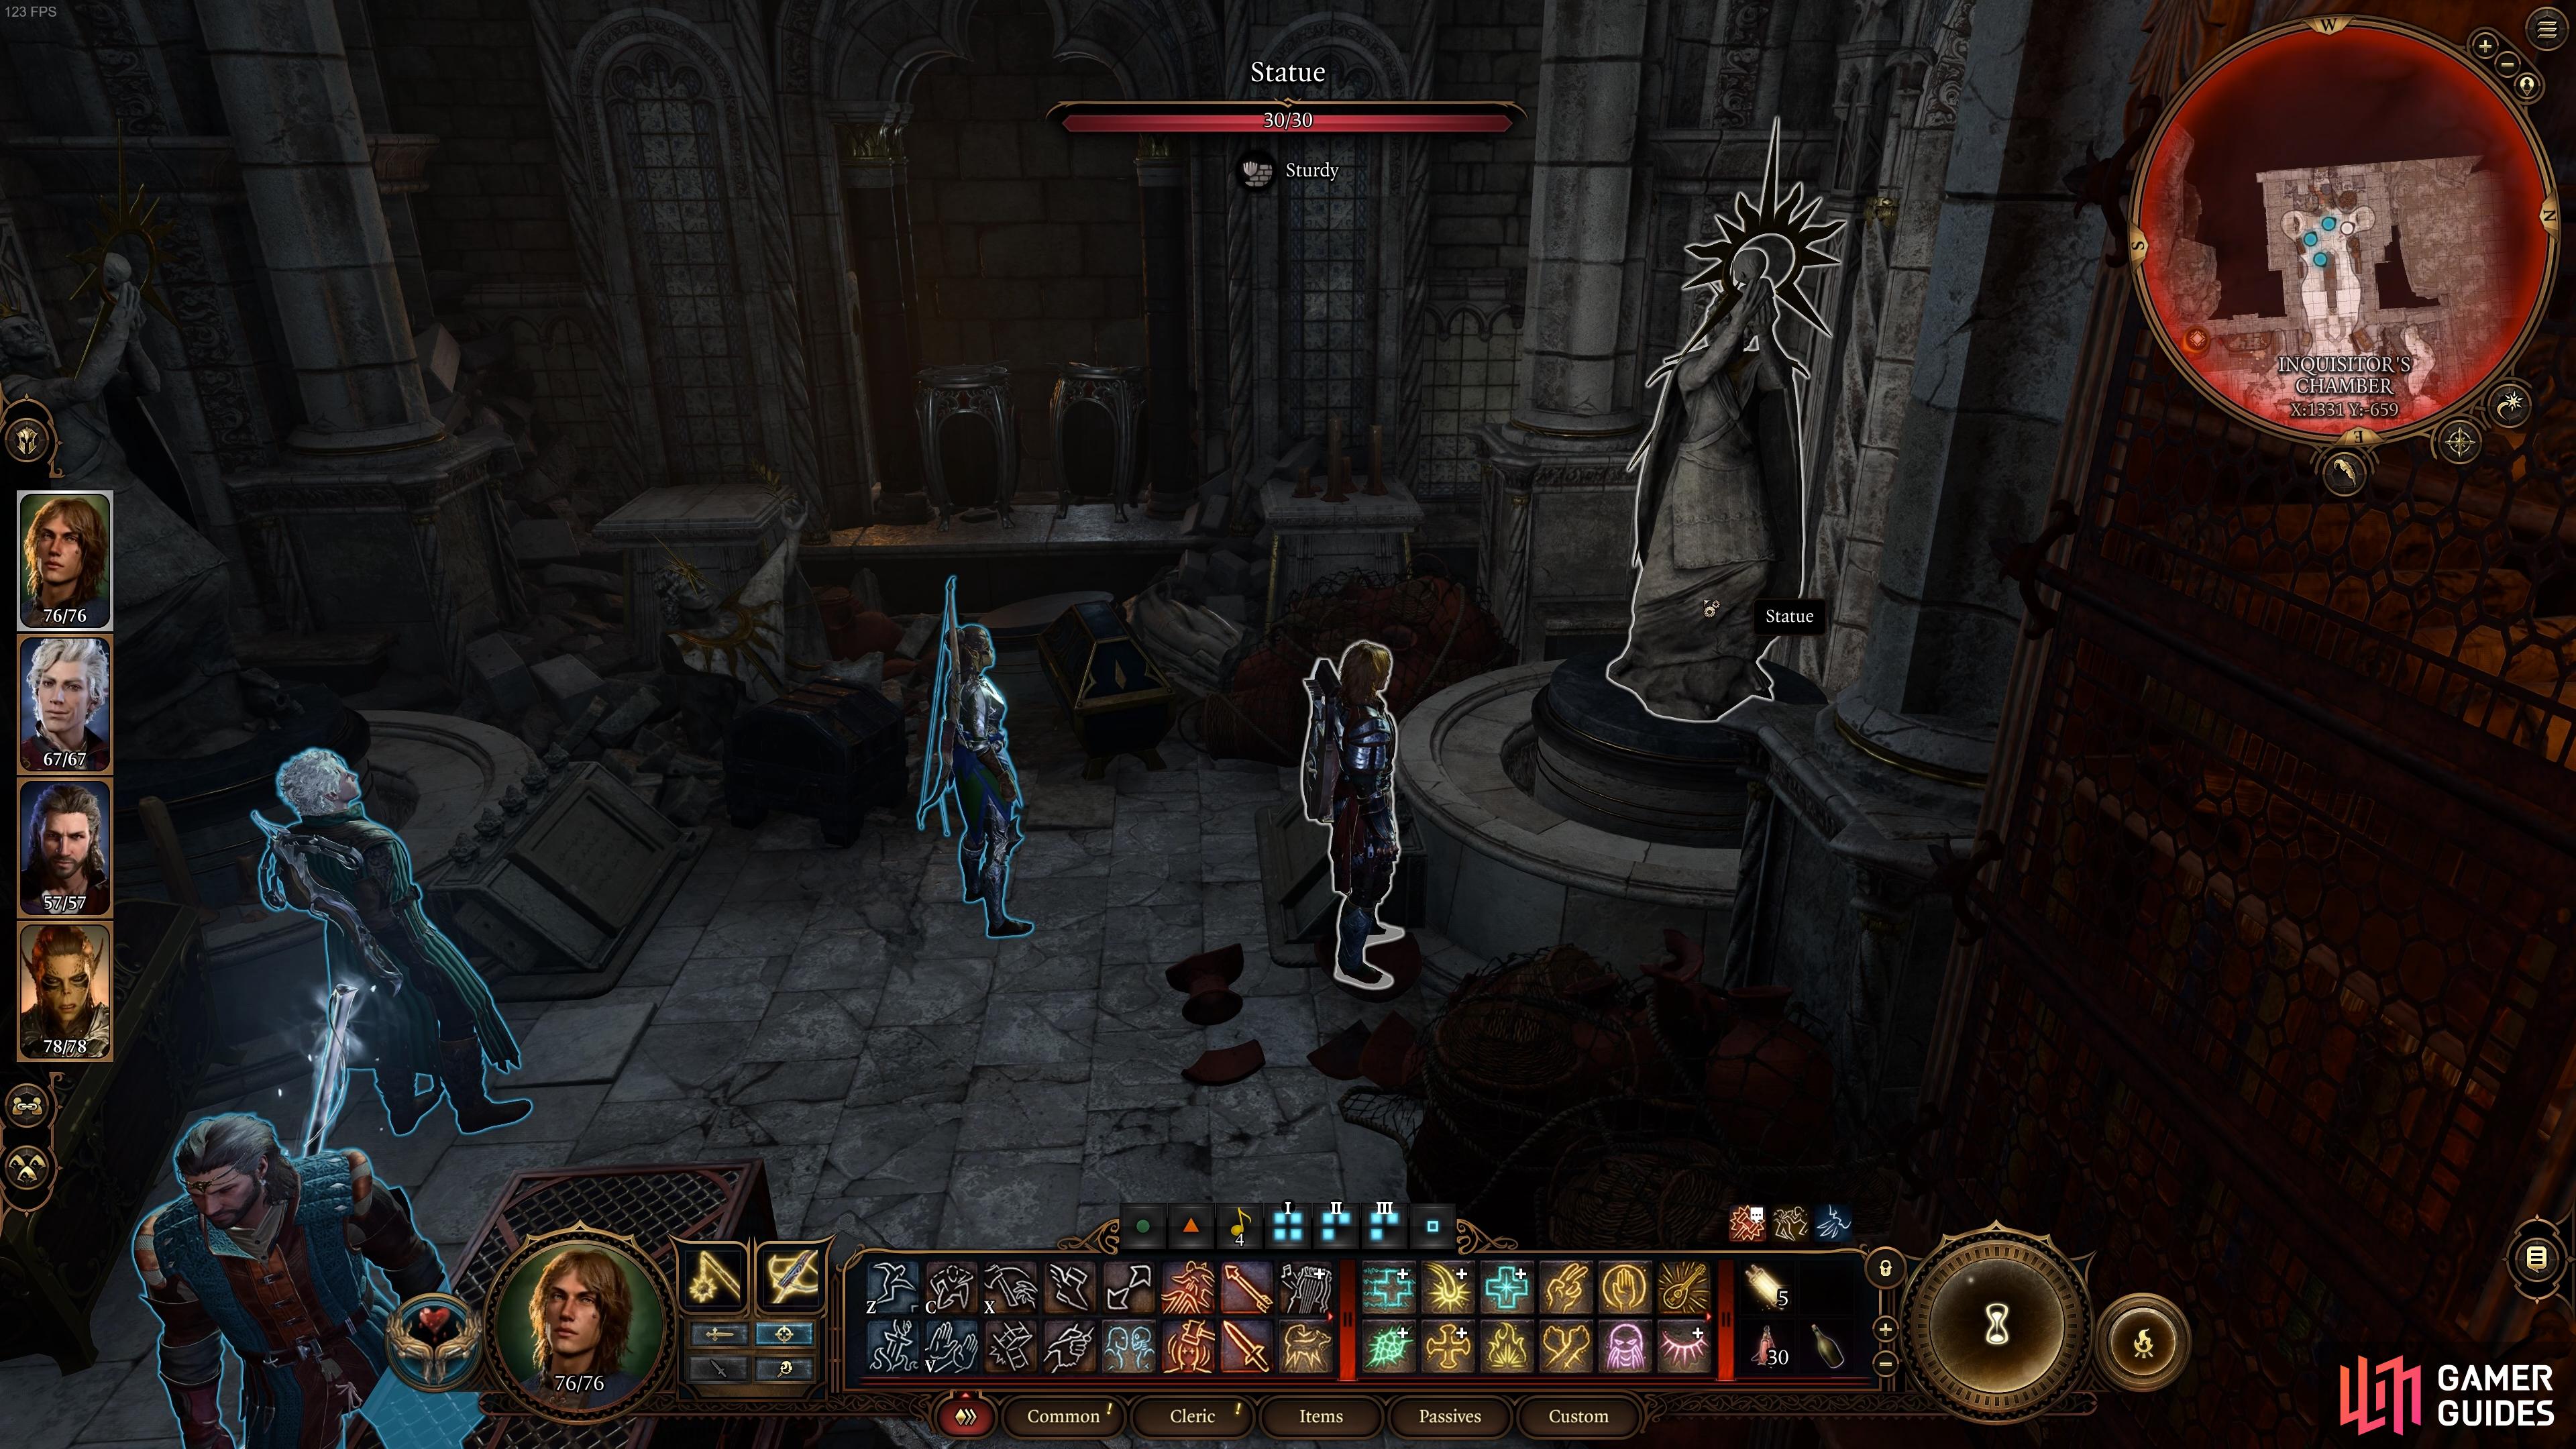
Position the statue on the northern side to face eastwards.
After positioning the statue on the southern side to face westwards, the secret passage will open.
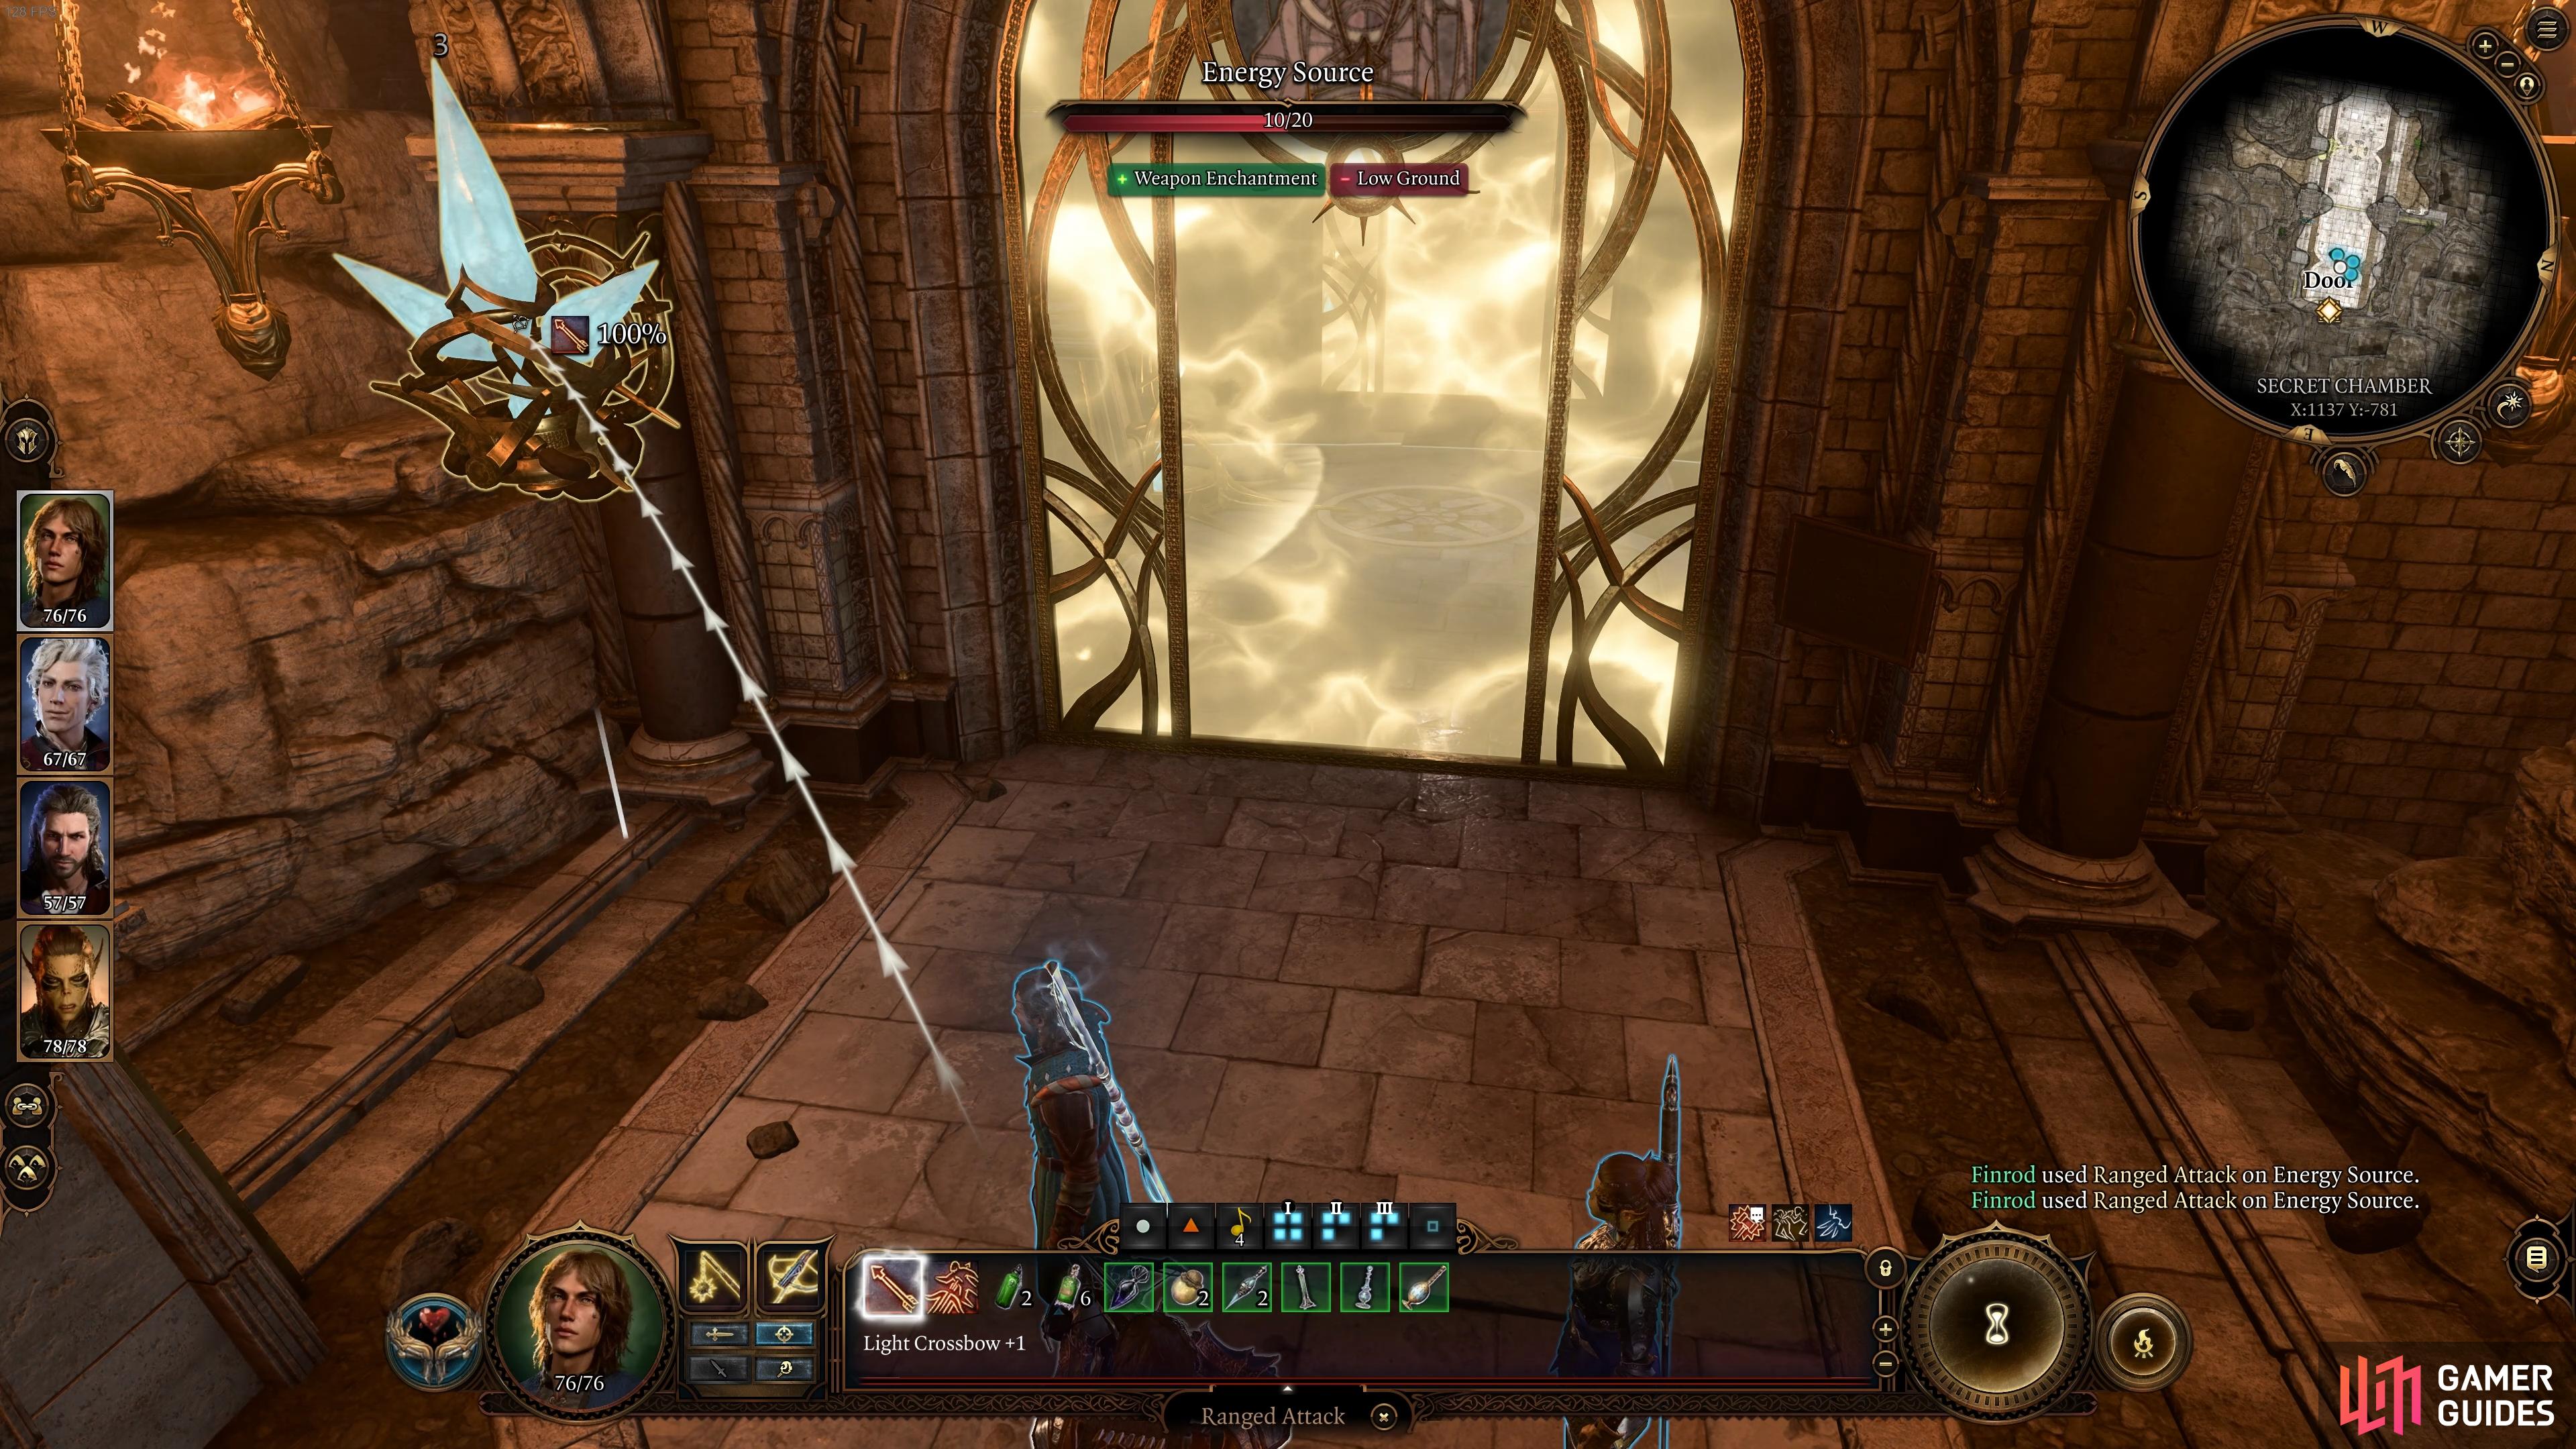
How to Solve the Lathanderian Traps Puzzle in the Secret Chamber
Now that you’re in the secret chamber, you’ll notice a barrier in front of you, blocking the way forward. To remove it, you need to destroy the energy source crystal which is located on a golden mount, just to the left of the barrier. You can do this using spells, or just by shooting it using a bow / crossbow.
After destroying the first energy source crystal, take whatever character is most adept at disarming traps in your party, and get them to disarm the trap surrounding the crystal in the second room, as shown in the screenshot below. You don’t need to destroy this one, just disarm the trap.
Once the trap is disarmed, look to the left of it and climb the rocks heading southwards. You’ll find a path going around the back of the barrier, leading to the other side. Jump over the rock to reach it, where you’ll find another crystal that you can destroy on the rock surface, and another that you can disarm on the ground. There’s actually another crystal below and to the right of this final barrier, which you can shoot by stepping down the rocks here.
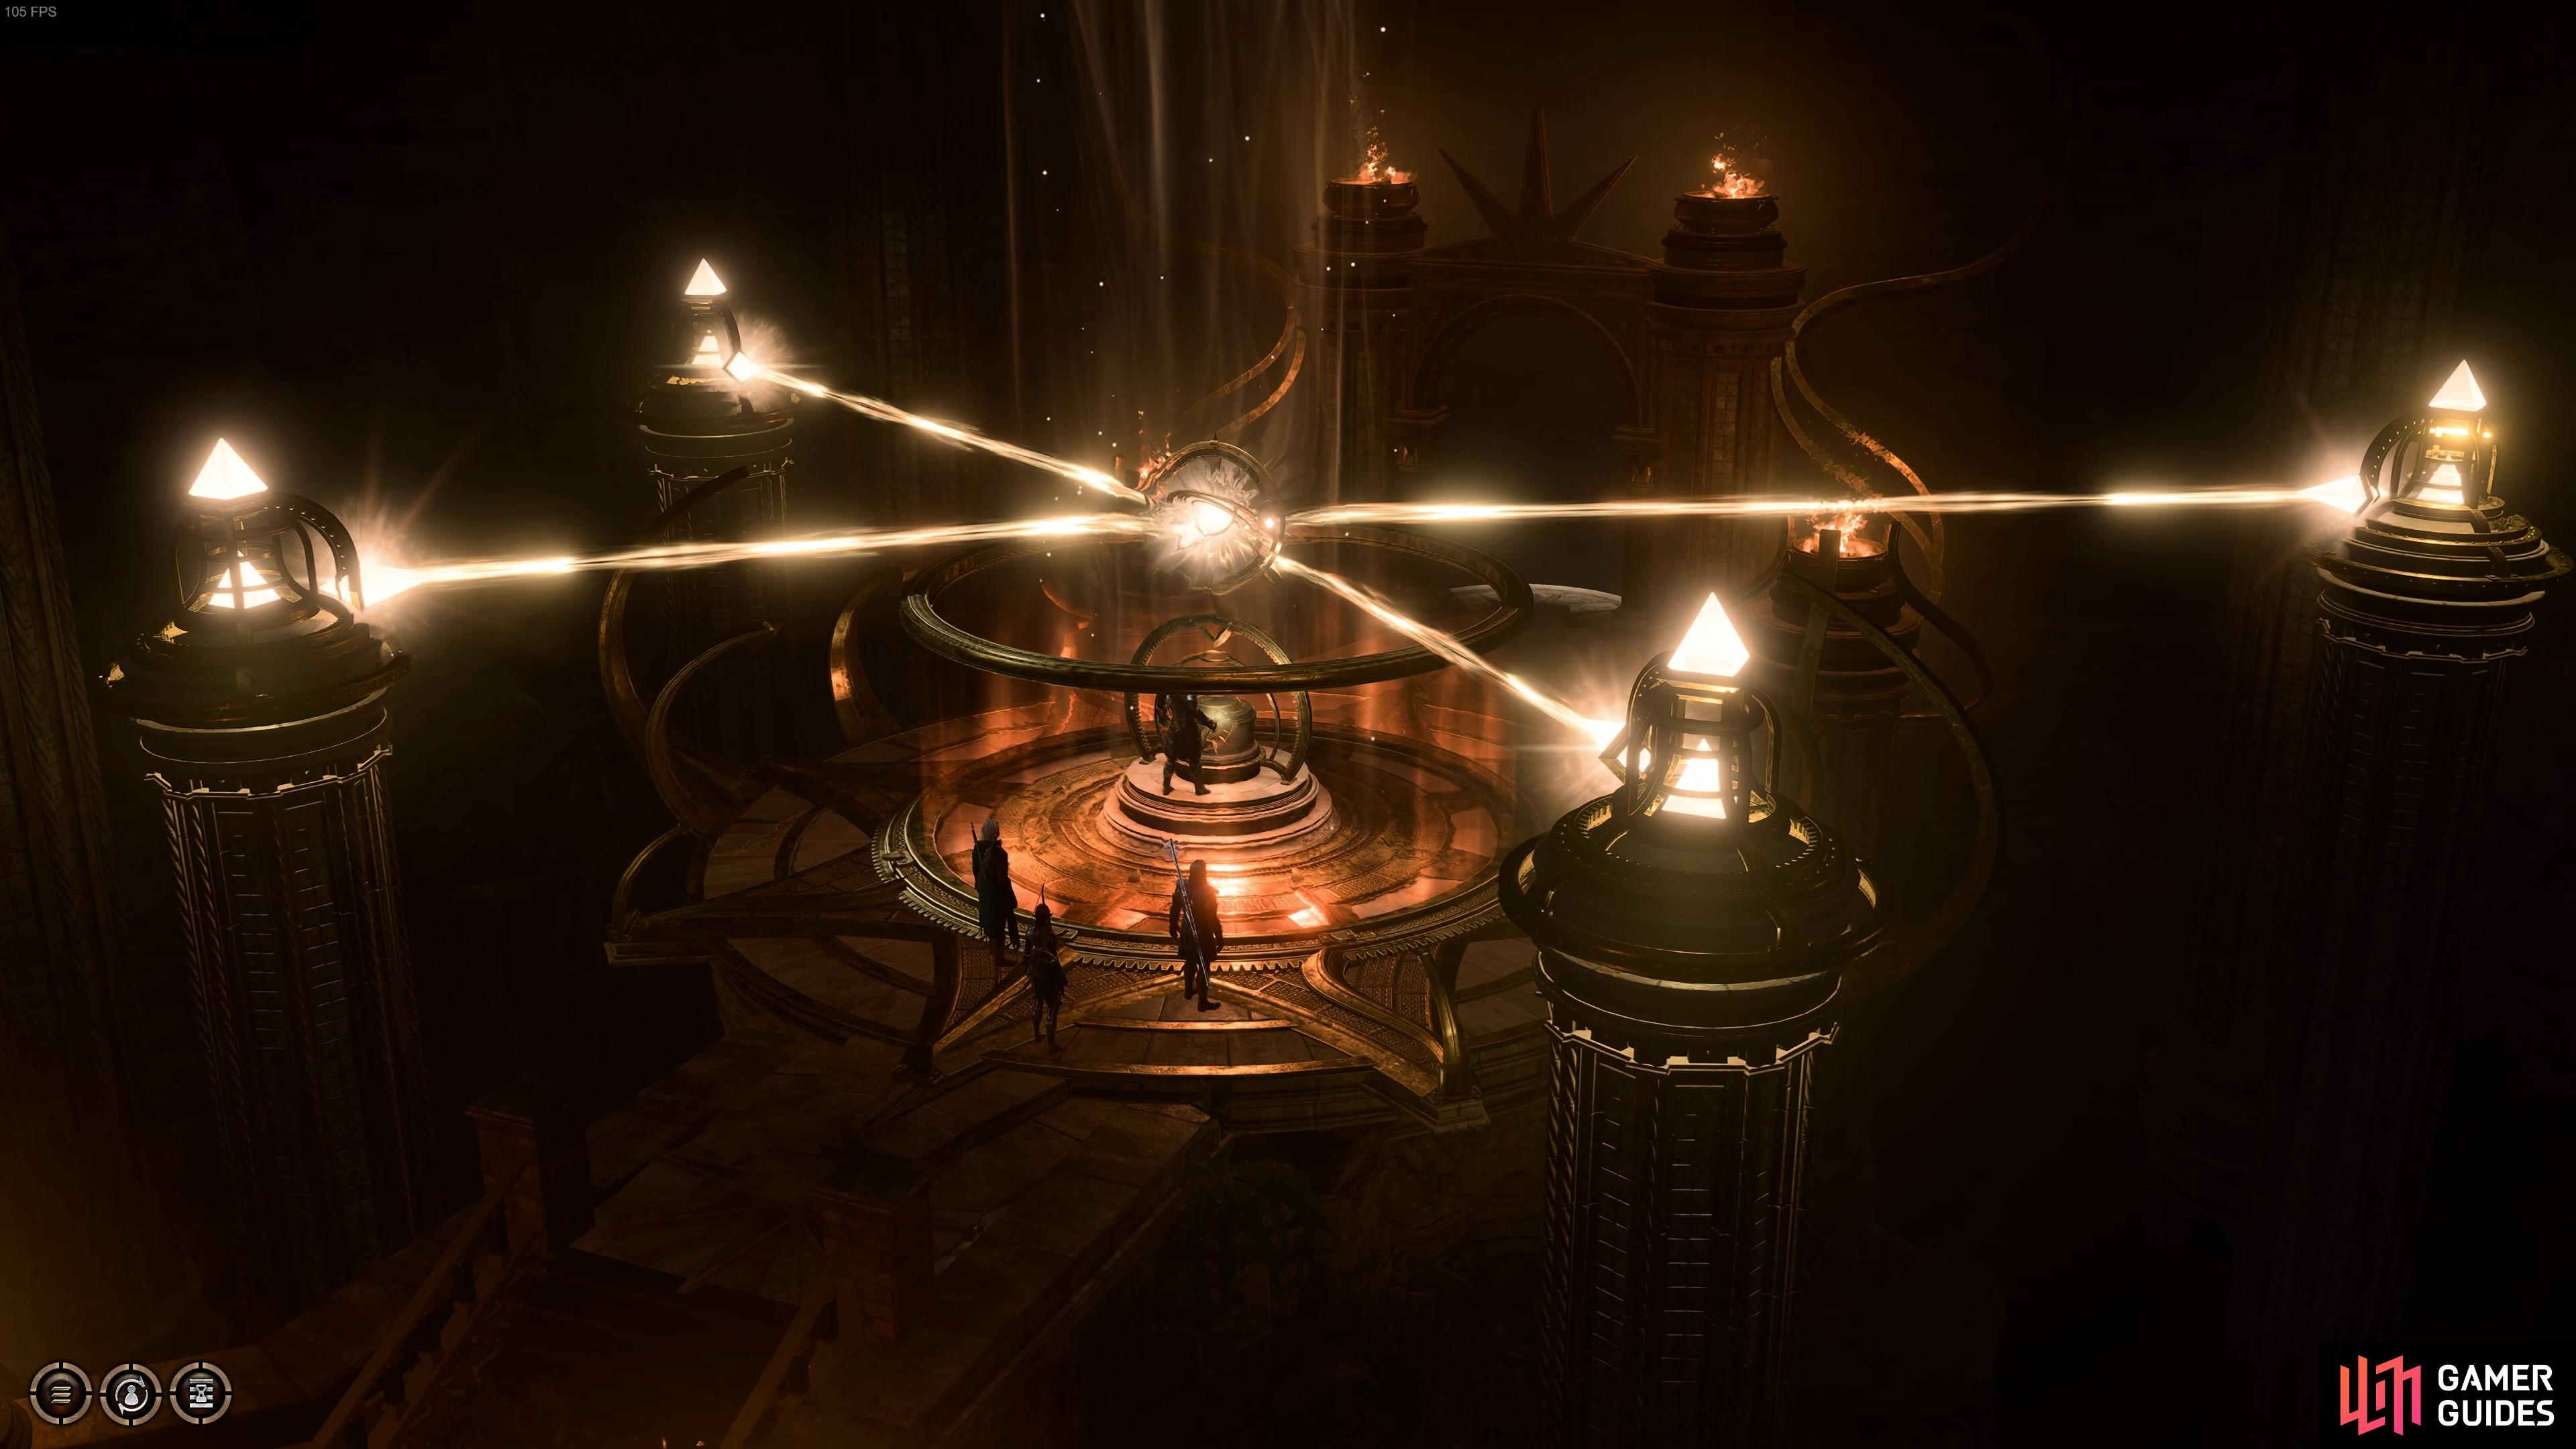
Insert the Dawnbreaker Crest into the Crest Panel
After destroying all of the energy source crystals, you’ll have free passage to the chamber where The Blood of Lathander mace is being kept.
How to Get The Blood of Lathander Legendary Mace
If you followed this guide in full, you will have the Dawnbreaker Crest in your inventory, which can now be used to insert into the Crest Panel. This will allow you to take The Blood of Lathander mace without any issues, and you can be on your merry way out of this secret chamber with one of the most powerful weapons in the game.
Should You Take the Blood of Lathander Mace?
If you didn’t get the Dawnbreaker Crest for any reason, you can actually still take the mace, but it will involve more work. In this scenario, when you try to take the mace from the pedestal, the character that you used to do it will be trapped behind an energy barrier, unable to do anything but buff their allies. For this reason we recommend using your best support character for this, leaving your highest-hitters outside.
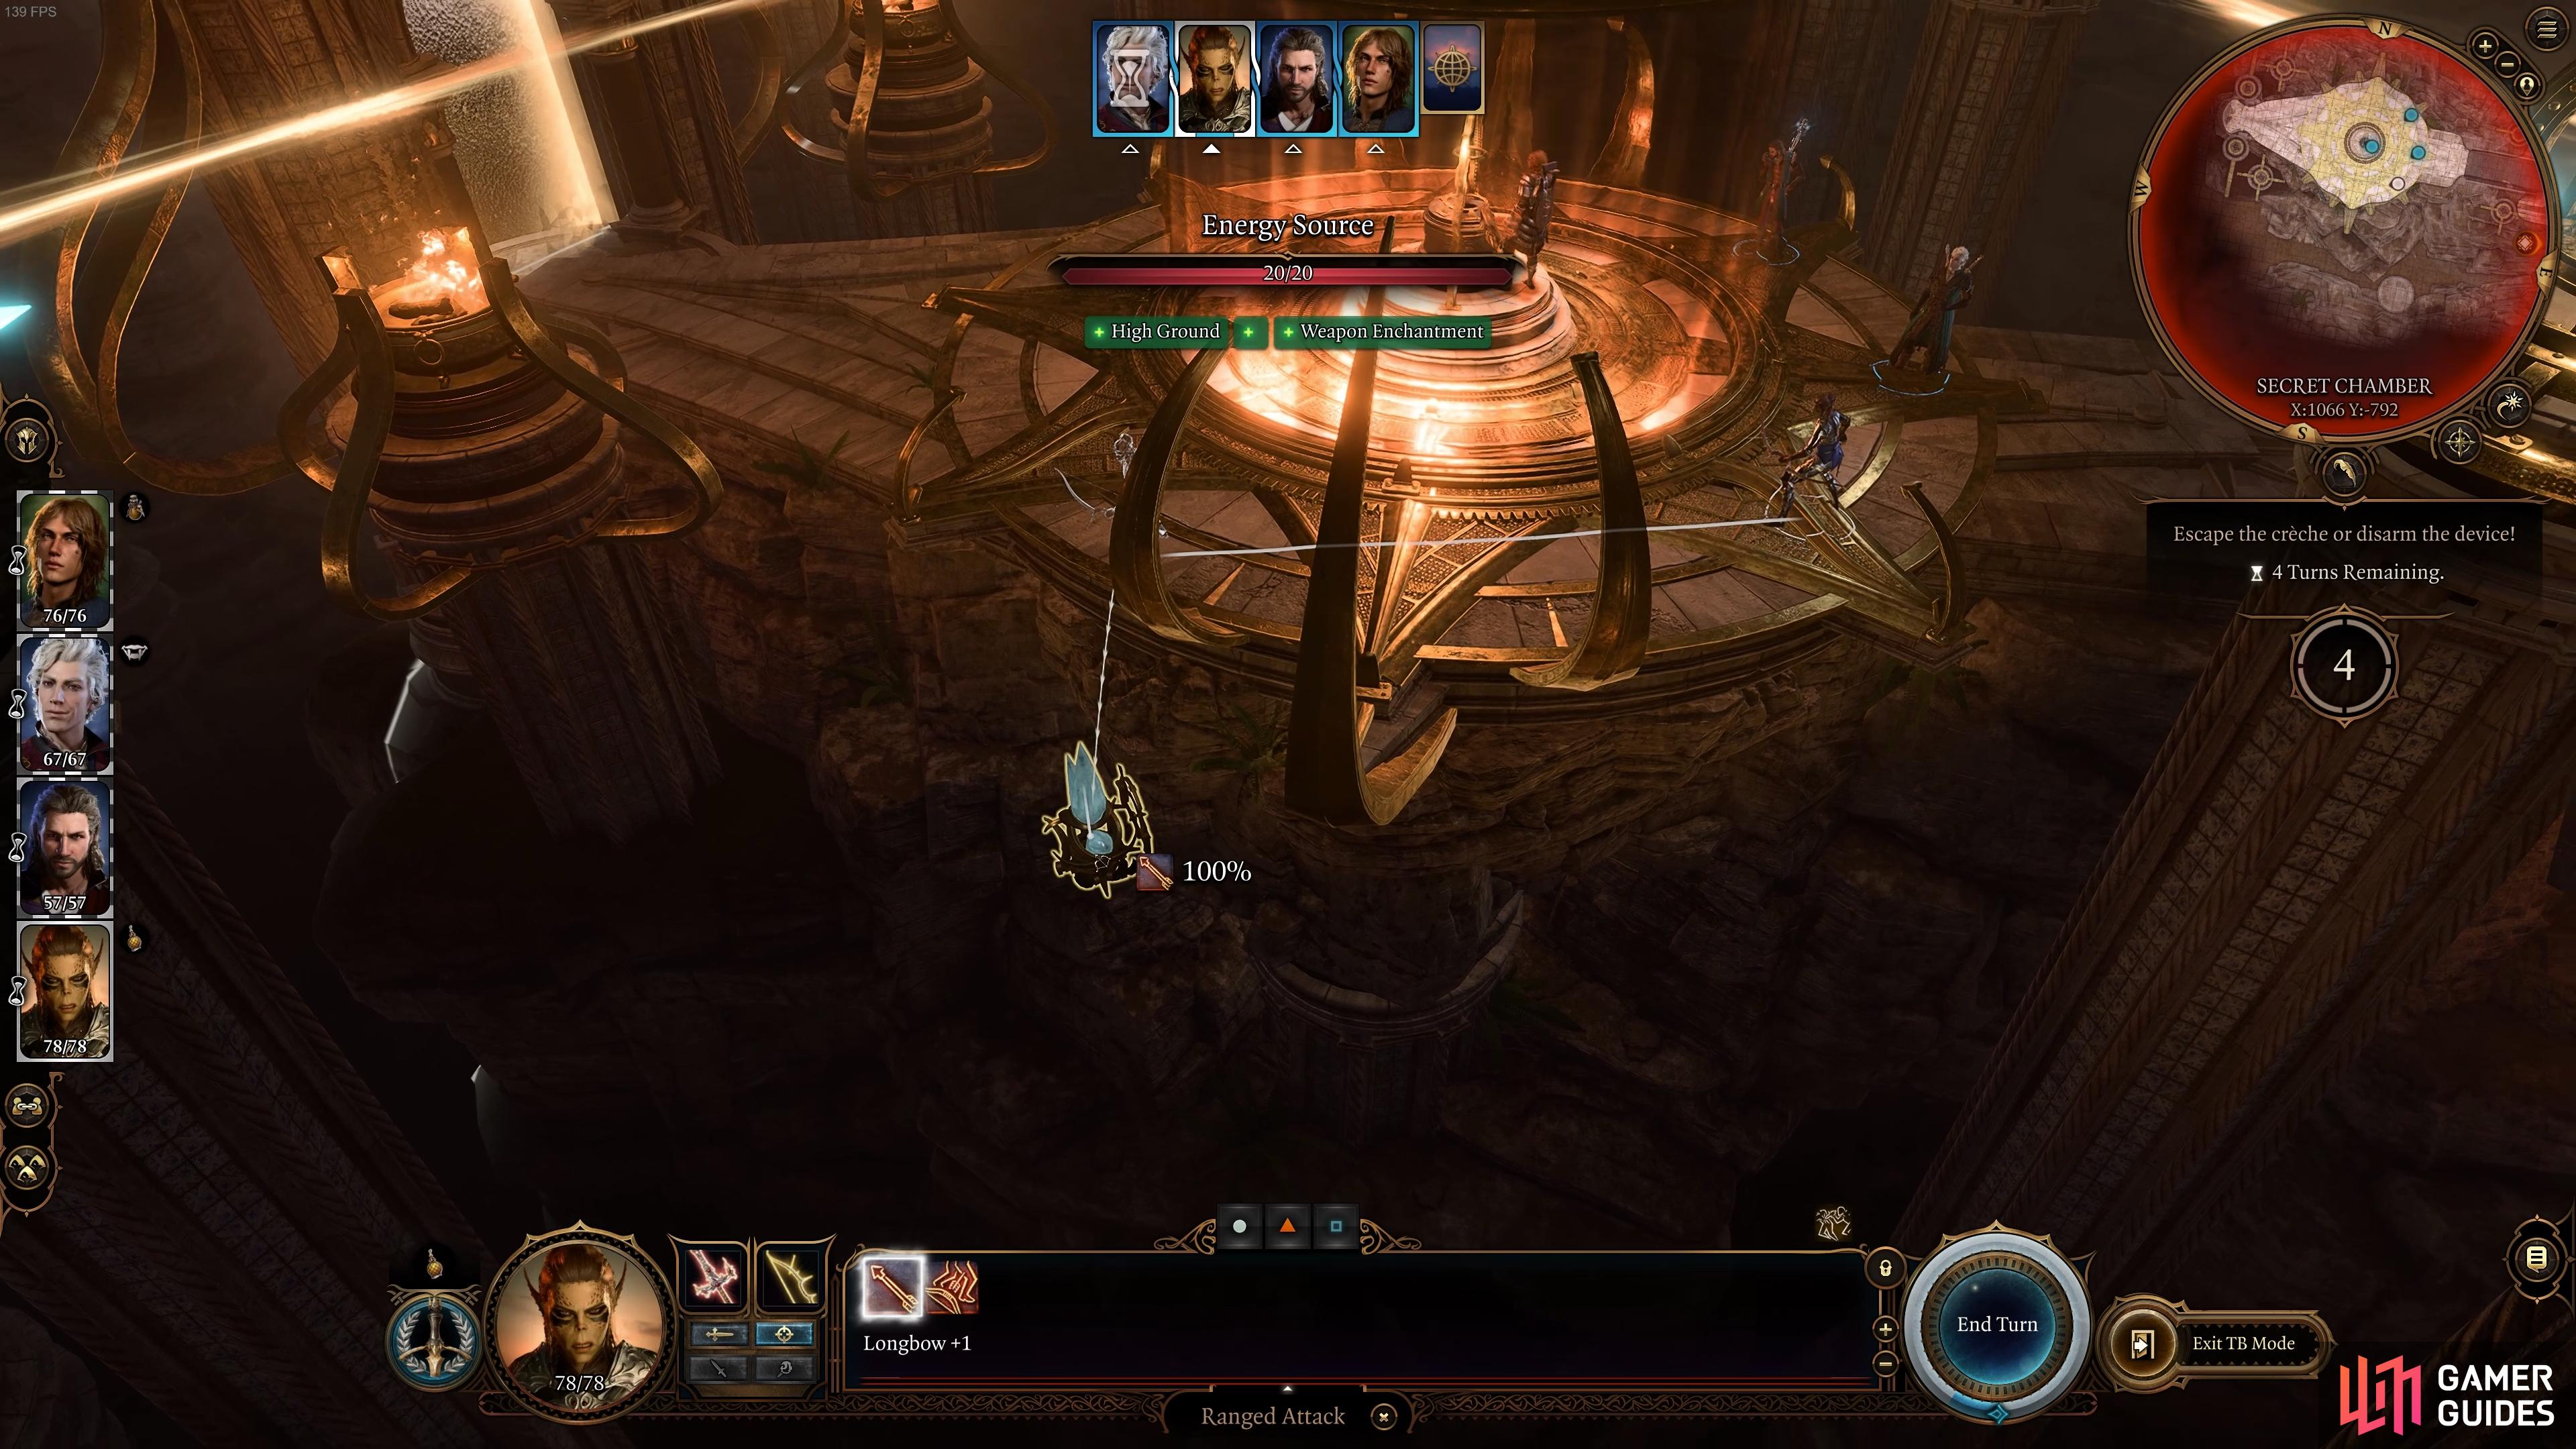
From here on, you’ll need to destroy the four crystals which have been erected around the chamber. This sounds easy enough, but it becomes more difficult once you realize that you only have four turns in which to do it. After each crystal has had its turn, the entire chamber (and the Creche Y’llek along with it) will be destroyed.
So, with such high stakes, it’s pretty important that you destroy those crystals. You’ll need to use your most damaging skills to get this encounter over with as quickly as possible, allowing you to keep the mace and save the creche in the process.
You need to destroy all four of these crystals if you want to escape with both the mace and the Creche Y’llek intact.
You can destroy this energy source crystal to release your trapped character.
How to Escape the Secret Chamber
If you’re finding it extremely difficult to destroy the crystals within four turns, there is an alternative route out of here which will allow you to keep the mace. However, this method will doom the Creche Y’llek to being destroyed, along with everything and and everyone in it, and ![]() Lae’zel won’t be too pleased with you for that. Still, if it’s your only option, all you need to do is destroy the energy source crystal located on the southern side of the rockface (shown in the screenshot above), then use the nearby portal (which looks like a barrier) to the west.
Lae’zel won’t be too pleased with you for that. Still, if it’s your only option, all you need to do is destroy the energy source crystal located on the southern side of the rockface (shown in the screenshot above), then use the nearby portal (which looks like a barrier) to the west.
More Baldur’s Gate 3 Guides
If you’re looking for more BG3 guides, be sure to check the links below!
No Comments