

The ![]() Goblin Camp in Baldur’s Gate 3 is one of the first areas that you’ll encounter during the main story. As you might expect, it’s filled with goblins, alongside three leaders that you need to kill for the Save the First !Druid quest objective. These are True Soul Gut, Nightwarden Minthara, and Dror Ragzlin. On this page we’ll show you how to clear the Goblin Camp in the easiest ways possible, without having to fight many goblins while still saving the !Druid Halsin.
Goblin Camp in Baldur’s Gate 3 is one of the first areas that you’ll encounter during the main story. As you might expect, it’s filled with goblins, alongside three leaders that you need to kill for the Save the First !Druid quest objective. These are True Soul Gut, Nightwarden Minthara, and Dror Ragzlin. On this page we’ll show you how to clear the Goblin Camp in the easiest ways possible, without having to fight many goblins while still saving the !Druid Halsin.
Where to Find the Goblin Camp in Baldur’s Gate 3
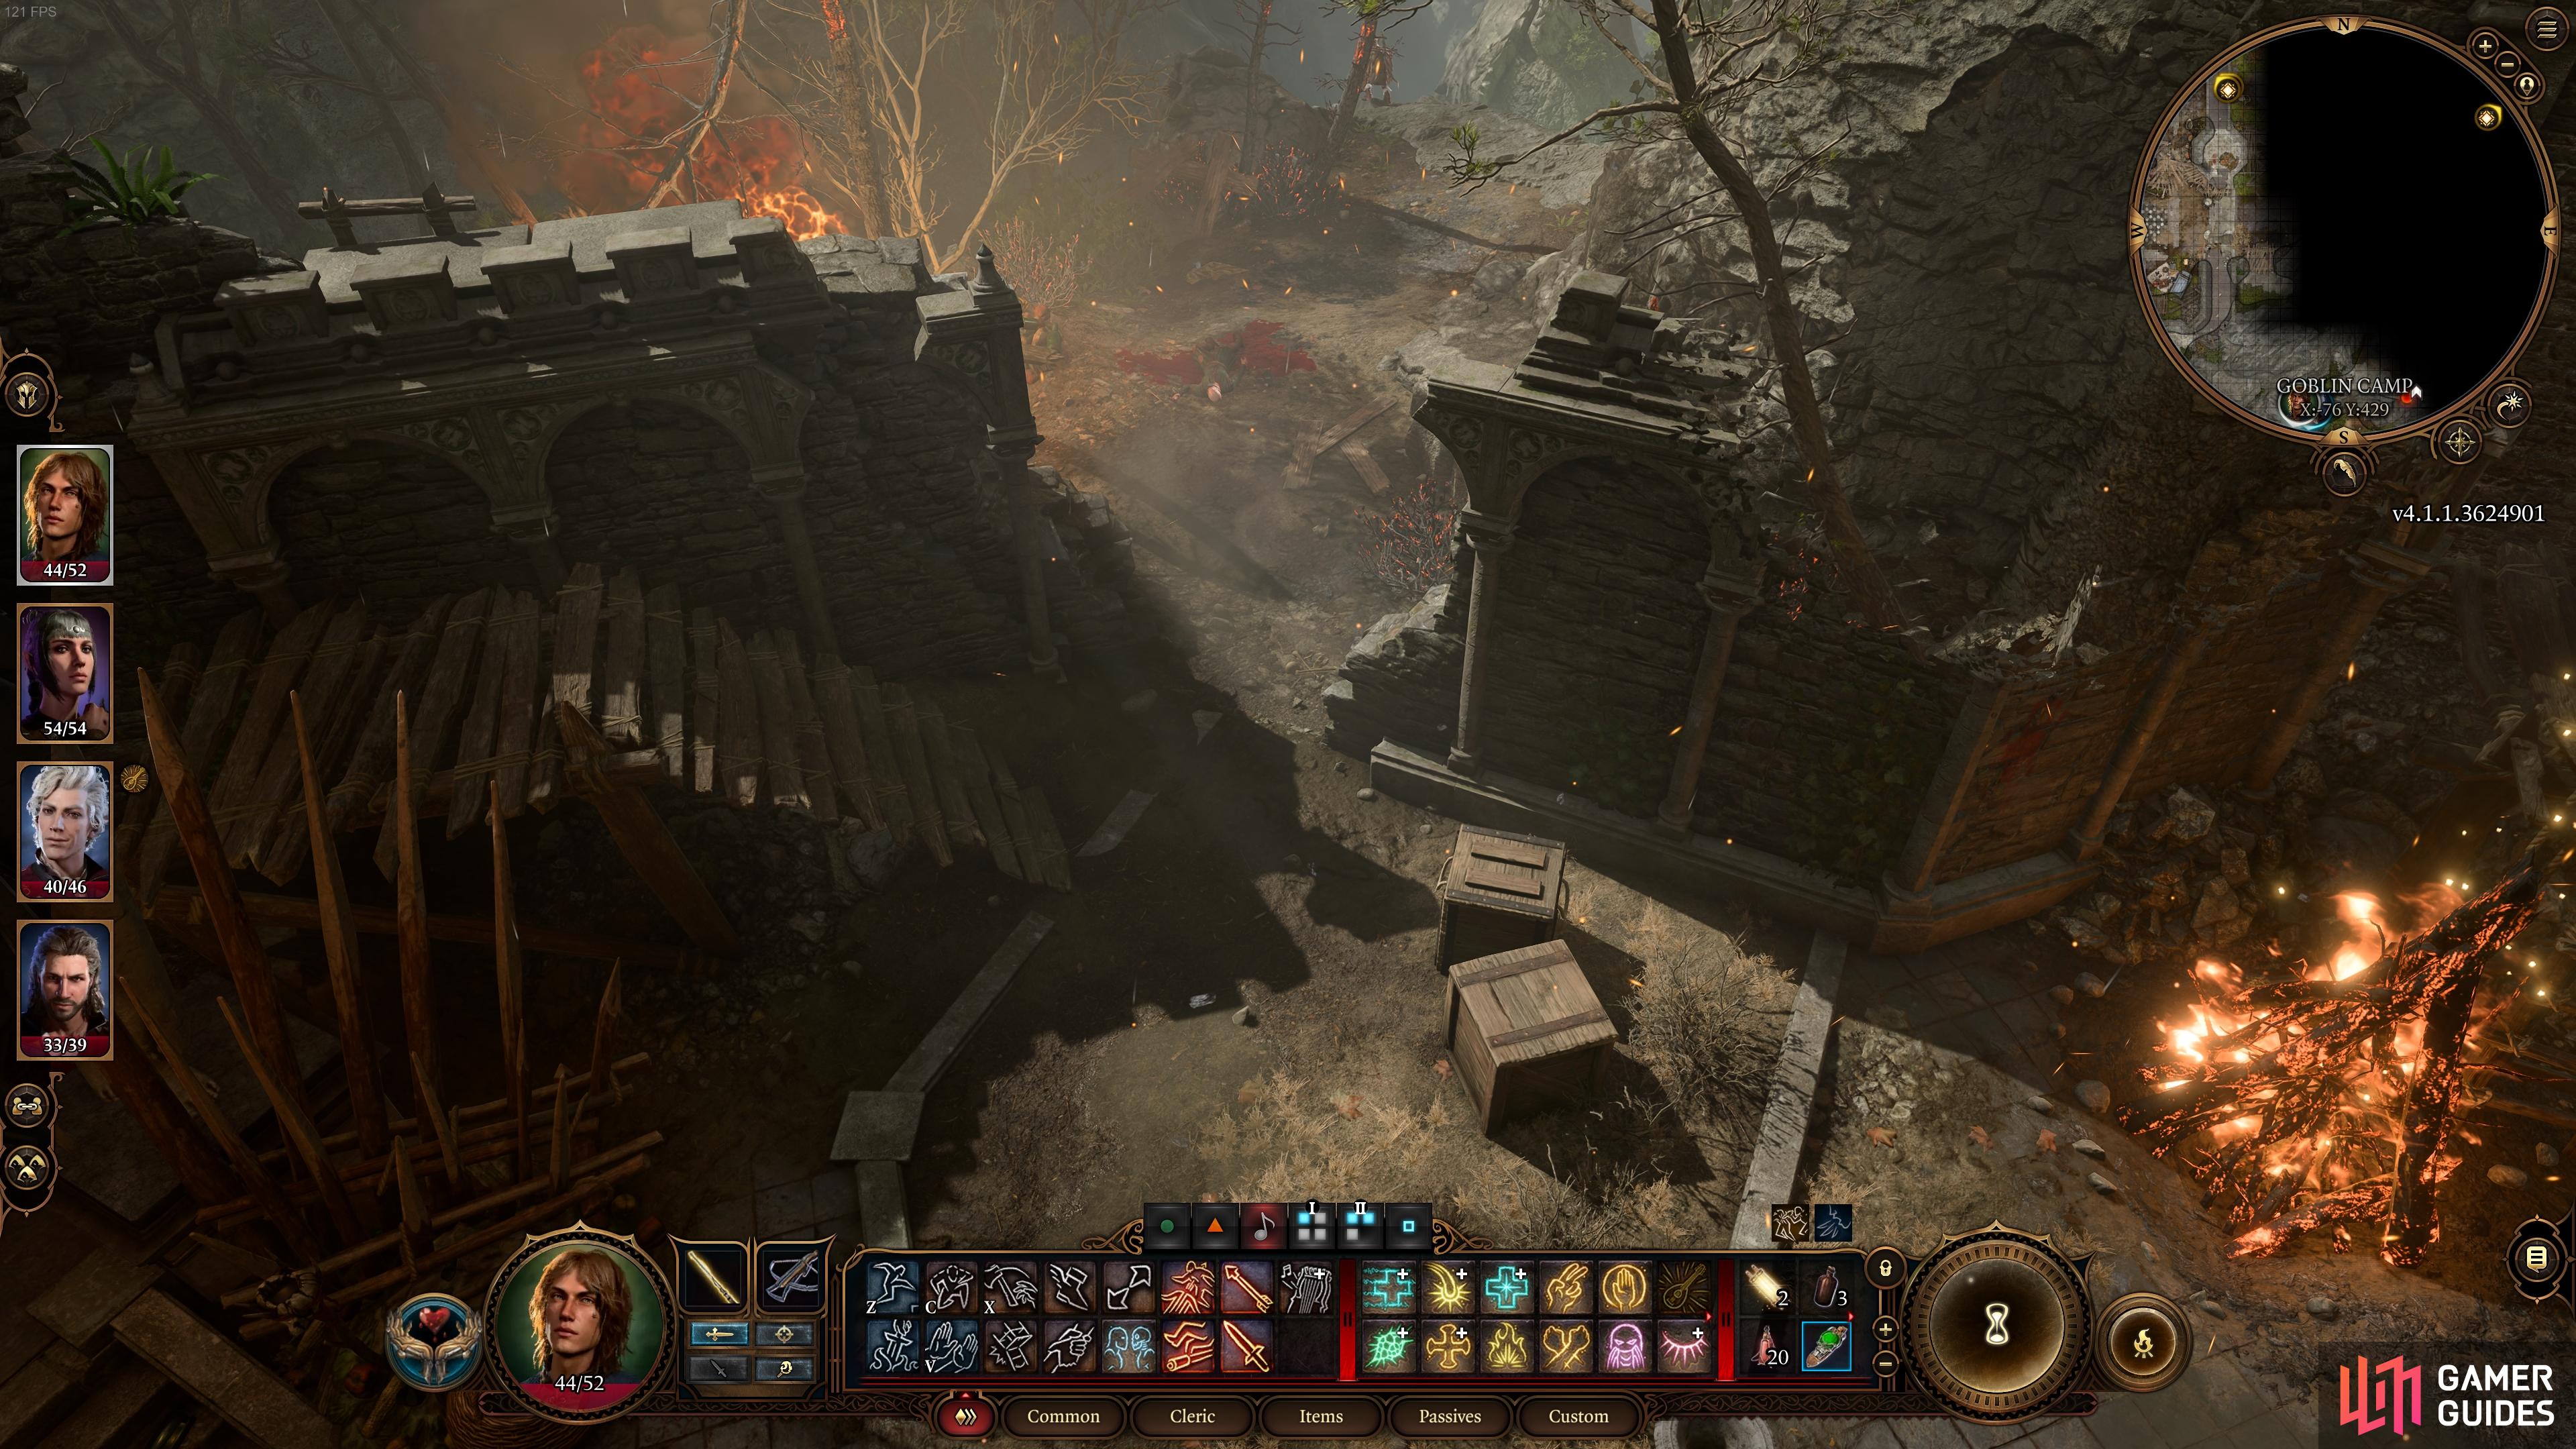
As you learned in the Emerald Grove from the !Druids there, the last known location of First !Druid Halsin is the Goblin Camp, which is located almost directly to the southwest of the Emerald Grove, beyond the ![]() Blighted Village, as shown in the screenshot below. You can pass through the Blighted Village without any bloodshed if you convince the goblins there to let you pass, or you can choose to kill them all if you prefer. It’s possible to do this in an organized way by targeting specific groups of goblins without alerting the others, but to do this you’ll need to make sure that any War Drums nearby are destroyed first.
Blighted Village, as shown in the screenshot below. You can pass through the Blighted Village without any bloodshed if you convince the goblins there to let you pass, or you can choose to kill them all if you prefer. It’s possible to do this in an organized way by targeting specific groups of goblins without alerting the others, but to do this you’ll need to make sure that any War Drums nearby are destroyed first.
After destroying any nearby War Drums, you can enter stealth (preferably with a rogue-like character such as ![]() Astarion if you have one), then assassinate individual goblins or small groups of them without alerting the others. It’s a good idea to separate the character you’re using to assassinate enemies from the rest of the group (by pressing
Astarion if you have one), then assassinate individual goblins or small groups of them without alerting the others. It’s a good idea to separate the character you’re using to assassinate enemies from the rest of the group (by pressing  ), to ensure that they don’t blow their cover. You can leave the rest of the group in a relatively hidden spot in the meantime but keep them close by just in case your assassin is detected.
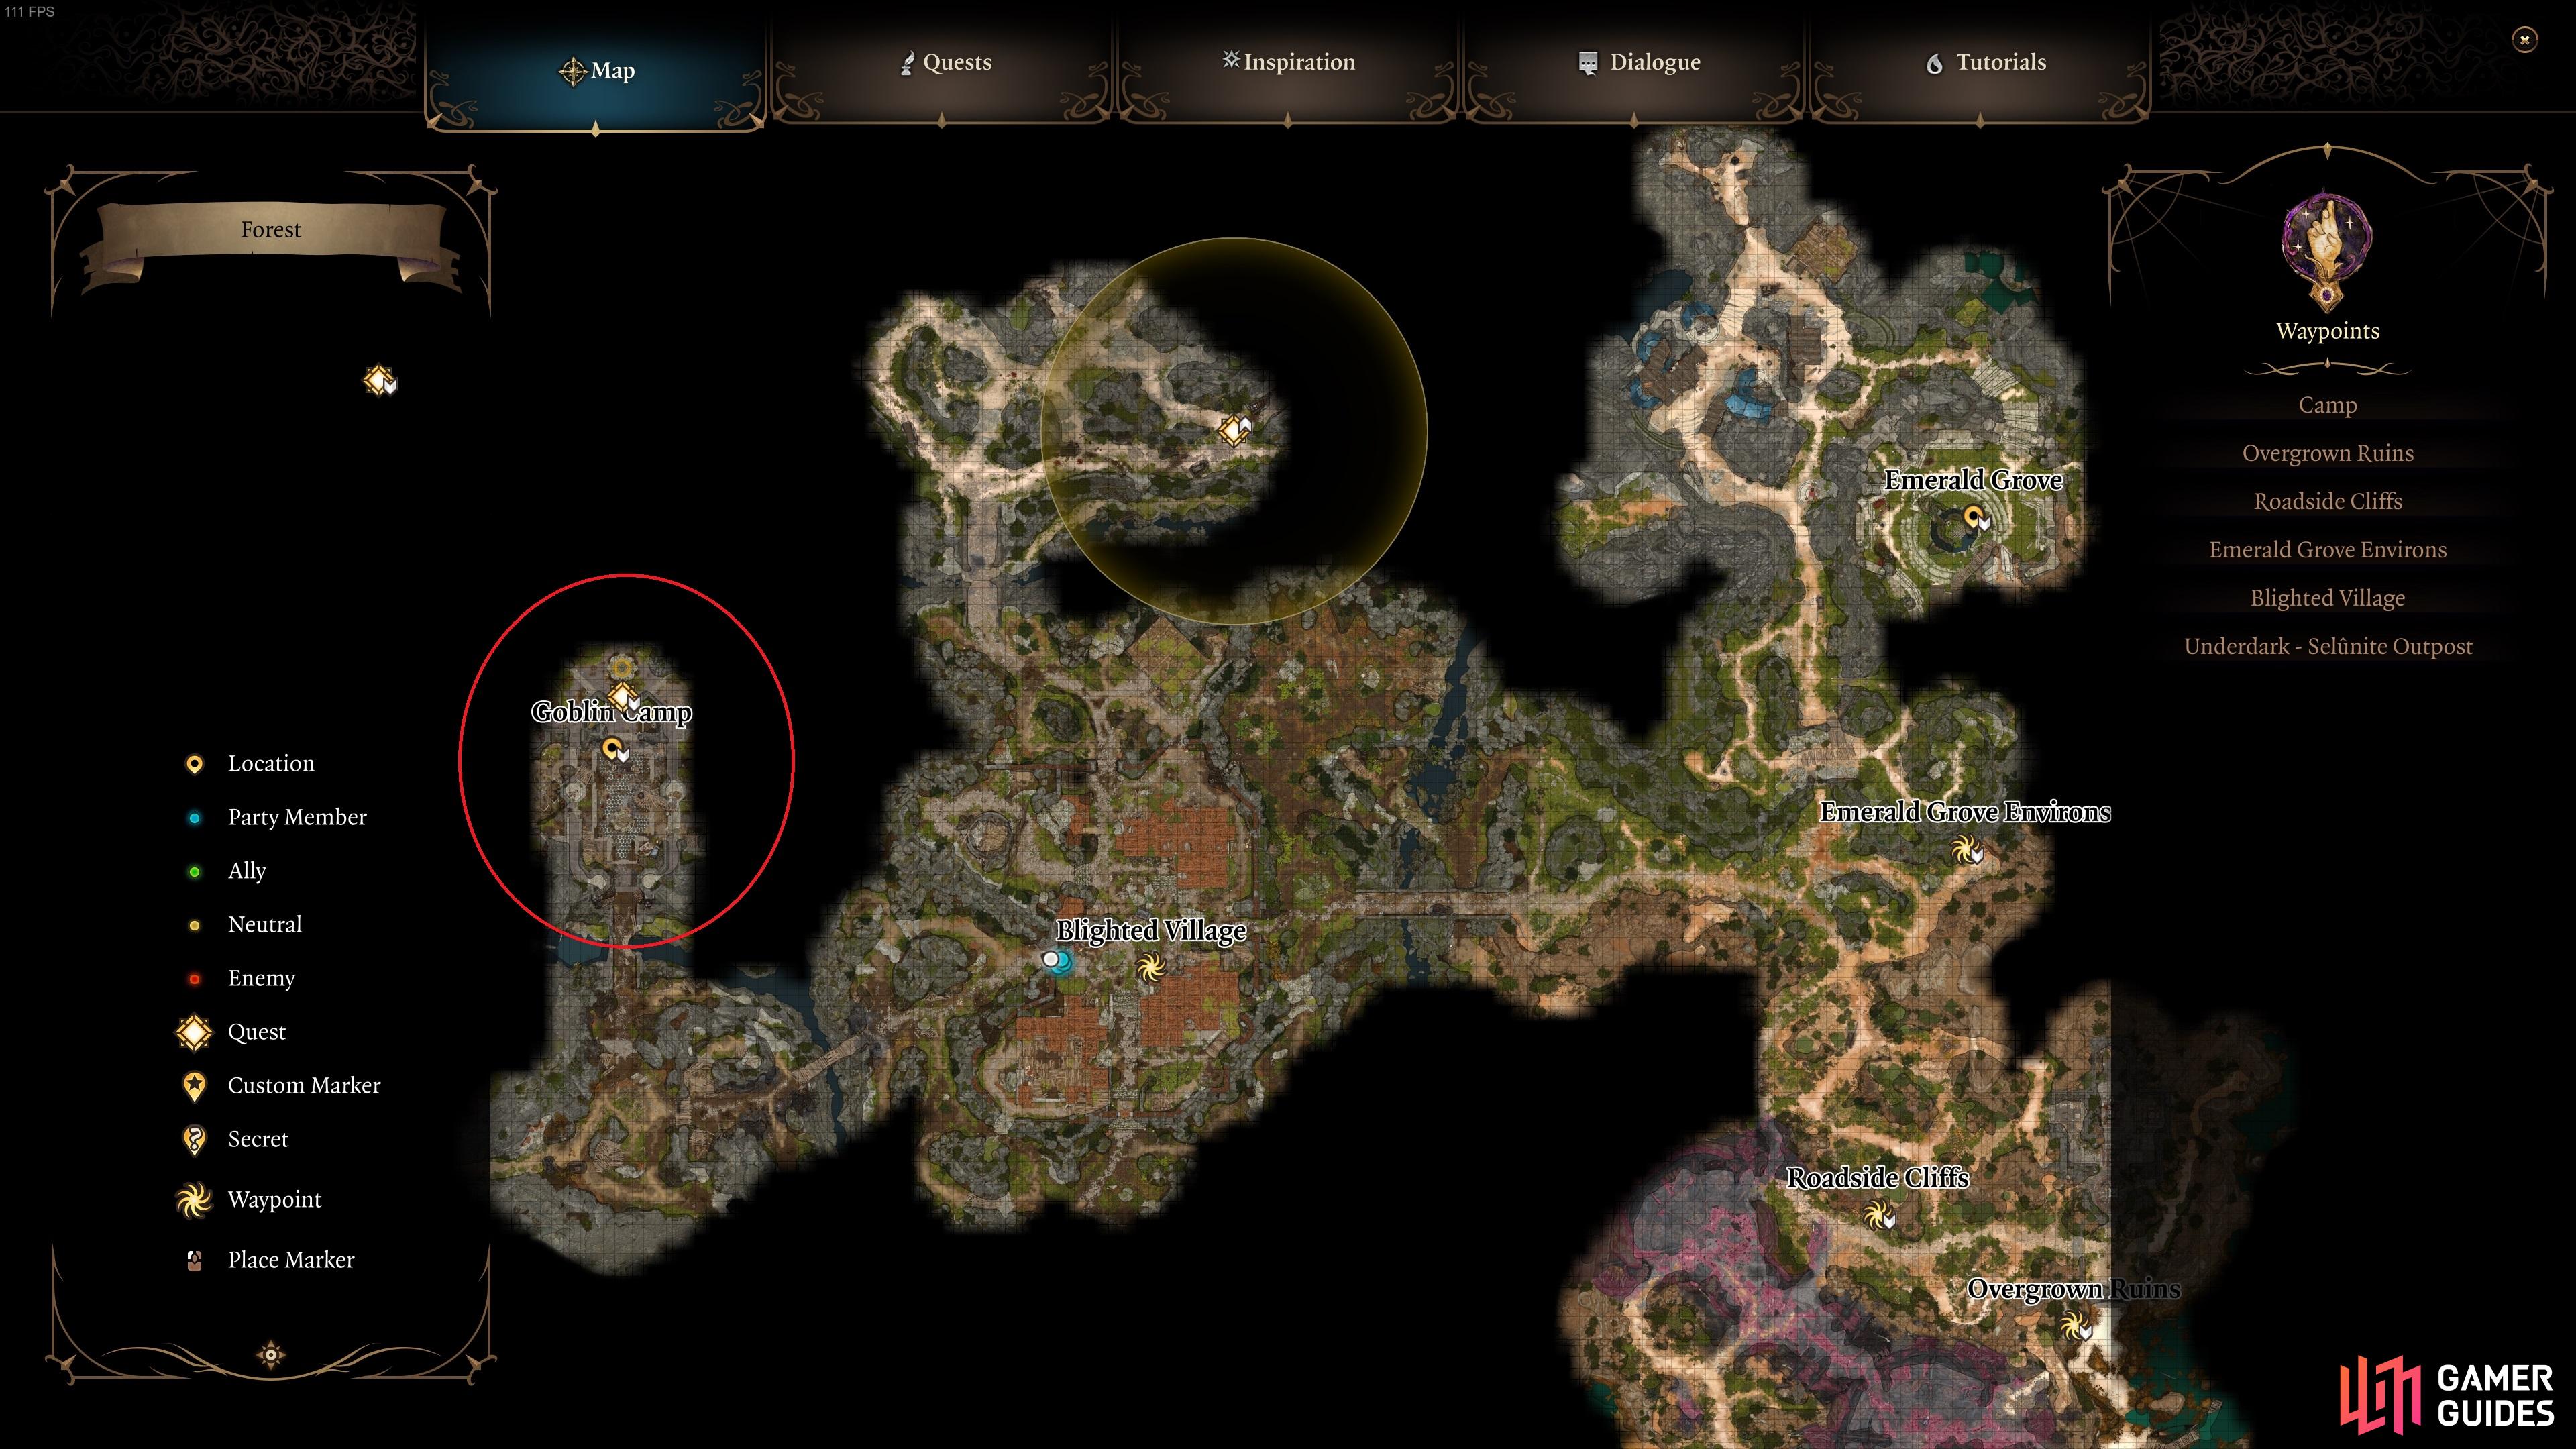
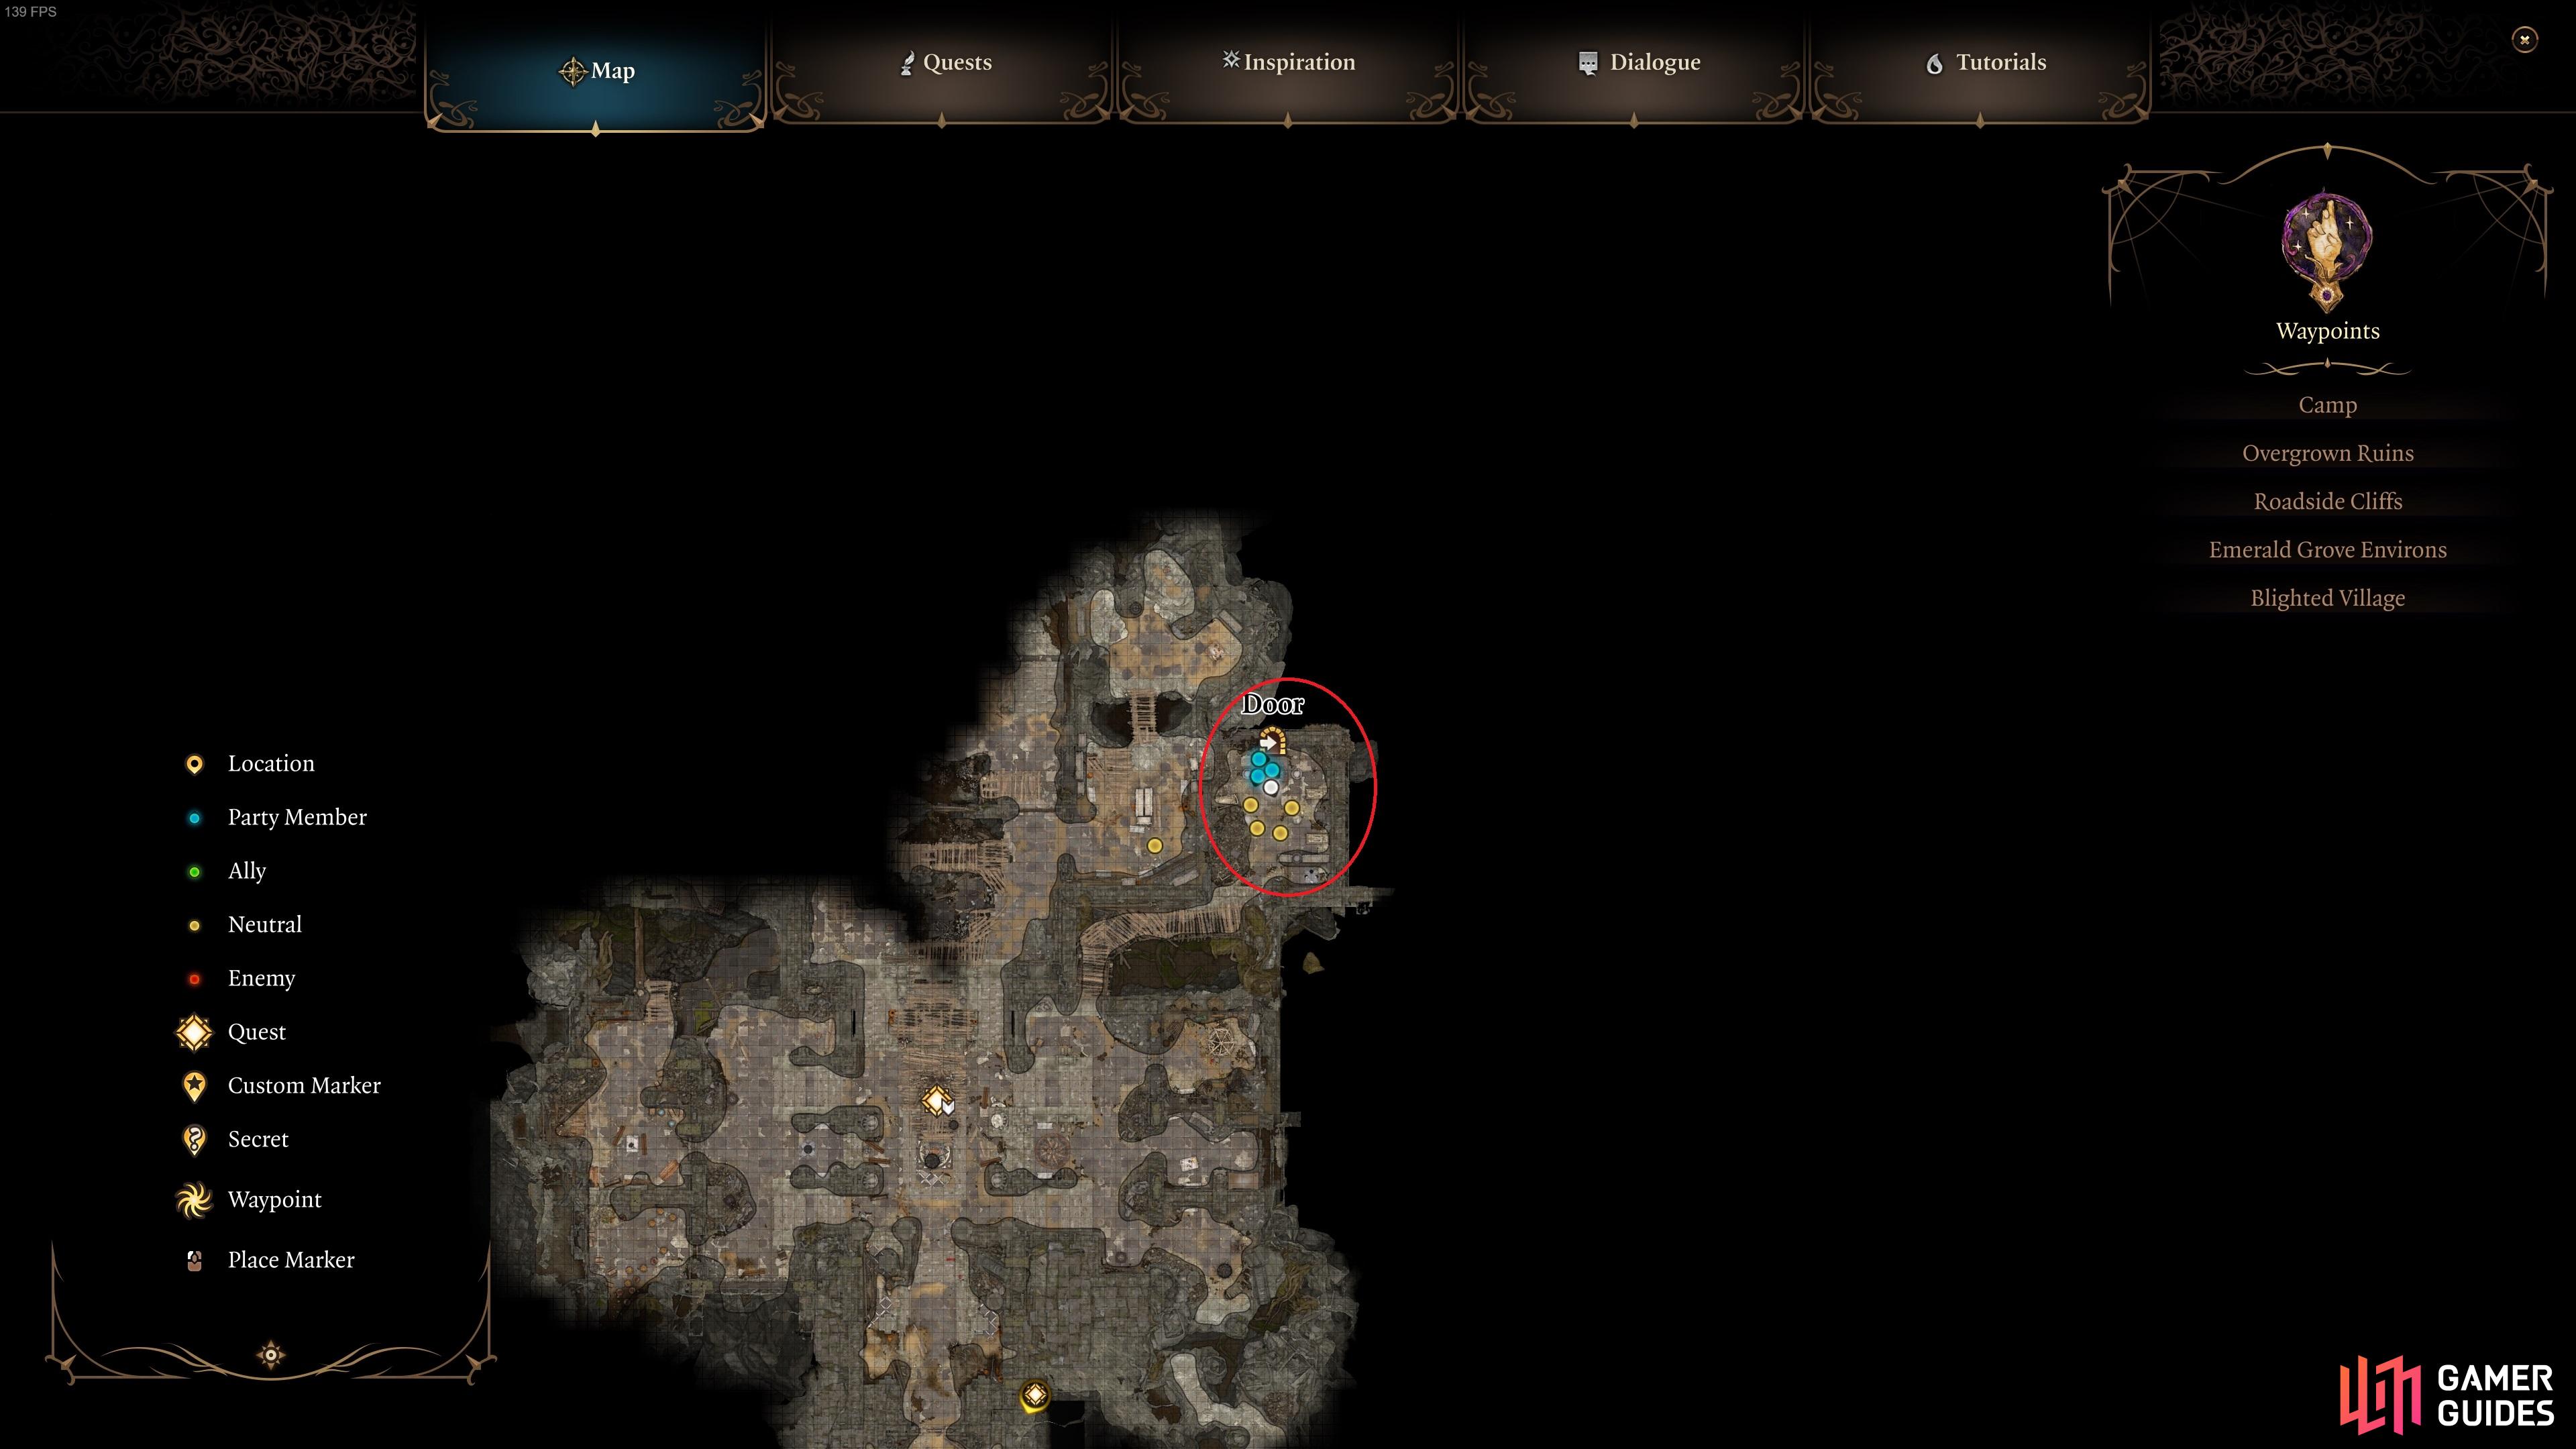
You can see the location of the Goblin Camp circled in red here, southwest of the Emerald Grove.
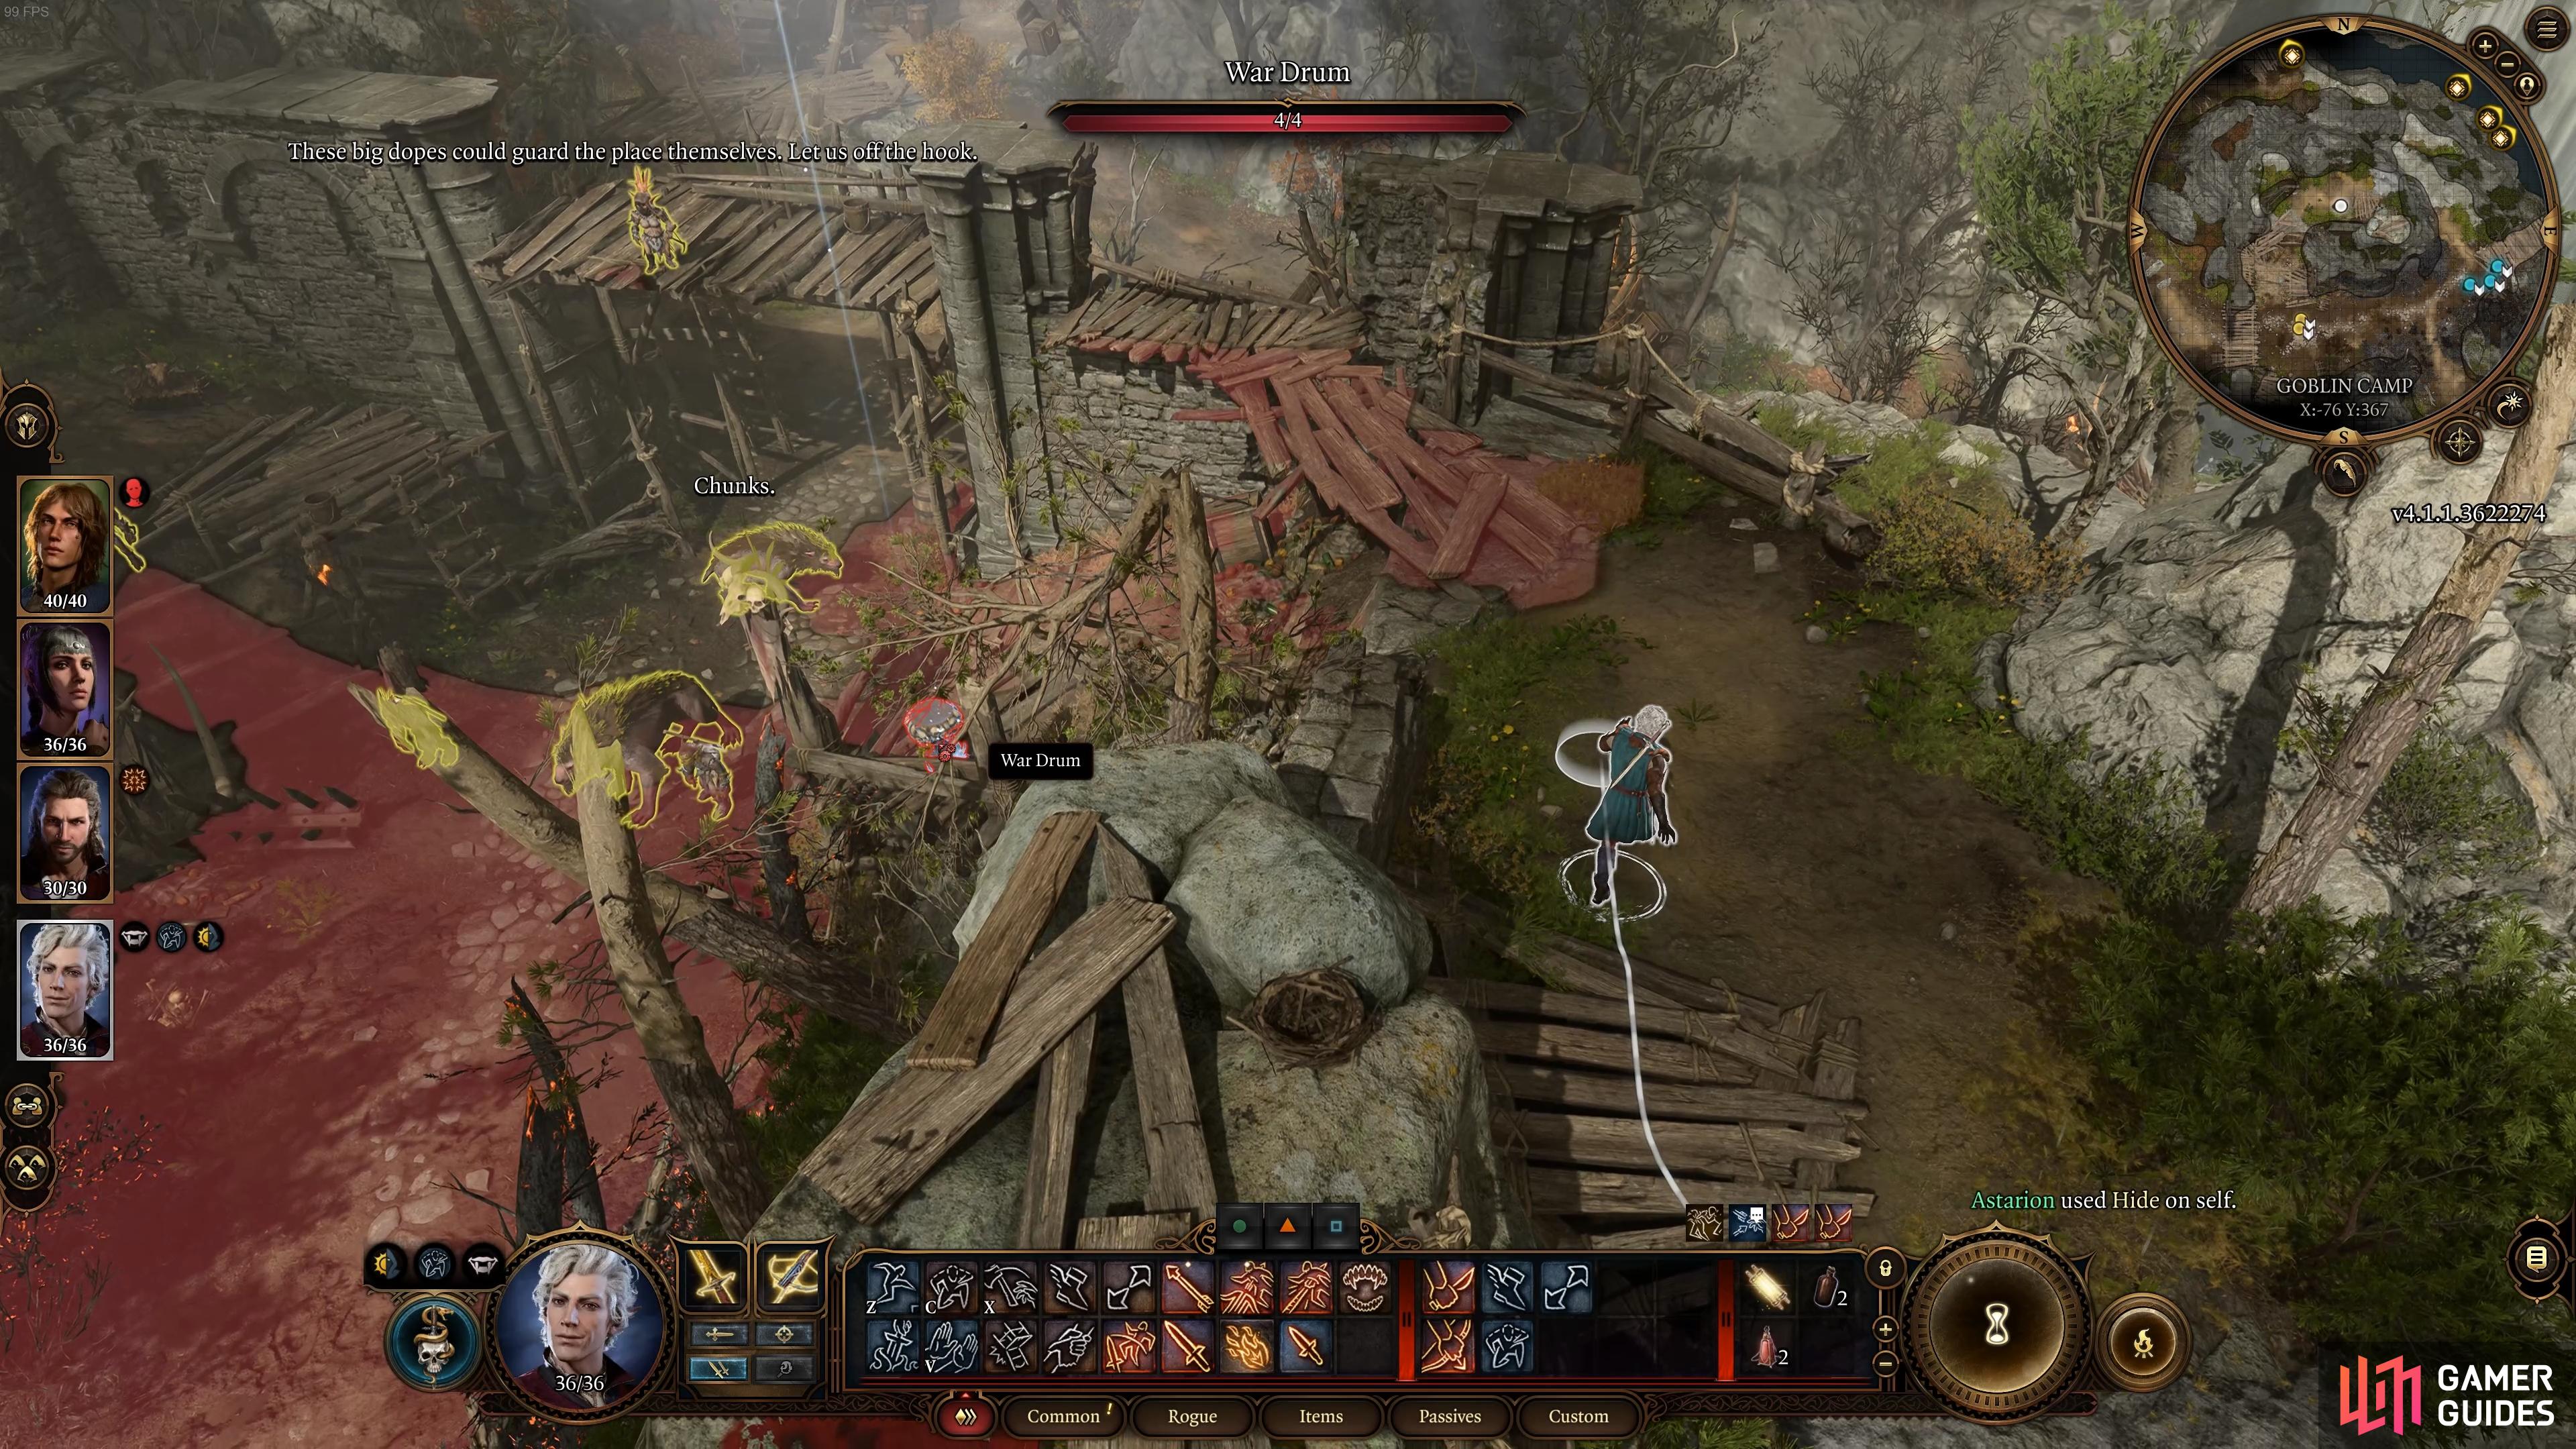
Hold left ALT to highlight any nearby War Drums, and ideally destroy them before starting a fight.
How to Enter the Goblin Camp West of the Blighted Village
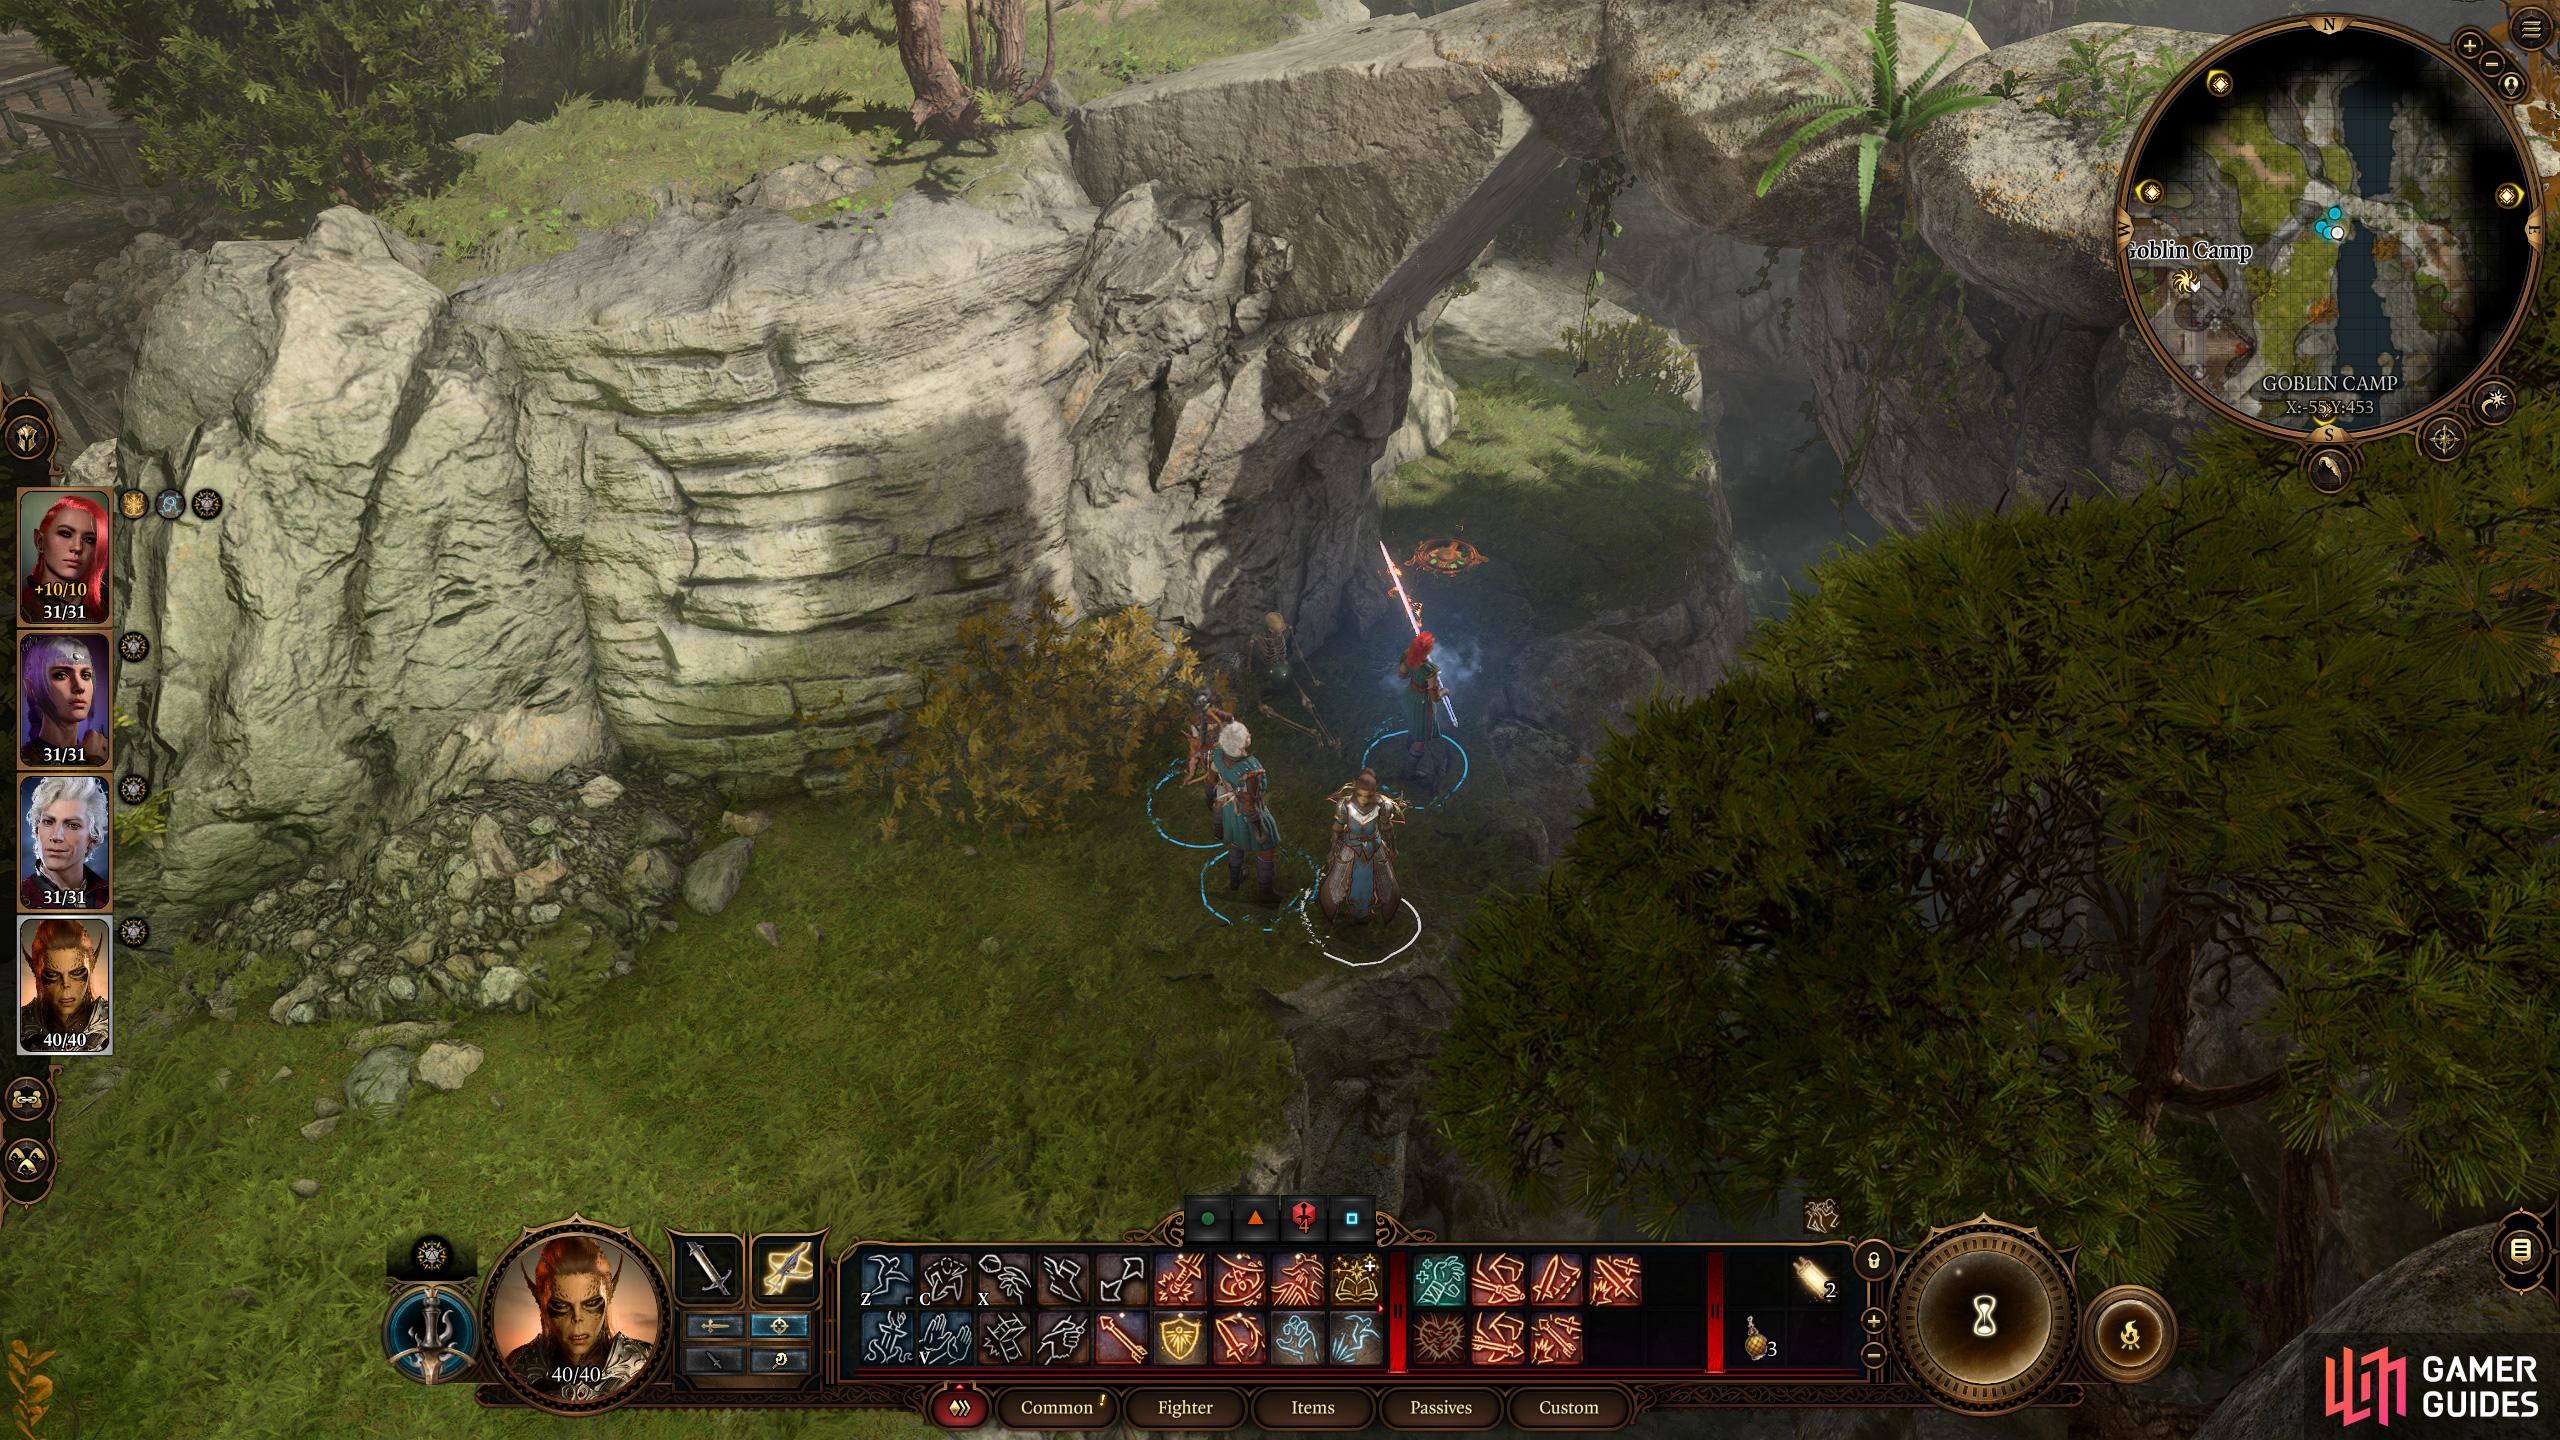
Once you’ve passed through the Blighted Village, whether by killing all of the goblins and their allies or by placating them with dialogue options, you can make your way on to the entrance of the Goblin Camp by taking the western road from the village, as it heads southwest. You’ll soon come upon a bridge that you can cross without issue, but on the other side there are goblins stationed with a few beasts for allies. You have three main options to navigate here, summed up by the following:
- Enter stealth and climb the rock to the right of the bridge to assassinate the goblins and destroy the War Drum
- Take the path immediately to your left over the bridge and bypass the goblins in stealth
- Try to speak with the goblins, face them head-on and kill them all
If you take option one, there’s a good chance that you’ll be caught after killing one or two goblins and destroying the War Drum, but this will be enough to thin their forces and give you an easier fight.
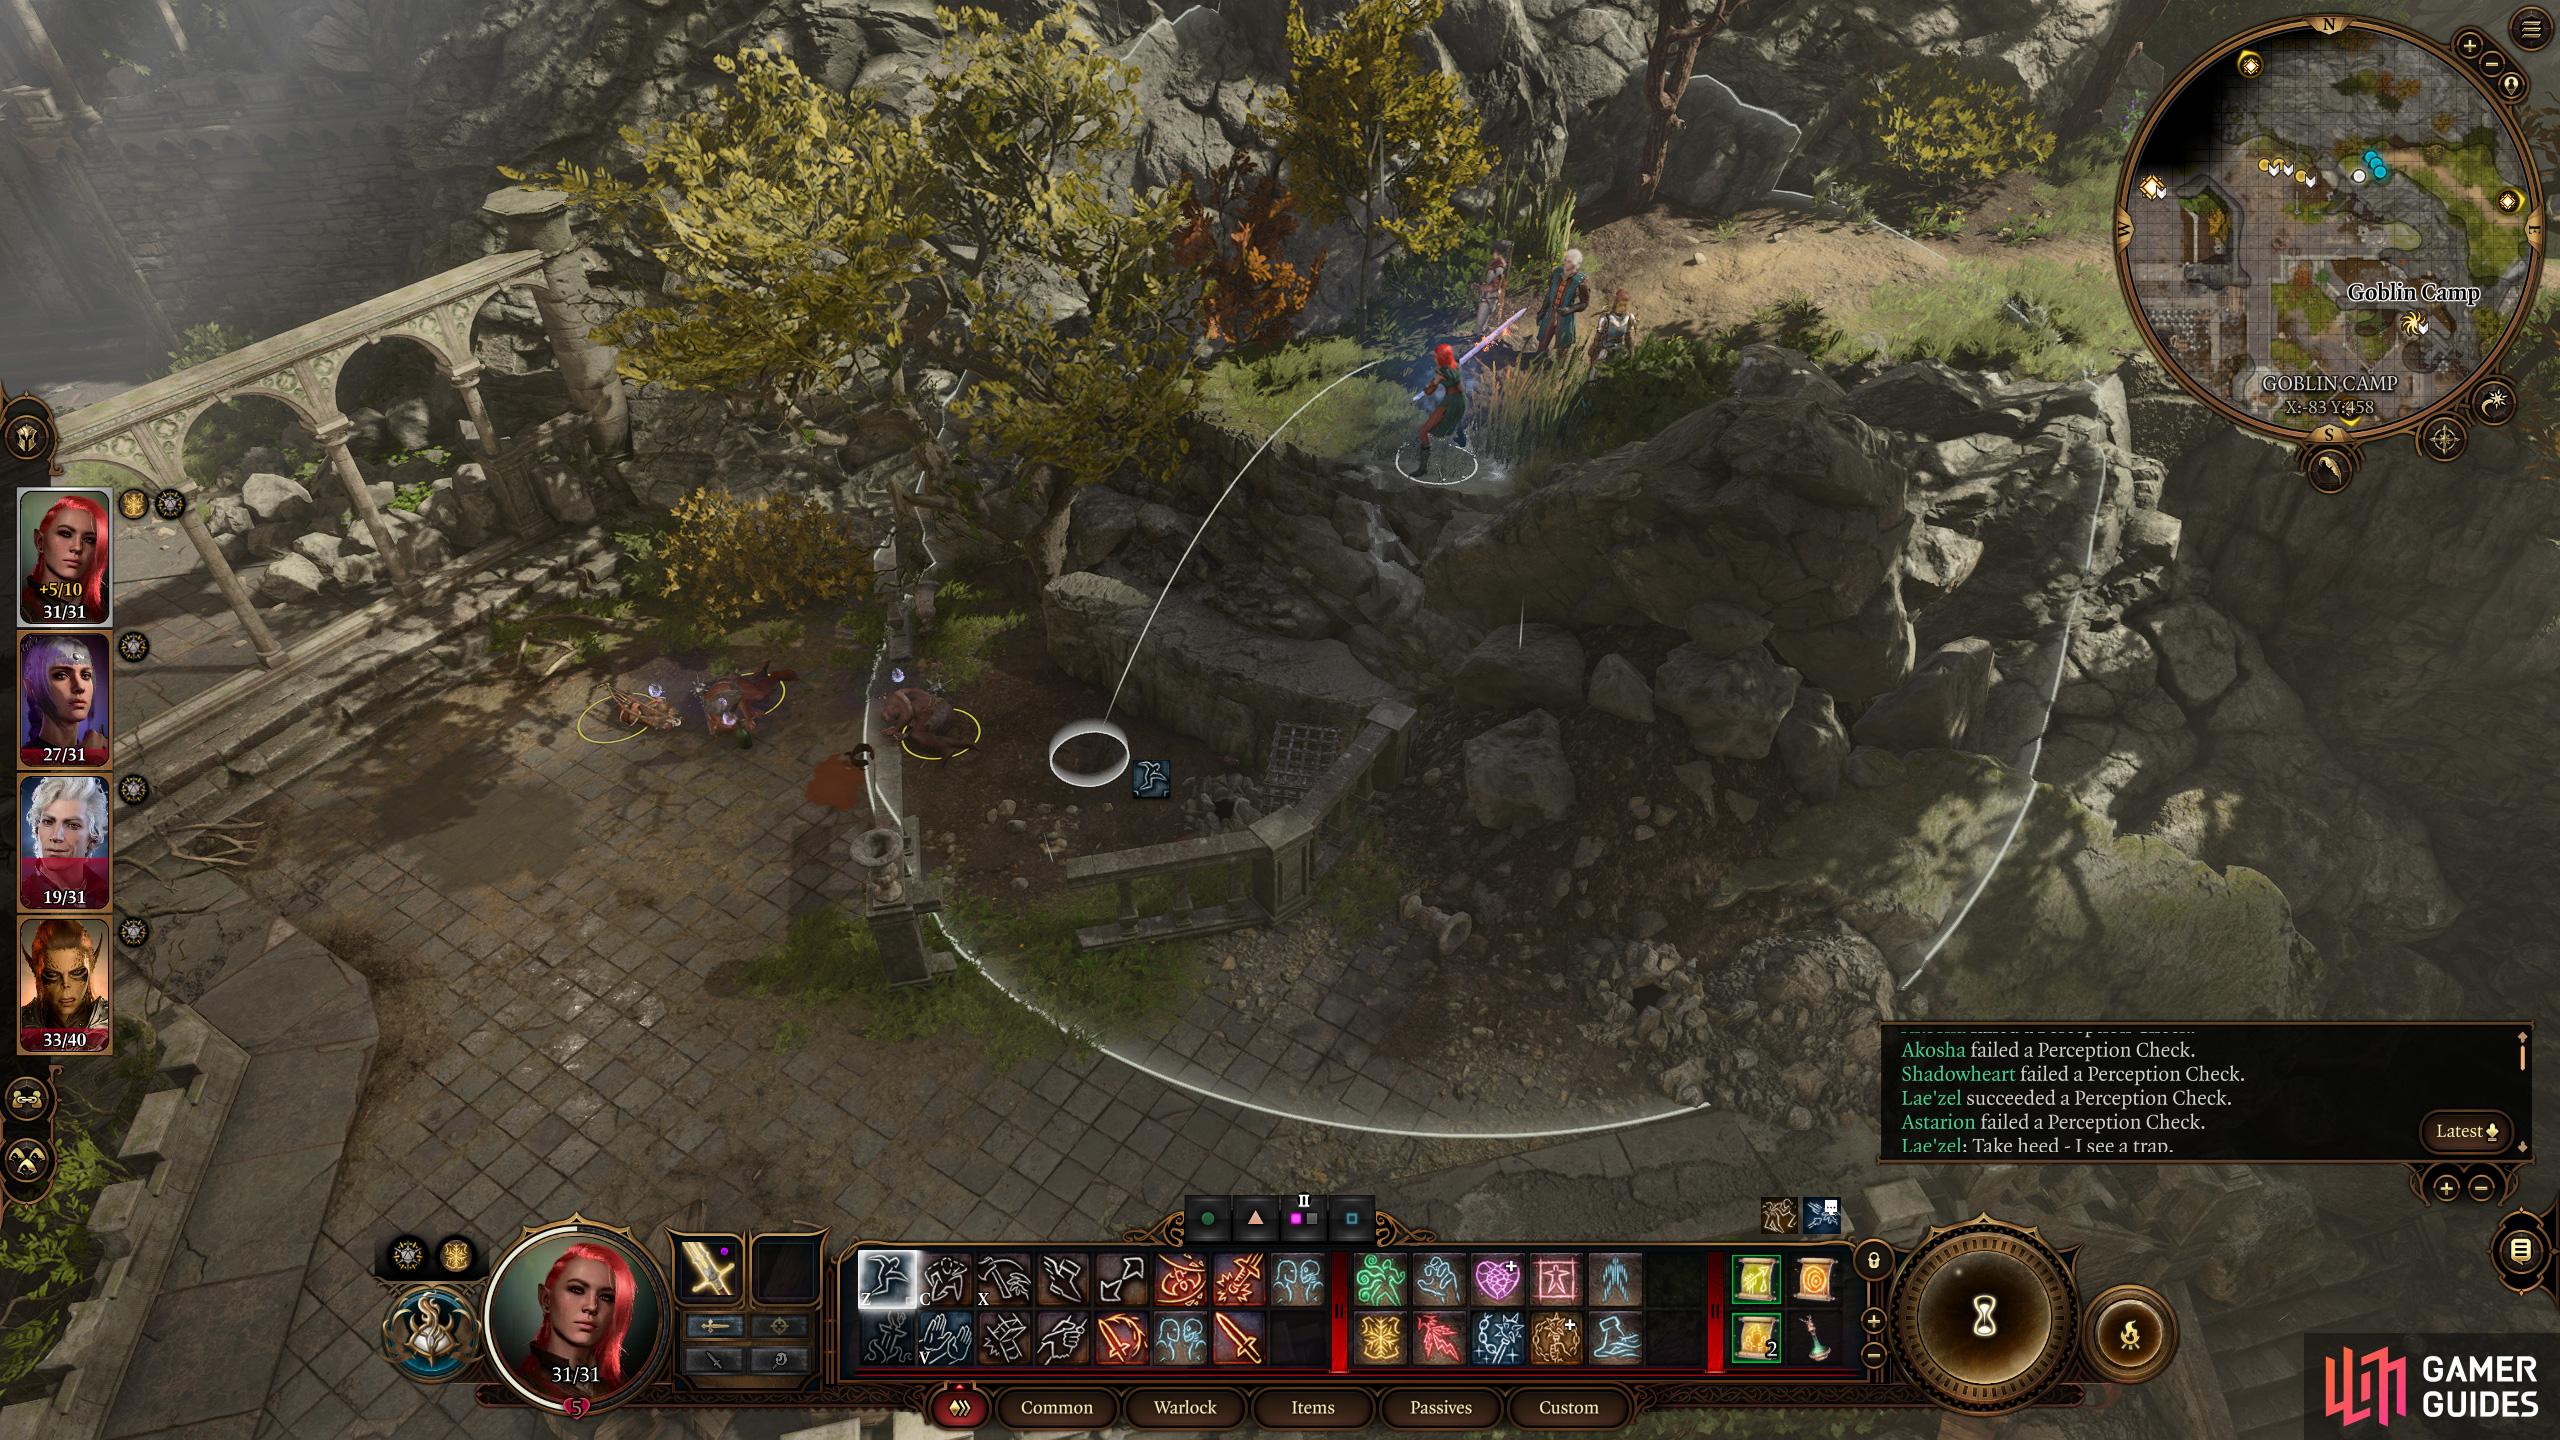
Option two will allow you to bypass the larger group of goblins here, but you’ll still need to fight a group of three goblins on the path behind them as you make your way around. You will also need to jump over a hole in the ground as you make your way westwards here, and be ready to avoid some Blast Mine traps around this hole. Take your time and use turn-based mode to make sure that you avoid the traps. After killing the three goblins by the wagons you should be able to continue north, over the bridge and into the main part of the goblin camp, while avoiding the guards at the entrance that you bypassed.
Option three will almost certainly result in you having to face the goblins head-on without thinning their forces or having the option to bypass them. They aren’t susceptible to being bribed here and there are no persuasion or intimidation checks, so it will inevitably result in a bloodbath. If that’s what you want (and a bit more of a challenge), go for it.
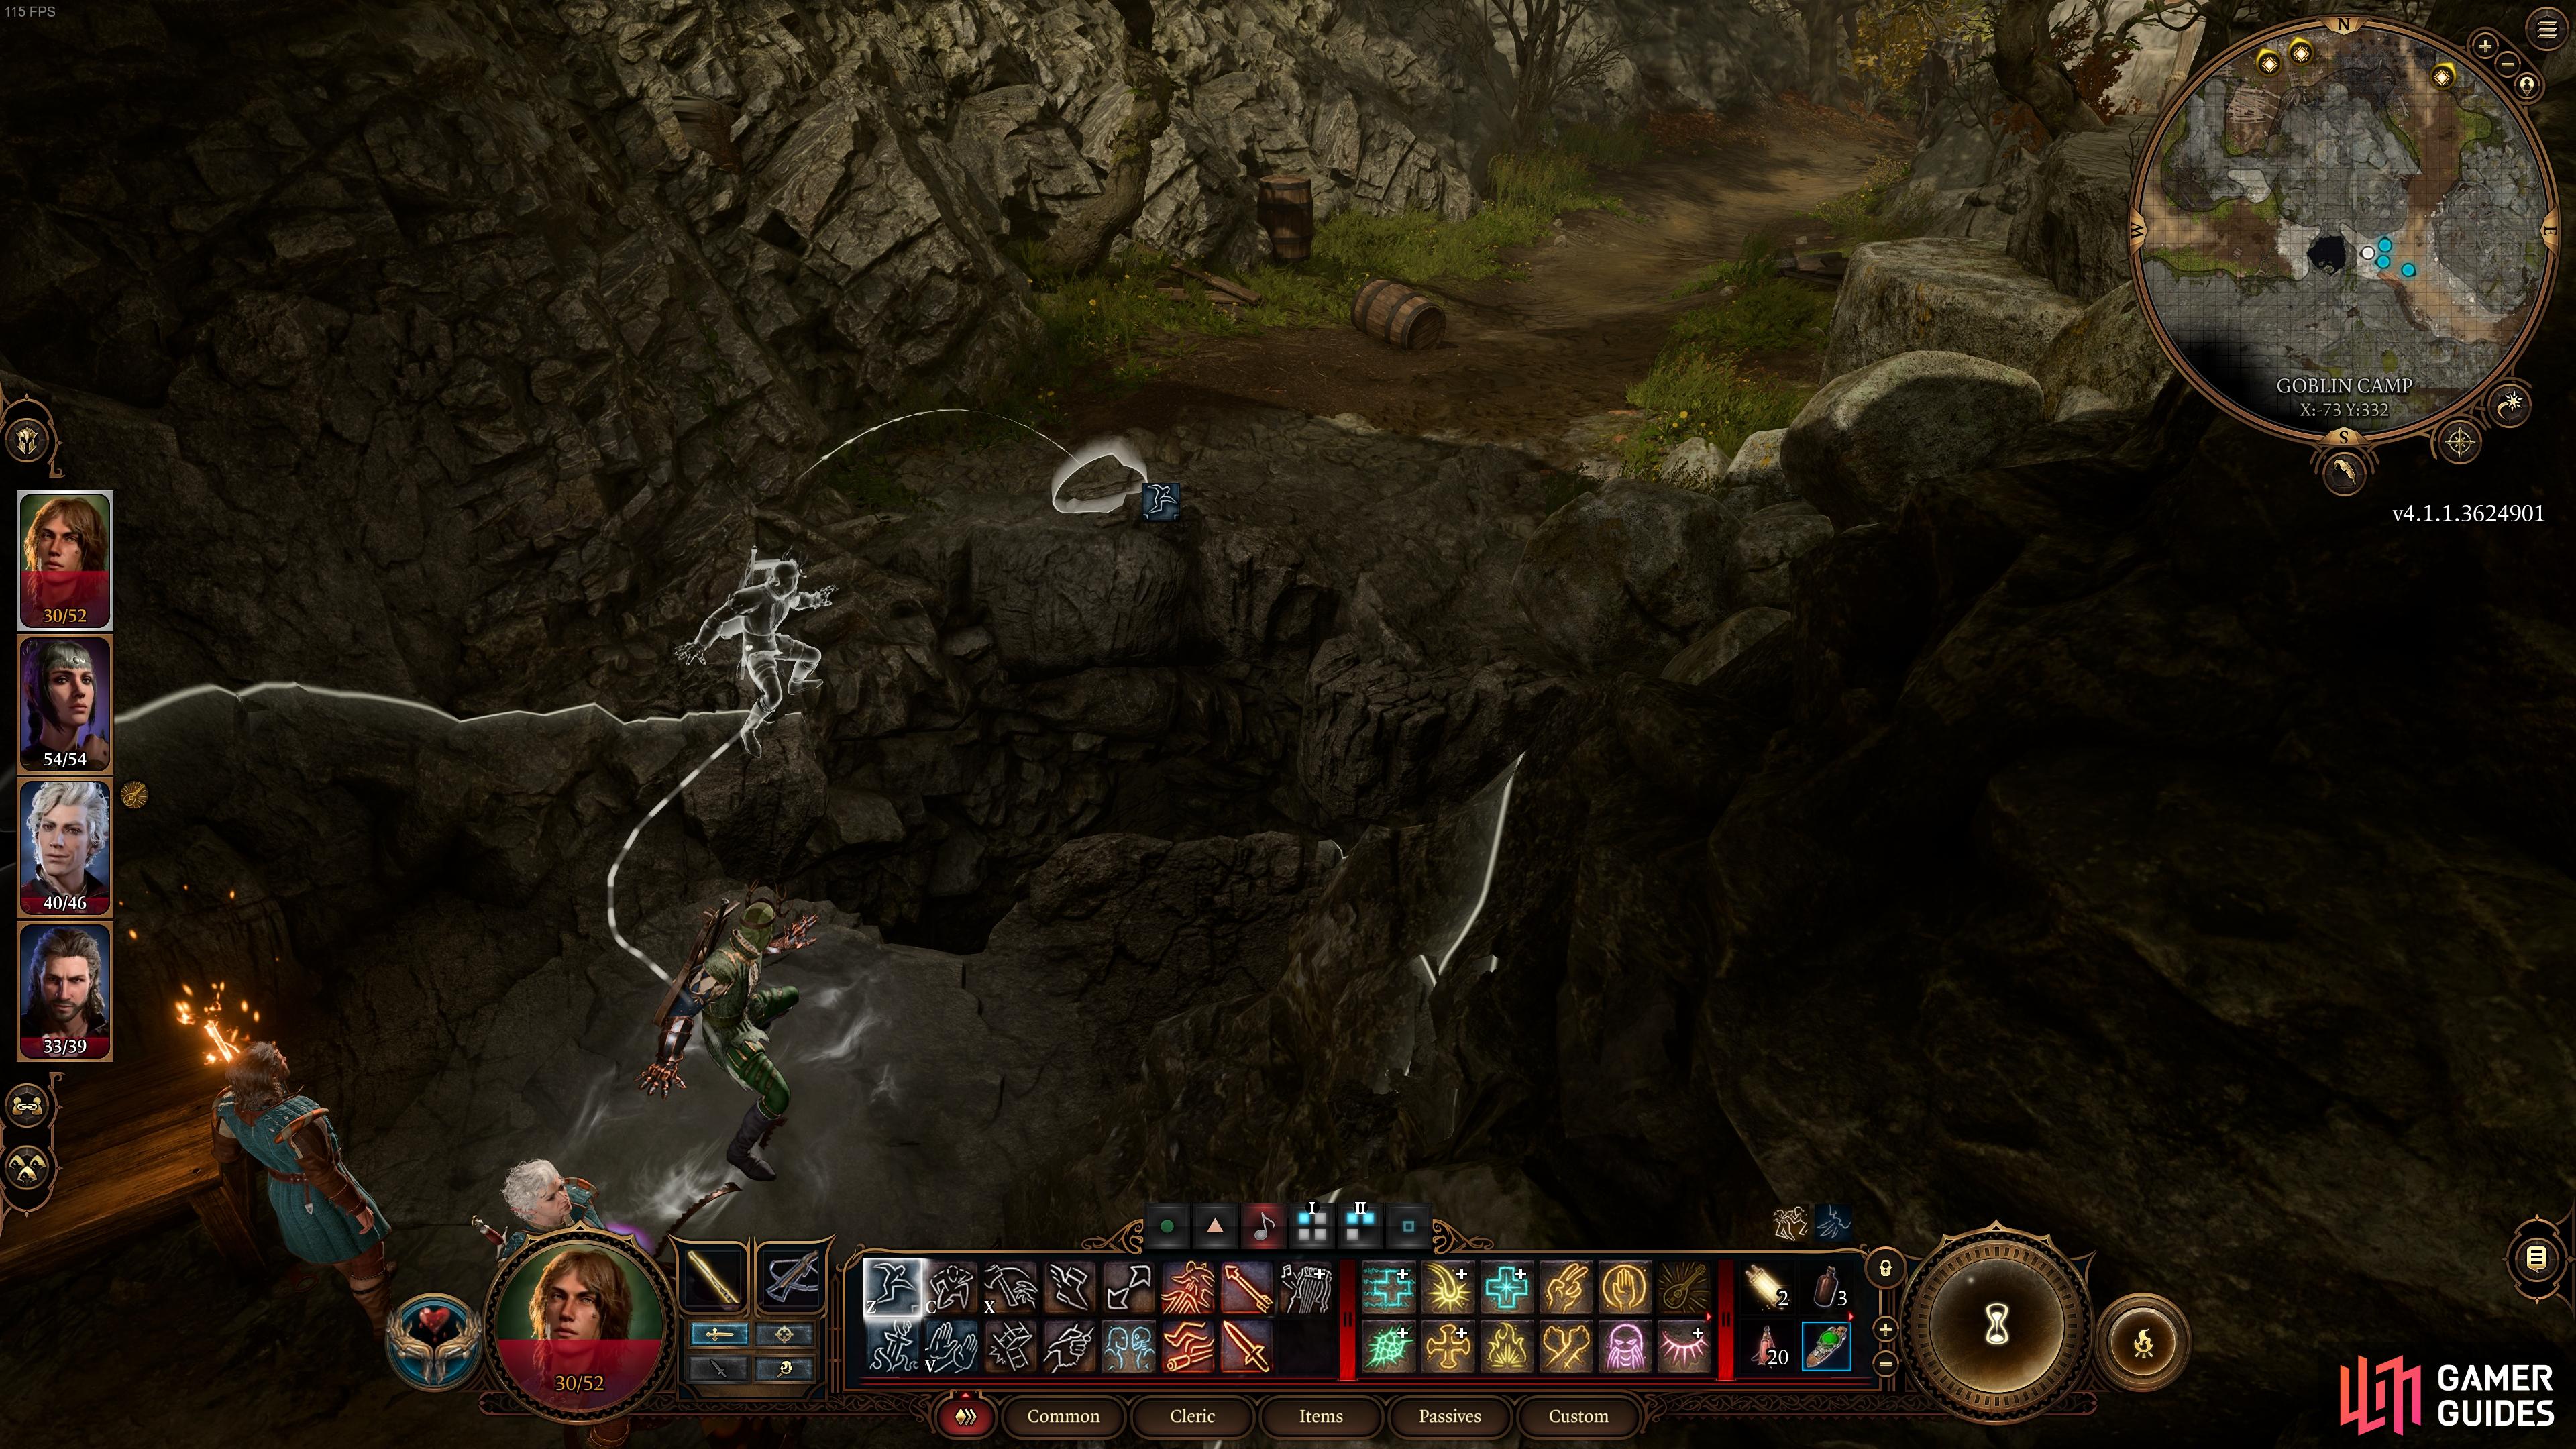
If you take the path to the left of the bridge (westwards), you need to jump over this hole.
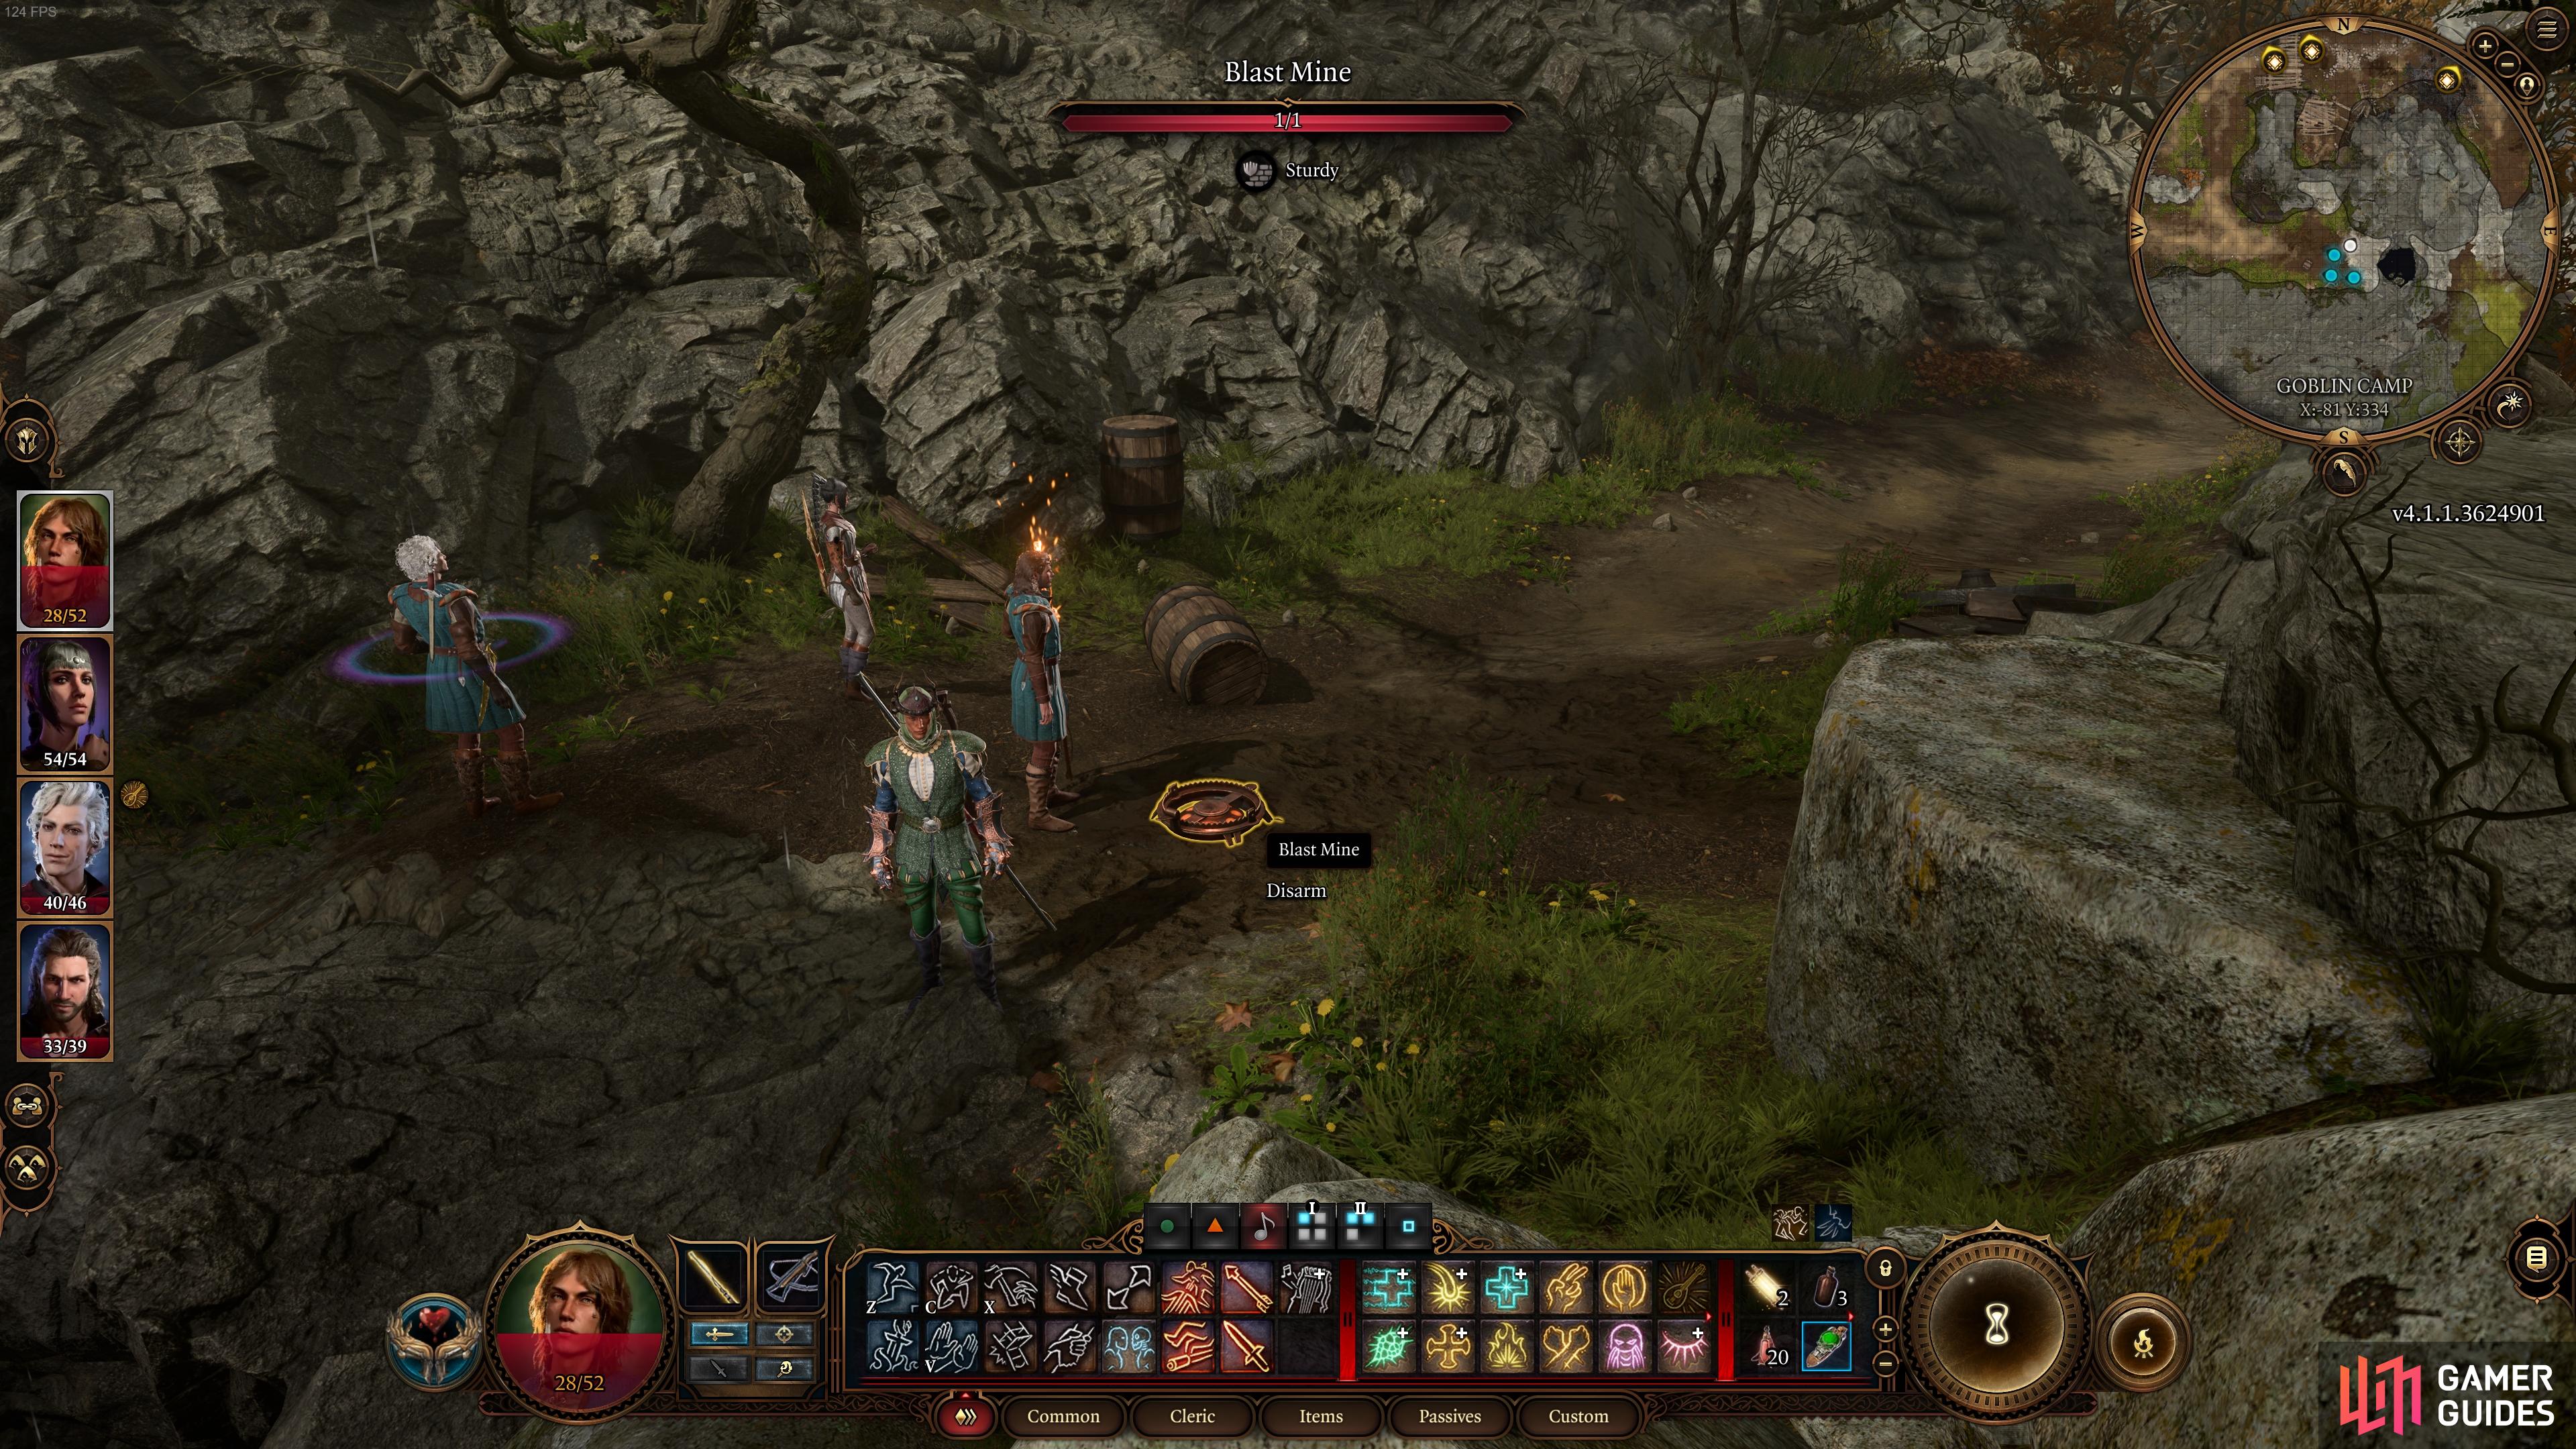
Be careful to avoid the Blast Mines around the hole on this path.
Save Volo in the Goblin Camp Courtyard
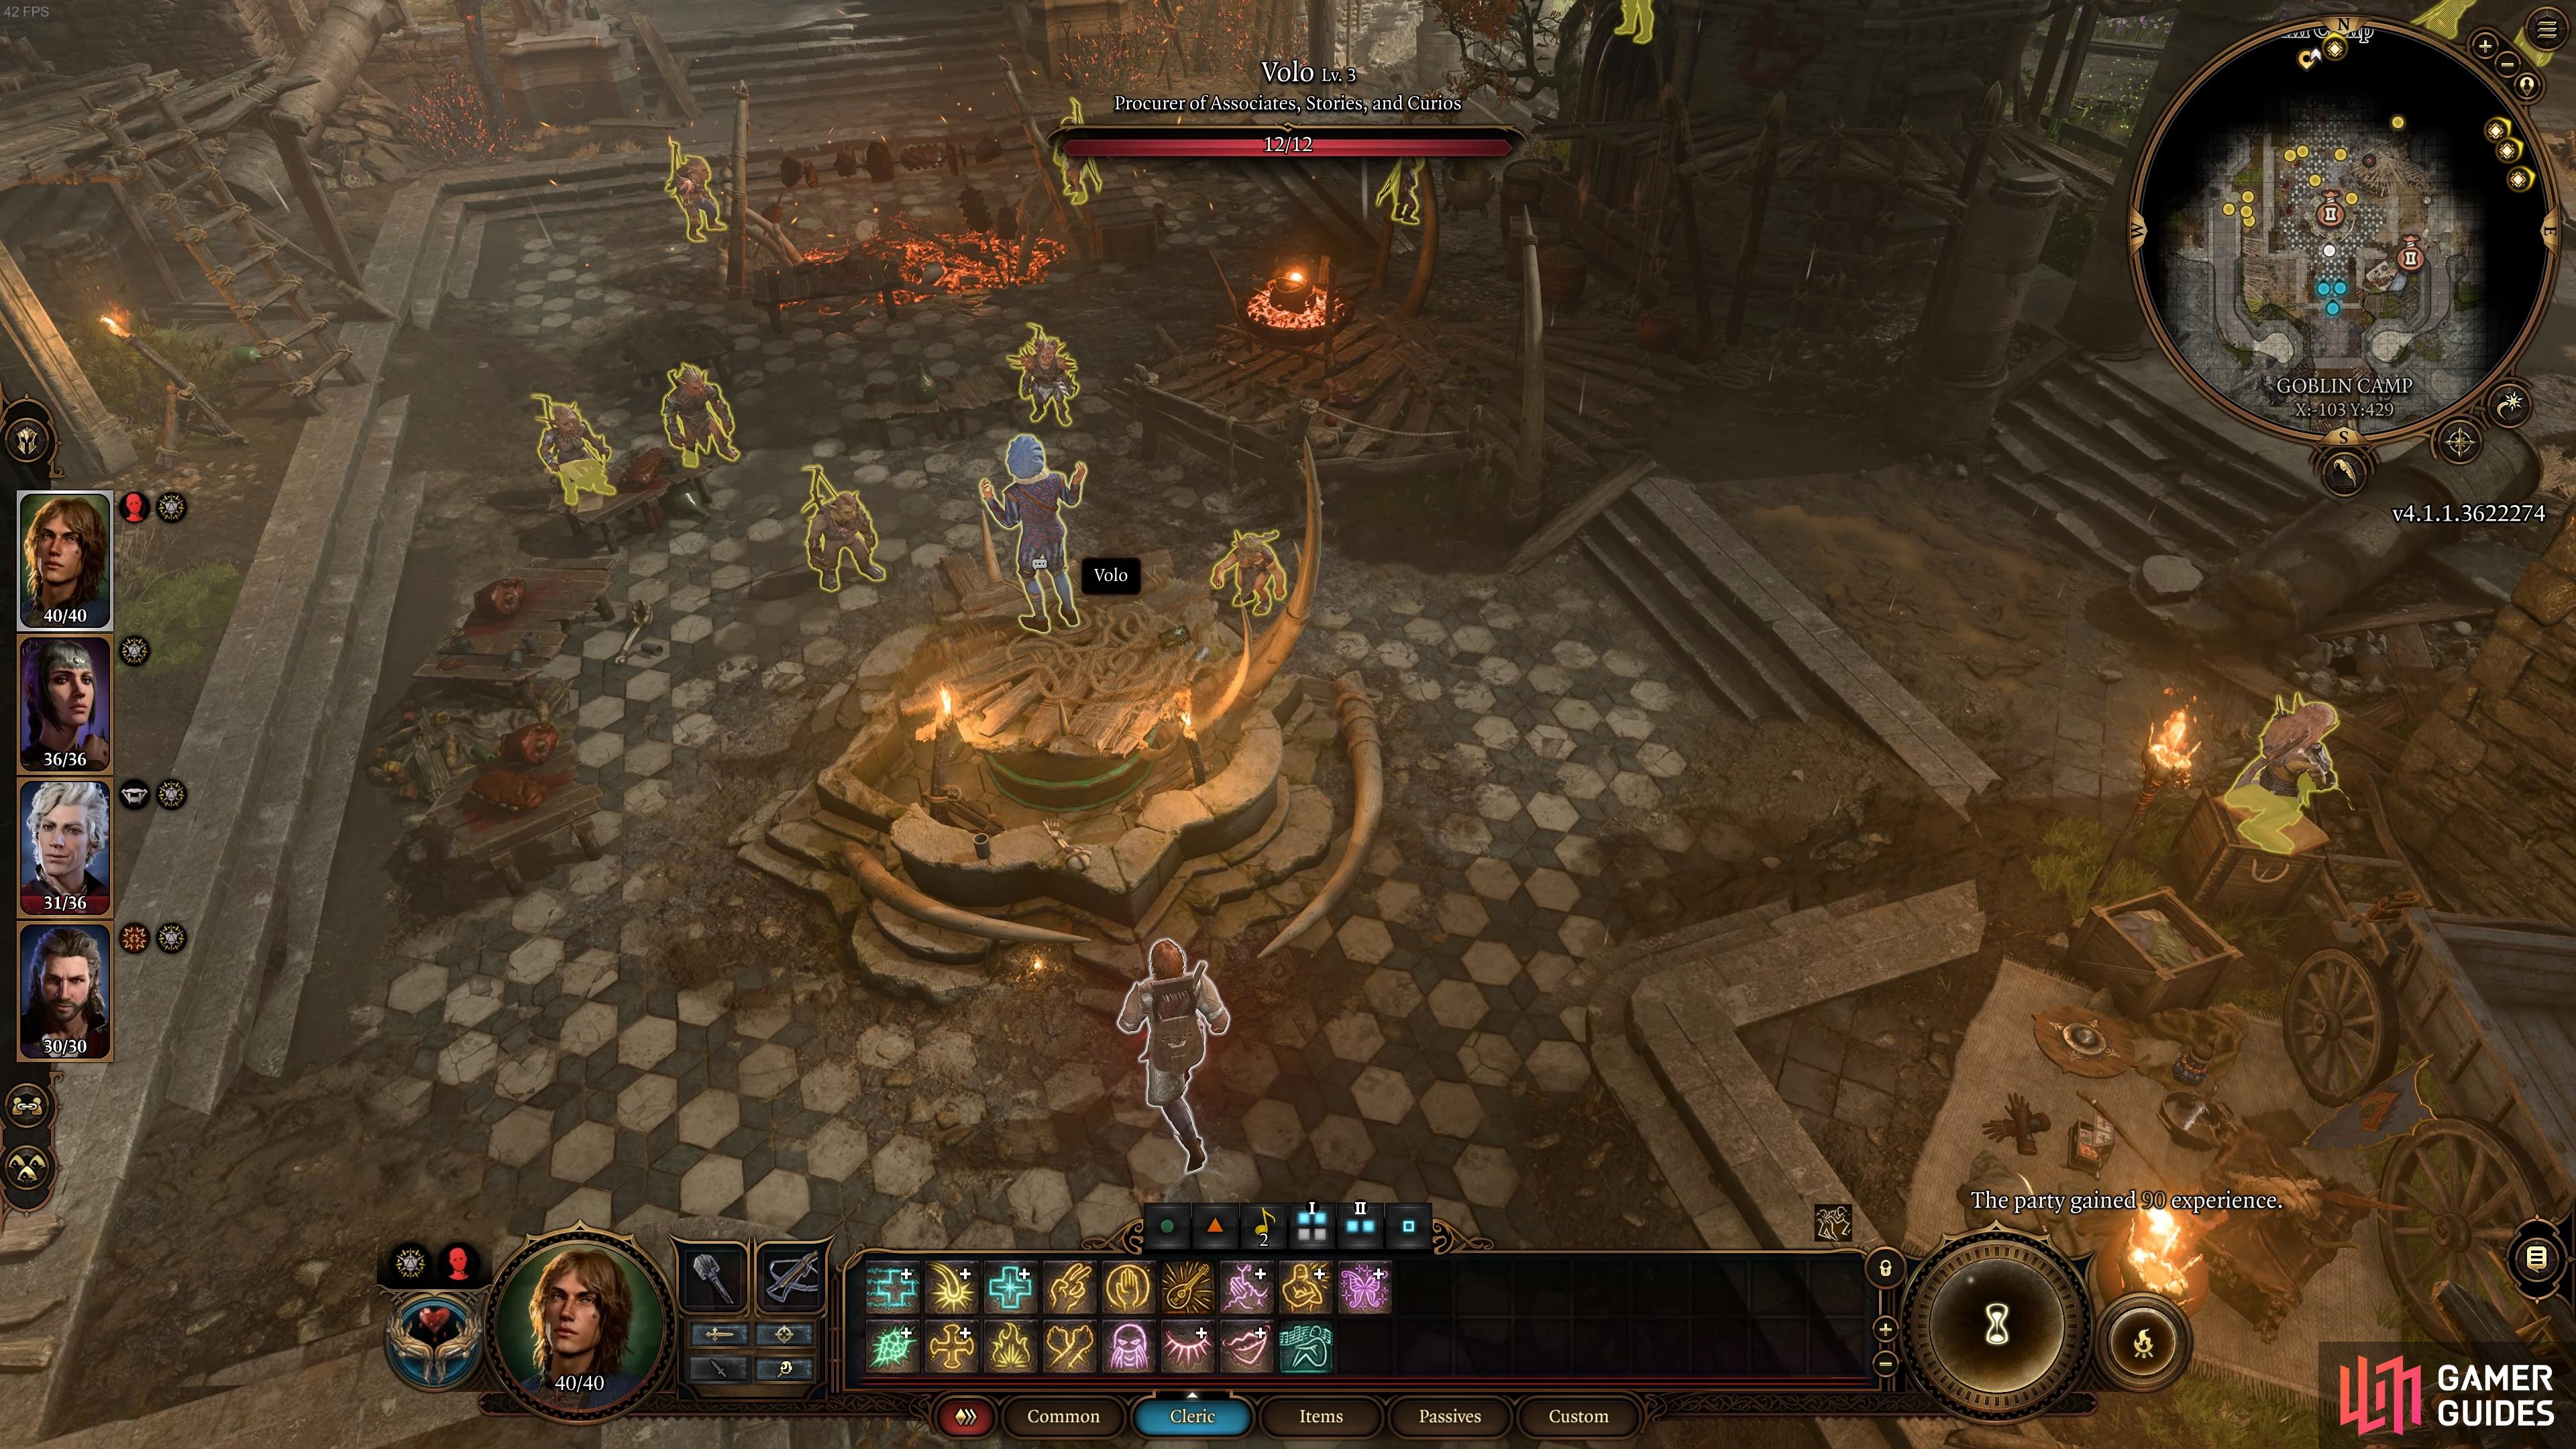
As you make your way into the courtyard of the goblin camp, you’ll notice a bunch of goblins being entertained by Volo, Procurer of Associates, Stories, and Curios, who you may have already met in the Emerald Grove. He’s in the center of the courtyard so difficult to miss, and you can speak with him to begin a cutscene. Here you’ll go through a number of dialogue options, but they all result in the same outcome: Volo being brought inside and imprisoned by the goblin named Gribbo. You’ll be able to rescue him later, so be sure to check our guide for this on the How to Save Volo in the Goblin Camp page.
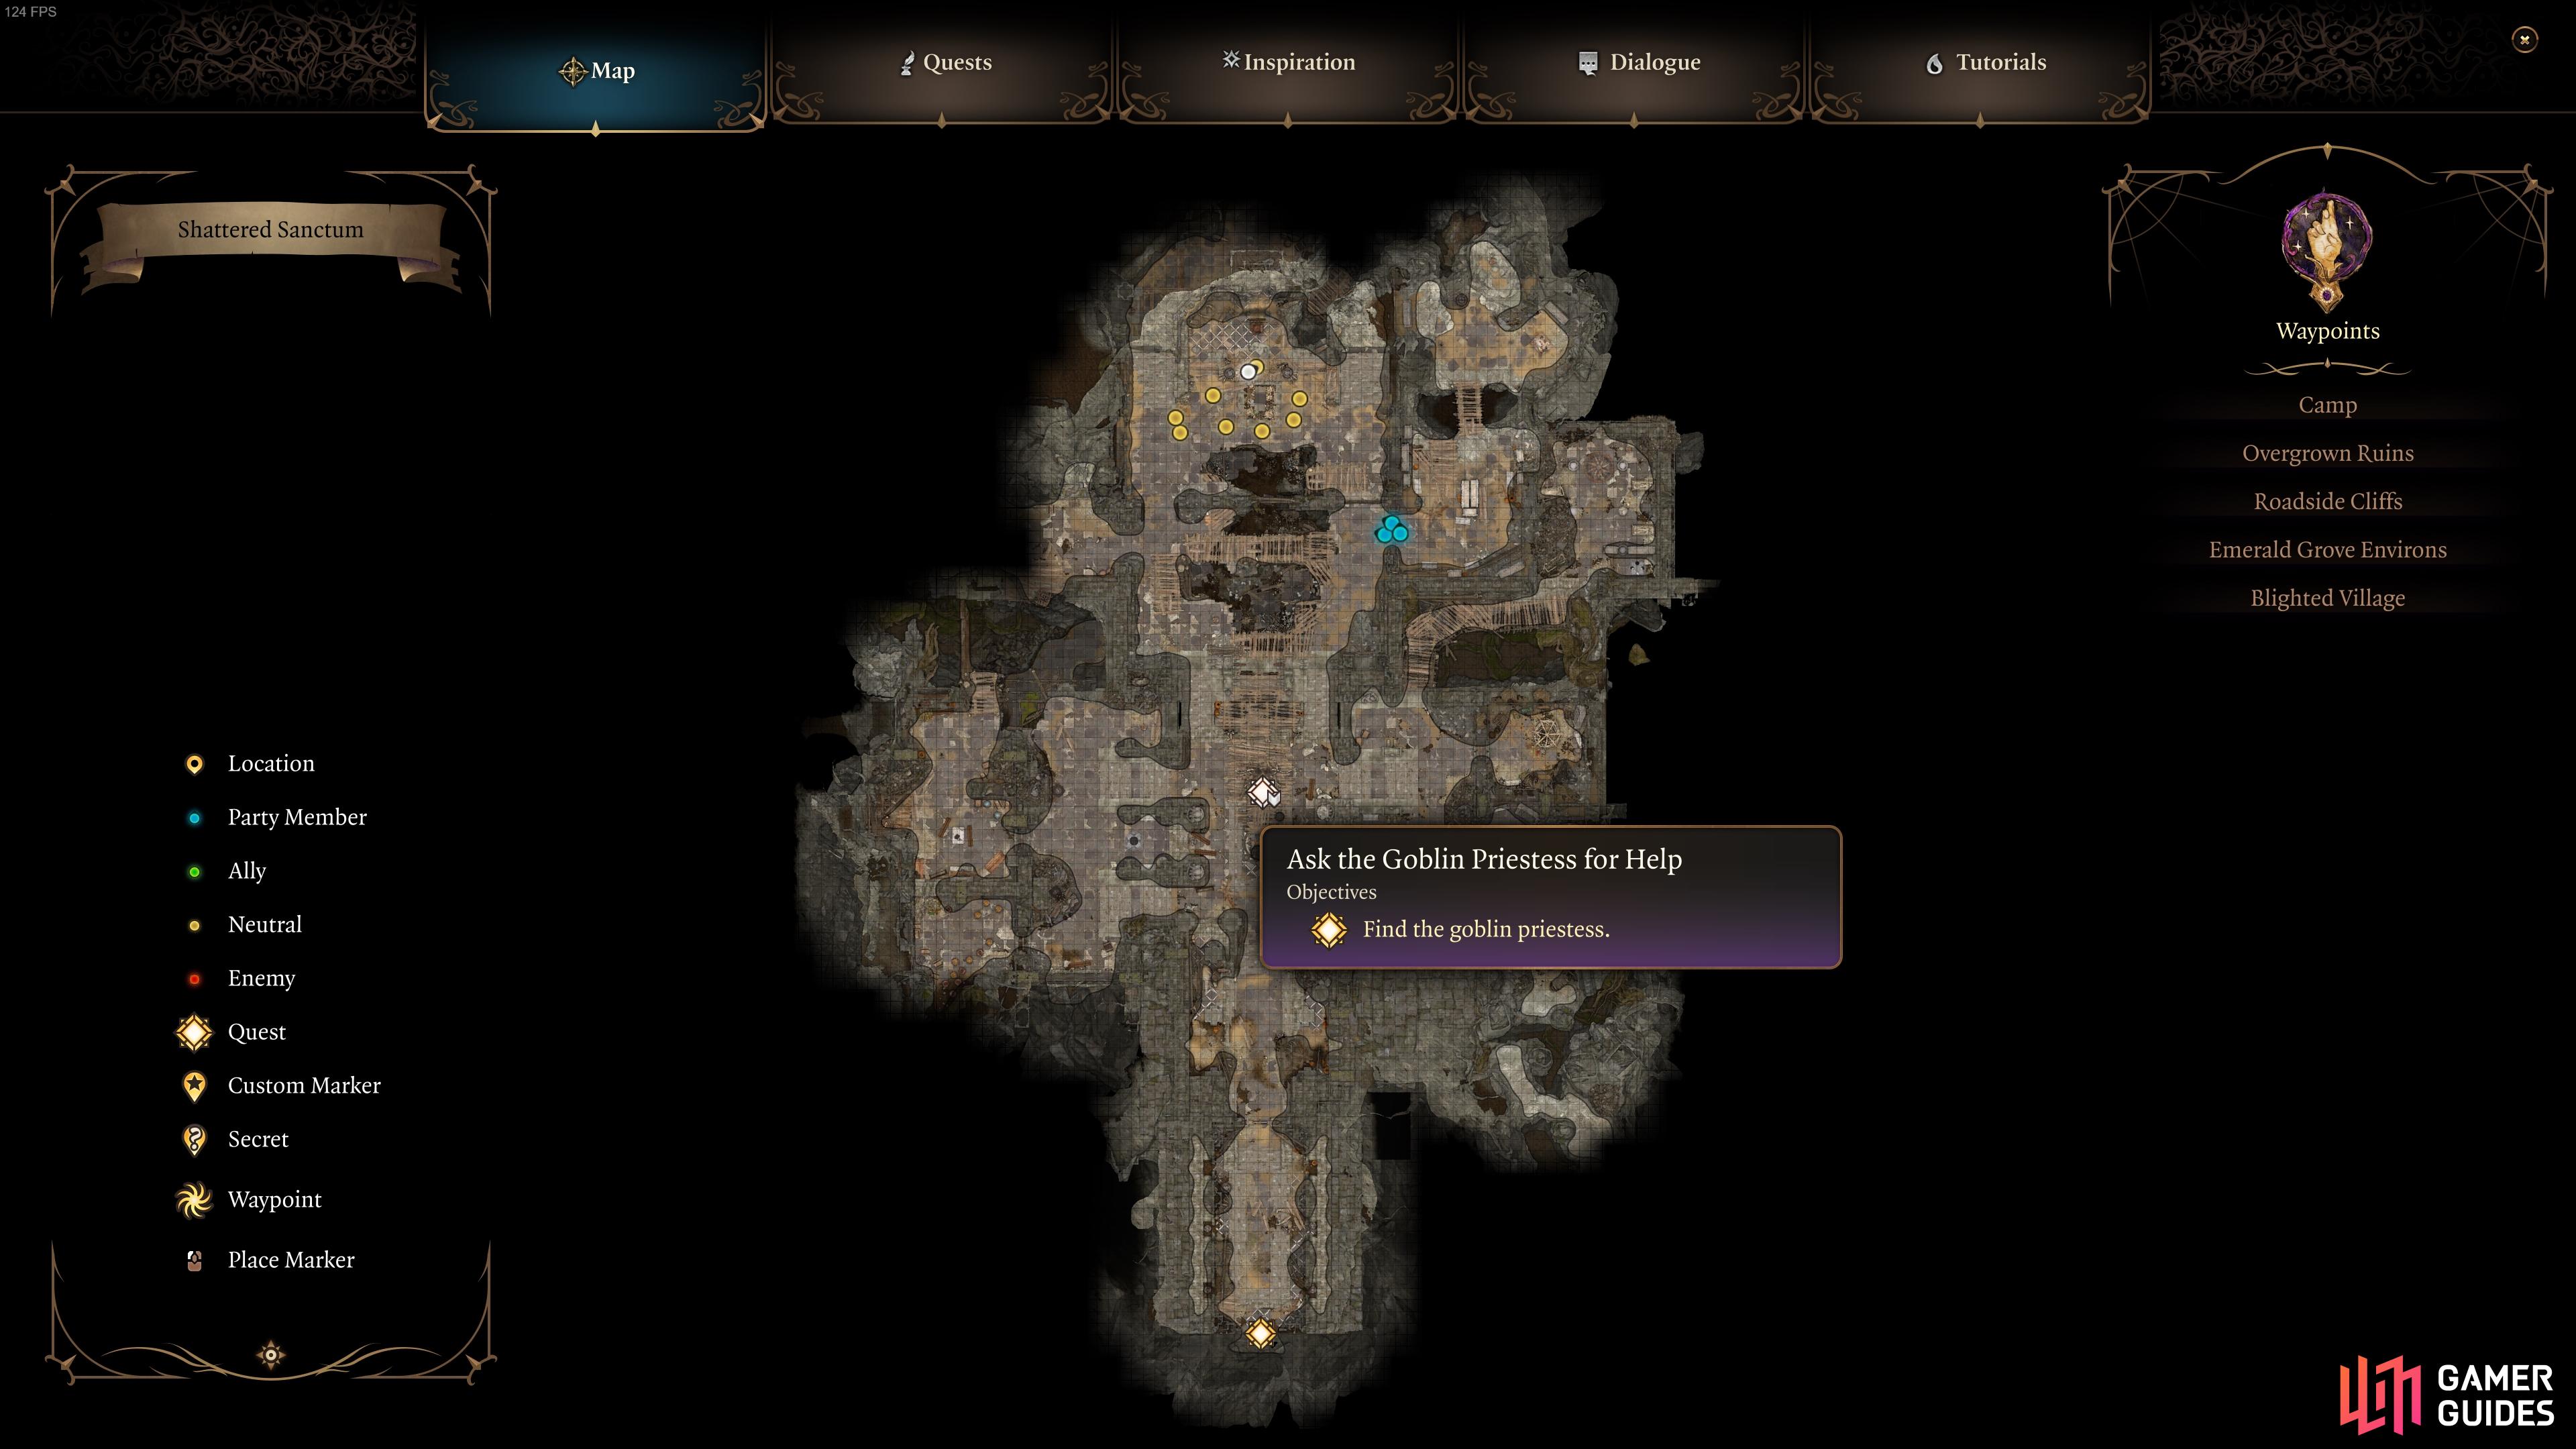
Enter the Shattered Sanctum in the Goblin Camp
After the scene with Volo, you can take some time to explore the goblin courtyard if you wish, but there isn’t much to see here other than a few amusing dialogue exchanges with the goblins. At this point you can go through the Heavy Oak Doors to enter the ![]() Shattered Sanctum, unless you want to spend a bit more time in the courtyard in the interests of nefarious intent first…
Shattered Sanctum, unless you want to spend a bit more time in the courtyard in the interests of nefarious intent first…
How to Poison the Goblins in the Courtyard
If your heart is filled with malice and you want to have a bit more fun, you can actually poison most of the goblins here by dropping a Basic Poison potion in one of the nearby cauldrons. You’ll then need to convince the goblins to drink by raising a toast, and make sure that you pass the roll checks for them to drink first. If all goes well, most of the goblins will be dead, but a few will survive and they’ll immediately suspect you as the one who poisoned them. You’ll need to pass a roll check based on your stat strengths, or by using the Illithid Wisdom check, to calm the goblins at this point. Alternatively, you can choose to slaughter all those that remain in the courtyard.
Look for this hole in the wall on the southeast side of the courtyard.

When you reach the cave, avoid the tripwire and use Thieves’ Tools to unlock the chest.
Where to Find the Secret Treasure in the Cave Behind the Waterfall
Just before you leave the courtyard to enter the Shattered Sanctum, you should consider heading southeast to find a large hole in the stone wall. Go through this and take the ladder down, then follow the path to the waterfall, behind which you’ll find a climbable wall. At the top you’ll find a small cave but be careful of the tripwire trap as you make your way to the Crude Chest. You’ll need to open it using Thieves’ Tools, but it’s well worth the effort for the gold, ![]() Greataxe, Elixir of Arcane Cultivation, camp supplies, Basic Poison, and a sweet letter to Nightwarden Minthara from an adoring goblin named Klagga.
Greataxe, Elixir of Arcane Cultivation, camp supplies, Basic Poison, and a sweet letter to Nightwarden Minthara from an adoring goblin named Klagga.
Goblin Camp Upper Levels - Glowing Shield and Secret Entrance
As if there’s not enough to do in and around the Goblin Camp, there’s also a second level to this fortress with even more to explore. To reach these heights you’ll need to climb some vines to the west of the entrance to the Shattered Sanctum (an ogre named Guard Gurgon stands by the front door, so it should be easy to spot), or alternatively you can head east and southeast to climb a ladder behind a boastful goblin named Crusher (make him kiss your feet - everybody like that).
If you climb the ladder you’ll reach a grassy area near a river - follow the river north and under a natural stone archway, but be wary of numerous traps [Perception 15] lying around. Your reward for bypassing several such traps is a locked chest [Sleight of Hand 10] containing the ![]() Glowing Shield and likely an assortment of gold, a scroll and a potion. Backtrack south and climb a Cragged Rock to reach some higher ground, then head west to reach a balcony above the entrance to the Shattered Sanctum, near which you’ll find a buried treasure [Survival 10], mostly buried meats.
Glowing Shield and likely an assortment of gold, a scroll and a potion. Backtrack south and climb a Cragged Rock to reach some higher ground, then head west to reach a balcony above the entrance to the Shattered Sanctum, near which you’ll find a buried treasure [Survival 10], mostly buried meats.
(1 of 4) If you make loud noises - jumping or attacking - near the sleeping Goblins and Bugbears,
If you climbed the vines you’d eventually have ended up at this balcony as well, and the most prominent features here are the sleeping goblins and bugbears. Leaping up the ledges will awaken them, and while one of the bugbears near the ledges, Stimk, has endless forbearance (just pass an [Intimidation 15], [Deception 15], [Persuasion 7] or [Illithid | Wisdom 2] check to calm him down - you must give him alcohol in addition to the Persuasion attempt), the goblin near the fountain, Booyahg Culk, is less forgiving. It’s unfortunate, too, as north of the fountain near the goblins you’ll find a Cracked Wall [Perception 10] that you can smash through to gain access to the Shattered Sanctum’s upper reaches, but if you take two hits, Booyahg Culk will turn hostile.
There’s a simple solution to this problem, however - a little bit of murder goes a long way. If you bring Astarion around, he can sneak attack the sleepers, and provided he kills them in a single blow, they won’t alert their fellows. You can conceivably do this to kill all the enemies up here and free the way for your ledge jumping and wall smashing endeavors.
Finally, atop a tower just south of the hungover bugbear you’ll find Booyahg Piddle, who is a secret admirer of literature. This interaction is more interesting than lucrative, so do what you will.
How to Access the Shattered Sanctum
When you’re ready to enter the Shattered Sanctum, all you have to do is go through the Heavy Oak Doors at the northernmost point of the courtyard. If you didn’t kill all the goblins there will be an ogre guarding the doors here, but they’ll let you pass without any issue. Once inside, however, you need to convince the goblins to let you pass. There will be a number of options for dialogue roll checks here including [Illithid] [Wisdom], [Deception], [Intimidation], and others that may be relevant to your class such as ![]() Detect Thoughts. Use the one most relevant to your roleplaying preferences or class strengths, and you’ll have a good chance of getting in without having to fight. If all else fails, it’s a fight against four normal goblins, so you should be fine.
Detect Thoughts. Use the one most relevant to your roleplaying preferences or class strengths, and you’ll have a good chance of getting in without having to fight. If all else fails, it’s a fight against four normal goblins, so you should be fine.
You can speak with Volo in the courtyard as you pass through.
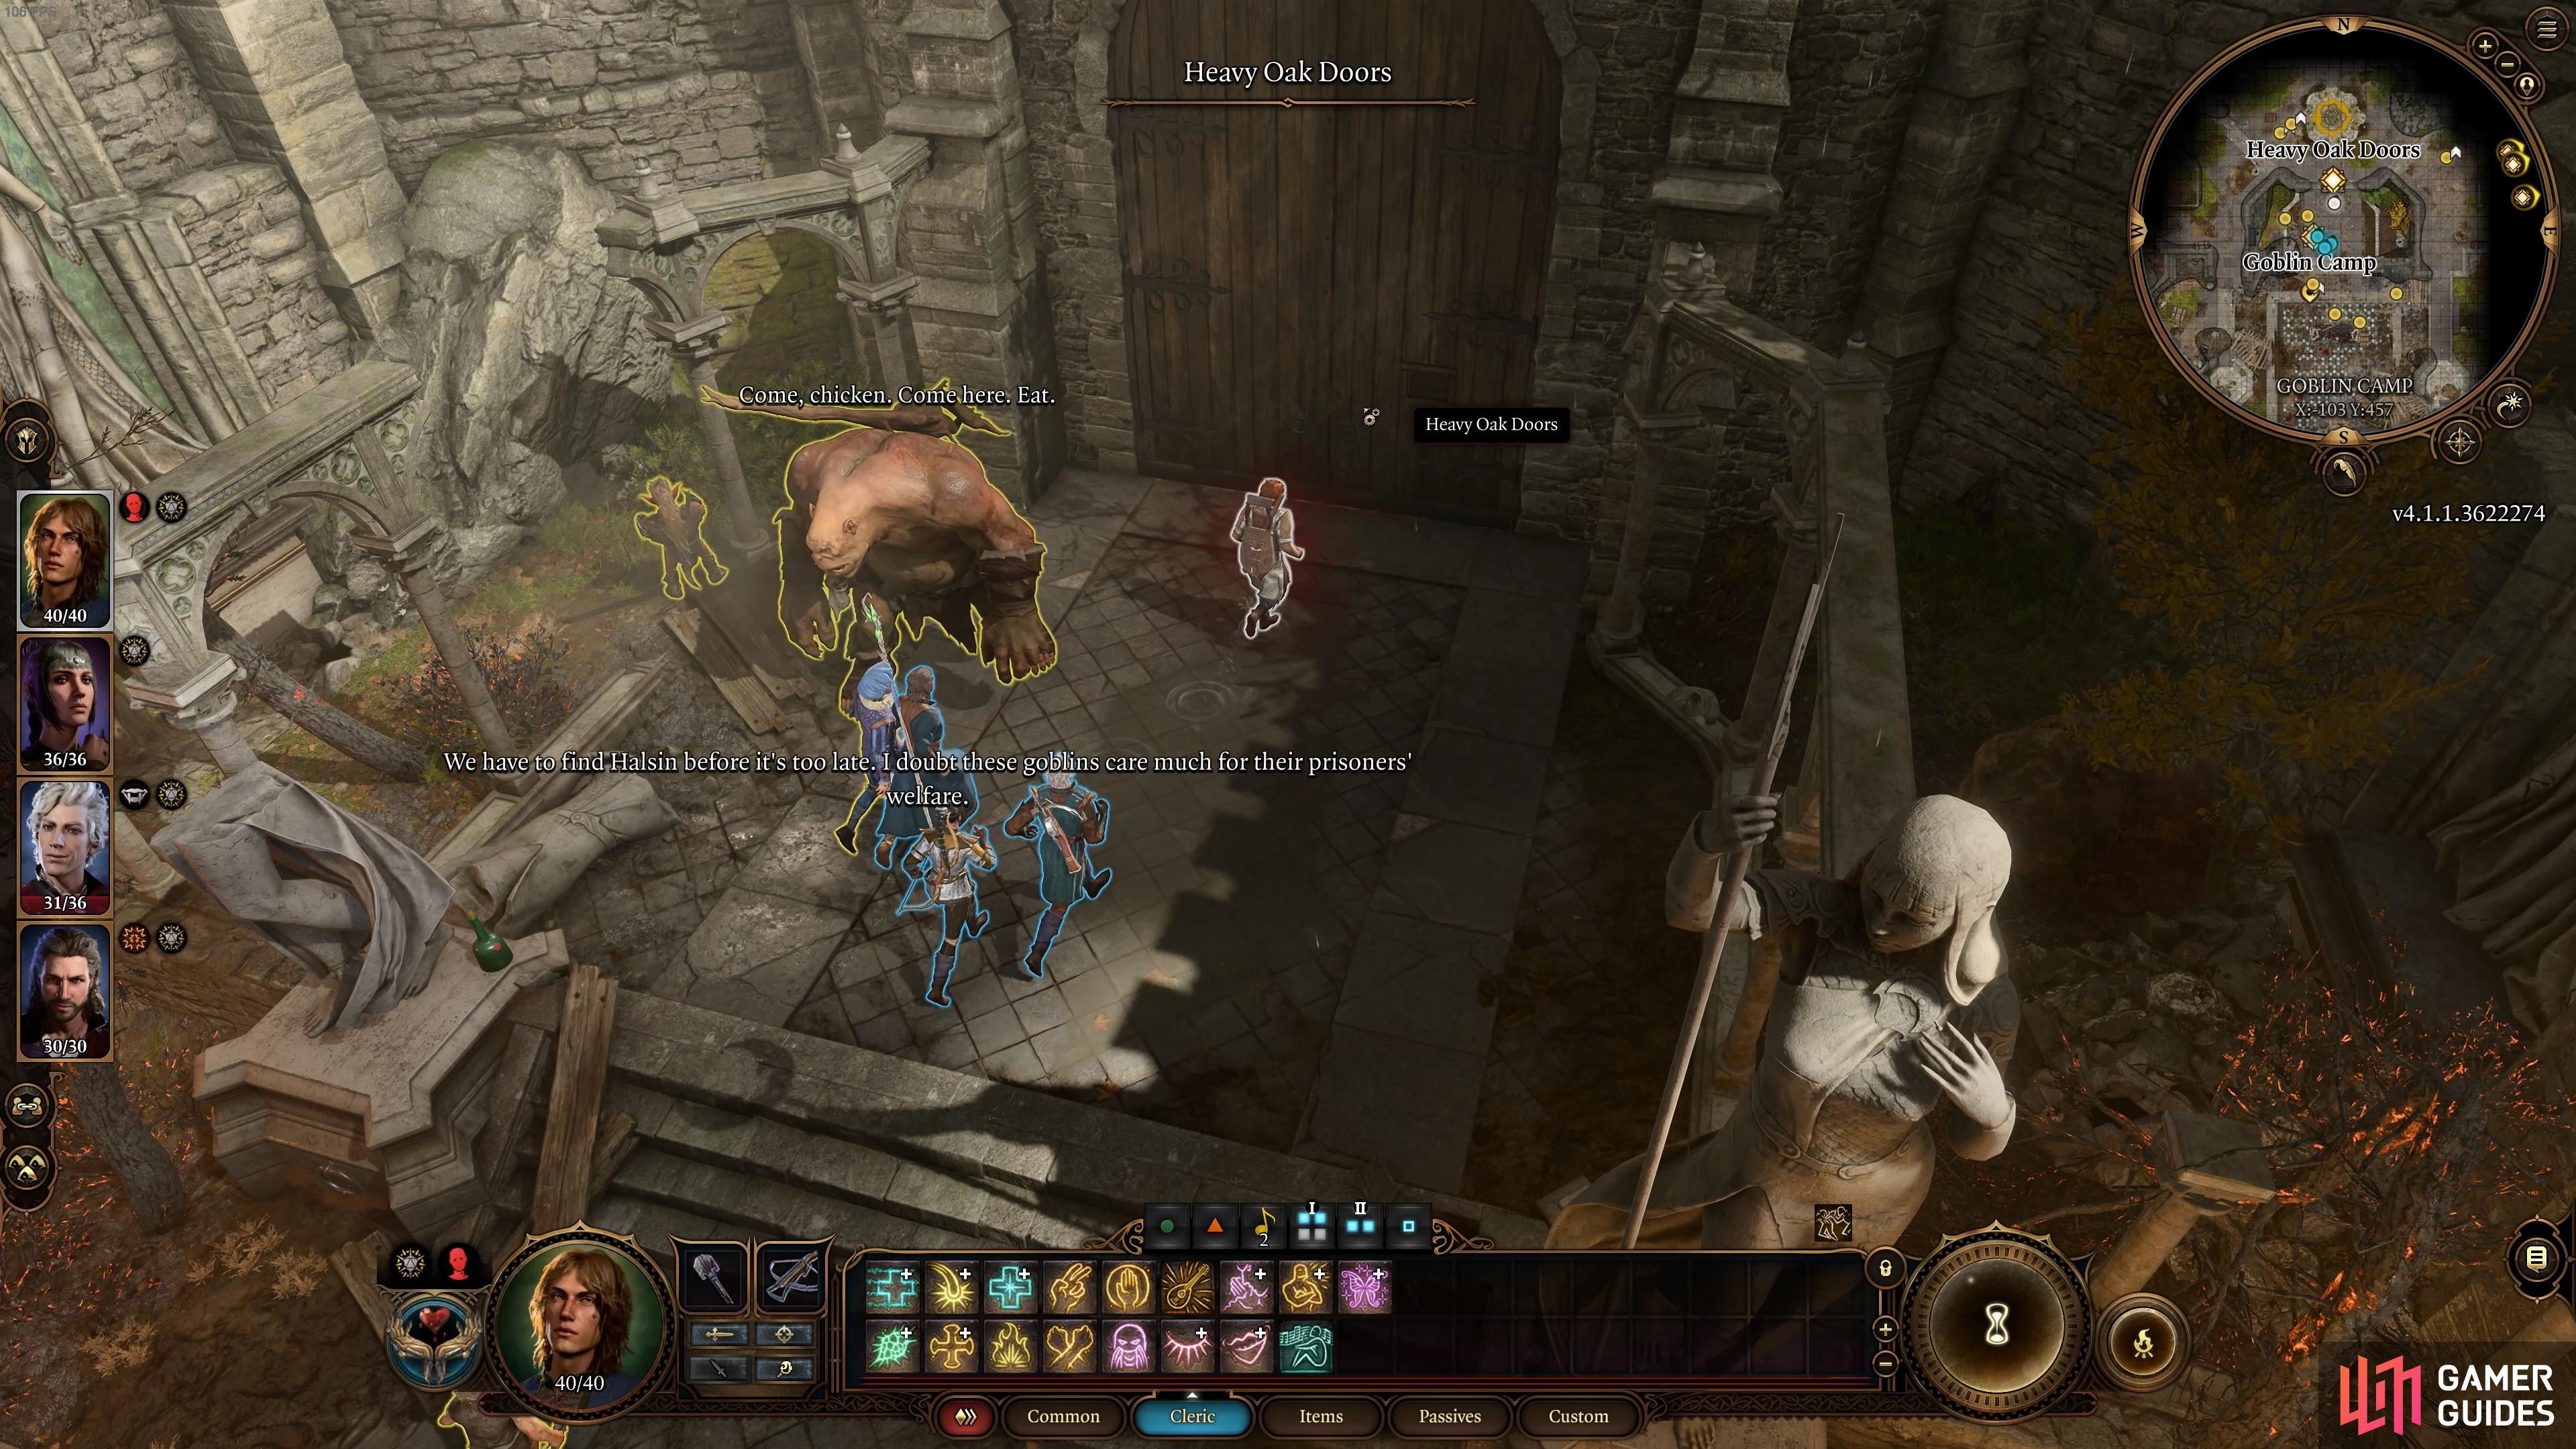
Enter the Shattered Sanctum via the Heavy Oak Doors where the ogre stands guard.
How to Kill the Goblin Leaders in Baldur’s Gate 3
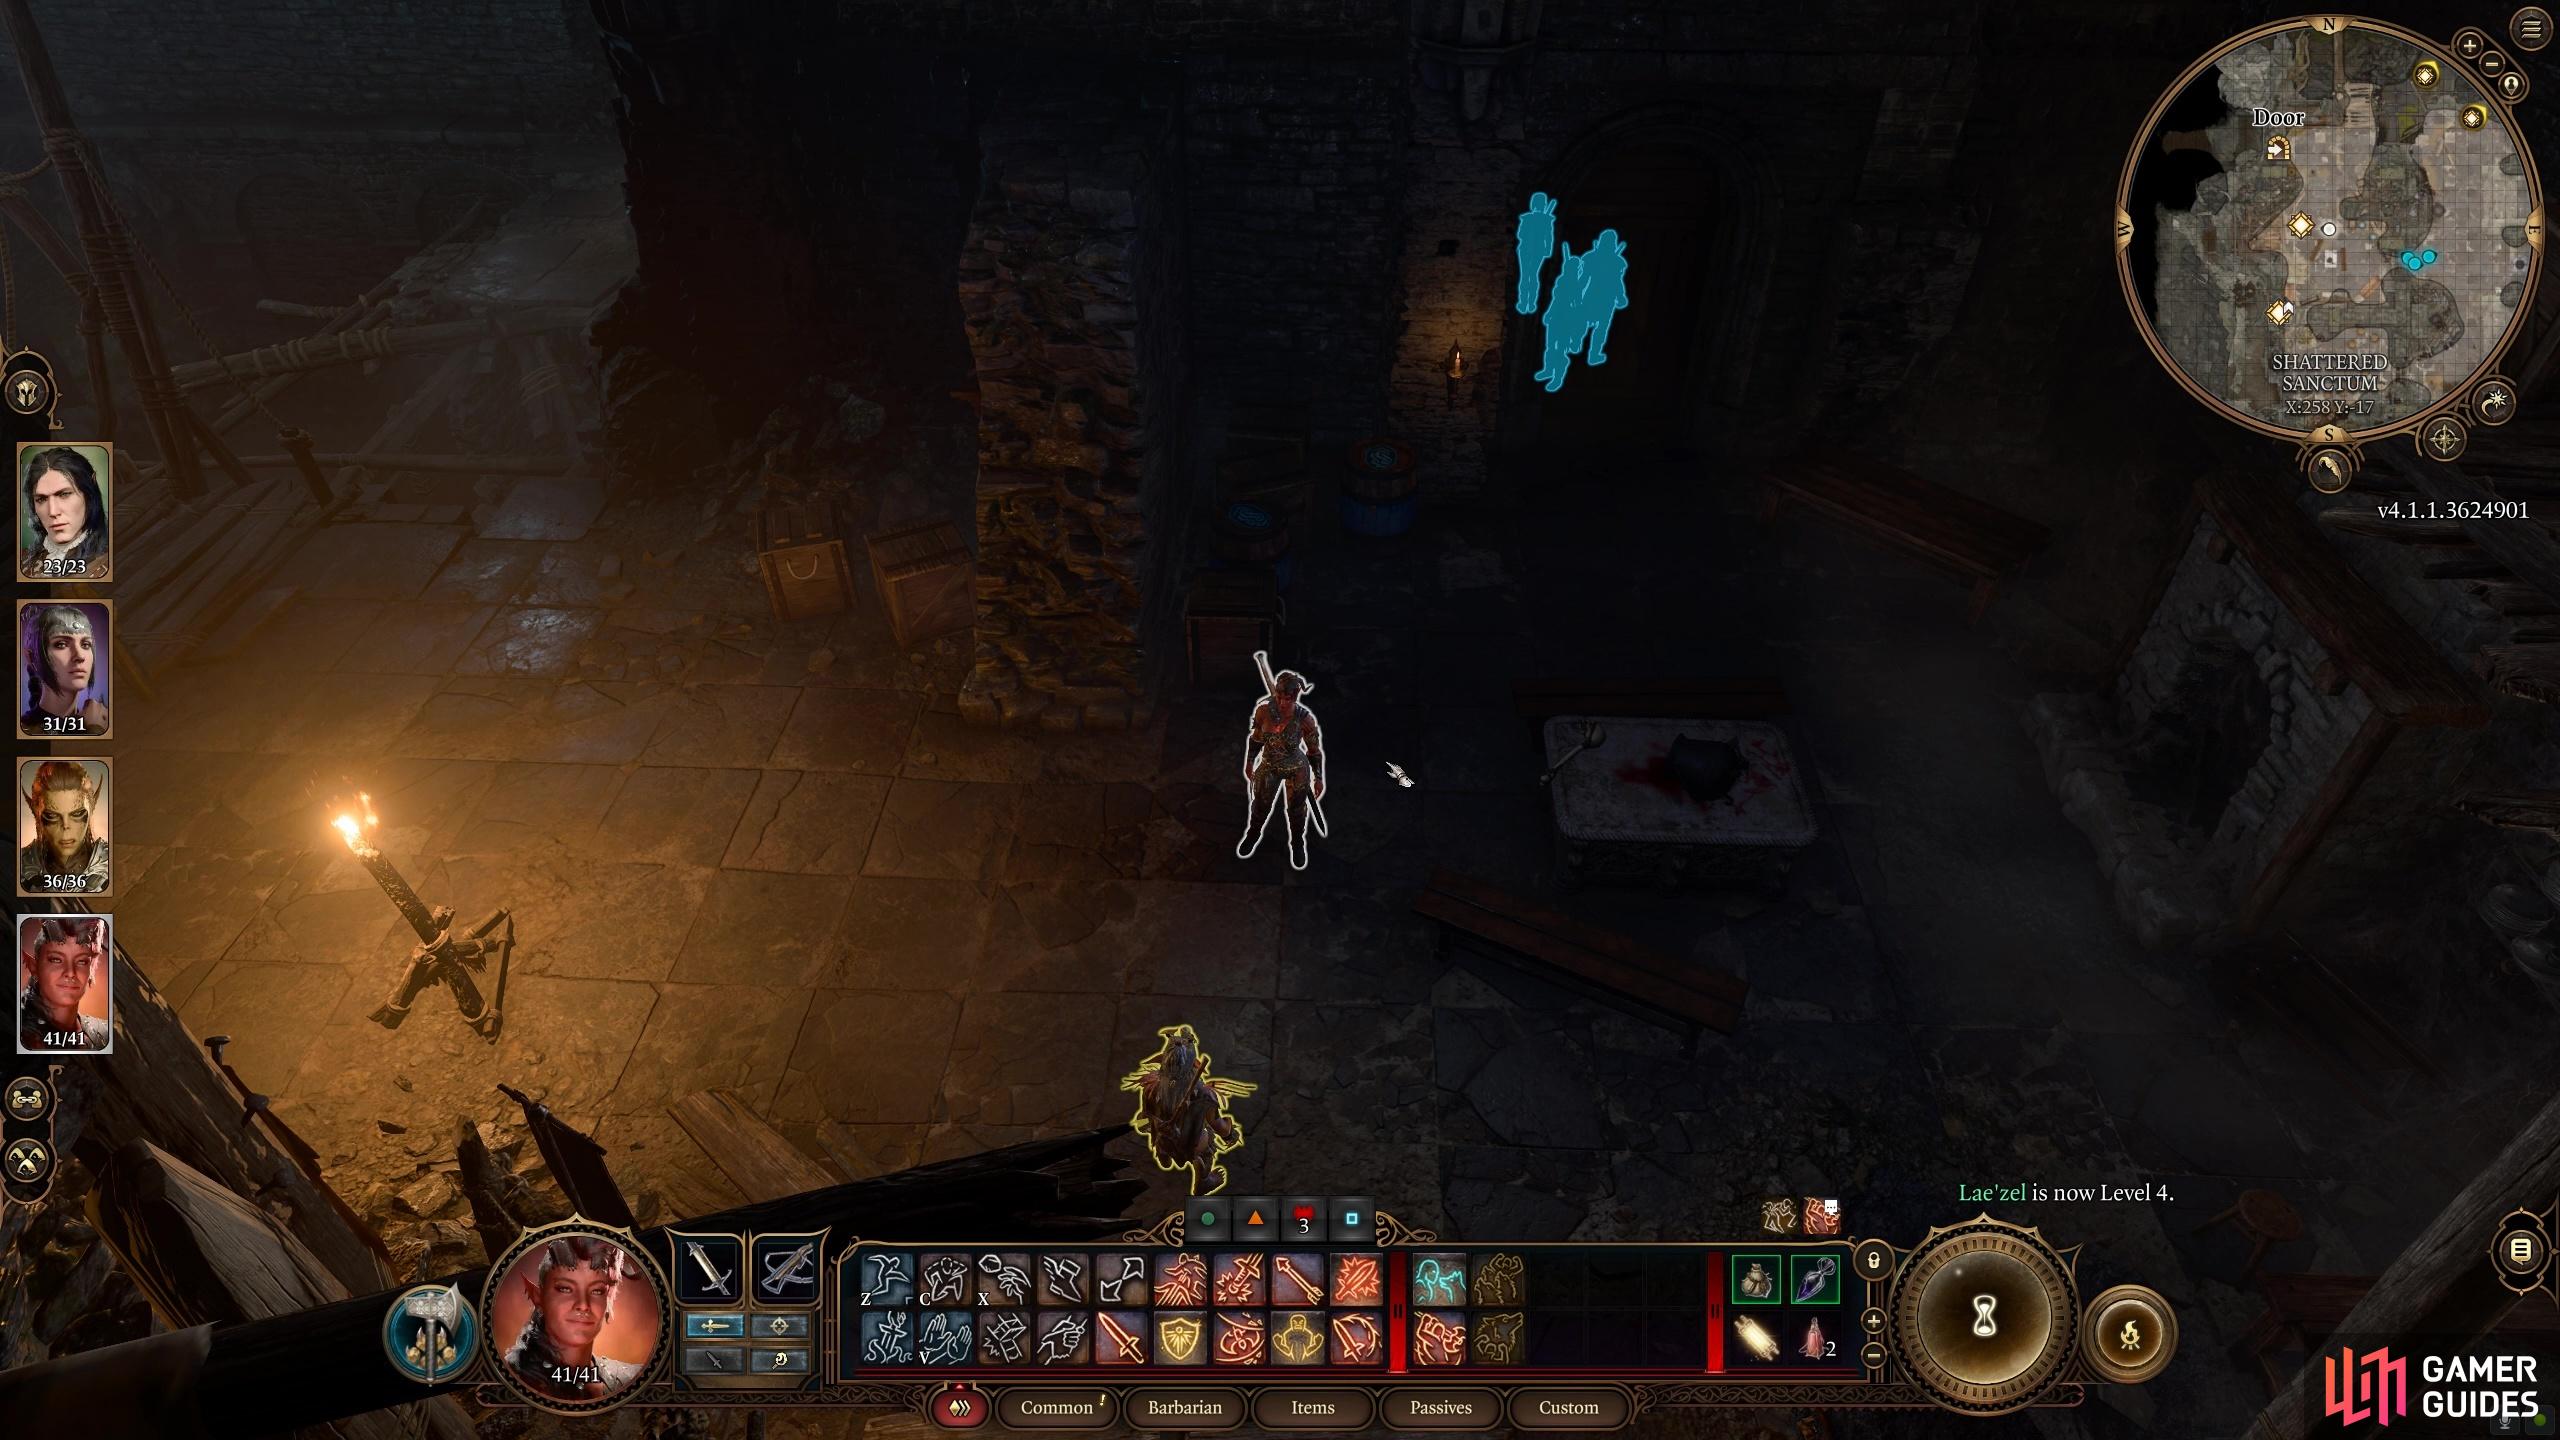
Now that you’re inside the Shattered Sanctum, you have free reign to explore it so long as you don’t do anything to make the goblins hostile. The main objective here is to kill the three goblin leaders mentioned earlier: True Soul Gut, Nightwarden Minthara, and Dror Ragzlin. You will notice that True Soul Gut is just ahead as you enter the sanctum, so you’ve already found your first target.
Speak With Roah Moonglow (Trader)
Before we move on to the specific tactics for killing each goblin leader, it’s useful to note that there’s a trader inside the Shattered Sanctum named Roah Moonglow. You’ll find them just up the steps to the left as you enter the main part of the sanctum, just after persuading (or fighting) your way inside. This trader will have a number of items that you can make good use of, including scrolls, weapons, armor, and potions. It’s a good idea to upgrade your equipment and replenish supplies at this point if you need to, so be sure to take a look.
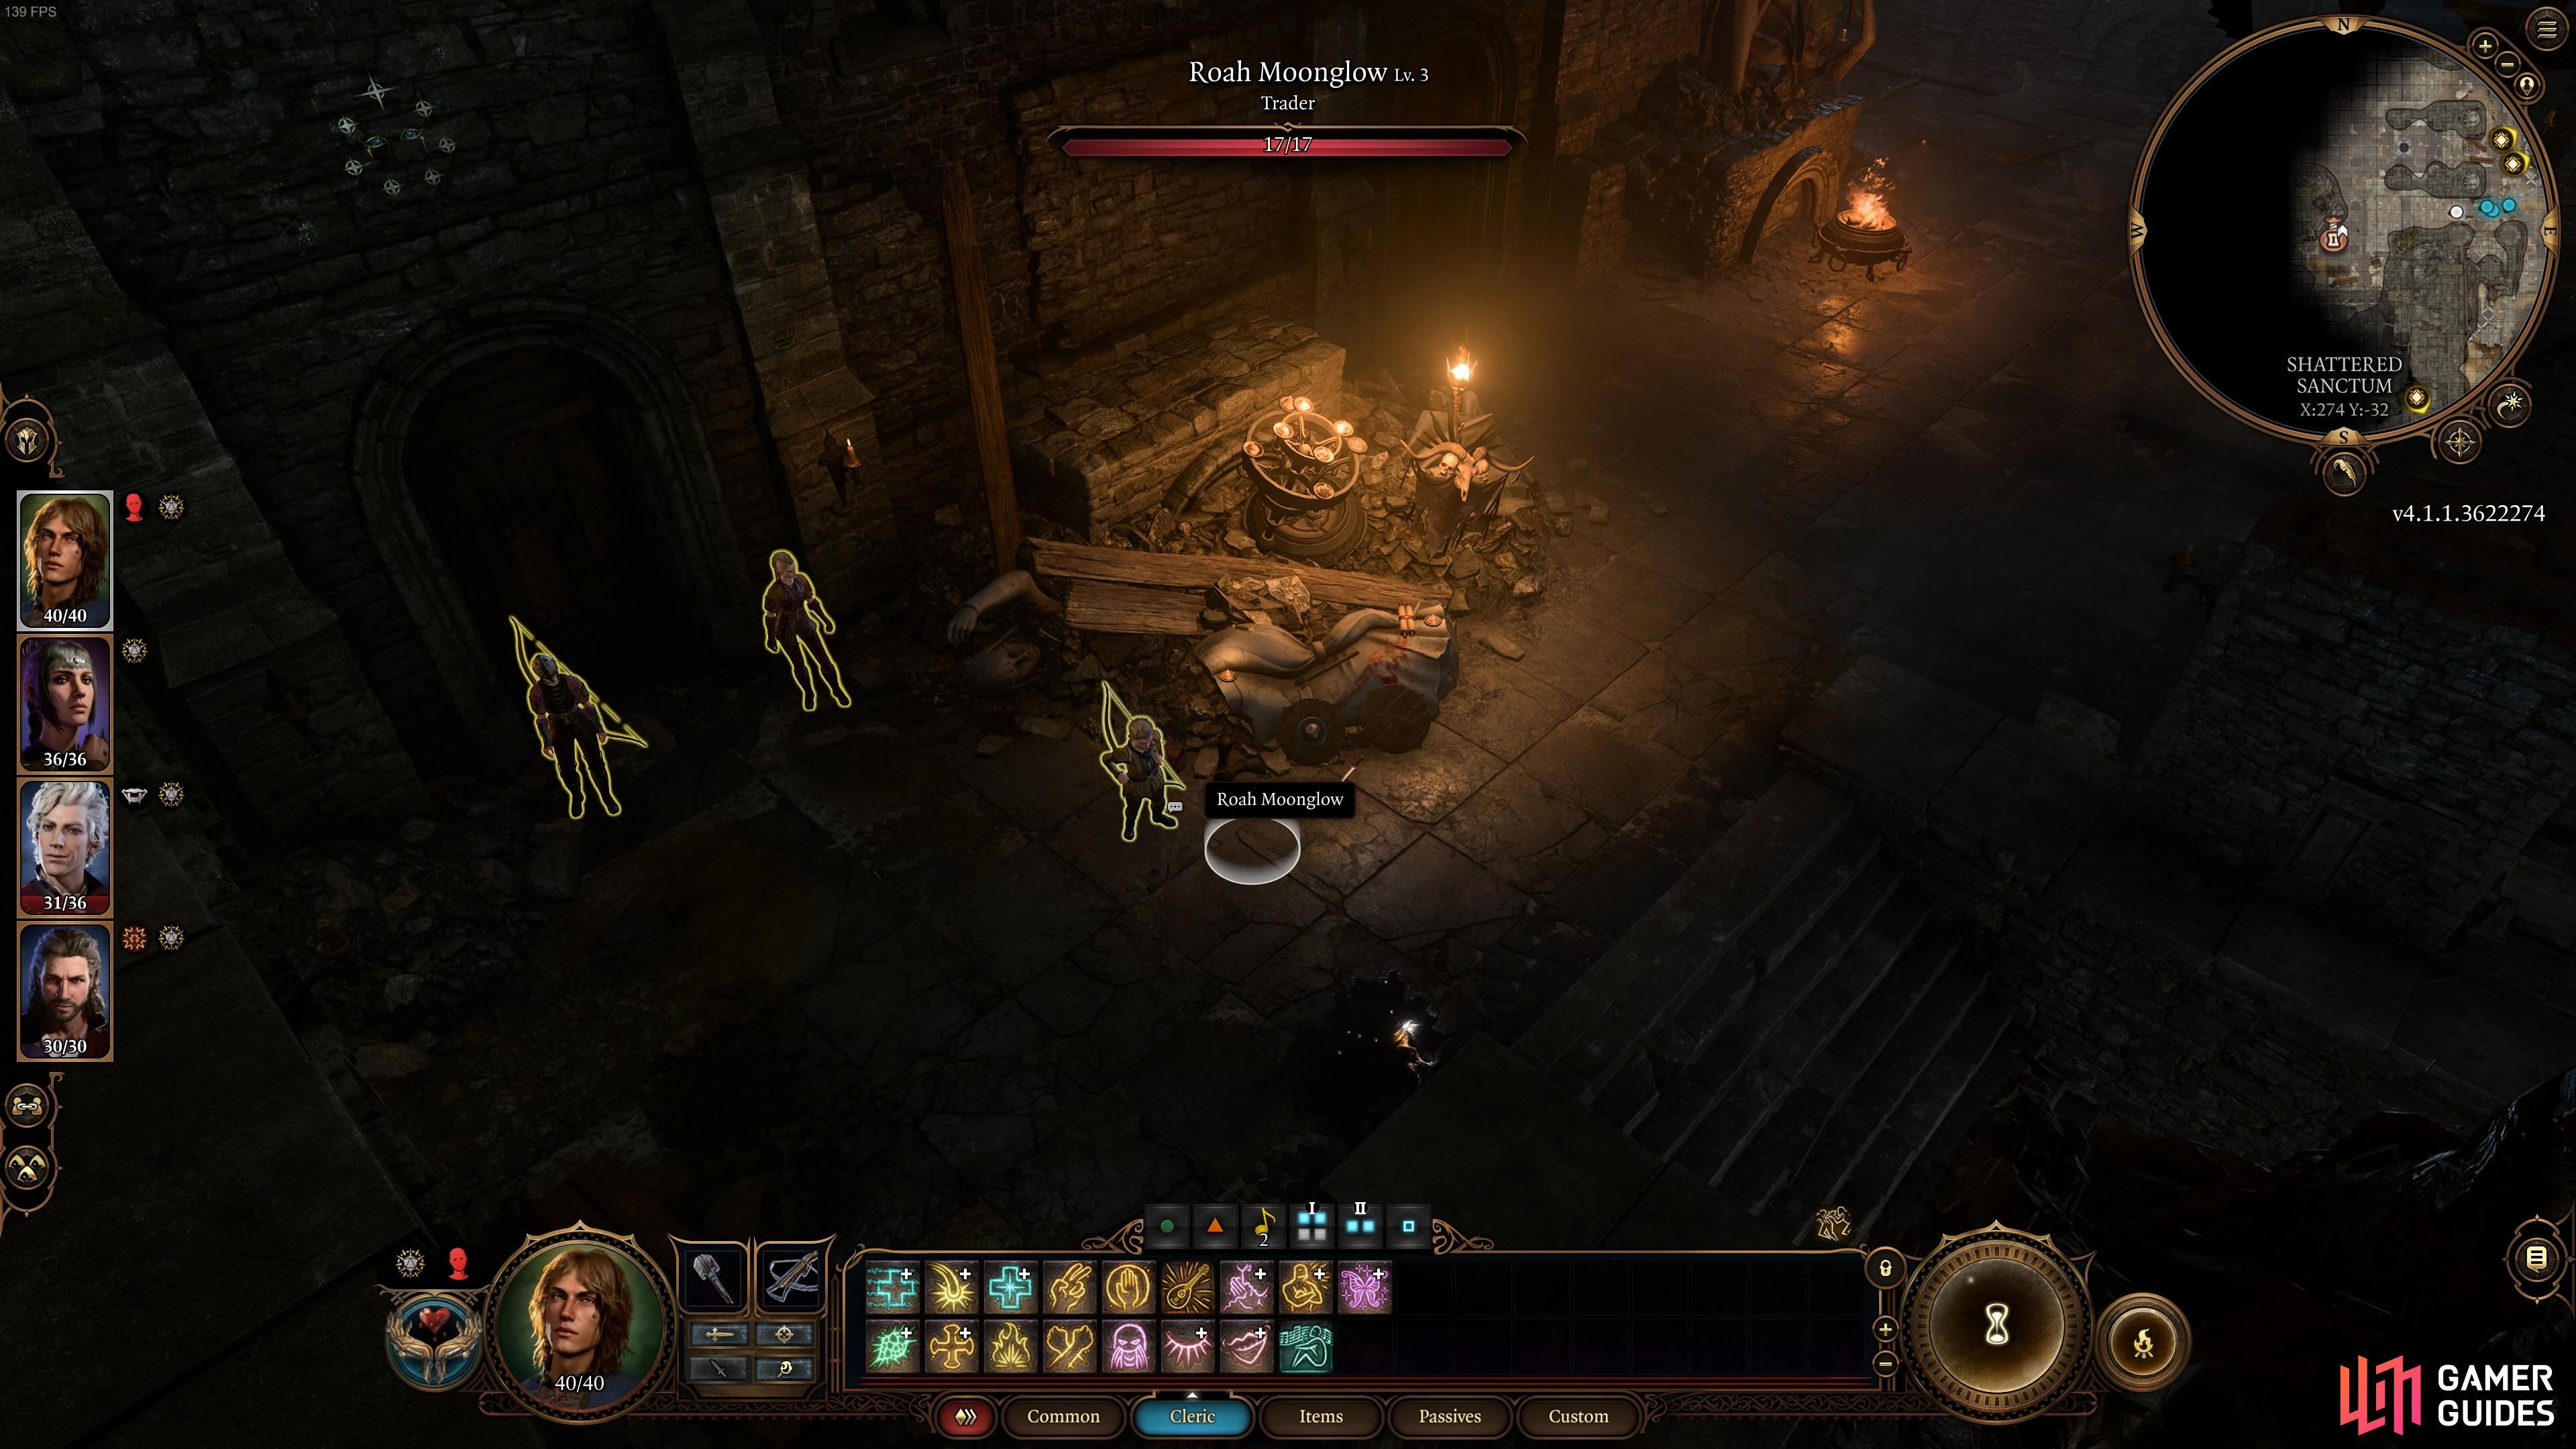
You’ll find Roah Moonglow at the top of the steps when you turn left after entering the Shattered Sanctum.
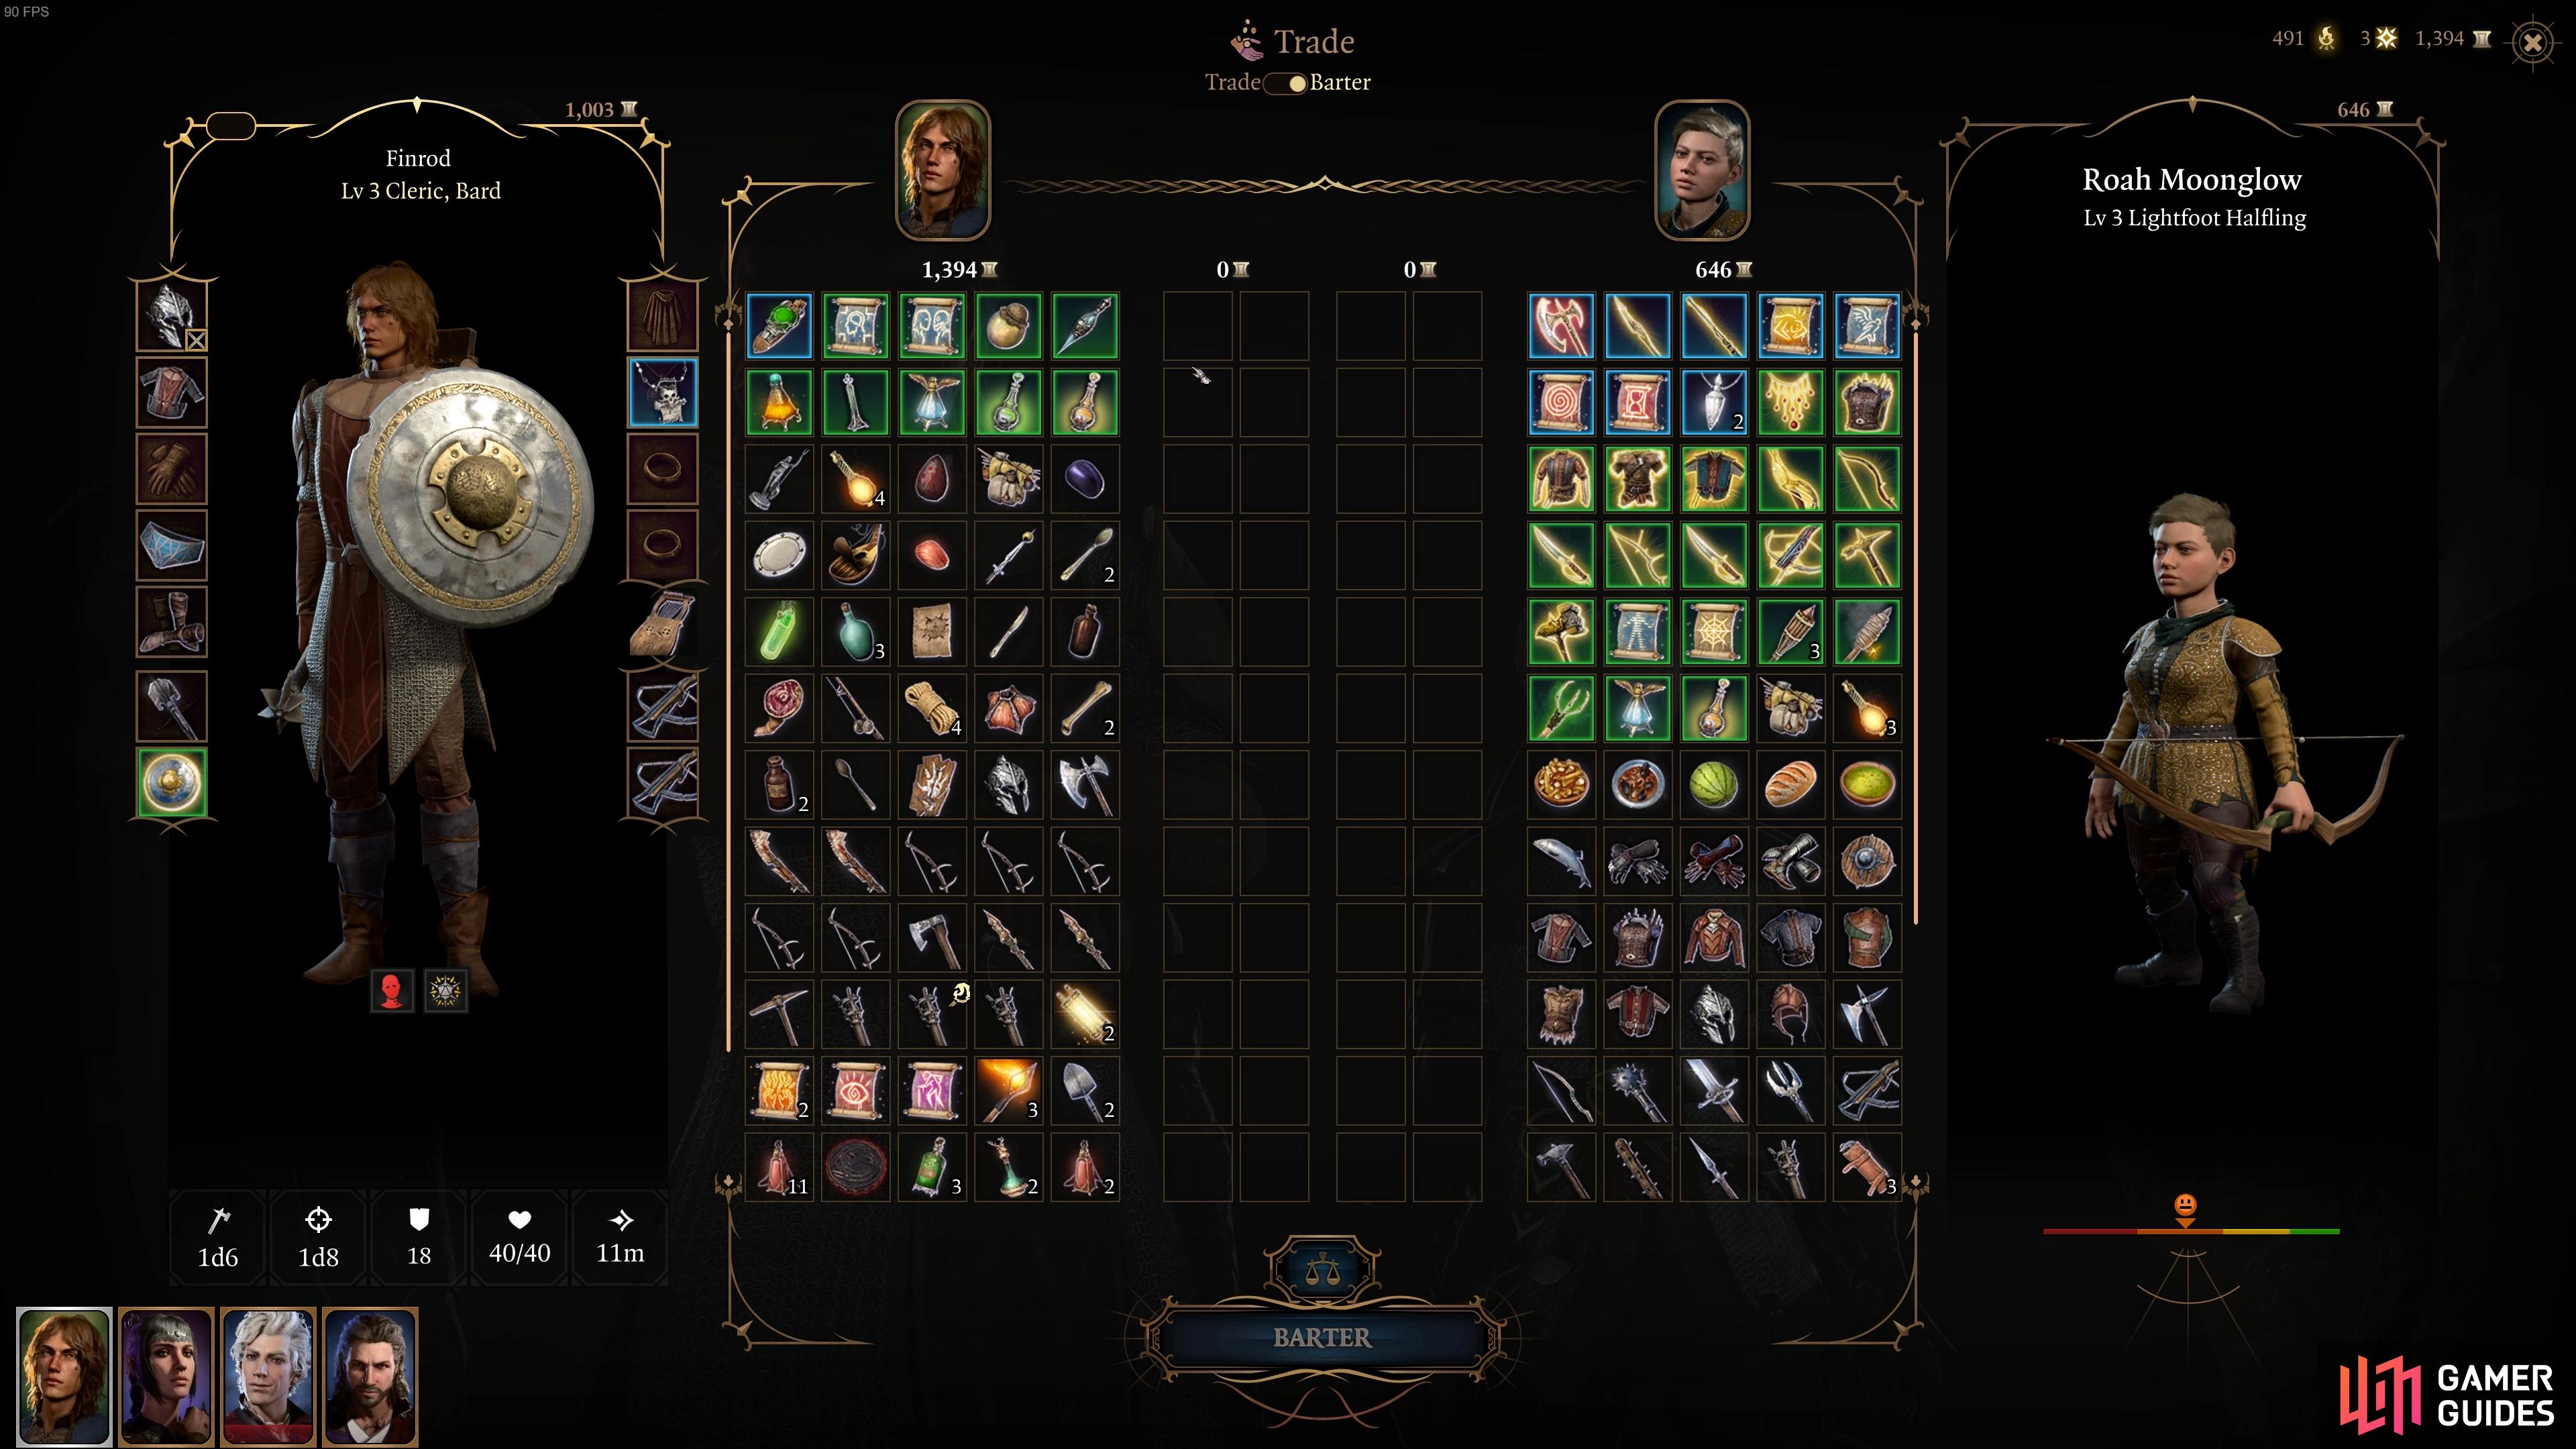
Roah has a lot to offer in terms of equipment upgrades, potions, scrolls, and utility items.
Easiest Way to Kill True Soul Gut in the Goblin Camp
If you want to kill the goblin leaders with the least possible bloodshed, there are ways to do it without having to kill many other goblins at all. In the case of True Soul Gut, the best way to do this is to accept her invitation for you to be branded by the Mark of the Absolute. You don’t need to worry if you’d rather not be marked in this way, since you don’t have to go through with the procedure. All you need to do is go along with the act until you follow True Soul Gut into her personal chambers, then when you’re alone with her, toggle to your other characters and bring them into the chambers as well. At this point she will become hostile, but you only need to kill her, without any other goblins noticing.
Use Korrilla to Kill True Soul Gut
There is another way to kill True Soul Gut without actually having to fight her, but for this to work you’ll need to follow the above steps as a human character, and don’t bring your other characters into the chamber. Instead, follow her instructions as you take the sleeping potion offered, then select the “Preserve Your Strength” dialogue option when you wake up. Don’t try to break free from the chains using a strength or acrobatics check, since this will result in you having to fight True Soul Gut alone if you succeed. After another brief cutscene, a mysterious woman named Korrilla will appear and kill True Soul Gut for you.
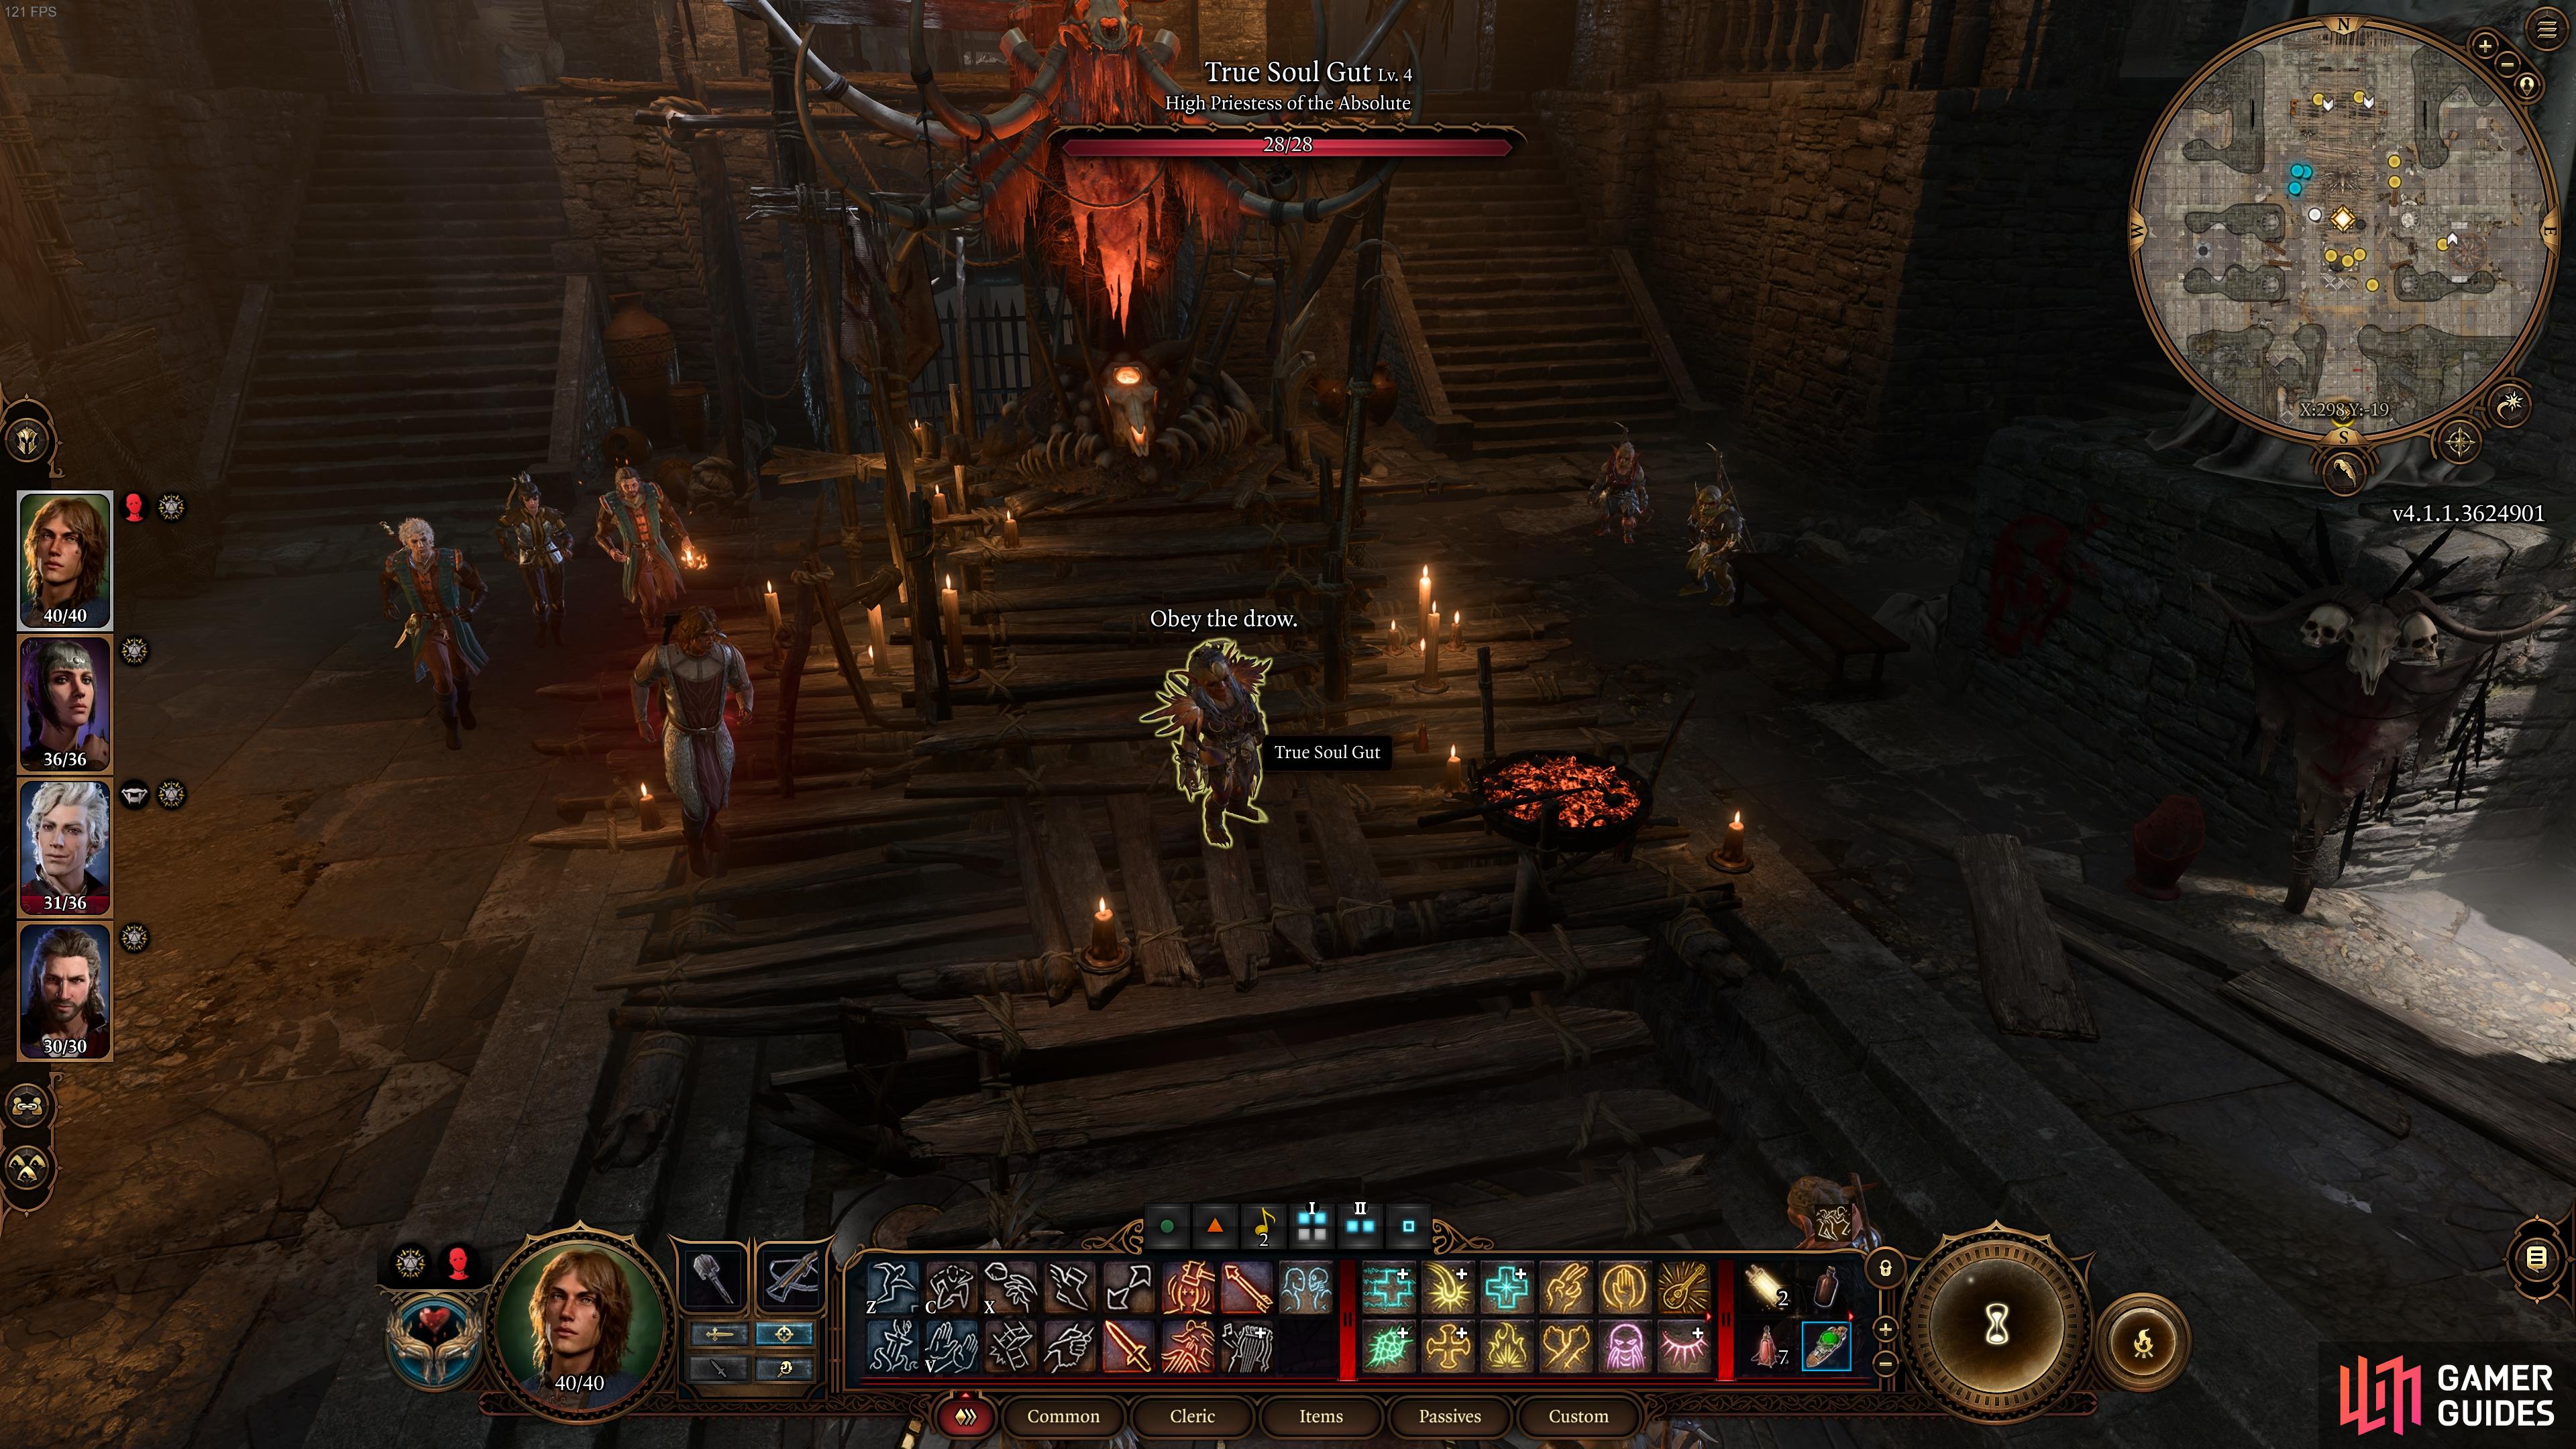
You’ll find True Soul Gut in the central chamber of the Shattered Sanctum.
Allow True Soul Gut to believe that she can mark you, until you’re alone where you can kill her or have Korrilla do it for you.
Easiest Way to Kill Nightwarden Minthara in the Goblin Camp
To kill Nightwarden Minthara with minimal fighting, you need to find her while you’re still perceived as neutral / friendly to the goblins. You’ll find her in the far northeastern part of the Shattered Sanctum, and you can get there by walking up the steps from the main central chamber, where True Soul Gut was initially found. Take the steps on the eastern side and follow the path of the stone flooring until you see some Heavy Oak Doors. From here, turn right to find the room where Minthara is waiting by a table with some war maps on it.
What Does the Scrying Eye Near Minthara Do?
You may be wondering what the purpose of the Scrying Eye is, which levitates around the room where Minthara is located. There’s no obvious function other than as an entity which will constantly knock you out of stealth, since it can ![]() See Invisibility, preventing you from sneaking around the area.
See Invisibility, preventing you from sneaking around the area.
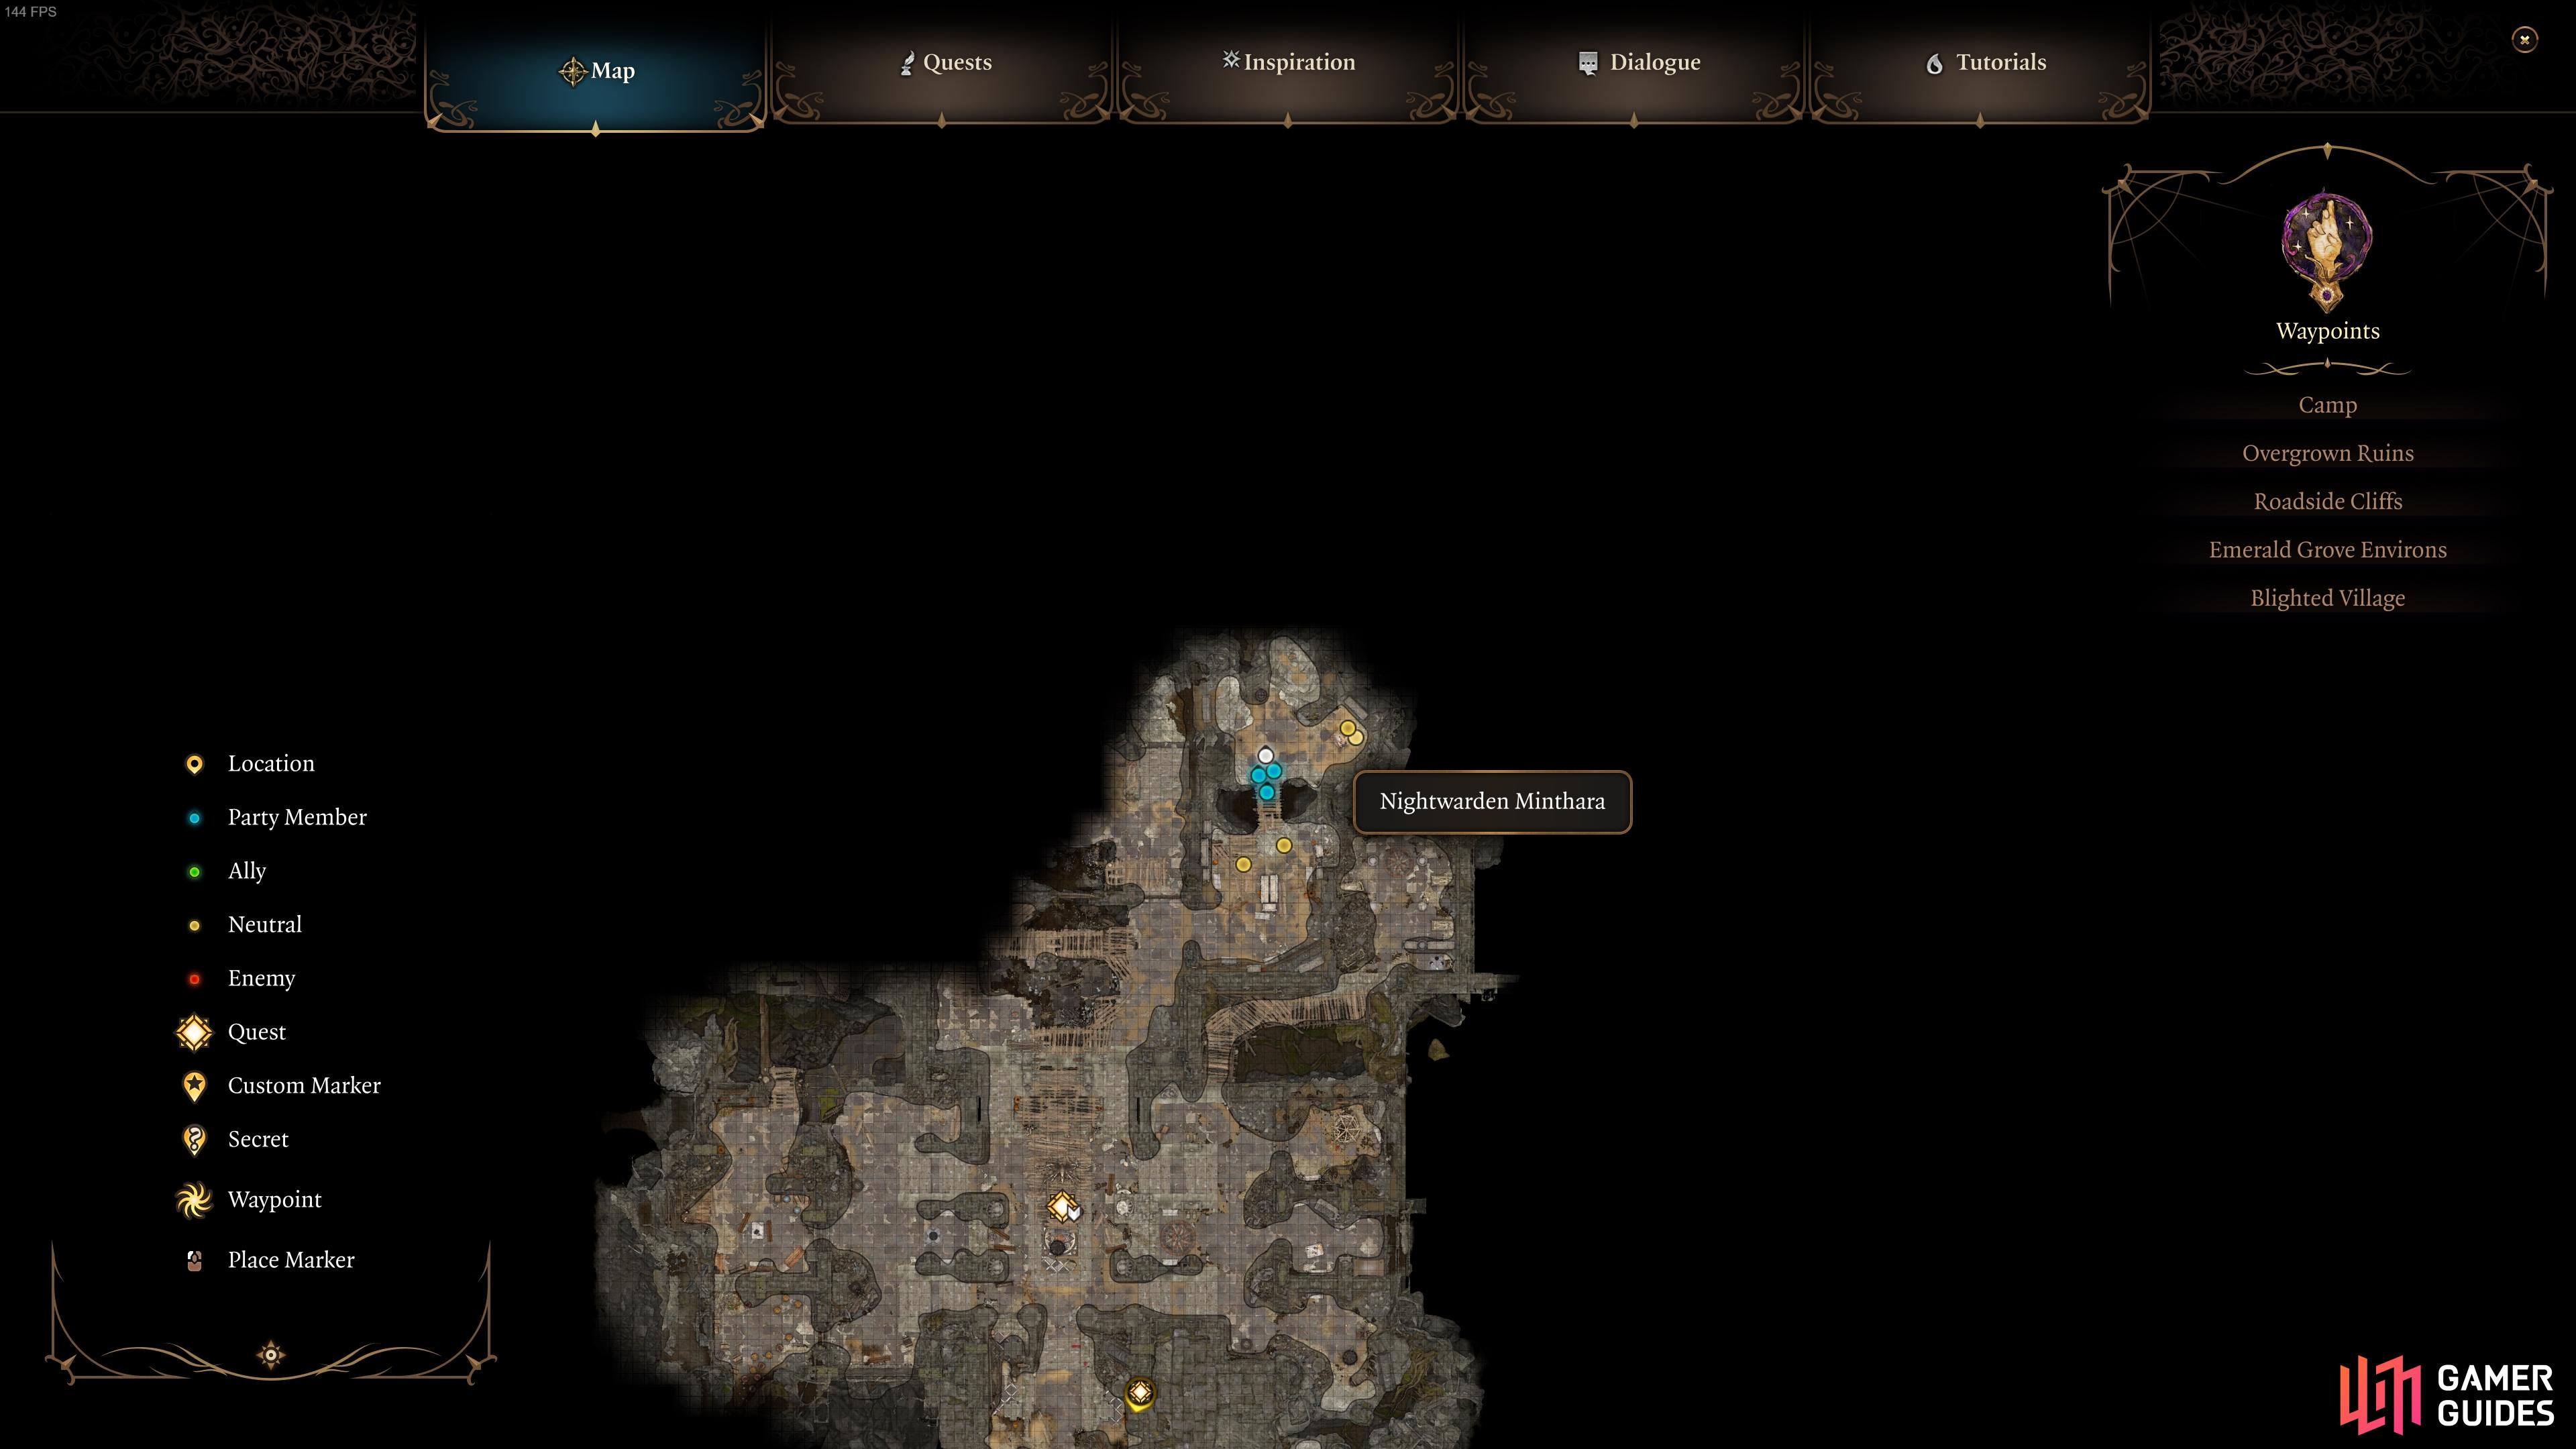
The location of Nightwarden Minthra, in the northeastern part of the Shattered Sanctum.
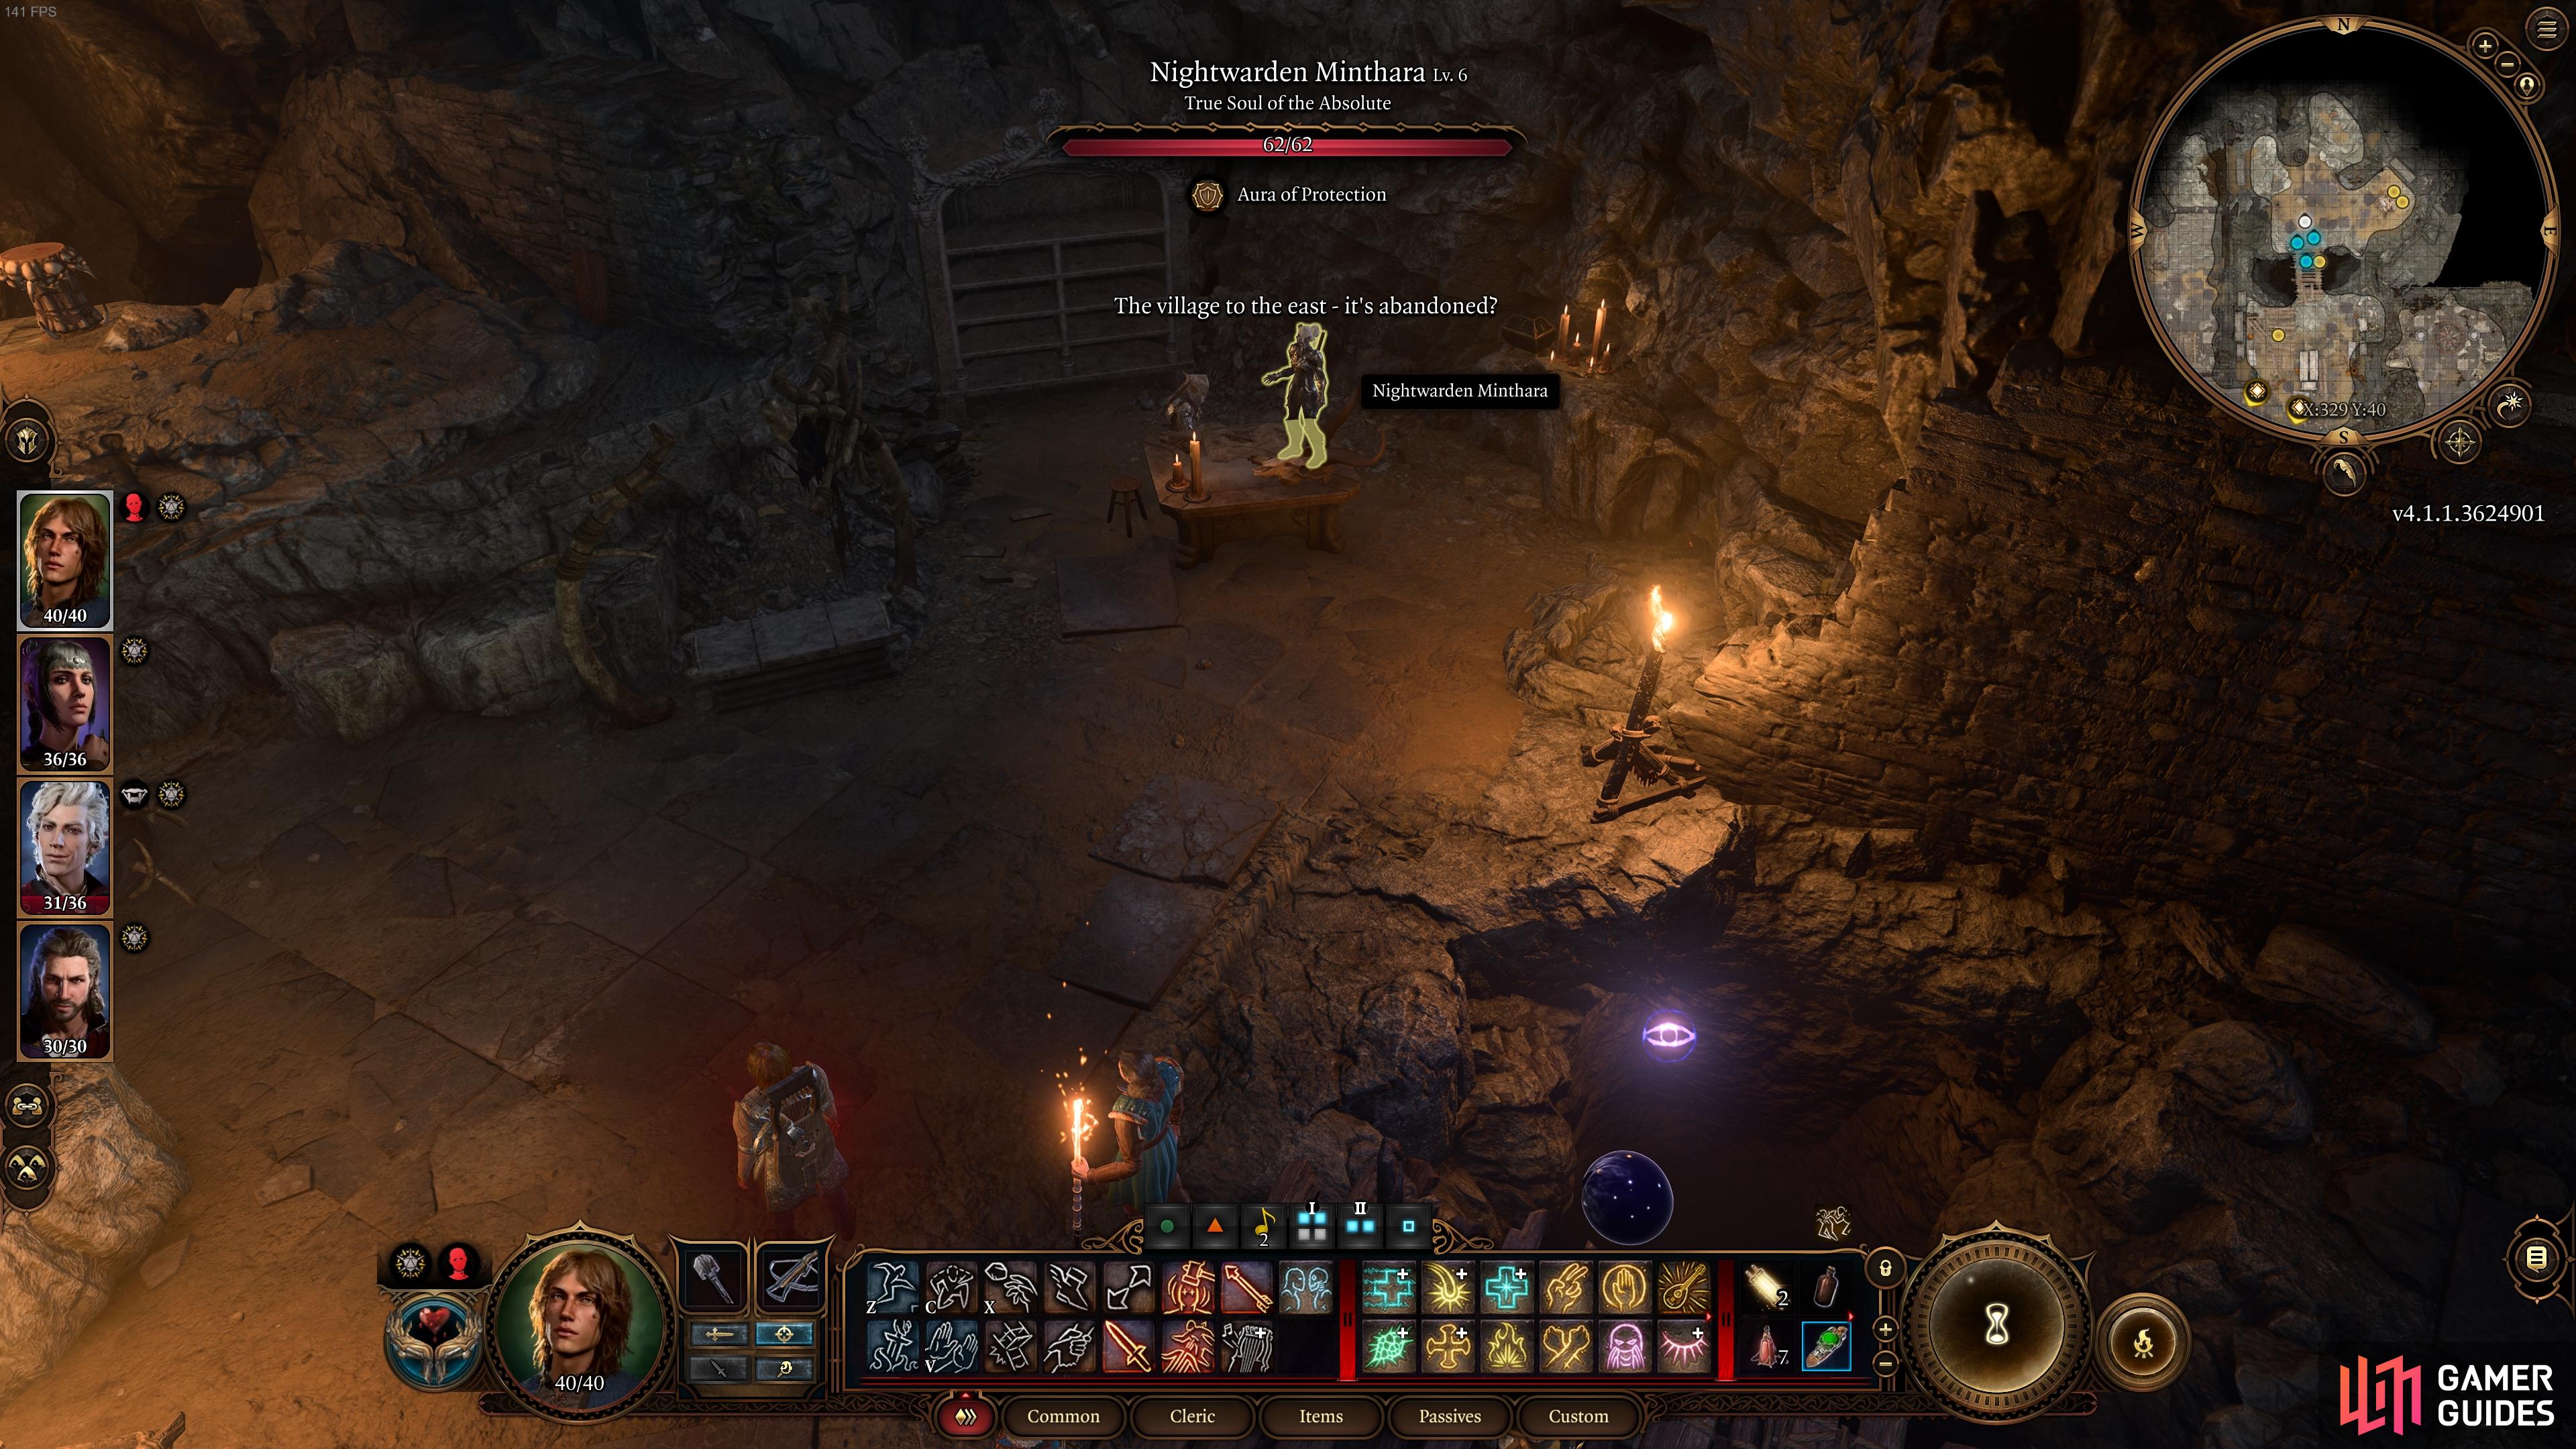
You’ll find Minthra by a table which contains war maps in the corner of the room.
How to Shoot the Wooden Support to Kill Minthara on the Bridge
The name of the game here is deception, since you’ll initially need to convince Minthara that you want to help her infiltrate the Emerald Grove, and that requires following the dialogue options below:
- “A hunt? Who’s the target?”
- “Leading her to the tieflings might doom them… but it would earn you her trust.”
- “We don’t need the prisoner. I already know the place you’re looking for.”
- “Nothing stays hidden from me.”
- “Allow her to read your thoughts.”
- “And once I’m inside?”
- “It shall be so.”
After selecting the above dialogue options in the order listed, Minthara will begin to move across the wooden bridge to the south. If you’re quick, you can aim to shoot the Wooden Support at the end of the bridge, to the right on the northern side. Be ready to shoot it as she’s walking on the bridge, and she’ll fall into the chasm below as it crumbles. If you don’t think you’ll be quick enough or you need more time to locate the support, enter turn-based mode first.
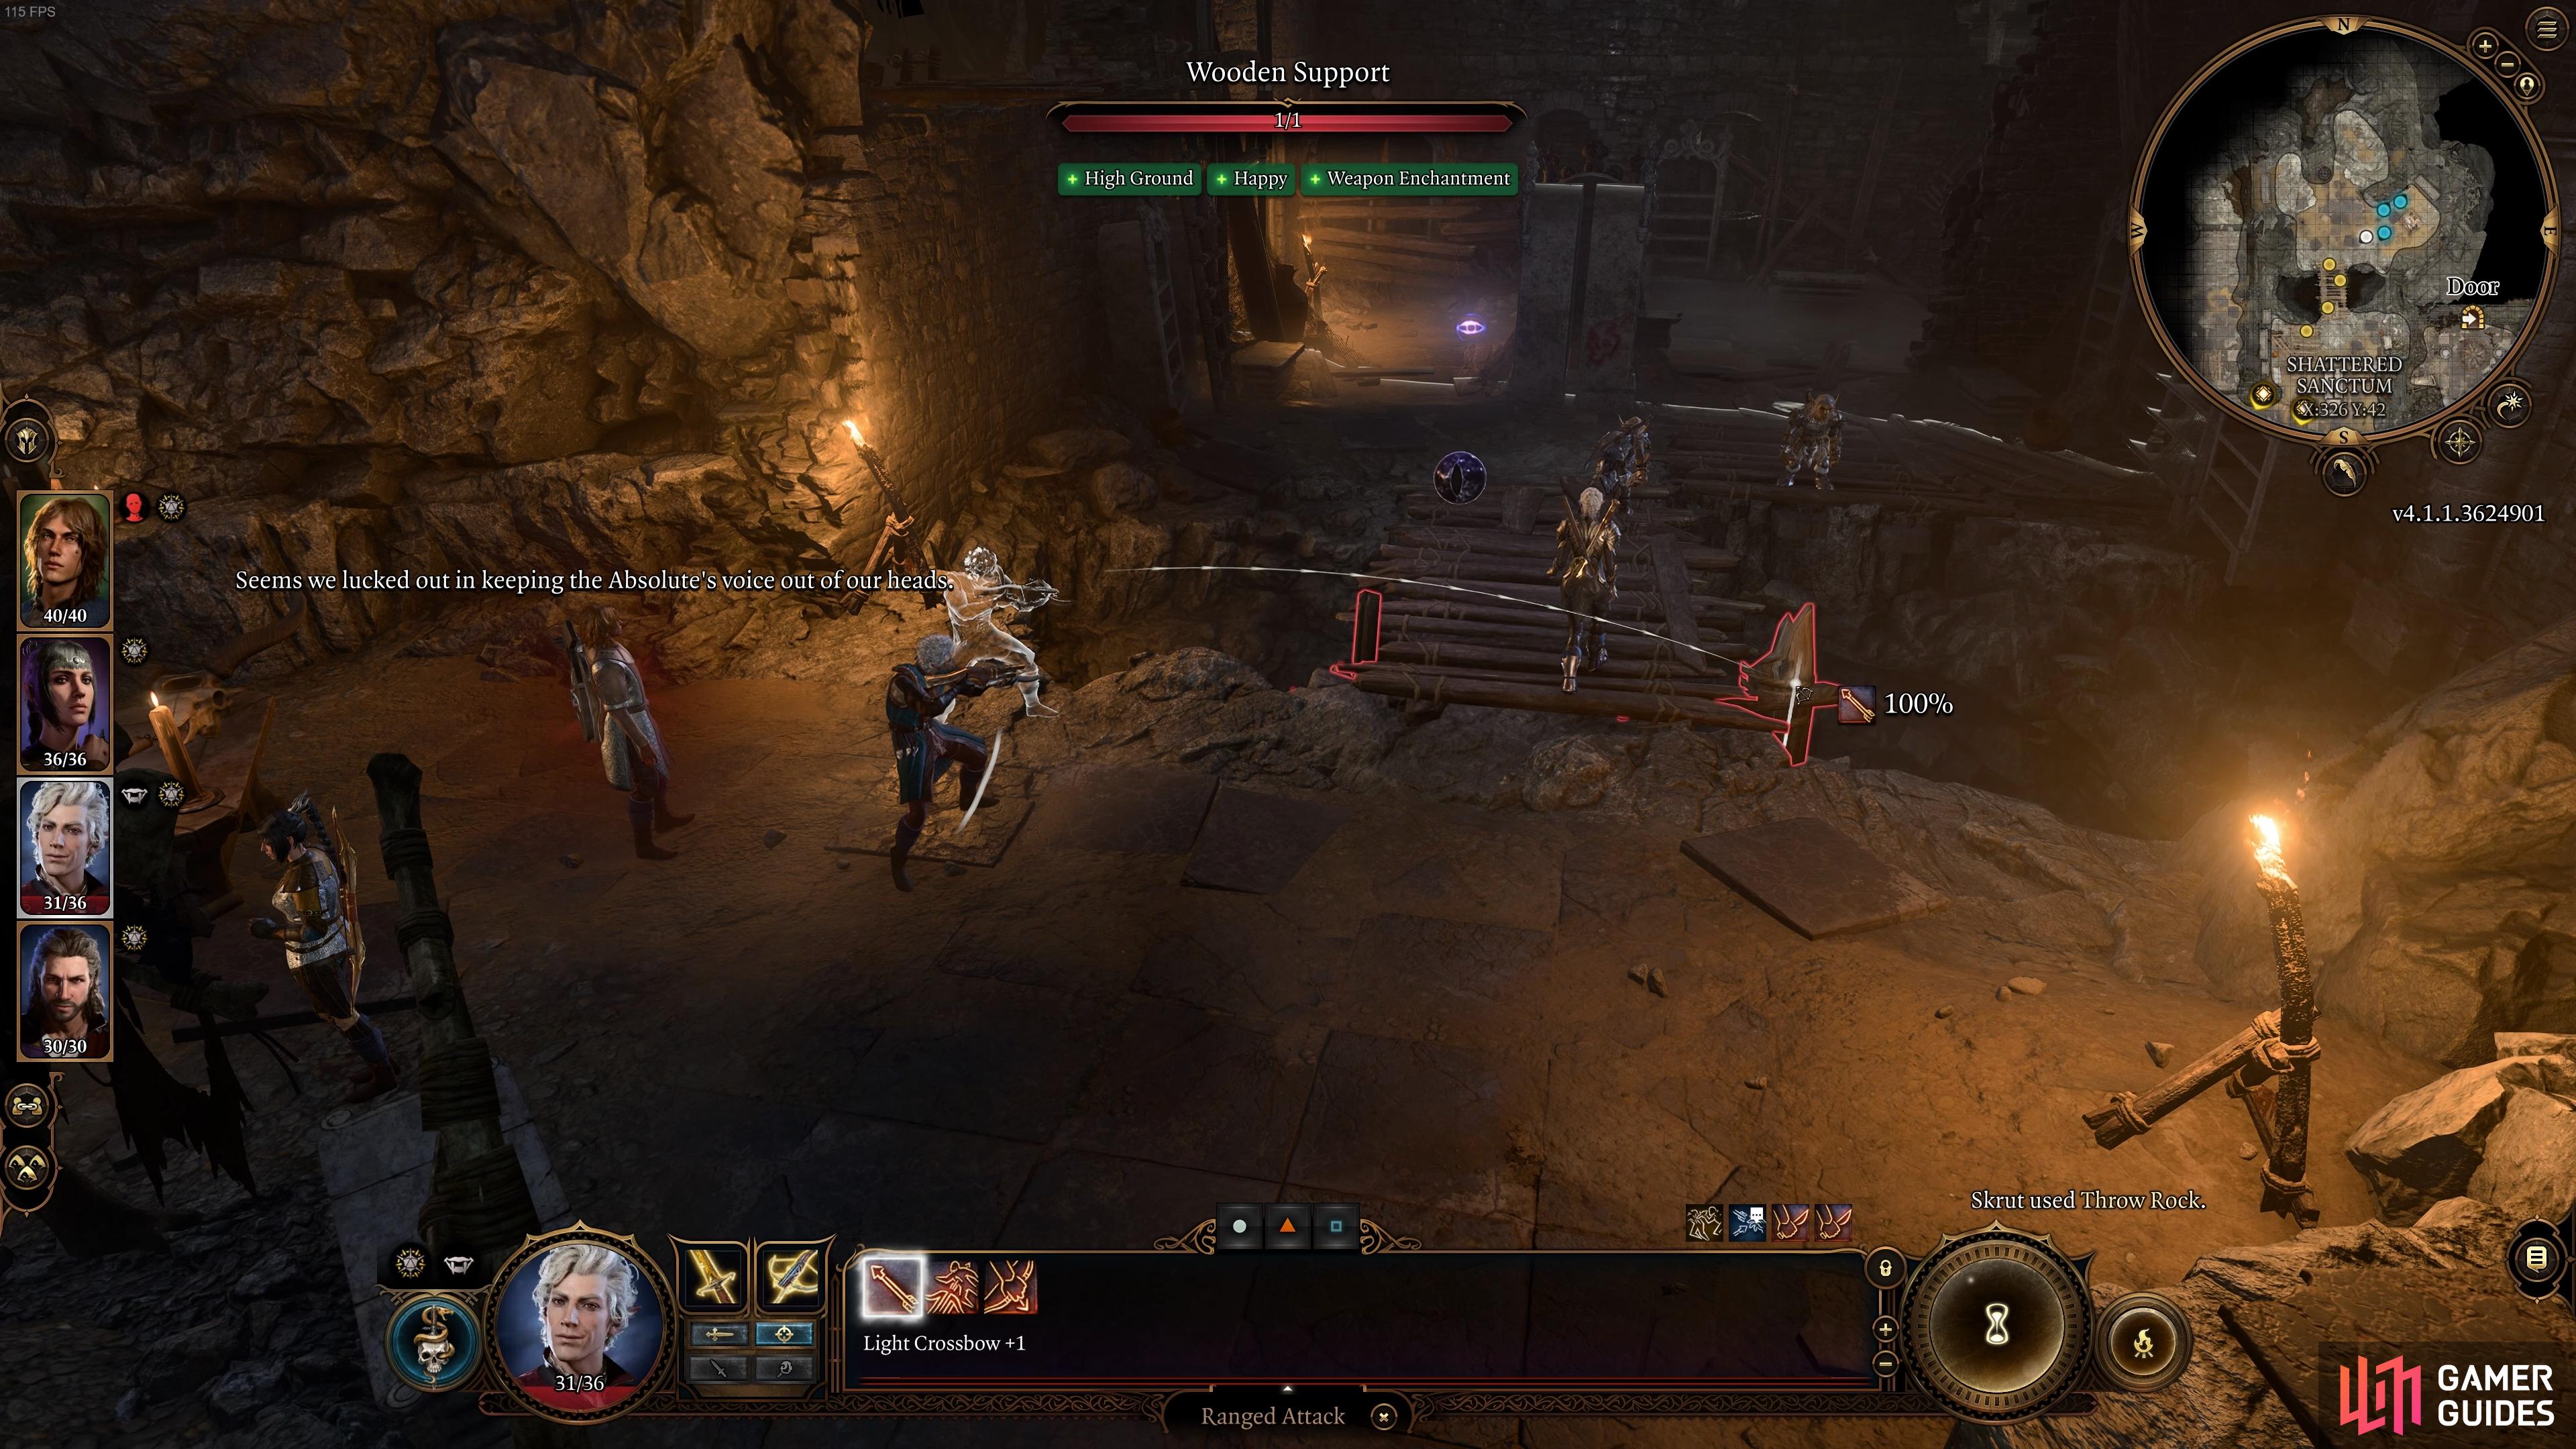
You can shoot the wooden support at the end of the bridge to cause it to collapse when Minthara is on it.
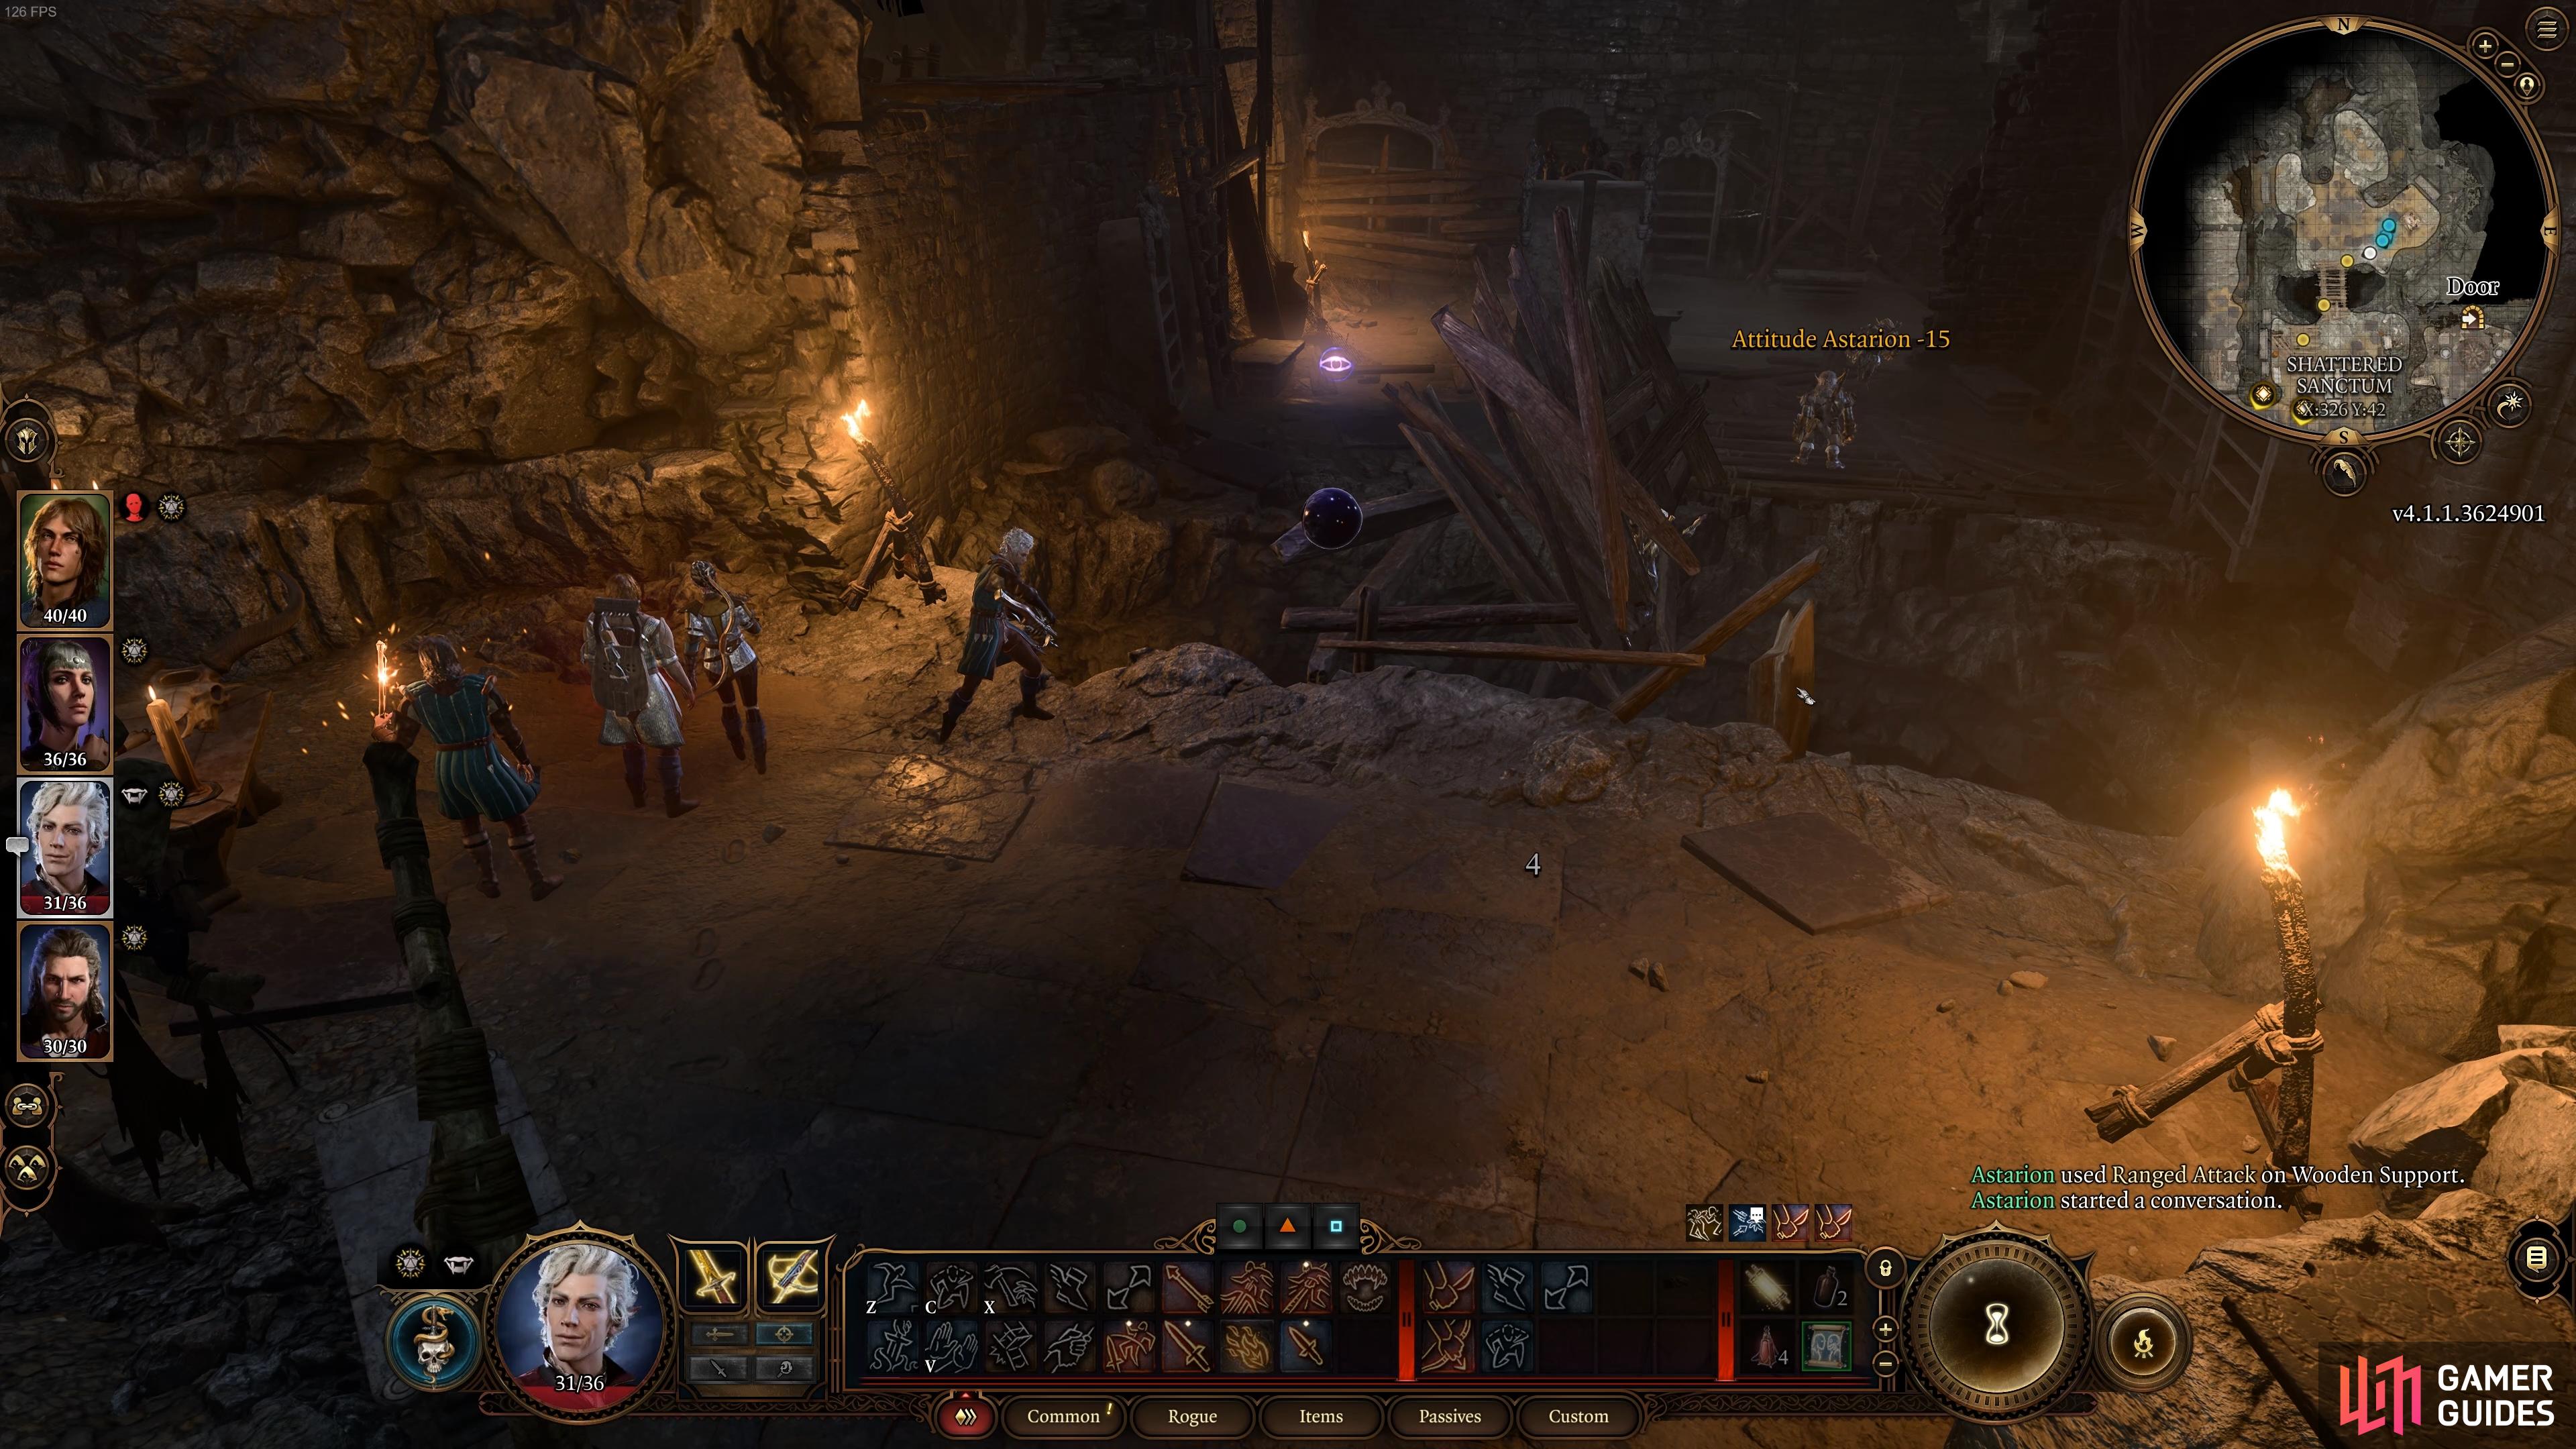
If you time it correctly, Minthara will fall into the chasm below.
After you’ve killed Minthara one way or another in this room, there may be one or two goblins still patrolling in the northern part. You’ll need to kill them quickly if they’re hostile, before they reach one of the nearby War Drums. You can jump over the chasm where the bridge was to reach them quickly, but with any luck they won’t have noticed what you’ve done before it’s too late. In our case one goblin noticed, but we had the option to bribe them, or convince them that it was a mistake, and this was enough to keep them neutral.
Easiest Way to Kill Dror Ragzlin in the Goblin Camp
Now for the last goblin leader in the Shattered Sanctum: Dror Ragzlin, who you can find in the northernmost central chamber of the Shattered Sanctum, where he’s conducting a ceremony.
This is a hobgoblin boss with a significant amount of health. He also hits pretty hard so the fight against him on an even playing field would be fairly tough, especially with the number of allies surrounding him in the same room. Fortunately, there’s a cheeky way to get rid of him quickly by shoving him into the pit below. You can do this by approaching him from the southwest and shoving him into the smaller hole to the northeast, or by goading him towards the south where there’s a much bigger hole, with less room for error.
It’s important to note that you will need to use a character with reasonably high Strength and Athletic stats to successfully knock Dror Ragzlin far enough into the chasm to the northeast. If you try with a weaker character, he won’t be budged far enough. If you don’t have any characters capable of this, you may want to find and recruit Halsin first to help you with the fight. You can see where to find Halsin in the “Finishing Up in the Goblin Camp: Loot & Loose Ends” section of this guide.
The location of Dror Ragzlin, in the northernmost central chamber of the Shattered Sanctum.
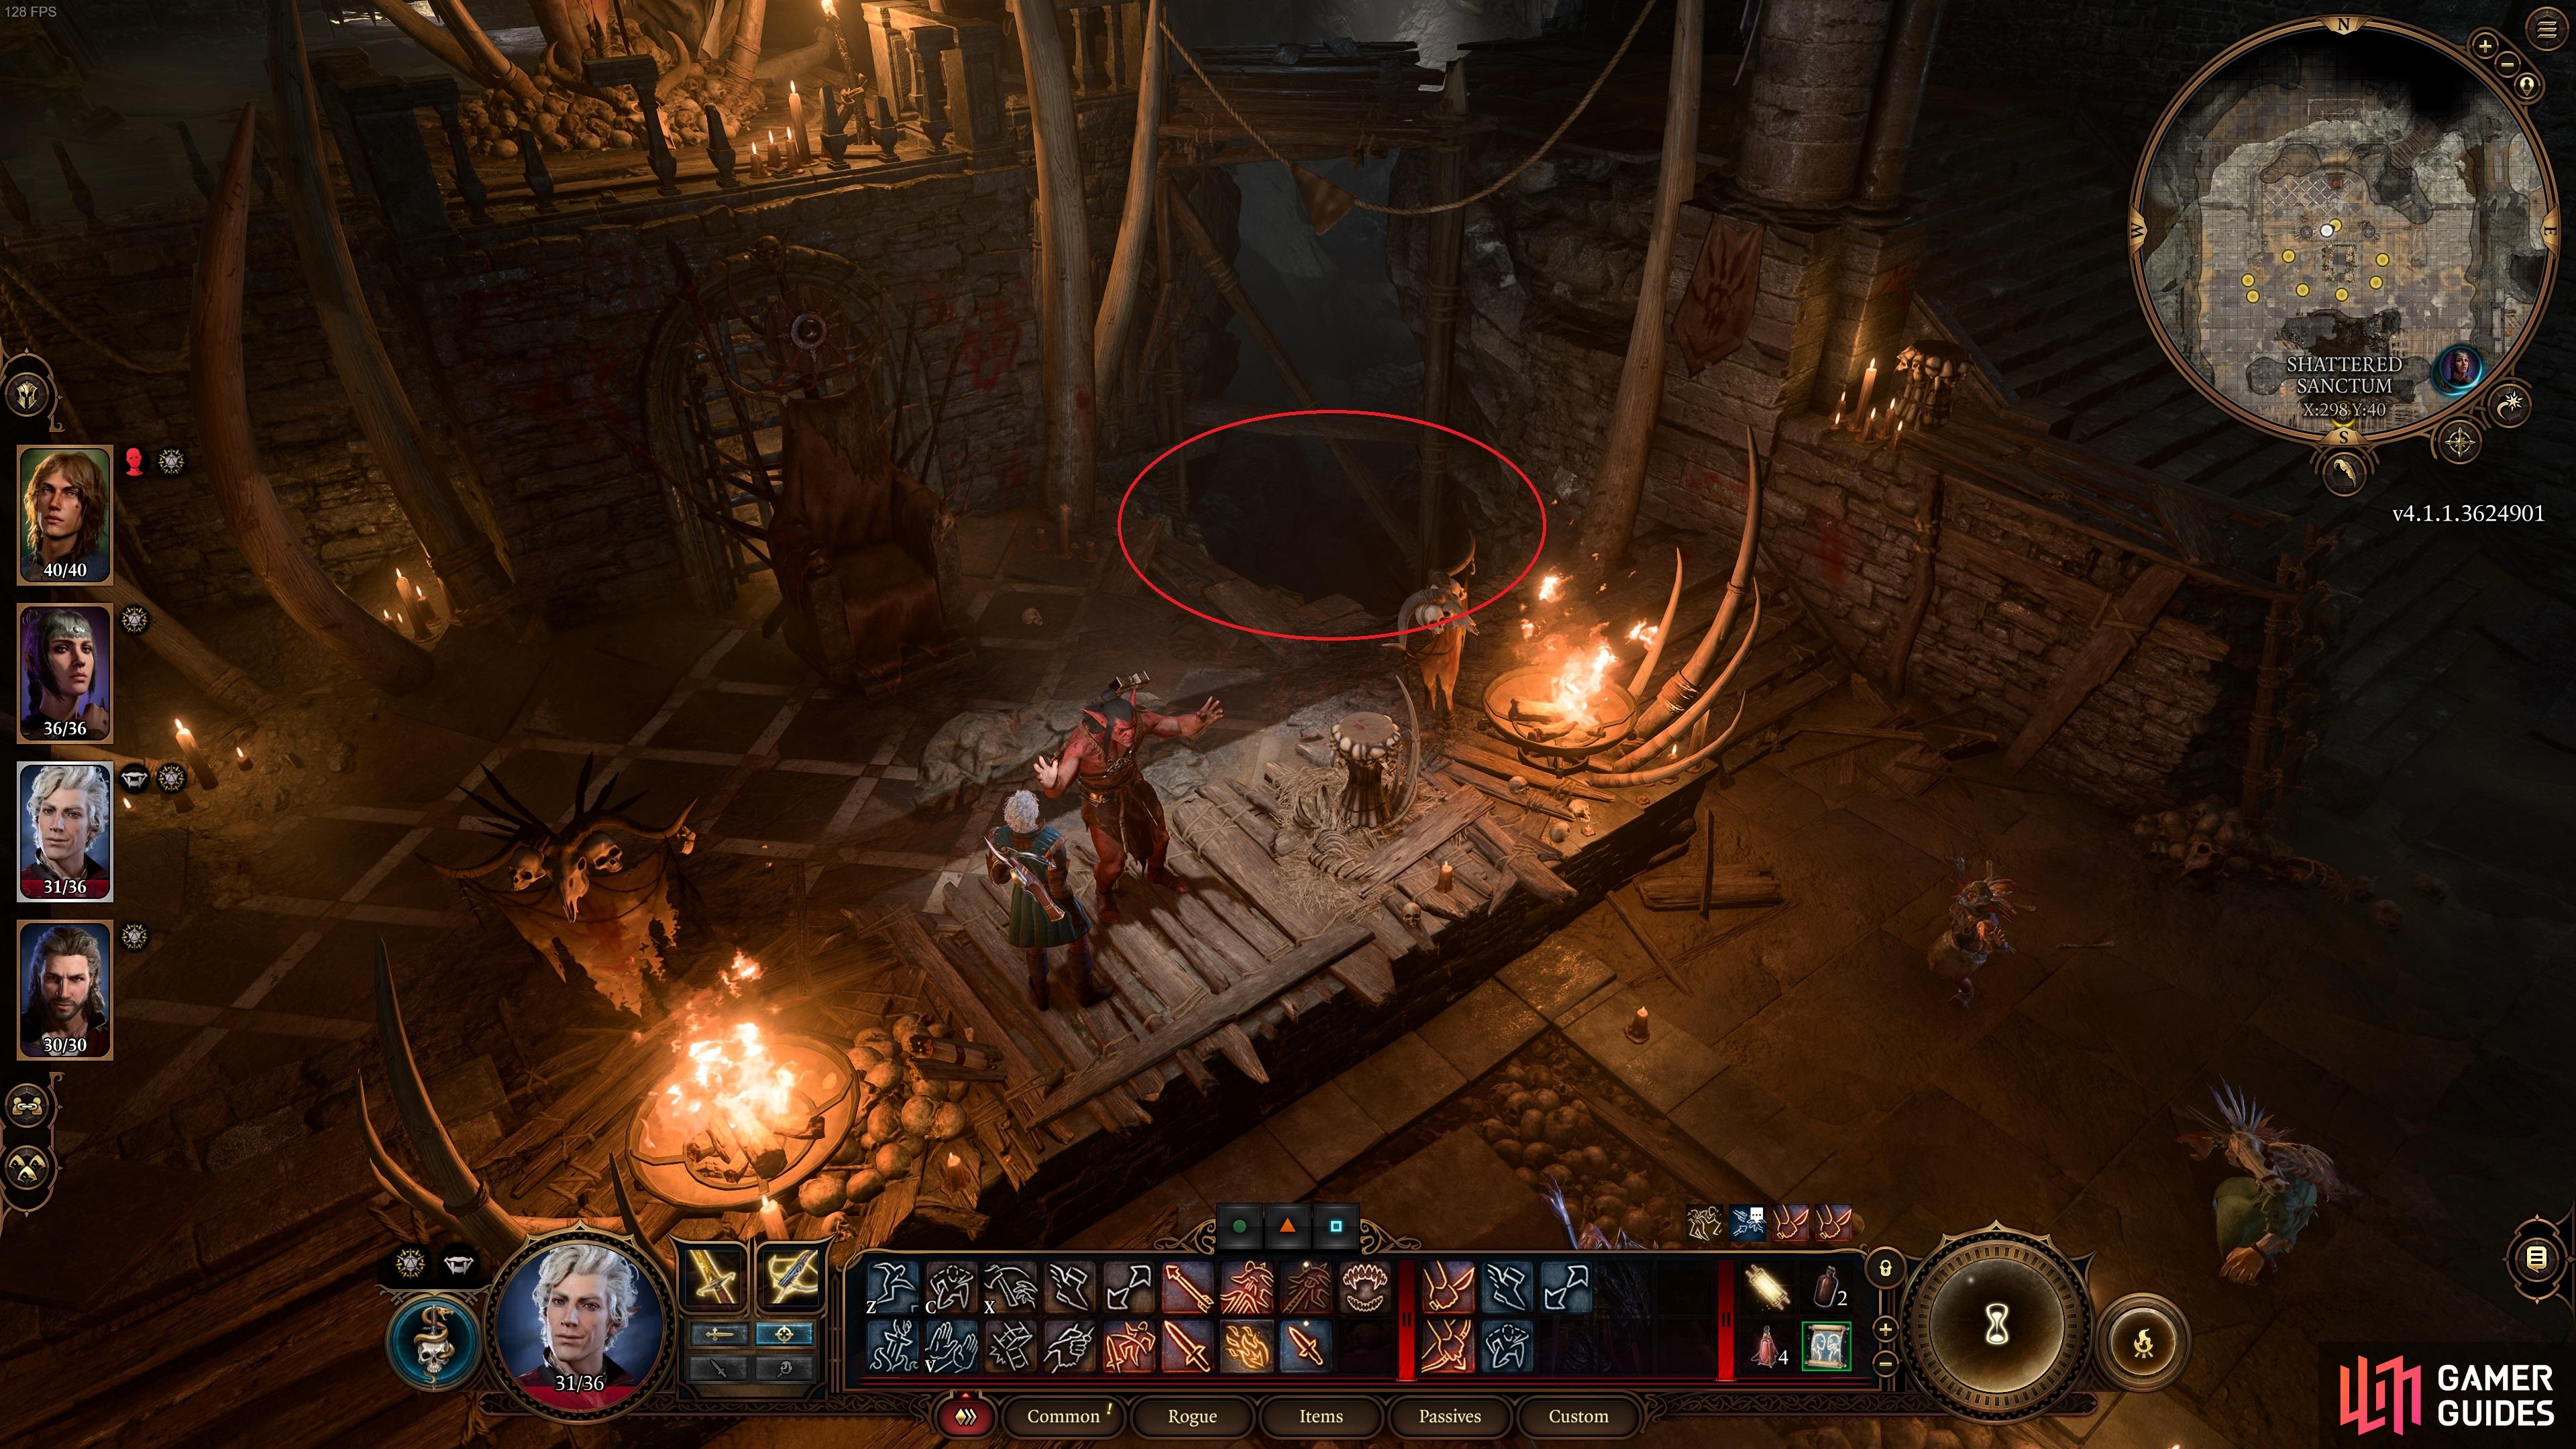
You need to shove Ragzlin into the chasm to the northeast to kill him outright, so you need high-strength character (unlike Astarion pictured here).
If you manage to shove Dror into the smaller pit to the northeast, he will die instantly upon hitting the bottom. If you shove him into the larger pit to the south, he’ll fall into the spider lair and you’ll need to finish him off from above with ranged attacks or return to him later by opening the gate to the lair. The latter method involves an increased risk of introducing more goblins to the fight, so you’re better off shoving him into the pit to the northeast if possible.
Either way, the most important thing to do here is not make yourself vulnerable to being shoved into the pit yourself. Keep your characters in the center of the room as you try to position yourself in a way which provides you with a good opportunity to shove Dror into the pit and stay away from the edges. If you want to be sure that you get this right, you can make a hard save just before you enter the room, allowing you to reload if things go south.
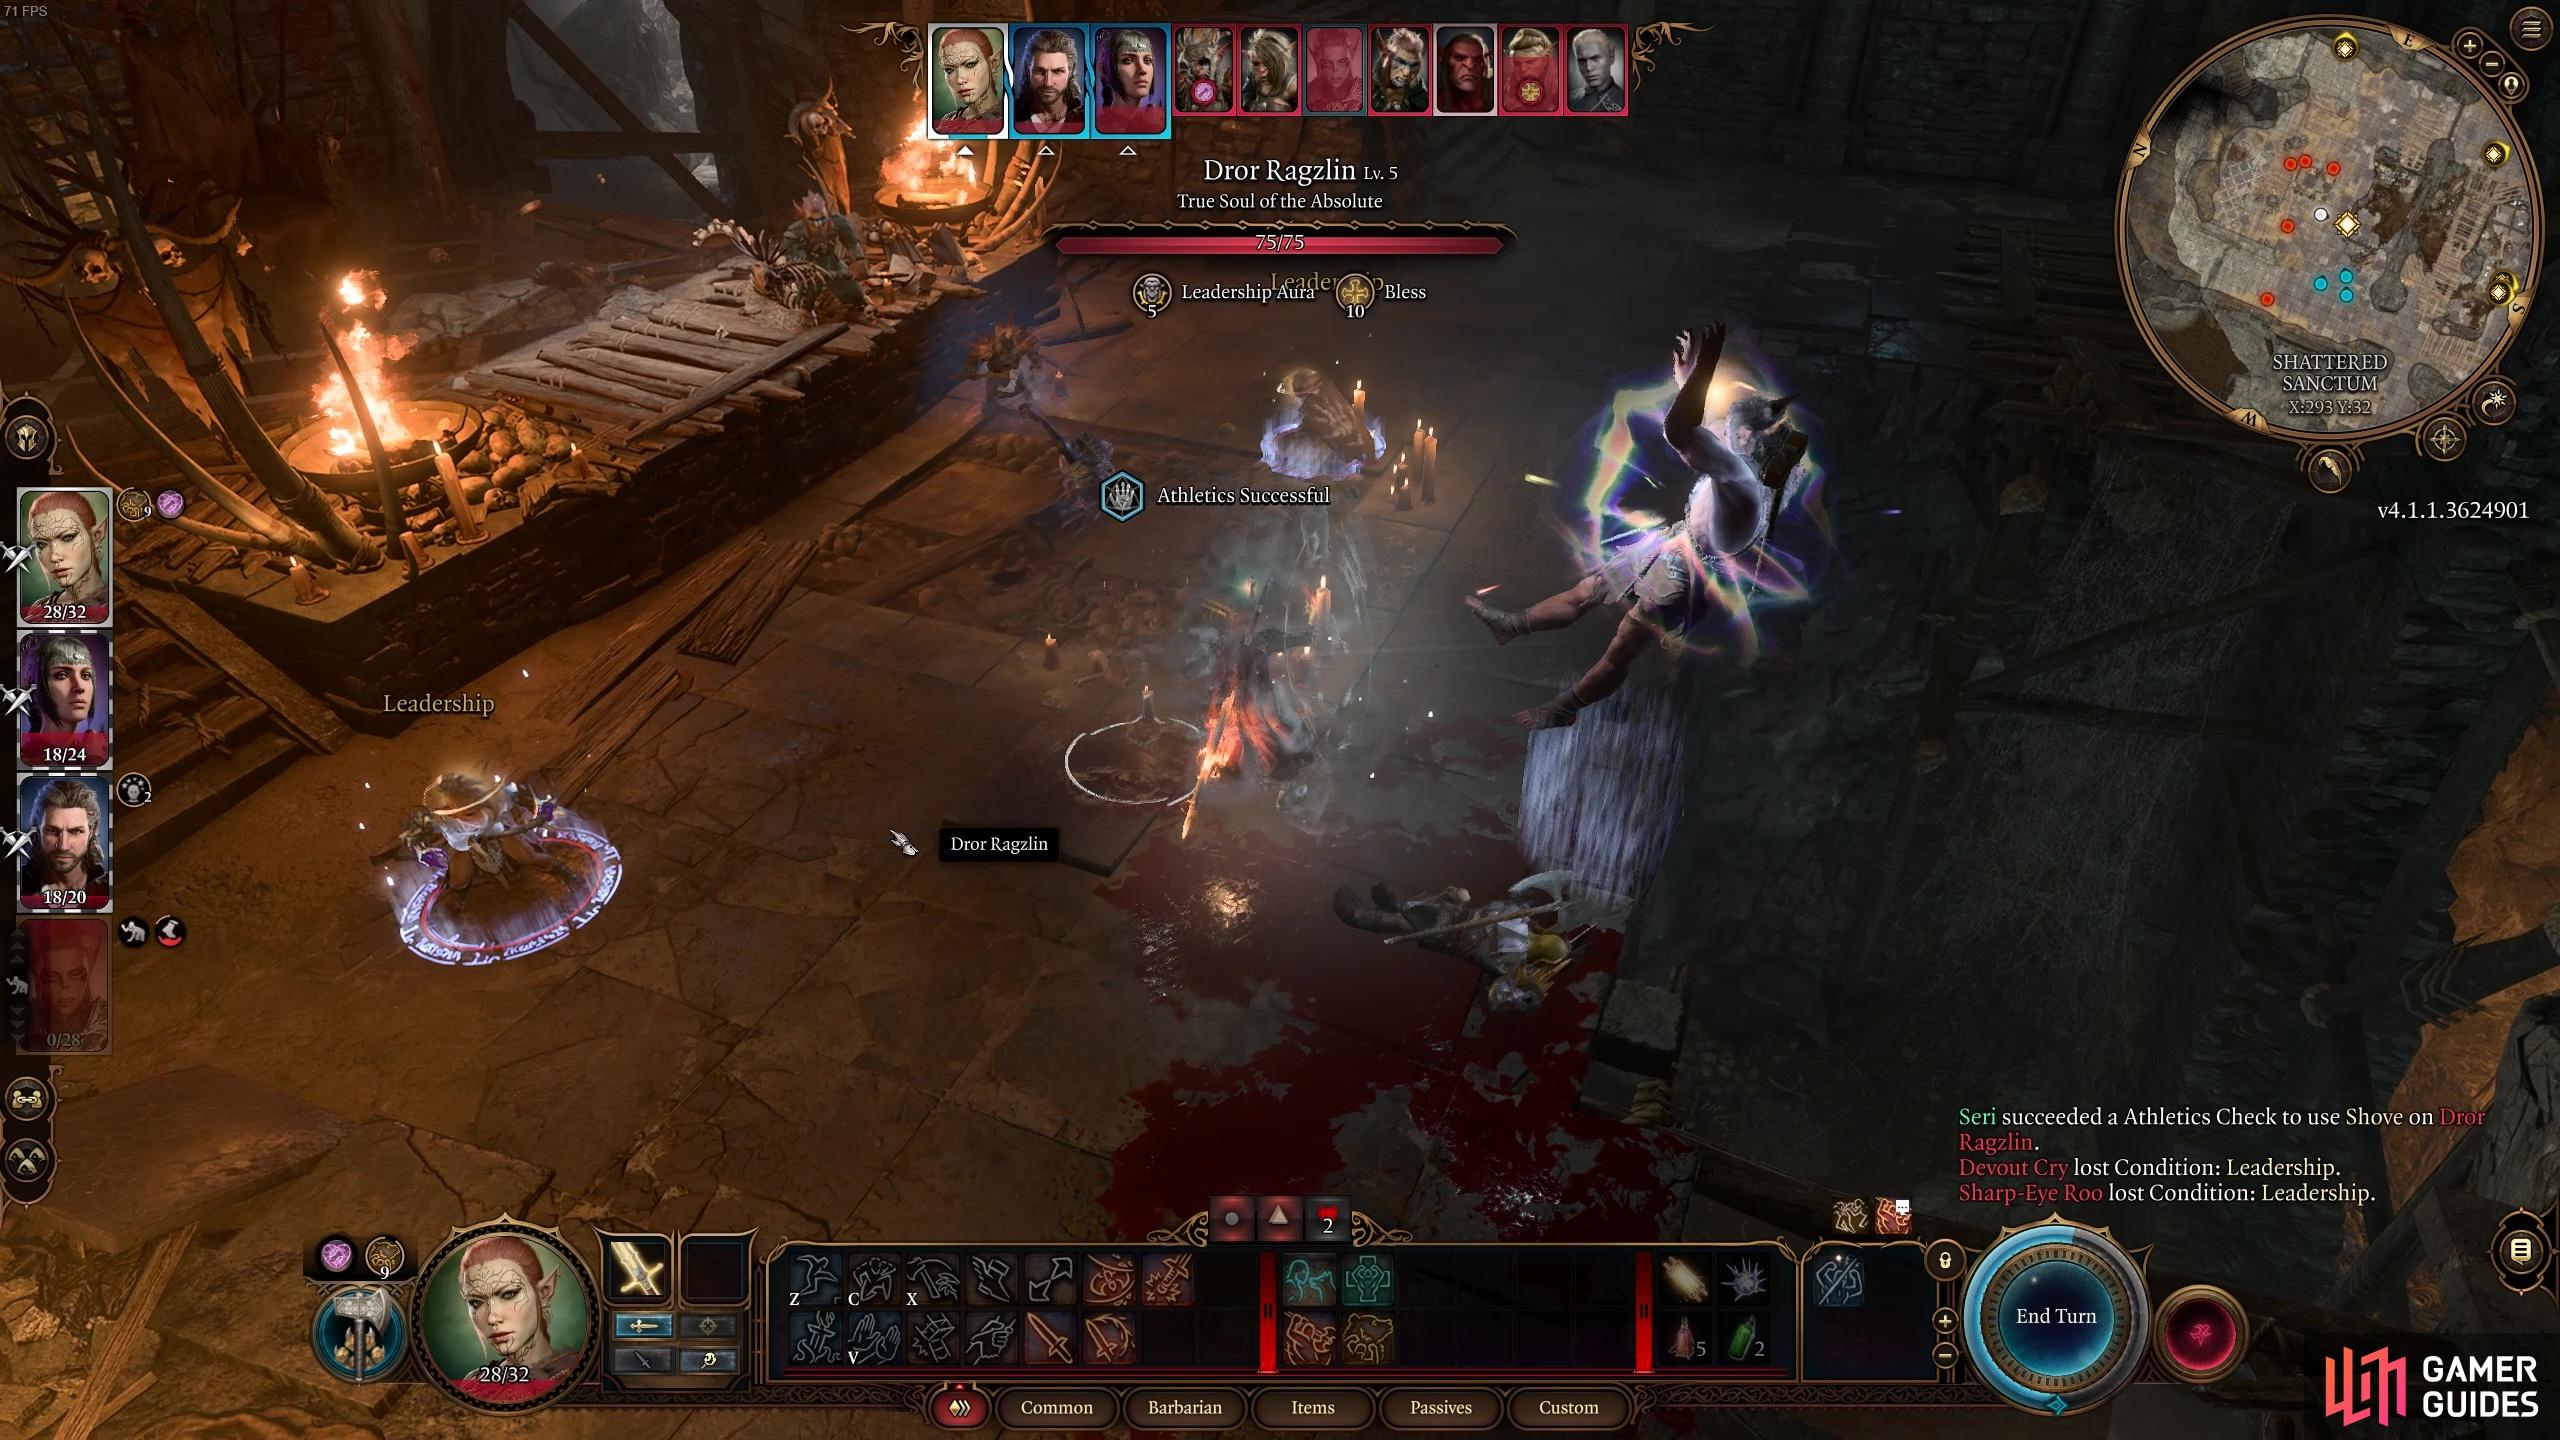
(1 of 3) Try to position Dror Ragzlin so that he’s near the drop to the spider pit in the south.
There are ways to make shoving Dror into the northeast pit slightly easier, but it will involve either a character with excellent stealth capabilities, or a character with an invisibility potion / spell. However you do it, the aim is to take one character into the room where Dror is preparing the ceremony, get close enough to him while remaining unseen to avoid triggering dialogue, and position yourself facing northeast so that you can shove him into the pit in the corner of the room. If your stealth check fails, you’ll have to agree for him to begin the ceremony first, then do the same thing while being visible.
The advantage of remaining invisible with one character is that you can re-enter that state of being unseen after shoving Dror, then make your way outside of the room to avoid a fight with the goblins. However, you’ll need at least two invisibility potions for this to work, or be able to cast ![]() Invisibility twice. You should be able to use
Invisibility twice. You should be able to use ![]() Dash to get out of the room before the goblins perceive you, but if for any reason you are caught, just be sure to stay in the center of the room to avoid being shoved into the pit yourself, and be ready to have your companions (who should be waiting just outside the room) come in to help you with the fight.
Dash to get out of the room before the goblins perceive you, but if for any reason you are caught, just be sure to stay in the center of the room to avoid being shoved into the pit yourself, and be ready to have your companions (who should be waiting just outside the room) come in to help you with the fight.
Finishing Up in the Goblin Camp: Loot & Loose Ends
Now that you’ve killed all three goblin leaders, you can take some time to explore the rest of the camp to complete all of the remaining objectives and obtain some decent loot. We’ll detail each step in this process below.
Find and Rescue First Druid Halsin
As mentioned previously, there are numerous ways in which you can kill the goblin leaders, and the methods described above aren’t necessarily the only correct ways, they’re just arguably the easiest to avoid fighting too many goblins. I tend to prefer those bigger fights with large groups of enemies because they can be fun, and if you want to try this instead, you’ll benefit from finding and recruiting Halsin first.
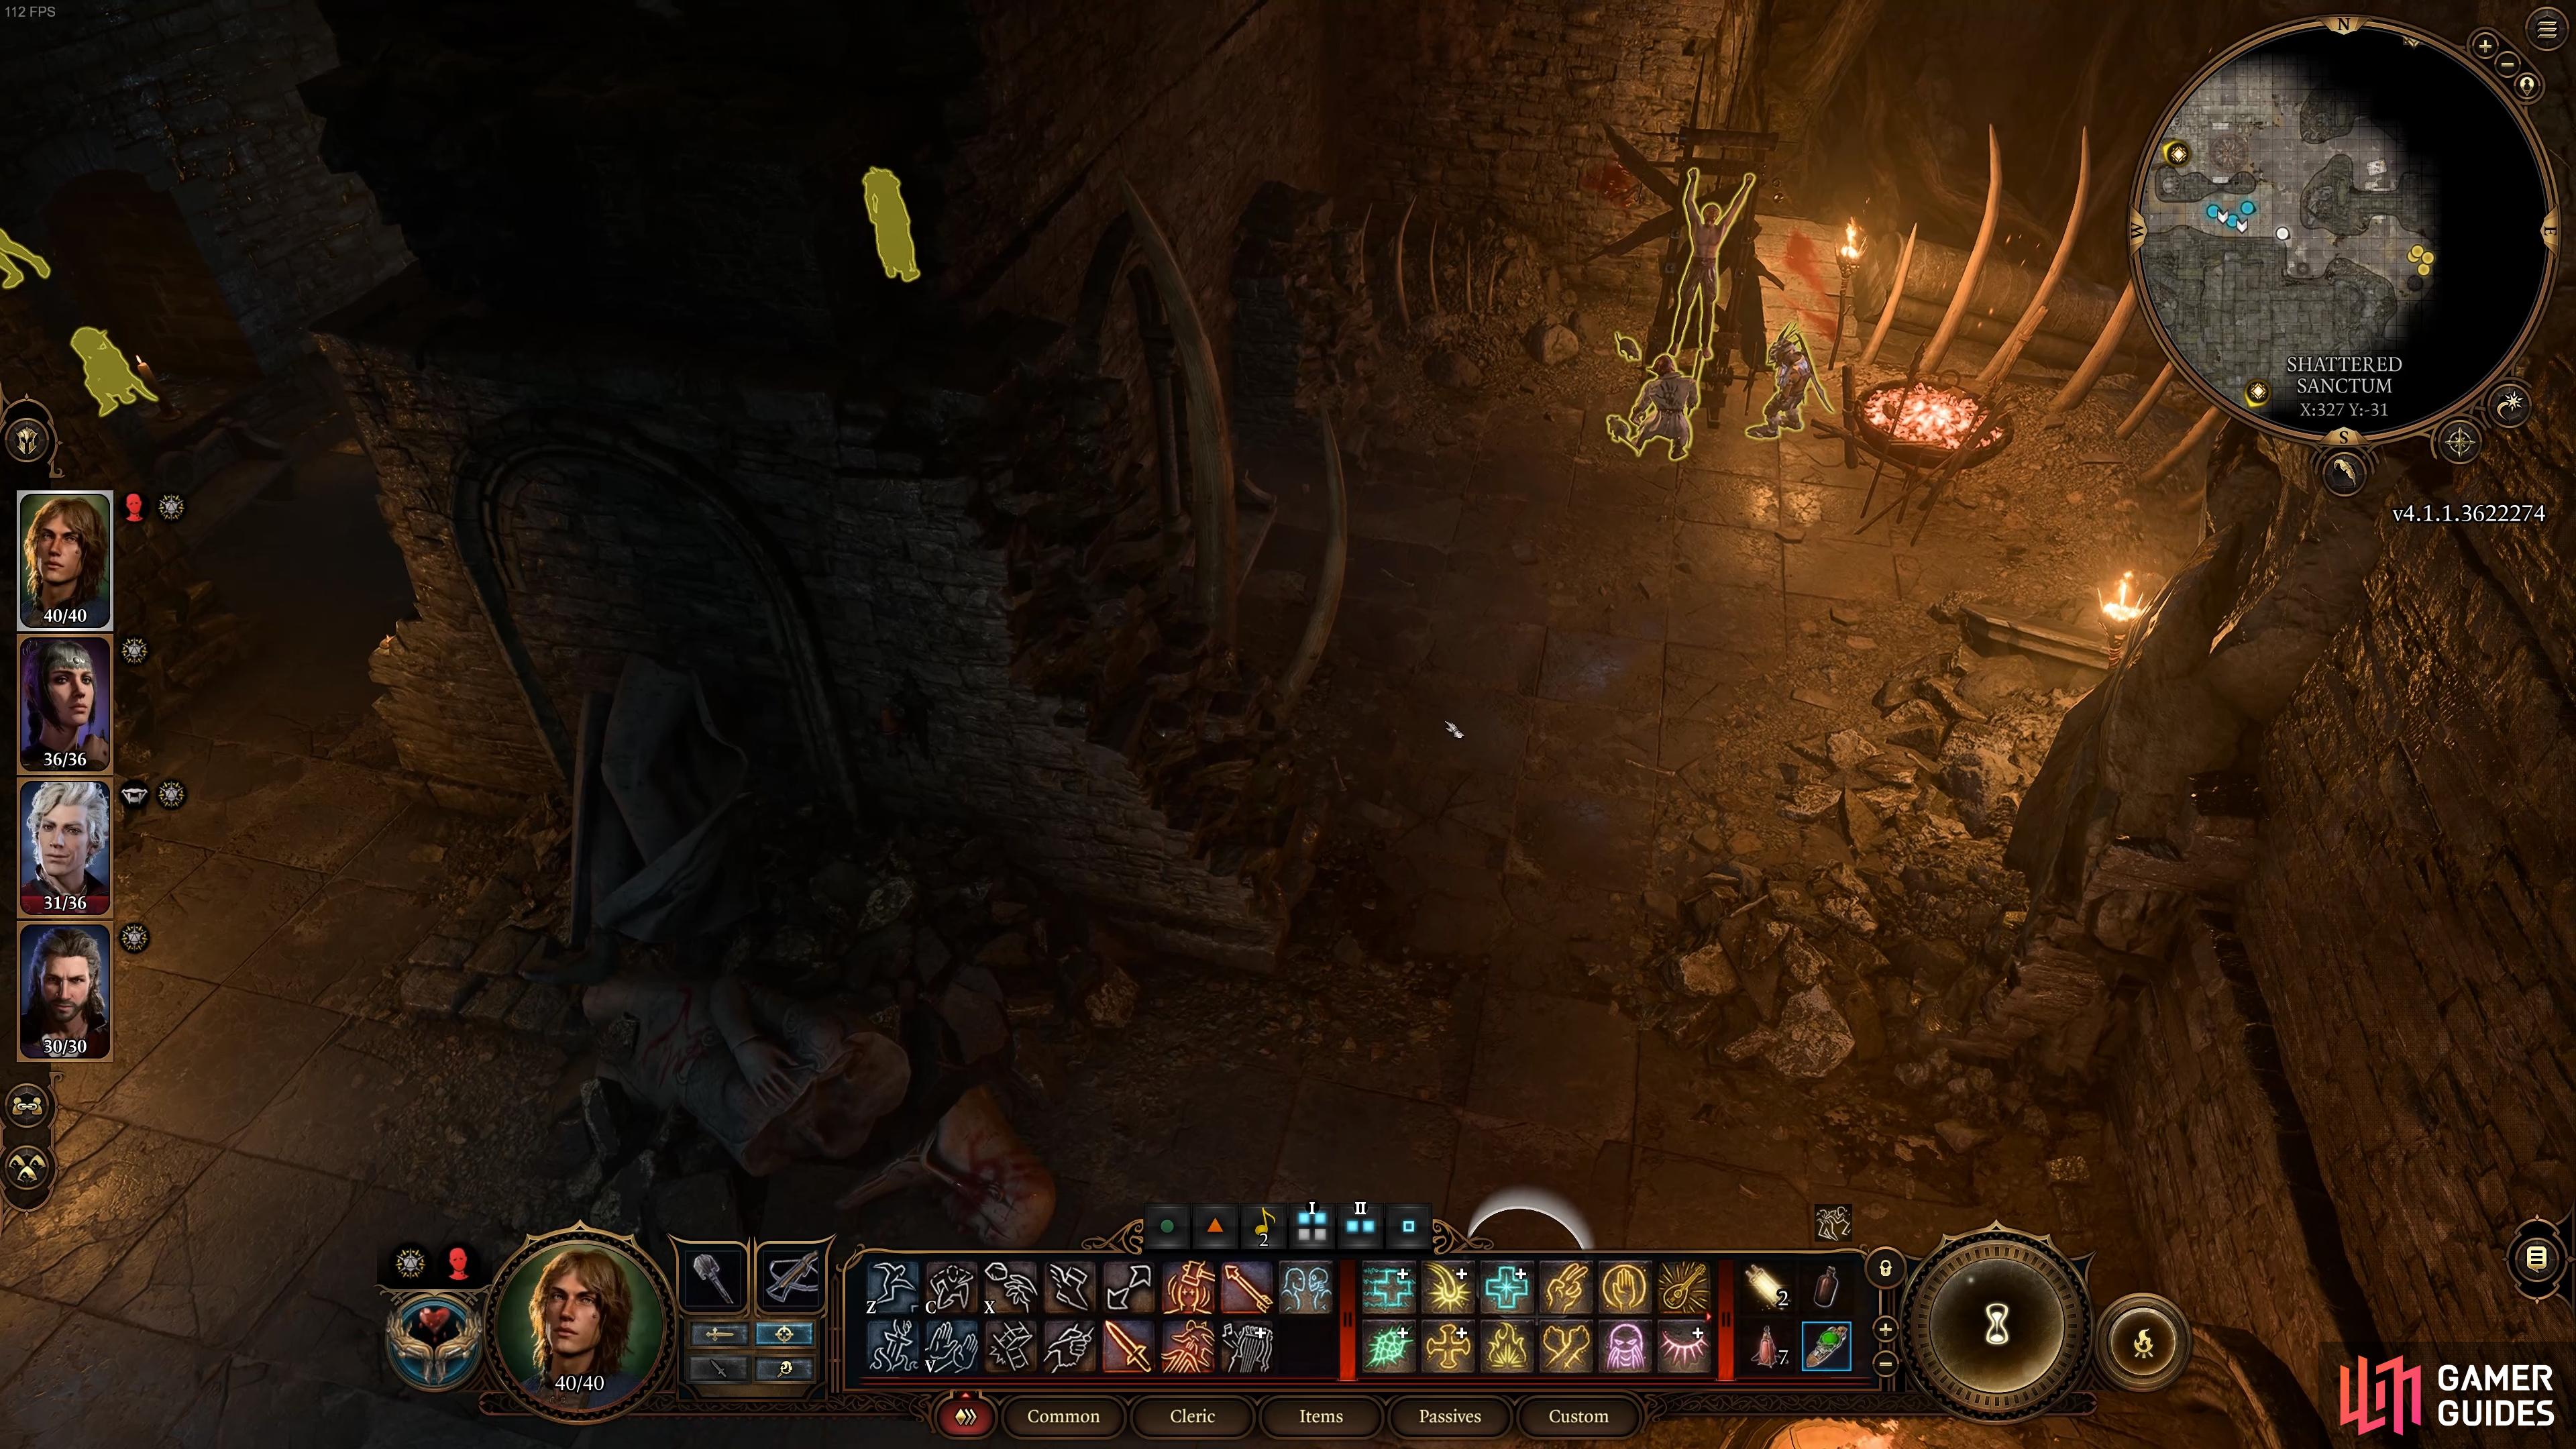
The location of the dungeons in the Shattered Sanctum, where Halsin can be found in his bear form.
You’ll first encounter Halsin in his bear form, and he’ll help you to defeat the nearby goblins.
We’ve got a page on how to recruit Halsin which you can read here, but if you want the condensed version: go to the eastern side of the Shattered Sanctum and walk over the wooden bridge which bends further westwards. This will lead to the entrance of the dungeons, where you’ll find Halsin imprisoned in his bear form. You need to attack the goblins here for Halsin to join you, then kill them all together. Afterwards you can ask Halsin to wait in the dungeon for your return, or bring him with you, but keep in mind that once Halsin is with you, all of the goblins will become hostile when they see you.
Find and Rescue Volo and Liam
You may have already rescued Volo after reading our page linked above, but if not be sure to check this page for a guide to it. It’s a fairly simple process and it doesn’t involve the risk of fighting any goblins if you do it using dialogue options alone. Even if you fail the roll checks on the dialogue, you only need to defeat one goblin to save Volo. For reference, Volo can be found in a room on the eastern side of the Shattered Sanctum, just up the steps from the central chamber.
There’s another character in the Shattered Sanctum who you can save from being tortured. His name is Liam, and he can be found on the eastern side as well, just to the south of the room where you found Volo.
The location of Liam where he’s being tortured by the goblins, in the southeast of the Shattered Sanctum.
You’ll find Liam being tortured, but you can convince the goblins to leave, or kill them.
As you approach Liam (who is tied up being tortured), a cutscene will begin. It won’t be long before you get some dialogue options to stop him from being tortured, including a [Deception], and [Performance] check, but you can use whatever choice is relevant to your character’s strengths.
After persuading the goblins to leave, you can speak to Liam and learn more about how he ended up here, and a little bit of information about the Nightsong. You should have the key to free Liam from his chains after looting the goblin who held Volo hostage, but if not you can try a Sleight of Hand roll to pick the lock, and you’ll have as many chances as you need for this.
Abdirak Choices and Loviatar’s Love Buff
As you made your way from where Volo was being kept to where Liam was being tortured, you may have noticed another NPC named Abdirak. This is a human devotee of Loviatar, goddess of pain, and if you speak with him and engage in his religiously inspired session of sadomasochism, you can gain a permanent buff that will last until your next long rest.
The buff is called Loviatar’s Love, and it will provide you with a +2 bonus to Attack Rolls and Wisdom Saving ![]() Throws for 3 turns, whenever your hit points drop to 30% or less. To obtain it, you need to allow Abdirak to inflict pain by hitting you a few times, and each time you should choose to cry out in pleasure.
Throws for 3 turns, whenever your hit points drop to 30% or less. To obtain it, you need to allow Abdirak to inflict pain by hitting you a few times, and each time you should choose to cry out in pleasure.
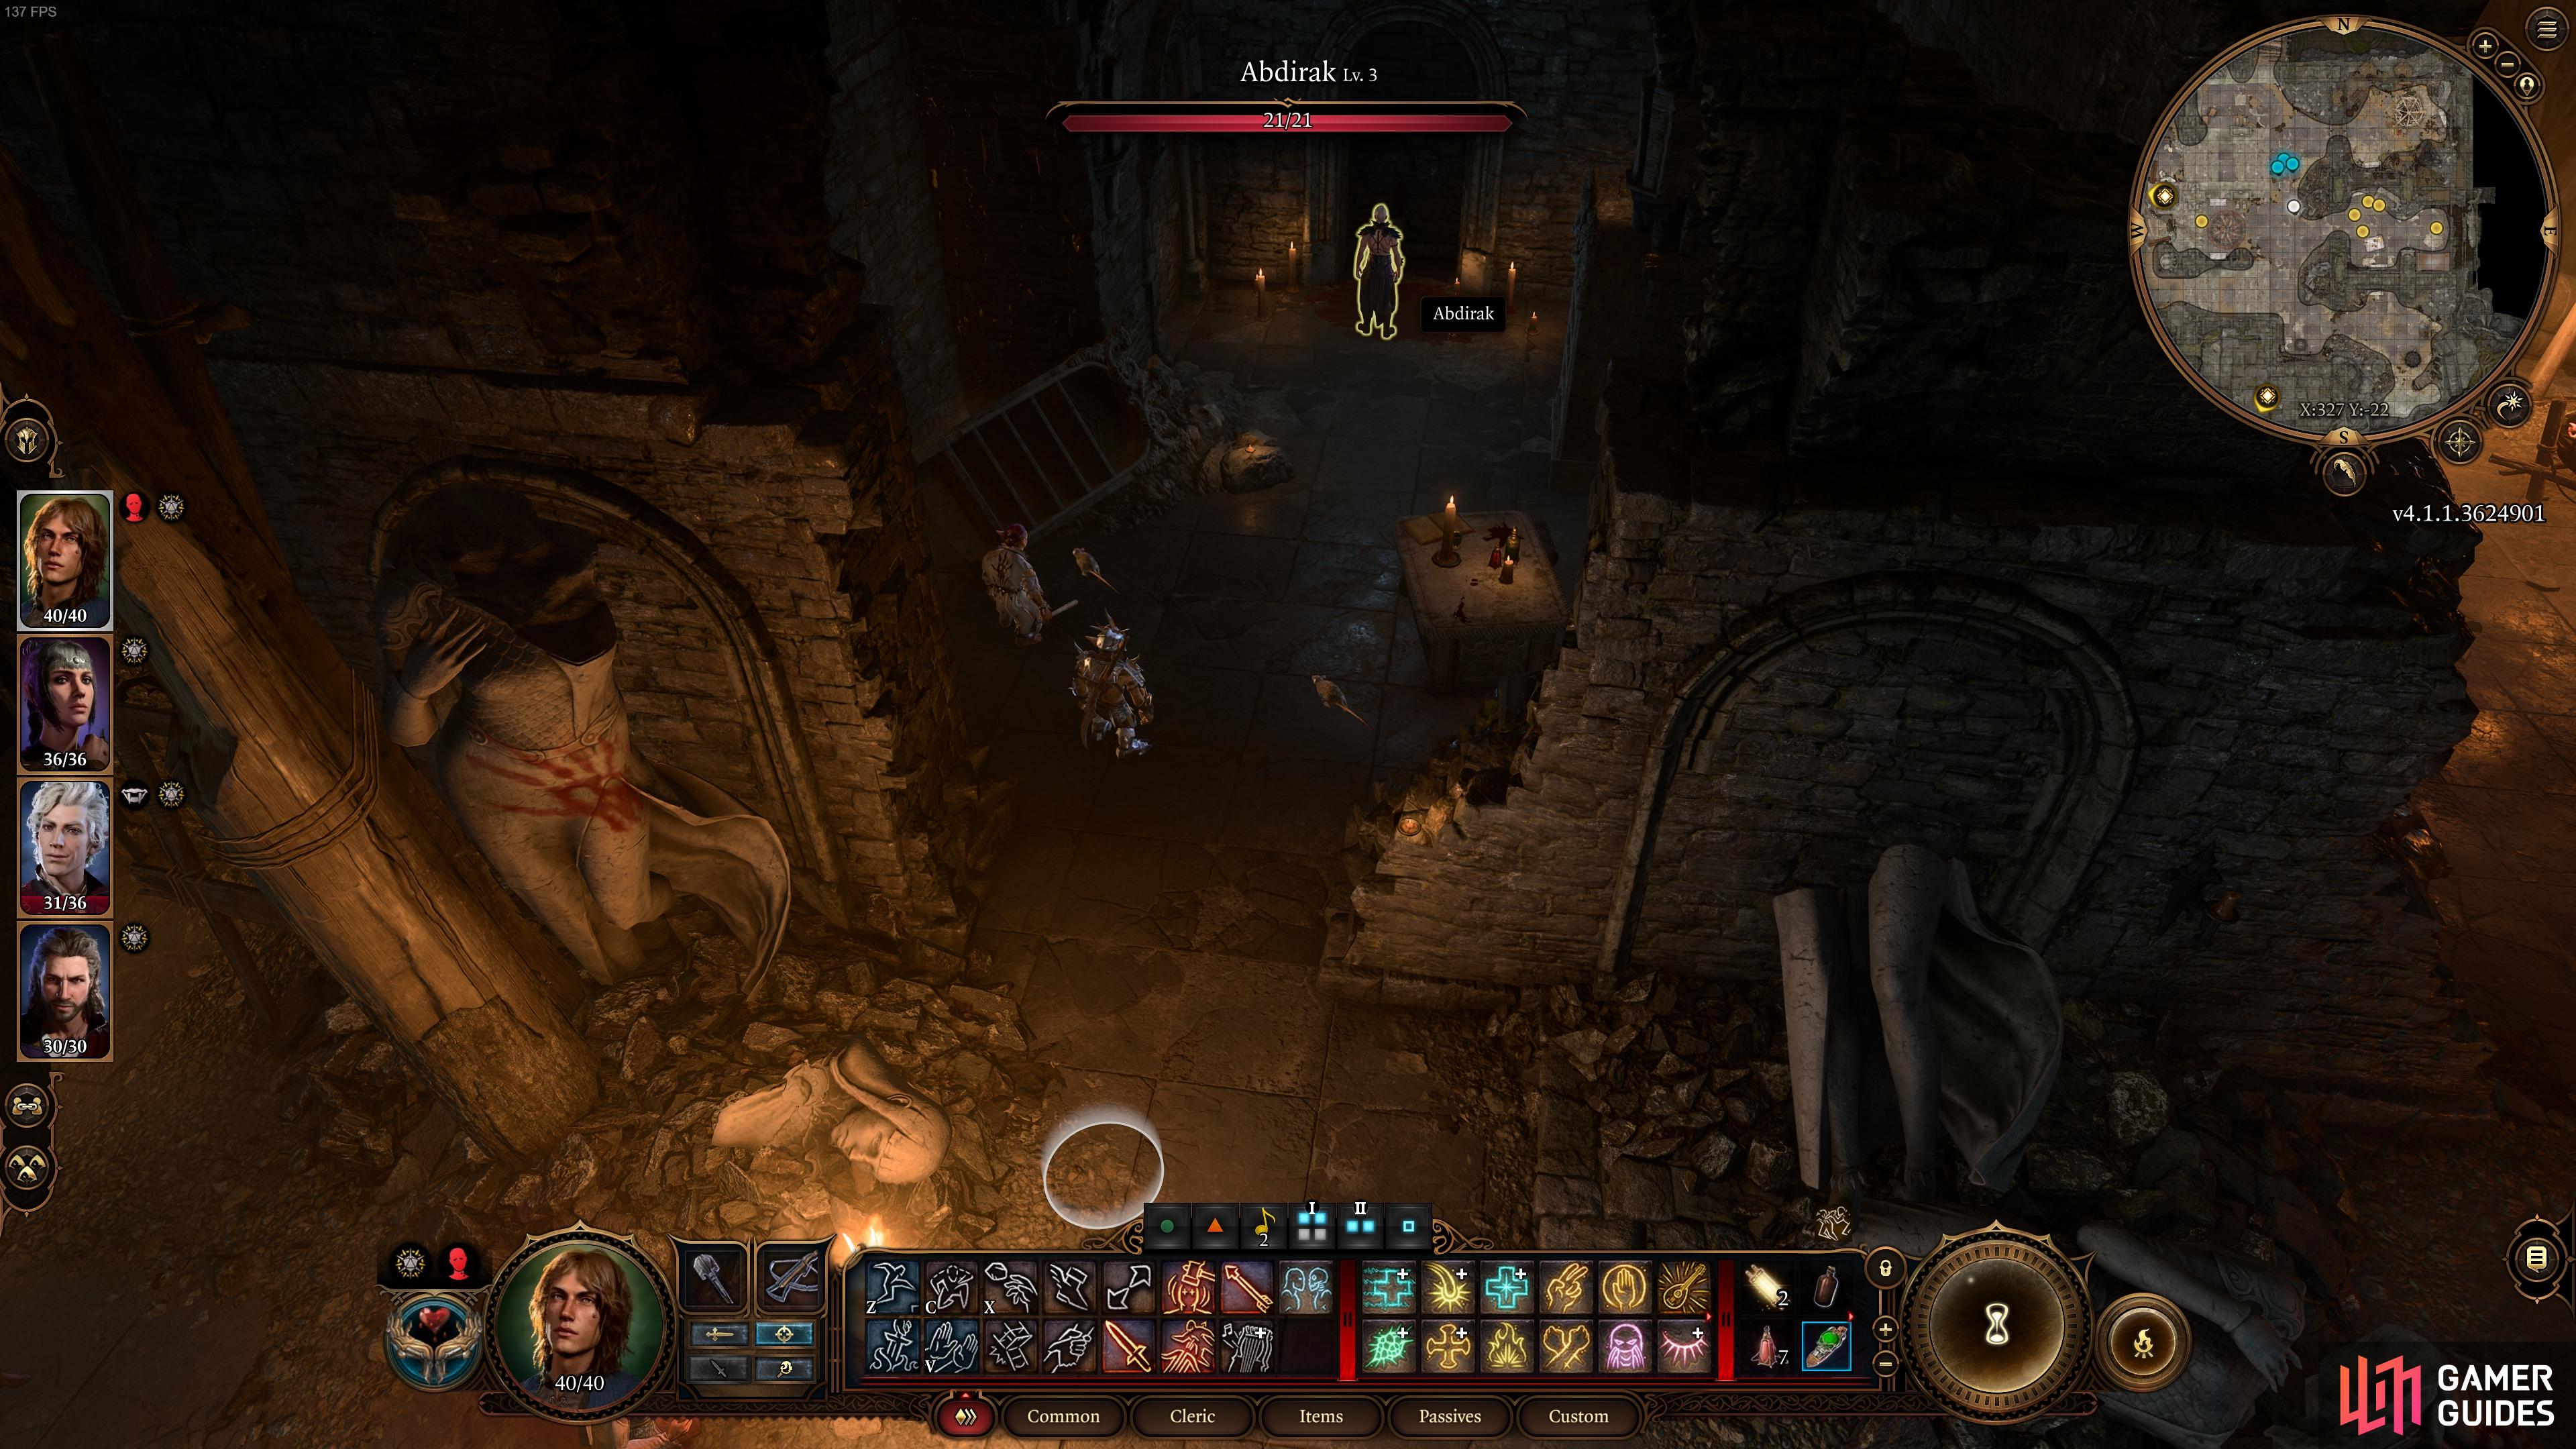
You’ll find Abdirak in the room between Volo and Liam.
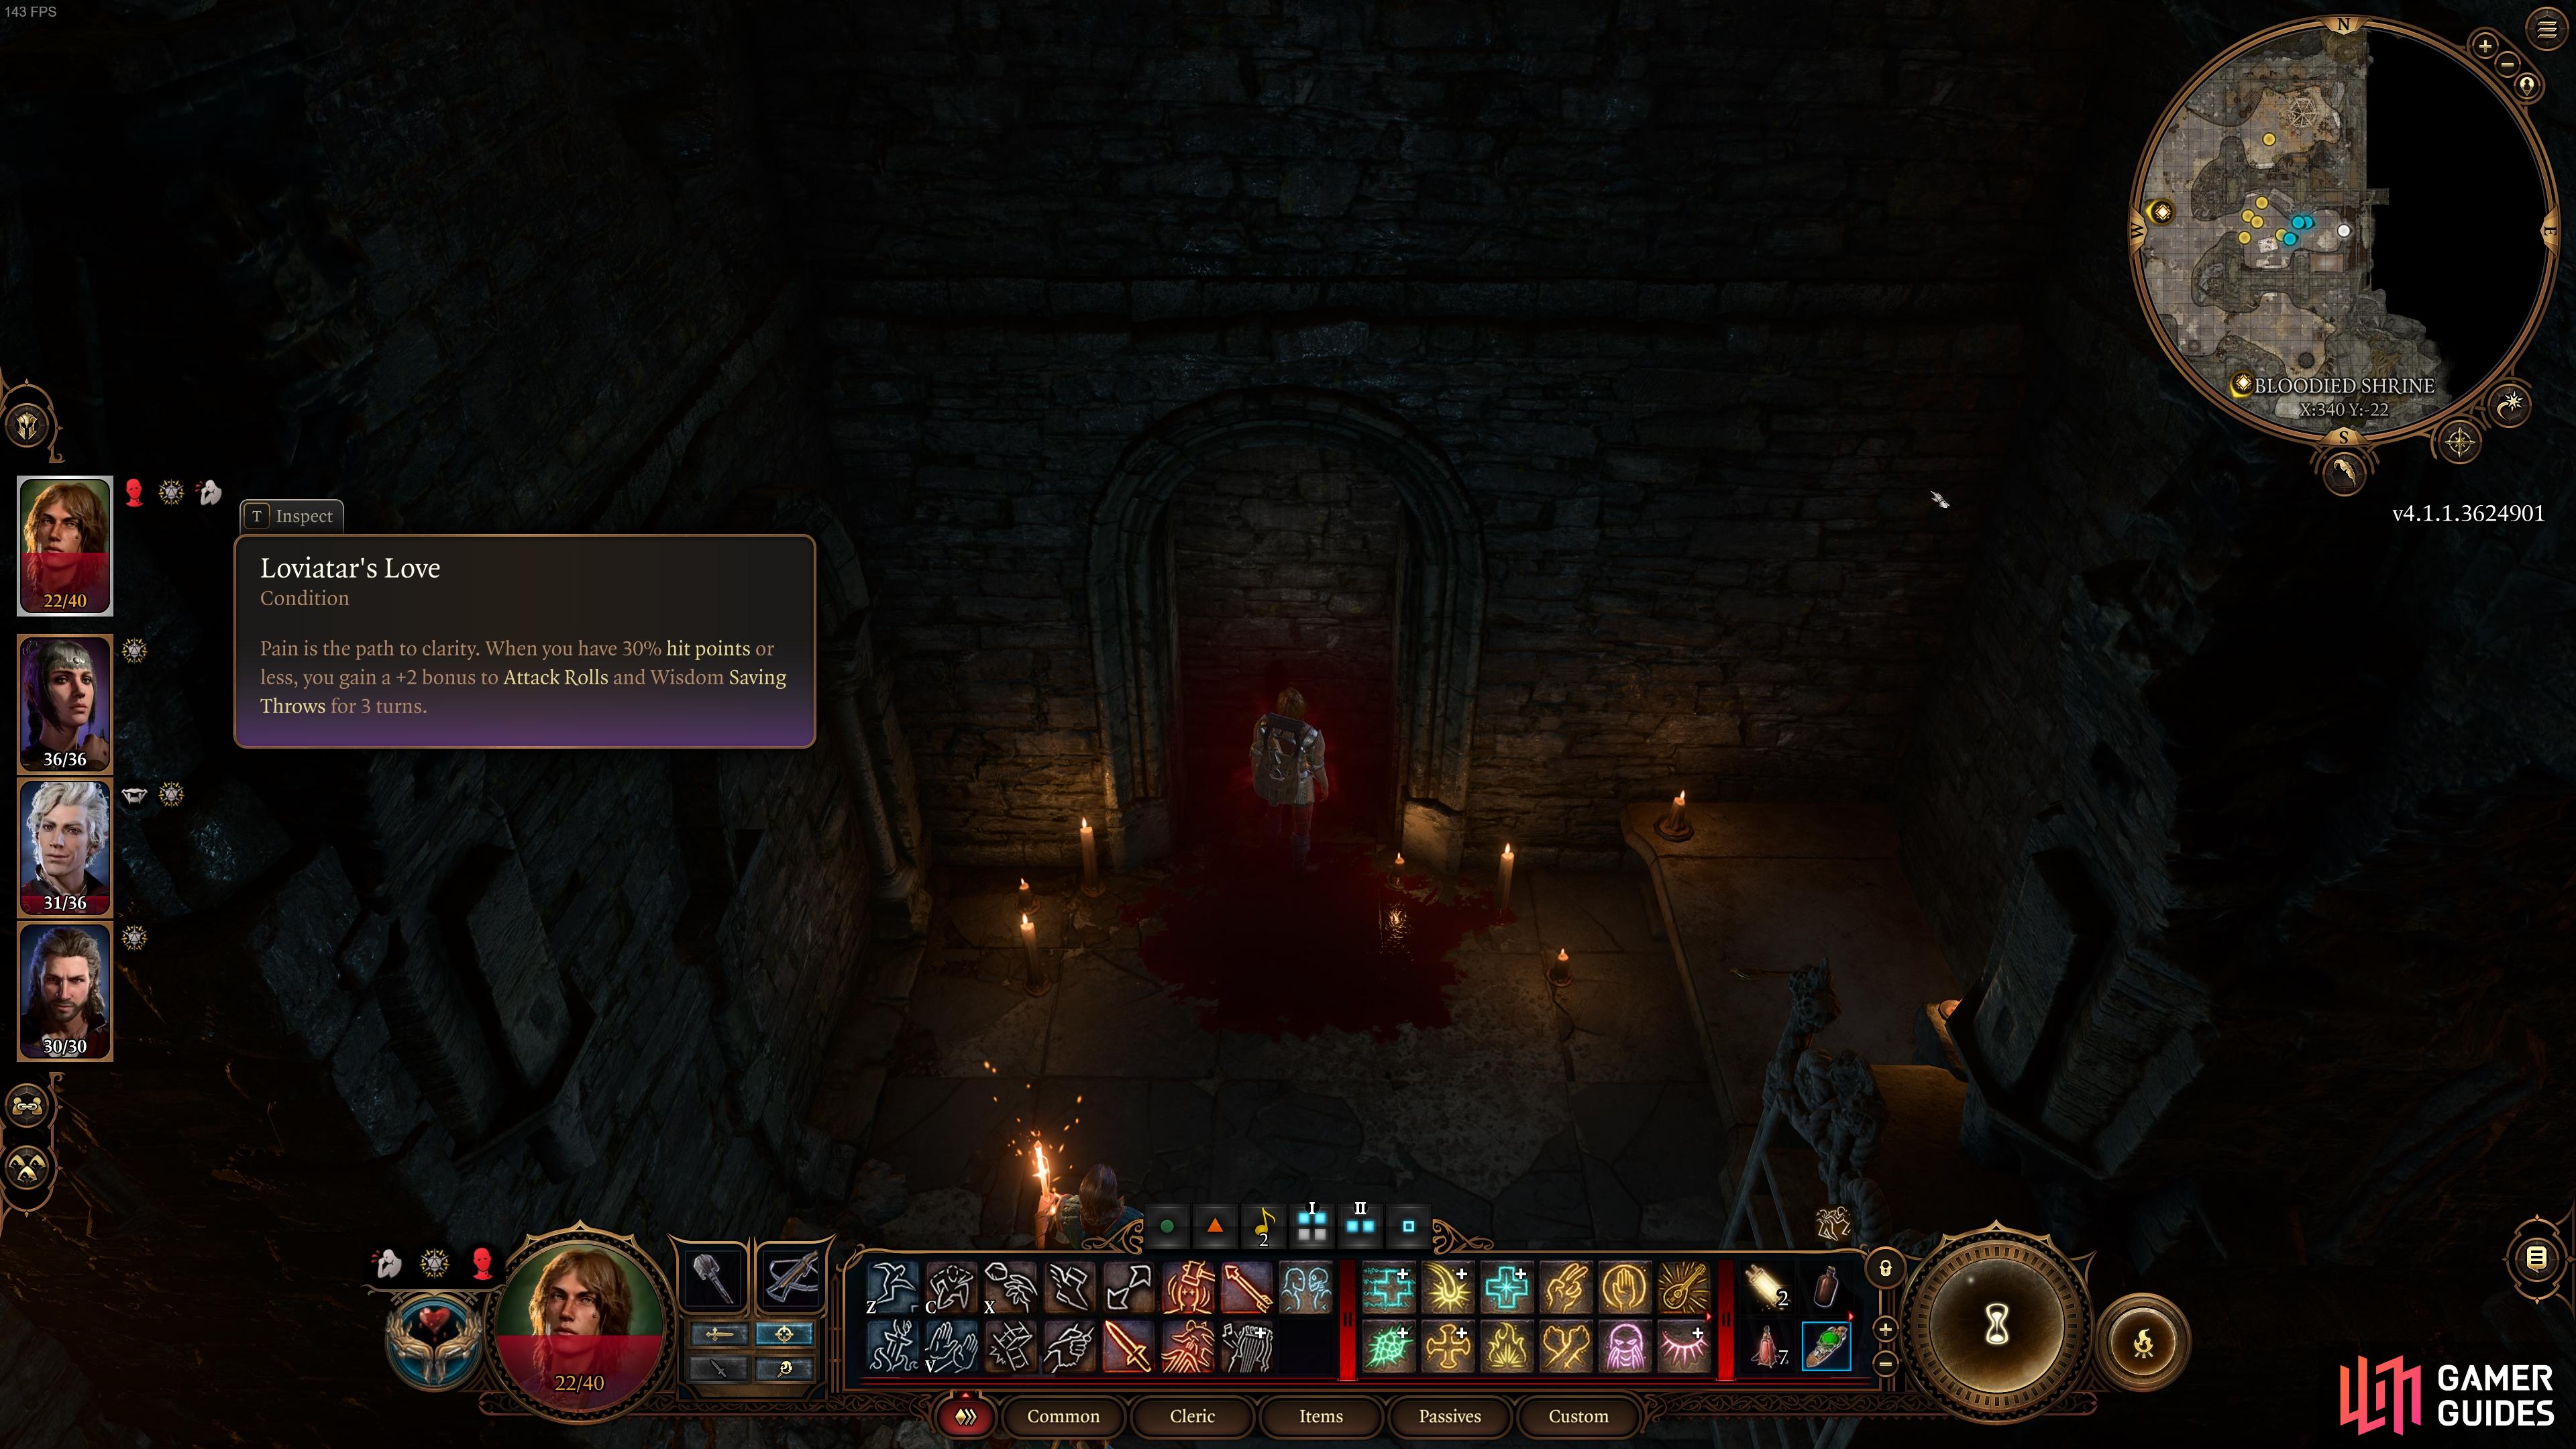
If you allow Abdirak to hit you and choose the dialogue options to cry out in pleasure, you’ll gain the Loviatar’s Love buff.
Loot the Treasure Room Behind Dror Ragzlin’s Throne
If you happened to kill Dror Ragzlin without shoving him into the chasm in the northeastern part of his throne room, you should be able to loot Dror Ragzlin’s Key from his body. If you shoved him into the spider pit, you’ll need to enter that via the iron gates from the main chamber in the Shattered Sanctum. You should have the key to the spider pit after killing the other goblins mentioned above, but if not, you can pick the lock using Thieves’ Tools. If you don’t have any on you at the time, you can always come back to get the key at a later time.
The location of Dror Ragzlin’s treasure room, in the northernmost part of the Shattered Sanctum.
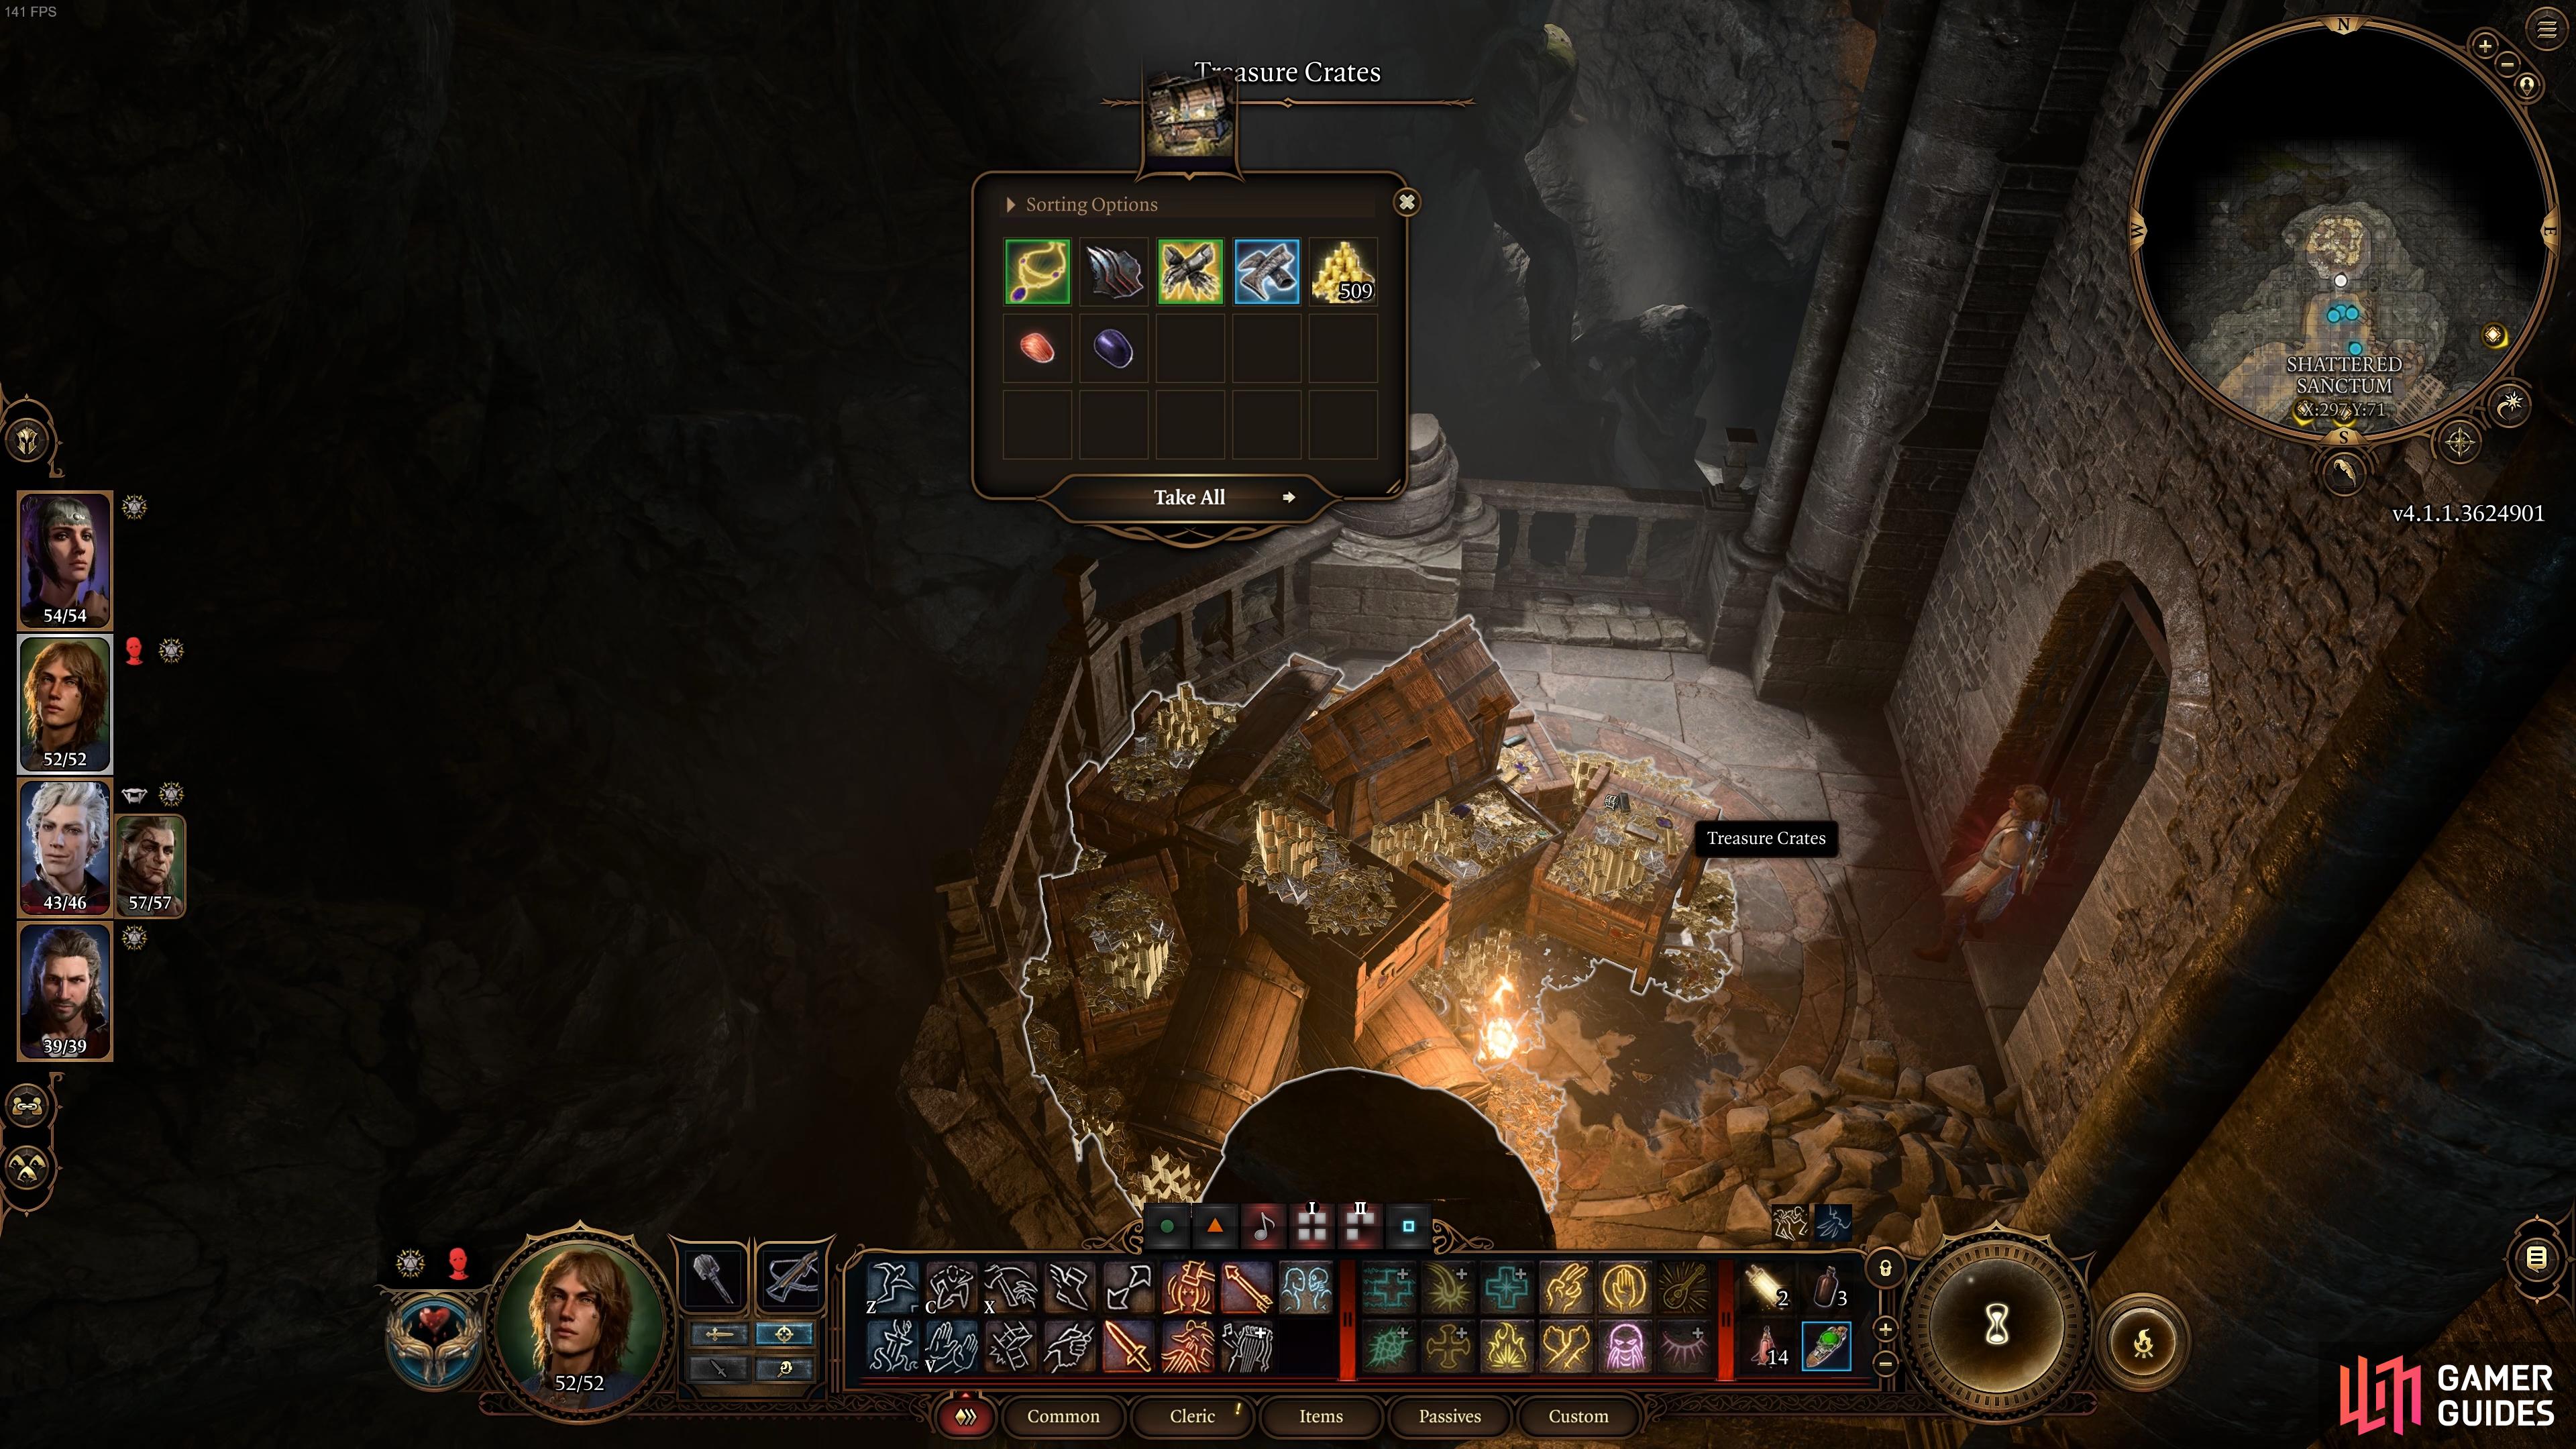
You’ll find a decent amount of gold and some useful items in the treasure hoard.
Once you have Dror Ragzlin’s Key, you can use it to open the treasure room located in the northernmost part of his throne room, just up the steps behind the throne. You’ll get nearly 500 gold from this, alongside some valuable equipment, so it’s well worth the effort. If you did successfully shove Dror Ragzlin into the chasm, causing him to die immediately without having the chance to loot his body, you can still use some Thieves’ Tools on the gate to the treasure room to open it. Whichever method you choose, there are two large spiders waiting for you on the other side, so make sure you’re well rested enough to defeat them.
Loot the Treasure On the Scaffold and Behind the Collapsed Corridor
There’s even more hidden treasure to be found in the highest reaches of the Shattered Sanctum, which you can get to by climbing any ladder that you find inside. There are some of these on either side of the main chamber where you first saw True Soul Gut, and yet more in Dror Ragzlin’s throne room. Essentially, wherever you find a ladder, climb it, and you’re likely to find some hidden treasure chests on the scaffolding above. These mostly contain gold, and a decent amount of it too, but some have unique items that may prove useful for your characters.
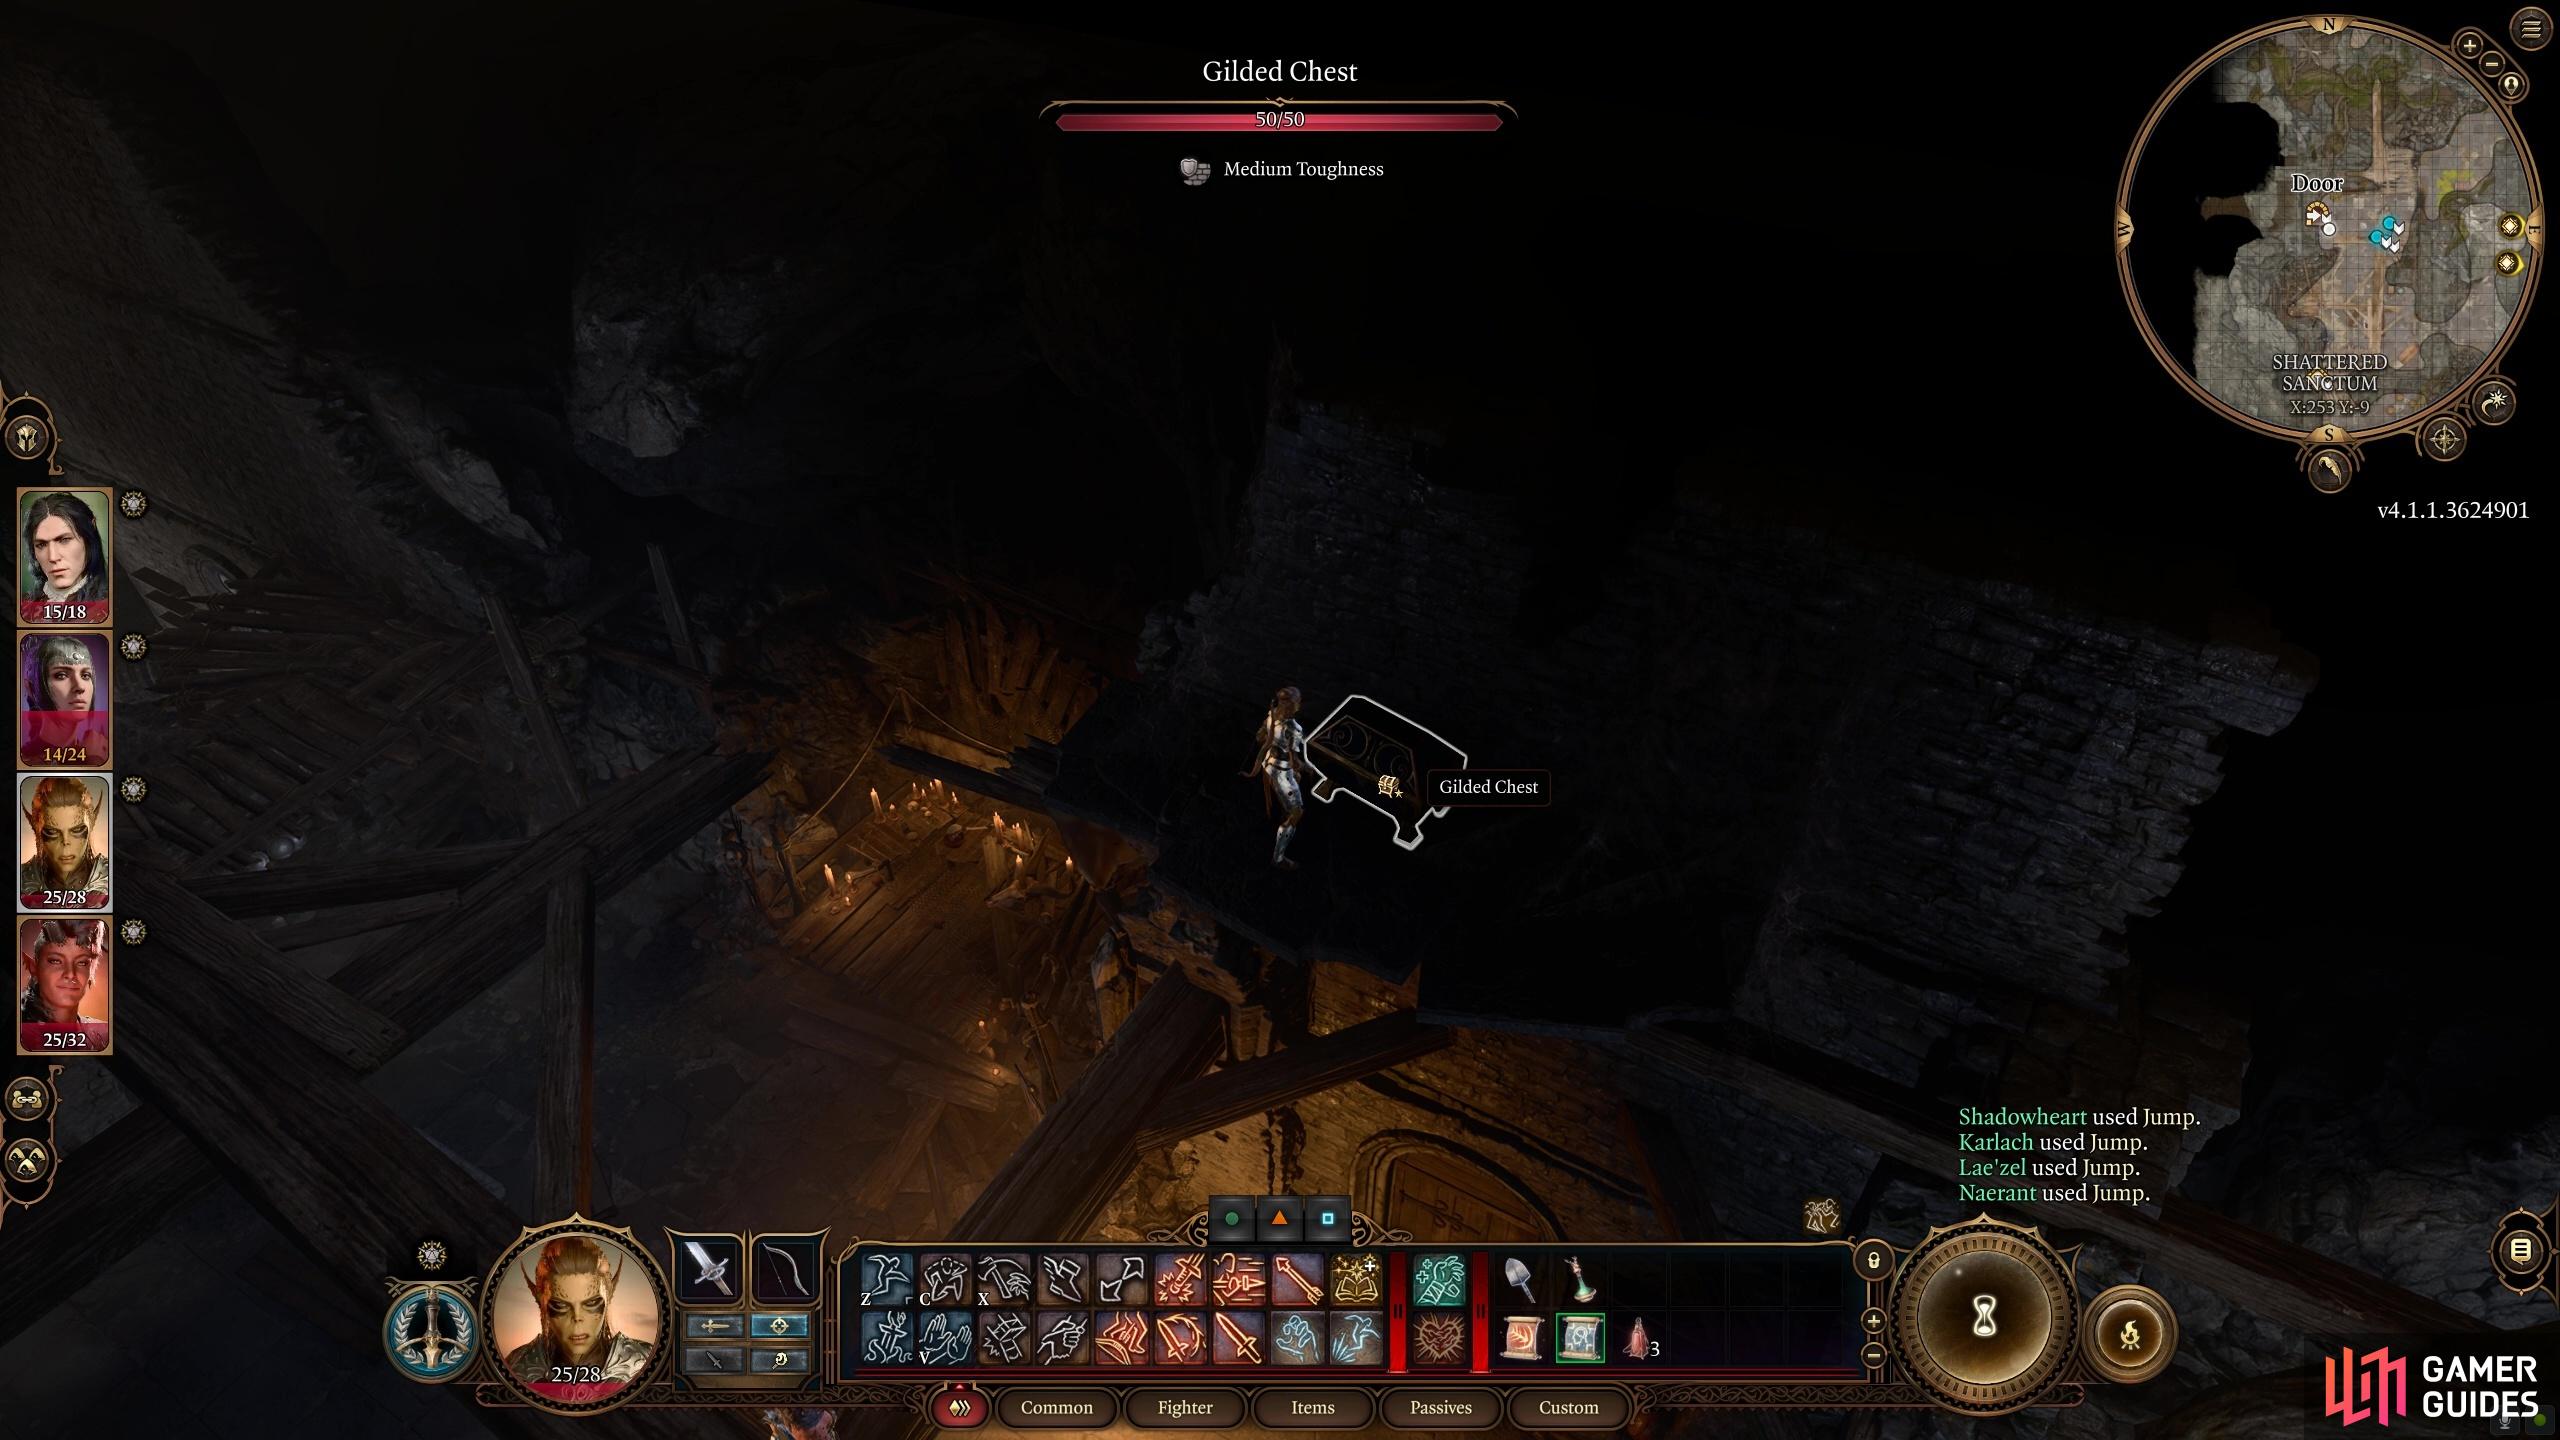
You’ll find a lot of treasure in the hidden places above the Shattered Sanctum, which you can reach by jumping and using ladders.
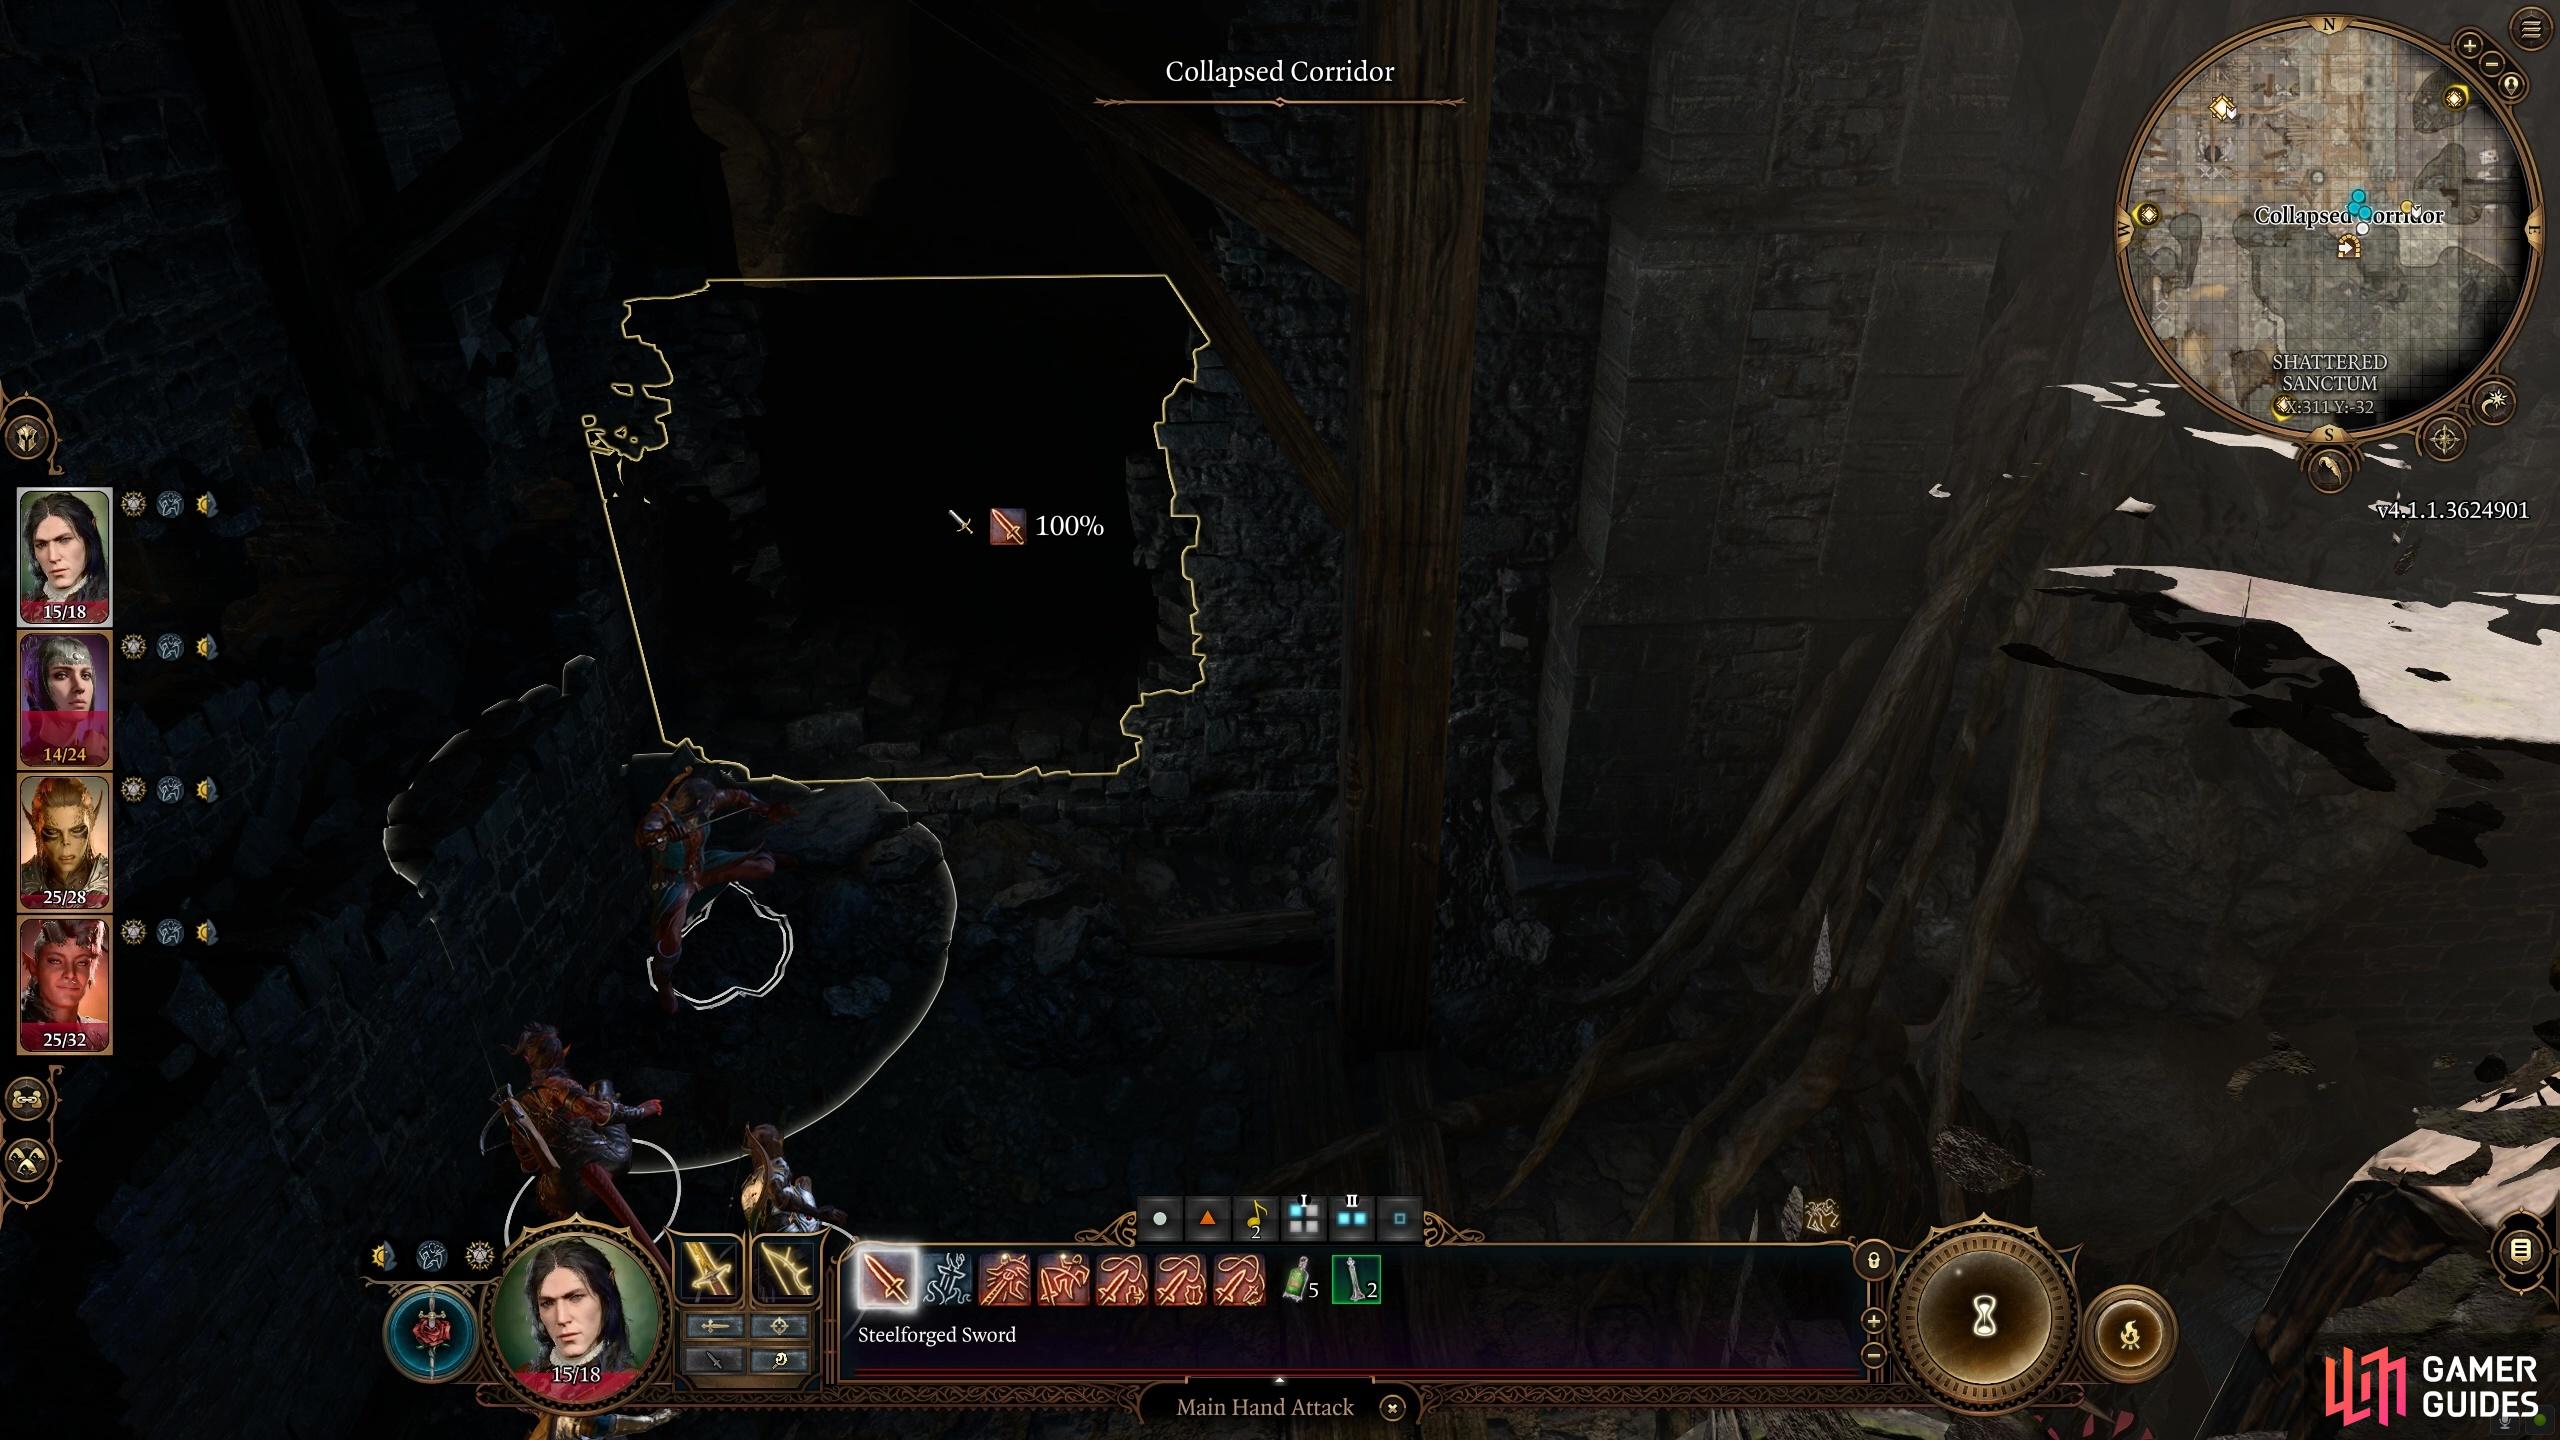
You can break through the Collapsed Corridor using powerful spells such as Eldritch Blast.
Solve the Defiled Temple Moon Puzzle to the Underdark
At this point you’re pretty much done with the goblin camp and the Shattered Sanctum, but there’s one more secret that you can discover by completing the ![]() Defiled Temple Moon Puzzle. We’ve got a guide dedicated to this on our How To Solve The Defiled Temple Moon Puzzle page, so be sure to check that out if you need some help with it. Although it’s not essential at this point in the story, solving the puzzle will give you access to the
Defiled Temple Moon Puzzle. We’ve got a guide dedicated to this on our How To Solve The Defiled Temple Moon Puzzle page, so be sure to check that out if you need some help with it. Although it’s not essential at this point in the story, solving the puzzle will give you access to the ![]() Underdark, which is a vast underground area where plenty more adventures await, but it also serves as a route to
Underdark, which is a vast underground area where plenty more adventures await, but it also serves as a route to ![]() Moonrise Towers, where you can go with Halsin as part of the main story.
Moonrise Towers, where you can go with Halsin as part of the main story.
And with that, you should now be done with most of what this area has to offer. There’s a lot more to find here than you might initially suspect, so it’s worth taking your time and making manual saves whenever you accomplish one significant task. The last thing you want is to make real progress, only for it to be ruined by a series of unfortunate events, or a few mistakes along the way. Save, save, save!
When you’re ready to move on from the Goblin Camp, check out the following pages for more quests, in-depth explanations of various objectives you can undertake in the Goblin Camp, or alternative routes you can take:
- How to Save Volo in the Goblin Camp in BG3
- How to Rescue and Recruit Halsin in Baldur’s Gate 3
- How to Recruit Nightwarden Minthara in Baldur’s Gate 3
- How To Solve The Defiled Temple Moon Puzzle In Baldur’s Gate 3
- Mountain Pass or Underdark? Exploring Your Options in Baldur’s Gate 3
- Baldur’s Gate 3 Act 1 Underdark: Map, Entrances, POIs
No Comments