
Kagha is the leader of the druids of the Emerald Grove, having assumed control after the disappearance of Halsin in Aradin’s ill-fated expedition to find the artifact Nightsong. Your first interaction with her casts her in a negative light - she’s callous, cruel and domineering, and if you use Detect Thoughts you’ll glean that her actions are calculated to prove her authority and competence as the grove’s new leader, regardless of the consequences. Nasty as she is, her actions might be understandable - if not excusable - as those of a stressed, insular bigot trying to protect her grove at any cost. That or she’s a petty tyrant in the making whose divisive actions are more likely to lead to conflict that’ll weaken - perhaps fatally - the grove. Who knows? If only there were some evidence exposing Kagha’s true motivations and allegiances… This page will provide a walkthrough for the hidden subquest ![]() Investigate Kagha in Baldur’s Gate 3, including information on finding Kagha’s hidden chest and exposing her to her fellow druids.
Investigate Kagha in Baldur’s Gate 3, including information on finding Kagha’s hidden chest and exposing her to her fellow druids.
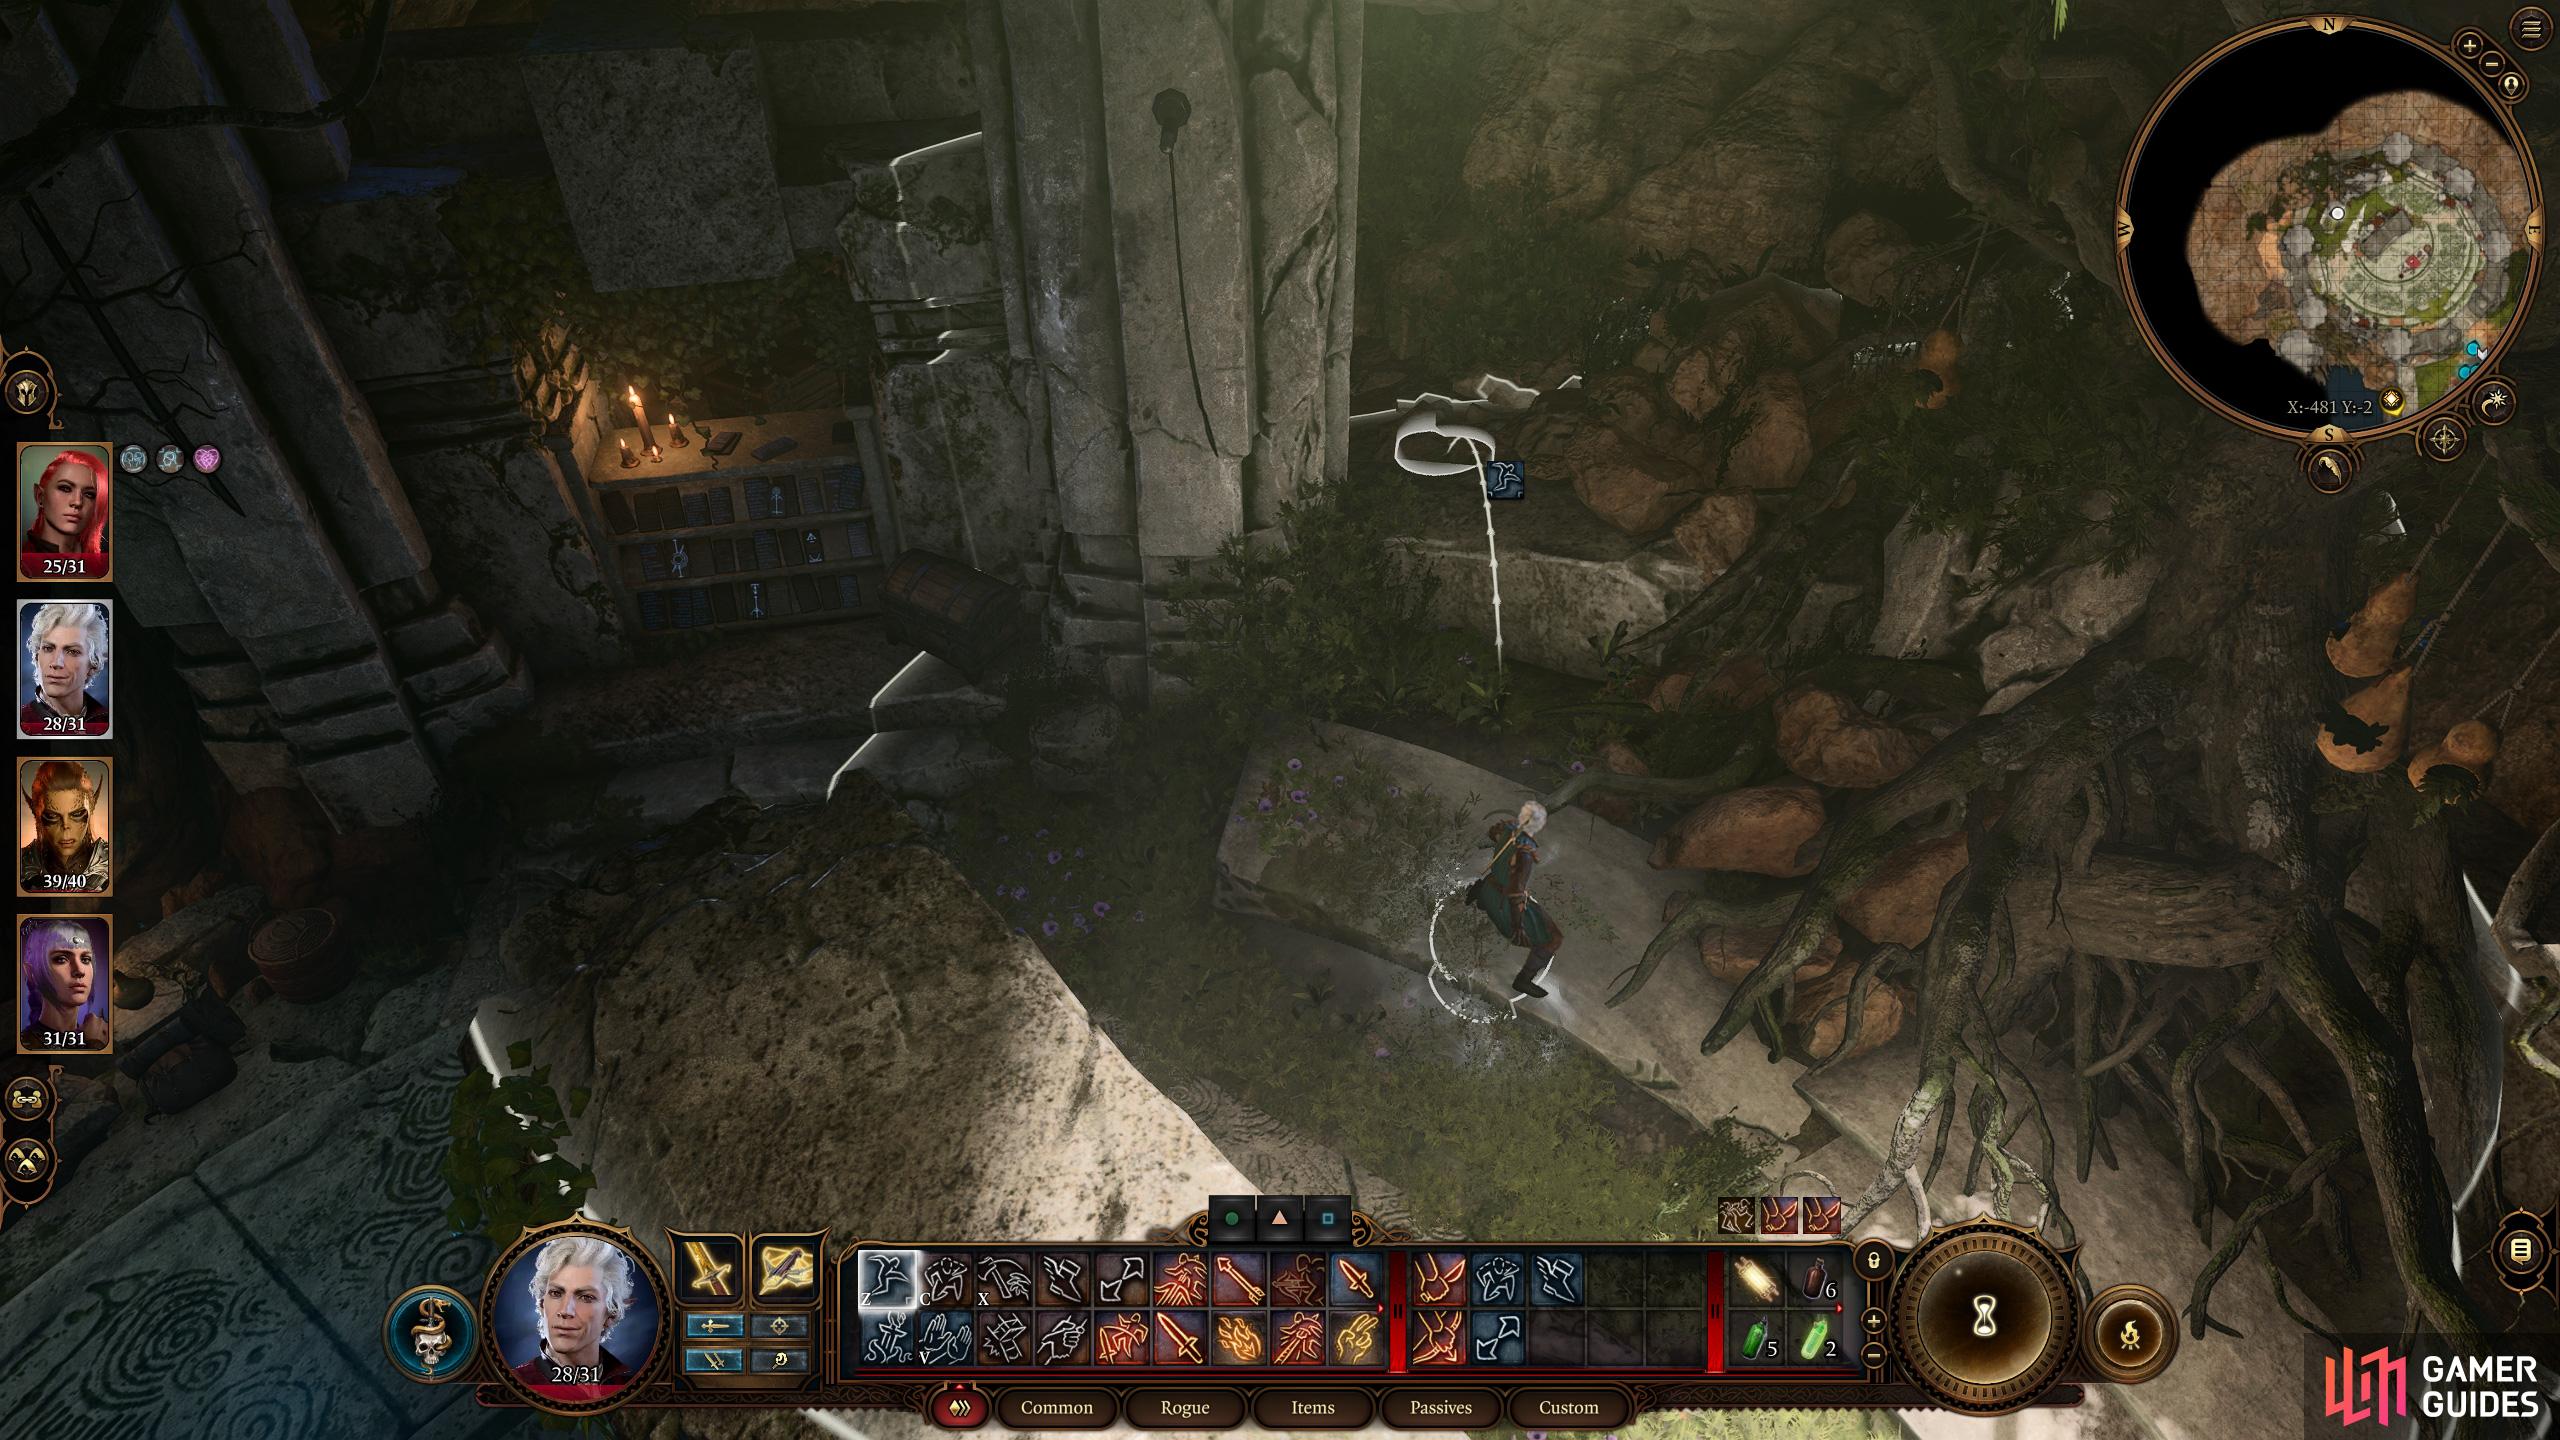
Search the Servants Quarters in the Emerald Grove and jump near a column,
to get behind a bookshelf that hides Kagha’s Chest, and inside, an awfully suspicious note…
How to Find Kagha’s Chest in Baldur’s Gate 3
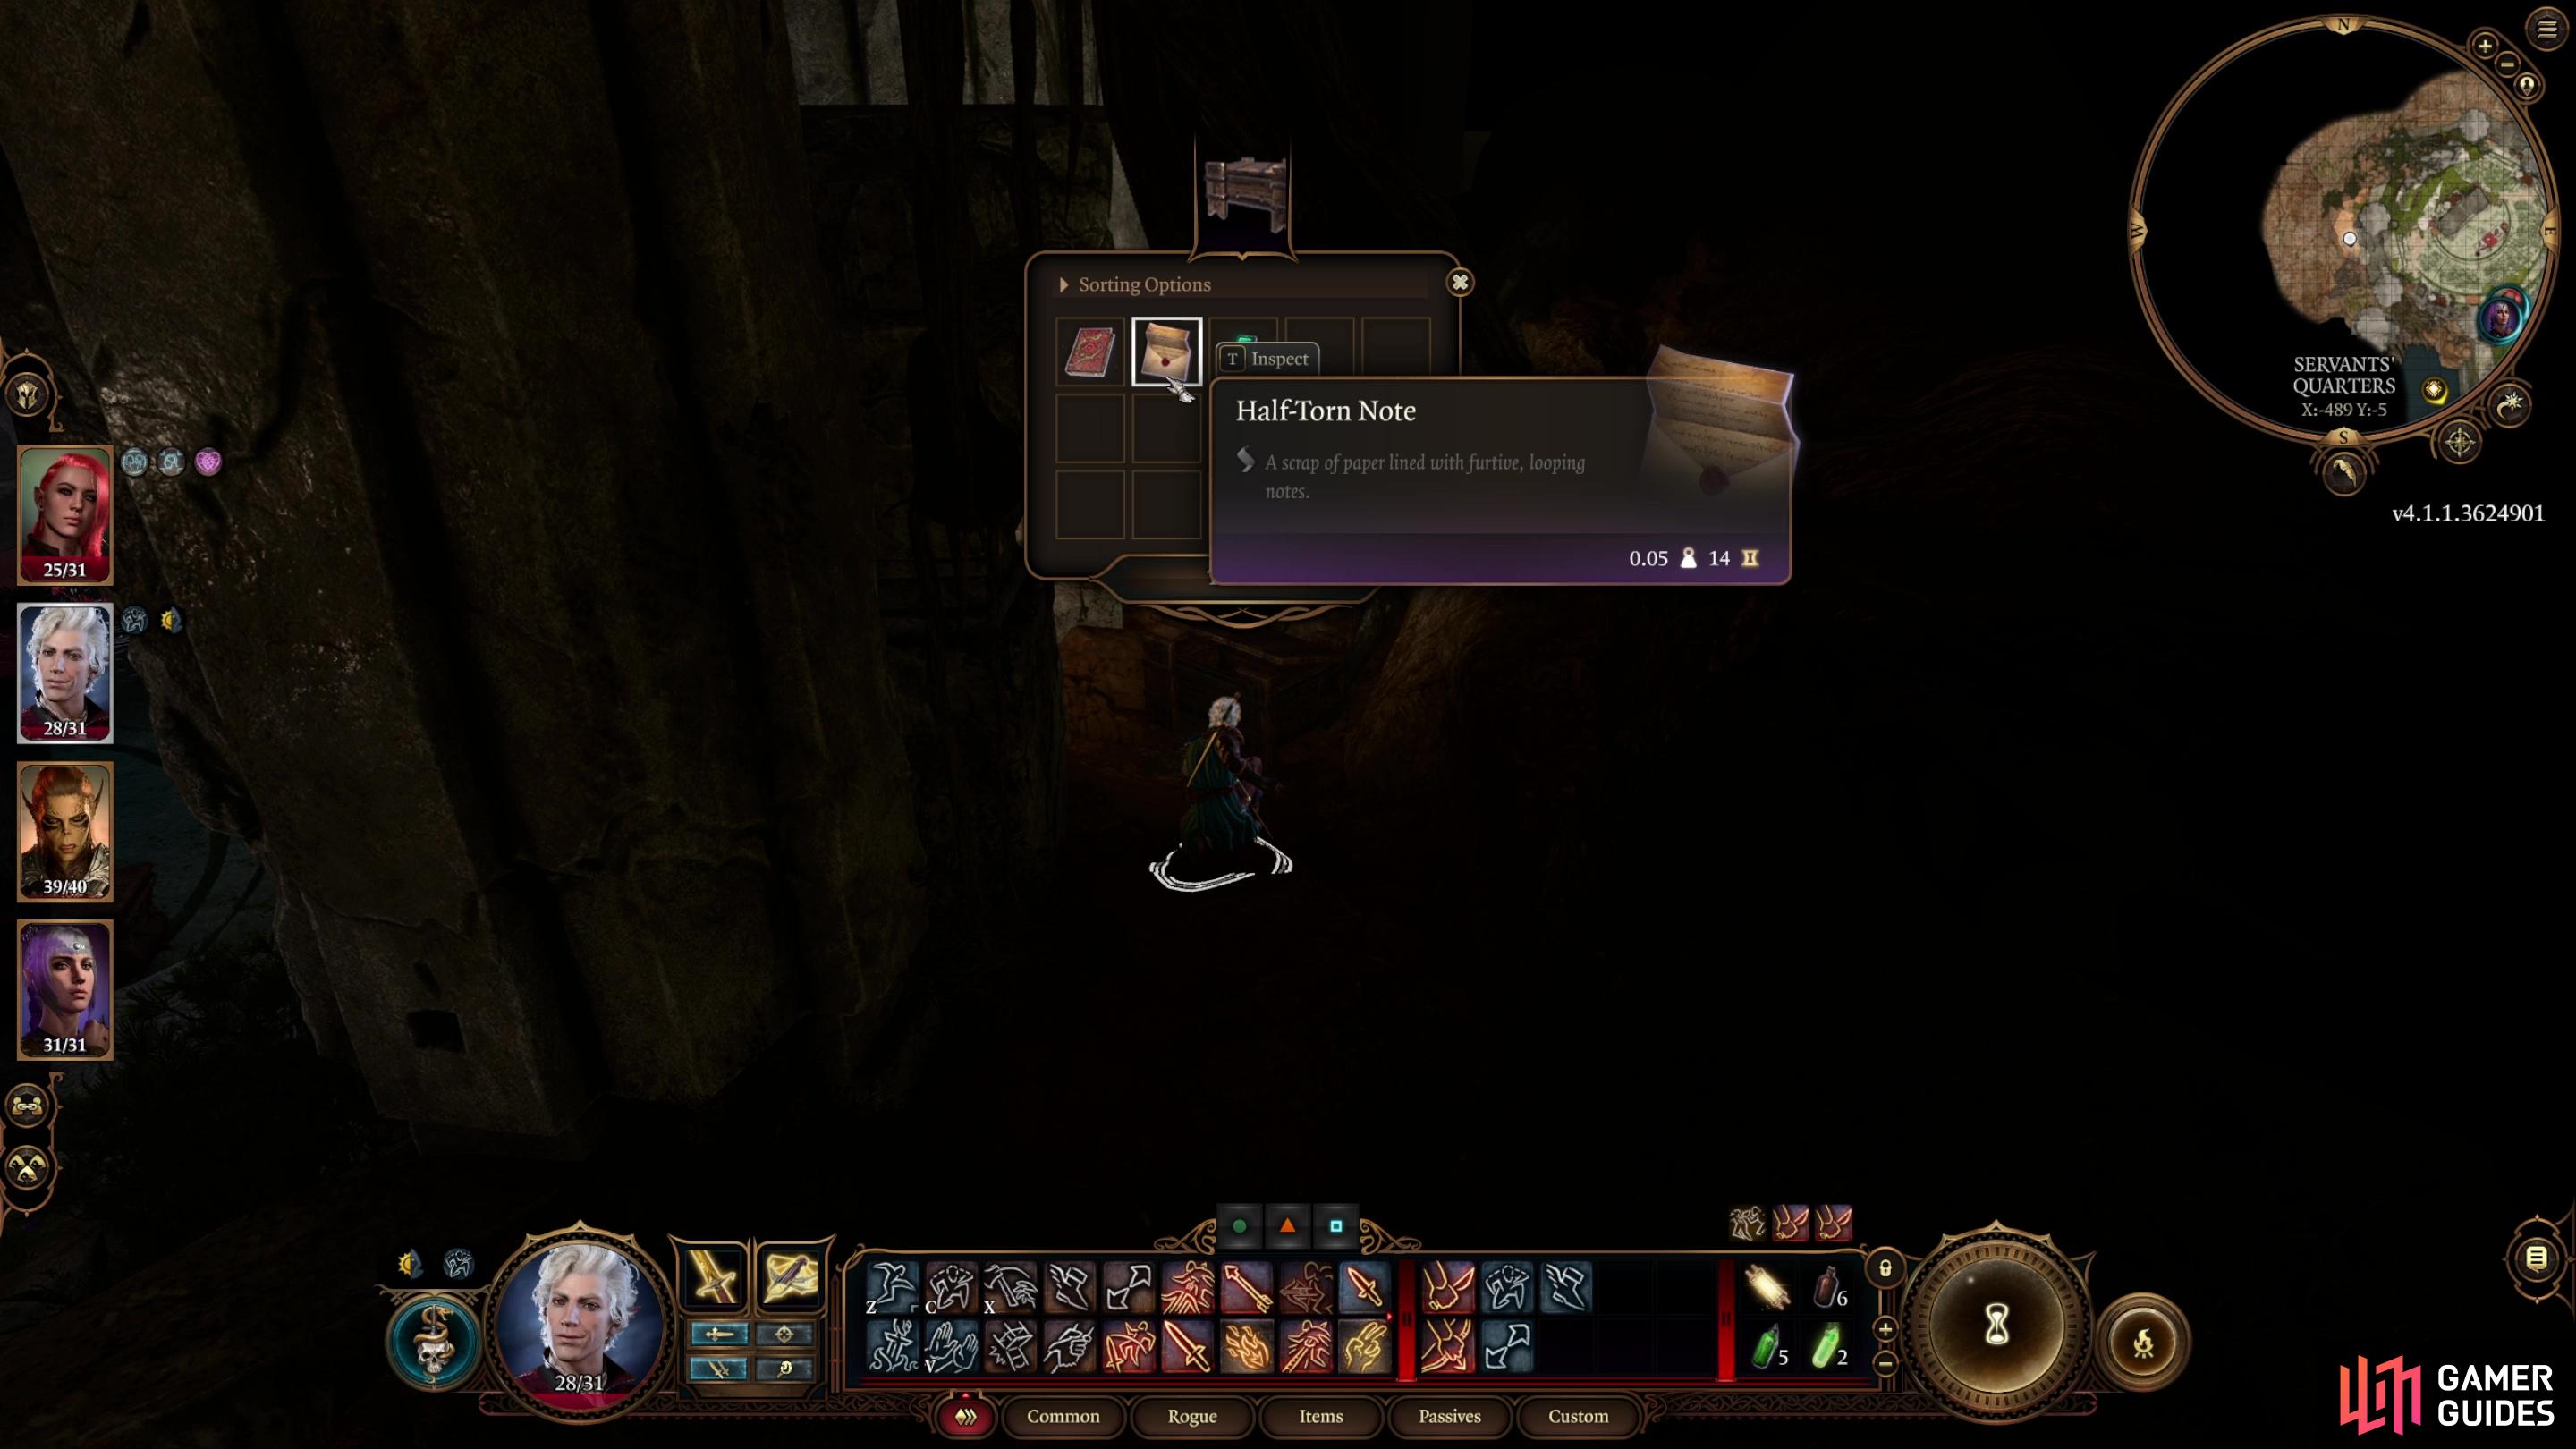
To start this quest out, you’ll need to find Kagha’s Chest. If the existence of this container is mentioned anywhere, we missed it, but you can find it in the druid’s sanctum in the Emerald Grove. From the first circular room this entry stairs take you to, just go northwest into the “Servant’s Quarters” and note some bookshelves to the left. Kagha’s chest is behind one of these bookshelves along the eastern edge of the room, just climb up next to a column to find the chest behind the bookshelf. Pick the lock [Sleight of Hand 10] and inside you’ll find a Half-Torn Note. Reading this note will start the subquest Investigate Kagha, which is part of the Save the Refugees questline.
Anywho, this intercepted letter directs Kagha to rendezvous with one Olodan at the “swamp-docks”, near some tree.
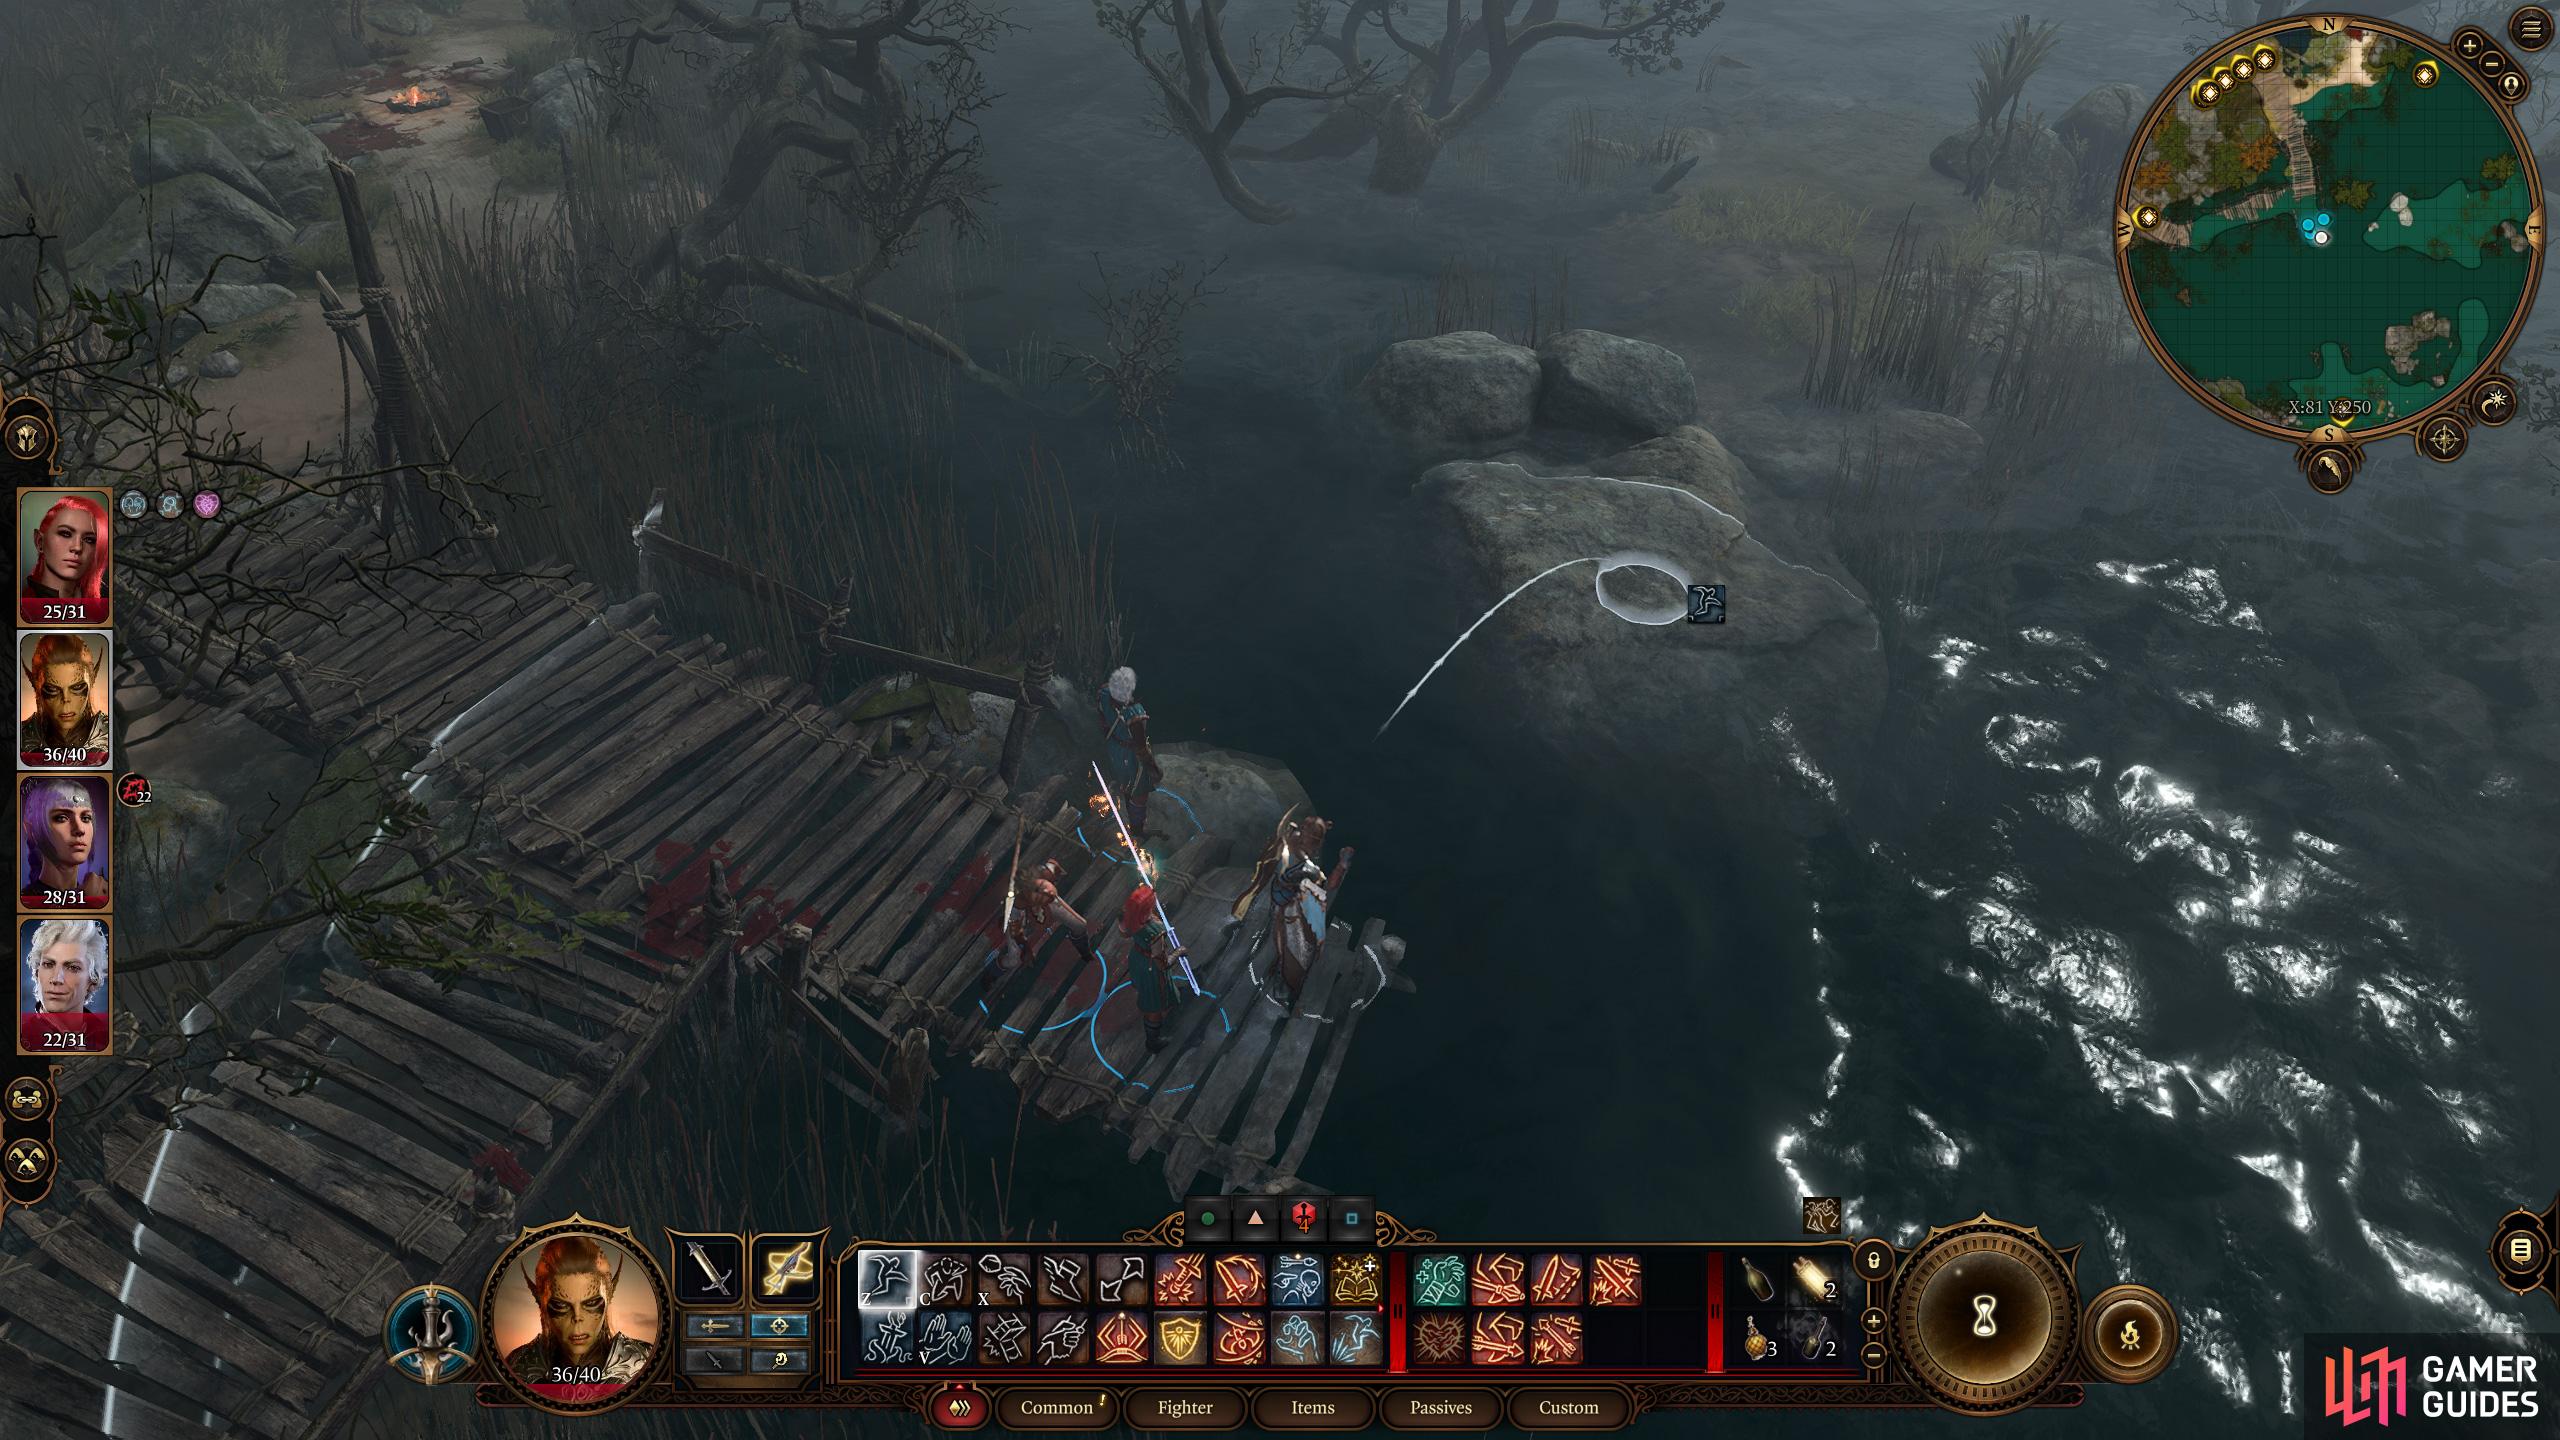
(1 of 5) Make your way to the docks along the southeastern edge of the swamp and jump over to an island.
Where to Find the Shadow Druids in the Swamp - How to Defeat the Wood Woads and Mud Mephits
Finding this rendezvous site takes a fair bit of travel, as it’s found in the swamp along the southwestern corner of the map, at the southeastern corner of the swamp itself. From the ![]() Riverside Teahouse waypoint you’ll want to head south, then follow a trail northeast until you hit some docks. You shouldn’t encounter any enemies en route, but there are plenty of traps [Perception 15 | Sleight of Hand 10] found in the waters of the swamp, so be wary. When you reach the docks, head to the end of them and turn east and jump over to a small island, then jump over to a rock to the south and from there jump south again to reach a small sandy island dominated by a large tree.
Riverside Teahouse waypoint you’ll want to head south, then follow a trail northeast until you hit some docks. You shouldn’t encounter any enemies en route, but there are plenty of traps [Perception 15 | Sleight of Hand 10] found in the waters of the swamp, so be wary. When you reach the docks, head to the end of them and turn east and jump over to a small island, then jump over to a rock to the south and from there jump south again to reach a small sandy island dominated by a large tree.
No shadow druids here, but there are some critters, including several Ancient Mud Mephits and a pair of Wood Woads. The Ancient Mud Mephits are fast, prefer ranged attacks, will summon Young Mud Mephits and are fragile, while the Wood Woads are slow melee bruisers who are fairly durable. There are two important aspects to this fight: first, Mud Mephits will explode when defeated, and they’re almost guaranteed to bunch up, which could lead to a glorious chain reaction. Second, Wood Woads are incredibly durable, having a high Armor Class and decent Hit Points, but mostly, Regeneration (regains 10 Hit Points per turn). ![]() Fire damage will prevent this regeneration for a time.
Fire damage will prevent this regeneration for a time.
With all that sorted, here’s our strategy: We cast ![]() Fog Cloud at the corner of the island where we land so we can use it as cover, protecting ourselves from the Mud Mephit’s ranged attacks. Just run out of the fog, shoot at a target, then return back in. We want to ignore the Wood Woads at first and target Mud Mephits, especially any that are bunched up. Killing them near other enemies and causing a chain reaction is the key to this fight, and you’ll have a turn or two before the Mud Mephits can reach the fog, while the slower Wood Woads will take longer. Once the Mud Mephits are defeated, focus on the Wood Woads one at a time - hit one of them with fire damage and concentrate fire to bring it down while its regeneration is down.
Fog Cloud at the corner of the island where we land so we can use it as cover, protecting ourselves from the Mud Mephit’s ranged attacks. Just run out of the fog, shoot at a target, then return back in. We want to ignore the Wood Woads at first and target Mud Mephits, especially any that are bunched up. Killing them near other enemies and causing a chain reaction is the key to this fight, and you’ll have a turn or two before the Mud Mephits can reach the fog, while the slower Wood Woads will take longer. Once the Mud Mephits are defeated, focus on the Wood Woads one at a time - hit one of them with fire damage and concentrate fire to bring it down while its regeneration is down.
Defeat these critters, then search along the tree to find a Wooden Chest, inside of which are ![]() The Sparkle Hands gloves. One of the Wood Woads will also drop the Wood Woad Shield, which allows the wielder to use Woad’s
The Sparkle Hands gloves. One of the Wood Woads will also drop the Wood Woad Shield, which allows the wielder to use Woad’s ![]() Ensnaring Strike. Pick up these treasures, then search the tree to find a Wooden Crevice, inside of which you’ll find a Letter to Kagha. This letter mentions Kagha, the shadow druids, and one “Archdruid Aelis”, which is pretty incriminating stuff.
Ensnaring Strike. Pick up these treasures, then search the tree to find a Wooden Crevice, inside of which you’ll find a Letter to Kagha. This letter mentions Kagha, the shadow druids, and one “Archdruid Aelis”, which is pretty incriminating stuff.
How to Expose Kagha and Defeat the Shadow Druids in Baldur’s Gate 3
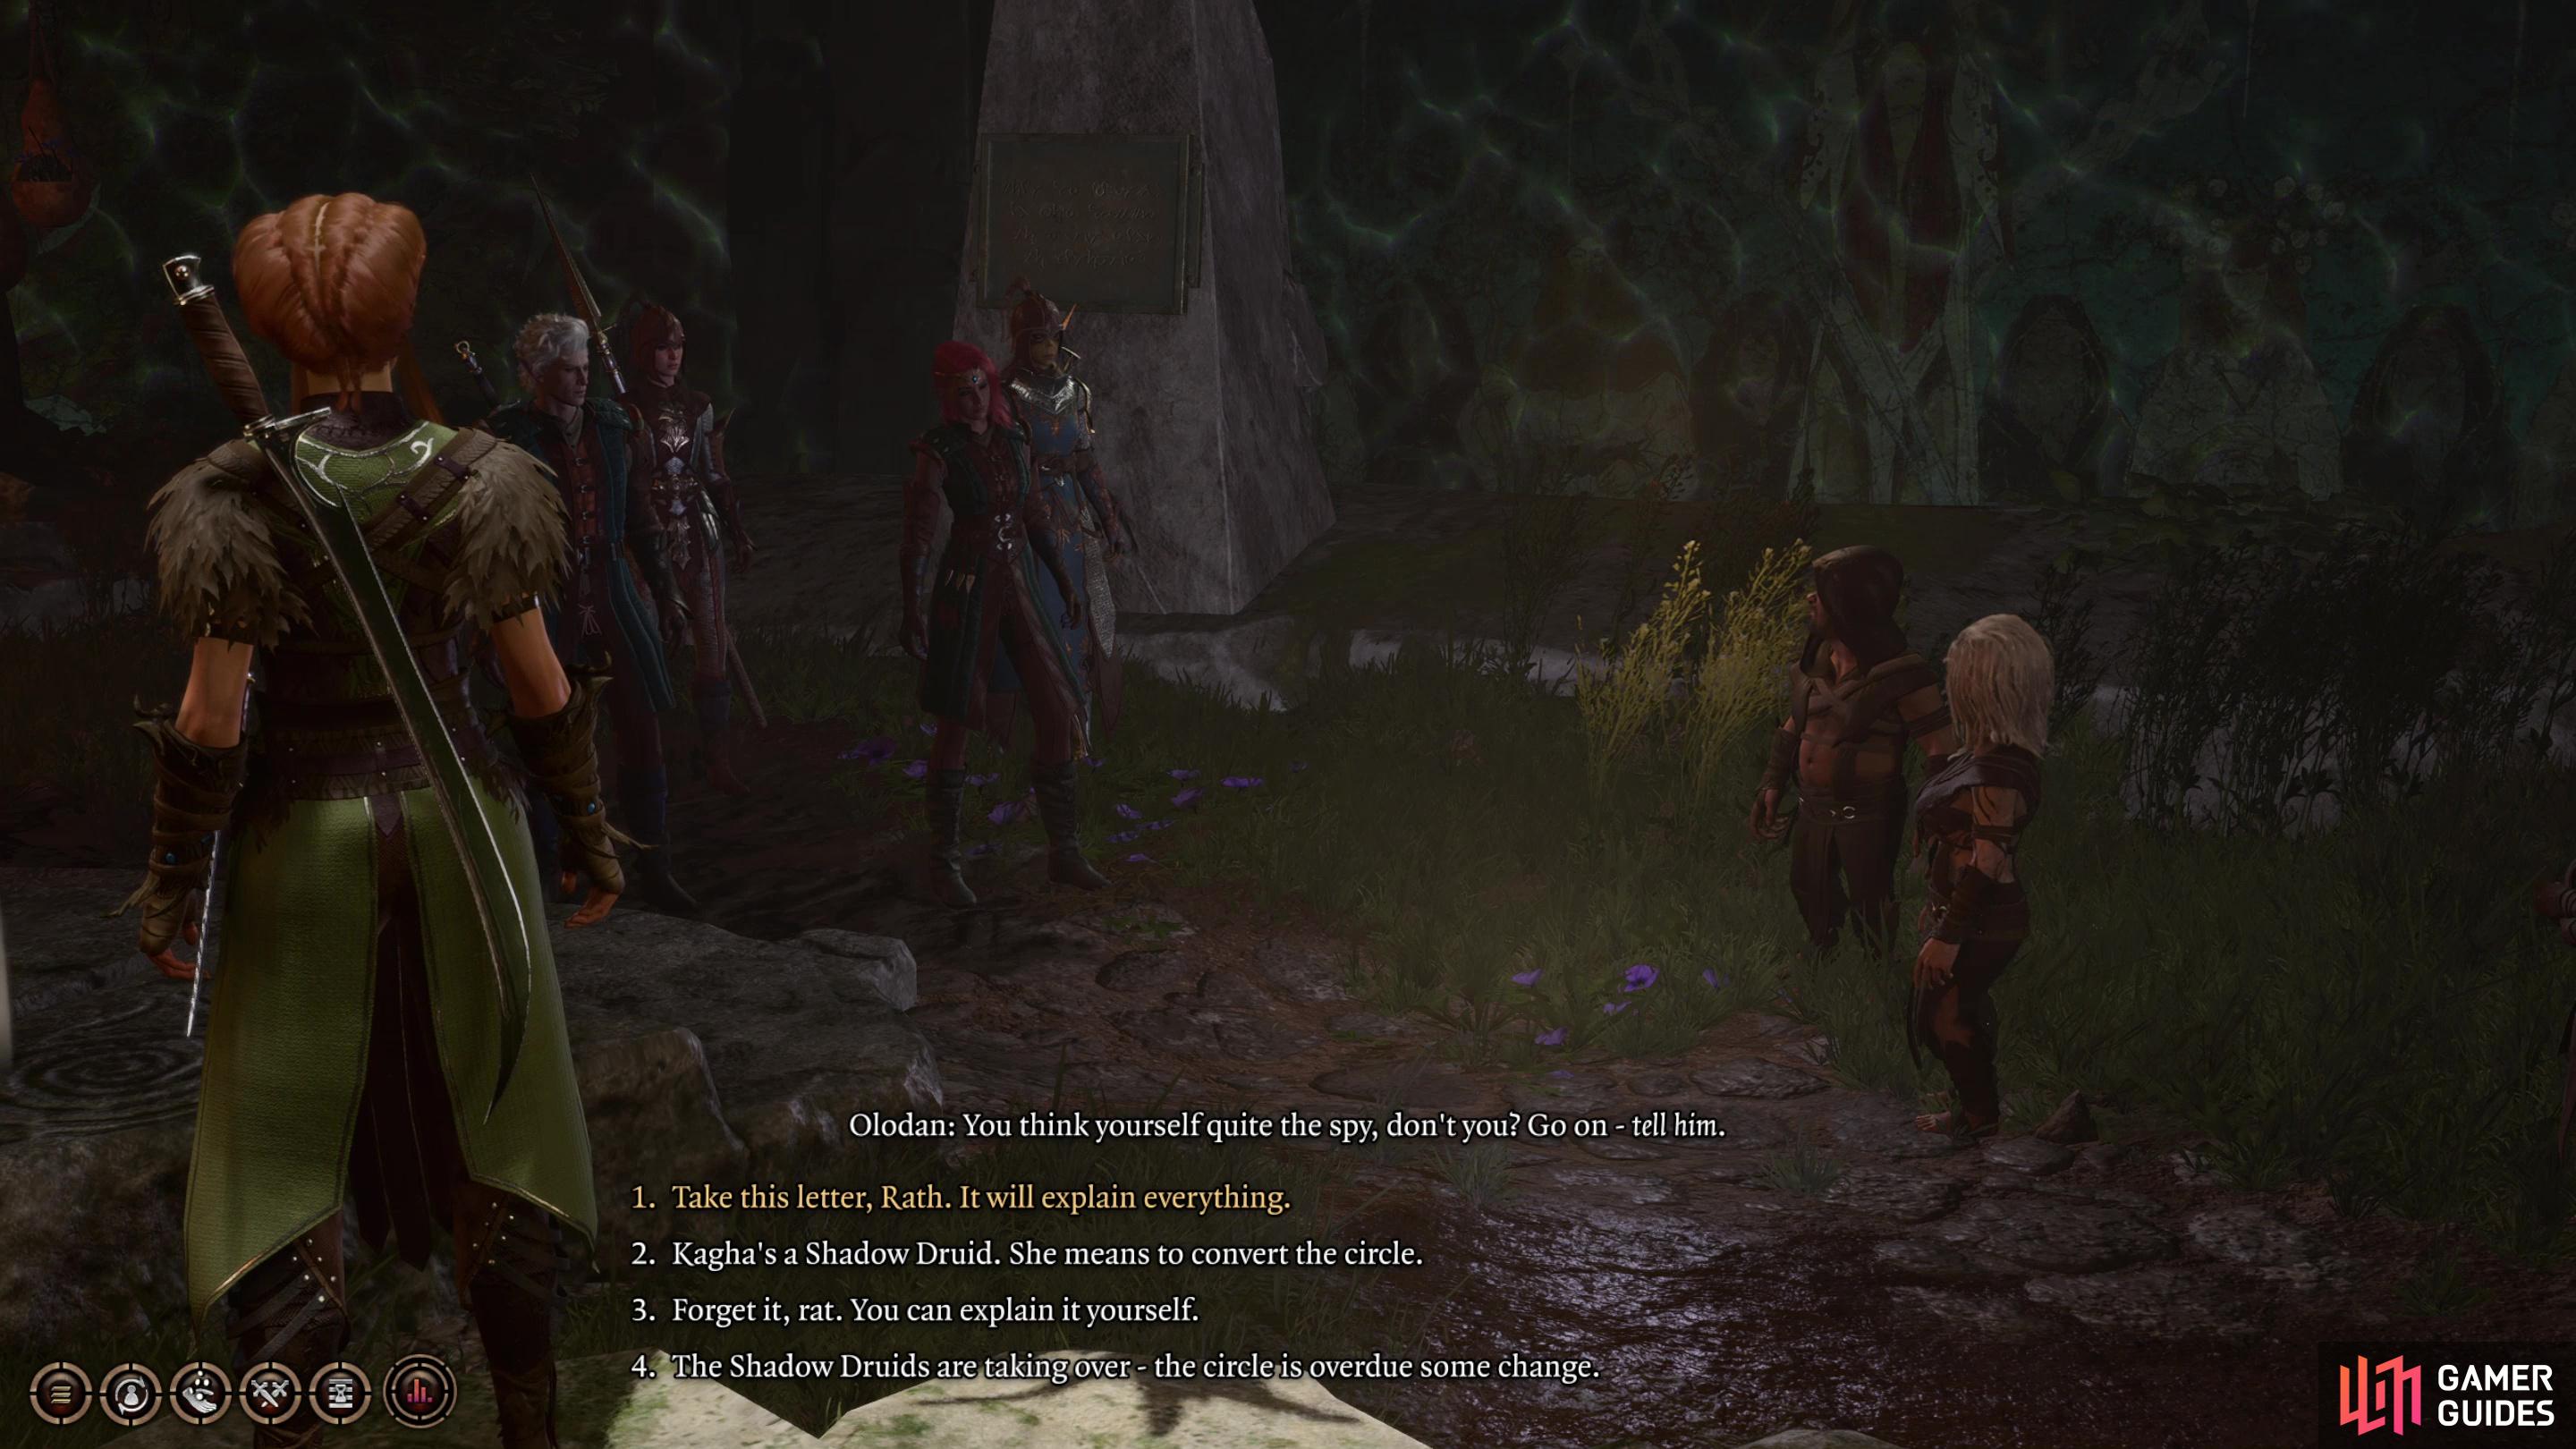
Now that you have evidence, it’s time to return to the Emerald Grove and pay Kagha a visit. Talk to her and pick the dialog option ”I know the truth. You mean to take the grove for the Shadow !Druids.”, which will cause her conspirators to expose themselves for the rats they were and still are. Despite the options here, you can’t really side with the shadow druids, who seem hell-bent on picking a fight and purging the grove. You can, however, talk sense into Kagha and make the upcoming fight much, much easier.
To do this, avoid any options that outright pick a fight and you’ll eventually get either a [Persuasion 15] or a [![]() Detect Thoughts 13] check. If you succeed at the [Detect Thoughts] check you’ll unlock the option ”You’re so desperate to be proven right - it’s made you forget who you really are.”, which will make Kagha see reason. If you try the [Persuasion] check, you’ll automatically attempt an [Insight 10] check, which only helps you spot Kagha’s increasing doubt. Pass or fail the [Insight] check and you’ll get two more checks, [Religion 15] or [Persuasion 10], both of which will, if successful, keep Kagha loyal.
Detect Thoughts 13] check. If you succeed at the [Detect Thoughts] check you’ll unlock the option ”You’re so desperate to be proven right - it’s made you forget who you really are.”, which will make Kagha see reason. If you try the [Persuasion] check, you’ll automatically attempt an [Insight 10] check, which only helps you spot Kagha’s increasing doubt. Pass or fail the [Insight] check and you’ll get two more checks, [Religion 15] or [Persuasion 10], both of which will, if successful, keep Kagha loyal.
If you convince Kagha to stay true to her circle, you’ll only have to fight Olodan, Wren and Pinta, a trio of level five druids. They’re nuisance enemies, using a variety of damaging and debuffing spells while also shapeshifting should they feel the need to engage in melee. When they shapeshift, you’ll have to defeat their animal form, and none of the damage you deal to that form will carry over to their natural form, basically giving them free Hit Points. Fortunately, they can only do this a few times during combat, and if the rest of the grove is assisting you the shadow druids will be handily outnumbered and outmatched.
Should Kagha defect, however, she’ll be joined by Marcoryl and Loic, two Emerald Grove druids who are apparently more loyal to Kagha (or just xenophobic and violently isolationist enough to side with shadow druids if it means expelling the tieflings), leaving only Findal and Rath on your side. This six-on-six battle is far more dangerous, especially since Kagha somehow has 65 Hit Points despite only being a level five !Druid with 14 Constitution. Actually, her entire stat spread is kind of silly - 16, 16, 14, 14, 16 14? With stats like those, she should be the protagonist of this game! Then again, Olodan is rocking three 18s. Point-buy system making our characters worse than random NPCs. Feels bad.
Anywho, whether you’re fighting three druids or six, the key is to concentrate fire and pick off your enemies one at a time. The more of them there are, the more spells will come your way. If one of your casters gets a good Initiative Roll, consider using ![]() Hold Person to lock down an enemy and ensure they don’t see the next turn by concentrating fire. With so many spell effects and saves going around, RNG can play a larger role in this fight than average, and if you’re also fighting Kagha, you’ll really need your handful of allies to pull their weight and at least distract the enemy. If you kept Kagha loyal, on the other hand, this will be a cakewalk.
Hold Person to lock down an enemy and ensure they don’t see the next turn by concentrating fire. With so many spell effects and saves going around, RNG can play a larger role in this fight than average, and if you’re also fighting Kagha, you’ll really need your handful of allies to pull their weight and at least distract the enemy. If you kept Kagha loyal, on the other hand, this will be a cakewalk.
If you kill Kagha (she’s very unlikely to die if you’re fighting the shadow druids together) you can loot her for the ![]() Broodmother’s Revenge gloves, which cause the wearer to deal 1-6 extra poison damage after being healed. You can also pick up Kagha’s Key, which is kind of redundant now, but it was the only clue that hinted she had a chest, if you bothered to try and pick pocket her. Anyways, after the requisite number of druids are dead, talk to Kagha (if she’s still alive) and/or Rath to finish up this quest. The Tieflings have one less thing to worry about, so go meet up with Zevlor and give him the good news, and in return he’ll give you
Broodmother’s Revenge gloves, which cause the wearer to deal 1-6 extra poison damage after being healed. You can also pick up Kagha’s Key, which is kind of redundant now, but it was the only clue that hinted she had a chest, if you bothered to try and pick pocket her. Anyways, after the requisite number of druids are dead, talk to Kagha (if she’s still alive) and/or Rath to finish up this quest. The Tieflings have one less thing to worry about, so go meet up with Zevlor and give him the good news, and in return he’ll give you ![]() Hellrider’s Pride, uncommon gloves that gives its wearer a +1 bonus on Strength Saves and gives characters healed by the wearer resistance to bludgeoning, piercing and slashing attacks.
Hellrider’s Pride, uncommon gloves that gives its wearer a +1 bonus on Strength Saves and gives characters healed by the wearer resistance to bludgeoning, piercing and slashing attacks.
Now that you’ve calmed things down at the Emerald Grove and rooted out the rot in the circle, turn your attention to these related pages:
If you are a druid and you get kagha to fight for you she gives you the pale oak staff.
If you are a druid and you get kagha to fight for you she gives you the pale oak staff.