
The ![]() Gauntlet of Shar is filled with puzzles, and the game makes no bones about it. You’ll need to solve a puzzle before you even enter the dungeon, and another one awaits immediately within. This page will cover the latter, providing a walkthrough for solving the statue of Shar puzzle at the beginning of the Gauntlet of Shar in Baldur’s Gate 3.
Gauntlet of Shar is filled with puzzles, and the game makes no bones about it. You’ll need to solve a puzzle before you even enter the dungeon, and another one awaits immediately within. This page will cover the latter, providing a walkthrough for solving the statue of Shar puzzle at the beginning of the Gauntlet of Shar in Baldur’s Gate 3.
Where to Find the Statue of Shar Puzzle in the Gauntlet of Shar
Finding this puzzle is more or less an equivalent task to finding the Gauntlet of Shar itself. You must go through the Thorm Mausoleum, which is along the northern end of ![]() Reithwin Town, along the northwestern corner of the map. To get through this area and reach the Gauntlet of Shar, you must complete the Painting Puzzle, which is covered in detail on the linked page. Once you take the disc to the Gauntlet of Shar, just continue forward until you reach a large chamber with a statue in the middle.
Reithwin Town, along the northwestern corner of the map. To get through this area and reach the Gauntlet of Shar, you must complete the Painting Puzzle, which is covered in detail on the linked page. Once you take the disc to the Gauntlet of Shar, just continue forward until you reach a large chamber with a statue in the middle.

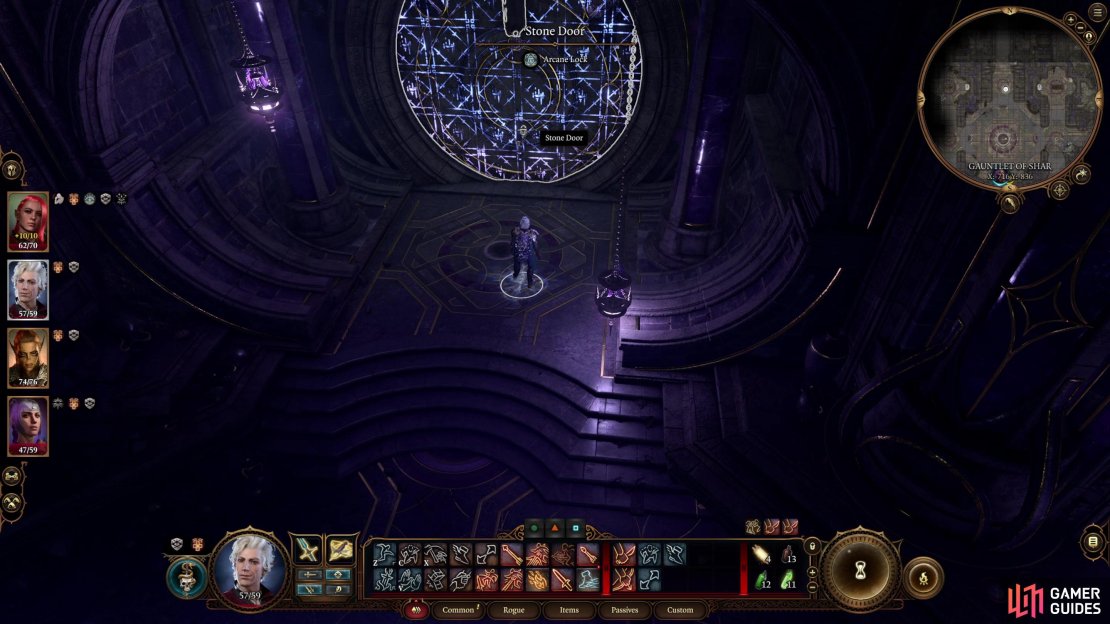
(1 of 4) Approaching the statue of Shar will cause you to be repulsed by an unseen force.
How to Solve the Statue of Shar Puzzle
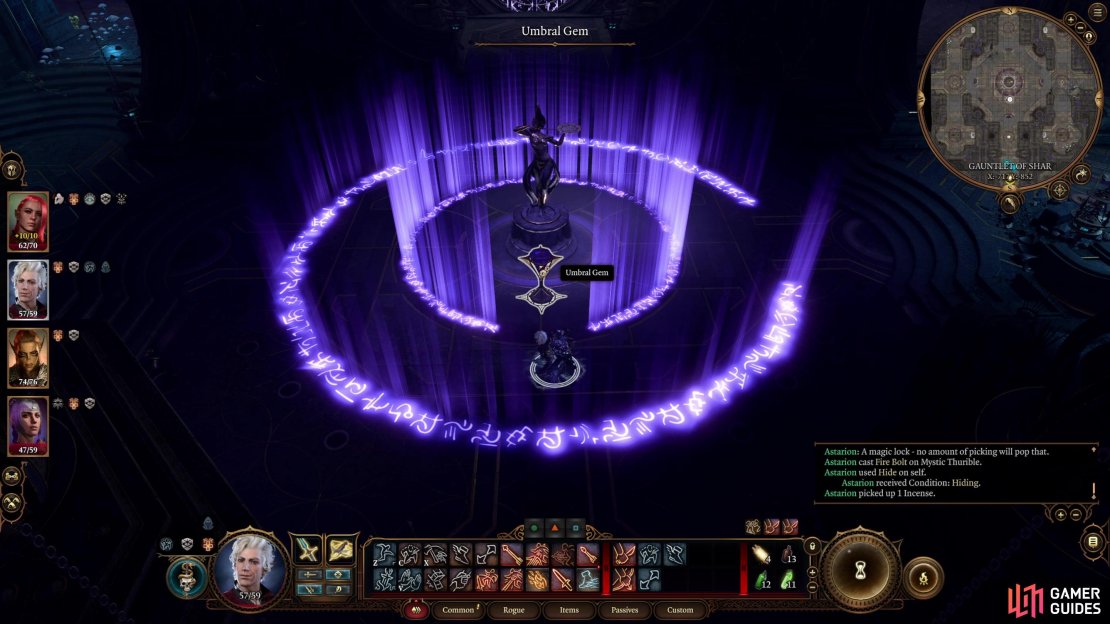
The room is dominated by a statue of Shar, and in front of her is an Umbral Gem, while behind (north of) the aforementioned statue you’ll find a door sealed by an ![]() Arcane Lock. The objective is simple, reach the Umbral Gem, remove the Arcane Lock on the door, profit. One complication, however, prevents you from strolling on - you’ll be violently repulsed every time you approach the statue. This is due to some invisible runes on the ground forming nearly complete rings around the statue of Shar - step on the runes and you’ll be repulsed. Problem is, you can’t see the rune rings if there’s any light, so you’ll need to drown the area in darkness so you can see where to go.
Arcane Lock. The objective is simple, reach the Umbral Gem, remove the Arcane Lock on the door, profit. One complication, however, prevents you from strolling on - you’ll be violently repulsed every time you approach the statue. This is due to some invisible runes on the ground forming nearly complete rings around the statue of Shar - step on the runes and you’ll be repulsed. Problem is, you can’t see the rune rings if there’s any light, so you’ll need to drown the area in darkness so you can see where to go.
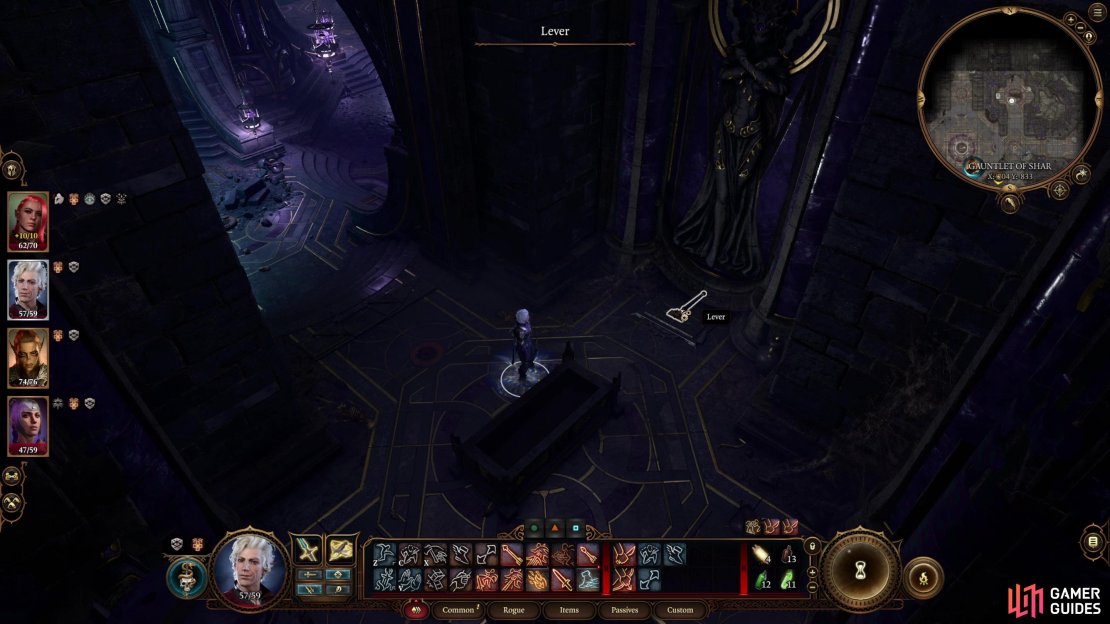
The solution to your conundrum is nearby, but not quite in the same room. Orbiting the larger room with the statue are four chambers with tombs in them, but more importantly, each of these tomb chambers houses a Lever. The locations of these four levers are roughly at:
- Northwest (x=-730, y=-830)
- Southwest (x=-730, y=-860)
- Northeast (x=-705, y=-835)
- Southeast (x=-707, y=862)
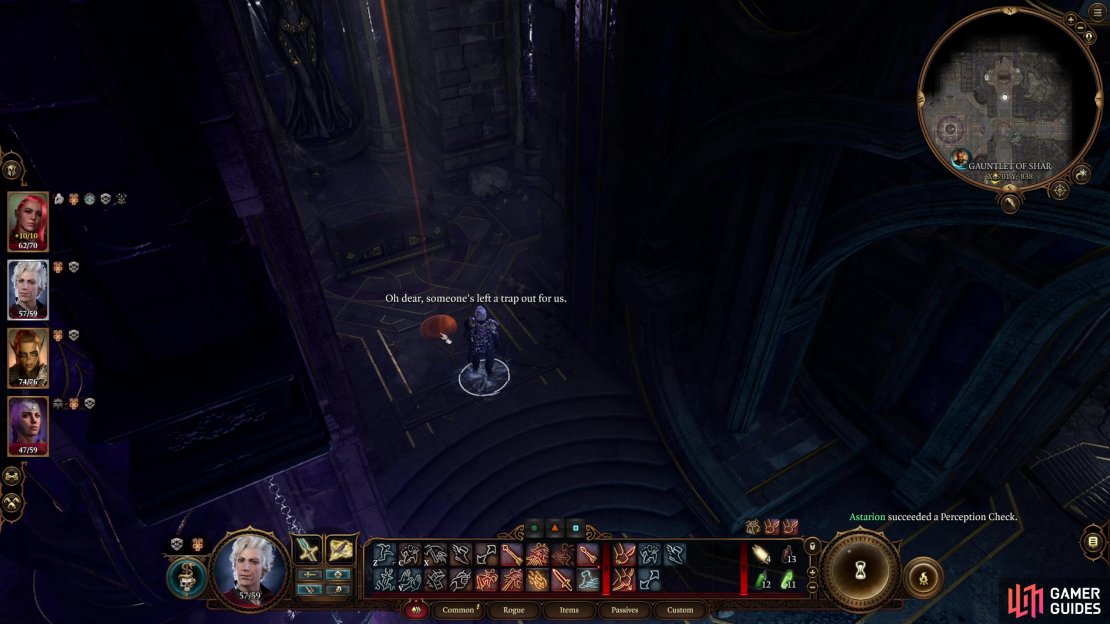
Your first goal is to pull them all, but you need to be wary of a variety of traps scattered about, which makes the going perilous. Brave the traps, pull the levers, and you’ll find that they lower Mystic Thuribles. These sources of light are what’s keeping you from seeing the rune rings that protect the statue of Shar, so go around and snuff them all out, then make sure you don’t have any source of light yourself - the ![]() Light spell or
Light spell or ![]() The Blood of Lathander being common culprits. Moving every other character save one away from the statue may suffice, if you don’t want to permanently remove the sources of light.
The Blood of Lathander being common culprits. Moving every other character save one away from the statue may suffice, if you don’t want to permanently remove the sources of light.


(1 of 3) Pulling these levers will lower some Mystic Thuribles, sources of light that are obscuring the Sharrans runes.
Once the room is enshrouded in complete darkness you’ll see two rune rings glowing along the floor around the statue. These rings aren’t completely enclosed, so ungroup your party and move one character through the rings to reach the Umbral Gem. Once you touch it, the seal on the door to the north will be removed, allowing you to advance deeper into the dungeon.
Now that you’re past this initial puzzle in the Gauntlet of Shar, check out the following walkthrough pages to advance through this dungeon:
- Gauntlet of Shar and Temple of Shar Complete Walkthrough in BG3
- Where to Find Balthazar: Thorm Mausoleum Painting Puzzle & Gauntlet of Shar
- Umbral Gem Locations in BG3: Gauntlet of Shar, Puzzle & How to Get
- Soft-Step Trial Puzzle Guide at the Gauntlet of Shar in BG3
- Gauntlet of Shar: How to Complete the Self-Same Trial in BG3
- How to Break Yurgir’s Contract in BG3
No Comments