
The ![]() Gauntlet of Shar is one of the major dungeons in Act 2, wherein you’ll advance the main questline, deal with one of Raphael’s rivals (and in the process help
Gauntlet of Shar is one of the major dungeons in Act 2, wherein you’ll advance the main questline, deal with one of Raphael’s rivals (and in the process help ![]() Astarion learn what Cazador wrote on him), track down the Nightsong, deal with Balthazar and potentially alter
Astarion learn what Cazador wrote on him), track down the Nightsong, deal with Balthazar and potentially alter ![]() Shadowheart’s position within the Sharran cult. Before you can get to the Gauntlet of Shar, however, you must pass through the Thorm Mausoleum, which requires you to solve a puzzle. On this page you’ll find a walkthrough for the Thorm Mausoleum, including information on how to solve the painting puzzle.
Shadowheart’s position within the Sharran cult. Before you can get to the Gauntlet of Shar, however, you must pass through the Thorm Mausoleum, which requires you to solve a puzzle. On this page you’ll find a walkthrough for the Thorm Mausoleum, including information on how to solve the painting puzzle.
Which will trigger if you press the buttons at the base of each painting in the incorrect order.
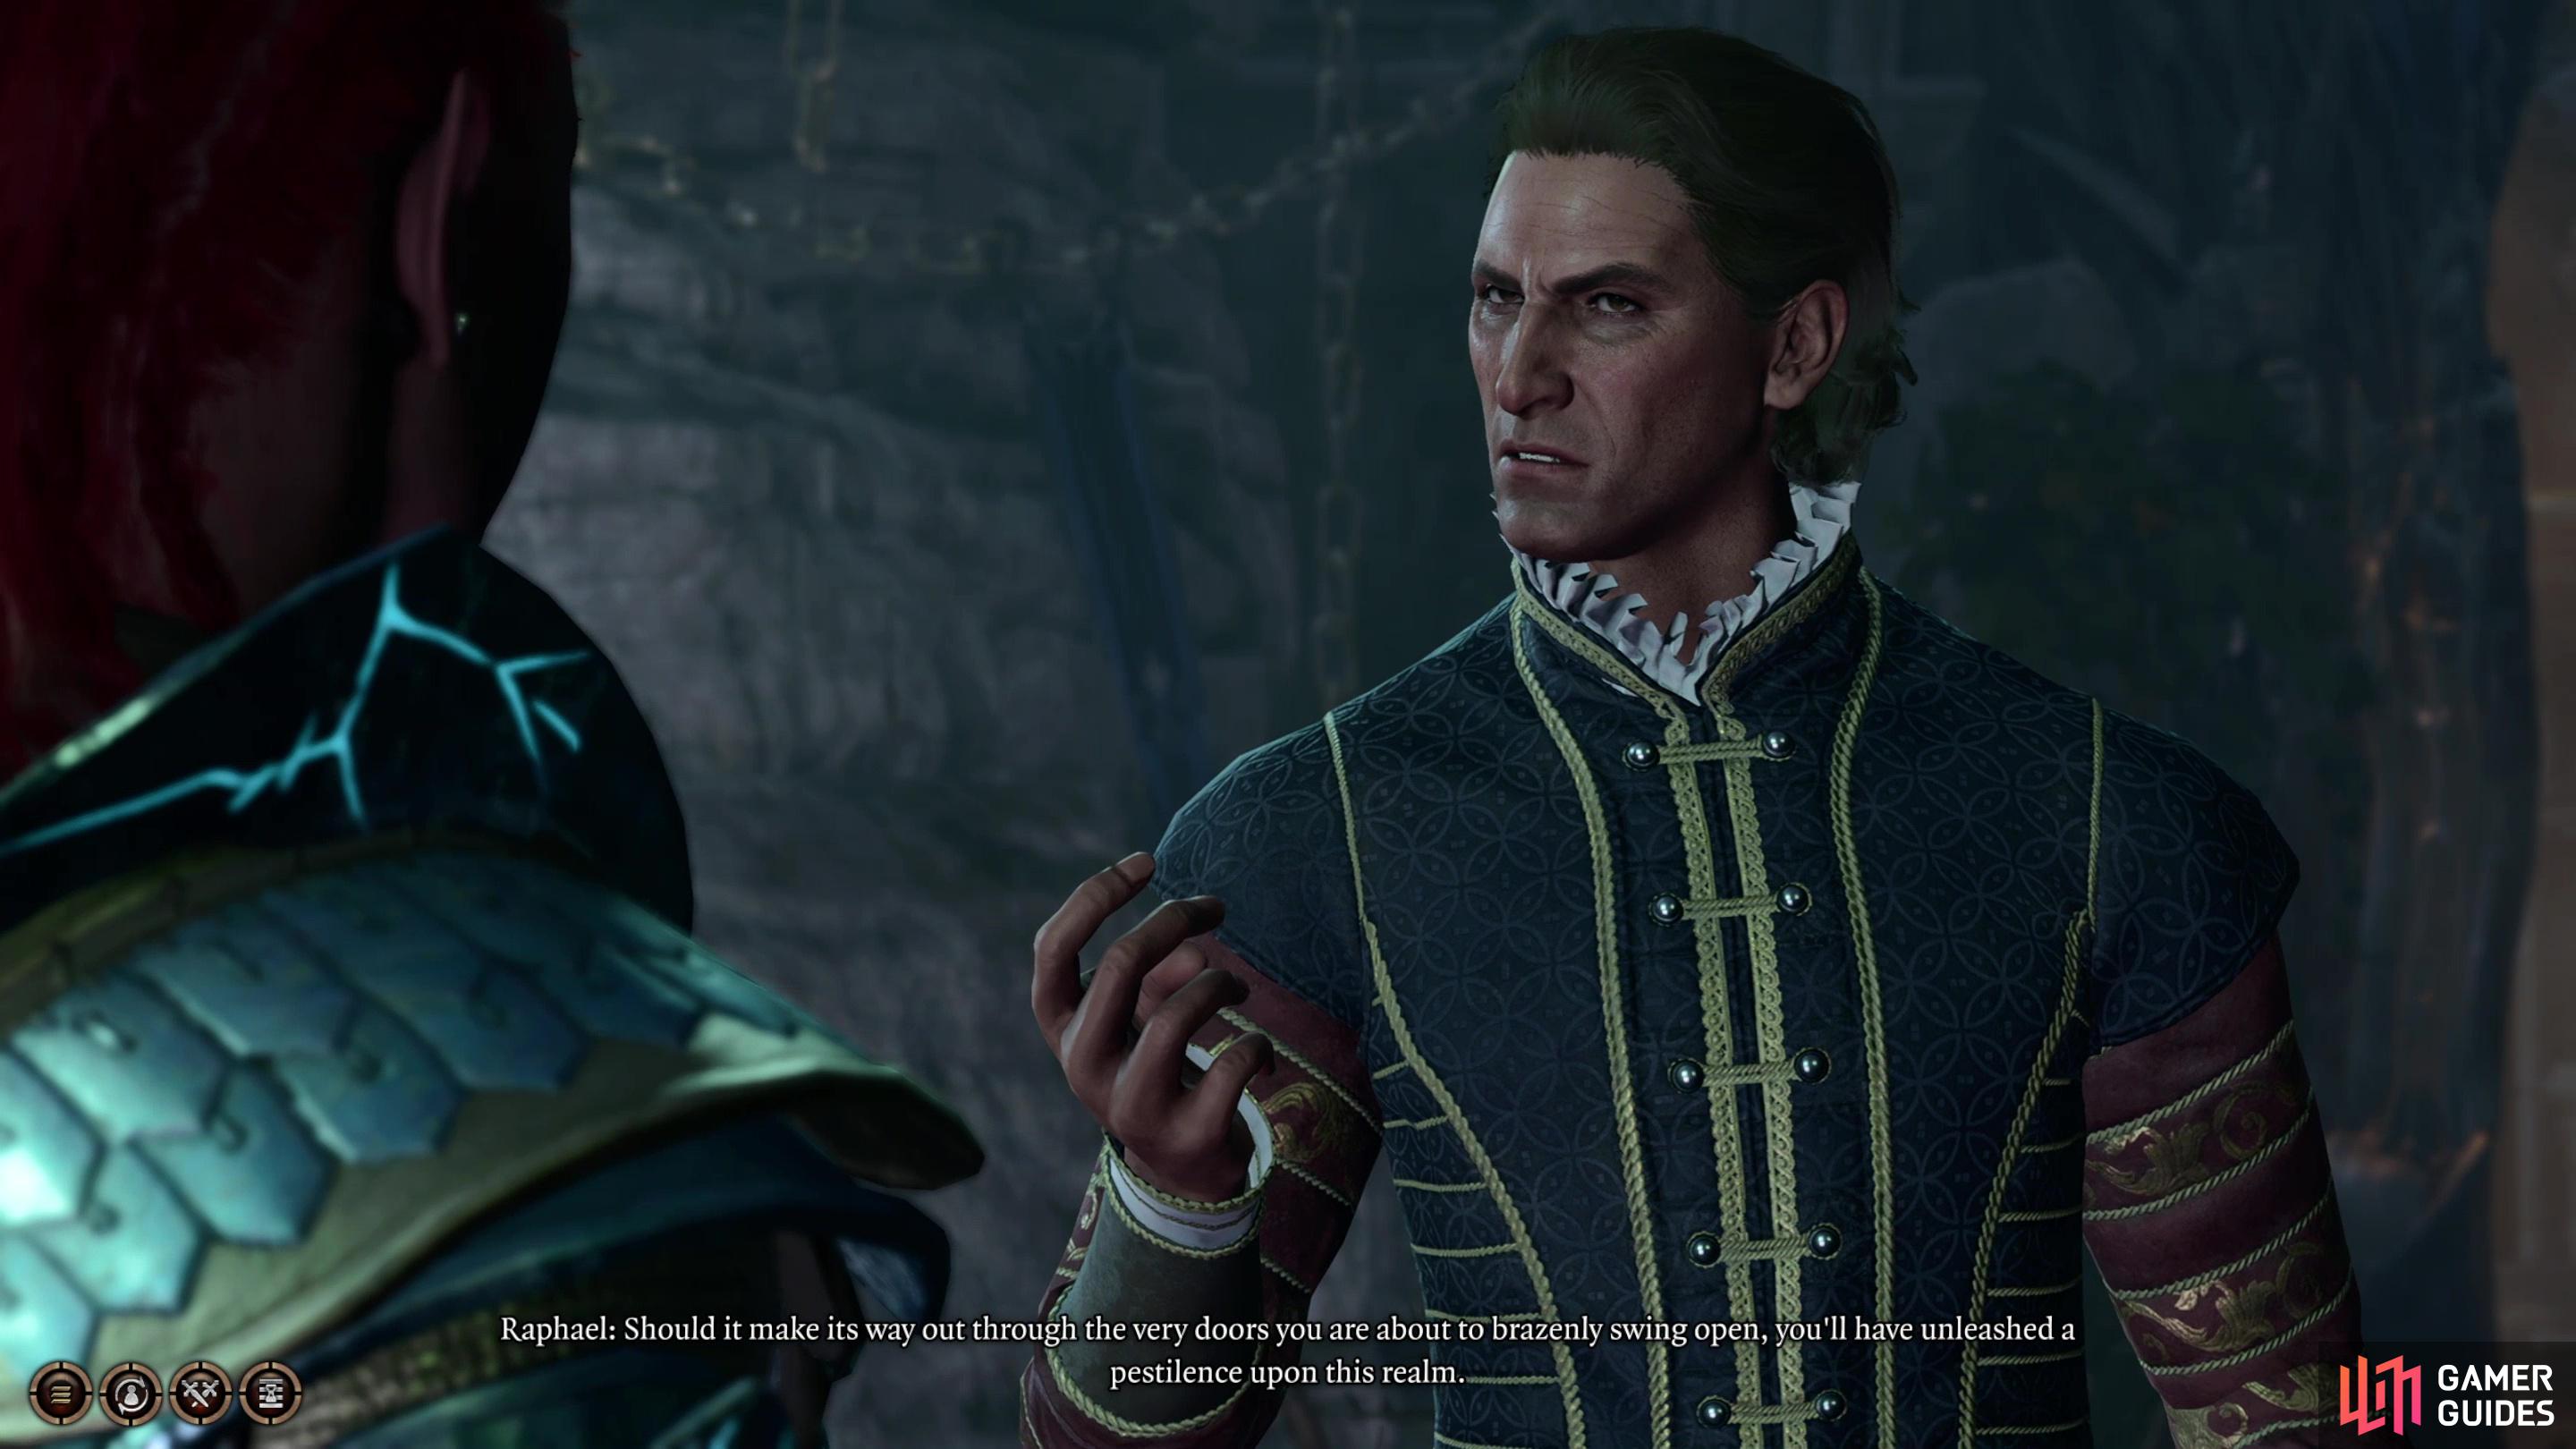
As you approach the Thorm Mausoleum, Raphael will appear and try to dupe you into getting rid of one of his rivals.
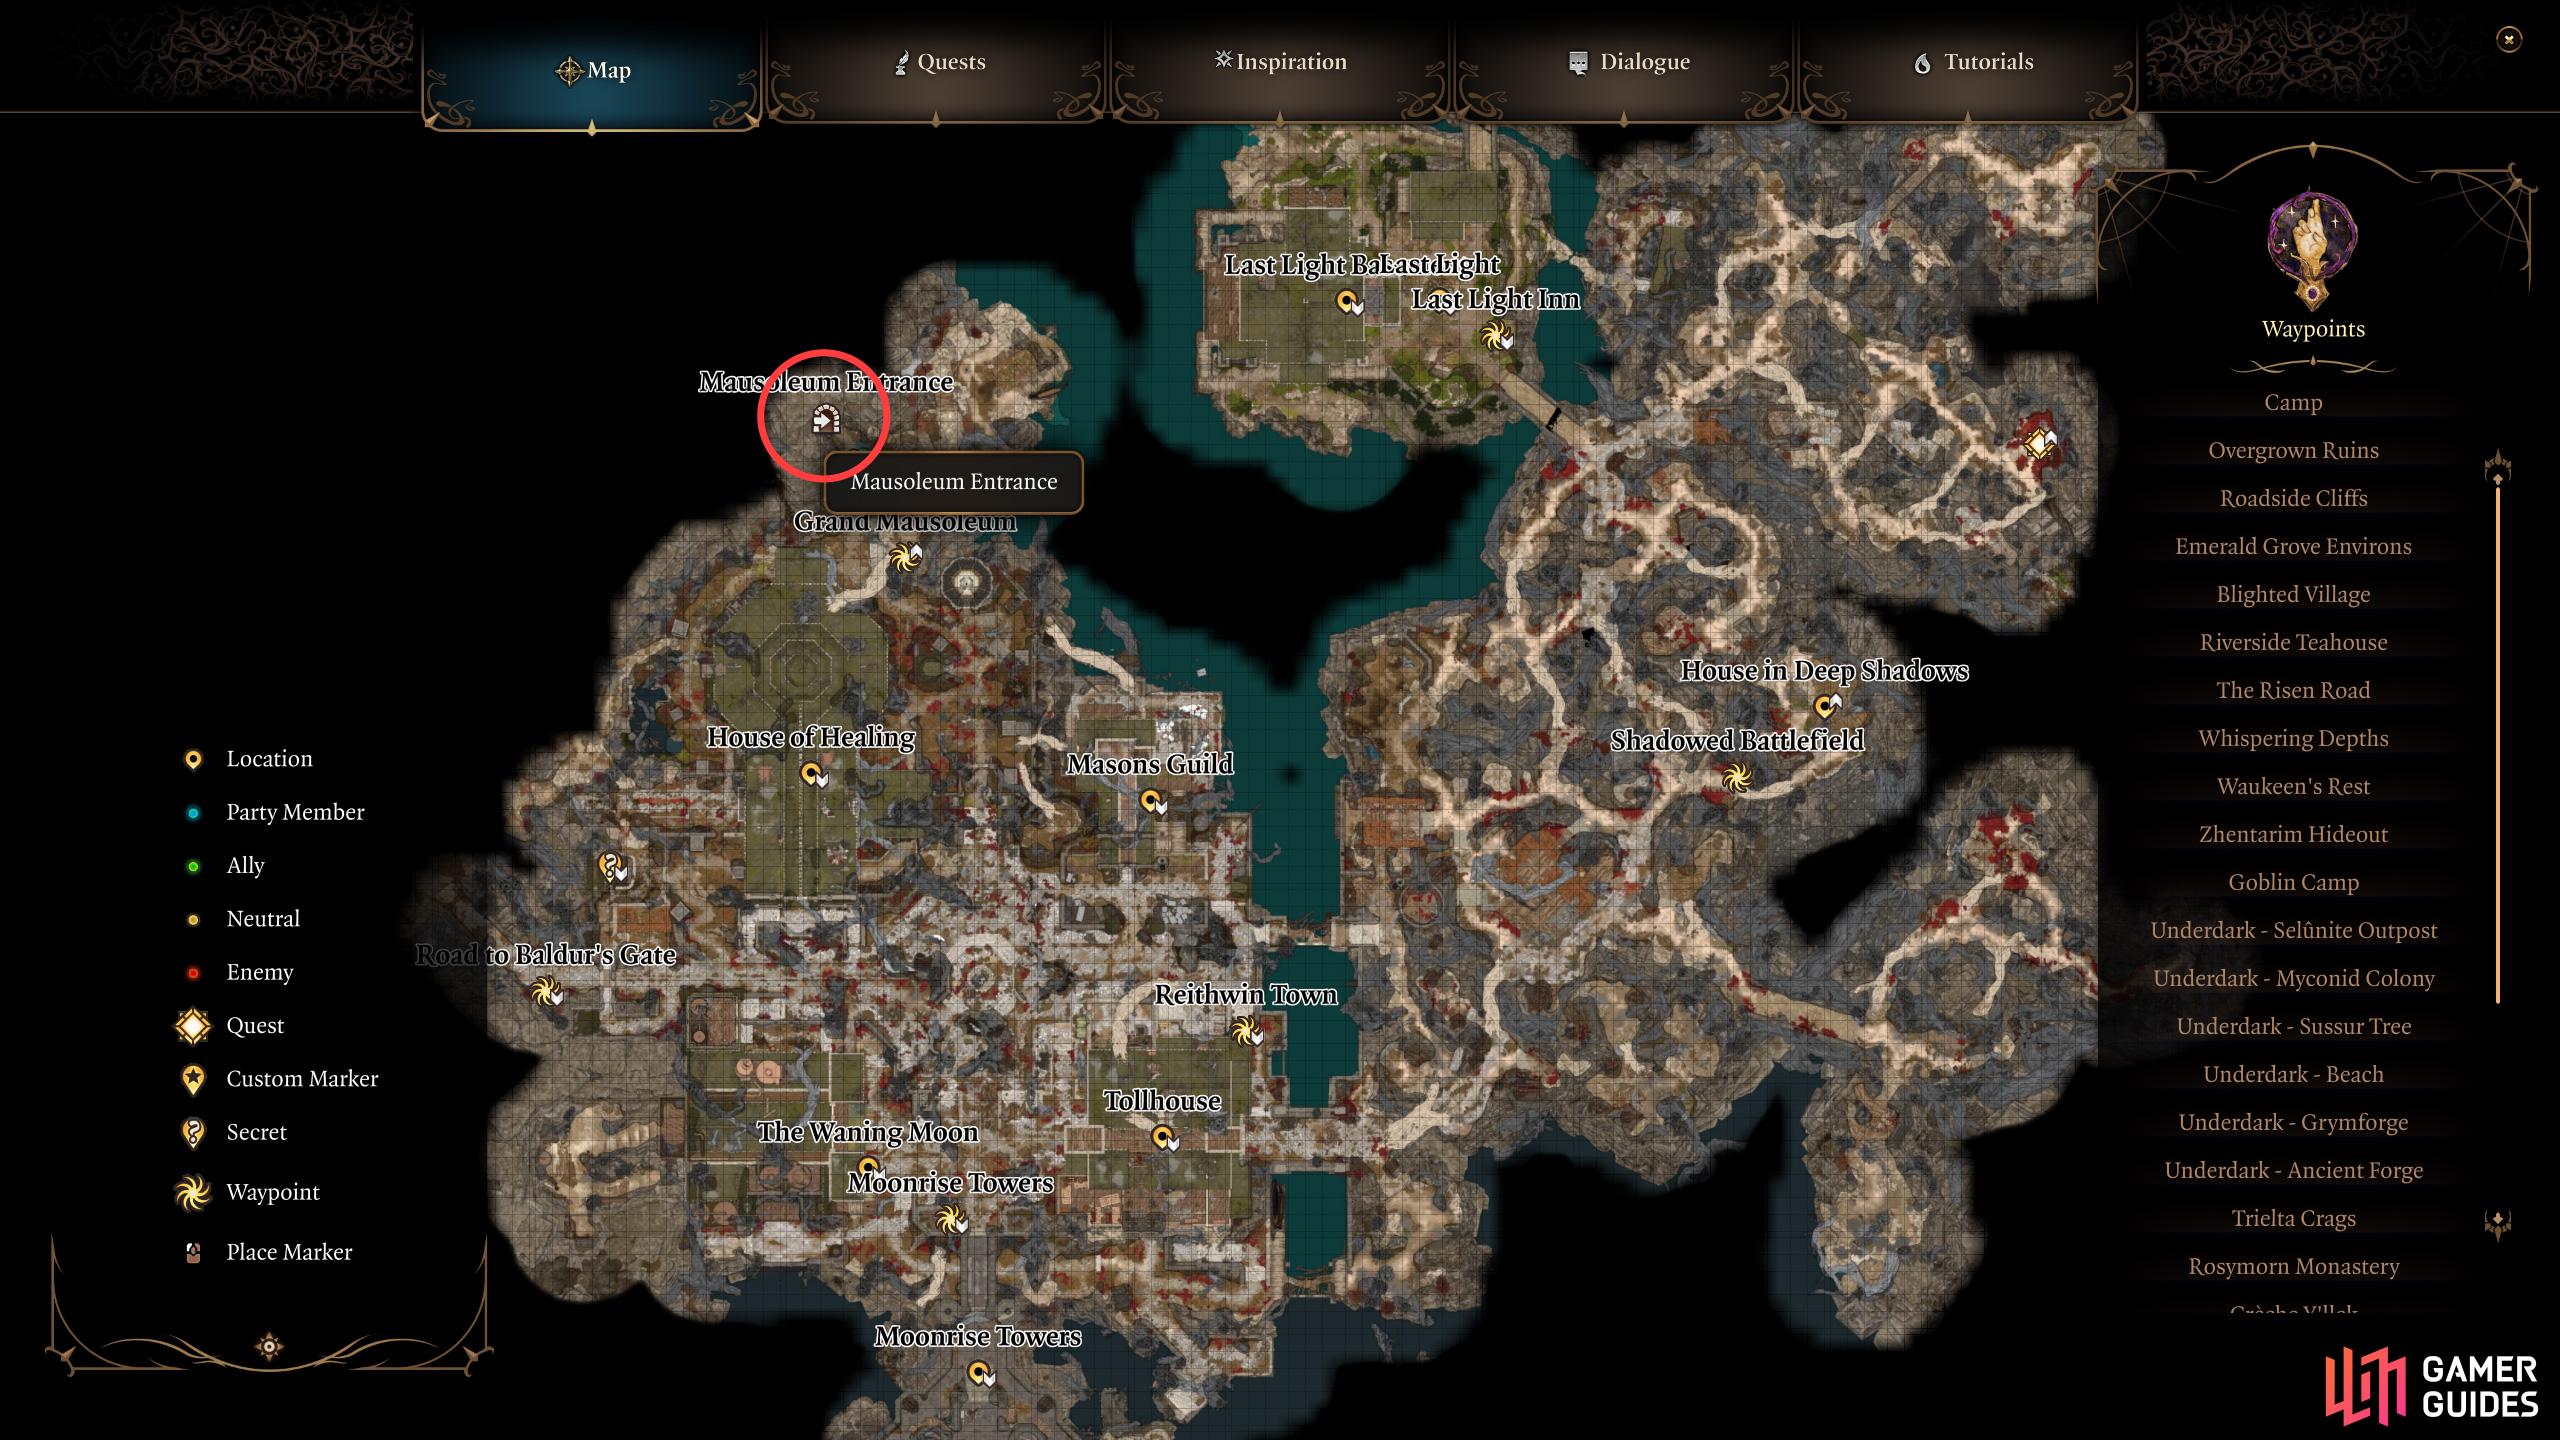
Where to Find the Thorm Mausoleum in BG3
You can find the Thorm Mausoleum along the northwestern corner of the Shadowlands, across the river that separates ![]() Reithwin Town from the rest of the region. It’s northwest of the
Reithwin Town from the rest of the region. It’s northwest of the ![]() Mason’s Guild, and north of the
Mason’s Guild, and north of the ![]() House of Healing - you should discover the Grand Mausoleum waypoint when you get close. You’ll also be pestered by Raphael, who will give you the quest Raphael’s Old Enemy and update
House of Healing - you should discover the Grand Mausoleum waypoint when you get close. You’ll also be pestered by Raphael, who will give you the quest Raphael’s Old Enemy and update ![]() The Pale Elf. After that little encounter, enter the mausoleum.
The Pale Elf. After that little encounter, enter the mausoleum.
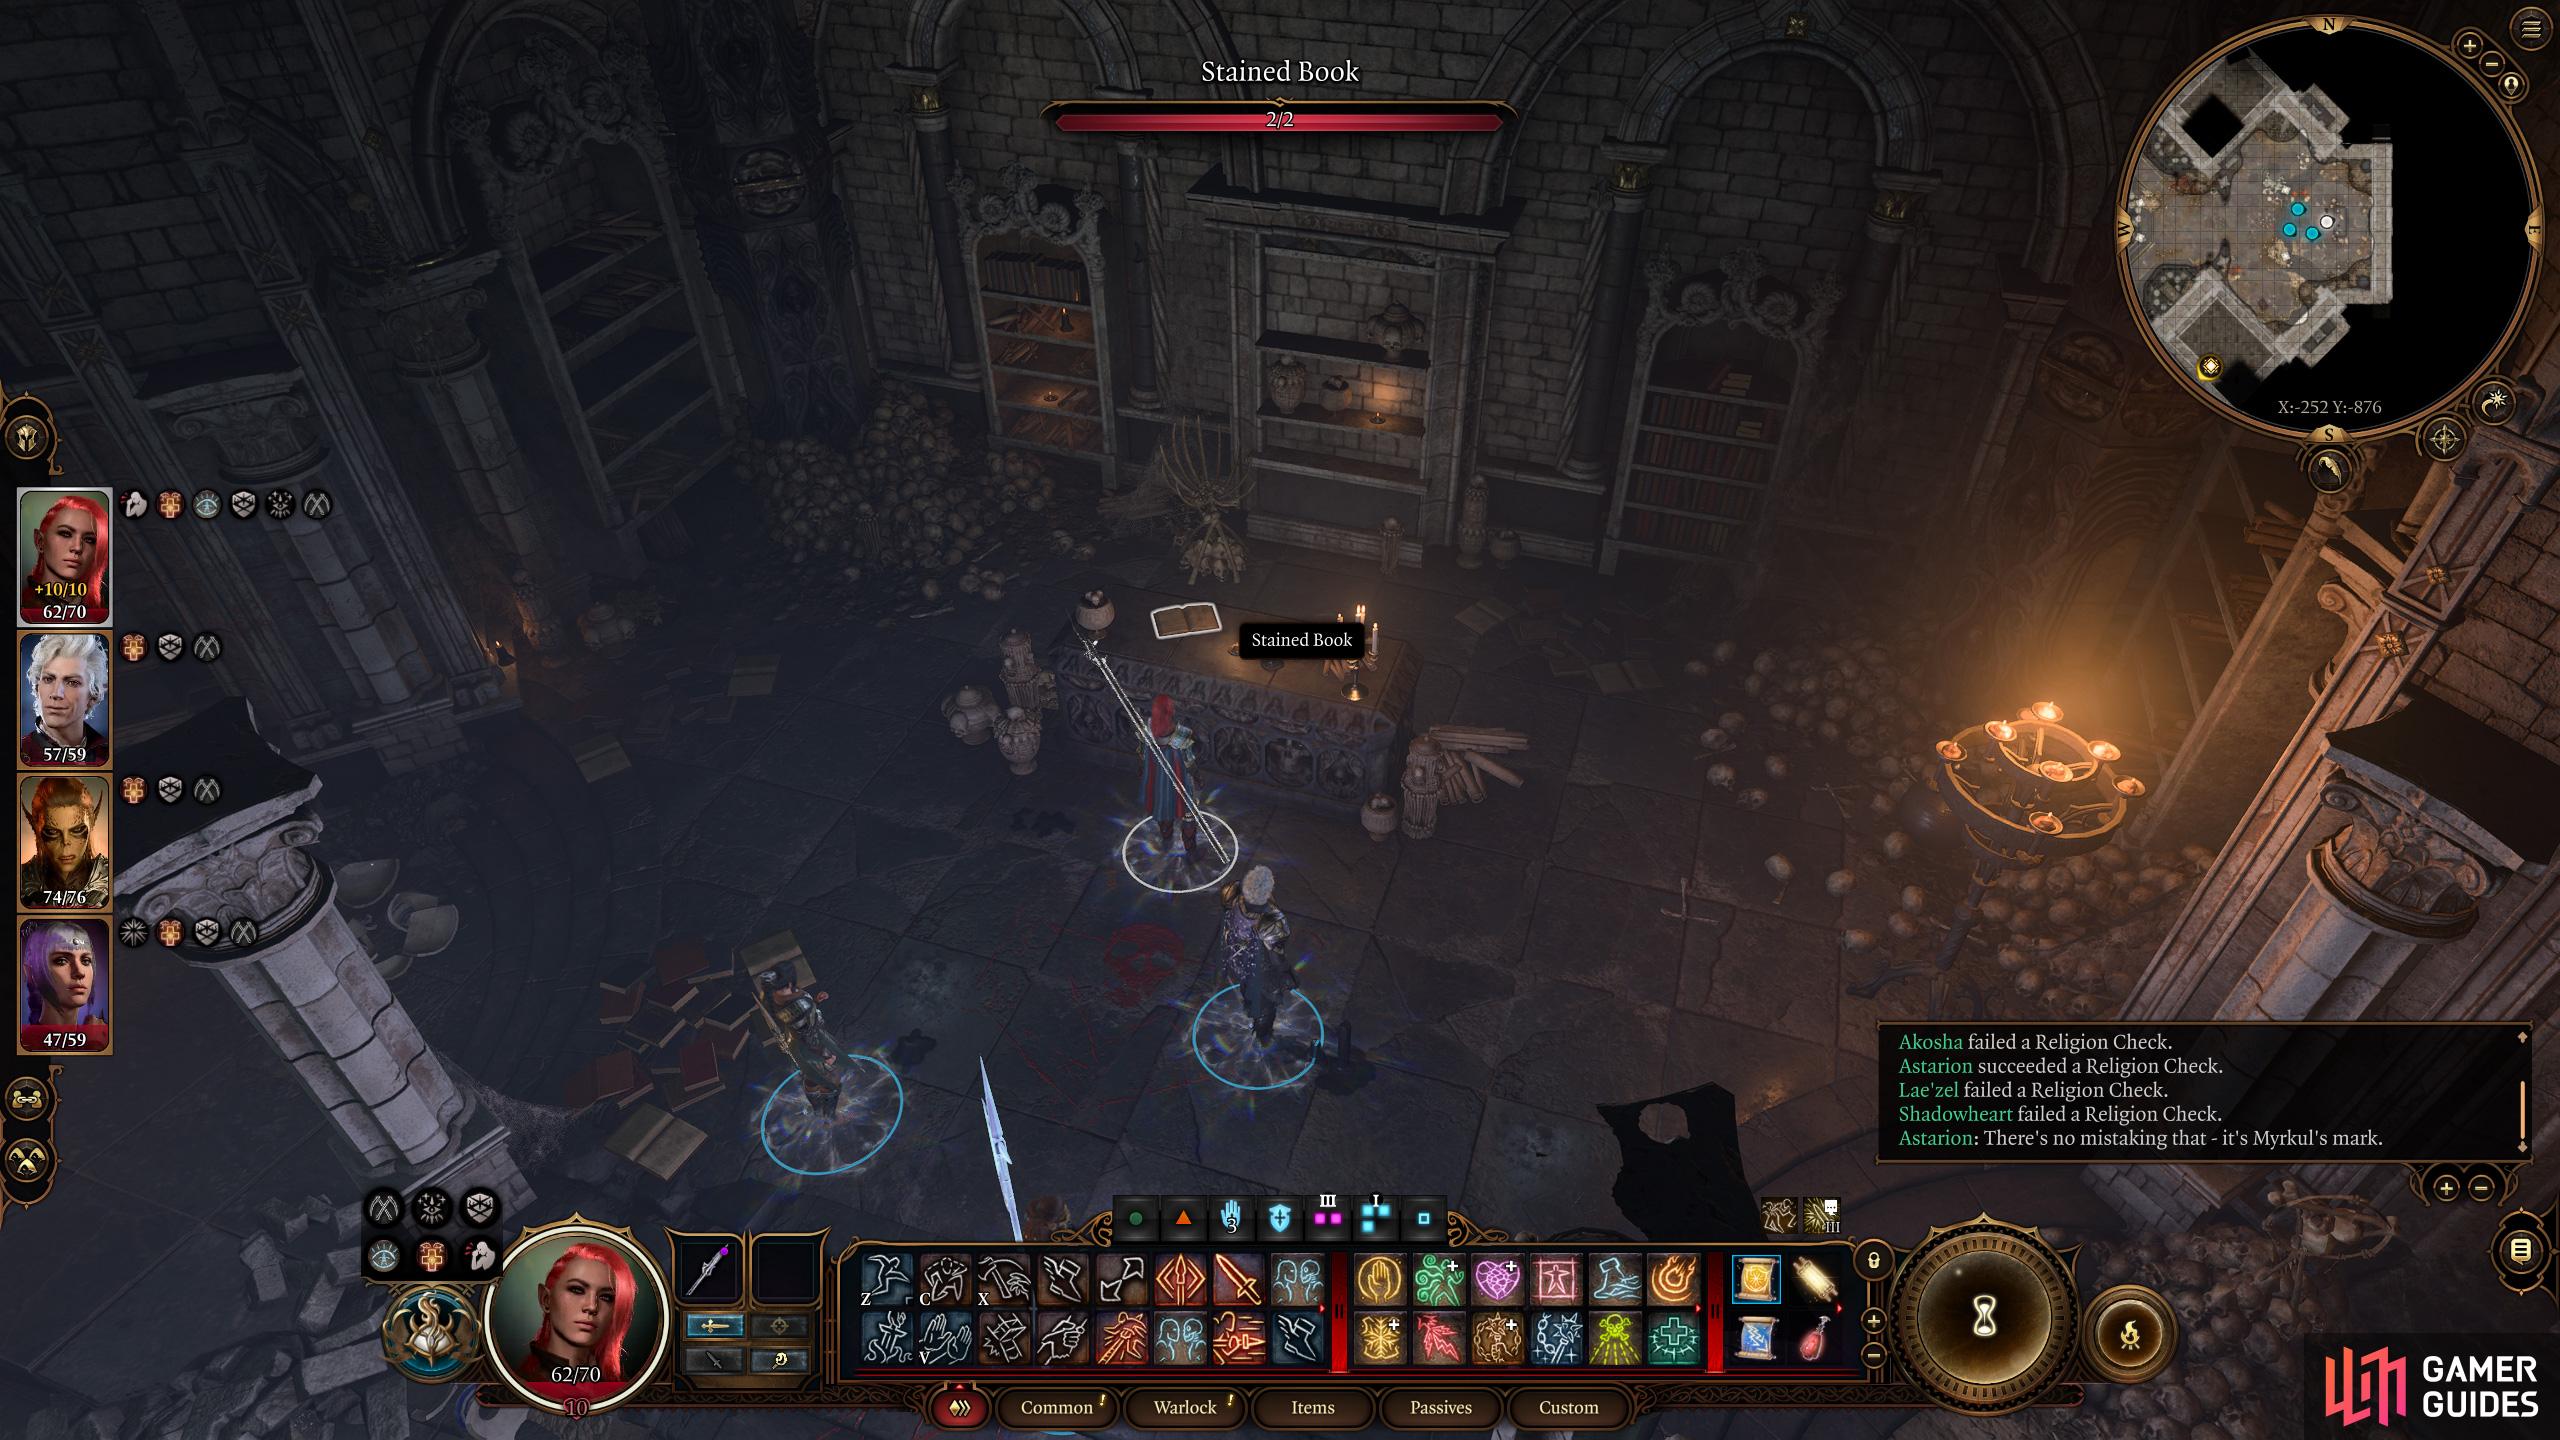
Read a Stained Book to gain clues for solving the upcoming painting puzzle,
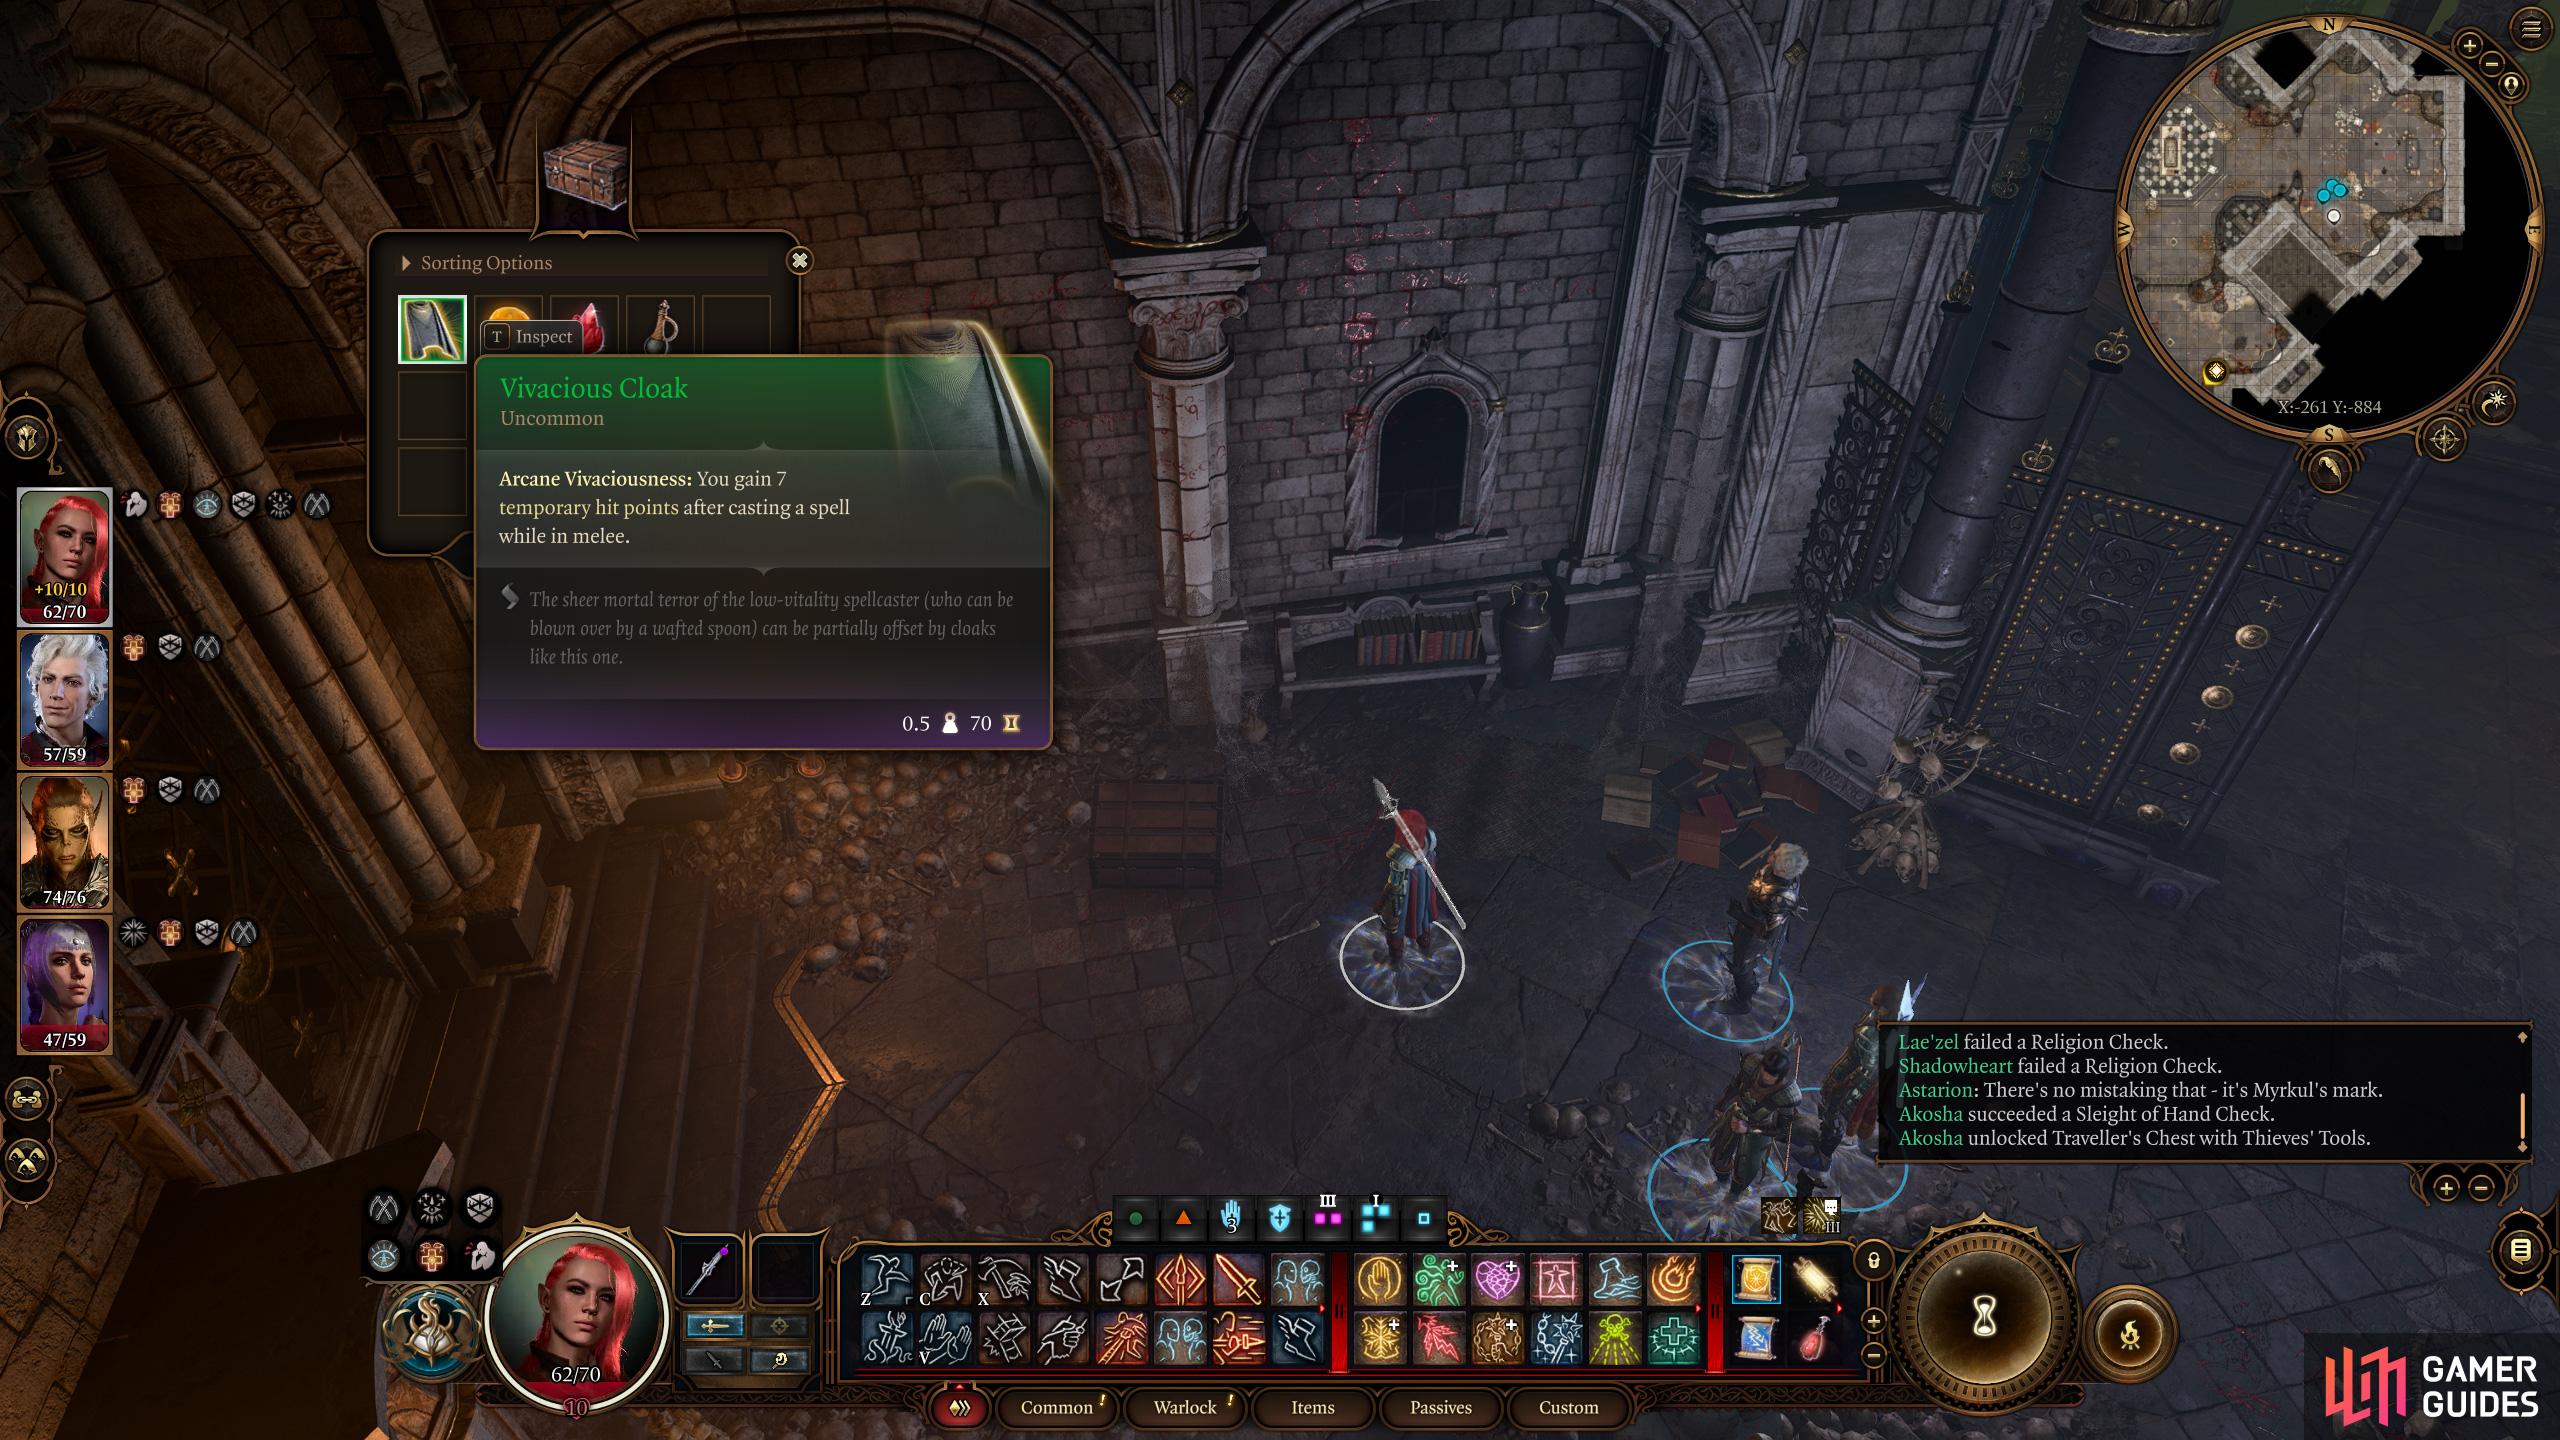
then loot a chest to score a Vivacious Cloak.
How to Solve the Painting Puzzle in the Thorm Mausoleum
This place isn’t terribly complicated, head north and you’ll find the tomb of Melodia Thorm, along with the Diary of Ketheric Thorm, Vol 1. There are three of these, and while they shed light onto Thorm’s character, they aren’t particularly relevant to the task at hand. Search to the east, however, and you’ll find a room with a Stained Book on a desk (passing a [Religion 18] check will reveal some markings significant to the cult of Myrkul). Read the book and it’ll mention that:
”…in order to find what lies beyond this mausoleum, one must walk in his own footsteps, deed by deed. From splendor, to tragedy, to infamy…”
This is actually the key to solving this area’s puzzle. Speaking of which, let’s get on that… right after you loot a nearby Traveler’s Chest [Sleight of Hand 14] which contains the ![]() Vivacious Cloak. Grab the cloak (useful for melee casters!) return to Melodia’s sarcophagus, then continue north to reach Isobel Thorm’s tomb.
Vivacious Cloak. Grab the cloak (useful for melee casters!) return to Melodia’s sarcophagus, then continue north to reach Isobel Thorm’s tomb.
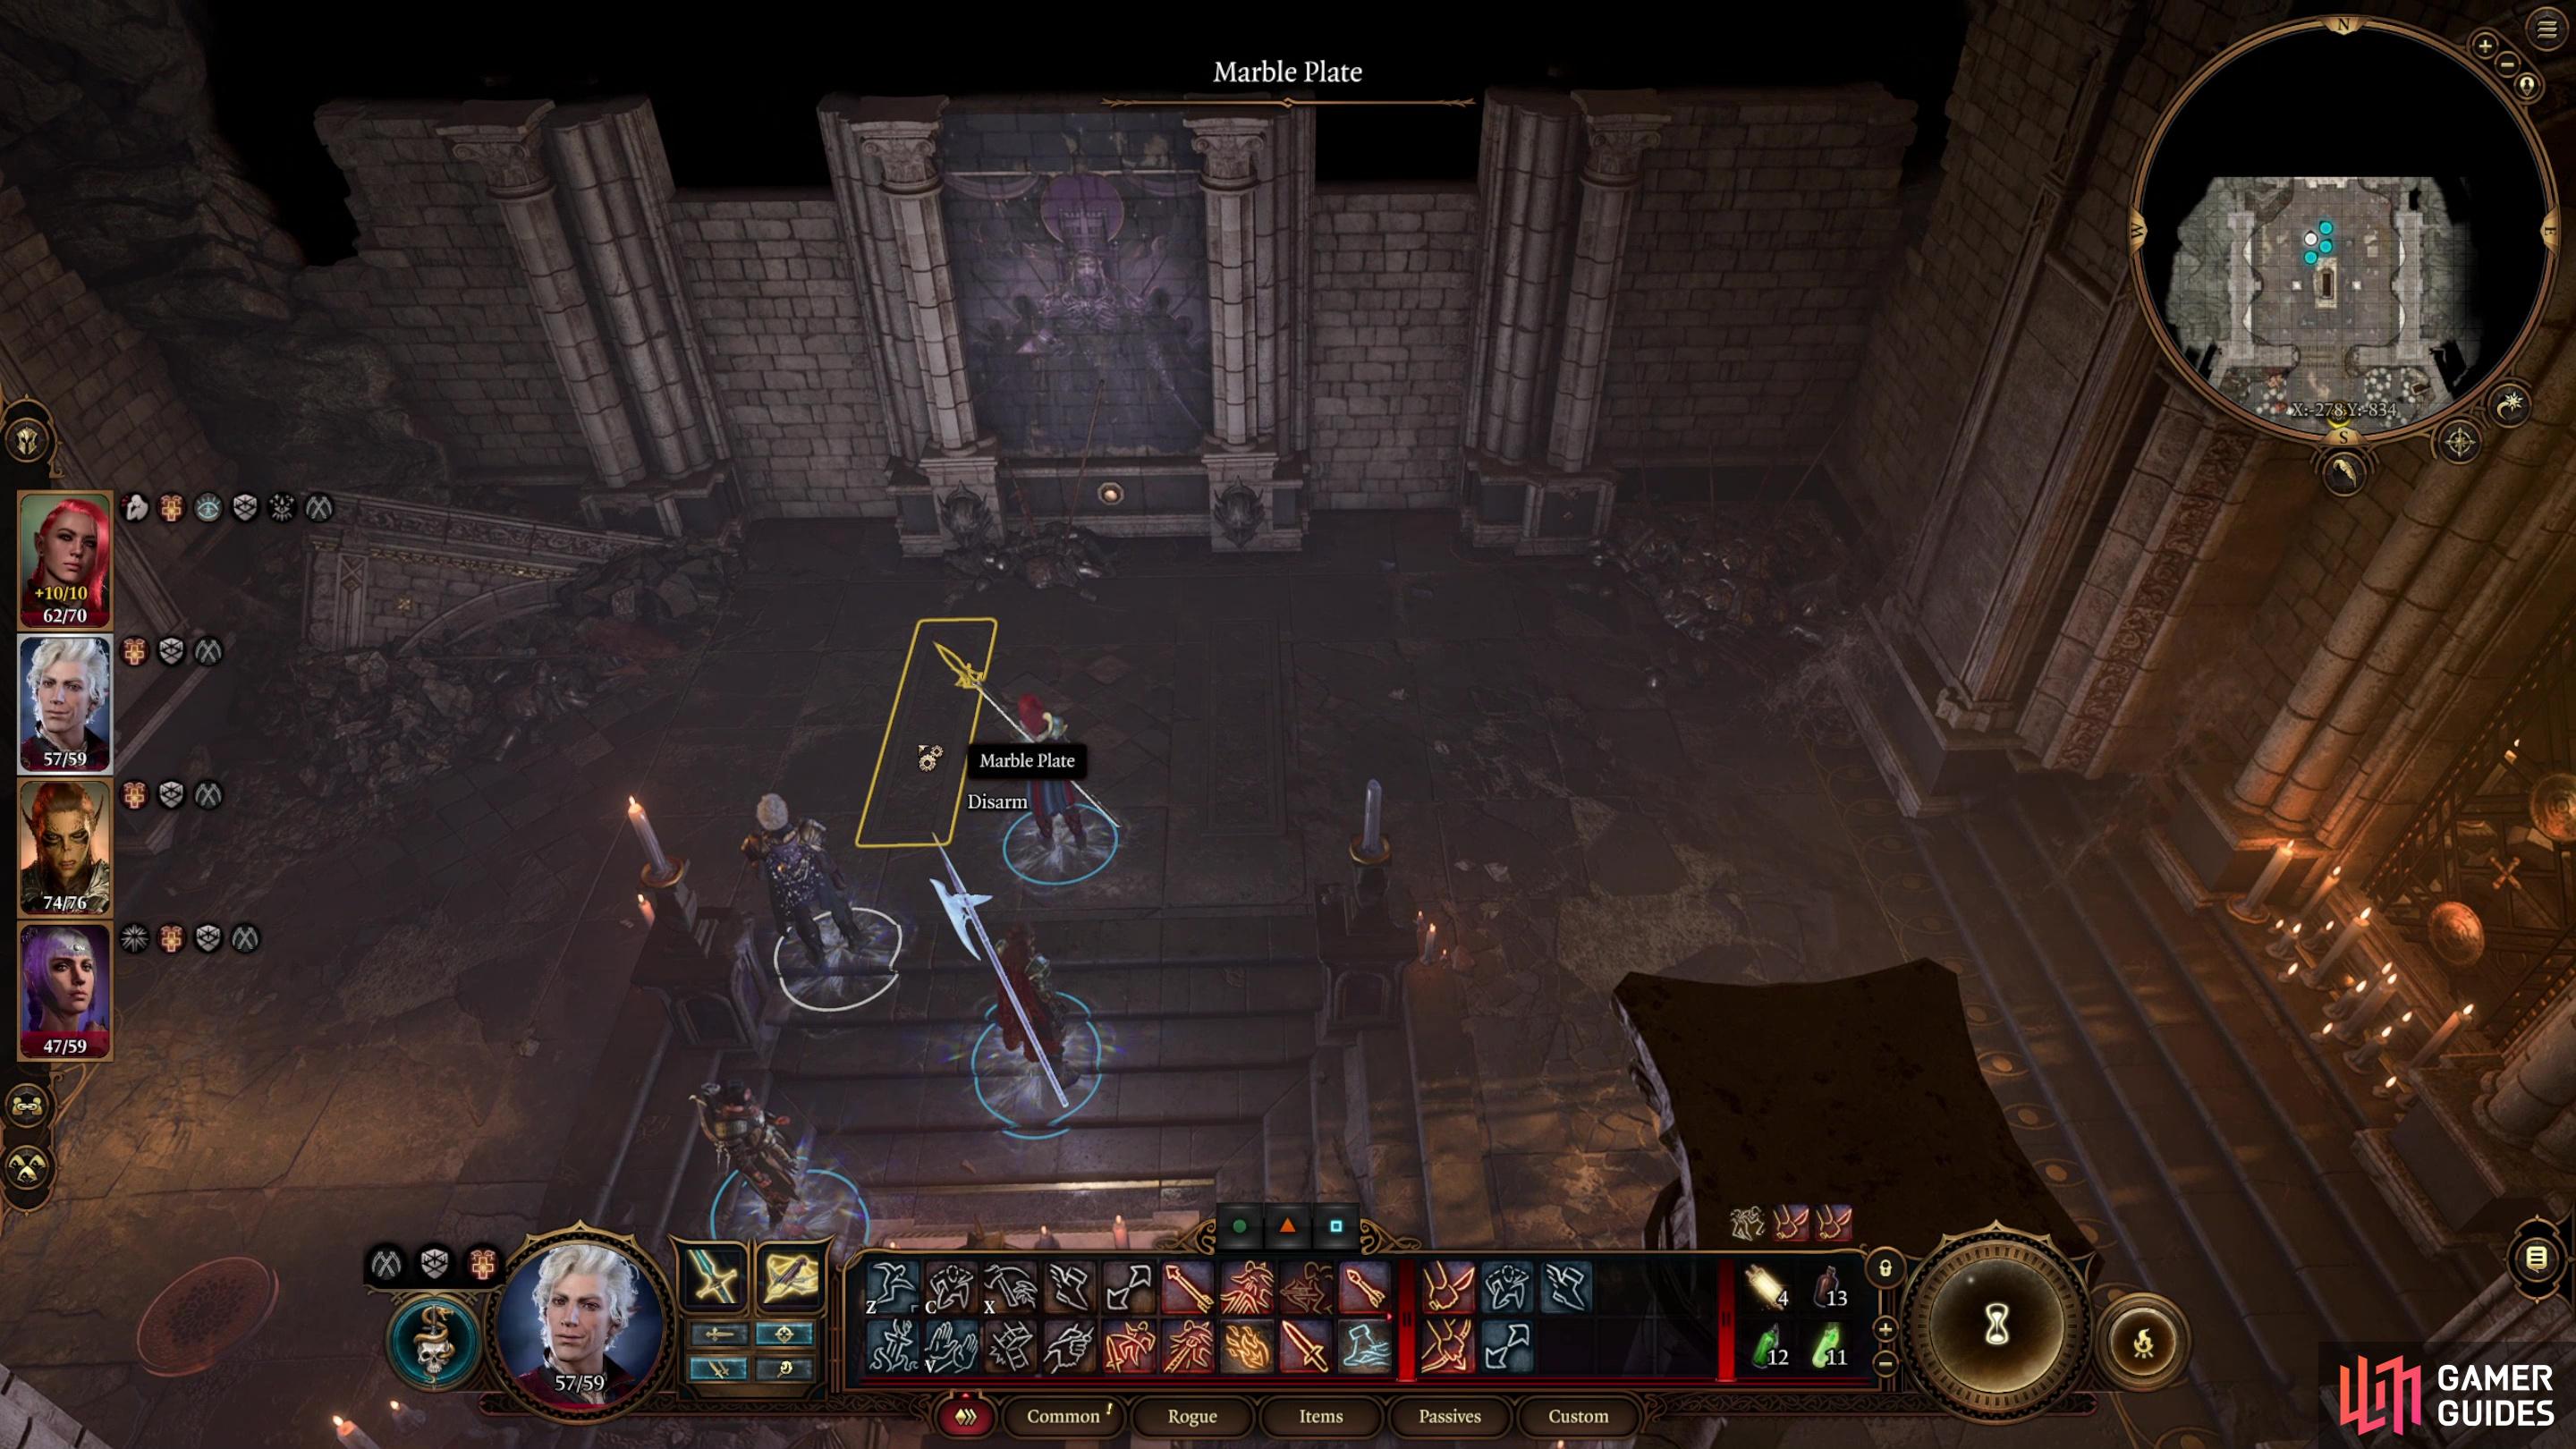
Isobel’s tomb is the location of the painting puzzle… and is one of the most trapped rooms you’ve had the displeasure of stumbling into thus far. There are vent traps, gargoyle traps, and marble plates, most of which require a [Perception 10] check to spot and a [Sleight of Hand 10] check to disarm. Nothing too crazy, just tedious with how many there are. That said, they won’t trigger if you step on them - they’re punishment for guessing wrong with the picture puzzle, so you technically don’t need to disarm them if you don’t want to.
There are three paintings in the room, as follows:
 Moonrise Towers - southwestern corner
- Grief - southeastern corner
- General - north center
You must press a button at the base of each painting in the order mentioned in the Stained Book, ”From splendor, to tragedy, to infamy”. Splendor refers to Moonrise Towers, tragedy leads to grief, and Ketheric Thorm gained infamy as a general, so hit the three buttons under the corresponding paintings in that order; 1) Moonrise Towers, 2) Grief and 3) General. If you press the buttons in the wrong order, the traps will trigger - the vents release ![]() Darkness, blinding you, and the marble plates now activate the gargoyle heads, which shoot
Darkness, blinding you, and the marble plates now activate the gargoyle heads, which shoot ![]() Magic Missiles, dealing 1d4+1 damage if they hit. Press the buttons in the right order and doors will open up beside the General painting. Solving the puzzle also dispels the Darkness effect and disables the other traps.
Magic Missiles, dealing 1d4+1 damage if they hit. Press the buttons in the right order and doors will open up beside the General painting. Solving the puzzle also dispels the Darkness effect and disables the other traps.
Continue north through the newly-opened doors and you’ll find a disc with a “Traversal Gem” on it, which will take you to the Gauntlet of Shar. Now that you’re ready to enter the Gauntlet of Shar, check out the following pages to help you along this large, convoluted dungeon:
No Comments