
The ![]() Blighted Village can be found west of the Druid Grove, and it’s crawling with potential enemies, including goblins, bugbears and ogres. There’s plenty of monsters to slay in the ruins of the village, but you’ll find more dangers underground - and more treasure, too. Underneath the Blighted Village you’ll find the
Blighted Village can be found west of the Druid Grove, and it’s crawling with potential enemies, including goblins, bugbears and ogres. There’s plenty of monsters to slay in the ruins of the village, but you’ll find more dangers underground - and more treasure, too. Underneath the Blighted Village you’ll find the ![]() Whispering Depths, and this page will provide a walkthrough for these spider-infested caverns, with tips on how to defeat the Phase Spider Matriarch and claim the
Whispering Depths, and this page will provide a walkthrough for these spider-infested caverns, with tips on how to defeat the Phase Spider Matriarch and claim the ![]() Dark Amethyst in Baldur’s Gate 3.
Dark Amethyst in Baldur’s Gate 3.
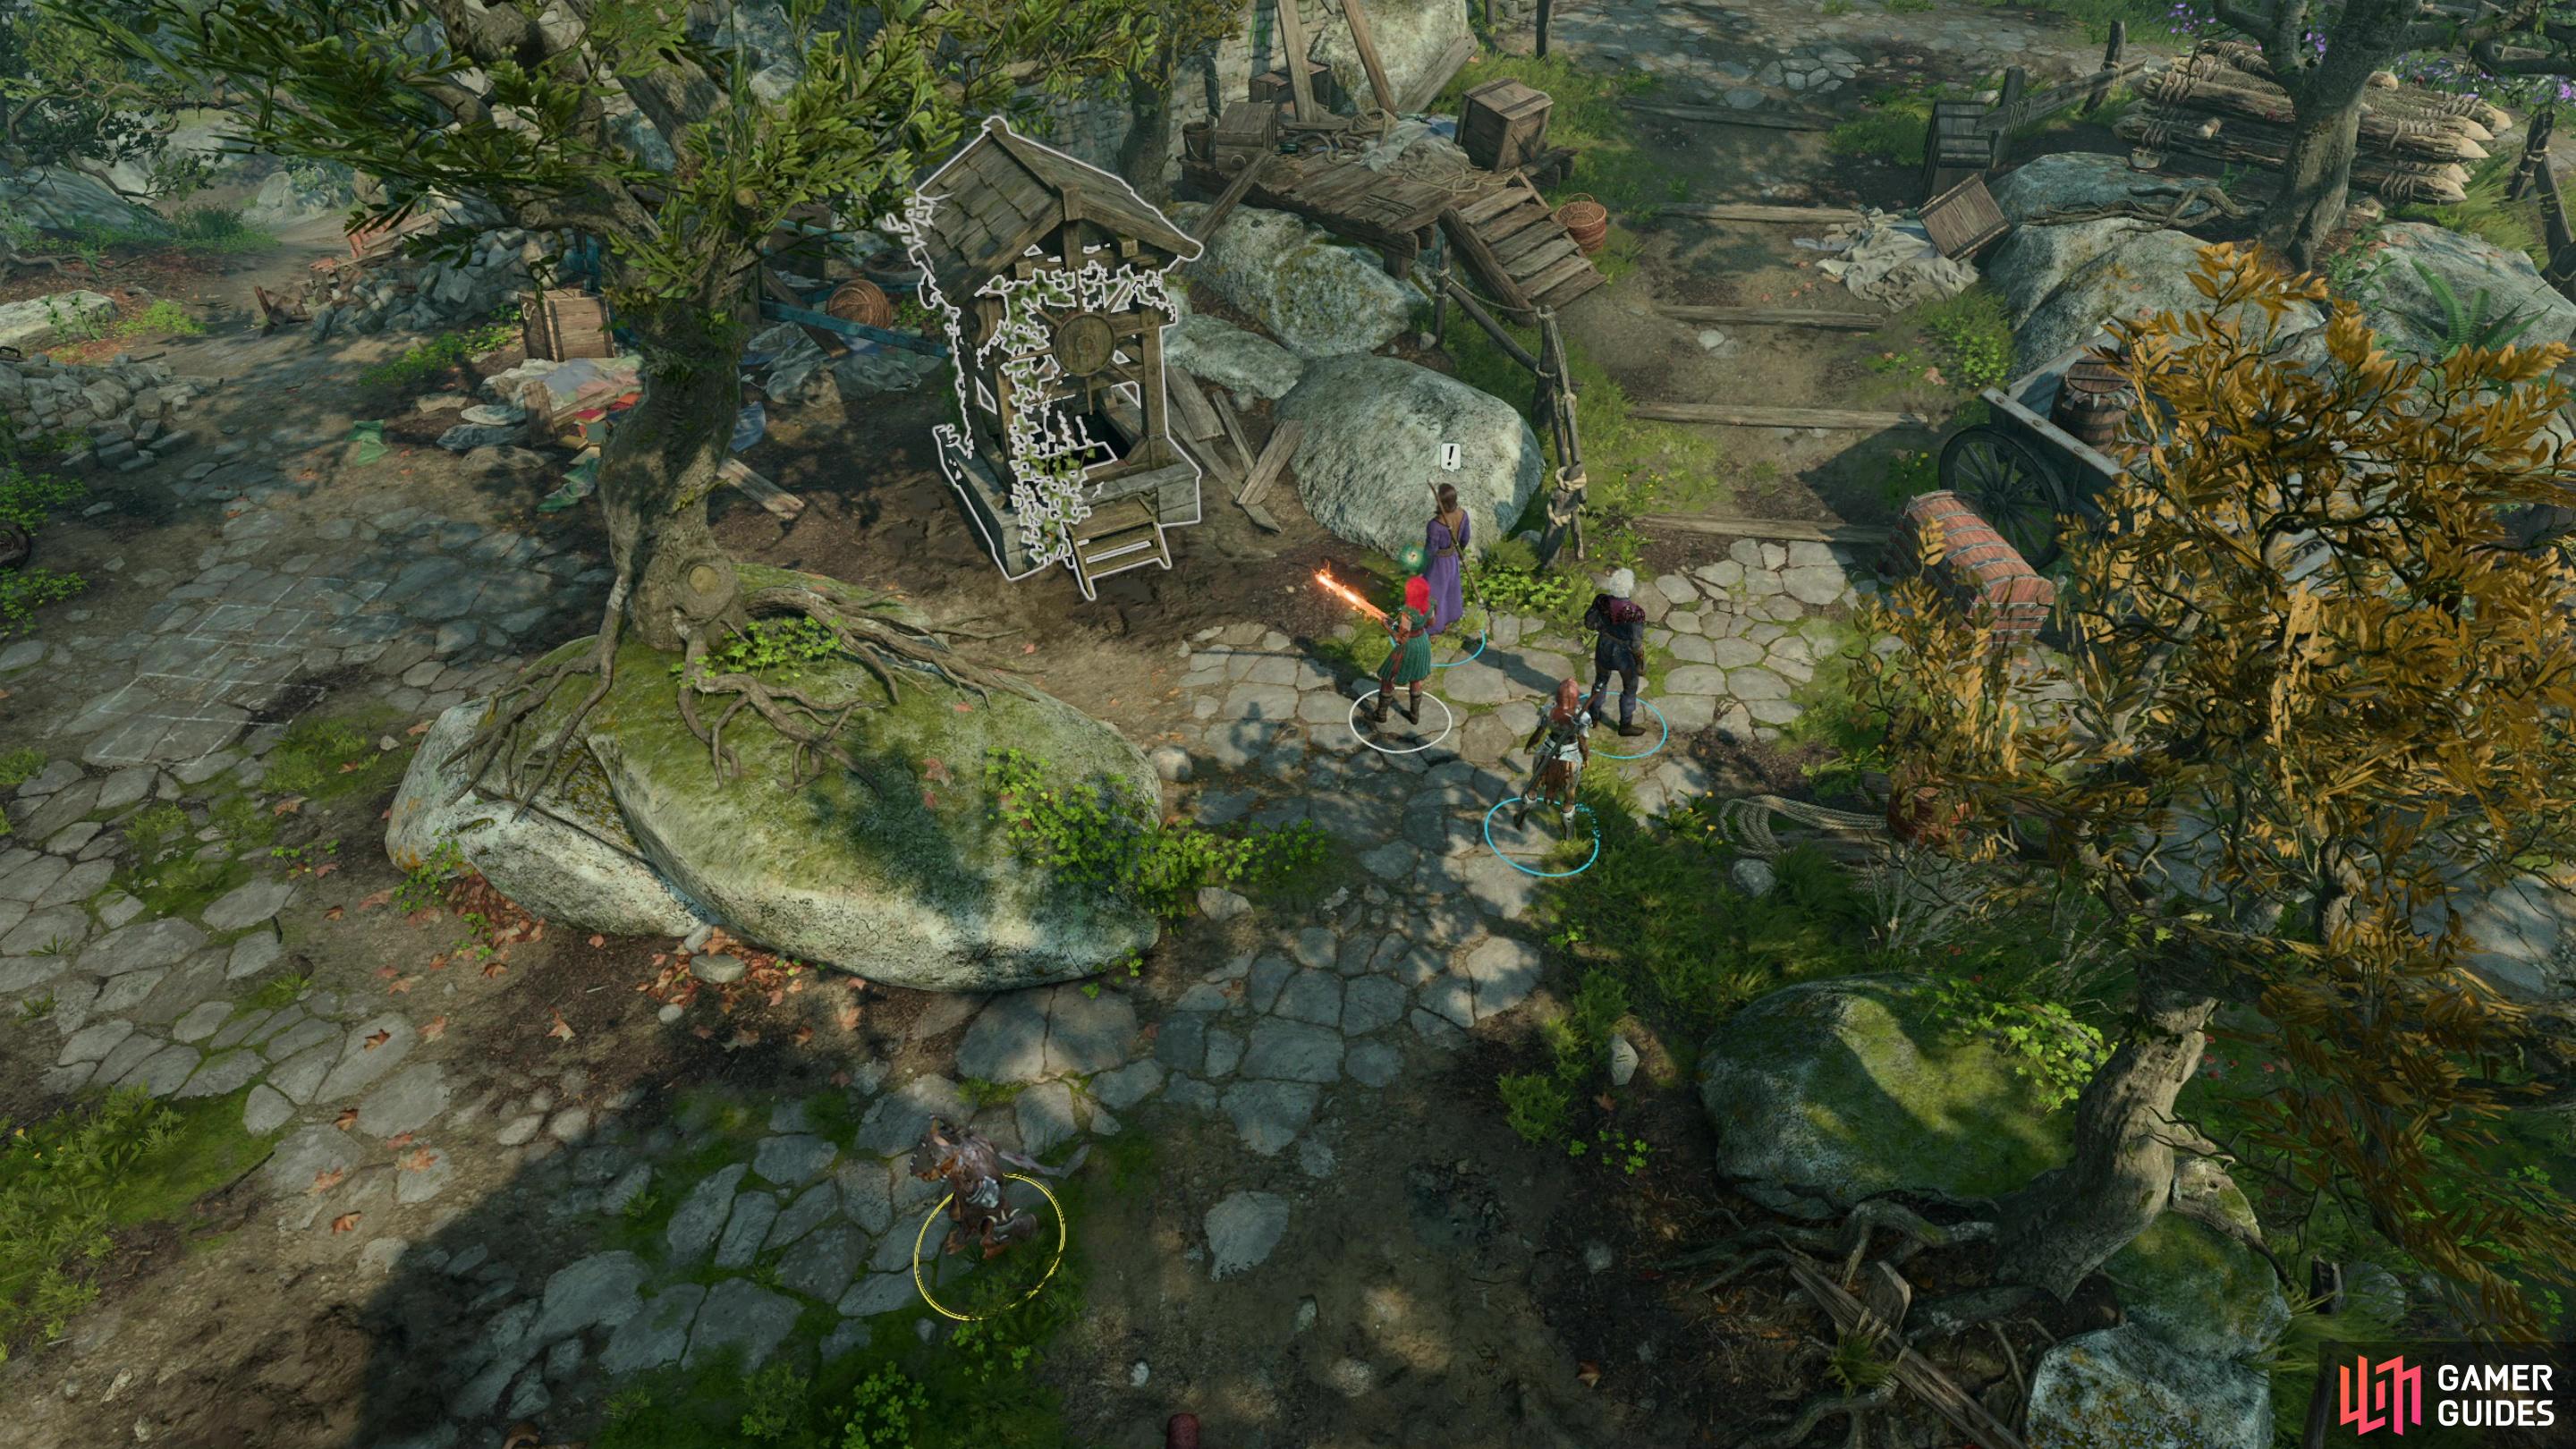
Seek out a well in the Blighted Village,
and interact with it to get some options that will allow you to descend into the depths.
How to Find the Whispering Depths Under the Blighted Village
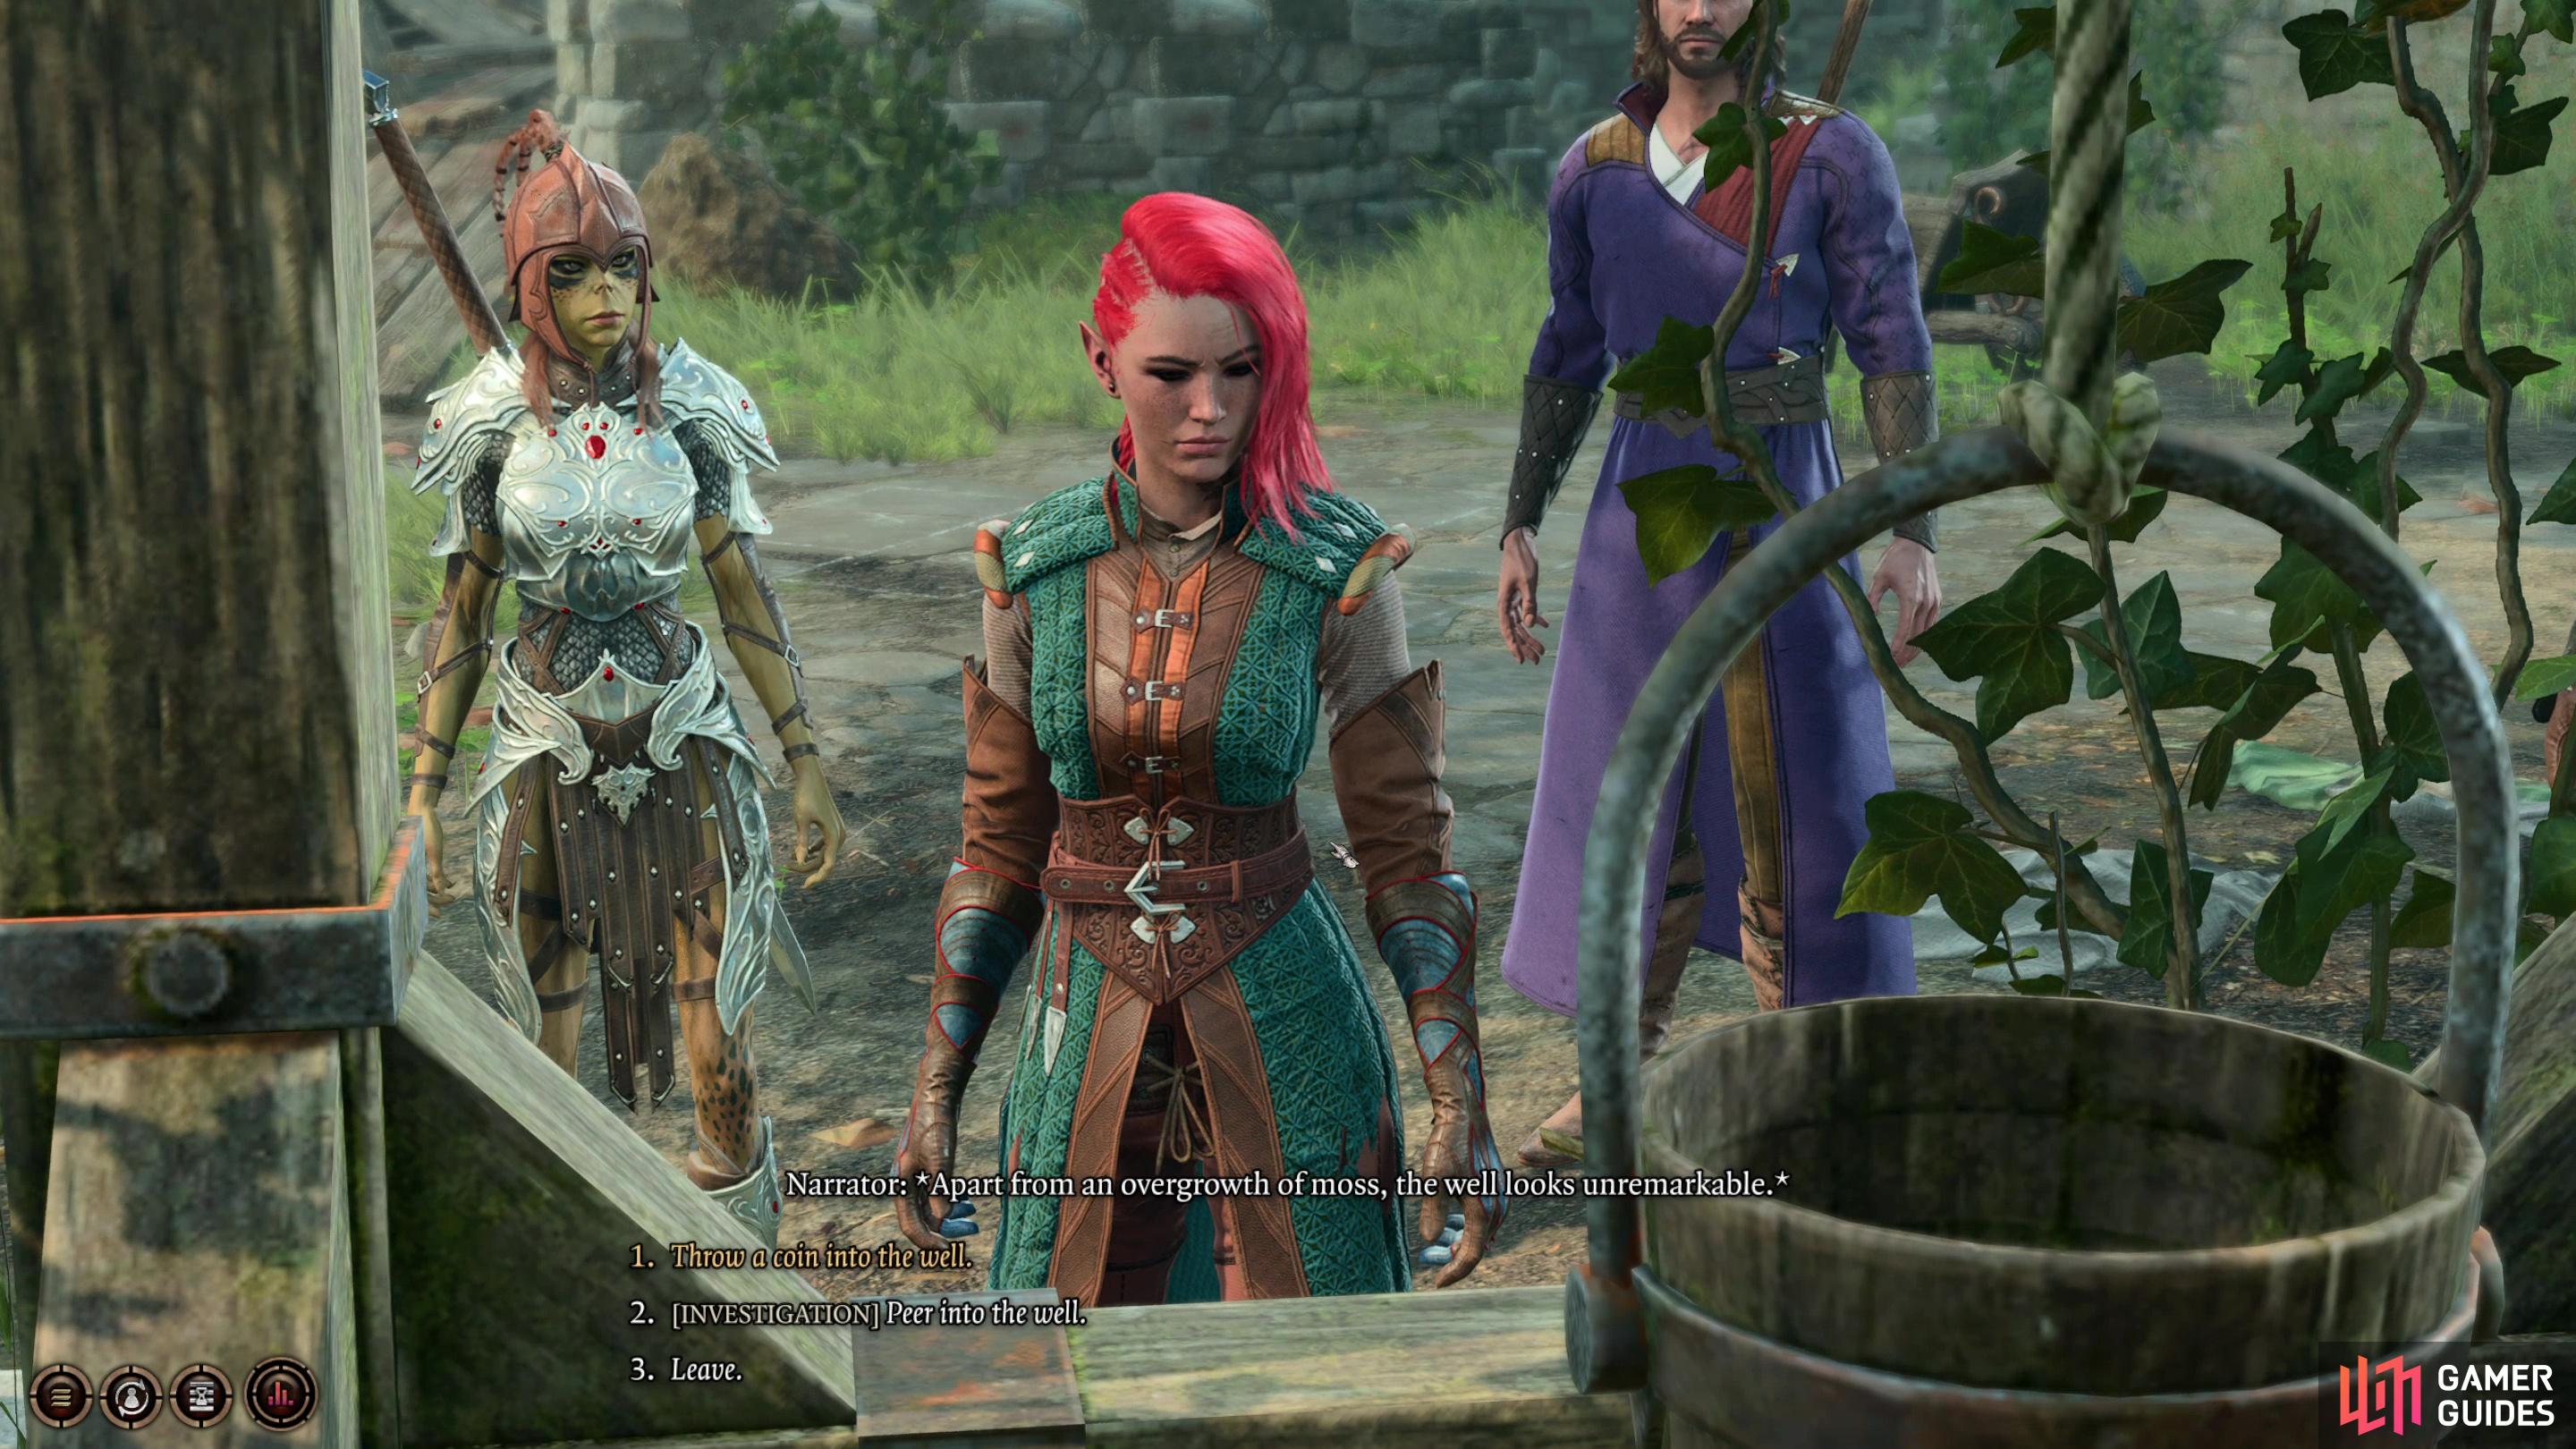
As mentioned before, to find the Blighted Village you’ll need to follow the road west from the Emerald Grove Environs waypoint. The Blighted Village lies beyond a bridge, and when you go to enter you may be accosted by some goblins - talk your way past them or fight, as you prefer, then continue uphill to the west to reach the town square, where you’ll find the Blighted Village waypoint and a well. Interact with the well and you’ll get two options: Throw a coin into the well. and [Investigation 10] Peer into the well. Which one you choose doesn’t matter, should you toss a coin into the well or pass the [Investigation 10] check you’ll get the option Climb down the bucket rope., which will take you down into the Whispering Depths.
Sneak through the tunnels and climb a cliff,
to reach a vantage from which you can ambush your arachnid foes, below.
How to Defeat the Ettercaps and Phase Spiders in the Whispering Depths
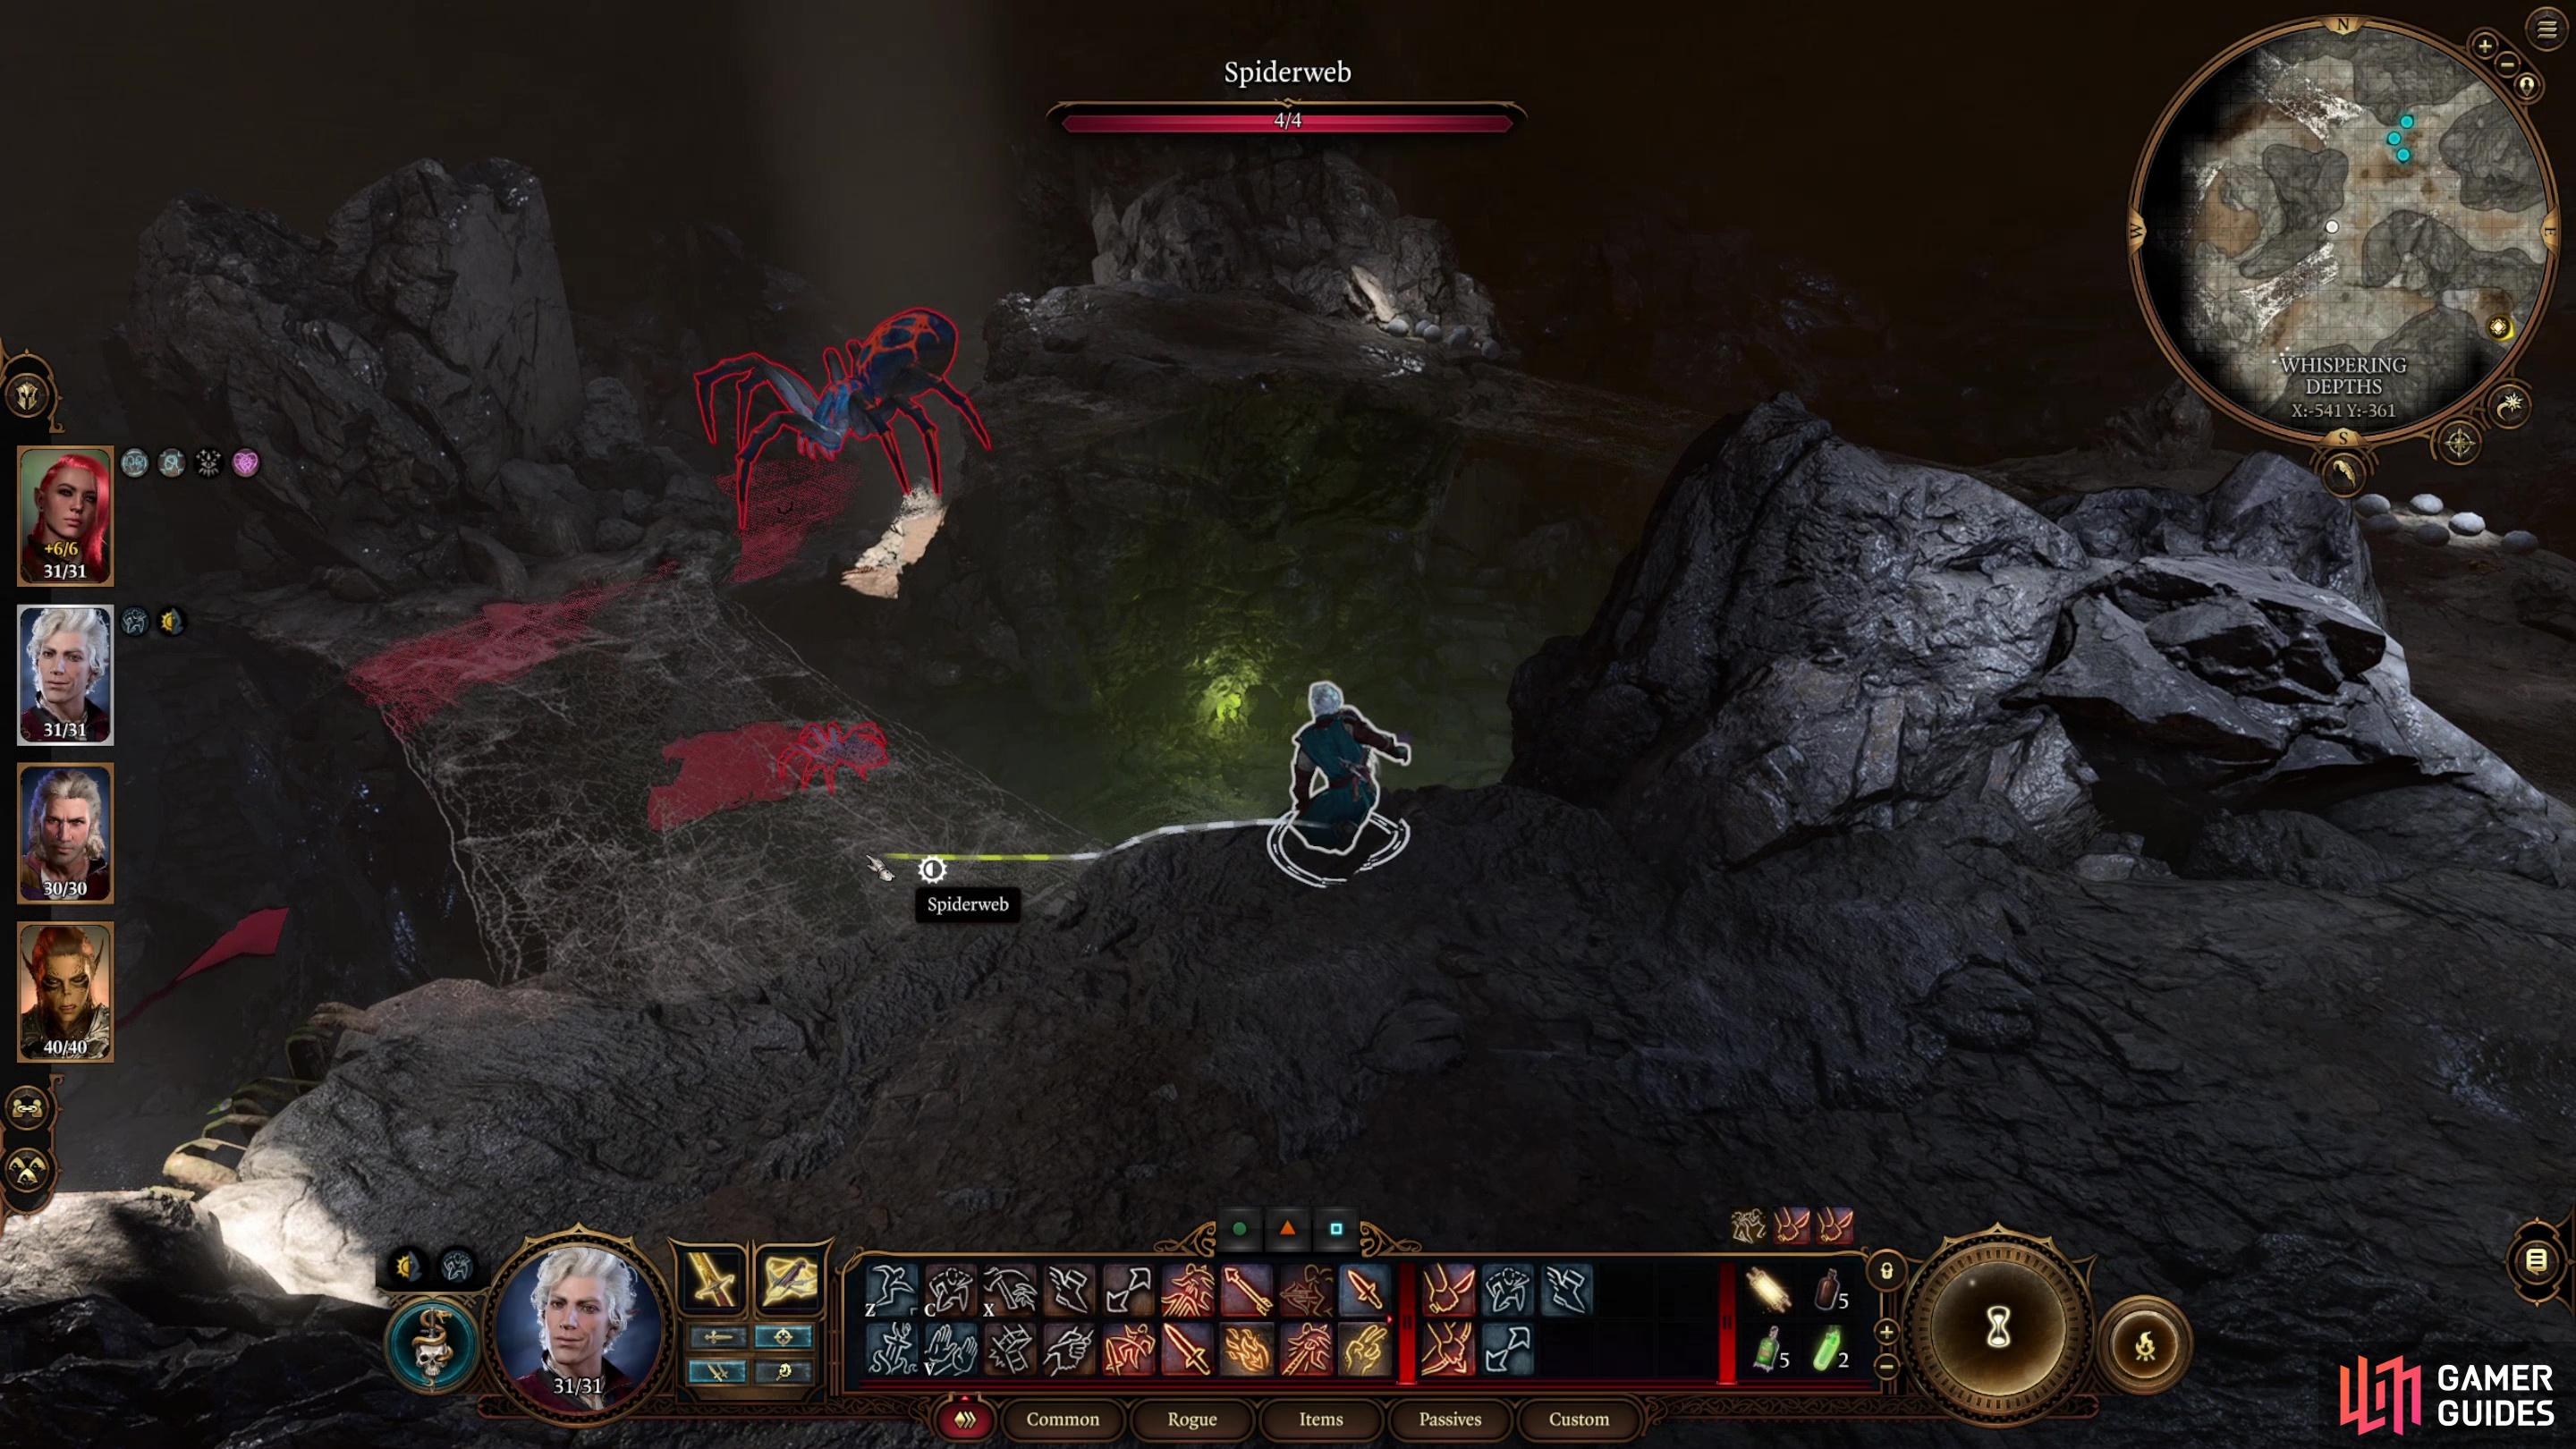
When you reach the bottom of the well, you’ll automatically perform a [Nature 15] check. You have four attempts to make it (assuming you have a full party) but the takeaway is pretty obvious - step on webs and whatever spun them will be aware of you. Also, if you step on webs you have a chance to become Enwebbed, which will immobilize you and give attacks against you Advantage, while your own attacks will suffer Disadvantage. Not something you want to inflict on yourself voluntarily, especially not when spiders may be near.
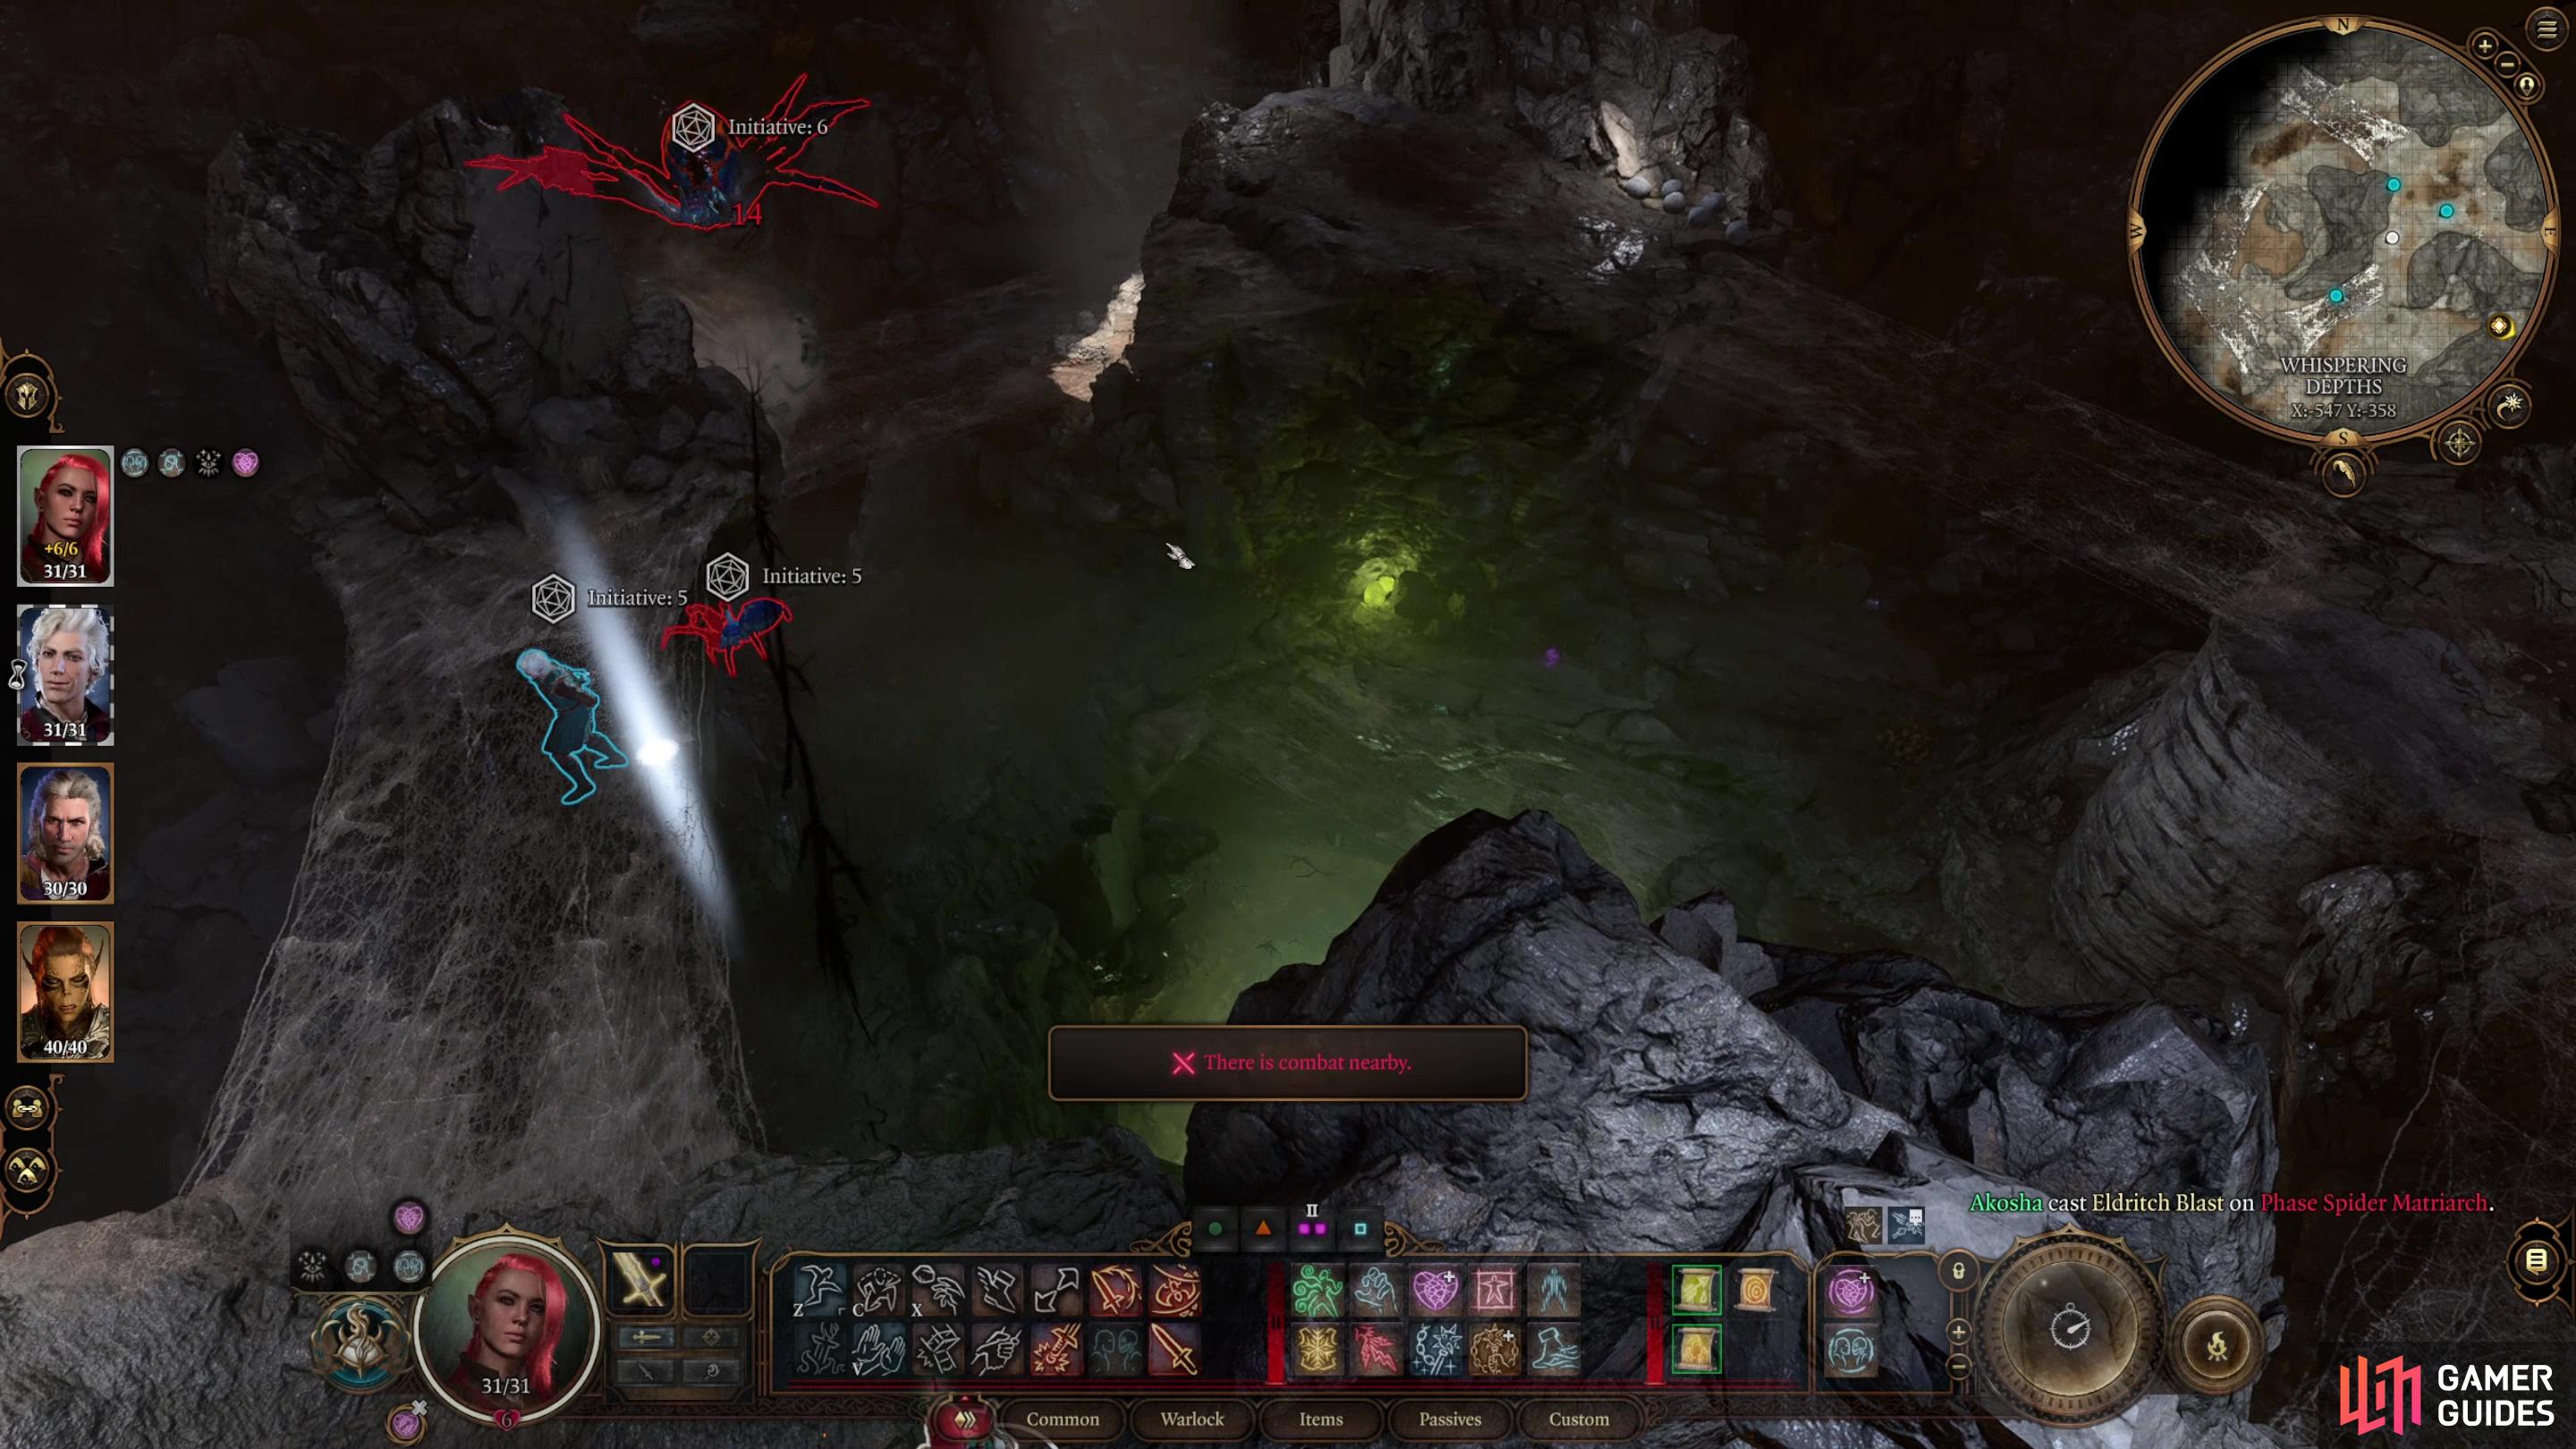
A fight in these tunnels is virtually unavoidable, and should one begin you’ll likely end up fighting all the enemies in the vicinity. In this case, that’s two Ettercaps and two Phase Spiders - both of which are nasty foes. Since a fight is almost certain, best to make things as advantageous as possible.
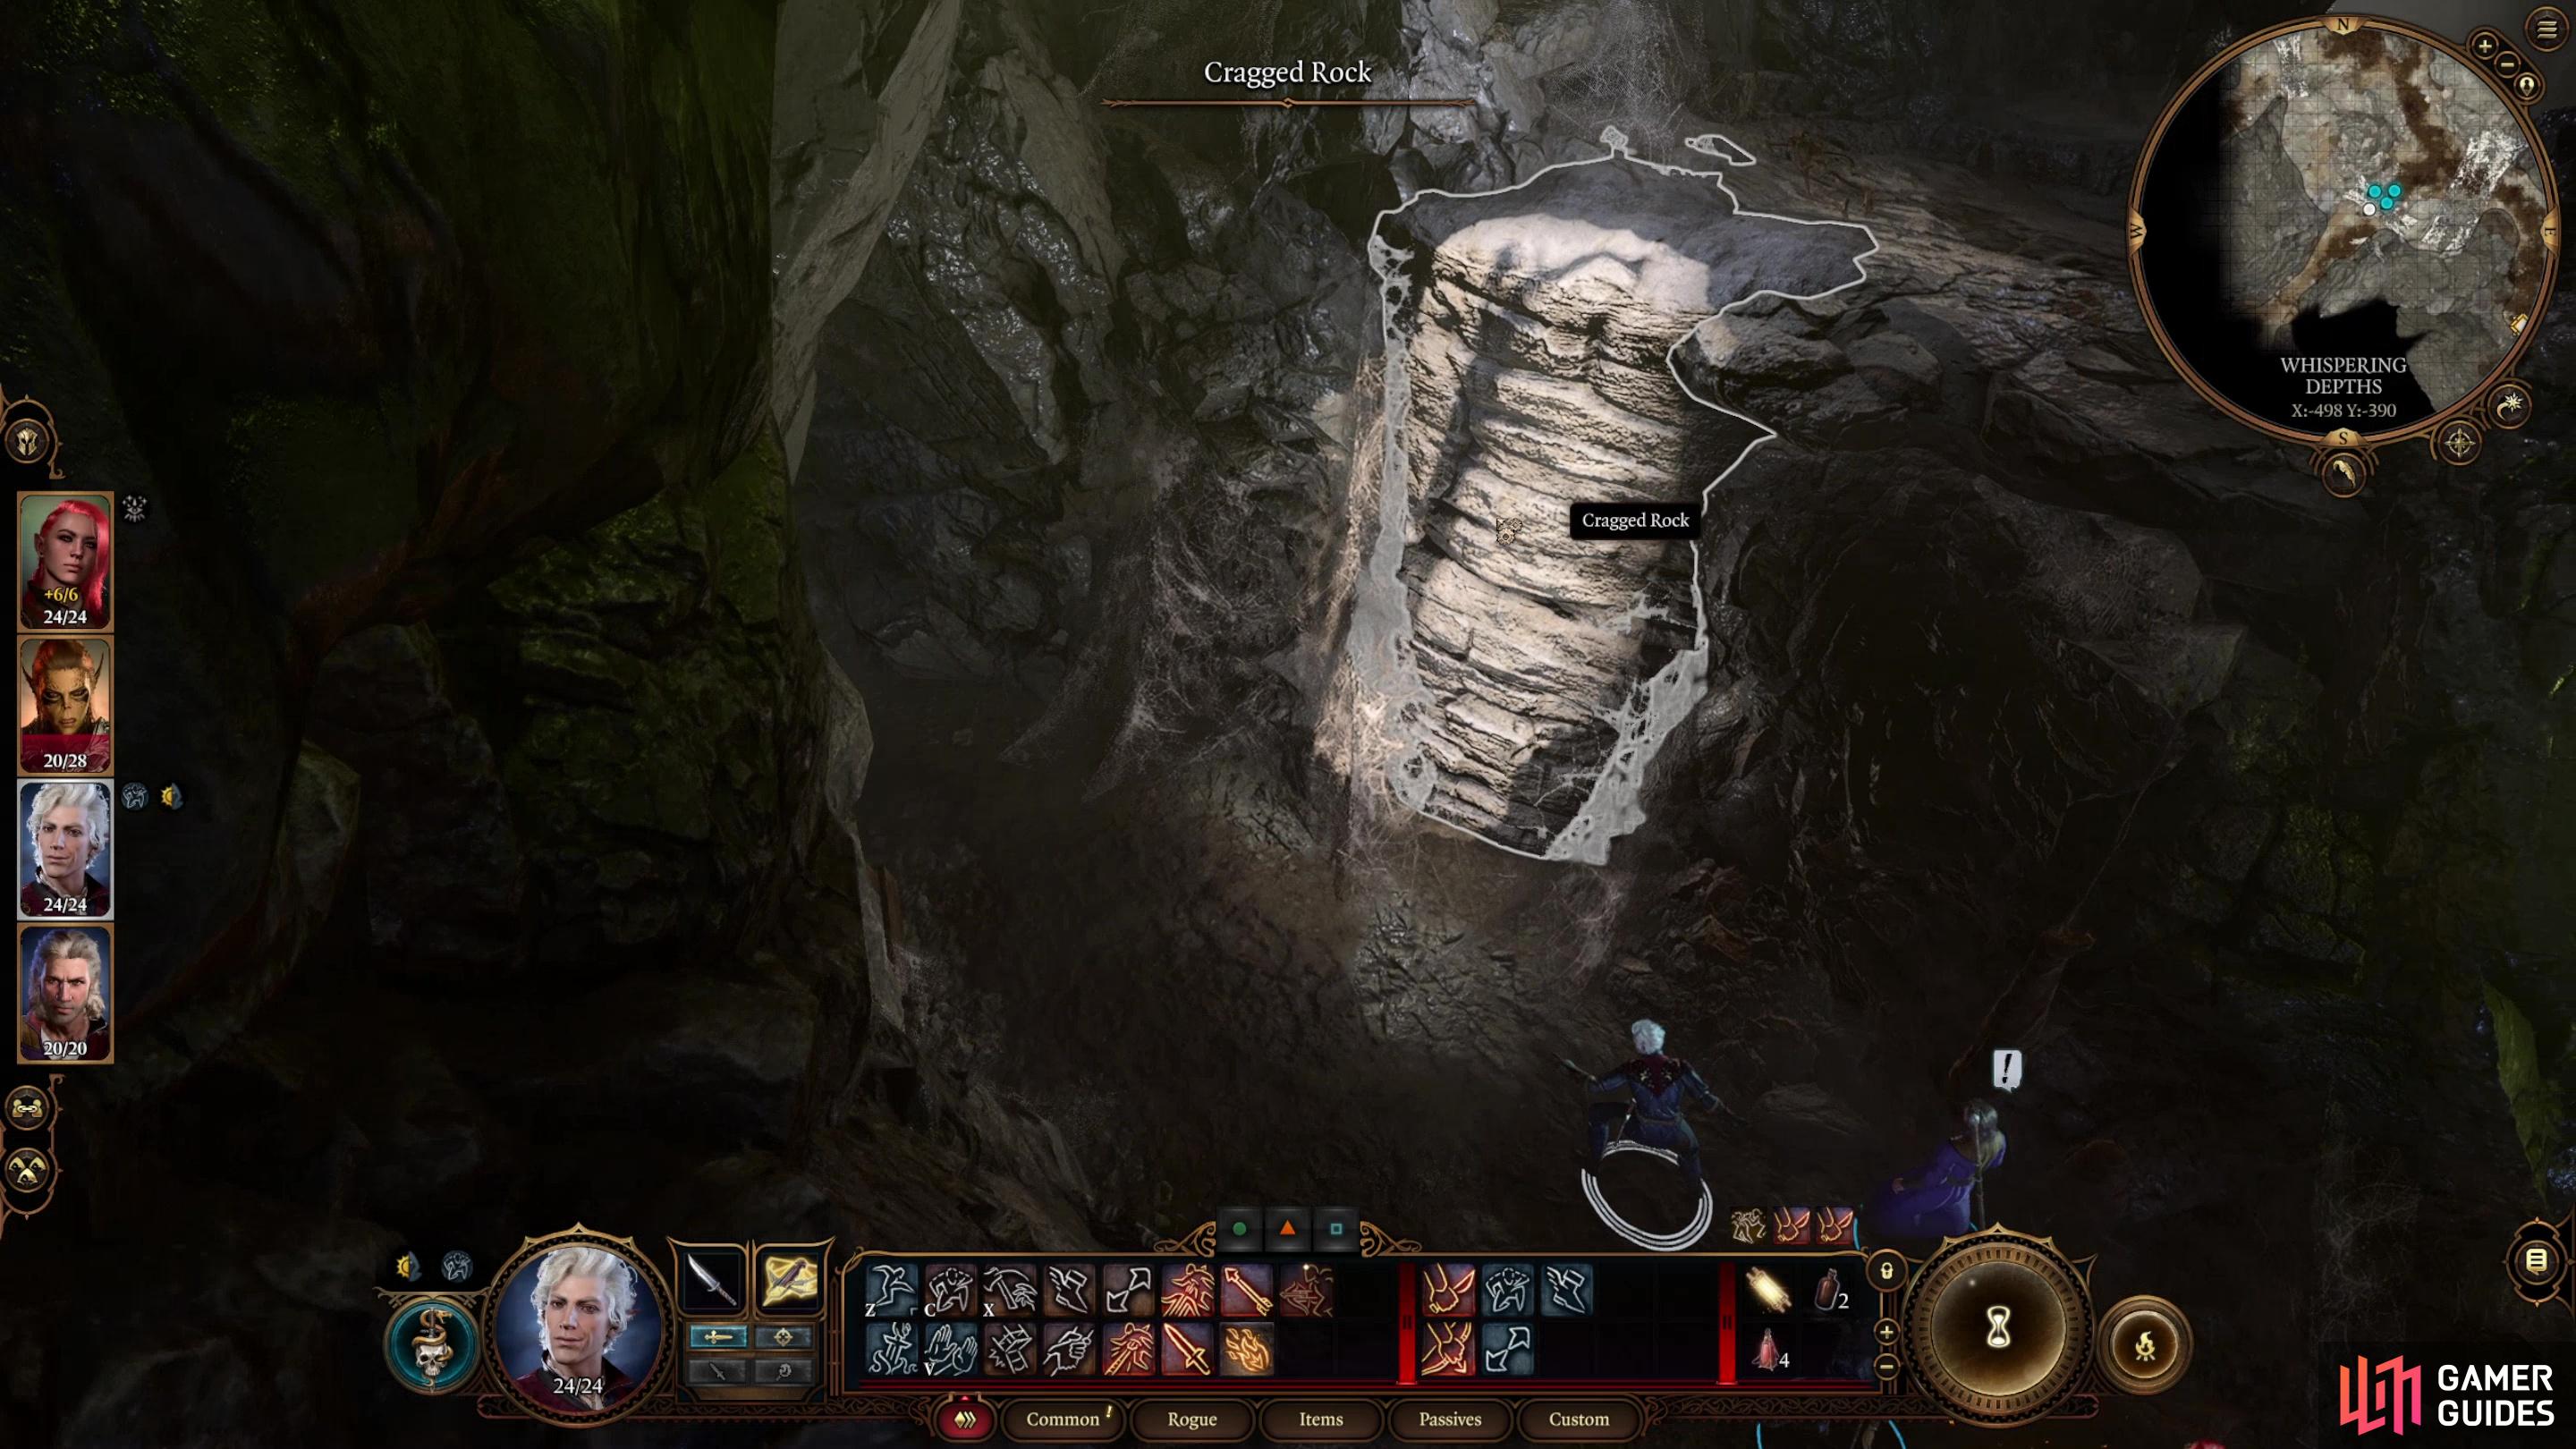
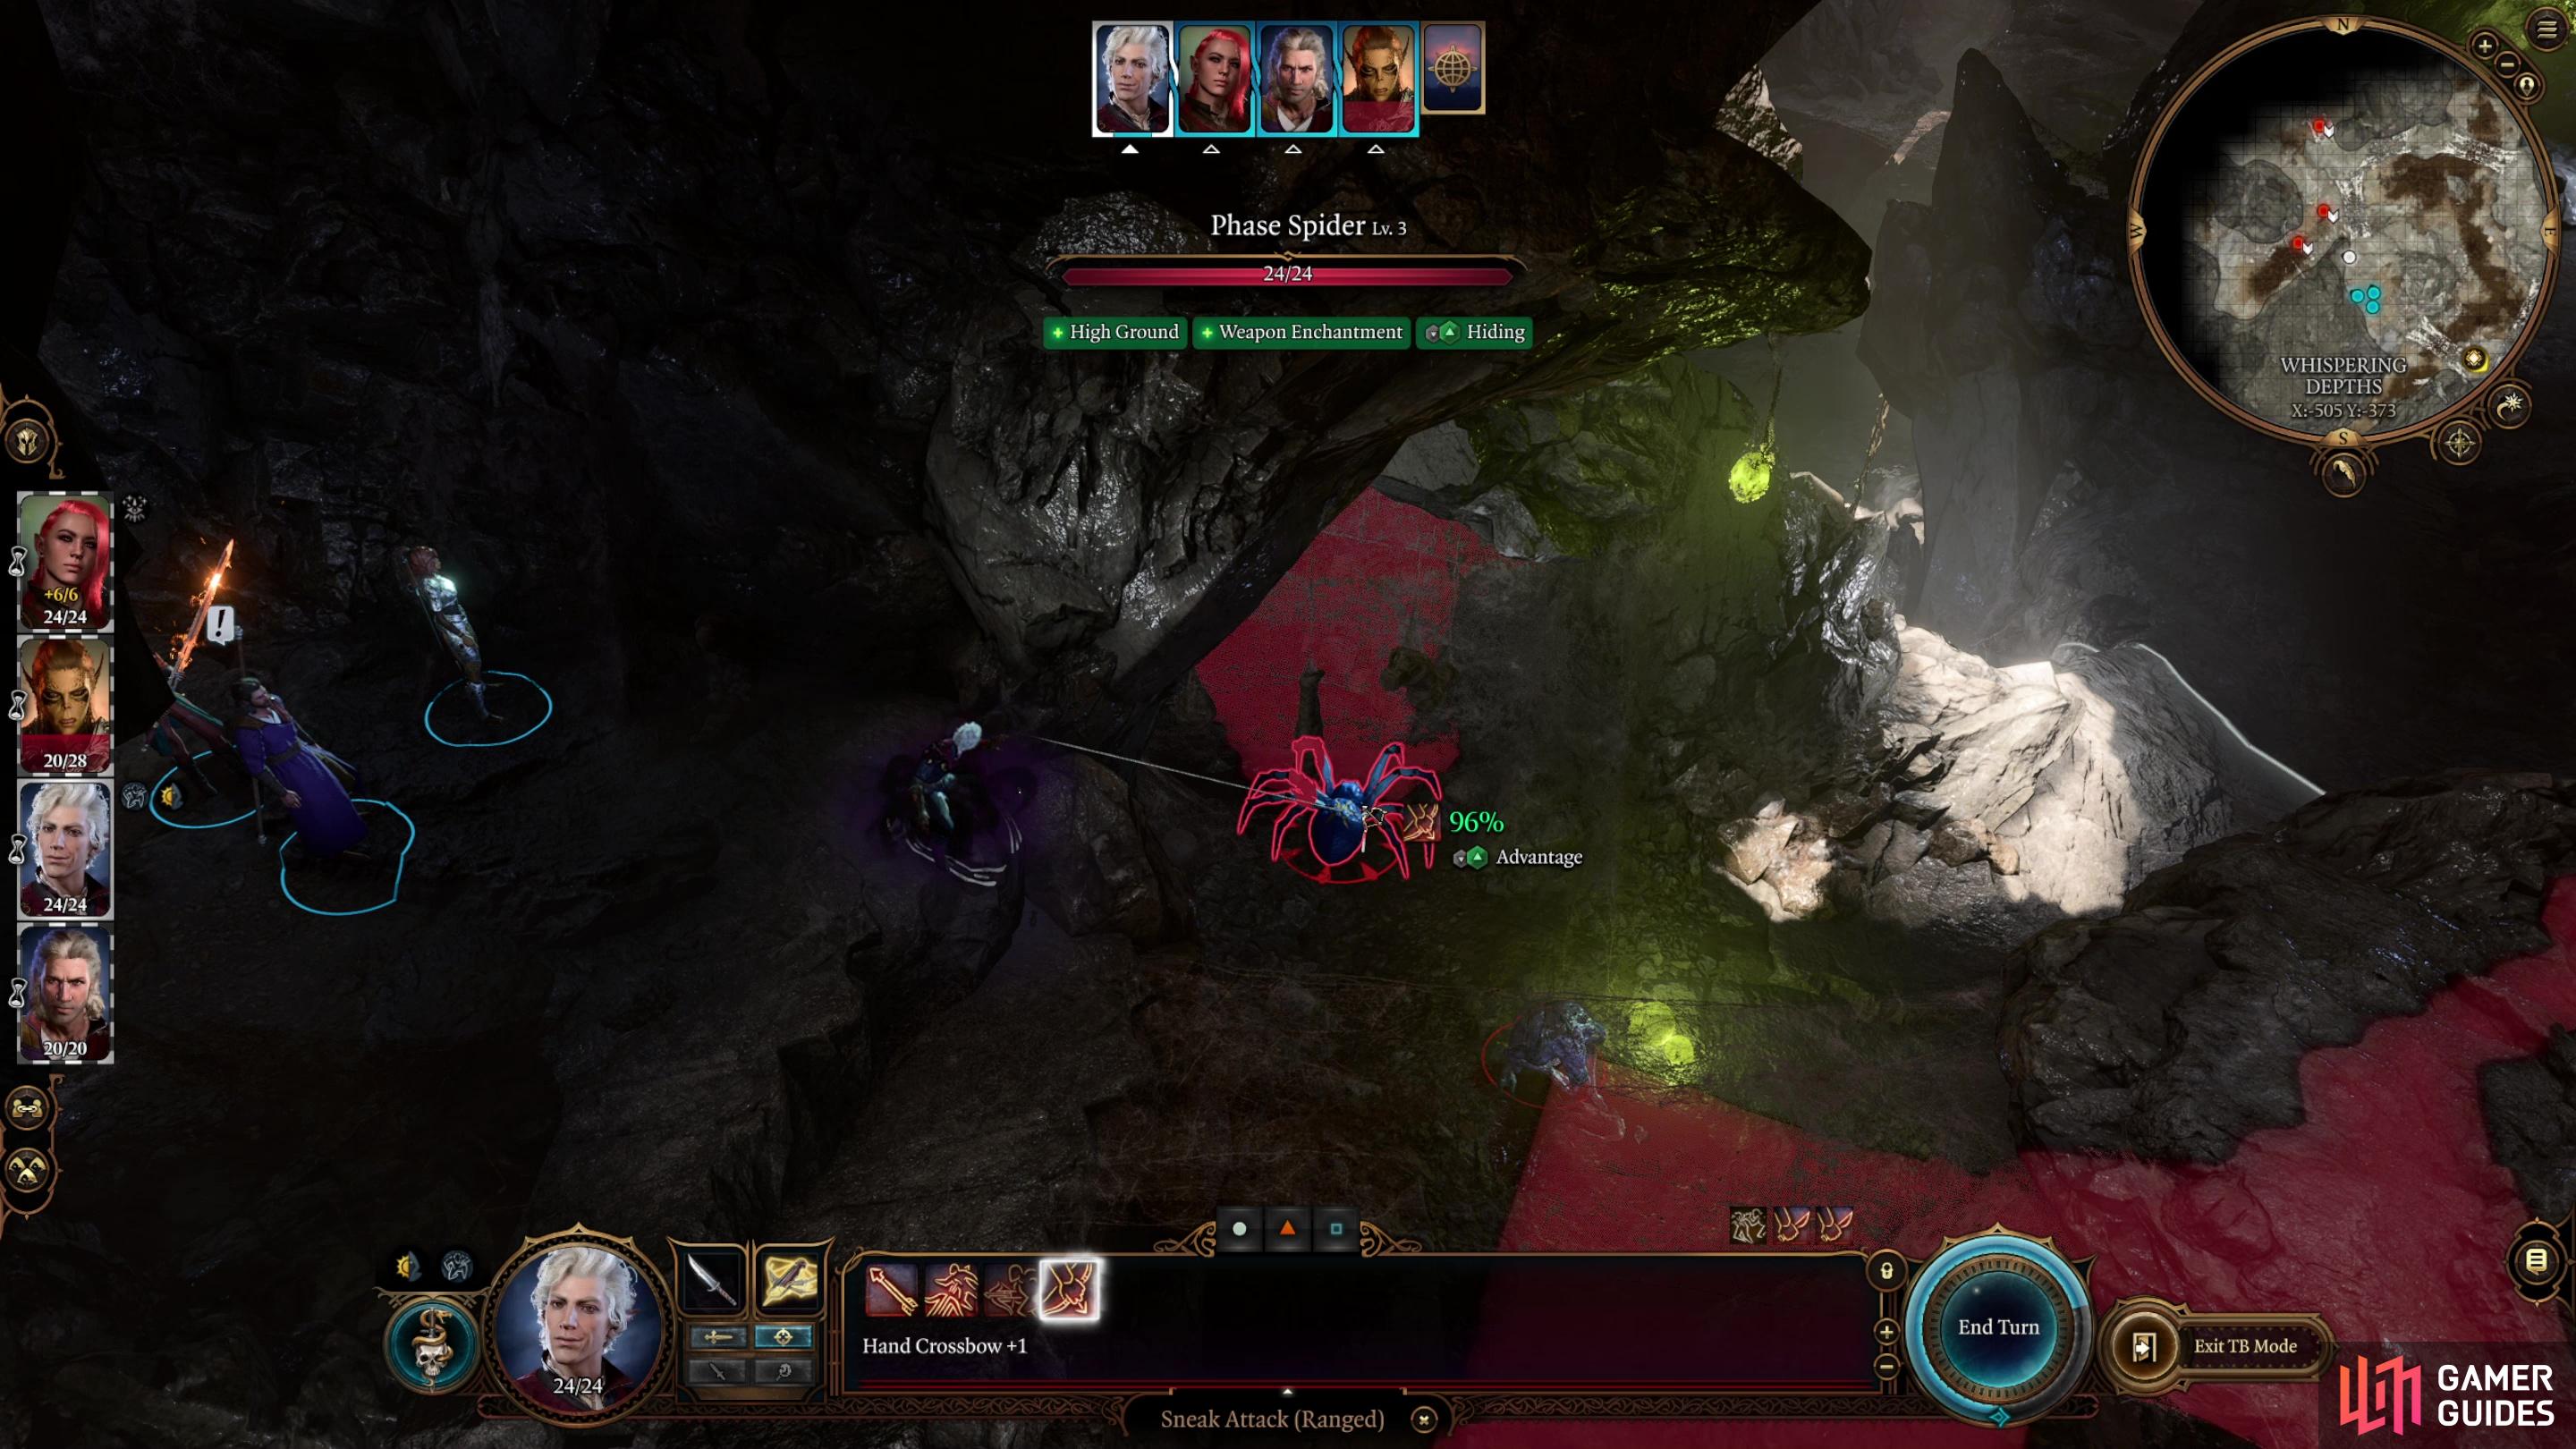
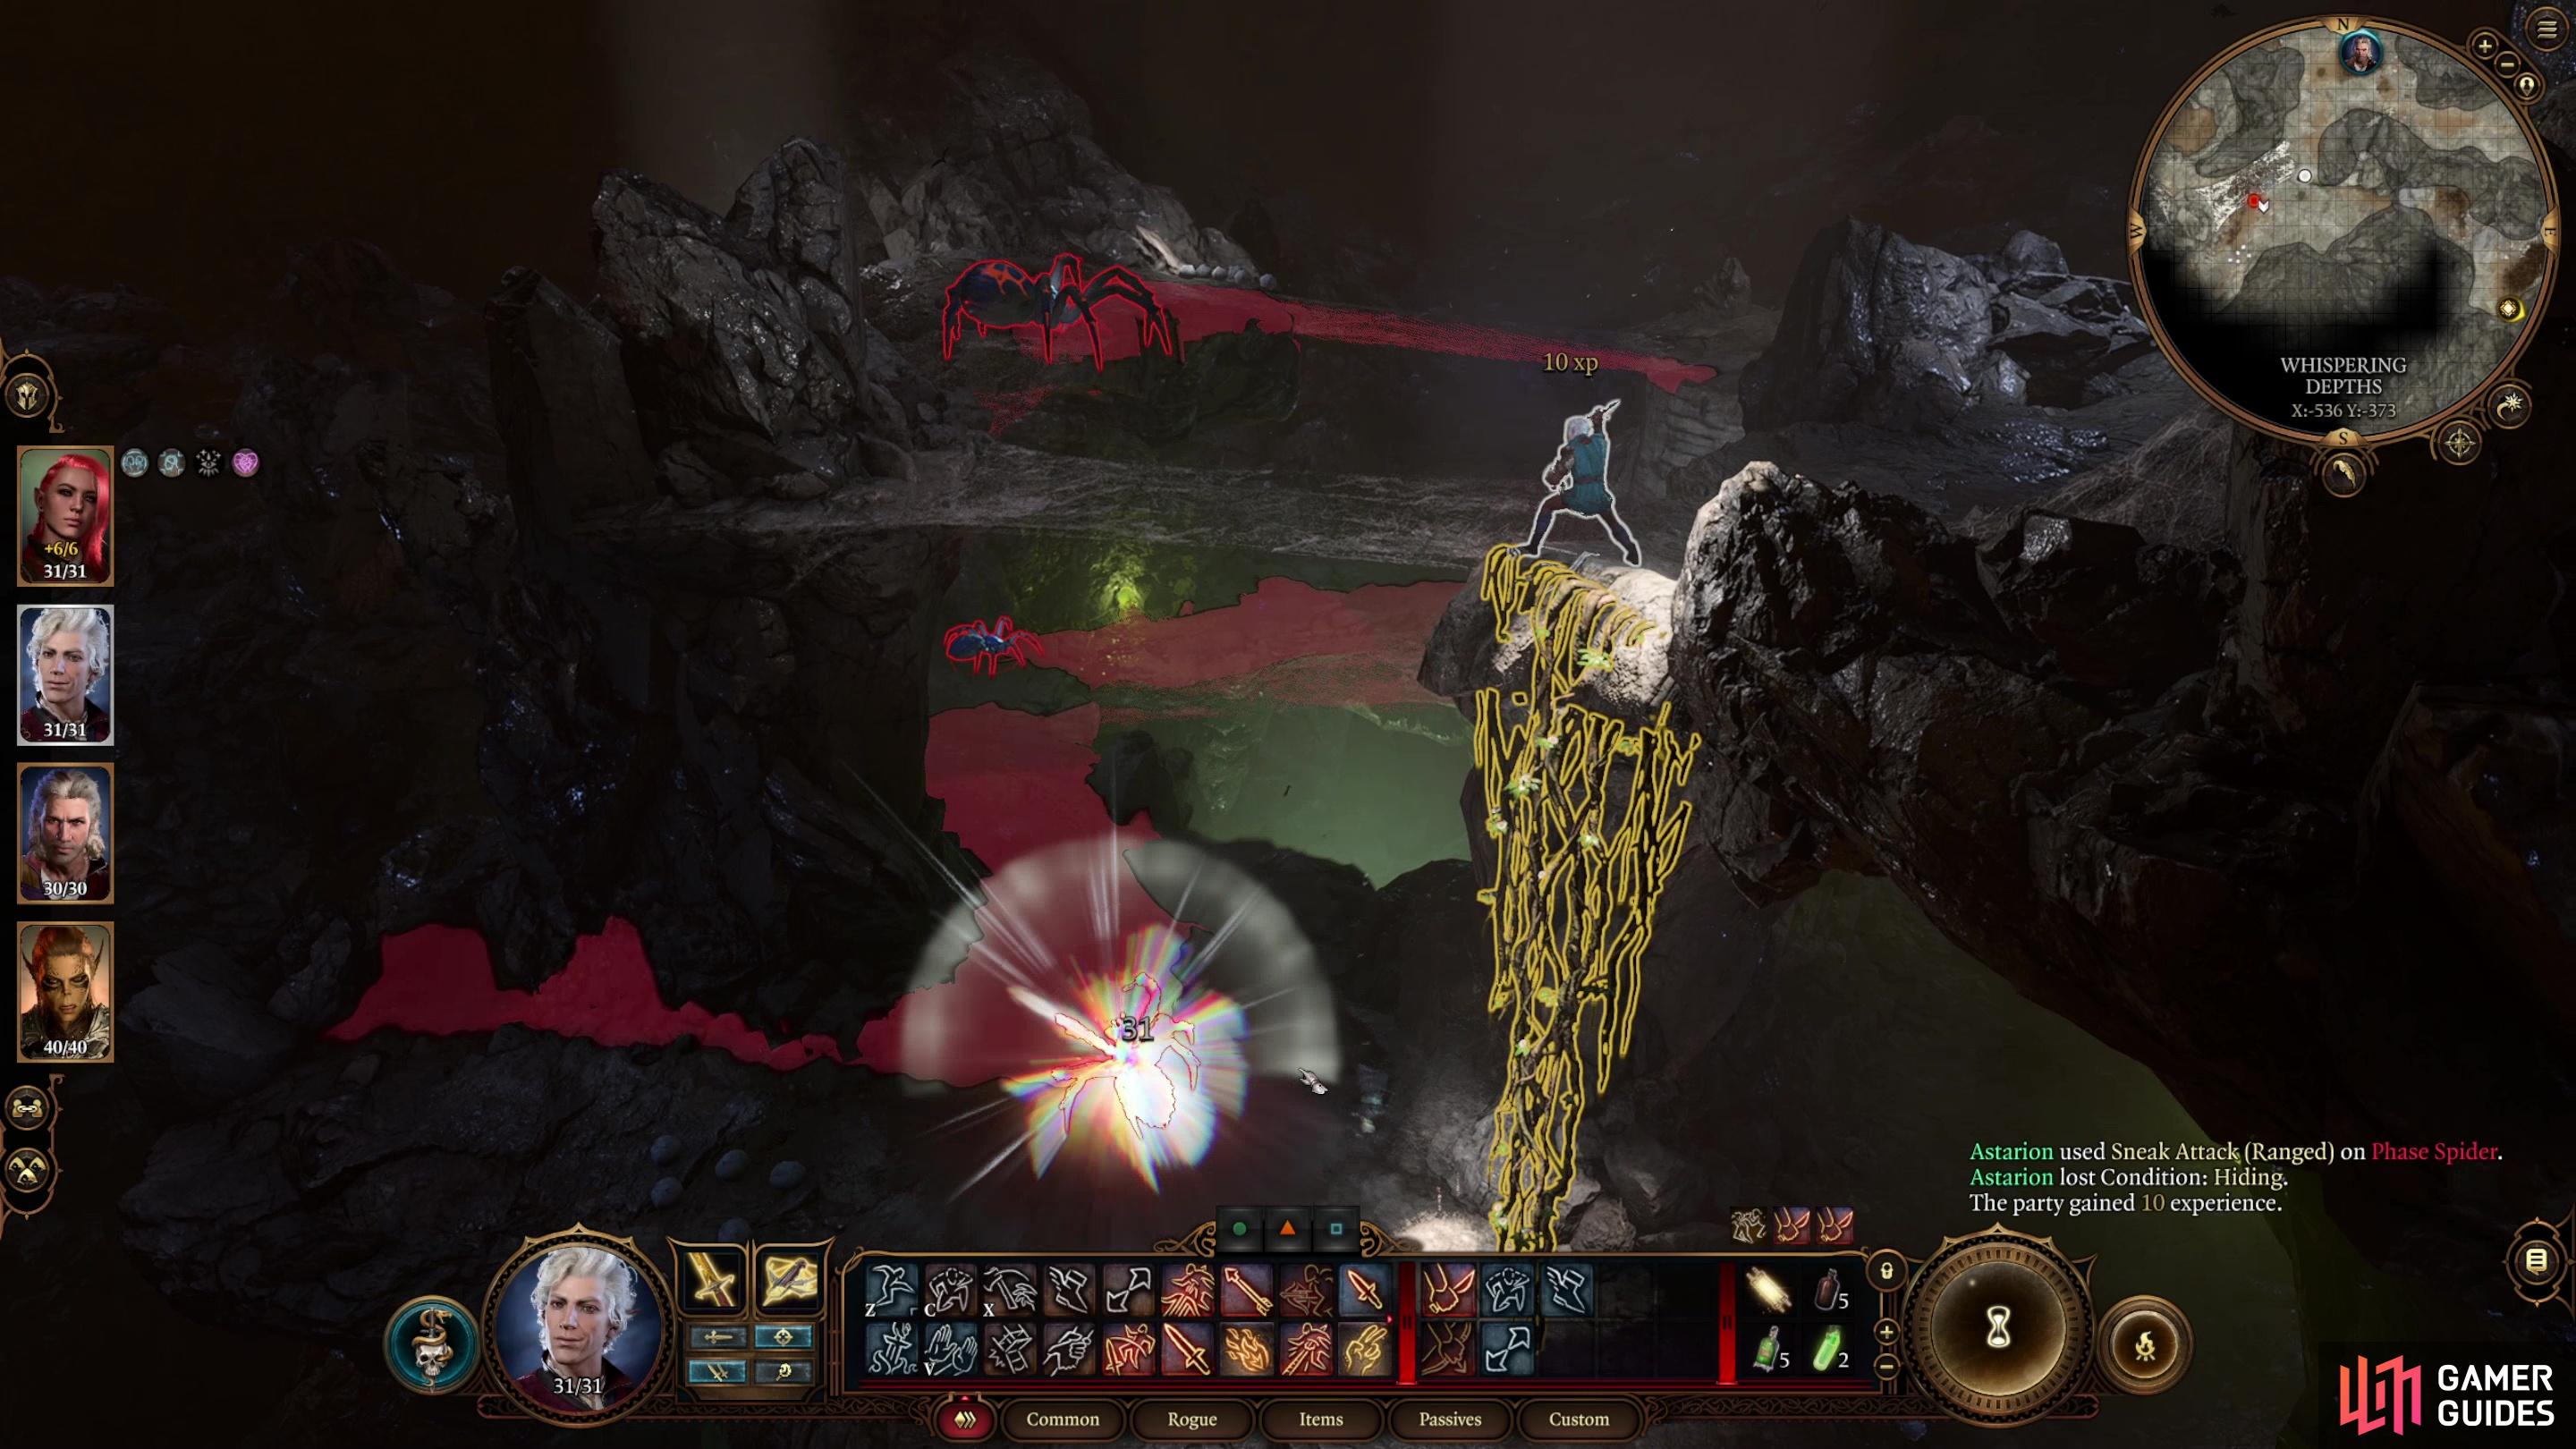
From the bucket you rode in on, head northeast, then when you reach a fork, turn southwest. Be wary of your enemies, they’re just down the northeastern fork. As you go southwest, check the cavern walls to find a Cragged Rock you can climb to reach an elevated ledge. From this ledge you should have high ground on the Phase Spiders and Ettercaps below. You might not retain this advantage the entire fight, but at the very least you’ll probably prevent the Phase Spiders from gaining the high ground against you. If you brought Astarion, hide, enter turn-based mode, and try to sneak attack one of the enemies. Not only can this deal heavy damage (our Astarion was dealing 7-22 with a ![]() Hand Crossbow +1), but it’ll earn you a surprise round, and possibly a second sneak attack, not to mention the ability for the rest of your party to take potshots at your victims.
Hand Crossbow +1), but it’ll earn you a surprise round, and possibly a second sneak attack, not to mention the ability for the rest of your party to take potshots at your victims.

(1 of 3) Ettercaps are nasty beasts with the Infested debuff - keep them away lest you end up suffering.
With any luck you can defeat two enemies this way, especially if Astarion lands a sneak attack on two different enemies. As for target prioritization, you’re unlikely to have more than two targets in range at a time, but Phase Spiders are highly mobile menaces who can spit poison from a distance, and Ettercaps are melee bruisers who have a nasty Infested debuff they can spread to nearby foes. You probably can’t do anything to stop the Phase Spiders from targeting whomever they wish, as their Ethereal Jaunt ability allows them to teleport about, and if possible they’ll take the high ground and spit at you. On the plus side, if they roost upon a web bridge you can destroy it with fire damage (a simple ![]() Fire Bolt should suffice), knocking the Phase Spider down and dealing damage. Remember that trick, it’ll come in handy soon. As for Ettercaps, you don’t want them anywhere near you, lest you get Infested. This debuff will deal 2-8 damage a turn, and can be removed with acid or fire, the application of which is likely as painful as the disease. If you can immobilize or knockback the Ettercaps, it’s worth considering. At the very least, you should shove them away before finishing them off, lest they explode and Infest numerous party members.
Fire Bolt should suffice), knocking the Phase Spider down and dealing damage. Remember that trick, it’ll come in handy soon. As for Ettercaps, you don’t want them anywhere near you, lest you get Infested. This debuff will deal 2-8 damage a turn, and can be removed with acid or fire, the application of which is likely as painful as the disease. If you can immobilize or knockback the Ettercaps, it’s worth considering. At the very least, you should shove them away before finishing them off, lest they explode and Infest numerous party members. ![]() Fire damage will temporarily suppress their infestation.
Fire damage will temporarily suppress their infestation.
While this elevated perch does allow us to strike down upon our foes, it does come with a significant drawback - it’s rather cramped. This can prove to be significant, as both enemies have an AoE attack - the Phase Spiders can spit Venomous Discharge, which will hit all enemies in a radius, and the Ettercaps can use ![]() Web, the effects of which were previously explained. Try to spread out as much as the vantage allows. Don’t be shy about using Superiority Die or spells like
Web, the effects of which were previously explained. Try to spread out as much as the vantage allows. Don’t be shy about using Superiority Die or spells like ![]() Scorching Ray to ensure your victory - these enemies have a fair few Hit Points and can deal a surprising amount of damage under the right conditions. Don’t give them the opportunity.
Scorching Ray to ensure your victory - these enemies have a fair few Hit Points and can deal a surprising amount of damage under the right conditions. Don’t give them the opportunity.
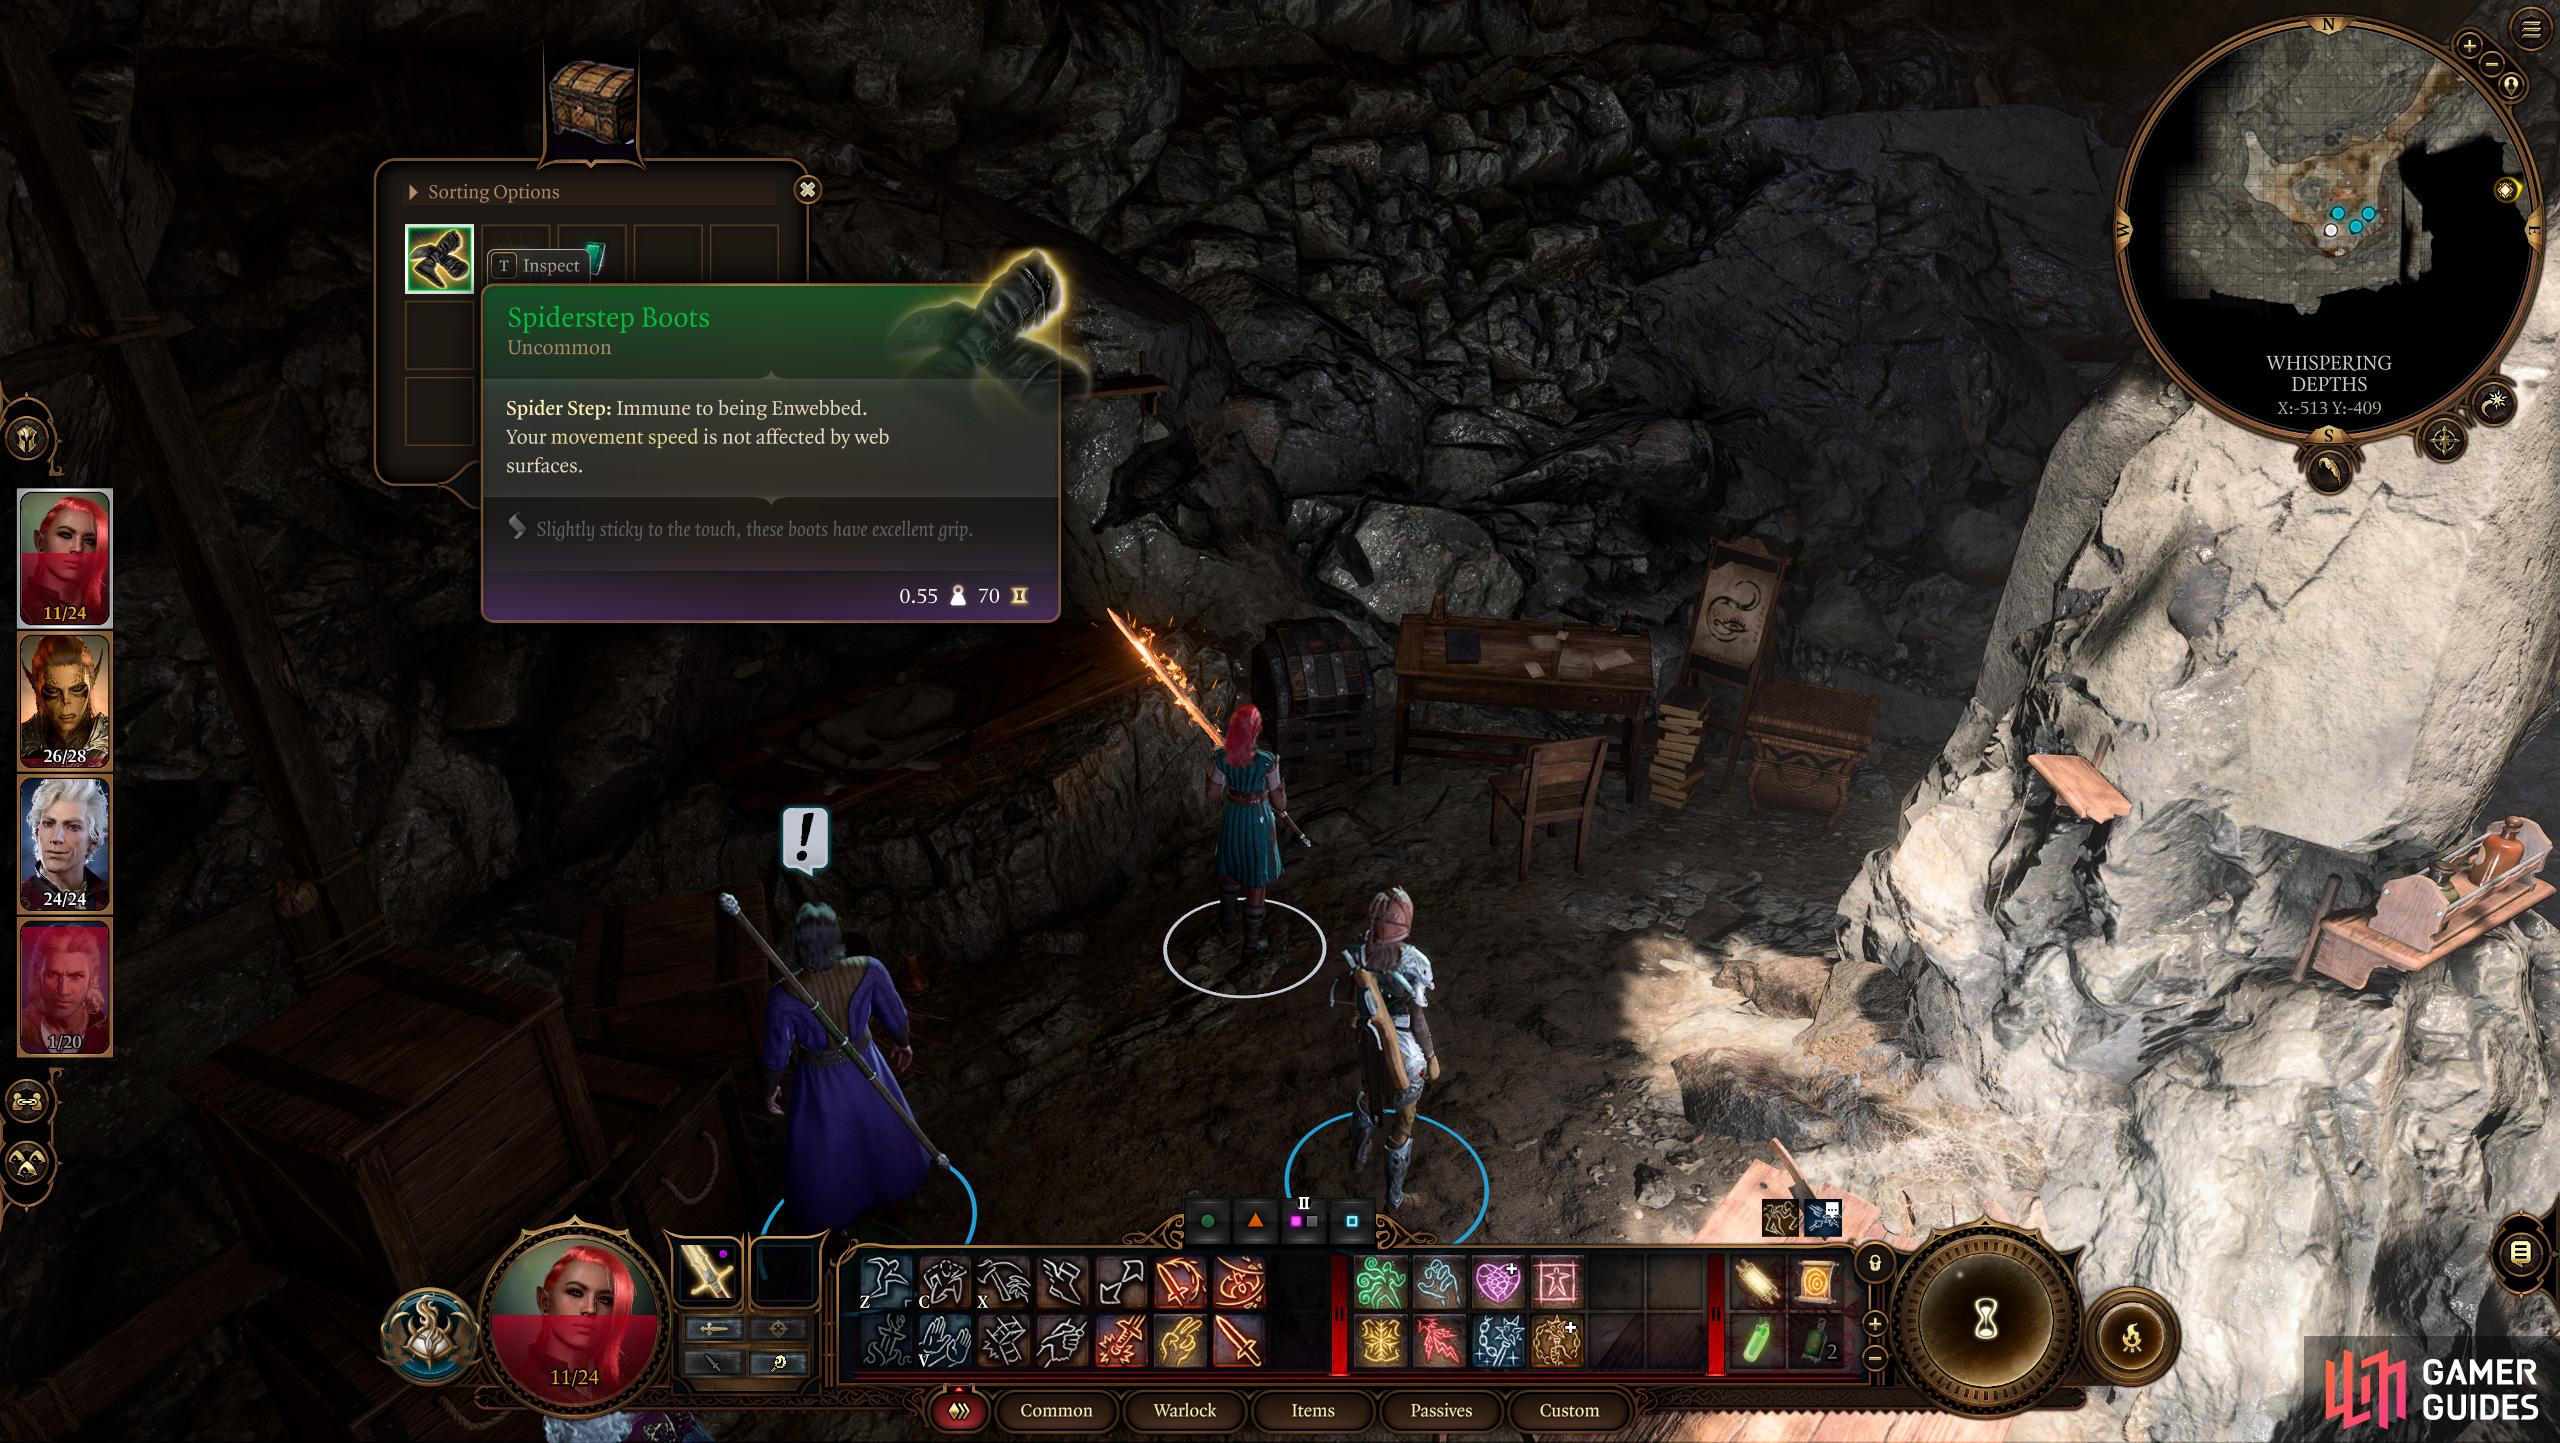
Search a well-furnished side chamber to score some Spiderstep Boots,
and a chest full of scrolls.
Finding Treasure in the Whispering Depths
Now that you’ve dispatched the Ettercaps and Phase Spiders, you’ve cleared half the encounters in this dungeon. That’s right, there’s only two, and the next one is more difficult. That said, there’s lots of exploration to do before the next fight, so let’s get to it. We’ll focus on the highlights here, use the left “Alt” key to highlight most of the lootables in the area. Note that you can destroy hanging Spider Silk Cocoons to possibly get some of the loot within.
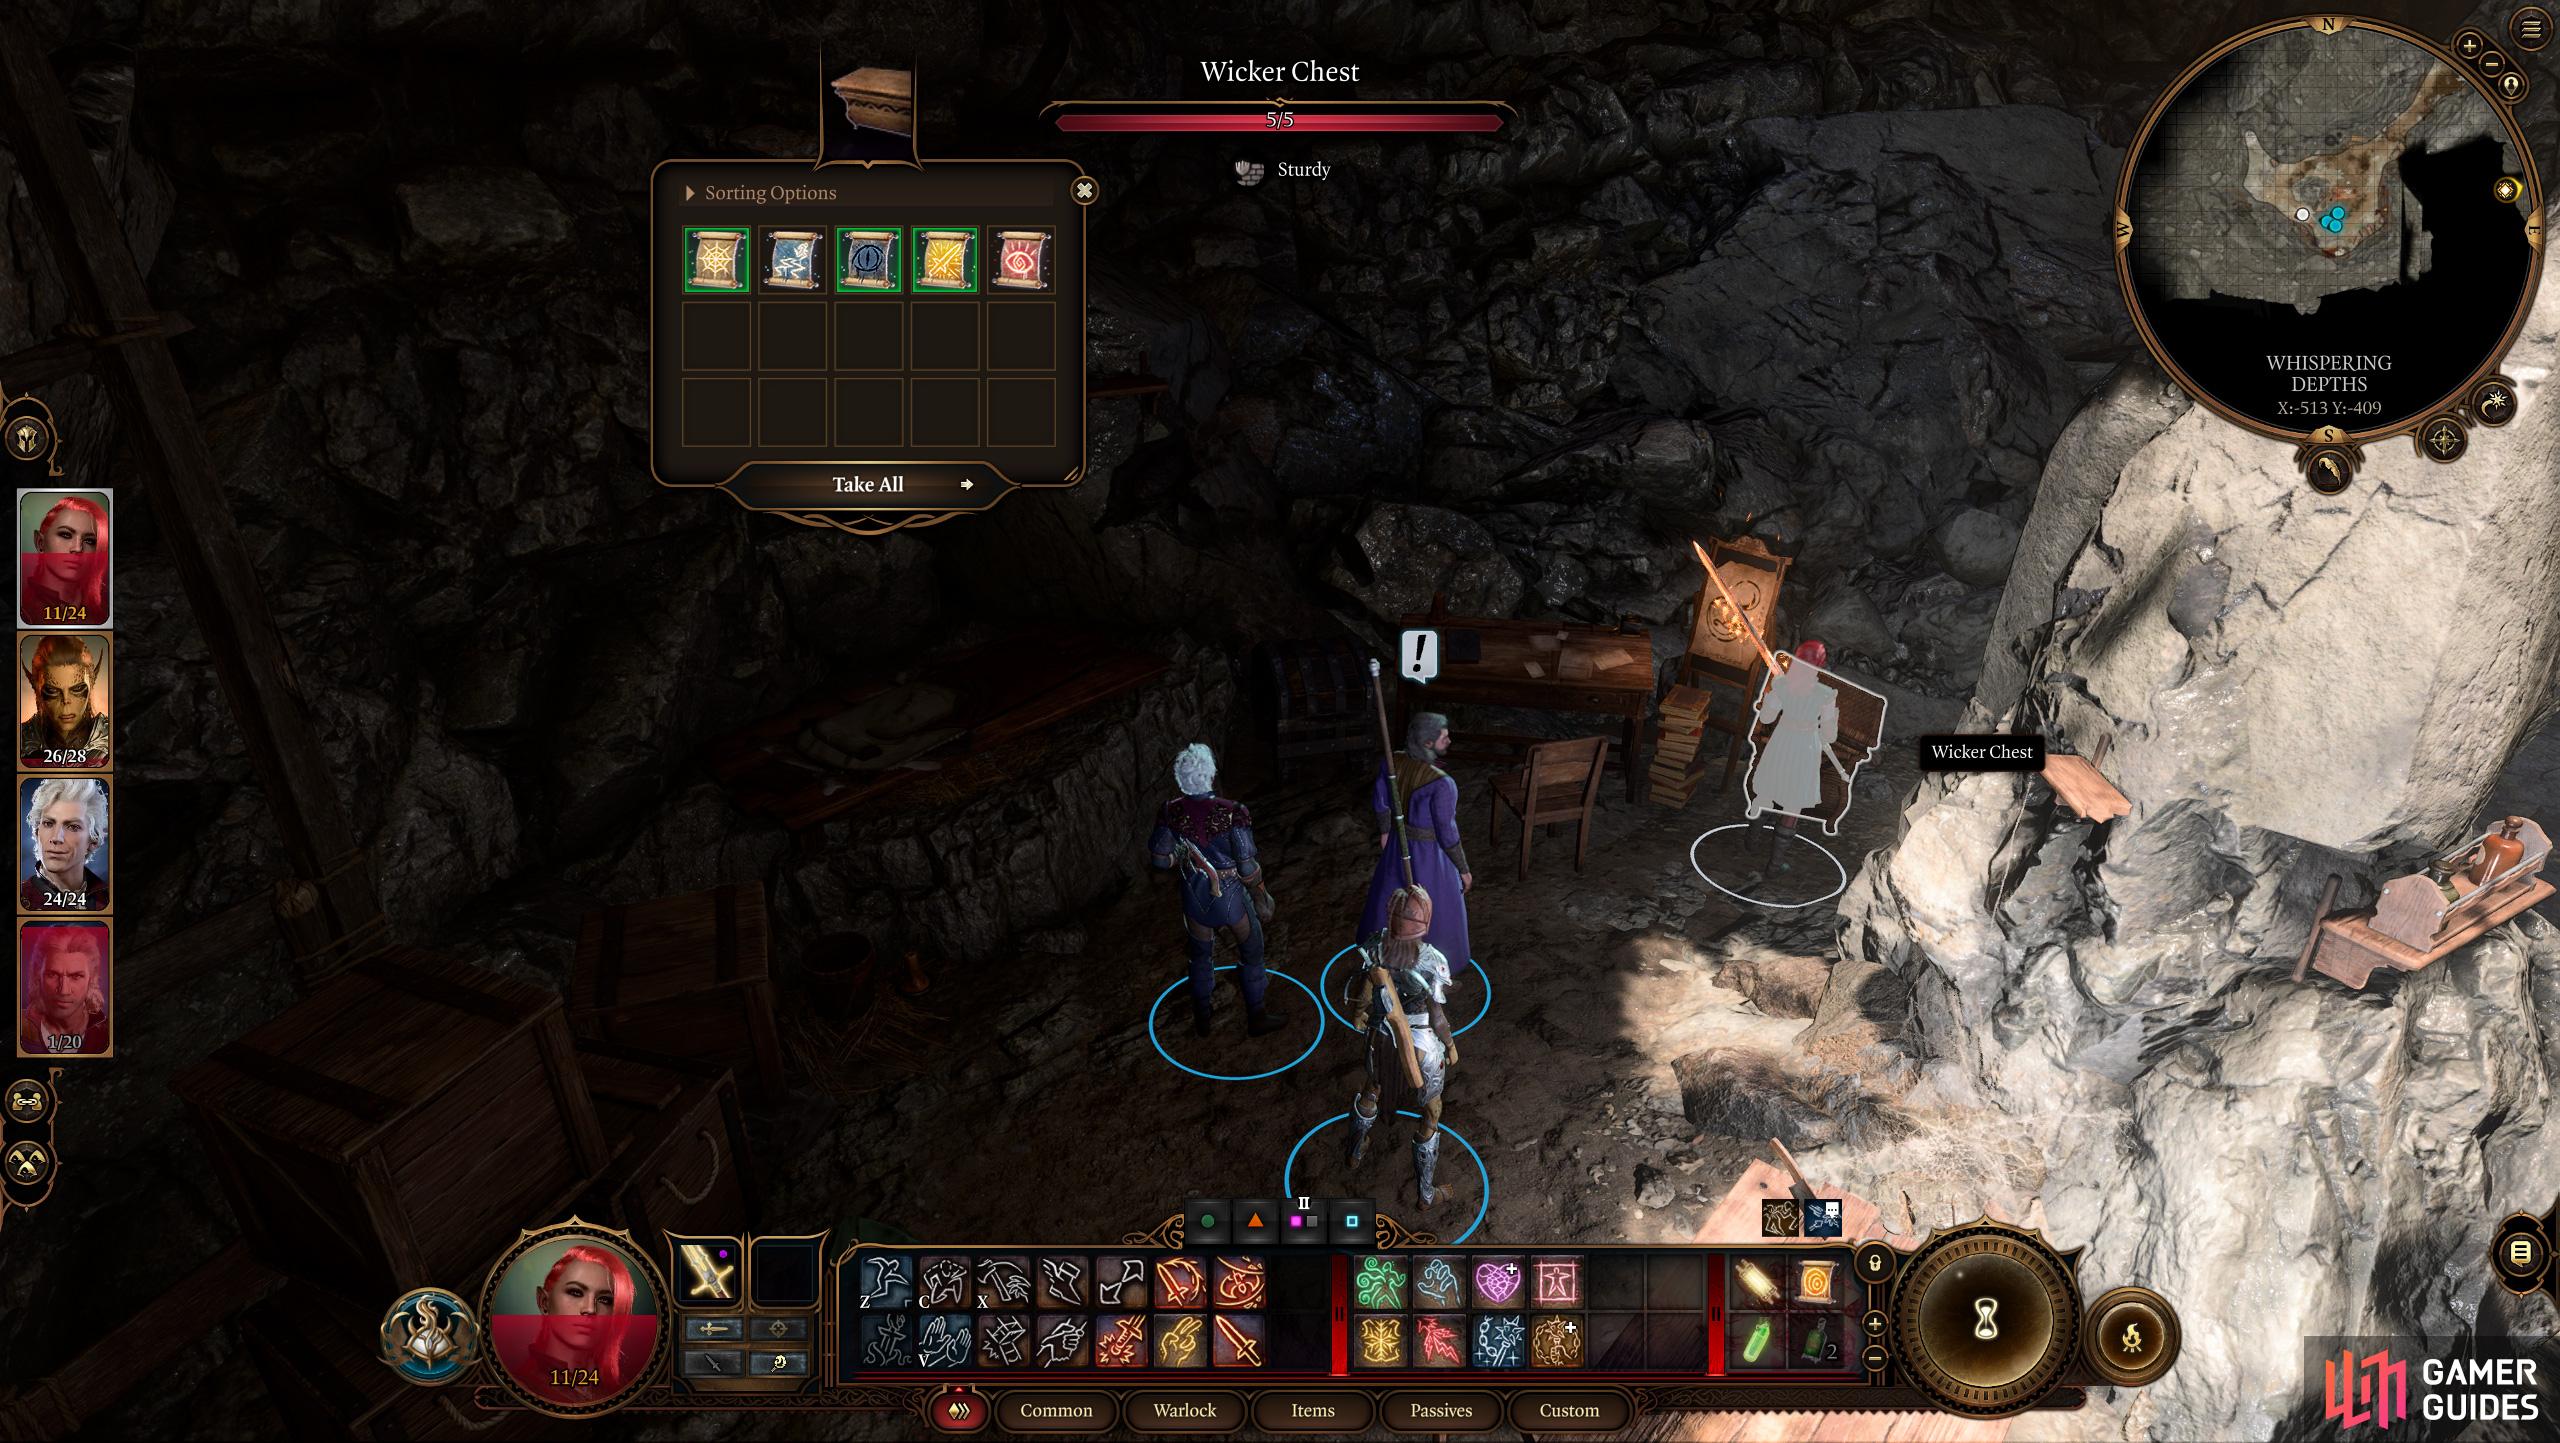
Backtrack to the first fork and continue southwest, past the wall you climbed to reach your ambush site, and eventually you’ll reach a small, well-furnished chamber. Read some journals and scour for loot if you wish, but be sure to grab the ![]() Spiderstep Boots out of a Heavy Chest. These boots will make you immune to being Enwebbed, which will prove very handy as you traverse this dungeon, so slip them on immediately. In a nearby Wicker Chest you’ll find several spell scrolls. Pillage this chamber, then head back to the fork, this time heading northeast a bit to reach the chamber where you fought the Ettercaps and Phase Spiders. Make use of the left “Alt” key to flag cocoons, backpacks and skeletons - odds are you’ll find some coin, jewelry, and the odd spell scroll and potion. In addition we scored a
Spiderstep Boots out of a Heavy Chest. These boots will make you immune to being Enwebbed, which will prove very handy as you traverse this dungeon, so slip them on immediately. In a nearby Wicker Chest you’ll find several spell scrolls. Pillage this chamber, then head back to the fork, this time heading northeast a bit to reach the chamber where you fought the Ettercaps and Phase Spiders. Make use of the left “Alt” key to flag cocoons, backpacks and skeletons - odds are you’ll find some coin, jewelry, and the odd spell scroll and potion. In addition we scored a ![]() Spurred Band, a magical ring that gives its wearer Momentum when they start a turn with under 50% of their Hit Points. They can’t all be winners.
Spurred Band, a magical ring that gives its wearer Momentum when they start a turn with under 50% of their Hit Points. They can’t all be winners.
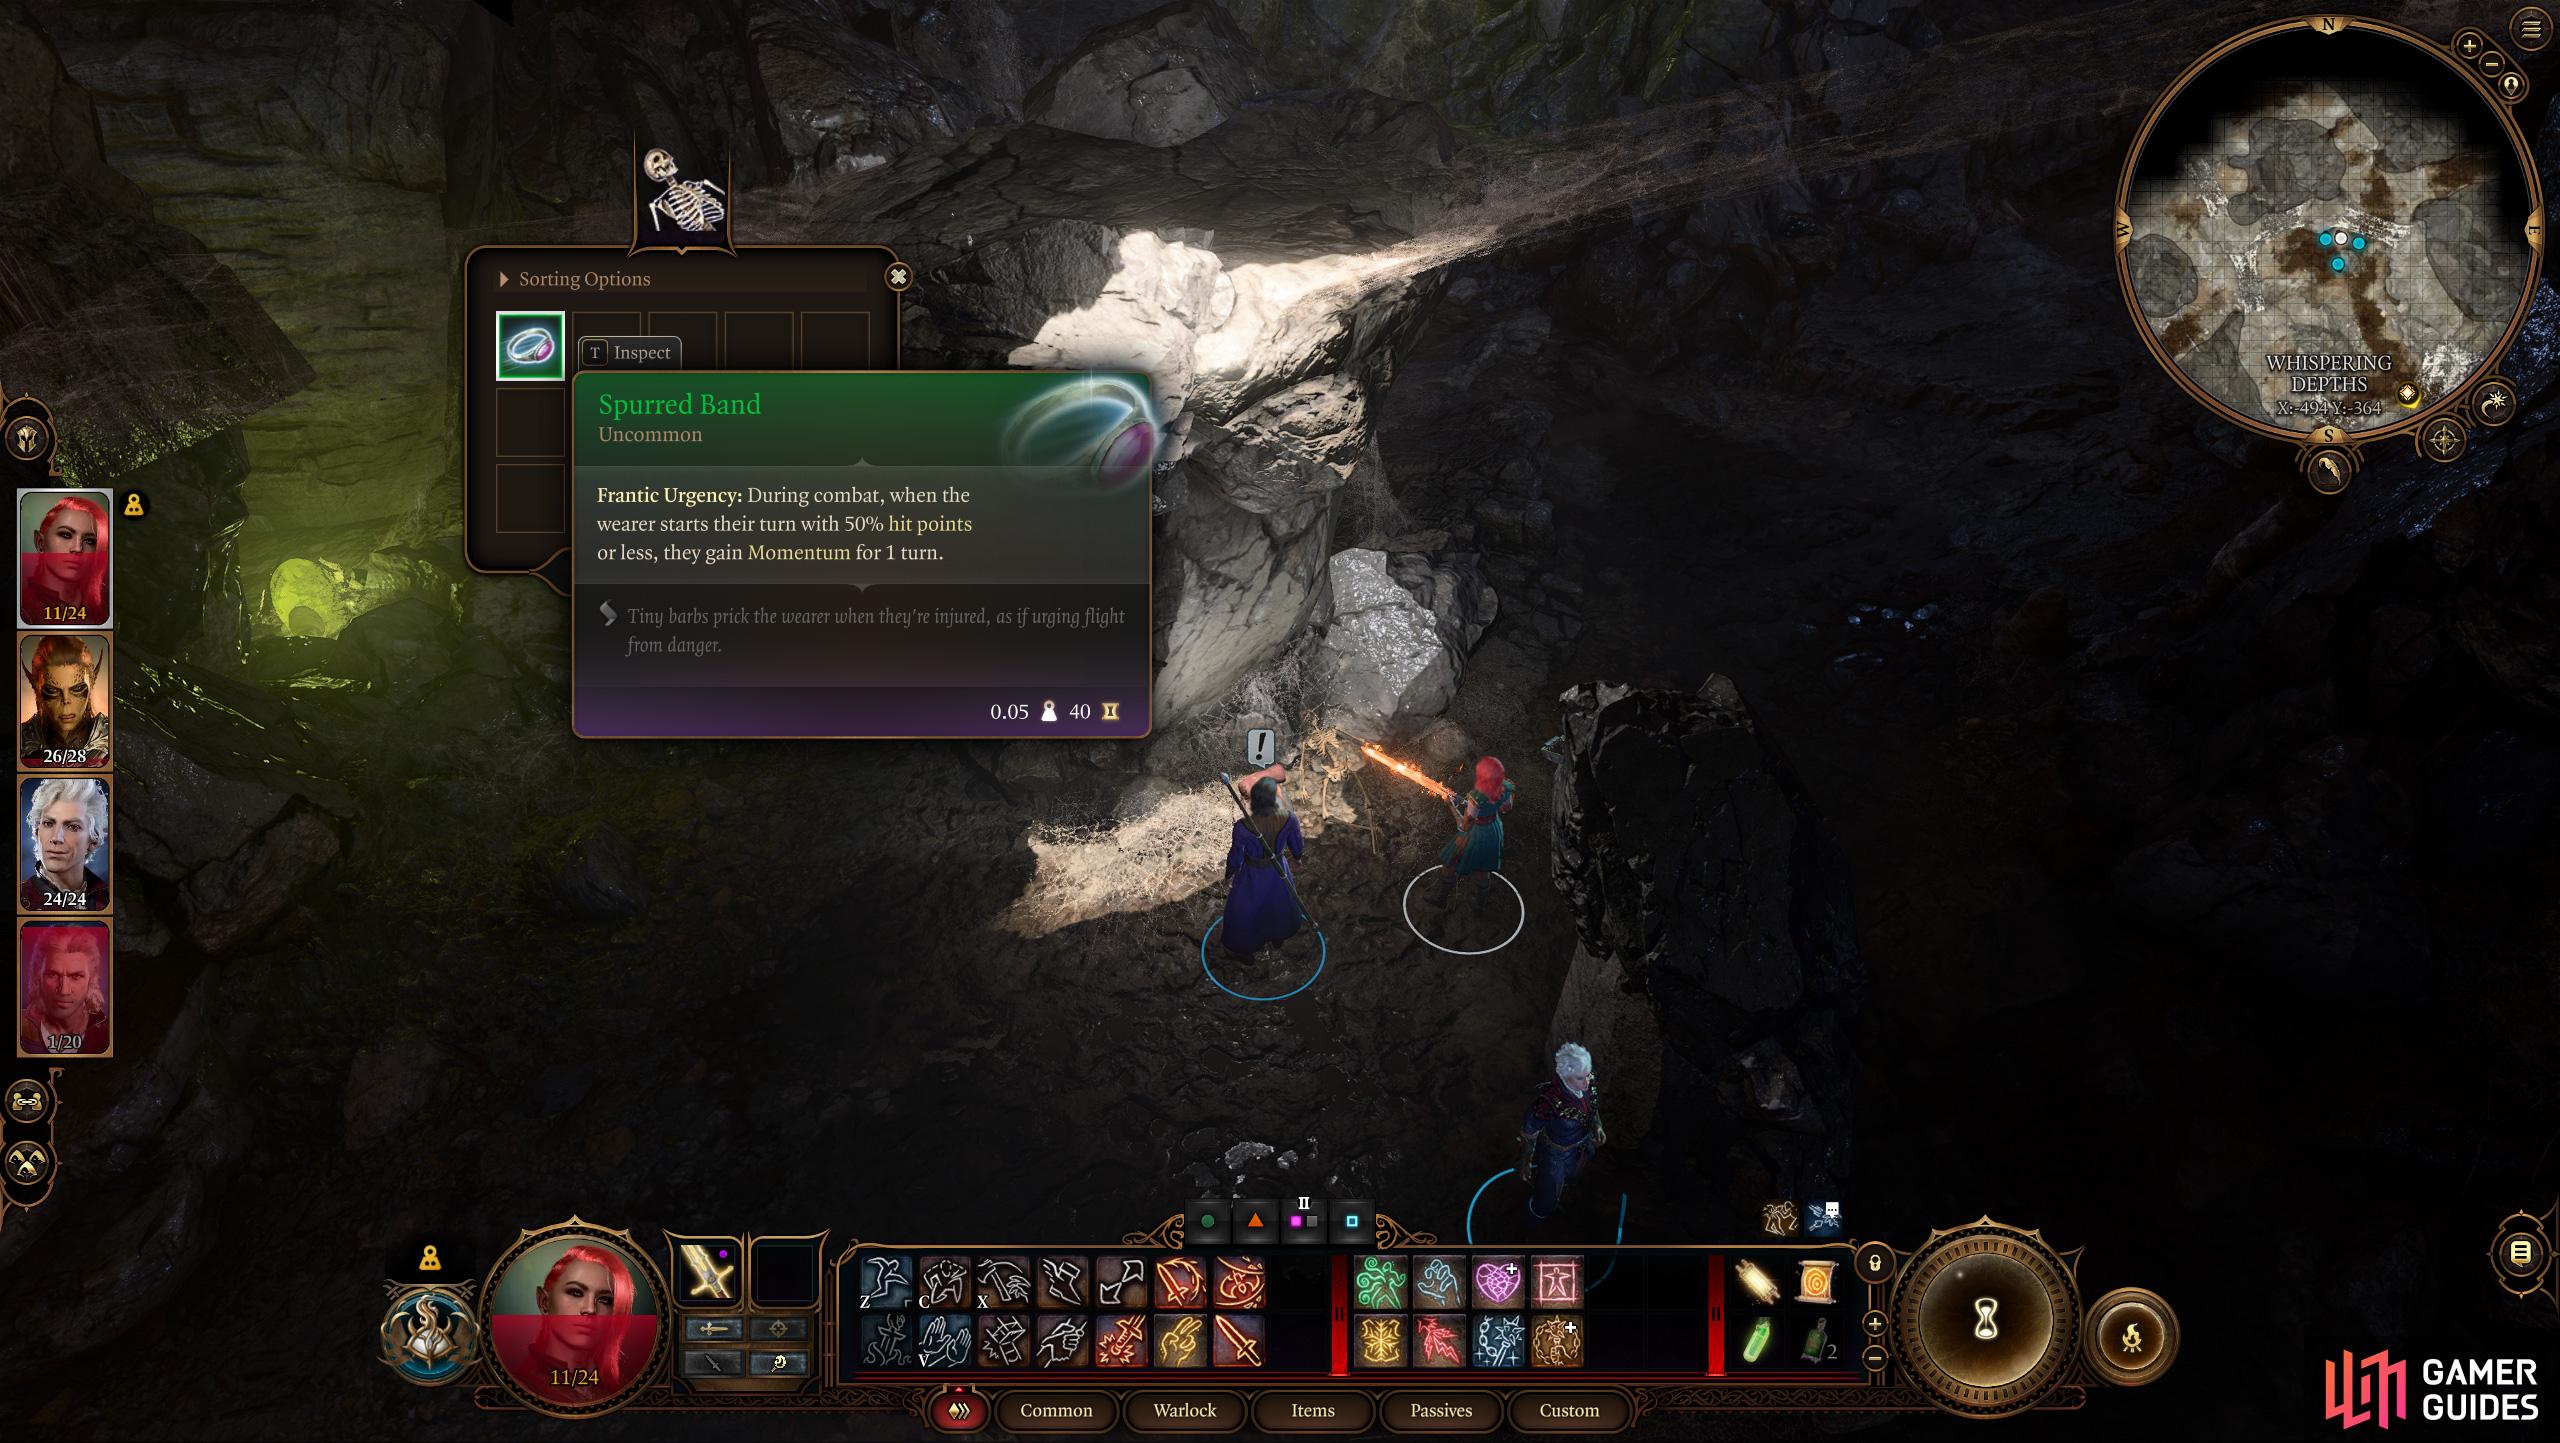
Be sure to loot the spider’s victims thoroughly, as you can find gold, gems, jewelry, potions, scrolls and the odd magical trinket.
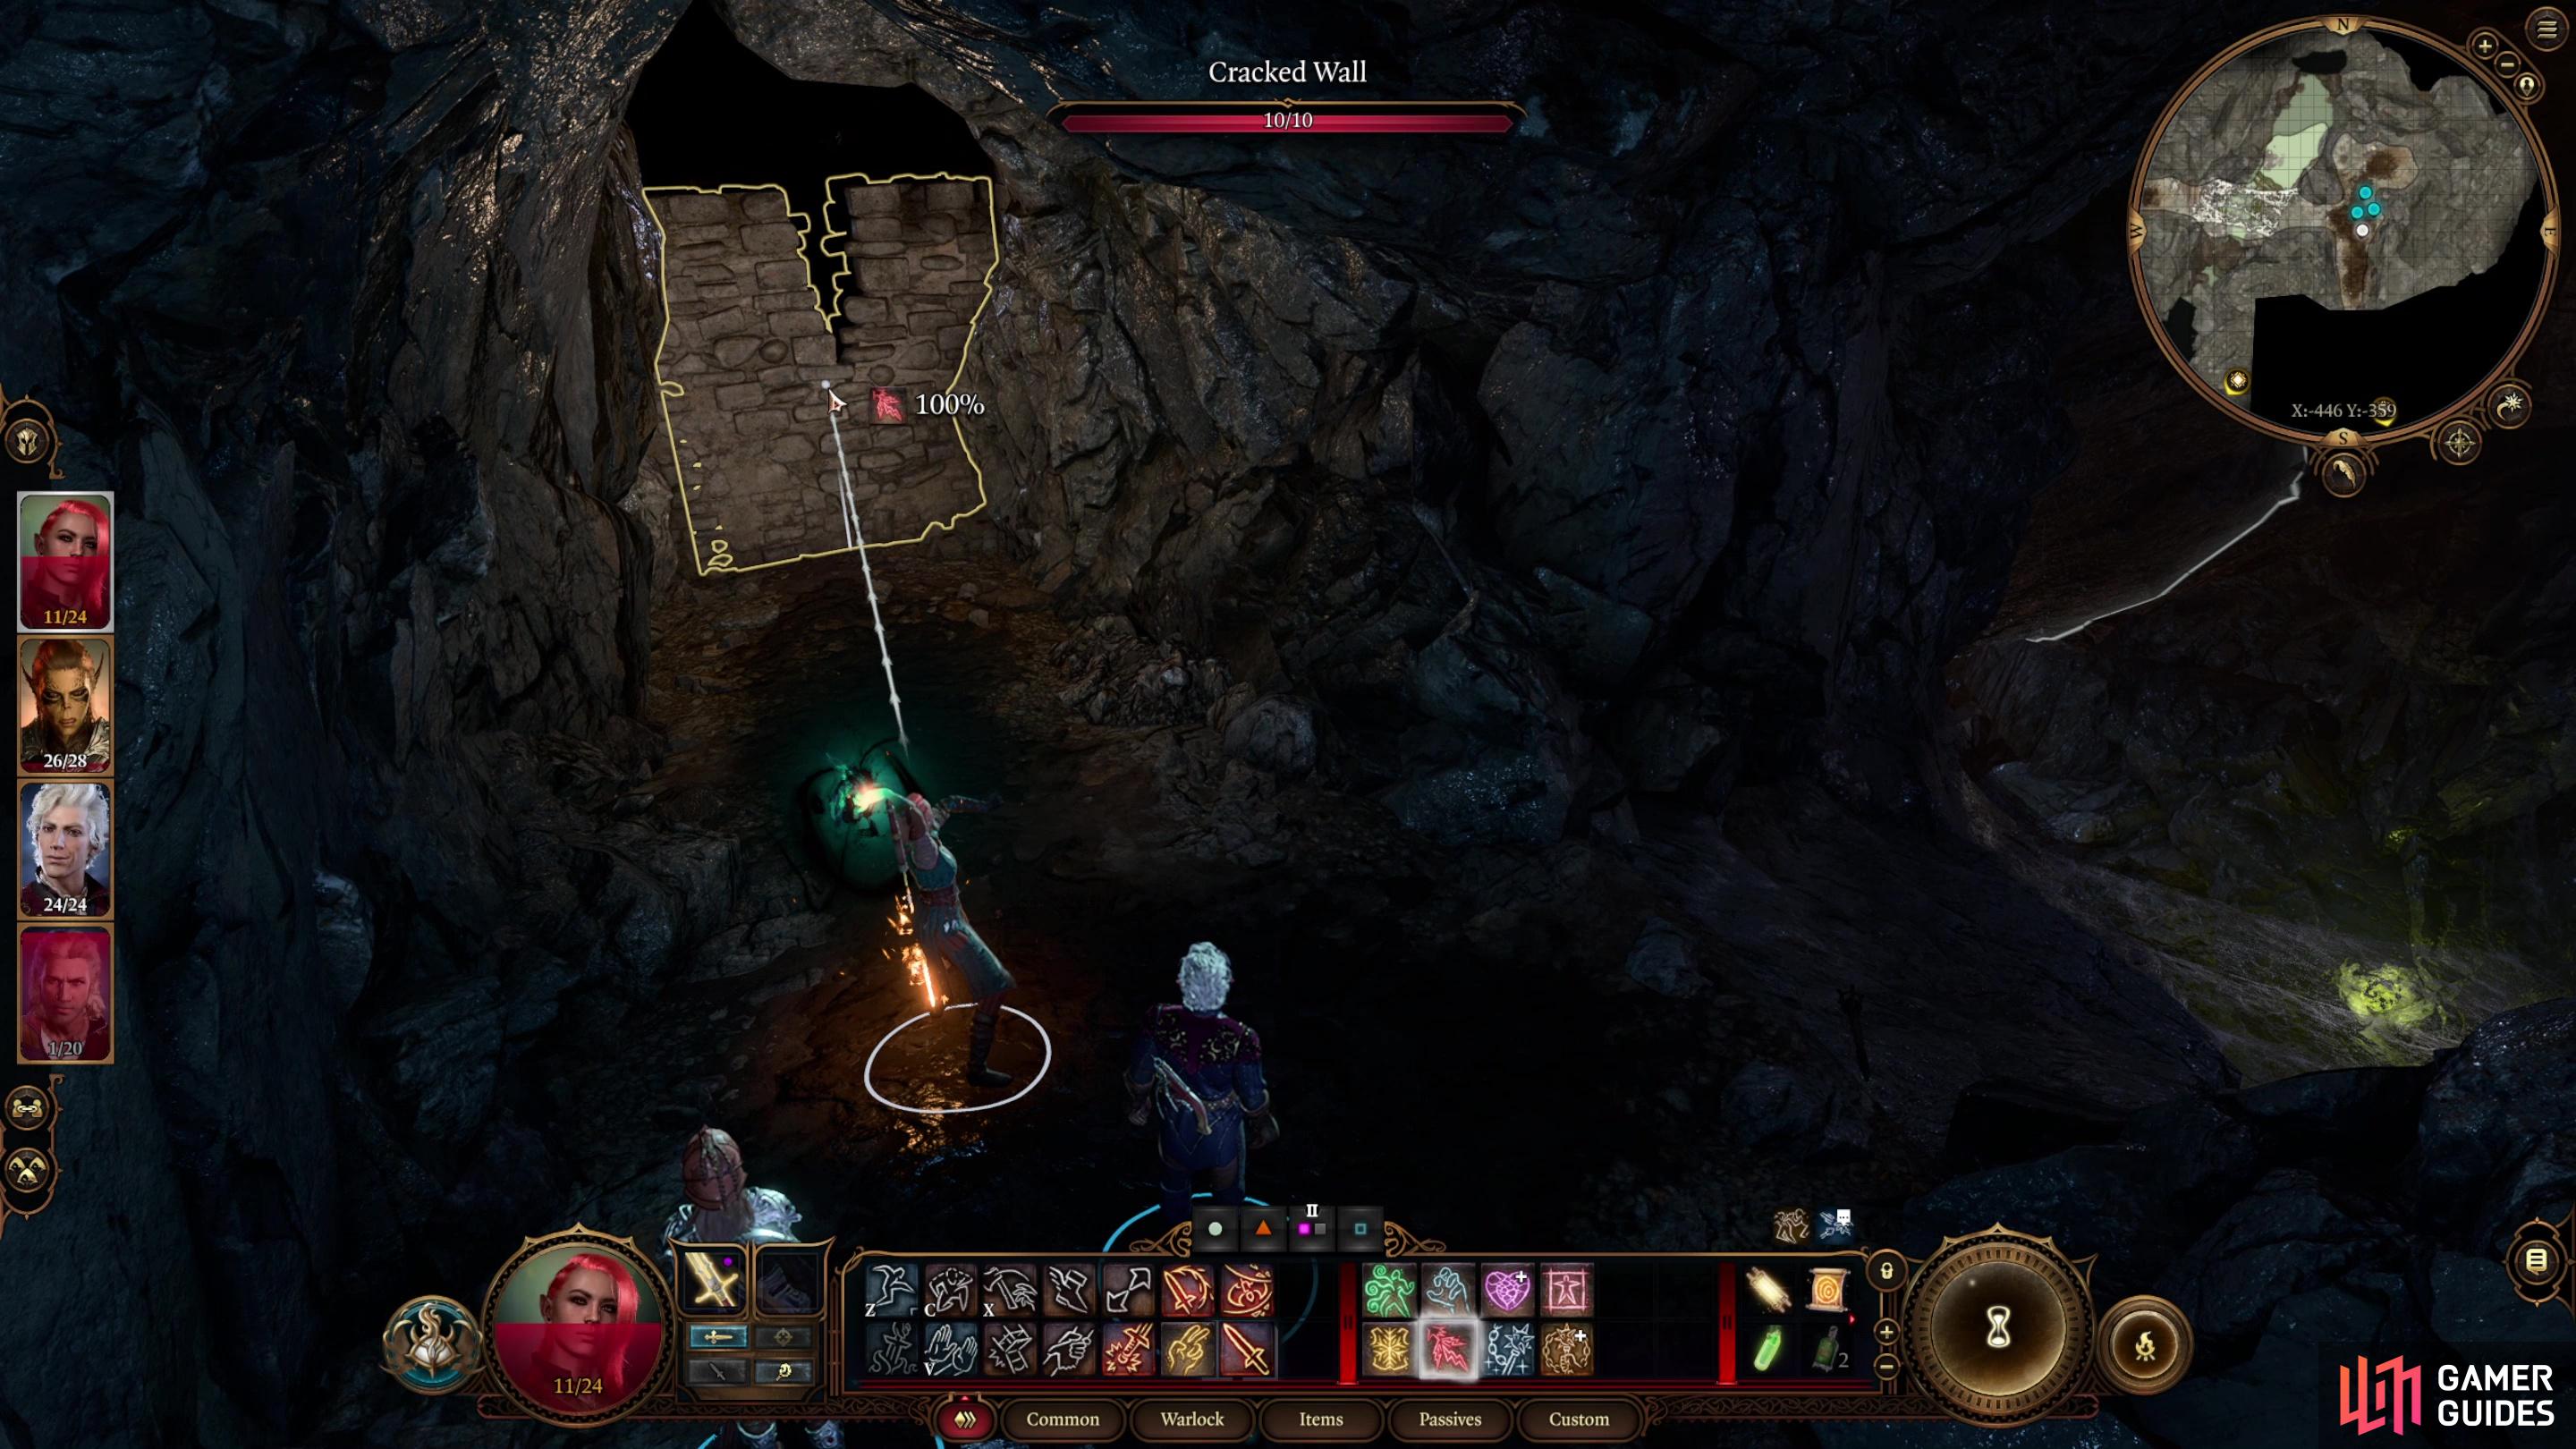
You can reach a workshop by blasting through a cracked wall, where much of the quest “Finish the Masterwork” takes place.
If you head northwest you’ll make your way towards the next encounter, but before that, let’s finish exploring the rest of this dungeon. Instead make your way northeast and you should find a series of ledges to the northwest and a slope leading up to the northeast. Go northeast and cross a web bridge (this could take a bit, as somebody is bound to end up enwebbed - fortunately, the enemies that would have responded to your trespass are now dead) and when you find yourself on solid rock again, turn right (south) and you’ll run into a wall. If you pass an [Investigate 10] check you’ll notice that the wall is compromised - hitting it for ten damage will knock it down and give you a route back to the Blighted Village, albeit through a workshop with a functional furnace. Check out the walkthrough for the side quest Finish the Masterwork for more details.
If you have a reliable means of knocking enemies back, hit the Phase Spider Matriarch as she patrols her web bridges,
and you may just punt her into a void, defeating her in a single attack.
How to Defeat the Phase Spider Matriarch Boss in Baldur’s Gate 3
Alright, time to finish off the second and final encounter in this miserable spider hole. Return to the last fork and this time head north up the ledges and follow the linear path ahead to the northwest, hanging north whenever you can. Eventually you’ll reach an open chamber with web bridges running to other platforms to the northeast and southeast. Be on the lookout and you’ll see a Phase Spider Matriarch crawling around - she’s also joined by two normal Phase Spiders, who tend to be more distant and occupy lower ground.
Fighting three Phase Spiders, each with the ability to teleport and spit AoEs at you isn’t an enviable proposition, and we would love to be able to score some sneak attacks to make this easier. With a bit of effort, this can be done, but before we get into the details… there’s actually a way to win this fight rather easily. First you need a character that can knock enemies back - ideally a Warlock with Repelling Blast. Then you need the Phase Spider Matriarch to be in an ideal position - if it’s pacing along a third web bridge far to the west it’ll be in a prime spot, as punting it off this web bridge will send it into the void below. There are some complications, however, namely the web bridges and the distances involved. It can be hard to land a hit from the safe rock ground to the east, but if you tread on the web bridges you risk becoming Enwebbed. Put on the Spiderstep Boots, however, and you’re all sorted on that front. Just wait near the bridge (hide to you can see the line of sights of your enemies, if for no other reason) then when the Phase Spider Matriarch patrols near the southeastern edge of the far web bridge, enter turn based mode (left shift + spare bar), jog forward, and knock her into oblivion. This will earn you the Pest Control achievement and make a difficult fight trivial.
A patient and lucky Rogue may manage to pick off a Phase Spider without alerting the other arachnids.
If you can start the fight off with some sneak attacks and a surprise round, you’ll make your life much easier - and potentially longer.
If you don’t have the means to punt the boss off her web, or you want to fight fair - but not fair enough to forfeit the first strike - you can rely on sneak attacks. This is functionally similar to the knockback scheme mentioned above - give your sneaker attacker (likely Astarion) the Spiderstep Boots, hide, wait for his target to come within range, enter turn-based mode, then run up and shoot. While the Phase Spider Matriarch is an obvious target for this, if you’re patient, crafty, and lucky, you can pick off at least one of the lesser Phase Spiders, specifically the one on the low ground beneath the southeastern web bridge. Just make sure the Phase Spider Matriarch isn’t nearby and that you dispatch the Phase Spider in one hit, and if you manage this you’ll be able to retreat and try to land another sneak attack.
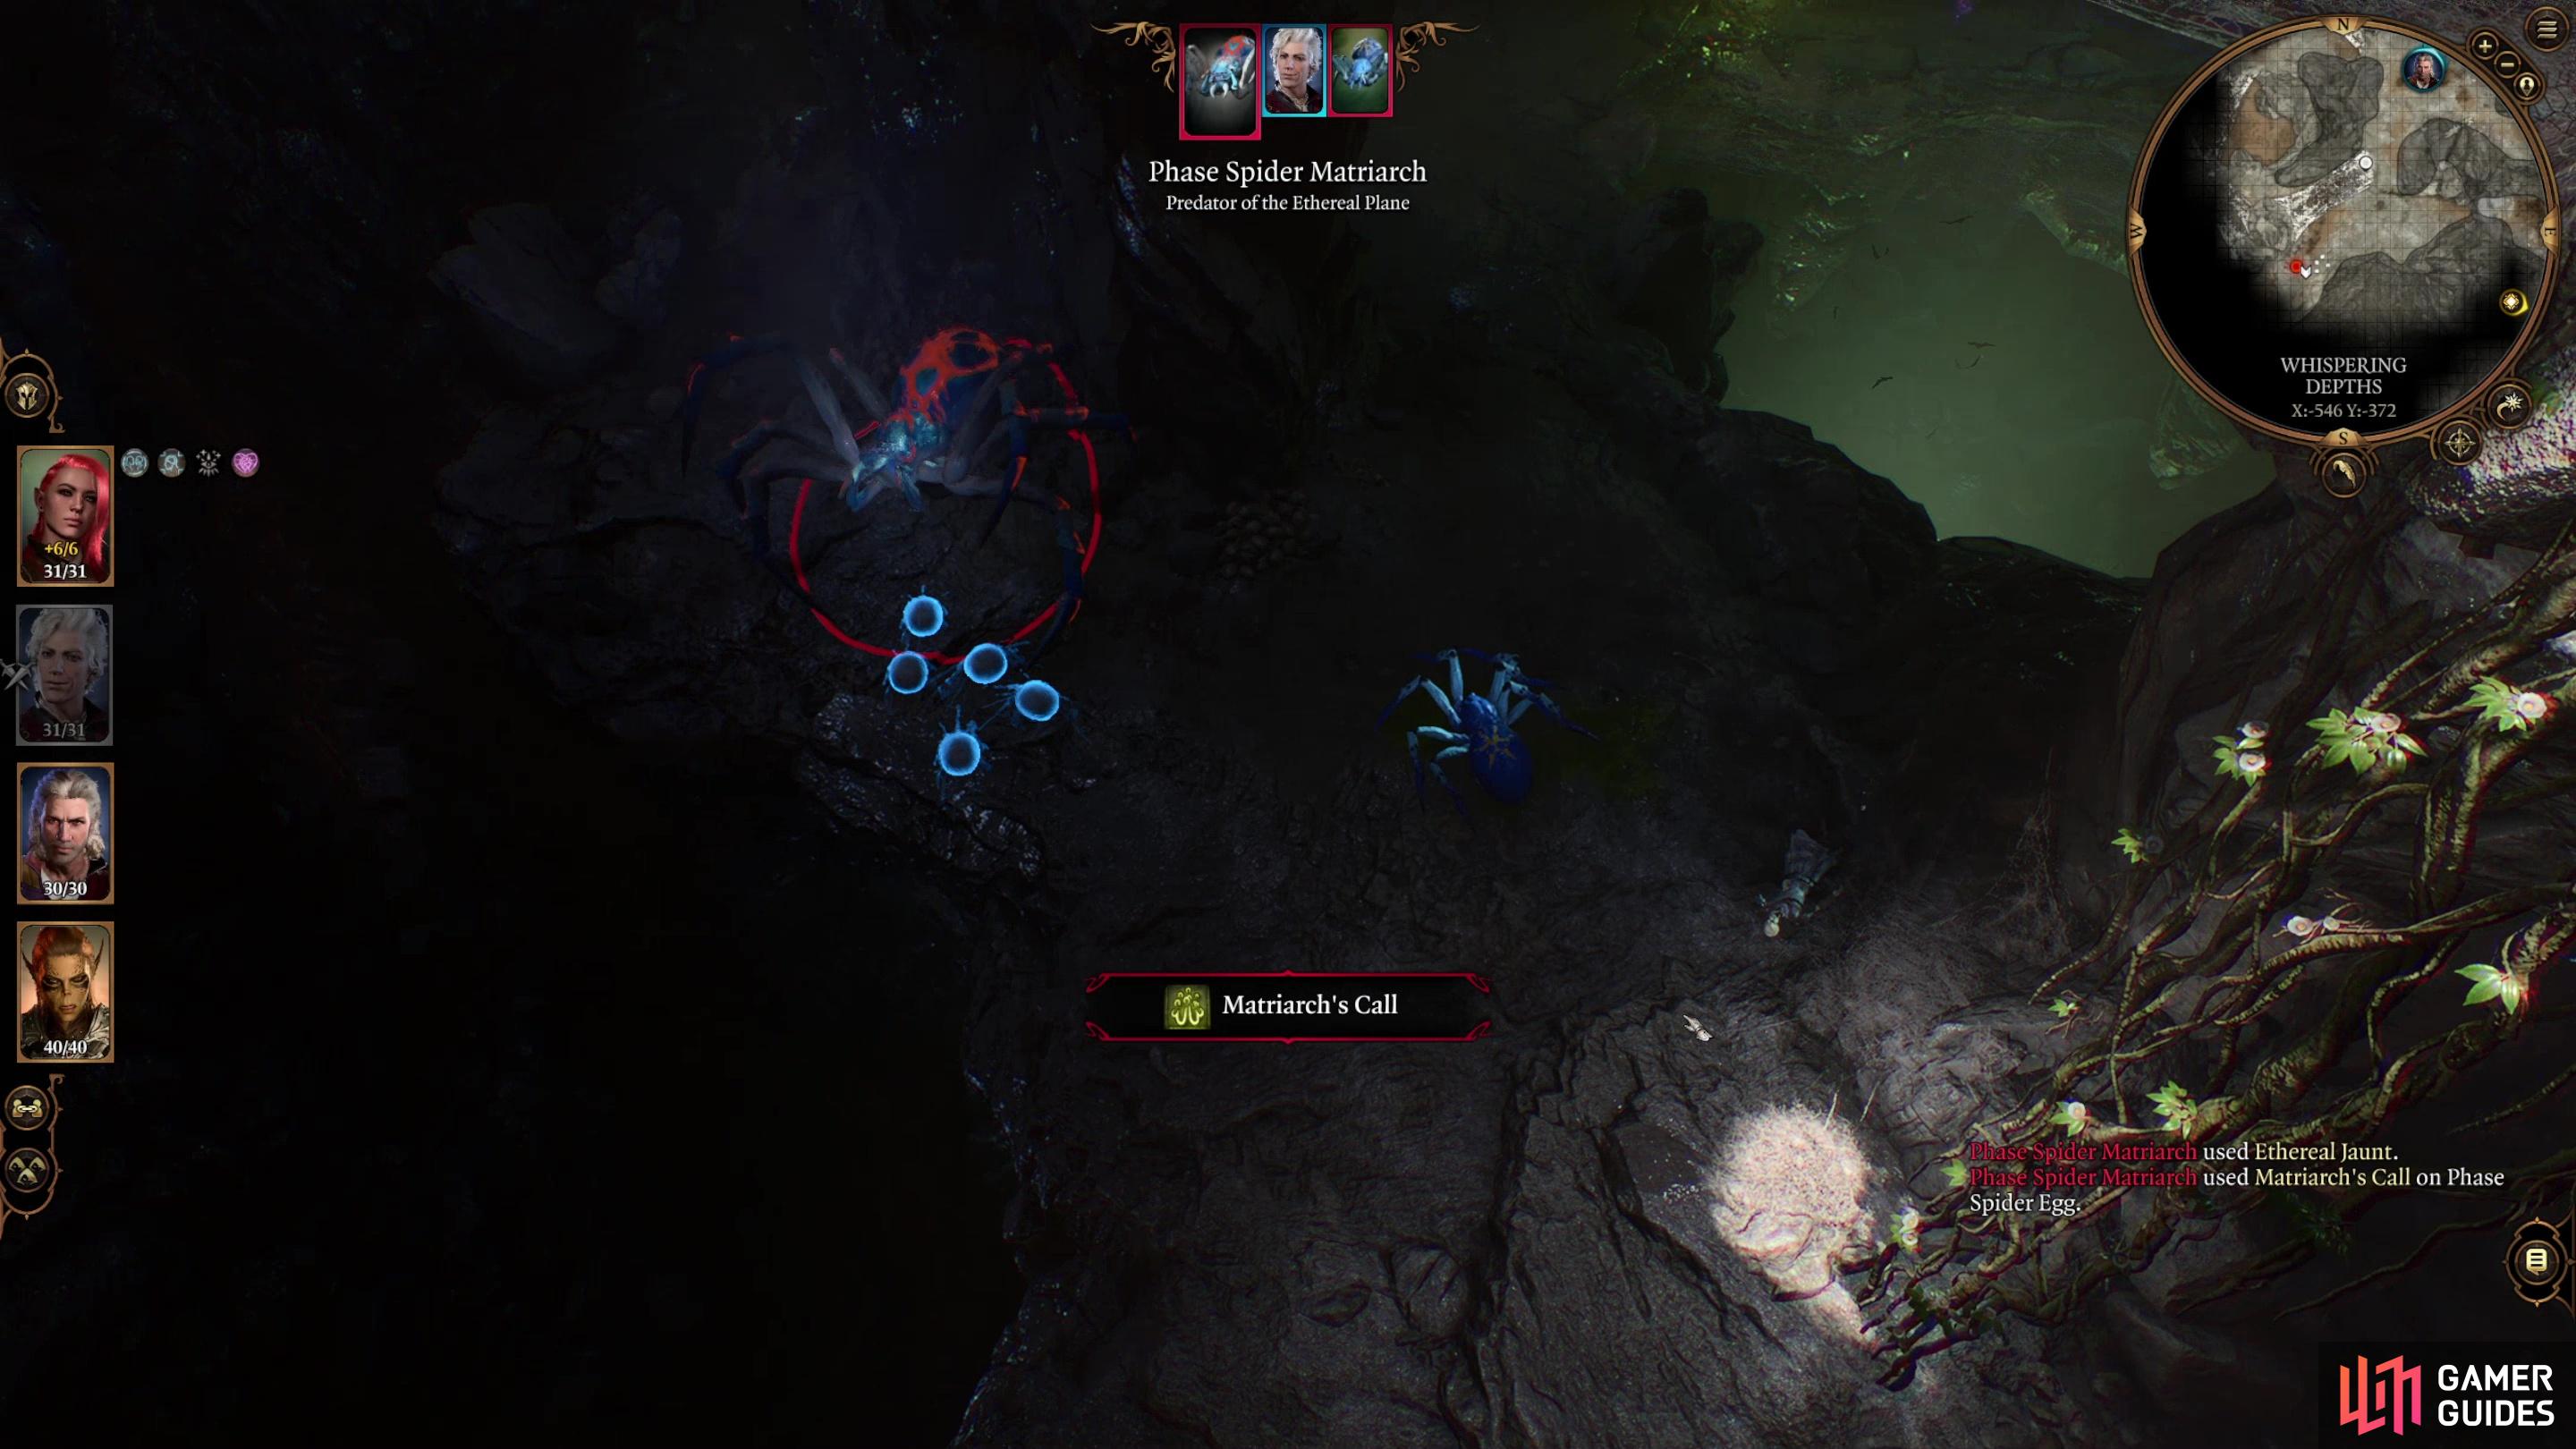
(1 of 3) The Phase Spider Matriarch’s first move will be to spawn several Phase Spiderlings.
With the surprise round out of the way (hopefully much in your favor), the battle will begin. The first thing the Phase Spider Matriarch will do is teleport down to the low ground and spawn five Phase Spiderlings. They only have 6 Hit Points and are miserable combatants (give them a break - they were just born!), but they can still be nuisances, since they can already teleport. Wipe them out with an AoE - a well-placed ![]() Thunderwave works wonders.
Thunderwave works wonders.
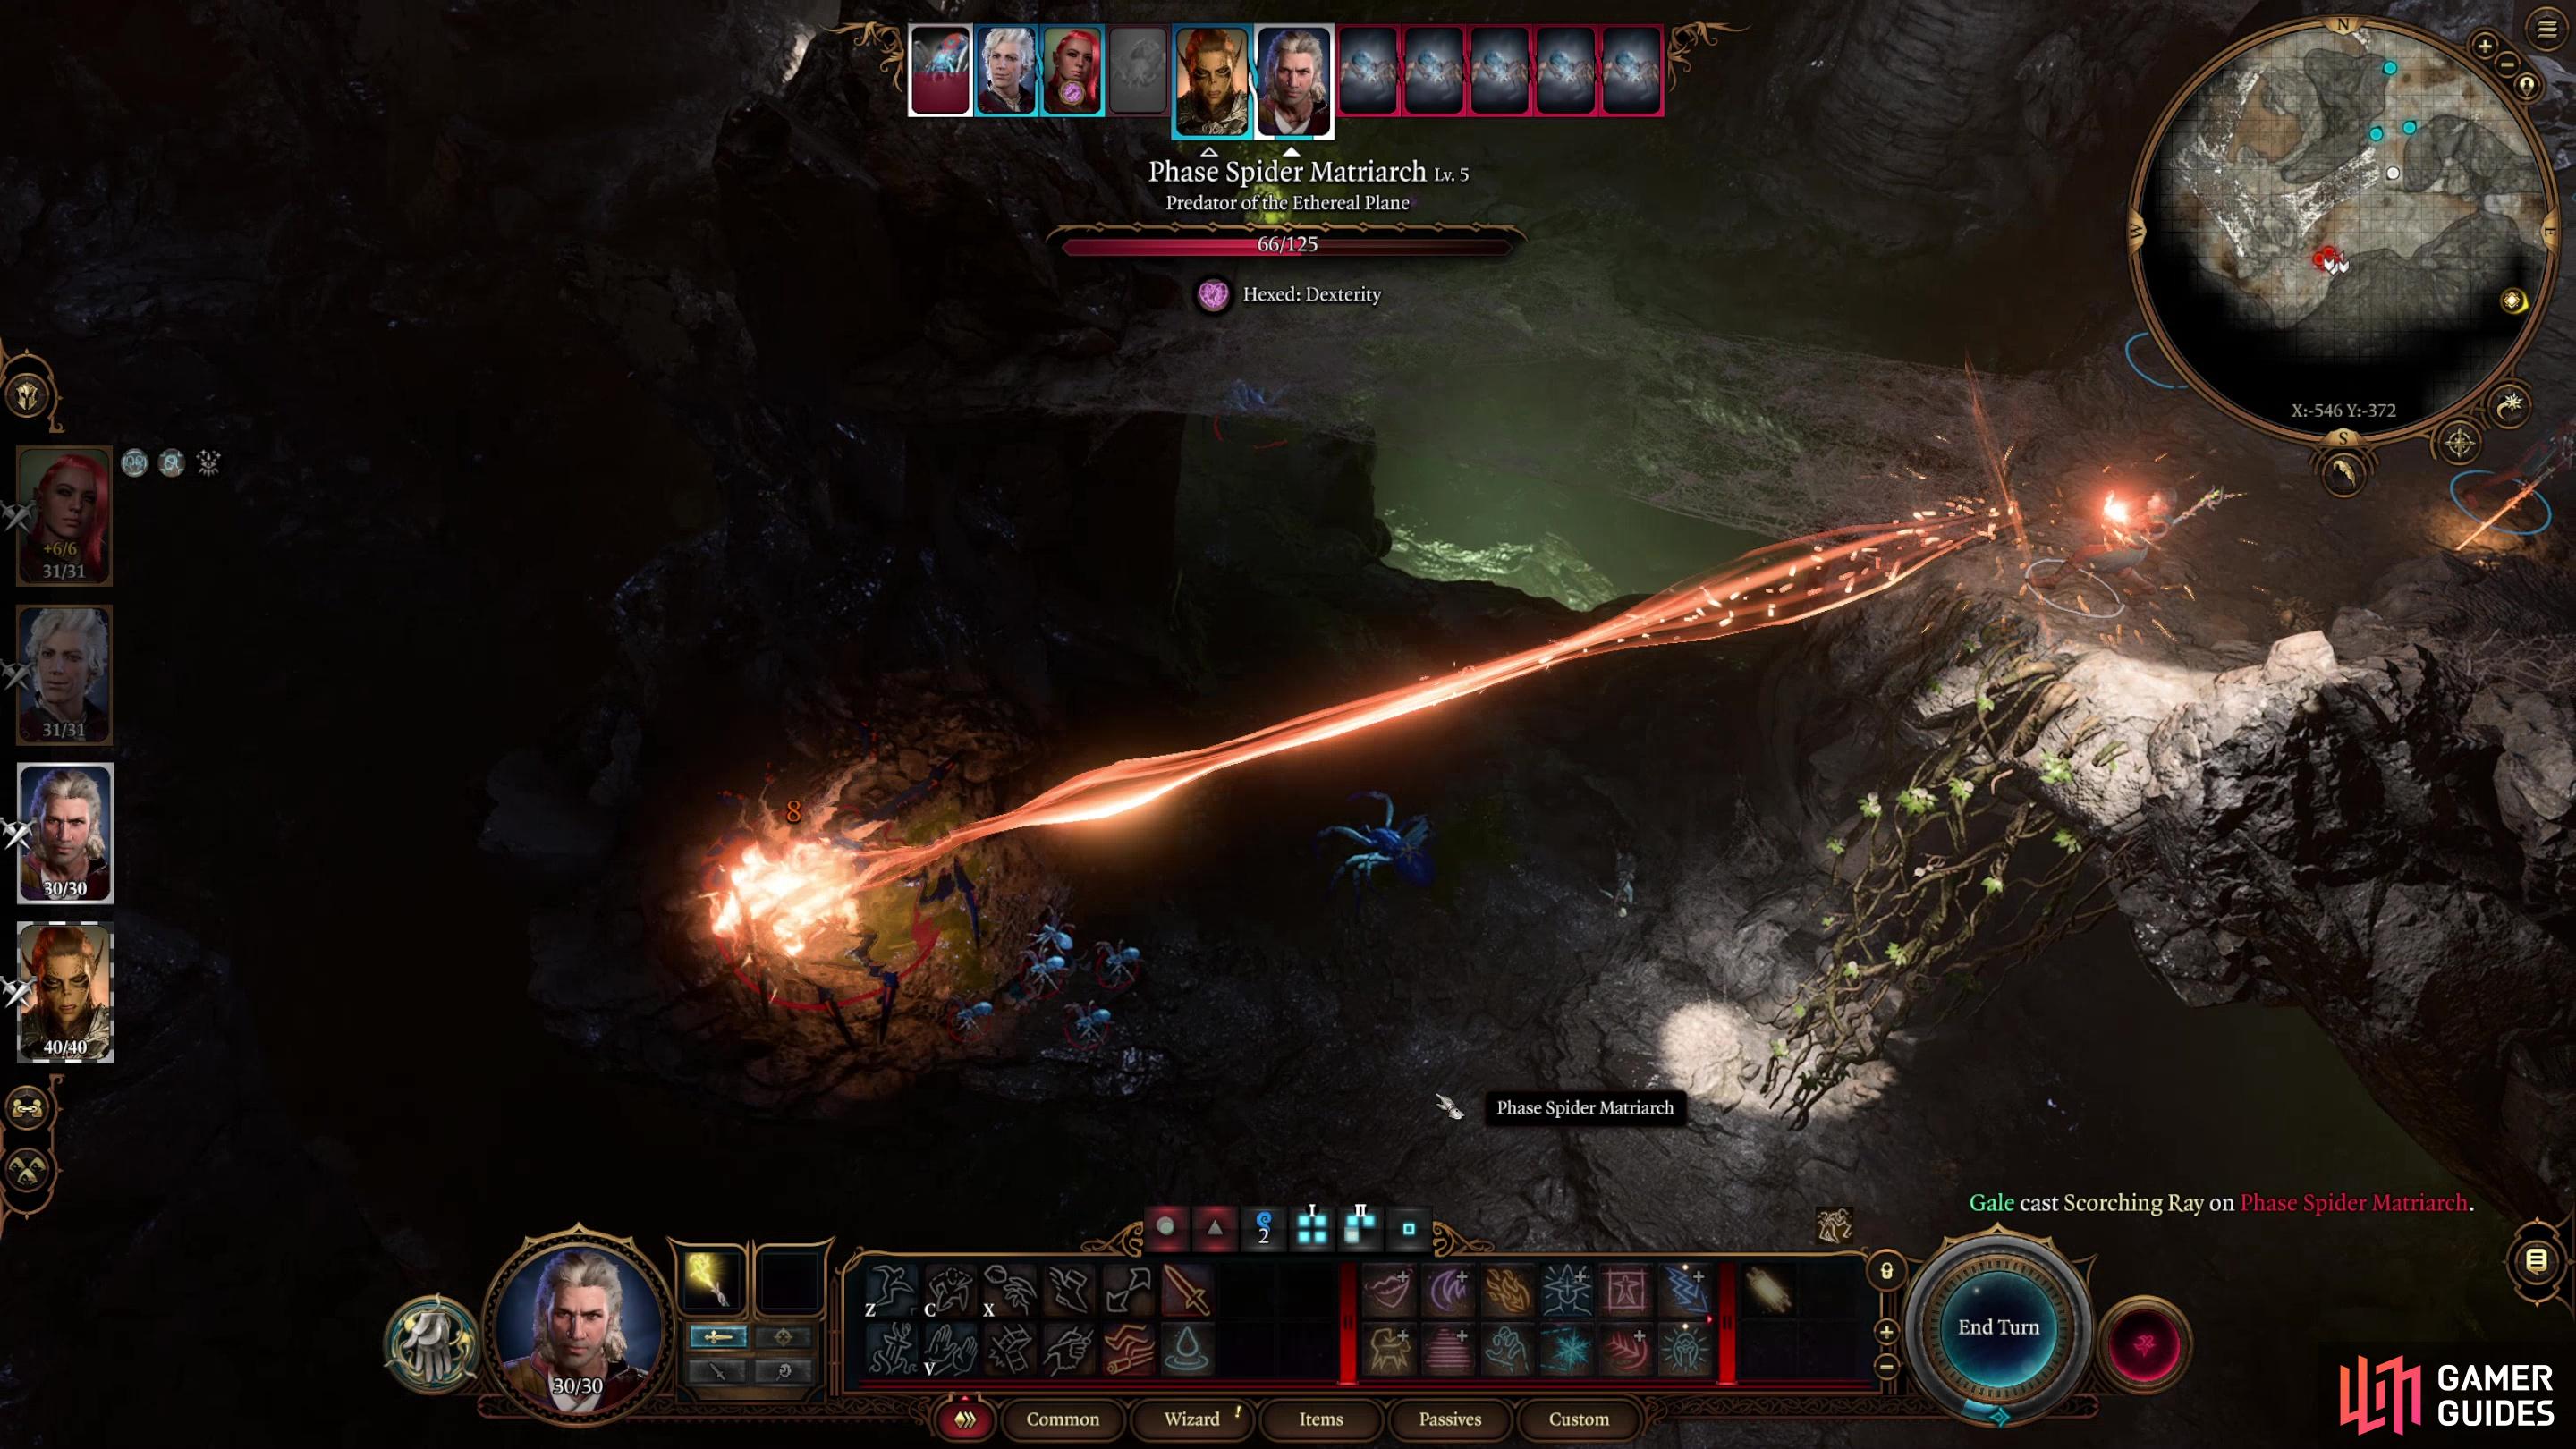
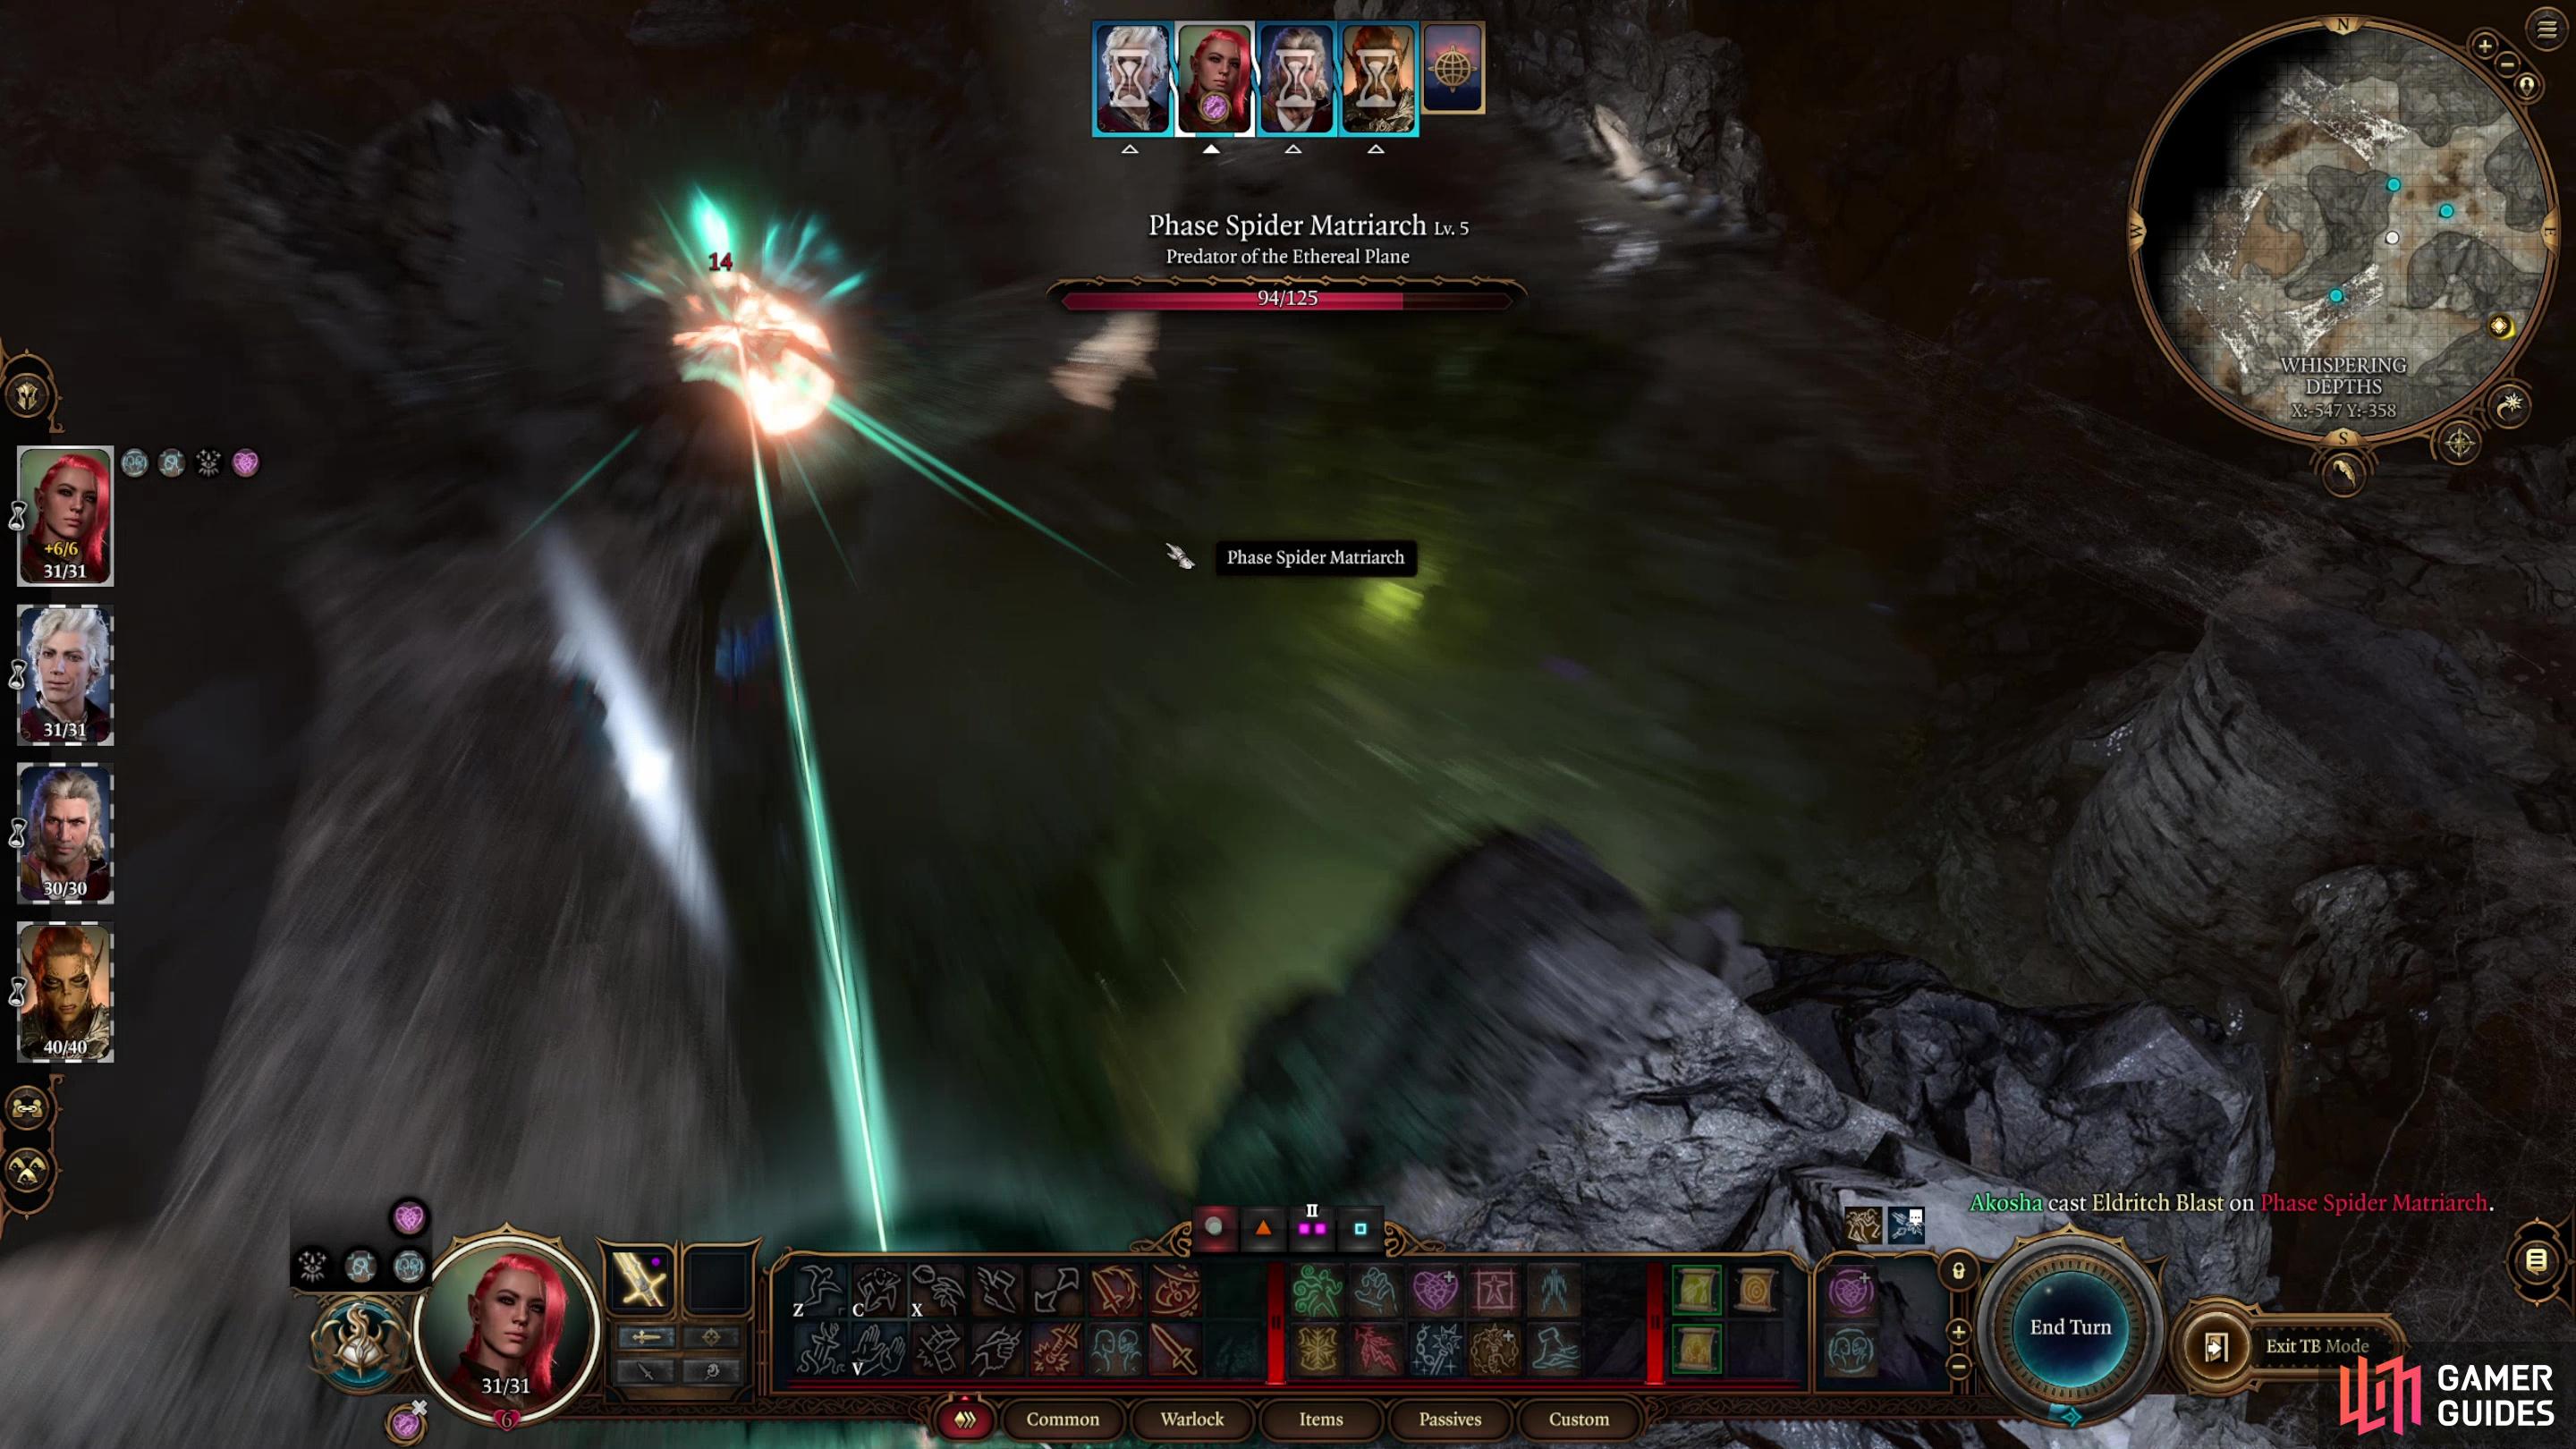
(1 of 3) Hit the Phase Spider Matriarch with your most potent attacks to whittle down her immense 125 Hit Points,
The Phase Spider Matriarch has 125 Hit Points, has an Armor Class of 16 and is resistant to poison damage. She’s a sturdy brute that has staying power and can dish out massive AoE damage with her Venomous Discharge. Keep some distance between your characters so she can only torment one at a time and hope for a bit of luck with her Attack Rolls. Don’t hold back - hit her with damage-dealing spells like Scorching Ray, use Superiority Die to boost your Fighter’s damage output, Weapon Actions - the works. After spawning the Spider Phaselings she’ll likely Ethereal Jaunt onto the nearby web bridge to perform her first Venomous Discharge - if she does, use fire to destroy the bridge (again, the humble Fire Bolt works) and send her plummeting to the ground. She’ll take around 40 damage from this, which is a huge help. When she’s been injured she’ll likely use Spider Queen’s Rage, before aggressively attacking in melee. Expect her bites to do around 20 damage each, and there’s not a whole lot you can do to thwart her - whomever she attacks is just going to have to weather it, or be rescued when there’s time.
Defeat the Phase Spider Matriarch and her babies, large and small, then loot the dethroned queen to obtain the ![]() Poisoner’s Robe, which causes the wearer to deal an extra 1-4 damage every time they inflict poison damage with a spell. If you’re not sated, there’s more to do in this area.
Poisoner’s Robe, which causes the wearer to deal an extra 1-4 damage every time they inflict poison damage with a spell. If you’re not sated, there’s more to do in this area.
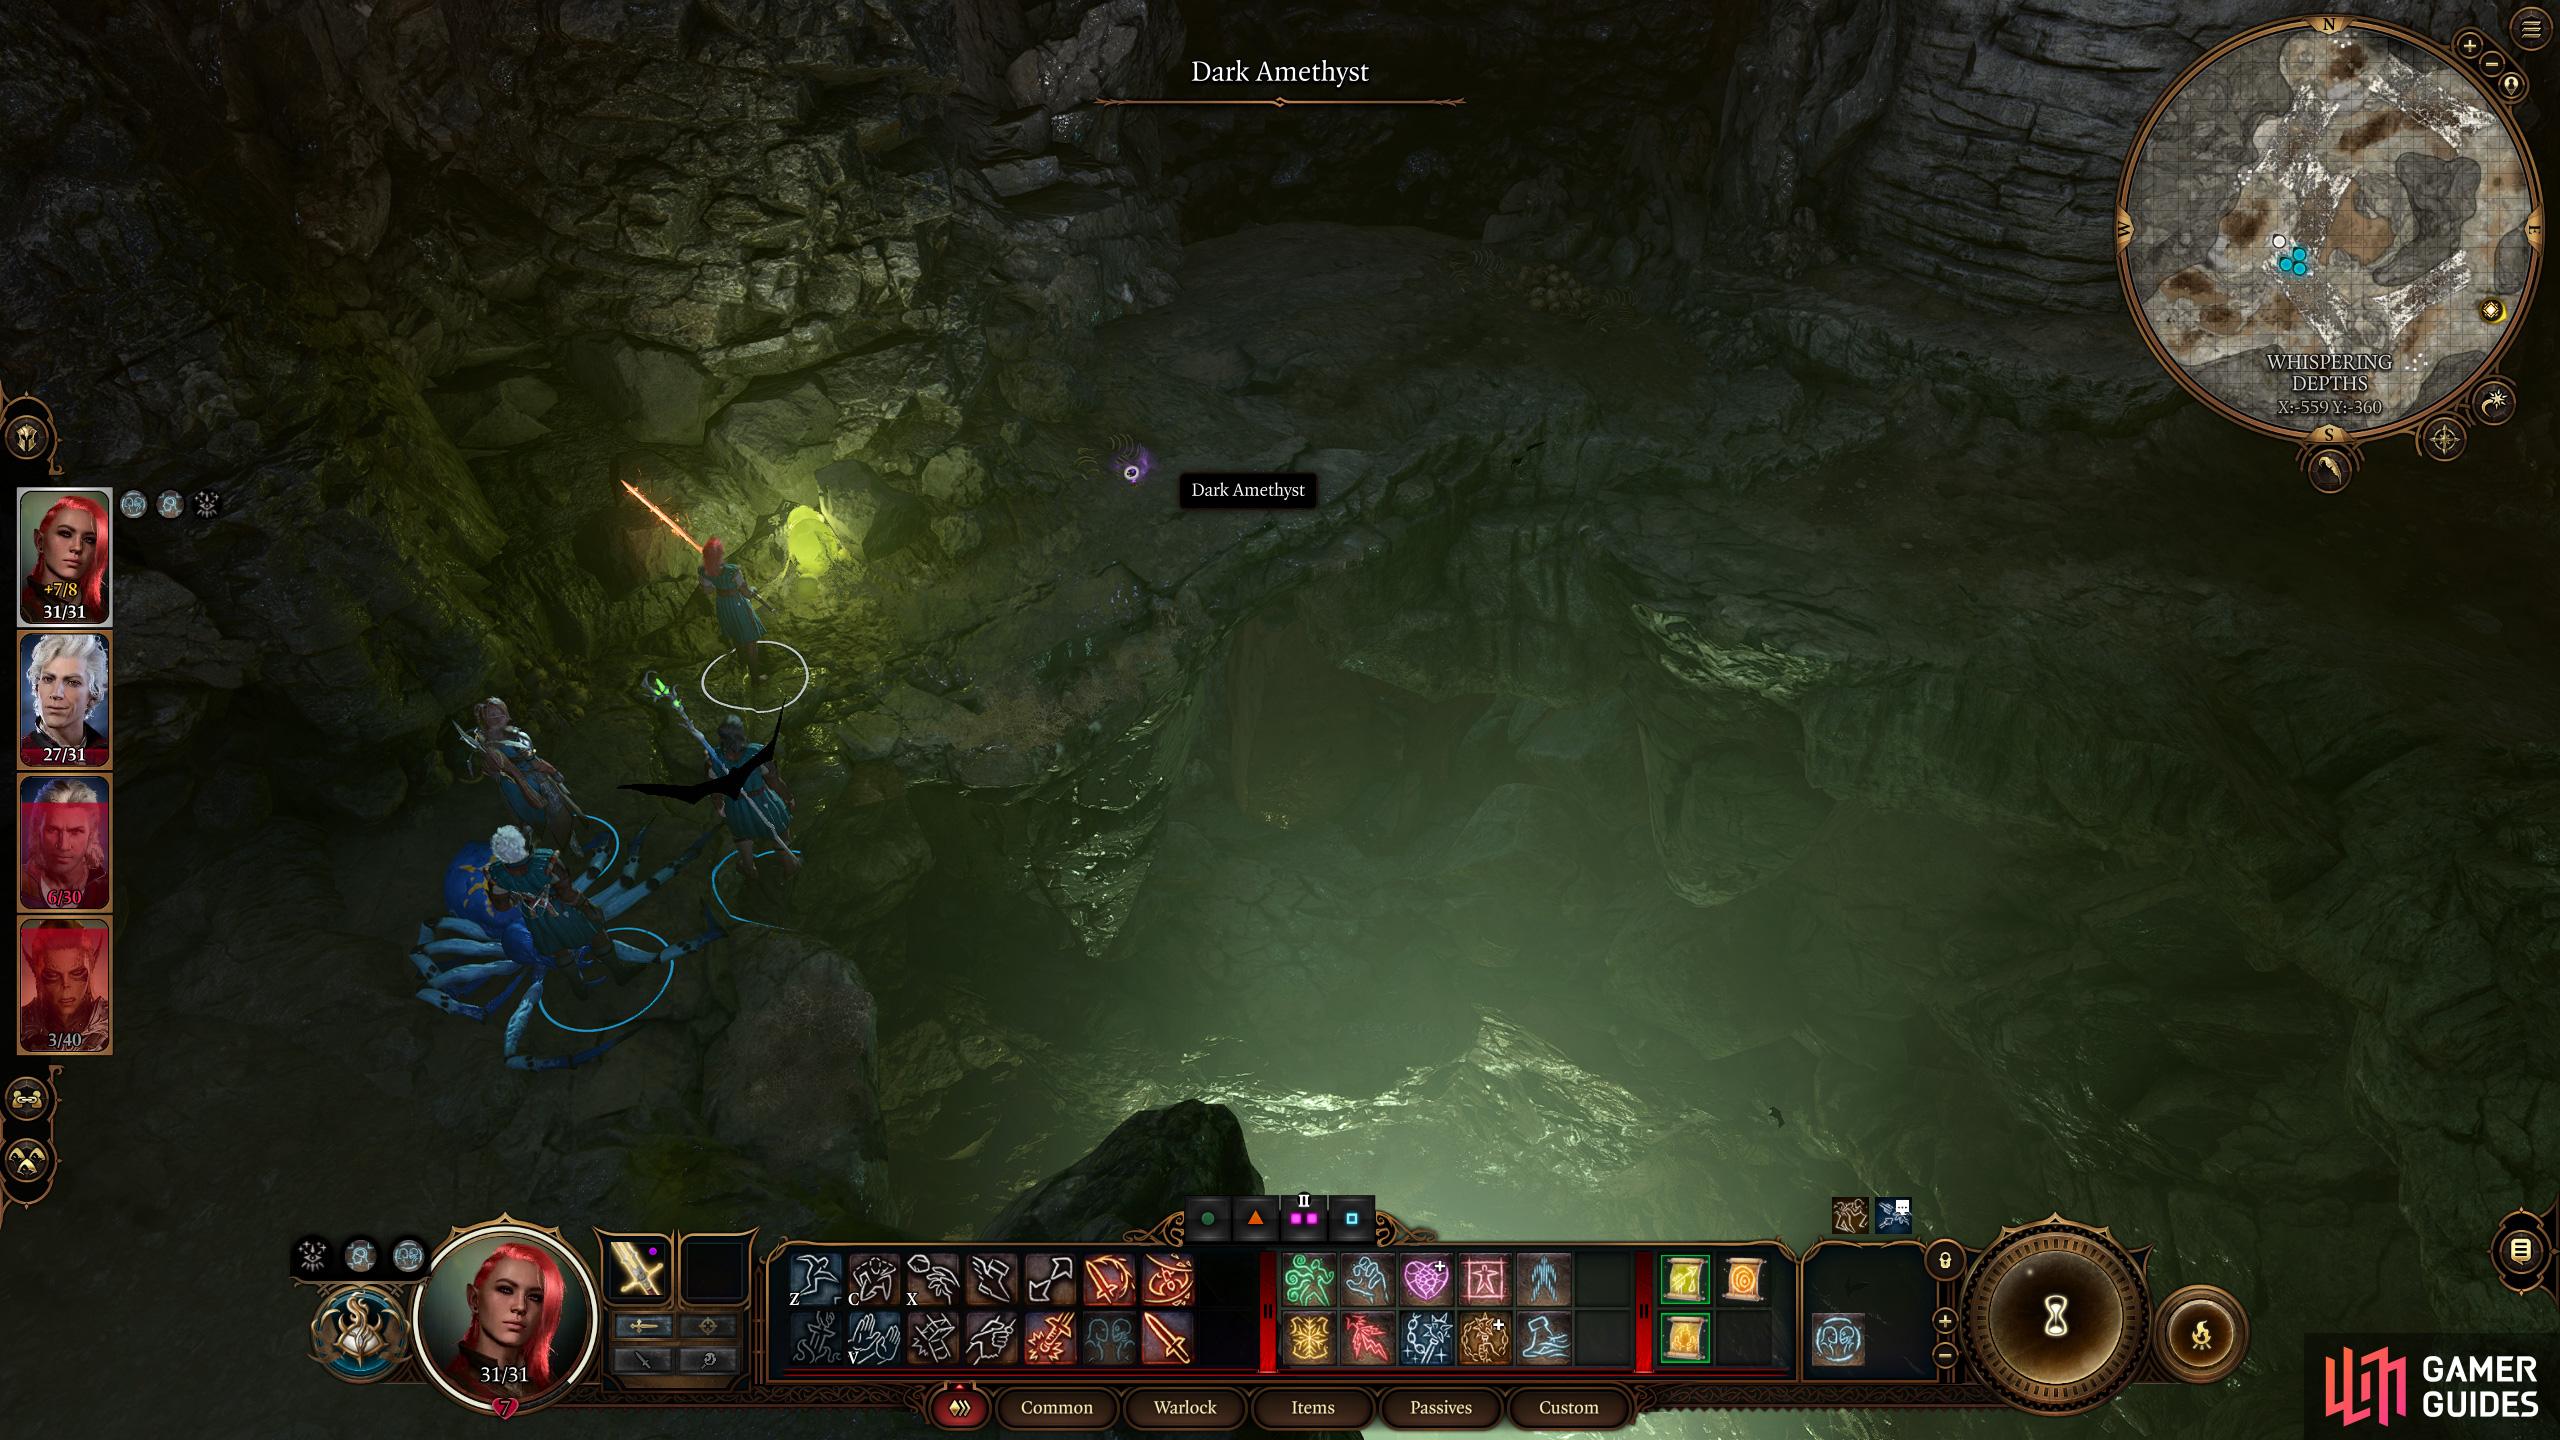
Where to Find the Dark Amethyst and the Entrance to the Underdark
Climb down some knotted roots on the edge of the ledge near where you vanquished the spiders and turn north to spot a hole in the ground, partially covered by webs. This hole leads to the ![]() Underdark, if you’re brave enough to jump down. It’s a long drop, however, and if you take the plunge without
Underdark, if you’re brave enough to jump down. It’s a long drop, however, and if you take the plunge without ![]() Feather Fall cast you’ll just get a rather unceremonious game over screen (which can be pretty funny - but save before you leap). There are other ways to reach the Underdark, and you shouldn’t really bother exploring down here until you’re level four or higher.
Feather Fall cast you’ll just get a rather unceremonious game over screen (which can be pretty funny - but save before you leap). There are other ways to reach the Underdark, and you shouldn’t really bother exploring down here until you’re level four or higher.
For something that’s more immediately interesting, search the northern edge of the hole to the Underdark and you’ll find a Dark Amethyst, which you’ll need to progress the quest Necromancy of Thay. If you venture west you’ll find the Whispering Depths waypoint, which will make getting back to the hole to the Underdark much easier, should you decide to go this route. Anyways, that should do it for the Whispering Depths!
Now that you’ve delved the Whispering Depths and exterminated the spiders within, check out the following pages for some ideas of what to do next.
- Baldur’s Gate 3 Act 1 Underdark: Map, Entrances, POIs
- Baldur’s Gate 3 - Search The Cellar: Bookcase, Mirror, Iron Gate Walkthrough
- Baldur’s Gate 3 - Necromancy of Thay Walkthrough: Key and Powers
- Baldur’s Gate 3 - Rescue The Gnome Walkthrough
- Toll House BG3 Walkthrough: Toll Collector’s Key, Chair Puzzle and Secret Door
- How to Recruit Karlach in Baldur’s Gate 3 - Hunt the Devil Walkthrough
No Comments